

Page 1

Owner’s Manual
Bedienungsanleitung
Manuel de l’utilisateur
Manual de Usuario
Manuale utente
取 扱 説 明 書
Page 2

Page 3
Important Safety Instructions Read all the instructions before using the product.
SAVE THESE INSTRUCTIONS
CAUTION
RISK OF ELECTRIC SHOCK
DO NOT OPEN
The lighting ash with arrowhead symbol, within an equilateral triangle, is intended to alert the
user to the presence of uninsulated "dangerous voltage" within the product's enclosure that
may be of sucient magnitude to constitute a risk of electric shock to persons.
The excla mation point w ithin an equila teral triang le is intended to a lert the user t o
the presence of impo rtant o perating and mai ntenance (servici ng) inst ructions in
the lete rature accompa nying the produ ct.
WARNING
The product should be connected to an AC outlet of the specied voltage.
If you are going to use an AC power cord, make sure that its has the correct plug shape and
L
conforms to the specied power voltage.
L
Failure to do so may result in re.
Do not insert or disconnect the powercord plug with wet hands.
Doing so may cause electric shock.
Take care not to allow any foreign matter to enter the product.
Entry of water, needles or hair pins may result in breakdown or short-circuit.
The product shall not be exposed to dripping or splashing. No objects lled with liquids,
such as vases, shall be placed on the product.
When using the headphones, do not listen for long periods of time at high volume levels.
Doing so may result in hearing problems.
Do not lean against the keyboard.
Doing so may cause the product to fall over, resulting in injury.
Do not use the product in wet areas, or areas close to water.
Doing so may cause ashort circuit, leading to an electric shock, or a re.
Do not disassemble, repair or modify the product.
Doing so may result in product breakdown, electric shock or short-circuit.
When disconnecting the AC power cord's plug, always hold the plug and pull it to remove it.
L
Pulling the AC power cord itself may damage the cord, causing a re, electric shock or short-circuit.
The product is not completely disconnected from the power supply even when the power
switch is turned o. If the product will not be used for a long time, unplug the AC power
cord from the AC outlet.
L
Failure to do so may cause re in case of lightning.
L
Failure to do so may over-heat the product, resulting in re.
This product shall be near the AC outlet and the power cord plug in a position so that it can
readily be disconnected in an emergency because electricity is always charging while the
plug is in the AC outlet even in a power switch o condition.
Notes on Repair
Should an abnormality occur in the product, immediately turn the power OFF, disconnect the
power cord plug, and then contact the shop from which the product was purchased.
CAUTION:
To prevent electric shock, match wide blade of plug to wide slot, fully insert.
ATTENTION:
Pour éviter les chocs électriques, introduire la lame la plus large de la che dans la borne
correspondante de la prise et pousser jusqu'au fond.
An information on Disposal for users
If your product is marked with this recycling symbol it means that, at the end of its
life, you must dispose of it separately by taking it to an appropriate collection point.
You should not mix it with general household waste. Disposing of this product correctly
will prevent potential negative eects on the environment and human health which
could otherwise arise due to inappropriate waste handling.
For further details, please contact your local authority.
(European Union only)
Instruction for AC power cord (U.K.)
IMPORTANT
THE WIRES IN THIS MAINS LEAD ARE COLOURED IN ACCORDANCE WITH THE FOLLOWING CODE.
As the colours of the wires in the mains lead of this apparatus may not correspond with the
coloured markings identifying the terminals in your plug, proceed as follows:
The wire which is coloured BLUE must be connected to the terminal which is marked with the
letter N or coloured BLACK.
The wire which is coloured BROWN must be connected to the terminal which is marked with
the letter L or coloured RED.
Do not plug either terminal of the power cord to the the ground od AC outlet on the wall.
Canadian Radio Interference Regulations
This instrument complies with the limits for a class B digital apparatus, pursuant to the Radio
Interference Regulations, C.R.C., c. 1374.
BLUE : NEUTRAL
BROWN : LIVE
Indicates a potential hazard that could result in death
or serious injury if the product is handled incorrectly.
INSTRUCTIONS PERTAINING TO A RISK OF FIRE, ELECTRIC SHOCK, OR INJURY TO PERSONS
WARNING
TO REDUCE THE RISK OF FIRE OR ELECTRIC
SHOCK , DO NOT EXPOSE THIS PRODUCT
TO RAIN OR MOISTURE.
FCC Information (U.S.A)
CAUTION : Changes or modications not expressly approved by the par ty responsible for compliance
could void the user’s authority to operate the equipment.
AVIS : RISQUE DE CHOC ELECTRIQUE - NE PA S OUVRIR.
TO REDUCE THE RISK OF ELECTRIC SHOCK, DO NOT REMOVE COVER (OR BACK).
NO USER-SERVICEABLE PARTS INSIDE.
REFER SERVICING TO QUALIFIED SERVICE PERSONNEL.
Examples of Picture Symbols
denotes that care should be taken.
The example instructs the user to take care not to allow ngers to be trapped.
denotes a prohibited operation.
The example instructs that disassembly of the product is prohibited.
denotes an operation that should be carried out.
The example instructs the user to remove the power cord plug from the AC outlet.
Indicates a potential hazard that could result in injury
CAUTION
Do not use the product in the following areas.
L Areas, such as those near windows, where the product is exposed to direct sunlight
L Extremely hot areas, such as near a heater
L Extremely cold areas, such as outside
L Extremely humid areas
L Areas where a large amount of sand or dust is present
L Areas where the product is exposed to excessive vibrations
Using the product in such areas may result in product breakdown.
Use the product only in moderate climates (not in tropical climates).
L Do not stand the main unit on its side for extended periods of time.
L Do not attempt to play the main unit at unusual angles.
Doing so may place stress on the keyboard action,resulting in breakdown of the product.
Use only the AC adaptor included with this instrument to power the instrument.
L Do not use other AC adaptor included with this instrument.
L Do not use the included AC adaptor or AC power cord to power other equipment.
Before connecting cords, make sure that the power to this product and other devices is turned OFF.
Failure to do so may cause breakdown of this product and other devices.
Do not drag the product on the oor. Take care not to drop the product.
Please lift up the product when moving it. Please note that the product is heavy and must
be carried by more than two persons. Dropping the product may result in breakdown.
When connecting the AC power cord and other cords, take care not to get them tangled.
Failure to do so may damage them, resulting in re, electric shock or short-circuit.
Do not wipe the product with benzene or thinner.
L Doing so may result in discoloration or deformation of the product.
L When cleaning the product, put a soft cloth in lukewarm water, squeeze it well, then wipe the product.
Do not stand on the product or exert excessive force.
L Doing so may cause the product to become deformed or fall over, resulting in breakdown or injury.
Do not place naked ame, such as lighted candles on the product.
L Doing so may cause the illumination to fall over, resulting in re.
Ensure that the ventilation is not impeded by covering the ventilation openings with
items, such as newspaper, table-cloths, curtains, etc.
L Failure to do so may over-heat the product, resulting in re.
The product should be located so that its location or position does not interfere with its proper
ventilation. Ensure a minimum distance of 5cm around the product for sucient ventilation.
The product should be serviced by qualied service personnel when:
L The power supply cord or the plug has been damaged.
L Objects have fallen, or liquid has been spilled into the product.
L The product has been exposed to rain.
L The product does not appear to operate normally or exhibits a marked change in performance.
L The product has been dropped, or the enclosure damaged.
NOTE : This equipment has been tested and found to comply with the limits for a Class B digital
device, pursuant to Part 15 of the FCC Rules. These limits are designed to provide reasonable
protection against harmful interference in a residential installation. This equipment generates, uses
and can radiate radio frequency energy and, if not installed and used in accordance with the
instructions, may cause harmful interference to radio communications. However, there is no guarantee
that interference will not occur in a particular installation. If this equipment does cause harmful
interference to radio or television reception, which can be determined by turning the equipment o
and on, the user is encouraged to try to correct the interference by one or more of the following
measures:
• Reorient or relocate the receiving antenna.
• Increase the separation between the equipment and receiver.
• Connect the equipment into an outlet on a circuit dierent from that to which the receiver is
connected.
• Consult the dealer or an experienced radio/TV technician for help.
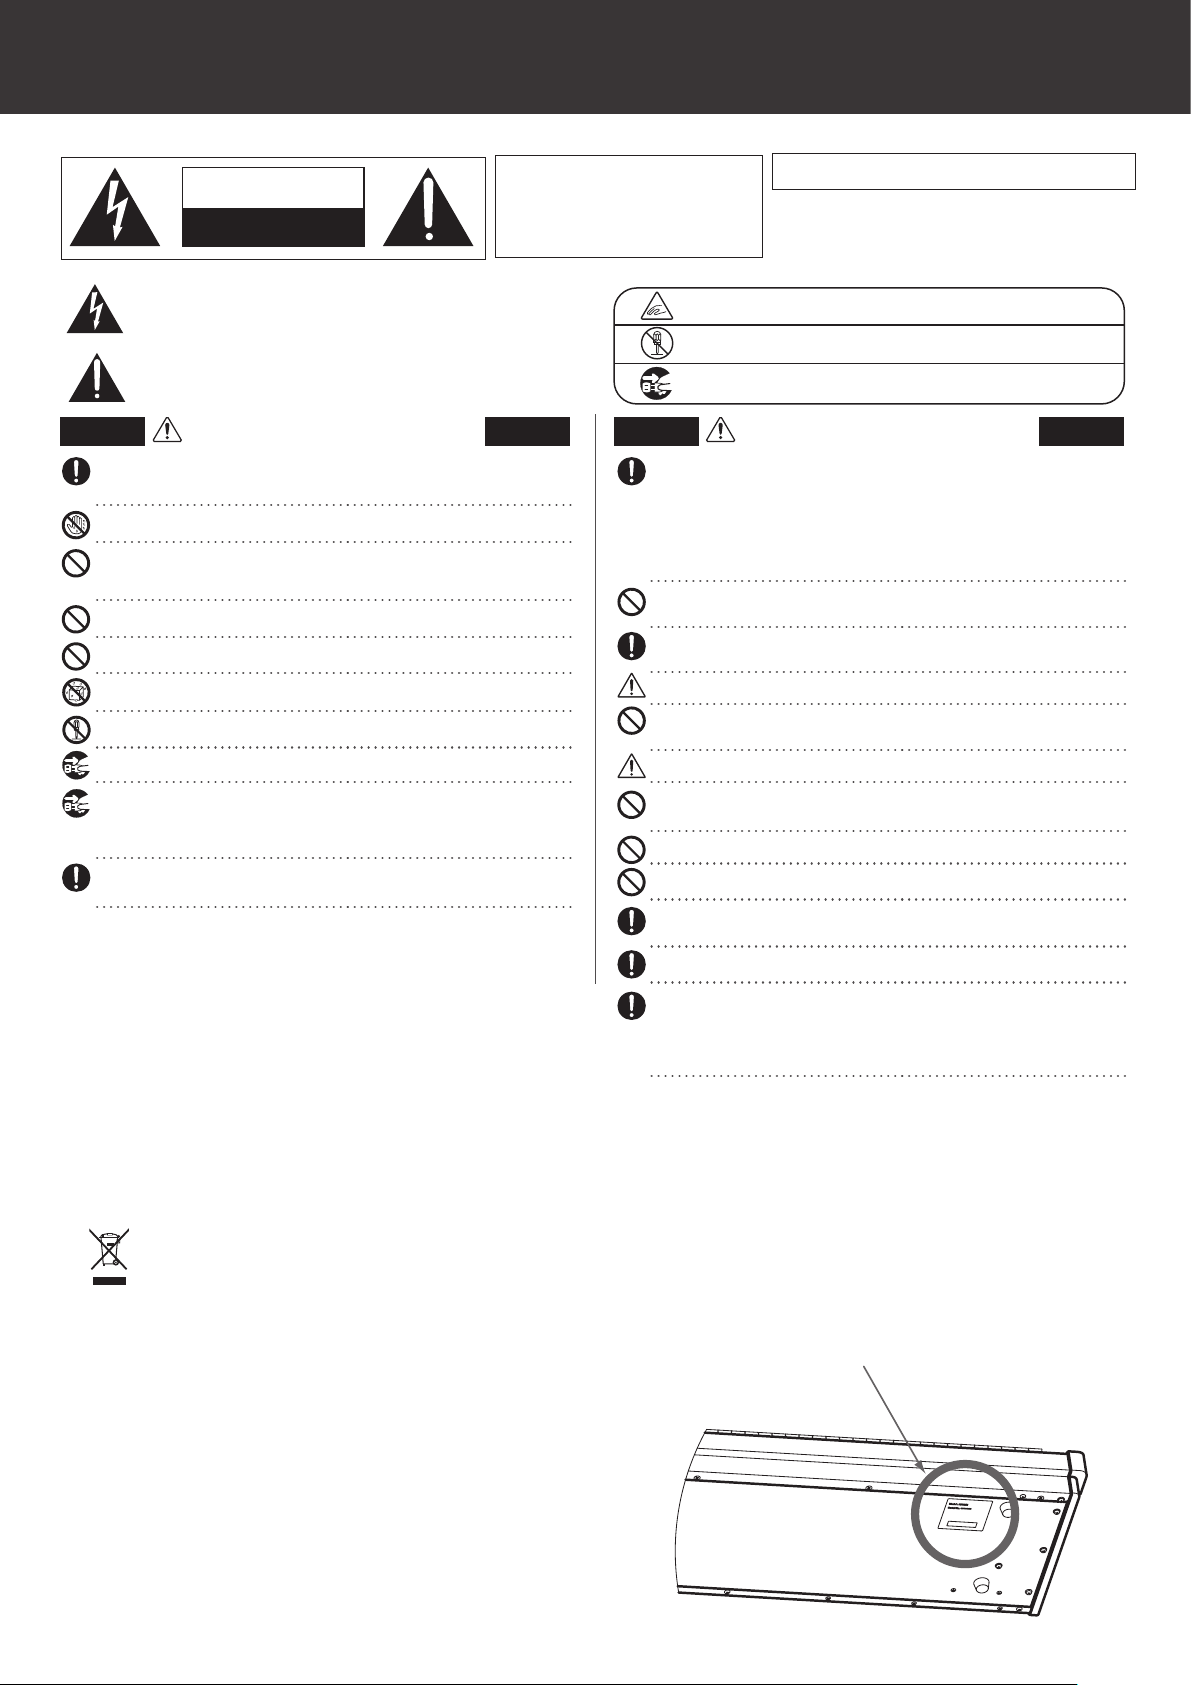
The nameplate label is located on the
or damage to the product or other property if the
product is handled incorrectly.
underside of the instrument, as indicated below.
Nameplate
Page 4

Getting Started
Thank you for purchasing the Kawai VPC1.
This owner’s manual contains important information regarding the usage and
operation of the VPC1. Please read all sections carefully, keeping this manual
handy for future reference.
Part Names and Functions
1
POWER button
1.
This button is used to turn the instrument on and o. The LED will be lit when
the power is turned on.
The status of the VPC1 will be indicated by the colour and appearance of the POWER
button LED as follows:
2 3 4 5
DC IN jack (12 V)
2.
This jack is used to connect the included AC power adapter to the VPC1’s DC IN
jack.
Pedal jack
3.
The jacks are used to connect the included Kawai pedal unit to the VPC1.
MIDI IN/OUT connectors
4.
Instrument Status Power button LED colour and appearance
Preset 1 Red
Preset 2 Orange
Preset 3 Green
Preset 4 Orange blinking
Preset 5 Green blinking
Updating VPC1 Red and Green blinking slowly (2 second intervals)
Updating error Red and Green blinking rapidly (0.2 second intervals)
Power error Red blinking
The VPC1 features a power saving function that can be used to automatically turn
o the instrument after a specied period of inactivity.
Please refer to the PDF manual of the VPC Editor Software for further information.
The jacks are used to connect the instrument to external MIDI devices (such as
other musical instruments or a computer) in order to send and receive MIDI data.
USB to Host connector
5.
This port is use to connect the instrument to a computer using a USB ‘B to A’
type cable in order to send and receive MIDI data
The AC power adapter is required when connecting the VPC1 to a device/computer
using the MIDI connectors.
When connecting the VPC1 to a computer using a USB cable, the AC power adapter is not required as power will be supplied through the computer’s USB connector.
This port is use to connect the instrument to a computer using a USB ‘B to A’ type
cable in order to send and receive MIDI data
However, in some cases the computer’s USB connector may be insucient to power the VPC1 correctly. In this case, the POWER button LED will blink red, indicating
that the AC power adaptor is required.
If VPC1 update is not completed successfully, the POWER button LED will blink red
and green rapidly (0.2 second intervals).
In this case, please try to update the VPC1 again.
Page 5
Setup
System Requirements (VPC1)
Windows
Computer
Mac
Computer
Installation (Windows)
The VPC1 will be automatically recognized by the computer without having
to install additional drivers. When the instrument keyboard is connected to
the USB port of your computer using the included USB cable and the power is
turned on, the OS standard USB-MIDI driver will be installed automatically, then
the instrument will be ready to use.
At this point, you can congure the instrument setting from your computer or
you can create touch curves using the VPC Editor software.
Before using the VPC Editor software, use the following steps to install the Kawai
USB-MIDI driver and the VPC Editor software.
It is recommended to install the Kawai USB-MIDI driver for establishing a more
stable environment even if you do not use the VPC Editor software.
Computer that has a USB port and satises the requirements
for running Microsoft Windows 8/7/Vista/XP
OS Windows 8/7/Vista/XP (With the latest service pack)
Apple Macintosh computer that has a USB port and satises
the requirements for running Mac OS X
OS Mac OS X 10.4 or later
Installing the Kawai USB-MIDI Driver
Download the Kawai USB-MIDI driver from the Kawai website:
1.
http://www.kawai.co.jp/worldwide/support/downloads.html
Extract the zip le and run the “DPInst.exe” installation program.
2.
When the “Kawai USB MIDI Device Installer” dialog appears, click “Next”.
3.
The “End User License Agreement” will be displayed. To agree with the terms,
4.
select “I accept this EULA”, then click “Next”.
When the installation is nished and the message “Installation complete!” is
5.
displayed, click “Finish”.
Installing the VPC Editor software
Download the Kawai VPC Editor Software from the Kawai website:
1.
http://www.kawai.co.jp/worldwide/support/downloads.html
Extract the zip le and run the “SETUP.exe” installation program.
2.
When the “Kawai VPC Editor - InstallShield Wizard” dialog appears, click “Next”.
3.
The “License Agreement” will be displayed. To agree with the terms, select “I
4.
accept the terms in the license agreement”, then click “Next”.
The destination folder for the installation will be displayed. If you want to
5.
install the VPC editor to this folder, click “Next”. If you want to install the VPC
editor to a dierent folder, click “Change..” to change the installation path and
click “Next” when you have selected the desired installation location.
The message “Ready to Install the Program” is displayed, click “Install”.
6.
When the installation is nished and the “Installshield Wizard Completed” dia-
7.
log is displayed, click “Finish”.
In order to install or uninstall the Kawai USB-MIDI driver and the VPC Editor software, you must have “Administrator ” privileges. For further information, please
contact your system administrator.
When you install the Kawai USB-MIDI driver and the VPC Editor soft ware, detach
all USB devices except the computer keyboard and mouse device.
When you have connected the VPC1 to your computer using a USB cable, it may
take some time to establish the communication.
If the VPC1 and your computer are connected via a USB hub and your notice that the
behavior is unstable, please connect it directly to a USB por t of your computer.
When you turn the VPC1 on/o, or you connect/disconnect the USB cable during
the following operations, you may notice that the behavior of the VPC1 or of the
computer to become unstable.
While installing the Kawai USB-MIDI Driver
-
While the computer starts
-
While a MIDI application is running.
-
While communicating with the computer
-
While the computer is ready an waiting in power saving mode
-
Depending on the configuration of your computer, the USB function might not
work properly. Please carefully read the owner’s manual for your computer, then
make the appropriate settings.
Installation (Mac OS X)
Installing the VPC Editor software
Download the Kawai VPC Editor Software from the Kawai website:
1.
http://www.kawai.co.jp/worldwide/support/downloads.html
Extract the zip le and run the “VpcEditorForMac.pkg” installation program.
2.
About the PDF Manual
A PDF manual is included with the VPC Editor software.
For details on the overview and operations on the VPC Editor software, please
refer to the PDF manual.
Using the PDF Manual
When the VPC Editor software is launched, click the KAWAI logo button to
1.
display the version information screen.
Click the HELP button.
2.
Page 6

Selecting a Preset Mode
Five preset modes are provided with the VPC1, which allow you to save the vari-
ous touch curves created by using the included VPC Editor software or the set-
tings of the instrument.
For further information on how to save the settings as presets, please refer to
the PDF manual of the VPC Editor software.
The section below describes how to select the preset modes using the VPC1.
Hold
Preset 1 Preset 2 Preset 3 Preset 4 Preset 5
Press and hold the POWER button, then press one of the highest 5 black keys to
select a preset mode.
When the preset mode assigned to the pressed key is selected, the LED color of
the POWER button will change.
When the power is turned on, the previously used preset will be selected automatically. When the power is turned on for the very rst time, Preset1 will be selected.
In addition to a standard touch curve, several touch curves suitable for popular
software pianos are provide as factory presets.
Troubleshooting
Power does not turn on
- Is the VPC1 connected to your computer via a USB hub?
Please connect it directly to a USB port on your computer without using a hub.
- Is the POWER button LED blinking red?
If the POWER button is lit with a red blinking light, the power supplied by the
computer through the USB bus is insucient. In such a case, please use the
included AC power adapter.
The connected device or software does not respond
- Is the USB cable or MIDI cable connected correctly?
- Has your computer detected the VPC1?
Please carefully read the manual for your computer and make sure that the VPC1
can be recognized by the computer.
Depending on the conguration of your computer hardware, the VPC1 may not
be detected properly when using the USB connection.
- The connected device or software might not support this feature. Please refer to
the manual of the connected device or software.
No sound is produced when the keys are pressed
- Please check the MIDI transmit channel and output settings for the VPC Editor
software.
- Has the software sound source been congured correctly?
The velocity of the keyboard does not work
- Please check the settings of Touch Curve and Velocity Oset of the VPC Editor
software.
Sound increases only at certain key(s) of the keyboard
- Please check the setting of Velocity Oset of the VPC Editor software.
Messages are not sent or received from the MIDI or USB port
- Please check the MIDI transmit channel and output settings for the VPC Editor
software.
The included foot pedal does not work
- Has the foot pedal been connected properly?
- Please check the Pedal CC# settings for the VPC Editor software.
- Has the software sound source to be used been set correctly?
Preset
Power LCD
state
1 Red Normal A standard touch curve.
2 Orange Ivory
3 Green Pianoteq
Orange
4
blinking
5
Green
blinking
Touch Cur ve Description
A touch curve suitable for the Ivory
software developed by Synthogy.
A touch curve suitable for the
Pianoteq software developed by
MODARTT.
Galaxy
Alicia's Keys
A touch curve suitable for the Galaxy
Pianos software developed by
Galaxy Instruments.
A touch curve suitable for the Alicia's
Keys software developed by Native
Instruments.
Technical Specications
Keyboard
Connection
terminals
Power supply USB Bus powered (via USB port), DC 12 VAC adapter
consumption
Dimensions 138 (W) x 42.5 (D) x 18.5 (H) cm
Package
Contents
Appearance and specications are subject to change without notice.
※
'Ivory', 'Pianoteq', 'Galaxy', and 'Alcia's Keys' are all trademarks of their respective owners.
※
88 wooden keys with Ivory Touch key surfaces
RM3 Grand II action with Let-o and Triple Sensor
Pedal jack, MIDI (IN/OUT) connectors, USB to HOST port,
Power supply connector (DC IN 12V)
Power
- With USB Bus power supply :1.0 W
- With AC power adapter :3.0 W
Weight 29.5 kg
Owner’s manual (this manual), USB cable, AC power adapter,
Power cord, F-30 foot pedal, Music rack/rest
Page 7
Sicherheitshinweise
Bitte lesen Sie sich zunächst alle Hinweise durch,
bevor Sie das Produkt verwenden.
HINWEISE AUFHEBEN
CAUTION
RISK OF ELECTRIC SHOCK
DO NOT OPEN
Zeigt an, dass ein Potentialunterschied auftreten kann, der Tod oder schwerwiegende
Verletzungen hervorruft, wenn das Gerät nicht korrekt gehandhabt wird.
Zeigt an, dass ein Pot entialunter schied au ftreten k ann, de r das G erät besch ädigt,
wenn es ni cht korrekt geh andhabt wird.
Zeigt an, dass ein Potentialunterschied auftreten kann,
WARNUNG
Dieses Gerät muss an eine Steckdose angeschlossen werden, deren Spannungsangabe dem Gerät entspricht.
Wenn Sie den Netzstecker in die Steckdose stecken, sollten Sie sicherstellen, dass die Form
L
der Anschlüsse geeignet ist und die Spannung übereinstimmt.
L
Zuwiderhandlungen können Feuer verursachen.
Ziehen Sie den Netzstecker nie mit nassen Händen ab und stecken Sie ihn auch nicht mit
nassen Händen in die Steckdose.
Zuwiderhandlung kann einen elektrischen Schock verursachen.
Achten Sie darauf, dass keine Fremdkörper in das Instrument gelangen.
Wasser, Nade ln und Haarspang en können Kurzsch lüsse und Defekte veru rsachen. Das
Produkt sollte weder Tropfen noch Spr itzern ausgesetzt. Stellen Sie keine mit Flüssigkeiten
gefüllten Gegenstände, wie Vasen, auf das Produkt.
Wenn Sie Kopfhörer verwenden, sollten Sie diese nicht über eine längere Zeit mit hoher Lautstärke betreiben.
Zuwiderhandlung kann Hörschäden hervorrufen.
Lehnen Sie sich nicht an das Instrument an.
Zuwiderhandlung kann ein Umfallen des Instruments verursachen.
Stellen Sie das Instrument nirgendwo auf, wo es nass werden könnte.
Das kann zu einem Kurzschluss führen, welcher einen elektrischen Schock oder ein Feuer zur Folge haben könnte.
Önen, reparieren oder modizieren Sie das Instrument nicht.
Zuwiderhandlung kann Defekte, einen elektrischen Schlag oder Kurzschlüsse verursachen.
Wenn Sie das Netzkabel abziehen wollen, fassen Sie immer den Stecker direkt an. Ziehen Sie niemals nur am Kabel.
L
Einfaches Ziehen am Kabel kann einen D efekt des Kabel verursachen. Dadurch kann es zu
einem elektrischen Schlag, Feuer oder Kurzschluss kommen.
Das Produkt ist nicht vollständig von der Stromversorgung getrennt, auch wenn der
Netzschalter ausgeschaltet ist. Wenn das Instrument für eine längere Zeit nicht benutzt
werden soll, ziehen Sie den Netzstecker aus der Steckdose.
L
Zuwiderhandlung kann Feuer und Überhitzung hervorrufen.
Dieses Produkt sollten Sie in unmittelbarer Nähe zu einer Wandsteckdose aufstellen, damit
Sie es im Notfall schnell vom Stromnetz trennen können und somit sicherstellen, dass kein
Strom mehr in das Produkt gelangt.
Reparaturhinweis
Sollte etwas Ungewöhnliches auftreten, schalten Sie das Gerät aus, ziehen den Netzstecker und
rufen den Service Ihres Händlers an.
der Tod oder schwerwiegende Verletzungen hervorruft,
wenn das Gerät nicht korrekt gehandhabt wird.
HINWEISE ZU FEUERRISIKO, ELEKTRISCHEM SCHOCK ODER VERLETZUNGEN VON PERSONEN
WARNING
TO REDUCE THE RISK OF FIRE OR ELECTRIC
SHOCK , DO NOT EXPOSE THIS PRODUCT
TO RAIN OR MOISTURE.
AVIS : RISQUE DE CHOC ELECTRIQUE - NE PA S OUVRIR.
Um das Risiko eines elektrischen Schlages zu verringern, sollten Sie niemals das Gerät önen.
Es gibt keine Teile im Inneren, die durch Sie gewartet werden müssten.
Überlassen Sie den Service qualiziertem Personal.
Beispiele von Bildsymbolen
Zeigt, dass vorsichtig gehandelt werden sollte.
Dieses Beispiel zeigt an, dass Teile nicht mit den Fingern berührt werden dürfen.
Verbietet eine unzulässige Manipulation.
Dieses Beispiel verbietet einen unzulässigen Eingri.
Zeigt, dass ein Vorgang ausgeführt werden soll.
Dieses Beispiel bittet Sie, den Netzstecker aus der Steckdose zu ziehen.
Zeigt an, dass ein Potentialunterschied auftreten
ACHTUNG
Stellen Sie das Instrument nicht an folgenden Plätzen auf.
L Unter dem Fenster, da es direktem Sonnenlicht ausgesetzt ist.
L Extrem heiße Plätze, wie unterhalb eines Heizlüfters.
L Extrem kalte Plätze, wie außerhalb von Gebäuden im Winter.
L Plätze mit extremer Luftfeuchtigkeit oder Regen.
L Plätze mit sehr hoher Sand oder Staubverschmutzung.
L Plätze mit extremen Erschütterungen.
Das Aufstellen des Instruments an solchen Plätzen kann Beschädigungen verursachen.
Verwenden Sie dieses Produkt nur in einem moderaten Klima (nicht in tropischem Klima).
L Stellen Sie das Instrument nicht für einen längeren Zeitraum auf die Seite.
L
Spielen Sie nicht auf der Tastatur, wenn das Instrument in einem unüblichen Winkel aufgestellt ist.
Ein Nichtbeachten kann Beschädigungen zur Folge haben.
Verwenden Sie ausschließlich den mitgelieferten Netzadapter, um das Instrument mit Strom zu versorgen.
L Verwenden Sie keine anderen Netzadapter.
L Verwenden Sie den mitgelieferten Netzadapter niemals für andere Geräte
Bevor Sie Kabel anschließen, stellen Sie sicher, dass alle Geräte ausgeschaltet sind.
Zuwiderhandlung kann Defekte an diesem und anderen Geräten hervorrufen.
Achten Sie darauf, dass das Gerät immer sorgfältig aufgestellt wird.
Bitte beachten Sie, dass dieses Instrument schwer ist und daher mit mindesten s zwei
Personen getragen werden sollte.
Wenn Sie das Netzkabel anschließen, achten Sie bitte darauf, dass die Kabel nicht durcheinander liegen und Knoten bilden.
Zuwiderhandlung kann die Kabel beschädigen, Feuer und einen elektrischen Schock oder einen Kurzschluss verursachen.
Reinigen Sie das Instrument nicht mit Benzin oder Verdünner.
L
Zuwiderhandlung kann eine Farbänderung oder Deformation des Gerätes zur Folge haben.
L
Zum Reinigen benutzen Sie bitte ein weiches Tuch mit lauwarmen Wasser, das Sie gut ausdrücken und dann erst zur Reinigung
Stellen Sie sich nicht auf das Instrument und üben Sie keine Gewalt aus.
Andernfalls kann das Instrument verformt werden oder umfallen.
Stellen Sie keine oenen Flammen, wie z.B. Kerzen, auf das Produkt.
Eine oene Flamme könnte umstürzen und einen Brand verursachen.
Achten Sie da rauf, dass Lüftungsön ungen nic ht durch Dinge wie Ze itungen,
Tischdecken, Vorhänge oder ähnliches abgedeckt werden.
L Nichtbeachtung kann zur Überhitzung des Produktes führen und einen Brand zur Folge haben.
Dieses Produkt sollte so aufgestellt werden, dass eine gute Luftzirkulation gewährleistet ist. Ein
Mindestabstand von 5 cm um das Produkt sollte für eine ausreichende Luftzirkulation vorhanden sein.
Das Gerät sollte durch qualiziertes Personal gewartet werden, wenn:
L das Netzkabel oder die Netzbuchse beschädigt sind.
L Gegenstände in das Gerät gefallen sind.
L das Gerät Regen ausgesetzt war.
L das Gerät nicht mehr normal funktioniert.
L das Gerät gefallen ist und das Gehäuse beschädigt ist.
kann, der das Gerät beschädigt, wenn es nicht
korrekt gehandhabt wird.
verwenden.
Eine Kundeninformation zur Entsorgung
Falls das Produkt mit diesem Recyclingsymbol gekennzeichnet ist bedeutet dies,
dass es am Ende seiner Lebenszeit zu einem geeigneten Sammelpunkt gebracht
werden muss.
Sie sollten es nicht mit dem normalen Hausmüll entsorgen. Ein korrektes Entsorgen
schützt die Umwelt und Ihre Gesundheit, die durch eine falsche Abfallentsorgung
gefährdet werden könnte. Für weitere Details fragen Sie Ihre lokalen Behörden.
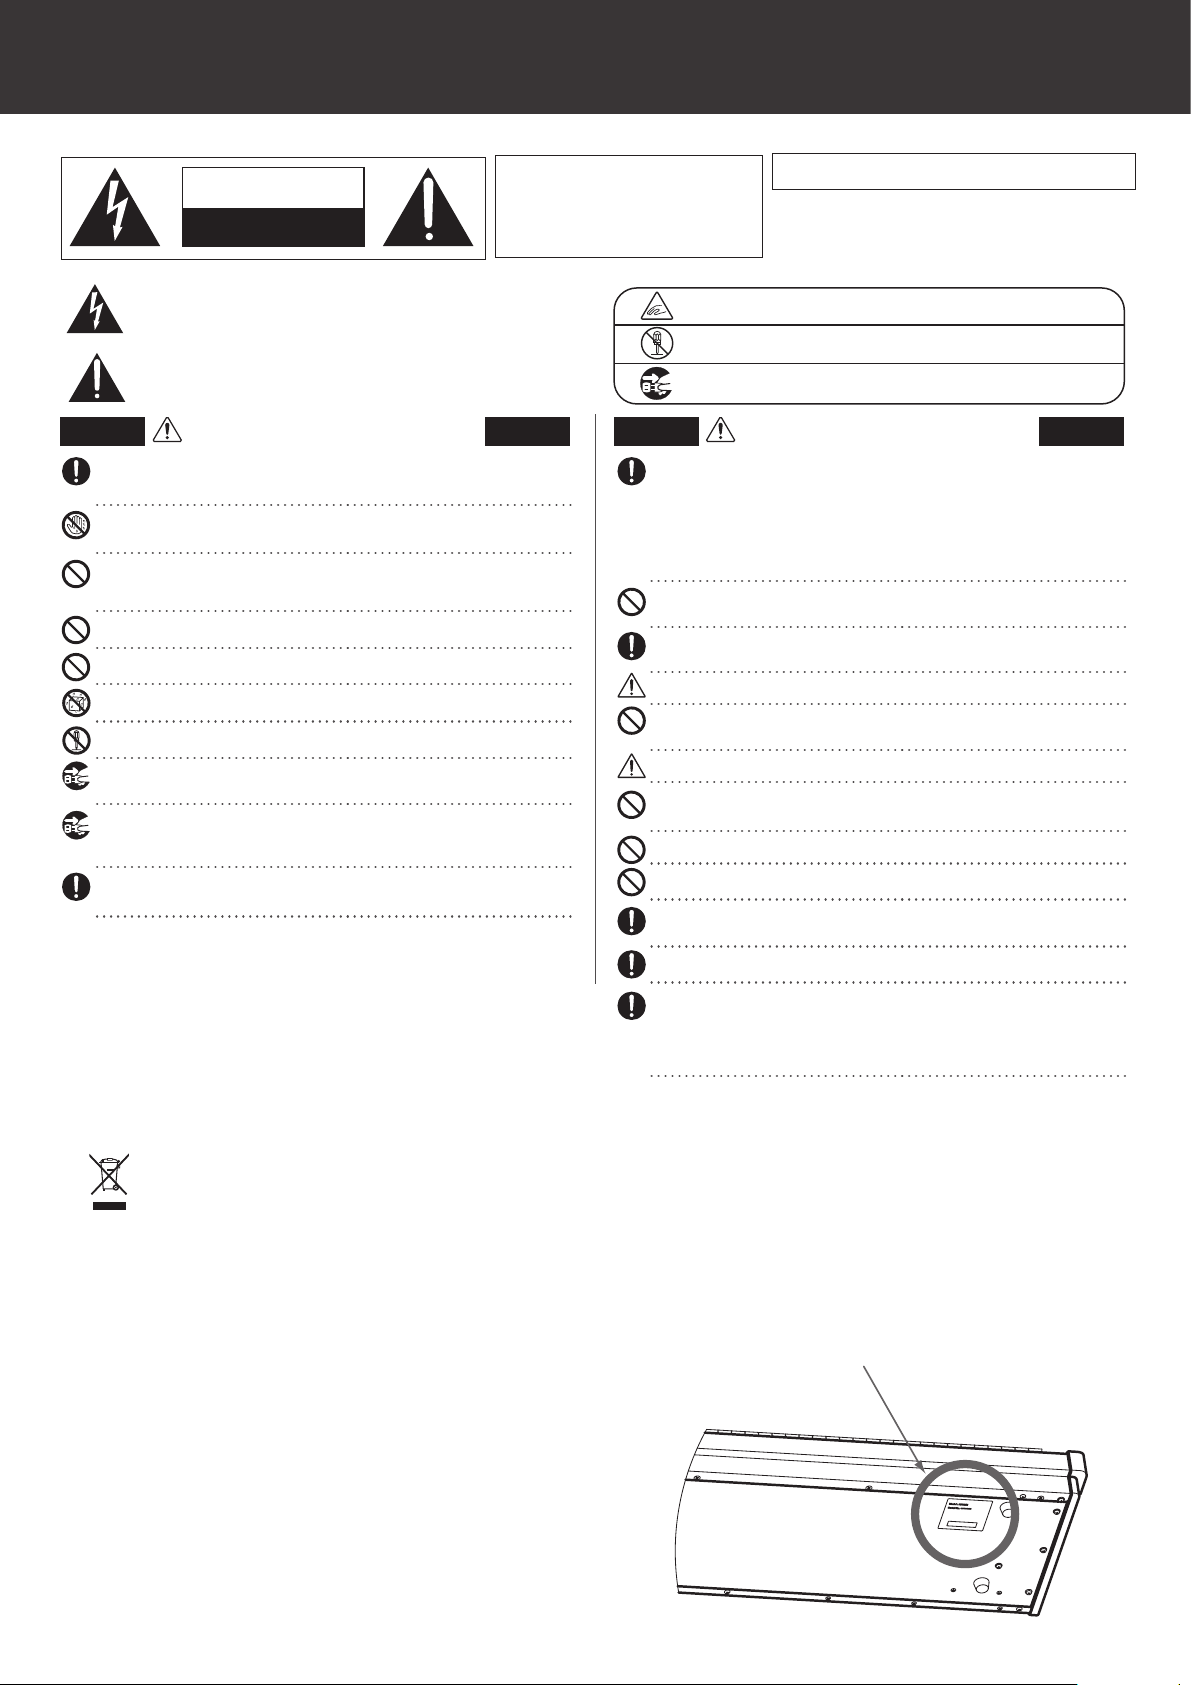
Das Typenschild bendet sich unter dem Spieltisch (siehe nachstehende Abbildung).
Typenschild
Page 8

Die ersten Schritte
Wir danken Ihnen, dass Sie sich für den Kauf eines Kawai VPC1 entschieden haben.
Diese Bedienungsanleitung enthält wichtige Informationen zu den Anwen-
dungen und Funktionen des VPC1.
Bedienungsanleitung aufmerksam durch und bewahren Sie diese für ein even-
tuelles späteres Nachschlagen gut auf.
Lesen Sie unbedingt alle Kapitel dieser
Part Bezeichnungen und Funktionen
2 3 4 5
1
POWER Taste
1.
Mit dieser Taste kann man das Instrument ein- und ausschalten. Im eingeschal-
teten Zustand leuchtet die LED.
Der Status des VPC1 wird durch die Farbe der leuchtenden LED angezeigt:
Status des Instruments LED Farbe der Power Taste
Preset 1 Rot
Preset 2 Orange
Preset 3 Grün
Preset 4 Orange blinkend
Preset 5 Grün blinkend
VPC1 Update
Prozess läuft
VPC1 Update
Prozess fehlerhaft
Stromversorgungs
problem
Das VPC1 verfügt über eine Energiesparfunktion. Das Instrument schaltet sich aus,
wenn eine gewisse Zeit nicht darauf gespielt wird.
Weitere Informationen dazu nden Sie in der PDF Anleitung der VPC Editor Software.
Rot und Grün langsam blinkend (alle 2 Sekunden)
Rot und Grün schnell blinkend (alle 0.2 Sekunden)
Rot blinkend
DC IN Buchse (12 V)
2.
An diese Buchse wird der mitgelieferte Netzadapter angeschlossen.
Pedal Buchsen
3.
An diese Buchsen wird das mitgelieferte Kawai Pedal angeschlossen.
MIDI IN/OUT Buchsen
4.
Über diese Anschlüsse können Sie den VPC1 mit einem anderen MIDI-fähigen Ge-
rät verbinden, um MIDI Daten zu senden und/oder zu empfangen.
USB to Host Anschluss
5.
An diesen Anschluss können Sie Ihren Computer mit einem herkömmlichen USB
„A zu B“ Kabel an den VPC1 anschließen. Wie mit einem normalen MIDI Interface
können darüber MIDI Daten empfangen und gesendet werden.
Der mitgelieferte Netzadapter wird benötigt, wenn das VPC1 über die MIDI Anschlüsse mit einem MIDI-fähigen Instrument oder einem Computer verbunden ist.
Wenn das VPC1 über USB mit einem Computer verbunden ist, wird der Netzadapter im Normallfall nicht benötigt, da die Spannungsversorgung des VPC1 über das
USB Kabel erfolgt.
Es kann sein, dass die Spannun gsversorg ung des Computers über USB nicht
leistungsstark ge nug ist und ein korrektes Fu nktionieren des VPC1 nicht s ichergestellt
ist.
In diesem Fa ll blinkt die LED An zeige des VPC1 POWER Tasters rot und zeigt
Ihnen damit an, dass der Anschluss des Netzadapters notwendig ist.
Wenn beim VPC1 Update Vorgang etwa s nic ht richtig funk tionier t hat, blinkt
anschließend die LED der POWER Taste im 0,2 Sekunden Intervall rot und grün im
Wechsel auf.
In diesem Fall führen Sie den Update Vorgang bitte erneut aus.
Page 9
Einrichtung
Installation des Kawai USB-MIDI Treibers
Systemvoraussetzungen (VPC1)
Windows
Computer
Der Computer muss über einen USB Anschluss verfügen und
die Anforderungen zur Verwendung von Microsoft Windows
8/7/Vista/XP erfüllen.
Windows 8/7/Vista/XP (mit dem jeweils aktuellsten Service
OS
Pack).
Mac
Computer
Der Computer muss über einen USB Anschluss verfügen und
die Anforderungen zur Verwendung von Mac OS X erfüllen.
OS ab Mac OS X 10.4
Installation (Windows)
Das VPC1 wird vom Computer automatisch erkannt. Wenn das VPC1 über das
mitgelieferte USB Kabel mit dem Computer verbunden und anschließend ein-
geschaltet wird, wird der Standard USB-MIDI Treiber des Computer Betriebssys-
tems automatisch installiert. Anschließend ist das VPC1 einsatzbereit.
Bevor Sie die VPC Editor Software verwenden, müssen Sie den Kawai USB-MIDI
Treiber und die VPC Editor Software auf Ihrem Computer – wie nachfolgend be-
schrieben - installieren.
Die Installation des Kawai USB-MIDI Treibers wird empfohlen, da er stabiler funk-
tioniert. Das gilt auch für den Fall, dass der VPC Editor nicht verwendet wird.
Nach der Installation des Kawai USB-MIDI Treibers und des VPC Editors können
Sie mit der VPC Editor Software die Instrumenten Einstellungen vom Computer
aus kongurieren oder Anschlagsdynamikkurven editieren.
Für die Installation oder Deinstallation des Kawai USB-MIDI Treibers und der VPC
Editor Software benötigen Sie Ad ministrator Rechte. Für weitere Informationen
kontaktieren Sie bitte Ihren System Administrator.
Für die Installation des Kawai USB-MIDI Treibers und der VPC Editor Software sollten alle USB Geräte (außer Maus und Tastatur) vom Computer getrennt werden.
Wenn das VPC1 über USB mit dem Computer verbunden ist, kann es etwas dauern
bis die Kommunikation funktioniert.
Wenn Sie das VPC1 über einen USB-Hub mit Ihrem Computer verbunden haben und
die Übertragung nicht stabil zu sein scheint, schließen Sie den VPC1 direkt an einen
USB Anschluss Ihres Computers an.
Wenn Sie den VPC1 ausschalten oder die USB Kabelverbindung während der folgenden Vorgänge trennen, kann die USB Verbindung instabil werden:
Während der Installation des Kawai USB-MIDI Treibers.
-
Während des Bootvorgangs des Computers.
-
Während eine MIDI Anwendung läuft.
-
Während der Datenübertragung zwischen Computer und VPC1.
-
Wenn sich der Computer im Energiesparmodus bendet.
-
Je nach Konguration Ihres Computers ist es möglich, dass die USB Funktion nicht
korrekt funktioniert. In diesem Fall lesen Sie bitte sorgfältig die Bedienungsanleitung Ihres Computers und überprüfen Sie anschließend alle relevanten Einstellungen an Ihrem Computer.
Den Kawai USB-MIDI Treiber können Sie unter dem folgenden Link herunterladen:
1.
http://www.kawai.co.jp/worldwide/support/downloads.html
Entpacken Sie die ZIP-Datei und starten Sie das Installationsprogramm
2.
“DPInst.exe”.
Wenn der "Kawai USB MIDI Device Installer" Dialog erscheint, klicken Sie “Weiter”.
3.
Der "End User License Agreement" Hinweis wird angezeigt. Für eine Zustim-
4.
mung wählen Sie "I accept this EULA" und klicken dann auf "Weiter".
Wenn die Installation beendet ist, erscheint die Meldung "Installation comple-
5.
te!". Klicken Sie auf "Fertig stellen"
Installation der VPC Editor Software
Die Kawai VPC Editorsoftware können Sie unter dem folgenden Link herunterladen:
1.
http://www.kawai.co.jp/worldwide/support/downloads.html
Entpacken Sie die ZIP-Datei und starten Sie das Installationsprogramm
2.
“SETUP.exe”.
Wenn der "Kawai VPC Editor - InstallShield Wizard" Dialog erscheint, klicken Sie
3.
"Weiter".
Der "License Agreement" Hinweis wird angezeigt. Für eine Zustimmung wählen
4.
Sie "Ich akzeptiere die Bedingungen der Lizenzvereinbarung". und klicken dann auf
"Weiter".
Der Zielordner für die Installation wird angezeigt. Wenn Sie den VPC Editor in
5.
diesen Ordner installieren möchten, klicken Sie auf "Weiter". Für die Auswahl
eines anderen Installationsordners klicken Sie auf "Ändern..". Wenn Sie einen
anderen Ordner gewählt haben klicken Sie auf "Weiter".
Wenn der Hinweis "Bereit das Programm zu installieren" angezeigt wird, kli-
6.
cken Sie auf "Installieren". Wenn die Installation beendet ist und der “Installs-
hield Wizard abgeschlossen” Dialog erscheint, klicken Sie auf "Fertig stellen".
Installation (Mac OS X)
Installation der VPC Editor Software
Die Kawai VPC Editorsoftware können Sie unter dem folgenden Link herunterladen:
1.
http://www.kawai.co.jp/worldwide/support/downloads.html
Entpacken Sie die ZIP-Datei und starten Sie das Installationsprogramm
2.
“VpcEditorForMac.pkg”.
Bedienungsanleitung als PDF-Datei
Eine Bedienungsanleitung als PDF-Datei ist im Umfang der VPC Editor Software
enthalten.
Details zur Bedienung des VPC Editor Programms entnehmen Sie bitte der PDF-
Anleitung.
Verwenden der Bedienungsanleitung (PDF-Datei)
Wenn der VPC Editor gestartet ist, klicken Sie auf das KAWAI Logo, um zur Ver-
1.
sionsanzeigeseite zu gelangen.
Durch klicken auf HELP ( auf der Versionsanzeigeseite) gelangen Sie zur Bedie-
2.
nungsanleitung.
Page 10

Preset Modus auswählen
Fehlersuche
Der Preset Modus im VPC1 ist mit 5 Presets ausgestattet. Das ermöglicht Ihnen
das Speichern von verschiedenen Touch Curves und anderen Einstellungen, die
mit dem VPC Editor erstellt wurden, auf das VPC1.
Weitere Informationen zum Speichern von Einstellungen als Preset im VPC1 n-
den Sie in der PDF-Bedienungsanleitung der VPC Editor Software.
Nachfolgend wird beschrieben, wie man Presets im VPC1 abrufen kann.
Halten
Preset 1 Preset 2 Preset 3 Preset 4 Preset 5
Halten Sie die POWER Taste gedrückt und drücken Sie währenddessen eine der
höchsten 5 schwarzen Tasten auf der Tastatur des VPC1, um ein Preset auszuwäh-
len.
Wenn Sie die Tasten loslassen, wechselt die Farbanzeige der LED (entsprechend
des gewählten Presets).
Das Instrument lässt sich nicht einschalten bzw. reagiert nicht korrekt.
- Kann man das VPC1 über einen USB-Hub an den Computer anschließen?
Es empehlt sich das VPC1 direkt an einen USB Anschluss des Computers anzuschließen.
- Die LED der POWER Taste blinkt rot.
Wenn die LED rot blinkt, ist die Spannungsversorgung über den USB Anschluss
nicht leistungsstark genug. Schließen Sie zusätzlich den mitgelieferten Netzadapter an.
Das angeschlossene Instrument bzw. der VPC Editor korrespondieren nicht mit dem VPC1.
- Überprüfen Sie die MIDI- bzw. USB-Verbindung?
- Hat Ihr Computer den Anschluss des VPC1 richtig erkannt?
Bitte lesen Sie sich sorgfältig die Bedienungsanleitung Ihres Computers durch
und vergewissern Sie sich, dass das angeschlossene VPC1 von Ihrem Computer
richtig erkannt wird.
Abhängig von der Konguration Ihrer Computer Hardware lässt sich nicht ausschließen, dass das Instrument über eine USB Verbindung nicht richtig erkannt
wird.
- Das angeschlossene Gerät bzw. die verwendete Software unterstützt dieses
Feature möglicherweise nicht. Schauen Sie in der Bedienungsanleitung des angeschlossenen Gerätes bzw. der verwendeten Software nach Hinweisen zu dieser
Thematik.
Es ist kein Ton zu hören, wenn man auf der Tastatur des VPC1 spielt.
- Überprüfen Sie die Einstellungen des Sendekanals und die Ausgangseinstellungen der VPC Editor Software.
- Wurde die Software Soundquelle richtig konguriert?
Die Anschlagsdynamik der Tastatur funktioniert nicht richtig.
- Überprüfen Sie die Touch Curve und Velocity Oset Einstellungen in der VPC
Editor Software.
Wenn das VPC1 aus- und wieder eingeschaltet wird, wird automatisch das zuletzt
gewählte Preset wieder aufgerufen. Beim allerersten Einschalten wird automatisch
das Preset 1 gewählt.
Zusätzlich zur Standard Touch Curve beinhaltet das VPC1 weitere Touch Curves,
die speziell auf einige Software Pianos abgestimmt und als werkseitige Presets
im VPC1 enthalten sind (siehe nachfolgende Liste).
Preset
LED Farbe der
POWER Taste
1 Rot Normal Standard Touch Curve.
2 Orange Ivory
3 Grün Pianoteq
4
5
Orange
blinkend
Grün blin-
kend
Touch Cur ve Beschreibung
Passende Touch Curve für die Ivory
Software (entwickelt von Synthogy).
Passende Touch Curve für die
Pianoteq Software (entwickelt von
MODARTT).
Galaxy
Alicia's Keys
Passende Touch Curve für die Galaxy
Pianos Software (entwickelt von
Galaxy Instruments).
Passende Touch Curve für die Alicia's
Keys Software (entwickelt von Native Instruments).
Eine oder mehrere Tasten lassen sich nicht laut spielen.
- Überprüfen Sie die Velocity Oset Einstellungen in der VPC Editor Software.
MIDI Daten werden über die Anschlüsse MIDI bzw. USB nicht gesendet oder empfangen.
- Überprüfen Sie die Einstellungen des Sendekanals und die Ausgangseinstellungen der VPC Editor Software.
Das mitgelieferte Fußpedal funktioniert nicht.
- Wurde das Fußpedal richtig angeschlossen?
- Überprüfen Sie die Pedal CC# Einstellungen in der VPC Editor Software.
- Überprüfen Sie die Einstellungen der angeschlossenen Software Soundquelle.
Technische Spezikationen
Tastatur
Anschlüsse Pedal, MIDI (IN/OUT), USB to HOST, Netzadapter (DC IN 12V)
Stromversorgung
Leistungsaufnahme
Abmessungen 138 (W) x 42,5 (D) x18,5 (H) cm
Gewicht 29,5 kg
Lieferumfang
Änderungen des Erscheinungsbildes und der Spezikationen bleiben ohne vorherige Ankündigung vorbehalten.
※
‘Ivory’, ‘Pianoteq’, ‘Galaxy’, und ‘Alcia’s Keys’ sind Warenzeichen der betreenden Hersteller.
※
88 Holztasten
RM3 Grand II Tastaturmechanik mit 3-fach Sensor System, Ivory
Touch Tastenbelägen und Druckpunkt Simulation
Über den USB Anschluss (via USB Anschluss)
DC 12 V AC Netzadapter
- Mit Spannungsversorgung über USB: 1,0 W
- Mit Netzadapter: 3,0 W
Bedienungsanleitung, USB Kabel, Netzadapter, Netzkabel,
F-30 Fußpedal, Notenpult
Page 11

Règles de sécurité Read all the instructions before using the product.
CONSERVEZ CES INSTRUCTIONS
INSTRUCTIONS RELATIVES AU RISQUES D’INCENDIE, D’ELECTROCUTION, OU DE BLESSURE D’UNE PERSONNE
CAUTION
RISK OF ELECTRIC SHOCK
DO NOT OPEN
Le symbole de l’éclair avec une pointe de èche à l’intérieur d’un triangle équilatéral met en
garde l’utilisateur contre la présence de tension dangereuse, non isolée, à l’intérieur de l’appareil,
dont l’amplitude peut être susante pour induire un risque d’électrocution d’une personne.
Le point d’excl amation à l’intér ieur d’un tria ngle équilaté ral alerte l’u tilisateur de l a
présen ce de règl es d’util isation e t d’entretien impo rtantes d ans la no tice qui
accomp agne l’apparei l.
Indique un risqu e potentiel qui peut
AVERTISSEMENT
Indique un risque potentiel qui peut entraîner la mor t, ou de graves lésions, si l’appareil
n’est pas manipulé correctement.
Si vous utilisez un câble d’alimentation secteur, vériez que la forme de la prise soit la
L
bonne, et qu’il soit conforme à la tension d’alimentation spéciée.
L
Le non respect de ces instructions peut causer un incendie.
Ne pas brancher ou débrancher le câble d’alimentation avec les mains humides.
Vous pourriez vous electrocuter.
Faite attention de ne pas introduire un produit étranger à l’intérieur de l’appareil.
L’introduction d’eau, d’aiguilles ou d’épingles à cheveux, peut provoquer une panne ou un
court-circuit. Ce produit doit être mis à l’abri des écoulements ou projections d’eau. Ne jamais
placer sur le produit des objets contenant des liquides, tels que des vases ou autres récipients.
N’utilisez pas le casque longtemps à fort volume. Zuwiderhandlung kann Hörschäden hervorrufen.
Si vous le faisiez vous pourriez avoir des problèmes d’audition.
Ne pas s’appuyer contre le clavier.
Cela pourrait provoquer la chute de l’appareil, et engendrer des blessures.
N'utilisez pas le produit dans des endroits humides, inondés ou près de l'eau.
Ceci pourrait provoquer un court-circuit, avec un risque d'électrocution ou d'incendie.
Vous ne devez pas démonter, réparer ou modier l’appareil.
Vous pourriez provoquer une panne, une électrocution ou un court-circuit.
Lorsque vous débranchez le câble secteur, faites-le en maintenant et en tirant la prise pour la déconnecter.
L
Si vous tiriez sur le câble, vous pourriez l’endommager en provoquant un incendie, une
électrocution, ou un court-circuit.
Ce produit n’est pas totalement déconnecté du circuit électrique lorsqu’il est mis hors
tension par le bouton d’arrêt. Si l’appareil ne doit pas être utilisé pendant une longue
période, débranchez le câble d’alimentation de la prise secteur.
L
Si vous ne le faisiez pas la foudre pourrait provoquer un incendie.
Si vous ne le faisiez pas, la surchaue de l’appareil pourrait provoquer un incendie.
L
Il est recommandé de placer l’instrument à proximité de la prise de courant et de positionner le câble
d’alimentation secteur de sorte qu’il puisse être débranché rapidement en cas d’urgence, le courant électrique
étant toujours présent tant que la prise est branchée même si le bouton de mise en marche est en position Arrêt.
Dépannage
Si quelque chose d’anormal se passe dans l’appareil, éteignez-le immédiatement (position OFF),
déconnectez le câble d’alimentation, et contactez le magasin qui vous a vendu l’appareil.
entraîner la mort, ou de graves lésions, si
l’appareil n’est pas manipulé correctement.
WARNING
TO REDUCE THE RISK OF FIRE OR ELECTRIC
SHOCK , DO NOT EXPOSE THIS PRODUCT
TO RAIN OR MOISTURE.
Exemples de symboles graphiques
Indique que des précautions doivent être prises.
L’exemple indique à l’utilisateur qu’il doit faire attention à ne pas se faire coincer les doigts.
Indique une manipulation interdite.
L’exemple indique que le démontage de l’appareil est interdit.
Indique qu’une manipulation doit être eectuée.
L’exemple indique à l’utilisateur qu’il doit débrancher le câble d’alimentation de la prise secteur.
PRECAUTION
Ne pas utiliser l’appareil dans les lieux suivants.
L Lieux exposés aux rayons directs du soleil, comme la proximité des fenêtres.
L Lieux surchaués, comme la proximité des radiateurs.
L Lieux très froids, comme à l’extérieur.
L Lieux très humides.
L Lieux où la présence de poussière ou de sable est importante.
L Lieux où l’appareil est exposé à des vibrations excessives.
L’utilisation de l’appareil dans un de ces lieux peut entraîner une panne de celui-ci.
Votre piano doit être utilisé uniquement dans un milieu tempéré (non dans un climat tropical).
L Ne placez pas l’unité principale sur le côté pendant des périodes prolongées.
L N’essayez pas de jouer alors que l’unité principale est penchée de façon inhabituelle.
Cela pourrait exercer une pression sur le mécanisme du clavier et engendrer un dysfonctionnement du produit.
Pour l’alimentation de cet instrument, utilisez exclusivement l’adaptateur secteur fourni.
L N’utilisez pas d’autres adaptateurs secteur pour alimenter cet instrument.
L
N’utilisez pas l’adaptateur secteur ou le cordon d’alimentation fourni pour alimenter d’autres appareils.
Avant de brancher le câble d’alimentation, assurez-vous que cet appareil, et les autres
appareils, soient en position Arrêt (OFF).
Le non respect de cette consigne peut engendrer la panne de cet appareil, ou des autres appareils.
Faites attention de ne pas lacher l’appareil.
L’appareil est lourd, et il doit etre porte par plus de deux personnes. La chute de l’appareil
peut entrainer la panne.
Lorsque vous branchez le câble d’alimentation et les autres câbles, faites attention de ne pas les emmêler.
Si vous négligiez ceci , il pourrait en résulter un incendie, une électrocution, ou un court-circuit.
Ne pas nettoyer l’appareil avec du benzène ou du diluant.
L
L’utilisation de ces produits pourrait entraîner une décoloration ou une déformation de l’appareil.
L
Pour nettoyer cet appareil, utilisez un chion doux imprégné d’eau tiède, essorez-le bien, puis frottez délicatement l’appareil.
Ne pas se tenir debout sur l’appareil, ou le surcharger.
Si vous le faisiez, vous pourriez déformer ou provoquer la chute de l’appareil, en entraînant une panne ou des blessures.
Ne pas poser sur votre instrument des sources de ammes nues telles que chandelier, bougie etc…
L Ceux-ci pourraient tomber et provoquer un incendie.
Assurez-vous que les orices de ventilation de l’instrument ne soient pas obstrués par
des objets, tels que des journaux, des napperons, des rideaux, etc
L
Vous risqueriez de provoquer une surchaue du produit, ce qui pourrait entraîner un incendie.
Votre piano doit etre place a un endroit tel que sa position n’altere pas sa propre ventilation.
Gardez une distance minimum de 5 cm autour de l’instrument pour une aeration susante.
L’appareil doit être révisé par du personnel qualié lorsque :
L Le câble ou la prise d’alimentation sont endommagés.
L Des objets sont tombés, ou du liquide à été renversé à l’intérieur de l’appareil.
L L’appareil a été exposé à la pluie.
L
L’appareil ne semble pas fonctionner normalement, ou manifeste un changement marqué dans ses performances.
L L’appareil est tombé, ou son meuble est endommagé.
AVIS : RISQUE DE CHOC ELECTRIQUE - NE PA S OUVRIR.
POUR REDUIRE LES RISQUES D’INCENDIE OU D’ELECTROCUTION,
NE DEMONTEZ PAS LE COUVERCLE (OU L’ARRIERE). A L’INTERIEUR,
AUCUNE PARTIE N’EST REPARABLE PAR L’UTILISATEUR. POUR LA MAINTENANCE,
ADRESSEZ-VOUS A DU PERSONNEL QUALIFIE.
Indique un risque potentiel qui peut entraîner la
détérioration, ou des dommages, pour l’appareil ou ses
propriétés, si celui-ci n’est pas manipulé correctement.
Information sur les déchets industriels à destination des
usagers
Si votre produit porte le marquage du symbole de recyclage, cela signie que, à la n
de sa vie, vous devez le remettre de façon séparée dans un centre de collecte de
déchets approprié. Vous ne devrez pas le remettre avec les déchets ménagers.
Remettre ce produit dans un centre de collecte de déchets approprié évitera de
potentiels eets négatifs sur l’environnement et sur la santé qui pourraient survenir
dans le cas contraire du fait d’un traitement des déchets non adapté. Pour de plus
amples détails, merci de contacter les instances locales.
(union européenne seulement)
La reference commerciale est inscrite sur une etiquette en dessous de votre instrument, conformement a l’indication ci-dessous.
Reference
Page 12

Pour commencer
Merci pour l’achat du VPC1 Kawai.
Ce manuel de l’utilisateur contient des informations importantes sur l’emploi et le
fonctionnement du VPC1. Lisez attentivement toutes les sections et conservez le
manuel pour référence ultérieure.
Nomenclature et fonctions
1
Bouton POWER
1.
Ce bouton sert à mettre en marche ou arrêter l'instrument. Le voyant LED est
allumé quand l'appareil est sous tension.
Le statut du VPC1 est indiqué par la couleur du voyant LED du bouton POWER, com-
me suit:
Statut de l'instrument Couleur de voyant LED du bouton Power
Préréglage 1 Rouge
Préréglage 2 Orange
Préréglage 3 Vert
Préréglage 4 Orange clignotant
Préréglage 5 Vert clignotant
Mise à jour du
VPC1
Erreur de mise à
jour
Erreur
d'alimentation
Rouge et Vert clignotant lentement
(par intervalles de 2 secondes)
Rouge et Vert clignotant rapidement
(par intervalles de 0,2 secondes)
Rouge clignotant
2 3 4 5
Prise DC IN (12 V)
2.
Cette prise sert à connecter l'adaptateur d'alimentation CA à la prise DC IN du VPC1.
Prise de pédale
3.
Cette prise sert à connecter le pédalier Kawai inclus au VPC1.
Connecteurs MIDI IN/OUT
4.
Ces prises servent à connecter l'instrument à des appareils MIDI externes, par
exemple un autre instrument de musique ou un ordinateur, pour envoyer et rece-
voir des données MIDI.
Connecteur USB to Host
5.
Ce port sert à connecter l'instrument à un ordinateur à l'aide d'un câble USB de
type «B à A» an d'envoyer et recevoir des données MIDI.
L'adaptateur d'alimentation CA est nécessaire lors de la connexion du VPC1 à un
appareil/ordinateur à l'aide de connecteurs MIDI.
Lors de la connexion du VPC1 à un ordinateur à l'aide d'un câble USB, l'adaptateur
d'alimentation CA n'est pas nécessaire car l'alimentation est fournie par le biais du
connecteur USB de l'ordinateur.
Le VPC1 comporte une fonction Économie d'énergie qui peut arrêter l'instrument
automatiquement au bout d'une période d'inactivité précise. Reportez-vous au manuel PDF du logiciel VPC Editor pour plus de détails.
Ce port sert à connecter l'instrument à un ordinateur à l'aide d'un câble USB de
type «B à A» an d'envoyer et recevoir des données MIDI.
Toutefois, dans certains cas, le connecteur USB de l'ordinateur ne sut peut-être
pas pour une alimentation correcte du VPC1. Dans ce cas, le voyant LED du bouton POWER clignote en rouge pour indiquer que l'adaptateur d'alimentation CA
est requis.
Si la mise à jour du VPC1 ne s'achève pas avec succès, le voyant LED du bouton
POWER clignote e n rouge et vert rapidemen t (par intervalles de 0,2 s econdes).
Dans ce cas, essayez une nouvelle fois de mettre à jour le VPC1
Page 13

Installation/Conguration
Le système requiert (VPC1)
Windows
Ordinateur
Mac
Ordinateur
Installation (Windows)
Le VPC1 est reconnu automatiquement par l'ordinateur. Il est donc inutile d'ins-
taller des pilotes supplémentaires. Quand le clavier de l'instrument est connecté
au port USB de votre ordinateur à l'aide du câble USB inclus et que l'appareil
est mis en marche, le pilote USB-MIDI standard du système d'exploitation est
installé automatiquement. L'instrument est alors prêt à l'emploi. À ce stade, vous
pouvez congurer l'instrument depuis votre ordinateur ou créer des courbes de
toucher à l'aide du logiciel VPC Editor.
Avant d'utiliser le logiciel VPC Editor, procédez comme suit pour installer le pi-
lote USB-MIDI de Kawai et le logiciel VPC Editor.
Il est recommandé d'installer le pilote USB-MIDI de Kawai pour établir un envi-
ronnement plus stable, même si vous n'utilisez pas le logiciel VPC Editor.
Pour pouvoir installer ou désinstaller le pilote USB-MIDI de Kawai et le logiciel VPC
Editor, vous devez disposer des privilèges d'administrateur. Pour plus de détails,
contactez l'administrateur système.
Quand vous installez le pilote USB-MIDI de Kawai et le logiciel VPC Editor, déconnectez tous les appareils USB, à l'exception du clavier et de la souris de l'ordinateur.
Une fois que vous avez connecté le VPC1 à votre ordinateur à l'aide d'un câble USB,
attendez un moment pour que la communication soit établie.
Si le VPC1 et votre ordinateur sont connectés via un concentrateur USB et que vous
observez un comportement instable, connectez-le directement à un port USB de l'ordinateur.
Quand vous mettez en marche ou arrêtez le VPC1 ou que vous connectez/déconnectez le câble USB lors des op érations suivantes, vous observerez peut-être un
comportement instable du VPC1 ou de l'ordinateur.
Lors de l'installation du pilote USB-MIDI de Kawai.
-
Au démarrage de l'ordinateur.
-
Lors de l'exécution d'une application MIDI.
-
Lors de la communication avec l'ordinateur.
-
Quand l'ordinateur est prêt et en attente (en mode Économie d'énergie)
-
Selon la conguration de votre ordinateur, il se peut que la fonction USB n'opère
pas correctement. Lisez attentivement le manuel de l'utilisateur de votre ordinateur, puis procédez au réglages appropriés.
Ordinateur doté d’une prise USB et pouvant tourner sous
Microsoft Windows 8/7/Vista/XP
OS Windows 8/7/Vista/XP (avec le service pack le plus récent)
Ordinateur Apple Macintosh doté d’une prise USB et pouvant tourner sous Mac OS X
OS Mac OS X 10.4 (ou ultérieur)
Installation du pilote USB-MIDI de Kawai
Télécharger le Kawai pilote USB-MIDI sur le site Kawai:
1.
http://www.kawai.co.jp/worldwide/support/downloads.html
Extraire le chier zip et exécutez le programme d’installation «DPInst.exe».
2.
Quand la boîte de dialogue «Kawai USB MIDI Device Installer» apparaît, cliquez
3.
sur «Suivant».
Le contrat de licence utilisateur (End User License Agreement) s'ache. Si vous
4.
acceptez les termes du contrat, sélectionnez «I accept this EULA» (J'accepte ce
contrat de licence pour utilisateur nal), puis cliquez sur «Suivant».
Une fois l'installation terminée, le message «Installation complete!» s'ache.
5.
Cliquez sur «Finish» (Terminer).
Installation du logiciel VPC Editor
Télécharger le logiciel Kawai éditeur VPC sur le site Kawai:
1.
http://www.kawai.co.jp/worldwide/support/downloads.html
Extraire le chier zip et exécutez le programme d’installation «Setup.exe».
2.
Quand la boîte de dialogue «Kawai VPC Editor - InstallShield Wizard» apparaît,
3.
cliquez sur «Suivant».
Le contrat de licence utilisateur («License Agreement») s'ache. Si vous acceptez
4.
les termes du contrat, sélectionnez «I accept the terms in the license agreement»
(J'accepte les termes du contrat de licence), puis cliquez sur «Suivant».
Le dossier de destination de l'installation s'ache alors. Pour installer le VPC
5.
Editor dans ce dossier, cliquez sur «Suivant». Pour installer le VPC Editor dans
un dossier diérent, cliquez sur «Change..» pour changer le chemin d'installa-
tion et cliquez sur «Suivant» après avoir sélectionné l'emplacement d'installa-
tion voulu.
Le message «Ready to Install the Program» (Prêt à installer le programme) s'af-
6.
che. Cliquez sur «Install».
Une fois l'installation terminée, la boîte de dialogue "Installshield Wizard Com-
7.
pleted" s'ache. Cliquez sur «Finish» (Terminer).
Installation (Mac OS X)
Installation du logiciel VPC Editor
Télécharger le logiciel Kawai éditeur VPC sur le site Kawai:
1.
http://www.kawai.co.jp/worldwide/support/downloads.html
Extraire le chier zip et exécutez le programme d’installation « VpcEditorFor-
2.
Mac.pkg ».
À propos du manuel PDF
Un manuel au format PDF est inclus avec le logiciel VPC Editor.
Pour des détails sur la présentation et les opérations du logiciel VPC Editor, re-
portez-vous au manuel PDF.
Utilisation du manuel PDF
Au lancement du logiciel VPC Editor, cliquez sur le bouton du logo KAWAI pour
1.
acher l'écran avec les informations de version.
Cliquez sur le bouton HELP.
2.
Page 14

Sélection d'un mode préréglé
Résolution des problèmes
Cinq modes préréglés sont fournis avec le VPC1. Ceci vous permet de sauvegar-
der les diverses courbes de toucher créées à l'aide du logiciel VPC Editor inclus
ou les valeurs de paramètres de l'instrument.
Pour plus de détails sur la sauvegarde des valeurs de paramètres comme préré-
glages, reportez-vous au manuel PDF du logiciel VPC Editor.
La section ci-dessous décrit comment sélectionner les modes préréglés avec le
VPC1.
Maintenez
enfoncé
Preset 1 Preset 2 Preset 3 Preset 4 Preset 5
Appuyez sur le bouton POWER et maintenez-le enfoncé, puis appuyez sur une
des 5 touches noires les plus hautes pour sélectionner un mode préréglé.
Quand le mode préréglé aecté à la touche enfoncée est sélectionné, la couleur
du voyant LED du bouton POWER change.
Lors de la mise sous tension, le préréglage utilisé précédemment est sélectionné
automatiquement. Lors de la mise sous tension initiale, le préréglage 1 est sélectionné.
Impossible de mettre en marche l’instrument.
- Le VPC est-il connecté à votre ordinateur à l'aide d'un concentrateur USB ?
Connectez-le directement au port USB de votre ordinateur, sans concentrateur.
- Est-ce que le voyant LED du bouton POWER clignote en rouge ?.
Si le bouton POWER est allumé et que le voyant clignote en rouge, l'alimentation
fournie par l'ordinateur à l'aide du bus USB est insusante. Dans ce cas, utilisez
l'adaptateur de courant CA inclus.
L'appareil connecté ou le logiciel ne répond pas.
- Est-ce que le câble USB ou le câble MIDI est connecté correctement ?
- Est-ce que votre ordinateur a détecté le VPC1 connecté ?
Lisez attentivement le manuel de l'ordinateur connecté et assurez-vous que le
VPC1 connecté est reconnu par celui-ci.
Lisez attentivement le manuel de l'ordinateur connecté et assurez-vous que le
VPC1 connecté est reconnu par celui-ci.
Selon la conguration matérielle de votre ordinateur, il se peut que l'instrument
ne soit pas détecté correctement lors de l'emploi de la connexion USB.
- L'appareil connecté ou le logiciel ne prend peut-être pas en charge la fonctionnalité. Reportez-vous au manuel de l'appareil connecté ou du logiciel.
Aucun son n'est émis quand on appuie sur des touches.
-
Vériez les réglages de canal de transmission et de sortie du logiciel VPC Editor.
- Est-ce que la source sonore du logiciel a été congurée correctement ?
La vélocité du clavier ne marche pas.
- Vériez les valeurs des paramètres Touch Curve et Velocity Oset du logiciel VPC
Editor.
Le son n'augmente qu'à certaines touches du clavier.
- Vériez le réglages du paramètre Velocity Oset du logiciel VPC Editor.
Aucun message n'est envoyé ou reçu depuis le port MIDI ou USB.
- Vériez les réglages de canal de transmission MIDI et de sortie du logiciel VPC
Editor.
En plus d'une courbe de toucher standard, plusieurs courbes de toucher appro-
priées pour des logiciels de piano répandus sont fournies comme préréglages
usine.
Preset
Power LCD
state
1 Rouge Normal Courbe de toucher standard.
2 Orange Ivory
3 Vert Pianoteq
4
5
Orange
clignotant
Vert
clignotant
Touch Cur ve Description
Courbe de toucher convenant
au logiciel Ivory développé par
Synthogy.
Courbe de toucher convenant au
logiciel Pianoteq développé par
MODARTT.
Galaxy
Alicia's Keys
Courbe de toucher convenant au
logiciel Galaxy Pianos développé par
Galaxy Instruments.
Courbe de toucher convenant au
logiciel Alicia's Keys développé par
Native Instruments.
Le pédalier ne marche pas
- Est-ce que le pédalier a été connecté correctement ?
- Vériez le réglage du paramètre Pedal CC# (Numéro de changement de
commande de pédale) du logiciel VPC Editor.
- Est-ce que la source sonore du logiciel a utiliser a été dénie correctement ?
Fiche technique
88 touches, bois
Clavier
RM3 Grand II avec surfaces de touche Ivory Touch, Let-O
Bornes de
connexion
Alimentation
Consommation
électrique
Dimensions 138 (W) x 42,5 (D) x 18,5 (H) cm
Contenu de la boîte
Apparence et spécications sujettes à des modications sans préavis.
※
‘Ivory’, ‘Pianoteq’, ‘Galaxy’, et ‘Alcia’s Keys’ sont des marques commerciales de leurs détenteurs respectifs.
※
Prise de pédale, Connecteurs MIDI (IN/OUT),
Port USB to HOST, Connecteur d'alimentation (DC IN 12V)
Alimentation du bus USB (via le port USB)
Adaptateur CC 12 V CA
- Avec alimentation de bus USB : 1,0 W
- Adaptateur CC 12 V CA: 3,0 W
Poids 29.5 kg
Manuel de l'utilisateur (ce manuel), Câble USB,
Adaptateur CA, Câble d'alimentation, Pédalier F-30, Pupitre
Page 15

Instrucciones de Seguridad Read all the instructions before using the product.
GUARDE ESTAS INSTRUCCIONES
INSTRUCCIONES SOBRE RIESGOS DE INCENDIO, DESCARGA ELECTRICA, O DANO A PERSONAS
CAUTION
RISK OF ELECTRIC SHOCK
DO NOT OPEN
Si se enciende el simbolo de un rayo en u n triangulo, alerta al usuario de la presencia
de ¨vo ltaje pelig roso¨ no p rotegido den tro del pro ducto, indi cando suc iente
magnit ud para constit uir riesgo de de scarga elec trica.
La presen cia del simbolo de a dmiracion dent ro de un triangulo, al erta al usuari o de
un importan te servicio de operacion y man tenimiento descritos en las in strucciones
que acom panan al produc to.
Indica dano potencial que podria resultar en
PRECAUCION
El producto deber ser conectado a un enchufe de corriente con el voltaje indicado.
Si utilizara un cable de corriente asegurese de que tenga el enchufe correcto y conforma el
L
voltaje especicado.
L
Si NO hiciera esto, podria incendiarse.
No inserte o desconecte el enchufe del cable con las manos humedas.
Si lo hace, puede darle una descarga electrica.
No permita que cualquier objeto extrano entre en el producto.
La entrada de agua, agujas, etc. puede causar averias o corto circuitos. El producto debe ser
protegido del agua y de las salpicaduras. No se debe de apoyar en el instrumento ningun
objeto que contenga liquido, como jarrones.
Cuando se usen los auriculares, no lo haga durante largos periodos de tiempo a niveles altos.
Podria derivar en problemas de audicion.
No se apoye sobre el instrumento.
El producto puede caer y romperse.
No utilice el instrumento en lugares humedos o mojados, o cerca de una fuente de agua.
Podria ocasionar un corto circuito, o una descarga electrica o un incendio.
No desmonte, repare o modique el producto.
Al hacerlo, el producto podria romperse, provocar descarga electrica o corto circuito.
Cuando desconecte el enchufe de la corriente, debe tirar siempre del enchufe para sacarlo.
L
Si tira del mismo cable de corriente, puede estropear el cable causando fuego, una descarga
electrica o corto circuito.
El producto tiene componentes electricos que se mantendran cargados a la fuente de
alimentacion aun cuando el instrumento este apagado. Si el producto no se utilizara
durante largo tiempo, se recomienda desconecte de la red de corriente.
L
En caso de tormenta y rayos, podria provocarse fuego.
O el excesivo calentamiento, provocar incendio.
L
Este producto debe estar cerca de una salida AC y el cable de corriente enchufado en una posicion
de tal forma que pueda desconectarse en caso de emergencia ya que la electricidad siempre esta
en carga mientras la clavija este enchufada en la salida AC incluso si el aparato esta apagado.
Notas de Reparacion
Si sucediera alguna anomalia al producto, apaguelo inmediatamente, desconecte de la red y
contacte con la tienda donde lo haya comprado.
muerte o serio accidente si el producto se
usa incorrectamente.
WARNING
PARA REDUCIR RIESGO DE INCENDIO O
DESCARGA ELECTRICA, NO EXPONGA ESTE
PRODUC TO A LA LLUVIA O HUMEDAD
Ejemplos de los Simbolos Dibujados
indica que debe tener cuidado.
El ejemplo indica al usuario tenga cuidado no se le atrapen los dedos.
indica una operacion prohibida
El ejemplo indica la prohibicion de desarmar el producto.
indica la operacion que debe seguirse.
El ejemplo instruye al usuario desenchufe el cable de la salida de corriente.
No use el producto en las siguientes zonas.
L
Tales como cerca de ventanas, donde el producto este expuesto a la luz directa del sol.
L Extremadamente calientes, como proximo a radiadores.
L Zonas extremadamente frias, como al exterior.
L Zonas extremadamente humedas.
L Zonas donde haya mucha arena o polvo.
L Zonas donde el producto pueda estar expuesto a excesivas vibraciones.
Del uso del producto en dichas zonas puede derivarse en el deterioro del mismo.
Use el producto solo en climas moderados (nunca en climas tropicales).
L No ponga la unidad principal a su lado durante largos periodos de tiempo.
L No intente tocar la unidad principal en angulos inusuales.
Hacerlo puede poner estres en la accion del teclado, resultando en el desglose del producto.
Solo utilice el adaptador AC incluido con este piano para encenderlo.
L No utilice otros adaptadores para encender este piano.
L
No utilice ni el adaptador ni el cable incluidos con este piano para encender otros aparatos.
Antes de conectar los cables, asegurese de que este y los demas aparatos esten apagados.
Si fallara en hacerlo correctamente, podria estropear el producto y los demas aparatos.
Tenga cuidado que no se caiga el producto.
Tenga en cuenta que el producto es pesado y debe ser movido por mas de dos personas.
La caida del producto puede generar una rotura.
Al conectar el cable de corriente y otros cables, cuide que no esten enredados.
Puede causar fuego, descarga electrica o corto circuito.
No limpie el producto con bencina o diluyente.
L
El resultado puede ser de decoloracion o deformacion del producto.
L
Para limpiar el producto, hagalo con un pano suave mojado en agua templada, escurralo bien, y paselo sobre el producto.
No se suba sobre el producto o presione con excesiva fuerza.
El producto se puede deformar o caer, con la consiguiente fractura o averia.
No acercar llamas al producto, tales como velas, etc.
L Podrian caerse y provocar un incendio.
Asegurese de dejar libres las aberturas de ventilacion y de no cubrirlas con objetos,
como periodicos, manteles, cortinas etc.
L El incumplimiento de esto puede provocar el recalentamiento del producto, produciendo un incendio.
El producto debera colocarse en un lugar donde ni su ubicacion ni su posicion intereran
con la ventilacion apropiada del mismo. Asegurese de que exista una distancia minima de
5cm. alrededor del producto para una ventilacion adecuada.
El producto debe ser atendido por el servicio tecnico cualicado cuando:
L El cable de corriente o enchufe se hayan estropeado.
L Hayan caido objetos, o se haya desparramado liquido dentro del producto.
L Haya sido expuesto a la lluvia.
L Tenga sintomas de alguna anormalidad o muestre notables cambios en la ejecucion.
L Haya caido el producto o se haya estropeado el mueble.
AVIS : RISQUE DE CHOC ELECTRIQUE - NE PA S OUVRIR.
PARA REDUCIR EL RIESGO DE DESCARGA ELECTRICA,
NO QUITE LA TAPA (O PARTE TRASERA). NO TOQUE NINGUNA PARTE INTERNA.
LLAME AL SERVICIO TECNICO CUALIFICADO SI NECESITA ATENCION.
AVISO
Indica dano potencial que podria resultar en accidente o dano al
producto u otros enseres si el producto se utiliza indebidamente.
Informacion a la disposicion de los usuarios
Si su producto esta marcado con este simbolo de reciclaje signica que al nal de su
vida util debe desecharlo por separado llevandolo a un punto limpio. No debe
mezclarlo con la basura general del hogar. Deshacerse de un producto de forma
adecuada ayudara a prevenir los efectos negativos sobre el medio ambiente y la
salud que pueden derivarse de un manejo inadecuado de la basura. Para mas
detalles, por favor contacte con sus autoridades locales.
(Solo Union Europea)
La placa con la inscripcion de la marca esta situada en la parte inferior del instrumento,como se indica seguidamente.
marca
Page 16

Empezar a tocar
Gracias por adquirir el Kawai VPC1.
Este manual de usuario contiene información importante relativa al uso y fun-
cionamiento del VPC1. Lea detenidamente todas las secciones y mantenga este
manual a mano para futuras consultas.
Nombres y funciones de las piezas
1
Botón POWER (encendido)
1.
Este botón se utiliza para encender y apagar el instrumento. El LED se ilumina
cuando el instrumento está encendido.
El estado del VPC1 lo indicará el color del LED de dicho botón, de la siguiente forma:
Estado del instrumento Color del LED del botón POWER
Programación 1 Rojo
Programación 2 Naranja
Programación 3 Verde
Programación 4 Naranja parpadeando
Programación 5 Verde parpadeando
Actualización de
VPC1
Error de
actualización
Error de encendido
El VPC1 incorpora u na función de ahorro de energía que se puede utilizar para
apagar automática mente el instrumento después de un ti empo de inactividad
determinado.
Consulte el manual en PDF del software VPC Editor para obtener más información.
Rojo y verde parpadeando lentamente
(intervalos de 2 segundos)
Rojo y parpadeando rápidamente
(intervalos de 0,2 segundos)
Rojo parpadeando
2 3 4 5
Conector DC IN (12 V)
2.
Este conector se utiliza para conectar el adaptador de CA que se incluye al conector
DC IN del VPC1.
Conector del pedal
3.
Este conector se usa para conectar la unidad de pedal Kawai pedal al VPC1.
Conectores MIDI IN/OUT
4.
Los conectores se utilizan para conectar el instrumento a dispositivos MIDI ex-
ternos (como otros instrumentos musicales o un ordenador) para enviar y recibir
datos MIDI.
Conector USB a host
5.
Este puerto se usa para conectar el instrumento a un ordenador con un cable
USB tipo ‘B a A’ con el n de enviar y recibir datos MIDI.
El adaptador de CA se necesita cuando se conecta el VPC1 a un dispositivo/ordenador utilizando los conectores MIDI.
Cuando se conecta el VPC1 a un ordenador usando un cable USB, no se necesita el
adaptador de CA ya que la alimentación eléctrica la suministra el conector USB del
ordenador.
Sin embargo, en algunos casos el conector USB del ordenador puede ser insuciente para alimentar correctamente el VPC1. En este caso, el LED del botón POWER
parpadeará en rojo indicando que se necesita el adaptador de CA.
Si no se completa correct amente la actual ización del VPC1, el LED del b otón
POWER parpadea rápidamente en rojo y verde (intervalos de 0,2 segundos).
En este caso, intente actualizarlo de nuevo.
Page 17

Conguración
Requisito del sistema (VPC1)
Windows
Ordenadorr
Mac
Ordenador
Con un puerto USB que cumpla los requerimientos
de Microsoft Windows 8/7/Vista/XP
OS Windows 8/7/Vista/XP (con el "service pack" más reciente)
Apple Macintosh con puerto USB y que cumpla los requerimientos de Mac OS X
OS Mac SO X 10.4 o superior
Instalación de la unidad Kawai USB-MIDI
Descargue el driver para USB-MIDI de Kawai desde la página web:
1.
http://www.kawai.co.jp/worldwide/support/downloads.html
Extraiga el archivo zip y ejecute el programa de instalación “DPInst.exe”
2.
Cuando aparezca el cuadro de diálogo "Kawai USB MIDI Device Installer"
3.
(Instalador del dispositivo Kawai USB MIDI), haga clic en "Next" (Siguiente).
Aparecerá el cuadro de diálogo "End User License Agreement" (Acuerdo de
4.
licencia para el usuario final). Para mostrar su acuerdo con los términos de
la licencia, seleccione "I accept this EULA" (Acepto este ALUF) y haga clic en
"Next" (Siguiente).
Una vez terminada la instalación y cuando aparezca "Installation complete!"
5.
(Instalación nalizada), haga clic en "Finish" (Terminar).
Instalación (Windows)
El ordenador reconocerá automáticamente el VPC1 sin necesidad de instalar
controladores adicionales. Cuando se conecta el teclado del instrumento al
puerto USB del ordenador utilizando el cable USB que se incluye y se enciende
el instrumento, se instala el controlador estándar del USB-MIDI del SO automá-
ticamente, y el instrumento estará listo para usarse. A partir de ese momento,
podrá congurarlo desde el ordenador o crear curvas de pulsación utilizando el
software VPC Editor que se incluye.
Antes de utilizar el software VPC Editor incluido, haga lo siguiente para instalar
la unidad Kawai USB-MIDI y el mencionado software.
Es aconsejable instalar el USB-MIDI Kawai para establecer un entorno más esta-
ble incluso aunque no utilice el software VPC Editor.
Para instalar o desinstalar el USB-MIDI Kawai y el software VPC Editor, debe tener
privilegios de administrador. Para obtener más información, póngase en contacto
con el administrador del sistema.
Cuando instale el USB-MIDI Kawai y el software VPC Editor, extraiga del ordenador
todos los dispositivos USB excepto el teclado y el ratón.
Una vez conectado el VPC1 al ordenador mediante un cable USB, puede que el
sistema tarde un cierto tiempo en establecer la comunicación.
Si el VPC1 y su ordenador están conectados vía un concentrador USB y que observa
un funcionamiento inestable, conecte directamente a un puerto USB del ordenador.
Si enciende o apaga el VPC1, o co necta o desconec ta el cable USB durante las
siguientes operaciones, puede que advierta que el funcionamiento del VPC1 o del
ordenador es inestable.
Durante la instalación del controlador USB-MIDI de Kawai.
-
Durante el arranque del ordenador.
-
Mientras se ejecuta una aplicación MIDI.
-
Mientras se está comunicando con el ordenador.
-
Cuando el ordenador está listo y esperando en modo de ahorro de energía
-
En función de la conguración del ordenador, la función USB puede no funcionar
correctamente. Lea detenidamente el manual del usuario del ordenador y realice
los ajustes oportunos.
Instalación del software VPC Editor
Descargue el Software de Edición de Kawai desde la página web:
1.
http://www.kawai.co.jp/worldwide/support/downloads.html
Extraiga el archivo zip y ejecute el programa de instalación “SETUP.exe”
2.
Aparecerá el cuadro de diálogo "License Agreement" (Acuerdo de licencia). Para
3.
mostrar su acuerdo con los términos de la licencia, seleccione "I accept the terms in
the license agreement", (Estoy de acuerdo con el acuerdo de licencia) y haga clic en
"Next" (Siguiente).
Aparecerá la carpeta de destino para la instalación. Si desea instalar VPC Editor
4.
en ella, haga clic en "Next" (Siguiente).Si prefiere instalarlo en otra carpeta,
haga clic en "Change.." (Cambiar) para cambiar la ruta de instalación y en
"Next" (Siguiente) una vez elegida la ubicación que desee.
Aparecerá el mensaje "Ready to Install the Program" (Listo para instalar el pro-
5.
grama); haga clic en "Install" (Instalar).
Cunado nalice la instalación y aparezca el cuadro de diálogo "Installshield
6.
Wizard Completed" (Asistente de Installshield completado), haga clic en "Fi-
nish" (Terminar).
Instalación (Mac OS X)
Descargue el Software de Edición de Kawai desde la página web:
1.
http://www.kawai.co.jp/worldwide/support/downloads.html
Extraiga el archivo zip y ejecute el programa de instalación “VpcEditorForMac.pkg”
2.
Acerca del manual en PDF
Con el software VPC Editor se incluye un manual en PDF.
Consúltelo para conocer más en detalle la información general y el funciona-
miento del software VPC Editor.
Uso del manual en PDF
Cuando se inicia el software VPC Editor, haga clic en el botón del logo de
1.
KAWAI para ver la pantalla de información de la versión.
Haga clic en el botón HELP (Ayuda).
2.
Page 18

Selección de un modo de programación
Solución de problemas
El VPC1 dispone de cinco modos de programación que permiten guardar las
diversas curvas de pulsación creadas utilizando el software VPC Editor que se
incluye o los ajustes del instrumento.
Para obtener más información sobre cómo guardar los ajustes como programa-
ciones, consulte el manual en PDF del software VPC Editor.
La sección siguiente describe cómo seleccionar los modos de programación uti-
lizando el VPC1.
Mantener
Preset 1 Preset 2 Preset 3 Preset 4 Preset 5
Mantenga pulsado el botón POWER (encendido) y pulse una de las cinco teclas
negras más altas para seleccionar un modo de programación.
Cuando se selecciona el modo de programación asignado a la tecla pulsada, el
LED del botón POWER (encendido) cambia de color.
Al encender el instrumento, se seleccionará de forma automática la programación utilizada previamente. Al encender el instrumento por la primera vez, estará
seleccionada la presintonización 1.
Además de una curva de pulsación estándar, el instrumento trae de fábrica
varias programaciones de curvas de pulsación adecuadas para los pianos de
software más populares.
Preset
1
2
3
4
5
Estado del LCD
de encendido
Rojo Normal Curva de pulsación estándar.
Naranja Ivory
Verde Pianoteq
Naranja
parpadeando
Verde
parpadeando
Curva de
pulsación
Galaxy
Alicia's Keys
Descripción
Curva de pulsación adecuada para
el software Ivory de Synthogy.
Curva de pulsación adecuada
para el software Pianoteq de
MODARTT.
Curva de pulsación adecuada
para el software Galaxy Pianos de
Galaxy Instruments.
Curva de pulsación adecuada para
el software de Native Instruments
Alicia's Keys.
No se enciende.
-
¿Es posible que VPC Computer esté conectado al ordenador a través de un concentrador USB?
Conéctelo directamente a un puerto USB del ordenador en lugar de a través de
un concentrador.
- ¿Está parpadeando en rojo el LED del botón POWER (encendido)?
Si el botón POWER (encendido) está encendido con una luz roja parpadeando,
la alimentación eléctrica que suministra el ordenador a través de la barra USB es
insuciente. En tal caso, utilice el adaptador de CA que se incluye.
El dispositivo conectado o el software no responden.
- ¿Están conectados correctamente los cables USB o MIDI?
- ¿Ha detectado el ordenador el VPC1 conectado?
Lea detenidamente el manual del ordenador y compruebe que reconoce el VPC1
conectado.
En función de la conguración del hardware del ordenador, puede que no detecte el instrumento correctamente cuando se usa la conexión USB.
- Puede que el dispositivo conectado o el software no admitan esta función.
Consulte el manual del dispositivo conectado o del software.
No se reproduce ningún sonido al pulsar las teclas.
-
Compruebe el ajuste del canal de transmisión y la salida del software VPC Editor.
- ¿Se ha congurado correctamente la fuente de sonido del software ?
La velocidad del teclado no funciona.
- Compruebe el ajuste de la curva de pulsación y la compensación de velocidad
del software VPC Editor.
El sonido aumenta solo con determinadas teclas del teclado.
- Compruebe el ajuste de la compensación de velocidad del software VPC Editor.
No se envían o reciben mensajes del puerto MIDI o USB.
-
Compruebe el ajuste del canal de transmisión MIDI y la salida del software VPC Editor.
El pedal de pie que se incluye no funciona
- ¿Se ha conectado correctamente?
- Compruebe el ajuste del valor Pedal CC# del software VPC Editor.
-¿Se ha congurado correctamente en el software la fuente de sonido que se va a
utilizar?
Especicaciones técnicas
88 teclas, de madera
Teclado
RM3 Grand II con supercies de tecla Ivory Touch, escape
Terminales de
conexión
Fuente de
alimentación
Consumo de energía
Dimensiones 138 (W) x 42,5 (D) x18,5 (H) cm
Contenido del
paquete
Aspecto y especicaciones sujetos a cambio sin previo aviso.
※
'Ivory', 'Pianoteq', 'Galaxy', 'Alicia Keys' son todas marcas registradas.
※
Conector del pedal, Conectores MIDI (Entrada/Salida),
Puerto USB to HOST, Conector de toma de corriente
(ENTRADA CC 12 V)
Alimentado mediante barra USB (a través del puerto USB)
Adaptador de CA de 12 V
- Alimentación con barra USB: 1,0 W
- Con adaptador de CA: 3,0 W
Peso 29,5 kg
Manual de usuario (este manual),Cable USB,
Adaptador de CA, Cable de alimentación,
Pedal de pie, Atril
Page 19

Avvertenze Utili Leggere tutte le istruzioni prima di utilizzare il prodotto
CONSERVATE QUESTE ISTRUZIONI
ISTRUZIONI PER PREVENIRE RISCHI DI INCENDIO, SCARICHE ELETTRICHE O DANNI ALLE PERSONE
CAUTION
RISK OF ELECTRIC SHOCK
DO NOT OPEN
Il simb olo raguran te un lampo all ’interno di un tr iangolo, avv erte della pr esenza,
all’interno de i componenti dello stru mento, di un “ voltaggio pericolos o” di rilevanza
tale da co stituire ris chio di scaric a elettrica.
Il simbol o ragurante un punto es clamativo all’intern o di un triangolo, infor ma che
lo st rumento e dotato di impor tanti ist ruzioni p er l’operativ ita e la manutenz ione
dello st esso.
indica possibilita di pericolo con conseguenze molto
RISCHI
Il prodotto deve essere connesso ad un adattatore avente l’esatto voltaggio.
Quando usate l’adattatore controllate che sia del voltaggio esatto.
L
L
Non tenere conto di quanto sopra puo causare danni gravi allo strumento
Non inserire o togliere la spina con le mani bagnate.
Puo causare una scarica elettrica.
Non far penetrare corpi estranei.
Non appoggiare oggetti contenenti liquidi. Acqua, chiodi e forcine possono danneggiare lo
strumento.
Non utilizzare a lungo le cue con diusione ad alto volume.
Farlo puo causare problemi all’udito.
Non appoggiarsi pesantemente allo strumento.
Potreste sbilanciarlo e farvi male.
Non usare lo strumento in ambienti particolarmente umidi o vicino all'acqua.
Potreste causare un corto circuito con conseguente pericolo di scossa elettrica o incendio.
Non smontare, riparare o modicare il prodotto.
Farlo puo causare danni allo strumento o generare corto circuito.
Non staccare la spina tirando il cavo.
L
Il cavo si puo danneggiare e provocare incendio, scarica elettrica o corto circuito.
Lo strumento non e completamente scollegato dalla corrente elettrica anche se e spento.
Se lo strumento non viene usato per lungo tempo e consigliabile togliere la spina dalla
relativa presa
L
In presenza di temporali si potrebbero vericare incendi o provocare il surriscaldamento
dello strumento.
Questo prodotto puo essere dotato di una spina polarizzata (uno spinotto piu largo dell'altro).
Questa e una caratteristica di sicurezza. Se non riuscite ad inserire la spina nella presa, contattate
un elettricista per sostituire la vostra vecchia presa. Non manomettete la spina.
Nota bene
Qualora si vericassero delle anomalie, spegnere subito lo strumento, togliere la spina e
contattare il negozio dove avete acquistato lo strumento.
Avvertenza agli utenti sullo smaltimento di questo
prodotto
Se sul vostro prodotto e presente questo simbolo per il riciclo dei materiali signica
che, alla ne della vita del vostro strumento, dovete eliminarlo separatamente dagli
altri riuti portandolo presso un appropriato centro di raccolta.
Non dovete assolutamente unirlo ai normali riuti domestici. Una corretta gestione
nell'eliminazione di questi prodotti preverra potenziali eetti negativi sull'ambiente
e sulla salute degli uomini.
Per ulteriori informazioni preghiamo contattare la vostra Autorita locale.
(Solo per Unione Europea)
gravi alla pe rsona a causa di errato utilizzo del
prodotto.
WARNING
AL FINE DI RIDURRE IL RISCHIO DI INCENDIO
E DI SCARICHE ELETTRICHE NON ESPORRE LO
STRUMENTO ALLA PIOGGIA E ALL’UMIDITA.
Spiegazione dei simboli
Prestare attenzione anche mani o dita non vengano intrappolate.
indica azioni proibite quali lo smontaggio dello strumento.
iindica un’operazione che necessita di particolare attenzione quale il disinserimento
della spina.
PRECAUZIONI
Non usare lo strumento nei seguenti luoghi.
L
vicino allenestre dove vi e luce diretta.
L zone particolarmente calde (es. vicino ad un termosifone).
L zone particolarmente fredde o all'aperto.
L zone particolarmente umide.
L zone particolarmente polverose.
L zone dove lo strumento possa subire eccessive vibrazione.
Non seguire queste indicazioni puo provocare danni allo strumento. Usare lo strumento
solo in luoghi con clima temperato. (non in quelli a clima tropicale)
L Non appoggiare per lungo tempo lo strumento su un anco.
L Non suonare lo strumento da angolazioni insolite.
Fare cio puo fare pressione sulla meccanica e causarne la rottura.
Usare solo l’adattatore AC in dotazione allo strumento.
L Non usare altri tipi di adattatori AC.
L
Non usare l’adattatore AC in dotazione o il cavo AC con altre apparecchiature.
Prima di inserire la spina assicurarsi che lo strumento ed eventuali altri dispositivi siano spenti.
In caso contrario lo strumento puo subire danni.
Non trascinare lo strumento.
Lo strumento e pesante e necessita di 2 o piu persone per lo spostamento. Trascinarlo puo
causargli delle rotture.
Controllare che il cavo di connessione non sia aggrovigliato.
Si potrebbe danneggiare provocando amme, scarica elettrica o corto circuito.
Non pulire con benzina o solventi.
L Il prodotto si puo scolorire o deformare.
L Pulire con panno morbido bagnato in acqua tiepida e ben strizzato
Non salire sullo strumento o esercitare eccessiva forza.
Puo deformarsi o cadere rompendosi e causandovi ferite.
Non mettere sullo strumento sorgenti a amma nuda. (es.:candele accese)
L Tali oggetti potrebbero cadere provocando un incendio.
Non impedire la ventilazion e coprendo le relative coperture con giornali, tovagl ie,
tende, ecc.
L In caso contrario lo strumento si potrebbe surriscaldare causando incendio.
Lo strumento deve essere posizionato in modo tale da non pregiudicare la giusta
ventilazione. Assicurare una distanza minima di 5 cm. tutt’intorno allo strumento per una
adeguata ventilazione.
Lo strumento deve essere riparato nel centro assistenza qualicato quando:
L Il cavo elettrico o la spina sono stati danneggiati.
L Oggetti sono caduti sullo strumento o del liquido e entrato nello stesso.
L Il prodotto e stato esposto alla pioggia.
L
Il prodotto non funziona normalmente o mostra un notevole cambiamento nelle proprie funzioni.
L Il prodotto e caduto, o le parti interne sono danneggiate.
AVIS : RISQUE DE CHOC ELECTRIQUE - NE PA S OUVRIR.
PER EVI TAR E SCARICHE ELE TTRICHE NO N TO GLIERE IL COPER CHIO
O LA PARTE POST ERIORE DELLO STR UMENTO NON MANOM ETTERE
O SOSTIT UIRE LE PARTI INTER NE. PER FARLO RIVOLGERSI A D
UN CENTR O ASSISTENZA Q UALIFICATO.
indica possibilita di danneggiamento o rottura del
prodotto a causa di uso errato.
L'etichetta recante il nome del modello e posta sul lato inferiore dello strumento, come di seguito indicato.
etichette
Page 20

Guida introduttiva
Grazie per aver acquistato il Kawai VPC1.
Questo manuale utente contiene importanti informazioni sull’uso e sulle opera-
zioni di VPC1. Leggere attentamente tutte le sezioni e tenere questo manuale a
portata di mano per le successive consultazioni.
Nome delle parti e funzioni
1
Pulsante alimentazione
1.
Questo pulsante viene utilizzato per accendere e spegnere lo strumento. All’
avvio, il LED si accenderà.
Lo stato del VPC1 verrà indicato dal colore del LED del pulsante POWER come segue:
Stato dello strumento Colore del LED del pulsante di alimentazione
Preset 1 Rosso
Preset 2 Arancione
Preset 3 Verde
Preset 4 Arancione lampeggiante
Preset 5 Verde lampeggiante
Aggiornamento
VPC1
Aggiornamento
errori
Errore di
alimentazione
Rosso e verde lampeggianti lentamente
(intervallo 2 secondi)
Rosso e verde lampeggianti velocemente
(intervallo 0.2 secondi)
Rosso lampeggiante
2 3 4 5
Presa DC IN (12 V)
2.
Questa presa viene utilizzata per collegare l’alimentatore AC in dotazione alla presa
DC IN del VPC1.
Presa pedale
3.
Questa presa viene utilizzata per collegare il pedale in dotazione al VPC1.
Connettori MIDI IN/OUT
4.
Le prese vengono utilizzate per collegare lo strumento ad un dispositivo MIDI
esterno ( altri strumenti musicali o computer) per poter trasmettere e ricevere dati
MIDI.
Connettore USB to Host
5.
Questa porta viene utilizzata per collegare lo strumento al computer a mezzo di
un cavo USB “ B ad A” per poter trasmettere e ricevere dati MIDI.
L’adattatore AC è necessario per collegare VPC1 ad un dispositivo/computer utilizzando i connettori MIDI.
Quando VPC1 viene collegato al computer con un cavo USB, l’alimentatore AC non
è necessario in quanto la potenza sarà fornita attraverso i connettori USB.
VPC1 dispone di una funzione di risparmio energetico che spegnerà lo strumento
dopo un certo periodo di inattività.
Per ulteriori informazioni consultare il manuale PDF del software VPC Editor.
Comunque, in alcuni casi, i connetto ri USB del computer potrebbero essere insucienti per alimentare correttamente VPC1. In questo caso il LED del pulsante
POWER lampegge rà in colore rosso per indicare che è necessario l’utilizzo dell’
alimentatore AC.
Se l’aggiornamento di VPC1 non è stato completato con successo, il LED rosso e
verde del pulsante POWER lampeggerà velocemente (intervallo 0.2 secondi). In
questo caso, provare ad aggiornare nuovamente VPC1
Page 21

Setup
Requisiti di sistema (VPC1)
Windows
Computer
Mac
Computer
Installazione (Windows)
VPC1 verrà automaticamente riconosciuto dal computer senza la necessità di
ulteriori drivers. Quando la tastiera dello strumento viene collegata alla porta
USB del computer tramite il cavo USB in dotazione e la si accende, il sistema
operativo del driver USB-MIDI verrà installato automaticamente dopo di che lo
strumento sarà pronto per essere usato. A questo punto, è possibile congurare
dal computer l’impostazione dello strumento o creare curve di tocco con il sof-
tware VPC Editor.
Prima di utilizzare il software VPC Editor, seguire i seguenti passaggi per installa-
re il driver Kawai USB-MIDI e il software VPC Editor.
Si raccomanda di installare il driver USB-MIDI per ottenere un ambiente più sta-
bile anche se non viene usato il software VPC Editor.
Computer con porta USB e che soddisfa i requisiti per
l'esecuzione di Microsoft Windows 8/7/Vista/XP
OS Windows 8/7/Vista/XP (con il più recente service pack)
Computer Apple Macintosh con porta USB e che soddisfa i
requisiti per l'esecuzione di Mac OS X
OS Mac OS X 10.4 o più recenti
Installare il driver USB-MIDI
Scaricare il driver Kawai USB-MIDI dal sito Kawai:
1.
http://www.kawai.co.jp/worldwide/support/downloads.html
Estrarre il le compresso e eseguire il programma di installazione “DPInst.exe”.
2.
Quando appare la nestra "Kawai USB MIDI Device Installer", cliccare "Next".
3.
Verrà visualizzato "End User License Agreement". Per accettare i termini,
4.
selezionare "I accept this EULA", quindi cliccare "Next".
Quando alla ne dell’installazione appare il messaggio "Installation complete!",
5.
cliccare "Finish".
Installare il software VPC Editor
Scaricare il software Kawai VPC Editor dal sito Kawai:
1.
http://www.kawai.co.jp/worldwide/support/downloads.html
Estrarre il le compresso e eseguire il programma di installazione “SETUP.exe”.
2.
Quando appare la videata "Kawai VPC Editor - InstallShield Wizard", cliccare
3.
"Next".
Apparirà "License Agreement" . Per accettare i termini, selezionare "I accept
4.
the terms in the license agreement", quindi cliccare "Next".
Verrà visualizzata la cartella di destinazione per l’installazione. Se si vuole
5.
installare VPC editor in questa cartella, cliccare "Next". Se si desidera installare
VPC Editor in un’altra cartella, cliccare "Change" per modicare il percorso di
installazione e, dopo aver selezionato la destinazione desiderata, cliccare "Next".
Apparirà il messaggio "Ready to Install the Program", cliccare "Install".
6.
Quando alla ne dell’installazione appare il messaggio "Installshield Wizard
7.
Completed", cliccare "Finish".
Per poter installare o disinstallare il driver Kawai USB-MIDI e il software VPC Editor,
è necessario disporre dei privilegi di “Amministratore”. Per ulteriori informazioni,
contattare l’amministratore di sistema.
Quando si installa il driver KAWAI USB-MIDI e il software VPC Editor, scollegare tutti i dispositivi USB tranne quelli della tastiera e del mouse.
Quando si collega VPC1 al computer con un cavo USB, potrebbe essere necessario
un po’ di tempo per stabilire la comunicazione.
Se VPC1 e il computer sono collegati tramite un hub USB e il comportamento risulta
instabile, collegare direttamente VPC1 a una porta USB del computer.
Quando VPC1 viene attivato/disattivato, o il cavo USB viene collegato/scollegato
durante una delle seguenti operazioni, potrebbe capitare che il comportamento di
VPC1 o del computer diventi instabile.
Durante l’installazione del driver Kawai USB-MIDI.
-
All’avvio del computer.
-
Mentre è in esecuzione un’applicazione MIDI.
-
Durante la comunicazione con il computer.
-
Mentre il computer è pronto e in attesa in modalità risparmio energetico
-
A seconda della congurazione del computer, la funzione USB potrebbe operare in
modo non corretto. Leggere attentamente il manuale utente del computer, quindi
eettuare le impostazioni corrette.
Installazione (Mac OS X)
Installare il software VPC Editor
Scaricare il software Kawai VPC Editor dal sito Kawai:
1.
http://www.kawai.co.jp/worldwide/support/downloads.html
Estrarre il le compresso e eseguire il programma di installazione “VpcEditor-
2.
ForMac.pkg.
Il manuale PDF
Il software VPC Editor comprende un manuale PDF.
Per i dettagli sulla panoramica e le operazioni del software VPC Editor, consulta-
re il manuale PDF.
Usare il manuale PDF
Quando viene lanciato il software VPC Editor, cliccare sul pulsante del logo
1.
KAWAI per visualizzare le informazioni sulla versione.
Cliccare il pulsante HELP.
2.
Page 22

Selezionare la modalità Preset
Risoluzione problemi
VPC1 dispone di cinque modalità preset che consentono di salvare le varie curve
di tocco create con il software VPC Editor oppure le impostazioni dello strumen-
to.
Ulteriori informazioni sul salvataggio delle impostazioni come presets sono di-
sponibili nel manuale PDF del software VPC Editor.
La sezione che segue descrive come selezionare le modalità preset con VPC1.
Tenere
premuto
Preset 1 Preset 2 Preset 3 Preset 4 Preset 5
Tenere premuto il pulsante POWER ,quindi premere uno dei 5 tasti neri più alti
per selezionare una modalità preset.
Quando la modalità preset assegnata al tasto premuto è stata selezionata, il co-
lore del LED del pulsante POWER cambierà.
All’accensione, il pre set utilizzato in precedenza verrà selezionato automaticamente. Alla prima accensione, verrà selezionato Preset1.
Oltre ad una curva di tocco standard, sono anche disponibili, come preset di fab-
brica, diverse altre curve di tocco adatte ai più popolari software per pianoforte.
Preset
Stato LCD di
alimentazione
Curva di tocco Descrizione
Non si accende
-
VPC potrebbe essere collegato al computer non si accende tramite un hub USB ?
Collegarlo direttamente alla porta USB del computer senza l’utilizzo dell’hub.
- Il LED del pulsante POWER è rosso lampeggiante?
Se il pulsante POWER è rosso lampeggiante, signica che la potenza fornita dal
computer tramite il bus USB è insuciente. In questo caso, utilizzare l’alimentatore AC in dotazione.
Il dispositivo o software collegato non risponde.
- Il cavo USB o il cavo MIDI è collegato correttamente ?
- Il computer ha rilevato il collegamento di VPC1?
Leggere attentamente il manuale del computer collegato e assicurarsi che VPC1
sia riconosciuto dallo stesso.
A seconda della congurazione hardware del computer, VPC1 può non essere
rilevato correttamente quando si utilizza una connessione USB.
- Il software o il dispositivo collegato potrebbe non supportare questa funzionalità. Consultare il manuale del dispositivo collegato o del software.
Quanto si premono i tasti non viene prodotto alcun suono.
-
Controllare le impostazioni del canale di trasmissione e dell’uscita del software
VPC Editor.
- Il software della sorgente di suono è stato congurato correttamente ?
La velocità della tastiera non funziona.
- Controllare le impostazioni della curva di tocco e il parametro di velocità del
software VPC Editor.
Il suono aumenta solo su determinati tasti della tastiera.
- Controllare il parametro della velocità del software VPC Editor.
I messaggi non vengono inviati o ricevuti dalle porte MIDI o USB.
-
Controllare le impostazioni del canale di trasmissione MIDI e l’output del software VPC Editor.
Il pedale in dotazione non funziona
- Il pedale è stato collegato correttamente ?
-
Controllare l'assegnazione del pedale CC del software VPC Editor.
- Il software della sorgente di suono da utilizzare è stato impostato
correttamente?
Caratteristiche tecniche
1 Rosso Normal Una curva di tocco standard.
2 Arancione Ivory
3 Verde Pianoteq
4
5
Arancione
lampeggiante
Verde
lampeggiante
Galaxy
Alicia's Keys
Una curva di tocco adatta al software
Ivory sviluppato da Synthogy.
Una curva di tocco adatta al software
Pianoteq sviluppato da MODARTT.
Una curva di tocco adatta al software
Galaxy Pianos sviluppato da Galaxy
Instruments.
Una curva di tocco adatta al
software Alicia's sviluppato da
Native Instruments.
88 tasti in legno con supercie Ivory Touch, meccanica
Tastiera
RM3 Grand II , simulazione doppio scappamento
Terminali di
collegamento
Alimentazione
Consumo energetico
Dimensioni 138 (W) x 42,5 (D)x18,5 (H) cm
Contenuto della
confezione
L’estetica e le caratteristiche tecniche possono variare senza preavviso.
※
Gl i strume nti virt uali 'Iv ory', ' Pianoteq', 'Galaxy' e 'A licia’s Keys' s ono tutt i marchi registr ati dei rispett ivi
※
proprietari.
presa pedale, connettori MIDI (IN/OUT),
porta USB to HOST, connettore di alimentazione (DC IN 12V)
USB Bus alimentato (tramite porta USB)
Adattatore DC 12 V AC
- Con alimentazione USB Bus: 1,0 W
- Con adattatore AC: 3,0 W
Peso 29,5 kg
Manuale utente (questo manuale), Cavo USB,
Adattatore di alimentazione AC, Cavo di alimentazione,
Pedale F-30, Leggio
Page 23

Page 24

はじめに
このたびは、KAWAI VPC1 をお買い求めいただきまして、誠にありがとうご
ざいます。本楽器を存分にお楽しみいただき、末永くご愛用いただくために
も、この取扱説明書をよくお読みいただき大切に保管くださいますようお願
いいたします。
付属品 ( お確かめ下さい )
□ 保証書
□ 取扱説明書(本書)
□ カワイデジタルピアノ ユーザー登録のご案内
□ アフターサービスと音楽教室のご案内
□ USB ケーブル
□ AC アダプター
□ 電源コード
□ フットペダル
□ 譜面立て
( 全て数量 1)
2 3 4 5
DC IN 12V 端子
2.
付属の AC アダプターを接続します。
ペダル端子
3.
付属のフットペダルと接続します。
各部の機能と名称
1
電源ボタン
1.
電源をオ ン / オフするス イッチです。 電源が入ると LED が点 灯します。
また本体の状態を次の表のように電源ボタンの点灯で表示します。
本体の状態 ボタンの点灯色
プリセット 1 赤
プリセット 2 オレンジ
プリセット 3 緑
プリセット 4 オレンジ点滅
プリセット 5 緑点滅
本体アップデート中 赤緑交互点滅 (2 秒間隔 )
アップデートエラー 赤緑交互点滅 (0.2 秒間隔 )
電源エラー 赤点滅
VPC1 は節電のため、自動的に電源をオフするオートパワーオフ機能を備
えています。詳細は VPC エディタソフトウェアのPDF マニュアルを参照
してください。
MIDI IN/OUT 端子
4.
MIDI 規格に対応している楽器と接続する端子です。
USB to Host 端子
5.
USB ケーブルでコンピュータと接続します。
AC アダプターは、MIDI 端子を使って接続した機器をコントロールする
場合に使用します。USB ケーブルでコンピュータと接続した場合には、
コンピュータから電源が供給されるので(バス電源方式)、AC アダプター
は必要ありません。コンピュータによっては、バス電源方式で電源が供
給できない場合があります。電源ボタンの LED が赤点滅で表示された場
合は、バス電源方式によるコンピュータからの電力が不足しています。
そのときは付属の AC アダプターを使用してください。
VPC1本体のアップデートに失敗した場合は電源ボタンのLEDが赤緑 0.2
秒間隔で交互点滅します。この場合は再度アップデートを行ってくださ
い。
Page 25

セットアップ
動作環境 (VPC1)
Windows
コンピュータ
Mac
コンピュータ
インストール (Windows)
VPC1 は、追加のドライバをインストールしなくてもコンピュータに認識
されます。 同梱されている USB ケーブルでコンピュータのUSB 端子にキー
ボードを接続して電源スイッチをオンにするだけで自動的に OS 標準の
USB-MIDI ドライバがインストールされ、使用可能な状態になります。
さらに、VPC エディタソフトウェアをつかいコンピュータからタッチカー
ブ作成や本体の設定を行うことができます。
VPC エディタソフトウェアを使用するときは、以下の手順に従い KAWAI
USB-MIDI ドライバと VPC エディタソフトウェアをインストールしてくだ
さい。
また、VPC エディタソフトウェアを使用しない場合でも、より動作の安定
している KAWAI USB-MIDI ドライバのインストールをお勧めします。
KAWAI USB-MIDI ドライバ、VPC エディタソフトウェアのインストールお
よびアンインストールを行うためには Administrator の管理者権限が必
要です。詳しくはシステム管理者に相談してください。
KAWAI USB-MIDI ドライバ、VPC エディタソフトウェアのインストールの
際にはコンピュータから、キーボードとマウス以外の USB 機器をすべて
外してください。
VPC1 とコンピュータを USB 接続した場合、通信を開始するまでしばら
く時間がかかることがあります。
VPC1 とコンピュータをハブ経由で接続し動作が不安定な場合は、コン
ピュータの USB ポートに直接接続してください。
次の動作中、VPC1の電源オン / オフ、USB ケーブルの抜き差しを行うと、
コンピュータや VPC1 の動作が不安定になる場合があります。
・「KAWAI USB-MIDI ドライバのインストール中」
・「コンピュータの起動中」
・「MIDI アプリケーションが動作中」
・「コンピュータと通信中」
・「コンピュータが省電力モードで待機中」
お使いのコンピュータの設定によっては、USB が正常に動作しない場合
があります。ご使用になるコンピュータの取扱説明書をよくお読みの上、
適切な設定を行ってください。
Microsoft Windows 8/7/Vista/XP の動 作環 境 を 満た す
USB ポート搭載のコンピュータ
OS Windows 8/7/Vista/XP(最新のサービスパック)
Mac OS X の動作環境を満たす USB ポートを搭載した
Apple Macintosh
OS Mac OS X 10.4 以降
KAWAI USB-MIDI ドライバをインストールする
下記のカワイホームページより USB-MIDI ドライバーをダウンロードし
1.
てください。
http://www.kawai.co.jp
ダウンロードした zip ファイルを展開し、DPInst.exe を実行してください。
2.
「KAWAI USB MIDI Device Installer」 ダ イ ア ロ グ が 表 示 さ れ た ら、
3.
「次へ」をクリックします。
「使用許諾書」が表示されます。条項に同意されましたら、「同意する」
4.
を選択し、「次へ」をクリックします。
インストールが完了し、「KAWAI USB MIDI のドライバのインストールが
5.
終了しました」というメッセージが表示されたら、「完了」をクリックし
ます。
VPC エディタソフトウェアをインストールする
下記のカワイホームページより Kawai VPC エディタ ソフトウェアをダウ
1.
ンロードしてください。
http://www.kawai.co.jp
ダウンロードした zip ファイルを展開し、SETUP.exe を実行してください。
2.
「InstallShield Wizard」ダイアログが表示されたら、「次へ」をクリック
3.
します。
「ソフトウェア使用許諾契約書」が表示されます。条項に同意されまし
4.
たら、「使用許諾契約の条項に同意します」を選択し、「次へ」をクリッ
クします。
インストール先のフォルダが表示されます。このフォルダにインストー
5.
ルする場合は、「次へ」をクリックします。別のフォルダにインストール
する場合は、「変更」をクリックし、インストール先を変更したら、「次
へ」をクリックします。
「プログラムをインストールする準備ができました」というメッセージ
6.
が表示されたら、「インストール」をクリックします。
インストール が 完 了し、「InstallShield ウ ィザ ード を完 了し まし た」
7.
というメッセージが表示されたら、「完了」をクリックします
インストール (Mac OS X)
下記のカワイホームページより Kawai VPC エディタ ソフトウェアをダウ
1.
ンロードしてください。
http://www.kawai.co.jp
ダウンロードした zip ファイルを展開し、VpcEditorForMac.pkg を実行し
2.
てください。
PDF マニュアルについて
VPC エディタソフトウェアには PDF マニュアルが付属しています。
VPC エディタソフトウェアの概要、および操作に関する説明は PDF マニュ
アルを参照してください。
PDF マニュアルを使用するには
VPC エディ タソフ トウェ アを起 動した ら、「KAWAI ロゴ」ボタンをク
1.
リックし、バージョン情報画面を表示します。
「ヘルプ」ボタンをクリックします。
2.
Page 26

プリセットの選択
故障とお思いになる前に
VPC1 は5つのプリセットを持っており、付属の VPC エディタソフトウェアを
使って作成したタッチカーブや本体の設定内容を各プリセットに保存できます。
プリセットに保存できる設定の詳細については VPC エディタソフトウェア
の PDF マニュアルを参照してください。
ここでは、VPC1 本体を使ってプリセットを選択する方法について説明します。
押しながら
プリセット 1 プリセット 2 プリセット 3 プリセット 4 プリセット5
電源ボタンを押しながら、黒鍵の最高音から 5 鍵のどれかを押して選択し
ます。
押された鍵盤に割り当てられているプリセットが選択され、電源ボタンの
点灯色が切り替わります。
電源オン時は、前回電源オフ時に選択していたプリセットが選択されま
す。初回電源オン時は、プリセット 1 が選択されます。
工場出荷時には標準的なタッチカーブに加え、有名なソフトピアノ音源に
合わせたタッチカーブがあらかじめプリセットとして記録されています。
プリセット
ボタンの
点灯色
タッチカーブ 説明
電源が入らない
・VPC1 とコンピュータをハブで経由して接続していませんか?
ハブを使用せずにコンピュータのUSB ポートに直接接続してください。
・電源ボタンの LED が赤点滅していませんか?
電源ボタンの LED が赤点滅で表示された場合は、バス電源方式によるコ
ンピュータからの電力が不足しています。付属の AC アダプターを使用
してください。
ソフトウェアや接続した機器が反応しない
・USB ケーブルや MIDI ケーブルが正しく接続されていますか?
・接続したコンピュータに VPC1 は認識されていますか?
接続したコンピュータの取扱説明書をよくお読みの上、VPC1 が接続し
たコンピュータに認識されているかを確認してください。ご使用になる
コンピュータのハードウェア環境によっては、USB 接続で本機を認識で
きないことがあります。
・接続している機器やソフトウェアが、その機能に対応していない場合があ
ります。接続している機器またはソフトウェアの取扱説明書を参照し、確
認してください。
鍵盤を弾いても発音されない
・VPC エディタソフトウェアの送信チャンネル設定、アウトプットセッティ
ングを確認してください
・ご使用になるソフト音源は正しく設定されていますか?
鍵盤のベロシティが効かない
・VPC エディタソフトウェアのタッチカーブ設定およびベロシティオフセッ
ト設定を確認してください。
特定の鍵盤だけが音が大きくなる
・VPC エディタソフトウェアのベロシティオフセット設定を確認してくださ
い。
USB 端子または MIDI 端子からメッセージが送信・受信されない
・VPC エディタソフトウェアの MIDI 送信チャンネル設定、アウトプットセッ
ティングを確認してください。
付属のフットペダルが効かない
・フットペダルが正しく接続されていますか?
・VPC エディタソフトウェアのペダル CC# 設定を確認してください
・ご使用になるソフト音源は正しく設定されていますか?
1 赤 Normal 標準的なタッチカーブです。
2 オレンジ Ivory
3 緑 Pianoteq
4
5 緑点滅 Alicia's Keys
オレンジ
点滅
Galaxy
Sythogy 社の Ivory に適したタッ
チカーブです。
MODARTT 社の Pianoteq に適し
たタッチカーブです。
Galaxy Instruments 社の Galaxy
Pianosに適したタッチカーブです。
Native Instruments 社の Alicia's
Keys に適したタッチカーブです。
主な仕様
88 鍵 木製鍵盤 RM3 グランドⅡ
鍵盤
アイボリータッチ / レットオフフィール
接続端子
消費電力
※仕様および外観は、改良のため予告なく変更することがあります。
※本取扱説明書に記載されている会社名および商品名は、各社の商標また
は登録商標です。
ペダル端子、MIDI (IN / OUT) 端子、USB to HOST 端子、
電源端子(DC IN 12V)
USB バス電源方式(USB 端子使用時)、
電源
DC12V / AC アダプター
USB バス電源使用時: 1.0W
AC アダプター使用時: 3.0W
寸法 W 138 × D 42.5 × H 18.5(cm)
重量 29.5 kg
保証書、取扱説明書 ( 本書 )、USB ケーブル、
同梱品
AC アダプター、電源コード、フットペダル、譜面立て
Page 27

SOFTWARE END USER LICENSE AGREEMENT
ソフトウェア使用許諾契約書
This End User License Agreement (“AGREEMENT”) is between Kawai Musical
Instruments Mfg. Co., Ltd. (“KAWAI”) and you (as an individual or legal entity) for
the Kawai USB MIDI Driver and VPC Editor Software which includes computer
software and may include electronic documentation, icon, image, and congu-
ration les (“SOFTWARE”). Only after agreeing to this AGREEMENT may you in-
stall, copy or use the SOFTWARE. By installing, copying or using the SOFTWARE
you are agreeing to be bound by the terms of this AGREEMENT.
GRANT OF LICENSE
1.
(1) You may use the SOFTWARE on a computer only for using the USB MIDI func-
tion of KAWAI products.
(2) You may use the SOFTWARE on a single computer at a time.
RESTRICTIONS
2.
(1) You may not redistribute, transfer and make transmittable the SOFTWARE.
(2) You may not alter, reverse engineer, decompile and disassemble the SOFT-
WARE for creating any derivative works thereof.
(3) You may not rent, sell or lease the SOFTWARE, and may not grant of security
interest and assign any right in the SOFTWARE.
COPYRIGHT
3.
(1) The SOFTWARE is copyrighted work of KAWAI and/or third party, and is pro-
tected by relevant copyright laws and all applicable treaty provisions.
DISCLAIMER OF WARRANTY
4.
(1) This SOFTWARE is provided “AS IS” and KAWAI does not warrant that this
SOFTWARE works correctly.
(2) KAWAI disclaims all warranties as to this SOFTWARE, express, and implied, in-
cluding but not limited to the implied warranties of merchantability, tness for a
particular purpose.
(3) KAWAI does not warrant that defects in the SOFTWARE will be corrected.
Also the SOFTWARE can be modied without notice.
LIABILITY IN DAMAGES
5.
(1) KAWAI shall not be liable for any direct, indirect, special, incidental or conse-
quential damages arising from the use or inability to use the SOFTWARE, even if
KAWAI has been advised of the possibility of such damages.
(2) You shall indemnify KAWAI and/or third party against any loss, damage, costs
or expenses related to any material breach of this AGREEMENT by you.
TERM AND TERMINATION
6.
(1) This AGREEMENT becomes effective at the moment that you accept this
AGREEMENT during the installation, and is terminated by stopping using the
SOFTWARE and deleting all les of this SOFTWARE.
(2) If you breach this AGREEMENT, KAWAI may immediately terminate this
AGREEMENT. Upon such termination, you must immediately delete all les of
this SOFTWARE.
MISCELLANEOUS
7.
(1) This AGREEMENT shall be construed and controlled by the laws of Japan.
(2) The Hamamatsu Branch of Shizuoka District Court or the Hamamatsu Sum-
mary Court shall be the exclusive agreement jurisdictional court of the first
hearing for any and all disputes arising from this AGREEMENT.
(3) This AGREEMENT constitutes the entire agreement between the parties and
supersedes any previous written or oral agreement, negotiations, commitments
and representations in respect thereto.
本使用許諾契約書(以下「本契約書」という)は、KAWAI USB MIDI ドラ
イバ及び VPC エディタソフトウェアのプログラム、文書、アイコン、イメー
ジと設定ファイル(以下「本ソフトウェア」という)に関して株式会社河
合楽器製作所(以下「当社」という)とお客様(個人または法人のいずれ
かであるかを問いません)との間に締結される契約です。お客様は本契約
書の条項を承諾した場合のみ、本ソフトウェアをインストール、コピー、
もしくは、使用することができます。本ソフトウェアをインストール、コ
ピー、もしくは、使用した場合は、お客様は本契約書の条項を承諾したも
のとします。
1. 使用許諾
(1)本ソフトウェアは当社の USB MIDI の機能を持つ製品とともに使用す
る場合に限り、コンピュータ上で使用することができます。
(2)本ソフトウェアは、一時に 1 台のコンピュータのみで使用する場合
に限り、使用することができます。
(3)本ソフトウェアは保管のためにコピーすることができます。
2. 使用制限
(1)本ソフトウェアは再配布、公衆送信、または送信可能化することは
できません。
(2)本ソフトウェアは二次著作物を作る目的で、改変、リバースエンジ
ニアリング、逆コンパイル、逆アセンブルはすることはできません。
(3)本ソフトウェアを貸与、販売、リース、担保設定、または権利譲渡
の対象にすることはできません。
3.著作権
(1)本ソフトウェアは当社または第三者の著作物であり、法令や条約に
より保護されています。
4. 無保証
(1)本ソフトウェアは現状有姿で提供され、当社は本ソフトウェアが正
常に動作することを保証するものではありません。
(2)当社は本ソフトウェアの商品性および特定の目的に対する適合性に
ついて明示または黙示を問わず一切保証をしません。
(3)当社は本ソフトウェアを修正する義務は負いません。また、当社は
本ソフトウェアを修正する場合に予告する義務を負いません。
5.損害賠償責任
(1)当社は本ソフトウェアの使用または使用不能による損害の責任は負
いません。たとえ、当社が当該の損害の可能性について予め知らされてい
た場合も同様です。
(2)お客様は本契約を履行して頂けなかったことに関して、当社および
第三者に発生したすべての損失および損害、およびこれを補填するための
費用を当社および第三者に対してご負担頂くものとします。
6. 期間
(1)本契約はお客様が本ソフトウェアのインストール時に本契約を承認
した時に始まり、お客様が本ソフトウェアの使用を停止し、関連するすべ
てのファイルを削除するまでとします。
(2)お客様が本契約の条項に違反した場合は、その時点で当社はお客様
に本契約を停止させることができるものとします。その場合は、お客様は
本ソフトウェアと関連するすべてのファイルを破棄しなければいけませ
ん。
7.雑則
(1)本契約は日本国法に準拠します。
(2)本契約について紛争が生じた時は、静岡地方裁判所浜松支部または
浜松簡易裁判所を第一審の専属的合意管轄裁判所とします。
(3)本契約は当社とお客様との間の完全なる合意によるものとします。
Page 28

Printed in Indonesia
Copyright © 2014 Kawai Musical Instruments Mfg. Co.,Ltd. All Rights Reserved.
VPC1 Owner ’s Manual
KPSZ-0566
OW1059EGFSIJ-J1403
8176 48-R102
 Loading...