

Kawai ANYTIME X2, ANYTIME X2-f, ANYTIME ATX2, ANYTIME ATX2-f Owner's Manual
Introduction
Playing the Piano
Music Menu
Recorder
Settings
Appendix
(ATX2/ATX2-f)
Owner’s Manual


Thank you for purchasing a KAWAI AnyTimeX2 piano!
The AnyTimeX2 piano is a revolutionary new instrument that combines the capabilities of an acoustic
piano and a digital piano. With the AnyTimeX2 piano, one can enjoy the pleasing, expressive tone of
KAWAI acoustic pianos, with the convenience of powerful, exciting features that can only be found on
a digital instrument.
As its name implies, the most compelling aspect of the AnyTimeX2 piano is that it can be played at
literally any time, without disturbing family or neighbours. It will allow you to enjoy the touch of a ne
KAWAI acoustic piano while retaining the privacy and power of built-in digital sound. The AnyTimeX2
piano will o er many creative new possibilities for music-making in your home, school, or recording
studio.
To get the most from your AnyTimeX2 piano, please read this manual carefully and become familiar with
all its powerful functions and features. We trust that you and your AnyTimeX2 piano will be making
beautiful music together (at any time of the day or night) for many years to come.
IMPORTANT SAFETY INSTRUCTIONS
IMPORTANT SAFETY INSTRUCTIONS
denotes that care should be taken.
The example instructs the user to take care not to allow fingers to be trapped.
denotes a prohibited operation.
The example instructs that disassembly of the product is prohibited.
denotes an operation that should be carried out.
The example instructs the user to remove the power cord plug from the AC outlet.
Examples of Picture Symbols
Read all the instructions before using the product.
CAUTION
RISK OF ELECTRIC SHOCK
DO NOT OPEN
AVIS : RISQUE DE CHOC ELECTRIQUE - NE PAS OUVRIR.
TO REDUCE THE RISK OF ELECTRIC SHOCK, DO NOT REMOVE COVER (OR BACK).
NO USER-SERVICEABLE PARTS INSIDE. REFER SERVICING TO QUALIFIED SERVICE PERSONNEL.
The lighting flash with arrowhead symbol, within an
equilateral triangle, is intended to alert the user to
the presence of uninsulated “dangerous voltage”
within the product’s enclosure that may be of
sufficient magnitude to constitute a risk of electric
shock to persons.
The exclamation point within an equilateral triangle
is intended to alert the user to the presence of
important operating and maintenance (servicing)
instructions in the literature accompanying the
product.
WARNING
TO REDUCE THE RISK OF
FIRE OR ELECTRIC
SHOCK, DO NOT EXPOSE
THIS PRODUCT TO RAIN
OR MOISTURE.
INSTRUCTIONS PERTAINING TO A RISK OF FIRE, ELECTRIC SHOCK, OR INJURY TO PERSONS
SAVE THESE INSTRUCTIONS
1) Read these instructions.
2) Keep these instructions.
3) Heed all warnings.
4) Follow all instructions.
5) Do not use this apparatus near water.
6) Clean only with dry cloth.
7) Do not block any ventilation openings. Install in
accordance with the manufacturer’s
instructions.
8) Do not install near any heat sources such as
radiators, heat registers, stoves, or other
apparatus (including amplifiers) that produce
heat.
9) Do not defeat the safety purpose of the
polarized or grounding-type plug. A polarized
plug has two blades with one wider than the
other. A grounding type plug has two blades
and a third grounding prong. The wide blade or
the third prongs are provided for your safety.
If the provided plug does not fit into your outlet,
consult an electrician for replacement of the
obsolete outlet.
10) Protect the power cord from being walked on
or pinched particularly at plugs, convenience
receptacles, and the point where they exit from
the apparatus.
11) Only use attachments/accessories specified by
the manufacturer.
12) Use only with the cart, stand, tripod, bracket, or
table specified by the manufacturer, or
sold with the apparatus. When a cart is used,
use caution when moving the cart/apparatus
combination to avoid injury from tip-over.
13) Unplug this apparatus during lightning storms
or when unused for long periods of time.
14) Refer all servicing to qualified service
personnel. Servicing is required when the
apparatus has been damaged in any way,
such as power-supply cord or plug is
damaged, liquid has been spilled or objects
have fallen into the apparatus, the apparatus
has been exposed to rain or moisture, does not
operate normally, or has been dropped.
The product is not completely disconnected from the
power supply even when the power switch is turned
off. If the product will not be used for a long time,
unplug the AC power cord from the AC outlet.
● Failure to do so may cause fire in case of
lightning.
● Failure to do so may over-heat the product,
resulting in fire.
This product may be equipped with a polarised line plug (one blade
wider than the other). This is a safety feature.
If you are unable to insert the plug into the outlet, contact an
electrician to replace your obsolete outlet.
Do not defeat the safety purpose of the plug.
When disconnecting the AC power cord’s
plug, always hold the plug
and pull it to remove it.
● Pulling the AC power cord itself may damage
the cord, causing a fire, electric shock or
short-circuit.
Doing so may cause the product to fall over,
resulting in injury.
Do not lean against the keyboard.
When using the headphones, do not
listen for long periods of
time at high volume levels.
Doing so may result in hearing problems.
It is a good practice to place the instrument near the AC outlet and to place the power cord plug in a
position that allows the plug to be disconnected easily in the event of an emergency. Electricity is always
charging while the plug is in the AC outlet even when the power switch is in the ‘OFF’ position.
The chair must be used properly (it must be
used only when playing the product).
● Do not play with it or stand on it.
● Only one person is allowed to sit on it.
● Do not sit on it when opening the lid.
● Re-tighten the bolts occasionally.
Doing so may cause the chair to fall over or your
fingers to be trapped, resulting in injury.
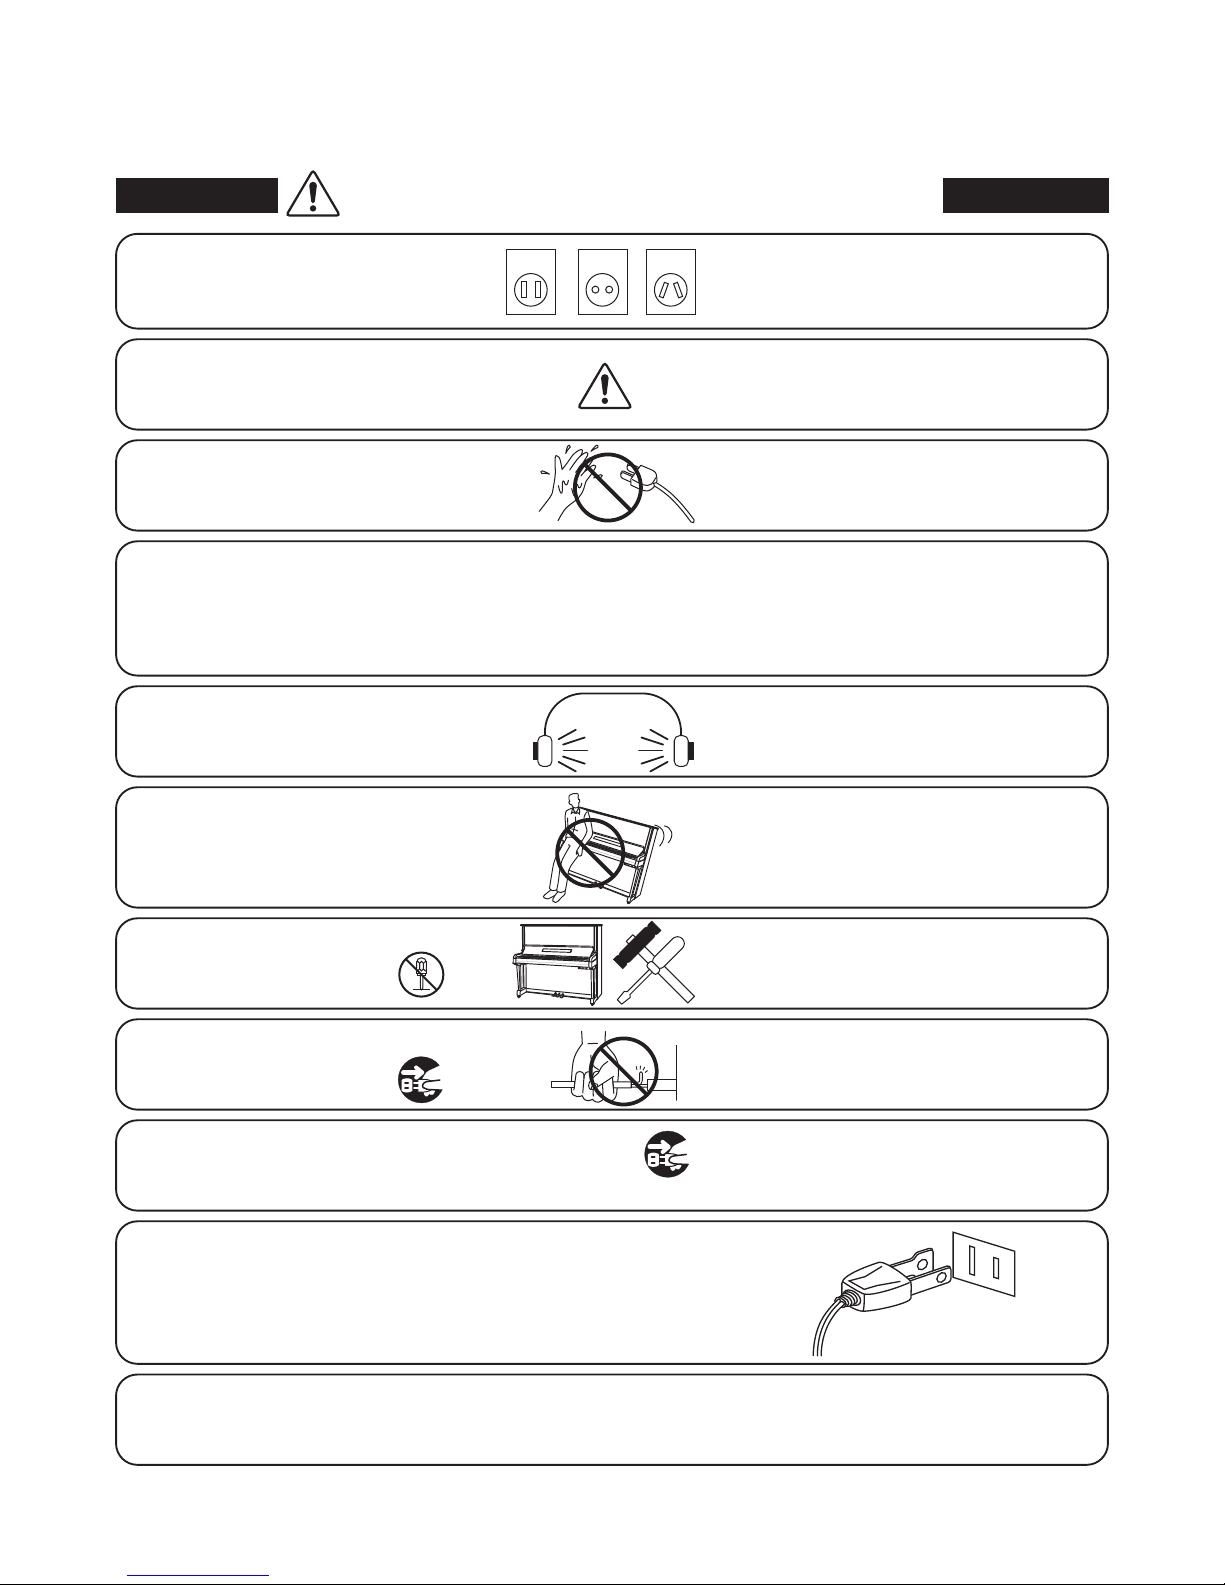
WARNING
The product should be connected to
an AC outlet of the specified voltage.
● If you are going to use an AC power cord,
make sure that it has the correct plug shape
and conforms to the specified power voltage.
● Failure to do so may result in fire.
120V 240V230V
Indicates a potential hazard that could result in death
or serious injury if the product is handled incorrectly.
Do not insert or disconnect the power
cord plug with wet hands.
Doing so may cause electric shock.
WARNING - When using electric products, basic precautions should always be followed,
including the following.
● Do not use other AC adaptors to power this
instrument.
● Do not use the included AC adaptor or AC
power cord to power other equipment.
Use only the AC adaptor included with
this instrument to power the instrument.
Do not disassemble, repair or modify
the product.
Doing so may result in product breakdown, electric
shock or short-circuit.

● Doing so may cause the product to become
deformed or fall over, resulting in breakdown
or injury.
Do not stand on the product or exert
excessive force.
● Doing so may result in discoloration or deformation
of the product.
● When cleaning the product, put a soft cloth in
lukewarm water, squeeze it well, then wipe the
product.
Do not wipe the product with benzene
or thinner.
Failure to do so may damage them, resulting in
fire, electric shock or short-circuit.
When connecting the AC power cord
and other cords, take care
not to entangle them.
CAUTION
Indicates a potential hazard that could result in injury
or damage to the product or other property if the
product is handled incorrectly.
Using the product in such areas may result in
product breakdown.
Use the product only in moderate climates (not
in tropical climates).
Do not use the product in the following areas.
● Areas, such as those near windows, where the product is
exposed to direct sunlight
● Extremely hot areas, such as near a heater
● Extremely cold areas, such as outside
● Extremely humid areas
● Areas where a large amount of sand or dust is present
● Areas where the product is exposed to excessive
vibrations
Entry of water, needles or hair pins may result
in breakdown or short-circuit.
The product should not be exposed to dripping or
splashing. No objects filled with liquids, such as
vases, should be placed on the product.
Take care not to allow any foreign
matter to enter the product.
● Doing so may cause the product to generate
noise.
● If the product generates noise, move the
product sufficiently away from the electrical
appliance or connect it to another AC outlet.
Do not place the product near electrical
appliances such as TVs and
radios.
Closing it roughly may trap your fingers,
resulting in injury.
When closing the fallboard, close
it gently.
Failure to do so may cause breakdown of this
product and other devices.
Before connecting cords, make sure
that the power to this product
and other devices is turned
OFF.
OFF
Please lift up the product when moving it.
Please note that the product is heavy and must
be carried by more than two persons.
Dropping the product may result in breakdown.
Do not drag the product on the floor.
Take care not to drop the product.
Doing so may cause the illumination to fall over,
resulting in fire.
Do not place naked flame, such as lighted
candles on the product.

Notes on Repair
Should an abnormality occur in the product, immediately turn the power OFF, disconnect the
power cord plug, and then contact the shop from which the product was purchased.
CAUTION:
To prevent electric shock, match the wide blade of the plug with the wide socket slot and insert fully.
ATTENTION:
Pour éviter les chocs électriques, introduire la lame la plus large de la fiche dans la borne
correspondante de la prise et pousser jusqu’au fond.
Instruction for AC power cord (U.K.)
Do not plug either terminal of the power cord to the ground of the AC outlet on the wall.
FCC Information
This equipment has been tested and found to comply with the limits for a Class B digital device,
pursuant to Part 15 of the FCC Rules. These limits are designed to provide reasonable
protection against harmful interference in a residential installation. This equipment generates,
uses and can radiate radio frequency energy and, if not installed and used in accordance with
the instructions, may cause harmful interference to radio communications.
If this equipment does cause harmful interference to radio or television reception, which can be
determined by turning the equipment off and on, the user is encouraged to try to correct the
interference by one or more of the following measures:
• Reorient or relocate the receiving antenna.
• Increase the separation between the equipment and receiver.
• Connect the equipment into an outlet on a different electrical circuit from the receiver.
• Consult the dealer or an experienced radio/TV technician for help.
Canadian Radio Interference Regulations
This instrument complies with the limits for a class B digital apparatus, pursuant to the Radio
Interference Regulations, C.R.C., c. 1374.
The product should be serviced by qualified service personnel when:
● The power supply cord or the plug has been damaged.
● Objects have fallen, or liquid has been spilled into the product.
● The product has been exposed to rain.
● The product does not appear to operate normally or exhibits a marked change in
performance.
● The product has been dropped, or the enclosure damaged.
The product should be located so that its location or position does not interfere with its proper
ventilation. Ensure a minimum distance of 5cm around the product for sufficient ventilation.
Failure to do so may over-heat the product,
resulting in fire.
Ensure that the ventilation is not
impeded by covering the ventilation
openings with items, such as newspaper,
table-cloths, curtains, etc.

8
Table of Contents
IMPORTANT SAFETY INSTRUCTIONS . . . . . . . . . . . . . . . . 4
Table of Contents . . . . . . . . . . . . . . . . . . . . . . . . . . . . . . . . . . . . 8
Introduction
Owner’s Manual Conventions . . . . . . . . . . . . . . . . . . . . . . 10
Part Names and Functions . . . . . . . . . . . . . . . . . . . . . . . . . . 12
Basic Operation . . . . . . . . . . . . . . . . . . . . . . . . . . . . . . . . . . . . . 14
Playing the Piano
Selecting Sounds . . . . . . . . . . . . . . . . . . . . . . . . . . . . . . . . . . . . 16
Dual Mode . . . . . . . . . . . . . . . . . . . . . . . . . . . . . . . . . . . . . . . . . . . 17
Dual Mode settings . . . . . . . . . . . . . . . . . . . . . . . . . . . . . . . . . 18
Split Mode . . . . . . . . . . . . . . . . . . . . . . . . . . . . . . . . . . . . . . . . . . . 19
Split Mode settings . . . . . . . . . . . . . . . . . . . . . . . . . . . . . . . . . 20
Four Hands Mode . . . . . . . . . . . . . . . . . . . . . . . . . . . . . . . . . . . 21
Four Hands Mode settings. . . . . . . . . . . . . . . . . . . . . . . . . . . 22
Reverb . . . . . . . . . . . . . . . . . . . . . . . . . . . . . . . . . . . . . . . . . . . . . . . 23
Reverb settings . . . . . . . . . . . . . . . . . . . . . . . . . . . . . . . . . . . . . 23
E ects . . . . . . . . . . . . . . . . . . . . . . . . . . . . . . . . . . . . . . . . . . . . . . . 25
Metronome / Drum Rhythms . . . . . . . . . . . . . . . . . . . . . . . 27
Metronome settings . . . . . . . . . . . . . . . . . . . . . . . . . . . . . . . . 27
Panel Lock . . . . . . . . . . . . . . . . . . . . . . . . . . . . . . . . . . . . . . . . . . . 29
Music Menu
Demo Songs . . . . . . . . . . . . . . . . . . . . . . . . . . . . . . . . . . . . . . . . . 30
Piano Music . . . . . . . . . . . . . . . . . . . . . . . . . . . . . . . . . . . . . . . . . 31
Lesson Function . . . . . . . . . . . . . . . . . . . . . . . . . . . . . . . . . . . . . 32
1. Selecting a lesson book/song. . . . . . . . . . . . . . . . . . . . . . 32
2. Listening to the selected lesson song . . . . . . . . . . . . . . 33
3. Lesson Function settings . . . . . . . . . . . . . . . . . . . . . . . . . . 34
4. Repeating sections of a lesson song . . . . . . . . . . . . . . . 35
5. Recording a lesson song practice . . . . . . . . . . . . . . . . . . 36
6. Finger Exercises . . . . . . . . . . . . . . . . . . . . . . . . . . . . . . . . . . 37
Recorder
Song Recorder (Internal Memory) . . . . . . . . . . . . . . . . . . . . . . 38
1. Recording a song . . . . . . . . . . . . . . . . . . . . . . . . . . . . . . . . . 38
2. Playing a song . . . . . . . . . . . . . . . . . . . . . . . . . . . . . . . . . . . . 40
3. Internal Recorder Edit menu . . . . . . . . . . . . . . . . . . . . . . . 41
4. Erasing a part/song . . . . . . . . . . . . . . . . . . . . . . . . . . . . . . . 42
5. Converting a song to an audio le . . . . . . . . . . . . . . . . . 43
Audio Record/Playback (USB Memory) . . . . . . . . . . . . . . . . 44
1. Recording a MP3/WAV audio le . . . . . . . . . . . . . . . . . . . 44
2. Playing an MP3/WAV audio le . . . . . . . . . . . . . . . . . . . . 46
3. Playing a MIDI song le . . . . . . . . . . . . . . . . . . . . . . . . . . . 48
4. USB Recorder Edit menu . . . . . . . . . . . . . . . . . . . . . . . . . . 50
5.
Converting a MIDI song le to an MP3/WAV audio le
. . . 51
6. Overdubbing a MP3/WAV audio le . . . . . . . . . . . . . . . . 52
Settings
Function menus . . . . . . . . . . . . . . . . . . . . . . . . . . . . . . . . . . . . . 53
Basic Settings . . . . . . . . . . . . . . . . . . . . . . . . . . . . . . . . . . . . . . . 54
1. Key Transpose . . . . . . . . . . . . . . . . . . . . . . . . . . . . . . . . . . . 55
2. Song Transpose . . . . . . . . . . . . . . . . . . . . . . . . . . . . . . . . . 56
3. Tone Control . . . . . . . . . . . . . . . . . . . . . . . . . . . . . . . . . . . . 57
User Tone Control . . . . . . . . . . . . . . . . . . . . . . . . . . . . . . . 58
4. Speaker Volume (AnyTimeX2-f onl y) . . . . . . . . . . . . . . . . . . 59
5. Phones Volume . . . . . . . . . . . . . . . . . . . . . . . . . . . . . . . . . 60
6. Line In Level . . . . . . . . . . . . . . . . . . . . . . . . . . . . . . . . . . . . . 61
7. Line Out Volume . . . . . . . . . . . . . . . . . . . . . . . . . . . . . . . . . 62
8. Wall EQ (AnyTimeX2-f onl y) . . . . . . . . . . . . . . . . . . . . . . . . . . 63
9. Tuning . . . . . . . . . . . . . . . . . . . . . . . . . . . . . . . . . . . . . . . . . . 64
10. Damper Hold . . . . . . . . . . . . . . . . . . . . . . . . . . . . . . . . . . . . 65
11. Four Hands . . . . . . . . . . . . . . . . . . . . . . . . . . . . . . . . . . . . . . 66
12. LCD Contrast . . . . . . . . . . . . . . . . . . . . . . . . . . . . . . . . . . . . 67
13. User Memory . . . . . . . . . . . . . . . . . . . . . . . . . . . . . . . . . . . . 68
14. Factory Reset . . . . . . . . . . . . . . . . . . . . . . . . . . . . . . . . . . . . 69
Virtual Technician Settings . . . . . . . . . . . . . . . . . . . . . . . . . 70
1. Touch Curve . . . . . . . . . . . . . . . . . . . . . . . . . . . . . . . . . . . . . 71
User Touch Curve . . . . . . . . . . . . . . . . . . . . . . . . . . . . . . . . 72
2. Voicing . . . . . . . . . . . . . . . . . . . . . . . . . . . . . . . . . . . . . . . . . 73
3. Damper Resonance . . . . . . . . . . . . . . . . . . . . . . . . . . . . . . 74
4. Damper Noise . . . . . . . . . . . . . . . . . . . . . . . . . . . . . . . . . . . 75
5. String Resonance . . . . . . . . . . . . . . . . . . . . . . . . . . . . . . . . 76

9
Settings (cont.)
6. Key-o E ect . . . . . . . . . . . . . . . . . . . . . . . . . . . . . . . . . . . . 77
7. Fall-back Noise . . . . . . . . . . . . . . . . . . . . . . . . . . . . . . . . . . 78
8. Hammer Delay . . . . . . . . . . . . . . . . . . . . . . . . . . . . . . . . . . 79
9. Topboard . . . . . . . . . . . . . . . . . . . . . . . . . . . . . . . . . . . . . . . 80
10. Decay Time . . . . . . . . . . . . . . . . . . . . . . . . . . . . . . . . . . . . . 81
11. Minimum Touch . . . . . . . . . . . . . . . . . . . . . . . . . . . . . . . . . 82
12. Stretch Tuning . . . . . . . . . . . . . . . . . . . . . . . . . . . . . . . . . . . 83
User Tuning . . . . . . . . . . . . . . . . . . . . . . . . . . . . . . . . . . . . . 84
13. Temperament . . . . . . . . . . . . . . . . . . . . . . . . . . . . . . . . . . . 85
User Temperament . . . . . . . . . . . . . . . . . . . . . . . . . . . . . . 86
14. Temperament Key . . . . . . . . . . . . . . . . . . . . . . . . . . . . . . . 87
15. User Key Volume. . . . . . . . . . . . . . . . . . . . . . . . . . . . . . . . . 88
16. Half-Pedal Adjust . . . . . . . . . . . . . . . . . . . . . . . . . . . . . . . . 89
17. Soft Pedal Depth . . . . . . . . . . . . . . . . . . . . . . . . . . . . . . . . . 90
MIDI Settings . . . . . . . . . . . . . . . . . . . . . . . . . . . . . . . . . . . . . . . . 91
MIDI Overview . . . . . . . . . . . . . . . . . . . . . . . . . . . . . . . . . . . . . . 91
1. MIDI Channel . . . . . . . . . . . . . . . . . . . . . . . . . . . . . . . . . . . . . 93
2. Send Program Change Number . . . . . . . . . . . . . . . . . . . . 94
3. Local Control . . . . . . . . . . . . . . . . . . . . . . . . . . . . . . . . . . . . . 95
4. Transmit Program Change Numbers . . . . . . . . . . . . . . . 96
5. Multi-timbral Mode . . . . . . . . . . . . . . . . . . . . . . . . . . . . . . . 97
6. Channel Mute . . . . . . . . . . . . . . . . . . . . . . . . . . . . . . . . . . . . 98
USB Menu . . . . . . . . . . . . . . . . . . . . . . . . . . . . . . . . . . . . . . . . . . . 99
1. Load Song . . . . . . . . . . . . . . . . . . . . . . . . . . . . . . . . . . . . . . 100
2. Load User Memory . . . . . . . . . . . . . . . . . . . . . . . . . . . . . . 101
3. Save Song . . . . . . . . . . . . . . . . . . . . . . . . . . . . . . . . . . . . . . . 102
4. Save SMF Song . . . . . . . . . . . . . . . . . . . . . . . . . . . . . . . . . . 103
5. Save User Memory . . . . . . . . . . . . . . . . . . . . . . . . . . . . . . . 104
6. Rename File . . . . . . . . . . . . . . . . . . . . . . . . . . . . . . . . . . . . . 105
7. Delete File . . . . . . . . . . . . . . . . . . . . . . . . . . . . . . . . . . . . . . . 106
8. Format USB . . . . . . . . . . . . . . . . . . . . . . . . . . . . . . . . . . . . . 107
Power Settings . . . . . . . . . . . . . . . . . . . . . . . . . . . . . . . . . . . . . 108
Auto Power O . . . . . . . . . . . . . . . . . . . . . . . . . . . . . . . . . . . . 108
Appendix
Connecting to Other Devices . . . . . . . . . . . . . . . . . . . . . . 109
Jack Panel . . . . . . . . . . . . . . . . . . . . . . . . . . . . . . . . . . . . . . . . . 110
Front Panel . . . . . . . . . . . . . . . . . . . . . . . . . . . . . . . . . . . . . . . . 110
Tro ub les ho oti ng . . . . . . . . . . . . . . . . . . . . . . . . . . . . . . . . . . . .111
Demo Song List . . . . . . . . . . . . . . . . . . . . . . . . . . . . . . . . . . . . 113
Sound List . . . . . . . . . . . . . . . . . . . . . . . . . . . . . . . . . . . . . . . . . . 114
Program Change Number List . . . . . . . . . . . . . . . . . . . . . 115
Drum Rhythm List . . . . . . . . . . . . . . . . . . . . . . . . . . . . . . . . . . 116
Speci cations . . . . . . . . . . . . . . . . . . . . . . . . . . . . . . . . . . . . . . 117
MIDI Implementation Chart . . . . . . . . . . . . . . . . . . . . . . . 118
10
Introduction
This owner’s manual utilises a number of illustrative conventions in order to explain the AnyTimeX2 piano’s various
functions. The examples below provide an overview of the button LED indicator states and press types, and the
appearance of di erence kinds of text.
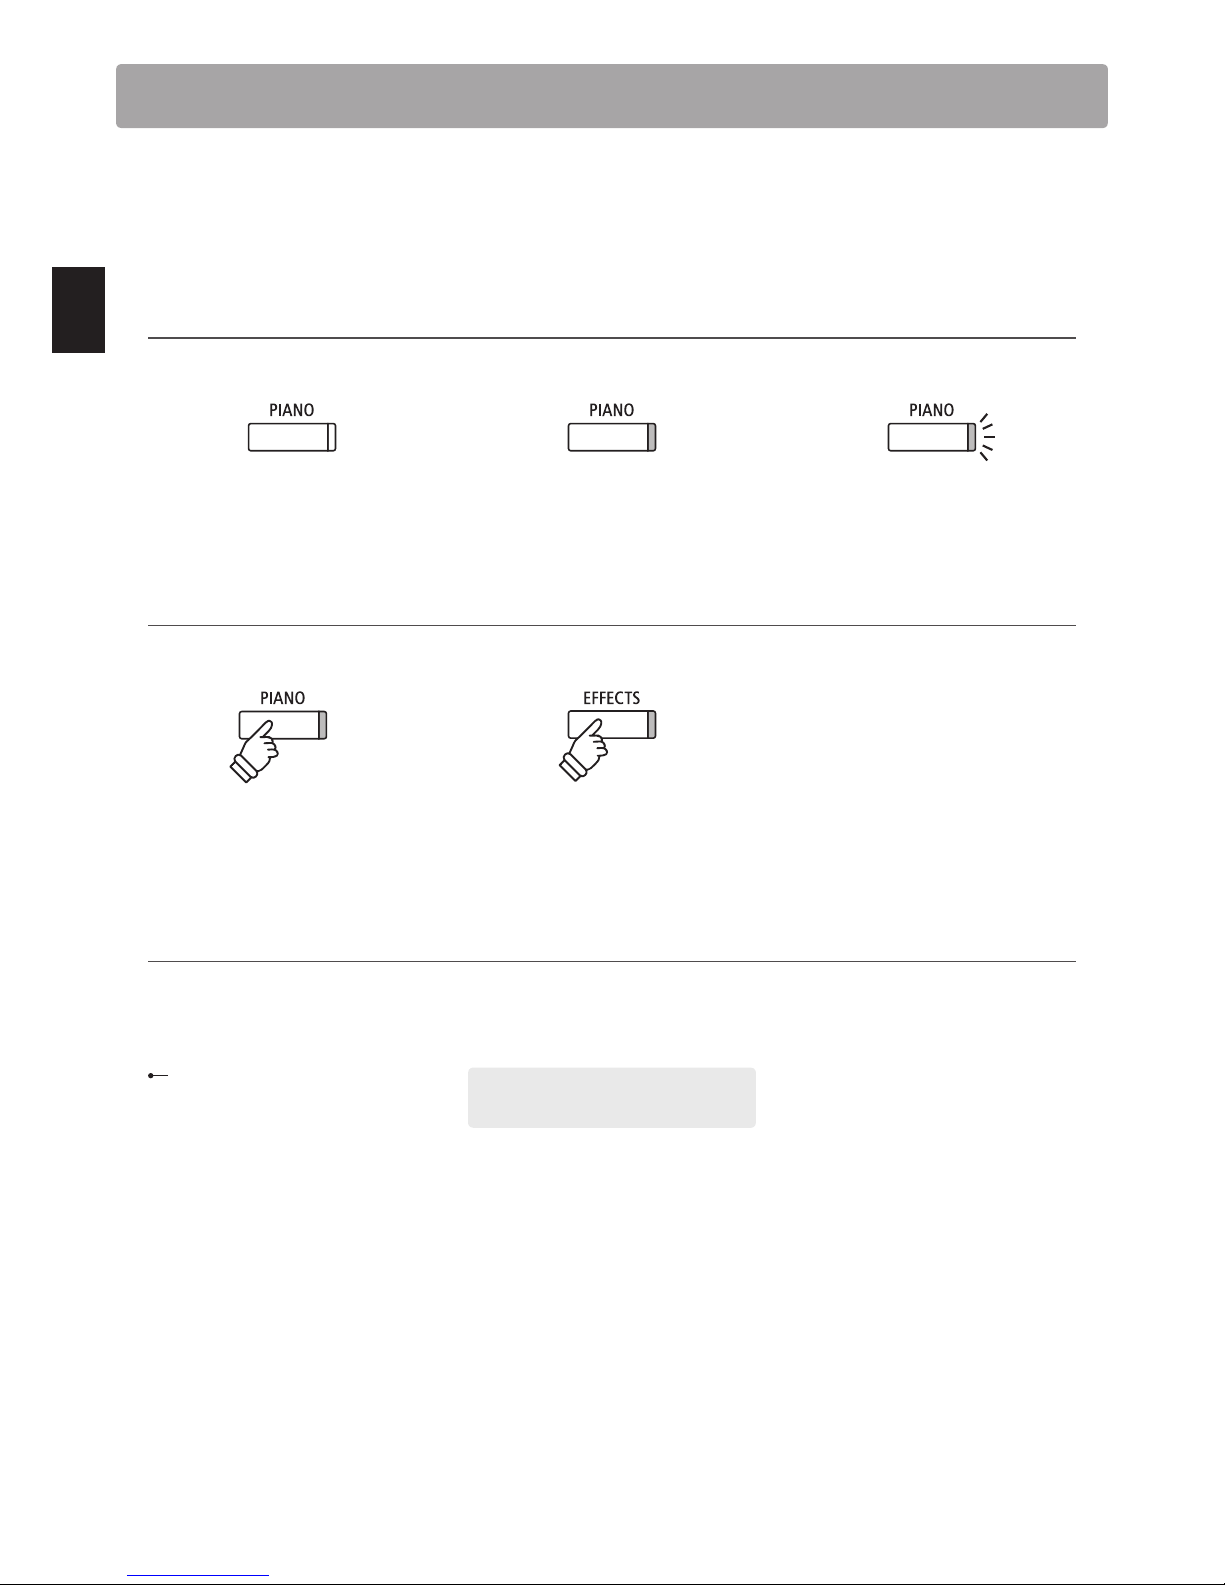
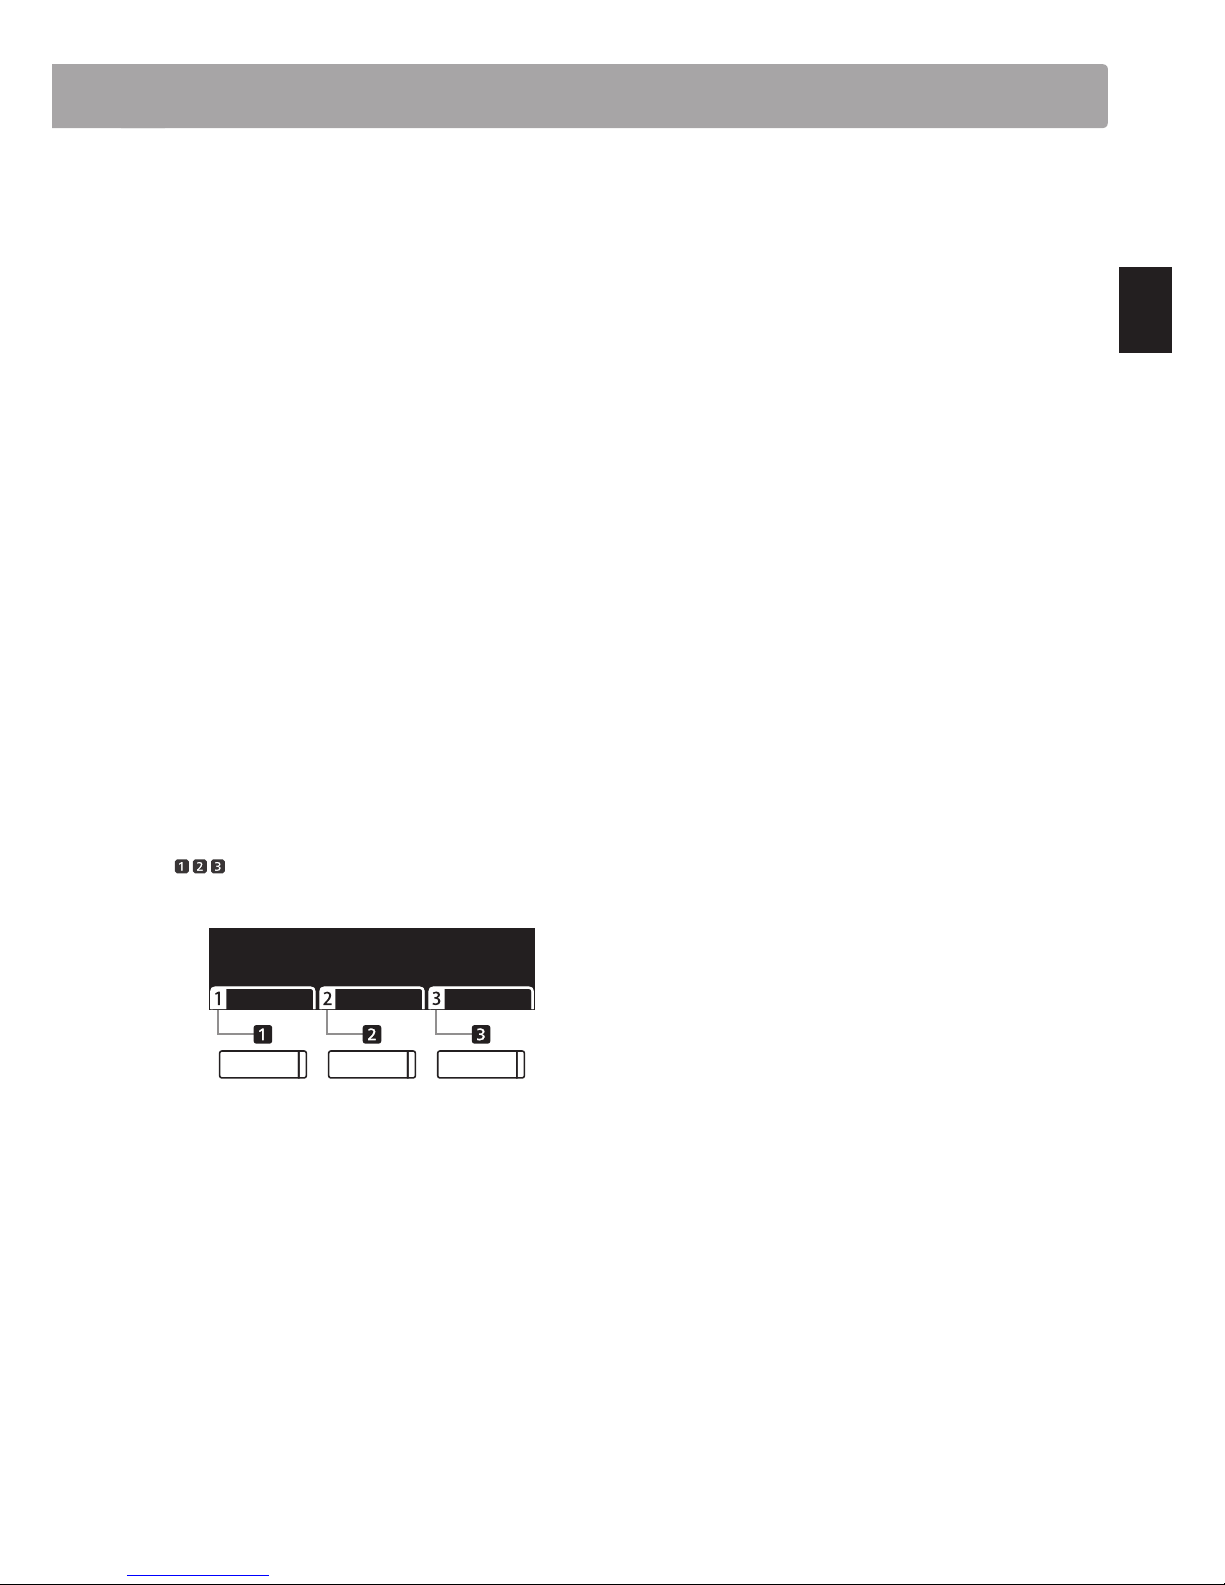
Button LED indicator states
Button press types
Text appearance
Owner’s Manual Conventions
LED indicator o :
Sound/Function is not selected.
LED indicator on:
Sound/Function is selected.
LED indicator ashing:
Sound/Function is selected in a
temporary state.
Normal instruction and explanation text
is written in regular type at 9 pt. size.
* Notes about functions are marked with an
asterisk and written in 8 pt. size.
Reminders about previous operations are
written in italic type at 9 pt. size.
Press and hold:
Select a function’s settings etc.
h
ol
d
hold
Captions explaining the LCD display
or button functions, are written in
bold type at 8.5 pt. size.
Example ope rations are written in italic t ype
at 8 pt. size, and enclosed within a grey box .
Normal press:
Select a sound or function.

11
Introduction
12
Introduction
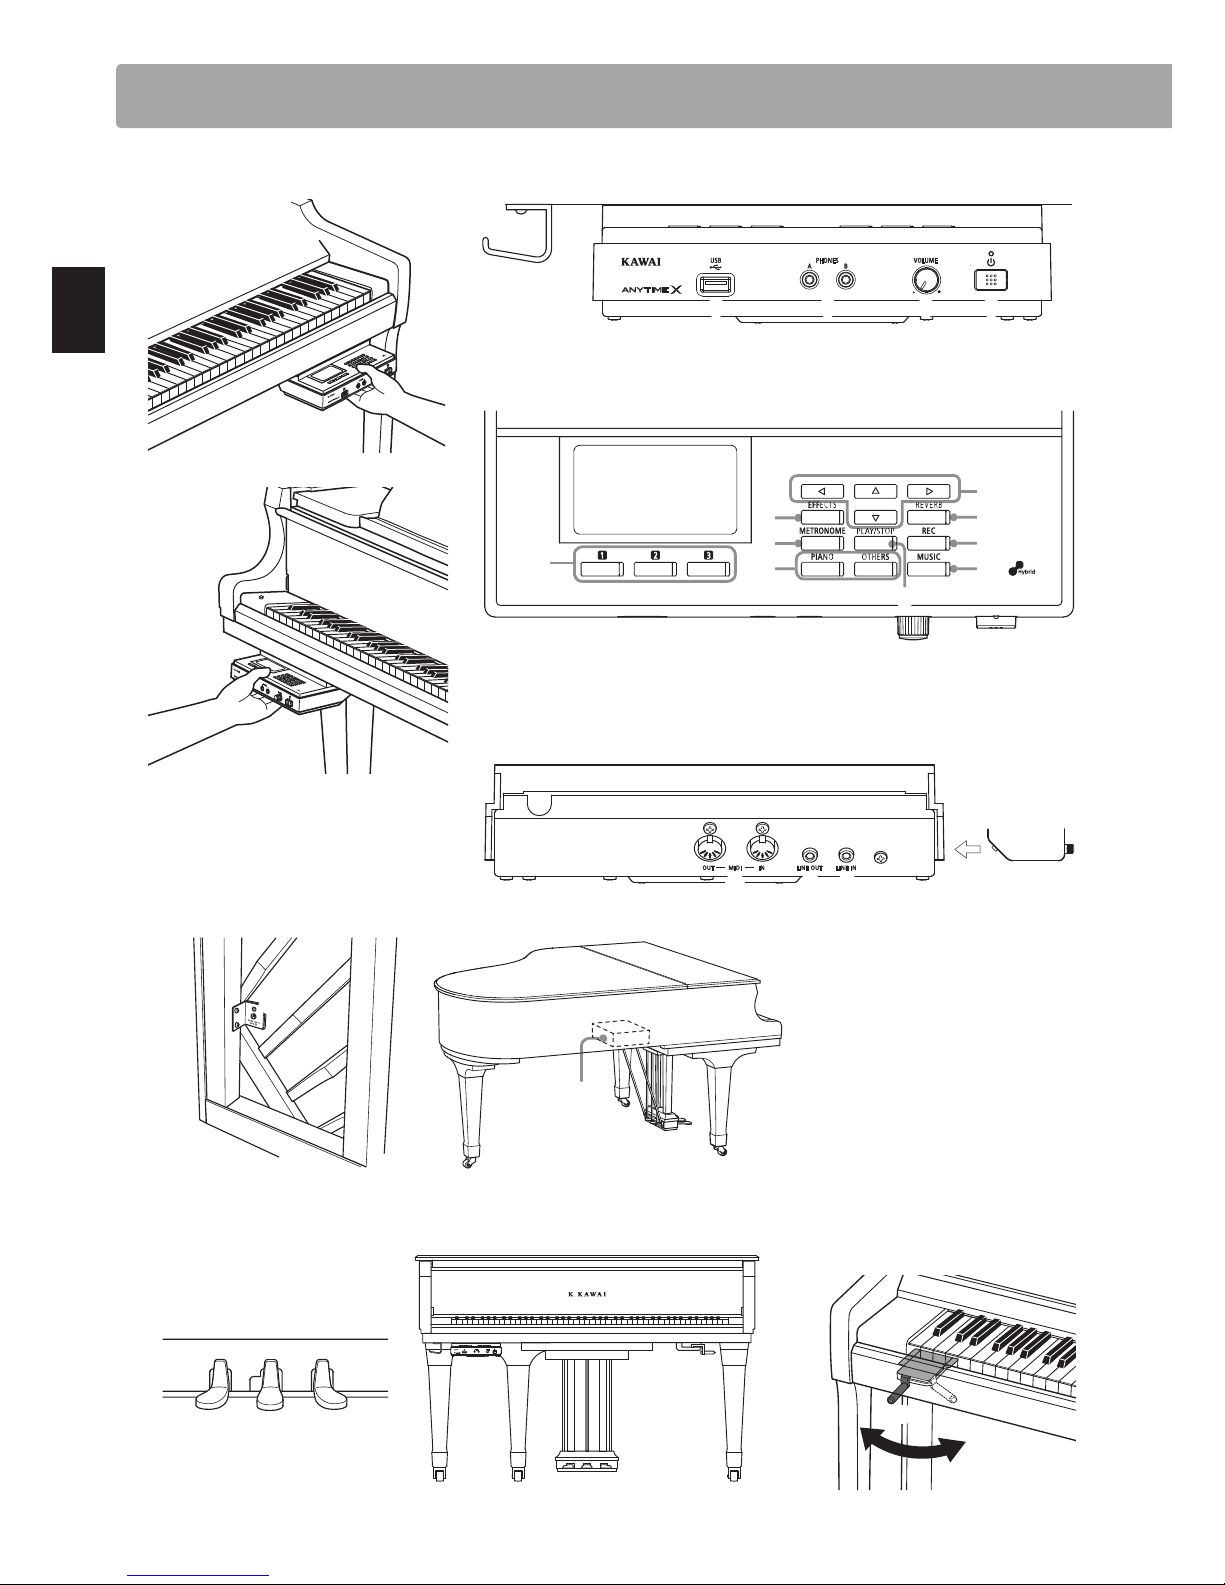
Part Names and Functions
Please do not place any objects on top of the control panel.
Control box: panel open (above view)
Control box: MIDI, LINE IN/OUT connectors (rear view)
Pedals & Muting lever
Mu er lever
Control box: panel open
Upright piano
Grand piano
Control box: panel & headphone hook (front view)
DC IN connector
Upright piano Grand piano
Grand piano
Upright piano
ab
g
c
h
d
i
e
j
f
k
s
s
o
m
qlp
n
r
ON
ON
OFF
OFF
Upright piano
wuu
y
t
x
v
v
13
Introduction
a POWER button
This switch is used to turn the instrument on/o . Be sure to turn o the
instrument after playing.
* The AnyTimeX2 piano features a power saving mode that can turn o the
instrument automatically after a speci ed period of inactivity. For more
information, please refer to the ‘Auto Power O ’ setting on page 108.
b VOLUME knob
Th is kn ob is us ed to ad ju st th e v ol um e w he n An yT im e m od e i s ac t iv at ed .
Turn the knob clockwise to increase the volume.
c PHONES jacks
These jack s are used to connect stereo he adphones to the AnyTimeX2 piano.
Two pairs of headphones can be connected and used simultaneously.
d USB to DEVICE port
This port is used to connect a FAT or FAT32 formatted USB memory
device to the instrument in order to load/save recorded song data and
MP3/WAV/SMF les etc.
e Headphone Hook
This hook is used to conveniently hang the headphones when not in use.
* The headphone hook is not pre-attached for grand pianos. Attach the
included headphone hook with the two screws provided, as shown in the
illustration on the previous page.
f LCD display
The LCD display provides useful information such as the currently
selected sound name, settings values, and the status of other functions
when active.
* A protective plastic lm is attached to the display during production.
Please remove this lm before attempting to play the instrument.
g FUNCTION button
These buttons are used to select one of three functions/options shown
at the bottom of the LCD display.
DUAL MENUSPLIT
h ARROW buttons
These buttons are used to navigate around the various menus and
screens, adjust values, and answer on-screen prompts.
i EFFECTS button
This button is used to turn e ects for the selected sound on/o , to
select the di erent e ect types, and to adjust their settings.
j REVERB button
This button is used to turn reverb for the selected sound on/o , to
select the di erent reverb types, and to adjust their settings.
k METRONOME button
This button is used to turn the metronome function on/o , and also to
adjust the tempo, time signature (or beat), and volume settings.
l PLAY/STOP button
This button is used to start/stop the playback of demonstration songs,
Piano Music pieces, and Lesson and Finger Exercises, and to start/stop
the recording and playback of recorder songs, and MP3/WAV audio les.
m REC button
Th is bu tton is us ed to reco rd pe rfo rman ces t o inte rna l mem ory or a US B
memory device as MP3/WAV audio les.
n SOUND buttons
These but tons are used to selec t the sound(s) that will be heard when playing
the keyboard in AnyTime mode. Mu ltiple sounds are assigne d to each category
button, and can be selected by pressing the same button repeatedly.
o MUSIC button
This b utton is used to select AnyTimeX2 piano’s built-in Demons tration
songs, Piano Music pieces and Lesson songs.
p LINE IN jack
This jack is used to connect the stereo output from audio equipment,
computers, or other electronic instruments to the AnyTimeX2 piano.
q LINE OUT jack
This jack is used to conne ct the stereo output of the AnyTimeX2 p iano to
external ampli ers, mixers, recording devices, and similar equipment.
r MIDI IN / OUT jacks
These jacks are used to connect the AnyTimeX2 piano to external MIDI
devices such as other musical instruments or a computer in order to
send and receive MIDI data.
* For more informat ion about the instrument ’s connectors and jack s, please
refer to ‘Connecting to Other Devices’ on page 109.
s DC IN Jack
This jack is used to connect the AC adaptor.
t Mute Pedal (upright piano)
Thi s ped al is u sed to mute t he aco usti c pian o sou nd. Depre ss thi s ped al
and slide it gently to the left to activate AnyTime mode.
Do not attempt to ac tivate/deactivate AnyTime mode while playing th e piano
as this can cause serious damage to the action mechanism of the instrument.
u Damper Pedal
This pedal is used to remove all dampers from the strings, allowing
them to vibrate freely. This greatly enriches the piano’s sound, while
also assisting the pianist to play smooth ‘legato’ passages.
v Soft Pedal / Sostenuto Pedal (upright piano)
This pedal is used to soften the sound, reducing its volume.
When ‘Jazz Organ’ or ‘Drawbar Organ’ sounds are selected, the soft
pedal is used to alternate the speed of the rotary speaker simulation
between ‘Slow’ and ‘Fast’ e ect modes.
With upright AnyTimeX2 instruments, it is also possible to use the Soft
pedal as a Sostenuto pedal by depressing the pedal while turning on
the AnyTimeX2 piano control panel.
w Sostenuto Pedal (grand piano)
This pedal is used to sustain one group of notes while other notes are
played without sustain.
x Muting Lever (grand piano)
This lever is used to mute the a coustic piano sou nd. Pull the lever gently to
the left to activate AnyTime mode. Do not attempt to activate/deactivate
AnyTime mode while playing the instrument as this can cause serious
damage to the action mechanism of the instrument.
y Mu er lever (upright piano)
This lever is used to activate/deactivate the mu er system of the
acoustic piano.
Pull the lever to activate and push it back to deactivate.
14
Introduction
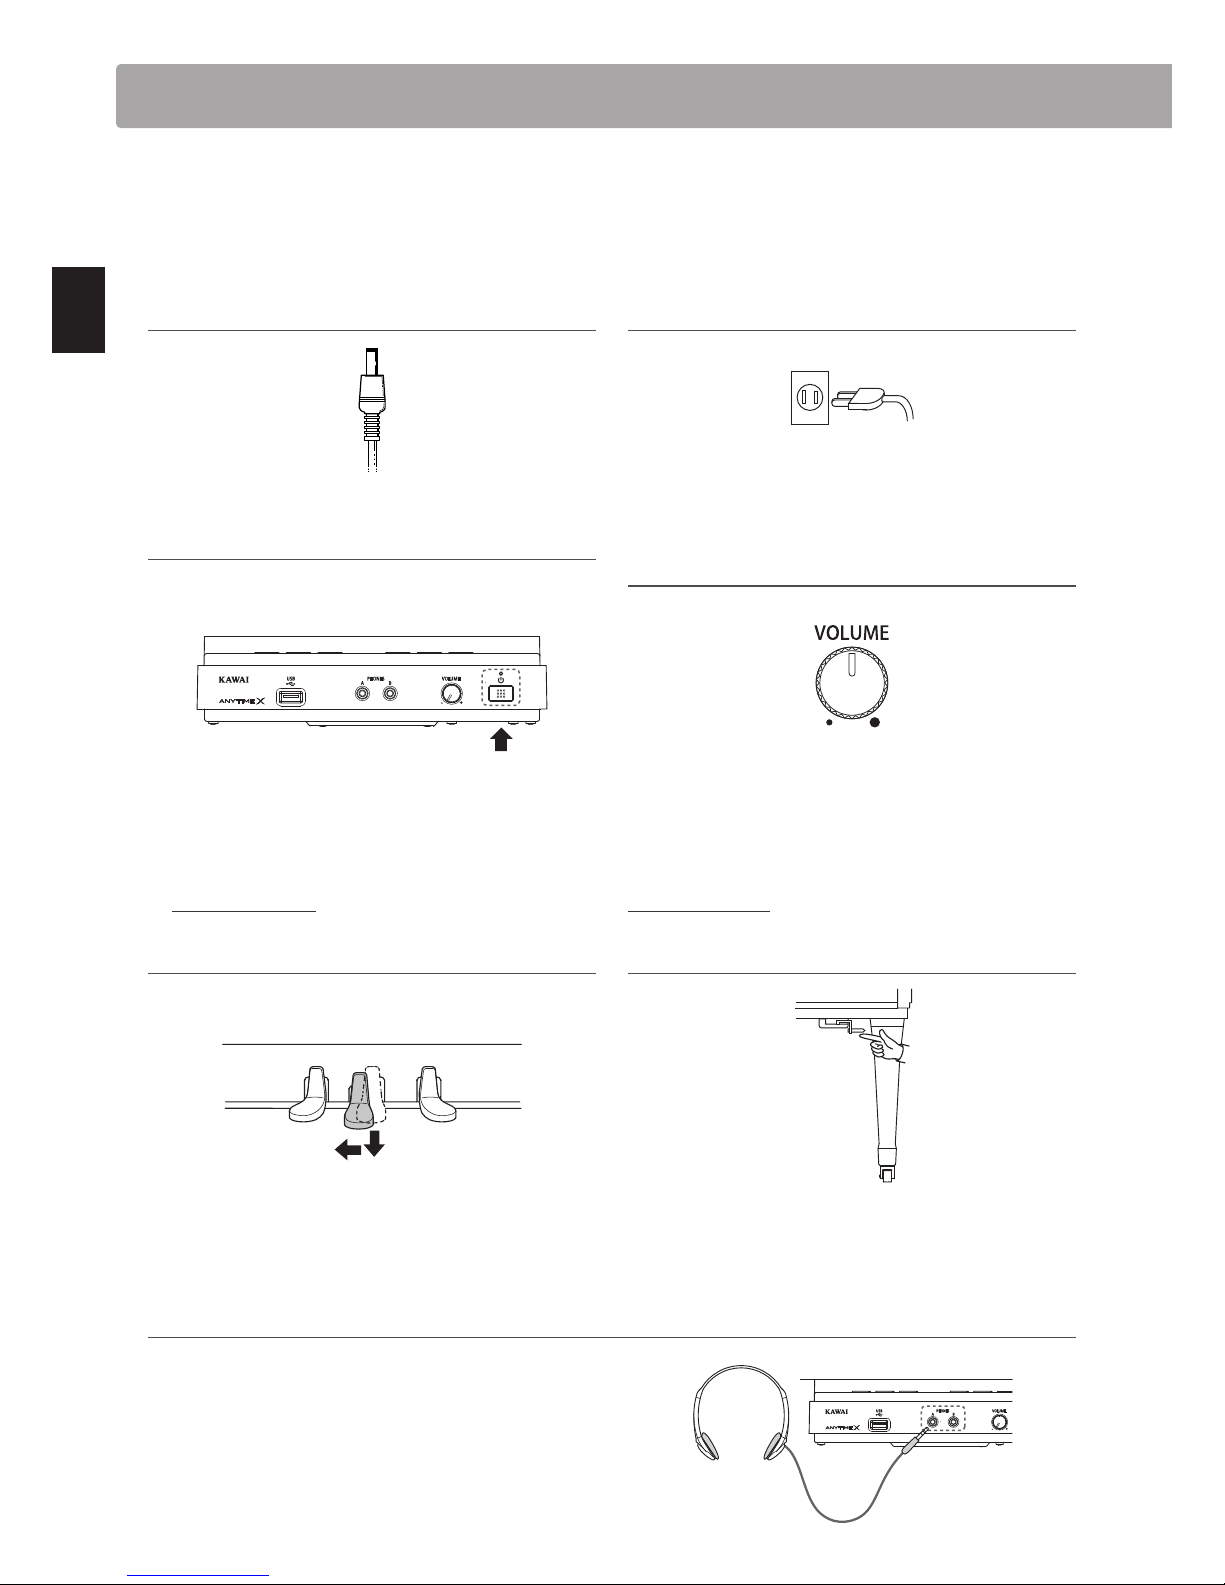
Basic Operation
This section explains the basic procedures for turning the power on, activating AnyTime mode, and performing
with headphones.
1. Plug the AC adaptor into the DC IN connector
located at the rear of the instrument.
2. Plug the AC adaptor’s power plug into the
electric wall outlet.
3. Press the POWER button.
The LED above the POWER button will light up to indicate that
the AnyTimeX2 control box is turned on.
Press
* The AnyTimeX2 p iano features a power saving mode that can turn o the
instrument automatically after a speci ed period of inactivity. For more
information, please refer to the ‘Auto Power O ’ setting on page 108.
4. Turn the VOLUME knob clockwise to the
half-way position.
5. [Upright piano] Depress the Mute pedal, then
slide it gently to the left to mute the acoustic
piano sound and activate AnyTime mode.
Pedals
(Mute)(Soft) (Damper)
[Grand piano] Pull the Muting lever to the
left to mute the acoustic piano sound and
activate AnyTime mode.
Do not attempt to activate/deactivate AnyTime mode while playing the piano,
as this can cause serious damage to the action mechanism of the instrument.
6.
Connect a pair of headphones to one of the PHONES jacks located on the front of the control box.
Two pairs of headphones can be connected simultaneously,
allowing two people to listen to the AnyTimeX2 piano at the
same time.

15
Introduction
Play the piano.
The sound of a Concert Grand piano will be played through the
headphones, with the acoustic piano sound muted.
About the soundboard speaker (ATX2-f)
ATX2-f upright and grand pianos feature a uniqe integrated soundboard speaker system, allowing the AnyTimeX2 sound to be
played without the use of headphones.
In addition, when AnyTime mode is deactivated (i.e. the acoustic piano sound is not muted), it is also possible to enjoy playing
ensemble pieces that feature both the acoustic piano sound and AnyTimeX2 sound simultaneously, such as piano with strings.

16
Playing the Piano
The AnyTimeX2 piano features a wide selection of realistic instrument sounds suitable for various musical styles.
Sounds are arranged into eight categories, with several sounds assigned to each category button. For a complete
listing of available instrument sounds, please refer to page 114 of this owner’s manual.
By default, the ‘Concert Grand’ sound will be selected automatically when the instrument is turned on.
Selecting a sound
Press the desired SOUND button.
The LED indicator for the button will turn on to indicate that this
category has been selected, and the name of the sound will be
shown in the LCD display.
Changing the sound
Several sounds are assigned to each category button.
Press the selected category button repeatedly to cycle through
the di erent sound variations.
The or buttons can also be used to select sounds and cycle
through the di erent sound variations.
Selecting Sounds
LED indicator on:
Sound category is
selected.
Example: To select the OTHERS category, press
the OTHERS button.

17
Playing the Piano
Dual Mode
The Dual Mode function allows two sounds to be layered together, creating a more complex sound.
For example, a piano sound layered with strings, or a church organ combined with a choir, etc.
1. Entering Dual mode
Press the FUNCTION button (DUAL).
The DUAL Mode screen will be shown in the LCD display.
The currently selected sound is shown on the rst line. Slow
Strings is selected as layered sound and shown on the second
line.
Layered
sound
Main
sound
2. Changing the main/layered sounds
Press the or buttons to move the selection cursor over the
main sound or layered sound.
Press the or buttons to cycle through the di erent sound
variations.
buttons:
Move selection cursor.
buttons:
Change sound variation.

18
Playing the Piano
Dual Mode
Dual Mode settings
The Dual Mode settings menu allows characteristics of the combined sound to be adjusted.
Dual Mode settings
Dual Mode setting Description Default setting
Balance Adjust the volume balance between the main and layered sounds. 5 : 5
Layer Octave Shift Raise/lower the pitch of the layered sound in octave steps. 0
Dynamics Adjust the dynamic sensitivity of the layered sound relative to the main sound. 10
Entering the Dual Mode settings menu
While the Dual Mode screen is shown in the LCD display:
Press the
FUNCTION button (EDIT).
The Dual Mode settings menu will be shown in the LCD display.
Adjusting Dual Mode settings
After entering the Dual Mode settings menu:
Press the or buttons to move the selection cursor over the
desired setting.
Press the or buttons to adjust the selected setting.
* To reset the current setting to the default value, press the
FUNCTION button (RESET).
3. Exiting Dual mode
Press the FUNCTION button (EXIT) to exit Dual Mode.
buttons:
Move selection cursor.
buttons:
Adjust selected setting.
19
Playing the Piano
Split Mode
The Split Mode function divides the keyboard into two sections, allowing each section to be played with a di erent
sound. For example, a bass sound in the lower section, and a piano sound in the upper section.
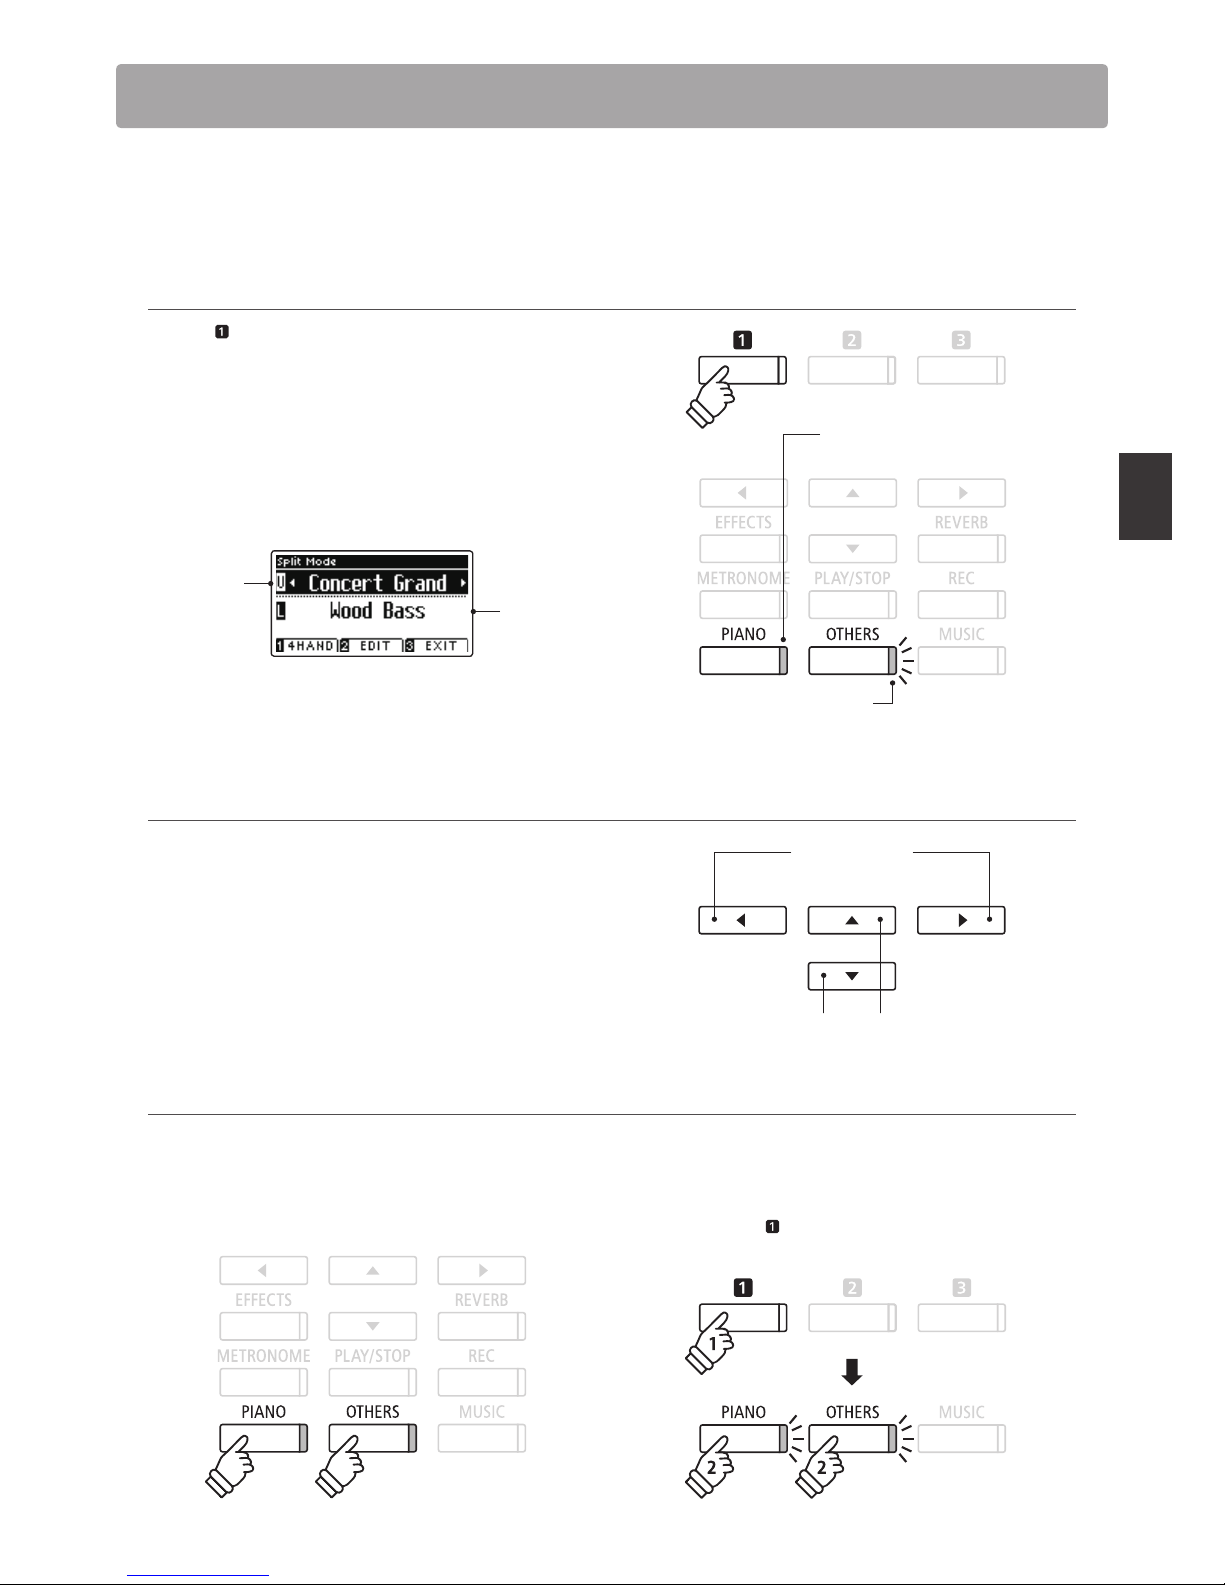
1. Entering Split mode
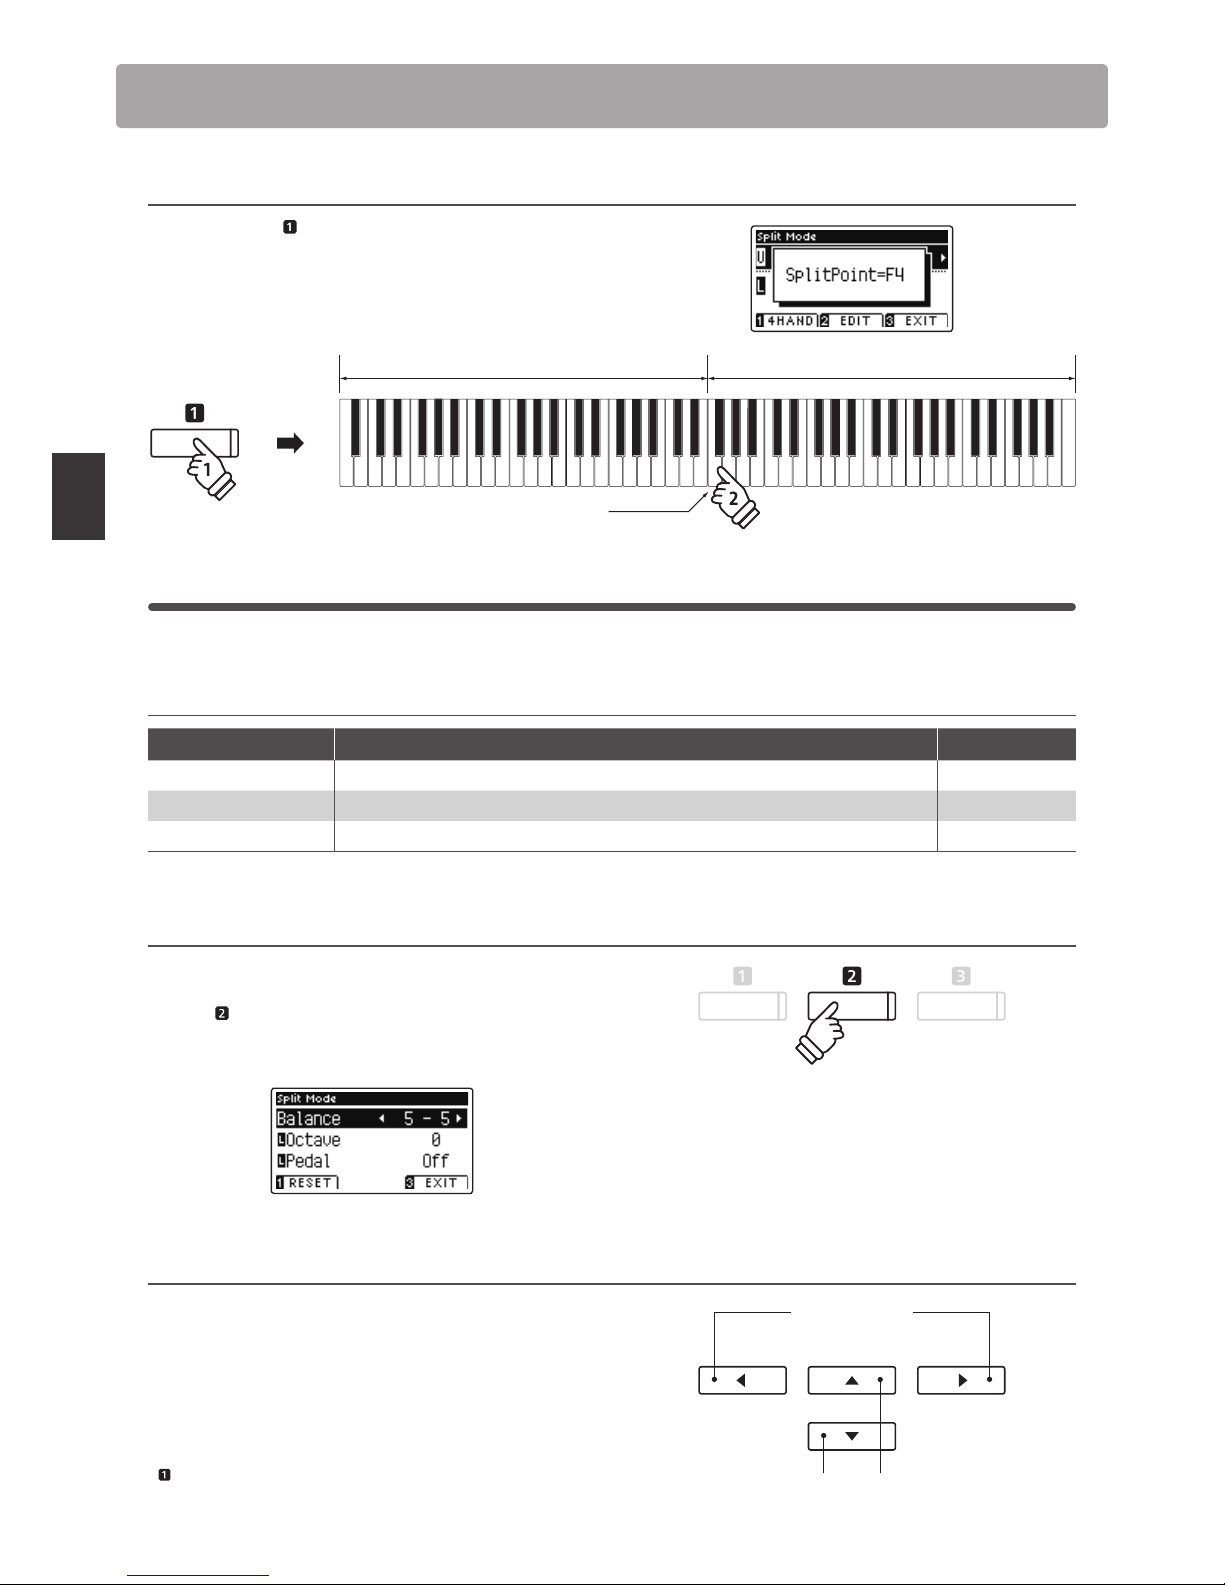
Press the FUNCTION button (SPLIT).
The Split Mode screen will be shown in the LCD display.
* The default split point is set between keys B3 and C4.
The upper section and lower section sound names will be
shown in the LCD display. The LED indicator for the upper
section sound button will turn on, and the LED indicator for the
lower section sound button will start to ash.
Lower
section
sound
Upper
section
sound
* By default, the lower section will be set to the ‘Wood Bass’ sound.
2a. Changing the upper/lower section sounds: Method 1
Press the or buttons to move the selection cursor over the
upper section or lower section sound.
Press the or buttons to cycle through the di erent sound
variations.
2b. Changing the upper/lower section sounds: Method 2
It is also possible to change the upper/lower section sound by pressing the PIANO or OTHERS buttons.
To select a di erent sound for the upper section:
Press the PIANO or OTHERS buttons repeatedly.
or
To select a di erent sound for the lower section:
Press and hold the
FUNCTION button, then press the PIANO
or OTHERS buttons repeatedly.
or
ho
l
d
hold
buttons:
Move selection cursor.
buttons:
Change sound variation.
LED indicator ashing:
Lower section sound.
LED indicator on:
Upper section sound.
20
Playing the Piano
Split Mode
3. Changing the split point
Press and hold the FUNCTION button, then press the desired
split key on the keyboard.
The name of the pressed key will brie y be shown in the LCD
display, and will become the new split point.
hold
hold
Upper sectionLower section
New split point
Split Mode settings
The Split Mode settings menu allows characteristics of the Split Mode sound and operation to be adjusted.
Split Mode settings
Split Mode setting Description Default setting
Balance Adjust the volume balance between the upper and lower sections. 5 - 5
Lower Octave Shift Raise/lower the pitch of the lower section sound in octave steps. 0
Lower Pedal Enable/disable the sustain pedal for the lower section sound. O
Entering the Split Mode settings menu
While the Split Mode screen is shown in the LCD display:
Press the
FUNCTION button (EDIT).
The Split Mode settings menu will be shown in the LCD display.
Adjusting Split Mode settings
After entering the Split Mode settings menu:
Press the or buttons to move the selection cursor over the
desired setting.
Press the or buttons to adjust the selected setting.
* To reset the current setting to the default value, press the
FUNCTION button (RESET).
buttons:
Move selection cursor.
buttons:
Adjust selected setting.

21
Playing the Piano
Four Hands Mode
The Four Hands Mode function divides the keyboard into two sections in a similar way to that of the Split Mode
function. However, with Four Hands Mode enabled, the octave/pitch of each section is automatically adjusted to
create two separate 44-key instruments with the same playing range. Furthermore, the damper (right) pedal and
soft (left) pedal act as separate damper pedals for the respective upper and lower sections, allowing two people to
perform piano duets using a single instrument.
1. Entering Four Hands mode
Press the FUNCTION button (SPLIT) once to enter Split Mode,
then press the
FUNCTION button (4HAND) again to select
Four Hands Mode.
* The default four hands mode split point is set between keys E4 and
F4.
The Four Hands Mode screen and right/left section sound
names will be shown in the LCD display.
Left
section
sound
Right
section
sound
2a. Changing the right/left section sounds: Method 1
Press the or buttons to move the selection cursor over the
right section or left section sound.
Press the or buttons to cycle through the di erent sound
variations.
2b. Changing the right/left section sounds: Method 2
It is also possible to change the right/left section sound by pressing the PIANO or OTHERS buttons.
To select a di erent sound for the right section:
Press the PIANO or OTHERS buttons repeatedly.
or
To select a di erent sound for the left section:
Press and hold the
FUNCTION button (SPLIT), then press the
PIANO or OTHERS buttons repeatedly.
or
ho
l
d
hold
buttons:
Move selection cursor.
buttons:
Change sound variation.
* By default, the right and left sections will both be set to the ‘Concert
Grand’ sound.

22
Playing the Piano
Four Hands Mode
3. Changing the Four Hands mode split point
Press and hold the FUNCTION button, then press the desired
split key on the keyboard.
The name of the pressed key will brie y be shown in the LCD
display, and will become the new split point.
hold
hold
Right sectionLeft section
New split point
Four Hands Mode settings
The Four Hands Mode settings menu allows characteristics of the Four Hands Mode sound to be adjusted.
Four Hands Mode settings
Four Hands Mode setting Description Default setting
Balance Adjust the volume balance between the right and left sections. 5 - 5
Right Octave Shift Raise/lower the pitch of the right section sound in octave steps. 0
Left Octave Shift Raise/lower the pitch of the left section sound in octave steps. + 2
Entering the Four Hands Mode settings menu
While the Four Hands Mode screen is shown in the LCD display:
Press the
FUNCTION button (EDIT).
The Four Hands Mode settings menu will be shown in the LCD
display.
Adjusting Four Hands Mode settings
After entering the Four Hands Mode settings menu:
Press the or buttons to move the selection cursor over the
desired setting.
Press the or buttons to adjust the selected setting.
* To reset the current setting to the default value, press the
FUNCTION button (RESET).
buttons:
Move selection cursor.
buttons:
Adjust selected setting.
* Changes made to the Four Hands Mode settings will not a ect the
Split Mode settings, and vice versa.

23
Playing the Piano
Reverb
Reverb adds reverberation to the sound, simulating the acoustic environment of a recital room, stage, or concert
hall. Some sound types, such as acoustic piano, enable reverb automatically in order to improve acoustic realism.
The AnyTimeX2 piano features six di erent reverb types.
Reverb types
Reverb type Description
Room Simulates the ambiance of a small rehearsal room.
Lounge Simulates the ambiance of a piano lounge.
Small Hall Simulates the ambiance of a small hall.
Concert Hall Simulates the ambiance of a concert hall or theater.
Live Hall Simulates the ambiance of a live hall or stage.
Cathedral Simulates the ambiance of a large cathedral.
1. Turning Reverb on/o
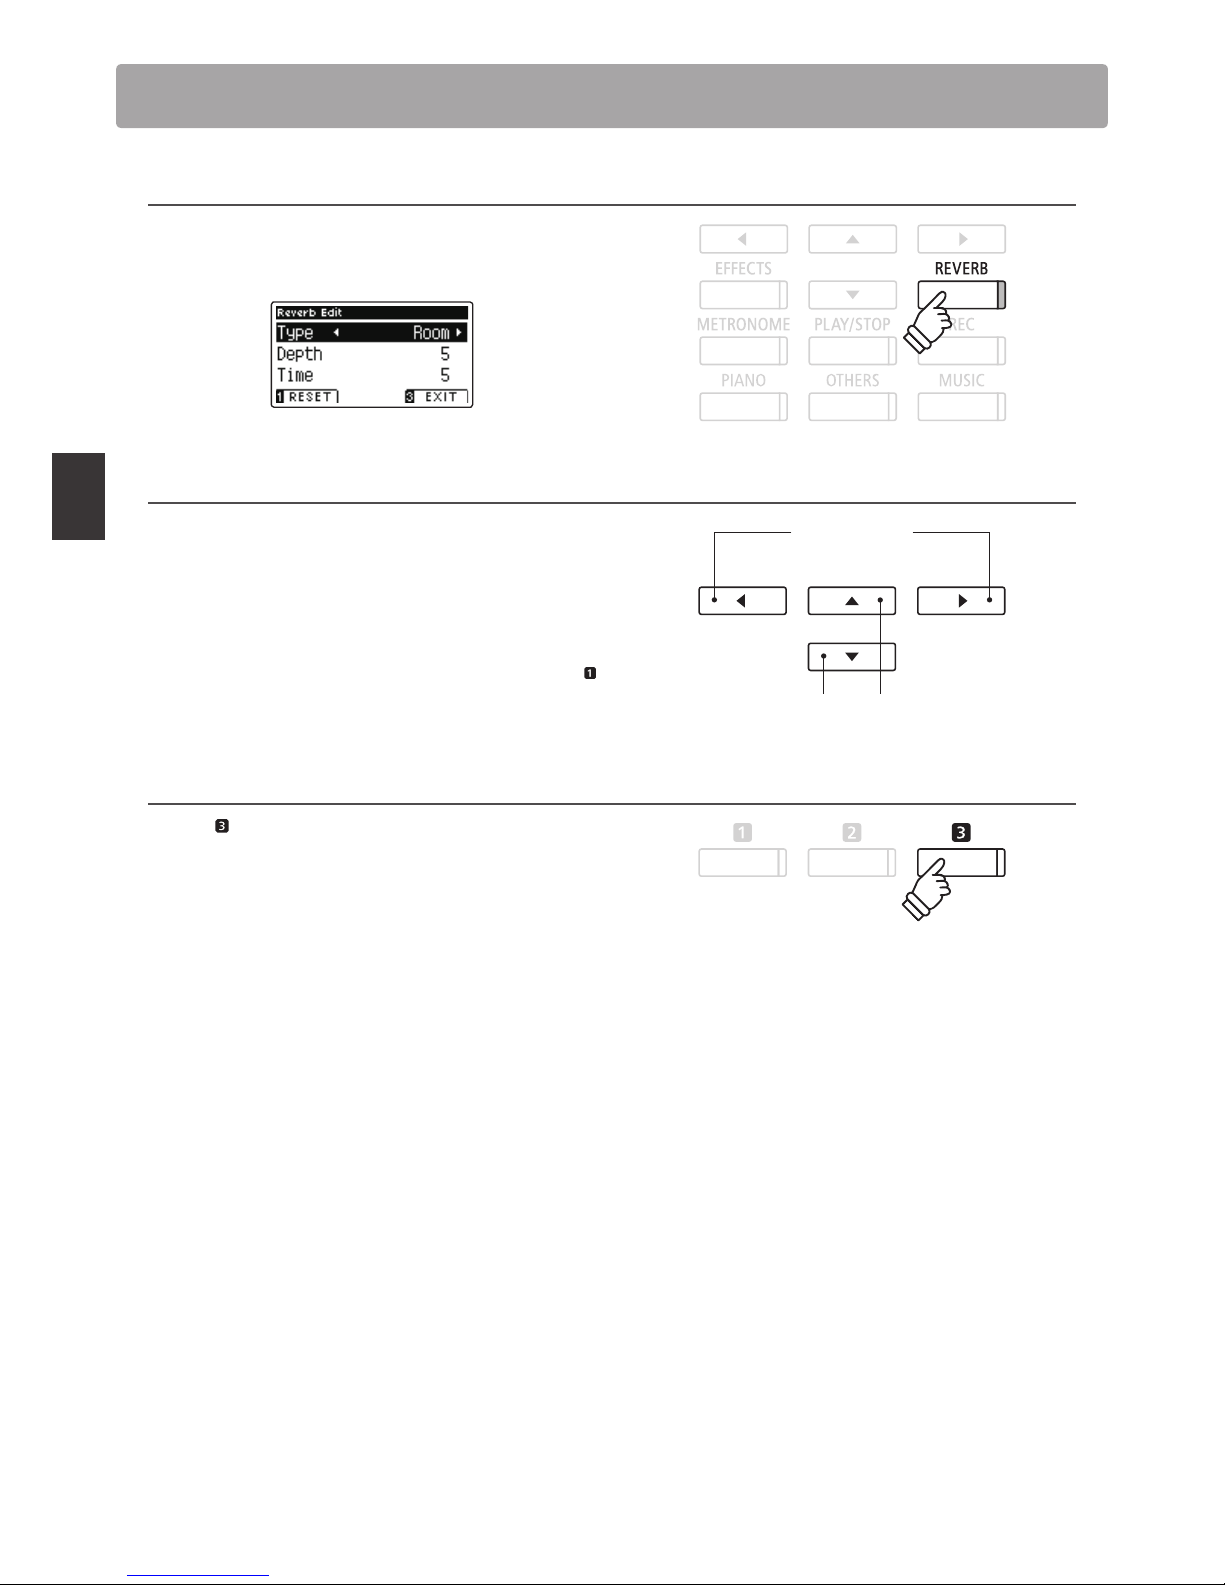
Press the REVERB button to turn reverb on/o .
The LED indicator for the REVERB button will turn on to indicate
when reverb is in use, and the current status will brie y be
shown in the LCD display.
Reverb
status
Reverb
type
Reverb settings
The Reverb settings menu allows the type and characteristics of the reverb to be adjusted.
Reverb settings
Reverb setting Description Range
Type Changes the type of environment. –
Depth Adjusts the depth of the environment (i.e. amount of reverberation to apply). 1 - 10
Time Adjusts the decay length/speed of the reverberation. 1 - 10
24
Playing the Piano
Reverb
Entering the Reverb settings menu
Press and hold the REVERB button.
The Reverb settings menu will be shown in the LCD display.
Adjusting Reverb settings
After entering the Reverb settings menu:
Press the or buttons to move the selection cursor over the
desired setting.
Press the or buttons to adjust the selected setting.
* To reset the current setting to the default value, press the
FUNCTION button (RESET).
Exiting the Reverb settings menu
Press the FUNCTION button (EXIT) to exit the Reverb settings
menu.
* Reverb settings are independent for each sound variation.
* Any changes made to the reverb type, settings, or on/o status will
remain until the power is turned o .
buttons:
Move selection cursor.
buttons:
Adjust selected setting.
ho
l
d
hold

25
Playing the Piano
E ects
In addition to reverb, various other e ects can be applied to the selected sound, altering the tonal character and
feeling of the instrument. As with reverb, some sound types enable cer tain e ect s automatically in order to enhance
tonal quality. The AnyTimeX2 piano features 11 di erent e ect types, with 4 combination e ects, and 3 additional
ampli ed e ects.
E ect types
E ect type Description
Stereo Delay Adds an echo e ect to the sound, playing through both speakers (stereo) simultaneously.
Ping Delay Adds a ‘ping pong’ echo e ect to the sound, giving the impression that it is ‘bouncing’ from left to right.
Triple Delay Similar in principle to Ping Delay, but with an additional centre echo.
Chorus Layers a slightly detuned version of the sound over the original, thus enriching its tonal character.
Classic Chorus Similar in principle to Chorus, but intended for vintage electric piano sounds.
Tremolo Continuously varies the volume at a constant speed, adding a vibrato type e ect to the sound.
Classic Tremolo Similar in principle to Tremolo, but intended for vintage electric piano sounds.
Auto Pan Alternates the sound output from left to right across the stereo eld using a sine wave.
Classic Auto Pan Similar in principle to Auto Pan, but intended for vintage electric piano sounds.
Phaser Applies a cyclic phase change to the sound, giving the impression that the sound is moving.
Rotary
Simulates the sound of a rotary speaker commonly used with vintage electronic organs.
There are three di erent levels of overdrive, with and without a Chorus e ect.
* The soft pedal can be used to alternate the speed of the rotary simulation between ‘Slow’ and ‘Fast’ e ect modes.
Combination E ects
Di erent combinations of the above e ects, applied simultaneously.
* Combination e ect types: Phaser+Chorus, Tremolo+Chorus, Phaser+AutoPan, Chorus+Chorus
Ampli ed E ects A selection of the above e ects, with a vintage electric piano speaker e ect applied.
1. Turning E ects on/o
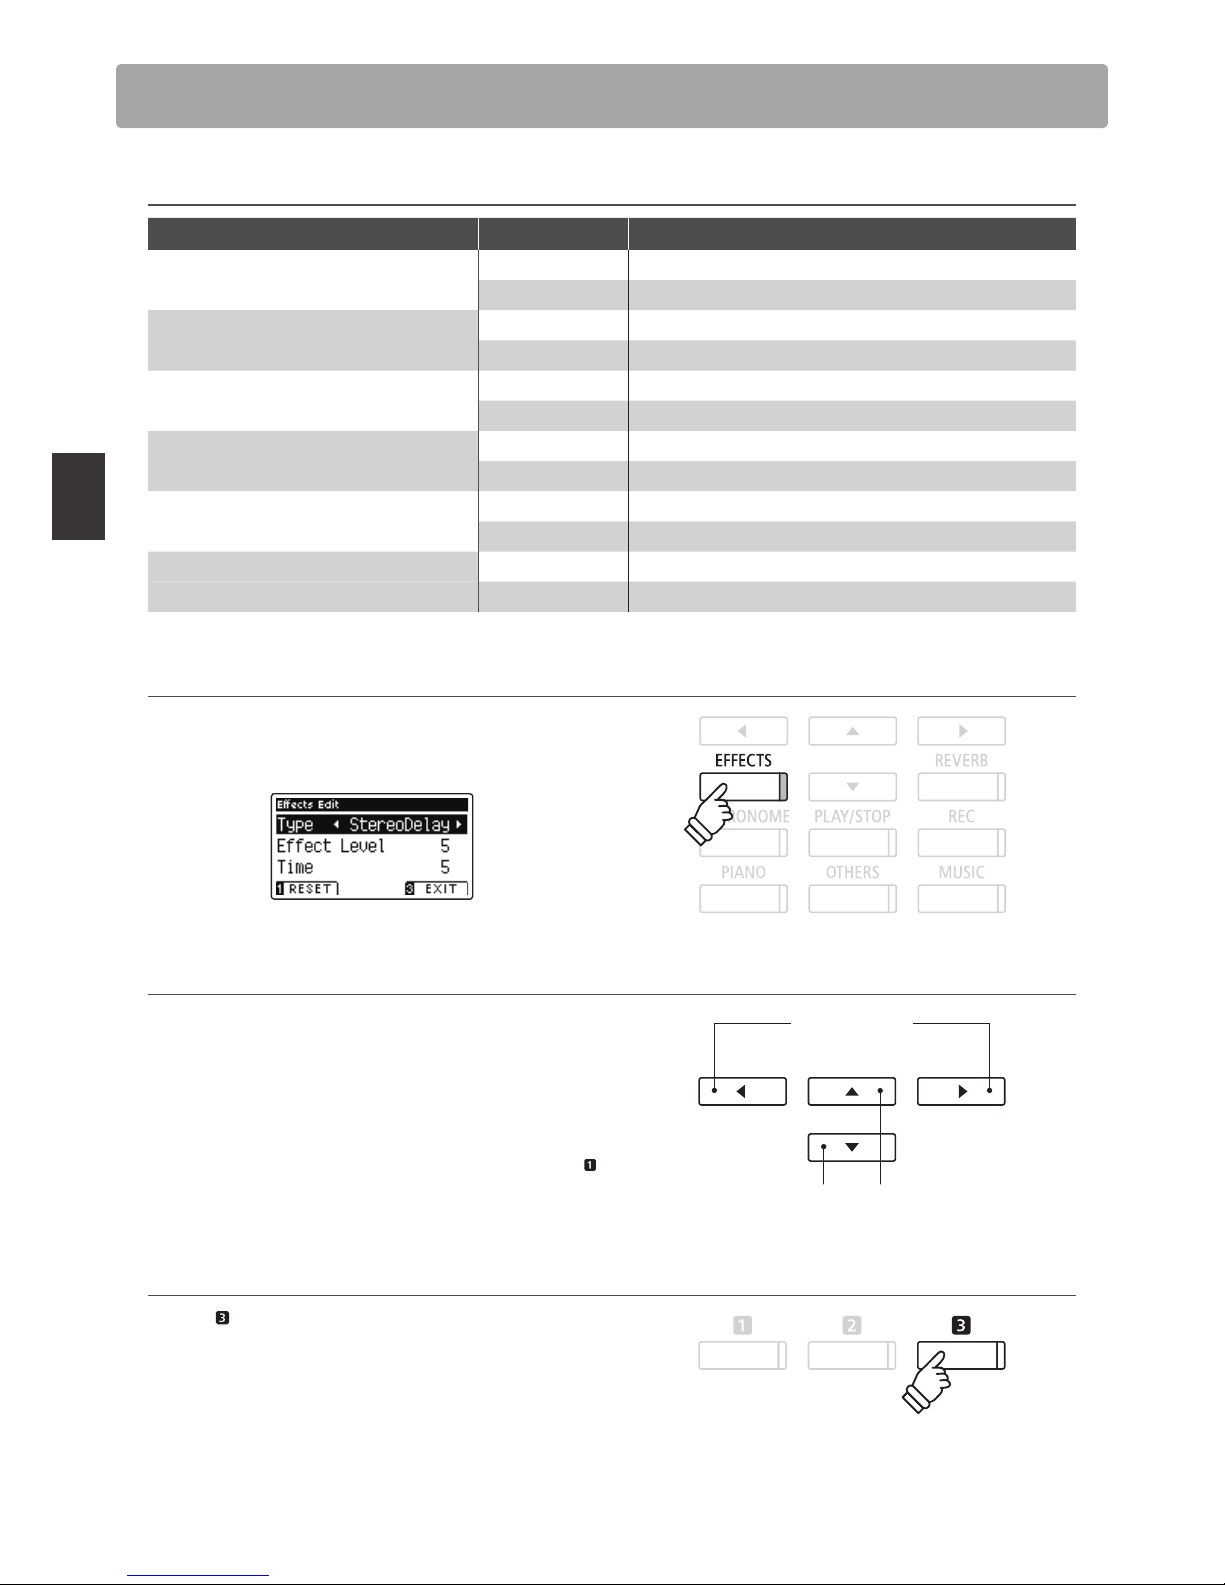
Press the EFFECTS button to turn e ects on/o .
The LED indicator for the EFFECTS button will turn on to indicate
when e ects are in use, and the current status will brie y be
shown in the LCD display.
E ect
status
E ect
type
E ects settings
E ect type E ect setting Description
Stereo Delay / Ping Delay / Triple Delay Dry / Wet Adjust the intensity of the delay.
Time Adjust the interval of time between each delay.
Chorus Dry / Wet Adjust the intensity of the chorus.
Speed Adjust the speed of the chorus.
26
Playing the Piano
E ects
E ects settings (cont.)
E ect type E ect setting Description
Classic Chorus Mono / Stereo Toggle between a Mono or Stereo effect.
Speed Adjust the speed of the chorus.
Tremolo / Classic Tremolo Dry / Wet Adjust the intensity of the tremolo.
Speed Adjust the speed of the tremolo.
Auto Pan / Classic Auto Pan Dry / Wet Adjust the intensity of the pan.
Speed Adjust the speed of the pan.
Phaser Dry / Wet Adjust the intensity of the phaser.
Speed Adjust the speed of the phaser.
Rotary Accel. Speed Adjust the acceleration speed between slow and fast modes.
Rotary Speed Adjust the speed of the rotary speaker.
Combination E ects / Ampli ed E ects Dry / Wet Adjust the intensity of the e ects.
Speed Adjust the speed of the e ects.
Entering the E ects settings menu
Press and hold the EFFECTS button.
The E ects settings menu will be shown in the LCD display.
Adjusting E ects settings
After entering the E ects settings menu:
Press the or buttons to move the selection cursor over the
desired setting.
Press the or buttons to adjust the selected setting.
* To reset the current setting to the default value, press the
FUNCTION button (RESET).
Exiting the E ects settings menu
Press the FUNCTION button (EXIT) to exit the E ects settings
menu.
* E ects settings are independent for each sound variation.
* Any changes made to the e ects type, settings, or on/o status will
remain until the power is turned o .
buttons:
Move selection cursor.
buttons:
Adjust selected setting.
ho
l
d
hold
27
Playing the Piano
Metronome / Drum Rhythms
The Metronome function provides a steady beat to aid practicing the piano at a consistent tempo. In addition
to regular metronome beats, the AnyTimeX2 piano also features a variety of drum rhythms to accompany most
playing styles and musical genres.
For a complete listing of available drum rhythms, please refer to page 116 of this owner’s manual.
Turning the Metronome on/o
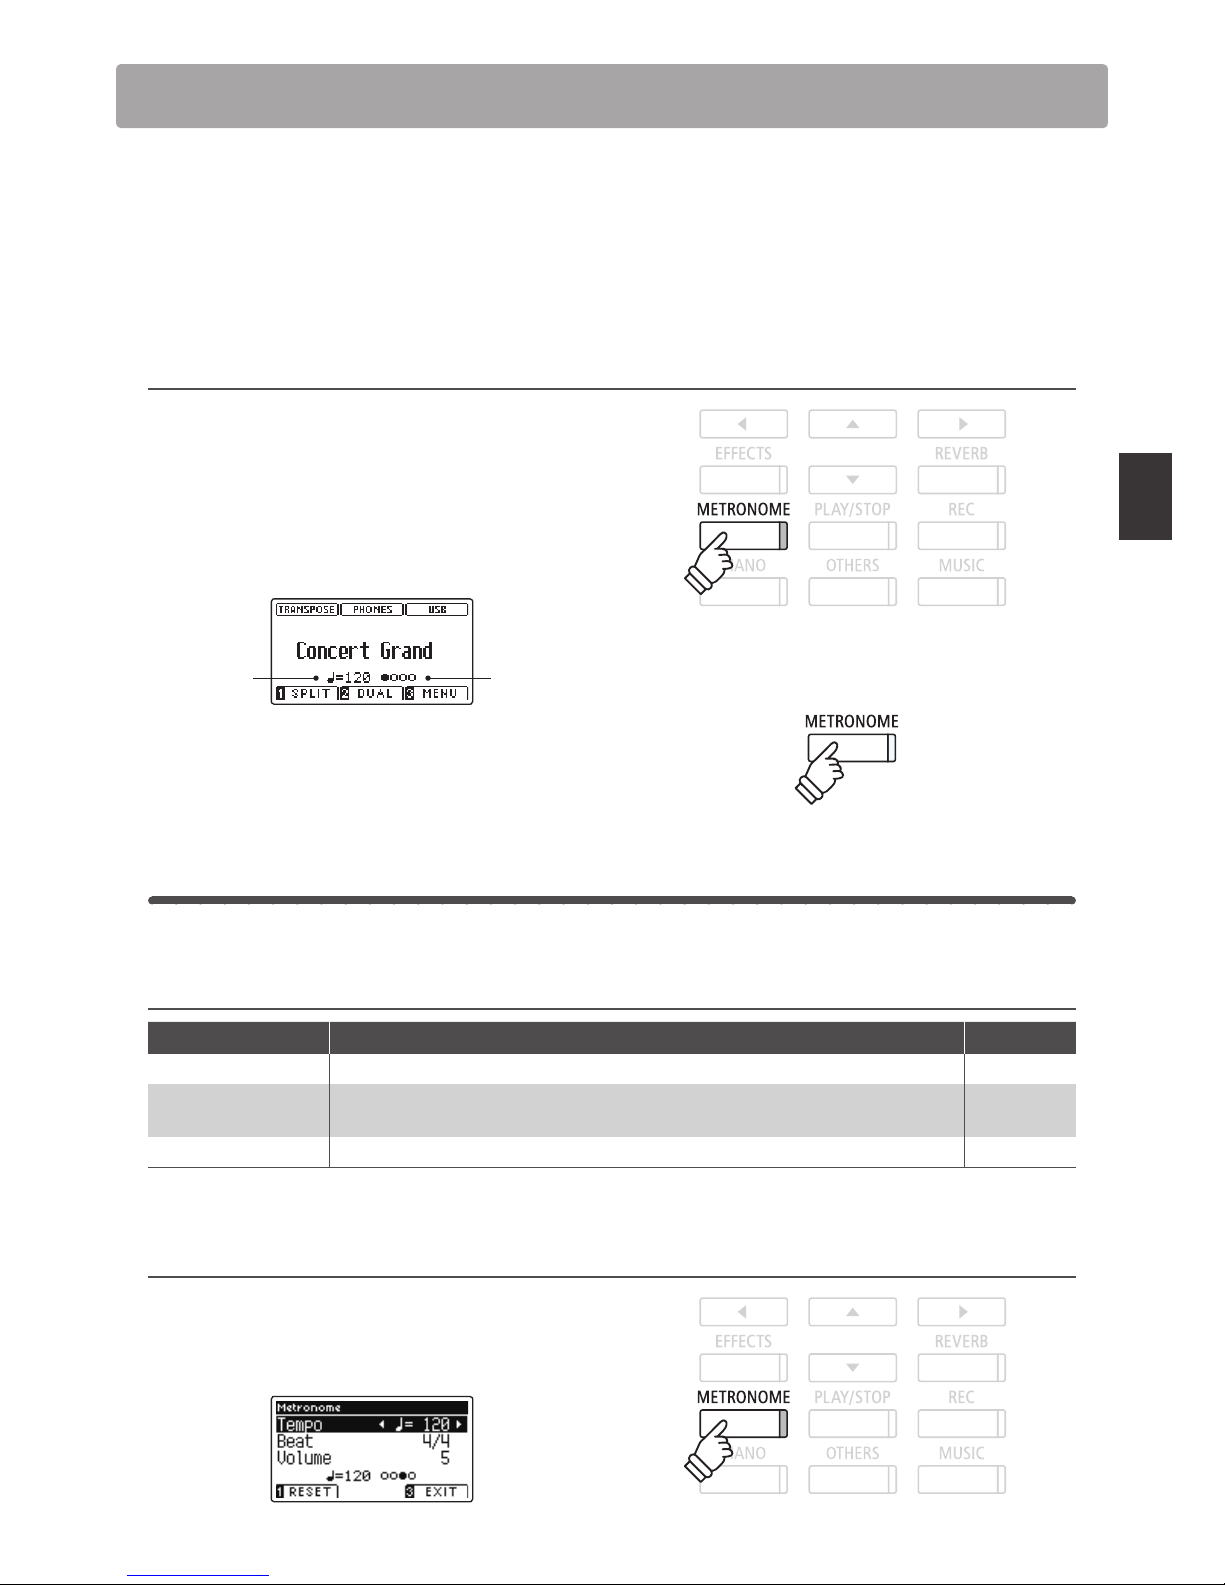
Press the METRONOME button.
The LED indicator for the METRONOME button will turn on to
indicate that the metronome function is in use, and a 1/4 beat
will start to count.
The current metronome tempo in beats per minute (BPM) and
beat of the bar will also be shown in the LCD display.
BeatTem po
Press the METRONOME button again to stop the metronome.
The LED indicator for the METRONOME button will turn o .
Metronome settings
The Metronome settings menu allows the tempo, beat, and volume of the metronome to be adjusted.
Metronome settings
Metronome setting Description Range
Tempo Adjust the tempo of the metronome beat / drum rhythm in beats per minute (BPM). 10 - 400 bpm
Beat
Change the metronome beat (time signature) / drum rhythm.
* There are ten di erent time signature available: 1/4, 2/4, 3/4, 4/4, 5/4, 3/8, 6/8, 7/8, 9/8, and 12/8.
–
Volume Adjusts the volume of the metronome beat / drum rhythm. 1 - 10
Entering the Metronome settings menu
Press and hold the METRONOME button.
The Metronome settings menu will be shown in the LCD
display.
h
ol
d
hold
28
Playing the Piano
Metronome / Drum Rhythms
Adjusting Metronome settings
After entering the Metronome settings menu:
Press the or buttons to move the selection cursor over the
desired setting.
Press the or buttons to adjust the selected setting.
* To reset the current setting to the default value, press the
FUNCTION button (RESET).
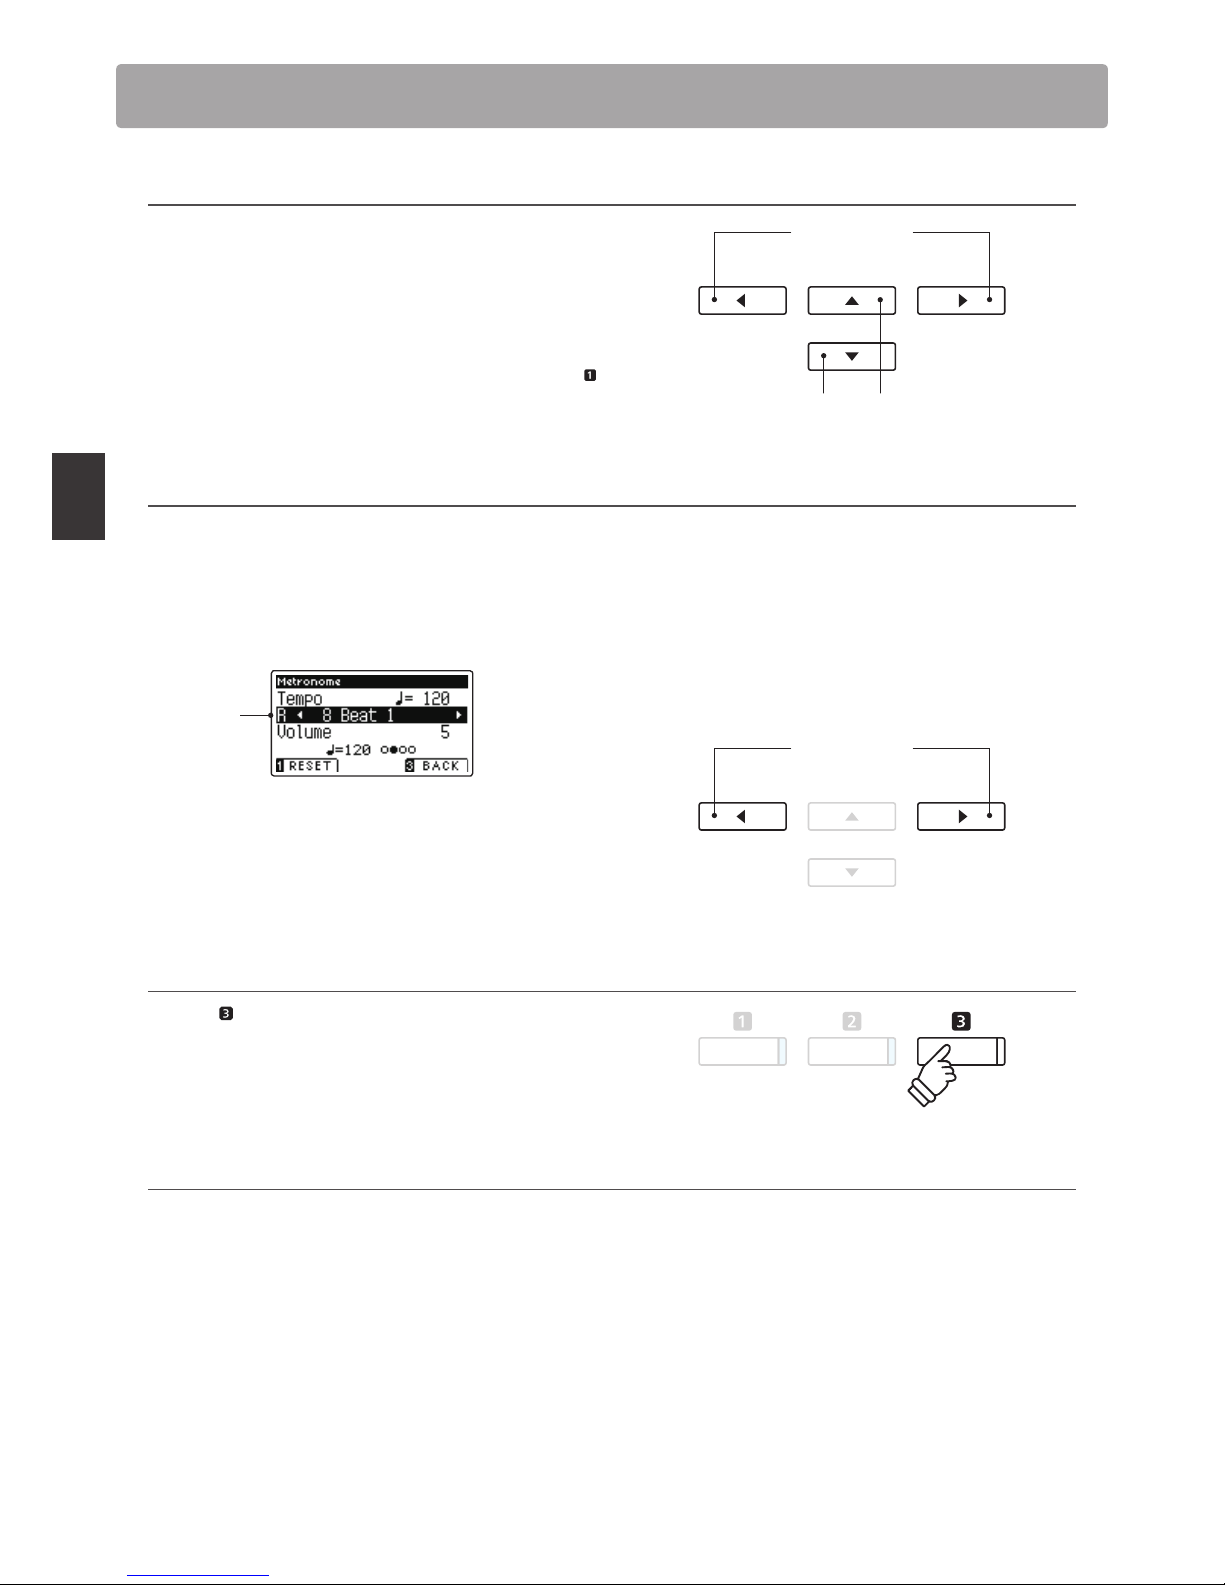
Drum rhythms
As an alternative to the simple metronome count, it is also possible
to select a drum pattern from one of 100 di erent rhythm styles.
Enter the Metronome set tings menu and select the Beat setting.
Press the or buttons to cycle through the available beats
until reaching the ‘8 Beat 1’ drum rhythm.
Drum
rhythm
Continue to press the or buttons to select the desired
drum rhythm.
* For a complete listing of availab le drum rhythms, please ref er to page
116 of this owner’s manual.
Exiting the Metronome settings menu
Press the FUNCTION button (BACK) to exit the Metronome
settings menu.
* Any changes made to the metronome tempo, beat, or volume
settings will remain until the power is turned o .
Recording with the metronome
It is also possible to record songs with the metronome activated. This is useful when recording parts separately, or wishing to
maintain correct timing throughout complex passages. Note that the standard metronome ‘click’ will not be heard when the song
is played back, however if a drum rhythm is selected, the pattern will be heard.
* For more information about the instrument’s Recorder function, please refer to page 38.
buttons:
Move selection cursor.
buttons:
Adjust selected setting.
buttons:
Select drum rhythm.

29
Playing the Piano
Panel Lock
The Panel Lock function allows the state of all panel buttons to be temporarily locked, preventing sounds and other
settings from being changed. This function may prove useful in teaching environments, ensuring that students are
not distracted by changing sounds etc.
1. Activating the Panel Lock
Press the and buttons simultaneously.
The Panel Lock screen will be shown in the LCD display, and the
instrument will stop responding to panel button presses.
2. Deactivating the Panel Lock
While the Panel Lock is activated:
Press and hold the
FUNCTION button (UNLOCK).
A message will be shown in the LCD display to indicate that
the Panel Lock has been deactivated, and the instrument will
resume responding to panel button presses as normal.
* When activated, the Panel Lock will remain until the power is turned
o .
* While Panel Lock is activated, the LED indicators for all buttons will
turn o .
hold
hold

30
Music Menu
Demo Songs
The Demo function provides an excellent introduction to the varied capabilities of AnyTimeX2 piano. There are over
20 di erent demonstration songs available, highlighting the instruments’ rich selection of high quality sounds.
For a complete listing of demonstration songs, please refer to page 113 of this owner’s manual.
Entering Demo mode
Press the MUSIC button.
The LED indicator for the MUSIC button will start to ash, and
the Music Menu will be shown in the LCD display. Demo mode
will be selected automatically.
Press the FUNCTION (ENTER) or PLAY/STOP buttons.
The LED indicator for the PIANO button will start to ash, and
the ‘Concert Grand’ demo song will start to play.
Selecting a demo song
While Demo mode is selected:
Press the PIANO or OTHERS buttons to select a sound category.
The rst demo song of the sound category will start to play.
Press the or buttons to cycle through the di erent sound
categories, and the or buttons to cycle through the demo
songs in the selected sound category.
* When the selected song has nished, the next demo song in the
category will begin to play automatically.
Stopping the demo song and exiting Demo mode
Press the FUNCTION (BACK) or PLAY/STOP buttons while the
song demo is playing.
The LED indicator for the selected SOUND button will stop
ashing, and the song demo will stop playing.
Press the FUNCTION (EXIT) button to exit the Music Menu.
or
buttons:
Select sound category
buttons:
Select demo song
or
 Loading...