

Page 1

KASPERSKY LABS
Kaspersky Inspector 3.5
for Windows
USER GUIDE
Page 2

KASPERSKY INSPECTOR 3.5 FOR WINDOWS
User
Guide
Kaspersky Labs Ltd.
Tel. +7(095)797-87-00 • Fax +7(095)948-43-31
Visit our WEB site:
http://www.kaspersky.com/
Page 3

Contents
1. Kaspersky Inspector for Windows ....................... 8
1.1. Features and function............................................. 8
1.2. Features of Kaspersky Inspector™ under
MS Windows NT ................................................................ 10
1.3. New features of Kaspersky Inspector 3.5 ......... 10
1.4. Distribution kit ....................................................... 11
1.4.1. What is in your KAV distribution kit ........... 11
1.4.2. License agreement........................................ 11
1.4.3. Registration card ........................................... 12
1.5. Help desk for registered users ............................ 12
1.6. Information in the book ....................................... 13
2. Installing Kaspersky Inspector ........................... 14
2.1. Software and hardware requirements ............... 14
2.2. Running setup wizard........................................... 15
2.2.1. Installing
2.2.2. Reinstalling..................................................... 25
2.2.3. Removing........................................................ 27
2.3. The .KEY File.......................................................... 30
......................................................... 15
3. The program’s Operation Concept ..................... 31
3.1. Checks that Kaspersky Inspector performs ...... 32
3.2. Analysing changes on your disk.......................... 33
3.3. Searching for stealth viruses............................... 35
3
Page 4

3.4. Deleting viruses using KAVI Cure Module™ ......36
3.4.1. KAVI Cure Module for Windows ..................36
3.4.2. KAVI Cure Module for DOS32 ......................37
3.5. Checking the OS parameters during the boot
(the KAVIBOOT.VXD driver).............................................38
4. Kaspersky Inspector Interface.............................39
4.1. Main window...........................................................39
4.2. Menu-bar.................................................................41
4.3. Tool-bar...................................................................42
4.4. Icon-bar...................................................................44
4.5. Work-area ...............................................................45
4.6. Status-bar ...............................................................46
4.7. Interface elements for programm settings........46
4.7.1. Settings’ tree
..................................................47
4.7.2. Controls ...........................................................47
4.7.3. Control indicators...........................................51
5. Starting Kaspersky Inspector............................... 54
5.1. How to start the program.....................................54
5.1.1. Starting the program using the MS Windows
Start menu ......................................................................54
5.1.2. Starting Kaspersky Inspector from the
command line.................................................................55
5.1.3. Starting Kaspersky Inspector using Control
Centre 59
5.2. Starting the program the first time.....................59
5.3. Starting to check for changes on your disk.......60
5.3.1. Checking for changes on the disk ...............60
5.3.2. Creating new tables.......................................60
5.4. Starting to search for stealth viruses..................61
6. Customising Kaspersky Inspector.......................63
4
Page 5

6.1. The Options work-area: Selecting general
options ................................................................................ 63
6.1.1. Using the wizard to define general settings
64
6.1.2. Defining the location of working files and
folders. Check modes ................................................... 69
6.1.3. File check parameters .................................. 71
6.1.4. These checks can be disabled..................... 78
6.1.5. Selecting options for Cure Module ............. 79
6.1.6. Selecting options for the anti-virus scanner
81
6.1.7. Selecting options for the performance report
82
6.2. The Objects work-area: Selecting options for
every drive to be checked................................................ 84
6.2.1. Defining check parameters for hard,
network and logical drives........................................... 84
6.2.2. Defining how to access a drive................... 85
6.2.3. Items to be checked on the drive............... 87
6.2.4. Defining how to calculate CRC values ....... 87
6.2.5. Checking for stealth viruses ........................ 88
6.2.6. Advanced settings......................................... 89
6.3. Saving and loading settings................................. 89
7. Viewing Check Results............................................ 91
7.1. The Statistics work-area: Viewing Kaspersky
Inspector performance statistics .................................... 91
7.2. The Disks work-area: Viewing changes detected
92
7.3. The Disks work-area: Working with modifications
detected.............................................................................. 95
7.4. The Disks work-area: Master Boot Record details
98
5
Page 6

7.5. The Disks work-area: Boot Record details.........99
7.6. The Registry work-area: Viewing modifications in
registry files ......................................................................101
7.7. Disks and Registry work-areas:
Allowing/prohibiting to change KAVI tables ................104
8. Running KAVI Cure Module for DOS32 ...........106
8.1. KAVI Cure Module for DOS32 ............................106
8.2. Launching KAVI Cure Module for DOS32.........107
8.3. Creating Cure diskette ........................................108
9. Messages about Suspicious Changes............... 110
9.1. Messages: when the check is completed.........110
9.1.1. Boot or Master Boot record changed........112
9.2. New bad clusters appeared................................113
9.3. Stealth virus detected .........................................113
9.4. Troubleshooting ...................................................115
10. Warnings and Error Messages........................116
10.1. Messages: launching or running Kaspersky
Inspector ...........................................................................118
10.2. Messages: checking Master Boot and Boot
records 119
10.3. Messages: checking debug registers ............119
10.4. Messages: launching Kaspersky Inspector ..120
10.5. Messages of the KAVIBOOT.VXD driver.......121
11. Kaspersky Labs Ltd.............................................125
11.1. About Kaspersky Labs.....................................125
11.2. Other Kaspersky Labs Products....................126
11.3. Kaspersky Labs Contact Information............131
6
Page 7

Dear Customer,
Thank you for choosing Kaspersky Anti-Virus to protect your computer
from viruses. We have worked hard to make this product meet the
highest possible standards and feel sure that you will find it efficient and
effective. By choosing our software, you acquire the unbeatable
protection against viruses.
Our company always seeks to make the software products more friendly
and easy-to-use while keeping their functionality at the same level.
Kaspersky Anti-Virus provides its users with the highly reliable anti-virus
protection, heuristic code-analyser, ability to check for viruses in all the
commonly used mail formats and compressed files, easy-to-use anti-
virus managing tools. Furthermore the user is provided with round-the-
clock technical support, information service, personal attention to every
client and immediate response to new viruses.
We highly appreciate your confidence in our product and hope you'll find
it fairly efficient and useful.
Kaspersky Labs
7
Page 8

Chapter
1
1. Kaspersky Inspector for
Windows
What is Kaspersky Inspector for Windows?
Distribution kit.
1.1. Features and function
Kaspersky Inspector™ (KAVI) is an integrity checker running
under Microsoft Windows 95/98/ME
NT/2000
Kaspersky Inspector checks disks for modifications in files and
directories. The program can be used as a supplementary anti-virus
program to monitor changes on the disk.
The program reduces the time you need to check your computer
using the KAV scanner, since now, your Kaspersky Inspector will
provide the scanner with information about the files that have been
changed or created, and the scanner will check for viruses in those
files only.
®
.
8
®
or Microsoft Windows
Page 9

KASPERSKY ANTI-VIRUS
While checking for changes on your disk the program collects the
data and saves it to the table. This table contains images of your
Master Boot and Boot records, the list of bad clusters, the schema
of your directory tree and information about every controlled file.
Kaspersky Inspector accesses your disks directly via the IOS
(Input-Output Supervisor) driver without using the conventional
methods (the 21h and 13h interrupts). This feature allows the
program to detect and kill even the most dangerous stealth viruses
that settle themselves in the computer memory and process those
vital for your computer interruptions.
Besides, Kaspersky Inspector remembers and, when started again,
checks the size of available DOS memory (most boot viruses
change the size of random access memory), and the quantity of
hard drives installed.
The main features of Kaspersky Inspector are the following:
accesses the disks directly via the IOS (Input-Output
Supervisor) driver, bypassing DOS resident viruses (boot
viruses in particular, since they intercept the 13h interruption
when the computer is booted).
allows to recover boot sectors on the disks.
allows to check network and compressed drives.
allows to read FAT12, FAT16, VFAT32, NTFS file systems
without using the corresponding OS functions.
analyses files while searching for the identical change in their
sizes.
processes OLE2 documents (the Word, Excel and Access
documents).
allows to recover DOS and Windows 95/98/NT executable files
(KAVI Cure Module provides this possibility).
9
Page 10

KASPERSKY INSPECTOR
allows to detect stealth viruses in the wild.
1.2. Features of Kaspersky
Inspector™ under
MS Windows NT
Due to architectural features of Microsoft Windows NT®, while
running in this environment Kaspersky Inspector does not check:
• debug registers;
• size of the available DOS memory.
Other functions of Kaspersky Inspector are performed under
Microsoft Windows in corpora.
1.3. New features of Kaspersky
Inspector 3.5
In this version we introduce new user interface
(see chapter Ошибка! Источник ссылки не найден.). This
interface solution allows you to understand more clearly both the
hierarchy of general settings (see subchapter 6.1) and the hierarchy
of settings for various drive types (see subchapter 6.2).
10
Page 11

KASPERSKY ANTI-VIRUS
1.4. Distribution kit
1.4.1. What is in your KAV distribution kit
Your KAV distribution kit contains the following items:
• license agreement;
• sealed envelope with diskettes (or CD) containing the
program installation files;
• Kaspersky Inspector 3.5 User Guide;
• registration card.
Before you unseal the envelope with diskettes (or CD)
make sure to review thoroughly the license agreement.
1.4.2. License agreement
License Agreement is a legal agreement between you (either an
individual or a single entity) and the manufacturer (Kaspersky Labs
LTD) describing the terms on which you may employ this anti-virus
product.
Make sure to peruse this LA!
If you do not agree to terms of this LA, Kaspersky Labs is not willing
to license the software product to you and you should return the
unused product to your KAV dealer for a full refund, but make sure
the envelope with CD (or diskettes) is sealed.
11
Page 12

KASPERSKY INSPECTOR
IF YOU UNSEAL THE ENVELOPE IT MEANS THAT YOU
AGREED TO ALL THE LA TERMS.
1.4.3. Registration card
To register you must fill the detachable coupon of your registration
card (your full name, phone and e-mail address) and mail it to the
Kaspersky Labs legal dealer that sold this kit to you.
If your mail/e-mail address or phone number changed please notify
the entity to which you mailed the coupon.
When registered you obtain the status of Kaspersky Labs legal
customer and will be provided with the product support and antivirus database updates for the period of your subscription.
Furthermore Kaspersky Labs provides Kaspersky Anti-Virus
registered users with information about the new products released
by the company.
1.5. Help desk for registered
users
Kaspersky Labs offers a large service package enabling its legal
customers to employ Kaspersky Inspector efficiently.
If you register and purchase a subscription you will be provided with
the following services for the period of your subscription:
• anti-virus database WEEKLY updates;
• new versions of the Kaspersky Labs anti-virus software
provided on the FREE basis;
12
Page 13

KASPERSKY ANTI-VIRUS
• PHONE, E-MAIL or IN-OFFICE advising on matters
related to the operation of our anti-virus software;
• information about the Kaspersky Labs new products
and about new computer viruses.
For more information about our services refer to your
README.TXT.
Kaspersky Labs does not provide information related to
operation and use of your operation system, and various
technologies.
1.6. Information in the book
This book contains information on how to install, customise and
manage the software product, explains its basic concepts and the
way they can be applied, recommends how to manage and change
settings.
13
Page 14

Chapter
2
2. Installing Kaspersky
Inspector
Installing the program.
The KEY file.
2.1. Software and hardware
requirements
In order to install Kaspersky Inspector you need a system that
meets the following requirements:
• IBM PC (or 100% compatible computer) with the MS
Windows
it;
• minimum 16Mb of RAM (32 Mb is advisable) for
Windows
is advisable) for Windows NT
• minimum 5 Mb of free space on the hard disk.
®
95/98/NT operation system pre-installed on
®
95/98, and minimum 32 Mb of RAM (64 Mb
14
®
;
Page 15
KASPERSKY ANTI-VIRUS
2.2. Running setup wizard
2.2.1. Installing
To install the Kaspersky Inspector program on your
file server, follow the steps:
1. Insert the supplied CD into the CD-ROM drive of your
computer.
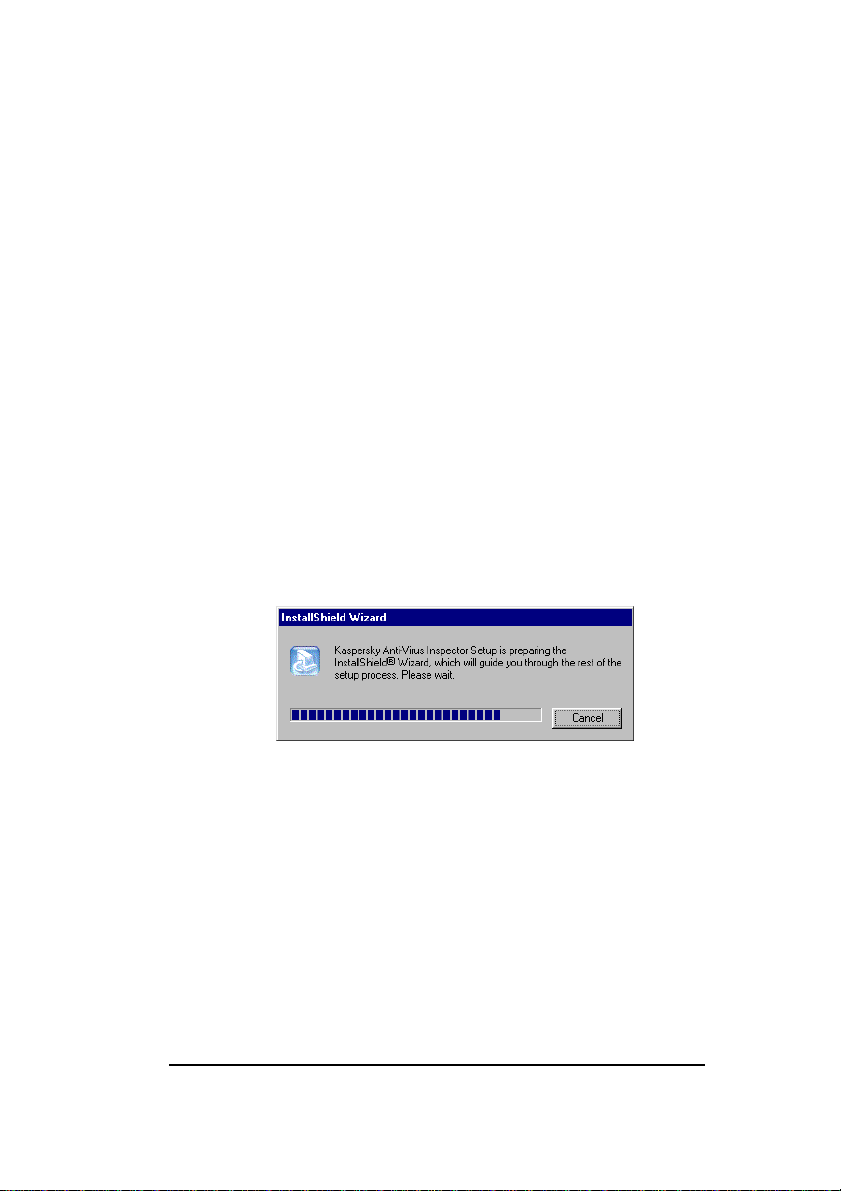
2. Start the Setup wizard program - setup.exe.
3. The Setup wizard will start (figure 1 and 2). Follow
instructions on your screen.
Figure 1. The InstallShield Wizard progress box
15
Page 16

INSTALLING KASPERSKY INSPECTOR
Figure 2. The Welcome wizard window
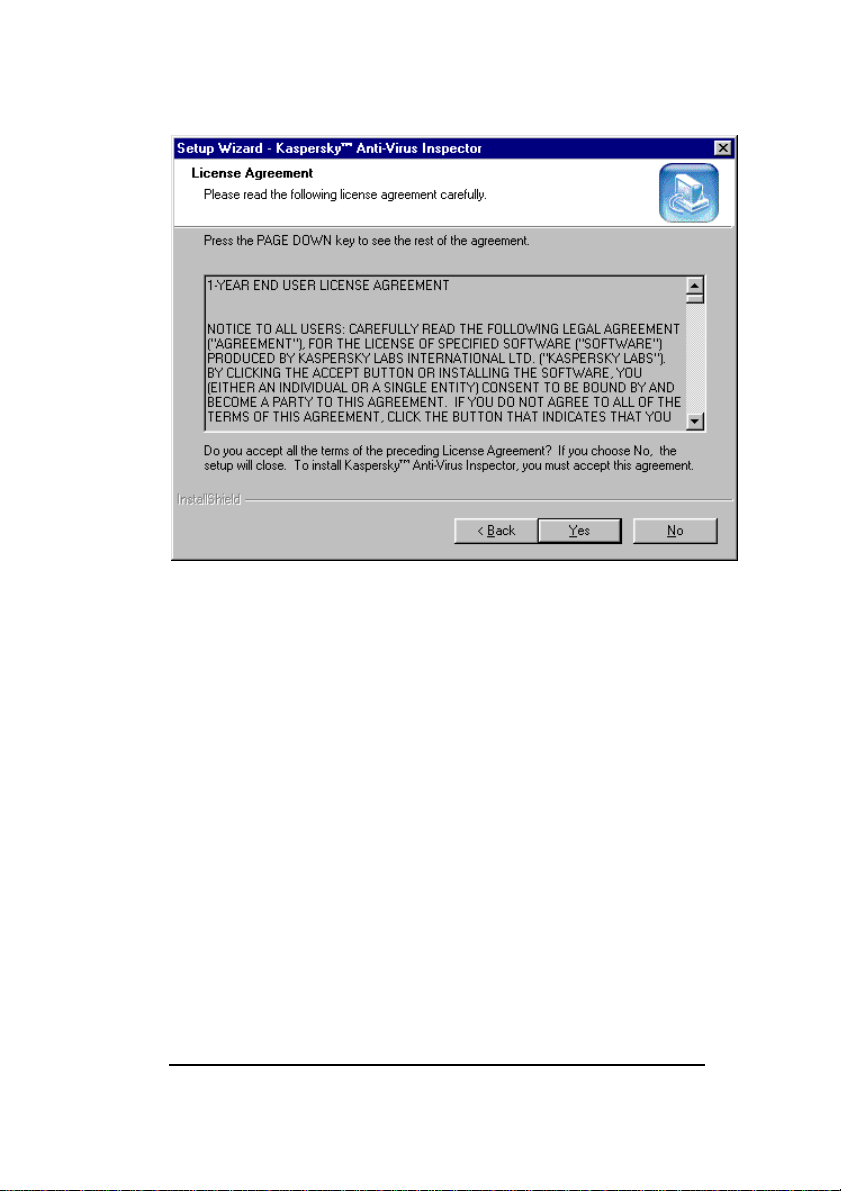
4. Read the window message and click the Next button
to continue the installation. The License Agreement
wizard window will appear on your screen (figure 3).
16
Page 17
KASPERSKY ANTI-VIRUS
Figure 3. The License Agreement wizard window
5. Review all the agreement terms. If they are
acceptable click the Yes button to continue the
installation. Click No to abort the installation if the
terms are not acceptable. If you accepted the terms,
the Customer Information wizard window will appear
on your screen (figure 4).
17
Page 18
INSTALLING KASPERSKY INSPECTOR
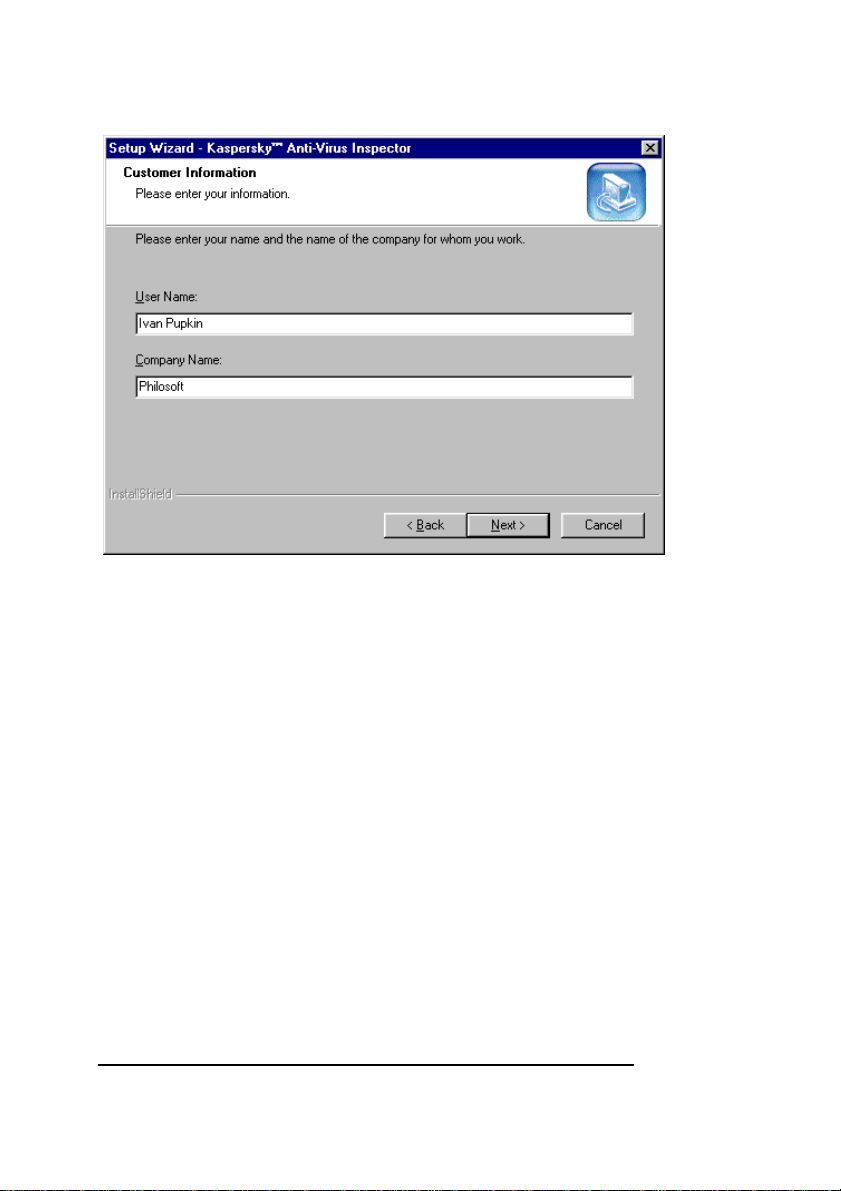
Figure 4. The Customer Information wizard window
6. Enter your name and your company name into the User
Name and Company Name text fields. Then click the Next
button. The Choose Destination Location wizard window will
appear on your screen (figure 5).
18
Page 19
KASPERSKY ANTI-VIRUS
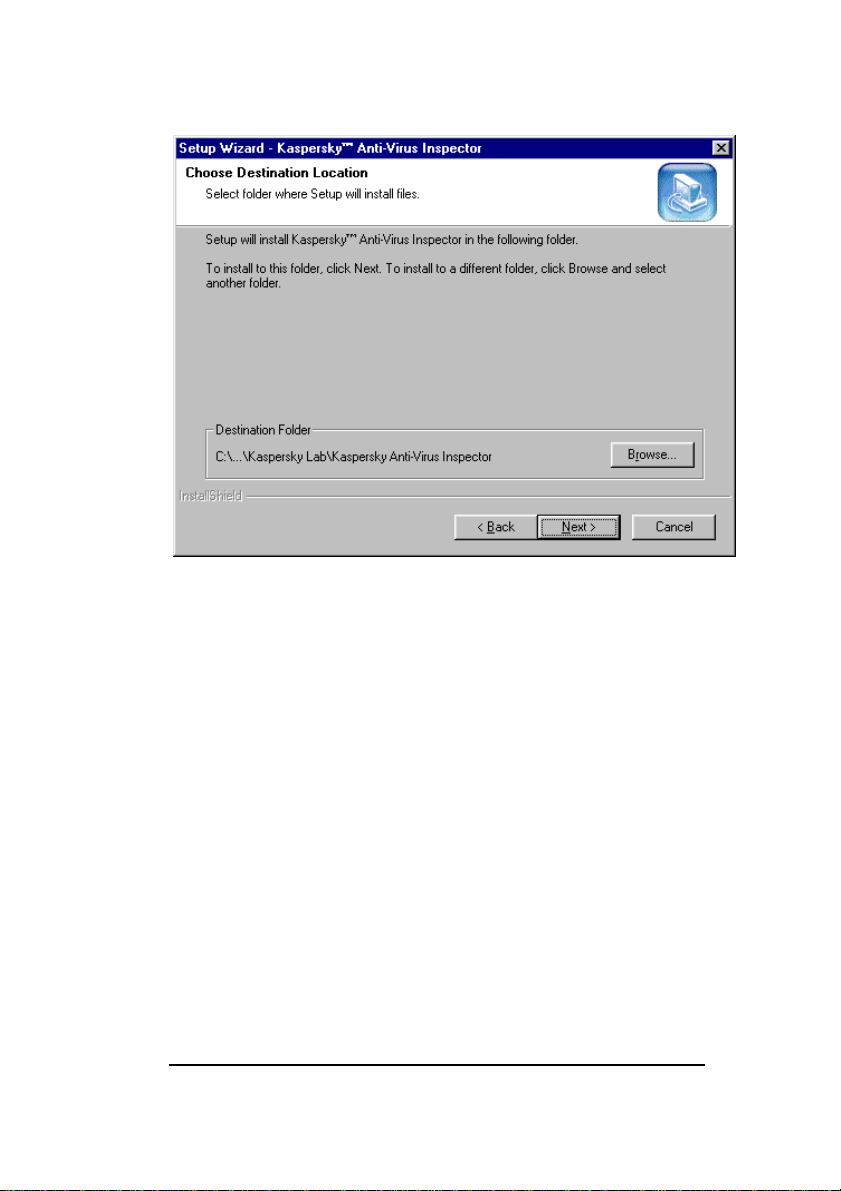
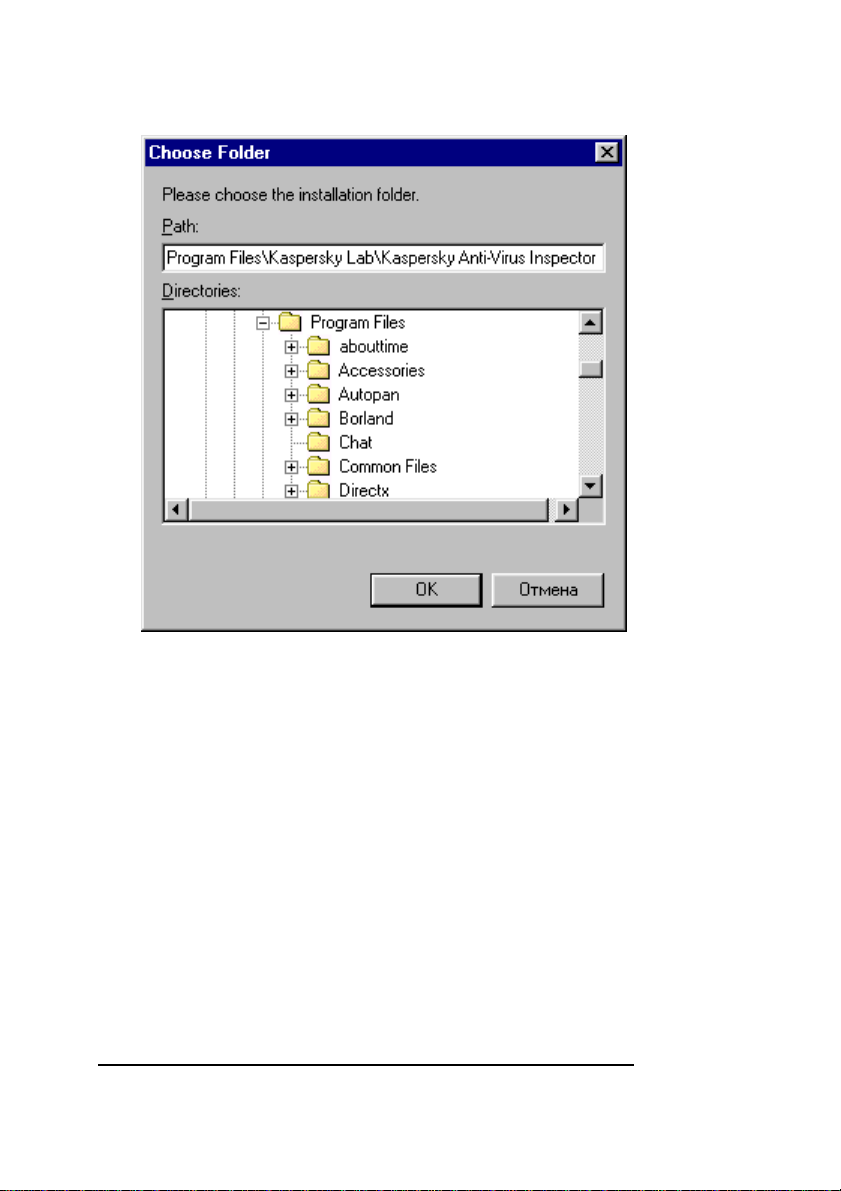
Figure 5. The Choose Destination Location wizard window
7. In this window you must select the destination location
for your Kaspersky Inspector software to be installed
into:
• Click the Browse button and use the
Choose Folder wizard window (figure 6) to
choose the folder.
• Click ОК.
• In the Choose Destination Location wizard
window click the Next button to continue the
installation.
19
Page 20
INSTALLING KASPERSKY INSPECTOR
Figure 6. The Choose Folders wizard window
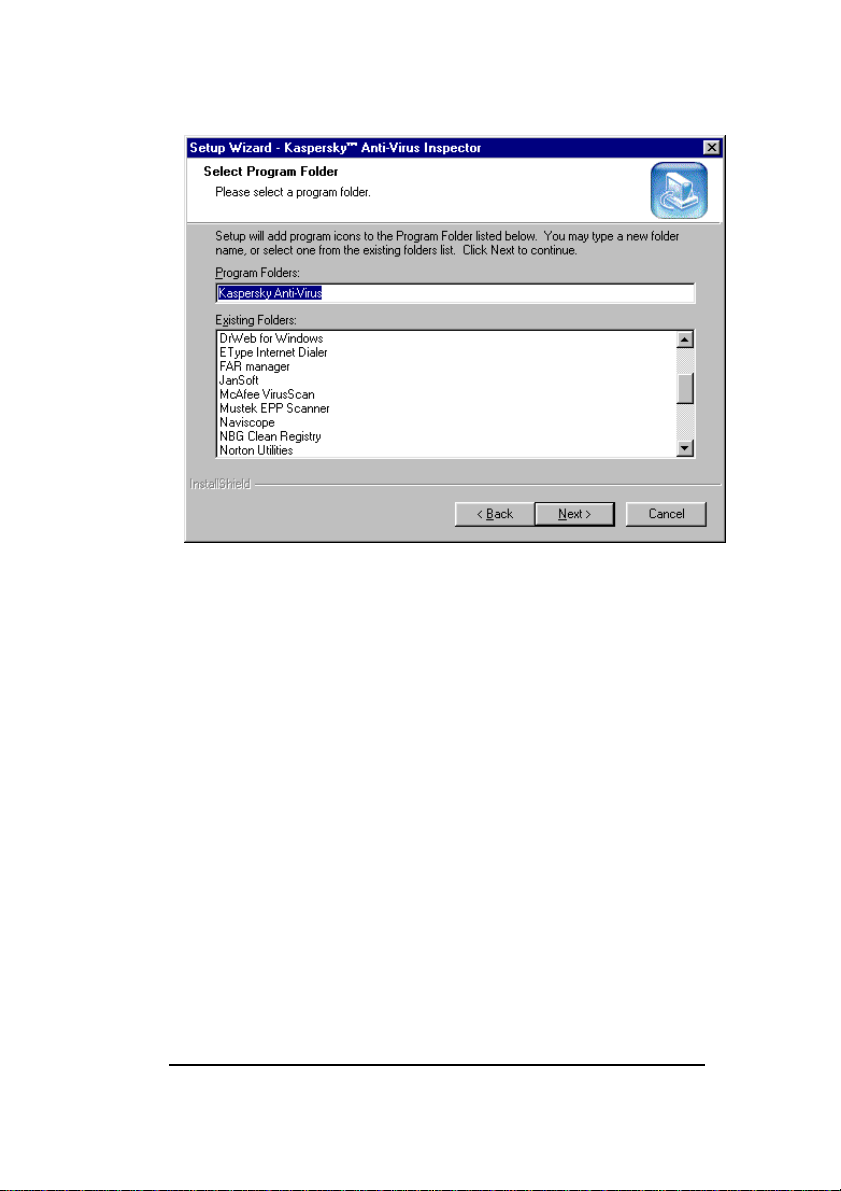
8. In the Select Program Folder wizard window
(figure 7) you must select the Kaspersky Inspector
program group in the Windows Start menu. When
done, click the Next button to continue the installation.
20
Page 21
KASPERSKY ANTI-VIRUS
Figure 7. The Select Program Folder wizard window
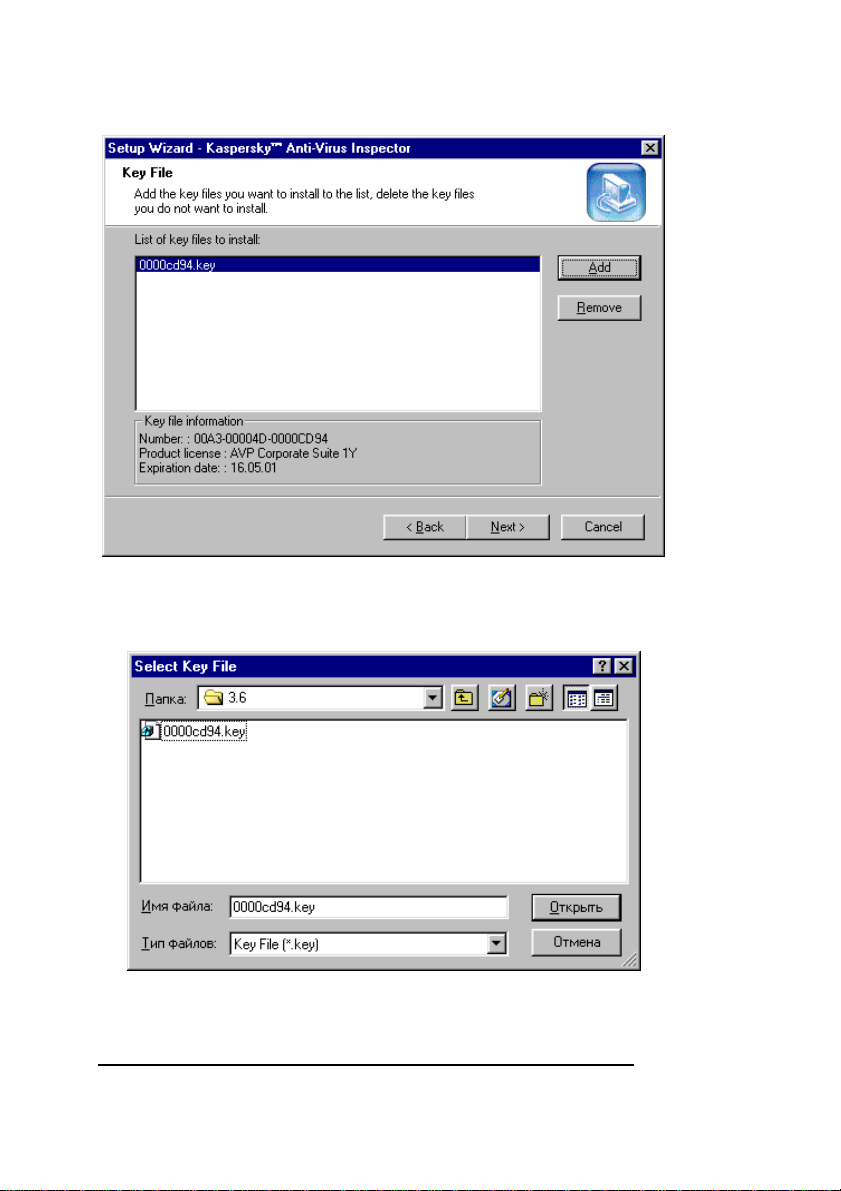
9. In the Key File wizard window (figure 8) you must
choose the name of your key file (see subchapter 2.3)
and the path to it. If the file is located in the folder you
are installing from, it will be displayed in the List of
key files to install list. If the file is located in some
other folder, click the Add button and select your file
in the Select Key File wizard window (figure 9). If
necessary, you can use more than one key file at a
time. After you specified all the key files that you want
to install, press the Next button to continue the
installation.
21
Page 22
INSTALLING KASPERSKY INSPECTOR
Figure 8. The Key File wizard window
Figure 9. The Select Key File wizard window
22
Page 23
KASPERSKY ANTI-VIRUS
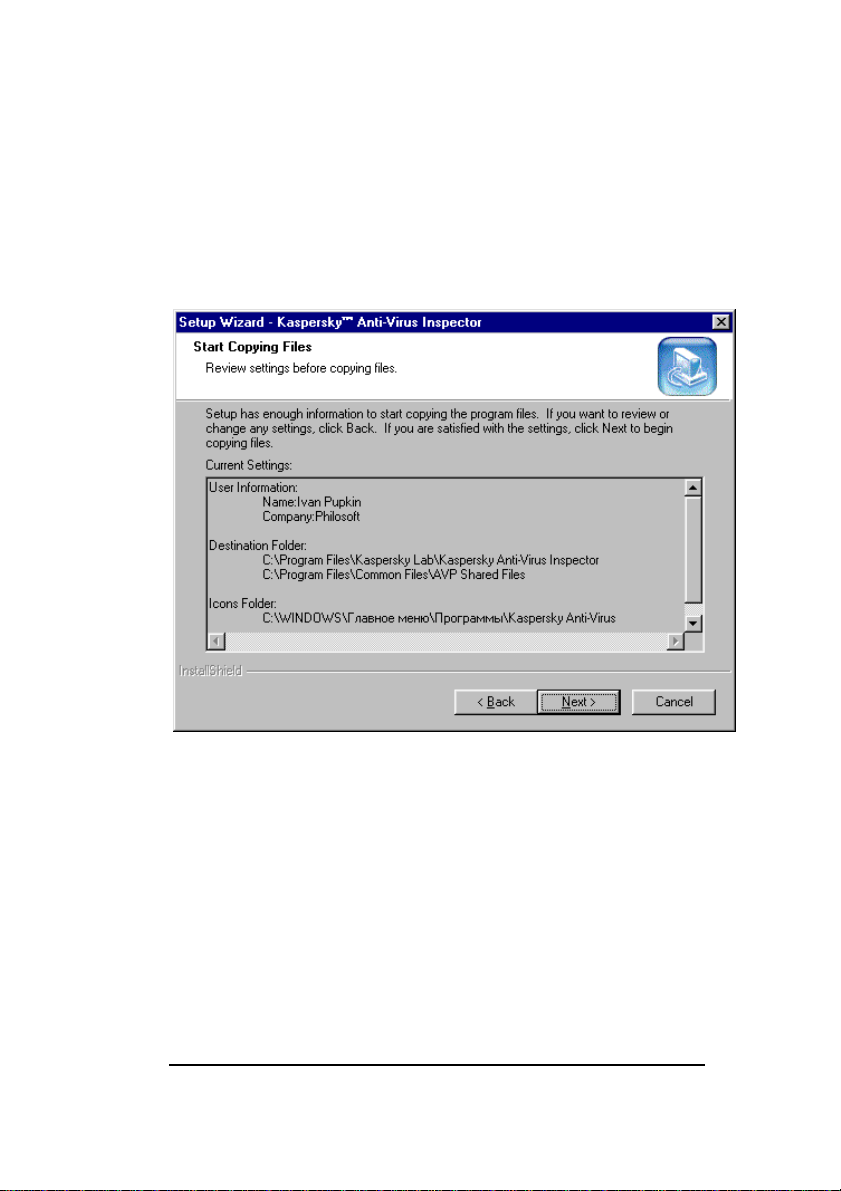
10. In the Start Copying Files wizard window (figure 10)
on your screen review and check current settings of
your Setup wizard. Click Next for the Setup wizard to
start copying files on your server, and then wait a
minute or two while the installation proceeds
(figure 11).
Figure 10. The Start Copying Files wizard window
23
Page 24
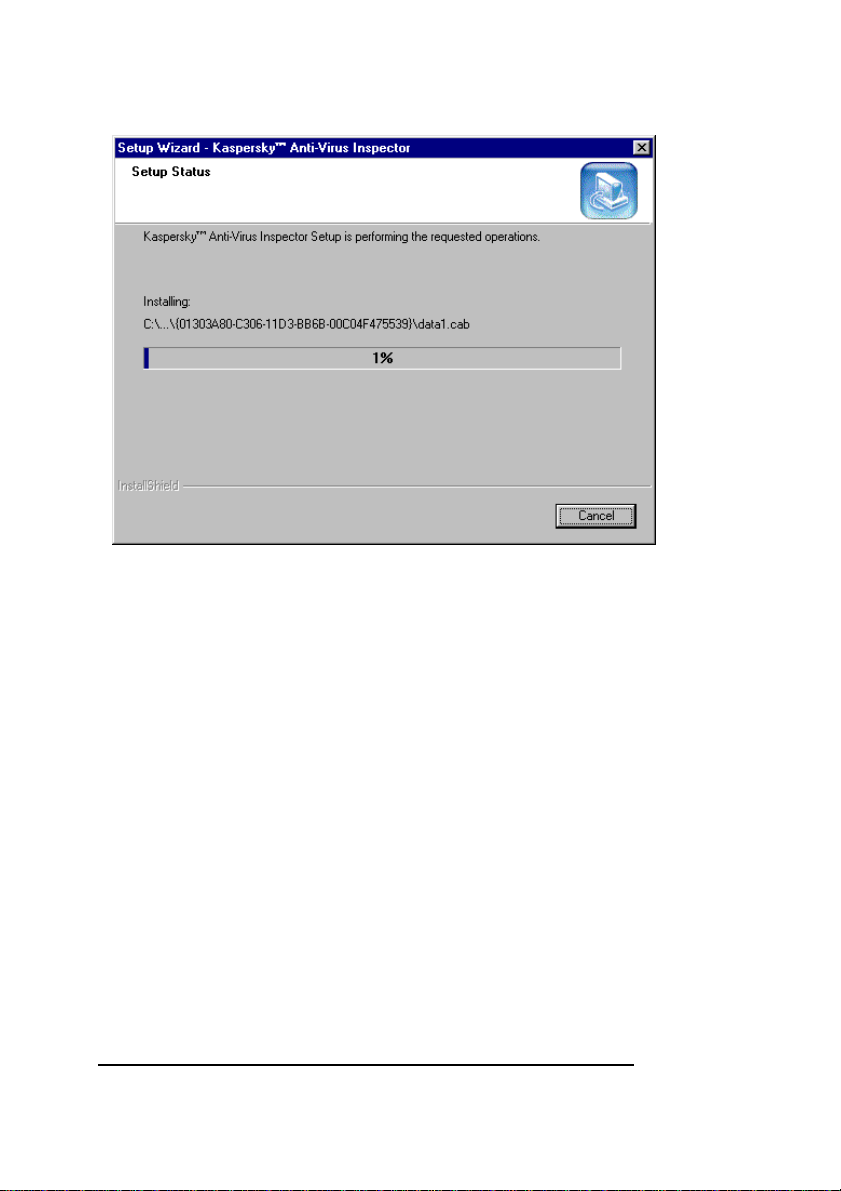
INSTALLING KASPERSKY INSPECTOR
Figure 11. The Setup Status wizard window
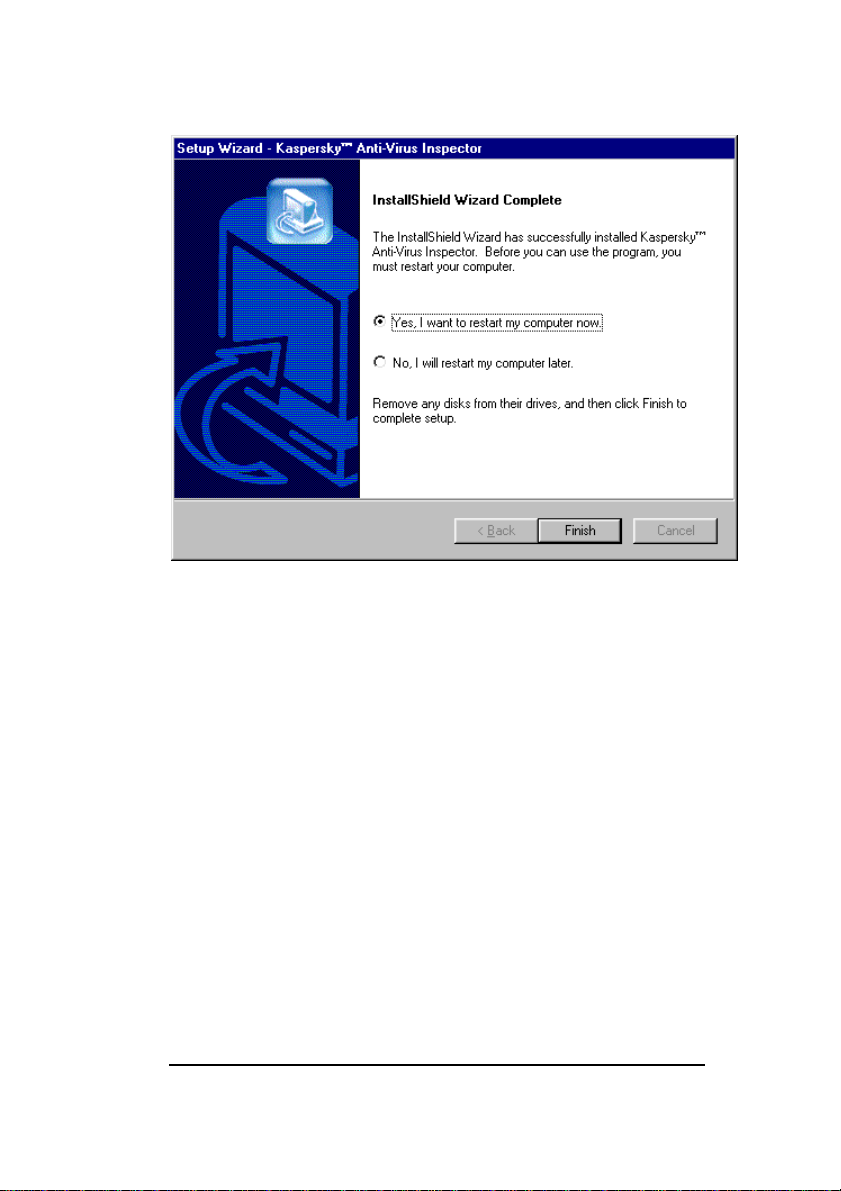
11. After the Kaspersky Inspector software has been
copied to your hard disk the InstallShield Wizard
Complete (figure 12) wizard window will be displayed.
For the software to be correctly installed on your
computer, check the Yes, I want to restart my
computer now check box and click the Finish button.
Before you click the Finish button, make sure to exit all
Windows applications that are currently running.
24
Page 25
KASPERSKY ANTI-VIRUS
Figure 12. The InstallShield Wizard Complete wizard window
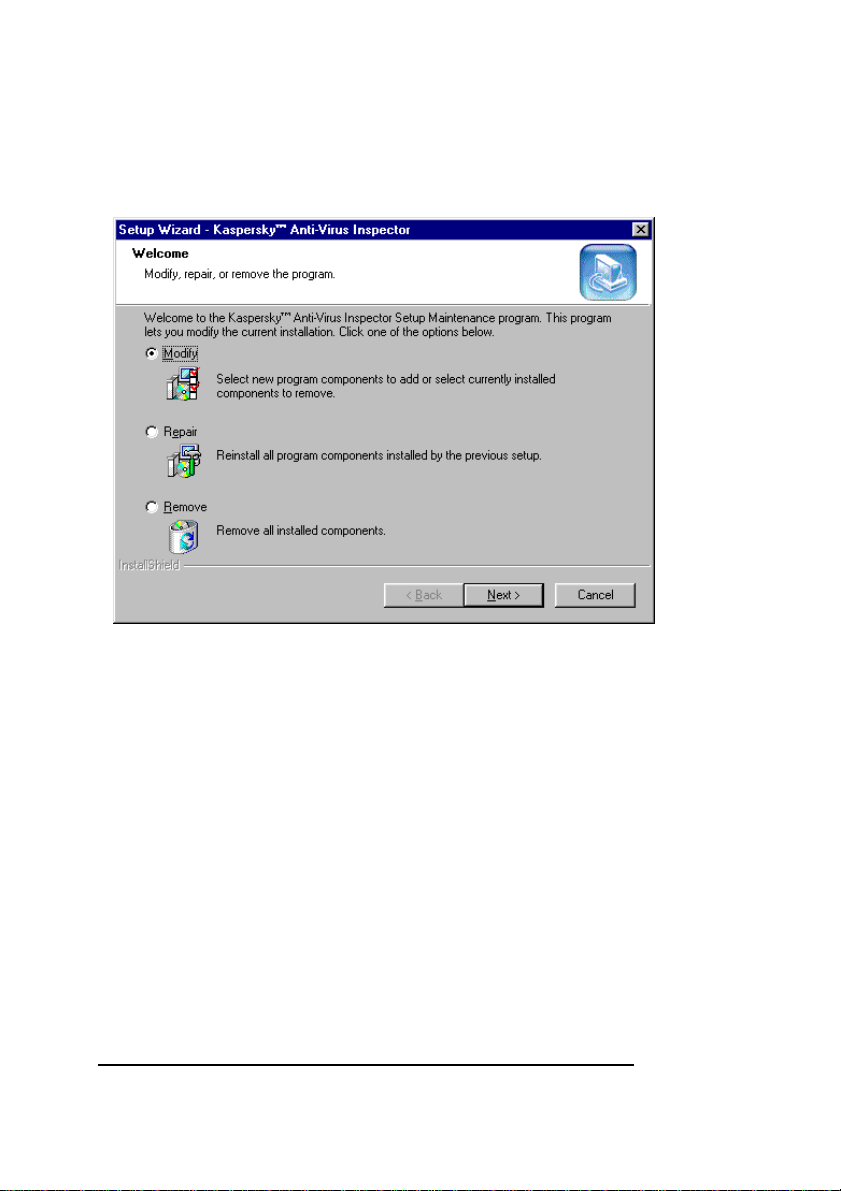
2.2.2. Reinstalling
If when running the installation wizard finds a copy of Kaspersky
Inspector on your computer, the Welcome wizard window
(figure 13) with the following option buttons will appear on your
screen:
• Modify — adds new components to the package
components that have been installed on your computer
before.
• Repair — reinstalls all the package components.
• Remove — removes the Kaspersky Inspector copy
from your computer (see subchapter 2.2.3).
25
Page 26
INSTALLING KASPERSKY INSPECTOR
To select one of the options you must enable the corresponding
option button and click the Next button.
Figure 13. The Welcome wizard window
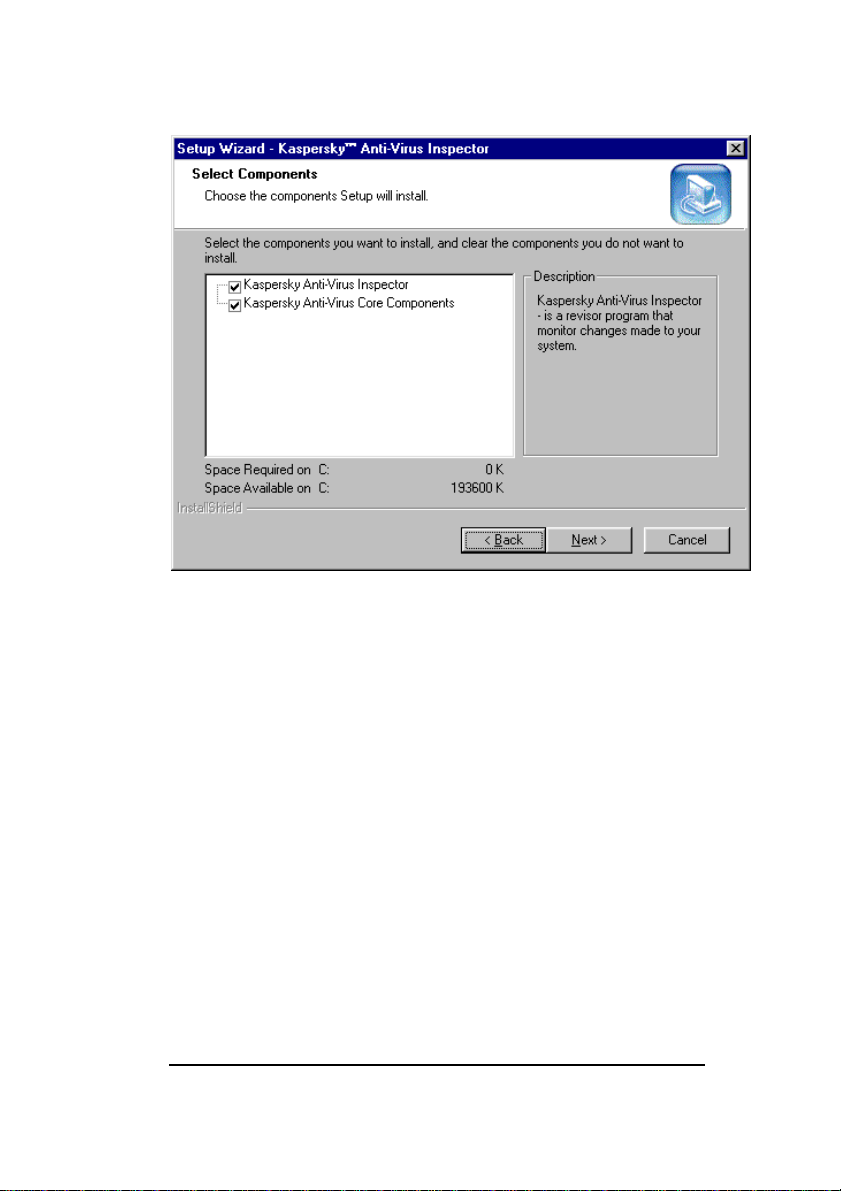
If you selected to Modify the installed package and clicked the
Next button the Select Components wizard window (figure 14)
allowing you to choose exactly which components to install will
appear on your screen.
Select the components by checking the appropriate check boxes
and click the Next button. The following wizard windows will appear
on your screen one after another: Setup Status (see figure 11)
and InstallShield Wizard Complete (see figure 12). To move
from one wizard window to another click the Next button.
26
Page 27
KASPERSKY ANTI-VIRUS
Figure 14. The Select Components wizard window
If you selected to Repair the installed package and clicked the
Next button the Setup Status (see figure 11) and InstallShield
Wizard Complete (see figure 12) will appear on your screen one
after another. You can choose this mode if you accidentally deleted
some files belonging to Kaspersky Inspector
2.2.3. Removing
If by some reasons you want to remove Kaspersky Inspector from
your computer, select the Remove option button in the Welcome
wizard window (see figure 13) and click the Next button.
The wizard window asking you to confirm the removal (figure 15)
will appear on your screen. To start the process click the ОК button
27
Page 28
INSTALLING KASPERSKY INSPECTOR
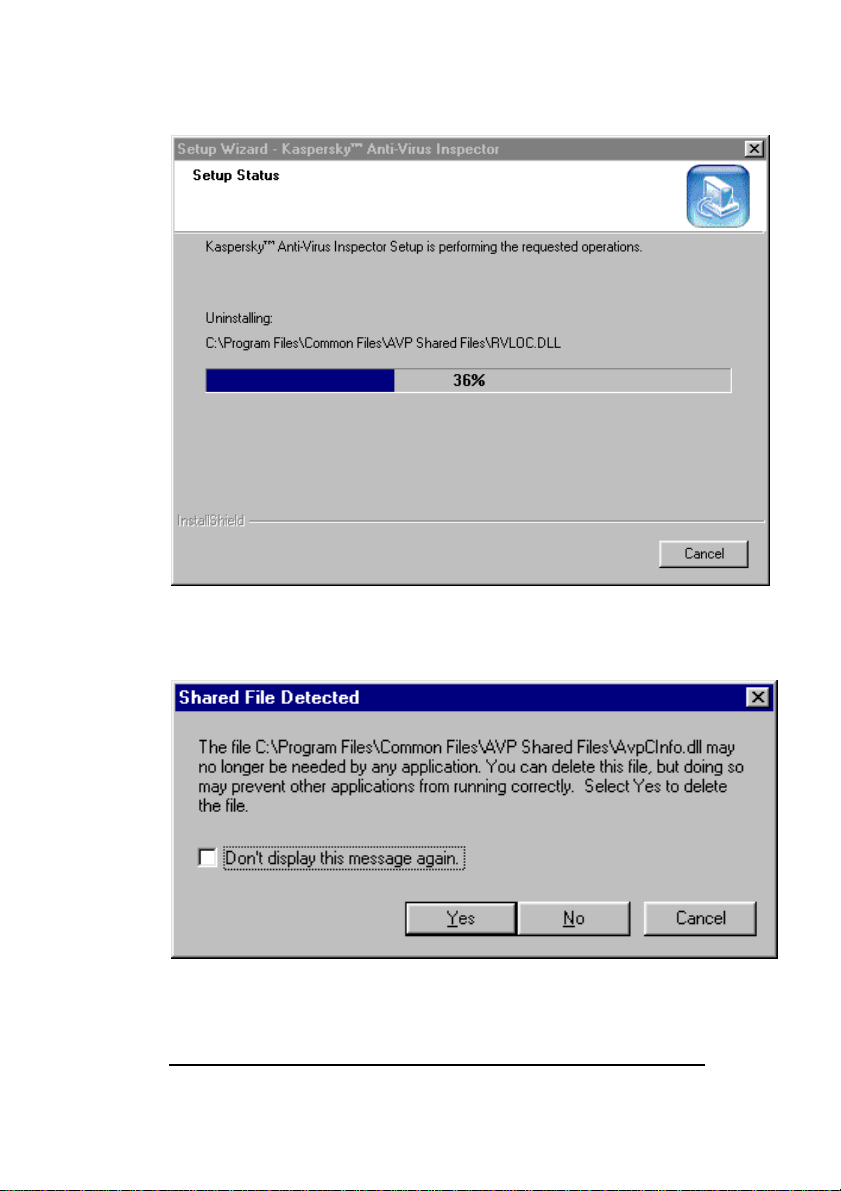
in this window. The installation wizard will start removing files of
Kaspersky Inspector from your hard drive (figure 16).
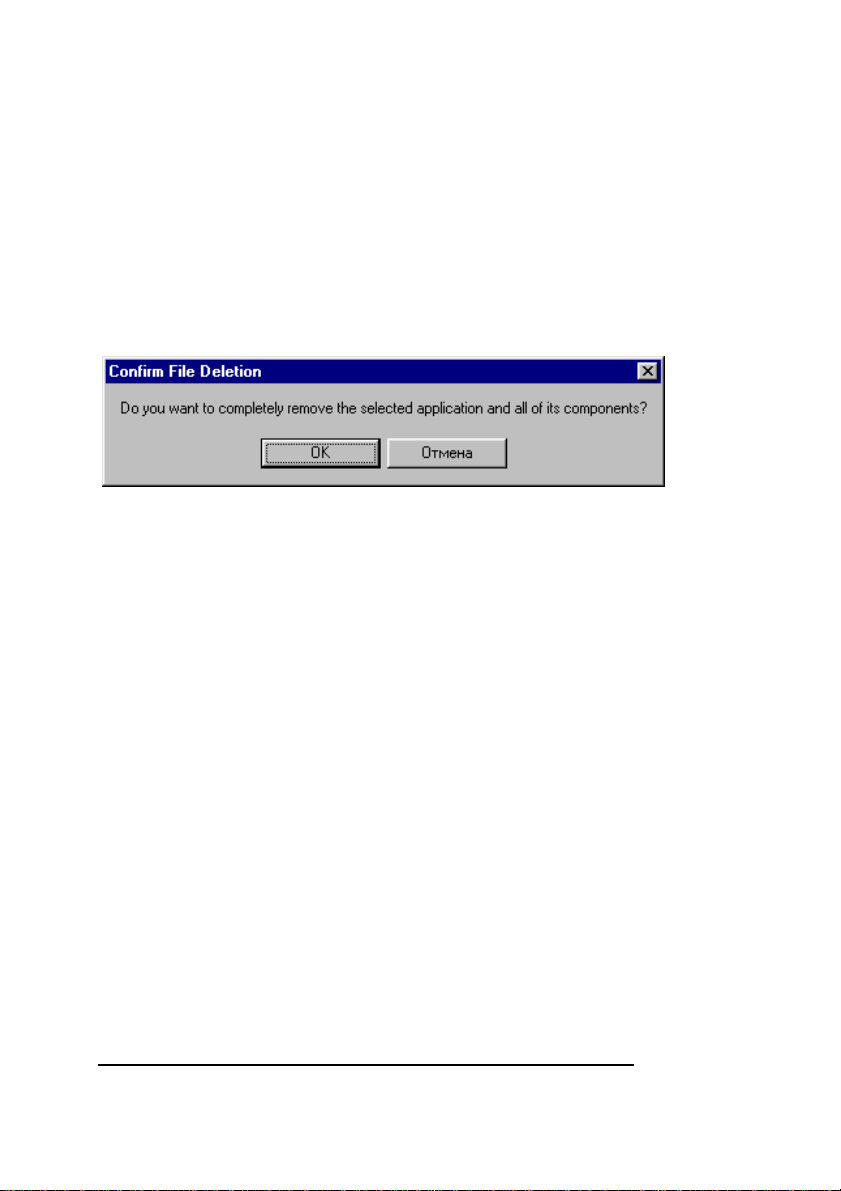
If during the process of removal the wizard detects a file that can be
used by some other program on your computer, the wizard window
asking you to confirm deletion of this file will appear on your screen
(figure 17). To delete the given file click the Yes button in the
window.
Figure 15. The wizard window asking to confirm the program
removal
28
Page 29
KASPERSKY ANTI-VIRUS
Figure 16. The Setup Status wizard window
Figure 17. The wizard window asking to confirm the file deletion
29
Page 30

INSTALLING KASPERSKY INSPECTOR
2.3. The .KEY File
The file with .KEY extension is supplied with the Kaspersky
Inspector distribution kit. This file is a kind of your personal key that
contains the following housekeeping data which is required in order
for your Kaspersky Inspector to work correctly:
contact information of your Kaspersky Inspector vendor
(company name, address, phone numbers);
contact information of the Help Desk;
the software product release date;
validation that the program is a registered copy;
expiry date of your Kaspersky Inspector user license.
If no *.KEY file present in the directory where you installed
Kaspersky Inspector, the program will be running as a
demo version, what means that it will be not able to delete
viruses from infected files.
You must keep your *.KEY file safe. In order to protect
your *.KEY file it is strongly recommended that you back it
up.
30
Page 31

Chapter
3
3. The program’s
Operation Concept
Main concept of the program operation. The
checks performed.
While searching for modifications on a hard drive all disk inspectors
(also called CRC scanners or integrity checkers) utilise the same
algorithm. The program performs the following tasks:
1. calculates mathematical values known as checksums or
CRC values (for Cyclic Redundancy Code) for disk sectors
and files.
2. store these CRCs in a database (table).
3. whenever started up again the disk inspector recalculates
these values and checks them against the database.
The disk inspector also stores other information such as file sizes,
the latest modification date and time, file attributes and other details
that is required to recover modified (infected) files. The database
also contains comprehensive patterns of the hard disk Master Boot
Record and Boot sectors, a list of fail clusters, subdirectory tree and
other information about the objects inspected.
31
Page 32

OPERATING CONCEPT
Besides, Kaspersky Inspector remembers and, when started again,
checks information about your operation system and the hardware,
i.e. the RAM capacity (checking for boot viruses) and the number of
your hard disks.
Kaspersky Inspector accesses the disks directly via the IOS (InputOutput Supervisor) driver without using the conventional methods
(the 21h and 13h interrupts). This feature allows the program to
successfully detect and kill even the most dangerous stealth viruses
(see subchapter 3.3).
3.1. Checks that Kaspersky
Inspector performs
When started the first time KAVI collects the data about your RAM
capacity in DOS and the address of your INT 13h handler, then the
program saves this data in a special database (table).
When started up again KAVI:
• checks your RAM capacity in DOS and the address of
INT 13h handler.
• checks Master Boot and Boot records. The program
checks Master-Boot record while processing all the
logical drives. If the collected data doesn’t match the
database, the program allows to recover the sector.
Besides you can use the built-in viewer to compare the
database data against the data collected by Kaspersky
Inspector during the check.
• checks numbers of the bad clusters. There are viruses
that mark a good cluster as the fail one and use it to
place their code or the data. If a new bad cluster is
detected KAVI informs your about this event.
32
Page 33

KASPERSKY ANTI-VIRUS
• checks the directory tree on your disk. The program
searches for directories that have been created or
deleted.
• checks the file structure of your disks. The program
searches for files that have been created, deleted,
renamed or changed. While checking files KAVI looks
for any modifications in their size, the date and the time
of creation and their CRCs.
Kaspersky Inspector analyses all changes detected and, if they do
not indicate a virus presence (for example, changes in the file size
are accompanied by the appropriate changes in the date and the
time this file was saved to the disk), the program will screen the
appropriate statistics window. But if Kaspersky Inspector detected
suspicious modifications that look like a virus manifestation, the
warning message will appear on your screen (see chapter 9).
3.2. Analysing changes on your
disk
All changes that have been detected by the program during the
check are analysed and divided into the following two groups:
harmless and suspicious. For example, if the contents of a file
changed, and the date and time when it has been created changed
also, it cannot indicate a virus presence. These changes are
harmless.
Anyway, KAVI provides you with information about all the changes
detected. You can view this statistics in the dialog mode and,
furthermore, you can save it to your hard drive in the form of a text
file. If the program detected any suspicious changes, it informs you
about the possibility that your computer is infected.
The following changes can indicate a VIRUS presence:
33
Page 34

OPERATING CONCEPT
• a file contents changed while the date and the time of
last modification remained the same (these changes
can indicate the presence of a file virus on your
computer);
• similar changes in the size of two or more files;
• the date and the time of last modification of a file are
not valid: the date is more than 31, the month is more
than 12, the year is more than the current one or the
time exceeds 59 minutes, 23 hours or 59 seconds
(some viruses use this method to mark infected files);
• a file registered in the list of unchangeable files is
changed;
• changes indicating presence of viruses infecting the
DOS kernel (the IO.SYS, IBMBIO.BIN and… files).
Never ignore messages about changes detected on your
drive by Kaspersky Inspector (especially, if the changes
are suspicious). If the reason of the changes is unknown,
you must investigate it.
If the program messages contain technical information that you do
not understand, refer to a qualified expert or to the Kaspersky Labs
Help Desk department. ANYWAY, REMEMBER, THAT THESE
MESSAGES MUST NOT BE IGNORED!!!
34
Page 35

KASPERSKY ANTI-VIRUS
DISREGARD OF THESE RECOMMENDATIONS MAY
RESULT IN INFECTION OF YOUR COMPUTER AND
INCREASES THE PROBABILITY OF DATA LOSS.
3.3. Searching for stealth
viruses
The term stealth describes viruses that use certain methods to
mask their presence in the system. To hide themselves they
intercept calls to infected objects and accordingly modify
appropriate data blocks so that these files and sectors in infected
system look like the virus-free ones. There are viruses using
various methods to hide themselves in a system and sometimes
these methods are extremely complicated. You should also know
that there are stealth viruses of all types, it means that file viruses,
boot viruses and macro viruses, they all can posses stealth
functions. For more information about stealth viruses refer to Virus
Encyclopaedia.
If a virus uses some methods to hide itself in a system, it cannot be
detected using the conventional anti-virus tools, because when
these tools open and read data from the file infected with a stealth
virus, it collects only the virus-free data and the virus code remains
unnoticed. To detect such a virus you must use the so called antistealth technology (for example, direct reading of data from the
disk).
Kaspersky Inspector uses the most reliable anti-stealth methods,
what allows the program to efficiently detect both the well-known
and the unknown stealth viruses.
You must know that the ability to hide in a system turned out to be
the weak point of stealth viruses. We developed a method that,
though complicated, allows Kaspersky Inspector to detect
practically any stealth virus in a system. To detect a stealth virus the
35
Page 36

OPERATING CONCEPT
program checks contents of the boot sector or the suspicious file
using two different methods, and then compares the results.
The first method of reading is conventional and allows to read the
data via the operation system.
The second method of reading allows to read the data directly, i.e.
bypassing the operation system.
If a stealth virus is present in the system, the results of two checks
(using two different methods) will differ, since the virus can intercept
the conventional call only and cannot interfere in the direct reading
operation. The comparison technique based on this method is
implemented in Kaspersky Inspector (for details about how to
enable the anti-stealth mode see subchapter 6.2.5).
3.4. Deleting viruses using
KAVI Cure Module™
3.4.1. KAVI Cure Module for Windows
KAVI Cure Module™ (KAVIC) is a built-in program module
(cure.dll) allowing to detect and delete computer viruses without
using the anti-virus databases.
The fundamental concept of KAVIC operation differs from that of
the anti-virus scanners (KAV
information about the protected file, but knows nothing about the
virus. According to the Kaspersky Labs internal tests, KAVIC
completely recovered files in 96% of all cases (this statistics cannot
be considered as an axiom, results of the recovery procedure
depend on various external conditions). Thereby, KAVIC will allow
you to detect and delete most viruses whether they are known or
not.
®
). The point is that KAVIC has some
36
Page 37

KASPERSKY ANTI-VIRUS
While running Kaspersky Inspector informs KAVIC about files that
have been created or deleted since the last check. In its turn,
KAVIC collects data that is required to recover the files.
The current KAVIC version allows to recover (cure) DOS and
Windows files (files with the EXE, COM, SYS, PRG, DLL, SCR,
OCX and etc. extensions).
3.4.2. KAVI Cure Module for DOS32
KAVI Cure Module for DOS32 (KAVICD32) is designed to recover
files corrupted or infected with a virus. KAVICD32 works in
combination with KAVI Cure Module (KAVIC) that is built in
Kaspersky Inspector.
Though KAVIC and KAVICD32 are two versions of the same
program the main difference between them is that KAVIC runs
under Windows 95/98/NT only and cannot recover certain files that
are locked by the operation system. In this case KAVICD32 will
help you. Since the program runs under DOS, you can use it in
those cases when you cannot launch your graphic operation
system.
While running KAVICD32 uses the tables developed by KAVIC as
the source of information about files and sectors, and compares this
data against the actual contents of files and sectors on your
computer. If the actual data mismatches the data in tables,
KAVICD32 will suggest to recover the file or sector containing
modifications.
37
Page 38

OPERATING CONCEPT
3.5. Checking the OS
parameters during the boot
(the KAVIBOOT.VXD driver)
The KAVIBOOT.VXD driver checks some parameters of your
operation system (Windows 95/98) while it is booted. The driver
checks:
• available DOS memory;
• Master-Boot record (MBR);
• the INT 13h handler addresses (reading/writing to the
disk).
Those checks allow you to detect a boot virus in your system.
While reading from sectors Kaspersky Inspector calls your BIOS
directly, bypassing the DOS handlers. Besides, the driver utilises a
special mechanism of protection from virus attempts to intercept the
data read from the disk.
This system of protection from interception can result in the driver
hang-up. But these cases are extremely rare. To eliminate such a
possibility the driver, when started the first time, automatically
checks itself for hang-ups.
If when you installed Kaspersky Inspector and restarted your
computer, the computer hung-up, you must restart it again. In this
case the driver will understand that the system was restarted after
the improper shutdown, and will not use these procedures again.
38
Page 39

Chapter
4
4. Kaspersky Inspector
Interface
Features of the Kaspersky Inspector user interface.
4.1. Main window
If you start Kaspersky Inspector without using any command line switch
(see chapter 5) the program main window will appear on your screen (figure 18).
39
Page 40

INTERFACE
Figure 18. The Kaspersky Inspector main window
In the program main window you will find the following items:
• menu-bar (see subchapter 4.2);
• tool-bar (see subchapter 4.3);
• icon-bar (see subchapter 4.4);
• work-area (see subchapter 4.5);
• status-bar (see subchapter 4.6).
40
Page 41

KASPERSKY ANT-VIRUS
4.2. Menu-bar
Right below the main window title you can find a menu-bar (figure 19).
Figure 19. Menu-bar
Use commands in these menus to initiate features that are available in your
Kaspersky Inspector. Table 1 below describes the menu commands.
Table 1. Manu commands
Menu Command What does it do
File Save profile as
default
Load profile
Defines the current profile as to
be loaded by default
Allows you to load settings from
one of the existing profiles (see
subchapter 6.3)
Save profile
Saves settings that you selected
to the profile (see subchapter 6.3)
Save profile as
Allows you to save your current
profile under a different name
Unload
Scan Start scan
Allows you to exit the program
Starts the check (see
subchapter 5.3)
Stop scan
Aborts the check
41
Page 42

Menu Command What does it do
INTERFACE
Pause scan
Tables Create registry
table
Pauses the check
Allows you to create a new
registry table (see
subchapter 5.3.2)
Create disk
table
Tools Show report
Allows you to create a new disk
table (see subchapter 5.3.2)
Loads the Report Viewer program
allowing you to view results of the
last check
Help Contents
About
Displays the Help topics
Displays the box containing
information about the program
developers, this version number
and your registration details
4.3. Tool-bar
Right below the main window menu-bar you can see a tool-bar (figure 20) that
contain buttons allowing to perform most frequently used functions of the program.
Figure 20. Tool-bar
Most buttons perform functions that may be also initiated with the appropriate menu
commands (see subchapter 4.2). If you place your mouse cursor on a tool-bar
button a tip with a name of the button will pop-up.
42
Page 43

KASPERSKY ANT-VIRUS
Table 2 below describes the tool-bar buttons and the corresponding menu
commands.
Table 2. Tool-bar buttons
Button Command What does it do
Load profile
Save profile
Save as
default
Start scan
Pause scan
Stop scan
The Load profile
command in the
File menu
The Save profile
command in the
File menu
The Save profile
as default
command in the
File menu
The Start scan
command in the
Scan menu
The Pause scan
command in the
Scan menu
The Stop scan
command in the
Scan menu
Allows you to load settings
from one of the existing
profiles (see
subchapter 6.3)
Saves settings that you
selected to the profile (see
subchapter 6.3)
Defines the current profile
as to be loaded by default
Starts the check (see
subchapter 5.3)
Pauses the check
Aborts the check
43
Page 44

Button Command What does it do
INTERFACE
Scan
current scan settings of the
program
preview
Allows you to preview
Report
The Show report
command in the
Tools
The Unload
command in the
Loads the Report Viewer
program allowing you to
view results of the last
check
Allows you to exit the
program
File
Exit
4.4. Icon-bar
Right below the tool-bar and at the left side of the main window you can see an
icon-bar.
This vertical bar contains five icons describing five groups of settings (see table 3).
To switch to a certain group of settings you must press the corresponding icon.
If you click your mouse right button in any place within the icon-bar the right-click
menu with the following two commands will appear on your screen:
• Small Icons — displays small icons in the bar;
• Large Icons — displays large icons in the bar.
Table 3. Icons in the icon-bar
Icon What does it do
44
Page 45

KASPERSKY ANT-VIRUS
Icon What does it do
Allows you to change settings defining location
and objects to be scanned, and how your
Kaspersky Inspector must treat infected objects.
This group of settings is represented by a certain
type of control – settings’ tree of the objects’
hierarchy (see subchapter 6.2)
Allows you to define settings that are general for
all the objects to be scanned, and also the rules
according to which Kaspersky Inspector must
interact with other KAV modules (KAV Cure
Module and KAV32). Here you can also define
settings of the log file (see subchapter 6.1)
Displays a table with the program performance
statistics (see subchapter 7.1)
Allows to view modifications that Kaspersky
Inspector detected while checking the objects and
to make changes using the right-click menu (see
subchapter 7.2–7.5)
Allows to view modifications that Kaspersky
Inspector detected while checking the registry
files and to make changes using the right-click
menu (see subchapter 7.6)
4.5. Work-area
Right below the main window tool-bar and at the right of the icon-bar you can see
the main window work-area. This area occupies the major part of the main window.
Depending on the icon that you selected in the icon-bar the work area can show
45
Page 46

INTERFACE
various group of settings. For more details refer to the corresponding chapters in
this book (see chapters 6 and 7).
4.6. Status-bar
At the bottom of the main window you can see a status-bar.
The status-bar displays information about the current status of the program, and
during the check you can see there the names of files that are currently checked.
4.7. Interface elements for programm
settings
The Kaspersky Anti-Virus interface uses the so-called Tree-Chart technology.
Tree-Chart is the universal technology of data presentation that is developed by
Kaspersky Labs experts for both beginners and advanced users. As provided by
this technology the entire data is presented in the form of a tree with conventional
controls as joints (buttons, drop-down lists, check-boxes and etc.).
This technology provides the clear and easy-to-understand picture of interrelations
between various settings and makes it easy to study the program.
In this book all the controls are illustrated by the pictures. So that you may
see how do they look like in the program windows.
46
Page 47

KASPERSKY ANT-VIRUS
4.7.1. Settings’ tree
Every joint in this tree may have branches. If the branch is visible the corresponding
joint looks similar to this
change for
.
, and if the branch is hidden the corresponding joint will
To change some certain setting you must make its branch visible.
To display and hide a branch you must use the following methods:
What to do How it might be done
To display a branch
(joint looks like
)
The
The
key on your keyboard.
command of the right-click
menu.
*" key on your numerical keyboard(all branches of
The "
the joint become visible).
To hide a branch
(joint looks like
The
key on your keyboard.
)
The
command of the right-click menu
.
-" key on your numerical keyboard (all branches of
The "
the joint disappear from your screen).
4.7.2. Controls
To change settings you will use several types of controls:
47
Page 48

4.7.2.1. Check box
A check-box may be
— unchecked meaning that this type of virus check will not be
performed.
— checked meaning that the program will perform this type of
virus check.
To check and uncheck a box you must use the following methods:
What to do How it might be done
INTERFACE
To check the box The S
PACE key on your keyboard.
The
command of the right-click
menu .
Click it with your mouse.
To uncheck the box The Space key on your keyboard.
The
command of the right-click
menu .
Click it with your mouse.
4.7.2.2. Option button
The option button is a member of the group. A group of option buttons may
consist of two and more buttons. You must use this group to select one of the
options. The option button may be:
—selected (enabled);
48
Page 49

KASPERSKY ANT-VIRUS
— deselected (disabled);
You can select only one option button from the group.
To select and deselect an option button you must use the following methods:
What to do How it might be done
To select the option
The S
PACE key on your keyboard.
button
The
command of the right-click
menu .
Click it with your mouse.
To deselect the option
Select some other option button from the group.
button
4.7.2.3. Text field
To edit value of the text field you must use your keyboard. You may see the text
field current value enclosed with angle brackets at the right of the field name.
— the text field.
To edit a text field value use the following methods:
What to do How it might be done
To edit the field
Click with your mouse on the field icon.
value
The
command of the right-click menu .
The F2 key on your keyboard. The text field will change
its appearance for
49
.
Page 50

INTERFACE
After you finish editing the text field value press the ENTER key on your keyboard or
click with your mouse outside of this text field.
4.7.2.4. Input field defining the path to…
To edit value of the path field you must use the conventional Windows dialog
allowing to select the directory or file.
— the path input field.
To edit a path field value use the following methods:
What to do How it might be done
To edit the field
Click with your mouse on the field icon.
value
The
command of the right-click menu .
The F2 key on your keyboard.
4.7.2.5. Input field defining the number of …
To input new value in the number field you must type it in from your keyboard or
use the courser controlling keys to change the current value. You may see the
number field current value enclosed with angle brackets at the right of the field
name.
— the number input field.
To edit a number in the field use the following methods:
What to do How it might be done
50
Page 51

KASPERSKY ANT-VIRUS
What to do How it might be done
To edit the field
Click with your mouse on the field icon.
value
The
command of the right-click menu .
The F2 key on your keyboard.
4.7.2.6. Elements' list
Elements' list combines many elements together (Figure 21). To browse the list you
must use the
the list you must use the C
and keys on your keyboard. To automatically scroll down/up
TRL+ and CTRL+ key combinations.
Figure 21. Elements' list
4.7.3. Control indicators
When setting your anti-virus to check for viruses in the disk hierarchy you must use
the so-called Rules of Succession, i.e. if you define some settings for the My
51
Page 52

INTERFACE
computer item (Figure 22), they will be automatically assigned for all disks on your
computer.
Figure 22. Disk hierarchy
Some macro-instruction icons and control indicators completely depend
on those of the group. These macro-instructions inherit the group rule.
By default all the macro-instructions inherit the group rule.
Some macro-instruction icons and control indicators differ from those
of the group. These macro-instructions have their independent rules.
To define some macro-instruction as having an independent rule you
need to assign to this macro-instruction a rule that is different from
that of the group or change its control indicator status.
Macro-instructions with independent rules may be restored to macroinstructions inheriting the group rule.
Some macro-instructions may have icons and control indicator statuses
strictly independent from those of the group. These macro-instructions
have strictly independent rules.
To define some macro-instruction as having a strictly independent
rule you need just to select the Set Strict command from the rightclick menu. In this case the macro-instruction control indicator
appearance will change for the red square with black tick.
To disable the status of strictly independent rule select the Remove
Strict command from the right-click menu.
Rules of macro-instructions with strictly independent rules are fully
independent from the group rule and control indicator status.
52
Page 53

KASPERSKY ANT-VIRUS
The control indicator may look similar to the following:
Looks
like
Description Meaning
A square with a tick
The check mode is enabled.
inside. The square may
be red or black.
The square is red – the inheriting mode is
disabled,
The square is black – the inheriting mode is
enabled.
A square with the tick
inside and the triangle in
the right-bottom corner.
The inheriting mode is enabled, but some
objects are excluded from the group and have
their own settings
The triangle may be red
or black.
The triangle is red – for one or more objects
the inheriting mode is disabled.
The triangle is black – for one or more objects
the rule is changed.
A square without the
tick and with the triangle
The check mode is disabled, but for one or
more objects this mode is enabled.
in the right-bottom
corner. The triangle may
be red or black.
The triangle is red – for one or more objects
the inheriting mode is disabled.
The triangle is black – for one or more objects
the rule is changed.
53
Page 54

Chapter
5
5. Starting Kaspersky
Inspector
Various methods to start your Kaspersky
Inspector. Available command line switches.
5.1. How to start the program
5.1.1. Starting the program using the
MS Windows Start menu
You can start KAVI using the Kaspersky Anti-Virus Inspector
command that was added to the Windows Start menu as a result of
KAVI installation on your computer.
To do it, you must click the Start button, point to Programs, point
to Kaspersky Anti-Virus, then point and click Kaspersky Anti-
Virus Inspector (figure 23).
54
Page 55

KASPERSKY ANT-VIRUS
Figure 23. The Kaspersky Anti-Virus Inspector command in
the Kaspersky Anti-Virus program group
5.1.2. Starting Kaspersky Inspector from
the command line
When you start Kaspersky Inspector from the command line, you
can define or change its settings using available switches. In this
case the program command line will look similar to the following:
[Path to the file]KAVI.EXE [<switches>] <disk>
[<disk> ...]
To start the program from the command line follow
the steps:
1. Click the Start button, and point and click the Run
command.
2. Enter the path to your Kaspersky Inspector module and
required command line switches in the Run dialog text field.
3. Click ОК.
Available command line switches:
You can specify required command line switches in the command
line while starting Kaspersky Inspector. The switches must begin
from the characters
– or / and can be entered using both small and
capital letters.
-cl[<path>] allows you to save the check log to the directory
defined in this switch. For example, if you want to create a report
and place it into the KAVI folder that is located on the C: drive, you
55
Page 56

STARTING KASPERSKY INSPECTOR
must specify the following switch in the command line: -
clC:\KAVI\
. If you defined no path when using this switch, the
report will be saved into the root directory of the disk checked by
your Kaspersky Inspector. If the log file already exists on the disk,
the report will be appended to the file contents. When you define
the path you can use long names for the folder, but in this case
make sure to enclose the path in quotation marks, i.e. the switch
can look similar to the following:
Inspector".
the
-cl switch. To do it, you can simply use the Report tool-bar
You can also save the report to a file without using
-cl"c:\Kaspersky
button.
-l[<path>] allows you to save the check log to the directory
defined in this switch. For example, if you want to create a report
and place it into the KAVI folder that is located on the C: drive, you
must specify the following switch in the command line:
lC:\KAVI\
. If you defined no path when using this switch, the
-
report will be saved into the root directory of the disk checked by
Kaspersky Inspector. The
the function of the
-cl switch. The only difference is that, if the log
-l switch function looks very similar to
file already exists on the disk, the check log will overwrite the file
contents. When you define the path you can use long names for the
folder, but in this case make sure to enclose the path in quotation
marks, i.e. the switch can look similar to the following:
l"c:\Kaspersky Inspector".
-
-d launches a check once a day.
-d1 the alternative switch to launch a check once a day. The
difference from the previous one is that if no suspicious changes
are detected on the disk the program will not update its tables and
will not screen the performance statistics window. But if KAVI
detected changes that can indicate a virus presence, it will inform
you about those changes. In this case the check statistics window
will be displayed on your screen.
-e do not mark table files as hidden.
56
Page 57

KASPERSKY ANT-VIRUS
-f launches a fast check. Kaspersky Inspector will not
calculate CRCs, but will check files for changes in their size and
their date and time of last modification. In this mode the tables are
not updated. This switch is similar to the Fast check mode option
(see subchapter 6.1.3).
-i launches the info check. Kaspersky Inspector does not
update its tables when started in this mode. This switch is similar to
the Info mode option (see subchapter 6.1.3). You cannot use both
switches (
-nl do not lock the disk (when running in Windows 95/98 only)
-@<file> allows to create a file containing names of files
that have been changed or created (where
-i and –d) in the same command line.
<file> is the name of
this file). Later the KAVI scanner will use data from this file to
identify the files that must be checked for viruses.
-ti<time> delays the check. Kaspersky Inspector will start
checking disks within a certain period of time. The exact time must
be specified in seconds. You can specify the
to 999. This switch is useful, if you launch a lot of programs while
starting Windows 95
®
or Windows NT®.
<time> value from 1
-a<time> maximum period of time during which the
performance statistics window must be displayed. The exact time
must be specified in seconds. You can specify the
<time> value
from 1 to 999. This switch is used only for the checks performed
once a day.
-Stop<value> allows to disable some checks. The <value>
value must be calculated by summation of the following numbers:
1 — skips MBR;
2 — skips Boot record;
4 — skips bad clusters;
57
Page 58

STARTING KASPERSKY INSPECTOR
8 — skips directories created;
16 — skips directories deleted;
32 — skips files changed;
64 — skips files created;
128 — skips files deleted;
256 — skips files moved to the other directory;
512 — skips files renamed;
4096 — skips available DOS memory;
8192 — skips quantity of physical disks;
32768 — skips debug registers
For example, if you want the program not to search for changes in
Master Boot Record and for the directories created, you must
specify the following command line switch:
-Stop9. This switch is
similar to the corresponding boxes checked in the program
graphical interface (see subchapter 6.1.4).
Suppose your program is located in the directory C:\KAVI, and you
want to start it once a day to check the disks C: and D:, and to save
the results in a file located in the directory C:\TEMP. Your
command line for Kaspersky Inspector must look similar to the
following:
C:\KAV\KAVI.exe -d -lD:\Temp\ C: D:
C:\KAV\ is the directory where the program is located; -l is
where
a switch enabling the program to save the results to a file located in
the directory
D:\Temp; -d is a switch enabling the program to
58
Page 59

KASPERSKY ANT-VIRUS
launch once a day; C: and D: are the disks that must be checked
for modifications.
5.1.3. Starting Kaspersky Inspector using
Control Centre
Kaspersky Inspector as well as all other programs included in the
KAV package can be started from Control Centre. Using your
Control Centre you can schedule KAVI to start at certain time
everyday or within certain periods of time.
5.2. Starting the program the
first time
When started the first time Kaspersky Inspector suggests to create
tables (figure 24) for every object that is checked (see
subchapter 6.2). These tables are critical for your KAVI operation,
that is why if the tables are not created, KAVI cannot check for
modifications on your disks.
Figure 24. Suggesting to create the tables
For your Kaspersky Inspector to create the tables automatically,
click the Yes button. If you did it, the next time you will start KAVI,
the program will be able to detect modifications on your disks.
59
Page 60

STARTING KASPERSKY INSPECTOR
5.3. Starting to check for
changes on your disk
5.3.1. Checking for changes on the disk
If in Control Centre you scheduled your Kaspersky Inspector to start
once a day or you started the program from the command line
using the corresponding switch (see subchapter 5.1.2), then
everyday at the first start of your operation system Kaspersky
Inspector will be automatically launched to check for changes on
your disks (see subchapter 3.1).
If you want to check for modifications on your disks at any other
time, you must click the
this case the program will check for modifications in those objects
that are defined in its settings (see subchapter 6.2).
button in the main window tool-bar. In
5.3.2. Creating new tables
Sometimes (for example, when you install new drives on your
computer or if the tables you had are corrupted or deleted) it is
necessary to create new tables.
To create new tables for your disk, first you must mark it in the
disks’ tree by clicking on it with your mouse (see subchapter 6.2),
then you must select one of the following commands from the
Tables menu:
Create registry table — creates new registry tables. If you select
this command the corresponding confirmation box will appear on
60
Page 61

KASPERSKY ANT-VIRUS
your screen (figure 25). To confirm your selection click the Yes
button. After this, the new registry tables will be created.
Create disk table — creates new disk tables. If you select this
command the corresponding confirmation box will appear on your
screen (figure 26). To confirm your selection click the Yes button.
After this, the program will start creating new disk tables. Be patient,
the procedure of creation may take some time.
Figure 25. Confirmation box to create new registry table
Figure 26. Confirmation box to create new disk table
5.4. Starting to search for
stealth viruses
To start checking for stealth viruses in one or more objects (see
subchapter 6.2), you must check the corresponding box in the
Objects work-area of the main window (see subchapter 6.2.5) and
click the
button in the main window tool-bar.
61
Page 62

STARTING KASPERSKY INSPECTOR
While running Kaspersky Inspector checks your Master Boot record
and Boot records of the logical disks, and also compares the file
sizes and CRCs detected via your operation system against their
actual sizes and CRCs calculated using the direct reading method.
If the results differ from each other, Kaspersky Inspector
immediately stops the check, so that the virus didn’t have any time
to infect other files and sectors, and screens the corresponding alert
message (for details about the messages see chapter 9).
62
Page 63

Chapter
6
6. Customising Kaspersky
Inspector
How to customise your Kaspersky Inspector.
General settings. Settings for various object
types.
6.1. The Options work-area:
Selecting general options
To display general settings of your Kaspersky Inspector, you must
click the
subchapter 4.4). After this, the general options tree will appear in
the main window work area (figure 27).
icon in the main window icon-bar (see
63
Page 64

CUSTOMISING KASPERSKY INSPECTOR
Figure 27. General options tree of the program
6.1.1. Using the wizard to define general
settings
In the upper-left corner of the options work-area you can see the
Wizard button. This is an easy-to-use tool that you can use to
define general settings of the program. You can use the wizard to
define and change the main settings only, other settings of the
program can be changed directly in the Options work-area
(see subchapters 6.1.2–6.1.7).
64
Page 65

KASPERSKY ANT-VIRUS
To define settings of the program using the wizard,
follow the steps:
1. Click the Wizard button.
2. The Check Mode wizard window (figure 28) will
appear on your screen. In this window you must select
one of the available check modes (for details about
the check modes see subchapter 6.1.2). Click the
Next button to move to the next window.
Figure 28. The Check Mode wizard window
3. The File Types wizard window (figure 29) will appear
on your screen. In this window you can see the list of
file extensions that will be processed by Kaspersky
Inspector (for details see subchapter 6.1.3). You can
also edit this list:
65
Page 66

CUSTOMISING KASPERSKY INSPECTOR
• To add a new value to the list click the Add
button. The Add extension dialog box
(figure 30). Enter the value in the Extension
text field, and use the CRC type drop down to
select how you want to calculate CRC for files
with this extension (for details see
subchapter 6.1.3). Then click the Add button.
To define a set of extensions in the Add extension text
field you can use the inquiry character (?) that denotes any
character. For example, the OV? value in the text field
denotes all files which extension begins from OV (OVL,
OVR, …).
• To remove a value from the list, highlight it in
the list by clicking on it with your mouse and
click the Delete button.
Figure 29. The File Types wizard window
66
Page 67

KASPERSKY ANT-VIRUS
Figure 30. The Add extension wizard window
4. Click the Next button to move to the next window. The
Interaction with KAV Scanner wizard window
(figure 31) will appear on your screen. In this window
you must specify the information that is critical for your
Kaspersky Inspector to interact with the anti-virus
scanner on your computer. In this window you will find
the following two input fields:
• KAV Scanner executable file name — in this
field you must define the path to your KAV32
executable file. To do this, click the button at
the right of the field and select this file in the
dialog window on your screen;
• Scan list file name — in this field you must
define the path to a file where Kaspersky
Inspector will store the list of modifications
detected in files (for details see
subchapter 6.1.6). To do this, click the button at
the right of the field and select this file in the
dialog window on your screen.
67
Page 68

CUSTOMISING KASPERSKY INSPECTOR
Figure 31. The Interaction with KAV Scanner wizard window
5. Click the Next button to move to the next window. The
Report (figure 32) wizard window will appear on your
screen. In the Report file name input field of this
window define the path to a file where Kaspersky
Inspector will store reports describing results of the
check. To do this, click the button at the right of the
field and select this file in the dialog window on your
screen.
6. When done, click the Finish button.
68
Page 69

KASPERSKY ANT-VIRUS
Figure 32. The Choose Report file wizard window
6.1.2. Defining the location of working
files and folders. Check modes
Configuration (figure 33) — general parameters:
Tables:
Table files base name — name of the file containing
the tables.
69
Page 70

CUSTOMISING KASPERSKY INSPECTOR
The file name must not be longer than seven characters. It
is related to the following: the resulting name must look
similar to KAVITAB*.DAT, where * is the character
denoting the disk checked (e.g. C). Accordingly, only
seven characters of this name constitute the variable part.
Table files location — directory where the files with the
tables are located.
If you want to place KAVI tables into the root directory of
the disk checked, you can leave this field blank. If, by
some reasons, you do not wish to do this, you can
specify a directory where the program will place tables
for all the disks checked. Remember, that you cannot
use all kinds of removable disks to store the tables.
Working directories
New Value — here you can specify directories where,
as you know, the modifications are frequent and that
must be ignored by Kaspersky Inspector.
To remove the value, highlight it (e.g. by clicking on it with
your mouse) and press the D
keyboard.
ELETE key on your
Check mode — here you must select the check mode for
the disks defined as to be checked by Kaspersky
Inspector:
Normal — while checking in this mode your Kaspersky
Inspector is able to update tables of the disks that have
been checked (the tables are updated according to the
modifications detected);
Fast — while checking in this mode your Kaspersky
Inspector does not calculate CRC values of the files. In
this case the file is considered by the program as
modified, if its size or/and the creation date (time) have
changed since the last check;
Info — while checking in this mode your Kaspersky
70
Page 71

KASPERSKY ANT-VIRUS
Inspector searches for modifications on the disk.
If you selected one of the last two check modes (Fast check
or Info) the program will not be able to update its tables.
Update tables automatically under Control Center — if
you check this box the program will automatically
update its tables after the check is completed. This
option is available only when the Kaspersky Inspector is
started from Control Centre (see subchapter 5.1.3).
Figure 33. The Configuration branch of the Options tree
6.1.3. File check parameters
Files (figure 34) — settings defining how the program must
process files of different types.
71
Page 72

CUSTOMISING KASPERSKY INSPECTOR
Figure 34. The Files branch of the Options tree
Checked — the list of extensions that will be processed by
Kaspersky Inspector. For every extension in the list you
must define how you want to calculate the CRC value.
New Value — here you can specify a value that you
want to add to the list
No CRC — while checking files in this mode
Kaspersky Inspector will not calculate the files’ CRC
values. In this case the table describes only the size
and the creation date and time for this file.
Fast CRC — this type of CRC value depends on the
internal structure of DOS and Windows executable
files, and while taking insignificant time allows you to
reliably control integrity of those files. It’s strongly
advisable to enable this mode for the COM, EXE,
VXD, DLL, 386, CPL, SCR and other extensions of
executable files.
Full CRC — CRC is calculated along the entire file
72
Page 73

KASPERSKY ANT-VIRUS
contents. This type of check allows total control over
the integrity of file, but it takes much more time than
the previous check type. This check is advisable for
files with the BAT and SYS extensions.
Macro fast CRC — this type of CRC value depends
on the internal structure of macro documents
®
(Documents of Microsoft Word
®
and Microsoft Access
) and allows reliable control
, Microsoft Excel®
over the integrity of OLE2 documents. This check is
advisable for files with the DOC, DOT (DO?), XLS,
XLA, (XL?) and MDB extensions.
Macro full CRC — this type of check allows the
calculation of CRC along all the macros at large. It
allows the most complete control over the integrity
of OLE2 documents.
Macro CRC checks are advisable only for files that contain
OLE2 macros. Currently this check mode supports the
following applications: Microsoft Word
®
and Microsoft Access
.
To remove a value, highlight it (e.g. by clicking on it with
your mouse) and press the D
keyboard.
®
, Microsoft Excel®
ELETE key on your
73
Page 74

CUSTOMISING KASPERSKY INSPECTOR
Figure 35. The Checked branch
Stable (figure 36) — the list of files which contents must
not contain any modifications. Here you can define, for
example, your DOS files (Command.Com, NDos.Com,
and etc.), executable files of your file manager (Norton
Commander (NC.Exe) or Volkov Commander
(Vc.com)), files of your operation system (IO.SYS,
IBMBIO.COM) and etc.
It’s advisable that you specify files with various extensions in
the Stable list (COM, EXE, SYS).
New Value — here you can enter a new value.
To remove a value, highlight it (e.g. by clicking on it with
your mouse) and press the D
ELETE key on your
keyboard.
74
Page 75

KASPERSKY ANT-VIRUS
Figure 36. The Stable branch
Excluded (figure 37) — the list of files to be excluded from
the check. Usually these are the files frequently
modified by some of your programs or by your
operation system. The swap file in Windows 95/98/NT
is the example of such a file.
New Value — here you can enter a new value.
To remove a value highlight it (e.g. by clicking on it with
your mouse) and press the D
ELETE key on your
keyboard.
75
Page 76

CUSTOMISING KASPERSKY INSPECTOR
Figure 37. The Excluded branch
Checked by default (figure 38) — the list of extensions
that are checked by Kaspersky Inspector by default. For
these files you can only define how you want to
calculate their CRC values:
No CRC check — while checking in files in this
mode Kaspersky Inspector will not calculate the
files’ CRC values.
Fast CRC check — this type of CRC value depends
on the internal structure of DOS and Windows
executable files, and while taking insignificant time
allows you to reliably control integrity of those files.
It’s strongly advisable that you enable this mode for
the COM, EXE, VXD, DLL, 386, CPL, SCR and
other extensions of executable files.
Full CRC check — CRC is calculated along the
entire file contents. This type of check allows total
control over the integrity of file, but it takes much
more time than the previous check type. This check
is advisable for files with the BAT and SYS
extensions.
76
Page 77

KASPERSKY ANT-VIRUS
Macro fast CRC check — this type of the CRC
value depends on the internal structure of a macro.
Macro full CRC check — this type of check allows
the calculation of CRC along all the macros at large.
Figure 38. The Checked by default branch
Minimum dangerous file size change (figure 39) —
defines the dangerous change of a file size.
Maximum dangerous file size change (figure 39) —
defines the maximum change of a file size.
Dangerous number of files with similar file size change
(figure 39) — defines the maximum quantity of files with
similar size changes.
Figure 39. Defining parameters of dangerous file changes
77
Page 78

CUSTOMISING KASPERSKY INSPECTOR
6.1.4. These checks can be disabled
Not reported changes (figure 40) — the list of checks that
can be disabled. It means that you can enable your Kaspersky
Inspector to ignore:
Changes in Master Boot Record
Changes in boot record
New directories
Deleted directories
New files
Deleted files
Renamed files
Files moved to other directories
New bad clusters
Debug registers use
Changes in the number of physical disks
78
Page 79

KASPERSKY ANT-VIRUS
Attention!!! By checking a box on this branch you
DISABLE the corresponding type of check.
Figure 40. The Not reported changes branch
6.1.5. Selecting options for Cure Module
Cure Module (figure 41) — here you can define settings of
your Kaspersky Inspector Cure Module.
Use Cure Module — defines whether your Kaspersky
Inspector will use Cure Module or not.
Tables — use this branch to define the type of tables
that your Cure Module must use:
Large — large tables allow the highest probability of
file recovery (disinfecting), but occupy more disk
space and take more time for processing.
Small — small tables speed up the module
performance.
Curable file types — a list of file types that the
79
Page 80

CUSTOMISING KASPERSKY INSPECTOR
program must be able to recover.
New Value — here you can enter a new value. You
are able to add only those extensions that are
included in the list of extensions checked by KAVI
(figure 35).
Table files base name — a name of the file containing
tables of your Cure Module.
The file name must not be longer than seven characters. It
is related to the following: the resulting name must look
similar to CURETAB*.DAT, where * is the character
denoting the disk checked (e.g. C). Accordingly, only
seven characters of this name constitute the variable
part.
Redundant search factor — a variable describing the
redundant search factor. This variable can posses the
values from 0 to 50. The factor that is more than 0 may
increase the quantity of files recovered but the module
performance will substantially slow down.
The value exceeding 10 is not advisable for this variable.
Move incurable files to directory – check this box
to enable your Cure Module to move files that it failed to
cure to the below directory.
— use this input field to define the directory to which
the incurable files will be moved.
80
Page 81

KASPERSKY ANT-VIRUS
Figure 41. The Cure Module branch
6.1.6. Selecting options for the anti-virus
scanner
KAV Scanner (figure 42) — here you can define how your
Kaspersky Inspector must interact with the KAV32 scanner.
Use KAV Inspector info — while scanning for viruses the
scanner will consider the KAVI performance results.
Scan list file name – use the joint to define the file
where your Kaspersky Inspector will store a list of files
(created, modified, renamed and moved) to be checked
by the scanner. You must enter the file name and its
location in the below text field.
If you enter only the name for this file, it will be created
81
Page 82

CUSTOMISING KASPERSKY INSPECTOR
in the directory where you installed KAVI.
KAV Scanner executable file name – use this joint to
define your KAV32 executable file. Enter the name of
your KAV32 executable file and its location in the below
text field.
Close KAV Scanner window after scan finished — if
checked, shuts down the scanner automatically after the
scanning is completed.
Run KAV Scanner minimized — if checked, minimises
the scanner to an icon, after it is started.
KAV Scanner profile name — use this joint to define
the profile that must be used by the KAV32 scanner.
Enter the file name and its location in the below text
field.
Figure 42. The KAV Scanner branch
6.1.7. Selecting options for the
performance report
Report (figure 43) — here you can define how your Kaspersky
Inspector must report its performance results.
82
Page 83

KASPERSKY ANT-VIRUS
Make report — if checked, saves the KAVI performance
results to a file.
Append — if checked, appends new report to the log file
contents. If unchecked, overwrites the file contents with
a new report.
Report file name — here you must enter the file name
and its location.
Limit size — if checked limits the log file size to the
value defined below.
Maximum report file size is — here you must
define the maximum size of your log file.
Figure 43. The Report branch
83
Page 84

CUSTOMISING KASPERSKY INSPECTOR
6.2. The Objects work-area:
Selecting options for every
drive to be checked
6.2.1. Defining check parameters for hard,
network and logical drives
To define check parameters for your drives you must click the
icon in the main window icon-bar (see subchapter 4.4).
After this, the work-area will split into two parts (figure 44).
In the left part of the work-area you will see a list of drives that can
be checked, while in the right part you will see a settings’ tree.
By checking a box (
corresponding drive as to be checked by your Kaspersky Inspector.
For every drive in the list you can define separate check
parameters.
The set of options that are available for an object in the list
completely depends on a type of this object. Objects located on
different levels of the drives’ hierarchy use different sets of options.
The maximum quantity of options is available for the My Computer
object (see subchapter 6.2.2–6.2.6).
For local hard drives of your computer you cannot enable
Kaspersky Inspector to check registry files (see subchapter 6.2.6).
) in the drives’ list you will define the
84
Page 85

KASPERSKY ANT-VIRUS
For logical and network drives you cannot define how your
Kaspersky Inspector will access those objects (see
subchapter 6.2.2), you also cannot define which elements of the
drive must be checked by Kaspersky Inspector (on these disks the
program is able to check for modifications in the directory structure
only) (see subchapter 6.2.3).
Figure 44. Drives’ check parameters
6.2.2. Defining how to access a drive
Access mode — use this list of option buttons to define how
your Kaspersky Inspector must access the drive:
OS-dependent — enables Kaspersky Inspector to access
the drive using your operation system. In this case you
85
Page 86

CUSTOMISING KASPERSKY INSPECTOR
can check for modifications on your network drives. If
you defined this type of access for a drive, your
Kaspersky Inspector will be not able to check for stealth
viruses and to check boot sectors and bad clusters on
this drive.
Int 25h — enables Kaspersky Inspector to access objects
using the disk drivers (INT 25h). In this case the
program bypasses DOS and reads the disk sectors
directly, i.e. via the 25h interruption (disk absolute
reading). This mode can be used when checking for
modifications on drives compressed using such
programs as Stacker ver. 4.x or DriveSpace. The
compression programs described above are supported
by Kaspersky Inspector. Besides such disks are
displayed using special icons. If you use other
compression programs, that are not supported by
Kaspersky Inspector, you must define the access mode
to the compressed disk as INT 25h.
Int 13h — enables Kaspersky Inspector to access objects
using INT 13h. In this case the program reads the disk
directly via BIOS (the 13h interruption). You can use
this mode when checking for modifications on the
physical drives only, i.e. in partitions of a fixed disk.
IOS — enables Kaspersky Inspector to access objects using
IOS (IO Supervisor). In this case the access type is
determined by the following rules: if the 32-bit access to
disk (VFAT ("Dragon") drives) is used or the protectedmode disk compression software is running
(DriveSpace) or the access to disk is implemented via
Real Mode Mapper, the program calls the 32bit disk
access driver (IOS) directly. Otherwise the program
accesses the disk via INT 13h or the disk driver. In
other words, in almost all the cases Kaspersky
Inspector will access the drive via IO Supervisor. This
option is available in Windows 9x only.
86
Page 87

KASPERSKY ANT-VIRUS
6.2.3. Items to be checked on the drive
Check on disk — here you can define items that must be
checked on the drive:
Boot sector — allows you to disable the check of boot
record on the drive. It is useful, for example, for drives
that have been created using the Stacker program
(drive compacting system), since this program
constantly modifies contents of the boot record.
Bad clusters — allows you to enable/disable the check for
new fail clusters on the drive.
Directory structure — allows you to enable/disable the
check for modifications in directory structure on the
drive (detection directories that have been created or
deleted).
6.2.4. Defining how to calculate CRC
values
Check all files — if checked, enables your Kaspersky
Inspector to check every file on the drive. This branch options are
independent from those in the general settings’ tree (the Options
Icon).
The list of option buttons allows you to select how to calculate CRC
values for the files:
No CRC — while checking in files in this mode Kaspersky
Inspector will not calculate the files’ CRC values. In this
case the table describes only the size and the creation
date and time for a file.
Fast CRC — this type of CRC value depends on the internal
structure of DOS and Windows executable files, and
while taking insignificant time allows you to reliably
87
Page 88

CUSTOMISING KASPERSKY INSPECTOR
control integrity of those files. It’s strongly advisable to
enable this mode for the COM, EXE, VXD, DLL, 386,
CPL, SCR and other extensions of executable files.
Full CRC — CRC is calculated along the entire file contents.
This type of check allows total control over the integrity
of file, but it takes much more time than the previous
check type. This check is advisable for files with the
BAT and SYS extensions.
Macro fast CRC — this type of CRC value depends on the
internal structure of macro documents (Documents of
®
Microsoft Word
®
Access
) and allows reliable control over the integrity of
, Microsoft Excel® and Microsoft
OLE2 documents. This check is advisable for files with
the DOC, DOT (DO?), XLS, XLA, (XL?) and MDB
extensions.
Macro full CRC — this type of check allows the calculation
of CRC along all the macros at large. It allows the most
complete control over the integrity of OLE2 documents.
Macro CRC checks are advisable only for files that contain
OLE2 macros. Currently this check mode supports the
following applications: Microsoft Word
®
and Microsoft Access
.
®
, Microsoft Excel®
6.2.5. Checking for stealth viruses
Check for stealth viruses — this joint allows you to check for
stealth viruses on the drive:
All files — if checked, enables Kaspersky Inspector to
check for stealth viruses in every file on the drive.
Only new files — if checked, enables Kaspersky Inspector
to check for stealth viruses in new files only.
88
Page 89

KASPERSKY ANT-VIRUS
Kaspersky Inspector does not check for stealth viruses
on drives that are accessed via the operation system (the
OS-dependent access mode) .
6.2.6. Advanced settings
Check working directories — if checked, enables the program
to check working directories on this drive.
Save Cure Module Info — if checked, supports Cure Module
performance for this drive.
Check Registry — if checked, enables the program to check
registry files on this drive.
6.3. Saving and loading settings
You can save all settings (see subchapter 6.1 and 6.2) to a special
file with the *.klr extension.
To save all current settings to the hard drive of your
computer, follow the steps:
1. Select the Save profile as command from the File
menu.
2. In the Windows dialog box on your screen define the
name and the location of a file where you want to
save the settings.
3. Click the Save button.
89
Page 90

CUSTOMISING KASPERSKY INSPECTOR
To load settings from a file, follow the steps:
1. Select the Load profile command from the File
menu.
2. In the Windows dialog box on your screen define the
name and the location of a file that contains the
required settings.
3. Click the Open button.
90
Page 91

Chapter
7
7. Viewing Check Results
Viewing your Kaspersky Inspector performance
report. Actions that you may take, if the program
detected changes on your disk.
7.1. The Statistics work-area:
Viewing Kaspersky Inspector
performance statistics
To view your Kaspersky Inspector performance
statistics, follow the steps:
1. After a check procedure is launched, click the
icon in the main window icon-bar.
2. The statistics window (figure 45) allowing you to
monitor the check will appear in the main window
work-area.
91
Page 92

VIEWING CHECK RESULTS
Figure 45.The performance statistics window
7.2. The Disks work-area:
Viewing changes detected
After a check is completed the program will inform you about this
and will suggest to display the statistics of modifications detected
(Figure 46).
To display the window containing the statistics of modifications
detected during the check, click the Yes button in the confirmation
dialog box.
92
Page 93

KASPERSKY ANT-VIRUS
Figure 46. The confirmation dialog box to display the statistics
of changes detected
After this, the modifications’ statistics window will appear in the
main window work-area (Figure 47).
If while checking your disks the Kaspersky Inspector
detected modifications that may indicate a virus
manifestation, before displaying the list of all modifications
on your disks, the program will screen a warning message
and a list of suspicious modifications (See chapter 9).
The modifications’ statistics window displays the following
information about modifications detected: the quantity of files
modified, deleted, renamed, moved and created; the quantity of
directories created and deleted; information about modifications in
your Master Boot and Boot records. To see more details about a
certain type of modifications, click the Details button at the right of
the required list entry.
93
Page 94

VIEWING CHECK RESULTS
Figure 47. The statistics of modifications detected
If necessary, you can view all the modifications detected in the form
of a tree. To do it, switch to the Tree view tab (figure 48).
On this tab page you can use the right-click menu commands to
work with files and folders in the tree (see subchapter 7.3).
94
Page 95

KASPERSKY ANT-VIRUS
Figure 48. The modifications-detected tree
7.3. The Disks work-area:
Working with modifications
detected
To see more details about a certain type of modifications detected,
display the modifications’ statistics window and click the Details
button at the right of the required list entry.
After this, the window containing the list of modifications will appear
on your screen (figure 49).
95
Page 96

VIEWING CHECK RESULTS
Figure 49. The list of new files detected
Kaspersky Inspector allows you to work with the following types of
modifications in the statistics window:
• files changed — the Change entry in the Files
scanned section;
• files created — the New entry in the Files scanned
section;
• files moved — the Moved entry in the Files scanned
section;
• files renamed — the Renamed entry in the Files
scanned section;
• directories created — the New entry in the Directories
scanned section.
96
Page 97

KASPERSKY ANT-VIRUS
All other types of modifications cannot be edited.
To edit modifications described above you must use
commands in the right-click menu.
While working with files that have been modified or created you
can use the following commands:
• Delete — deletes the file.
• Add to exclude list — adds the file to the list files
excluded from the check (see subchapter 6.1.3).
• Add to stable list — adds the file to the list of files which
contents must not contain any modifications (see
subchapter 6.1.3).
• Check with KAV — checks the file using your KAV
scanner (see subchapter 6.1.6).
• Check all with KAV — checks all files in the list using
your KAV scanner (see subchapter 6.1.6).
Renamed or moved files can only be deleted. To do it, select
the Delete command from the right-click menu.
While working with directories that have been created you can
use the following commands:
• Check with KAV — checks the directory using your KAV
scanner (see subchapter 6.1.6).
• Check all with KAV — checks all directories in the list
using your KAV scanner (see subchapter 6.1.6).
97
Page 98

VIEWING CHECK RESULTS
7.4. The Disks work-area:
Master Boot Record details
If your Kaspersky Inspector detected modifications in the Master
Boot record of your computer a virus warning box with
corresponding information will appear on your screen
(see chapter 9).
To see the details of modifications detected in MBR, click the
Details button at the right of the Master Boot Record entry in the
statistics window.
The Master Boot Record details box (figure 50) will appear on
your screen.
In this box you can see which fields of the of the partition table have
been modified. Usually viruses do not change the partition table,
they change the loader. But there are some computer viruses that
change the initial address of active partition, leaving the loader
unchanged. Besides when you change your operation system (or
the version of your operation system) the loader also changes.
98
Page 99

KASPERSKY ANT-VIRUS
Attention!!! If your Kaspersky Inspector detected
modifications in MBR, it’s strongly advisable that you
investigate the cause!
Figure 50. The Master Boot Record details box
7.5. The Disks work-area: Boot
Record details
If your Kaspersky Inspector detected modifications in the Boot
record of your computer a virus warning box with corresponding
information will appear on your screen (see chapter 9).
To see the details of modifications detected in BR, click the Details
button at the right of the Boot sector entry in the statistics window.
The Boot Record details box (figure 51) will appear on your
screen.
99
Page 100

VIEWING CHECK RESULTS
In this box you can see which fields of the BIOS Parameter Block
(BPB) have been modified. Usually viruses do not change BPB,
they change the loader (frequently they change the JMP to loader
and the OS manufacturer name). Besides when you change your
operation system (or the version of your operation system) the
loader also changes.
Attention!!! If your Kaspersky Inspector detected
modifications in BR, it’s strongly advisable that you
investigate the cause!
Figure 51. The Boot Record details box
100
 Loading...