

Page 1

KASPERSKY LAB
DOrder for Microsoft Windows .
Version 1.0
User's Guide
Page 2

DORDER FOR MICROSOFT WINDOWS.
VERSION 1.0
User's Guide
© Kaspersky Lab Ltd.
Tel. (095) 797- 87- 00 • Fa x (09 5)797 -8 7-0 0
http://ww w.kaspersky.c om/
Date of edition: October 2001
Page 3

Contents
1.
OVERVIEW OF DORDER 1.0 FOR MICROSOFT WINDOWS .............................5
1.1. Purpose and Fu nctionality O ver vi e w............ ... ..... ... ... ..... ... .. ...... .. ... .5
1.2. Scope of Use........................ ................................................... ......7
1.3. Technical Sup port................. ..... ... ... .. ...... .. ... ..... ... ... ..... ... .. ...... .. ... .8
1.4. What You Can Find in Thi s Guid e...................... .. ... ..... ... ... ..... ... .. ....8
1.5. Document Co nve ntio ns .............. ...... ........ ..... ..... ........ ...... ..... ........ .8
2. INSTAL LING AND UNINSTALL ING THE DORDER PROGRAM.............................9
2.1. The Distributi on Pack.... ........ ..... ...... ........ ..... ..... ........ ...... ..... ........ .9
2.2. Hardware and Software Requirements ........................... .................9
2.3. The DOrder program Installation ..................................................10
2.4. Uninstalling the DOrder program ..................................................16
3. DORDER START AND INITIAL CONFIGURATION...........................................18
3.1. Registe ring and Setting Up the Program: Concepts . .......................18
3.1.1. Registe r ing the Program................. ................................... ....18
3.1.2.
3.2. The First Time Start...... ..... ...... ........ ..... ..... ........ ...... ..... ........ ..... ..19
3.3. Registrat ion at the Firs t St art............ .. ...... .. ...... .. ... ..... ... ... ..... ... .. ..21
3.4. Installing the Product List File..... ................................... ...............24
4. DORDER GENERAL PROCEDURES AND USER INTERFACE ..........................26
4.1. Starting the Program........ .................................. ..........................26
4.2. User Inter f ace: the Main Window................................... ...............27
4.3. Quitting the Program .................... ................................... ............29
5. FORMING AND SENDING AN ORDER...........................................................30
Setting Up the Program.................. .......................................19
5.1. Choosing a Pr od u ct.................... ... ..... ... ... .. ...... .. ... ..... ... ... ..... ... .. ..30
5.2. Setting the Number of Li censes for the Selected Programs.............31
5.3. Setting the Number of O rders Forme d Simultane ously ............ .......32
5.4. Setting the Key’s Expiration Date ................ ................... ...............33
5.5. Selecting the Key Type............................... ..................................34
5.6. Entering Registration Information about the End User of the Key....35
5.7. Entering License Information for the Key............. ................... .......37
5.8. Ordering an Update of the Key ......................... ............................38
5.9. Sending t he Order to Kaspersky Lab .............................. ...............39
5.10. Viewing the Keys Orde rs History................................................40
5.11. Cleaning t h e Main window ........................................................42
6. RECEIVING AND VIEWING THE KEYS..........................................................43
6.1. Receiving the Keys by Email....................... ..................................43
3333
Page 4

KASPERSKY LAB LTD.
6.2. Viewing the Keys ............................. .................................. ..........44
7.
8. CONFIGURING THE PROGRAM...................................................................47
8.1. Displayi ng the Configuration Menu................................................47
8.2. Changing the Program Login Password .........................................48
8.3. Resending the Publi c Key ......... .................................. ..................49
8.4. Configuring the Email Client ..... .................................. ..................50
9. KASPERSKY LAB LTD...............................................................................51
APPENDIXES ......................................................................................................52
Appendix A. The I nput Fie lds of the User Inf ormation Dial og....................52
Appendix B. The Main Window El e me nt s............... ...... .. ...... .. ... ..... ... ... ....53
Appendix C. The Products Tabl e .............. ..... ... ... ..... ... .. ...... .. ... ..... ... ... ....55
Appendix D. The Prog rams Table..... ..... ... ... ..... ... .. ... ..... ... ... ..... ... .. ...... .. ..56
ETTING INFORMATION ABOUT THE PROGRAM
G
.......................................... 46
4444
Page 5

Chapte
r
1. Overview of DOrder 1.0 for
Microsoft Windows
1.1. Purpose and Functionality O v erview
The world-renowned developer and provider of information security software,
Kaspersky Lab Ltd., distributes its products via dis tributors, dealer s, and VARs (further in this guide—partners).
With each c opy of K aspersk y Lab’s s oftware pr oduct , deliver ed by a pa rtner to a n
end user, a unique key file (further in this guide—key) is enclosed.
The keys are gener ated in the Kaspersk y Lab Compan y. KL pr o vides each par tner
with a key for each c opy of a product fo r sale. The DOrder 1.0 f or Microsoft Windows program (fur t her in t h is guide — DOrd er ) is a to ol th at s implifies t he k e y ord ering process for the partners.
The DOrder program is a clie nt part of the ke ys generation s ystem. DOrder is installed locally on the computer, and is used by employees of the partner’s company
responsible for ordering and receiving the keys from Kaspersky Lab.
DOrder allows forming a key order, sending it to Kaspers ky Lab, where th e keys
are generated, and receiving the ready-to-use keys by email from Kaspersky Lab.
5555
Page 6

KASPERSKY LAB LTD.
Each software pr oduct of Kas pe rs k y Lab cons ists of a fixed list of pro-
grams. When buying a product, a user can order certain programs from
this list. Only these programs will be includ ed in the product delivered t o
the user (princ iple of configurable software solution; see the current
product list of Kaspersky Lab). For each program included in the product, the number of licensed items (further in this guide—licenses) should
be specifie d. The number of licenses det ermines the number of items
legally protected by the product (accor ding to the license agreement).
A partner is entitled to distribute only a ce rtain list of Kaspersky Lab
software products. Each partner receives the product list file with names
and features of the software products for dist ribution from Kas persky
Lab.
A typical wor kflow of an employee ordering a key from Kas persky
Lab using D Order include s the f ollowing ste ps :
1. Entering information necessary to make an order for a key with the
use of DOrder’s GUI.
• Each order for a key should include the following information:
- Name of the product f or which a key or keys will be gene rated;
- Lis t of the program names, selected by the employee with
the order of a certain produc t;
- The number of licenses for eac h program included in the
software pr oduct delivered to the end user;
Information about the end user ordering the product (or a
-
description of the distribution channel if the end user is unknown at the time of the order reseller);
2. Sending the order to Kaspersky Lab. The c ompleted or der is sent by
email directly from DOrder .
6666
Page 7

DORDER 1.0
3. Short waiting period for the order to be received and e xec uted b y
Kaspersky Lab. The key delivery from Kaspersky Lab may take
some time. Kaspersky Lab will generate the ordered keys and send
them to you by email.
4. Ready key delivery fr om Kaspersky Lab by email. The generated
keys are the files with .ke y e xtens io n atta ched to the email.
You can order a set of keys for the selected programs of the pr oduct,
which may be legally used in several installations of the product. Such
keys are referred to as identical. The feature is available only for OEM
products, distributed in accordance with special programs of Kaspersky
Lab.
Each product deli vered to a n end user is provid ed with the licens e infor -
mation that defines the rights and restrictions of the product use. For example, if a company has ordered the product, only this company may
use it. The license information is entered into the system during the key
order, and then is stored in the key file distributed to the end user.
There are two types of the k eys—personal a nd serial. A personal key
may be used only by a person or a c ompany for whom it has been ordered. A serial key is ordered if at the moment of sending the request for
the key a particular end user of this key is unknown to the partner. Some
products allow both the serial and pers onal keys, others only pers onal or
only serial.
1.2. Scope of Use
The DOrder pr ogram is a n internal non commercial sof tware product of Kaspersk y
Lab Ltd., whic h is distributed among its par tners to comp uterize the ke ys ordering
and receiving process.
The DOrder program may not be distributed:
As a component of any software product
•
• Without a proper license agreement with Kaspersky Lab Ltd.
7777
Page 8

KASPERSKY LAB LTD.
1.3. Technical Support
Kaspersky Lab Lt d. provides free technical suppor t by either phon e or email to the
partners who order keys using the DOrder program. If you encounter any problems
during the DOrder installation or usage, please contact the technical support department of Kaspersky Lab Ltd., See Chapter 9.
1.4. What You Can Find in This Guide
This document is intended to help you become famili ar with the DOr der program. It
contains the informat ion you need t o install, configur e, and run DOrd er. This document describes release 1.0 of the DOrder program.
1.5. Document Conventions
To make th e guide more us er-friendly an d to underline its structur e, the following
typographic conventions are used (See Table 1):
Table 1. Legend
Designation Meaning
Enter value
From the Fil e menu, choose… GUI elements name
To open the window,
click the mouse.
15 using keyboard
.
Strings entered by user from keyboard and
displayed on the screen, listings, commands, file names, names of catalogs.
Step by step instructions
Watch out! Never do…
Warning
Note that… Note
8888
Page 9

Chapte
r
2. Installing and Uninstalling the
DOrder Program
2.1. The Distribution Pack
The DOrder distribution pack includes:
Program files (as zip archive)
•
• This User’s Guide
To work with the DOrder prog ram, you als o need the
file is sent by email.
Calcue.csl file
. This
2.2. Hardwar e and Software
R equirements
To run DOrder, you must have certain hardware and software installed on your
computer. The system requirements include:
• Any IBM-compatible machine with Microsoft Windows version 9.X/ NT/
2000 or later installed on it;
9999
Page 10
KASPERSKY LAB LTD.
• Ethernet card plugged in your computer;
• Email client installed for Microsoft Windows
2.3. The DOrder program Installation
To install DOrder 1.0 for Microsoft Windows on your machine:
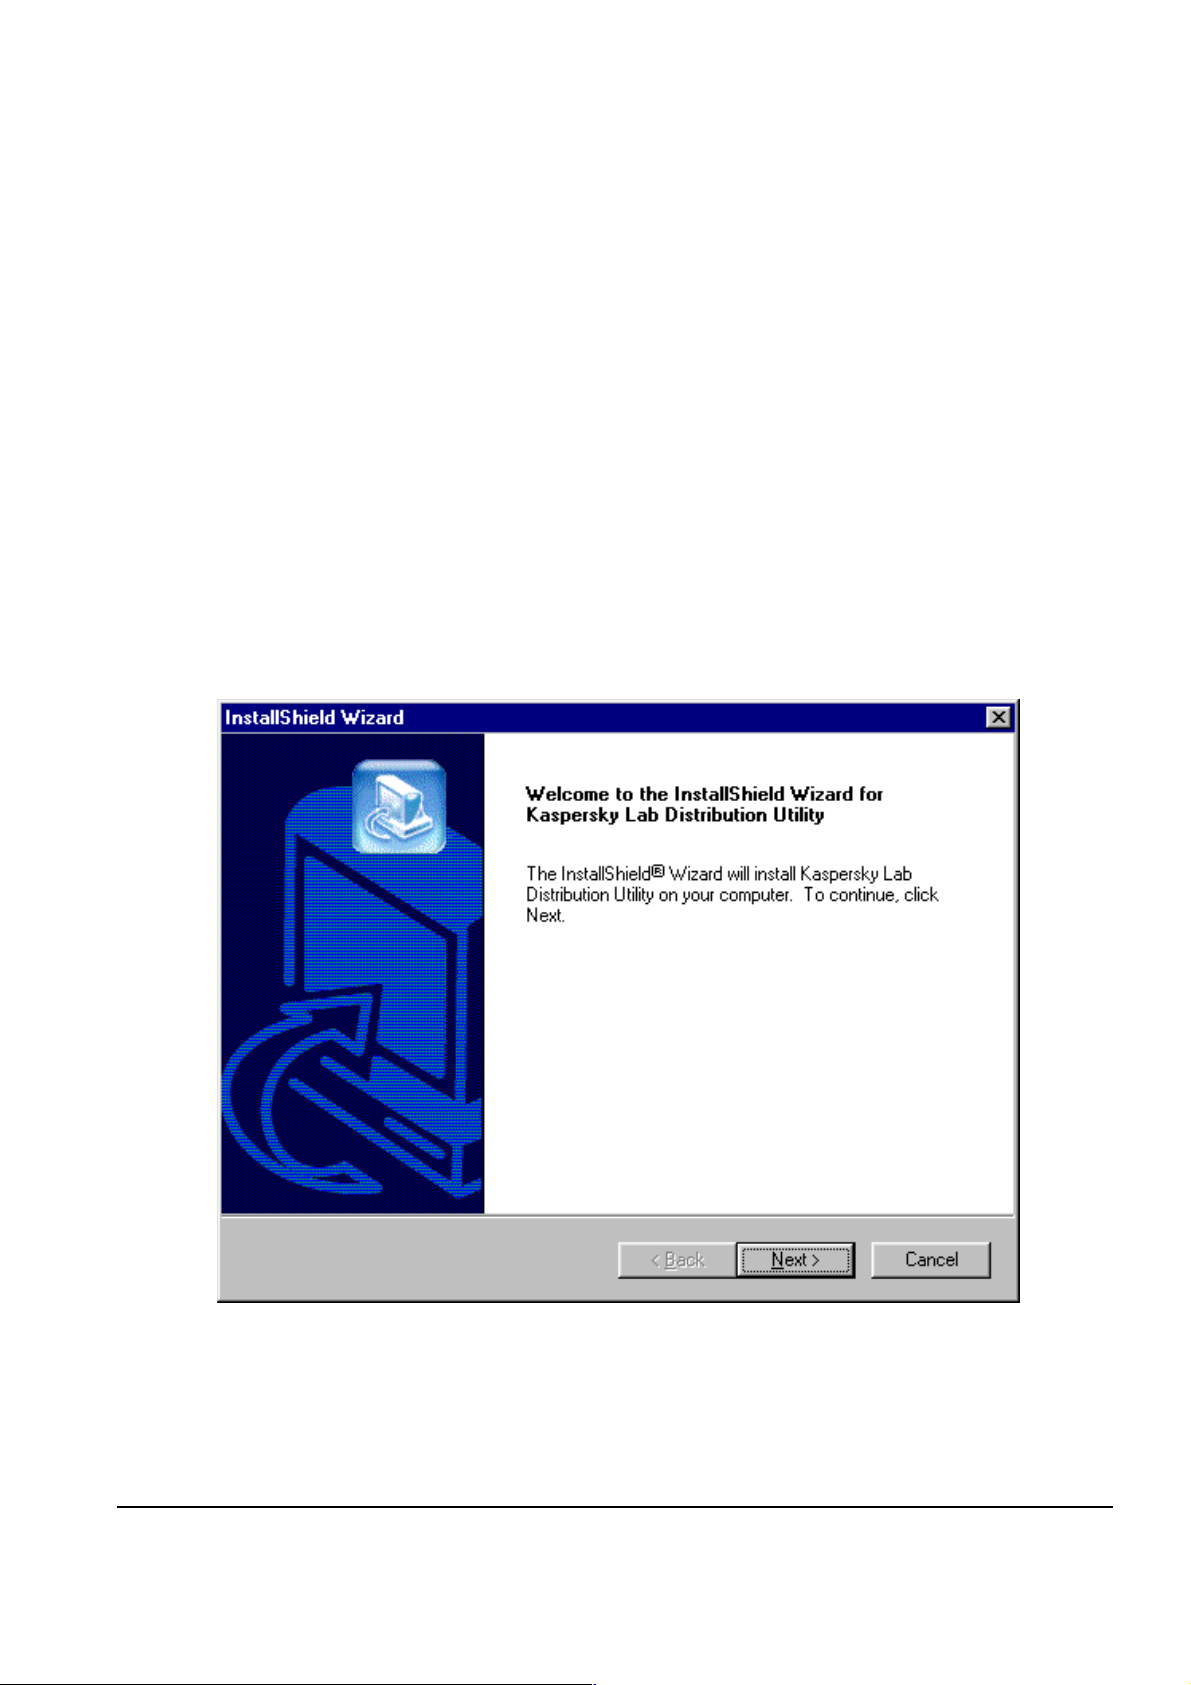
1. Locate the
Run the
(See Fig. 1). Please carefu l l y follo w the instr uc tions on the
screen.
setup.exe
setup.exe
file on you distribution medi a.
program. The setu p pro gr am then launches
Figure 1 . The Welcome window
10
10
1010
Page 11

INSTALLING AND UNINSTALLING DORDER
2. After reading the message in the Welcome window, click the
Next
button. The
Customer Information
window appears
on the screen (See Fig. 2).
Figure 2. The Customer Information window
3. In the User Name field, enter your name. In t he Company
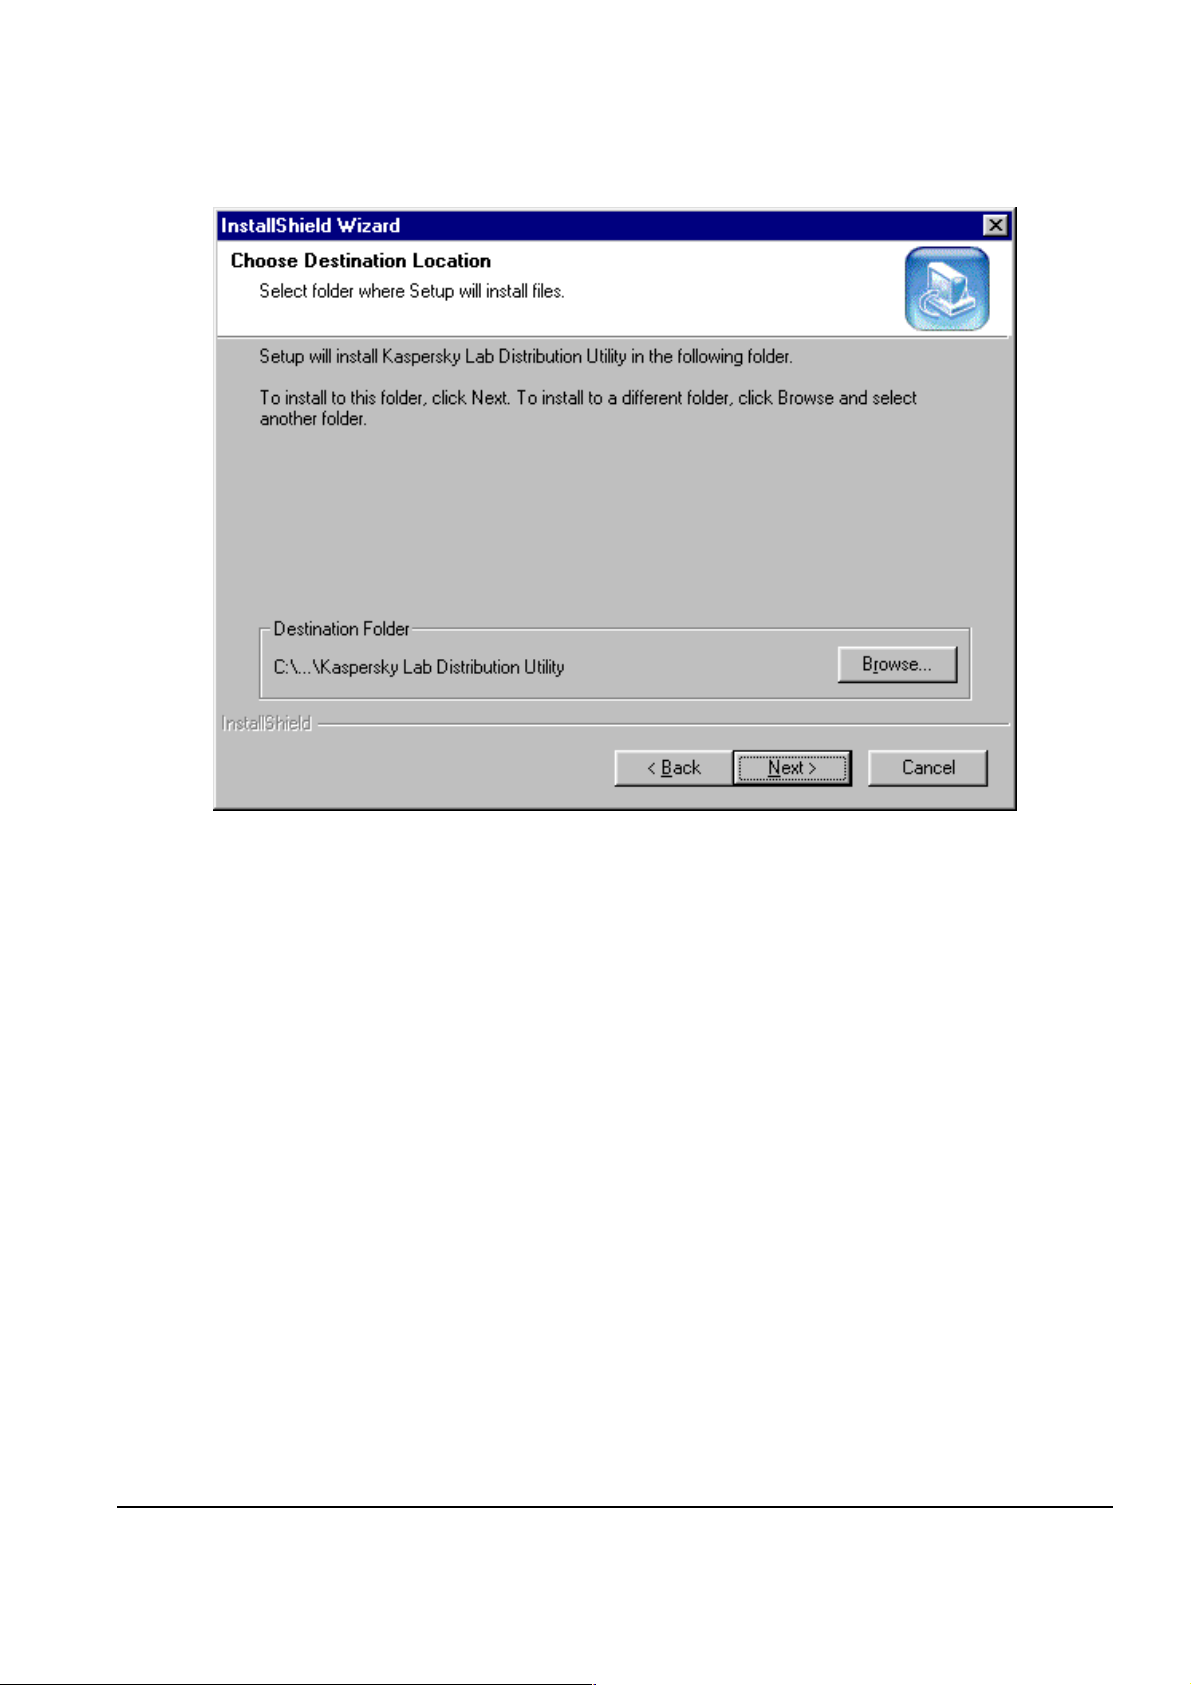
Name field, enter name of the company you work for. After filling in both the fields, click the Next butto n. The Choose
Destination Location window is presented (Fig. 3).
11
11
1111
Page 12
KASPERSKY LAB LTD.
Figure 3. The Choose Destination Location window
4. In this window, select the folder for DOrder files ins ta ll a tion . You
can accept the default folder off e red and click the Next button
immediately. Select another folder for the DOrder files.
To change the default folder name:
• Click the Brow se button. In the displayed standard
Choose Folder dialog, set the path to the folder you want
DOrder to be installed.
• Click the OK but ton. If necessary, the folder you set above
will be creat ed.
•
In the
Choose Destination Location
window dis-
played again. Click the Next button.
12
12
1212
Page 13

INSTALLING AND UNINSTALLING DORDER
After clicking the Nex t button, the Select Program Folder
window will be presented (Fig. 4).
Figure 4. The Select Program Folder window
5. In the Select Program Folder window, select a n ame for
the DOrder menu comman d, whic h wil l be added to th e Wind o ws
Programs menu. You can accept the name offered by default,
enter a new name, or s elect an existing name.
• If you choose the name set by default, click Next.
• To set a new name, enter the name in the Program
Folders field, and then click the Next button.
• To select an existing name, click the corresponding item in
the Existing Folders list, then click Next.
13
13
1313
Page 14
KASPERSKY LAB LTD.
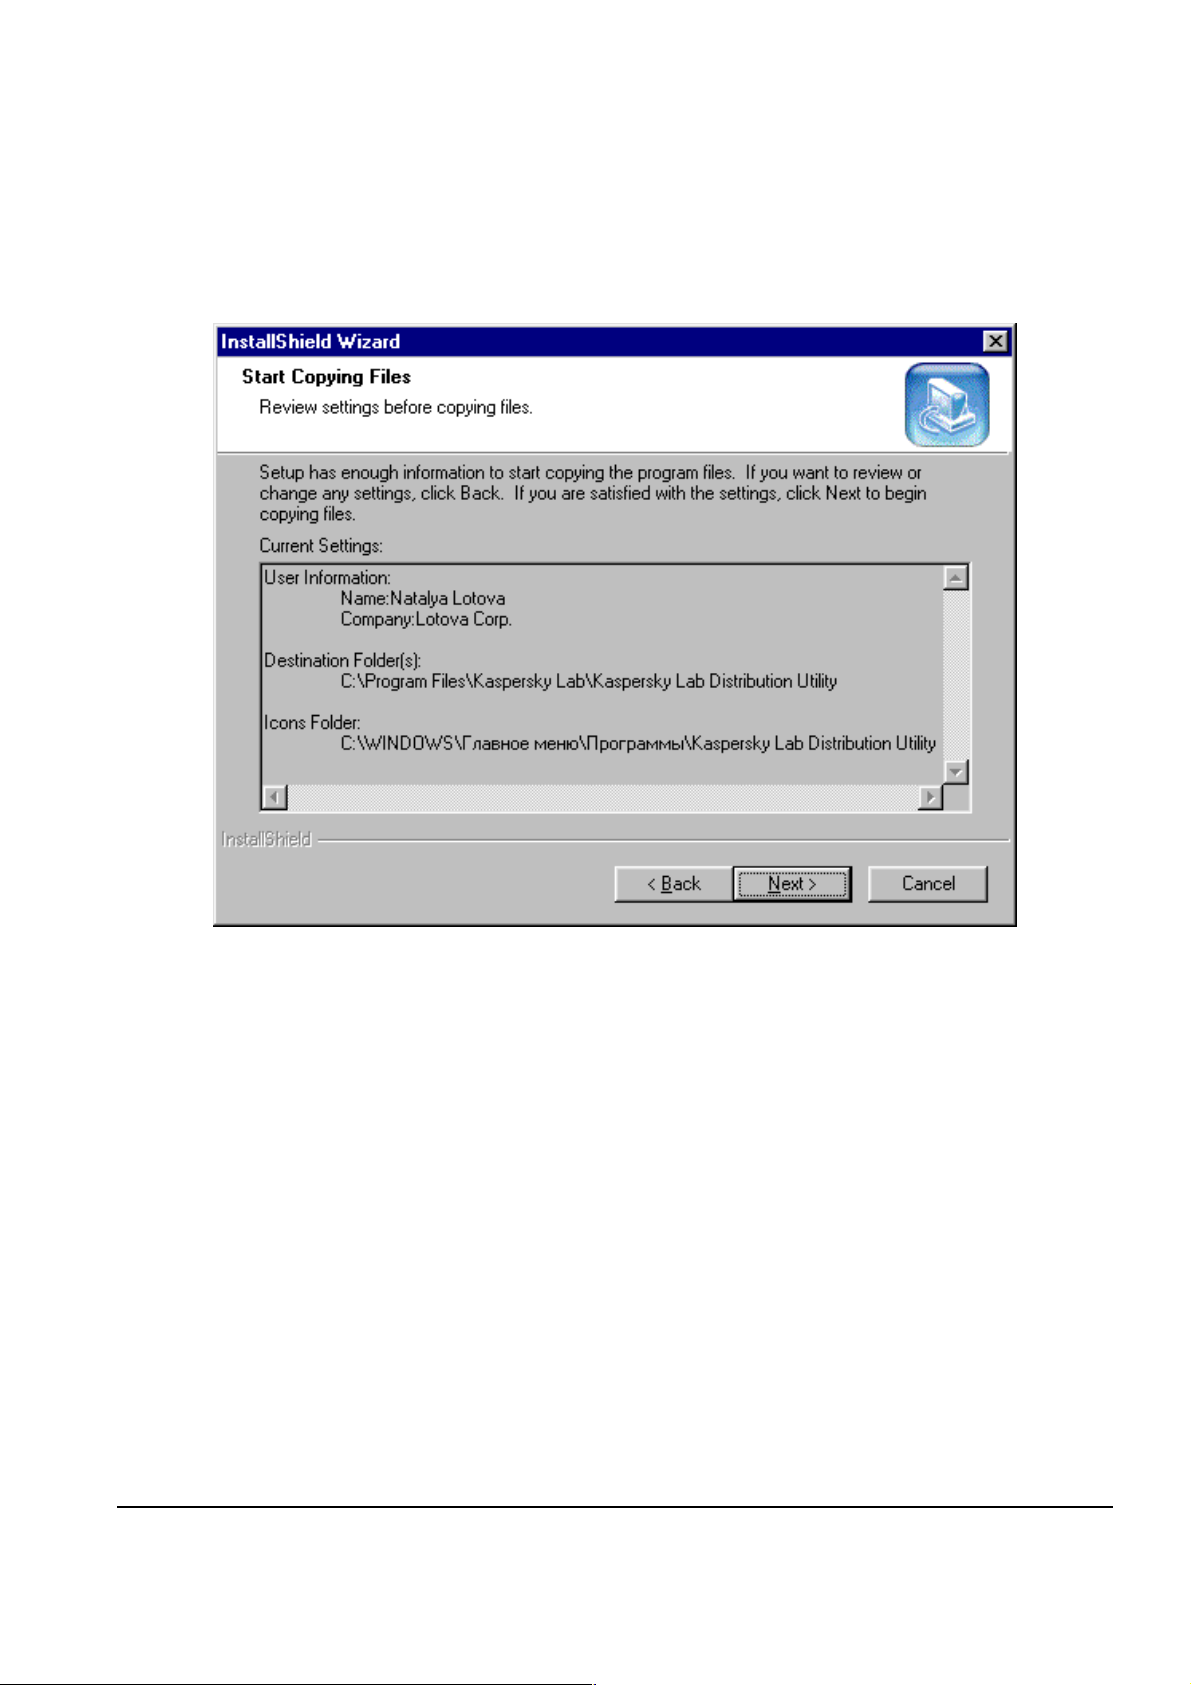
After clicking the Next button, the Start Copying Files win-
dow appears (Fig. 5).
If you made any mistakes while enter ing inf ormation necessa ry for the
setup program, and have not noticed the m while review ing settings in
the Start Copying Files window, or you need for any reason to reinstall the DOrder program, r emove the current installation of the pro-
Figure 5. The Start Copying Files window
6. Configuration of the setup parameters is now complete. In the
Start Cop ying Files window, ensur e th at you have made al l
the settings correctly. If you want to cha nge any settin gs, return
to one of the windows described above by clicking the Back
button. If al l the settings are correct, click Next. The Setup
Statu s window will be presented (Fig. 6). The setup program
will perform the f i les copying and system configuration and you
will not be able to change any settings after that.
14
14
1414
Page 15
INSTALLING AND UNINSTALLING DORDER
gram from your computer, please see the item 1.4, then follow the setup
steps described above.
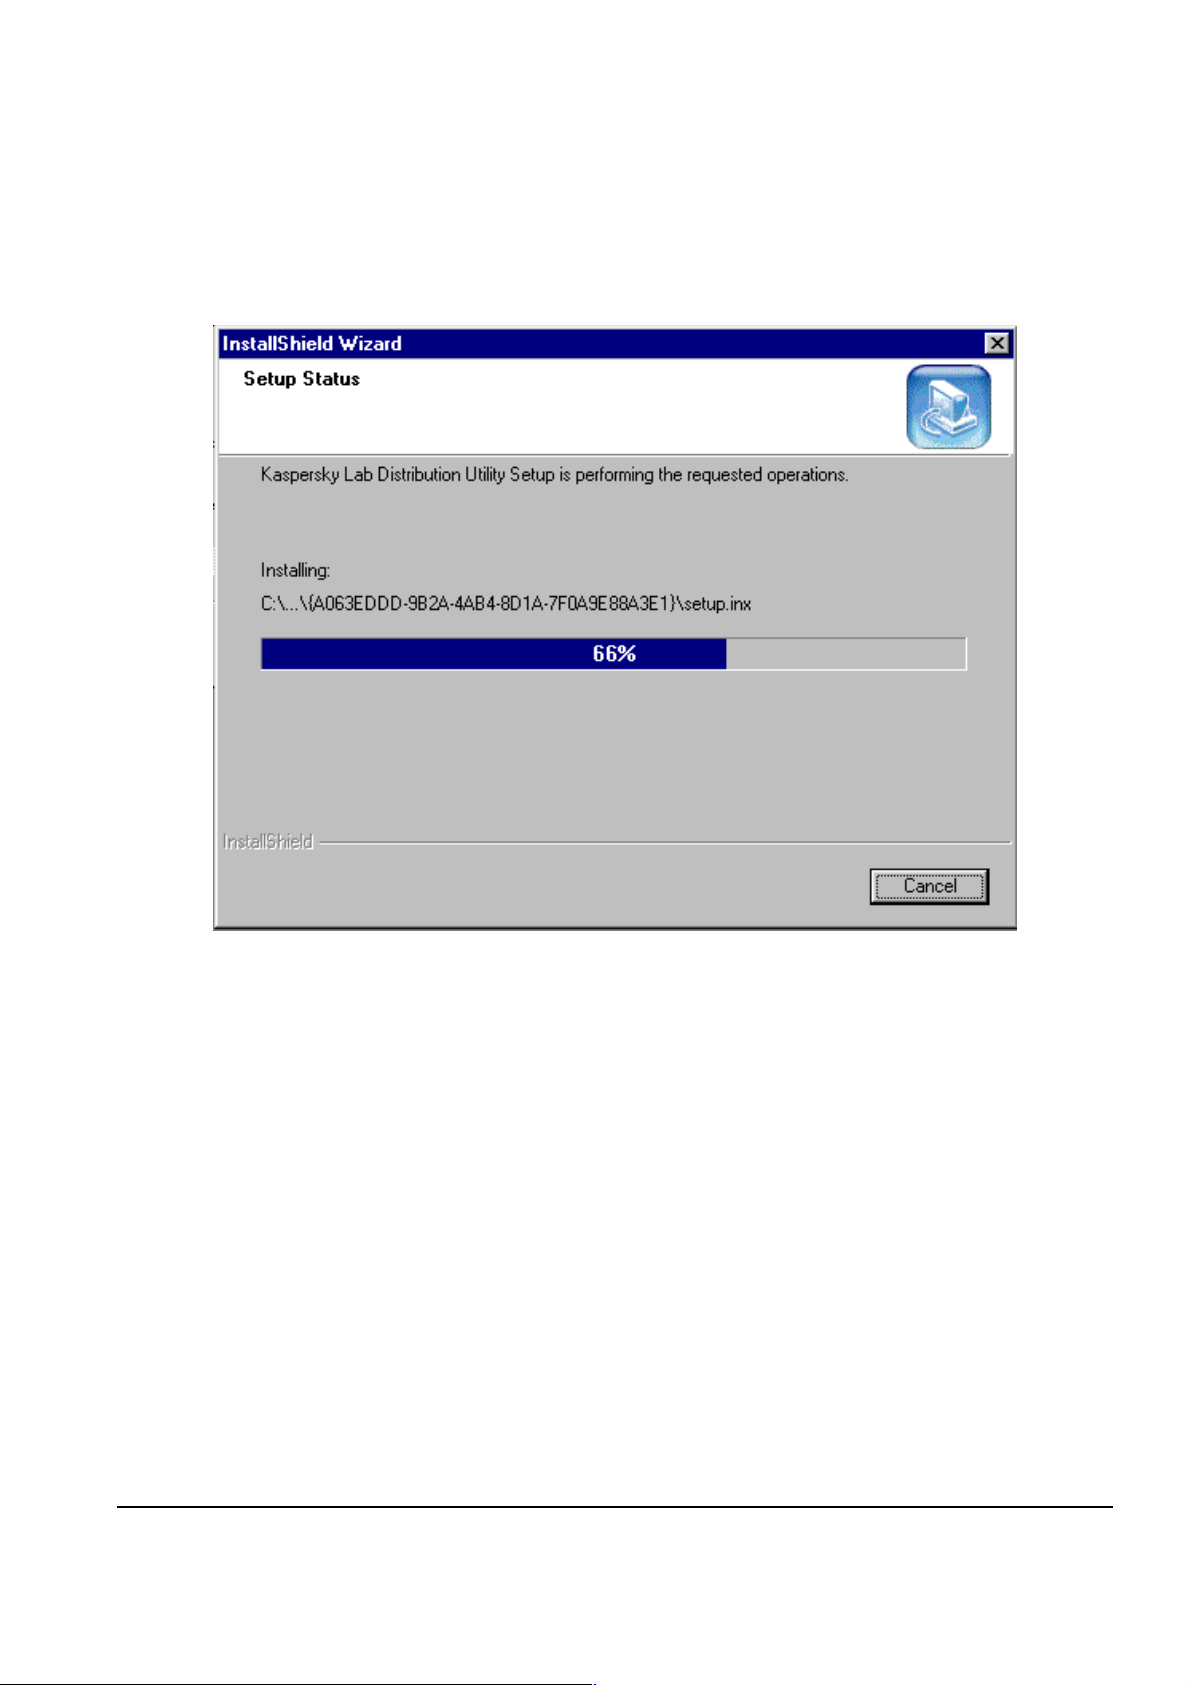
Figure 6. The Set up Status windows
7. The Setup Status window displays the file name cur rent ly be-
ing copied and the progress indicator showing the percentage of
the setup process that has been completed. Please wait for the
setup program to finish copying and configuring the program
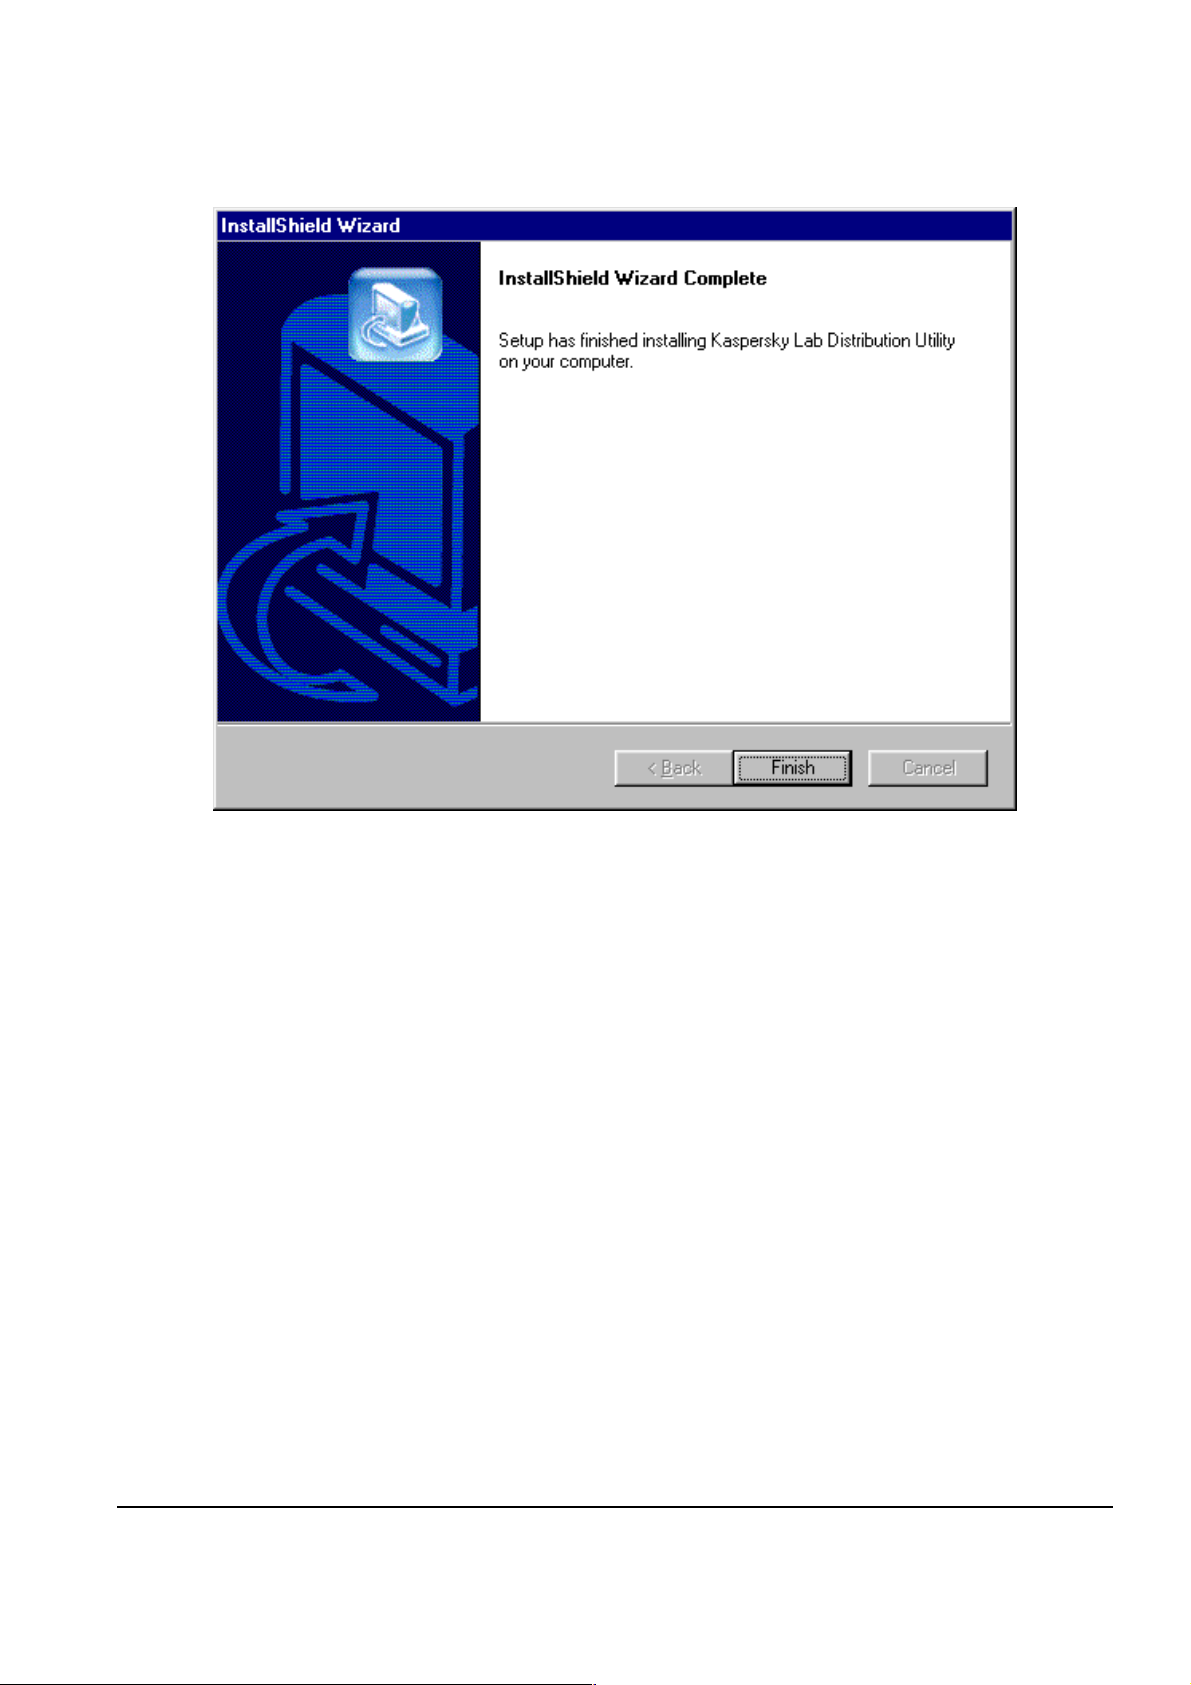
files. Upon the co mpletion of the installation, the Set up
Complete window is displayed (Fig. 7).
15
15
1515
Page 16
KASPERSKY LAB LTD.
Figure 7. The Setup Complete window
8. Click the Finis h button to end the installation and to quit the
setup program.
2.4. Uninstall ing t he DOrder pro gram
To remove DOrder from your computer
1. Click the Start button on the Windo ws task ba r.
2. From the Windows menu, choose
click Control panel.
Settings
. On the next menu,
3. In the Control panel window, double click the Add/ Remov e
Progr ams icon.
16
16
1616
Page 17

INSTALLING AND UNINSTALLING DORDER
4. On the Add/Rem ove tab of the Add/Remove Programs
dialog, select
Kasper sky Lab Distribution Utility
and
click the Ad d/Rem ove... button.
5. If you are sure you would like to remove DOrder, c lic k Yes in the
confirmation window. To cancel the progr am un inst a ll in g, click
No.
If you confirm th e uni ns ta lla tio n of DOr der , al l th e infor m a tion re garding DOrder will
be removed from the W indo ws system files and d irector ies. Af ter that, you can delete the DOrder directory from your computer.
17
17
1717
Page 18

r
Chapte
3. DOrder Start and Initial
Configuration
3.1. Registering and Setting Up the
Program: Concepts
To start working with DOrder, you s hould accomplish several tasks. Pleas e register
the DOrder program, and install the product list file. Normally, you do it once before
the first start of DOrder.
3.1.1. Registering th e Program
The purpose of registrat ion is to ins ert informat ion about your install ation in the internal database of Kaspersky Lab.
During the re gistrat ion, t wo ke ys are for med—p rivate and public. Each ke y is a f ile
located in the DOrder installation catalog.
The private key file is called
by you to Ka spersky Lab. T his file is st ored on your com puter.
DOrder.sgn
. The private k e y is us ed to s ign orde rs sent
18
18
1818
Page 19

DORDER START AND INITIAL CONFIGURATION
If the
mended to create a backup copy of this file.
The public key file is called DOrder.pub. After the registration, this file is sent to
Kaspersky Lab, and is used later to check the signatures of your orders.
You can start ordering keys with DOrder only after registration of your
installation in the Kaspersky Lab database. As soon as you are registered, you will recei ve a co nfir m ati on email, See item 3.3.
If prior to the installatio n of DOrder , you had t he pre vio us versio n of the
software for ordering keys (
need to regist er. Both the private and public ke ys will be copied from the
Dtool
key to Kaspersky Lab.
DOrder.sgn
catalog. The only task you need to perform is to send the public
is lost, you will have to register again. It is recom-
DTool
) installed on your computer, you do not
3.1.2. Setting Up the Program
To start ord ering keys with t he DOrder program you should install t he product list
file on your computer.
The product list file contains a certain list describing attributes of Kaspersky Lab’s
products, which you may distribute.
The product list for each part ner is form ed in Kaspers ky Lab, and is sent as an attached file by email.
3.2. The First Time Start
To start the DOrder program
1. Click the
displayed Windows menu, click the Programs command.
Start
button in the Windows control panel, then in the
19
19
1919
Page 20

KASPERSKY LAB LTD.
2. Click the command th at opens the DOrder submenu. It is called
Kaspersky Lab Distribution Utility
you can change its name during the installation process,
See item 2.3. In the DOrder submenu, click Kaspersky Lab
Distribution Utilit y. (Fig. 8).
by default thou gh
Figure 8. Starting the DOrder progra m from the Windows menu
You can also start the program di rectly from the DOrder installat ion catalog by opening the DOrd er cat alo g in Windo ws E xpl orer , locatin g the
DOrder.exe file
and then double clicking the file name.
20
20
2020
Page 21

DORDER START AND INITIAL CONFIGURATION
3.3. Registration a t the F irst Start
To register the DOrder program
1. Start the program as described in item 3.1. Th e
Information window (Fig. 9) appears. Th e wi ndow el em ents
are described in the Table 2.
Figure 9. The User Inf ormation dialo g
2. Enter your login name and pass wor d in the Acc oun t and
Password fields respectively. This name and password will be
used later to s tart the program.
User
The
Remember the password y ou have enter ed , you will need it eac h time to
Acc ount
characters , up to 20 characters, not including reserved symbols
(!@#$%^&*”?).
3. Enter your password in the Conf irm Password field. This is
required to confirm the password string you typed in the
Password field.
start the program.
and
Password
21
21
2121
fields may contain strings of Latin
Page 22

KASPERSKY LAB LTD.
If after clicking the OK button, the wrong password message appears
on the screen, click OK in the error window. The User Information
dialog becomes active. Fill in the window fields as described above. Be
careful when entering passwords; the Password and Confirm
Password fields should contain the same values .
4. Click the OK button. The window confirm ing the pub lic ke y
(See item 3.1) dispatch to Kaspersky Lab, appears on the screen
(See Fig. 10).
Figure 10. The public key dispatch confirmation window
5. Click OK in this wi nd ow. The Main window of the
DOrder program (Fig. 14) a ppear s.
22
22
2222
Page 23

DORDER START AND INITIAL CONFIGURATION
If after clicking OK, the error message (Fig. 12.) is displayed; and after
clicking OK in this window, the empty Main window is displayed, then
you need to install the product list file on your computer, See item 3.4.
If after clicking
send an emai l to Kaspersk y Lab, is displa yed, then you need to configure your email client, See item 8.3, 8.4.
Make sure that Kaspersky Lab has received your public key, and
registere d your insta ll ation of the DOrder program
1. Start the program, which you use to recei ve em ai ls for m
Kaspersky Lab.
2. Make sure that you have received the email (Fig. 11) from
Kaspersky Lab, conf ir ming the r egis tration of your installati on.
3. If you have received the email, the registration was successful.
You may now proce ed with the produc t lis t ins ta ll ati on. If you
have not recei ved the email, please check your mailbox again after a while . In case of any problems, plea se contact Kaspersky
Lab, See chapter 9.
, the error mes sage, stating t hat DOrder failed to
OK
It may take som e time to register your installation in the Kaspersky Lab’s
internal database and form a new product list for you. Please take this
into considerat ion and wait for the emai l.
You will receive two different emails: one with confirmation of your
registration, the other with the product list fil e. The emails will b e s ent to
you independently and at di fferent times. The registration is performed
automatic ally, while the product lis t is created manually by a Kaspersky
Lab manager.
23
23
2323
Page 24

KASPERSKY LAB LTD.
Figure 11. The email, confirming registration
3.4. Installing the Product List File
If while running with DOrd e r you see the wind o w pres e nted in Fig. 12,
you should install the pr od u c t list file on your com puter.
Figure 12. The error mess a ge: The product list is not ins talled
To install the product list from the file atta ched to the email
1. Start the email program and find the e mail from Kaspersky Lab
with the
Calcue.csl file attached
24
24
2424
.
Page 25

DORDER START AND INITIAL CONFIGURATION
2. Click the attached file. The window confirming the product list installation will be displayed ( Fig. 13).
Figure 13. The product lis t ins tal lat ion co nfir mation
If you have not found the email with the product list file, contact
Kaspersky Lab to describe t he problem.
You should install new product lists as soon as you receive them from
Kaspersky Lab. To update the product list installed on your computer,
please follow the product list installation procedure described above.
25
25
2525
Page 26

r
Chapte
4. DOrder General Procedures
and User Interface
4.1. Starting the Program
After you have received the email confirmation of registration in Kaspersky Lab
(See item 3.3) and installed the price list file, (See item 3. 4) you can s tart form ing
and sending orders for keys. Both tasks are performed in the Main window of t h e
DOrder program.
To display the Main window of the DOrder progra m
1. Start the program, as described in item 3.2. A log in di al og window will be displayed.
2. Enter the password you have set duri ng registration , in the
Password field.
3. Click the OK button. The Main window of DOrder appear s,
Fig.14.
26
26
2626
Page 27

DORDER GENERAL PROCEDURES, USER INTERFACE
If the program does not dis play the password dialog window and the
Main
window appears righ t after the progr am’s start, a password has
not been specified during regis t ration. We recommend you to prote ct the
DOrder by specifying a login password. To do this, change the password
in DOrder.
Follow the ste ps in the ite m 8.2 to speci f y anot her pas sw or d.
4.2. User Interface: the Main Window
Orders for the keys are formed in the Main window of the D O rder prog ram , pl ease
see fig 14 and the information on how to display this window can be found in
item 4.1.
Figure 14. The Main wi nd o w of the DOrd er pro gram
27
27
2727
Page 28

KASPERSKY LAB LTD.
The Main window elements are de scribe d in th e Appendix B.
The upper table in the Main window is t he Products Table. It contains a list
of products for which you can order a key. For detailed information about the
Products Table, please refer to item 5.1.
The Programs Table locat ed be lo w t he Products Table displays a list of
programs inc l uded in the pr o duc t selected in th e Products Table. For detailed
information about the Programs Table, please refer to item 5.2.
The Lic ense field an d t he Change License button are used to set th e number of licenses for the selected programs. For detailed information about sett ing
the licenses numbers, pl ea s e re f e r t o item 5.2 .
Nine fields in the End User group bo x, located at the bottom of the Main win-
dow, are used to enter information about the end user of the product. See item 5.3.
(Informatio n from the End User group is inserted in the un ified databas e of the
end users in Kaspersky Lab, and is not registered in the key file).
The License Info field is use d to enter license in formation for a k ey being ordered. Select ing the Auto filling license info check box makes it possible
to fill the License Info field automatically. (Information from the Lice nse
Info field is registered in th e key file). For descr iption of en te ri ng th e lic en se i nformation, please refer to item 5.7.
The Main window contains elements used to enter information required for the
order execution. The Expiry Date field makes it possible to change (to decrease) the maximum of the key life (See 5.4), the Quantity field is us ed to set
the number of or de r s for m ed simultaneously, (See 5 .3) , the Personal check box
is used to select the key type (See item 5.5), the Parent UUID f ield is used to
enter a reference to another order (See item 5.8).
The
Send
button is used to dispatch an order for execution to Kaspersky Lab
(See item 5.9), the His tor y button allows to view the orders sent earlier
(See item 5.10), the Cle ar button deletes informat ion ab out the e nd user and the
numbers of lice ns es for th e s elec ted pr ogr ams ( S e e item 3.1.1), the Exit button is
used to quit the program (See item 4.3).
28
28
2828
Page 29

DORDER GENERAL PROCEDURES, USER INTERFACE
The program configuration menu displayed by clicking the right mouse button in the
top left corner of the
Main
window is used to configure DOrder. See item 8.1.
4.3. Quitting the Program
To quit the program
click the Exit button in the Main window of the progra m.
Information about unsent orders will be lost aft er quitting DOrder.
29
29
2929
Page 30

Chapte
r
5. Forming and sending an
Order
5.1. Choosing a Product
The upper table in the Main window, the Products Table, contai ns a list of
products, for which you can order a key.
Each product is described by a certain set of attributes presented in Appendix C.
All information disp la yed in the Main window relates to the currently
To start making an order for a key
select the product you want to get a key for by clicking its name on the
Products Table. After that, check the Programs Table containing a list o f programs, incl uded i n the se lect ed pro duct.
selected product. For example, if the currently selected product does not
allow ident ical keys (the value in the Identical Key column of the
Products Table is 0), the Identical check box in the Main win-
dow is unavailable. Or if the s ele cted product allows only serial keys (the
value in th e Ke y Type column of the Products Table is 2), the
fields of the End User gr ou p bo x, the Persona l and Auto filling
license info check boxe s are unavailable, etc.
30
30
3030
Page 31

FORMING AND SENDING AN ORDER
5.2. Setting the Number of Licenses for
the Selected Programs
The Programs Table locat ed below the Products Table s hows a list of
programs included in the product selected in the Products Table.
Each program is described by a set of attributes, presented in Appendix D.
After choosing th e product , for which you are order ing the ke ys (See item 5.1) , se-
lect the progra ms that you would like to be incl uded in th e product de livered to an
end user, and set the number of licenses for each of them.
Programs wit h a fixed nu m ber of lice ns es on this pr oduct (the value in
the Fixed column of the Programs Table is not equal to 0) are included in the or der with the number of licenses s pecified in th e
Request column. The Request column of the Programs Table is
filled in automatically and you cannot change it. The Change license
button is unavailable.
For programs with a floating number of licens es (the value in the Fixed column of
the Programs Table is zero), the number of ordered licenses can be set by the
DOrder’s user.
To add the program t o the order and to set the number of licenses
for it
1. Select the product, for which you are or dering the keys, as described in item 5.1.
2. Select the program t hat you want to include in the product delivered to the end user, by clic king its name in the Prog rams
Table.
3. Type the desired number of licenses for the selected prog ram in
the License field and click Change License. Make sure
31
31
3131
Page 32

KASPERSKY LAB LTD.
that the desired number is displ a yed in the Re quest column
opposite your program’s name.
The DOrder program aut om atic a lly va li dat e s numbers you enter in the
License field. If you enter a value larger than the maximum allowed for
this program displayed in the Max column, the Req uest column will
be set to the maximum and not to the value s pecified by you. Similarly,
you cannot s et the value in the
minimum shown in the Min column.
4. Repeat steps 1-3 for each program that you want to include in
the product delivered to the end user.
Request
column to be smaller than the
To find out which programs are already included in the product
delivered to the end user
in the Programs Table, find programs with nonempty values in the
Request column. If the Request colum n is empty for a program, this
program is not includ ed in the ord er. If the value is s et to a positive num ber,
the program is inc lude d in t he or der with th e numb er of li ce ns es dis played i n
the Request co lumn.
5.3. Setting the Number of Orders Formed
Simultaneously
You can form several order s concurrent ly, only if ordering serial keys.
(That means that you form an order in the Main windo w and click
Send once, but receive several letter s with a diff er e nt s et of ke ys, or receive one letter with a set of keys, which you may copy.)
To form several or ders f o r
clear the Identity chec k box, set the desired numb er of lice nses for ea ch
program included in the product to be delivere d to the end user, then ent er
different
32
32
3232
keys
Page 33

FORMING AND SENDING AN ORDER
the number of such orders in the Quantity field. You will receive keys for
each order in a separate email.
To form several or ders f o r
1. Make sure that the selected product allows ordering identical
keys (the Identical Key column of the Pr oducts Table
contains 1).
2. Select the Identity check box and enter the des ired number of
identic al keys in t h e Quantity field. You wi ll recei ve a single
letter with keys for the sel ected programs in attached fi le. This
set of keys may be legally used for several different installations
of the product. The number of legal installations with this set of
keys is equal to the value in the Quantity field.
identical
keys
5.4. Setting the Ke y’ s Expiration Da te
The Expiration Dat e defines the date the key will become invali d
and when it can n o longer be used. By defaul t, the Expiration Date
is calculated as a sum of thr ee items: the date of the key’s generation
(the date of the order), the Subscription Period (See the
Products Table), and the Can be installed within period (See
the Products Table).
The key can b e installed at any time du ring the Can be installed
within per iod, displayed in t he Products Table, starting with the
date of order. The key can be used after installation during the period
defined by the Subscription Period value, but not after the date
specified in the Expiration date.
You can change ( decrease) the Expiration date value manually. DOr der will
not allow you to increase the maximal Expiration date.
33
33
3333
Page 34

KASPERSKY LAB LTD.
Before changing the Expiration Date, please contact your supervising manager at Kaspersky Lab.
To change the Expiration date value
enter a new value in the Expiration Date field .
5.5. Selecting the K ey T ype
There are two types of keys—personal and serial.
A personal ke y may be us ed only by a per s on or a c ompany for whom it has been
ordered. A serial ke y is ordered if, at the mo ment of sending the re quest for a k ey,
you do not know the particular end user of this key.
To select the type of the key you ordering
The key types, allowed for the product, are defined by the value in the
Key Type column of the Products Table. 0 means that a key for
this product can be serial or personal, 1—only personal, 2—only ser ial.
If the selected product allows only one pa rticular type of key, the
Personal check box will be una vai lable , and its valu e is set automatically.
1. Make sure that the selected product allows both serial and personal keys.
2. Select the Personal check box if you want to order a pers ona l
key. Clear the Personal check box, if you want to order a serial key.
34
34
3434
Page 35

FORMING AND SENDING AN ORDER
5.6. Entering Registration Information
about the End User of the Ke y
The fields in the End User group box, located at the bottom of the Main win-
dow, are used to enter infor mation abou t the end us er of the pr oduct for which the
keys are ordered.
If you order the serial key, the fields are unavailable.
To enter information about the end user (in the case of a personal
key)
1. Fill in the Name and Company fields of the End User group
box. If the end user of the product, for which the keys are or dered, is a company, type the company’s name in the
Company field and, if possible, the name of the cont act person in the Name field. If the end user is a per s on, type his/ her
name in the Name field.
You should fill in at least one of the two requir ed fields—Name or
Company.
patched when you click Send . After clicking the Send button, the error
message, Fig. 15, appears.
If both fiel ds are left empty, your order will not be dis-
Figure 15. The Error mess a ge: You have not pr o vided t he req uire d info rm ati on
about the end user
35
35
3535
Page 36

KASPERSKY LAB LTD.
2. Enter information in the other fields of the End User group box
according to the Tabl e 2. If possible, fill in all of the fiel ds .
Table 2. The Fields of the End User Group box
Field Limitations Sample
Company
Name
Countr y
City
Address
Phone
50 characters; inverted co mmas (“)
are not allowed; the templat e is
<Name>, <Organization form>
50 characters; inverted co mmas (“)
are not allowed
50 characters; inverted co mmas (“)
are not allowed
50 characters; inverted co mmas (“)
are not allowed
255 characters; inverted c ommas
(“) are not allowed
30 characters; inverted co mmas (“)
ABC, Inc
John Smith
USA
Boston
1 Memorial drive,
office 10
+1.617.1234567
Fax
E-mail
WWW
are not allowed
30 characters; inverted co mmas (“)
are not allowed
255 characters; inverted c ommas
(“) are not allowed
255 characters; inverted c ommas
(“) are not allowed
36
36
3636
+1.617.1234568
info@abc.ru
www.abc.ru
Page 37

FORMING AND SENDING AN ORDER
5.7. Entering License Information for the
Key
License inform ation for a key restrict s the rights of key us age according to the License Agreement.
To enter the license information manually
Make sure that t he Auto filling license info check box is clear .
1. Enter the license information in plain-text for m in the License
info field. If you ar e ord eri ng a pers ona l ke y, e nter infor m at ion
about the end user in the License info field; if order ing a serial key, specify a distribution channel. (Examples of distribution
channels: direct sales, partner’s sales, OEM sales, Internet
sales).
The License info field is required and needs to be entered. If you
leave the License info empty, after cl ic king OK, the er ror message,
in Fig. 16, will be displ ayed.
Figure 16. The Error message: License informat io n is n ot provi de d
If you order a pers onal k e y, you ca n us e t he automatic enter ing l icen se inf orm a tio n
feature.
37
37
3737
Page 38

KASPERSKY LAB LTD.
In the case of or dering a serial key, the Auto filling lice nse info
To fill in the License info f iel d automatically
select the Auto filling license info check box.
field is unava ilable. Please type the license information in the License
info field manually.
5.8. Ordering an Updat e of the K ey
If you need to extend a period within which the generated key is available, you may
order an update for thi s key.
Before ordering the key’s update, please contact your supervising man-
ager in Kaspersk y Lab.
The order’s identical number is a unique number assigned to your order
To order an update for the key
specify the order’s identical number for the key, for which you need an update, in the Parent UUID field.
on its dispatch to Kaspersky Lab. The letter with the keys generated for
your order, which yo u rece i ve b y email, cont ai ns this n umber in the firs t
string of the body, See Fig. 20. You can also find the identical n umber of
the order in the Histor y windo w. This windo w lists all the orde rs made
by you, and is displayed by clicking the History butt on, See item 5.10.
38
38
3838
Page 39

FORMING AND SENDING AN ORDER
5.9. Sending the Order to Kaspersky Lab
To send an order for the key
1. Make sure that you filled in all the fields in the
rectly.
2. Click the Se nd button. If the information you spec ified in the
Main window is validated suc c ess full y, a window with infor mation about the order will be displayed, Se e Fig. 17. In the case of
any errors (i.e., a required f iel d is left empty), an error message
appears. After clicking the OK button in this window, the Main
window becomes active. You can correct errors and click
again.
Main
window cor-
Send
Figure 17. The Order Review Window
39
39
3939
Page 40

KASPERSKY LAB LTD.
3. Click Yes, to send the order to Kaspersky Lab. Click NO, to re-
turn to the
clicking the Yes button, the order is sent, and the confirmation
window is displayed , see Fi g. 18 . In this win do w, yo u c an speci fy
which fields of the Main window should be cleaned, before you
will start making another order.
Main
window and co ntinue forming the order. After
Figure 18. The Dispatch Confirmation Window
4. Click Yes to clean the fields in the End User group bo x, th e
License Info field, and the number of requested licenses for
the selected programs (with “floating” numbe r of licenses) in the
Programs Table. Click No to remove information about the
requested licens es, and pres erve all other information in the
Main window.
You will receive the generated keys that you have ordered by Email, See item 6.1.
5.10. Viewing the K eys Orders History
To view pre vi o us orders
1. Click the Hist ory button in the Main window and the
History
window, see Fig. 19., is displa ye d.
40
40
4040
Page 41

FORMING AND SENDING AN ORDER
2. Find the order you are look ing for b y using th e scr oll bar . Each
row in the table repres ents a single or der . You can see the order’s details in the columns of the table, see Table 3.
Table 3. The Order’s De tails
Field Meaning
Date Date of the order
Time Time of the ord er
Request UIID Unique identica l number of the or der
Name of Sale List Product name, for whic h th e key was ord er ed
Duration Period within which the key can be used
IsPersonal Key type (1—personal, 0—serial)
IsIdentical Defines, whether the ordered k eys are identica l or
different
Quantity Quantity of the orders, formed concurrently
3. Select the order by clickin g its name in the table. In the table located below, a list of the programs included in this order will be
displayed. The Pr ogram column shows a program name, the
License column—th e number of licenses for this program. The
License info field displays license information for this order .
4. Click the OK button. The Histor y window will be closed, and
the Main window become s active .
41
41
4141
Page 42

KASPERSKY LAB LTD.
Figure 19. The Hist ory window
5.11. Cleaning the Main window
To clean the fields of the End User gr oup a nd to rem ove i nfor ma-
tion about the requested licenses from the Programs Table
click the Cl ear button in the Main window.
42
42
4242
Page 43

Chapte
r
6. Receiving and Viewing the
Keys
6.1. Receiving the Keys by Email
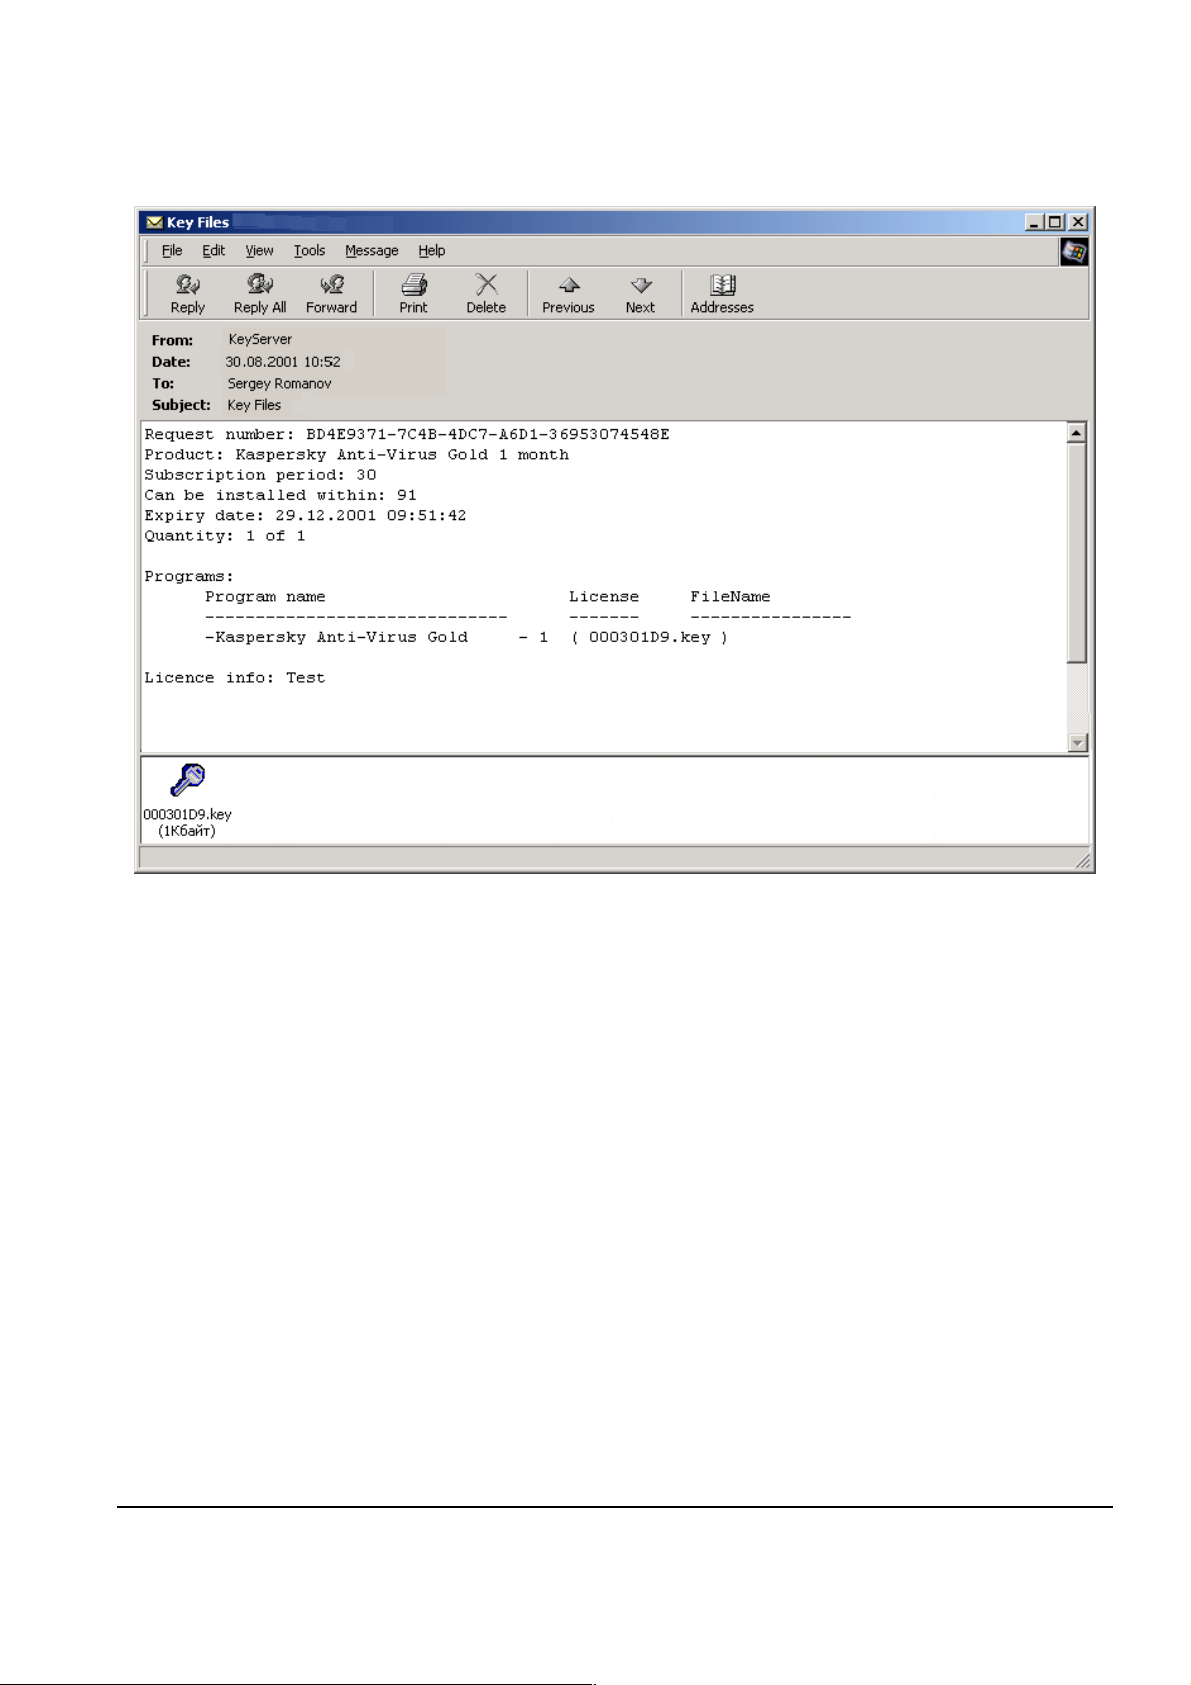
Generated ke ys that you have o rd ered are sent t o you b y ema il. An example of an
email with an attached file containing the keys is shown on Fig. 20.
In the body of t he email, you can a lso see inform ation about the order and t he ordered keys. The keys can be found in the attached files. To view a key, you need a
special program called KeyVi ewer . Short information about this program is
given in item 6.2.
To get the keys
1. Open the program, which you use to receive emails from
Kaspersky Lab.
2. Find the email containing the particular order ID in the body. The
order ID is the number typed after
Request number.
43
43
4343
Page 44
KASPERSKY LAB LTD.
Figure 20. A letter with a ke y from Kaspers ky Lab
If you have m ade several orders, the keys of each order will be sent i n
separate email. If you have ordered different keys, you will receive
Quantity emails, e ach containing a set of ke ys fo r the select ed programs; if identical, you will receive a single letter with a set of keys. You
are allowed to make Quantit y copies of this set.
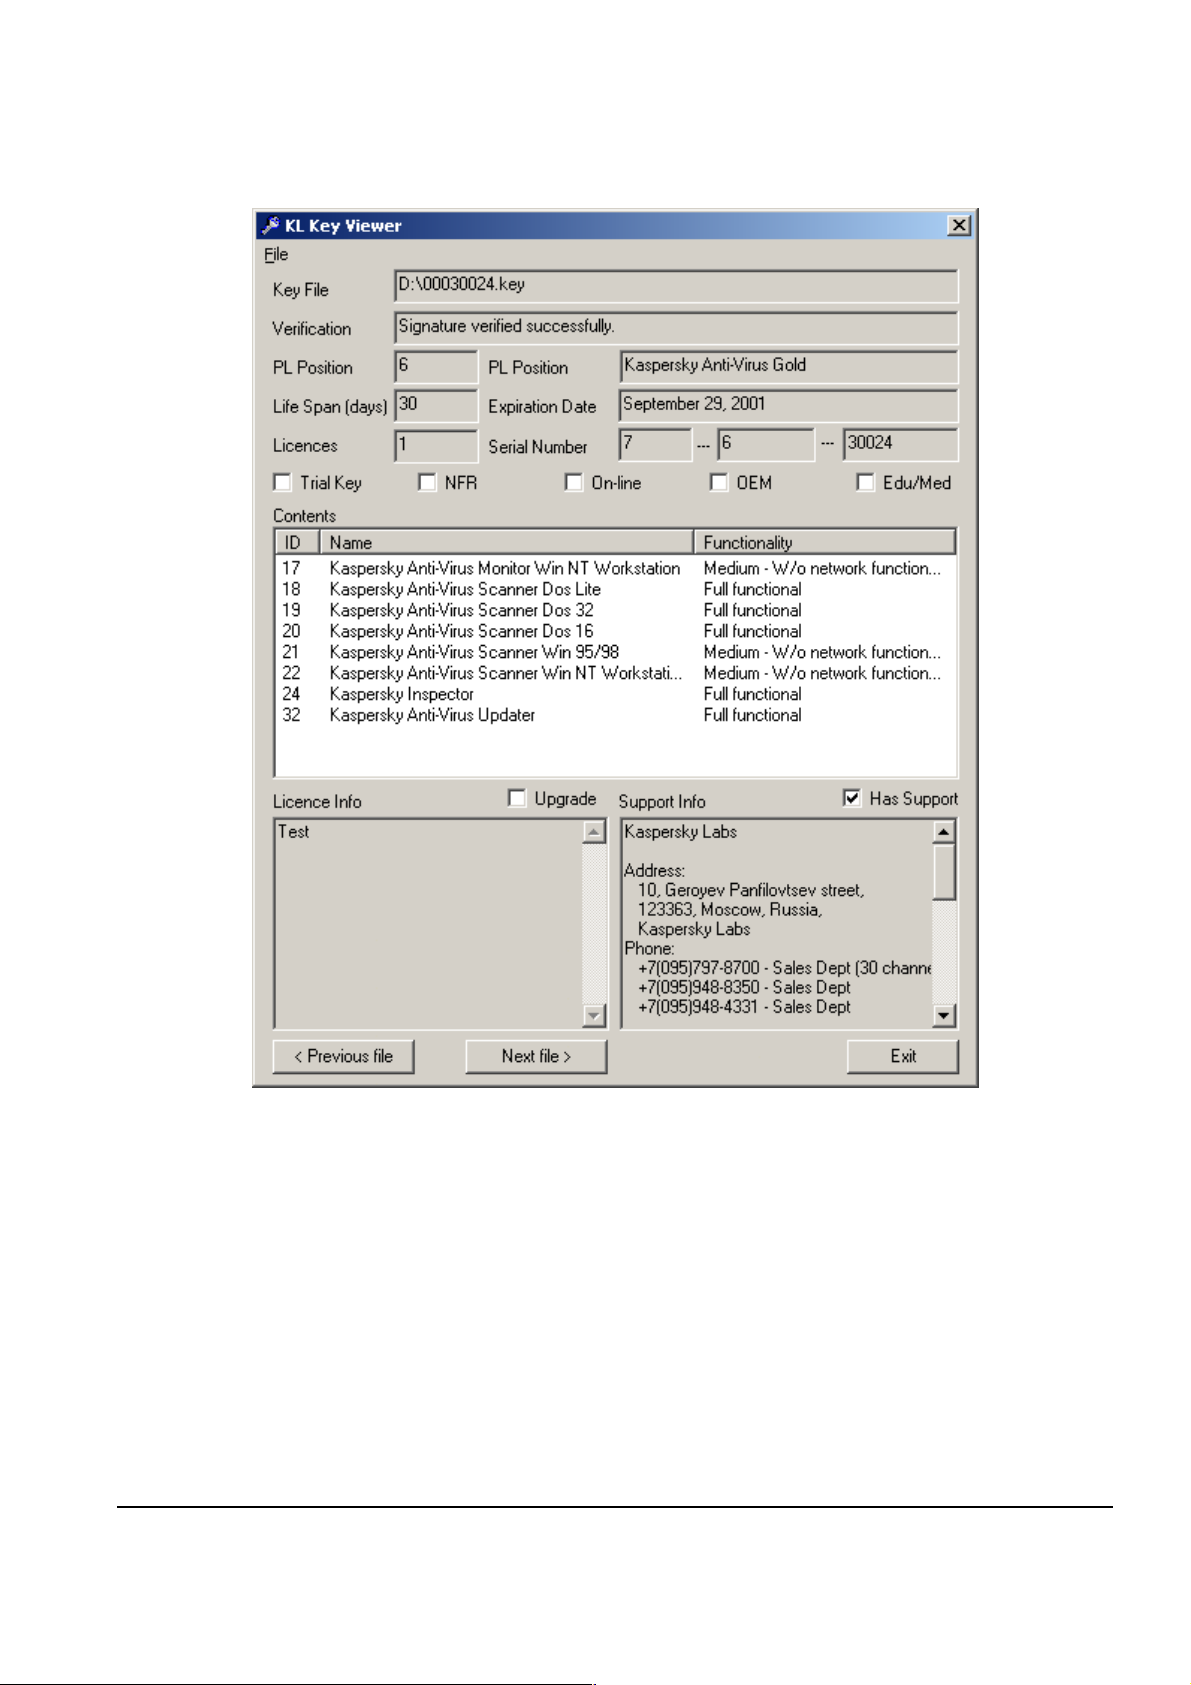
6.2. Viewing the Keys
Generated ke ys that you have order ed are sent to you b y email in at tached files
(See item 6.1).
Keys files can be viewed only usi ng a special pr ogram—Ke yViewer. The main
window of the Ke yView er program is presented in the Fig. 21.
44
44
4444
Page 45
RECEIVING AND VIEWING THE KEYS
Figure 21. The main window of KeyView er
For a detailed description of the KeyViewer program, please refer to
Key Viewer User’s Guide
the
.
45
45
4545
Page 46

Chapte
r
7. Getting Information about the
Program
To displa y the version number of DOrder and other informat i on
about the program
Click the Kaspersk y Lab logo on the bottom right corner of the Main window, or choose About DOrder… from the configuration menu of DOrder
(See item 8.1). The About Dorder window will be displayed
(Fig. 22).
Figure 22. The About DOrder window
46
46
4646
Page 47

Chapte
r
8. Configuring the Program
8.1. Displaying the Configuration Menu
To displa y the configuration menu of the DOrder pro gram (Fig. 23 )
click the right mouse button in the top left corner of the Main window .
Figure 23. The configur at io n menu of DOrd er
47
47
4747
Page 48

KASPERSKY LAB LTD.
8.2. Changing the Program Login
Password
To change the program login password
1. From the DOrder conf ig urat ion menu (S ee ite m 8.1), choos e
Change Password
by a password, the dialog (Fi g. 24) will be displayed. Enter the
old password in the Password field and click OK and the
User Information
can specify a ne w pas sword.
. If the program login is already protected
dialog (Fig. 10) will be displaye d . Here you
Figure 24. The Pass word di alo g
2. Enter a new password in the
Password fields.
Password
and
Confirm
The Password field should contain a string of Latin characters and be
no longer than 20 characters and not contai n reserved symbols
(!@#$%^&*”?).
If you want to remove the DOrder password pro tection, leave both the
fields Password and Conf irm Passw ord empty.
48
48
4848
Page 49

3. Click the OK button.
CONFIGURING THE PROGRAM
If after clicking the
played click
Information window. Enter a new password in the Password and
Confirm Pa ssword fields. Be careful when typing the password;
both the fields
the same strings.
to close the message d ialog and retur n to the
OK
Password
button, the wrong password message is dis-
OK
and
Confirm Password
8.3. Resending the Publ ic K ey
To resend the public key to DOrder
1. From the DOrder conf ig uration menu (See item 8.1), choos e the
Send Public Key to KL command. The window with the
confirmation of the public key dispatch to Kaspersky Lab appears on the screen (Fig. 10).
User
should contain
2. Wait till the open key t hat you have sent, is receive d and processed by Kaspersky Lab. As soon as the key is generated, you
will get an emai l with the keys, See Fig. 11.
3. Make sure that the email body contains
member string
about your installation has been updated in the internal database
of Kaspersky Lab. The
tion about your installation has been inserted in the internal database of Kaspersky Lab for the first time.
Usually the public ke y is sent automatica ll y when the pr ogram is regis-
tered (See item 3.3) . Ho we ver, if the ke y has not re ached Kaspersky
Lab, or Kaspersky Lab asks for an update of your key, you may need to
resend the key manually.
. The
Update me mber
Insert member
string means that information
Insert member
string means that informa-
or
Update
49
49
4949
Page 50

KASPERSKY LAB LTD.
If you have received a reje ction of your update by email, contact a
Kaspersky Lab technical s upport spec ialist. A possibl e reason for this rejection is sending the key from another email address, not the one registered for you in the inter nal data bas e of Kas persky Lab.
8.4. Configuring the Email Client
To select the email client for DOrder
1. From the program configuration menu ( See item. 8.1), choose
E-Mail Configure. The e-Mail configure window, with a
list of all email c lients, installed on your computer ( Fig. 25), is
displayed.
2. Select the program name in the drop-down list and click OK. After that this program will be used for sending emails to
Kaspersky Lab.
Figure 25. The e-Mail configuration window
50
50
5050
Page 51

Chapte
r
9. Kaspersky Lab Ltd.
If you have an y questio ns, commen ts or s uggestions p lease r efer them t o our dis tributors listed in your Re adme.txt or d irectly to Kas persky Lab. We will be gl ad to
advise you on any matters related to our product by telephone or e-mail and all
your recommendations and suggestions will be thoroughly reviewed and considered.
Table 4. How to contact Kaspersky Lab Ltd.
Technical
Support
E-Mail: sales@kaspersky.com Sales Department
WWW: http://www.kaspersky.com
Tel: +7 (095) 797-8707, +7 (095) 493-0300
support@kaspersky.com
newvirus@kaspersky.com Anti-virus lab (only for
info@kaspersky.com Marketing and Advertis-
http://www .v ir us list. com
archived virus copies)
ing Department
51
51
5151
Page 52

Appendixes
Appendix A. The Input Fields of the User
Info rmation Dialog
Field Description Allowed Values
GUID The unique identifi-
cation number of
the installation
Acco unt The login name of
the user
Password The password string A string of Latin characters,
Confirm
Password
The password string
(Password Confirmation)
Value is set program matically. The field is unavailable.
A string of Latin characters,
20 characters or less and
not containing reserved
symbols (!@#$%^&*”?).
20 characters or less and
not containing reserved
symbols (!@#$%^&*”?).
A string of Latin characters,
20 characters or less and
not containing reserved
symbols (!@#$%^&*”?).
The string entered in the
field should be the same as
entered in the Password
field.
52
52
5252
Page 53

APPENDIXES
Appendix B. The Main Window Elements
Element Description
Products Table Contains a lis t of Kaspersky Lab’s
products, whic h yo u are al l o wed to
distribute. For more information about
the Products Table, please refer
to item 5.1 and the Appendi x C.
Programs Table
Contains a list of programs, which
constitute the product selected in the
Products Table. For more information about the
Products Table,
please refer to item 5.2 and
Appendix D.
License Field
Are used to se t the number of licenses for the programs included in
Change License button
the product delivered to a customer.
See item. 5.2.
End User fields
Let you enter i nformation about an
end user of the product for which the
key is ordered. See item 5.6.
License Info Field Is us ed to enter the lic ense informa-
tion for the key being ordered. See
item 5.7.
Auto filling license info
check box
Switches on/ of f the automatic filling of
the License Info field. S ee
item 5.7.
Expiration Date Field Lets you modify the exp irati on dat e of
the key being ordered. See item 5.4.
Quantity Field Is used to set the number of orders
formed simultaneously. See item 5.3.
53
53
5353
Page 54

KASPERSKY LAB LTD.
Element Description
Identity check box Is used when f orming several orders
simultaneously. Specifies whether the
different keys for each order should
be generated, or one set of keys for
programs sh ould be created. In the
latter case, the set of keys may be
used for several installations of the
product (identical keys). See item 5.3.
Personal check box Is used to set the type of key. See
item 5.5.
Parent UUI D field The reference to another order. See
item 5.8.
Send button Sends the order to Kaspers ky Lab.
See item 5.9.
History button Displays a hist ory of all your previous
orders. See item 5.10.
Clear button Cleans the fields of the End User
group and removes inf or ma tion about
the requested licenses from the
Programs Table. See item 5.11
Exit button Exits the program. See item 4.3.
Program menu Is displayed by right-clicki ng on the
top left corner of the Main window. Is
used to configur e the program.
See item 8.1.
Kaspersky Lab’s Logo Displays a window wi th info r mati on
about the program. See chapter 7.
54
54
5454
Page 55

APPENDIXES
Appendix C. The Products T able
Field Meaning
Position Code The code of the product
Sale List Name The name of the product
Technical Support The technical suppor t availability (1—the technical
support is available, 0—the technical support is not
available)
Identical Key The capability of ordering identical keys for the
product. (1—iden tical keys are allowed, 0—
identical keys are not allowed). Detailed information about ident ical keys or dering you can fi nd in
item 5.4.
Key Type The type of the key (is one of the following: 0—
keys can be personal or serial, 1—keys can be
only personal, 2—keys can be only serial). For
more information about keys types, please re fer to
item 5.6.
Subscription
Period
The subscription per iod (in da ys). For deta il ed information ab out period of time, during which the
key can be installed and used, ple ase refer to
item 5.5.
Can be installed
within
The period of time starting from the moment of key
formation, during which the key can be installed (in
days). For detailed inf or mat ion abo ut the per iod of
time, during wh ich th e key can be installed and
used, please refer to item 5.5.
55
55
5555
Page 56

KASPERSKY LAB LTD.
Appendix D. The Programs T able
Field Meaning
Name The name of the program
Fixed The fixed number of licenses. If this number is
zero, the program can be d eli ver ed onl y with the
number of licenses displayed in the Fixed col-
umn. If the value in the Fixed column is not zero,
the program can be delivered with any number of
licenses, from a rang e set b y Min, Max.
Min
The minimal number of licenses with which the
program can be delivered. If both Min, Max values are zeros, the number of licenses is fixed and
equals value in the Fi xed column.
Max The maximal num ber of licenses with which the
program can be delivered. If both Min, Max values are zeros, the number of licenses is fixed and
equals value in the Fi xed column.
Request The requested number of licenses. For the pro-
grams with a fi xed number of lic ens es, it is set
automatical ly. For the pro gr ams wit h a floati ng
number of licenses, it is defined by the License
column. For a det ailed description of how to
choose the number of licenses for the programs,
please refer t o item 5.3.
56
56
5656
 Loading...