

Page 1

Kaspersky Security 8.0 for Micr osoft Exchange
Servers
Administrator’s Guide
APPLICATION VERSION: 8.0 MAINTENANCE RELEASE 2 CRITICAL FIX 1
Page 2

2
Dear User!
Thank you for choosing our product. We hope that this document will help you in your work and provide answers to the
majority of your questions.
Warning! This document is the property of Kaspersky Lab ZAO (herein also referred to as Kaspersky Lab): all rights to
this document are reserved by the copyright laws of the Russian Federation and by international treaties. Illegal
reproduction and distribution of this document or parts thereof will result in civil, administrative or criminal liability in
accordance with applicable law.
Any type of reproduction or distribution of any materials, including in translated form, is allowed only with the written
permission of Kaspersky Lab.
This document and the graphic images it contains may be used exclusively for informational, non-commercial or personal
purposes.
This document may be amended without prior notification. For the latest version, please refer to Kaspersky Lab’s web
site at http://www.kaspersky.com/docs.
Kaspersky Lab assumes no liability for the content, quality, relevance or accuracy of any materials used in this document
the rights to which are held by third parties, or for potential damages associated with using such materials.
Document revision date: 11/9/2013
© 2013 Kaspersky Lab ZAO. All Rights Reserved.
http://www.kaspersky.com
http://support.kaspersky.com
Page 3

3
TABLE OF CONTENTS
ABOUT THIS GUIDE .....................................................................................................................................................7
In this document .......................................................................................................................................................7
Document conventions .............................................................................................................................................9
SOURCES OF INFORMATION ABOUT THE APPLICATION......................................................................................11
Data sources for independent searching ................................................................................................................11
Discussing Kaspersky Lab applications on the forum .............................................................................................12
Contacting the Sales Department ...........................................................................................................................12
Contacting the Technical Writing and Localization Unit ..........................................................................................12
KASPERSKY SECURITY 8.0 FOR MICROSOFT EXCHANGE SERVERS ................................................................13
Distribution kit .........................................................................................................................................................14
Hardware and software requirements .....................................................................................................................14
APPLICATION ARCHITECTURE.................................................................................................................................17
APPLICATION INTERFACE ........................................................................................................................................18
Main window of the Administration Console ...........................................................................................................18
Console tree ...........................................................................................................................................................19
Details pane ............................................................................................................................................................20
Quick access pane .................................................................................................................................................20
Context menu .........................................................................................................................................................20
APPLICATION LICENSING .........................................................................................................................................22
About the License Agreement.................................................................................................................................22
About the license ....................................................................................................................................................22
Licensing options ....................................................................................................................................................23
About the key file ....................................................................................................................................................23
About data submission ...........................................................................................................................................24
Installing a key ........................................................................................................................................................25
Viewing key details .................................................................................................................................................26
Replacing a key ......................................................................................................................................................26
Removing a key ......................................................................................................................................................27
Configuring the license expiry notification ...............................................................................................................28
Licensing specifics for Security Servers within a profile..........................................................................................28
STARTING AND STOPPING THE APPLICATION ......................................................................................................30
SERVER PROTECTION STATUS ...............................................................................................................................31
Default Microsoft Exchange Server protection ........................................................................................................31
Viewing Microsoft Exchange Server protection status details .................................................................................32
Viewing profile protection status details ..................................................................................................................37
GETTING STARTED....................................................................................................................................................40
Starting the Administration Console........................................................................................................................40
Connecting the Administration Console to a Security Server .................................................................................40
MANAGING PROFILES ...............................................................................................................................................42
About profiles ................................................................................................ ..........................................................42
Creating a profile ....................................................................................................................................................43
Configuring Security Servers in a profile .................................................................................................................43
Page 4

A D M I N I S T R A T O R ' S G U I D E
4
Specifics of managing profiles in a Microsoft Exchange database availability group ..............................................44
Adding Security Servers to a profile........................................................................................................................45
Removing a Security Server from a profile .............................................................................................................46
Removing a profile ..................................................................................................................................................46
UPDATING DATABASES ............................................................................................................................................48
About database updates .........................................................................................................................................48
About update centers..............................................................................................................................................49
About database updates in configurations with a cluster or DAG of servers ..........................................................49
Updating databases manually.................................................................................................................................49
Configuring scheduled databases updates .............................................................................................................50
Selecting an update source ....................................................................................................................................51
Configuring the connection to the update source....................................................................................................52
Configuring proxy server settings ...........................................................................................................................53
Designating a server as an update center and configuring its settings ...................................................................54
ANTI-VIRUS PROTECTION.........................................................................................................................................56
About Anti-Virus protection .....................................................................................................................................56
About participation in Kaspersky Security Network.................................................................................................58
About ZETA Shield technology ...............................................................................................................................58
Enabling and disabling anti-virus server protection.................................................................................................58
Enabling and disabling KSN in Anti-Virus ................................ ...............................................................................59
Enabling and disabling ZETA Shield technology ....................................................................................................60
Configuring Anti-Virus processing of objects ..........................................................................................................60
Configuring mailbox and public folder protection settings .......................................................................................61
Configuring anti-virus scan exclusions....................................................................................................................62
About trusted recipients ....................................................................................................................................63
Configuring exclusions by recipient's address...................................................................................................64
Configuring exclusions by file name mask ........................................................................................................65
Configuring scanning of attached containers and archives ...............................................................................66
Configuring background scan settings ....................................................................................................................66
PROTECTION AGAINST SPAM AND PHISHING .......................................................................................................68
About Anti-Spam protection ....................................................................................................................................68
About additional services, features, and anti-spam technologies ...........................................................................70
About anti-phishing scans .......................................................................................................................................71
Enabling and disabling Anti-Spam protection of the server ....................................................................................72
Enabling and disabling message scanning for phishing .........................................................................................72
Configuring spam and phishing scan settings.........................................................................................................73
Configuring the white and black lists of senders .....................................................................................................75
Configuring the white list of recipients ....................................................................................................................76
Configuring an increase in the spam rating of messages .......................................................................................78
Using external anti-spam message scanning services ...........................................................................................79
Configuring additional settings of spam and phishing scans ..................................................................................80
BACKUP ......................................................................................................................................................................83
About Backup .........................................................................................................................................................83
Viewing the Backup contents ..................................................................................................................................84
Viewing properties of objects in Backup .................................................................................................................85
Configuring the Backup filters .................................................................................................................................86
Saving objects from Backup to disk ........................................................................................................................87
Page 5

A B O U T T H I S GU ID E
5
Sending an objects from Backup to recipients ........................................................................................................88
Deleting objects from Backup .................................................................................................................................88
Configuring Backup settings ...................................................................................................................................89
Selecting Backup database for viewing its contents from the profile ......................................................................89
NOTIFICATIONS..........................................................................................................................................................91
About notifications ..................................................................................................................................................91
Configuring notification settings ..............................................................................................................................91
Configuring notification delivery settings .................................................................................................................92
REPORTS ....................................................................................................................................................................94
About application reports ........................................................................................................................................94
Creating Quick reports ............................................................................................................................................95
Creating a report generation task ...........................................................................................................................96
Editing the settings of a report generation task .......................................................................................................97
Starting a report generation task.............................................................................................................................97
Deleting a report generation task ............................................................................................................................98
Viewing report generation tasks..............................................................................................................................98
View the Ready reports ..........................................................................................................................................99
Saving a report .....................................................................................................................................................101
Deleting a report ...................................................................................................................................................101
APPLICATION LOGS.................................................................................................................................................103
About application logs...........................................................................................................................................103
Configuring log settings ........................................................................................................................................104
Configuring the diagnostics level ..........................................................................................................................104
MANAGING CONFIGURATION .................................................................................................................................106
Exporting settings .................................................................................................................................................106
Importing settings .................................................................................................................................................107
TESTING THE APPLICATION OPERATION .............................................................................................................108
About the EICAR test file ......................................................................................................................................108
About the types of the EICAR test file...................................................................................................................108
Testing application performance using the EICAR test file ...................................................................................110
CONTACTING THE TECHNICAL SUPPORT SERVICE ...........................................................................................112
Ways to receive technical support ........................................................................................................................112
Technical support by phone ................................................................................................................................ ..112
Obtaining technical support via Kaspersky CompanyAccount ..............................................................................113
Using a trace file and AVZ script...........................................................................................................................114
APPENDIX. SCRIPT FOR SENDING SPAM FOR ANALYSIS ..................................................................................115
About the script for sending spam for analysis .....................................................................................................115
Script operation modes .........................................................................................................................................116
Script execution parameters .................................................................................................................................117
Configuring parameters of the script configuration file ..........................................................................................117
Script operation log ...............................................................................................................................................119
Page 6

A D M I N I S T R A T O R ' S G U I D E
6
GLOSSARY ...............................................................................................................................................................120
KASPERSKY LAB ZAO .............................................................................................................................................124
INFORMATION ABOUT THIRD-PARTY CODE.........................................................................................................125
TRADEMARK NOTICE ..............................................................................................................................................126
INDEX ........................................................................................................................................................................127
Page 7

7
ABOUT THIS GUIDE
IN THIS SECTION
In this document ................................................................................................................................................................ 7
Document conventions ...................................................................................................................................................... 9
This document is the Administrator's Guide to Kaspersky Security 8.0 for Microsoft® Exchange Servers (hereinafter
"Kaspersky Security" or "applications").
It is meant for technical specialists tasked with installing and administering Kaspersky Security and supporting
companies that use Kaspersky Security.
The Guide serves the following purposes:
Helps to configure and use the application.
Serves as a quick source of information to answer questions relating to the operation of Kaspersky Security.
References additional sources of information about the application and describes ways to get technical support.
IN THIS DOCUMENT
This document includes the following sections:
Sources of information about the application (see page 11)
This section describes sources of information about the application and lists websites that you can use to discuss the
application's operation.
Kaspersky Security 8.0 for Microsoft Exchange Servers (see page 13).
This section describes the features of the application and provides brief information about application functions and
components. You will learn what items are included in the distribution kit and what services are available for registered
users of the application. This section provides information about the software and hardware requirements that a
computer must meet to allow installation.
Application architecture (see page 17)
This section describes Kaspersky Security components and the logic of their interaction.
Application interface (see page 18)
This section describes the basic elements of the graphical user interface of the application: the Administration Console
main window, the Administration Console tree, the details pane, the quick access pane, and the context menu.
Page 8

A D M I N I S T R A T O R ' S G U I D E
8
Application licensing (see page 22)
This section contains information about the basic concepts of application activation. This section describes the purpose
of the End User License Agreement, the ways to activate the application and renew the license.
Starting and stopping the application (see page 30)
This section contains information on starting and shutting down the application.
Server protection status (see page 31)
This section covers the default settings of Kaspersky Security. This section describes how you can use the
Administration Console to view license info, the status of application modules and databases, as well as statistics on the
number of messages processed and instances of threats and spam detected.
Getting started (see page 40)
This section explains how to begin using Kaspersky Security, launch Administration Console, and create a list of
protected servers.
Managing profiles (see page 42)
This section describes how you can create, manage, and configure profiles.
Updating databases (see page 48)
This section explains how to update application databases and configure database updates.
Anti-Virus protection (see page 56)
This section contains information about Anti-Virus protection of a Microsoft Exchange server, background scanning of
storages, and ways to configure protect and scan settings.
Anti-Spam and Anti-Phishing protection (see page 68)
This section contains information about Anti-Spam and Anti-Phishing filtering of email traffic and instructions on
configuring it.
Backup (see page 83)
This section contains information about Backup and how to use it.
Notifications (see page 91)
This section covers notifications and ways to configure them.
Reports (see page 94)
This section covers application reports and ways to configure them.
Application logs (see page 103)
This section covers the application logs and ways to configure them.
Page 9
A B O U T T H I S GU ID E
9
SAMPLE TEXT
DOCUMENT CO NVENTIONS DESCRIPTION
Please note that...
Warnings are highlighted in red and enclosed in frames.
Warnings contain information about potential threats that may cause loss of data,
hardware or operating system malfunctions.
Configuration management (see page 106)
This section explains how you can export the application configuration to file and import it from file.
Application testing (see page 108)
This section explains how to test the application in order to make sure that it detects viruses and their modifications and
takes action on them.
Contacting Technical Support (see page 112)
This section explains how to contact Kaspersky Lab Technical Support.
Appendix. Script for sending spam for analysis (see page 115)
This section describes a script for sending spam for analysis to Kaspersky Lab analysts and how to configure it.
Glossary (see page 120)
This section contains a list of terms mentioned in the document and their respective definitions.
Kaspersky Lab ZAO (see page 124)
This section contains information about Kaspersky Lab ZAO.
Information about third-party code (see page 125)
This section provides information about third-party code used in the application.
Trademark notices (see page 126)
This section lists third-party trademarks used in this document.
Index
This section allows you to quickly find required information within the document.
DOCUMENT CONVENTIONS
The text in this document is accompanied by semantic elements - warnings, tips and examples that you are advised to
read thoroughly.
These elements are intentionally highlighted using graphics and typeface. Document conventions and examples of their
use are described in the table below.
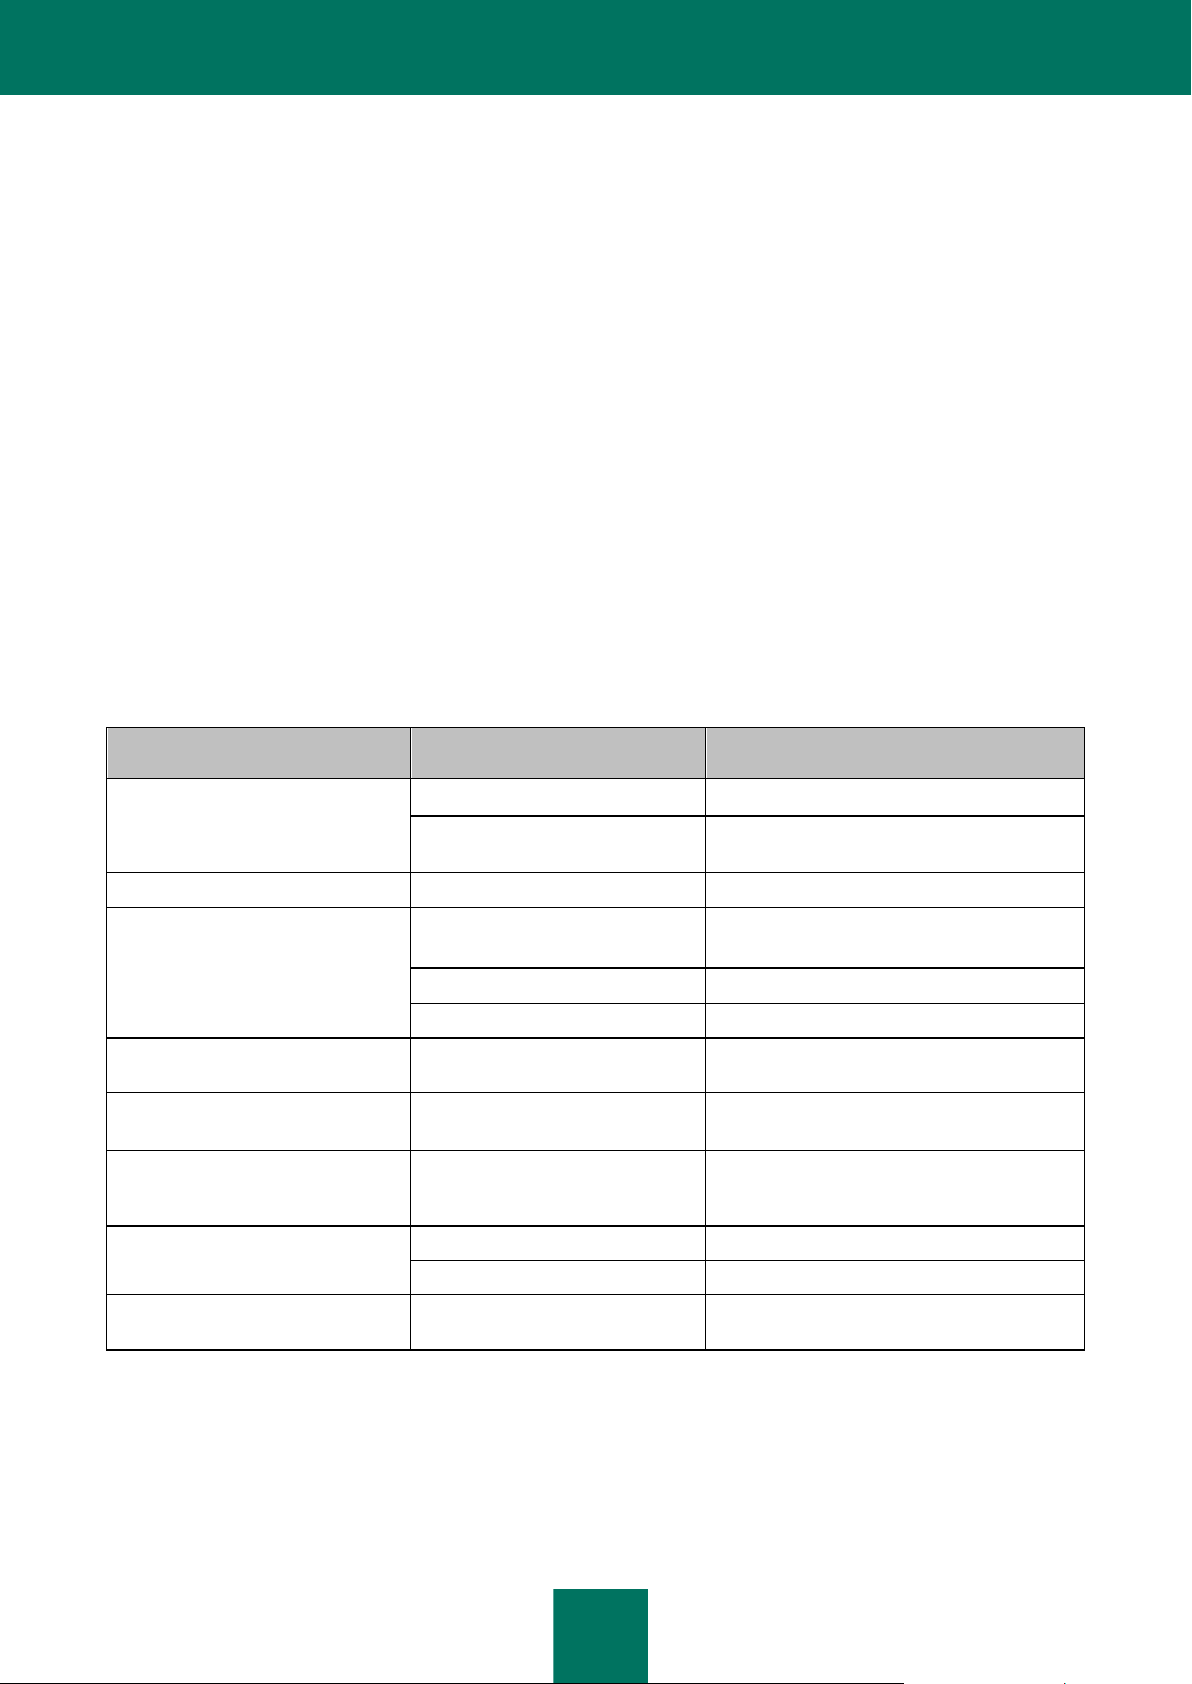
Table 1. Document conventions
Page 10
A D M I N I S T R A T O R ' S G U I D E
10
SAMPLE TEXT
DOCUMENT CO NVENTIONS DESCRIPTION
It is recommended that you use...
Notes are enclosed in frames.
Notes may contain helpful hints, recommendations, specific values for settings,
or noteworthy particular use cases.
Example:
...
Examples are given in blocks against a yellow background under the heading
"Example".
An update is...
The Databases are outdated event
occurs.
the following items are highlighted using italics:
new terms;
status variations and application events.
Press ENTER.
Use the ALT+F4 keyboard shortcut.
Names of keyboard keys appear in bold and are capitalized.
Names of keys linked with a + (plus) sign indicate key combinations. Such keys
should be pressed simultaneously.
Click the Enable button.
UI elements, for example, names of entry fields, menu items, buttons are in bold.
To configure a task schedule,
perform the following steps:
Introductory phrases of instructions are printed in italics and marked with an
arrow sign.
Enter help in the command line
The following message will appear:
Specify the date in DD:MM:YY format.
The following types of text content are set off with a special font:
command line text;
text of program messages output on the screen;
data that the user has to enter.
<User name>
Variables are enclosed in angle brackets. You should replace the variable with
the corresponding value in each case, omitting the angle brackets.
Page 11
11
SOURCES OF INFORMATION ABOUT THE
IN THIS SECTION
Data sources for independent searching ......................................................................................................................... 11
Discussing Kaspersky Lab applications on the forum ..................................................................................................... 12
Contacting the Sales Department.................................................................................................................................... 12
Contacting the Technical Writing and Localization Unit................................................................................................... 12
APPLICATION
This section describes sources of information about the application and lists websites that you can use to discuss the
application's operation.
You can select the most convenient source, depending on the urgency or importance of your question.
DATA SOURCES FOR INDEPENDENT SEARCHING
You can use the following sources to find information about the application:
Application page on the Kaspersky Lab website
Application page on the Technical Support website (Knowledge Base)
Online help
Documentation
If you cannot find a solution for your issue, we recommend that you contact Kaspersky Lab Technical Support (see
section "Technical support by phone" on page 112).
An Internet connection is required to use information sources on the Kaspersky Lab website.
The application page on Kaspersky Lab's web site
The Kaspersky Lab website features a separate page dedicated to each application.
Visit http://www.kaspersky.com/security-microsoft-exchange-servers to view general information about the application, its
features and functions.
A link to eStore is available on the http://www.kaspersky.com website. There you can purchase the application or renew
your license.
The application page on the Technical Support web site (in the Knowledge Base)
Knowledge Base is a section on the Technical Support website that provides advice on using Kaspersky Lab
applications. Knowledge Base comprises reference articles grouped by topics.
Page 12

A D M I N I S T R A T O R ' S G U I D E
12
On the application page in Knowledge Base (http://support.kaspersky.com/exchange/security8.0) you will find articles
providing useful tips, advice, and answers to the frequently asked questions about purchasing, installing, and using the
application.
Articles may provide answers to questions relating not just to Kaspersky Security, but also to other Kaspersky Lab
applications. They also may contain news from Technical Support.
Online help
The online help of the application comprises help files.
Online help contains information about each window of the application: the list of settings, their descriptions and links to
the tasks using these settings.
Full help provides information about managing computer protection, configuring the application and solving typical user
tasks.
Documentation
On this page of the Kaspersky Lab website (http://www.kaspersky.com/product-updates/microsoft-exchange-server-
antivirus), you can download documents that will help you to install the application on computers on the corporate
network, configure application settings, and find information about the basic techniques for using the application.
DISCUSSING KASPERSKY LAB APPLICATIONS ON THE
FORUM
If your issue does not require an immediate solution, you can discuss it with Kaspersky Lab specialists and other users
on our Forum (http://forum.kaspersky.com).
On this forum you can browse existing threads, leave comments, and create new threads.
CONTACTING THE SALES DEPARTMENT
If you have any questions on how to select, purchase, or renew the application, you can contact our Sales Department
specialists in one of the following ways:
By calling our Headquarters in Moscow (http://www.kaspersky.com/contacts).
By sending a message with your question to sales@kaspersky.com.
Service is available in Russian and English.
CONTACTING THE TECHNICAL WRITING AND
LOCALIZATION UNIT
To contact the Technical Writing and Localization Unit, send an email to docfeedback@kaspersky.com. Please use
"Kaspersky Help Feedback: Kaspersky Security 8.0 for Microsoft Exchange Servers" as the subject line in your
message.
Page 13

13
KASPERSKY SECURITY 8.0 FOR
IN THIS SECTION
Distribution kit .................................................................................................................................................................. 14
Hardware and software requirements ............................................................................................................................. 14
MICROSOFT EXCHANGE SERVERS
Kaspersky Security 8.0 for Microsoft Exchange Servers is an application designed for protection of mail servers based on
Microsoft Exchange Server against viruses, Trojan software and other types of threats that may be transmitted via email, as well as spam and phishing.
Kaspersky Security provides anti-spam protection on the level of your corporate mail server, saving your employees the
trouble of deleting unwanted mail manually.
Kaspersky Security protects mailboxes, public folders, and relayed mail traffic on a Microsoft Exchange Server against
malware, spam, and phishing. The application scans all e-mail traffic passing through the protected Microsoft Exchange
Server.
Kaspersky Security can perform the following operations:
Scan mail traffic, incoming and outgoing mail, as well as the messages stored on a Microsoft Exchange Server
(including public folders) for malware. While scanning, the application processes the whole message and all its
attached objects. Depending upon the selected settings, the application disinfects and removes detected
harmful objects and provides users with complete information about them.
Filter unsolicited mail (spam) from mail traffic. The Anti-Spam component scans mail traffic for spam content. In
addition, Anti-Spam allows creation of black and white lists of sender addresses and supports flexible
configuration of anti-spam analysis intensity.
Scan mail traffic for phishing and malicious URLs.
Save backup copies of objects (an object consists of message body and its attachments) and spam messages
prior to their disinfection or deletion to enable subsequent restoration, if required, thus preventing the risk of
data losses. Configurable filters allow the user to easily locate specific stored objects.
Notify the sender, the recipient and the system administrator about messages that contain malicious objects.
Manage identical settings centrally in the group of Security Servers by means of profiles.
Maintain event logs, collect statistics and create regular reports on application activity. The application can
create reports automatically according to a schedule or by request.
Configure the application settings to match the volume and type of relayed mail traffic, in particular, define the
maximum connection wait time to optimize scanning.
Update the Kaspersky Security databases automatically or in manual mode. Updates can be downloaded from
the FTP and HTTP servers of Kaspersky Lab, from a local / network folder that contains the latest set of
updates, or from user-defined FTP and HTTP servers.
Re-scan messages for the presence of new viruses according to a schedule. This task is performed as a
background scan and has little effect on the mail server’s performance.
Perform anti-virus protection on storage level based on the list of protected storages.
Page 14

A D M I N I S T R A T O R ' S G U I D E
14
DISTRIBUTION KIT
Kaspersky Security is available from online stores of Kaspersky Lab (for example, http://www.kaspersky.com, in the
eStore section) and from partner companies.
Kaspersky Security is supplied as part of Kaspersky Security for Mail Servers and Kaspersky Total Security.
After buying a license for Kaspersky Security, you will receive an email with a link for downloading the application from
the eStore website along with an application key file, or a CD with the distribution kit containing the application files and
manuals.
Before breaking the seal on the envelope with the installation disk, carefully read through the EULA.
For more information about ways to purchase the application and about the distribution kit, contact the Sales Department
at sales@kaspersky.com.
HARDWARE AND SOFTWARE REQUIREMENTS
For Kaspersky Security to work properly, the computer should meet the hardware and software requirements listed
below.
Hardware requirements
The hardware requirements for installing the Security Server are identical to the hardware requirements for a protected
Microsoft Exchange server. Depending upon the application settings and mode of operation, considerable disk space
may be required for Backup and other service folders (when using default settings,the Backup folder can occupy up to
5120 MB). The Administration Console is installed together with the Security Server.
The Administration Console can be also installed separately from the Security Server. Hardware requirements for
separate installation of the Administration Console:
Intel® Pentium® 400 MHz or faster processor (1000 MHz recommended);
256 MB free RAM;
500 MB disk space for the application files.
Software requirements
The Security Server can be installed under one of the following operating systems:
Microsoft Windows Server® 2012 R2;
Microsoft Windows Server 2012;
Microsoft Small Business Server 2011;
Microsoft Windows Server 2008 R2 Enterprise Edition Service Pack 1;
Microsoft Windows Server 2008 R2 Standard Edition Service Pack 1;
Microsoft Windows Server 2008 x64 Enterprise Edition Service Pack 2;
Microsoft Windows Server 2008 x64 Standard Edition Service Pack 2;
Microsoft Small Business Server 2008 Standard x64;
Page 15

K A S P E R S K Y S E C U R I T Y 8 . 0 F O R M I C R O S O F T E X C H A N G E S E R V E R S
15
Microsoft Small Business Server 2008 Premium x64;
Microsoft Essential Business Server 2008 Standard x64;
Microsoft Essential Business Server 2008 Premium x64;
Microsoft Windows Server 2003 x64 R2 Enterprise Edition Service Pack 2;
Microsoft Windows Server 2003 x64 R2 Standard Edition Service Pack 2;
Microsoft Windows Server 2003 x64 Enterprise Edition Service Pack 2;
Microsoft Windows Server 2003 x64 Standard Edition Service Pack 2.
The following software is required to install the Security Server:
One of the following mail servers:
Microsoft Exchange Server 2007 x64 Service Pack 3 or Microsoft Exchange Server 2010 Service Pack 1
deployed in at least one of the following roles: Hub Transport, Mailbox, or Edge Transport;
Microsoft Exchange Server 2013 deployed in the Mailbox role.
Microsoft .NET Framework 3.5 Service Pack 1.
One of the following database management systems:
Microsoft SQL Server® 2012;
Microsoft SQL Server 2012 Express;
Microsoft SQL Server 2008 R2 Enterprise Edition;
Microsoft SQL Server 2008 R2 Standard Edition;
Microsoft SQL Server 2008 R2 Express Edition;
Microsoft SQL Server 2008 Enterprise Edition;
Microsoft SQL Server 2008 Standard Edition;
Microsoft SQL Server 2008 Express Edition;
Microsoft SQL Server 2005 Enterprise Edition;
Microsoft SQL Server 2005 Standard Edition;
Microsoft SQL Server 2005 Express Edition.
Administration Console can be installed under one of the following operating systems:
Microsoft Windows® 8.1;
Microsoft Windows Server 2012 R2;
Microsoft Windows Server 2012;
Microsoft Windows 8;
Page 16

A D M I N I S T R A T O R ' S G U I D E
16
Microsoft Windows 8 x64;
Microsoft Small Business Server 2011;
Microsoft Windows 7 Professional;
Microsoft Windows 7 Professional x64;
Microsoft Windows 7 Enterprise;
Microsoft Windows 7 Enterprise x64;
Microsoft Windows 7 Ultimate;
Microsoft Windows 7 Ultimate x64;
Microsoft Windows Server 2008 R2 Enterprise Edition Service Pack 1;
Microsoft Windows Server 2008 R2 Standard Edition Service Pack 1;
Microsoft Small Business Server 2008 Standard;
Microsoft Small Business Server 2008 Premium;
Microsoft Essential Business Server 2008 Standard;
Microsoft Essential Business Server 2008 Premium;
Microsoft Windows Server 2008 x64 Enterprise Edition Service Pack 2;
Microsoft Windows Server 2008 x64 Standard Edition Service Pack 2;
Microsoft Windows Server 2008 Enterprise Edition Service Pack 2;
Microsoft Windows Server 2008 Standard Edition Service Pack 2;
Microsoft Windows Vista®;
Microsoft Windows Vista х64;
Microsoft Windows Server 2003 x64 R2 Standard Edition;
Microsoft Windows Server 2003 x64 R2 Enterprise Edition;
Microsoft Windows Server 2003 R2 Standard Edition;
Microsoft Windows Server 2003 R2 Enterprise Edition;
Microsoft Windows Server 2003 x64 Service Pack 2;
Microsoft Windows Server 2003 Service Pack 2;
Microsoft Windows XP Service Pack 3;
Microsoft Windows XP x64 Service Pack 2.
Installation of the Administration Console requires the following software:
Microsoft Management Console 3.0;
Microsoft .NET Framework 3.5 Service Pack 1.
Page 17

17
APPLICATION ARCHITECTURE
Kaspersky Security consists of two basic components:
The Security Server is installed on the Microsoft Exchange server and performs anti-spam filtering of mail
traffic and provides anti-virus protection. The Security Server intercepts messages arriving on the Microsoft
Exchange Server and uses its internal Anti-Virus and Anti-Spam modules to perform anti-virus scanning and
anti-spam filtering of such messages. If infection or spam is detected in the incoming message, the application
processes it according to the Anti-Virus and Anti-Spam settings.
The Security Server includes the following modules: E-mail Interceptor, Anti-Virus (see page 56), Anti-Spam
(see page 68), and Internal Application Management and Integrity Control Module.
The Administration Console is a dedicated isolated snap-in integrated into MMC 3.0. You can use the
Administration Console to create and edit the list of protected Microsoft Exchange servers and manage Security
Servers. The Administration Console can be installed both on a Microsoft Exchange server with the Security
Server and on a remote computer.
The application also requires a special database running on Microsoft SQL Server, the so-called Backup and Reporting
database (hereinafter also "database"). The application uses this database to store Backup data and statistics of
operation of the application.
For details on the application architecture, see the Kaspersky Security 8.0 for Microsoft Exchange Servers Installation
Guide.
Page 18
18
APPLICATION INTERFACE
IN THIS SECTION
Main window of the Administration Console .................................................................................................................... 18
Administration Console tree ............................................................................................................................................ 19
Details pane .................................................................................................................................................................... 20
Quick access pane .......................................................................................................................................................... 20
Context menu .................................................................................................................................................................. 20
The user interface of the application is provided by the Administration Console component. The Administration Console
is a dedicated isolated snap-in integrated into MMC.
MAIN WINDOW OF THE ADMINISTRATION CONSOLE
The main window of the Administration Console (see figure below) contains the following elements:
Menu. Displayed immediately above the toolbar. The menu lets you manage files and windows and access the
help system.
Toolbar. Displayed in the upper part of the main window. The buttons on the toolbar allow direct access to
some frequently accessed features of the application.
Administration Console tree. Located in the left part of the main window. The Administration Console tree
displays profiles, connected Security Servers, and Kaspersky Security settings. Profiles, connected Security
Servers, and Kaspersky Security settings are displayed as nodes.
Details pane. Located in the right part of the main window. The details pane shows the contents of the node
selected in the Administration Console tree.
Page 19
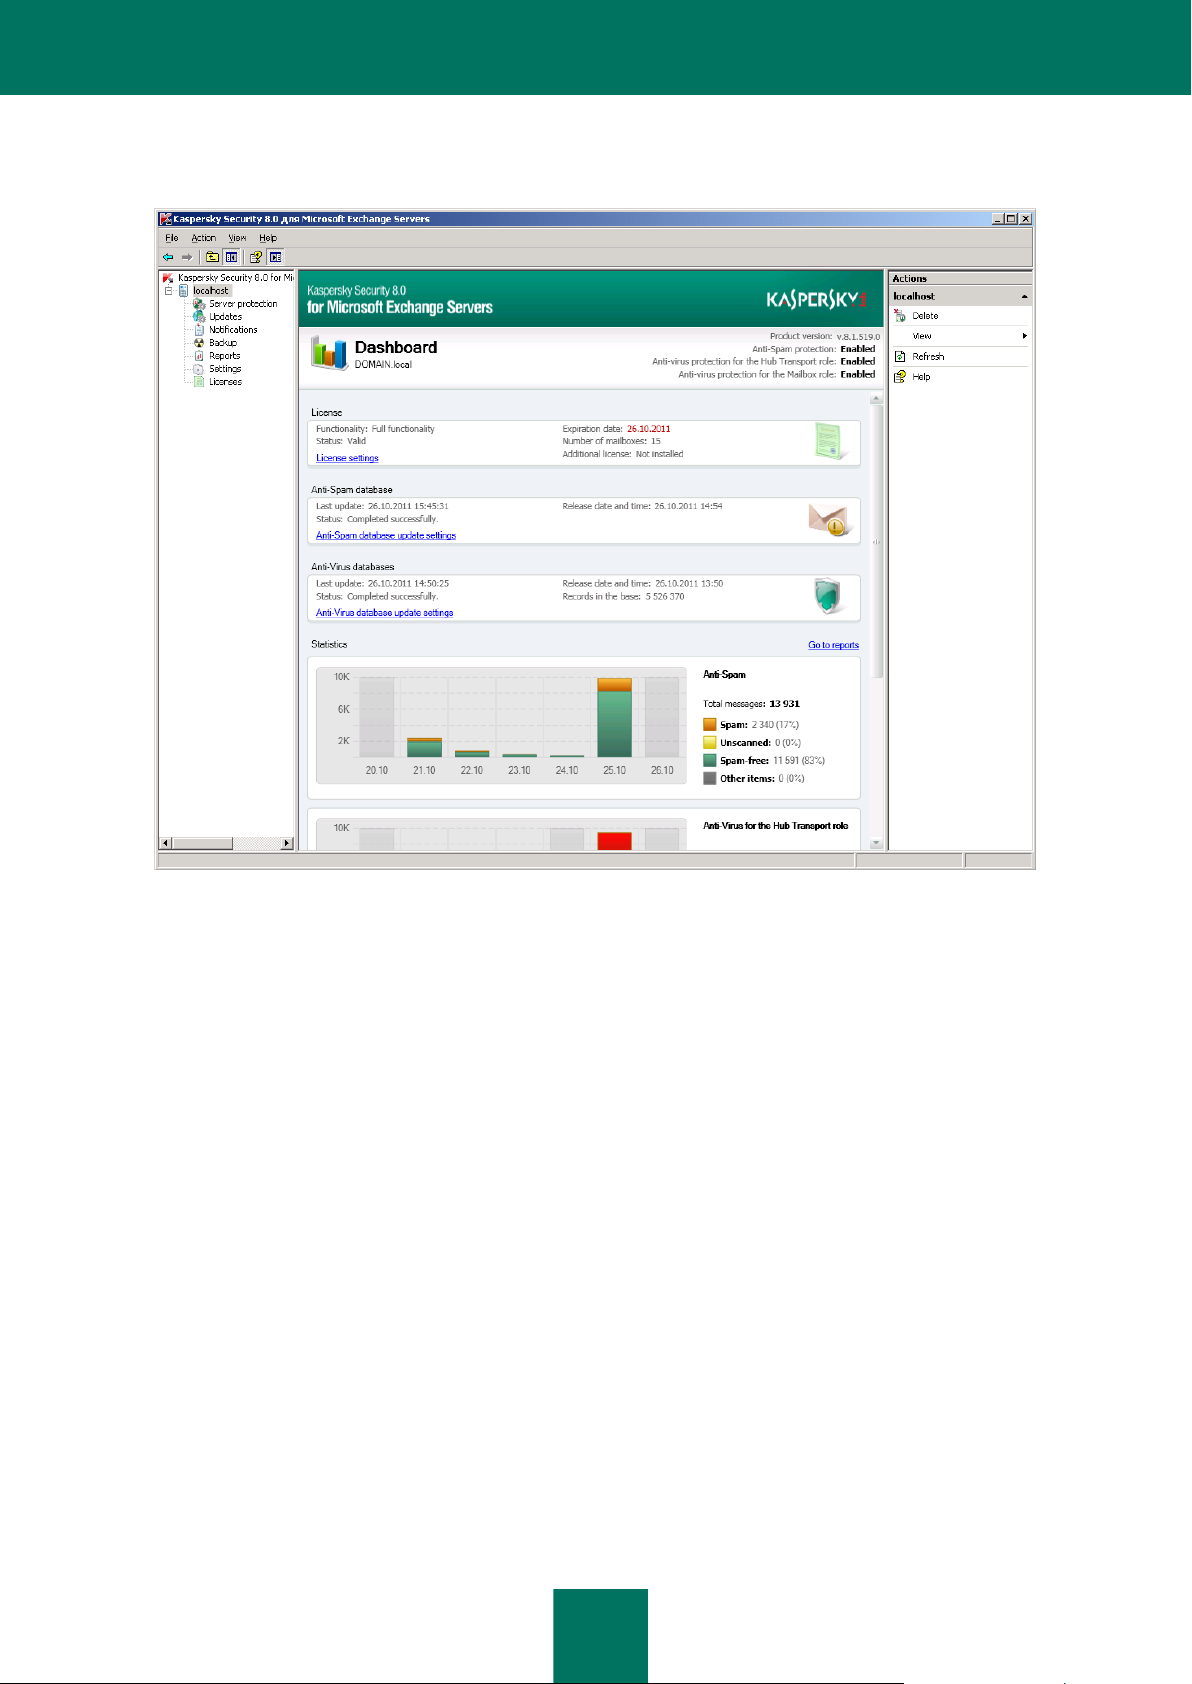
A P P L I C A T I O N I N T E R F A C E
19
Quick access pane. Located on the right of the details pane. The quick access pane lets you manage the
selected node.
Figure 1. Main application window
CONSOLE TREE
The Administration Console tree shows the structure of profiles, Microsoft Exchange servers, and subnodes for
managing application functions.
The Administration Console appears in the ММC tree with the Kaspersky Security 8.0 for Microsoft Exchange
Servers root node. It contains the Profiles and <Server name> subnodes.
The Profiles node contains nodes with the names of all profiles created in the application. Such profiles appear as
<Profile name> nodes. Each <Profile name> node contains the Servers node that shows subnodes with the names of
Microsoft Exchange servers.
The <Server name> node is displayed for each protected Microsoft Exchange server to which the Administration
Console is connected. As a result, the Administration Console tree can contain several nodes with Microsoft Exchange
server names.
For every <Profile name> node, every <Server name> node, and every <Server name> subnode in the Servers node,
the Administration Console tree shows the following subnodes designed for managing application functions:
Server protection: manage e-mail traffic protection against malware and spam.
Updates: manage database updates for the application.
Notifications: configure settings pertaining to the application event notifications sent to the administrator and
other persons concerned.
Page 20
A D M I N I S T R A T O R ' S G U I D E
20
Backup: configure Backup settings and manage objects stored there.
NODE
LINK
LINK PURPOSE
Kaspersky Security 8.0 for
Microsoft Exchange Servers
Connect to server
The Connect to server window opens.
Enable snap-in diagnostics
Starts keeping the Administration Console
log.
Profiles
Add profile
Opens the Create new profile window.
<profile name>
Add server
Opens a wizard for adding the Security
Server to the profile.
Rename
Opens the Rename profile window.
Delete
Removes the profile.
Servers
Add server
Opens a wizard for adding the Security
Server to the profile.
Profiles → <Security Server
name>
Remove from profile
Removes the Security Server from the profile.
Kaspersky Security 8.0 for
Microsoft Exchange Servers →
<Security Server name>
Remove server
Removes a Security Server from the
Administration Console tree.
Update
Update Anti-Virus databases
Updates Anti-Virus databases.
Update Anti-Spam databases
Updates Anti-Spam databases.
Notifications
Notification delivery settings
Opens the Notification delivery settings
window.
Reports: configure application report settings (not shown for <Server name> subnodes in the Servers node).
Settings: configure basic application settings.
Licensing: view details of keys installed, install and remove keys.
DETAILS PANE
The details pane shows information about the current Microsoft Exchange servers protection status, Kaspersky Security
and application settings.
The appearance of the details pane depends on the node selected in the Administration Console tree.
QUICK ACCESS PANE
Specific links displayed in the quick access pane depend on the node selected in the Administration Console tree.
Besides the standard links of the MMC console, the quick access pane contains links for managing the selected node
(see table below).
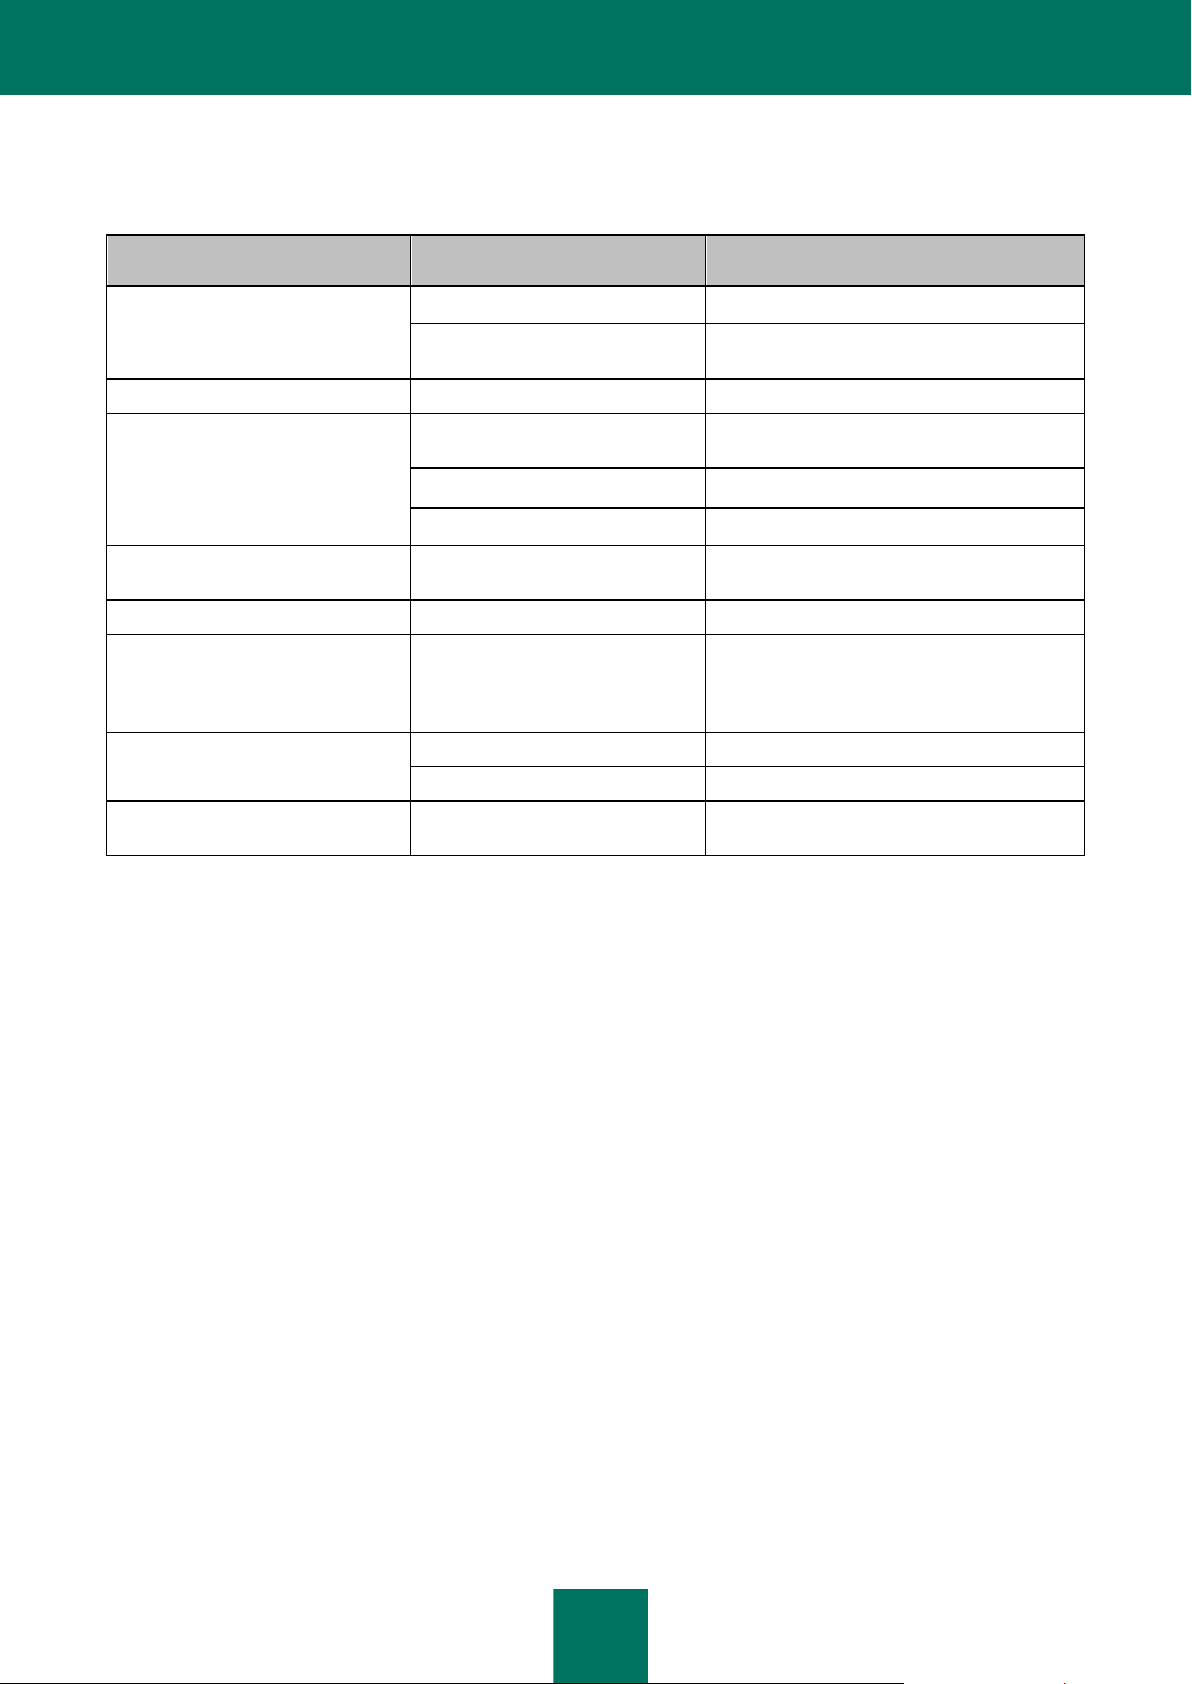
Table 2. Quick access pane links
CONTEXT MENU
Each category of nodes in the Administration Console tree has its own context menu, which you can open by rightclicking.
Page 21
A P P L I C A T I O N I N T E R F A C E
21
NODE
MENU ITEM
PURPOSE OF THE MENU ITE M
Kaspersky Security 8.0 for
Microsoft Exchange Servers
Connect to server
The Connect to server window opens.
Enable snap-in diagnostics
Starts keeping the Administration Console
log.
Profiles
Add profile
Opens the Create new profile window.
<profile name>
Add server
Opens a wizard for adding the Security
Server to the profile.
Rename
Opens the Rename profile window.
Delete
Removes the profile.
Servers
Add server
Opens a wizard for adding the Security
Server to the profile.
Profile → <Security Server name>
Remove from profile
Removes the Security Server from the profile.
Kaspersky Security 8.0 for
Microsoft Exchange Servers →
<Security Server name>
Remove server
Removes a Security Server from the
Administration Console tree.
Update
Update Anti-Virus databases
Updates Anti-Virus databases.
Update Anti-Spam databases
Updates Anti-Spam databases.
Notifications
Notification delivery settings
Opens the Notification delivery settings
window.
Besides the standard items of the MMC context menu, it contains menu items for managing the selected node (see table
below).
Table 3. Context menu items of the Administration Console nodes
Page 22
22
APPLICATION LICENSING
IN THIS SECTION
About the License Agreement ......................................................................................................................................... 22
About the license ................................................................ ............................................................................................. 22
Licensing models............................................................................................................................................................. 23
About the key file ................................................................ ............................................................................................. 23
About data submission ................................................................................................................................ .................... 24
Installing a key................................................................................................................................................................. 25
Viewing key details .......................................................................................................................................................... 26
Replacing a key ............................................................................................................................................................... 26
Removing a key............................................................................................................................................................... 27
Configuring the license expiry notification ....................................................................................................................... 28
Licensing specifics for Security Servers within a profile .................................................................................................. 28
This section contains information about the basic concepts of application activation. This section describes the purpose
of the End User License Agreement, the ways to activate the application and renew the license.
This section also provides instructions on managing keys, configuring license expiry notifications, and creating a list of
protected mailboxes and storages.
ABOUT THE LICENSE AGREEMENT
The License Agreement is a binding agreement between you and Kaspersky Lab, setting out the terms on which you
may use the software you have purchased.
Carefully review the terms of the License Agreement before using the application.
You are deemed to agree to be bound by the terms of the License Agreement if you confirm your acceptance of the
License Agreement text upon application installation. If you disagree with the terms of the License Agreement, you must
abort the installation or refrain from using the application.
ABOUT THE LICENSE
A license is a time-limited right to use the application, granted under the End User License Agreement.
A license entitles you to the following kinds of services:
Using the application to protect a certain number of mailboxes.
Contacting Kaspersky Lab Technical Support for assistance.
Page 23
A P P L I C A T I O N L IC E N S I N G
23
Other services available from Kaspersky Lab or its partners during the license period.
The scope of services and application usage term depend on the type of license.
The following license types exist:
Trial – a free license intended for trying out the application.
A trial license is usually short in duration. When the trial license expires, all Kaspersky Security features become
disabled. To continue using the application, you need to buy a commercial license.
Commercial – a pay-for license that is provided when you buy the application.
When the commercial license expires, the application continues to work in limited functionality mode. You can
still use all application components but only with databases that were installed before the license expired. To
continue using Kaspersky Security in fully functional mode, you have to renew your commercial license.
We recommend renewing the license before its expiry to ensure that your computer stays fully protected against
all computer security threats and spam.
LICENSING OPTIONS
Depending on the application deployment scenario, keys should be installed according to the following licensing models:
If the application is used on standalone Microsoft Exchange Servers, a separate key must be installed for each
server.
If the application is used on a cluster of Microsoft Exchange Servers, it suffices to install a single key that covers
the entire cluster.
If the application is used on Microsoft Exchange Servers that are part of a DAG, it suffices to install a single key
that covers the entire DAG.
If you use profiles to manage several Security Servers, you have to add a single key for a profile that applies to
all Security Servers within this profile (see section "Licensing specifics for Security Servers within a profile" on
page 28).
ABOUT THE KEY FILE
A key file is a file with the .key extension. The application can only be used provided an appropriate key file is available.
A key file contains the following details:
Key – a unique alphanumeric sequence. A key serves a number of purposes, such as receiving technical
support from Kaspersky Lab.
Key file creation date.
License term is the period specified in the License Certificate during which you may use the application.
The license expires no later than the validity period of the key file that was used to add the active key.
Key file validity period – a specific period that counts down from the time of key file creation. The key file validity
period may be several years. You can use the application with the relevant key only until the expiry of this
period.
Page 24

A D M I N I S T R A T O R ' S G U I D E
24
ABOUT DATA SUBMISSION
In you agree to participate in the Kaspersky Security Network (see section "Participating in the Kaspersky Security
Network (KSN)" on page 58), the following information collected during the operation of Kaspersky Security on the
computer is automatically forwarded to Kaspersky Lab:
Application name
Application type
Application version
Application installation ID
Operating system version
Operating system service pack version
Operating system language
IP address of the Microsoft Exchange server hosting Kaspersky Security
IP address of the sender of the probably infected message
Checksums (MD5) of email addresses for the sender of the probably infected message
Web addresses contained in the probably infected message with removed passwords
URL or IP address (IPv4 and IPv6 versions supported) of the phishing link
Checksums (MD5) of graphic objects included in the message
Checksums (MD5) of the names of files attached to the message
Anti-Virus database release date and time
Information from the Anti-Virus module on the status of message scanning
Information from the Anti-Spam module on the status of message scanning, including the trust level, weight, and
status
Target of the phishing attack (brief name of the organization, website address)
Status of scanning by the Anti-Spam module
Triggered categories of the content filtering database of the Anti-Spam module (theme category of text
determined by the application)
Technical information having to do with the method by which the application detected a probably infected
message
Technical information having to do with the method by which the application detected probable spam
Brief text signatures from the message text that are checked against known spam mailings, and the
application's decisions on such messages
Kaspersky Lab protects any information received in this way as prescribed by law. Kaspersky Lab uses any collected
information as general statistics only. General statistics are automatically generated using original collected information
and do not contain any private data or other confidential information. Original collected information is stored in encrypted
form and destroyed as it is accumulated (twice per year). General statistics are stored indefinitely.
Page 25

A P P L I C A T I O N L IC E N S I N G
25
Participation in Kaspersky Security Network is voluntary. You can opt out of participating in the Kaspersky Security
Network at any time (see section "Configuring spam and phishing scan settings" on page 73). No personal data of the
user is collected, processed, or stored. You can also read the KSN Statement to find out about the types of data that the
application relays to Kaspersky Security Network (see section "Configuring spam and phishing scan settings" on
page 73).
INSTALLING A KEY
You can add a separate key for a Security Server or add a single key for a profile, thus applying it to all Security Servers
within this profile (see section "Licensing specifics for Security Servers within a profile" on page 28).
If Kaspersky Security runs within a configuration with a server cluster or with DAG, it suffices to add one key for the
entire cluster or DAG. You can add the key by connecting the Administration Console to any server within this cluster
DAG.
To add a key for a Security Server:
1. In the Administration Console tree, expand the node of a Security Server.
2. Select the Licensing node.
3. In the details pane, do one of the following:
To add the active key, click the Add button in the Active key section.
To add an additional key, click the Add button in the Additional key section.
An additional key may be added only if the active key is available.
Only a commercial license key can be installed as the additional key. A trial license key cannot be installed
as the additional key.
4. In the File name window that opens, specify the path to the key file (a file with the key extension) and click the
Open button.
The key is added, and its details appear in the relevant section.
To add a key for a profile:
1. In the Administration Console tree, expand the Profiles node.
2. Expand the node of the profile for which you want to add the key.
3. Select the Licensing node.
4. In the details pane, do one of the following:
To add the active key, click the Add button in the Active key section.
To add an additional key, click the Add button in the Additional key section.
An additional key may be added only if the active key is available.
Only a commercial license key can be installed as the additional key. A trial license key cannot be installed
as the additional key.
Page 26

A D M I N I S T R A T O R ' S G U I D E
26
5. In the File name window that opens, specify the path to the key file (a file with the key extension) and click the
Open button.
The key is added, and its details appear in the relevant section.
VIEWING KEY DETAILS
To view the details of keys added for a Security Server or profile:
1. Perform the following steps in the Administration Console tree:
To view the details of keys added for a Security Server, maximize the node of the Security Server the
details of whose keys you want to view;
To view the details of keys added for a profile, maximize the Profiles node and inside it maximize the node
of the profile the details of whose keys you want to view.
2. Select the Licensing node.
The details pane shows the following key details:
Status. Possible values:
Current license. The license has not expired, and application functionality is not limited.
Trial license validity period has expired. The functionality of the Anti-Virus and Anti-Spam modules is
unavailable. Updates are not allowed.
License expired. The license has expired, updates are unavailable, and access to KSN is blocked (see
section "About additional services, features, and anti-spam technologies" on page 70).
Databases are corrupted. Anti-Virus or Anti-Spam databases are corrupted or missing.
Key is missing. The functionality of the Anti-Virus and Anti-Spam modules is unavailable. Updates are not
allowed.
Key blocked. Only database updates are available. The functionality of the Anti-Virus and Anti-Spam
modules is unavailable.
Key blacklist corrupted or missing. Only database updates are available. The functionality of the Anti-Virus
and Anti-Spam modules is unavailable.
Key. Unique alphanumeric sequence.
License type. License type (trial, commercial).
Representative. Contact person of the organization that signed the End User License Agreement.
Number of users. The maximum number of application users whose mailboxes can be protected by the
application with this key.
Expiration date. License expiration date.
REPLACING A KEY
To replace a key added for a Security Server:
1. In the Administration Console tree, expand the node of a Security Server.
Page 27
A P P L I C A T I O N L IC E N S I N G
27
2. Select the Licensing node.
3. In the details pane, do one of the following:
To replace the active key, click the Replace button in the Active key section.
To replace an additional key, click the Replace button in the Additional key section.
4. In the File name window that opens, specify the path to the key file (a file with the key extension) and click the
Open button.
The key is added, and its details appear in the relevant section.
To replace a key added for a profile:
1. In the Administration Console tree, expand the Profiles node.
2. Expand the node of the profile whose key you want to replace.
3. Select the Licensing node.
4. In the details pane, do one of the following:
To replace the active key, click the Replace button in the Active key section.
To replace an additional key, click the Replace button in the Additional key section.
5. In the File name window that opens, specify the path to the key file (a file with the key extension) and click the
Open button.
The key is added, and its details appear in the relevant section.
REMOVING A KEY
To remove a key added for a Security Server:
1. In the Administration Console tree, expand the node of a Security Server.
2. Select the Licensing node.
3. In the details pane, do one of the following:
To remove the active key, click the Delete button in the Active key section.
To remove an additional key, click the Delete button in the Additional key section.
The application deletes the selected key. When the active key is deleted, the additional key (if installed) becomes
active.
To delete a key added for a profile:
1. In the Administration Console tree, expand the Profiles node.
2. Expand the node of the profile whose key you want to remove.
3. Select the Licensing node.
4. In the details pane, do one of the following:
To remove the active key, click the Delete button in the Active key section.
Page 28
A D M I N I S T R A T O R ' S G U I D E
28
To remove an additional key, click the Delete button in the Additional key section.
The application deletes the selected key. When the active key is deleted, the additional key (if installed) becomes
active.
Automatic substitution of the active key with the additional key at the expiry of the license term that elapses from the date
when the active key was added is performed on each Security Server within a profile according to the time of the
physical server on which the Security Server is deployed.
CONFIGURING THE LICENSE EXPIRY NOTIFICATION
The application checks the active license after each update. On detecting that the license is about to expire, the
application makes a relevant entry in the application log and starts sending notifications to the email addresses specified
in the notification settings (see section "Configuring notification settings" on page 91). By default, the application starts
sending notifications 15 days before license expiry. You can change the time when this notification should be sent.
To configure Security Server license expiry notifications:
1. In the Administration Console tree, expand the node of a Security Server.
2. Select the Licensing node.
3. In the lower part of the details pane, in the spin box of the Notify about license expiry in setting, specify in
how many days before license expiry you want to receive a notification about license expiry.
4. Click the Save button.
To configure profile license expiry notifications:
1. In the Administration Console tree, expand the Profiles node.
2. Expand the node of the profile for whose Security Servers you want to configure license expiry notifications.
3. Select the Licensing node.
4. In the lower part of the details pane, in the spin box of the Notify about license expiry in setting, specify in
how many days before license expiry you want to receive a notification about license expiry.
5. Click the Save button.
LICENSING SPECIFICS FOR SECURITY SERVERS WITHIN A
PROFILE
When using profiles, consider the following licensing specifics for Security Servers added to the profile:
Automatic substitution of the active key with the additional key at the expiry of the license term that elapses from
the date when the active key was added is performed on each Security Server within a profile according to the
time of the physical server on which the Security Server is deployed. This is important when, for example, the
Security Servers of a profile are located in different time zones.
In the Administration Console, in the details pane of the Profiles → <profile name> → Licensing node, the
keys and license expiry dates are shown for each of the added keys according to the time of the Administration
Console. For example, if a license defined by an active key has expired according to the time of the
Administration Console and an additional key has been added, the details pane shows only the additional key
and its properties.
Page 29

A P P L I C A T I O N L IC E N S I N G
29
You cannot add, modify, or remove a key for a separate Security Server added to a profile. You can add,
modify, or remove a key for the entire profile only, and the relevant license will apply to all Security Servers
within the profile.
After a Security Server has been added to a profile, the license is applied to it at the profile level even if this
Security Server had a different active license before it was added to this profile. In this case, the active key of
the Security Server is replaced with the active key of the profile.
After a Security Server has been removed from a profile, it continues to be subject to the license at the level of
the profile from which it has been removed. In this case, the details pane of the Licensing node still shows the
active key of the profile for this Security Server.
Page 30
30
STARTING AND STOPPING THE
APPLICATION
Kaspersky Security is started automatically when the Microsoft Exchange Server starts, at Microsoft Windows startup on
the server hosting the Security Server, when the first message passes via the Microsoft Exchange Server, and when the
Administration Console connects to the Security Server installed on the Microsoft Exchange Server. If the Microsoft
Exchange server protection is enabled during installation, anti-spam and anti-virus scanning of e-mail traffic is started or
stopped together with the Microsoft Exchange server.
You can separately enable or disable anti-virus protection of the Microsoft Exchange Server for the Mailbox and Hub
Transport roles and anti-spam protection of the Microsoft Exchange Server.
To stop the application:
1. In the Administration Console, disable anti-virus protection (see section "Enabling and disabling anti-virus
protection of the server" on page 58) and anti-spam protection (see section "Enabling and disabling anti-spam
protection of the server" on page 72).
2. On the computer hosting the Security Server, use the Windows tools to stop the Kaspersky Security 8.0 for
Microsoft Exchange Servers service and change its launch type to Disabled.
To launch the application after it has been stopped:
1. Start the Kaspersky Security 8.0 for Microsoft Exchange Servers service using Windows tools.
2. Make sure that the launch type for the Kaspersky Security 8.0 for Microsoft Exchange Servers service is set
to Enabled in the Windows settings on the computer hosting the Security Server.
3. In the Administration Console, enable anti-virus protection (see section "Enabling and disabling anti-virus
protection of the server" on page 58) and anti-spam protection (see section "Enabling and disabling anti-spam
protection of the server" on page 72).
Page 31

31
SERVER PROTECTION STATUS
IN THIS SECTION
Default Microsoft Exchange Server protection ................................................................................................................ 31
Viewing Microsoft Exchange Server protection status details ......................................................................................... 32
Viewing profile protection status details .......................................................................................................................... 37
This section covers the default settings of Kaspersky Security. This section describes how you can use the
Administration Console to view license info, the status of application modules and databases, as well as statistics on the
number of messages processed and instances of threats and spam detected.
DEFAULT MICROSOFT EXCHANGE SERVER PROTECTION
Anti-virus and anti-spam protection of the Microsoft Exchange Server starts immediately after the Security Server
component is installed, unless it has been turned off in the Application Configuration Wizard (see the Kaspersky Security
8.0 for Microsoft Exchange Servers Installation Guide).
The following application mode is engaged by default:
The application scans messages for all currently known malware in Anti-Virus databases with the following
settings:
The application scans the message body and attached objects in any format, except for container objects
with a nesting level above 32.
The application scans all storages of public folders and all mailbox storages.
The choice of the operation performed upon detection of an infected object depends on the role of the
Microsoft Exchange Server where the object has been detected:
When an infected object is detected on a Microsoft Exchange Server in a Hub Transport or Edge
Transport role, the object is deleted automatically, and the application saves the original copy of the
message in Backup and adds the [Malicious object deleted] tag to the message subject.
When an infected object is detected on a Microsoft Exchange Server in a Mailbox role, the application
saves the original copy of the object (attachment or message body) in Backup and attempts
disinfection. If disinfection fails, the application deletes the object and replaces it with a text file
containing the following notification:
Malicious object <VIRUS_NAME> has been detected. The file (<OBJECT_NAME>) was deleted by
Kaspersky Security 8.0 for Microsoft Exchange Servers. Server name: <server_name>
When a password-protected or corrupted object is detected, the application skips it. If you have configured
the application to delete the object or message when these categories of objects are detected, the
application deletes the object or message and saves the original copy of the message in Backup.
The application scans messages for spam with the following settings:
The application uses the low intensity level of anti-spam scanning. This level provides an optimal
combination of scanning speed and quality.
Page 32

A D M I N I S T R A T O R ' S G U I D E
32
The application skips all messages. Messages that have been labeled as Spam, Probable spam, Mass
mailing, or Blacklisted are marked with special tags in the message subject: [!!SPAM], [!!Probable Spam],
[!!Mass Mail] and [!!Blacklisted], respectively.
The maximum duration for scanning a single message is 30 seconds.
The maximum size of a message with attachments to be scanned is 1,536 KB (1.5 MB).
External services are used to check IP addresses and URLs:DNSBL and SURBL (see section "About
additional services, features, and anti-spam technologies" on page 70). These services enable spam
filtering using public black lists of IP addresses and URLs.
If you chose to use KSN in the Configuration Wizard, the KSN and Reputation Filtering services are
enabled. Otherwise, the KSN and Reputation Filtering services are disabled.
If you enabled the use of the Enforced Anti-Spam Updates Service in the Application Configuration Wizard,
the use of the Enforced Anti-Spam Updates Service is enabled. Otherwise, the use of the Enforced AntiSpam Updates Service is disabled.
If the application database update function was enabled in the Initial Configuration Wizard, the databases are
updated regularly from Kaspersky Lab update servers (with a frequency of once every hour for Anti-Virus
databases and once every five minutes for Anti-Spam databases).
VIEWING MICROSOFT EXCHANGE SERVER PROTECTION
STATUS DETAILS
To Microsoft Exchange Server protection status details:
1. Launch the Administration Console by selecting Start → Programs → Kaspersky Security 8.0 for Microsoft
Exchange Servers → Administration Console.
2. In the Administration Console tree, select the node of the Security Server installed on the relevant Microsoft
Exchange server whose status you want to view.
The details pane of the selected Security Server node shows the following information about the state of server
protection:
The Profile section explains how to configure Security Server settings by means of profiles.
The Product info section shows information about the Microsoft Exchange server and the application modules:
Server name.
The server name can take the following values:
Name of the physical server if the Administration Console is connected to a Security Server
deployed on a standalone Microsoft Exchange server, a passive node within a cluster, or on a
server that belongs to a DAG.
Virtual server name, if the Administration Console is connected to a virtual server or its active
node.
Details of the application deployment model.
The field contains one of the following values:
Virtual Server, if the Administration Console is connected to a virtual Microsoft Exchange Server
or its active node.
<DAG name>, if the Administration Console is connected to a Security Server deployed on a
Microsoft Exchange server that belongs to a DAG.
Page 33

S E R V E R P R O T E C T I O N S T A T U S
33
Version.
Details of the application version.
Anti-Spam module.
Status of the Anti-Spam module. Shown if the Microsoft Exchange Server is deployed as a Hub
Transport or Edge Transport. Possible values:
Disabled – the Anti-Spam module is installed, anti-spam scanning of messages is disabled.
Not active – the Anti-Spam module is installed, anti-spam scanning of messages is enabled, but
the Anti-Spam module is not scanning messages for spam due to licensing errors, database errors,
or scan errors.
Not installed: the Anti-Spam module is not installed.
Enabled – the Anti-Spam module is installed, anti-spam scanning of messages is enabled, the
Anti-Spam module is scanning messages for spam.
Anti-Virus module for Hub Transport role.
Status of the Anti-Virus module for the Hub Transport role. Shown if the Microsoft Exchange Server is
deployed as a Hub Transport or Edge Transport. Possible values:
Disabled – the Anti-Virus module is installed for the Hub Transport and Edge Transport roles, and
anti-virus protection for the Hub Transport role is disabled.
Not active – the Anti-Virus module is installed for the Hub Transport and Edge Transport roles,
anti-virus protection for the Hub Transport role is enabled, but the Anti-Virus module is not
scanning messages for viruses and other threats due to licensing errors, database errors, or scan
errors.
Not installed – the Anti-Virus module is not installed for the Hub Transport and Edge Transport
roles.
Enabled – the Anti-Virus module is installed for the Hub Transport and Edge Transport roles, anti-
virus protection for the Hub Transport role is enabled, and the Anti-Virus module is scanning
messages for viruses and other threats.
Anti-Virus module for Mailbox role.
Status of the Anti-Virus module for the Mailbox role. Shown if the Microsoft Exchange Server is
deployed in Mailbox role. Possible values:
Disabled – the Anti-Virus module is installed for the Mailbox role, and the Enable anti-virus
protection for the Mailbox role is cleared.
Does not work – the Anti-Virus module is installed for the Mailbox role, and the Enable anti-virus
protection for the Mailbox role check box is selected, but the Anti-Virus module is not scanning
messages for viruses and other threats due to licensing errors, database errors, or scan errors.
Not installed – the Anti-Virus module is not installed for the Mailbox role.
Enabled – the Anti-Virus module is installed for the Mailbox role, the Enable anti-virus protection
for the Mailbox role check box is selected, and the Anti-Virus module is scanning messages for
viruses and other threats.
The set of fields reflecting the state of Security Server modules may be shorter, depending on the configuration
of the Microsoft Exchange Server. If the field corresponding to a module is not displayed, this module cannot be
installed with the current configuration of the Microsoft Exchange Server.
If the SQL server is unavailable, the Product info configuration section shows information about an SQL server
connection error.
Clicking the Go to server protection settings link opens details pane of the Server protection node.
Page 34

A D M I N I S T R A T O R ' S G U I D E
34
The Licensing section shows information about the current license:
Functionality.
Available application features determined by the current license. Possible values:
Full functionality.
License expired. Database updates are not allowed, and access to KSN is blocked.
Update only.
Management only.
Status.
Possible values:
Current license. Application functionality is not limited.
Trial license validity period has expired. The functionality of the Anti-Virus and Anti-Spam modules
is unavailable. Updates are not allowed.
License expired. Updates are not allowed, and access to KSN is blocked.
Databases are corrupted. Anti-Virus or Anti-Spam databases are corrupted or missing.
Key is missing. The functionality of the Anti-Virus and Anti-Spam modules is unavailable. Updates
are not allowed.
Key blocked. Only database updates are available. The functionality of the Anti-Virus and Anti-
Spam modules is unavailable.
Key blacklist corrupted or missing. Only database updates are available. The functionality of the
Anti-Virus and Anti-Spam modules is unavailable.
If the Status field shows a value other than Active license, the Licensing section is highlighted in red. This
requires installing an active key (see section "Installing a key" on page 25) after opening the Licensing
section via the Manage keys link.
Expiration date.
License expiration date.
If the Expiration date field is highlighted in red, you have to renew the license, for example by adding an
additional key (see section "Adding a key" on page 25) by opening the Licensing node via the Manage
keys link.
The period of time until license expiry during which the field is highlighted in red is defined by the Notify N
days before license expiry setting (see section "Notification about license expiry" on page 28) located
in the details pane of the Licensing node. The default value is 15 days.
Number of users.
The maximum number of users whose mailboxes can be protected by the application with this key.
Additional key.
Clicking the Manage keys link opens the details pane of the Licensing node in which you can add or remove
keys.
Information on the availability of an additional key: Added or Not found.
Page 35

S E R V E R P R O T E C T I O N S T A T U S
35
The Anti-Spam database section shows the following Anti-Spam database status information:
Last update.
Date of the last update of the Anti-Spam databases.
Status.
Status of the last update of the Anti-Spam databases. Possible values:
Database updated – database update was successful;
Completed with an error – an error was encountered while updating the database;
Not performed – the update task was not performed.
Release date and time.
Anti-Spam database release date and time. Displayed in the date format defined in the settings of the
operating system.
If the Anti-Spam databases are outdated by more than one hour, the text in this field is highlighted in
red.
If the Anti-Spam database section or the Release date and time field within this section are highlighted in red,
update the Anti-Spam databases (see section "Updating databases manually" on page 49). If necessary, you
can configure Anti-Spam database update settings (see section "Configuring scheduled database updates" on
page 50).
If the last Anti-Spam database update ended in an error, the Anti-Spam databases section is highlighted in red
and the error message is displayed in the Status field.
Clicking the Configure update settings link opens details pane of the Updates node.
The Anti-Virus databases section shows the following Anti-Virus database status information:
Last update.
Date of the last update of the Anti-Virus databases.
Status.
Status of the last update of the Anti-Virus databases. Possible values:
Database updated – database update was successful;
Completed with an error – an error was encountered while updating the database;
Not performed – the update task was not performed.
Release date and time.
Anti-Virus database release date and time. Displayed in the date format defined in the settings of the
operating system.
If the Anti-Virus databases are outdated by more than one day, the text in this field is highlighted in red.
Records in the base.
Number of records describing known threats and stored in the Anti-Virus database.
Page 36

A D M I N I S T R A T O R ' S G U I D E
36
If the Anti-Virus databases section or the Release date and time field within this section is highlighted in red,
update the Anti-Virus databases (see section "Updating databases manually" on page 49). If necessary, you
can configure Anti-Virus database update settings (see section "Configuring scheduled database updates" on
page 50).
If the last Anti-Virus database update ended in an error, the Anti-Virus databases section is highlighted in red
and the error message is displayed in the Status field.
Clicking the Configure update settings link opens details pane of the Updates node.
The Statistics section shows the following counters with the number of messages moved to Quarantine for
rescanning for spam (see page 68):
Total number of messages moved to Quarantine by the application.
Number of messages moved to Quarantine since the application started tracking statistics.
Number of messages in Quarantine.
Number of messages currently in Quarantine.
Charts with performance statistics of application modules over the past seven days are displayed under the
counters in the Statistics section:
Anti-Spam.
The chart includes the following information:
Total messages. Number of processed messages.
With phishing or spam. Number of scanned messages containing phishing links or spam.
Unscanned. Number of messages left unchecked.
Clean. Number of scanned messages without phishing links or spam.
Other items. Number of messages belonging to the following categories:
Probable spam.
Formal notification.
Mass mailing.
Message matching black or white list criteria.
Anti-Virus for Hub Transport role.
The chart includes the following information:
Total messages. Number of processed messages.
Infected. Number of infected messages detected.
Unscanned. Number of messages left unchecked.
Uninfected. Number of checked messages that are free from threats.
Other items. Number of messages belonging to the following categories:
Probably infected.
Protected.
Corrupted.
Page 37

S E R V E R P R O T E C T I O N S T A T U S
37
Anti-Virus for the Mailbox role.
The chart includes the following information:
Server name. Name of the connected server.
Total objects. Number of processed messages.
Infected. Number of infected messages detected.
Unscanned. Number of messages left unchecked.
Uninfected. Number of checked messages that are free from threats.
Other items. Number of messages belonging to the following categories:
Probably infected.
Protected.
Corrupted.
The set of charts may be abbreviated depending on the configuration of the application.
Clicking the Go to reports link opens the details pane of the Reports node in which you can generate
application reports.
VIEWING PROFILE PROTECTION STATUS DETAILS
To view profile protection status details:
1. Launch the Administration Console by selecting Start → Programs → Kaspersky Security 8.0 for Microsoft
Exchange Servers → Administration Console in the operating system.
2. In the Profiles node of the Administration Console tree, select the node of the profile whose protection status
details you want to view.
The following information appears in the details pane of the selected profile:
The Licensing section shows information about the profile license:
Functionality.
Available application features determined by the current license. Possible values:
Full functionality.
License expired. Database updates are not allowed, and access to KSN is blocked.
Update only.
Management only.
Page 38

A D M I N I S T R A T O R ' S G U I D E
38
Status.
Possible values:
Current license. Application functionality is not limited.
Trial license validity period has expired. The functionality of the Anti-Virus and Anti-Spam modules
is unavailable. Updates are not allowed.
License expired. Updates are not allowed, and access to KSN is blocked.
Databases are corrupted. Anti-Virus or Anti-Spam databases are corrupted or missing.
Key is missing. The functionality of the Anti-Virus and Anti-Spam modules is unavailable. Updates
are not allowed.
Key blocked. Only database updates are available. The functionality of the Anti-Virus and Anti-
Spam modules is unavailable.
Key blacklist corrupted or missing. Only database updates are available. The functionality of the
Anti-Virus and Anti-Spam modules is unavailable.
If the Status field shows a value other than Active license, the Licensing section is highlighted in red. This
requires installing an active key (see section "Installing a key" on page 25) after opening the Licensing
section via the Manage keys link.
Expiration date.
License expiration date.
If the Expiration date field is highlighted in red, you have to renew the license, for example by adding an
additional key (see section "Adding a key" on page 25) by opening the Licensing node via the Manage
keys link.
The period of time until license expiry during which the field is highlighted in red is defined by the Notify N
days before license expiry setting (see section "Notification about license expiry" on page 28) located
in the details pane of the Licensing node. The default value is 15 days.
Number of users.
The maximum number of users whose mailboxes can be protected by the application with this key.
Additional key.
Information on the availability of an additional key: Added or Not found.
Clicking the Manage keys link opens the details pane of the Licensing node in which you can add or remove
keys.
The Server state section shows a table whose columns contain information about the state of profile servers,
updates, application modules, and the SQL server:
Server.
The server name can take the following values:
<Server domain name>, if the profile includes a Security Server deployed on a Microsoft Exchange
server that does not belong to a DAG and is not a passive node within a cluster.
<DAG name – Server domain name>, if the profile includes a Security Server deployed on a
Microsoft Exchange server that belongs to a DAG.
<Virtual server name – Server domain name>, if the profile includes a virtual server.
Page 39

S E R V E R P R O T E C T I O N S T A T U S
39
Update status.
Status of database updates on the server. Possible values:
Database updated – database update was successful;
Database error – there has been an error during database updates, databases are obsolete or
corrupted, or no updates have been performed;
Server unavailable – the server is unavailable on the network or turned off.
Anti-Virus module.
Status of the Anti-Virus module. Possible values:
Disabled – the Anti-Virus module is installed for the Hub Transport and Edge Transport roles or for
the Mailbox role, the Enable anti-virus protection for the Hub Transport role check box or the
Enable anti-virus protection for the Mailbox role check box is cleared.
Does not work – the Anti-Virus module is installed for the Hub Transport and Edge Transport
roles or the Mailbox role, and the Enable anti-virus protection for the Hub Transport role check
box or the Enable anti-virus protection for the Mailbox role check box is cleared check box is
selected, but the Anti-Virus module is not scanning messages for viruses and other threats due to
licensing errors, database errors, or scan errors.
Not installed – the Anti-Virus module is not installed for the Hub Transport and Edge Transport
roles or the Mailbox role.
Enabled – the Anti-Virus module is installed for the Hub Transport and Edge Transport roles or the
Mailbox role, the Enable anti-virus protection for the Hub Transport role check box or the
Enable anti-virus protection for the Mailbox role check box is selected, the Anti-Virus module is
scanning messages for viruses and other threats.
Anti-Spam module.
Status of the Anti-Spam module. Shown if the Microsoft Exchange Server is deployed as a Hub
Transport or Edge Transport. Possible values:
Disabled – the Anti-Spam module is installed, anti-spam scanning of messages is disabled.
Not active – the Anti-Spam module is installed, anti-spam scanning of messages is enabled, but
the Anti-Spam module is not scanning messages for spam due to licensing errors, database errors,
or scan errors.
Not installed: the Anti-Spam module is not installed.
Enabled – the Anti-Spam module is installed, anti-spam scanning of messages is enabled, the
Anti-Spam module is scanning messages for spam.
SQL server.
The status of the SQL server can take the following values:
Available.
Unavailable.
If the server is unavailable, the Update status column shows the Server unavailable status, and the Update
status, Anti-Virus module, and Anti-Spam module columns are highlighted in red.
If the Update status column shows a value other than Databases are up to date, the column is highlighted in
red.
If the status of the Anti-Virus module or the Anti-Spam module is Disabled or Does not work, the column
corresponding to the module is highlighted in red.
Clicking the server name in the Server column opens the details pane of the server node.
Page 40

40
GETTING STARTED
IN THIS SECTION
Starting: Administration Console ..................................................................................................................................... 40
Connecting the Administration Console to a Security Server .......................................................................................... 40
This section explains how to begin using Kaspersky Security: launch Administration Console and create a list of
protected servers.
Operation of the application can be managed from the administrator's workstation through the Administration Console.
You can connect any number of Security Servers to the Administration Console and manage them both locally and
remotely.
STARTING THE ADMINISTRATION CONSOLE
To launch the Administration Console,
Start → Programs → Kaspersky Security 8.0 for Microsoft Exchange Servers → Administration Console.
When launched, the Administration Console automatically connects to the local Security Server, and the following
appears in the Administration Console tree: the application icon, the Kaspersky Security 8.0 for Microsoft Exchange
Servers node, and the node of the local Security Server (if it has been installed) connected to the Administration
Console.
To connect the Administration Console to the Security Server deployed on a remote Microsoft Exchange server, the
Kaspersky Security 8.0 for Microsoft Exchange Servers service must be added to the trusted applications list of the
remote Microsoft Exchange server's firewall, or RPC connections must be allowed.
CONNECTING THE ADMINISTRATION CONSOLE TO A
SECURITY SERVER
To manage the application, you have to connect the Administration Console to all Security Servers deployed on
Microsoft Exchange servers that you want to protect. You can connect the Administration Console either to a local
computer or a network-deployed Microsoft Exchange server.
Microsoft Exchange database availability groups (DAG) cannot be added to the list of protected servers. Instead, you can
add any of the DAG servers in order to perform operations common to the DAG, or add a separate Microsoft Exchange
Server (including one that is part of DAG) in order to configure its individual settings.
Examples of operations common to the DAG include: configuring anti-virus protection settings for the Mailbox role,
configuring Anti-Virus report settings for the Mailbox role, configuring notification settings, configuring Anti-Virus
database update settings, viewing Backup contents, and adding a key.
Examples of individual settings of the Microsoft Exchange Server include: anti-virus protection settings for the Hub
Transport role, anti-spam scan settings, Backup settings, settings of the Anti-Spam and Anti-Virus reports for the Hub
Transport role, and Anti-Spam database update settings.
Page 41

G E T T I N G S T A R T E D
41
To connect the Administration Console to a Security Server, perform the following steps:
1. Select the Kaspersky Security 8.0 for Microsoft Exchange Servers node in the Administration Console tree.
2. Open the Connect to server window in one of the following ways:
By selecting the Connect to server item in the Action menu.
By selecting the Connect to server item in the context menu of the Kaspersky Security 8.0 for Microsoft
Exchange Servers node.
By clicking the Connect to server button in the details pane.
By clicking the Connect to server link in the quick access pane.
3. In the Connect to server window, select the Security Server deployed on the Microsoft Exchange server, to
which you want to connect the Administration Console:
4. If you want to connect the Administration Console to a Security Server deployed on a local computer, choose
the Local computer option.
5. If you want to connect the Administration Console to a Security Server deployed on a remote Microsoft
Exchange Server, choose the Other computer option.
To connect the Administration Console to the Security Server deployed on a remote server, add the Kaspersky
Security 8.0 for Microsoft Exchange Servers service to the trusted applications list of the remote computer's
firewall, or allow RPC connections.
6. If you have chosen the Other computer option, in the entry field specify the name of the remote Microsoft
Exchange Server on which the Security Server is deployed. You can select the remote Microsoft Exchange
server from the list by clicking the Browse button or by typing manually one of the values for the remote
Microsoft Exchange server:
IP address
Fully-qualified domain name (FQDN) in the format <Computer name>.<DNS-domain name>
Computer name on the Microsoft Windows network (NetBIOS name)
7. Click OK.
The connected Security Server appears in the Administration Console tree.
Page 42

42
MANAGING PROFILES
IN THIS SECTION
About profiles .................................................................................................................................................................. 42
Creating a profile ............................................................................................................................................................. 43
Configuring Security Servers in a profile ......................................................................................................................... 43
Specifics of managing profiles in a Microsoft Exchange database availability group ...................................................... 44
Adding Security Servers to a profile ................................................................................................................................ 45
Removing a Security Server from a profile ...................................................................................................................... 46
Removing a profile .......................................................................................................................................................... 46
This section describes how you can create, manage, and configure profiles.
ABOUT PROFILES
If a corporate network includes several Microsoft Exchange servers with the application installed, you may need to
manage the application settings in a group of servers simultaneously. For example, these may be Microsoft Exchange
servers with identical security requirements. To manage identical settings in a group of Security Servers, Kaspersky
Security provides profiles. A profile is a set of identical settings applied to several Security Servers at once. Using profiles
allows you to specify identical settings for all Security Servers of the same type simultaneously and to avoid the hassle of
configuring each Security Server separately.
Profiles can be useful in the following cases:
There are several Microsoft Exchange servers with the application on the corporate network and you need to
manage these servers in the same way. In this case, you can create a single profile, add all Security Servers to
this profile, and configure application settings in the profile.
There are two or more groups of Security Servers on the corporate network, and you need to configure different
settings for these groups. In this case, the following profile usage options are possible:
If each of the groups includes more than one Security Server, you can create several profiles with different
settings and add different Security Servers to them.
If one of the Security Servers requires customs settings, you can create a profile for a group of servers with
identical settings and manage their settings using the profile created, while configuring the settings of the
Security Server that does not belong to this group separately without creating a profile for it. A standalone
Security Server that is not included in any profile is called an unassigned Security Server. You can
configure an unassigned Security Server individually in the node of that Security Server.
Using profiles is optional. You can also configure the settings of Security Servers separately in the node of each Security
Server.
If a company has multiple sites, allowance should be made for replication delays when creating and editing profiles,
since the application stores profile information in Active Directory.
Page 43

M A N A G I N G P R O F IL E S
43
To use profiles, perform the following:
1. Create a profile (see section "Creating a profile" on page 43).
2. Configure the profile (see section "Configuring a Security Server in a profile" on page 43).
3. Add Security Servers to the profile (see section "Adding Security Servers to a profile" on page 45).
You may not be able to modify the Security Server settings if the Security Server has been added to a profile and profile
settings have been inherited for it (see section "Configuring Security Servers in a profile" on page 43). The "lock" symbol
appears next to the setting that cannot be edited. To specify Security Server settings that differ from the values of profile
settings, remove the Security Server from the profile (see section "Removing a Security Server from a profile" on
page 46).
You can create as many profiles as you wish, and add Security Servers to them or remove Security Servers from them at
any time (see section "Removing a Security Server from a profile" on page 46).
You may need to remove a Security Server from the profile, for example, in the following cases:
If you need to specify Security Server settings that differ from those of a profile.
If you need to add a Security Server to another profile (in this case, you should first remove it from the profile to
which it has been added earlier).
If you do not need an existing profile anymore, you can remove that profile from the application configuration (see section
"Removing a profile" on page 46).
CREATING A PROFILE
To create a new profile:
1. In the Administration Console tree, expand the Profiles node.
2. Add a new profile in one of the following ways:
By selecting the Add profile item in the Action menu.
By selecting the Add profile item in the context menu of the Profiles node.
By clicking the Add profile button in the details pane of the Administration Console.
By clicking the Add profile link in the quick access pane.
3. In the Create profile window that opens, enter a profile name.
4. Click OK.
The child node with the name of the created profile appears within the Profiles node.
To be able to use the profile, you have to configure it (see section "Configuring Security Servers in a profile" on page 43)
and add Security Servers to it (see section "Adding Security Servers to a profile" on page 45).
CONFIGURING SECURITY SERVERS IN A PROFILE
You can configure the following general settings for Security Servers belonging to the same profile (in the child nodes of
the profile):
Page 44

A D M I N I S T R A T O R ' S G U I D E
44
Configure the anti-virus protection settings (see section "Configuring anti-virus processing of objects" on
page 60) and spam protection settings (see section "Configuring spam scanning" on page 73), and also
additional Anti-Virus settings (see section "Configuring anti-virus scanning exclusions" on page 62) in the
Server protection node;
Configure the schedule of automatic database updates (see section "Configuring scheduled database updates"
on page 50) and the update source (see section "Selecting an update source" on page 51) in the Updates
node;
Configure notification settings (see section "Configuring notifications" on page 91) in the Notifications and
Settings nodes;
Configure event log settings (see section "Configuring logs" on page 104) and the diagnostics level (see section
"Configuring diagnostics level" on page 104) in the Settings node;
Manage keys (see section "Application licensing" on page 22) and configure the license expiry notification
settings (see section "Configuring the license expiry notification" on page 28) in the Licensing node;
Configure the report settings (see section "Reports" on page 94) in the Reports node.
These changes do not affect the following custom settings of Security Servers and actions taken by the application on
Security Servers:
Start of a background scan (see section "Configuring background scanning" on page 66) in the Server
protection node.
Start of a database update (see section "Starting a database update manually" on page 49) in the Updates
node.
Update center settings (see section "Designating a server as an update center and configuring its settings" on
page 54) in the Updates node.
Test notification (see section "Configuring notification delivery" on page 92) in the Notifications and Settings
nodes.
Backup settings (see section "Backup settings" on page 89) in the Settings node.
You will still be able to edit settings and perform operations only separately for each of the Security Servers (in the child
nodes of each Security Server or in the profile node in the tree of the Servers node for each Security Server).
SPECIFICS OF MANAGING PROFILES IN A MICROSOFT
EXCHANGE DATABASE AVAILABILITY GROUP
If you make changes in the Exchange Administration Console to the configuration of a DAG that has been added to a
profile in Kaspersky Security, consider the following specifics of the settings of Security Servers belonging to this DAG in
Kaspersky Security:
If you install Kaspersky Security on a Microsoft Exchange server belonging to a DAG that has been added to a
profile, the settings of this profile are applied to the relevant Security Server in Kaspersky Security after
installation.
If you use the Exchange Administration Console to add a Microsoft Exchange server with Kaspersky Security
installed to a DAG that has been added to a profile in Kaspersky Security, the settings of this profile are applied
to the relevant Security Server in Kaspersky Security. If the DAG has not been added to a profile, individual
settings of this DAG are applied to the relevant Security Server in Kaspersky Security.
If you use the Exchange Administration Console to combine several Microsoft Exchange servers with the
application installed into a new DAG, the settings of this DAG are applied to the relevant Security Servers in
Kaspersky Security. In other words, the common default settings are applied (except for the list of protected
Page 45

M A N A G I N G P R O F IL E S
45
storages and public folders), while the individual settings of servers and the settings of the list of protected
storages and public folders remain just like they were before the servers were added to the DAG.
If servers had been added to profiles prior to being combined into a DAG, once combined they still appear not
only in the list of DAG servers, but also in such profiles. However, you will not be able to manage the settings of
such servers from the profiles. You can manage the settings of these servers only from the profile to which the
DAG has been added, or the individual settings of the DAG (if the DAG has not been added to a profile). If
necessary, you can remove servers shown in profiles manually.
If you use the Exchange Administration Console to remove a Microsoft Exchange server with the application
installed from a DAG that has been added to a profile in Kaspersky Security, the corresponding Security Server
is removed from the profile in Kaspersky Security and gets the default settings. After being removed from the
DAG, this Security Server does not appear in the list of profile servers. You have to add it manually to the list of
protected Microsoft Exchange servers (see section "Connecting the Administration Console to a Security
Server" on page 40) or to one of the profiles (see section "Adding Security Servers to a profile" on page 45) and
configure it (see section "Configuring Security Servers in a profile" on page 43).
ADDING SECURITY SERVERS TO A PROFILE
To add Security Servers to a profile:
1. In the Administration Console tree, expand the Profiles node.
2. Select the node of the profile to which you want to add a Security Server, or expand the node of the profile and
select the Servers node.
3. One the wizard for adding the Security Server to the profile in one of the following ways:
By selecting the Add server item in the Action menu.
By selecting the Add server item in the context menu of the node.
By clicking the Add server link in the quick access pane.
By clicking the Add server button in the details pane of the Administration Console (only when the profile
node is selected).
4. In the Server selection window of the Wizard, in the Unassigned servers field select Security Servers that you
want to add to the profile.
The Unassigned servers field displays Security Servers that have been added to none of the profiles.
5. In the Server selection window of the Wizard, click the >> button.
The selected Security Servers appear in the Added to profile field.
6. Click the Next button.
7. In the Confirmation window of the Wizard that opens, click the Finish button.
The added Security Servers appear on the list of servers in the details pane of the profile node and in the profile
node in the Servers node tree. Within 5 minutes, the application will apply the general settings of Security Servers of
the profile (see section "Configuring Security Servers in a profile" on page 43) to the Security Servers that have been
added to the profile.
You can add DAG servers or cluster servers to a profile only all at once. When a DAG is added to a profile, all servers
and all their roles (including the Hub Transport role) are added to this profile.
Page 46

A D M I N I S T R A T O R ' S G U I D E
46
A Security Server deployed on a computer on which a Microsoft Exchange server is deployed in the Edge Transport role
cannot be added to the profile.
After a Security Server has been added to a profile, the license is applied to it at the profile level even if this Security
Server had a different active license before it was added to this profile.
REMOVING A SECURITY SERVER FROM A PROFILE
To remove a Security Server from a profile:
1. In the Administration Console tree, expand the Profiles node.
2. Select the Security Server you want to remove in one of the following ways:
Select the node of the profile from which you want to remove the Security Server, and in the server list
appearing in the details pane select the Security Server that you want to remove.
Expand the node of the profile from which you want to remove the Security Server, expand the Servers,
and select the Security Server that you want to remove in the server list.
3. Remove the selected Security Server in one of the following ways:
If you have selected a Security Server in the details pane, click the Remove server button.
If you have selected a Security Server in the server list of the Servers node, remove the Security Server in
one of the following ways:
Select the Remove item in the Action menu.
Select the Remove item in the context menu of the node
Click the Remove link in the quick access pane.
4. In the window that opens, confirm server removal.
Within 5 minutes, the application will remove the Security Server from the list of servers in the details pane of
the profile node and from the Servers node in the tree of the profile node. These changes will not impact the
settings of the Security Server, but you will no longer be able to adjust them from the profile; you will be able to
adjust them individually for the Security Server in the node of this Security Server.
You can remove DAG servers or cluster servers from a profile only all at once.
After a Security Server has been removed from a profile, it continues to be subject to the license at the level of the profile
from which it has been removed.
REMOVING A PROFILE
To remove a profile:
1. In the tree of the Administration Console, select the profile you want to remove in one of the following ways:
Select the Profiles node, and select the profile you want to remove in the profile list appearing in the details
pane.
Page 47

M A N A G I N G P R O F IL E S
47
Expand the Profiles node, and select the node of the profile that you want to remove in the list of nodes.
2. Remove the selected profile in one of the following ways:
If you have selected a profile in the details pane, click the Remove profile button.
If you have selected a node of a profile nested in the Profiles node, remove the profile in one of the
following ways:
Select the Remove item in the Action menu.
Select the Remove item in the context menu of the profile node.
Click the Remove link in the quick access pane.
3. In the window that opens, confirm profile removal.
The application will remove the profile from the tree of the Profiles node. Security Servers included in the profile
become unassigned. These modifications will not impact the settings of unassigned Security Servers, but you will be
able to adjust all of the settings for each of the Security Servers only individually in the node of each server.
Page 48

48
UPDATING DATABASES
IN THIS SECTION
About database updates ................................................................................................................................................. 48
About update centers ...................................................................................................................................................... 49
About database updates in configurations with a cluster or DAG of servers ................................................................... 49
Updating databases manually ......................................................................................................................................... 49
Configuring scheduled databases updates ..................................................................................................................... 50
Select update source....................................................................................................................................................... 51
Configuring the connection to the update source ............................................................................................................ 52
Configuring the proxy server settings .............................................................................................................................. 53
Designating a server as an update center and configuring its settings............................................................................ 54
This section explains how to update application databases (hereinafter updates, database updates) and configure
database updates.
ABOUT DATABASE UPDATES
Updates of Kaspersky Security application databases keeps Microsoft Exchange server protection up to date.
New viruses and other threats as well as new kinds of spam appear on a daily basis worldwide. Information about threats
and spam and ways to neutralize them is contained in Anti-Virus and Anti-Spam databases of the application. Application
databases have to be updated regularly to enable timely detection of new threats and spam messages.
You are advised to update application databases immediately after installation, as the databases included in the
distribution kit will be out of date by the time you install your application. Anti-Virus databases on update servers of
Kaspersky Lab are updated every hour. The Anti-Spam database is updated every five minutes. We recommend
configuring scheduled database updates to be performed at the same intervals (see section "Configuring scheduled
databases updates" on page 50).
Kaspersky Security can retrieve database updates from the following update sources:
From Kaspersky Lab's update servers on the Internet
From another HTTP server or FTP server, such as your Intranet server
From a local update source, such as a local or network folder
From the update center – one of the servers with Kaspersky Security installed, which has been designated as
the update center (see section "About update centers" on page 49).
Database updates can be performed manually or according to schedule. After the files are copied from the specified
update source, the application automatically connects to the new databases.
Page 49

U P D A T I N G D A T A B A S E S
49
ABOUT UPDATE CENTERS
Any Microsoft Exchange server with Kaspersky Security installed can be designated as an update center (see section
"Designating a server as an update center and configuring its settings" on page 54). Update centers receive updated
databases from Kaspersky Lab servers and can serve as sources of updates for application databases (see section
"Selecting the update source" on page 51) of other Microsoft Exchange servers with the application installed.
Update centers can be useful in the following cases:
If your company has several Microsoft Exchange servers with the application installed, you can designate one of
the Microsoft Exchange servers as an update center that receives databases from Kaspersky Lab servers and
set it as an update source for other Microsoft Exchange servers of the company. This reduces the amount of
Internet traffic, maintains databases on all Microsoft Exchange servers in an identical state, and eliminates the
need to configure the Internet connection for each Microsoft Exchange server and monitor the security of such
connections.
If the corporate network has geographically distributed server segments with slow data links, you can create a
dedicated update center for each regional segment to receive database updates from Kaspersky Lab servers.
This reduces the amount of network traffic between regional segments and speeds up the distribution of
updates to all servers on the corporate network.
ABOUT DATABASE UPDATES IN CONFIGURATIONS WITH A
CLUSTER OR DAG OF SERVERS
In configurations with a cluster or DAG of Microsoft Exchange servers, database update settings are the same for the
entire cluster / DAG of servers. This enables centralized updates of databases on all servers that are part of the
configuration.
You can configure centralized database updates in the following ways:
From Kaspersky Lab's update servers. When this method is used, each server in the cluster / DAG connects
to Kaspersky Lab update servers at the specified time independently of other servers, which causes a great
amount of Internet traffic. This method is therefore not recommended for configurations with a large number of
servers. Another downside of this method is the need to configure the Internet connection on each server in the
configuration. The advantage of this method is high reliability, as updates are performed directly from Kaspersky
Lab servers without intermediaries.
From an intermediate server or network folder. When this method is used, servers belonging to a cluster /
DAG download updates from an intermediate HTTP server or FTP server or network folder located outside of
the configuration of Microsoft Exchange servers. This method reduces the amount of Internet traffic while
ensuring fast and synchronized updates on all servers in the configuration, but also entails extra expenses on
the upkeep of intermediate hardware.
From an update center. This method involves designating one of the servers in the cluster / DAG as an update
center (see section "Designating a server as an update center and configuring its settings" on page 54). The
advantages of this method are low Internet traffic, fast and synchronized updates on all servers in the
configuration. When this method is used, however, higher reliability requirements apply to the server designated
as the update center.
UPDATING DATABASES MANUALLY
To view information about Anti-Virus database updates and update them if necessary:
1. In the Administration Console tree, expand the node of a Security Server.
2. Select the Updates node.
Page 50

A D M I N I S T R A T O R ' S G U I D E
50
3. The details pane in the Anti-Virus database update configuration section shows the following information:
Result of the last update. Information about the Anti-Virus database update status.
Release date of the databases. Time when the Anti-Virus database currently used in the application was
published on the Kaspersky Lab server (UTC).
Records. Number of virus signatures in the current version of the Anti-Virus database.
4. To update Anti-Virus databases, click the Start update button.
5. To stop the update procedure, click the Stop button.
If the application is running on a cluster or DAG of Microsoft Exchange servers, a manual update of the Anti-Virus
database has to be performed on each server within the cluster or DAG.
To view information about Anti-Spam database updates and update them if necessary:
1. In the Administration Console tree, expand the node of a Security Server.
2. Select the Updates node.
3. The details pane in the Anti-Spam databases update configuration section shows the following information:
Result of the last update. Information about the Anti-Spam database update status.
Release date of the databases. Time when the Anti-Spam database currently used in the application
became available on the server of Kaspersky Lab (UTC).
4. To update Anti-Spam databases, click the Start update button.
5. To stop the update procedure, click the Stop button.
CONFIGURING SCHEDULED DATABASES UPDATES
To configure scheduled Anti-Virus database updates:
1. Perform the following steps in the Administration Console tree:
To configure scheduled Anti-Virus database updates for an unassigned Security Server, maximize the node
of the relevant Security Server;
To configure scheduled Anti-Virus database updates for Security Servers belonging to a profile, maximize
the Profiles node and inside it maximize the node of the profile for whose Security Servers you want to
configure Anti-Virus database updates.
2. Select the Updates node.
3. Open the Anti-Virus database update configuration section in the details pane.
4. Select one of the following options from the Run mode drop-down list:
Periodically. In the every N minutes / hours / days spin box, specify the frequency of database updates
in minutes / hours / days.
Daily. In the spin box on the right, specify the exact local time of the server.
On selected day. Select the check boxes next to the days of the week when you would like to update the
Anti-Virus database, and specify the update time.
Page 51

U P D A T I N G D A T A B A S E S
51
5. Click the Save button.
If the application is running on a DAG of Microsoft Exchange servers, the settings of scheduled Anti-Virus database
updates configured on one of the servers will be automatically applied to other servers within the DAG. It is not required
to configure scheduled updates on the remaining servers within this DAG.
To configure scheduled Anti-Spam database updates:
1. Perform the following steps in the Administration Console tree:
To configure scheduled Anti-Spam database updates for an unassigned Security Server, maximize the
node of the relevant Security Server;
To configure scheduled Anti-Spam database updates for Security Servers belonging to a profile, maximize
the Profiles node and inside it maximize the node of the profile for whose Security Servers you want to
configure Anti-Spam database updates.
2. Select the Updates node.
3. Open the Anti-Spam databases update configuration section in the details pane.
4. Select one of the following options from the Run mode drop-down list:
Periodically. In the every N minutes / hours / days spin box, specify the frequency of database updates
in minutes / hours / days.
Daily. In the spin box on the right, specify the exact local time of the server.
On selected day. Select the check boxes next to the days of the week when you would like to update the
Anti-Spam database, and specify the update time.
5. Click the Save button.
SELECTING AN UPDATE SOURCE
To choose an Anti-Virus database update source:
1. Perform the following steps in the Administration Console tree:
To choose an Anti-Virus database update source for an unassigned Security Server, maximize the node of
the relevant Security Server;
To choose an Anti-Virus database update source for Security Servers belonging to a profile, maximize the
Profiles node and inside it maximize the node of the profile for whose Security Servers you want to choose
an update source.
2. Select the Updates node.
3. Expand the Anti-Virus database update configuration section in the details pane and choose one of the
following options:
To download updates from Kaspersky Lab servers, select the Kaspersky Lab's update servers item.
This source of updates is set by default.
To download updates from an intermediate server, local or network folder, select the HTTP server, FTP
server, local or network folder item. Then specify the server address or the full path to a local or network
folder in the entry field.
Page 52

A D M I N I S T R A T O R ' S G U I D E
52
To download updates from an update center, select the Update center storage item. Then select the
server that is the update center in the drop-down list.
You can select this update source if at least one update center has been created in your configuration (see
section "Designating a server as an update center and configuring its settings" on page 54). If the Microsoft
Exchange server for which you are selecting an update source is deployed in an Edge Transport role, the
name of the server designated as the update server may be missing from the drop-down list. In this case,
manually type the name of the server that is the designated update center.
4. Click the Save button.
If the application is running on a cluster or DAG of Microsoft Exchange servers, the database update settings (in
particular the source of updates) that are configured on one of the servers will be automatically applied to other servers
within this cluster or DAG. It is not necessary to configure update settings on other servers.
To choose an Anti-Spam database update source:
1. Perform the following steps in the Administration Console tree:
To choose an Anti-Spam database update source for an unassigned Security Server, maximize the node of
the relevant Security Server;
To choose an Anti-Spam database update source for Security Servers belonging to a profile, maximize the
Profiles node and inside it maximize the node of the profile for whose Security Servers you want to choose
an update source.
2. Select the Updates node.
3. Expand the Anti-Spam databases update section in the details pane and perform one of the following:
To download updates from Kaspersky Lab servers, select the Kaspersky Lab's update servers item.
This source of updates is set by default.
To download updates from an intermediate server, local or network folder, select the HTTP server, FTP
server, local or network folder item. Then specify the server address or the full path to a local or network
folder in the entry field.
To download updates from an update center, select the Update center storage item. Then select the
server that is the update center in the drop-down list.
You can specify this update source if at least one update center has been created in your configuration. If
the Microsoft Exchange server for which you are selecting an update source is deployed in an Edge
Transport role, the name of the server designated as the update server may be missing from the drop-down
list. In this case, manually type the name of the server that is the designated update center.
4. Click the Save button.
CONFIGURING THE CONNECTION TO THE UPDATE SOURCE
To configure the connection to an update source:
1. Perform the following steps in the Administration Console tree:
To configure the connection to an update source for an unassigned Security Server, maximize the node of
the relevant Security Server;
Page 53

U P D A T I N G D A T A B A S E S
53
To configure the connection to an update source for Security Servers belonging to a profile, maximize the
Profiles node and inside it maximize the node of the profile for whose Security Servers you want to
configure the connection to an update source.
2. Select the Updates node.
3. Open the Connection settings configuration section in the details pane.
4. If your Internet connection is established through a proxy server, enable the option to Use proxy server.
5. In the Maximum connection timeout spin box, enter the maximum time (in seconds) that the server will wait
for a connection to the update source.
The Microsoft Exchange server will be attempting to connect to the update source during this time. The default
value of this setting is 60 seconds. You may need to increase it if you have a slow Internet connection, for
example.
6. Click the Save button.
If the Internet connection is established using a proxy server, you have to configure the proxy server settings (see
section "Configuring the proxy server settings" on page 53).
CONFIGURING PROXY SERVER SETTINGS
To configure the proxy server settings, perform the following steps:
1. Perform the following steps in the Administration Console tree:
To configure the connection to a proxy server for an unassigned Security Server, maximize the node of the
relevant Security Server;
To configure the connection to a proxy server for Security Servers belonging to a profile, maximize the
Profiles node and inside it maximize the node of the profile for whose Security Servers you want to
configure the connection to a proxy server.
2. Select the Settings node.
3. In the details pane, expand the Proxy server settings section.
4. Enter the proxy server address in the Proxy server address field.
5. Specify the proxy server port number in the Port field.
By default, port 8080 is used.
6. If authentication is required to connect to the specified proxy server, select the Use authentication check box
and enter the account name in the Account field and password in the Password field.
7. Click the Save button.
Page 54

A D M I N I S T R A T O R ' S G U I D E
54
DESIGNATING A SERVER AS AN UPDATE CENTER AND
CONFIGURING ITS SETTINGS
We strongly advise against designating an update center and configuring its settings when migrating to a new version of
the application on servers operating as part of a configuration with a cluster or DAG of Microsoft Exchange servers. The
operations described in this section should be performed only after completing the migration of all servers to the new
version of the application (for details see the Kaspersky Security 8.0 for Microsoft Exchange Servers Installation Guide).
We strongly advise against designating a virtual Microsoft Exchange server as an update center.
A Microsoft Exchange server that is an update center must have a constant Internet connection and 500 MB of extra disk
space.
To designate a server as an update center and configure its settings:
1. In the Administration Console tree, expand the node of a Security Server.
2. Select the Updates node.
3. In the details pane, expand the Update center settings section.
4. Select the Server functions as Update Center check box.
5. Select the update source from which the update center will be receiving databases.
To download updates to the update center from Kaspersky Lab servers, select the Kaspersky Lab's
update servers item.
This source of updates is set by default.
To download updates to the update center from an intermediate server, local or network folder, select the
HTTP server, FTP server, local or network folder item. Then specify the server address or the full path to
a local or network folder in the entry field.
To download updates to the update center from another update center, select the Update center storage
item. Then select the server that is the update center in the drop-down list.
6. Configure the database update schedule for the update center. To do so, select one of the following options
from the Run mode drop-down list:
Periodically. In the every N minutes / hours / days spin box, specify the frequency of database updates.
Daily. Define the precise local time of the server in HH:MM format.
On selected day. Select the check boxes next to the days of the week when you would like to update the
database, and specify the update time.
We strongly advise against selecting the Manually database update start mode for the update center, as this
mode makes it impossible to ensure that databases stay up to date on the update center and on all servers that
use it as an update source.
Page 55

U P D A T I N G D A T A B A S E S
55
7. If the Internet connection is established via a proxy server, select the Use proxy server for the Update Center
check box and configure the proxy server settings by selecting one of the following options:
If you want to connect the update center to the Internet using the proxy server settings specified in the
Settings node, choose the option Use proxy server settings specified in the Settings section.
If you want to connect the update center to the Internet using other proxy server settings, select the option
Specify proxy server settings for update downloads by the Update Center and perform the following:
a. Type the proxy server address and port in the Proxy server address and Port fields, respectively.
b. If authentication is required to connect to the specified proxy server, select the Use authentication
check box and enter the account name in the Account field and password in the Password field.
8. Click the Save button.
The selected Microsoft Exchange server is designated as an update center. You can later select it as an update
source for other servers (see section "Selecting the update source" on page 51).
Page 56

56
ANTI-VIRUS PROTECTION
IN THIS SECTION
About Anti-Virus protection .............................................................................................................................................. 56
About participation in Kaspersky Security Network ......................................................................................................... 58
About ZETA Shield technology........................................................................................................................................ 58
Enabling and disabling anti-virus server protection ......................................................................................................... 58
Enabling and disabling KSN in Anti-Virus........................................................................................................................ 59
Enabling and disabling ZETA Shield technology ............................................................................................................. 60
Configuring object processing settings ............................................................................................................................ 60
Configuring mailbox and public folder protection settings ............................................................................................... 61
Configuring anti-virus scan exclusions ............................................................................................................................ 62
Configuring background scan settings ............................................................................................................................ 66
This section contains information about Anti-Virus protection of a Microsoft Exchange server, background scanning of
storages, and ways to configure protect and scan settings.
ABOUT ANTI-VIRUS PROTECTION
One of the main purposes of Kaspersky Security is anti-virus protection as part of which the application scans the e-mail
traffic and mailbox messages for viruses and disinfects infected objects using Anti-Virus databases.
The application scans in real time all e-mail messages arriving at the Microsoft Exchange server. The application
processes both incoming and outgoing e-mail traffic as well as the stream of transit messages. If anti-virus protection of
the server is enabled, traffic scanning starts and stops simultaneously with the starting and stopping of the Microsoft
Exchange server.
When anti-virus protection of the server is enabled, the application remains loaded in the computer's RAM, and the Email Interceptor analyzes e-mail traffic received from the Microsoft Exchange server and transfers messages to the AntiVirus Scan module for processing.
Anti-Virus scans messages using the latest downloaded version of databases, Heuristic Analyzer, and the Kaspersky
Security Network cloud service if this service is enabled in Anti-Virus settings (see section "Enabling and disabling KSN
in Anti-Virus" on page 59).
Following the scan, Anti-Virus assigns one of the following status labels to each object:
Infected: the object contains at least one known virus.
Not infected: the object contains no viruses.
Protected: the object is password-protected.
Corrupted: the object is corrupted.
Page 57

A N T I - V I R U S P R O T E C T I O N
57
If an e-mail message or a part of it is infected, Anti-Virus processes the detected malicious object in accordance with the
specified settings (see section "Configuring Anti-Virus processing of objects" on page 60).
You can configure the application to perform the following operations with messages containing malicious objects:
Skip the message and the malicious object which it contains.
Delete the malicious object but allow the message to pass.
Delete the message together with the malicious object.
Before being processed, a copy of the message can be saved in Backup (see page 83).
When a malicious object gets deleted on a Microsoft Exchange server deployed as a Mailbox, the message or
attachment containing the malicious object is replaced with a text file containing the name of the malicious object, the
release date of the database used to detect the malicious object, and the name of the Microsoft Exchange server where
the object was detected. When a malicious object is detected on a Microsoft Exchange server deployed in a Hub
Transport role, the application also adds the Malicious object deleted prefix to the message subject.
When a user whose mailboxes are protected creates messages in public folders of unprotected Microsoft Exchange
servers, Kaspersky Security does not scan such messages. If messages are transferred from public folders of an
unprotected storage to a protected one, the application scans them. During data replication between protected and
unprotected storages, any changes made by the application as a result of the anti-virus scan are not synchronized.
If background scanning of storages is enabled (see section "Configuring background scan settings" on page 66), the
application regularly scans messages stored on the Microsoft Exchange server and the contents of public folders using
the latest version of the databases. Using background scan mode decreases the load on the servers during busy hours
and increases the security level of the e-mail infrastructure in general. Background scans can be launched either
automatically (using a schedule) or manually.
Background scanning can slow down the Microsoft Exchange server somewhat. It is therefore best to use it during
periods of minimum load on mail servers, for example at night.
During background scanning, the application receives all e-mail messages located in public folders and protected
storages from the Microsoft Exchange server in accordance with the current settings. If a message has not been
scanned against databases of the latest version, the application forwards it to the Anti-Virus module for processing.
During background scanning, objects are processed in the same way as during real-time anti-virus scanning of email
traffic.
The application scans the message body and attachments any format.
Kaspersky Security differentiates between the following types of objects that are scanned: a simple object (message
body or a simple attachment, such as an executable file) and a container object, which consists of several objects (such
as an archive or a message with another message attached).
When scanning multivolume archives, the application processes each volume as a separate object. In this case,
Kaspersky Security can detect malicious code only if the code is fully located in one of the volumes. If the malicious code
is also divided into parts during a partial download, it will not be detected during the scan. In this situation, the malicious
code may propagate after the object is restored as one entity. Multiple-volume archives can be scanned after they are
saved to the hard drive by the anti-virus application installed on the user's computer.
If necessary, you can define a list of objects that should not be scanned for viruses. Archives, all container objects with a
nesting level above the specified value, files matching name masks, and messages addressed to specific recipients can
be excluded from scanning (see section "Configuring anti-virus scan exclusions" on page 62).
Files over 1 MB will be saved to the Store working folder for processing. The Store folder is located in the Data folder of
the application. The Data folder also contains the temporary files storage – the Tmp folder. The Store and Tmp folders
should be excluded from scanning by anti-virus applications running on computers with a Microsoft Exchange server
installed.
Page 58

A D M I N I S T R A T O R ' S G U I D E
58
ABOUT PARTICIPATION IN KASPERSKY SECURITY
NETWORK
To protect your computer more effectively, Kaspersky Security uses data that is collected from users around the globe.
Kaspersky Security Network is designed to collect such data.
Infrastructure of online services providing access to the current knowledge base of Kaspersky Lab describing the
reputation of files, web sites and software. The use of data from Kaspersky Security Network ensures faster response by
Kaspersky Security to unknown threats, improves the effectiveness of some protection components, and reduces the risk
of false positives.
Thanks to users who participate in Kaspersky Security Network, Kaspersky Lab is able to promptly gather information
about types and sources of new threats, develop solutions for neutralizing them, and process spam messages with a
high level of accuracy.
Participation in Kaspersky Security Network also lets you access reputation statistics for applications and websites.
When you participate in Kaspersky Security Network, certain statistics are collected while Kaspersky Endpoint Security is
running and are automatically sent to Kaspersky Lab (see section "About data submission" on page 24). Also, additional
checking at Kaspersky Lab may require sending files (or parts of files) that are imposed to an increased risk of being
exploited by intruders to do harm to the user's computer or data.
You can enable or disable Kaspersky Security Network separately for Anti-Virus (see section "Enabling and disabling
KSN in Anti-Virus" on page 59) and Anti-Spam (see section "Configuring spam and phishing scan settings" on page 73).
Participation in Kaspersky Security Network is voluntary. You can opt out of participating in Kaspersky Security Network
at any time. No personal data of the user is collected, processed, or stored. The types of data that Kaspersky Security
sends to Kaspersky Security Network are described in the KSN Statement.
ABOUT ZETA SHIELD TECHNOLOGY
ZETA Shield technology can single out attacks specifically targeting the local area network from among other malware
and defend against them effectively. Targeted attacks exploit known LAN vulnerabilities and are usually meant for a
limited number of recipients. ZETA Shield technology works together with the Anti-Virus engine.
You can enable or disable ZETA Shield technology (see section "Enabling and disabling ZETA Shield technology" on
page 60). ZETA Shield technology is enabled by default.
ENABLING AND DISABLING ANTI-VIRUS SERVER
PROTECTION
If the anti-virus server protection is enabled, anti-virus scanning of e-mail traffic is started or stopped together with the
Microsoft Exchange server. Background scanning of storages (see section "Configuring background scanning" on
page 66) can be launched manually or automatically according to schedule.
Disabling anti-virus protection of the server considerably increases the risk of malware infiltrating the e-mail system. You
are advised not to disable anti-virus protection unless absolutely necessary.
Anti-virus protection of a Microsoft Exchange server deployed in Mailbox and Hub Transport roles is enabled separately.
Page 59

A N T I - V I R U S P R O T E C T I O N
59
To enable or disable Anti-Virus protection of the Microsoft Exchange server in the Mailbox role:
1. Perform the following steps in the Administration Console tree:
To enable or disable anti-virus protection of an unassigned Security Server, maximize the node of the
relevant Security Server;
To enable or disable anti-virus protection of Security Servers belonging to a profile, maximize the Profiles
node and inside it maximize the node of the profile for whose Security Servers you want to configure antivirus protection.
2. Select the Server protection node.
3. In the details pane, open the Protection for the Mailbox role tab and perform one of the following operations in
the Anti-Virus scan settings configuration section:
Select the Enable Anti-Virus protection for the Mailbox role check box if you want to enable Anti-Virus
protection of the Microsoft Exchange server.
Clear the Enable Anti-Virus protection for the Mailbox role check box if you want to disable Anti-Virus
protection of the Microsoft Exchange server.
4. Click the Save button.
If the application is running on a DAG of Microsoft Exchange servers, anti-virus server protection enabled for the Mailbox
role on one of the servers is enabled automatically on the remaining servers within this DAG. Enabling anti-virus
protection for the Mailbox role on the remaining DAG servers is not necessary.
To enable Anti-Virus protection of the Microsoft Exchange server in the Hub Transport role:
1. Perform the following steps in the Administration Console tree:
To enable or disable anti-virus protection of an unassigned Security Server, maximize the node of the
relevant Security Server;
To enable or disable anti-virus protection of Security Servers belonging to a profile, maximize the Profiles
node and inside it maximize the node of the profile for whose Security Servers you want to configure antivirus protection.
2. Select the Server protection node.
3. In the details pane, open the Protection for the Hub Transport role tab and perform one of the following
operations in the Anti-Virus scan settings configuration section:
Select the Enable Anti-Virus protection for the Hub Transport role check box if you want to enable Anti-
Virus protection of the Microsoft Exchange server.
Clear the Enable Anti-Virus protection for the Hub Transport role check box if you want to disable Anti-
Virus protection of the Microsoft Exchange server.
4. Click the Save button.
ENABLING AND DISABLING KSN IN ANTI-VIRUS
To enable or disable KSN in Anti-Virus:
1. Perform the following steps in the Administration Console tree:
To enable or disable KSN in Anti-Virus for an unassigned Security Server, maximize the node of the
relevant Security Server;
Page 60

A D M I N I S T R A T O R ' S G U I D E
60
To enable or disable KSN in Anti-Virus for Security Servers belonging to a profile, maximize the Profiles
node and inside it maximize the node of the profile for whose Security Servers you want to enable or
disable it.
2. Select the Server protection node.
3. In the details pane select the Advanced Anti-Virus settings tab.
4. Select the Use Kaspersky Security Network (KSN) check box.
The Use Kaspersky Security Network (KSN) check box is available when the I accept the KSN Statement
check box is selected in the KSN settings section of the Settings node.
5. If necessary, specify the timeout for requests to a KSN server in the Maximum timeout for a KSN request
scroll field.
The default value is 10 sec.
6. Click the Save button.
ENABLING AND DISABLING ZETA SHIELD TECHNOLOGY
To enable or disable ZETA Shield technology:
1. Perform the following steps in the Administration Console tree:
To enable or disable ZETA Shield technology for an unassigned Security Server, maximize the node of the
relevant Security Server;
To enable or disable ZETA Shield technology for Security Servers belonging to a profile, maximize the
Profiles node and inside it maximize the node of the profile for whose Security Servers you want to enable
or disable it.
2. Select the Server protection node.
3. In the details pane select the Advanced Anti-Virus settings tab.
4. Select / clear the Use ZETA Shield check box to enable / disable ZETA Shield technology.
5. Click the Save button.
CONFIGURING ANTI-VIRUS PROCESSING OF OBJECTS
You can configure Anti-Virus processing of objects by selecting an action to be taken by the application on each type of
objects.
If a Microsoft Exchange server is deployed in Mailbox and Hub Transport roles, the object processing settings for these
roles have to be configured separately.
To configure object processing settings:
1. Perform the following steps in the Administration Console tree:
To configure the settings of anti-virus processing of objects for an unassigned Security Server, maximize
the node of the relevant Security Server;
Page 61

A N T I - V I R U S P R O T E C T I O N
61
To configure the settings of anti-virus processing of objects for Security Servers belonging to a profile,
maximize the Profiles node and inside it maximize the node of the profile for whose Security Servers you
want to configure the settings of anti-virus processing of objects.
2. Select the Server protection node.
3. Perform one of the following steps:
To configure object processing settings for a Microsoft Exchange server in the Mailbox role, on the
Protection for the Mailbox role tab in the details pane expand the Anti-Virus scan settings configuration
section.
To configure object processing settings for the Hub Transport role, on the Protection for the Hub
Transport role tab in the details pane expand the Anti-Virus scan settings section.
4. In the Objects processing settings section, use the Infected object drop-down list to select the action to be
taken on infected objects:
Select Allow to have the application allow the message and the infected object contained in it.
Select Delete object to have the application delete the infected object but allow the message.
Select Delete message to have application delete the message containing the infected object with all
attachments.
5. Password protection may prevent anti-virus scanning of protected objects. In the Protected object drop-down
list, select an action to be taken on protected objects:
Select Allow to have the application allow messages with password-protected objects.
Select Delete message to have the application delete messages with password-protected objects.
6. In the Corrupted object drop-down list, select an action:
Select Allow to have the application allow messages with corrupted objects.
Select Delete message to have the application delete messages with corrupted objects.
7. To have the application save a copy of the object in Backup before processing it (see page 83), select the Save
a copy of the object in Backup check box.
If the application is running on a DAG of Microsoft Exchange servers, object processing settings configured for a server
deployed in the Mailbox role on one of the servers are automatically applied to other servers within this DAG. Configuring
the object processing settings for the Mailbox role on other servers of the DAG is not necessary. However, the object
processing settings for the Hub Transport role have to be configured individually on each of the DAG servers.
CONFIGURING MAILBOX AND PUBLIC FOLDER
PROTECTION SETTINGS
The application can protect the number of mailboxes that does not exceed the limitation of the active key (see section
"Viewing key details" on page 26). If this number is insufficient, you can alternate protection between mailboxes. To do
so, you have to move to unprotected storage the mailboxes that need no protection. By default, the application also
protects all public folders of the mail server. You can remove protection from public folders if you think that scanning
them would be redundant.
By default, the application protects those storages of mailboxes and storages of public folders on the protected Microsoft
Exchange server, which already existed at the time when the application was installed, as well as all newly-created
storages.
Page 62

A D M I N I S T R A T O R ' S G U I D E
62
To configure the protection settings for mailboxes and public folders:
1. Perform the following steps in the Administration Console tree:
To configure the protection settings for mailboxes and public folders for an unassigned Security Server,
maximize the node of the relevant Security Server;
To configure the protection settings for mailboxes and public folders for Security Servers belonging to a
profile, maximize the Profiles node and inside it maximize the node of the profile for whose Security
Servers you want to configure the protection settings for mailboxes and public folders.
2. Select the Server protection node.
3. On the Anti-virus protection for the Mailbox role tab in the details pane, expand the Protection for
mailboxes configuration section.
The lists of Protected mailbox storages and Protected public folder storages show the mailbox storages
and public folders on the protected Microsoft Exchange server.
If the application is running in a DAG of Microsoft Exchange servers, these lists enumerate mailbox storages
and public folder storages on all the servers within this DAG.
When viewed from a profile, the Protected mailbox storages list shows only the protected storages of those
Microsoft Exchange servers on which Anti-Virus for the Mailbox role is deployed.
4. In the Protected mailbox storages list, select the check boxes of the mailbox storages for which protection
should be enabled.
5. In the Protected public folder storages list, select the check boxes of the public folder storages for which
protection should be enabled.
6. Click the Save button.
CONFIGURING ANTI-VIRUS SCAN EXCLUSIONS
To ease the load on the server during an anti-virus scan, you can configure scan exclusions by limiting the range of
objects to scan. Anti-virus scan exclusions apply to both e-mail traffic scanning and background scanning of storages.
You can configure anti-virus scan exclusions as follows:
Disable scanning of archives and containers (see section "Configuring scanning of attached containers and
archives" on page 66).
Configure exclusions by file name masks (see section "Configuring exclusions by file name masks" on page 65).
Files with names matching the specified masks are excluded from the anti-virus scan.
Configure exclusions by recipient's address.
Messages addressed to the specified recipients are excluded from the anti-virus scan.
If the application is running on a DAG of Microsoft Exchange servers, the scanning exclusions configured on one of the
servers are automatically applied to all Microsoft Exchange servers within the DAG. Configuring scanning exclusions on
other servers within this DAG is not necessary.
Page 63

A N T I - V I R U S P R O T E C T I O N
63
ABOUT TRUSTED RECIPIENTS
You can exclude from scanning the messages addressed to specific recipients by specifying the addresses of these
recipients in the list of trusted recipients (see section "Configuring exclusions by recipient's address" on page 64). The list
is empty by default.
You can add recipients' addresses to the list of trusted recipients in the form of entries of the following types:
Active Directory objects:
User.
Contact.
Distribution Group.
Security Group.
It is recommended to add addresses in the form of entries of this type.
SMTP addresses in the mailbox@domain.com format.
Entries of this type should be added when Anti-Virus is installed for the Hub Transport role or the address you
want to exclude cannot be located in Active Directory.
To exclude a public folder from scanning by Anti-Virus for the Hub Transport role, you should add all of its
SMTP addresses (if there are several of them) to the list of trusted recipients. If any of the SMTP addresses of
the public folder are not on the list, messages arriving in the public folder can be scanned by Anti-Virus.
Display Name.
Entries of this type should be added when Anti-Virus is installed for the Mailbox role or the address you want to
exclude cannot be located in Active Directory.
Public folders.
Entries of this type should be added if Anti-Virus has been installed for the Mailbox role. Public folders cannot
be selected from Active Directory. The full path to the public folder should be specified when adding such
entries.
When Anti-Virus is installed for the Mailbox role and the Hub Transport role and the address you want to exclude cannot
be located in Active Directory, the list of trusted recipients should include two entries corresponding to this address:
SMTP address and user / group name. Otherwise, messages sent to this address will not be excluded from the scan.
Recipients' addresses specified in the form of Active Directory objects are excluded from the anti-virus scan according to
the following rules:
If the recipient's address is specified as a User or a Contact, messages addressed to this recipient are excluded
from scanning.
If the address is specified as a Distribution Group, messages addressed to this distribution group are excluded
from the scan. However, messages addressed personally to individual distribution group members are not
excluded from the scan unless their addresses have been added to the list separately.
If the address is specified as a Security Group, messages addressed to this group and its members are
excluded from the scan. However, if a nested security group is a member of the specified Security Group,
messages addressed to members of the nested security group are not excluded from the scan unless their
addresses have been added to the list separately.
Page 64

A D M I N I S T R A T O R ' S G U I D E
64
The application automatically updates user addresses received from Active Directory following changes to the relevant
Active Directory accounts (for example, when a user's email address has changed or a new member has been added to
a security group). This update is performed once a day.
CONFIGURING EXCLUSIONS BY RECIPIENT'S ADDRESS
You can exclude messages addressed to specific recipients by specifying the addresses of these recipients in the list of
trusted recipients.
To configure exclusions by recipient's address:
1. Perform the following steps in the Administration Console tree:
To configure exclusions by recipient addresses for an unassigned Security Server, maximize the node of
the relevant Security Server;
To configure exclusions by recipient addresses for Security Servers belonging to a profile, maximize the
Profiles node and inside it maximize the node of the profile for whose Security Servers you want to
configure exclusions.
2. Select the Server protection node.
3. In the details pane select the Advanced Anti-Virus settings tab.
4. Check the Do not scan messages for the following recipients box.
5. Add the recipient's address to the list of trusted addresses. To do so, perform the following:
To add an Active Directory account to the list:
a. click the button;
b. in the window that opens, locate the relevant Active Directory account and click OK.
Addresses selected in Active Directory are marked in the list by the following symbols:
– users, contacts, distribution groups;
– security groups.
To add an SMTP address, a user name, or a public folder to the list:
To add an SMTP address or a user name to the list, type it in the entry field and click the button.
To add a public folder, enter the path to the folder and click the button.
Addresses added in this way are marked in the list by the symbol.
Addresses added in this way are not checked for their presence in Active Directory.
6. To remove a recipient's address from the list of trusted recipients, highlight the recipient's entry in the list and
click the button.
7. To export a list of trusted addresses to file:
a. click the button;
Page 65

A N T I - V I R U S P R O T E C T I O N
65
Examples of allowed file name masks:
*.txt - all files with the *.txt extension, for example, readme.txt or notes.txt;
readme.??? – all files named readme with an extension of three characters, for example, readme.txt or
readme.doc;
test - all files named test without an extension.
b. In the window that opens, specify the file name in the File name field
c. click the Save button.
8. To import a list of trusted addresses from file:
a. click the button;
b. In the window that opens, in the File name field specify the file containing the list of trusted addresses
c. Click the Open button.
9. Click the Save button.
CONFIGURING EXCLUSIONS BY FILE NAME MASK
To configure exclusions by file name masks:
1. Perform the following steps in the Administration Console tree:
To configure exclusions by file name masks for an unassigned Security Server, maximize the node of the
relevant Security Server;
To configure exclusions by file name masks for Security Servers belonging to a profile, maximize the
Profiles node and inside it maximize the node of the profile for whose Security Servers you want to
configure exclusions.
2. Select the Server protection node.
3. In the details pane select the Advanced Anti-Virus settings tab.
4. Check the Do not scan files matching the masks box.
5. Add a file name mask (hereinafter also "mask") to the list of masks. To do so, perform the following:
a. Type the mask in the entry field.
a. Click the button on the right of the entry field.
1. To delete a mask from the list of masks, highlight the mask entry in the list and click the button.
2. To export the list of masks file:
a. click the button;
b. In the window that opens, specify the file name in the File name field
c. click the Save button.
Page 66

A D M I N I S T R A T O R ' S G U I D E
66
3. To import a list of masks from file:
a. click the button;
b. In the window that opens, in the File name field specify the file containing the list of masks.
c. Click the Open button.
4. Click the Save button.
CONFIGURING SCANNING OF ATTACHED CONTAINERS AND ARCHIVES
Kaspersky Security scans attached archives and containers by default. You can disable scanning of attachments or limit
the nesting level of such objects to optimize the operation of Kaspersky Security, decrease the server load, and decrease
mail traffic processing time. It is not recommended that you disable scanning of attachments for a long time, since they
may contain viruses and other malicious objects.
To configure scanning of attached containers and archives:
1. Perform the following steps in the Administration Console tree:
To configure scanning of attached containers and archives for an unassigned Security Server, maximize
the node of the relevant Security Server
To configure scanning of attached containers and archives for Security Servers belonging to a profile,
maximize the Profiles node and inside it maximize the node of the profile for whose Security Servers you
want to configure scanning.
2. Select the Server protection node.
3. In the details pane select the Advanced Anti-Virus settings tab.
4. Enable / disable scanning of attached containers and archives by performing one of the following actions:
If you want the application to scan such objects, select the Scan attached containers / archives with
nesting level not higher than N check box.
If you want the application to ignore such objects, clear this check box.
5. Specify the allowed nesting level for attached containers and archives in the spin box.
6. Click the Save button.
If the application is running on a Microsoft Exchange DAG, the settings for scanning of attached containers and archives
configured on one of the servers will be automatically applied to all servers within the DAG. Configuring scanning of
attached containers and archives on other servers of the DAG is not necessary.
CONFIGURING BACKGROUND SCAN SETTINGS
When in background scan mode, Kaspersky Security receives all e-mail messages located in public folders and
protected storages from the Microsoft Exchange server in accordance with the current settings and scans them using
Anti-Virus databases. The application scans only those messages which have not been scanned using the current
version of the Anti-Virus database.
Background scanning is available only if Microsoft Exchange Server is deployed in the Mailbox role. The application
scans message bodies and attached files using the anti-virus scan settings for the Microsoft Exchange server deployed
in the Mailbox role. Background scanning is unavailable for other roles.
Page 67

A N T I - V I R U S P R O T E C T I O N
67
If the application is running on a Microsoft Exchange DAG, the background scanning settings configured on one of the
servers will be automatically applied to all servers within the DAG. Configuring background scanning settings on other
servers of the DAG is not necessary.
To configure and launch background scanning of e-mail messages and contents of public folders stored on the
server:
1. Perform the following steps in the Administration Console tree:
To configure background scan settings for an unassigned Security Server, maximize the node of the
relevant Security Server;
To configure background scan settings for Security Servers belonging to a profile, maximize the Profiles
node and inside it maximize the node of the profile for whose Security Servers you want to configure
background scan settings.
2. Select the Server protection node.
3. On the Protection for the Mailbox role tab in the details pane, expand the Protection for mailboxes
configuration section.
4. In the Background scan section, use the Schedule drop-down list to select the option that suits you best:
Manually. Background scanning will have to be started manually.
Daily. Background scanning will be performed daily. Specify precise scan time in the entry field in
<HH:MM> format.
On selected day. Background scanning will be performed on the selected days. Select check boxes
opposite the days of the week when you would like to perform a background scan and specify the precise
start time for the background scan in <HH:MM> format in the entry field.
Monthly. Background scanning is performed once a month. In the spin box, specify the day of the month
when you would like to start a background scan and specify the precise start time for the background scan
in <HH:MM> format in the entry field.
5. To have the application scan the message body during background scanning, select the Scan message
content check box.
6. If you want the application to scan messages received over a specified time interval before the background scan
startup, select the Scan recent messages only check box and specify a number of days in the Scan
messages received no later than <N> days before background scan spin box.
Maximum parameter value is 364 days.
7. Select the Limit the scan time check box and define the necessary value for the Stop the scan in <N> hours
after scan start setting to optimize the scan duration.
8. Click the Save button.
9. To launch a background scan of a Microsoft Exchange server right away, click the Start scan button.
Background scanning starts within a minute of the button click.
Background scanning can be launched only on the Microsoft Exchange server on which the selected Security
Server is installed. This remains true for any configuration of Microsoft Exchange servers, including DAG. To
start background scanning immediately on other DAG servers, the background scan must be started separately
for each Microsoft Exchange server.
10. To stop the background scan of a Microsoft Exchange server, click the Stop button.
Background scanning stops within one minute of the button click.
Page 68

68
PROTECTION AGAINST SPAM AND
IN THIS SECTION
About Anti-Spam protection ............................................................................................................................................ 68
About additional services, features, and anti-spam technologies .................................................................................... 70
About anti-phishing scans ............................................................................................................................................... 71
Enabling and disabling Anti-Spam protection of the server ............................................................................................. 72
Enabling and disabling message scanning for phishing .................................................................................................. 72
Configuring spam and phishing scan settings ................................................................................................................. 73
Configuring the white and black lists of senders.............................................................................................................. 75
Configuring the white list of recipients ............................................................................................................................. 76
Configuring an increase in the spam rating of messages ................................................................................................ 78
Using external anti-spam message scanning services .................................................................................................... 79
Configuring additional settings of spam and phishing scans ........................................................................................... 80
PHISHING
This section contains information about Anti-Spam and Anti-Phishing filtering of email traffic and instructions on
configuring it.
ABOUT ANTI-SPAM PROTECTION
A key feature of Kaspersky Security is filtering out spam from the mail traffic passing through the Microsoft Exchange
server. The Anti-Spam module filters incoming mail before messages reach user mailboxes.
Anti-Spam scans the following types of data:
Internal and external traffic via SMTP using anonymous authentication on the server.
Messages arriving on the server through anonymous external connections (edge server).
Anti-Spam does not scan the following types of data:
Internal corporate mail traffic.
External mail traffic arriving on the server during authenticated sessions. You can enable scanning of such mail
traffic manually (see section "Configuring additional settings of spam and phishing scans" on page 80) using the
Scan authorized connections setting.
Messages arriving from other servers of the Microsoft Exchange mail infrastructure, because connections
between servers within the same Microsoft Exchange infrastructure are considered to be trusted. Notably, if
messages arrive in the infrastructure via a server on which Anti-Spam is inactive or not installed, the messages
are not scanned for spam on all subsequent servers of this infrastructure along the path traveled by messages.
Page 69

P R O T E C T IO N A G A I N S T S P A M A N D P H I S H IN G
69
You can enable scanning of such messages manually (see section "Configuring additional settings of spam and
phishing scans" on page 80) using the Scan authorized connections setting.
Anti-Spam scans the message header, contents, attachments, design elements, and other message attributes. While
performing the scan, Anti-Spam uses linguistic and heuristic algorithms that involve comparing the message being
scanned with sample messages, as well as additional cloud services, such as Kaspersky Security Network (see section
"About participation in Kaspersky Security Network" on page 58).
After filtering, Anti-Spam assigns one of the following statuses to messages:
Spam. The message shows signs of spam.
Potential spam. The message shows signs of spam but its spam rating is not high enough to mark it as spam.
Mass mailing. A message belongs to a mass mailing (usually a news feed or advertisement) that lacks sufficient
attributes for a spam verdict.
Formal notification. An automatic message informing, for example, about mail delivery to the recipient.
Clean. The message shows no signs of spam.
Blacklisted. The sender's email address or IP address is on the black list of addresses.
You can choose actions to be taken by the application on messages with a specific status (see section "Configuring
spam and phishing scan settings" on page 73). The following operations are available for selection:
Allow. The message is delivered to recipients unchanged.
Reject. An error message is returned to the sending server (error code 500), and the message is not delivered
to the recipient.
Delete. The sending server receives a notification that the message has been sent (code 250), but the message
is not delivered to the recipient.
Add SCL value. The application will assign a rating to messages indicating the probability of spam content
inside (SCL, Spam Confidence Level). The SCL rating is a number ranging from 1 to 9. A high SCL rating
means a high probability that the message is spam. The SCL rating is calculated by dividing the spam rating of
the message by 10. If the resulting value exceeds 9, the SCL rating is assumed to equal 9. The SCL rating of
messages is taken into account during subsequent processing of messages by the Microsoft Exchange
infrastructure.
Add label to message header. Messages that have been labeled as Spam, Probable spam, Mass mailing or
Blacklisted are marked with special tags in the message subject: [!!SPAM], [!!Probable Spam], [!!Mass Mail] or
[!!Blacklisted], respectively. You can edit the text of these tags (see section "Configuring spam and phishing
scan settings" on page 73).
The application supports four levels of Anti-Spam scan intensity:
Maximum. This intensity level should be used if you receive spam too often. When you select this level, the
frequency of false positives rises: that is, useful mail is more often recognized as spam.
High. When this intensity level is selected, the frequency of false positives decreases (compared to the
Maximum level) and the scan speed increases. The High intensity level is recommended if you receive spam
often.
Low. When this intensity level is selected, the frequency of false positives decreases (compared to the High
level) and the scan speed increases. This Low intensity level provides an optimum combination of scanning
speed and quality.
Minimum. This intensity level should be used if you rarely receive spam.
Page 70

A D M I N I S T R A T O R ' S G U I D E
70
By default, the application uses the Low intensity level of anti-spam protection. You can increase or reduce the intensity
INTENSITY LE VEL
POTENTIAL SPAM
SPAM
Maximum
60
75
High
70
80
Low
80
90
Minimum
90
100
level (see section "Configuring spam and phishing scan settings" on page 73). Depending on the scan intensity level and
the spam rating assigned after the scan, a message can be labeled as Spam or Potential spam (see table below).
Table 4. Threshold values of spam rating at different levels of scan intensity.
ABOUT ADDITIONAL SERVICES, FEATURES, AND ANTI-
SPAM TECHNOLOGIES
The application uses the following additional features, services, and technologies of Kaspersky Lab for more thorough
anti-spam protection of email:
DNSBL (Domain Name System Block List). This feature retrieves information from DNSBL servers containing
public lists of IP addresses used by spammers.
SURBL (Spam URI Realtime Block List). This feature retrieves information from SURBL servers containing
public lists of links leading to online resources advertised by spammers. Thus, if a message contains an URL
from that list of URLs, it is labeled as spam.
Lists of DNSBL and SURBL servers are updated from Kaspersky Lab update servers together with the AntiSpam databases every five minutes. Responses from DNSBL and SURBL servers are taken into account when
determining the spam rating of a message. A spam rating is an integer ranging from 0 to 100. During spam
rating calculation, the application considers the weight assigned to each responding DNSBL and SURBL server.
If the total rating of the servers that have responded exceeds 100, the spam rating of such a message will be
increased by 100. If it is smaller than 100, the spam rating of the message will not be increased.
KSN (Kaspersky Security Network). It is an infrastructure of online services that improve user protection,
accelerate the response of Kaspersky Lab applications to new threats and new types of spam, and minimize the
number of Anti-Spam false positives.
KSN is disabled by default (see section "About participation in Kaspersky Security Network" on page 58). To
start using KSN, you have to accept the KSN Statement that governs the procedure for collecting information
from the computer running Kaspersky Security.
Enforced Anti-Spam Updates Service. The service providing quick updates to the Anti-Spam database. If the
Enforced Anti-Spam Updates Service is enabled, the application will keep contacting the servers of Kaspersky
Lab and updating the Anti-Spam database as soon as new spam descriptions become available on Kaspersky
Lab servers. This approach helps improve the efficiency of Anti-Spam against new emerging spam.
To ensure proper functioning of the Enforced Anti-Spam Updates Service the following conditions are required:
a constant Internet connection of the computer that hosts the Security Server;
regular updates of the Anti-Spam database (recommended frequency: every five minutes).
Reputation Filtering. A cloud-enabled reputation filtering service of additional message scanning that moves
messages requiring additional scanning to a special temporary storage – Quarantine. During the specified
period (50 minutes), the application scans the message again using additional information received from
Page 71

P R O T E C T IO N A G A I N S T S P A M A N D P H I S H IN G
71
Kaspersky Lab servers (for example, from KSN). If the application has not marked the message as spam during
this time, it allows the message to reach the recipient. Reputation Filtering increases the accuracy of spam
detection and reduces the probability of Anti-Spam false positives.
To be able to use Reputation Filtering, you have to confirm your participation in the Kaspersky Security Network
(KSN) and accept a special KSN agreement.
Messages that have been moved to Quarantine by Reputation Filtering but have not be labeled as spam are
delivered to recipients after the 50-minute period expires even if the application is closed or paused.
Dynamic DNS client. This feature detects the potential belonging of the sender's IP address to a botnet using
reverse lookup of its DNS. This functionality can be used provided that the protected SMTP server is not serving
any xDSL or dial-up users.
SPF (Sender Policy Framework) technology. A technology that checks the sender's domain for signs of
spoofing. Domains use SPF to authorize certain computers to send mail on their behalf. If a message sender is
not included in the list of authorized senders, its spam rating will be increased.
ABOUT ANTI-PHISHING SCANS
Kaspersky Security can scan messages for phishing and malicious URLs.
Phishing URLs lead to fraudulent websites designed to steal personal data of users, such as bank account details. A
phishing attack can be disguised, for example, as a message from your bank with a link to its official website. By clicking
the link, you go to an exact copy of the bank's website and can even see the bank site's address in the browser, even
though you are actually on a spoofed site. From this point forward, all of your actions on the site are tracked and can be
used to steal your private data.
Malicious URLs lead to web resources designed to spread malware.
To protect Microsoft Exchange servers against phishing and malicious URLs, the application uses databases of URL
addresses that have been labeled as phishing or malicious URLs by Kaspersky Lab. The databases are regularly
updated and are included in the Kaspersky Security delivery kit.
While scanning messages for phishing and malicious URLs, the application analyzes not only URLs but also the
message subject, contents, attachments, design features, and other message attributes. The scan also uses heuristic
algorithms and requests to the Kaspersky Security Network (see section "About participation in Kaspersky Security
Network" on page 58) (KSN) cloud service if the use of KSN is enabled in Anti-Spam settings (see section "Configuring
spam and phishing scan settings" on page 73). With the help of KSN, the application receives the latest information
about phishing and malicious URLs before they appear in Kaspersky Lab databases.
On detecting phishing or malicious URLs in a message, the application labels it as Phishing. You can choose actions to
be taken by the application on messages with this status. The following operations are available for selection:
Allow. The message is delivered to recipients unchanged.
Reject. An error message is returned to the sending server (error code 500), and the message is not delivered
to the recipient.
Delete. The sending server receives a notification that the message has been sent (code 250), but the message
is not delivered to the recipient.
Add SCL and PCL rating. The application adds a spam confidence level (SCL) rating of 9 and a phishing
confidence level (PCL) rating to 8 to messages. On arriving in the Microsoft Exchange mail infrastructure,
messages with a high PCL rating (more than 3) are automatically directed to the Junk E-Mail folders, and all
URLs contained in them are deactivated.
Add label to message header. Messages with Phishing status are marked with a special [!!Phishing] label in
the message subject. You can edit the text of this label tags (see section "Configuring spam and phishing scan
settings" on page 73).
Page 72

A D M I N I S T R A T O R ' S G U I D E
72
ENABLING AND DISABLING ANTI-SPAM PROTECTION OF
THE SERVER
Disabling Anti-Spam protection of the server considerably increases the risk of unwanted email. We do not recommend
disabling Anti-Spam protection unless absolutely necessary.
To enable or disable Anti-Spam protection of a Microsoft Exchange server:
1. Perform the following steps in the Administration Console tree:
To enable or disable Anti-Spam protection for an unassigned Security Server, maximize the node of the
relevant Security Server;
To enable or disable Anti-Spam protection for Security Servers belonging to a profile, maximize the
Profiles node and inside it maximize the node of the profile for whose Security Servers you want to
configure Anti-Spam protection.
2. Select the Server protection node.
3. In the details pane, open the Protection for the Hub Transport role tab and perform one of the following
operations in the Anti-Virus scan settings section:
To enable Anti-Spam protection, select the Enable anti-spam scanning of messages check box.
To disable Anti-Spam protection, clear the Enable anti-spam scanning of messages check box.
4. Click the Save button.
ENABLING AND DISABLING MESSAGE SCANNING FOR
PHISHING
You can enable Anti-Phishing scanning of messages only if Anti-Spam protection of the server is enabled. Anti-Phishing
scanning also includes scanning for malicious URLs.
To enable or disable Anti-Phishing scanning of messages:
1. Perform the following steps in the Administration Console tree:
To enable or disable Anti-Phishing scanning of messages for an unassigned Security Server, maximize the
node of the relevant Security Server;
To enable or disable Anti-Phishing scanning of messages for Security Servers belonging to a profile,
maximize the Profiles node and inside it maximize the node of the profile for whose Security Servers you
want to configure Anti-Phishing scanning.
2. Select the Server protection node.
3. In the details pane, open the Protection for the Hub Transport role tab and perform one of the following
operations in the Anti-Virus scan settings section:
To enable Anti-Phishing scanning of messages, select the Enable anti-phishing scanning of messages
check box.
Page 73

P R O T E C T IO N A G A I N S T S P A M A N D P H I S H IN G
73
To disable Anti-Phishing scanning of messages, clear the Enable anti-phishing scanning of messages
check box.
4. Click the Save button.
CONFIGURING SPAM AND PHISHING SCAN SETTINGS
To configure the Anti-Spam and Anti-Phishing scanning settings:
1. Perform the following steps in the Administration Console tree:
To configure the Anti-Spam and Anti-Phishing scanning settings for an unassigned Security Server,
maximize the node of the relevant Security Server;
To configure the Anti-Spam and Anti-Phishing scanning settings for Security Servers belonging to a profile,
maximize the Profiles node and inside it maximize the node of the profile for whose Security Servers you
want to configure the Anti-Spam and Anti-Phishing scanning settings.
2. Select the Server protection node.
3. In the details pane, on the Protection for the Hub Transport role tab expand the Anti-Spam analysis
settings configuration section.
4. Select the Enable anti-spam scanning of messages check box if you want the application to scan incoming
mail using the Anti-Spam module.
5. Use the Intensity level slider to set the level of anti-spam analysis intensity (see section "About Anti-Spam
protection" on page 68): maximum, high, low, minimum.
6. In the Spam processing settings configuration section, in the Action drop-down list select the action to be
taken by the application on messages with each of the statuses mentioned (Spam, Probable spam, Mass
mailing, Formal notification, Blacklisted):
Allow. The message is delivered to recipients unchanged.
Reject. An error message is returned to the sending server (error code 500), and the message is not
delivered to the recipient.
Delete. The sending server receives a notification that the message has been sent (code 250), but the
message is not delivered to the recipient.
7. In the Spam processing settings configuration section, specify additional actions to be taken by the
application on e-mail messages with each of the statuses mentioned. Select check boxes opposite the relevant
parameters:
Add SCL value. The application will add a Spam Confidence Level score to the message (SCL score). The
SCL score is a number ranging from 1 to 9. A high SCL score means a high probability that the message is
spam. The SCL rating of messages is taken into account during subsequent processing of messages by
the Microsoft Exchange infrastructure.
Save a copy. A copy of the message can be saved in Backup.
Add label to message header. Messages that have been labeled as Spam, Probable spam, Mass mailing
or Blacklisted are marked with special tags in the message subject: [!!SPAM], [!!Probable Spam], [!!Mass
Mail] or [!!Blacklisted], respectively. If necessary, edit the text of these tags in the entry fields corresponding
to the statuses.
8. Select the Enable anti-phishing scanning of messages check box if you want the application to scan
incoming mail for phishing links.
Page 74

A D M I N I S T R A T O R ' S G U I D E
74
9. In the Spam processing settings section, under the Enable anti-phishing scanning of messages check
box, in the Action drop-down list select the action to be taken by the application on messages labeled as
Phishing:
Allow. The message is delivered to recipients unchanged.
Reject. An error message is returned to the sending server (error code 500), and the message is not
delivered to the recipient.
Delete. The sending server receives a notification that the message has been sent (code 250), but the
message is not delivered to the recipient.
10. In the Spam processing settings section, under the Enable anti-phishing scanning of messages check
box, configure the actions to be taken by the application on messages labeled as Phishing: Select check boxes
opposite the relevant parameters:
Add SCL and PCL rating. The application adds a spam confidence level (SCL) rating of 9 and a phishing
confidence level (PCL) rating to 8 to messages. On arriving in the Microsoft Exchange mail infrastructure,
messages with a high PCL rating (more than 3) are automatically directed to the Junk E-Mail folders, and
all URLs contained in them are deactivated.
Save a copy. A copy of the message can be saved in Backup.
Add label to message header. Messages with Phishing status are marked using a special label in the
message subject: [!!Phishing]. If necessary, edit the text of this label in the entry field on the right.
11. In the Spam processing settings section, configure the usage of additional spam scanning services (see
section "About additional services, features, and anti-spam technologies" on page 70):
To enable the use of KSN during anti-spam and anti-phishing scans:
a. Select the Use Kaspersky Security Network (KSN) check box.
b. If necessary, specify the timeout for requests to a KSN server in the Maximum timeout for a KSN
request scroll field.
The default value is 10 sec.
The Use Kaspersky Security Network (KSN) check box is available when the I accept the KSN
Statement check box is selected in the KSN settings section of the Settings node.
To enable the use of the Reputation Filtering service, select the Use Reputation Filtering check box.
To be able to use Reputation Filtering, you have to confirm your participation in the Kaspersky Security
Network (KSN) and accept a special KSN agreement.
If you want the application to use the service for prompt delivery of Anti-Spam database updates, select the
Use Enforced Anti-Spam Updates Service check box.
If you want the application to connect to the KSN and Enforced Anti-Spam Updates Service servers via a
proxy server, select the Use proxy to access KSN and Enforced Anti-Spam Updates Service check
box.
You can configure the proxy server settings in the Settings node (see section "Configuring the settings
of the connection to the update source" on page 52).
12. Click the Save button.
Page 75

P R O T E C T IO N A G A I N S T S P A M A N D P H I S H IN G
75
CONFIGURING THE WHITE AND BLACK LISTS OF SENDERS
You can configure two kinds of lists of senders:
White lists contain addresses belonging to trusted senders whose messages should not be scanned for spam.
Black lists contain addresses belonging to senders all of whose messages are labeled as spam.
Kaspersky Security supports white and black lists of email addresses and IP addresses.
Configuring the white / black lists of email addresses of senders
To configure the white / black lists of email addresses of senders:
1. Perform the following steps in the Administration Console tree:
To configure the white / black lists of email addresses of senders for an unassigned Security Server,
maximize the node of the relevant Security Server;
To configure the white / black lists of email addresses of senders for Security Servers belonging to a profile,
maximize the Profiles node and inside it maximize the node of the profile for whose Security Servers you
want to configure the lists.
2. Select the Server protection node.
3. On the Protection for the Hub Transport role tab of the details pane, open the Settings of Anti-Spam black
and white lists section.
4. Select the Add sender's address to white / black list check box.
5. Add an email address to the list To do so, perform the following:
a. Type the email address in the entry field. You can specify an individual e-mail address or a mask, such as
*@domain.com, covering all addresses of a specific email domain.
b. Click the button.
6. To remove an email address from the list, select an address in the list and click the button.
7. To export the list to a file, click the button.
8. To import the list from a file, click the button.
9. Click the Save button.
Configuring the white / black lists of IP addresses of senders
the white / black lists of IP addresses of senders:
1. Perform the following steps in the Administration Console tree:
To configure the white / black lists of IP addresses of senders for an unassigned Security Server, maximize
the node of the relevant Security Server;
To configure the white / black lists of IP addresses of senders for Security Servers belonging to a profile,
maximize the Profiles node and inside it maximize the node of the profile for whose Security Servers you
want to configure the lists.
Page 76

A D M I N I S T R A T O R ' S G U I D E
76
2. Select the Server protection node.
3. On the Protection for the Hub Transport role tab of the details pane, open the Settings of Anti-Spam black
and white lists section.
4. Select the Add sender's address to white / black list of IP addresses check box.
5. To add an IP address to the list:
a. Type the IP address in the entry field. You can specify a solitary IP address or a range of IP addresses in
CIDR notation (represented as XXX.XXX.XXX.XXX/YY).
b. Click the button.
6. To remove an IP address from the list, select it in the list and click the button.
7. To export the list to a file, click the button.
8. To import the list from a file, click the button.
9. Click the Save button.
CONFIGURING THE WHITE LIST OF RECIPIENTS
You can configure the white list of recipients by adding or removing addresses of message recipients. Messages for
recipients added to that list will not be checked for spam presence. The white list is empty by default.
You can add recipients' addresses to the white list in the form of entries of the following types:
Active Directory objects:
User.
Contact.
Distribution Group.
Security Group.
It is recommended to add addresses to the white list in the form of objects of this type.
SMTP addresses in the mailbox@domain.com format. Entries of this type should be added if the address you
want to exclude cannot be located in Active Directory.
To exclude a public folder from scanning for spam, you should add all of its SMTP addresses (if there are
several of them) to the white list. If any of the SMTP addresses of the public folder are not on the list, messages
arriving in the public folder can be scanned.
Recipients' addresses specified in the form of Active Directory objects are excluded from the anti-spam scan according to
the following rules:
If the recipient's address is specified as a User or a Contact, messages addressed to this recipient are excluded
from scanning.
If the address is specified as a Distribution Group, messages addressed to this distribution group are excluded
from the scan. However, messages addressed personally to individual distribution group members are not
excluded from the scan unless their addresses have been added to the list separately.
Page 77

P R O T E C T IO N A G A I N S T S P A M A N D P H I S H IN G
77
If the address is specified as a Security Group, messages addressed to this group and its members are
excluded from the scan. However, if a nested security group is a member of the specified Security Group,
messages addressed to members of the nested security group are not excluded from the scan unless their
addresses have been added to the list separately.
The application automatically updates user addresses received from Active Directory following changes to the relevant
Active Directory accounts (for example, when a user's email address has changed or a new member has been added to
a security group). This update is performed once a day.
the white list of recipients:
1. Perform the following steps in the Administration Console tree:
To configure the white list of recipients for an unassigned Security Server, maximize the node of the
relevant Security Server;
To configure the white list of recipients for Security Servers belonging to a profile, maximize the Profiles
node and inside it maximize the node of the profile for whose Security Servers you want to configure the
white list of recipients.
2. Select the Server protection node.
3. On the Protection for the Hub Transport role tab of the details pane, open the Settings of Anti-Spam black
and white lists configuration section.
4. Select the Add recipient's address to white list check box.
5. Add the recipient's address to the white list of recipients. To do so, perform the following:
To add an Active Directory account to the list:
a. click the ;
b. in the window that opens, locate the relevant Active Directory account and click OK.
Addresses selected in Active Directory are marked in the list by the following symbols:
– users, contacts, distribution groups;
– security groups.
To add an SMTP address or a public folder to the list:
To add an SMTP address, type it in the entry field and click the button.
To add a public folder, enter the path to the folder and click the button.
Addresses added in this way are marked in the list by the symbol.
Addresses added in this way are not checked for their presence in Active Directory.
6. To remove an address from the list, select an entry and click the button.
7. To export the list to a file, click the button.
8. To import the list from a file, click the button.
Page 78

A D M I N I S T R A T O R ' S G U I D E
78
9. Click the Save button.
CONFIGURING AN INCREASE IN THE SPAM RATING OF
MESSAGES
You can configure the Anti-Spam settings affecting detection of a special message property - its spam rating. These
settings allow you to configure the application to increase the spam rating of a message based on the analysis of its
sender's email address and message subject, as well as when the message is written in a foreign language.
To configure the application to increase the spam rating of a message based on the analysis of its sender's address:
1. Perform the following steps in the Administration Console tree:
To configure the application to increase the spam rating of messages for an unassigned Security Server,
maximize the node of the relevant Security Server;
To configure the application to increase the spam rating of messages for Security Servers belonging to a
profile, maximize the Profiles node and inside it maximize the node of the profile for whose Security
Servers you want to configure the application to increase the spam rating of messages.
2. Select the Server protection node.
3. In the details pane, open on the Protection for the Hub Transport role tab the configuration section Spam
rating detection settings.
4. In the Increase spam rating if: configuration section, select the check boxes for the following settings as
necessary:
The "To" field contains no addresses. The spam rating of a message will be increased if its "To" field is
empty.
The sender's address contains numbers. The spam rating of a message will be increased if the address
of its sender contains digits.
Sender's address in the message body does not contain the domain part. The spam rating of a
message will be increased if the address of its sender contains no domain name.
5. Click the Save button.
To configure the application to increase the spam rating of messages based on the analysis of the message subject:
1. Perform the following steps in the Administration Console tree:
To configure the application to increase the spam rating of messages for an unassigned Security Server,
maximize the node of the relevant Security Server;
To configure the application to increase the spam rating of messages for Security Servers belonging to a
profile, maximize the Profiles node and inside it maximize the node of the profile for whose Security
Servers you want to configure the application to increase the spam rating of messages.
2. Select the Server protection node.
3. In the details pane, open on the Protection for the Hub Transport role tab the configuration section Spam
rating detection settings.
4. In the Increase spam rating if the subject contains: configuration section, select check boxes for the
following settings as necessary:
More than 250 characters. The spam rating of a message will be increased if its subject contains more
than 250 characters.
Page 79

P R O T E C T IO N A G A I N S T S P A M A N D P H I S H IN G
79
Many blanks and/or dots. The spam rating of a message will be increased if its subject contains multiple
spaces and / or dots.
Time stamp. The spam rating of a message will be increased if its subject contains a digital ID or a time
stamp.
5. Click the Save button.
To configure the application to increase the spam rating of messages based on the analysis of its content language:
1. Perform the following steps in the Administration Console tree:
To configure the application to increase the spam rating of messages for an unassigned Security Server,
maximize the node of the relevant Security Server;
To configure the application to increase the spam rating of messages for Security Servers belonging to a
profile, maximize the Profiles node and inside it maximize the node of the profile for whose Security
Servers you want to configure the application to increase the spam rating of messages.
2. Select the Server protection node.
3. In the details pane, open on the Protection for the Hub Transport role tab the configuration section Spam
rating detection settings.
4. In the Increase spam rating if message language is: configuration section, select the check boxes for the
languages whose presence in a message you consider to be a sign of spam:
Chinese, if you are not expecting mail in the Chinese language.
Korean, if you are not expecting mail in the Korean language.
Thai, if you are not expecting mail in the Thai language.
Japanese, if you are not expecting mail in the Japanese language.
5. Click the Save button.
USING EXTERNAL ANTI-SPAM MESSAGE SCANNING
SERVICES
To ensure more thorough Anti-Spam filtering of email messages, you can enable the use of external services (see
section "About additional services, features, and anti-spam technologies" on page 70).
To enable the use of external services to check IP addresses and URLs for spam:
1. Perform the following steps in the Administration Console tree:
To configure the use of external anti-spam message scanning services for an unassigned Security Server,
maximize the node of the relevant Security Server;
To configure the use of external anti-spam message scanning services for Security Servers belonging to a
profile, maximize the Profiles node and inside it maximize the node of the profile for whose Security
Servers you want to configure the use of external anti-spam message scanning services.
2. Select the Server protection node.
3. In the details pane, open on the Protection for the Hub Transport role tab the configuration section Using
external Anti-Spam services.
Page 80

A D M I N I S T R A T O R ' S G U I D E
80
4. Select the Use external anti-spam analysis services check box if you want the application to consider the IP
address and URL scan results of these services during anti-spam analysis.
5. If you want the application to scan messages for spam based on the default DNSBL black list, select the Use
default black list of the DNSBL service check box in the DNSBL configuration section.
6. To use a custom list of DNS names of servers and assign other weight coefficients to them, select the Use a
different list from the black list set of the DNSBL service check box. When this check box is selected, the
option allows you to create a custom list below. To do so, perform the following:
To add an entry to the custom list, specify the DNS name of the server and its weight coefficient in the
corresponding fields and click the button.
To delete an entry from the custom list, click the button.
To import a custom list, click the button .
To export a custom list, click the button .
7. If you want the application to scan messages for spam based on the default SURBL black list, select the Use
default black list of the SURBL service check box in the SURBL configuration section.
8. To use a custom list of DNS names of servers and assign other weight coefficients to them, select the Use a
different list from the black list set of the SURBL service check box. When this check box is selected, the
option allows you to create a custom list below. To do so, perform the following:
To add an entry to the custom list, specify the DNS name of the server and its weight coefficient in the
corresponding fields and click the button.
To remove a record, click the button .
To import a custom list, click the button .
To export a custom list, click the button .
9. To enable a reverse DNS lookup of the sender's IP address, select the Check sender IP for presence in DNS
check box.
10. To enable the use of SPF technology, select the Check SPF record check box.
11. If you want the application to check if the sender's IP address belongs to a botnet based on its reverse DNS
zone, select the Check if sender's IP address is dynamic check box.
If the check result is positive, the spam rating of the message is increased.
12. In the Maximum DNS request timeout spin box, enter the maximum time in seconds.
The default value is 10 sec. After timeout, the application scans the message for spam without checking if the
sender's IP address belongs to a dynamic DNS.
CONFIGURING ADDITIONAL SETTINGS OF SPAM AND
PHISHING SCANS
You can configure additional Anti-Spam and Anti-Phishing analysis settings, such as time- or size-based scanning
restrictions, and spam analysis of Microsoft Office files attached to messages.
Page 81

P R O T E C T IO N A G A I N S T S P A M A N D P H I S H IN G
81
To configure time- or size-based Anti-Spam and Anti-Phishing scanning restrictions:
1. Perform the following steps in the Administration Console tree:
To configure Anti-Spam and Anti-Phishing scanning restrictions for an unassigned Security Server,
maximize the node of the relevant Security Server;
To configure Anti-Spam and Anti-Phishing scanning restrictions for Security Servers belonging to a profile,
maximize the Profiles node and inside it maximize the node of the profile for whose Security Servers you
want to configure Anti-Spam and Anti-Phishing scanning restrictions.
2. Select the Server protection node.
3. In the details pane, open on the Protection for the Hub Transport role tab the section Advanced settings of
Anti-Spam.
4. In the Restrictions section, use the Maximum time for scanning a message spin box to specify the
necessary value in seconds.
If the message scan duration exceeds the specified time, the Anti-Spam or Anti-Phishing scan of the message
stops. The default value is 60 sec. If the application is configured to add service headers to the message, they
will contain information to the effect that the maximum scan time has been exceeded.
5. In the Restrictions configuration section, use the Maximum object size to scan spin box to specify the
necessary value in kilobytes.
If the message with all attachments exceeds the specified size, Anti-Spam and Anti-Phishing scanning is not
performed, and the message is delivered to the recipient. The default value is 1,536 KB (1.5 MB). The maximum
value is 20 MB, and the minimum value is 1 KB. If the application is configured to add service headers to the
message, they will contain information to the effect that the maximum object size has been exceeded.
6. Click the Save button to save the changes.
To configure the settings of Anti-Spam and Anti-Phishing scanning of Microsoft Office files:
1. Perform the following steps in the Administration Console tree:
To configure the settings of Anti-Spam and Anti-Phishing scanning of Microsoft Office files for an
unassigned Security Server, maximize the node of the relevant Security Server;
To configure the settings of Anti-Spam and Anti-Phishing scanning of Microsoft Office files for Security
Servers belonging to a profile, maximize the Profiles node and inside it maximize the node of the profile for
whose Security Servers you want to configure the settings of Anti-Spam and Anti-Phishing scanning of
Microsoft Office files.
2. Select the Server protection node.
3. In the details pane, open on the Protection for the Hub Transport role tab the section Advanced settings of
Anti-Spam.
4. In the Scan settings for Microsoft Office files configuration section, perform the following steps:
If you want the application to scan Microsoft Word documents for spam and phishing links, select the Scan
DOC files check box.
If you want the application to scan RTF documents for spam and phishing links, select the Scan RTF files
check box.
5. Click the Save button to save the changes.
Page 82

A D M I N I S T R A T O R ' S G U I D E
82
To configure additional Anti-Spam and Anti-Phishing scan settings:
1. Perform the following steps in the Administration Console tree:
To configure additional Anti-Spam and Anti-Phishing scan settings for an unassigned Security Server,
maximize the node of the relevant Security Server;
To configure additional Anti-Spam and Anti-Phishing scan settings for Security Servers belonging to a
profile, maximize the Profiles node and inside it maximize the node of the profile for whose Security
Servers you want to configure additional Anti-Spam and Anti-Phishing scan settings.
2. Select the Server protection node.
3. In the details pane, open on the Protection for the Hub Transport role tab the section Advanced settings of
Anti-Spam.
4. If you want the application to analyze images in mail attachments using image analysis technology (GSG),
select the Use image analysis check box.
It is used to analyze images by checking them against the samples in the Anti-Spam database. If a match is
found, the spam rating of such messages will be increased.
5. If you want the application to add X-headers to messages containing information about the scan results, select
the Enable service headers check box.
6. Select the Scan authorized connections check box to enable scanning of mail received via a trusted
connection for spam and phishing.
7. Select the Skip messages for the Postmaster address check box to disable scanning of messages arriving
for the Postmaster address for spam and phishing.
8. Click the Save button to save the changes.
Page 83

83
BACKUP
IN THIS SECTION
About Backup .................................................................................................................................................................. 83
Viewing the Backup contents .......................................................................................................................................... 84
Viewing properties of objects in Backup .......................................................................................................................... 85
Configuring the Backup filters ......................................................................................................................................... 86
Saving objects from Backup to disk................................................................................................................................. 87
Sending an objects from Backup to recipients ................................................................................................................ 88
Deleting objects from Backup ................................................................................................................................ .......... 88
Configuring Backup settings ............................................................................................................................................ 89
Selecting Backup database for viewing its contents from the profile ............................................................................... 89
This section contains information about Backup and how to use it.
ABOUT BACKUP
Before processing messages, Kaspersky Security moves copies of messages to Backup. Copies of messages are
placed in Backup together with all attachments.
Kaspersky Security places copies of messages in Backup in the following cases:
After message scanning by the Anti-Virus module, before modifying the message by Delete message or Delete
object operations, provided that the application is configured to move copies of messages to Backup during
Anti-Virus scanning (see section "Configuring object processing settings" on page 60).
After scanning messages for spam and phishing, before performing the Delete or Reject operations on the
message, provided that the application is configured to move copies of messages to Backup during spam and
phishing scans (see section "Configuring spam and phishing scan settings" on page 73).
You can manage copies of messages in Backup as follows:
View the contents of Backup (see section "Viewing the Backup contents" on page 84).
View the details of messages in Backup (see section "Viewing the properties of objects in Backup" on page 85).
Filter the details of messages in Backup for convenient viewing and searching of message details (see section
"Configuring Backup filters" on page 86).
Save messages from Backup to disk in order to view information contained in the message (see section "Saving
objects from Backup to disk" on page 87). You can also attempt to rescan the saved message with Anti-Virus
with the updated database.
Deliver messages from Backup to recipients (see section "Delivering messages from Backup to recipients" on
page 88). Saved objects will be delivered to the recipients.
Page 84

A D M I N I S T R A T O R ' S G U I D E
84
Delete message copies from Backup (see section "Deleting objects from Backup" on page 88).
Information about Backup objects is stored in the SQL database specified during application setup (details are available
in the Kaspersky Security 8.0 for Microsoft Exchange Servers Installation Guide). If several Security Servers use the
same SQL database (for example, in a DAG server configuration), Backup stores messages received from each of these
Security Servers.
Messages are stored in Backup in encrypted form, which eliminates the risk of infection and speeds up the operation of
Anti-Virus (files in Backup format are not detected as infected).
The total number of objects in Backup is limited to one million. You can additionally limit Backup size by restricting
Backup size and object storage duration (see section "Configuring Backup" on page 89).
The application checks every minute if these limitations are not exceeded. Based on the results of the check, the
application can perform the following operations:
If the allowed number of objects in Backup is exceeded, the application removes an appropriate quantity of the
oldest objects.
If there is a limit on Backup size in megabytes, and this limit is exceeded when a new message is moved to
Backup, the application frees up the required space by deleting the oldest objects.
If the message storage period is limited, the application deletes messages whose storage period has expired.
VIEWING THE BACKUP CONTENTS
You can view the details of all objects stored in Backup (messages and attachments).
To view the Backup content, perform the following steps:
1. In the Administration Console tree, expand the node of a Security Server.
2. Select the Backup node.
The details pane shows a table with the details of objects saved in Backup (see figure below).
In the lower part of the details pane under the table, you can see the total number of objects in Backup, the
space occupied by them, and the number of objects displayed in the details pane after a filter was applied.
By default, the table shows the following details of each object in Backup:
From. The e-mail address of the message sender.
To. The e-mail address of the message recipient.
Subject. Message subject.
Status. Object scan status (Infected, Probably infected, Disinfected, Spam, Probable spam, Mass mailing
Phishing, Blacklisted, Formal notification, Trusted, Protected, Corrupted, No access, Not found, Scanning
timeout, Scanning in progress, Scan error).
Page 85

B A C K U P
85
Reception date. Precise time of message arrival on Microsoft Exchange server.
Figure 2. Viewing the Backup contents
You can configure the appearance of the details pane changing the displayed table columns and their order.
To configure the details pane view, perform the following steps:
1. Click the Select columns button to add or remove table columns.
2. In the window that opens, perform the following operations:
Select the check boxes for the table columns that you want to view in the details pane.
Clear the check boxes for the table columns that you want to hide.
You can sort table data by any table column by clicking the header of the relevant column, such as From, To, Subject.
The number of objects that the details pane can display at any one time is limited. To view other objects, use the
navigation buttons in the lower right corner of the details pane. The current window number is displayed between the two
pairs of navigation buttons. To proceed to the next window, click the button with the > symbol. To proceed to the
previous window, click the button with the < symbol. To proceed to the last window, click the button with the >> symbol.
To return to the first window, click the button with the << symbol.
VIEWING PROPERTIES OF OBJECTS IN BACKUP
To view the properties of an object in Backup:
1. In the Administration Console tree, expand the node of a Security Server.
2. Select the Backup node.
3. In the table listing the Backup objects in the details pane, select the object (message or attachment) whose
properties you want to view.
4. Click the Properties button located in the upper part of the details pane above the list of objects.
The Message properties window opens. You can view the following details in this window:
Virus. The virus name will appear in this field if a message is infected.
Page 86

A D M I N I S T R A T O R ' S G U I D E
86
Object type. Object type: message, message body, or attachment.
From. The sender's address.
To. The e-mail address of the message recipient.
Copy. Address of the message copy recipient.
Object name. Name of the message or attachment file.
Size on disk. Disk space occupied by the message.
Subject. Message subject.
Path. Object storage path.
Server name. Name of the server that has placed the object in Backup.
Virtual server name. Virtual server name (only for cluster configurations of Microsoft Exchange).
Cluster name. Cluster name (only for cluster configurations of Microsoft Exchange).
Reception date. Precise time of message delivery (day, month, year, hour, minute).
Date. Precise time of message creation (day, month, year, hour, minute).
Release date of the databases. Release date of the databases.
Status. Status assigned by the application to a message.
Size. Size of an object (message or attachment) in bytes.
You can select several objects and view their status information.
To view the properties of several objects in Backup:
1. In the Administration Console tree, expand the node of a Security Server.
2. Select the Backup node.
3. In the table listing the Backup objects in the details pane, select the objects whose properties you want to view.
4. Click the Properties button located in the upper part of the details pane above the list of objects.
The Properties of the selected objects window opens. This window lets you view the status of all selected objects
and the number of selected objects with a particular status.
CONFIGURING THE BACKUP FILTERS
Filters make it easier to find and view details of Backup objects. You can use a filter to select objects that you want to
save to disk.
To configure Backup filter, perform the following steps:
1. In the Administration Console tree, expand the node of a Security Server.
2. Select the Backup node.
Page 87

B ACKUP
87
3. Use the drop-down list in the upper part of the details pane to select one of the following criteria to filter Backup
objects:
Phishing only. The details pane shows only messages labeled as Spam.
Spam only. The details pane shows only objects labeled as Spam.
Viruses only. The details pane shows only infected messages or messages containing viruses in
attachments.
Search for words. If you select this option, use the entry field to specify the key words that the application
will use while searching for messages. The application searches through the From, To, and Subject
columns.
Custom filter. If you have chosen this option, perform the following:
Select a criterion for the filter you are creating in the drop-down list.
Specify the condition of (equal to, not equal to, greater than, equal to or greater than, smaller
than, not greater than, or between).
Specify the criterion value. For the Message created on, Reception date and Database release date
criteria, specify the value using the calendar. For the Status criterion, select the status in the dropdown list. For other criteria, input the value manually in the entry field.
4. Click the Search button.
The filter applied is displayed in the upper part of the details pane. The table in the details pane shows objects
matching the search criteria.
5. To remove a filter, click the Remove button to the right of the filter.
Once filters are applied, you can also sort table data in ascending or descending order by any table column. To do so,
click the header of a particular column, for example From, To, Subject.
SAVING OBJECTS FROM BACKUP TO DISK
Saving objects from Backup may cause the computer to be infected.
To save an object from Backup to disk:
1. In the Administration Console tree, expand the node of a Security Server.
2. Select the Backup node.
3. In the details pane, in the table listing the Backup objects select the object that you want to save.
4. Click the Save to disk button located in the upper part of the details pane above the list of objects.
5. In the window that opens, specify the folder to which you wish to save the object and, if necessary, enter or
modify the object name.
6. Click the Save button.
The application will decode the encrypted object and save its copy with the defined name in the specified folder. The
saved object has the same format that it had before being processed by the application. After an object has been
saved successfully, the application displays the following notification: "Selected object has been saved to disk".
Page 88

A D M I N I S T R A T O R ' S G U I D E
88
SENDING AN OBJECTS FROM BACKUP TO RECIPIENTS
You can send a copy of a message stored in Backup to its original recipients.
To send an object from Backup to recipients, perform the following steps:
1. In the Administration Console tree, select the node of a Microsoft Exchange server and open it.
2. Select the Backup node.
3. In the details pane, in the table listing the Backup objects select the message that you want to send to
recipients.
4. Click the Send to recipients button located in the upper part of the details pane above the list of objects.
The application sends the selected object to the recipients of the original message.
DELETING OBJECTS FROM BACKUP
The application deletes the following objects from Backup automatically:
The oldest object, if adding a new object will cause the limit on the total number of objects in Backup to be
exceeded (the maximum number of files in this version is limited to one million).
The oldest object, if there is a limit on the size of Back and adding a new object will cause this limit to be
exceeded.
objects whose storage period has expired, if there is a restriction imposed on the storage period.
Objects may also be manually removed from Backup storage. This feature may prove useful for deleting objects that
have been saved to disk, and to free up space in Backup.
To delete objects from Backup:
1. In the Administration Console tree, select the node of a Microsoft Exchange server and open it.
2. Select the Backup node.
3. In the details pane, in the table listing the Backup objects select the object(s) that you want to delete. You can
use a filter to search for objects (see section "Configuring the Backup filters" on page 86).
4. Click the Delete button in the lower part of the details pane.
A confirmation window opens.
5. Click Yes in the confirmation window.
The application deletes selected objects from Backup.
To delete all objects from Backup:
1. In the Administration Console tree, select the node of a Microsoft Exchange server and open it.
2. Select the Backup node.
3. Click the Delete all button in the details pane.
A confirmation window opens.
Page 89

B A C K U P
89
4. Click Yes in the confirmation window.
If filters have been applied to Backup content, the application removes from Backup only the objects matching the
filters. If filters have not been applied to Backup content, the application removes all objects from Backup.
CONFIGURING BACKUP SETTINGS
Backup is created during installation of the Security Server. Backup settings have default values that can be modified by
the administrator.
To change the Backup settings, perform the following steps:
1. In the Administration Console tree, select the node of a Microsoft Exchange server and open it.
2. Select the Settings node.
3. To limit the size of Backup:
In the details pane, in the Data storage configuration section, select the Restrict the Backup storage size
check box.
Specify the maximum allowed Backup size in the Backup size may not exceed spin box.
The default maximum size of Backup is 5,120 MB.
4. To limit the duration of object storage in Backup:
In the details pane, in the Data storage configuration section, select the Restrict the duration of object
storage in Backup check box.
Specify the number of days in the Store objects no longer than spin box.
The default period of object storage in Backup is limited to 30 days.
5. Click the Save button.
If not a single check box is selected in the Data storage configuration section, only the total number of Backup
objects is limited (not to exceed 1 million objects).
Regardless of the application configuration (standalone server, server cluster, or DAG), Backup settings have to be
configured separately on each physical server.
SELECTING BACKUP DATABASE FOR VIEWING ITS
CONTENTS FROM THE PROFILE
Information about Backup objects is stored in the SQL database specified during application setup (details are available
in the Kaspersky Security 8.0 for Microsoft Exchange Servers Installation Guide).
When several Security Servers have been added to a profile, by default the node of the profile shows the node of the
Backup whose SQL database server appears first in the list arranged alphabetically in the format <SQL server
name>\<instance>.
In the profile, you can select the SQL database to store information about Backup objects in the storage whose contents
you want to view.
Page 90

A D M I N I S T R A T O R ' S G U I D E
90
To select a Backup database in the profile to view its contents:
1. In the Administration Console tree, expand the Profiles node.
2. Expand the node of the profile containing the Security Server that uses the relevant SQL database.
3. Select the Backup node.
4. Click the Select button in the details pane.
The Database window opens, listing all SQL databases that are used by at least one Security Server in the
profile.
5. In the Database window, select the Security Server that hosts the SQL database of the Backup you need.
6. Click OK.
If the connection is to a remote database on an SQL server, make sure that this SQL server is enabled to support
TCP/IP as a client protocol.
Page 91

91
NOTIFICATIONS
IN THIS SECTION
About notifications ........................................................................................................................................................... 91
Configuring notification settings....................................................................................................................................... 91
Configuring notification delivery settings ......................................................................................................................... 92
This section covers notifications and ways to configure them.
ABOUT NOTIFICATIONS
Kaspersky Security can send notifications about infected, password-protected, and corrupted objects discovered while
scanning. You can configure the application to send notifications about the revealed infected, protected and corrupted
objects to the e-mail addresses of message sender, recipients, administrator and to additional addresses, for example, to
security officers.
Notifications can be delivered using the following methods:
By sending email messages. In this case you need to configure notification delivery settings (see section
"Configuring notification delivery settings" on page 92).
By registering the event in the Microsoft Windows system log on the computer where the Security Server is
deployed. In this case, the information is accessible using Events viewer – a standard Microsoft Windows log
viewing and management tool.
CONFIGURING NOTIFICATION SETTINGS
To define the notification settings, perform the following steps:
1. Perform the following steps in the Administration Console tree:
To configure notification settings for an unassigned Security Server, maximize the node of the relevant
Security Server;
To configure notification settings for Security Servers belonging to a profile, maximize the Profiles node
and inside it maximize the node of the profile for whose Security Servers you want to configure notification
settings.
2. Select the Notifications node.
3. In the details pane, expand the relevant section to configure notifications of each type:
Notify about infected objects.
Notify about corrupted objects.
Notify about protected objects.
Notify about system errors.
Page 92

A D M I N I S T R A T O R ' S G U I D E
92
The application does not send system error notifications to the sender and the recipient.
4. Specify notification recipients in the Notify by email section for each type of notification.
If you want the application to send notifications to the administrator's email address, select the
Administrator check box.
If you want the application to send notifications to the sender of the message in which the object has been
detected, select the Sender check box.
The sender cannot be specified in the Notify about system errors section.
If you want the application to send notifications to the recipient of the message in which the object has been
detected, select the Recipient check box.
The recipient cannot be specified in the Notify about system errors section.
If you want the application to send notifications to the specified email addresses, select The following
recipients check box. In the entry field, specify the email address(es) to which the notifications should be
sent.
5. When configuring system error notification settings, you can select errors about which you want the application
to send notifications in the Notify about system errors configuration section. To this end, select the relevant
check boxes:
Notify about outdated databases.
Notify of licensing errors.
6. If you want the application to record the event in the Microsoft Windows system log, select the Register in
Windows Event Log check box.
7. Click the Save button.
If the application is running in a DAG of Microsoft Exchange servers, the notification settings configured on one of the
servers will be automatically applied to all servers within the DAG. Configuring notifications on other servers of the DAG
is not necessary.
CONFIGURING NOTIFICATION DELIVERY SETTINGS
To define the notification sending settings, perform the following steps:
1. Perform the following steps in the Administration Console tree:
To configure notification delivery settings for an unassigned Security Server, maximize the node of the
relevant Security Server;
To configure notification delivery settings for Security Servers belonging to a profile, maximize the Profiles
node and inside it maximize the node of the profile for whose Security Servers you want to configure
notification delivery settings.
2. Select the Notifications node or the Settings node.
Page 93

N O T I F I C A T I O N S
93
3. Depending on the node selected, do the following:
If you have selected the Notifications node, click the Notification delivery settings link in the lower part
of the details pane to open the Notification delivery settings window;
If you have selected the Settings node, maximize the Notification delivery settings configuration section.
4. In the Exchange web service address field, specify the address of the web service for sending notifications via
the Microsoft Exchange server. The following address is used on the Microsoft Exchange server by default:
https://<name_of_client_access_server>/ews/exchange.asmx
5. In the Account field, manually enter any account from mailboxes registered on the Microsoft Exchange server,
or click the ... button and select an account in the window that opens.
6. Type the password for the selected account in the Password field.
7. In the Administrator address field, specify the mail recipient's address.
8. When configuring notification settings for an unassigned Security Server, you can send a test message by
clicking the Test button.
Test messages for Security Servers belonging to a profile are not supported.
9. Click OK.
If the application is running on a Microsoft Exchange DAG, the notification settings configured on one of the servers will
be automatically applied to all servers within the DAG. Configuring delivery of notifications on other servers of the DAG is
not necessary.
Page 94

94
REPORTS
IN THIS SECTION
About application reports................................................................................................................................................. 94
Generating a quick report ................................................................................................................................................ 95
Creating a report generation task .................................................................................................................................... 96
Editing the settings of a report generation task ............................................................................................................... 97
Starting a report generation task ..................................................................................................................................... 97
Deleting a report generation task .................................................................................................................................... 98
Viewing report generation tasks ...................................................................................................................................... 98
Viewing ready reports...................................................................................................................................................... 99
Saving a report .............................................................................................................................................................. 101
Deleting a report ................................................................ ............................................................................................ 101
This section covers application reports and ways to configure them.
ABOUT APPLICATION REPORTS
Kaspersky Security supports creation and viewing of reports on the activity of the Anti-Virus and Anti-Spam modules.
The application generates a separate activity report for each module covering a period of one day or longer.
You can generate quick reports manually or have the application run report generation tasks automatically according to
schedule. You can also manually launch report generation tasks.
The application supports standard and detailed reports. Standard reports contain information about objects processed
during the entire time period without indication of the time when each individual event occurred. Detailed reports specify
the exact time spans in which the events occurred.
Time spans depend on the length of the reporting period selected:
If the period is one day, the minimum time span for each event is one hour.
If the period is two to seven days, the minimum time span for each event is six hours.
If the period is eight or more days, the minimum time span for each event is 24 hours.
You can view the reports in the application or receive them via e-mail. E-mailed reports are appended to a message as
an attachment. The message contains the following explanatory text:
Attached file contains an activity report on Kaspersky Security 8.0 for Microsoft Exchange Servers.
Page 95

R E P O R T S
95
CREATING QUICK REPORTS
To create a quick report, perform the following steps:
1. Perform the following steps in the Administration Console tree:
to create a report for an unassigned Security Server, maximize the node of the relevant Security Server;
to create a report for Security Servers belonging to a profile, maximize the Profiles node and inside it
maximize the node of the profile for whose Security Servers you want to generate a report.
2. Select the Reports node.
3. In the details pane, click the Generate report button in the Ready reports section.
4. In the Quick report generation settings window that opens, select one of the following items in the Report
type drop-down list:
Anti-Virus for the Mailbox role, if you want to generate an Anti-Virus activity report for the Mailbox role.
Anti-Virus for the Hub Transport role, if you want to generate an Anti-Virus activity report for the Hub
Transport role.
Anti-Spam, if you want to generate an Anti-Spam activity report.
5. Select one of the following items in the Detail level drop-down list:
To generate a report containing information about objects processed during the entire reporting period
without indicating the time span during which a specific event occurred, select the Standard item in the list.
To generate a detailed report indicating the time span during which a specific event occurred, select the
Detailed item in the list.
The length of time spans depends on the length of the reporting period selected.
6. In the from and to fields, type the start and end dates of the period covered by the report or select them in the
calendar.
7. To generate a report for Security Servers belonging to a profile, perform the following operations in the
Generate report based on statistics sections:
Choose the All profile servers option to generate a report containing information about all Security
Servers belonging to the profile. In the drop-down list on the right, select the server where the report will be
generated.
Choose the Single server option to generate a report containing information about a single Security Server
in the profile. In the drop-down list on the right, select the server for which you want to generate the report.
8. To create a quick report using the defined settings, click the OK button.
The application opens the report window in a browser as soon as report generation has been completed and shows
the report details in the Ready reports section.
Page 96

A D M I N I S T R A T O R ' S G U I D E
96
CREATING A REPORT GENERATION TASK
To create a report generation task:
1. Perform the following steps in the Administration Console tree:
to create a report generation task for an unassigned Security Server, maximize the node of the relevant
Security Server;
to create a report generation task for Security Servers belonging to a profile, maximize the Profiles node
and inside it maximize the node of the profile for whose Security Servers you want to create the report
generation task.
2. Select the Reports node.
3. In the details pane, click the Add task button in the Report generation tasks section.
4. In the Scheduled report generation task window that opens, enter the name of the task being created in the
Name field.
5. One the Report generation settings tab, select one of the following items in the Report type drop-down list:
Anti-Virus for the Mailbox role, if you want to generate an Anti-Virus activity report for the Mailbox role.
Anti-Virus for the Hub Transport role, if you want to generate an Anti-Virus activity report for the Hub
Transport role.
Anti-Spam, if you want to generate an Anti-Spam activity report.
6. Select one of the following report detail levels in the Detail level drop-down list:
To generate a report containing information about objects processed during the entire reporting period
without indicating the time span during which a specific event occurred, select the Standard level of detail
in the list.
To generate a detailed report indicating the time span during which a specific event occurred, select the
Detailed level of detail in the list.
7. If you want the application to email the generated reports to the administrator's email address, select the Send
to the Administrator check box.
8. If you want the application to send the generated reports to the specified email addresses, select Send to
recipients check box. In the entry field, specify the email addresses to which the reports should be sent.
9. To generate a report for Security Servers belonging to a profile, perform the following operations in the
Generate report based on statistics sections:
Choose the All profile servers option to generate reports containing information about all Security Servers
belonging to the profile. In the drop-down list on the right, select the server where the report will be
generated.
Choose the Single server option to generate reports containing information about a single Security Server
in the profile. In the drop-down list on the right, select the server for which you want to generate the reports.
10. Select the Generate scheduled report check box on the Schedule tab if you want the application to generate
reports in accordance with the specified schedule.
11. If you have selected the Generate scheduled report check box, specify the report generation frequency:
Every N days. In the Every N days entry field, specify the frequency of report generation in days. In the
Start time entry field, specify the time when report generation should start.
Page 97

R E P O R T S
97
12. Click OK.
Weekly. In the Start day section, select the days of the week on which the application should generate
reports. In the Start time entry field, specify the time when report generation should start.
Monthly. In the Day of the month entry field, specify the day of the month on which the application should
generate reports. In the Start time entry field, specify the time when report generation should start.
EDITING THE SETTINGS OF A REPORT GENERATION TASK
To edit the settings of a report generation task:
1. Perform the following steps in the Administration Console tree:
to edit the settings of a report generation task for an unassigned Security Server, maximize the node of the
relevant Security Server;
to edit the settings of report generation tasks for Security Servers belonging to a profile, maximize the
Profiles node and inside it maximize the node of the profile for whose Security Servers you want to edit the
settings of report generation tasks.
2. Select the Reports node.
3. In the table of the details pane inside the Report generation tasks section, select the task whose settings you
want to edit.
4. Click the Edit button above the table of tasks.
5. In the Scheduled report generation task window that opens, edit the relevant settings.
6. Click OK.
The application displays the created report generation task in the Report generation tasks section.
STARTING A REPORT GENERATION TASK
To start a report generation task:
1. Perform the following steps in the Administration Console tree:
to start a report generation task for an unassigned Security Server, maximize the node of the relevant
Security Server;
to start a report generation task for Security Servers belonging to a profile, maximize the Profiles node and
inside it maximize the node of the profile for whose Security Servers you want to start the report generation
task.
2. Select the Reports node.
3. In the details pane, click the Start task button in the Report generation tasks section.
The application opens the report window in a browser as soon as report generation has been completed and shows
the report details in the Ready reports section.
Page 98

A D M I N I S T R A T O R ' S G U I D E
98
DELETING A REPORT GENERATION TASK
To delete a report generation task:
1. Perform the following steps in the Administration Console tree:
to delete a report generation task for an unassigned Security Server, maximize the node of the relevant
Security Server;
to delete a report generation task for Security Servers belonging to a profile, maximize the Profiles node
and inside it maximize the node of the profile for whose Security Servers you want to delete the report
generation task.
2. Select the Reports node.
3. In the table of the details pane inside the Report generation tasks section, select the task that you want to
delete.
4. Click the Delete button above the table of tasks.
A confirmation window opens.
5. Click Yes in the confirmation window.
The selected task is deleted from the table of tasks in the Report generation tasks section.
VIEWING REPORT GENERATION TASKS
To view the report generation tasks:
1. Perform the following steps in the Administration Console tree:
to view report generation tasks for an unassigned Security Server, maximize the node of the relevant
Security Server;
to view report generation tasks for Security Servers belonging to a profile, maximize the Profiles node and
inside it maximize the node of the profile for whose Security Servers you want to view the report generation
tasks.
2. Select the Reports node.
3. All created tasks are displayed in the details pane in the Report generation tasks section. The following
information is displayed for each task:
Task name Name of the created report generation task.
Type. Generated report type: Anti-Spam, Anti-Virus for the Mailbox role or Anti-Virus for the Hub Transport
role.
Detail level. Level of detail of the generated reports: detailed or standard.
Scope. Profile / server or cluster covered by the generated reports.
Schedule. The specified report generation schedule.
Time of last modification. The time when the report generation task was last modified.
Next start. The next start of the scheduled report generation task.
Page 99

R E P O R T S
99
Automatic start. Indicates whether or not a task has been configured to start according to schedule.
Generation server. The server hosting the reports.
VIEW THE READY REPORTS
To view the reports on Anti-Virus and Anti-Spam activity:
1. Perform the following steps in the Administration Console tree:
to view a report for an unassigned Security Server, maximize the node of the relevant Security Server;
to view a report for Security Servers belonging to a profile, maximize the Profiles node and inside it
maximize the node of the profile for whose Security Servers you want to view the report.
2. Select the Reports node.
3. All created reports are displayed in the details pane in the Ready reports section. The table displays the
following information about each report:
Name. The default name of the report.
Date. Report generation date and time.
This column shows the time specified in the locale settings of the computer that hosts Administration
Console.
Interval. The period of time covered by the report.
Data source. Name of the server, profile, DAG or cluster of servers (only for the Anti-Virus for the Mailbox
role) covered in the report.
Type. Report type: Anti-Spam, Anti-Virus for the Mailbox role or Anti-Virus for the Hub Transport role.
Detail level. Level of detail of the report: detailed or standard.
Generation server. The server hosting the report.
4. To view a report, select it in the list and click the View button.
The selected report opens in the default web browser window.
Viewing an Anti-Virus report
The header of the Anti-Virus report contains the following information:
Report type.
Name of the server, cluster or DAG, for which the report was created.
Period covered by the report.
Day, month, year, and time of report generation (local time of the computer on which the report was generated).
You can view the following information in the standard Anti-Virus report table:
Status. Object status after Anti-Virus processing.
Page 100

A D M I N I S T R A T O R ' S G U I D E
100
Objects. The number of objects with the specified status.
Percentage. The share of objects with the specified status compared to the total number of objects.
Size. Size of objects (messages, their parts or attachments) in megabytes.
You can view the following information in the detailed Anti-Virus report table:
Time period. Time frame of object detection.
Non-infected objects. The number of uninfected objects.
Disinfected objects. The number of successfully disinfected objects.
Non-disinfected objects:
Infected objects. Number of objects infected with viruses or their modifications.
Probably infected objects. The number of objects which may contain an unknown virus.
Protected objects. The number of password-protected objects, for example, archives.
Corrupted objects. Number of objects that cannot be disinfected because they are corrupted.
Unprocessed objects:
License problem. The number of objects that have not been scanned because of a Kaspersky Security
license problem.
Anti-Virus database error. The number of objects which have not been scanned because of corrupted or
missing Anti-Virus databases.
Processing error. Number of objects that returned errors during scanning.
Total objects. The total number of objects referred for scanning.
The For the entire period row shows the total number of objects in each column for the entire reporting period.
Viewing an Anti-Spam report
The header of the standard Anti-Spam report contains the following information:
Day, month, year, and time of report generation (local time of the computer on which the report was generated).
Report type.
Name of the server for which the report has been generated.
Period covered by the report.
Servers covered in the report (if the report has been generated for a profile or DAG).
You can view the following information in the standard Anti-Spam report table:
Status. Message status after Anti-Spam processing.
Number of messages. The number of messages with the specified status.
Percentage. The share of messages with the specified status as a percentage of all messages.
 Loading...