

Kasco Robust-Aire Diffuser Assembly Instructions Manual
ROBUST-AIRE DIFFUSER
ASSEMBLY INSTRUCTIONS
800 Deere Rd. Prescott, WI 54021 • 715-262-4488 • sales@kascomarine.com • www.kascomarine.com
Robust-Aire Diffuser Assembly
Watch our assembly animation at http://kascomarine /products/diffusers/robust-aire/video
1
ROBUST-AIRE DIFFUSER
ASSEMBLY INSTRUCTIONS
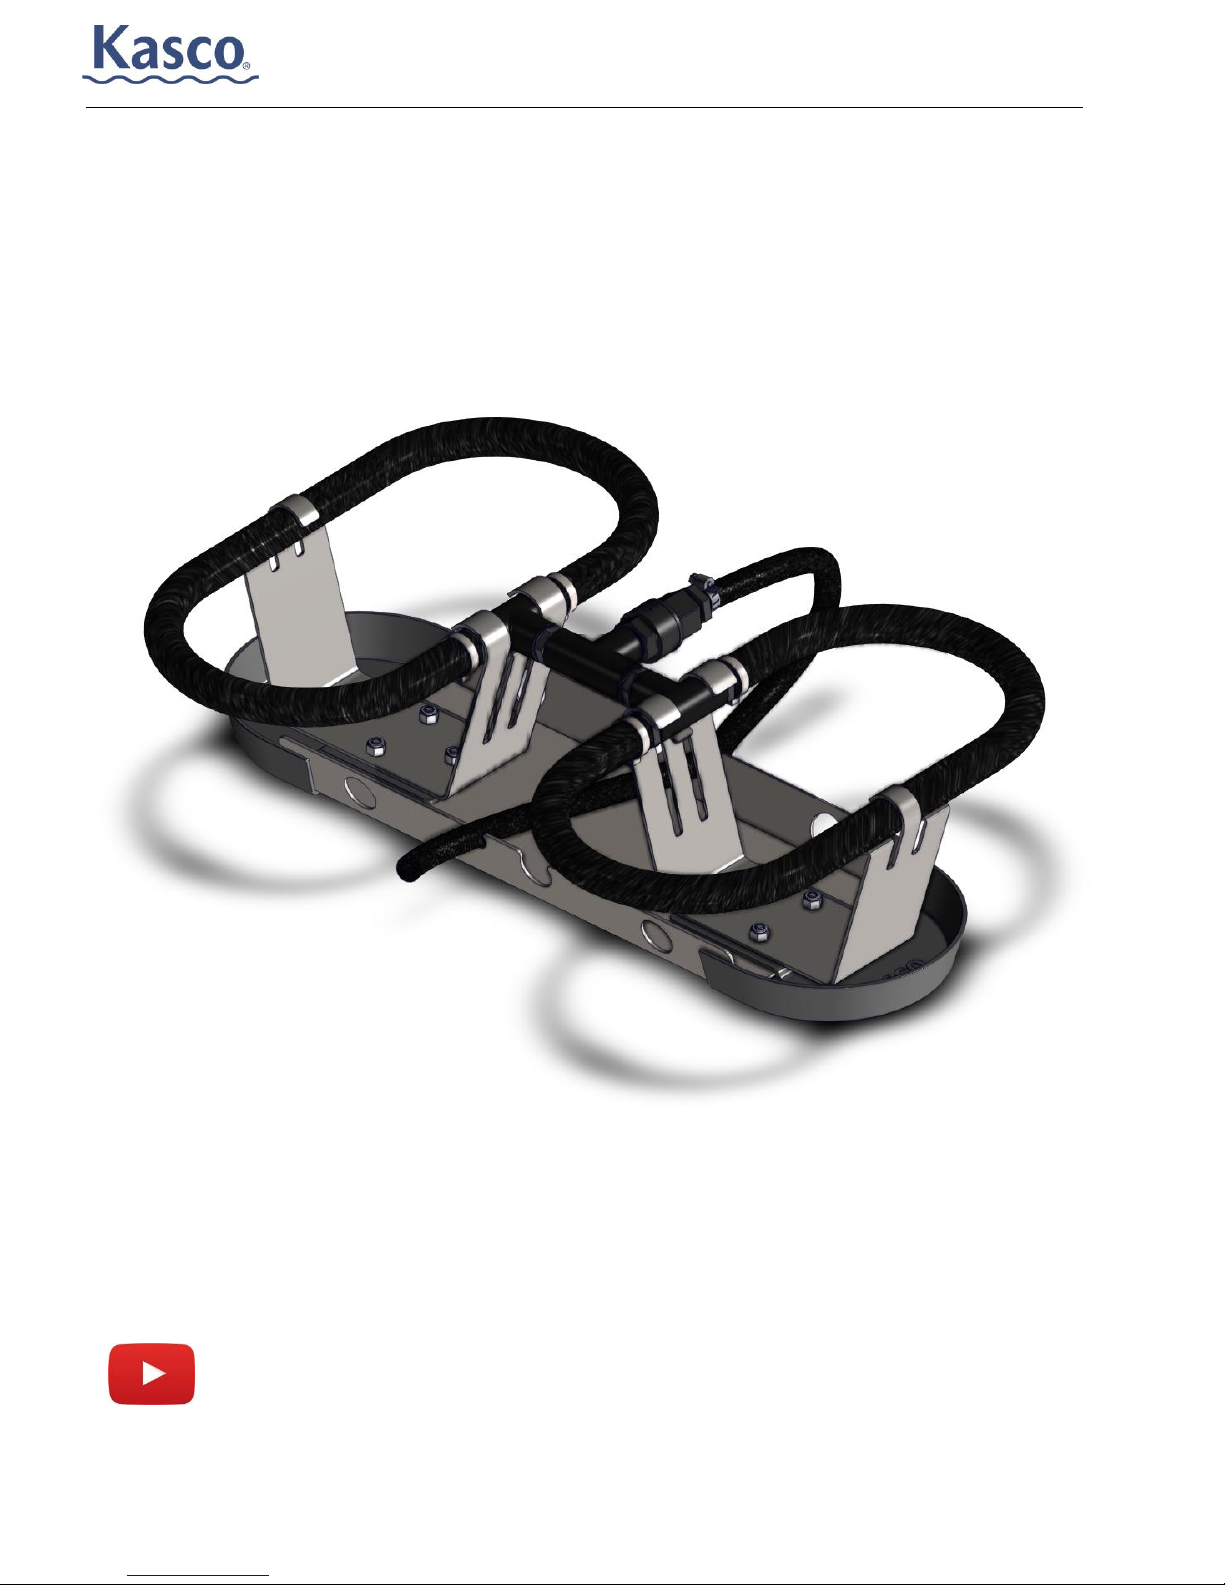
An unpacked Robust-Aire Diffuser. Please reference this image throughout assembly for part names.
2

ROBUST-AIRE DIFFUSER
ASSEMBLY INSTRUCTIONS
Suggested Installation Tools & Methods
7/16” socket wrench with shaft extension or 7/16” nut driver
Adjustable Wrench
Flathead screw driver or ¼” Nut Driver
Retrieval ropes longer than the desired installation depth. (Optional)
Marker Buoy (Optional)
Warnings and Suggestions
When installing do not use boats that tip easily, such as a canoe. Follow all boating
safety rules and regulations, including wearing a PFD. (Personal Flotation Device)
Make sure to unroll any rolls of SureSink tubing that have been received before
installing the diffuser. Unrolling the tubing will make it less likely to kink as it is being
taken out with the diffuser to the installation site. Make sure to also unroll and connect
any additional rolls of Suresink before going to the installation site.
Using a retrieval rope coupled with a buoy will allow for easy retrieval of the unit if
maintenance is ever needed or the need to move the diffuser arises.
3
ROBUST-AIRE DIFFUSER
ASSEMBLY INSTRUCTIONS
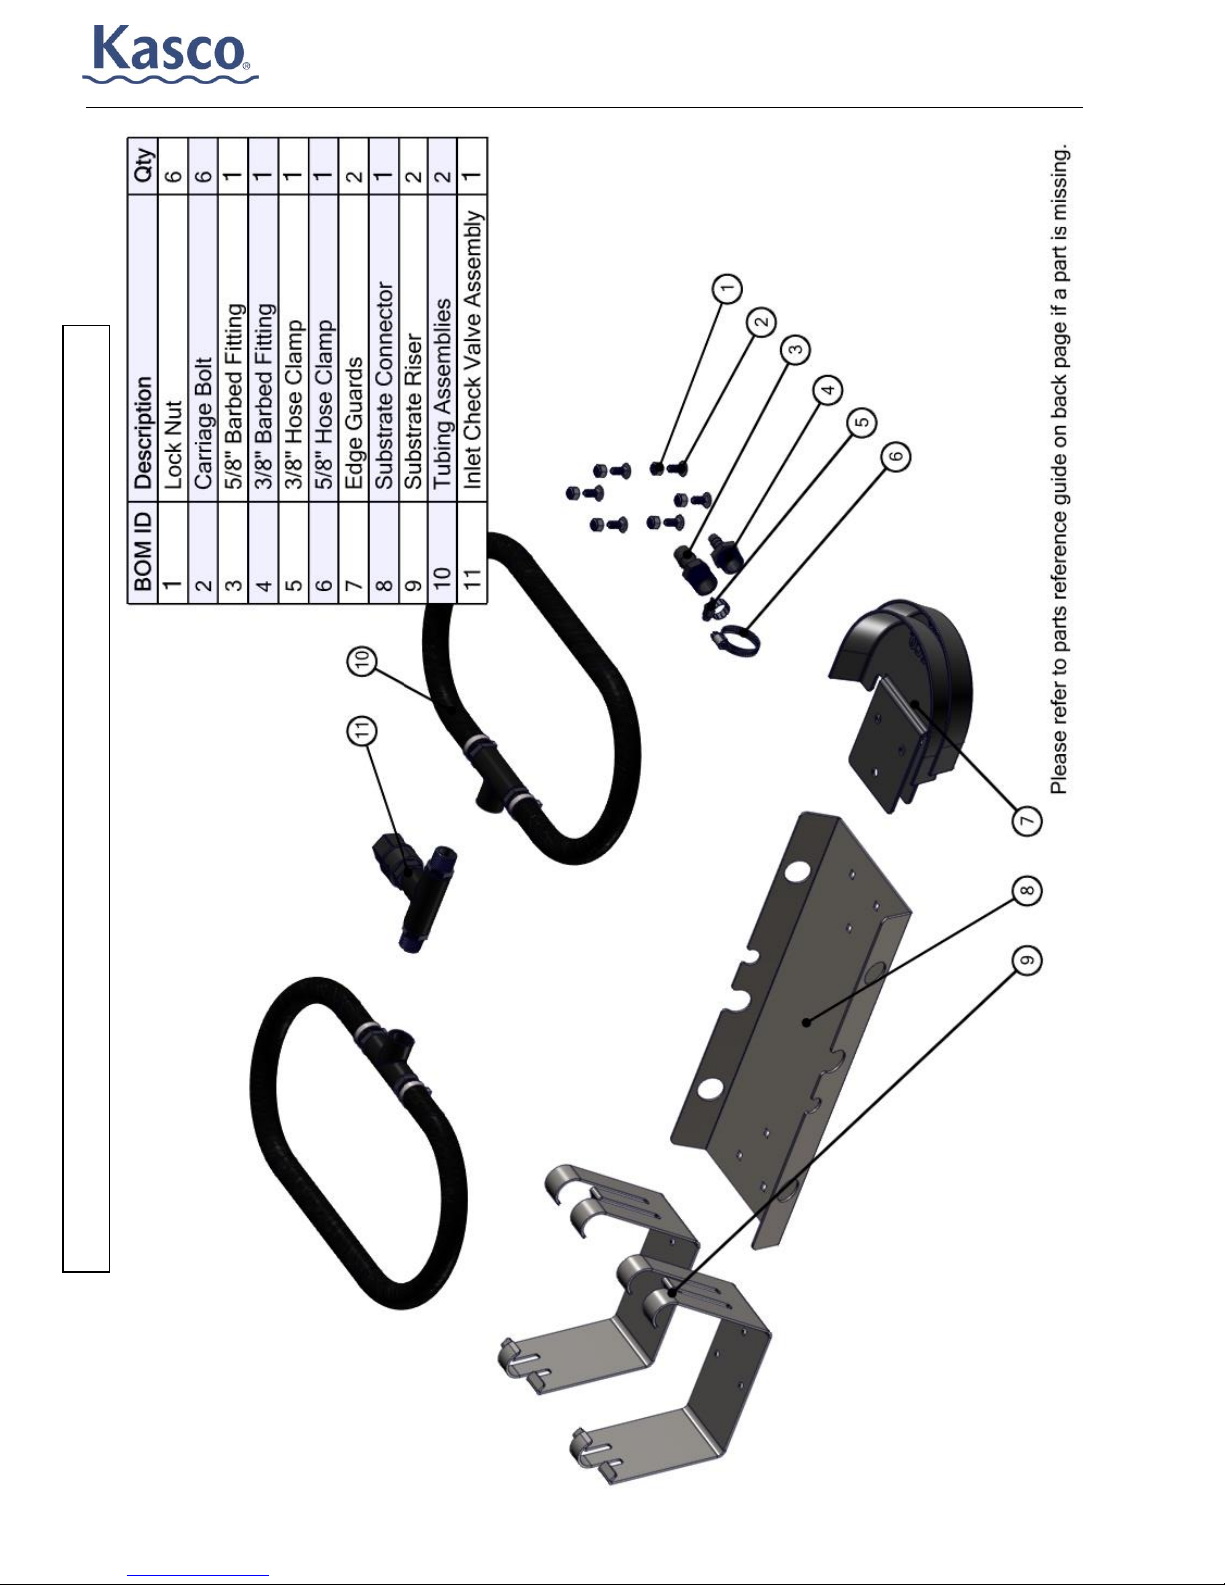
Note: When finished
assembling your diffuser
you will be left with the
parts needed for either
the 3/8” or 5/8”
SureSink tubing. These
are included in the kit as
user SureSink size is
unknown at the time of
making the product.
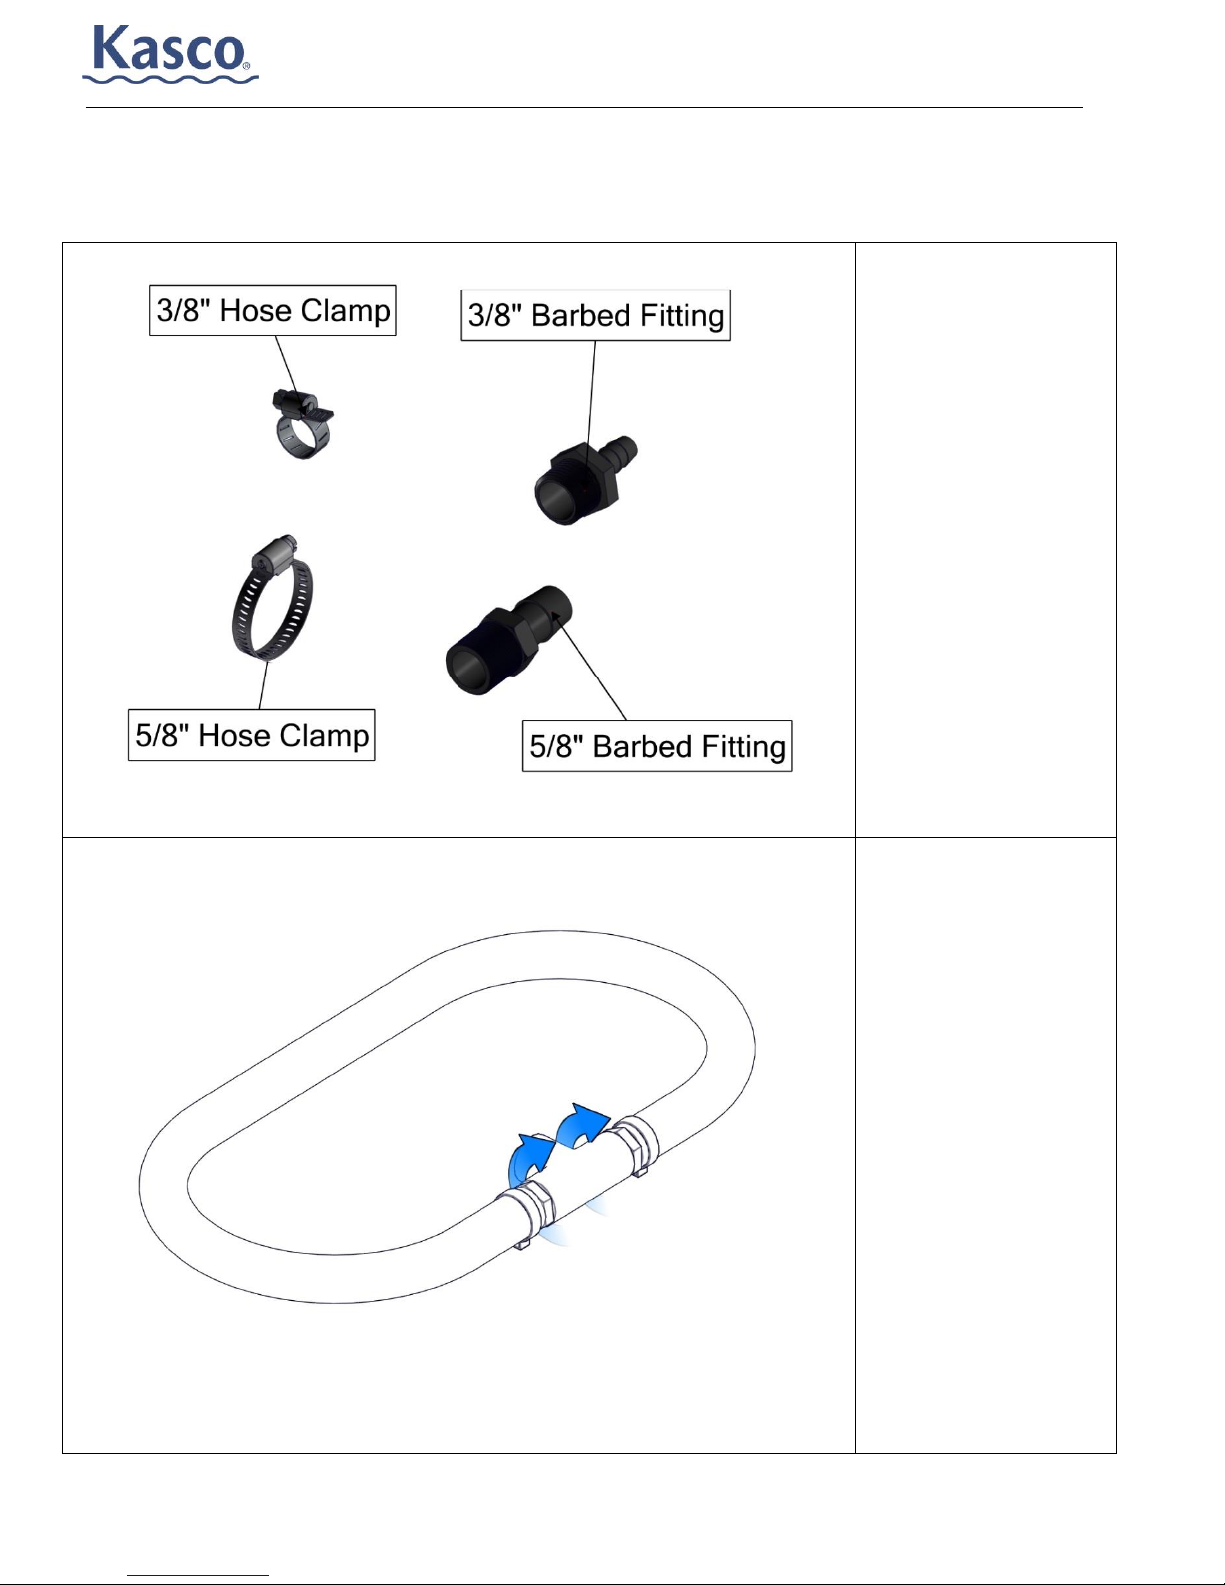
Step 1: After unpacking
your box, the tubing
assembly tee’s open
end will be turned
towards the center of
the loop. Twist the tee
fitting so the open end
will face away from the
center of the tubing
loop.
Assembly Instructions
4
 Loading...