

Page 1
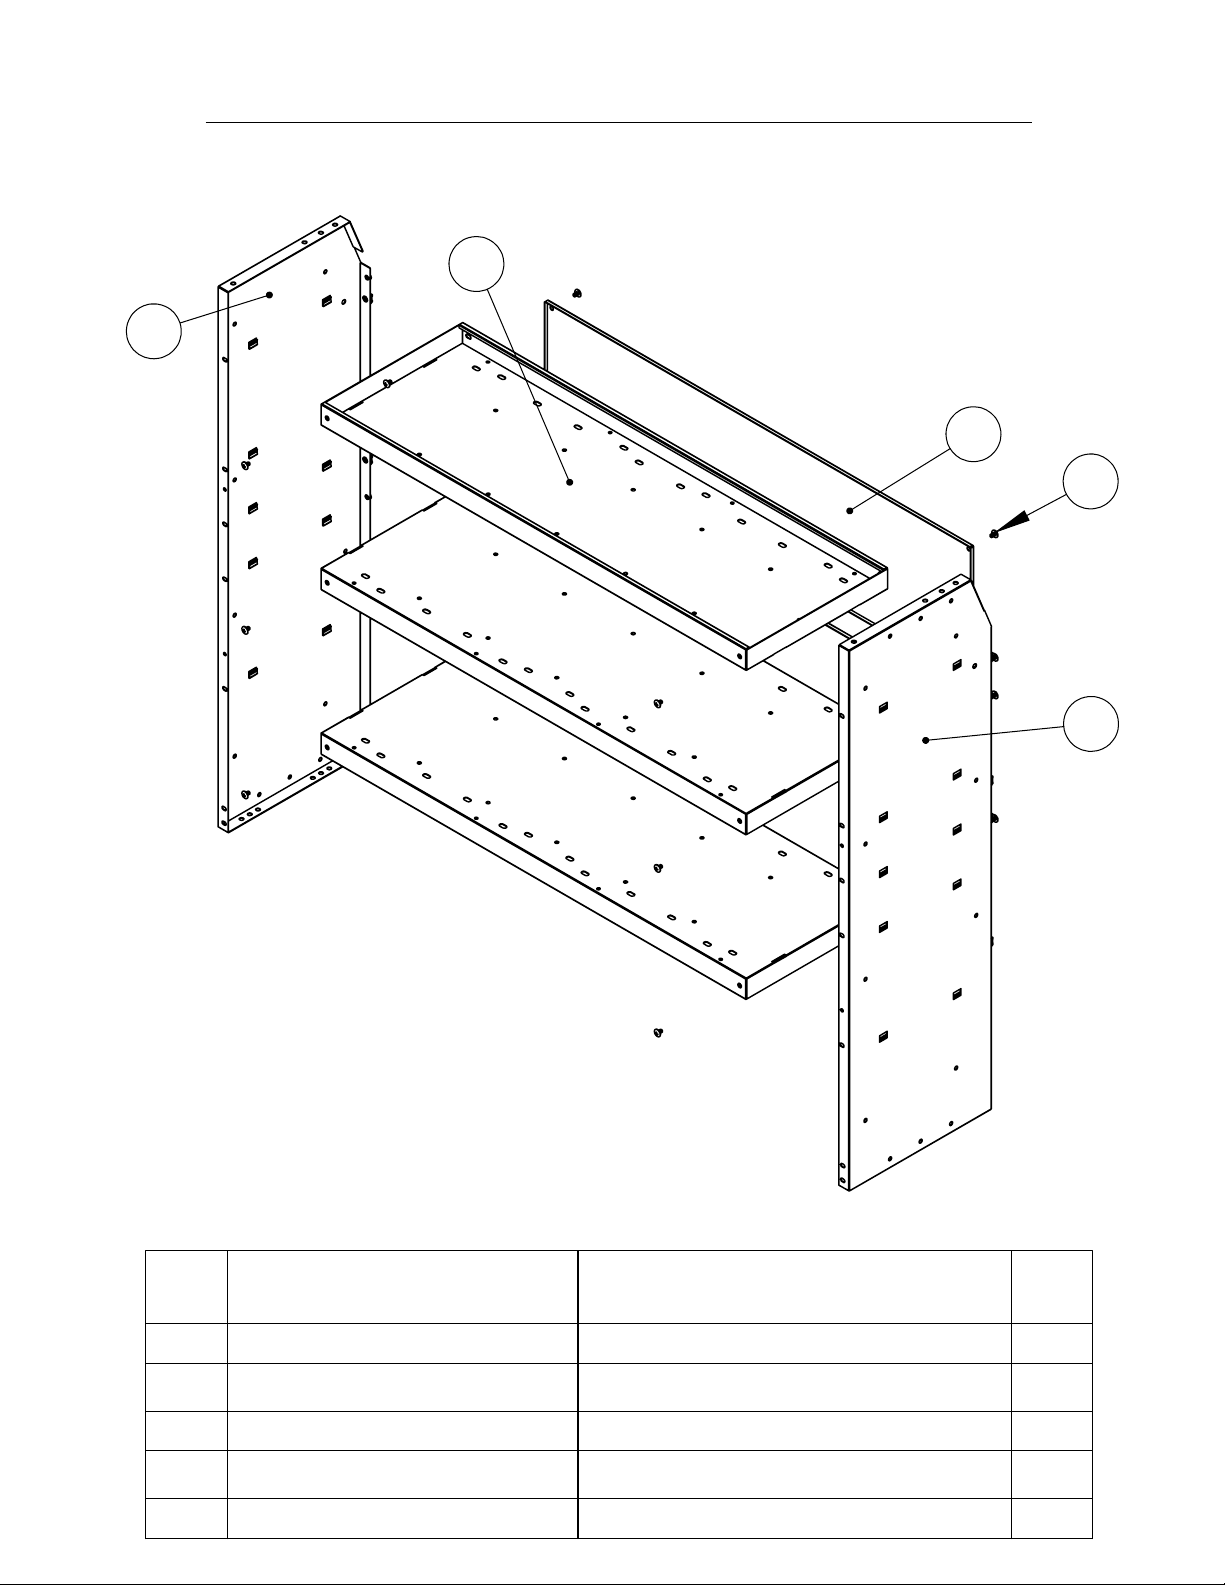
KARGO MASTER KD SHELF ASSEMBLY
1
3
4
5
NOTE: KD-42" is shown thoughout, but steps
are the same for the KD-32", and KD-26",
except where noted.
ITEM
PART NUMBER
DESCRIPTION
2
QTY.
1
KD-42 SHELF
2
KD-Right Side
3
KD-Left Side
4
KD-42 Back Panel
5
.25-20x.375 Button Head
42" Shelf
Right Side Panel
Left Side Panel
Back Panel
1/4-20x3/8 Button Head
3
1
1
2
20
Page 2
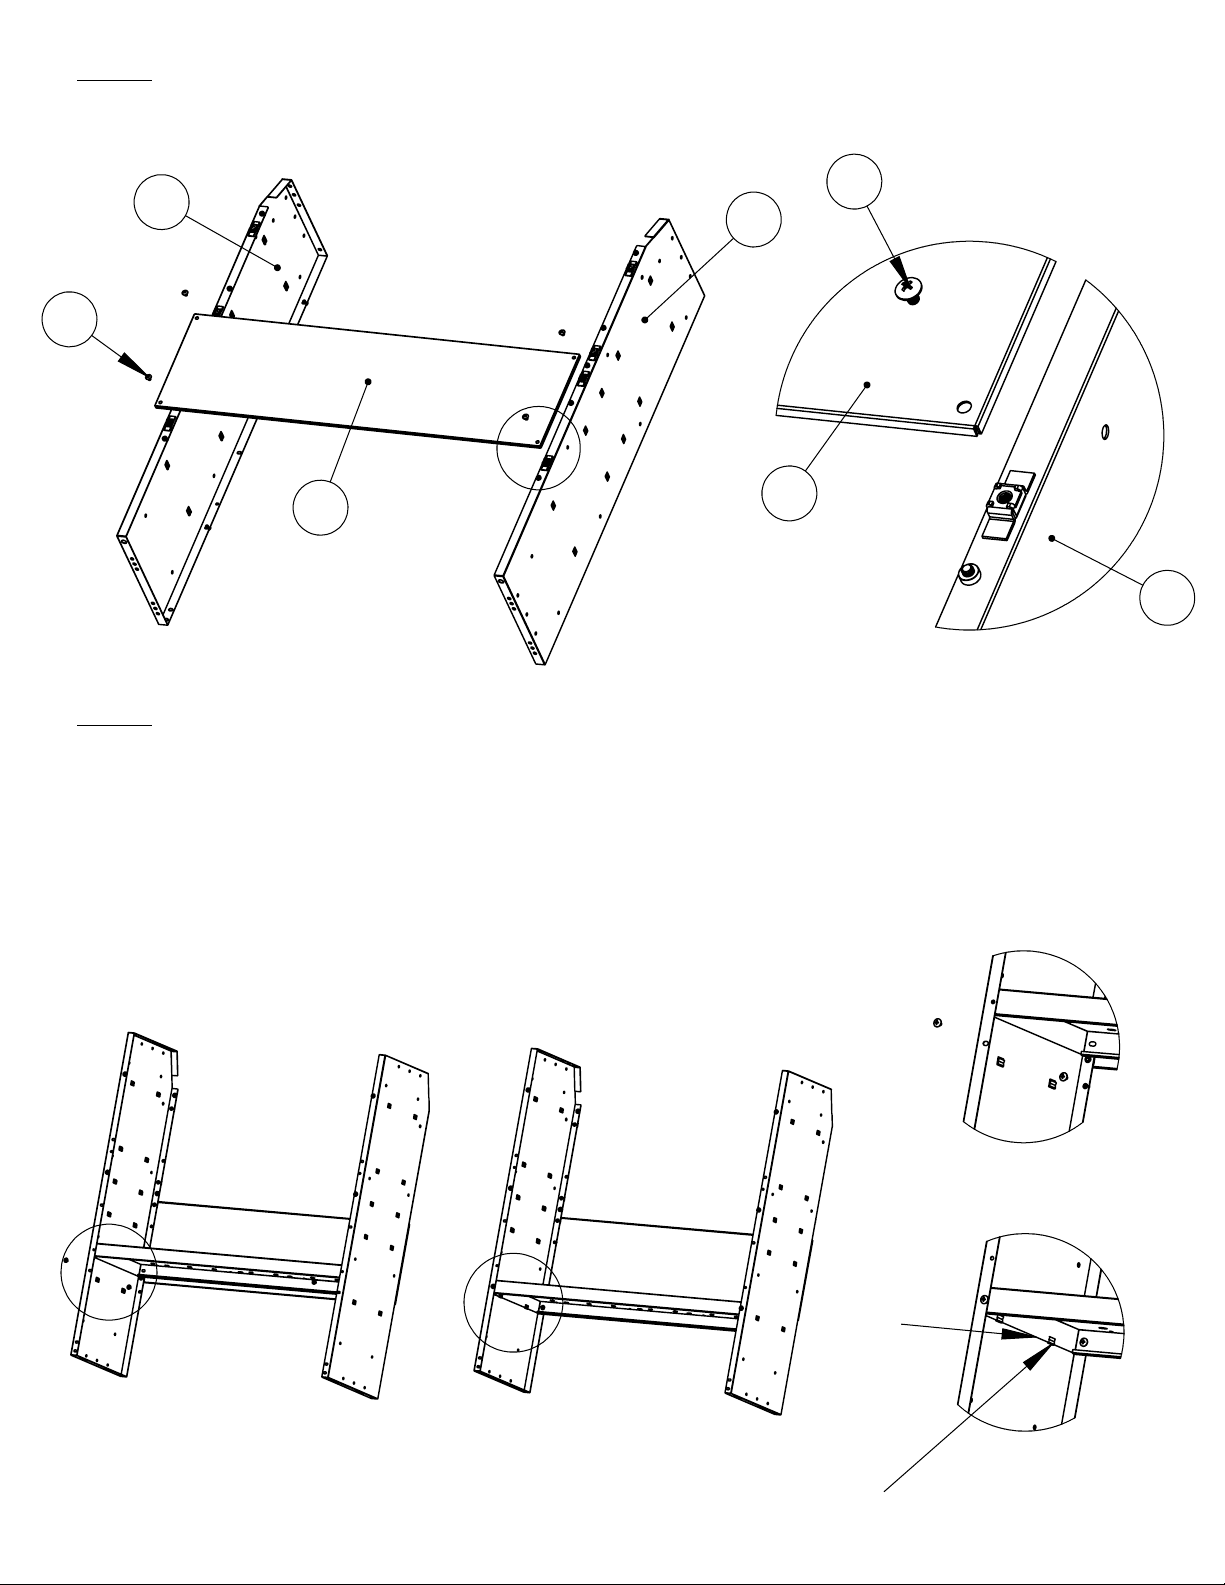
Step1
Attach Item 4(KD Back Panel) to Items 2&3(KD Side Panels) the lower position
using Item 5(1/4" Button Head Screws) loosely as shown
head bolts-NOT SHOWN).
2
3
5
(26" Shelf uses hex
5
A
4
Step2
Shelves can be assembled with flanges pointing up to retain shelf contents, or
flanges pointing down to allow the installation of drawer cabinets. Decide
which option you want for each shelf before attaching it to the sides. The
beveled corner of each Shelf Side is in the back. Each Shelf, Item 1, front side
only has nuts pressed into the Shelf flange. Make sure the shelf is oriented
properly (nuts in front) before attaching. Press the shelf down firmly so that is
resting solidly and level on the lances in the shelf sides (Detail B and C). Attach
the front of the Shelf to each side using 2 x ¼” Button Head Screws.
4
DETAIL A
SCALE 1 : 3
3
B
C
Bottom
Edge
Clip in
Side panel
DETAIL B
SCALE 1 : 10
DETAIL C
SCALE 1 : 10
Page 3
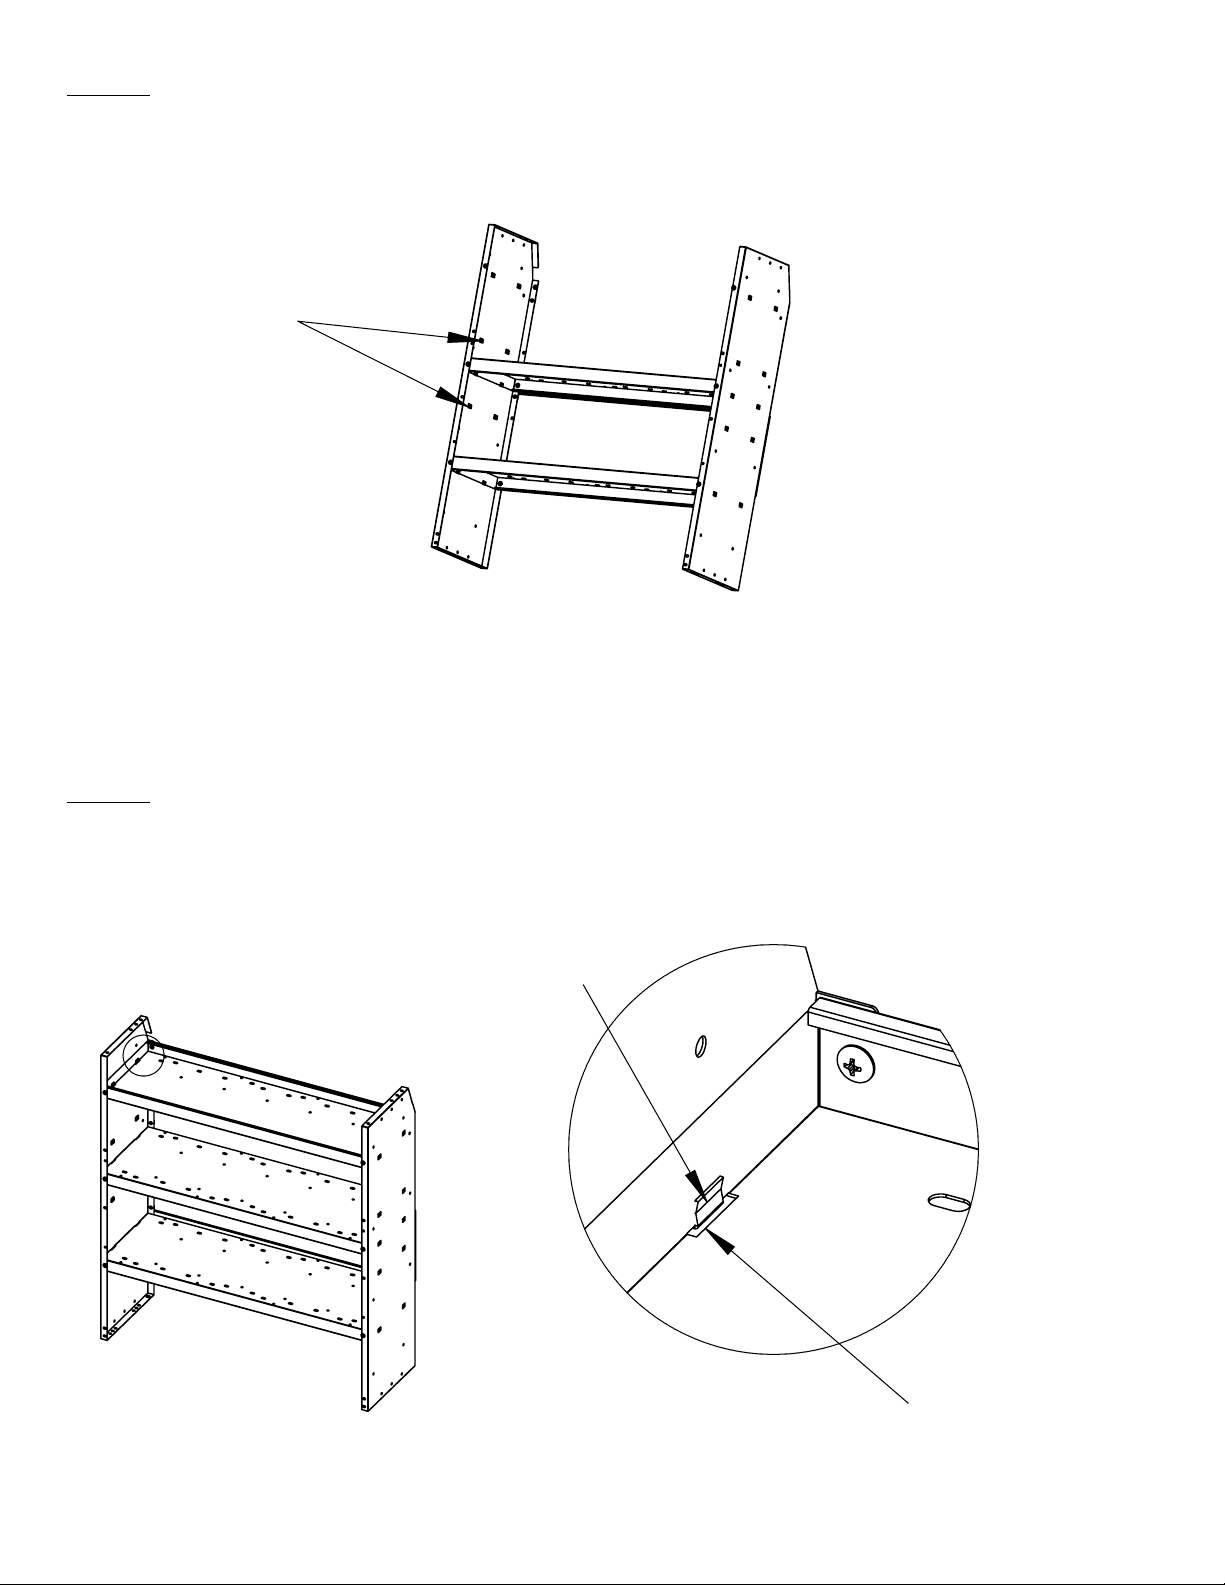
Step 3
Repeat step 2 for middle Shelf as shown.
for the middle Shelf, an optional 4th Shelf is available.
Optional mounting
locations
NOTE: There are 3 mounting locations
Step 4
Repeat step 2 for top Shelf as shown. This Shelf is shown with the flanges up,
since this is the most common configuration for this Shelf. Be sure that the clips in
the side panels go into the slot on the Shelf as shown in Detail "D".
Clip on side panel
D
DETAIL D
SCALE 1 : 2
Slot in shelf
Page 4
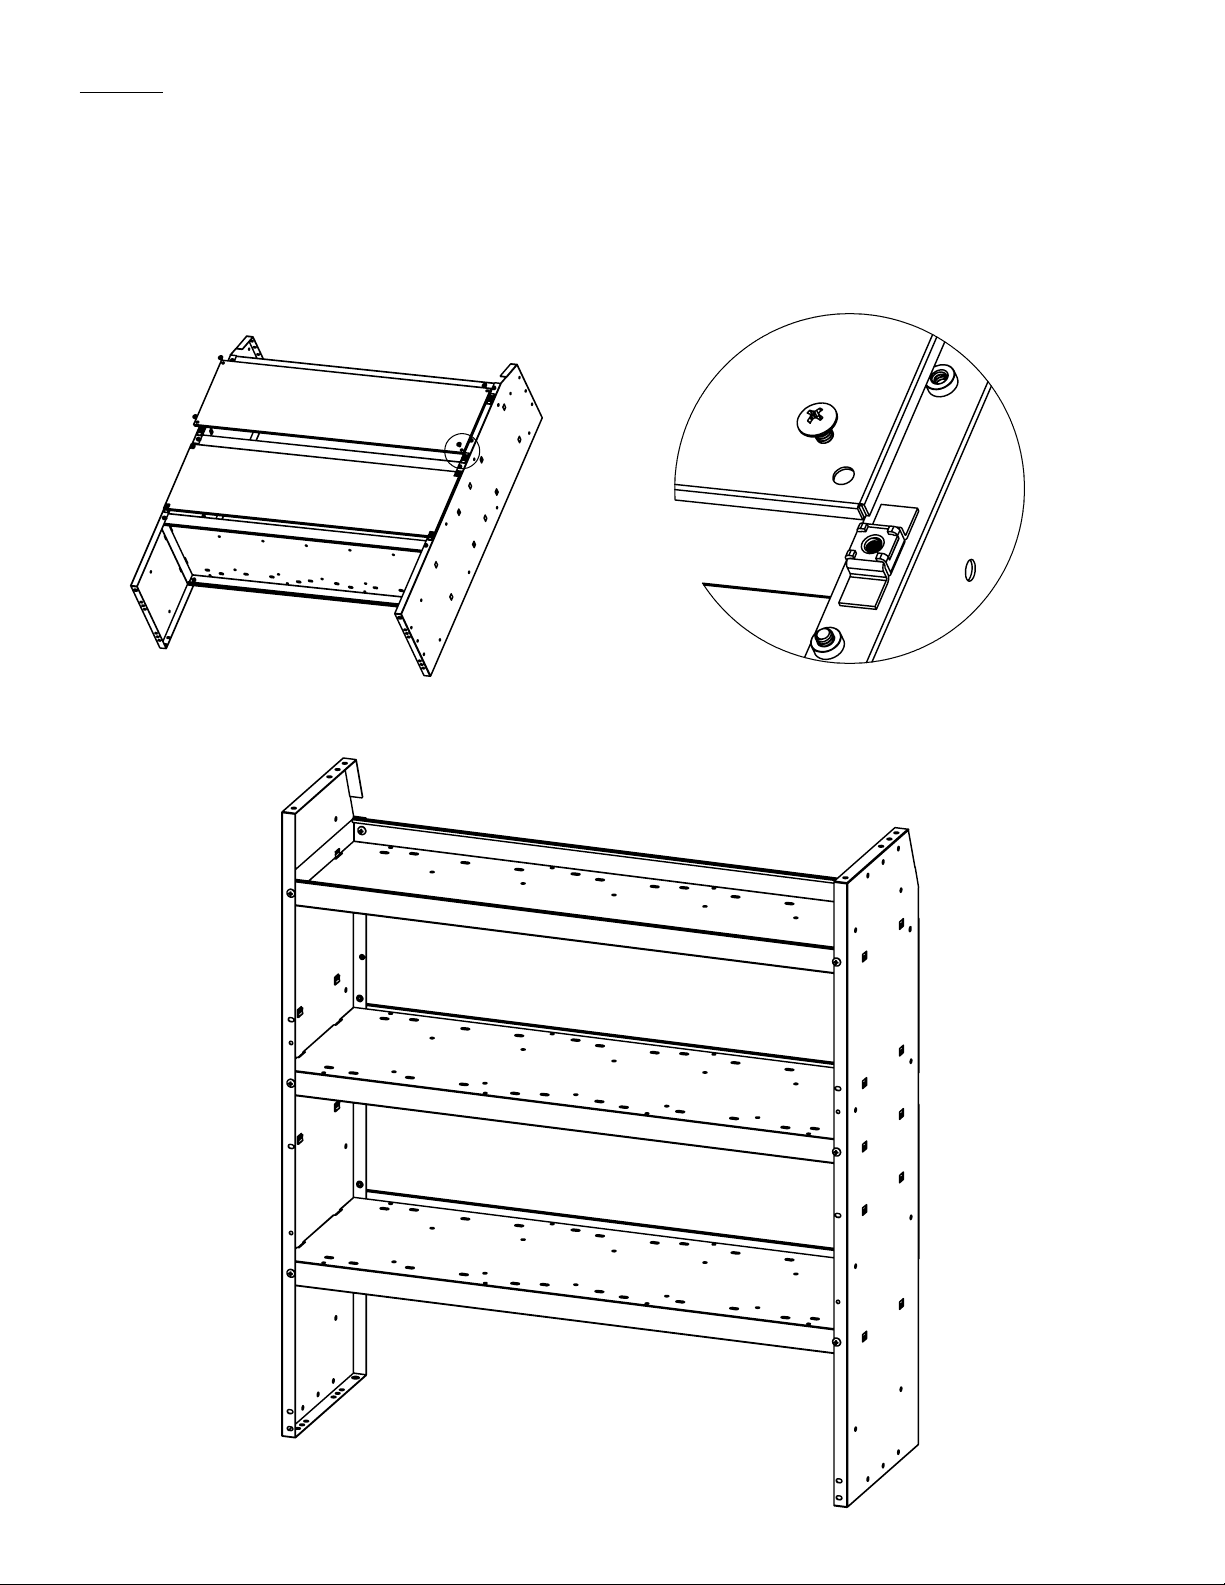
Step 5
Now attach the upper Back Panel, Item 4. You can now tighten all the screws
and are ready to install the shelf.
NOTE:
Transit Connect. If you want access to the contents of the shelves from both
sides, we recommend that you use the back panels to provide sheer strength
during installation, and then remove the backs after installation is complete.
In most cases, the 26” shelf unit will be installed in the door opening of a
E
DETAIL E
SCALE 1 : 2
 Loading...