

Page 1
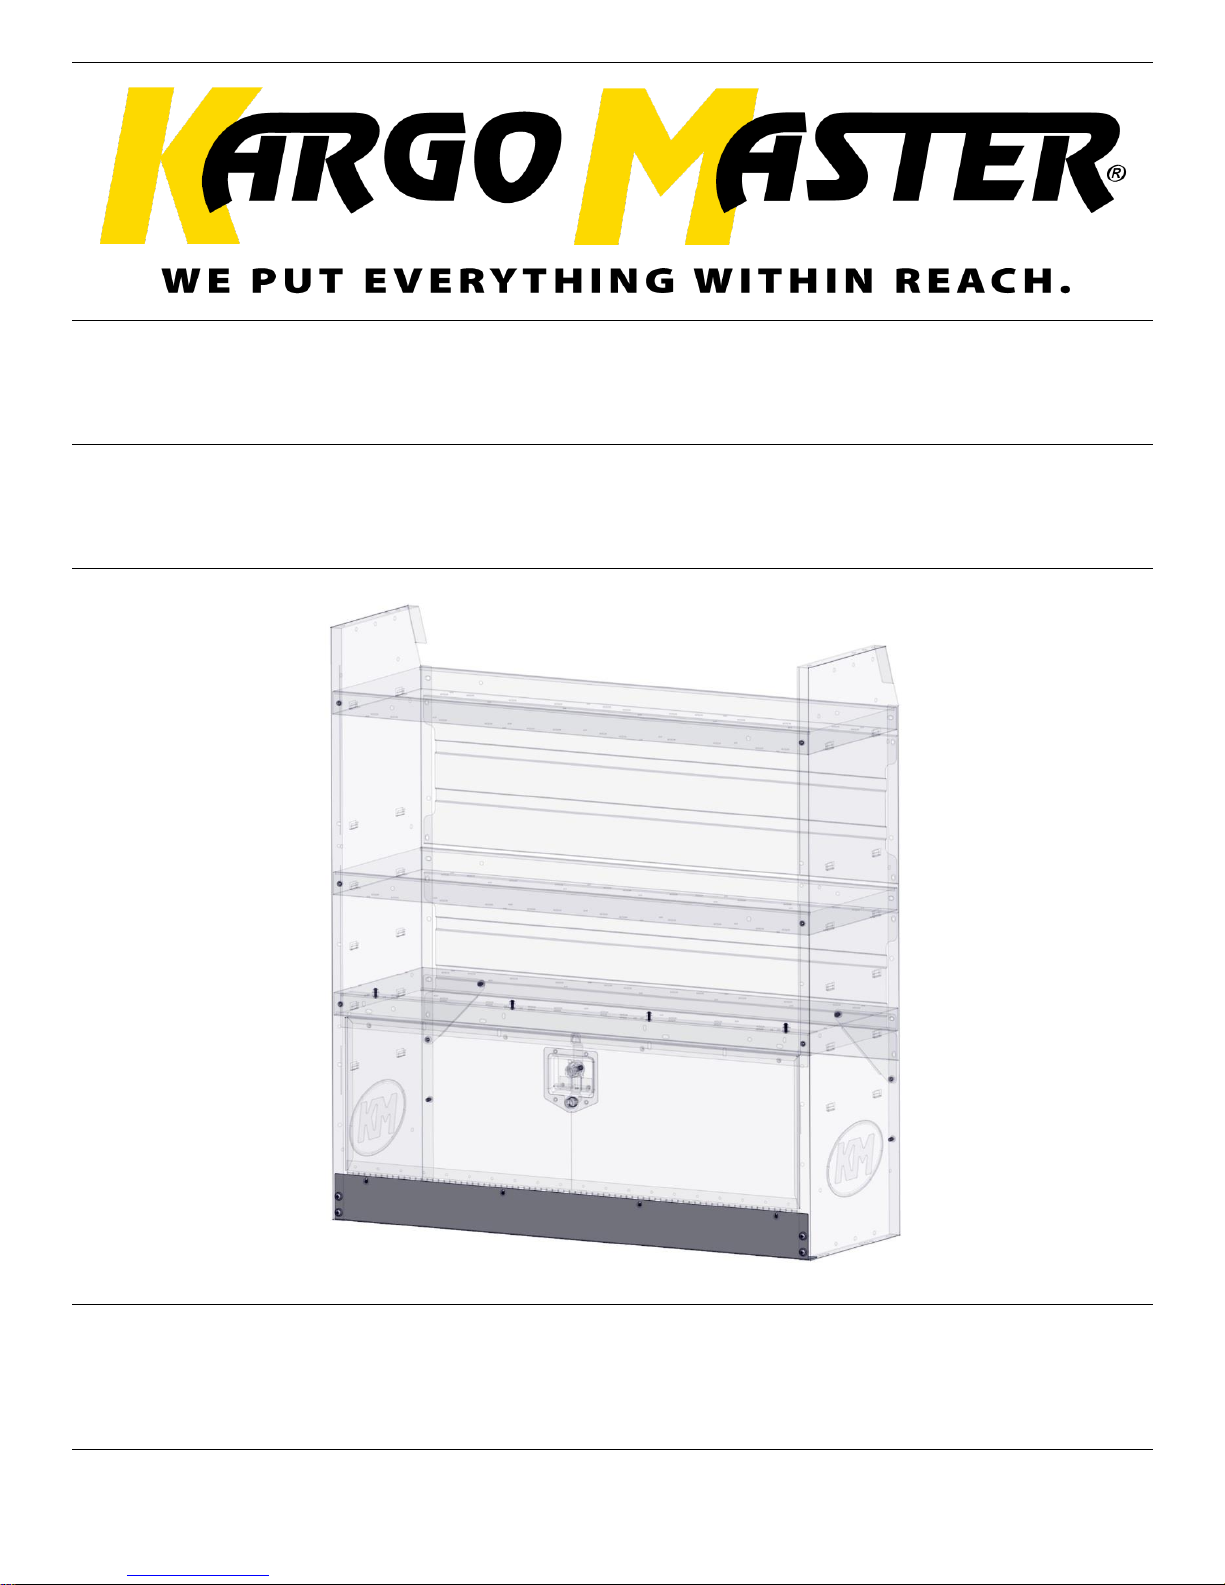
Installation Guide
48220
DATE: ______________
Page 2
For Technical Support Call: 800-343-7486 Monday-Friday 7AM - 4 PM (PST) Page 1
Install Instructions – 48220
*PLEASE READ ALL INSTRUCTIONS AND WARNINGS PRIOR TO ASSEMBLING,
INSTALLING, AND USING THIS PRODUCT*
Warning
Always check for wires, fuel tanks and lines, brake lines and other important vehicle
functionality items prior to drilling and installing all products.
Tools Needed
Phillips Driver
7/16” Wrench and Socket
Table of Contents
Parts List ................................................................................................................................... 2
Hardware List ........................................................................................................................... 2
Step 1 Place Shelf Lip in Position ............................................................................................. 3
Step 2 Install Door Kit (optional) .............................................................................................. 3
Before You Begin
• Read all instructions.
• Have shelf unit ready to install shelf lip.
• ENSURE SAFETY BEFORE DRILLING OR CUTTING
Page 3
For Technical Support Call: 800-343-7486 Monday-Friday 7AM - 4 PM (PST) Page 2
Install Instructions – 48220
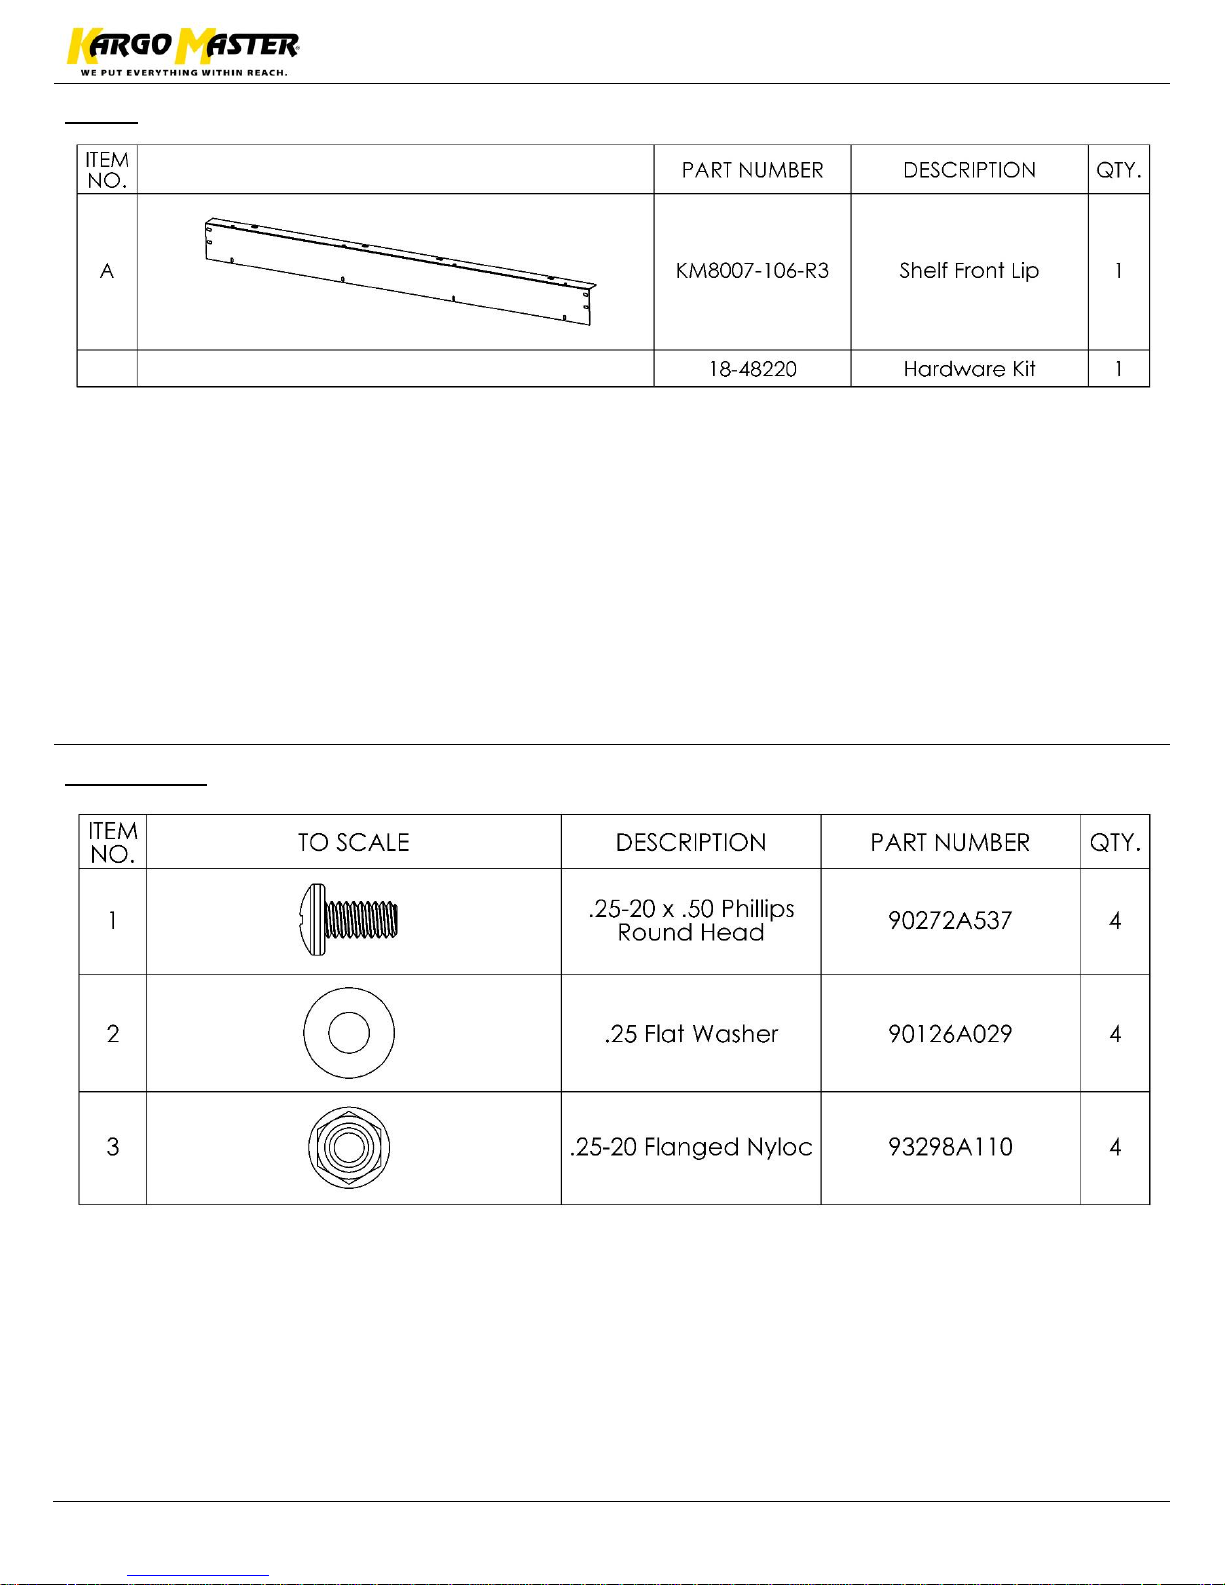
Parts
Hardware
Page 4
For Technical Support Call: 800-343-7486 Monday-Friday 7AM - 4 PM (PST) Page 3
Install Instructions – 48220
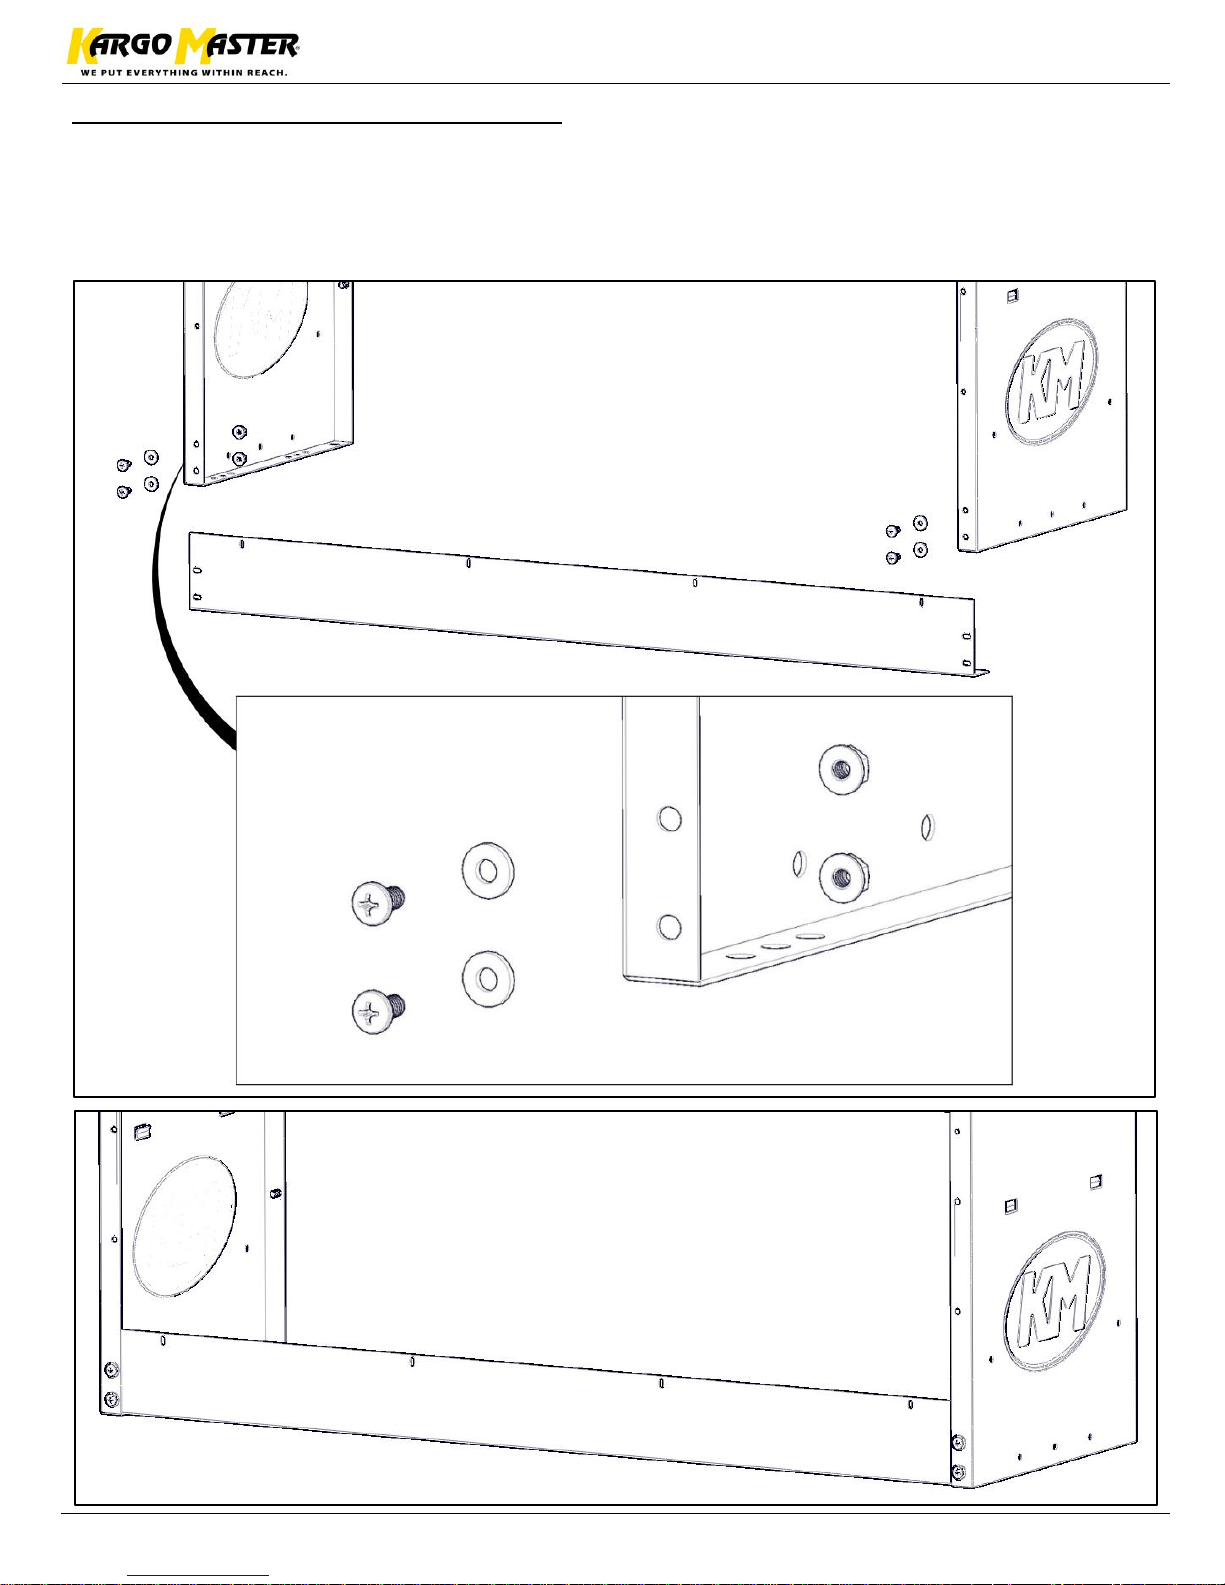
Step 1 – Place Shelf Lip in Position
• Place shelf lip in orientation shown at the bottom, front of the shelf assembly.
• Bolt shelf lip to shelf using .25 round head bolt, .25 flat washer and .25 flanged nyloc.
• The shelf lip goes inside of the lip on the shelf assembly.
• Snug Tighten, but allow movement.
Page 5
For Technical Support Call: 800-343-7486 Monday-Friday 7AM - 4 PM (PST) Page 4
Install Instructions – 48220
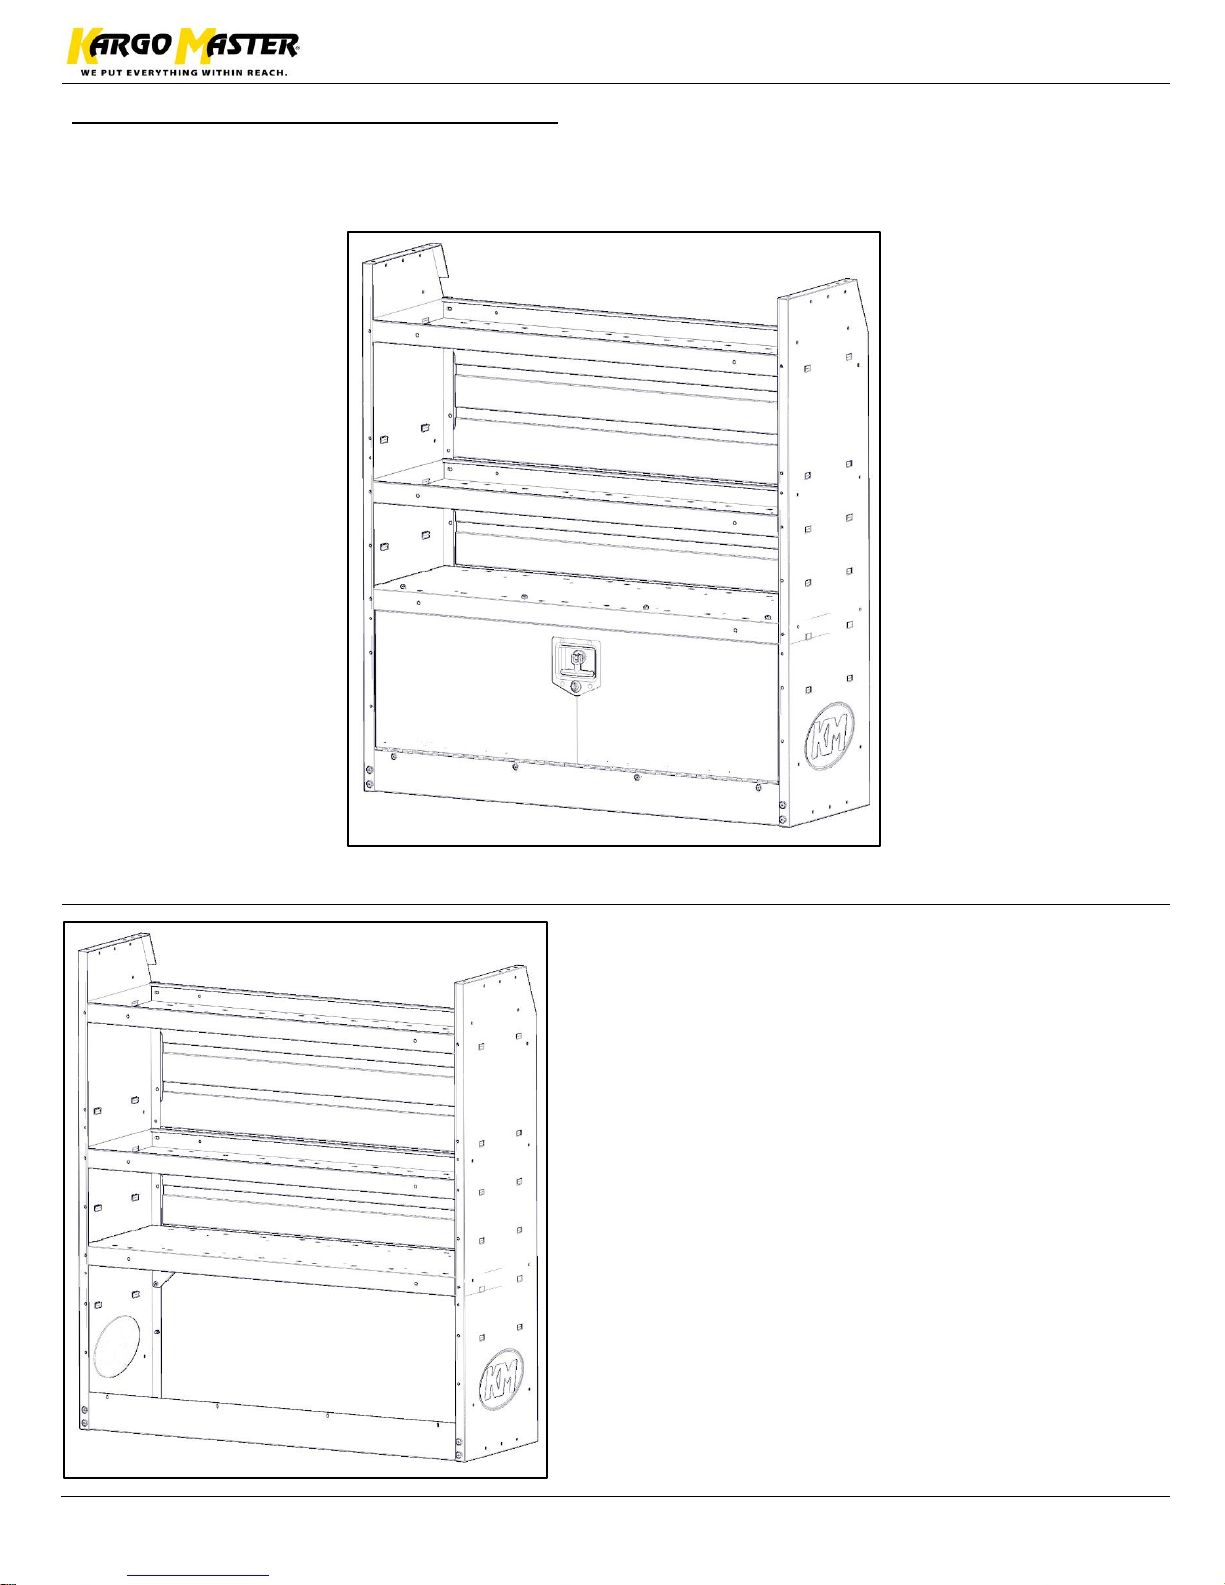
Step 2 – Install Door Kit (optional)
• Follow instructions from the door kit to install.
• Use previously installed shelf lip to mount door kit to.
Square and align to your liking.
Tighten all bolts from previous steps.
Your installation is now complete.
 Loading...