

Page 1
`
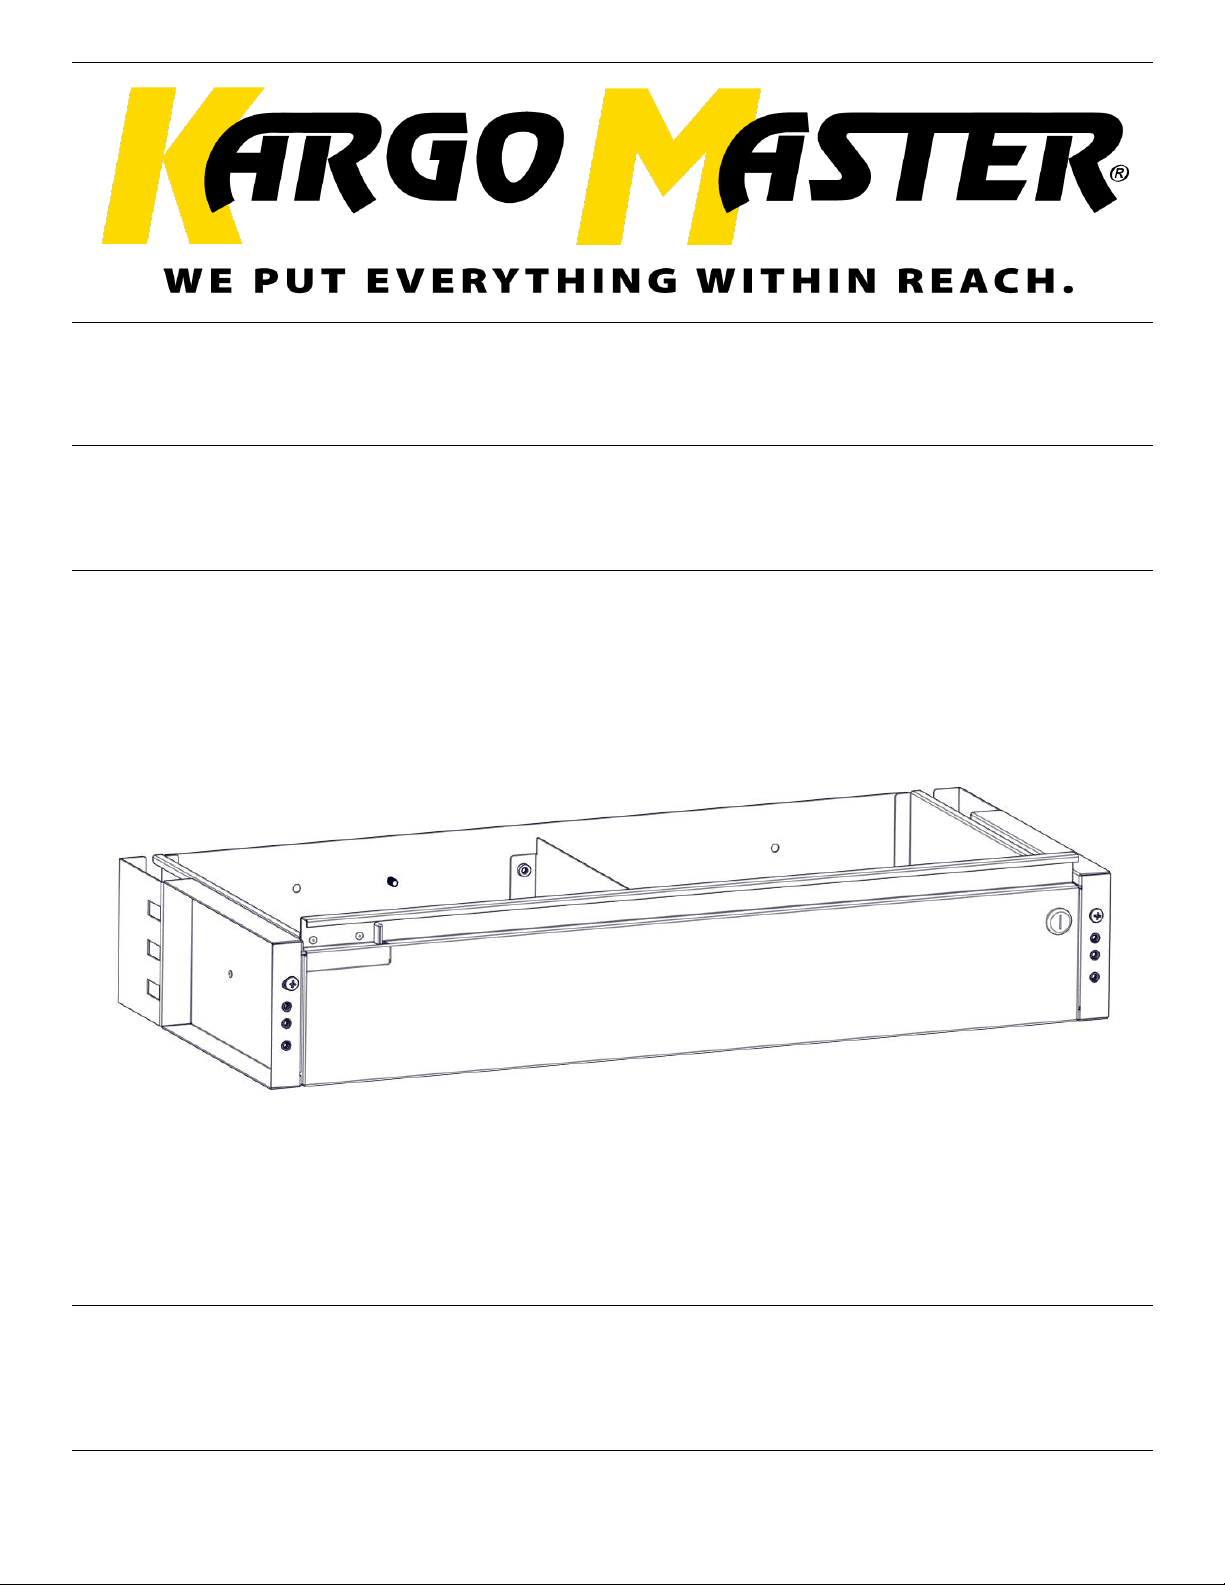
Installation Guide
48132
DATE: ______________
Page 2
For Technical Support Call: 800-343-7486 Monday-Friday 7AM - 4 PM (PST) Page 1
Installation Instructions – 48132
*PLEASE READ ALL INSTRUCTIONS AND WARNINGS PRIOR TO ASSEMBLING,
INSTALLING, AND USING THIS PRODUCT*
Warning
Always check for wires, fuel tanks and lines, brake lines and other important vehicle
functionality items prior to drilling and installing all products.
Tools Needed
Phillips Driver
Table of Contents
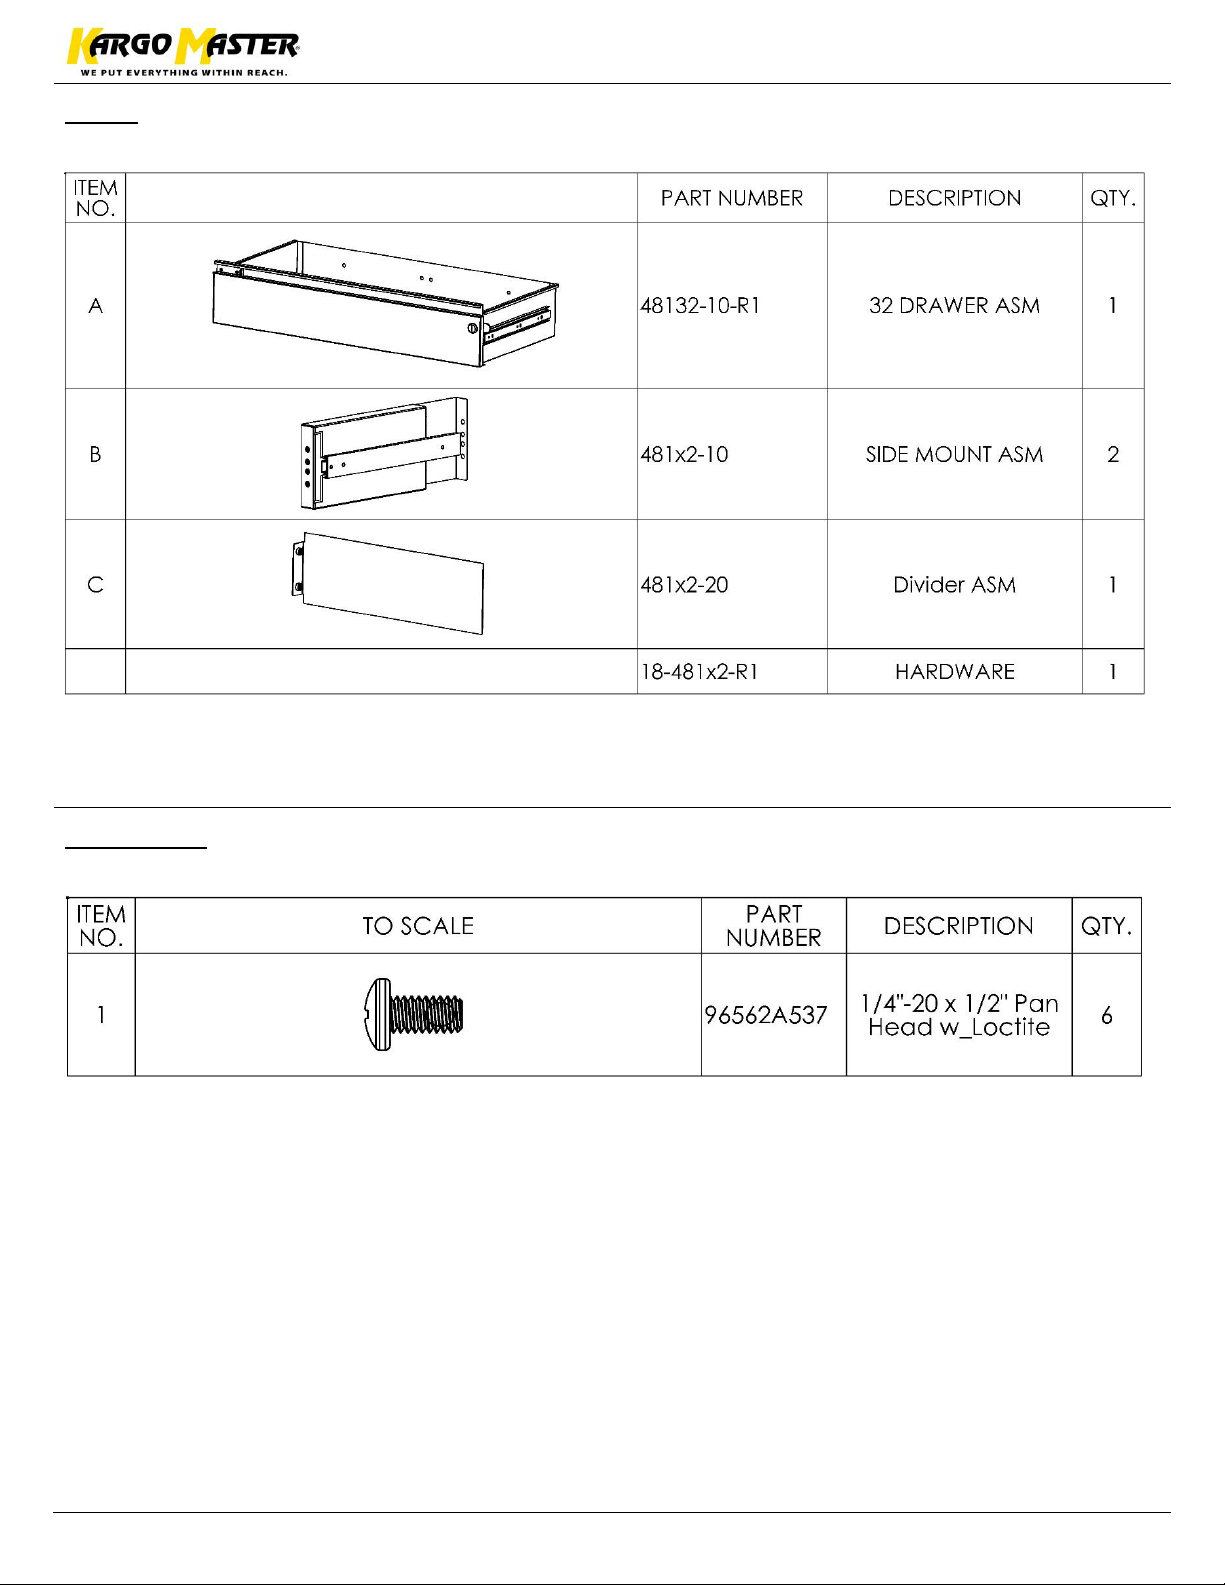
Parts List ................................................................................................................................... 2
Hardware List ........................................................................................................................... 2
Step 1 Slide Side Mounts Open .................................................................................................. 3
Step 2 Locate and Compress Latch ............................................................................................ 4
Step 3 Disengage Side Mount From Drawer .............................................................................. 5
Step 4 Find Location ................................................................................................................... 6
Step 5 Attach .............................................................................................................................. 6
Step 6 Divider ............................................................................................................................. 7
Step 7 Drawer ............................................................................................................................. 7
Before You Begin
• Read all instructions.
• Have 32”W shelf unit assembled.
Page 3
For Technical Support Call: 800-343-7486 Monday-Friday 7AM - 4 PM (PST) Page 2
Installation Instructions – 48132
Parts
Hardware
Page 4
For Technical Support Call: 800-343-7486 Monday-Friday 7AM - 4 PM (PST) Page 3
Installation Instructions – 48132
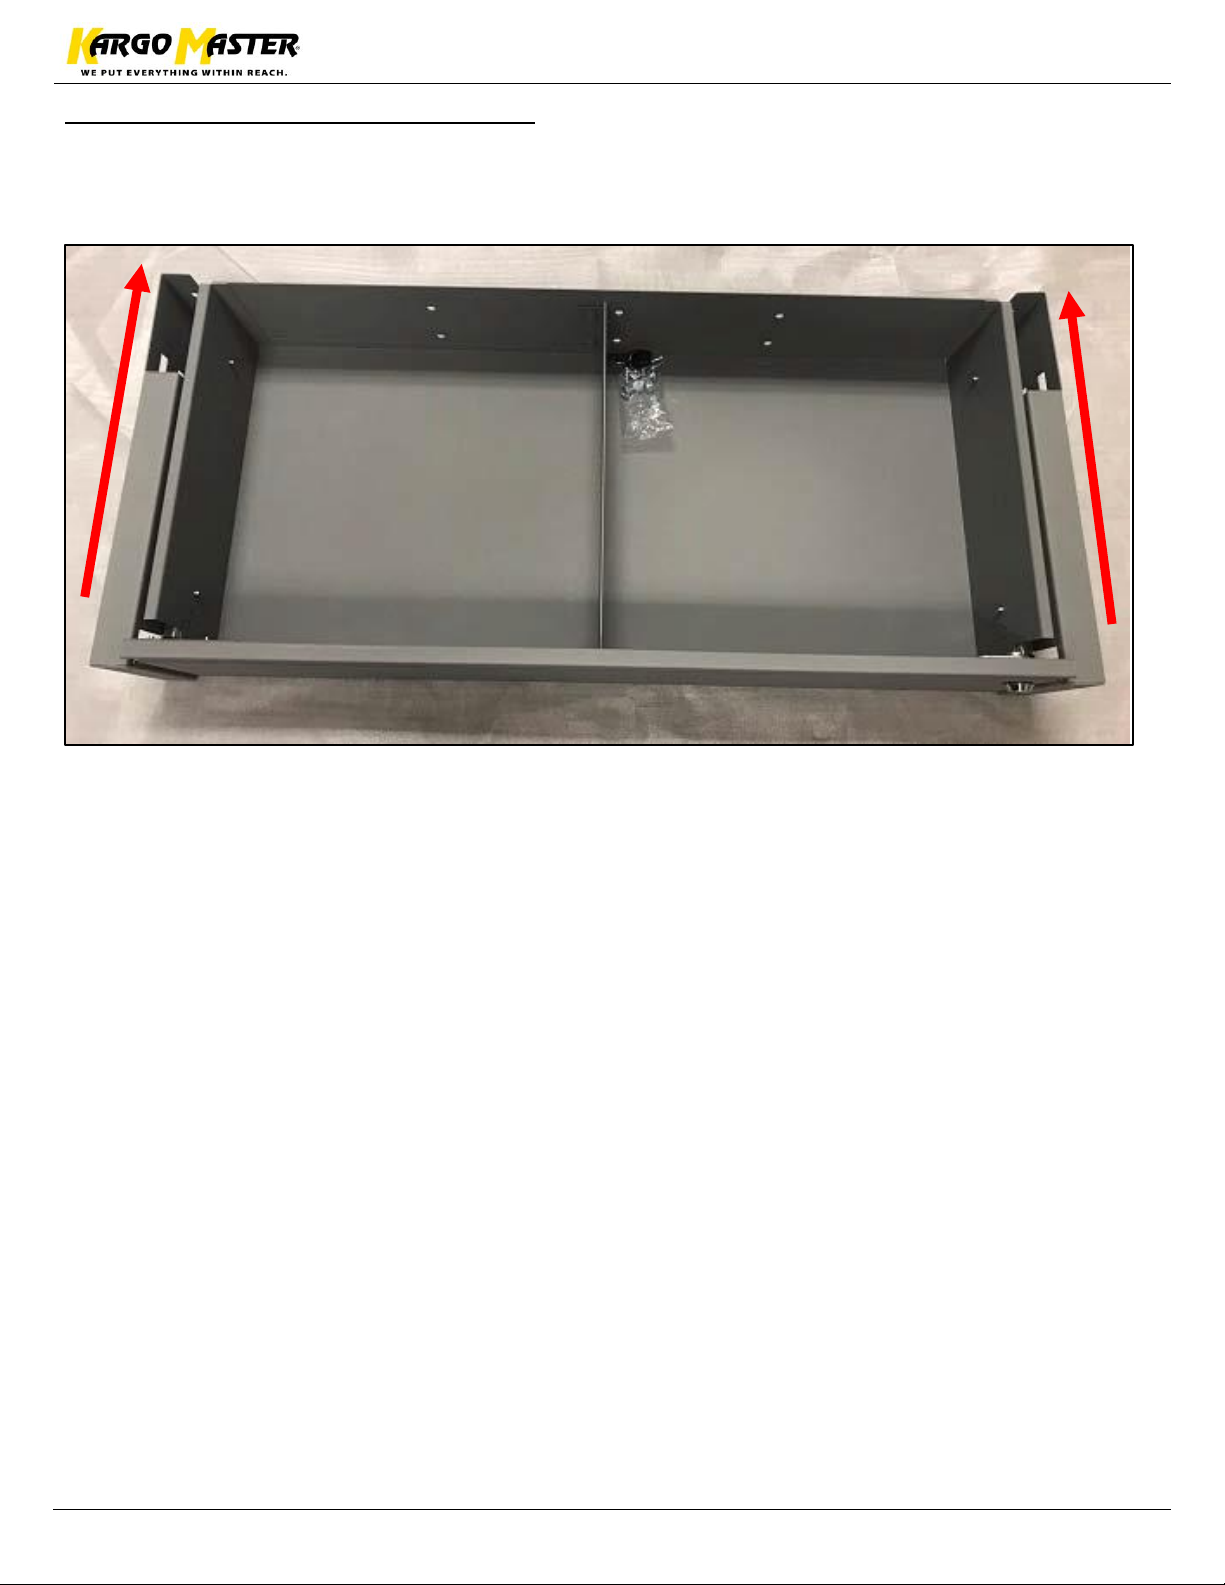
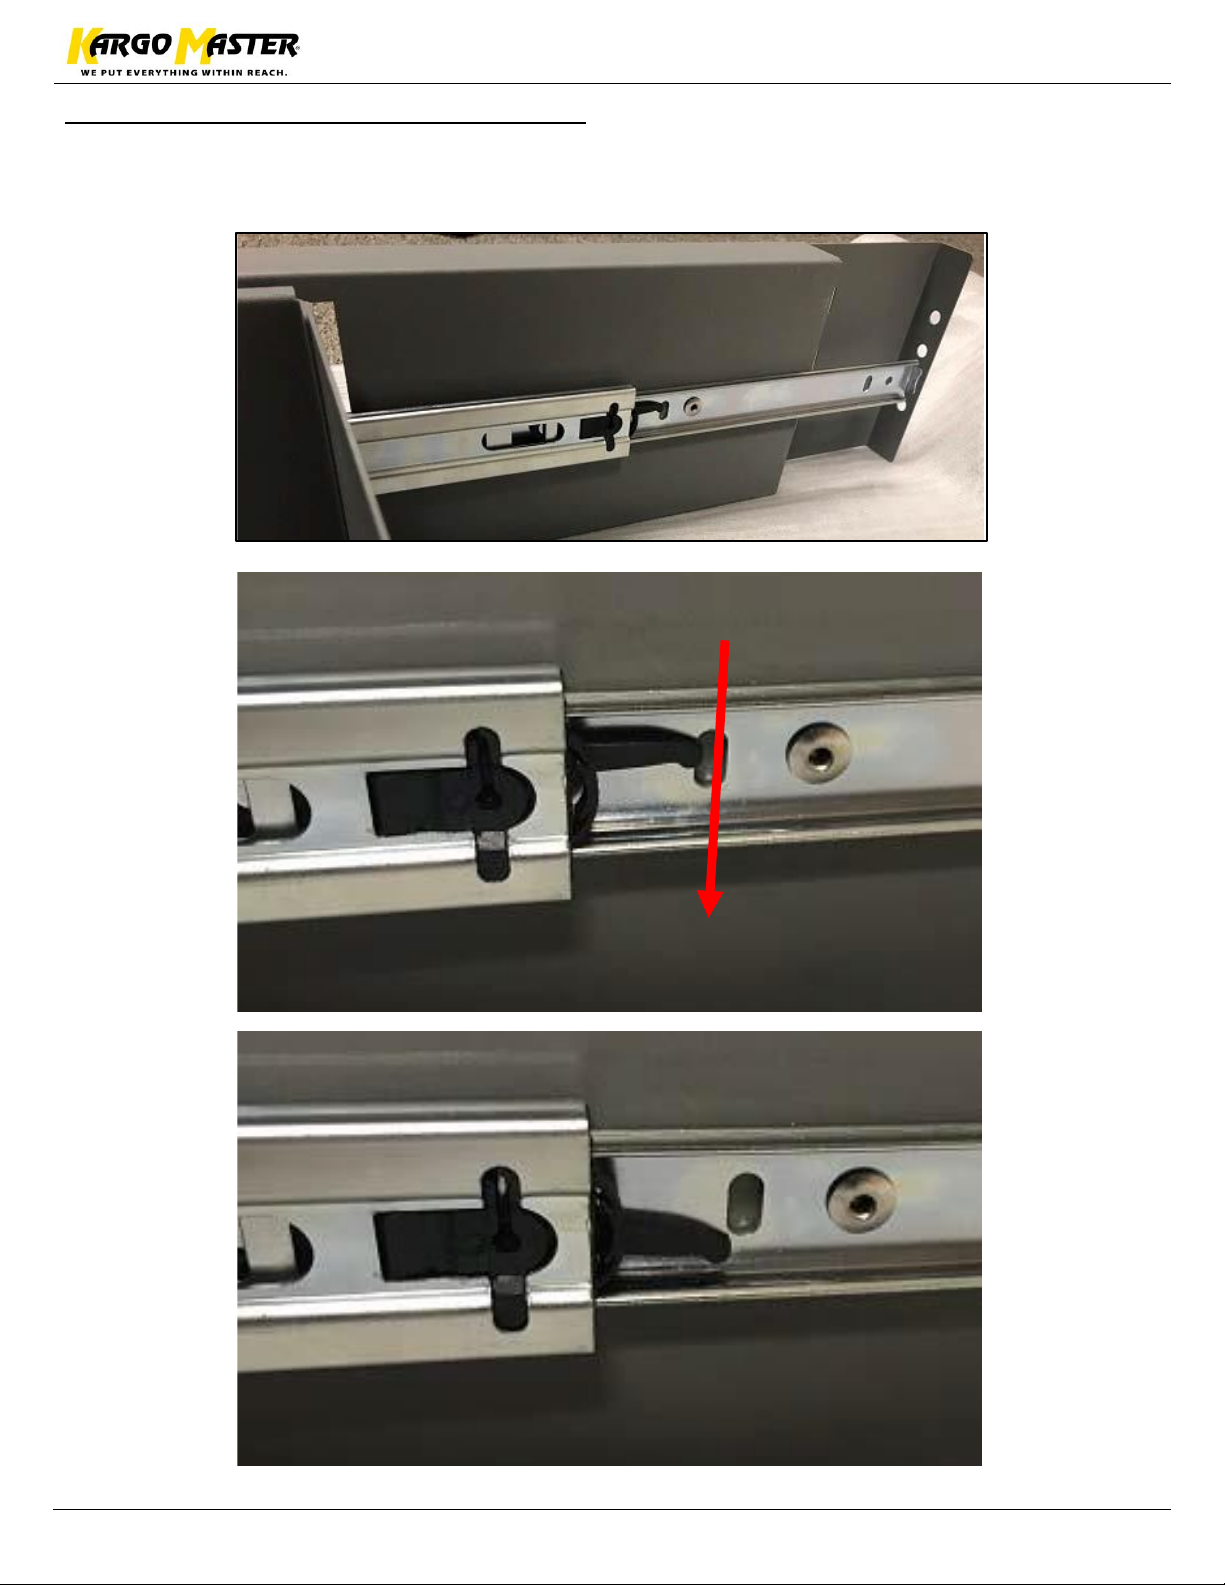
Step 1 – Slide Side Mounts Open
• The side brackets came from the package pre‐installed on the rails.
• Gently slide the side brackets to expose the rails.
Page 5
For Technical Support Call: 800-343-7486 Monday-Friday 7AM - 4 PM (PST) Page 4
Installation Instructions – 48132
Step 2 – Locate and Compress Latch
• Extend the side bracket all the way to view the latch. Gently click the latch to disengage the
rail. (Note: If the latch's original position is up, clip down to disengage and vice versa).
Page 6
For Technical Support Call: 800-343-7486 Monday-Friday 7AM - 4 PM (PST) Page 5
Installation Instructions – 48132
Step 3 – Disengage Side Mount From Drawer
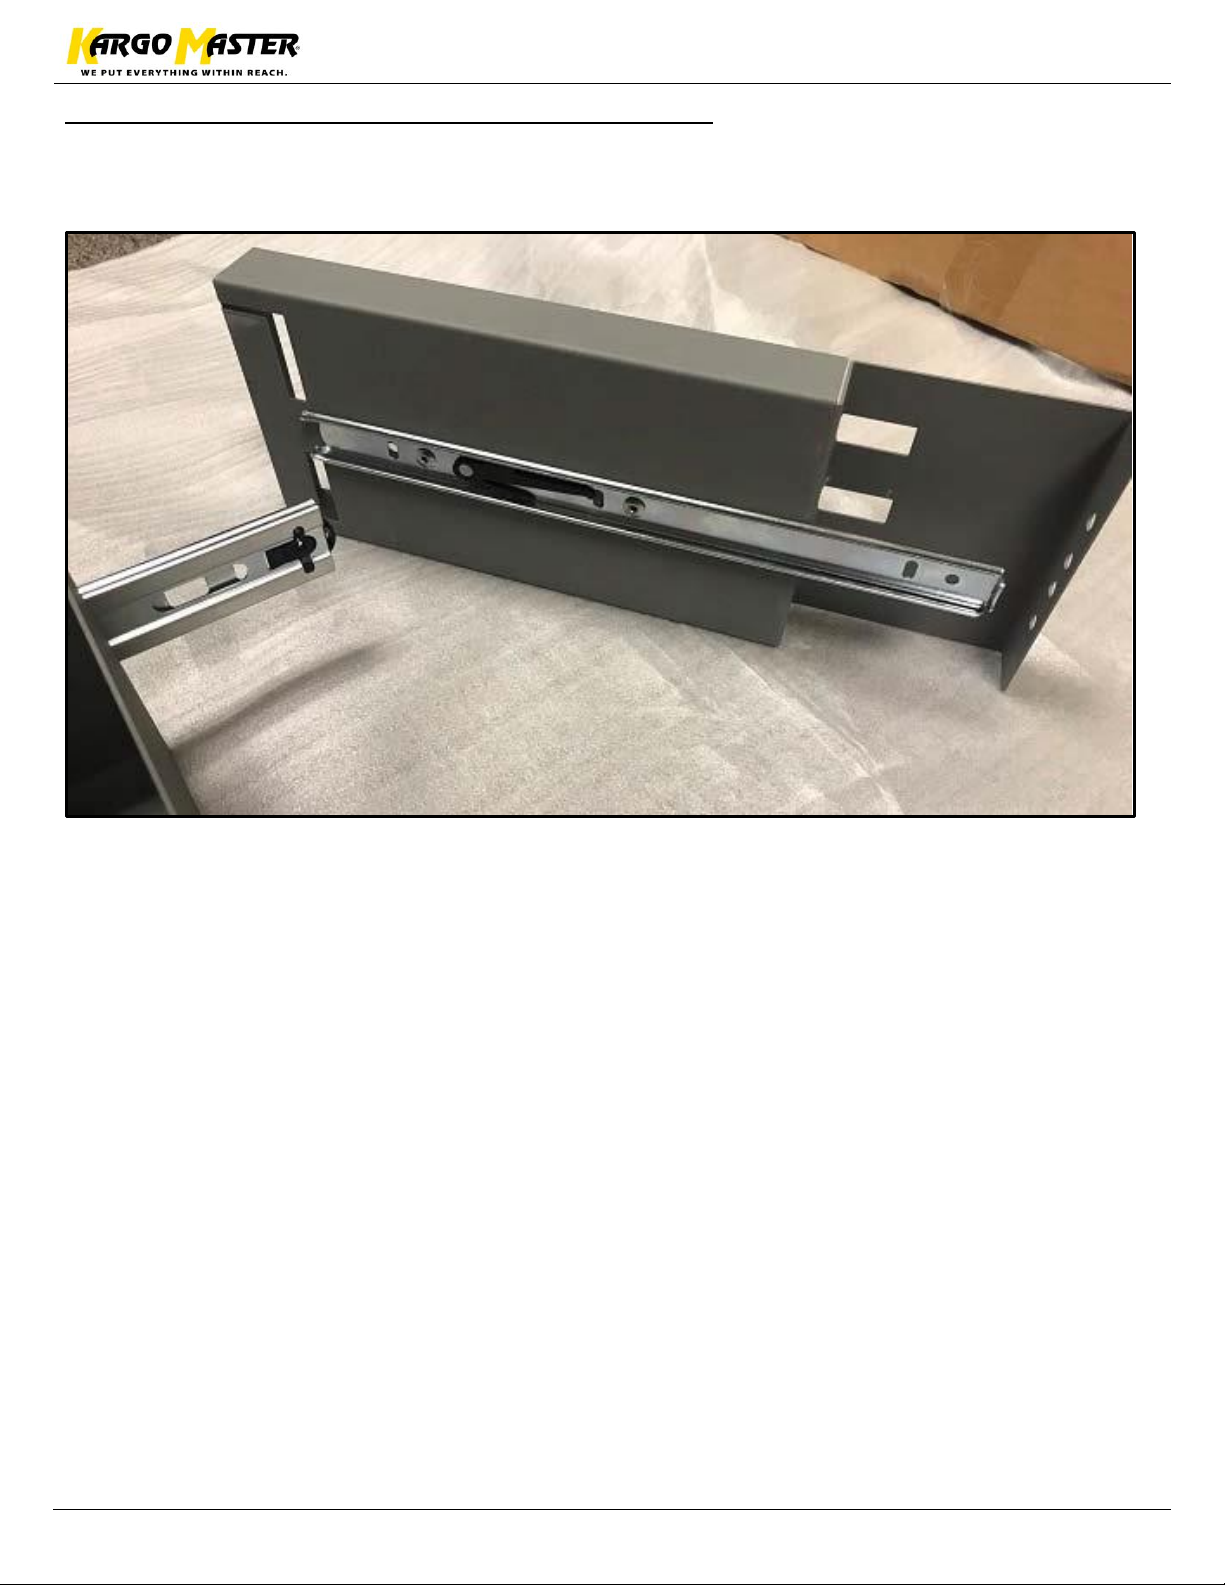
• Once disengaged, gently pull the side bracket back away from the drawer to detach the side
bracket completely.
• Repeat above steps to disengage both side brackets. Now you are able to follow the included
instructions and begin installation onto the shelf.
Page 7
For Technical Support Call: 800-343-7486 Monday-Friday 7AM - 4 PM (PST) Page 6
Installation Instructions – 48132
Step 4 – Find Location
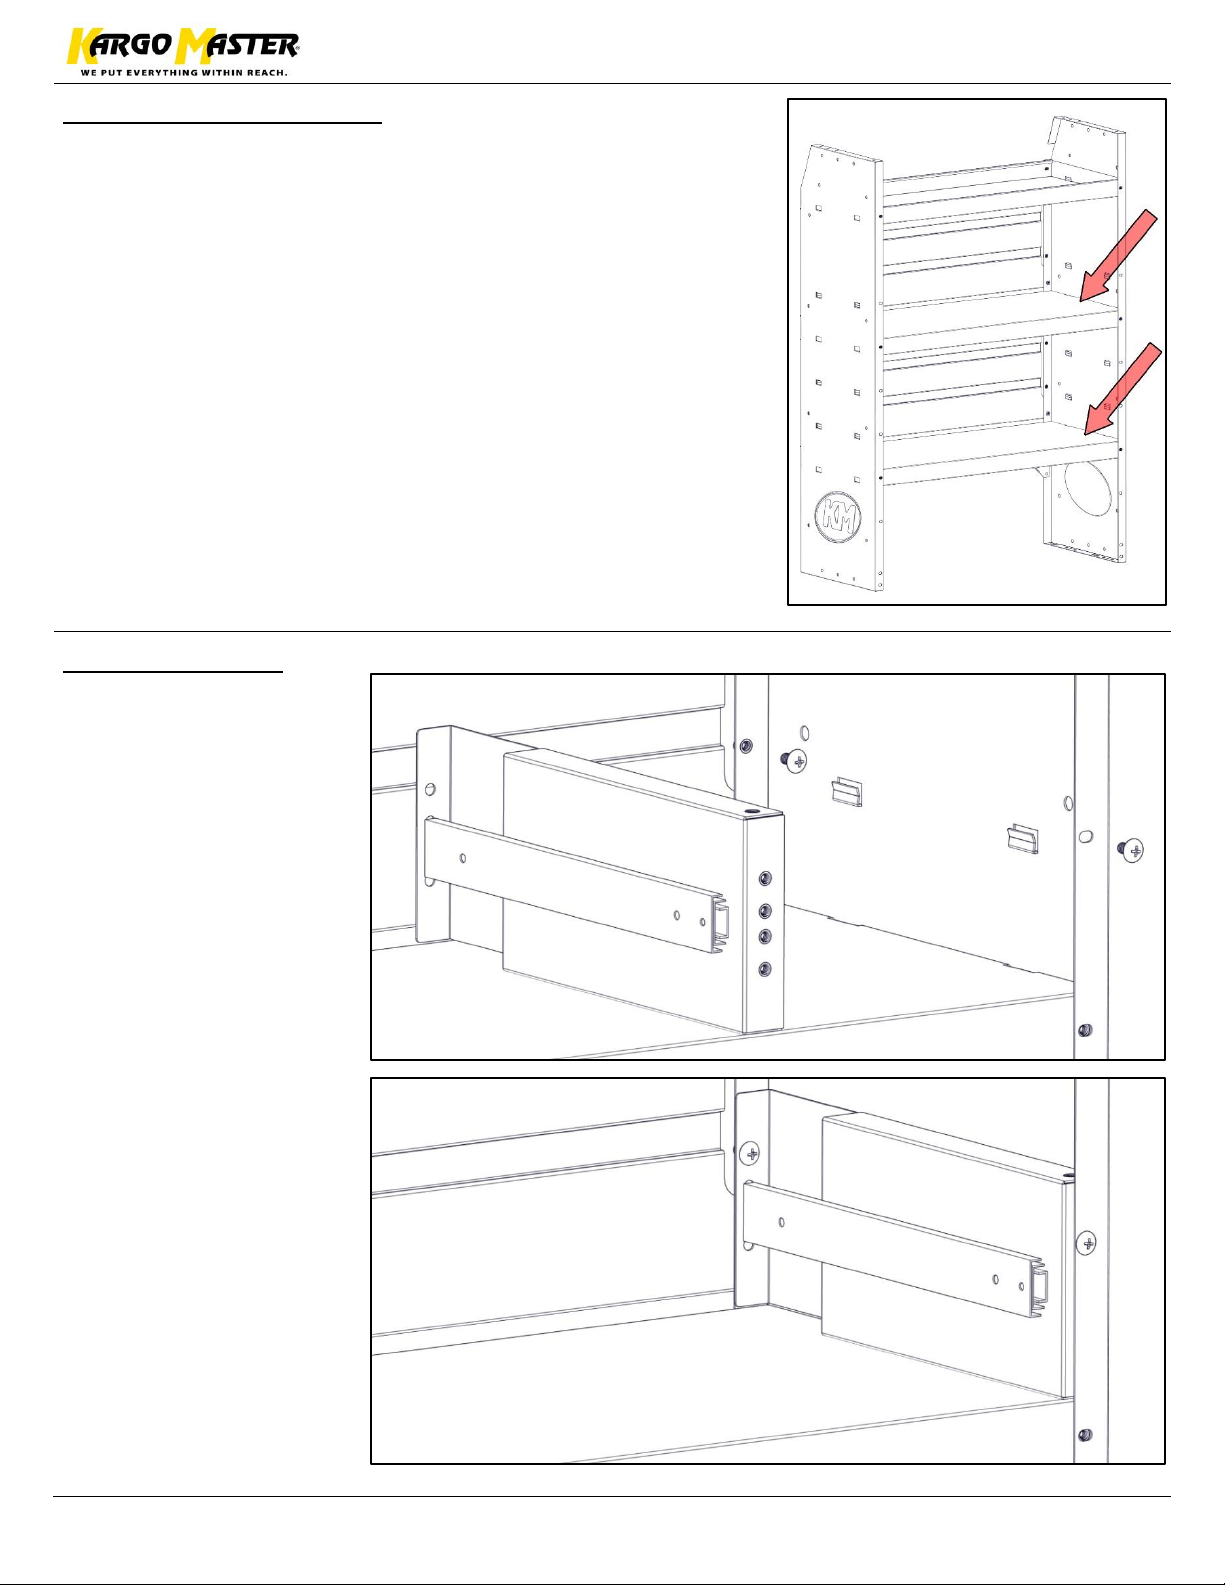
• Find desired location for shelf unit to be installed.
Step 5 – Attach
• Place install asm (B)
into shelf unit in the
orientation shown.
• Be sure the install
asm hooks on the
flange on the inner
shelf.
• Align the hole in the
shelf unit with the
pem in the install
asm.
• Screw in using 1/4" x
1/2" Pan Head Screw
(1).
• TIGHTEN rear screw.
• Snug Tighten front
screw.
• Repeat on both sides.
Page 8
For Technical Support Call: 800-343-7486 Monday-Friday 7AM - 4 PM (PST) Page 7
Installation Instructions – 48132
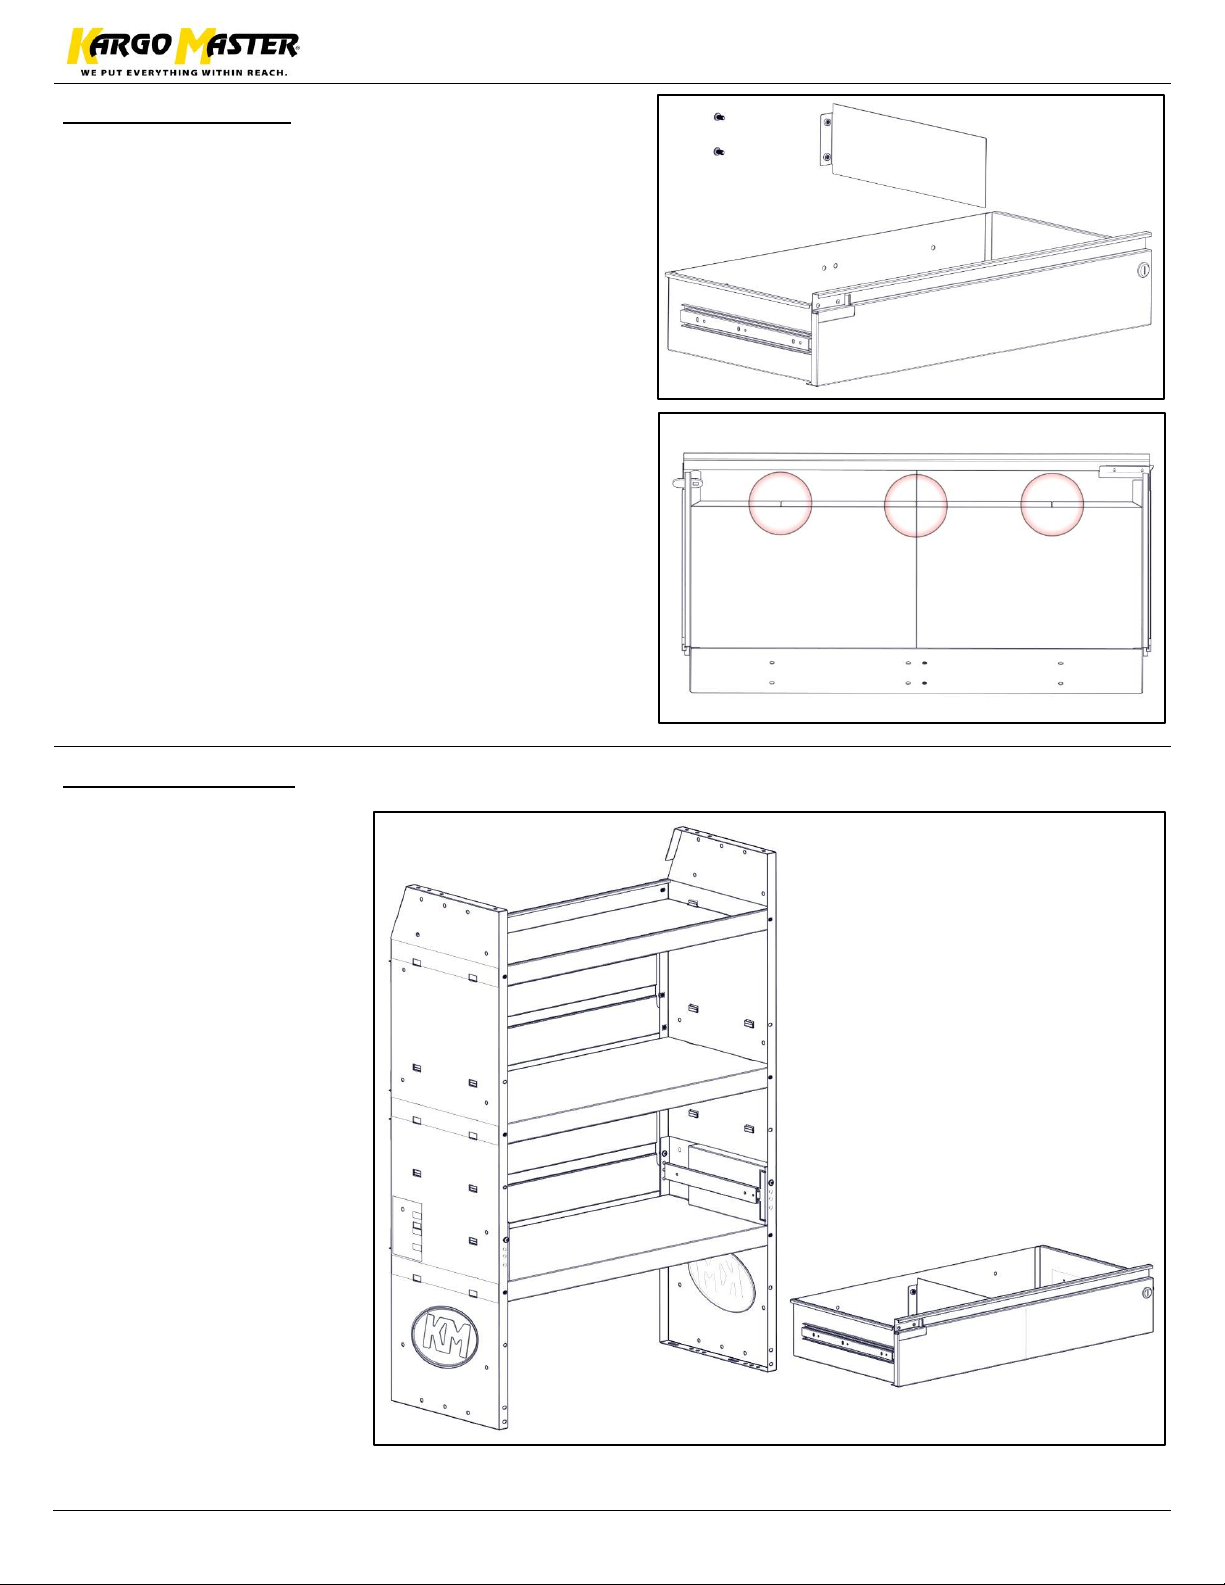
Step 6 – Divider
• Install divider asm (C) to drawer asm (A). Bolt
into place using 1/4" x 1/2" pan head screw (1).
• There are multiple locations where divider can
be installed.
• Be sure the front of the divider goes into the
slot of the drawer asm.
Step 7 – Drawer
• Install drawer asm (A)
to the previously
installed install asm
(B).
• Align both sides of the
slides and attach
together.
Page 9
For Technical Support Call: 800-343-7486 Monday-Friday 7AM - 4 PM (PST) Page 8
Installation Instructions – 48132
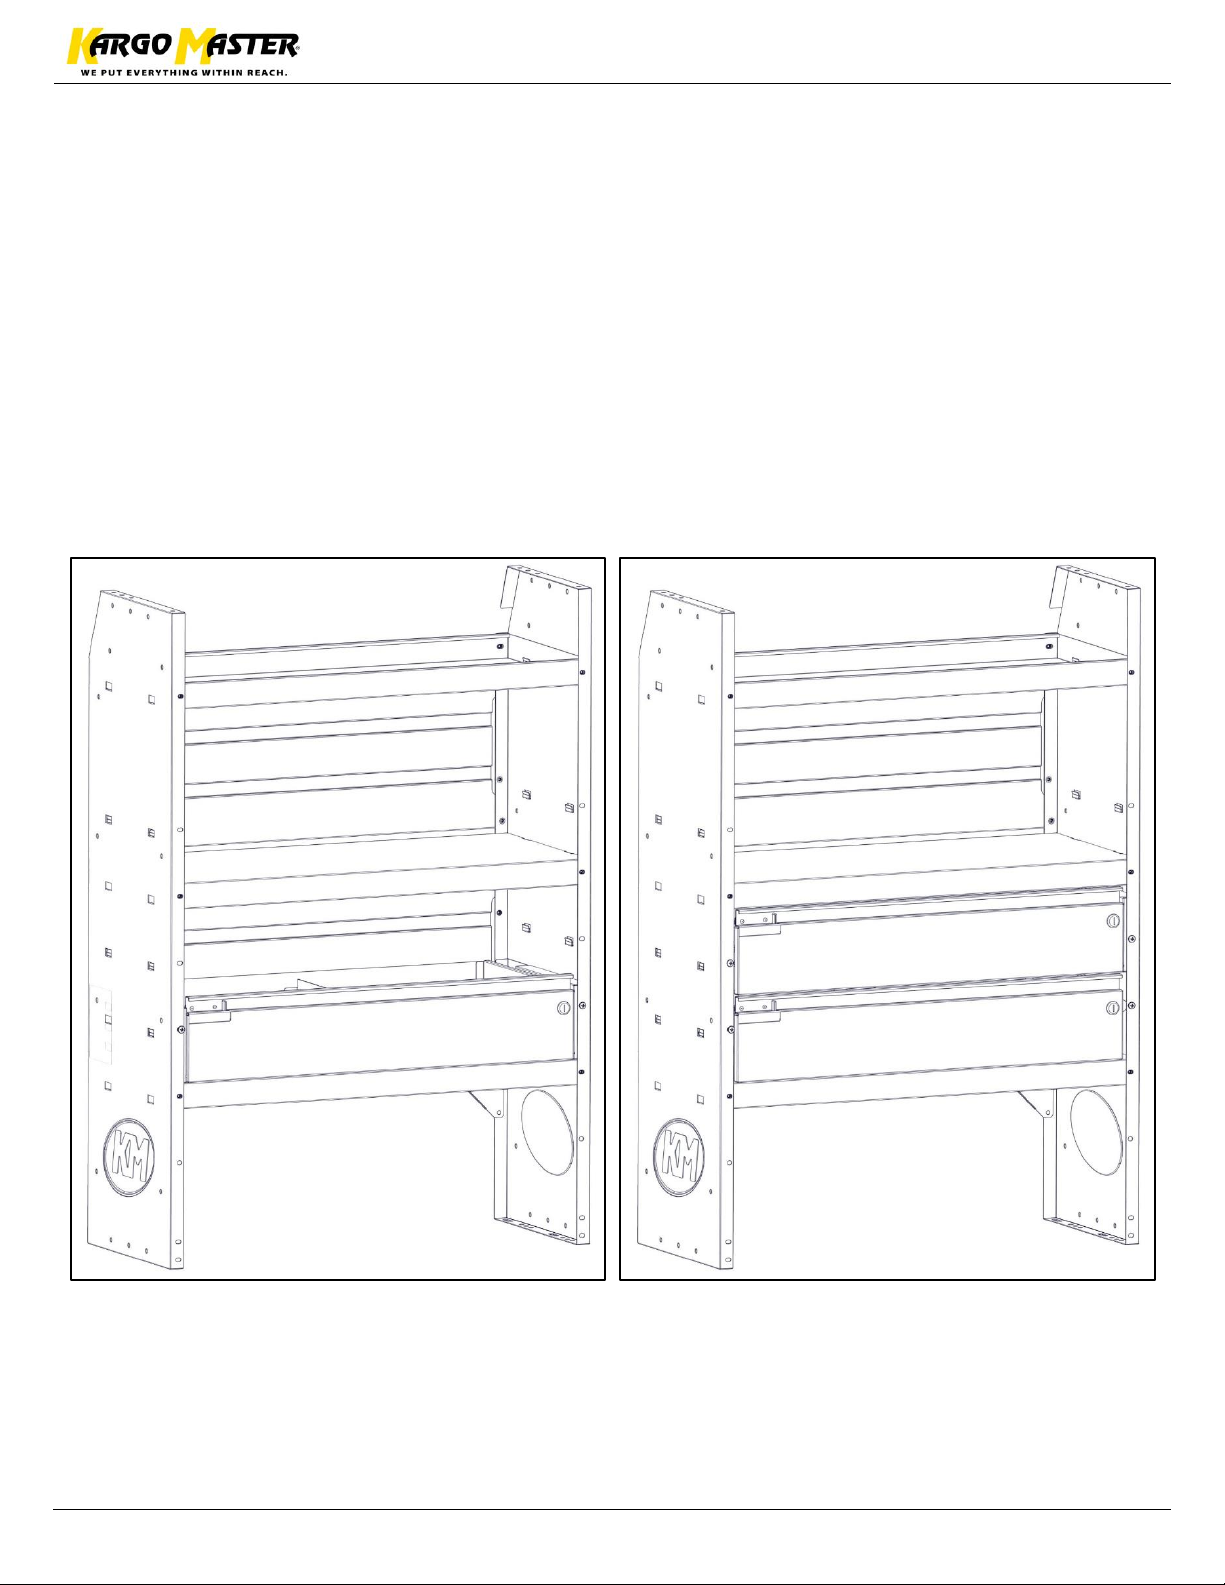
Multiple shelf units may be installed in a variety of different
locations. Some examples are shown below.
Ensure all bolts are tight. Your Installation is now complete.
 Loading...