

Page 1
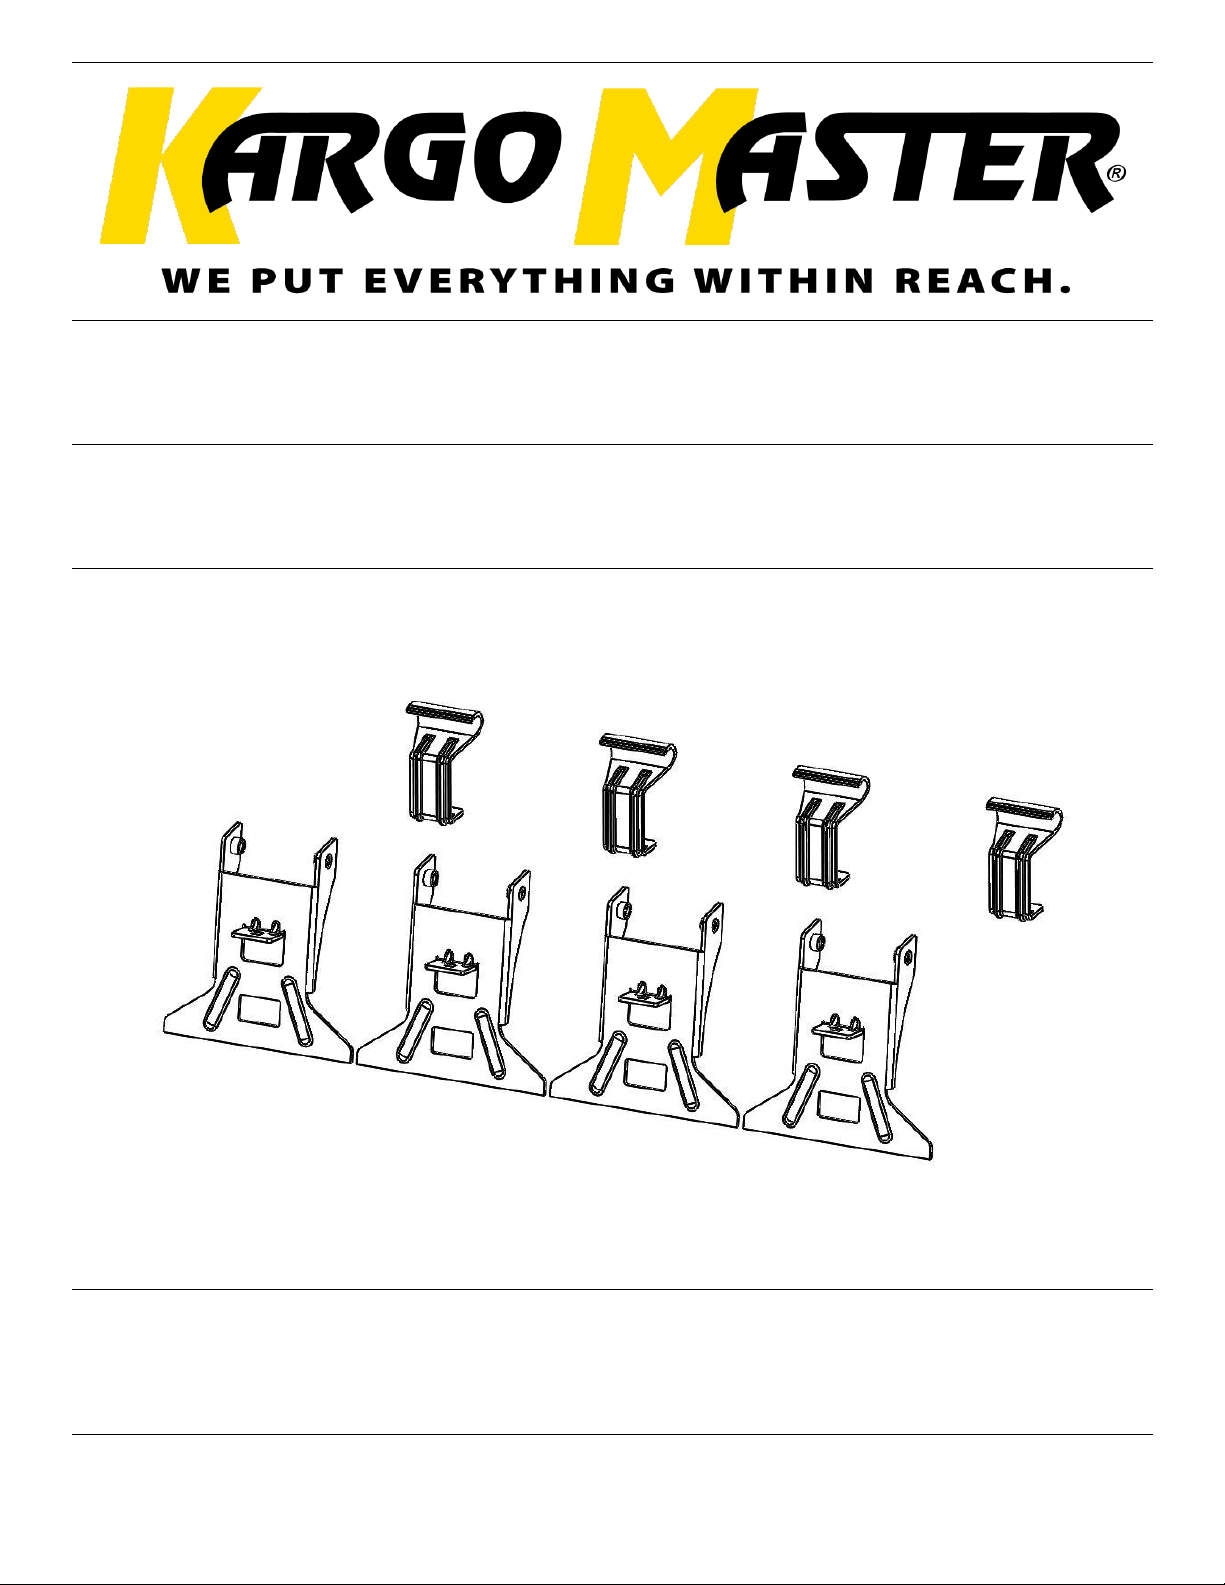
Installation Guide
409CD
DATE: ______________
Page 2
For Technical Support Call: 800-343-7486 Monday-Friday 7AM - 4 PM (PST) Page 1
Installation Instructions – 409CD
*PLEASE READ ALL INSTRUCTIONS AND WARNINGS PRIOR TO ASSEMBLING,
INSTALLING, AND USING THIS PRODUCT*
Warning
Always check for wires, fuel tanks and lines, brake lines and other important vehicle
functionality items prior to drilling and installing all products.
Tools Needed
9/16” Socket and Wrench
1/2” Socket and Wrench
Table of Contents
Parts List ................................................................................................................................... 2
Hardware List ........................................................................................................................... 3
Step 1 – Foot Attachment ........................................................................................................ 4
Step 2 – Assemble Top Tray ..................................................................................................... 4
Step 3 – Assemble Floor Mounts ............................................................................................. 5
Step 4 – Install into Vehicle ...................................................................................................... 5
Before You Begin
• Read all instructions.
• Have desired ladder rack ready to be installed.
Page 3
For Technical Support Call: 800-343-7486 Monday-Friday 7AM - 4 PM (PST) Page 2
Installation Instructions – 409CD
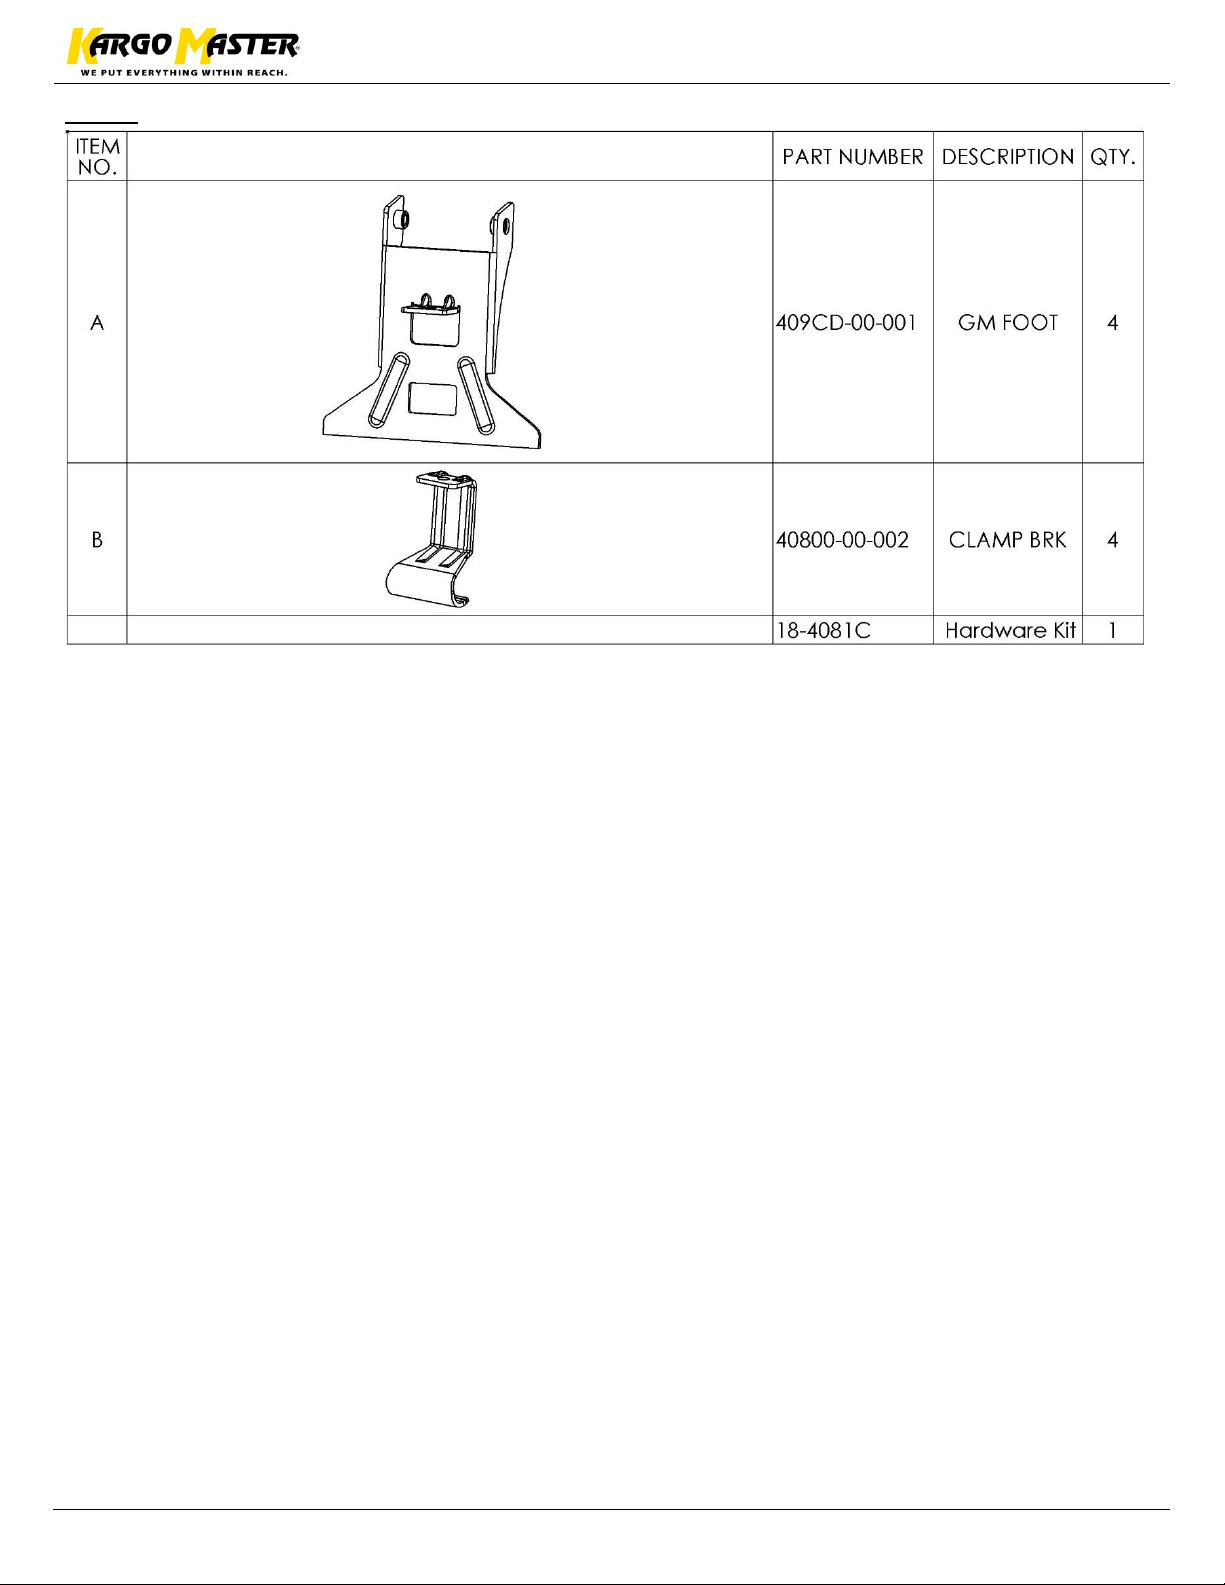
Parts
Page 4
For Technical Support Call: 800-343-7486 Monday-Friday 7AM - 4 PM (PST) Page 3
Installation Instructions – 409CD
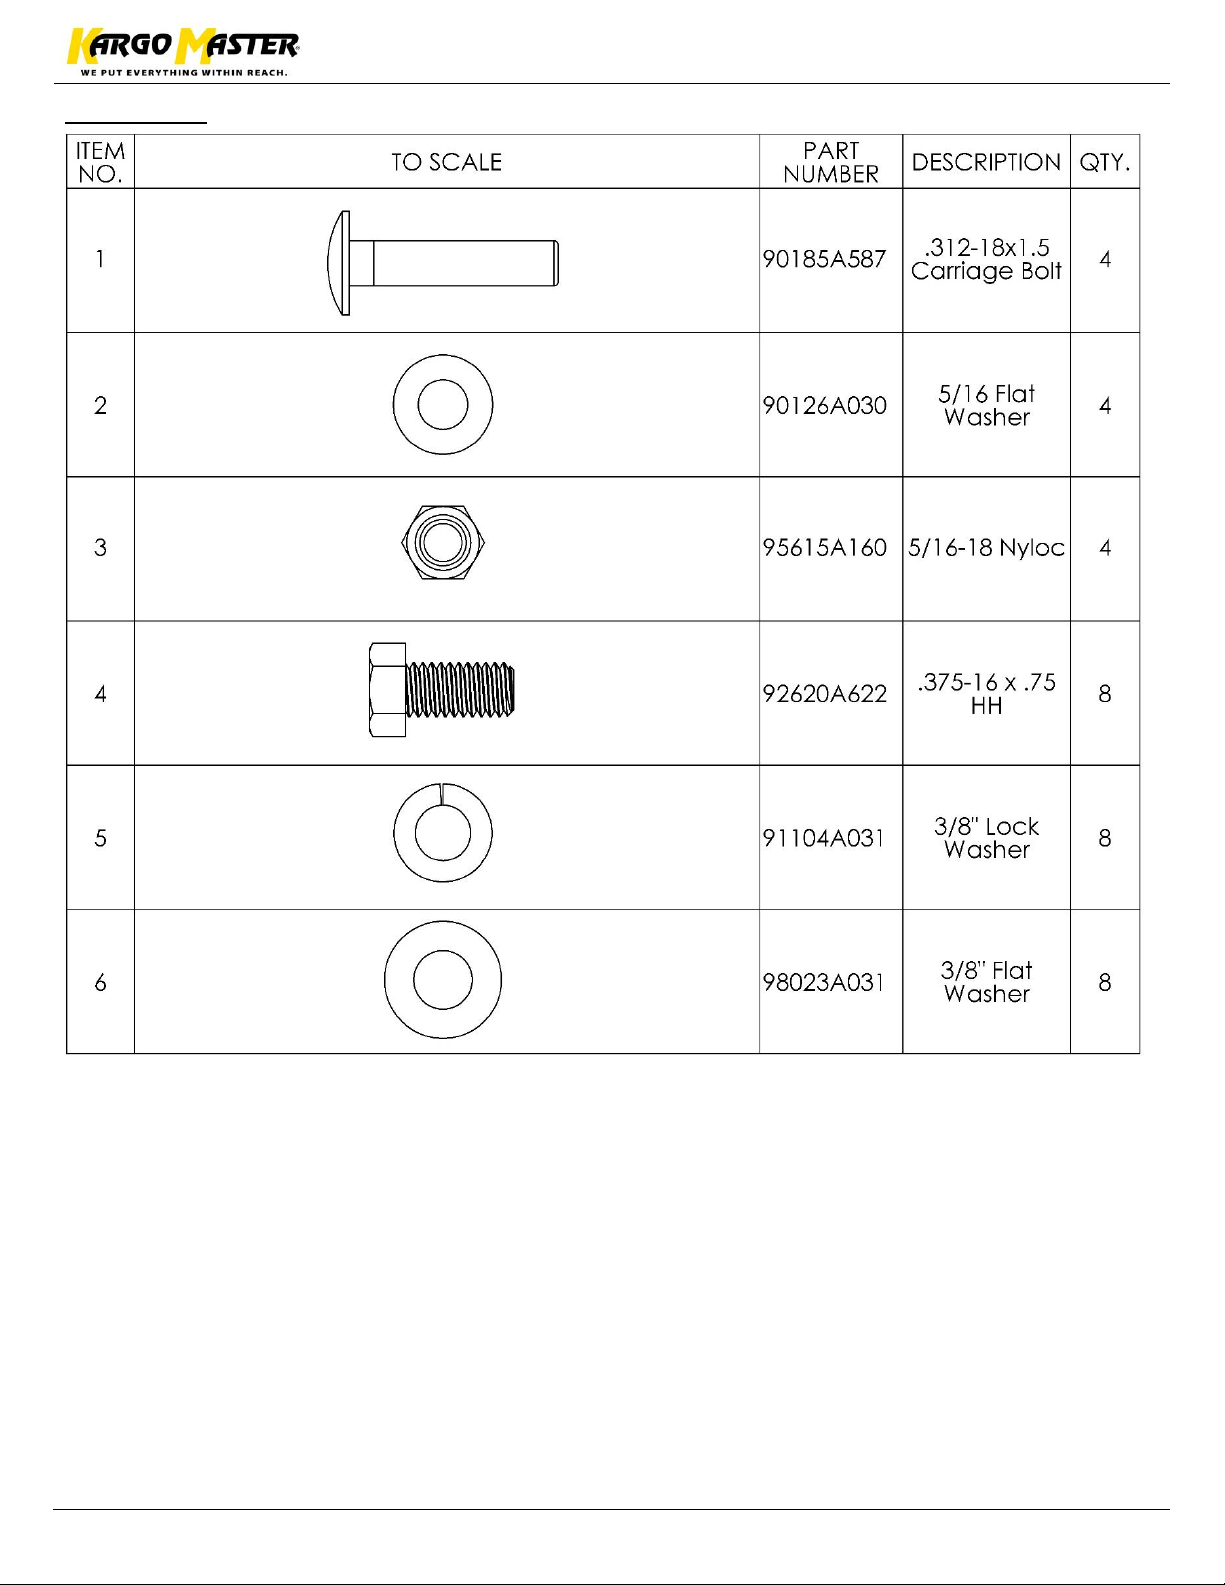
Hardware
Page 5
For Technical Support Call: 800-343-7486 Monday-Friday 7AM - 4 PM (PST) Page 4
Installation Instructions – 409CD
Step 1 – Foot Attachment
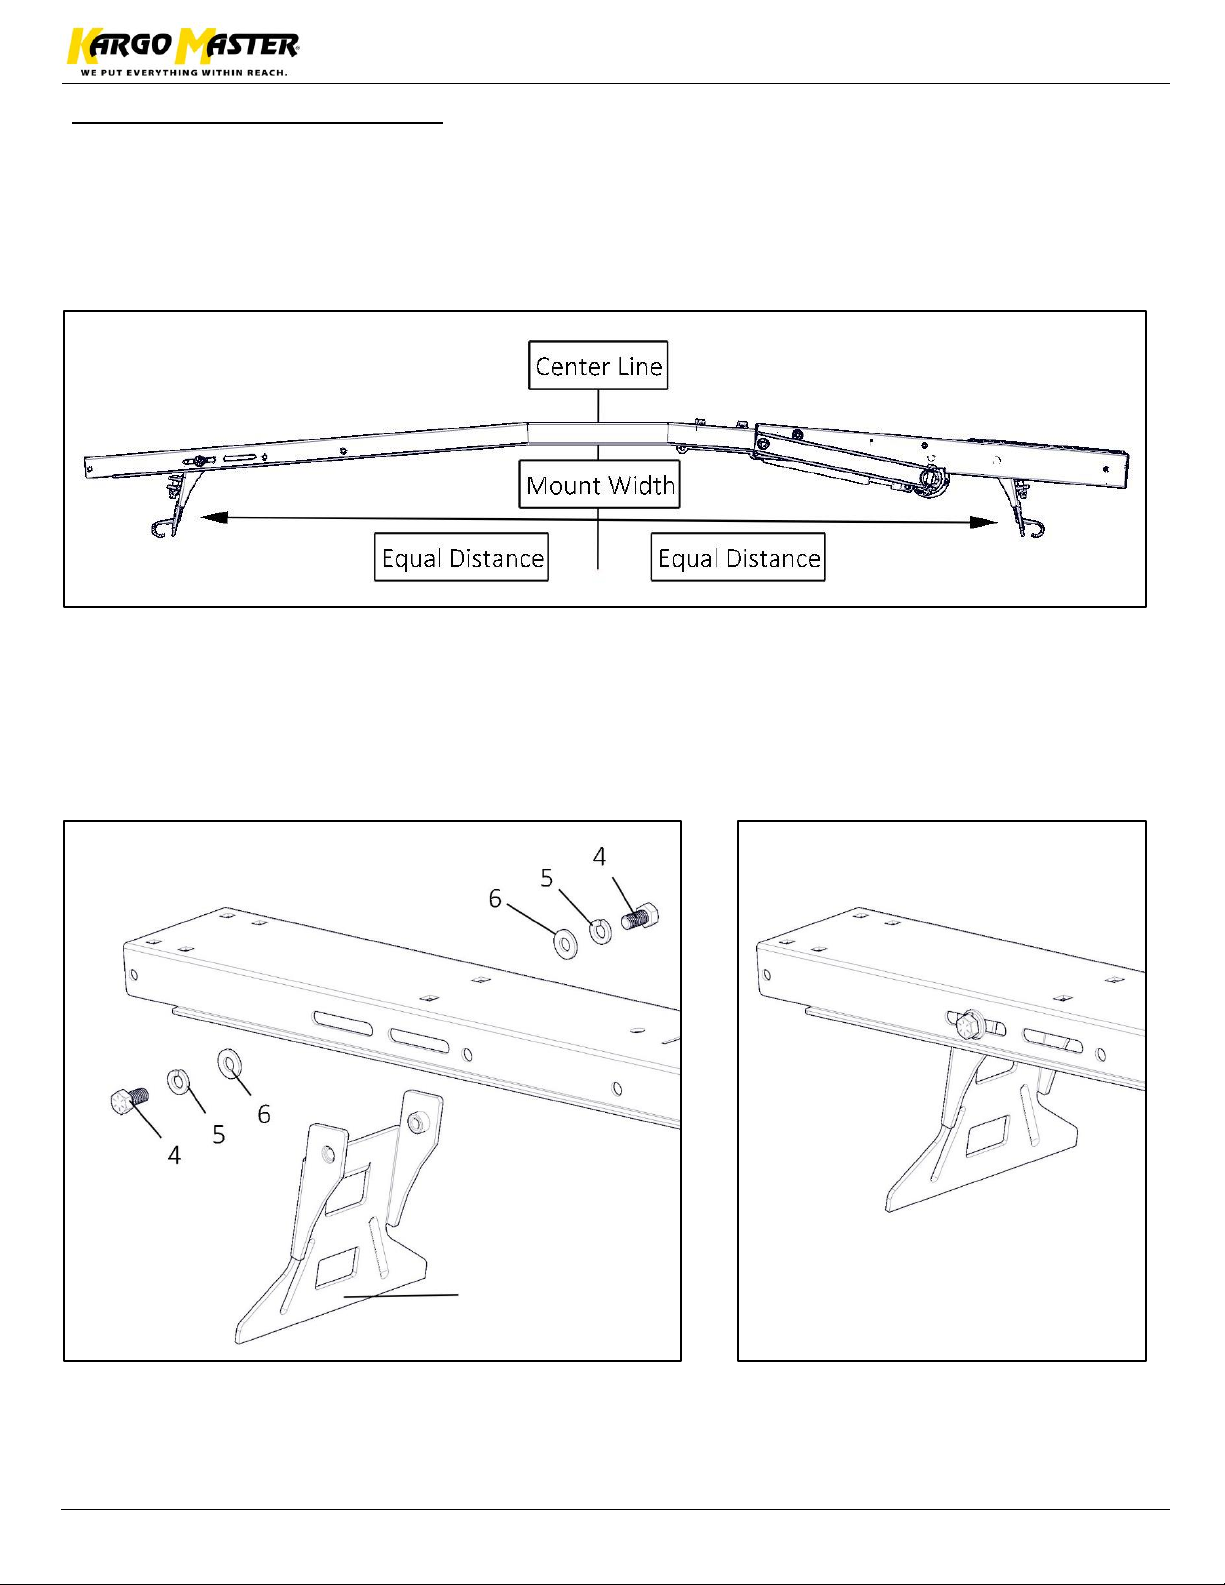
• Measure width of rain gutter on van, front and rear, typically they differ.
• Approximately at that width measured from the rain gutter, find the corresponding slots on
the ladder rack cross bow and attach mounting foot as shown. Be sure there is an equal
distance from the center of the cross bow to each foot.
• Attach GM Foot (A) to both sides of each bow using 3/8" x 3/4" hex bolts (4) with lock
washers (5) and flat washers (6) as shown.
• Leave loose until you set the assembly onto the vehicle. Most vans have a wider rain gutter at
the front of the vehicle.
A
Page 6
For Technical Support Call: 800-343-7486 Monday-Friday 7AM - 4 PM (PST) Page 5
Installation Instructions – 409CD
Step 2 – Attach to Rain Gutter
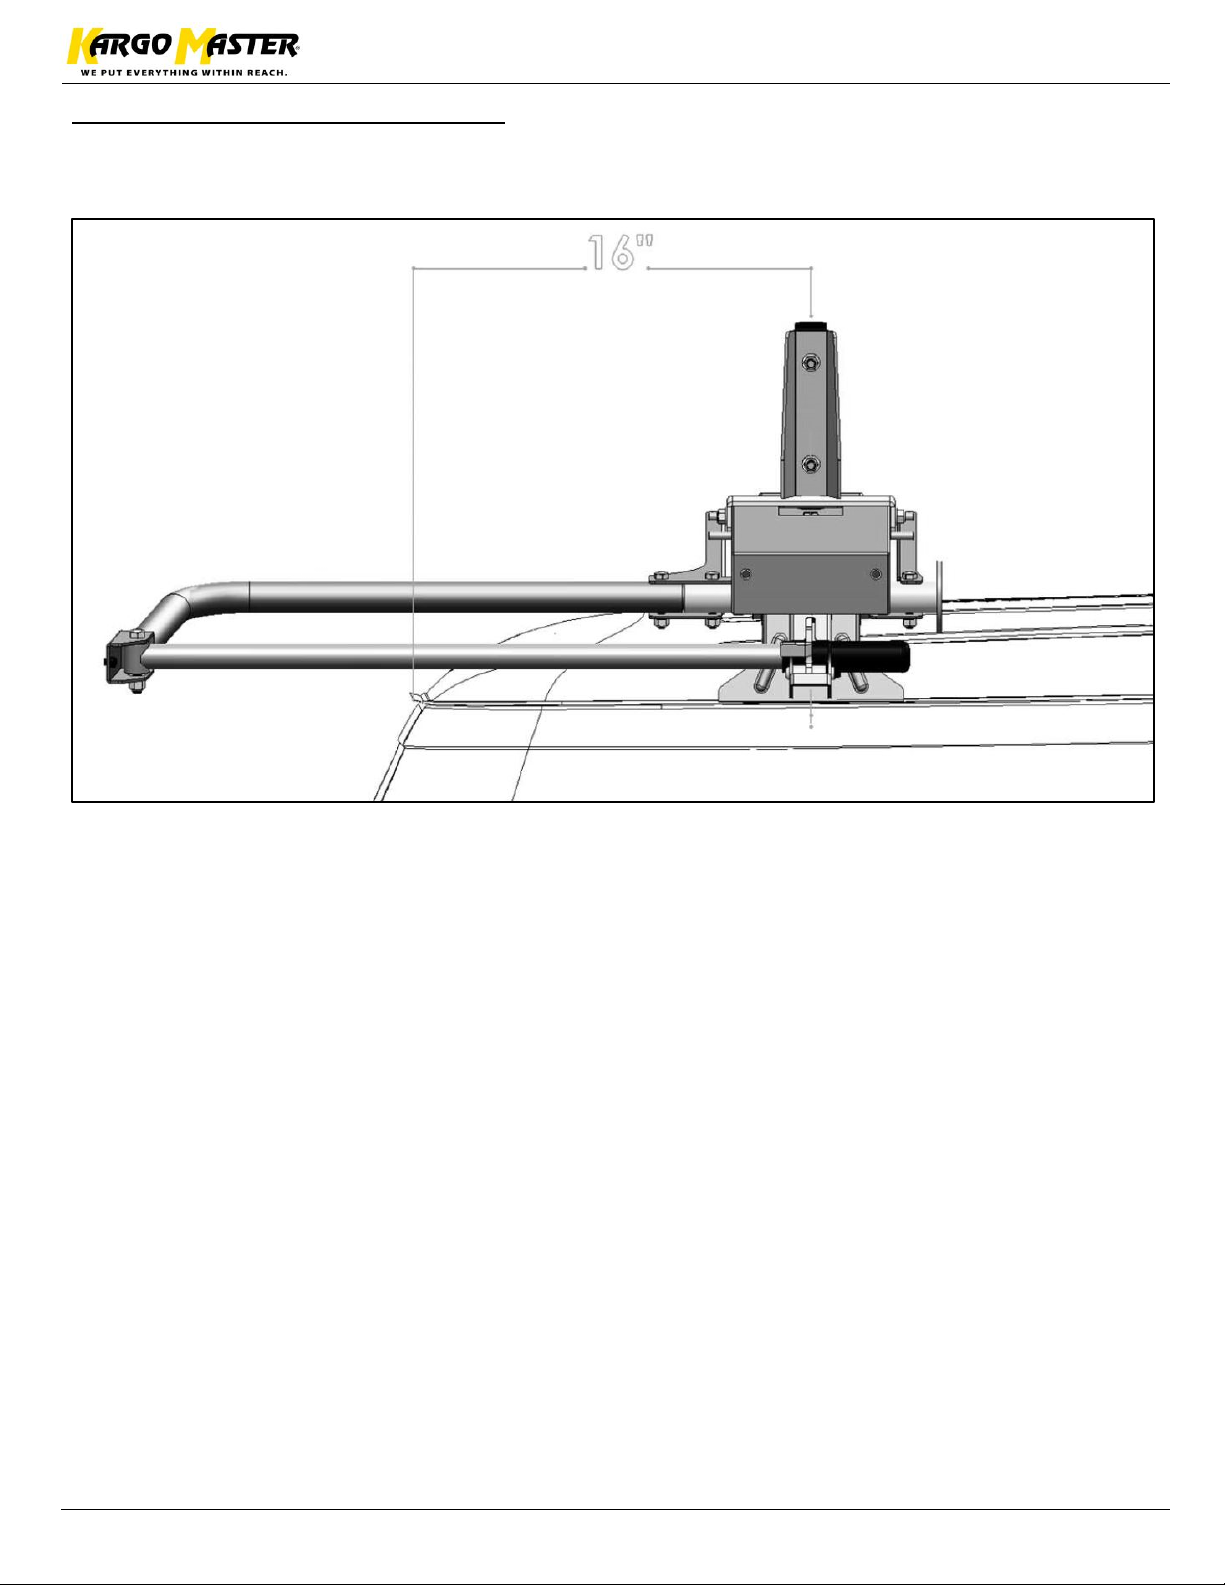
• Place rear bow assembly at rear of van, approximately 16” from rear of van.
• Be sure to have enough space for the handle to clear the rear of van when operating rack.
Page 7
For Technical Support Call: 800-343-7486 Monday-Friday 7AM - 4 PM (PST) Page 6
Installation Instructions – 409CD
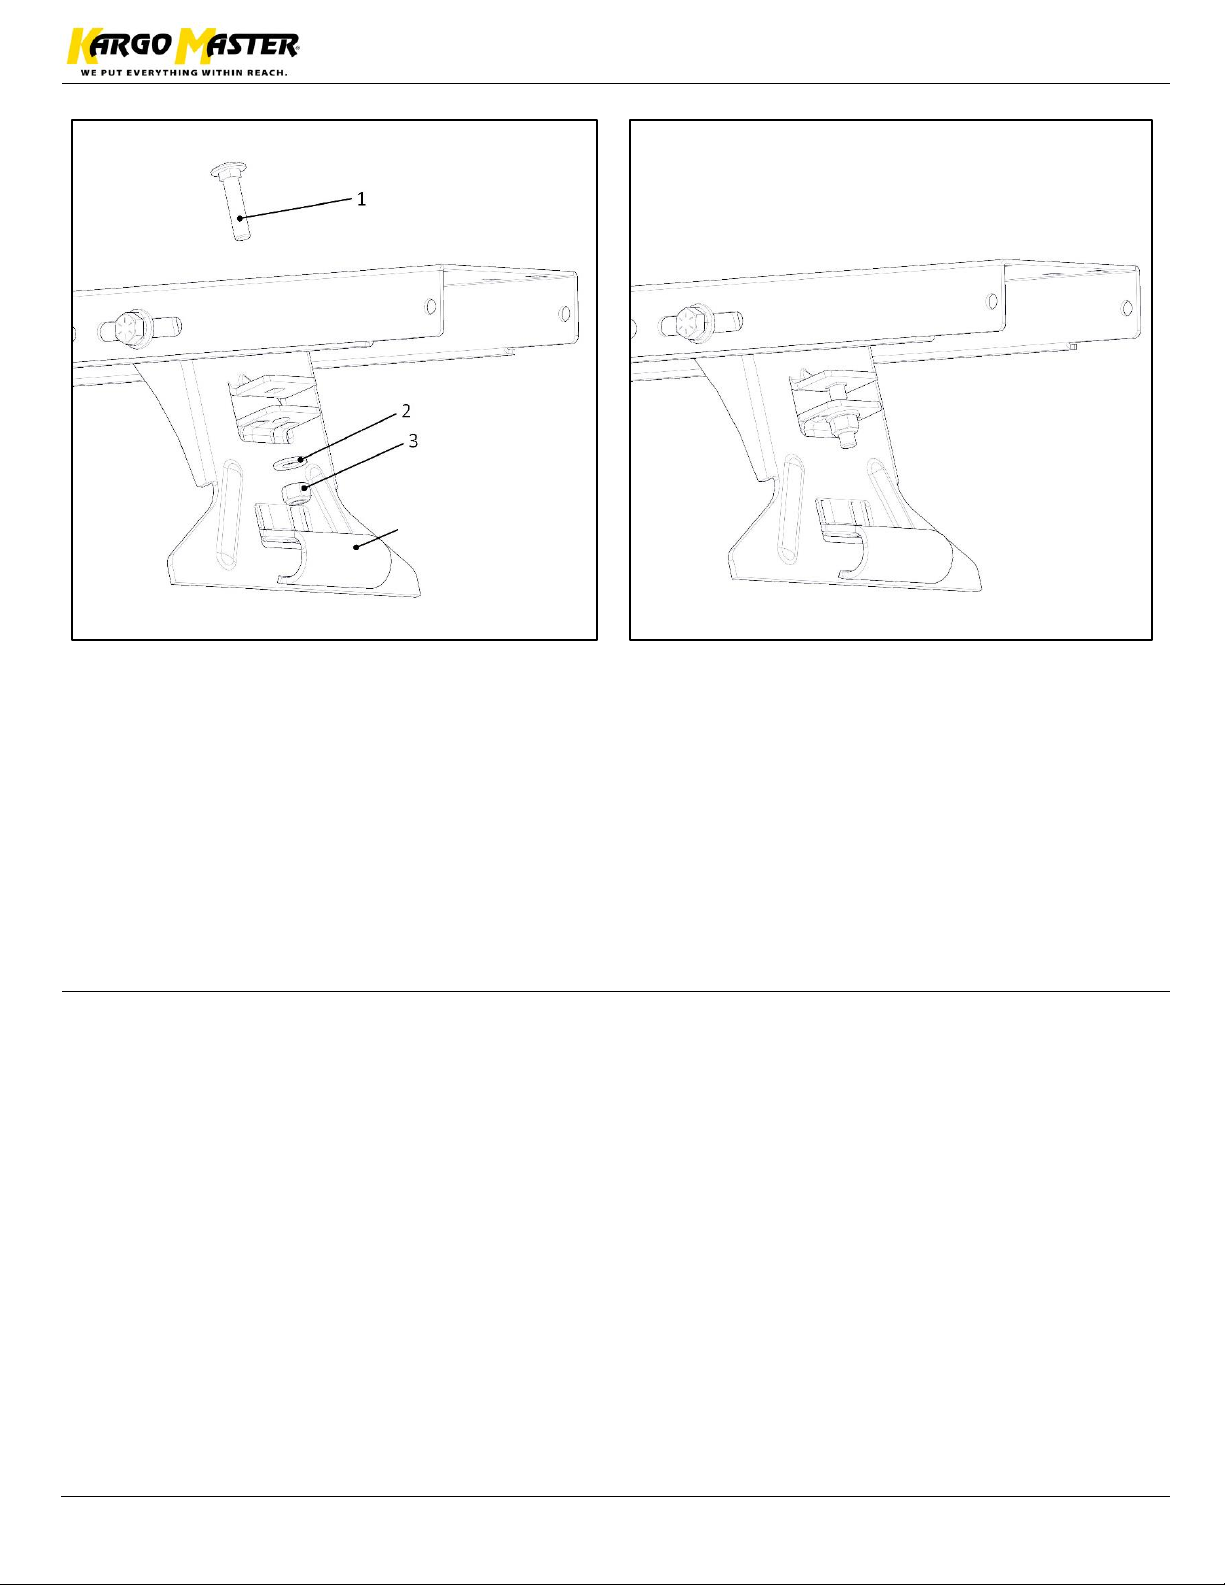
• Using a 5/16”x 1-1/2” carriage bolt (1), a 5/16” flat washer (2) and a 5/16” nyloc nut (3),
insert gutter mount (B) through mount foot (A).
• Be sure the rear bow assembly is secure, but can still be moved front to rear.
• Place front bow onto roof of van.
• Assemble rack as shown in the ladder rack instructions.
• Once the ladder rack is square and aligned to the users desire, TIGHTEN.
• Repeat on all four corners of van.
*Shown without van for clarity*
GO BACK AND ENSURE ALL HARDWARE IS TIGHT
Your installation is now complete.
B
 Loading...