

Page 1
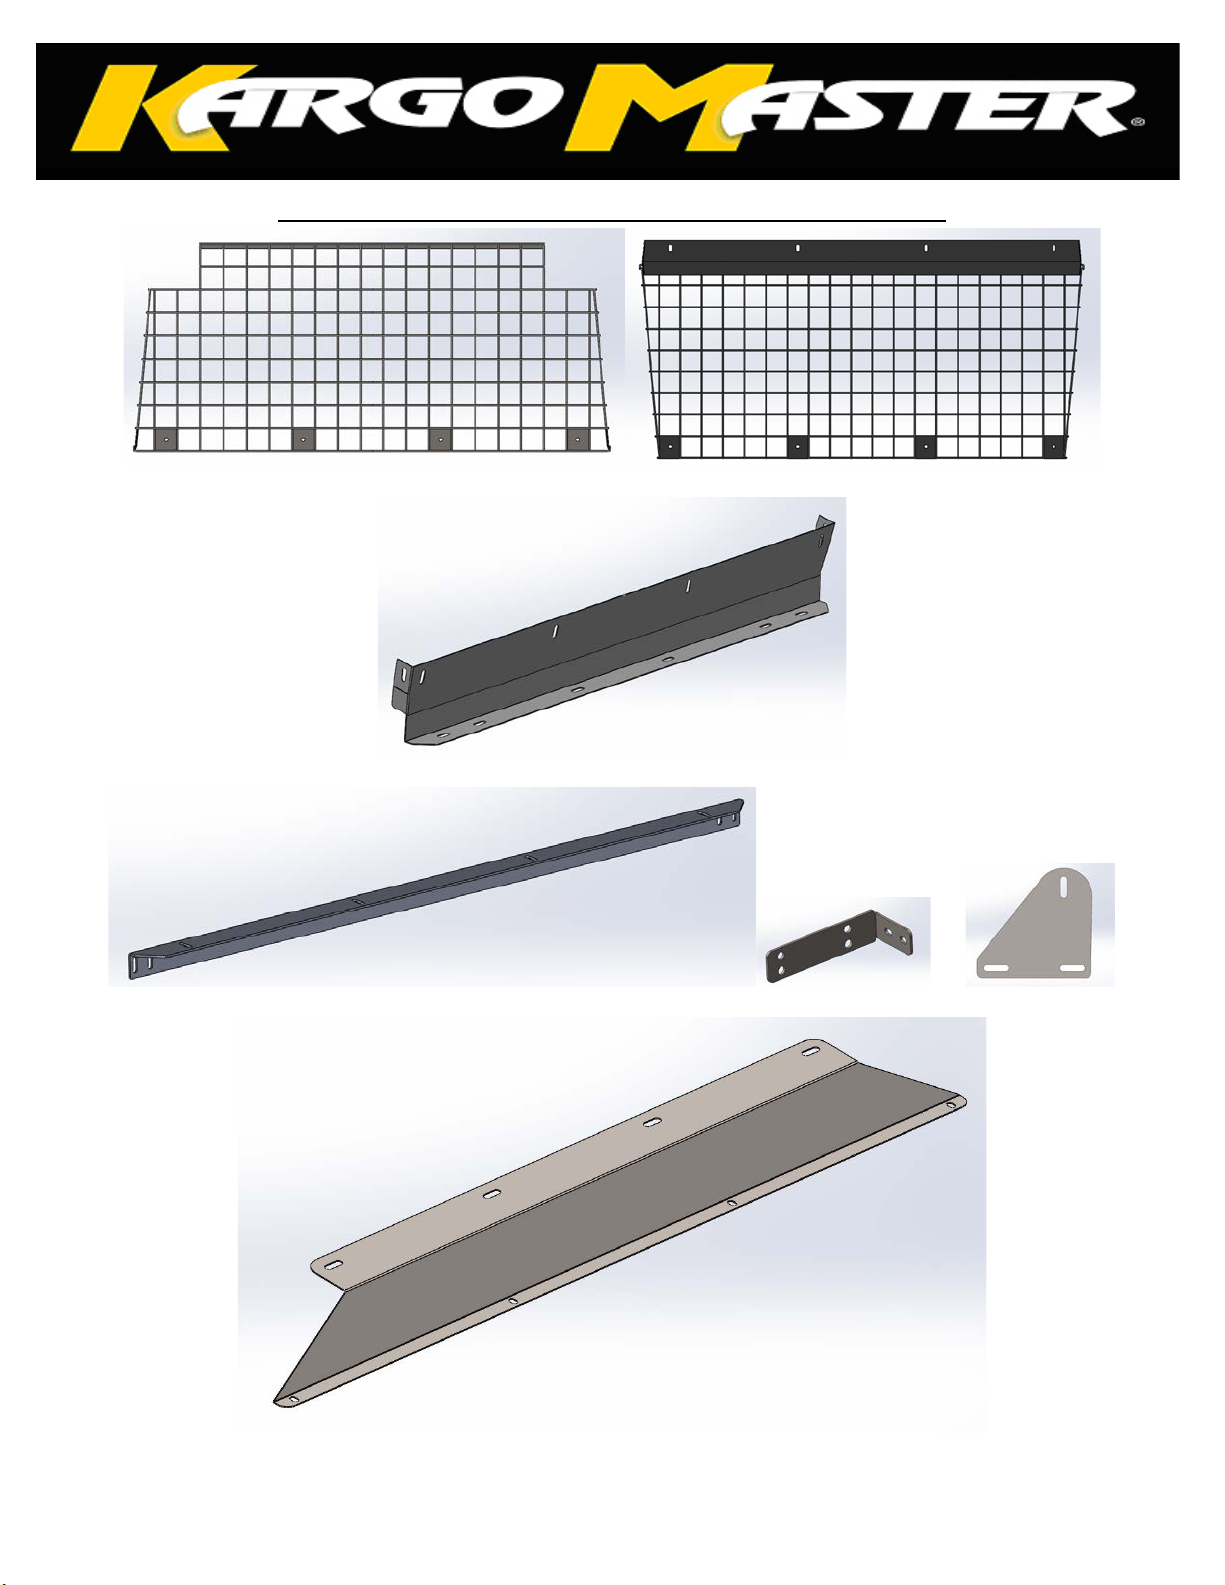
40668 Transit Connect/NV200 Wire Partition
Top Wire Panel (1) Bottom Wire Panel (1)
Bottom Mount Panel (1)
Transit Connect Top Angle (1) TC Top MNT BRKT (2) TC Bottom MNT PLT (2)
NV200 Top Mount Panel (1)
1
Page 2
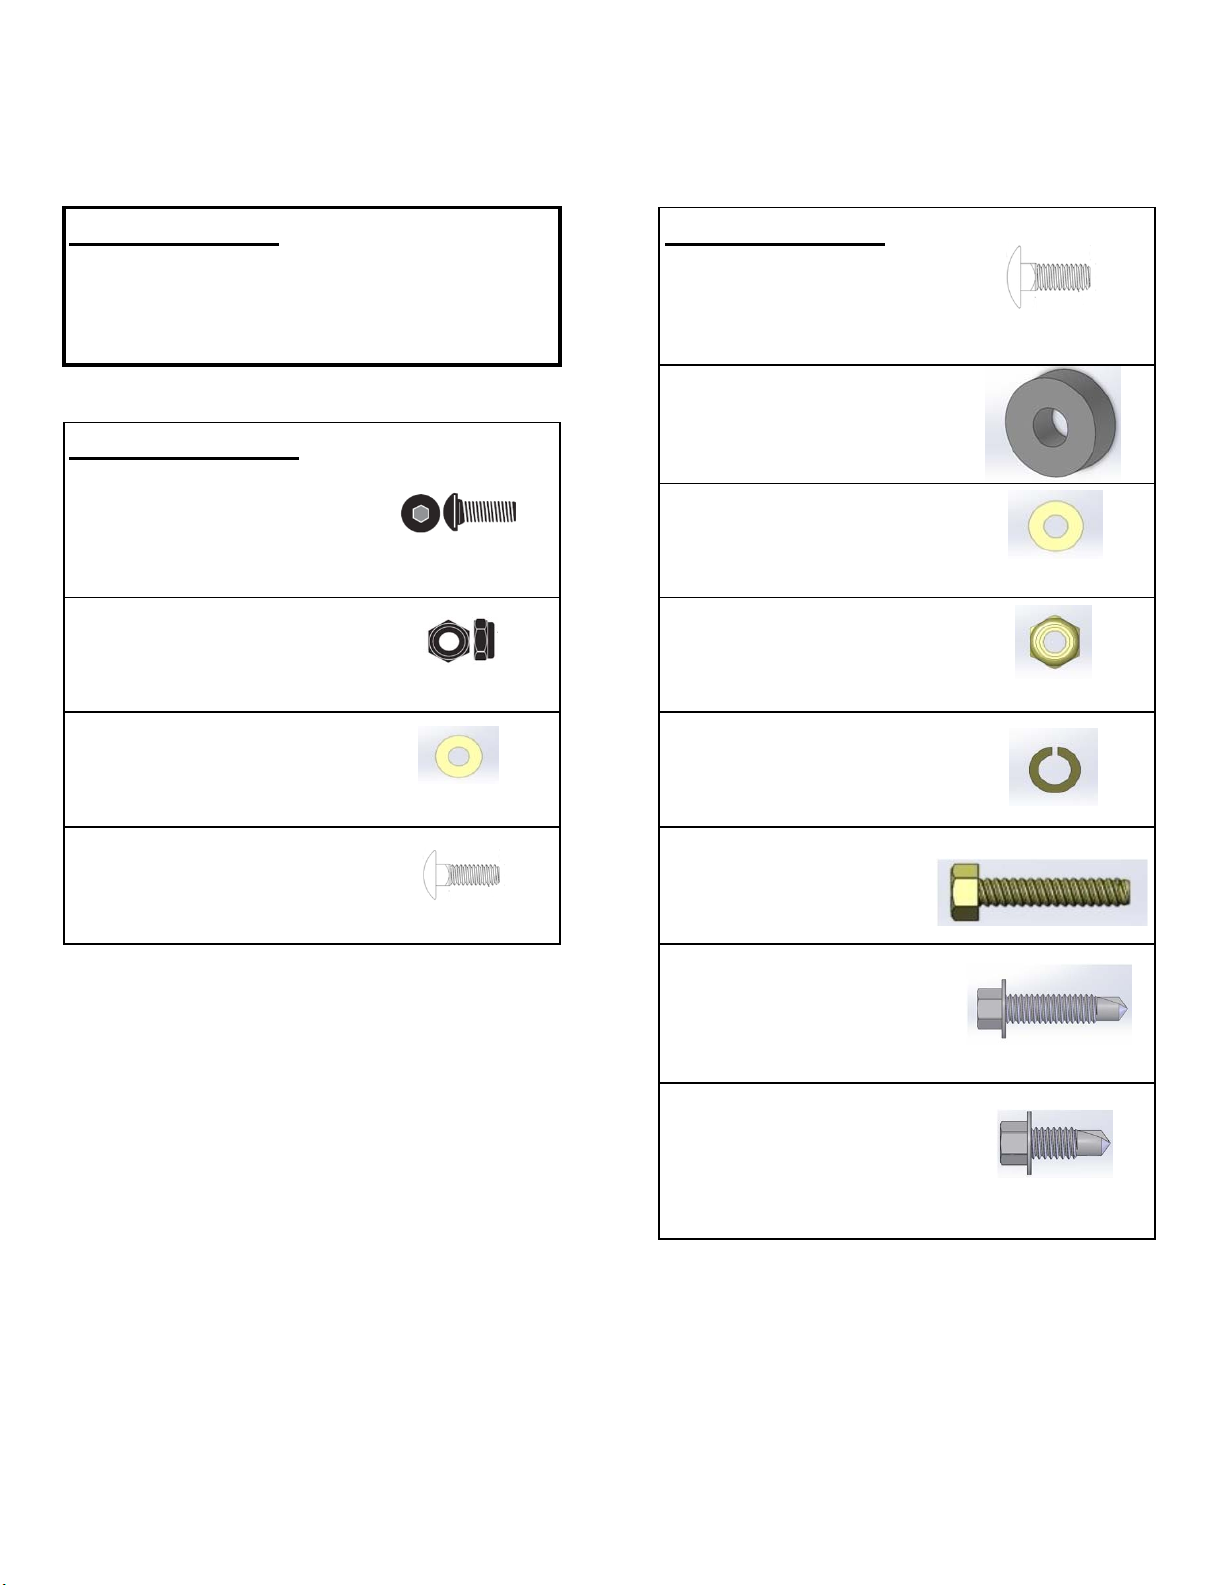
40668 Harware List
Tools Needed Installation Kit
8' Tape Measure (e)
1/4" Socket 1/4" End Wrench Qty 4 -
5/16" Socket 5/16" End Wrench 5/16" -20 x 0.75" L Carriage Bolt
Hardware Pack
(a) (g)
Qty 12 - Qty 8 -
1/4" - 20 x 0.75" Botton Head Bolt 5/16" Flat Washer
(b) (h)
Qty 20 - Qty 4 -
1/4" Nylock Nut 5/16" Nylock Nut
Philp Head Screw Driver
(f)
Qty 6 -
3/8" x 1" OD Nylon Spacer
(c) (i)
20 - Q
Qty
1/4" Flat Washer 5/16" Lock Washer
(d) (
Qty 8 - Qty 4 -
1/4"-20 x 0.75" L Carriage Bolt M8 x 45mm Hex Head Bolt
ty 4 -
j)
(k)
Qty 4 Hex Head Screw
5/16" - 20 x 1.375"
(l)
Qty 4 -
Hex head self Threading Screw
5/16" - 20 x 0.75"
For TECHNICAL SUPPORT Call: 800-343-7486 Monday - Friday 7:00 A.M. to 4:00 P.M (PST)
Page 3
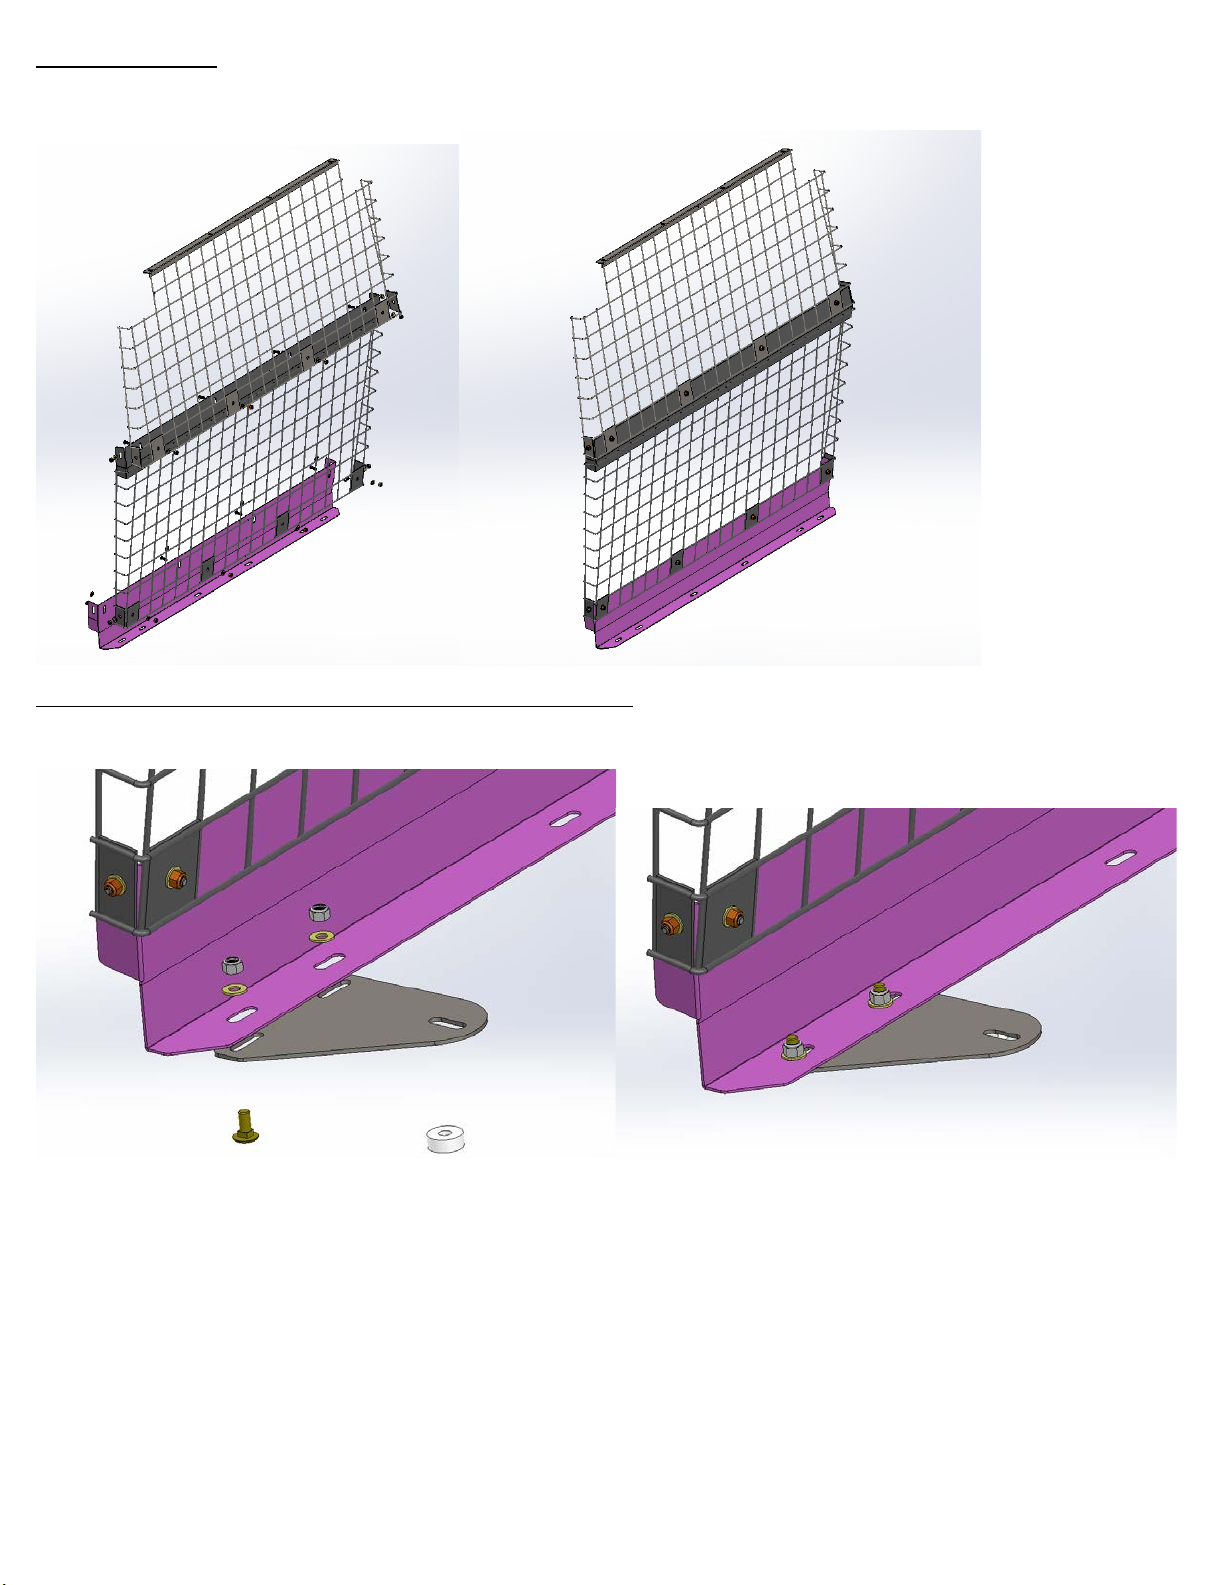
Step 1-Both Models
Bolt “Bottom Panel” to “Middle Panel” and “Upper Panel” using ¼”x3/4” Button Head bolts with flat washers and nyloc nuts as
shown, DO NOT FULLY TIGHTEN at this point.
Step 2-2014 and Newer Transit Connect-Skip This Step for NV 200
Bolt “Bottom Mount Plate” to the “Partition Assy.” Using 5/16”x3/4” Carriage bolts with flat washers and nyloc nuts from the
bottom as shown so the head of the bolt is against the floor mat.
2
Page 4
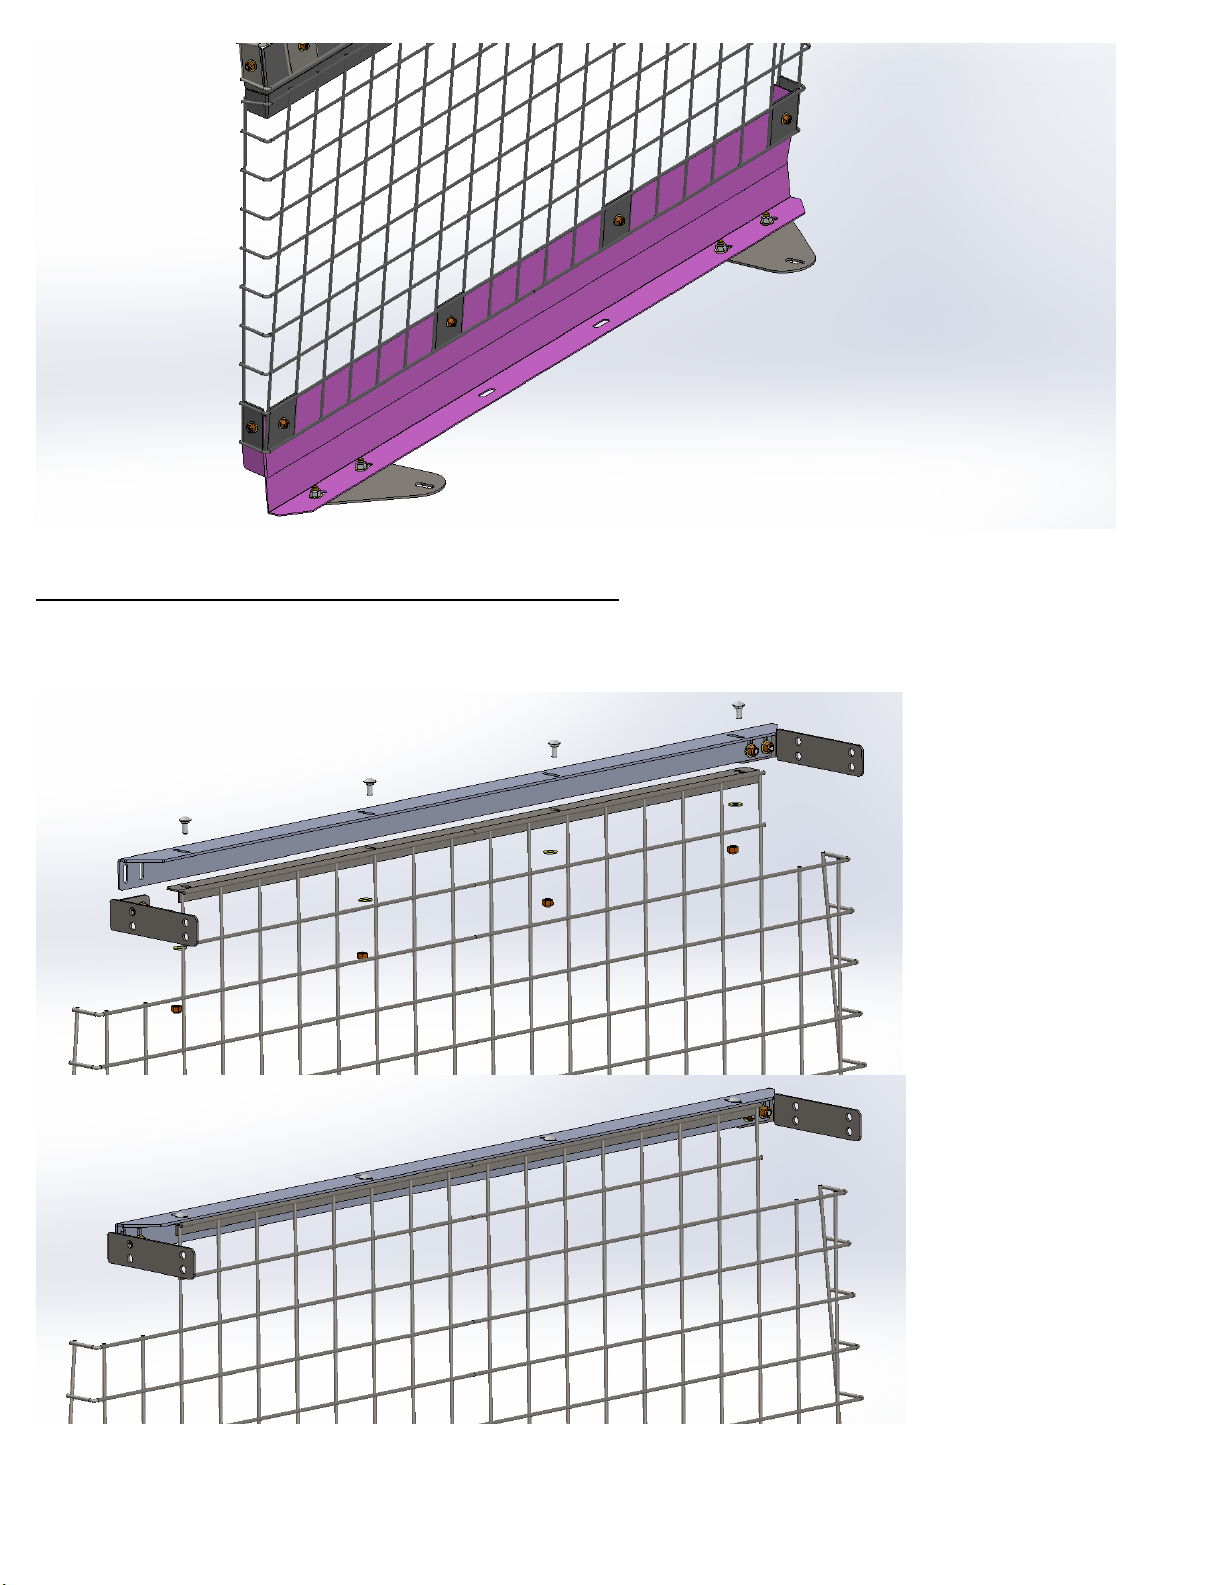
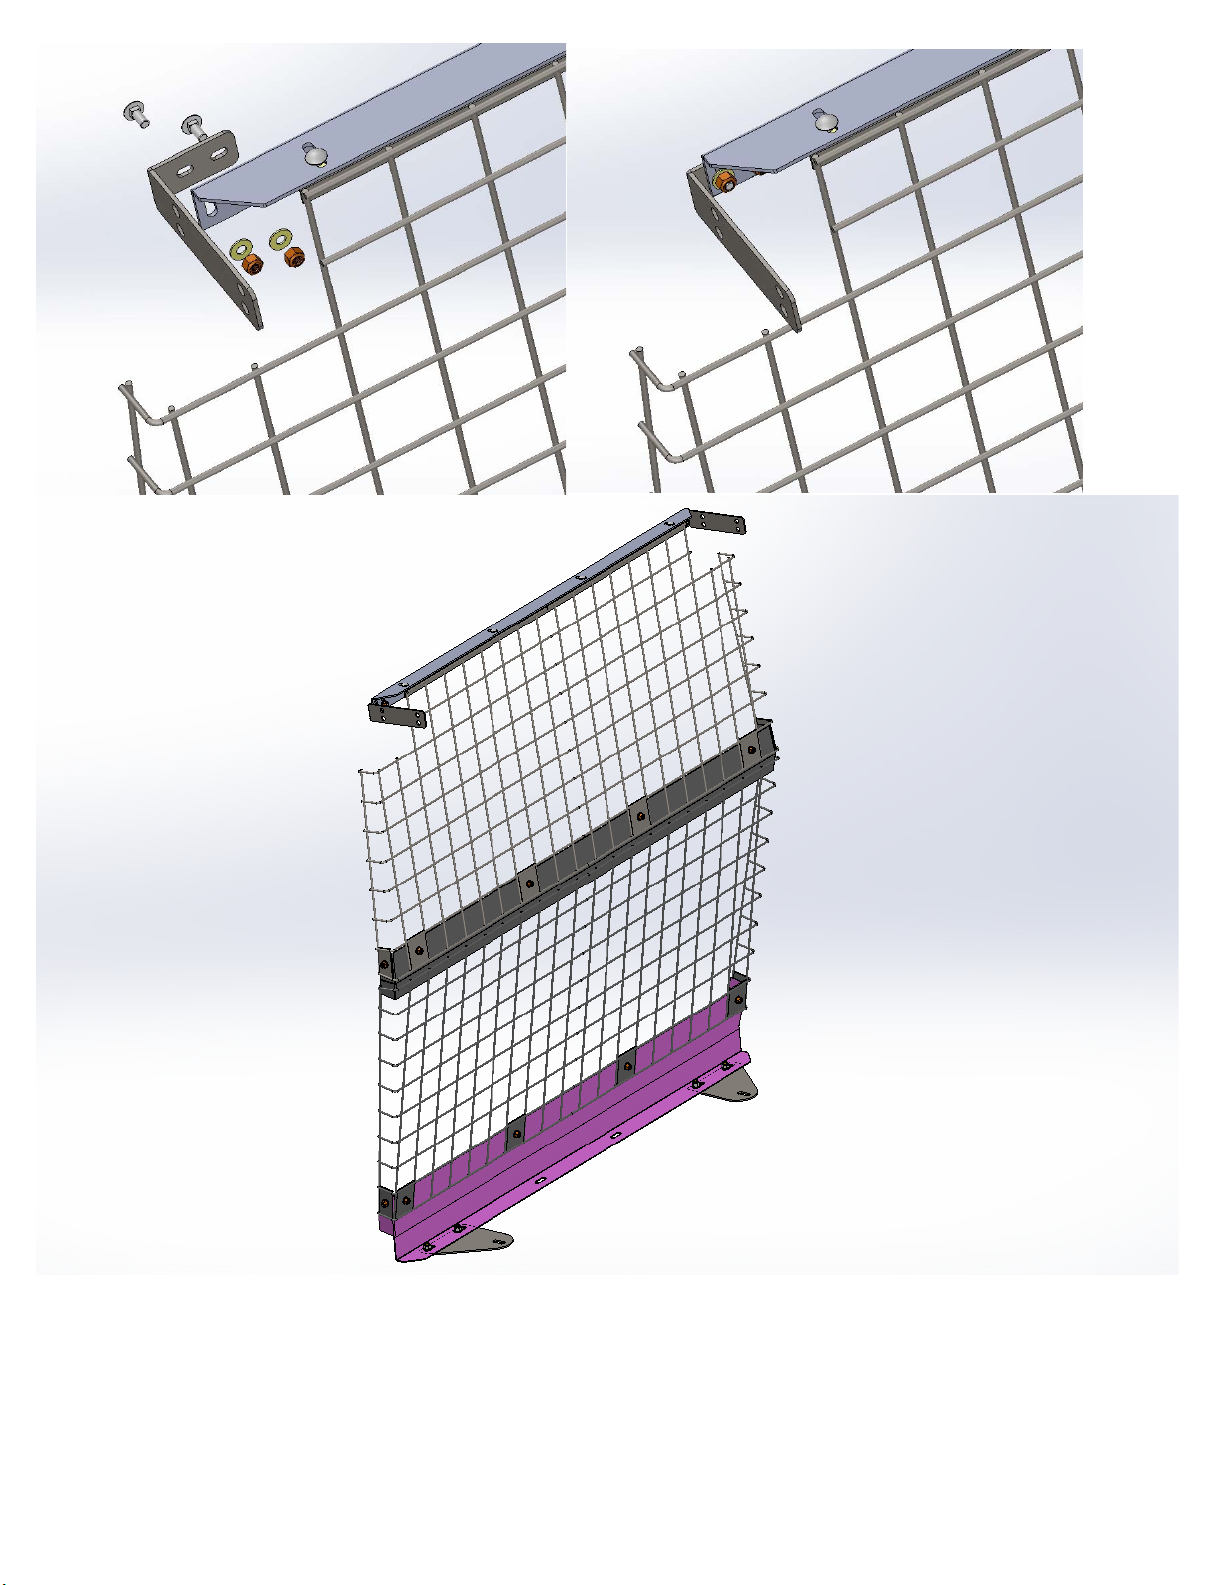
Step 3-2014 and Newer Transit Connect (NV200 go to Step 3NV)
Bolt “Top Mounting Angle” to the top of the “Partition Assy.” With the angle going down and to the front of the van, using
¼”x3/4” Carriage bolts with flat washers and nyloc nuts as shown. Now attach the “Upper Mount Brackets” pointing to the rear
of the van using ¼”x3/4” Carriage bolts with flat washer and nyloc nuts as shown.
3
Page 5
4
Page 6
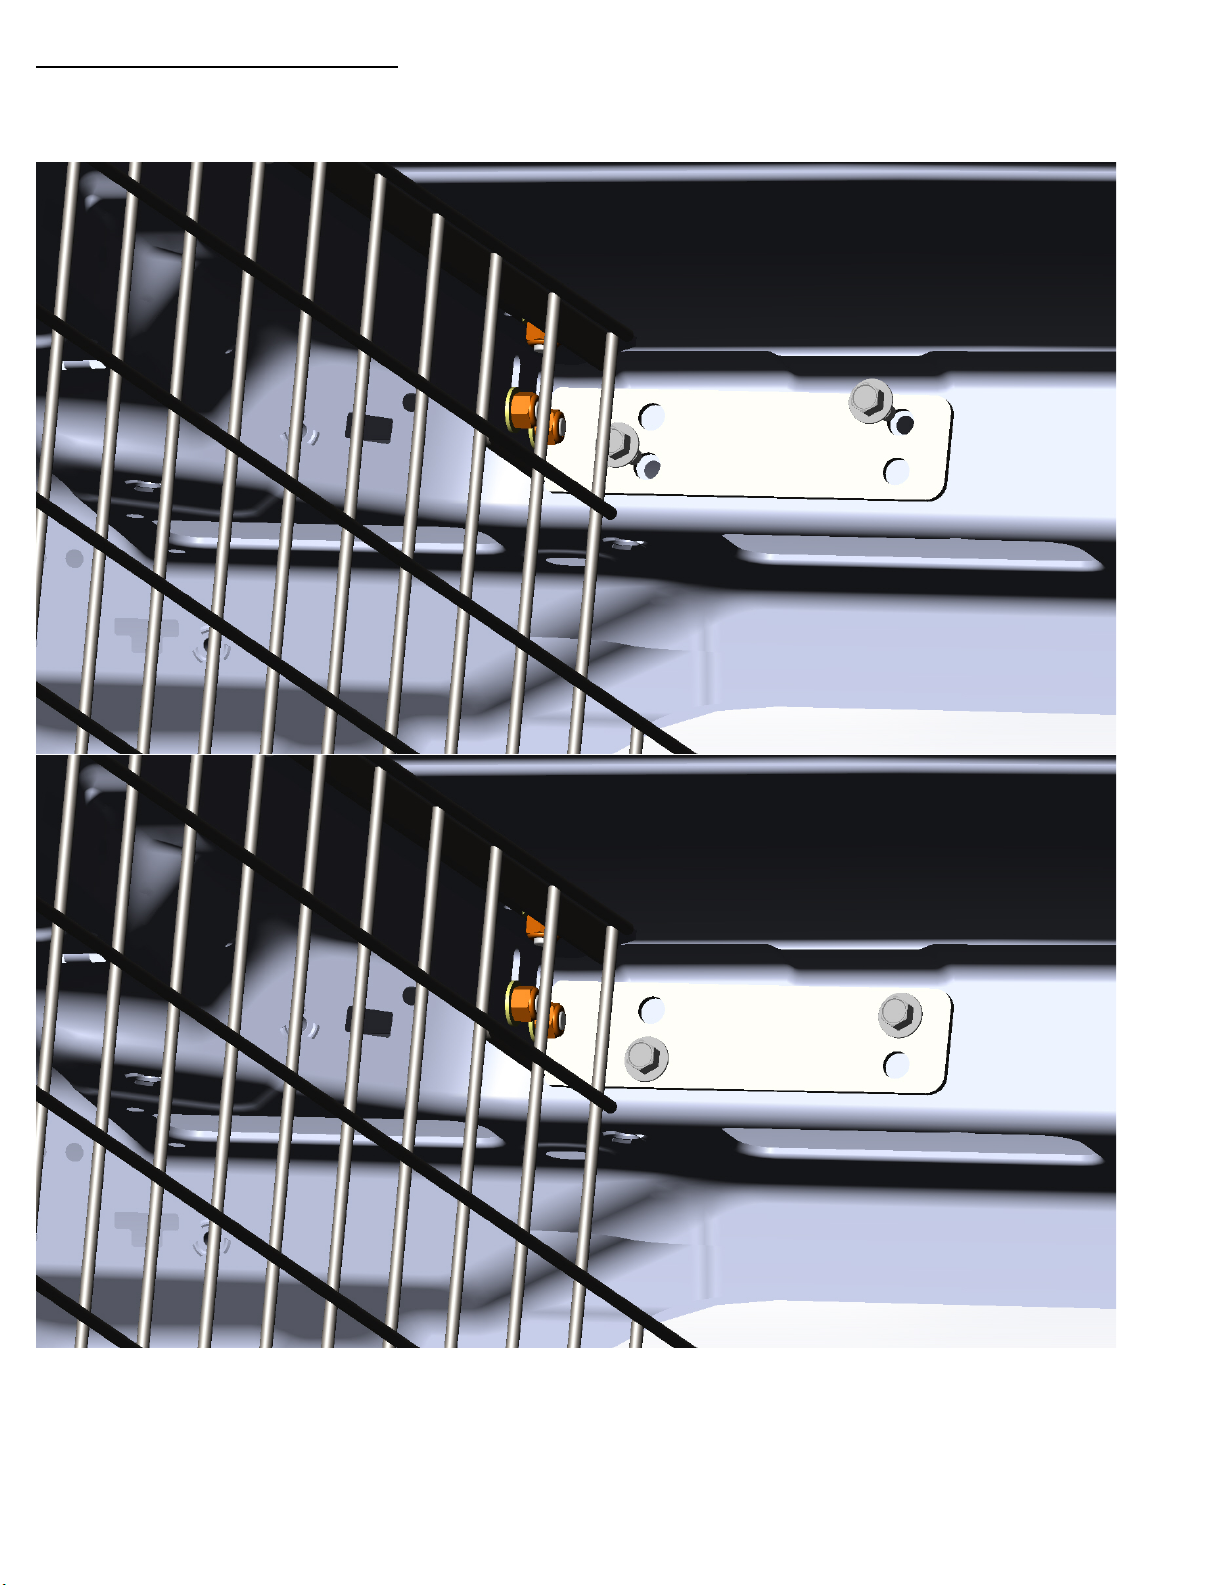
Step 4-2014 and Newer Transit Connect
Remove factory foam inserts from above sliding side door and factory “D” rings from the floor. Place Partition in the van and line
up the “Upper Mounting Brackets” as shown. Use 5/16”x3/4” Self Tapping Screws in existing holes as shown.
5
Page 7
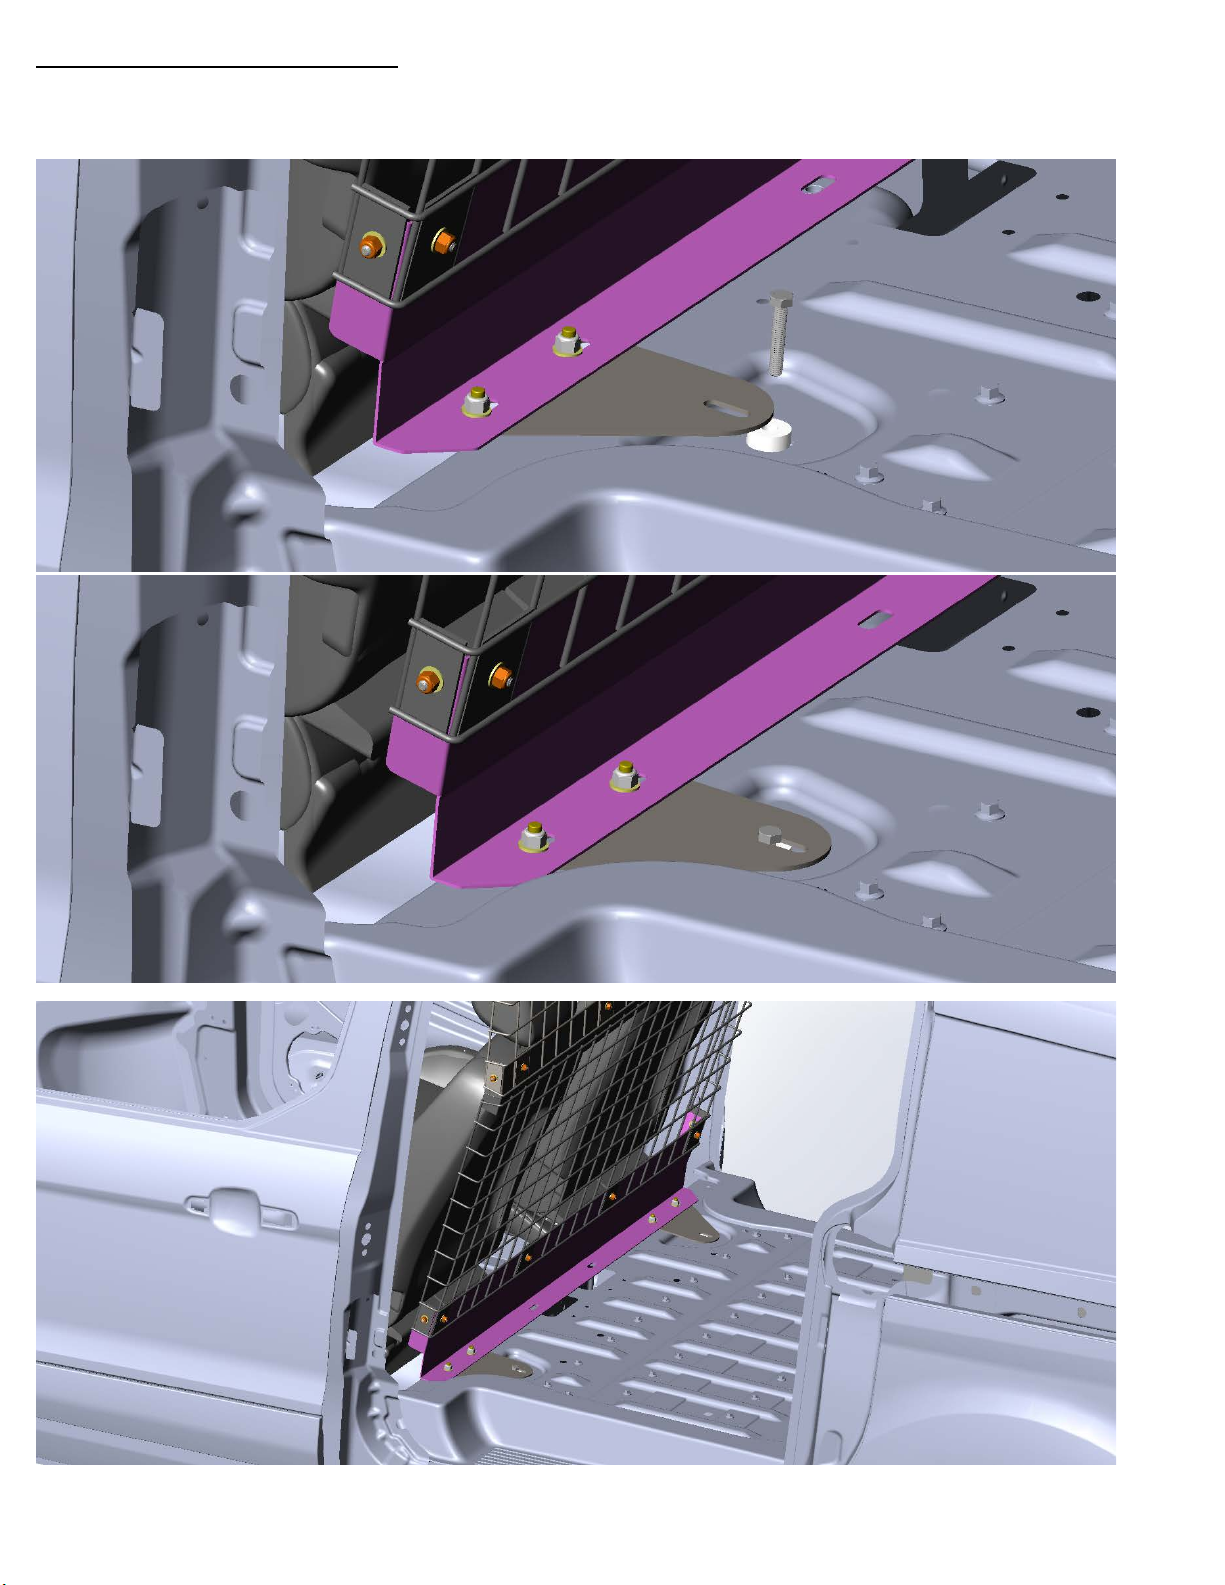
Step 5-2014 and Newer Transit Connect
Now put the 3/8” nylon spacer where the factory “D” ring was and slide the partition into place. Using the factory hardware, bolt
the bottom of the partition assembly in place (bolt shown is for reference). You can now go through and tighten all the
hardware. The installation is complete.
6
Page 8
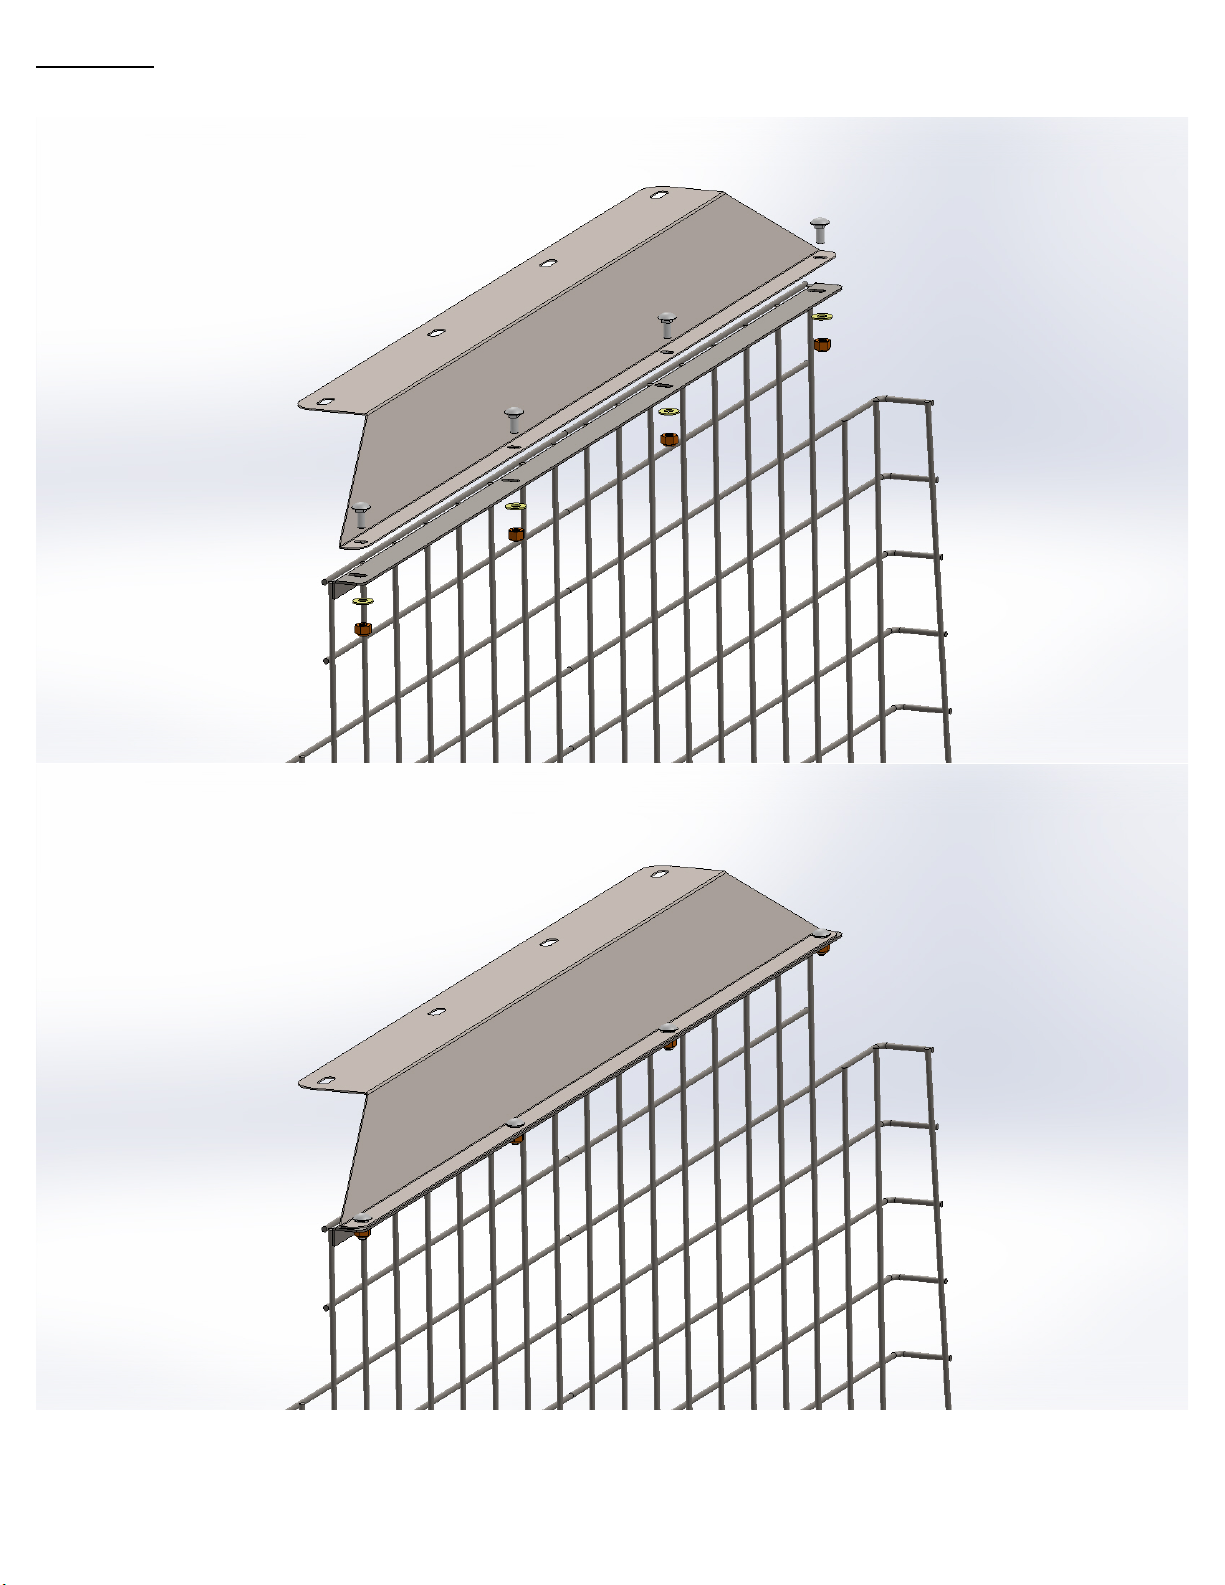
Step 3NV200
Attach “NV Top Mounting Panel” as shown using ¼”x3/4”Carriage bolts with flat washers and nyloc nuts as shown.
7
Page 9
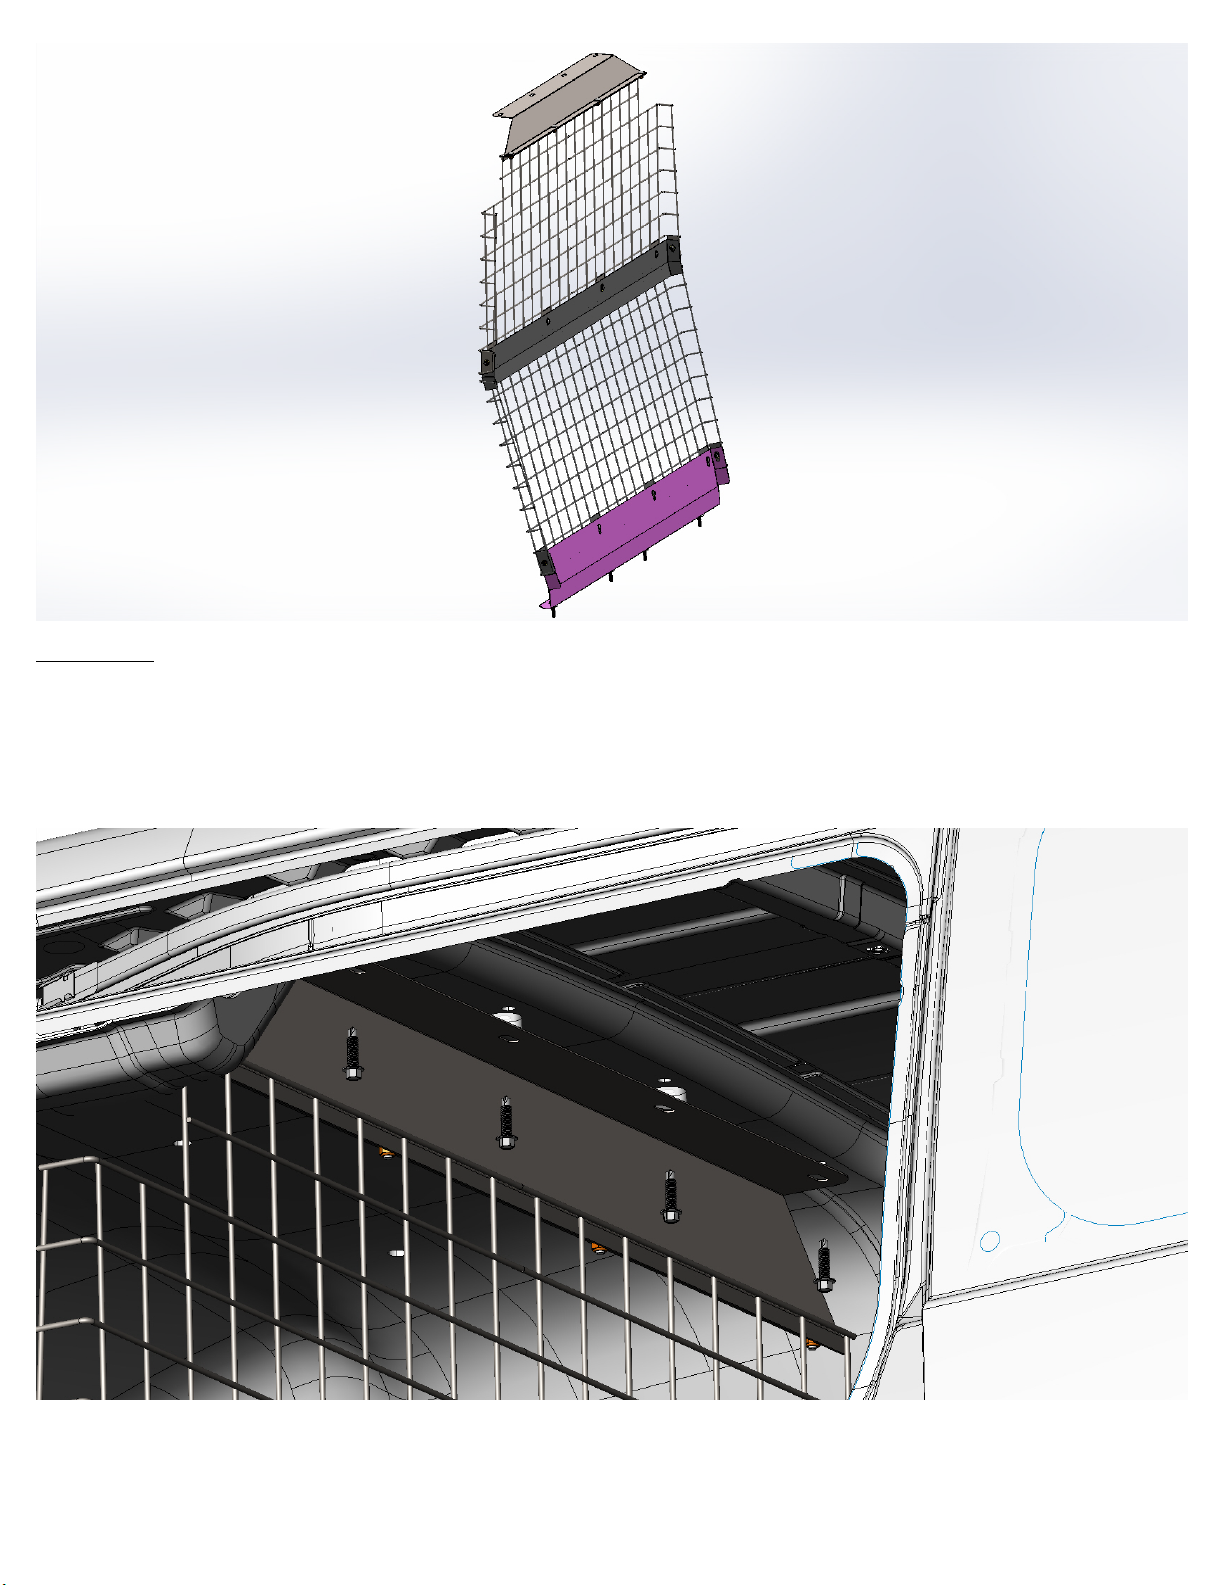
Step 4NV200
Remove rear headliner fasteners and factory “D” rings. Place Partition Assembly in van, line up the “Top Mount Panel” with the
holes in the headliner where you removed the fasteners. Loosely insert a 5/16”x1 ¼” self tapping screw in one of the side holes.
Use the nylon spacers for the center 2 holes between the “Top Mount Panel” and the headliner (you can put them under the
headliner for a better appearance) and start the other 3 5/16”x1 ¼” self tapping screws. DO NOT TIGHTEN fully until you get the
bottom bolts started.
8
Page 10
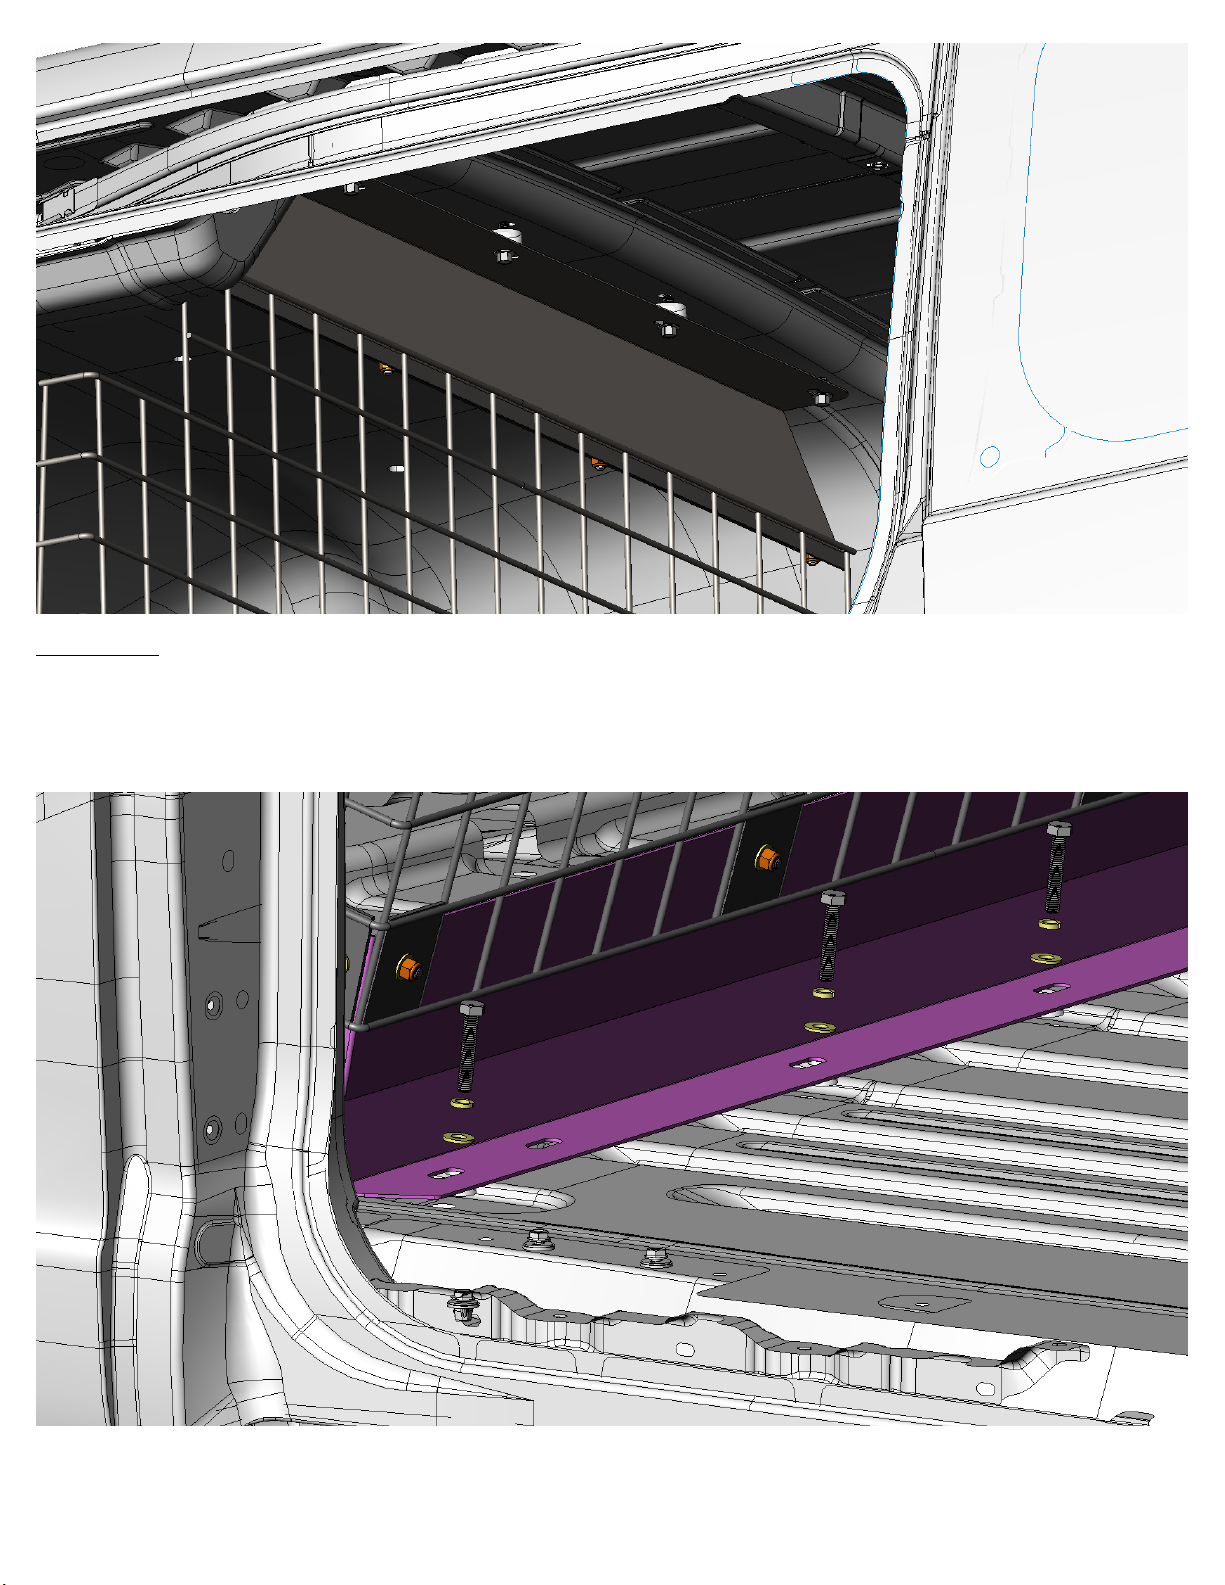
Step 5 NV200
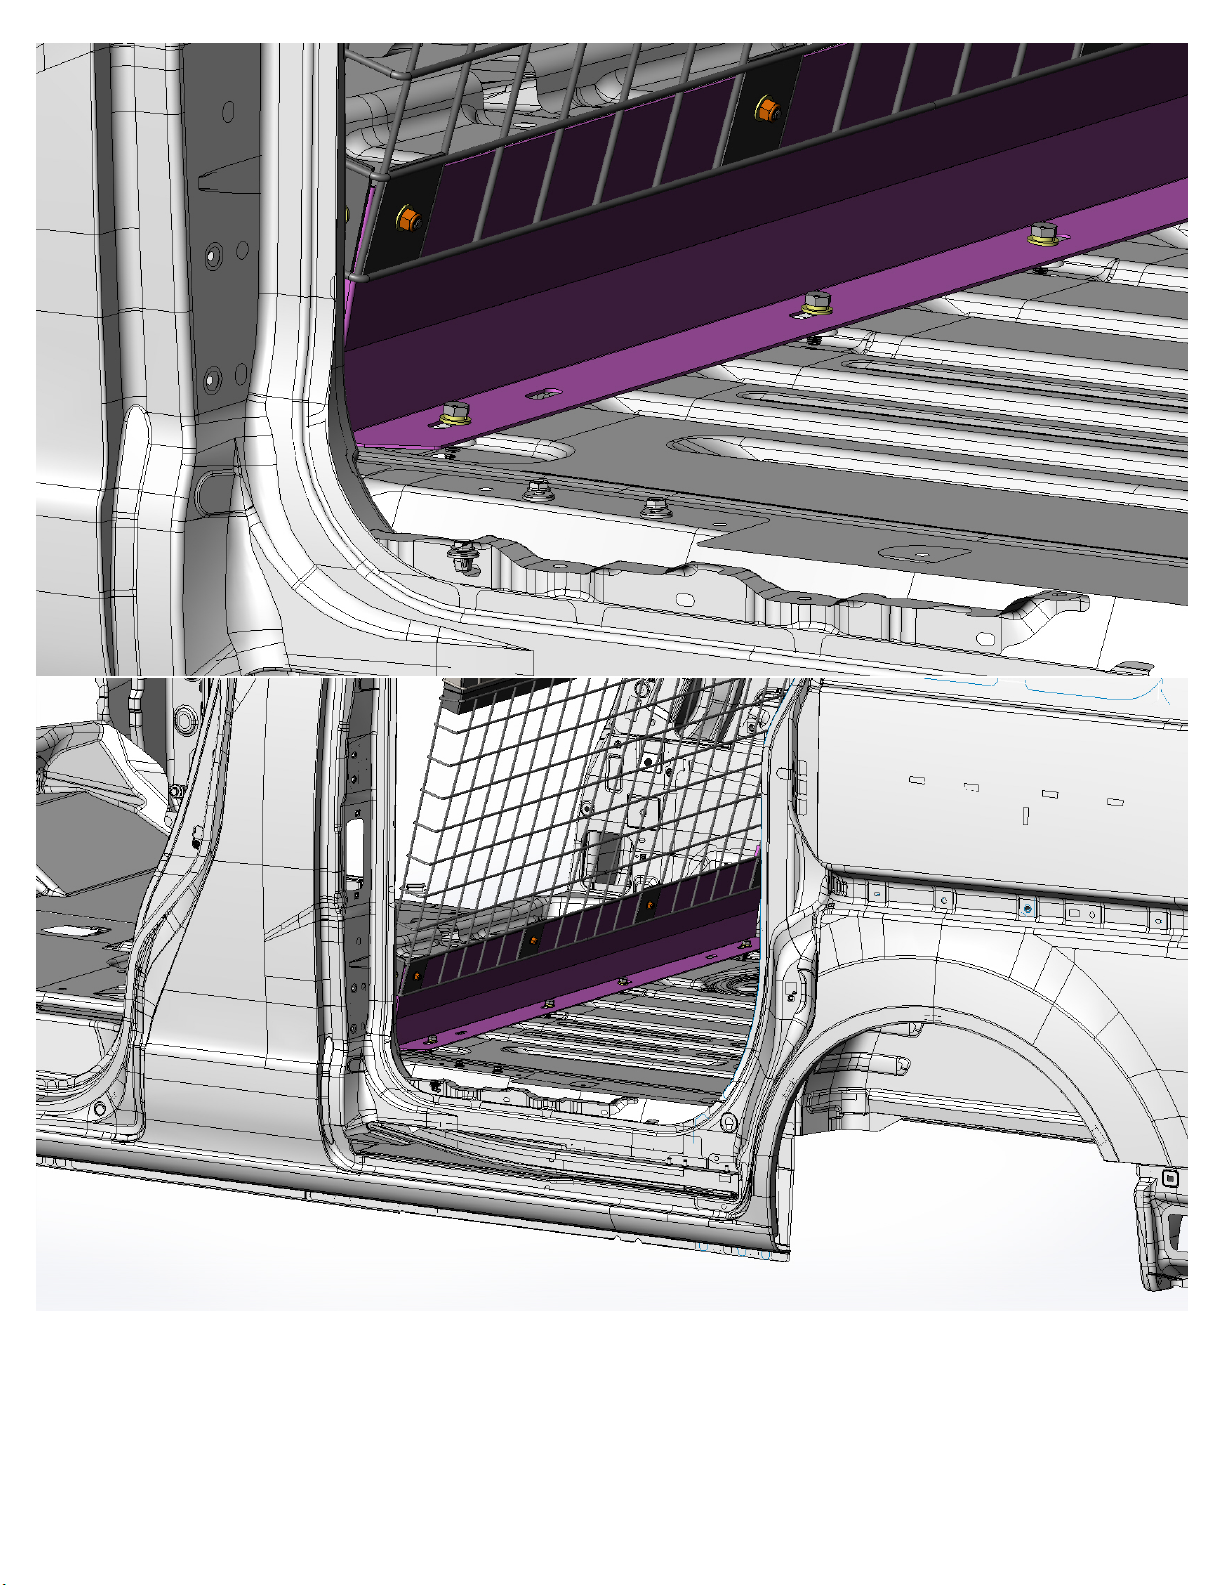
Line up the “Bottom Mount Panel” with the outer holes that you removed the “D” rings from, this will tell you where the center
ones are located. Cut holes in the mat to expose the center 2 mounting holes and remove the factory hardware. Place the nylon
spacers under the “Partition Assembly” and install the 4 M8x45MM bolts. You can now tighten the top first, and then the
bottom. The installation is complete.
9
Page 11
10
 Loading...