

Page 1
Register and win!
www.kaercher.com
WT 4.000
Deutsch 5
English 15
Français 25
Italiano 35
Nederlands 45
Español 55
Português 65
Ελληνικά 75
59638850 09/2010
Page 2

234
Page 3
Page 4

Page 5
Inhaltsverzeichnis
Geräteabbildung 3
Allgemeine Hinweise 5
Sicherheitshinweise 7
Bedienung 8
Pflege und Wartung
Hilfe bei Störungen
Technische Daten 14
12
13
Allgemeine Hinweise
Sehr geehrter Kunde,
Lesen Sie vor der ersten Benutzung Ihres Gerätes diese
Originalbetriebsanleitung, handeln Sie danach und be-
wahren Sie diese für späteren Gebrauch oder für Nachbesitzer auf.
Bestimmungsgemäße Verwendung
– Dieses Gerät wurde für den privaten Gebrauch entwickelt und ist
nicht für die Beanspruchungen des gewerblichen Einsatzes vorgesehen.
– Dieses Gerät ist zum Anschluss an einen Wasserhahn vorgese-
hen und steuert automatisch den Wasserfluss in Bewässerungssystemen.
Deutsch 5
Page 6
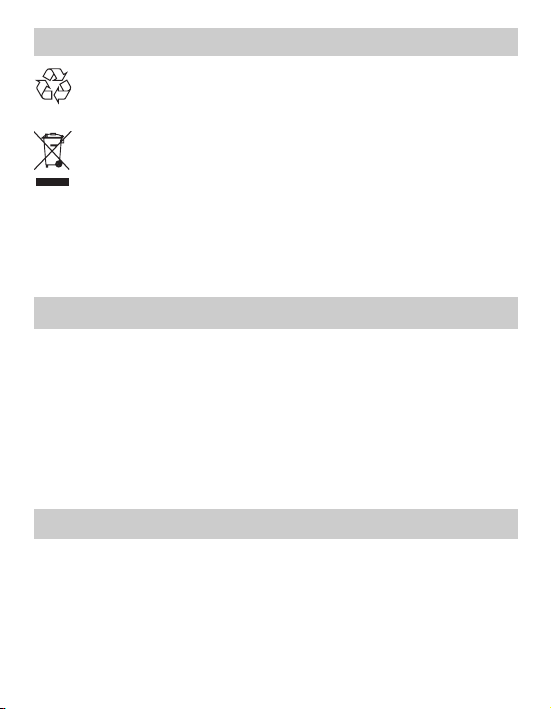
Umweltschutz
Die Verpackungsmaterialien sind recyclebar. Bitte werfen Sie
die Verpackungen nicht in den Hausmüll, sondern führen Sie
diese einer Wiederverwertung zu.
Altgeräte enthalten wertvolle recyclingfähige Materialien, die
einer Verwertung zugeführt werden sollten. Bitte entsorgen
Sie Altgeräte deshalb über geeignete Sammelsysteme.
Hinweise zu Inhaltsstoffen (REACH)
Aktuelle Informationen zu Inhaltsstoffen finden Sie unter:
http://www.karcher.de/de/unternehmen/
umweltschutz/REACH.htm
Garantie
In jedem Land gelten die von unserer zuständigen Vertriebsgesellschaft herausgegebenen Garantiebedingungen. Etwaige Störungen
an Ihrem Gerät beseitigen wir innerhalb der Garantiefrist kostenlos,
sofern ein Material- oder Herstellungsfehler die Ursache sein sollte.
Im Garantiefall wenden Sie sich bitte mit Kaufbeleg an Ihren Händler
oder die nächste autorisierte Kundendienststelle.
(Adresse siehe Rückseite)
Symbole in der Betriebsanleitung
Vorsicht
Für eine möglicherweise gefährliche Situation, die zu leichten Verletzungen oder zu Sachschäden führen kann.
6 Deutsch
Page 7

Sicherheitshinweise
Vorsicht
Bewässerungsautomat nicht in Trinkwassersystemen betreiben.
Bewässerungsautomat nur mit unbehandeltem, klarem Süßwas-
ser mit einer Temperatur bis maximal 35°C betreiben.
Bewässerungsautomat nur im Außenbereich installieren.
Bewässerungsautomat vor Spritzwasser schützen und nie in
Wasser tauchen.
Bewässerungsautomat vor jedem Betrieb auf Schäden prüfen,
bei sichtbaren Beschädigungen Betrieb einstellen.
Bewässerungsautomat nur in vertikaler Position anbringen.
Keine Dichtmasse und keine Schmiermittel verwenden, um den
Bewässerungsautomat am Wasserhahn anzuschließen.
Nicht am angeschlossenen Schlauch ziehen.
Nur 9V Batterien (Typ 6LR61 / Alkaline) verwenden.
Keine aufladbaren Batterien verwenden.
Bewässerungsautomat nicht an Orten installieren, an denen sich
Kondenswasser bildet, da hierdurch die Batterie beschädigt werden kann.
Bewässerungsautomat nicht in der Nähe von Wärmequellen in-
stallieren (maximale Umgebungstemperatur 60°C).
Bewässerungsautomat nicht in der Nähe von unter Spannung
stehenden Geräten betreiben.
Deutsch 7
Page 8

Bedienung
Prüfen Sie beim Auspacken den Packungsinhalt auf Vollständigkeit
und Beschädigungen. Benachrichtigen Sie bei Beanstandungen bitte
Ihren Händler.
Abbildungen siehe Ausklappseite!
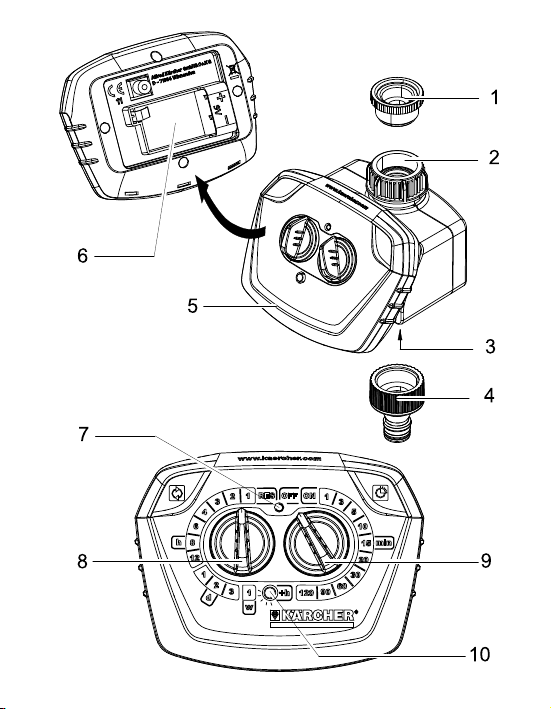
Gerätebeschreibung
1 Reduzierstück (G
2 Wasseranschluss (G 1) mit Filterdichtung
3 Schlauchanschluss
4 Kupplungsteil für Schlauchanschluss
5 Gehäuseoberteil
6 Batteriefach
7 Signalleuchte
8 Regler für Bewässerungshäufigkeit
9 Regler für Bewässerungsdauer
10 Taste zum Ändern der Startzeit / zur Funktionskontrolle
Î Gehäuseoberteil abnehmen.
Î 9V Batterie (Typ 6LR61 / Alkaline) einlegen.
Î Gehäuse schließen, auf richtigen Sitz achten.
Î Kupplungsteil auf Schlauchanschluss schrauben.
Î Bei Bedarf Reduzierstück auf Wasseranschluss schrauben.
Î Bewässerungsautomat am Gehäuse halten und Wasseranschluss
auf den Wasserhahn schrauben.
Vorsicht
Bewässerungsautomat nie ohne mitgelieferte Filterdichtung an den
Wasserhahn anschließen.
3
/4)
Vor Inbetriebnahme
8 Deutsch
Page 9

Inbetriebnahme
Bewässerungsdauer einstellen
Î Regler für die Bewässerungsdauer auf die gewünschte Dauer,
z.B. 15min einstellen.
Bewässerungshäufigkeit und Startzeitpunkt einstellen
Hinweis: Der Startzeitpunkt des Bewässerungsrhythmus entspricht
unmittelbar dem Einstellzeitpunkt der Bewässerungsdauer. Die Veränderung des Startzeitpunktes ist optional möglich und nachfolgend
mit beschrieben.
Î Regler für die Bewässerungshäufigkeit auf Stellung RES drehen.
Die Signalleuchte blinkt rot, der Programmiermodus ist für 30sec.
aktiviert.
Î Taste zum Ändern der Startzeit betätigen (optional). Pro Betäti-
gung erfolgt eine Verschiebung der Startzeit um 60min.
z.B.: Für Verschiebung der Startzeit um 3h, ausgehend von der
aktuellen Uhrzeit, Knopf 3x betätigen. Die Signalleuchte leuchtet
bei jeder Betätigung grün auf.
Î Regler für die Bewässerungshäufigkeit auf gewünschten Zyklus
einstellen.
h = Zyklus in Stunden, z.B alle 4 Stunden
d = Zyklus in Tagen, z.B alle 2 Tage
w = Zyklus wöchentlich
Einstellungen zurücksetzen
Um eine Eingabe zu korrigieren oder ein bereits eingestelltes Programm zu löschen
Î Regler für die Bewässerungshäufigkeit auf Stellung RES drehen.
Deutsch 9
Page 10

Betrieb
Programmgesteuerte Bewässerung
Die Bewässerung erfolgt automatisch gemäß des eingestellten Programmes (zum Beispiel alle 2 Tage für 15 Minuten).
Durch Betätigen der Taste zur Funktionskontrolle kann jederzeit der
aktuelle Status abgefragt werden. Bei aktivem Programm leuchtet die
Signalleuchte kurz grün.
Hinweis: Bei leerer Batterie wird das Bewässerungsprogramm automatisch unterbrochen, die Signalleuchte leuchtet rot. Wird der Bewässerungsautomat längere Zeit unbeaufsichtigt verwendet,
vorsorglich eine neue Batterie einlegen.
Manuelle Bewässerung
Die Bewässerung kann jederzeit manuell gestartet werden, die eingestellten Programme bleiben davon unberührt.
Start manuelle Bewässerung
Î Regler für die Bewässerungsdauer auf Stellung ON drehen, Sig-
nalleuchte leuchtet kurz grün, das Ventil öffnet.
Nach 30 Minuten wird der Bewässerungsvorgang automatisch
beendet.
Stopp manuelle Bewässerung
Î Regler für die Bewässerungsdauer auf Stellung OFF drehen, Si-
gnalleuchte leuchtet kurz rot, das Ventil schließt.
Hinweis: Ist am Bewässerungsautomat ein Bewässerungsprogramm festgelegt, muss nach Beendigung der manuellen Bewässerung der Regler für die Bewässerunghsdauer wieder auf die
gewünschte Dauer eingestellt werden. Steht der Regler auf OFF erfolgt keine Bewässerung, obwohl der interne Bewässerungsrhythmus weiterläuft.
10 Deutsch
Page 11

Betrieb beenden
Am Ende der Bewässerungssaison
Î Wasserhahn schließen.
Î Bewässerungsautomat von Wasserhahn und Wasserschlauch
trennen.
Î Manuelle Bewässerung aktivieren, damit restliches Wasser aus
dem Bewässerungsautomaten abfließen kann.
Î Regler für die Bewässerungshäufigkeit auf Stellung RES drehen.
Î Batterie entfernen.
Deutsch 11
Page 12

Pflege und Wartung
Filterdichtung reinigen
Î Filterdichtung im Wasseranschluss regelmäßig entnehmen und
unter fließendem Wasser ausspülen.
Batterie
Batterie wechseln
Vor jeder Bewässerungssaison oder bei rot leuchtender Signalleuchte.
Î Gehäuseoberteil abnehmen.
Î Neue 9V Batterie (Typ 6LR61 / Alkaline) einlegen.
Verbrauchte Batterie gemäß den geltenden Bestimmungen entsorgen.
Hinweis: Die Sicherheitseinrichtung des Bewässerungsautomaten schließt bei leerer Batterie automatisch das Ventil.
Î Gehäuse schließen, auf richtigen Sitz achten.
Wartung
Das Gerät ist wartungsfrei.
Lagerung
Î Bewässerungsautomat vollständig von Wasser entleeren.
Î Batterie entfernen.
Î Bewässerungsautomat an einem trockenen und frostsicheren
Ort lagern.
12 Deutsch
Page 13
Hilfe bei Störungen
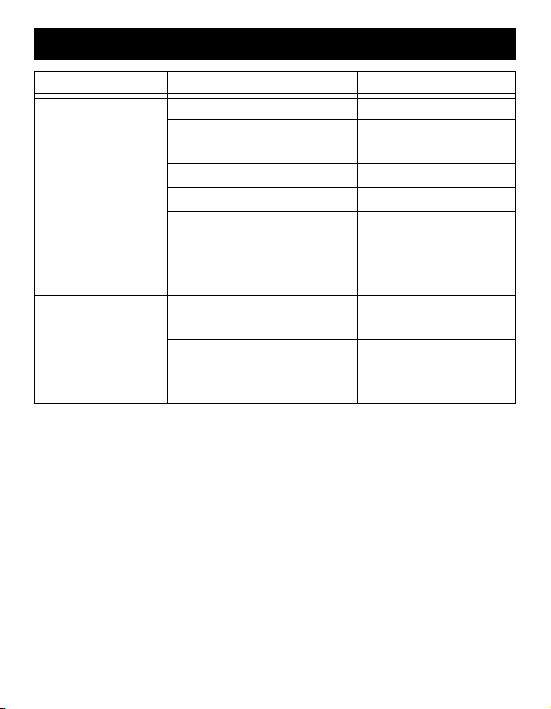
Störung Ursache Behebung
Bewässerung erfolgt trotz Programmierung
nicht.
Leckage am
Wasseranschluss.
Bei Fragen oder Störungen hilft Ihnen unsere Kärcher-Niederlassung
gerne weiter. Adresse siehe Rückseite.
Wasserhahn geschlossen. Wasserhahn öffnen.
Batterie leer. Neue 9V Batterie (Typ
6LR61 / Alkaline) einlegen.
Batterieanschlusskontakte
oxidiert.
Filterdichtung verstopft. Filterdichtung reinigen.
Bewässerungsprogramm ma-
nuell unterbrochen. Regler für
Bewässerungsdauer steht auf
OFF.
Filterdichtung defekt. Filterdichtung ersetzen.
Wasseranschluss am Was-
serhahn hat sich gelöst.
Kontakte reinigen.
Regler für die Bewässerungsdauer auf die
gewünschte Dauer,
z.B. 15min einstellen.
Wasseranschluss wieder festschrauben.
Deutsch 13
Page 14
Technische Daten
Betriebsdruck 0,1 - 1,0 (1 - 10) MPa (bar)
Zulauftemperatur (max.) 35 °C
Umgebungstemperatur +1 -> +60 °C
Batterietyp 9V (6LR61 / Alkaline)
Technische Änderungen vorbehalten!
14 Deutsch
Page 15
Contents
Illustration of appliance 3
General information 15
Safety instructions 17
Operation 18
Maintenance and care 22
Troubleshooting 23
Technical specifications 24
General information
Dear Customer,
them for later use or subsequent owners.
– This appliance has been designed for use in private households
– This appliance is designed to be connected to a water tap and au-
Please read and comply with these original instructions
prior to the initial operation of your appliance and store
Proper use
and is not intended for commercial use.
tomatically regulates the water flow in irrigation systems.
English 15
Page 16
Environmental protection
The packaging material can be recycled. Please do not place
the packaging into the ordinary refuse for disposal, but arrange
for the proper recycling.
Old appliances contain valuable materials that can be recycled. Please arrange for the proper recycling of old appliances.
Please dispose your old appliances using appropriate collec-
tion systems.
Notes about the ingredients (REACH)
You will find current information about the ingredients at:
http://www.karcher.de/de/unternehmen/
umweltschutz/REACH.htm
Warranty
The warranty terms published by the relevant sales company are applicable in each country. We will repair potential failures of your appliance within the warranty period free of charge, provided that such
failure is caused by faulty material or defects in manufacturing. In the
event of a warranty claim please contact your dealer or the nearest
authorized Customer Service centre. Please submit the proof of purchase.
(See address on the reverse)
Symbols in the operating instructions
Caution
Possible hazardous situation that could lead to mild injury to persons
or damage to property.
16 English
Page 17

Safety instructions
Caution
Do not use the irrigation device in drinking water systems.
Only operate the irrigation device with untreated, clear fresh wa-
ter at a temperature of max. 35°C.
Only install the device outside.
Protect the irrigation device from water spray and never sub-
merge in water.
Check the irrigation device for damages prior to each use and
stop using it if there are visual damages.
Only mount irrigation device in a vertical position.
Do not use sealant or lubrication to connect the irrigation device
to the water tap.
Do not pull on the attached hose.
Only use 9V batteries (type 6LR61 / Alkaline).
Do not use rechargeable batteries.
Do not install the irrigation device in areas where condensation
water may be generated, as this may damage the battery.
Do not install the irrigation device near heat sources (max. ambi-
ent temperature 60°C).
Do not install the irrigation device near powered devices.
English 17
Page 18
Operation
Check the contents of the packaging for completeness and damages
when unpacking. If you detect any damages please contact your
dealer.
Illustrations on fold-out page!
Description of the Appliance
1 Reduction piece (G
2 Water connection (G 1) with filter gasket
3 Hose connection
4 Coupling element for hose connection
5 Housing top
6 Battery compartment
7 Signal lamp
8 Regulator irrigation frequency
9 Regulator irrigation duration
10 Button to change the start time / for function control
Î Remove the top part of the casing.
Î Insert a 9V battery (type 6LR61 / Alkaline).
Î Close the casing and ensure a proper fit.
Î Screw the coupling element onto the hose connection.
Î If necessary, screw the reduction piece onto the water connection.
Î Hold the irrigation device to the casing and screw the water con-
nection onto the water tap.
3
/4)
Before Startup
18 English
Page 19

Caution
Never connect the irrigation device to the water tap without using the
supplied filter gasket.
Start up
Setting the irrigation duration
Î Set the regulator for the irrigation duration to the desired duration,
e.g. 15 minutes.
Set the irrigation frequency and the start time
Note: The start time of the irrigation rhythm corresponds directly to
the set time of the irrigation duration. The start can be optionally
changed and is also described below.
Î Turn the regulator for the irrigation frequency to the RES position.
The signal lamp blinks red, the programming mode is activated
for 30 seconds.
Î Activate the button to change the start time (option). Every use
moves the start time by 60 minutes.
e.g.: To delay the start time by 3 hours, press the button three
times (from the current time). The signal lamp glows green every
time it is used.
Î Turn the regulator for the irrigation frequency to the desired cycle.
h = cycle time in hours, e.g. every 4 hours
d = cycle time in days, e.g. every 2 days
w = weekly cycle
Reset setting
In order to correct an entry or to delete a preset programme
Î Turn the regulator for the irrigation frequency to the RES position.
English 19
Page 20

Operation
Programme-controlled irrigation
The irrigation will take place automatically as per the preset programme (e.g. every 2 days for 15 minutes each).
Actuating the button for function control lets you check the current
status at any time. While the programme is active, the signal lamp will
briefly light up green.
Note: If the battery is depleted, the irrigation programme will be interrupted automatically and the signal lamp will glow red. If the irrigation
device is to be used over longer periods without supervision, you
should insert a new battery.
Manual irrigation
The irrigation can be started manually at any time; the preset programmes will not be affected by this.
Start manual irrigation
Î Turn the regulator for the irrigation duration to the ON position;
the signal lamp will briefly light up green, the valve will open.
After 30 minutes, the irrigation process will end automatically.
Stop manual irrigation
Î Turn the regulator for the irrigation duration to the OFF position;
the signal lamp will briefly light up red, the valve will close.
Note: If an irrigation programme is set on the irrigation unit, the regulator for the irrigation duration must be reset to the desired times after the manual irrigation is completed. If the regulator is set to OFF,
there will be no irrigation, even though the internal irrigation rhythm
will continue.
20 English
Page 21

Finish operation
At the end of the irrigation season
Î Turn off tap.
Î Remove the irrigation device from the water tap and the water
hose.
Î Activate manual irrigation to drain the remaining water from the
irrigation device.
Î Turn the regulator for the irrigation frequency to the RES position.
Î Remove the battery.
English 21
Page 22

Maintenance and care
Clean the filter gasket
Î Regularly remove the filter gasket from the water connection and
rinse under running water.
Battery
Change the battery
Prior to each irrigation season or of the signal lamp glows red.
Î Remove the top part of the casing.
Î Insert a new 9V battery (type 6LR61 / Alkaline).
Dispose of the used battery according to the local provisions.
Note: The safety unit of the irrigation device will automatically
close the valve if the battery is depleted.
Î Close the casing and ensure a proper fit.
Maintenance
The appliance is maintenance-free.
Storage
Î Completely drain all water from the irrigation device.
Î Remove the battery.
Î Store the irrigation device at a dry and frost-free location.
22 English
Page 23
Troubleshooting
Fault Cause Remedy
The irrigation does
not take place in
spite of the programming.
Leakage at the water connection.
Our Kärcher branch will be pleased to help you further in the case of
questions or faults. See address on the reverse.
Water tap is closed. Open tap.
Battery depleted. Insert a new 9V battery
(type 6LR61 / Alkaline).
Battery contacts oxidized. Clean the contacts.
Filter gaskets blocked. Clean the filter gasket.
Irrigation programme inter-
rupted manually. Regulator
for irrigation duration set to
OFF.
Filter gasket defective. Replace the filter gas-
The water connection at the
water tap has become
loose.
Set the regulator for the
irrigation duration to the
desired duration, e.g.
15 minutes.
ket.
Reconnect the water
connection.
English 23
Page 24

Technical specifications
Operating pressure 0,1 - 1,0 (1 - 10) MPa (bar)
Max. feed temperature 35 °C
Ambient temperature +1 -> +60 °C
Battery type 9V (6LR61 / Alkaline)
Subject to technical modifications!
24 English
Page 25

Table des matières
Illustration de l'appareil 3
Consignes générales 25
Consignes de sécurité 27
Utilisation 28
Entretien et maintenance 32
Assistance en cas de panne 33
Caractéristiques techniques 34
Consignes générales
Cher client,
server pour une utilisation ultérieure ou pour le propriétaire futur.
– Cet appareil ne doit être utilisé que pour un usage domestique.
– Le présent appareil est destiné au raccord à un robinet d'eau et pi-
Lire cette notice originale avant la première utilisation de votre appareil, se comporter selon ce qu'elle requièrt et la con-
Utilisation conforme
lote automatiquement le flux d'eau dans les systèmes d'arrosage.
Français 25
Page 26

Protection de l’environnement
Les matériaux constitutifs de l’emballage sont recyclables. Ne
pas jeter les emballages dans les ordures ménagères, mais
les remettre à un système de recyclage.
Les appareils usés contiennent des matériaux précieux recyclables lesquels doivent être apportés à un système de recyclage. Pour cette raison, utilisez des systèmes de collecte
adéquats afin d'éliminer les appareils usés.
Instructions relatives aux ingrédients (REACH)
Les informations actuelles relatives aux ingrédients se trouvent sous
:
http://www.karcher.de/de/unternehmen/
umweltschutz/REACH.htm
Garantie
Dans chaque pays, les conditions de garantie en vigueur sont celles
publiées par notre société de distribution responsable. Les éventuelles pannes sur l’appareil sont réparées gratuitement dans le délai de
validité de la garantie, dans la mesure où celles-ci relèvent d'un défaut matériel ou d'un vice de fabrication. En cas de recours en garantie, adressez-vous à votre revendeur ou au service après-vente
agréé le plus proche munis de votre preuve d'achat.
(Adresse au dos)
Symboles utilisés dans le mode d'emploi
Attention
Pour une situation potentiellement dangereuse qui peut avoir pour
conséquence des blessures légères ou des dommages matériels.
26 Français
Page 27

Consignes de sécurité
Attention
Ne pas exploiter l'arroseur automatique dans des systèmes
d'eau potable.
N'exploiter l'appareil d'arrosage qu'avec de l'eau claire non trai-
tée, à une température maximale de 35°C.
Installer l'arroseur automatique uniquement en zone extérieure.
Protéger l'appareil d'arrosage contre les éclaboussures d'eau et
ne jamais le plonger dans l'eau.
Contrôler avant chaque utilisation que l'arroseur automatique
n'est pas endommagé, en arrêter l'exploitation en cas de dommages visibles.
Disposer l'arroseur automatique uniquement en position verticale.
Ne pas utiliser de masse d'étanchéification ni de lubrifiant pour
raccorder l'arroseur automatique au robinet d'eau.
Ne pas tirer sur le tuyau raccordé.
Utiliser uniquement des piles de 9V (type 6LR61 / Alkaline).
Ne pas utiliser de batteries rechargeables.
Ne pas installer l'arroseur automatique en des sites où il se forme
de la condensation d'eau car cela pourrait endommager la pile.
Ne pas installer l'arroseur automatique près de sources de cha-
leur (température ambiante max. 60° C).
Ne pas utiliser l'arroseur automatique à proximité d'appareils
sous tension électrique.
Français 27
Page 28

Utilisation
Lors du déballage, contrôler la présence de l’intégralité du matériel et
d'éventuels dommages. Si des dégâts imputables au transport sont
constatés, il faut en informer le revendeur.
Illustrations, cf. côté escamotable !
Description de l’appareil
1 Réducteur (G
2 Raccord d'eau (G1) avec joint filtre
3 Raccord du tuyau
4 Elément de couplage pour raccord de tuyau
5 Dessus de boîtier
6 Compartiment batterie
7 Témoin lumineux
8 Régulateur pour fréquence d'arrosage
9 Régulateur pour durée d'arrosage
10 Touche permettant de modifier le moment du démarrage / pour
contrôler le fonctionnement
Î Retirer la partie supérieure du logement.
Î Insérer la pile 9 V (type 6LR61 / Alkaline).
Î Fermer le boîtier, veiller à sa bonne assise.
Î Visser l'élément de couplage sur le raccord de tuyau.
Î Si nécessaire, visser le réducteur sur le raccord d'eau.
Î Maintenir l'arroseur automatique sur le logement et visser le rac-
cord d'eau sur le robinet d'eau.
3
/4)
Avant la mise en service
28 Français
Page 29

Attention
Ne jamais raccorder l'arroseur automatique au robinet d'eau sans le
joint de filtrage.
Mise en service
Régler la durée d'arrosage
Î Régler le régulateur sur la durée d'arrosage voulue, par ex. 15
minutes
Régler la fréquence et le moment du démarrage
Remarque : Le moment du démarrage de la cadence d'arrosage cor-
respond exactement au moment réglé pour la durée d'arrosage. Le
moment du démarrage est possible en option et est décrit par la suite.
Î Tourner le régulateur pour la fréquence d'arrosage en position RES.
Le témoin de signalisation clignote en rouge, le mode programme est
activé pendant 30 sec.
Î Actionner la touche permettant de modifier le moment du démarrage
(option). Par actionnement, le temps de démarrage se décale de 60
min.
Par ex. : Pour décaler le démarrage de 3 heures à partir de l'heure actuelle, appuyer 3x sur le bouton. Le témoin de signalisation s'allume en
vert à chaque actionnement.
Î Tourner le régulateur pour la fréquence d'arrosage sur le cycle voulu.
h = cycle en heures, par ex. toutes les 4 heures
d = cycle en jours, par ex. tous les 2 jours
w = cycle hebdomadaire
Réinitialiser les paramètres
Pour corriger une saisie ou supprimer un programme déjà réglé
Î Tourner le régulateur pour la fréquence d'arrosage en position
RES.
Français 29
Page 30

Fonctionnement
Arrosage à pilotage par programme
L'arrosage s'effectue automatiquement, conformément au programme réglé (par exemple tous les 2 jours pendant 15 minutes).
L'état peut être interrogé à tout moment, à titre de contrôle, par l'actionnement de la touche. Lorsque le programme est activé, le témoin de signalisation s'allume brièvement en vert.
Remarque : Lorsque la batterie est vide, le programme d'arrosage
est automatiquement interrompu, le témoin de signalisation s'allume
en rouge. Si l'appareil d'arrosage automatique est utilisé sans surveillance pendant une période prolongée, mettre une nouvelle batterie en place à titre préventif.
Arrosage manuel
L'arrosage peut être activée manuellement à tout moment, sans que
ceci n'influence les programmes réglés.
Démarrage de l'arrosage manuel
Î Tourner le régulateur de durée d'arrosage en position ON, le té-
moin de signalisation s'allume brièvement en vert et la vanne
s'ouvre.
La séquence d'arrosage s'achève automatiquement au bout de
30 minutes.
Arrêt de l'arrosage manuel
Î Tourner le régulateur de durée d'arrosage en position OFF, le té-
moin de signalisation s'allume brièvement en rouge et la vanne
se ferme.
Remarque : Si un programme d'arrosage est réglé sur l'appareil d'arrosage automatique, le régulateur de durée d'arrosage doit être de
nouveau réglé sur la durée d'arrosage voulue à l'issue de l'arrosage
30 Français
Page 31

manuel. Si le régulateur se trouve sur OFF, l'arrosage ne s'effectue
pas, bien que le rythme d'arrosage interne se poursuive.
Fin de l'utilisation
A la fin de la saison d'arrosage
Î Fermer le robinet d'eau.
Î Séparer l'arroseur automatique du robinet d'eau et du tuyau
d'eau.
Î Activer l'arrosage manuel afin que l'eau restante puisse s'écouler
de l'arroseur automatique.
Î Tourner le régulateur pour la fréquence d'arrosage en position
RES.
Î Retirer la pile.
Français 31
Page 32

Entretien et maintenance
Nettoyer le joint de filtrage
Î Retirer régulièrement le joint de filtrage dans le raccord d'eau et
le rincer à l'eau courante.
Batterie
changer la batterie
Avant chaque période d'arrosage ou bien lorsque le témoin de signalisation s'allume en rouge.
Î Retirer la partie supérieure du logement.
Î Insérer une pile 9 V (type 6LR61 / Alkaline) neuve.
Éliminer la batterie usée en respectant les dispositions en vigueur.
Remarque : Le dispositif de sécurité de l'arroseur ferme automatiquement la vale si la pile est vide.
Î Fermer le boîtier, veiller à sa bonne assise.
Maintenance
L'appareil ne nécessite aucune maintenance.
Entreposage
Î Vider complètement l'eau de l'arroseur automatique.
Î Retirer la pile.
Î Entreposer l'arroseur automatique dans un endroit sec et protégé
du gel.
32 Français
Page 33

Assistance en cas de panne
Panne Cause Remède
L'arrosage n'a
pas lieu en dépit de la programmation.
Fuite sur le raccord d'eau.
Notre succursale Kärcher se tient à votre entière disposition pour
d'éventuelles questions ou problèmes. L'adresse figure au dos.
Robinet d'eau fermé. Ouvrir le robinet
d'eau.
Pile vide. Insérer une pile 9 V
(type 6LR61 / Alkali-
ne) neuve.
Contacts de raccordement
de la pile oxydés.
Joint de filtage bouché. Nettoyer le joint de fil-
Programme d'arrosage manuellement interrompu. Le
régulateur de durée d'arrosage se trouve sur OFF.
Joint de filtrage défectueux. Remplacer le joint de
Le raccord d'eau s'est désolidarisé du robinet d'eau.
Nettopyer les con-
tacts.
trage.
Régler le régulateur
sur la durée d'arrosa-
ge voulue, par ex. 15
minutes
filtrage.
Resserrer le raccord
d'eau.
Français 33
Page 34

Caractéristiques techniques
Pression de service 0,1 - 1,0 (1 - 10) MPa (bar)
Température d'alimentation (max.) 35 ° C
Température ambiante +1 -> +60 ° C
Type de pile 9V (6LR61 / Alkaline)
Sous réserve de modifications techniques !
34 Français
Page 35

Indice
Illustrazione dell'apparecchio 3
Avvertenze generali 35
Norme di sicurezza 37
Uso 38
Cura e manutenzione 42
Guida alla risoluzione dei guasti 43
Dati tecnici 44
Avvertenze generali
Gentile cliente,
per un uso futuro o in caso di rivendita dell'apparecchio.
– Questo apparecchio è concepito per il solo uso domestico e non
– Questo dispositivo è previsto per il collegamento ad un rubinetto
Prima di utilizzare l'apparecchio per la prima volta, leggere le presenti istruzioni originali, seguirle e conservarle
Uso conforme a destinazione
deve essere adibito ad uso commerciale o industriale.
e controlla automaticamente il flusso di acqua nei sistemi di irrigazione.
Italiano 35
Page 36

Protezione dell’ambiente
Tutti gli imballaggi sono riciclabili. Gli imballaggi non vanno
gettati nei rifiuti domestici, ma consegnati ai relativi centri di
raccolta.
Gli apparecchi dismessi contengono materiali riciclabili preziosi e vanno perciò consegnati ai relativi centri di raccolta. Si prega quindi di smaltire gli apparecchi dismessi mediante i sistemi
di raccolta differenziata.
Avvertenze sui contenuti (REACH)
Informazioni aggiornate sui contenuti sono disponibili all'indirizzo:
http://www.karcher.de/de/unternehmen/
umweltschutz/REACH.htm
Garanzia
Le condizioni di garanzia valgono nel rispettivo paese di pubblicazione da parte della nostra società di vendita competente. Entro il termine di garanzia eliminiamo gratuitamente eventuali guasti
all’apparecchio, se causati da difetto di materiale o di produzione. Nei
casi previsti dalla garanzia si prega di rivolgersi al proprio rivenditore,
oppure al più vicino centro di assistenza autorizzato, esibendo lo
scontrino di acquisto.
(Indirizzo vedi retro)
Simboli riportati nel manuale d'uso
Attenzione
Per una situazione di rischio possibile che potrebbe determinare danni leggeri a persone o cose.
36 Italiano
Page 37

Norme di sicurezza
Attenzione
Non utilizzare l'automatismo di irrigazione nei sistemi di acqua
potabile.
Utilizzare l'automatismo di irrigazione solo con acqua dolce pulita
non trattata ad una temperatura fino a massimo 35°C.
Installare l'automatismo di irrigazione solo in ambienti esterni.
Proteggere l'automatismo di irrigazione contro gli spruzzi d'acqua
e non immergere mai nell'acqua.
Prima di ogni utilizzo accertarsi che l'automatismo di irrigazione
non sia danneggiato ed in caso di danni visibili interrompere il
funzionamento.
Applicare l'automatismo di irrigazione solo in posizione verticale.
Non utilizzare alcun mastice ed alcun lubrificante per collegare
l'automatismo di irrigazione al rubinetto.
Non tirare al tubo collegato.
Utilizzare solo batterie da 9V (Tipo 6LR61 / Alkaline).
Non utilizzare batterie ricaricabili.
Non installare l'automatismo di irrigazione nei punti in cui si po-
trebbe formare della condensa poiché si potrebbe danneggiare la
batteria.
Non installare l'automatismo di irrigazione vicino a fonti di calore
(temperatura ambiente massima 60°C).
Non utilizzare l'automatismo di irrigazione vicino a dispositivi sot-
to tensione.
Italiano 37
Page 38

Uso
Disimballare la confezione e controllare che il contenuto sia al completo e
che non presenti danneggiamenti. Nel caso in cui si riscontrino danni informare immediatamente il proprio rivenditore.
Figure riportate sulla pagina pieghevole!
Descrizione dell’apparecchio
1 Riduttore (G
2 Raccordo dell'acqua (G 1) con guarnizione del filtro
3 Giunto per tubo flessibile
4 Giunto per collegamento del tubo flessibile
5 Parte superiore alloggiamento
6 Alloggiamento batterie
7 Spia di segnalazione
8 Regolatore per frequenza di irrigazione
9 Regolatore per durata di irrigazione
10 Tasto per modificare l'ora di avvio / per il controllo funzionale
Î Rimuovere la parte superiore dell'alloggiamento.
Î Introdurre una batteria da 9V (Tipo 6LR61 / Alkaline).
Î Chiudere l'alloggiamento accertandosi che sia chiuso correttamente.
Î Avvitare il giunto sull'attacco del tubo flessibile.
Î All'occorrenza avvitare il riduttore sul raccordo dell'acqua.
Î Reggere l'automatismo di irrigazione all'alloggiamento ed avvitare il rac-
cordo dell'acqua sul rubinetto.
Attenzione
Non collegare mai l'automatismo di irrigazione al rubinetto senza la
guarnizione del filtro compresa nella fornitura.
3
/4)
Prima della messa in funzione
38 Italiano
Page 39

Messa in funzione
Impostare la durata di irrigazione
Î Impostare il regolatore della durata di irrigazione alla durata de-
siderata, ad es. 15min.
Impostare la frequenza di irrigazione e l'ora di avvio
Nota: Il punto dell'ora di avvio corrisponde al ritmo di irrigazione al
punto di impostazione della durata di irrigazione. La modifica del punto di avvio è possibile opzionalmente e descritta di seguito.
Î Ruotare il regolatore per la frequenza di irrigazione su RES.
La spia di segnalazione lampeggia rossa, la modalità di programmazione è attivata per 30sec.
Î Azionare il tasto per modificare l'ora di avvio (opzionale). Ad ogni azio-
namento ha luogo uno spostamento dell'ora di avvio di 60min.
P.es.: Per spostare l'ora di avvio di 3 ore, partendo dall'ora attua-
le, premere il tasto 3 volte. La spia di segnalazione ad ogni azionamento è verde.
Î Impostare il regolatore per la frequenza di irrigazione al ciclo de-
siderato.
h = Ciclo in ore, ad es. ogni 4 ore
d = Ciclo in giorni, ad es. ogni 2 giorni
w = ciclo settimanale
Azzerare le impostazioni
Per correggere l'inserimento o cancellare un programma già impostato
Î Ruotare il regolatore per la frequenza di irrigazione su RES.
Italiano 39
Page 40

Funzionamento
Irrigazione controllata da un programma
L'irrigazione avviene automaticamente secondo il programma impostato
(ad esempio ogni 2 giorni per 15 minuti).
Azionando il tasto per il controllo delle funzioni, in qualsiasi momento è possibile consultare lo stato attuale. Con il programma attivato la spia di segnalazione si accende brevemente verde.
Avviso: In caso di batteria scarica il programma di irrigazione viene interrotto automaticamente e la spia di segnalazione è rossa. Quando l'automatismo di irrigazione viene utilizzato per un periodo prolungato senza alcun
controllo, si consiglia di inserire per precauzione una nuova batteria.
Irrigazione manuale
L'irrigazione può essere avviata manualmente in qualsiasi momento,
i programmi impostati restano invariati.
Avvio dell'irrigazione manuale
Î Ruotare il regolatore per la durata di irrigazione in posizione ON,
la spia di segnalazione si accende brevemente verde, la valvola
si apre.
Dopo 30 minuti il programma di irrigazione termina automaticamente.
Arresto dell'irrigazione manuale
Î Ruotare il regolatore per la durata di irrigazione in posizione OFF,
la spia di segnalazione si accende brevemente rossa, la valvola
si chiude.
Nota: Nel caso in cui nell'automatismo di irrigazione sia impostato un
programma di irrigazione è necessario che al termine dell'irrigazione
manuale il regolatore per la durata di irrigazione venga impostato
nuovamente alla durata desiderata. Quando il regolatore è su OFF
non ha luogo alcuna irrigazione, nonostante il ritmo di irrigazione interno continui a funzionare.
40 Italiano
Page 41

Dopo l’uso
Alla fine della stagione dell'irrigazione
Î Chiudere il rubinetto.
Î Scollegare l'automatismo di irrigazione dal rubinetto e dal tubo
flessibile dell'acqua.
Î Attivare l'irrigazione manuale affinché l'acqua residua possa de-
fluire dall'automatismo di irrigazione.
Î Ruotare il regolatore per la frequenza di irrigazione su RES.
Î Rimuovere la batteria.
Italiano 41
Page 42

Cura e manutenzione
Pulire la guarnizione del filtro
Î Rimuovere regolarmente la guarnizione del filtro nel raccordo
dell'acqua e sciacquare il filtro sotto acqua corrente.
Batteria
Sostituire la batteria.
Prima di ogni stagione di irrigazione o quando la spia di segnalazione
è rossa.
Î Rimuovere la parte superiore dell'alloggiamento.
Î Introdurre una nuova batteria da 9V (Tipo 6LR61 / Alkaline).
Smaltire la batteria scarica in conformità alle disposizioni in vigore.
Avviso: Il dispositivo di sicurezza dell'automatismo di irrigazione
chiude la valvola automaticamente in caso di batteria scarica.
Î Chiudere l'alloggiamento accertandosi che sia chiuso corretta-
mente.
Manutenzione
L'apparecchio è senza manutenzione.
Supporto
Î Svuotare completamente l'acqua dall'automatismo di irrigazione.
Î Rimuovere la batteria.
Î Riporre l'automatismo di irrigazione in un luogo asciutto e protet-
to dal gelo.
42 Italiano
Page 43

Guida alla risoluzione dei guasti
Guasto Causa Rimedio
Nonostante la
programmazione
non ha luogo alcuna irrigazione.
Perdita dal raccordo dell'acqua.
In caso di domande o anomalie la filiale Kärcher è felice di poterla
aiutare. Indirizzo vedi retro.
Rubinetto chiuso. Aprire il rubinetto.
Batteria scarica. Introdurre una nuova
batteria da 9V (Tipo
6LR61 / Alkaline).
Contatti di collegamento delle
batterie ossidati.
Guarnizione del filtro otturato. Pulire la guarnizione
Programma di irrigazione interrotto manualmente. Il regolatore per la durata di
irrigazione è su OFF.
Guarnizione del filtro difettosa. Sostituire la guarnizio-
Il raccordo dell'acqua si è staccato dal rubinetto.
Pulire i contatti.
del filtro.
Impostare il regolatore
della durata di irrigazione alla durata desiderata, ad es. 15min.
ne del filtro.
Avvitare nuovamente il
raccordo dell'acqua.
Italiano 43
Page 44

Dati tecnici
Pressione di esercizio 0,1 - 1,0 (1 - 10) MPa (bar)
Temperatura in entrata (max.) 35 °C
Temperatura ambiente +1 -> +60 °C
Tipo batteria 9V (6LR61 / Alkaline)
Con riserva di modifiche tecniche!
44 Italiano
Page 45

Inhoud
Afbeelding van het apparaat 3
Algemene instructies 45
Veiligheidsinstructies 47
Bediening 48
Onderhoud 52
Hulp bij storingen 53
Technische gegevens 54
Algemene instructies
Beste klant,
waar deze voor later gebruik of voor een latere eigenaar.
– Dit apparaat is voor privé-gebruik ontwikkeld en is niet bedoeld
– Dit apparaat is voorzien voor de aansluiting aan een waterkraan en
Lees vóór het eerste gebruik van uw apparaat deze originele gebruiksaanwijzing, ga navenant te werk en be-
Doelmatig gebruik
voor industrieel gebruik.
regelt automatisch de waterstroming in besproeiiingssystemen.
Nederlands 45
Page 46

Zorg voor het milieu
Het verpakkingsmateriaal is herbruikbaar. Deponeer het verpakkingsmateriaal niet bij het huishoudelijk afval, maar bied
het aan voor hergebruik.
Onbruikbaar geworden apparaten bevatten waardevolle materialen die geschikt zijn voor hergebruik. Lever de apparaten
daarom in bij een inzamelpunt voor herbruikbare materialen.
Aanwijzingen betreffende de inhoudsstoffen (REACH)
Huidige informatie over de inhoudsstoffen vindt u onder:
http://www.karcher.de/de/unternehmen/
umweltschutz/REACH.htm
Garantie
In ieder land zijn de door ons bevoegde verkoopkantoor uitgegeven
garantiebepalingen van toepassing. Eventuele storingen aan het apparaat verhelpen wij zonder kosten binnen de garantietermijn, mits
een materiaal of fabrieksfout de oorzaak van deze storing is. Neem
bij klachten binnen de garantietermijn contact op met uw leverancier
of de dichtstbijzijnde klantenservicewerkplaats en neem uw aankoopbewijs mee.
(adres zie achterzijde)
Symbolen in de gebruiksaanwijzing
Voorzichtig
Voor een mogelijks gevaarlijke situatie die kan leiden tot lichte lichamelijke letsels of materiële schade.
46 Nederlands
Page 47

Veiligheidsinstructies
Voorzichtig
Bewateringsautomaat niet gebruiken in drinkwatersystemen.
Automatisch besproeiingssysteem alleen gebruiken met onbe-
handeld, zuiver en zoet water met een temperatuur vtot maximum 35°C.
Bewateringsautomaat alleen buiten installeren.
Automatisch besproeiingssysteem beschermen tegen spatwater
en nooit in water dompelen.
Bewateringsautomaat voor ieder gebruik op schade controleren,
bij zichtbare beschadigingen gebruik staken.
Bewateringsautomaat alleen verticaal aanbrengen.
Geen pakkingsmateriaal en geen smeermiddelen gebruiken, om
de bewateringsautomaat aan de waterkraan aan te sluiten.
Niet aan de aangesloten slang trekken.
Alleen 9V batterijen (type 6LR61 / Alkaline) gebruiken.
Geen oplaadbare batterijen gebruiken.
Bewateringsautomaat niet op plaatsen installeren, waar zich con-
denswater vormt, omdat hierdoor de batterij beschadigd kan raken.
Bewateringsautomaat niet in de buurt van warmtebronnen instal-
leren (maximale omgevingstemperatuur 60°C).
Bewateringsautomaat niet in de buurt van apparaten onder span-
ning gebruiken.
Nederlands 47
Page 48

Bediening
Controleer bij het uitpakken de inhoud van de verpakking op volledigheid en beschadigingen. Neem ingeval van opmerkingen contact op
met uw dealer.
Afbeeldingen zie uitklapbaar blad!
Beschrijving apparaat
1 Verloopstuk (G
2 Wateraansluiting (G 1) met filterafdichting
3 Slangaansluiting
4 Koppelgedeelte voor slangaansluiting
5 Bovenstuk behuizing
6 Batterijvak
7 Waarschuwingslampje
8 Regelaar voor de besproeiingsfrequentie
9 Regelaar voor de besproeiingsduur
10 Toets voor het wijzigen van de starttijd / voor de functiecontrole
Î Bovenstuk van de behuizing wegnemen.
Î 9V batterij (type 6LR61 / Alkaline) gebruiken.
Î Behuizing sluiten, letten op een juiste positionering.
Î Koppelgedeelte op slangaansluiting schroeven.
Î Indien nodig het verloopstuk op de wateraansluiting draaien.
Î Bewateringsautomaat aan de behuizing vasthouden en water-
aansluiting op de waterkraan schroeven.
Voorzichtig
Bewateringsautomaat nooit zonder meegeleverde filterpakking aan
de waterkraan aansluiten.
3
/4)
Voor ingebruikneming
48 Nederlands
Page 49

Ingebruikneming
Bewateringsduur instellen
Î Regelaar voor de besproeiingsduur instellen op de gewenste
duur, bv. 15 min.
Besproeiingsfrequentie en starttijdstip instellen
Instructie: Het starttijdstip van het besproeiingsritme komt overeen
met het insteltijdstip van de besproeiingsduur. De wijziging van het
starttijdstip is optioneel mogelijk en hierna ook beschreven.
Î Regelaar voor de besproeiingsfrequentie op stand RES draaien.
Het waarschuwingslampje knippert rood, de programmeermodus
is geactiveerd gedurende 30 sec.
Î Toets voor het wijzigen van de starttijd (optioneel) De starttijd
wordt 60 min. verlaat telkens als de toets ingedrukt wordt.
Bv.: Om de starttijd 3 uur later in te stellen, uitgaand van het hui-
dige tijdstip, moet de toets 3 keer ingedrukt worden. Het waarschuwingslampje brandt groen telkens als de toets ingedrukt
wordt.
Î Regelaar voor de besproeiingsfrequentie instellen op de gewens-
te cyclus.
h = cyclus in uren, bv. alle 4 uren
d = cyclus in dagen, bv. alle 2 dagen
w = cyclus wekelijks
Instellingen resetten
Om een invoer te corrigeren of een al ingesteld programma te wissen
Î Regelaar voor de besproeiingsfrequentie op stand RES draaien.
Nederlands 49
Page 50

Gebruik
Programmagestuurde bewatering
De besproeiing gebeurt automatisch volgens het ingestelde programma (bijvoorbeeld 2 dagen gedurende 15 minuten).
Door de toets voor de functiecontrole in te drukken, kan de huidige
status op elk ogenblik opgeroepen worden. Bij een actief programma
brandt het waarschuwingslampje kort groen.
Instructie: Bij een lege batterij wordt het besproeiingsprogramma
automatisch onderbroken, het waarschuwingslampje brandt rood.
Wanneer het automatische besproeiingssysteem gedurende lange
tijd zonder toezicht gebruikt wordt, moet uit voorzorg een nieuwe batterij geplaatst worden.
Manuele bewatering
De besproeiing kan op elk ogenblik handmatig gestart worden, de ingestelde programma's blijven onaangeroerd.
Start manuele bewatering
Î Regelaar voor de besproeiingsduur op stand ON draaien, waar-
schuwingslampje brandt kort groen, de klep gaat open.
Na 30 minuten wordt de besproeiing automatisch beëindigd.
Stop manuele bewatering
Î Regelaar voor de besproeiingsduur op stand OFF draaien, waar-
schuwingslampje brandt kort rood, de klep gaat dicht.
Instructie: Indien aan het automatische besproeiingssysteem een
programma is vastgelegd, moet de regelaar voor de besproeiingsduur na de beëindiging van de handmatige besproeiing opnieuw ingesteld worden op de gewenste duur. Indien de regelaar op OFF
staat, vindt geen besproeiing plaats, ook al loopt het interne besproeiingsritme verder.
50 Nederlands
Page 51

De werkzaamheden beëindigen
Op het einde van het bewateringsseizoen
Î Waterkraan dichtdraaien.
Î Bewateringsautomaat van waterkraan en waterslang halen.
Î Manuele bewatering activeren, opdat restwater uit de bewate-
ringsautomaat kan stromen.
Î Regelaar voor de besproeiingsfrequentie op stand RES draaien.
Î Batterij verwijderen.
Nederlands 51
Page 52

Onderhoud
Filterpakking reinigen
Î Filterpakking geregeld uit de wateraansluiting nemen en onder
stromend water uitspoelen.
Accu
Batterij vervangen
Voor elk besproeiingsseizoen of bij een rood waarschuwingslampje.
Î Bovenstuk van de behuizing wegnemen.
Î Nieuwe 9V batterij (type 6LR61 / Alkaline) gebruiken.
Verbruikte batterij conform de geldende bepaleingen verwijderen.
Tip: De veiligheidsinrichting van de bewateringsautomaat sluit
de klep automatisch, wanneer de batterij leeg is.
Î Behuizing sluiten, letten op een juiste positionering.
Onderhoud
Het apparaat is onderhoudsvrij.
Opslag
Î Bewateringsautomaat helemaal vrij van water maken.
Î Batterij verwijderen.
Î Bewateringsautomaat op een droge en vorstvrije plaats opslaan.
52 Nederlands
Page 53

Hulp bij storingen
Storing Oorzaak Oplossing
Bewatering vindt
niet plaats ondanks programmering.
Lekkage aan de
wateraansluiting.
Bij vragen of storingen helpt onze Kärcher-vestiging u graag verder.
Adres zie achterzijde.
Waterkraan dicht. Waterkraan openen.
Batterij leeg. Nieuwe 9V batterij
(type 6LR61 / Alkaline)
gebruiken.
Batterijaansluitcontacten
geoxideerd.
Filterpakking verstopt. Filterpakking reinigen
Besproeiingsprogramma
handmatig onderbroken. Regelaar voor besproeiingsduur
staat op OFF.
Filterpakking defect. Filterpakking vervan-
Wateraansluiting aan de
waterkraan is losgekomen.
Contacten reinigen.
Regelaar voor de be-
sproeiingsduur instel-
len op de gewenste
duur, bv. 15 min.
gen.
Wateraansluiting
weer vastschroeven.
Nederlands 53
Page 54

Technische gegevens
Bedrijfsdruk 0,1 - 1,0 (1 - 10) MPa (bar)
Toevoertemperatuur (max.) 35 °C
Omgevingstemperatuur +1 -> +60 °C
Batterijtype 9V (6LR61 / Alkaline)
Technische veranderingen voorbehouden!
54 Nederlands
Page 55

Índice de contenidos
Ilustración del aparato 3
Indicaciones generales 55
Indicaciones de seguridad 57
Manejo 58
Cuidados y mantenimiento 62
Ayuda en caso de avería 63
Datos técnicos 64
Indicaciones generales
Estimado cliente:
para un uso posterior o para otro propietario posterior.
– Este aparato ha sido diseñado para el uso particular y no para los
– Este aparato está diseñado para su conexión a un grifo de agua
Antes del primer uso de su aparato, lea este manual original, actúe de acuerdo a sus indicaciones y guárdelo
Uso previsto
esfuerzos del uso industrial.
y regula automáticamente el caudal en los sistemas de riego.
Español 55
Page 56

Protección del medio ambiente
Los materiales de embalaje son reciclables. Po favor, no tire el
embalaje a la basura doméstica; en vez de ello, entréguelo en
los puntos oficiales de recogida para su reciclaje o recuperación.
Los aparatos viejos contienen materiales valiosos reciclables
que deberían ser entregados para su aprovechamiento posterior. Por este motivo, entregue los aparatos usados en los pun-
tos de recogida previstos para su reciclaje.
Indicaciones sobre ingredientes (REACH)
Encontrará información actual sobre los ingredientes en:
http://www.karcher.de/de/unternehmen/
umweltschutz/REACH.htm
Garantía
En todos los países rigen las condiciones de garantía establecidas
por nuestra empresa distribuidora. Las averías del aparato serán
subsanadas gratuitamente dentro del periodo de garantía, siempre
que se deban a defectos de material o de fabricación. En un caso de
garantía, le rogamos que se dirija con el comprobante de compra al
distribuidor donde adquirió el aparato o al servicio al cliente autorizado más próximo a su domicilio.
(La dirección figura al dorso)
Símbolos del manual de instrucciones
Precaución
Para una situación que puede ser peligrosa, que puede acarrear lesiones leves o daños materiales.
56 Español
Page 57

Indicaciones de seguridad
Precaución
No utilizar los equipos automáticos de riego en sistemas de agua
potable.
Utilizar los equipos automáticos de riego solamente con agua
dulce, no tratada, con una temperatura máxima de 35ºC.
Instalar el equipo automático de riego solamente en exterior.
Proteger de salpicaduras de agua el equipo automático de riego
y no sumergirlo nunca bajo el agua.
Comprobar antes de cada utilización si el equipo automático de
riego está dañado, si hay daños visibles debe dejar de usarlo.
Colocar el equipo automático de riego solamente en posición
vertical.
No usar masa para juntas ni lubricante para conectar el equipo
automático de riego al grifo de agua.
No tirar de la manguera conectada.
Usar únicamente pilas de 9V (tipo 6LR61 / Alkaline).
No usar pilas recargables.
No instalar el equipo automático de riego en lugares donde se
forma agua de condensación, pues esta puede dañar la pila.
No instalar el equipo automático de riego cerca de fuentes de ca-
lor (temperatura ambiente máxima 60ºC).
No utilizar el equipo automático de riego cerca de aparatos so-
metidos a tensión.
Español 57
Page 58
Manejo
Verifique durante el desembalaje que no falte ninguna pieza ni haya
daños. Si debe hacer alguna reclamación, informe a su distribuidor.
Ilustraciones, véase la contraportada.
Descripción del aparato
1 Pieza reductora (G
2 toma de agua (G 1) con junta del filtro
3 empalme de manguera
4 Pieza de acoplamiento para conexión de manguera
5 Parte superior de la carcasa
6 Compartimento de las pilas
7 Luz de señalización
8 Regulador de la frecuencia de riego
9 Regulador de la duración de riego
10 Botón para modificar la hora de inicio / para controlar el funcio-
namiento
Î Extraer la parte superior de la carcasa.
Î Colocar pila de 9V (tipo 6LR61 / Alkaline).
Î Cerrar la carcasa, comprobar que está colocada correctamente.
Î Atornillar le pieza de acoplamiento a la conexión de manguera.
Î Si es necesario, atornillar la pieza reductora a la toma de agua.
Î Sujetar el equipo automático de riego a la carcasa y atornillar la
conexión de agua al grifo.
3
/4)
Antes de la puesta en marcha
58 Español
Page 59

Precaución
No conectar nunca el equipo automático de riego al grifo de agua sin
la junta de filtro suministrada.
Puesta en marcha
Ajustar la duración del riego
Î Ajustar el regulador de la duración de riego a la duración desea-
da, p.ej. 15 min.
Ajustar la frecuencia de riego y el momento de inicio.
Nota: El momento de inicio del ritmo de riego se corresponde con el
momento de ajuste de la duración de riego.Der Startzeitpunkt des
Bewässerungsrythmus entspricht unmittelbar dem Einstellzeitpunkt
der Bewässerungsdauer. Se puede modificar el momento de inicio y
se describe a continuación.
Î Girar el regulador de la frecuencia de riego a la posición RES.
El piloto de control parpadea en rojo, el modo de programación
se activa durante 30s.
Î Accionar el botón para modificar la hora de inicio (opcional).
Cada vez que se pulse el botón se retrasará 60 min el momento
de inicio.
P. ej.: Para retrasar el momento de inicio 3 horas desde la hora
actual, pulsar 3 veces el botón. El piloto de control se ilumina en
verde cada vez que se pulse.
Î Girar el regulador de la frecuencia de riego al ciclo deseado.
h = ciclos en horas, p.ej. cada 4 horas
d = ciclos en días, p.ej. cada 2 días
w = ciclo semanal
Español 59
Page 60

Restablecer las configuraciones
Para corrgir un dato introducido o borrar un programa ya ajustado
Î Girar el regulador de la frecuencia de riego a la posición RES.
Funcionamiento
Riego controlado por un programa
El riego se ejecuta automáticamente según el programa ajustado
(por ejemplo cada 2 días durante 15 minutos).
Si se pulsa la tecla para comprobar el funcionamiento, se puede consultar el estado actual en cualquier momento. Con el programa activo
se ilumina el piloto de control brevemente en verde.
Indicación: Si las pilas están agotadas se interrumpe automáticamente el programa de riego, el piloto de control se ilumina en rojo. Si
se va a utilizar el equipo automático de riego sin vigilancia durante un
período largo, como medida de precaución coloque una pila nueva.
Riego manual
El riego puede iniciarse en cualquier momento manualmente, los
ajustes de los programas no se ven afectados.
Inicio riego manual
Î Girar el regulador de la duración de riego a la posición ON, el piloto
de control se ilumina brevemente en verde, la válvula se abre.
Transcurridos 30 minutos el proceso de riego termina automáti-
camente.
Parada riego manual
Î Girar el regulador de la duración de riego a la posición OFF, el piloto
de control se ilumina brevemente en rojo, la válvula se cierra.
Indicación: Si en el sistema de riego se fija un programa de riego,
una vez finalizado el riego manual, poner el regulador de la duración
de riego de nuevo en la duración deseada. Si el regulador está en
OFF, no se produce el riego, aunque el ritmo de riego interno avanza.
60 Español
Page 61

Finalización del funcionamiento
Al final de la temporada de riego
Î Cerrar el grifo del agua.
Î Desconectar el equipo automático de riego del grifo del agua y
de la manguera de agua.
Î Activar riego manual, para que salga el agua residual del equipo
automático de riego.
Î Girar el regulador de la frecuencia de riego a la posición RES.
Î Retirar la pila.
Español 61
Page 62

Cuidados y mantenimiento
Limpiar la junta de filtro
Î Sacar regularmente la junta de filtro de la conexión de agua y en-
juagarla bajo agua corriente.
Batería
Cambiar pila
antes de cada temporada de riego o cuando el piloto de control se
ilumina en rojo.
Î Extraer la parte superior de la carcasa.
Î Colocar pila nueva de 9V (tipo 6LR61 / Alkaline).
Eliminar la batería usada de acuerdo con las normativas vigentes.
Nota: El dispositivo de seguridad del equipo automático de riego
cierra automáticamente la válvula si la pila está agotada.
Î Cerrar la carcasa, comprobar que está colocada correctamente.
Mantenimiento
El aparato no precisa mantenimiento.
Almacenamiento
Î Vaciar totalmente el equipo automático de riego, sacando todo el
agua.
Î Retirar la pila.
Î Guardar el equipo automático de riego en un lugar seco y prote-
gido de las heladas.
62 Español
Page 63

Ayuda en caso de avería
Avería Causa Modo de subsanarla
A pesar de estar
programado, no
se ejecuta el riego.
Fuga en la conexión de agua.
En caso de dudas o alteraciones, la sucursal de Kärcher estará encantada de ayudarle. La dirección figura al dorso.
Grifo de agua cerrado. Abrir el grifo del agua.
Pila agotada. Colocar pila nueva de
9V (tipo 6LR61 / Alkali-
ne).
Contactos de conexión de la
pila oxidados.
Junta de filtro obstruída. Limpiar la junta de filtro.
Programa de riego interrum-
pido manualmente. El regulador de la duración del riego
está en OFF.
Junta de filtro averiada. Sustituir junta de filtro.
La conexión de agua en el
grifo de agua se ha soltado.
Limpiar los contactos.
Ajustar el regulador de
la duración de riego a la
duración deseada, p.ej.
15 min.
Volver a enroscar la co-
nexión de agua.
Español 63
Page 64

Datos técnicos
Presión de trabajo 0,1 - 1,0 (1 - 10) MPa (bar)
Temperatura de entrada (máx.) 35 °C
Temperatura ambiente +1 -> +60 °C
Tipo de batería 9V (6LR61 / Alkaline)
Reservado el derecho a realizar modificaciones técnicas.
64 Español
Page 65

Índice
Ilustração do aparelho 3
Instruções gerais 65
Avisos de segurança 67
Manuseamento 68
Conservação e manutenção 72
Ajuda em caso de avarias 73
Dados técnicos 74
Instruções gerais
Estimado cliente,
guarde o manual para uma consulta posterior ou para terceiros a
quem possa vir a vender o aparelho.
– Este aparelho foi desenvolvido para o uso privado e não foi con-
– Este aparelho foi concebido para conectar a uma torneira de
Leia o manual de manual original antes de utilizar o seu
aparelho. Proceda conforme as indicações no manual e
Utilização conforme as disposições
cebido para suster as necessidades de uma utilização industrial.
água e regular automaticamente o caudal da água no sistema de
irrigação.
Português 65
Page 66

Protecção do meio-ambiente
Os materiais de embalagem são recicláveis. Não coloque as
embalagens no lixo doméstico, envie-as para uma unidade de
reciclagem.
Os aparelhos velhos contêm materiais preciosos e recicláveis
e deverão ser reutilizados. Por isso, elimine os aparelhos velhos através de sistemas de recolha de lixo adequados.
Avisos sobre os ingredientes (REACH)
Informações actuais sobre os ingredientes podem ser encontradas em:
http://www.karcher.de/de/unternehmen/
umweltschutz/REACH.htm
Garantia
Em cada país vigem as respectivas condições de garantia estabelecidas pelas nossas Empresas de Comercialização. Eventuais avarias no aparelho durante o período de garantia serão reparadas, sem
encargos para o cliente, desde que se trate dum defeito de material
ou de fabricação. Em caso de garantia, dirija-se, munido do documento de compra, ao seu revendedor ou ao Serviço Técnico mais
próximo.
(Endereços no verso)
Símbolos no Manual de Instruções
Atenção
Para uma possível situação perigosa que pode conduzir a ferimentos
leves ou danos materiais.
66 Português
Page 67

Avisos de segurança
Atenção
Não operar o aparelho de irrigação em sistemas de água potável.
Operar o aparelho de irrigação apenas com água limpa, não tra-
tada, com uma temperatura máx. de 35°C.
Instalar o aparelho de irrigação apenas no exterior.
Proteger o aparelho de irrigação contra salpicos de água e nunca
imergir em água.
Controlar o aparelho de irrigação, antes de cada utilização,
quanto a danos visíveis e imobilizar o sistema se forem detectados defeitos.
Fixar o aparelho de irrigação apenas numa posição vertical.
Não utilizar massa de vedação nem produtos abrasivos para unir
o aparelho de irrigação à torneira.
Não puxar pela mangueira conectada.
Utilizar apenas baterias de 9V (tipo 6LR61 / Alkaline).
Não utilizar baterias recarregáveis.
Não instalar o aparelho de irrigação em locais onde é formada
água de condensação, visto que esta pode danificar a bateria.
Não instalar o aparelho de irrigação na proximidade de fontes de
calor (temperatura ambiente máxima 60°C).
Não operar o aparelho de irrigação na proximidade de aparelhos
sob tensão.
Português 67
Page 68

Manuseamento
Ao desembalar verifique a integridade do conteúdo da embalagem e
eventuais danos. No caso de danos ou falta de material, informe o
seu revendedor.
Ver figuras na página desdobrável!
Descrição da máquina
1 Peça redutora (G
2 Ligação da água (G 1) com junta de filtro
3 Conexão de mangueira
4 Peça de acoplamento para ligação de mangueira
5 Parte superior da carcaça
6 Compartimento da bateria
7 Lâmpada de sinalização
8 Regulador para frequência de irrigação
9 Regulador para duração de irrigação
10 Tecla para modificar a hora de início / para controlo de funciona-
mento
Antes de colocar em funcionamento
Î Retirar a parte superior da carcaça.
Î Inserir uma bateria de 9V (tipo 6LR61 / Alkaline).
Î Fechar a carcaça e ter atenção ao assento correcto.
Î Enroscar a peça de acoplamento na ligação da mangueira.
Î Se necessário, enroscar a peça redutora na ligação da água.
Î Segurar o aparelho de irrigação na carcaça e enroscar a ligação
de água na torneira da água.
3
/4)
68 Português
Page 69

Atenção
Nunca ligar o aparelho de irrigação à torneira da água sem a junta de
filtro incluída no volume de fornecimento.
Colocação em funcionamento
Ajustar o tempo de irrigação
Î Ajustar o regulador para a duração da irrigação no tempo dese-
jado, p. ex., 15 minutos.
Ajustar a frequência de irrigação e a hora de início
Aviso: a hora de início do ritmo de irrigação corresponde aproxima-
damente ao momento de activação da duração de irrigação. A alteração da hora de início é opcionalmente possível e descrita a seguir.
Î Ajustar o regulador para a frequência de irrigação na posição
RES.
A lâmpada de sinalização pisca a vermelho e o modo de progra-
mação está activado durante 30 segundos.
Î Premir a tecla para modificar a hora de início (opcional). Por cada
accionamento o tempo de início é deslocado em 60 minutos.
p.ex.: Para deslocar a hora de início para as 3h (a partir da hora
actual é necessário premir o botão 3x. A lâmpada de sinalização
brilha a verde com cada accionamento.
Î Ajustar o regulador para a frequência de irrigação no ciclo dese-
jado.
h = ciclo em horas, p. ex. todas as 4 horas
d = ciclo em dias, p. ex, todos os 2 dias
w = ciclo semanal
Português 69
Page 70

Repor os ajustes efectuados
Para corrigir uma entrada ou para apagar um programa ajustado
Î Ajustar o regulador para a frequência de irrigação na posição
RES.
Funcionamento
Irrigação comandada pelo programa
A irrigação é efectuada automaticamente, de acordo com o programa ajustado (p. ex. de 2 em 2 dias durante 15 minutos).
Ao premir a tecla do controlo de funcionamento é possível consultar
a qualquer altura o actual estado. A lâmpada de sinalização brilha
por breves instantes a verde se o programa estiver activo.
Aviso: O programa de irrigação é interrompido automaticamente se
a bateria estiver descarregada e a lâmpada de sinalização brilha a
vermelho. Se utilizar o aparelho de irrigação, durante muito tempo,
sem qualquer supervisão deve-se inserir preventivamente uma nova
bateria.
Irrigação manual
A irrigação pode ser iniciada manualmente a qualquer hora, pelo que
os programas ajustados não sofrem quaisquer alterações.
Iniciar irrigação manual
Î Rodar o regulador da duração da irrigação para a posição ON, a
lâmpada de sinalização brilha brevemente a verde e a válvula
abre.
O processo de irrigação é terminado automaticamente após 30
minutos.
Parar a irrigação manual
Î Rodar o regulador da duração da irrigação para a posição OFF,
a lâmpada de sinalização brilha brevemente a vermelho e a válvula fecha.
70 Português
Page 71

Aviso: Se estiver definido um programa de irrigação no aparelho de
irrigação, é necessário reajustar o regulador da duração de irrigação
novamente na duração desejada, após a conclusão da irrigação manual. Se o regulador estiver ajustado em OFF não é efectuada nenhuma irrigação apesar de o ritmo de irrigação interno continuar a
funcionar.
Desligar o aparelho
No final da estação de rega
Î Fechar a torneira de água.
Î Separar o aparelho de irrigação da torneira da água e da man-
gueira da água.
Î Activar a irrigação manual para permitir a saída da água residual
do aparelho de irrigação.
Î Ajustar o regulador para a frequência de irrigação na posição
RES.
Î Retirar a bateria.
Português 71
Page 72

Conservação e manutenção
Limpar a junta de filtro
Î Retirar a junta de filtro regularmente da ligação da água e lavar
sob água corrente.
Bateria
Substituir bateria
Antes de cada época de irrigação ou em caso de uma lâmpada de
sinalização vermelha.
Î Retirar a parte superior da carcaça.
Î Inserir uma nova bateria de 9V (tipo 6LR61 / Alkaline).
Eliminar a bateria gasta de acordo com a legislação em vigor.
Aviso: O dispositivo de segurança do aparelho de irrigação fecha automaticamente a válvula se a bateria ficar sem carga.
Î Fechar a carcaça e ter atenção ao assento correcto.
Manutenção
O aparelho está isento de manutenção.
Armazenamento
Î Esvaziar toda a água do aparelho de irrigação.
Î Retirar a bateria.
Î Guardar o aparelho de irrigação num local seco e protegido con-
tra geada.
72 Português
Page 73

Ajuda em caso de avarias
Avaria Causa Eliminação da avaria
Irrigação não
funciona apesar
da programação.
Fuga na ligação
da água.
Em caso de dúvidas ou avarias, a nossa filial Kärcher local está à sua
disposição. Endereços no verso.
Torneira da água fechada. Abrir a torneira.
Bateria descarregada. Inserir uma nova bate-
ria de 9V (tipo 6LR61 /
Alkaline).
Contactos da bateria oxidados.
Junta de filtro entupida. Limpar a junta de filtro.
Programa de irrigação inter-
rompido manualmente. O regulador da duração de
irrigação está em OFF.
Junta de filtro com defeito. Substituir a junta de fil-
A ligação da água, na torneira,
soltou-se.
Limpar os contactos.
Ajustar o regulador
para a duração da irri-
gação no tempo dese-
jado, p. ex., 15 minutos.
tro.
Voltar a apertar a liga-
ção da água.
Português 73
Page 74

Dados técnicos
Pressão de serviço 0,1 - 1,0 (1 - 10) MPa (bar)
Temperatura de admissão (máx.) 35 °C
Temperatura ambiente +1 -> +60 °C
Tipo de bateria 9V (6LR61 / Alkaline)
Reservados os direitos a alterações técnicas!
74 Português
Page 75

Πίνακας περιεχομένων
Απεικόνιση μηχανημάτων 3
Γενικές υποδείξεις 75
Υποδείξεις ασφαλείας 77
Χειρισμός 78
Φροντίδα και συντήρηση 82
Αντιμετώπιση βλαβών 83
Τεχνικά χαρακτηριστικά 84
Γενικές υποδείξεις
Αγαπητέ πελάτη,
ενεργήστε σύμφωνα με αυτές και κρατήστε τις για μελλοντική χρήση
ή για τον επόμενο ιδιοκτήτη.
– Η παρούσα συσκευή σχεδιάστηκε ειδικά για ιδιωτική χρήση και
– Αυτή η συσκευή προορίζεται για σύνδεση σε βάνα νερού και
Πριν χρησιμοποιήσετε τη συσκευή σας για πρώτη φορά,
διαβάστε αυτές τις πρωτότυπες οδηγίες χρήσης,
Αρμόζουσα χρήση
δεν είναι σε θέση να ανταποκριθεί στις καταπονήσεις που
συνεπάγεται
ρυθμίζει αυτόματα τη ροή νερού στο σύστημα άρδευσης.
μία ενδεχόμενη επαγγελματική της χρήση.
Ελληνικά 75
Page 76

Προστασία περιβάλλοντος
Τα υλικά συσκευασίας είναι ανακυκλώσιμα. Μην πετάτε τη
συσκευασία στα οικιακά απορρίμματα, αλλά παραδώστε την
προς ανακύκλωση.
Οι παλιές συσκευές περιέχουν ανακυκλώσιμα υλικά, τα οποία
θα πρέπει να παραδίδονται προς επαναχρησιμοποίηση. Για το
λόγο αυτό αποσύρετε τις παλιές συσκευές με κατάλληλες
διαδικασίες συγκέντρωσης αποβλήτων.
Υποδείξεις για τα συστατικά (REACH)
Ενημερωμένες πληροφορίες για
διεύθυνση:
http://www.karcher.de/de/unternehmen/
umweltschutz/REACH.htm
τα συστατικά μπορείτε να βρείτε στη
Εγγύηση
Σε κάθε χώρα ισχύουν οι όροι εγγύησης που εκδόθηκαν από την αρμόδια
εταιρία μας προώθησης πωλήσεων. Αναλαμβάνουμε τη δωρεάν
αποκατάσταση οποιασδήποτε βλάβης στη συσκευή σας, εφόσον οφείλεται
σε αστοχία υλικού ή κατασκευαστικό σφάλμα, εντός της προθεσμίας που
ορίζεται στην εγγύηση. Σε περίπτωση
εγγύησης, παρακαλούμε απευθυνθείτε με την απόδειξη αγοράς στο
κατάστημα από το οποίο προμηθευτήκατε τη συσκευή ή στην πλησιέστερη
εξουσιοδοτημένη υπηρεσία τεχνικής εξυπηρέτησης πελατών μας.
(Για τη διεύθυνση βλ. στην πίσω σελίδα)
που επιθυμείτε να κάνετε χρήση της
Σύμβολα στο εγχειρίδιο οδηγιών
Προσοχή
Για ενδεχόμενη επικίνδυνη κατάσταση, η οποία μπορεί να οδηγήσει
σε ελαφρό τραυματισμό ή
υλικές βλάβες.
76 Ελληνικά
Page 77

Υποδείξεις ασφαλείας
Προσοχή
Μην χρησιμοποιείτε το αυτόματο σύστημα άρδευσης σε
συστήματα πόσιμου νερού.
Χρησιμοποιείτε το αυτόματο σύστημα άρδευσης μόνον με μη
επεξεργασμένο, καθαρό γλυκό νερό με θερμοκρασία έως 35°C.
Εγκαταστήστε το αυτόματο σύστημα άρδευσης μόνον σε
εξωτερικό χώρο.
Προστατεύετε το αυτόματο σύστημα άρδευσης από σταγόνες
νερού και μην το βυθίζετε ποτέ σε νερό.
Ελέγχετε το αυτόματο σύστημα άρδευσης για τυχόν βλάβες πριν
από κάθε χρήση και διακόψτε τη λειτουργία του, εάν διαπιστώσετε
ορατές βλάβες.
Τοποθετήστε το αυτόματο σύστημα άρδευσης μόνον σε όρθια
θέση.
Μην χρησιμοποιείτε παχύρρευστες ουσίες και λιπαντικά για τη
σύνδεση του αυτόματου συστήματος άρδευσης στη βάνα νερού.
Μην τραβάτε το συνδεδεμένο ελαστικό σωλήνα.
Χρησιμοποιείτε μόνον μπαταρίες 9V (τύπος 6LR61 / Alkaline).
Μην χρησιμοποιείτε επαναφορτιζόμενες μπαταρίες.
Μην εγκαθιστάτε το αυτόματο σύστημα άρδευσης σε σημεία,
όπου υπάρχει νερό συμπυκνώματος, καθώς ενδέχεται να
προκληθούν βλάβες στη μπαταρία.
Μην εγκαθιστάτε το αυτόματο σύστημα άρδευσης κοντά σε πηγές
θερμότητας (μέγιστη θερμοκρασία περιβάλλοντος 60°C).
Μην χρησιμοποιείτε το αυτόματο σύστημα άρδευσης πλάι σε
συσκευές υπό τάση.
Ελληνικά 77
Page 78

Χειρισμός
Κατά την αποσυσκευασία ελέγξτε το περιεχόμενο της συσκευασίας
για ελλείψεις και βλάβες. Σε περίπτωση παραπόνων ενημερώστε το
κατάστημα.
Εικόνες, βλ. αναδιπλούμενη σελίδα!
Περιγραφή της συσκευής
3
1 Τεμάχιο μείωσης (G
2 Σύνδεση νερού (G 1) με μόνωση φίλτρου
3 Σύνδεση λάστιχου
4 Σύζευξη για σύνδεση ελαστικού σωλήνα
5 Άνω μέρος περιβλήματος
6 Θήκη μπαταριών
7 Σηματοδότης
8 Ρυθμιστής συχνότητας άρδευσης
9 Ρυθμιστής διάρκειας άρδευσης
10 Πλήκτρο αλλαγής του χρόνου έναρξης / ελέγχου λειτουργίας
Î Αφαιρέστε το άνω μέρος του περιβλήματος.
Î Τοποθετήστε τη μπαταρία 9V (τύπος 6LR61 / Alkaline).
Î Κλείστε το περίβλημα, φροντίστε για τη σταθερή του έδραση.
Î Βιδώστε τη σύζευξη στη σύνδεση ελαστικού σωλήνα.
Î Βιδώστε το τεμάχιο μείωσης στη σύνδεση νερού.
Î Κρατήστε το αυτόματο σύστημα άρδευσης από το περίβλημα και
βιδώστε τη σύνδεση νερού στη βάνα.
Προσοχή
Μην συνδέετε ποτέ το αυτόματο σύστημα άρδευσης στη βάνα χωρίς
τη συνοδευτική μόνωση φίλτρου.
/4)
Πριν τη θέση σε λειτουργία
78 Ελληνικά
Page 79

Ενεργοποίηση
Ρύθμιση της διάρκειας άρδευσης
Î Ρυθμίστε το ρυθμιστή για την επιθυμητή διάρκεια άρδευσης, π.χ.
15 λεπτά.
Ρύθμιση της συχνότητας και του χρόνου εκκίνησης της
άρδευσης
Υπόδειξη: Ο χρόνος εκκίνησης του ρυθμού άρδευσης αντιστοιχεί
απευθείας στο χρόνο ρύθμισης της διάρκειας άρδευσης. Η αλλαγή του
χρόνου εκκίνησης είναι προαιρετικά δυνατή και περιγράφεται παρακάτω.
Î Περιστρέψτε το ρυθμιστή της συχνότητας άρδευσης στη θέση RES.
Η λυχνία σηματοδότησης αναβοσβήνει με κόκκινο και η λειτουργία
προγραμματισμού ενεργοποιείται για 30 sec.
Î Πιέστε το πλήκτρο αλλαγής του χρόνου έναρξης (προαιρετικό). Κάθε
φορά που πιέζεται το πλήκτρο, ο χρόνος εκκίνησης μετατίθεται κατά 60
min.
π.χ.: Για τη μετάθεση του χρόνου εκκίνησης κατά 3h από την τρέχουσα
ώρα, πιέστε το πλήκτρο 3 φορές. Κάθε φορά που πιέζετε το πλήκτρο,
η λυχνία σηματοδότησης ανάβει με πράσινο.
Î Ρυθμίστε το ρυθμιστή της συχνότητας άρδευσης στον επιθυμητό
κύκλο.
h = κύκλος σε ώρες, π.χ. ανά 4 ώρες
h = κύκλος σε ημέρες, π.χ. ανά 2 ημέρες
w = εβδομαδιαίος κύκλος
Επαναφορά ρυθμίσεων
Για να διορθώσετε μια καταχώρηση ή να διαγράψετε ένα ήδη
ρυθμισμένο πρόγραμμα
Î Περιστρέψτε το ρυθμιστή της συχνότητας άρδευσης στη θέση
RES.
Ελληνικά 79
Page 80

Λειτουργία
Άρδευση με προγραμματισμό
Η άρδευση πραγματοποιείται αυτόματα σύμφωνα με τα ρυθμισμένα
προγράμματα (για παράδειγμα ανά 2 ημέρες επί 15 λεπτά).
Μπορείτε να εμφανίσετε την κατάσταση ανά πάσα στιγμή πιέζοντας
το πλήκτρο ελέγχου λειτουργίας. Όταν το πρόγραμμα είναι ενεργό,
ανάβει στιγμιαία με πράσινο η λυχνία σηματοδότησης.
Υπόδειξη: Εάν αδειάσει η μπαταρία, το πρόγραμμα άρδευσης
διακόπτεται αυτόματα
κόκκινο. Εάν το αυτόματο σύστημα άρδευσης χρησιμοποιείται χωρίς
επίβλεψη για μεγάλο χρονικό διάστημα, τοποθετήστε προληπτικά μια
νέα μπαταρία.
Μη αυτόματη άρδευση
Το αυτόματο σύστημα άρδευσης μπορεί να εκκινηθεί με μη αυτόματο
τρόπο οποιαδήποτε στιγμή. Αυτό δεν επηρεάζει τα ρυθμισμένα
προγράμματα.
Εκκίνηση μη αυτόματης άρδευσης
και η λυχνία σηματοδότησης ανάβει με
Î Περιστρέψτε το ρυθμιστή της διάρκειας άρδευσης στη θέση ΟΝ.
Η λυχνία σηματοδότησης ανάβει στιγμιαία με πράσινο και η
βαλβίδα ανοίγει.
Η διαδικασία άρδευσης τερματίζεται αυτόματα έπειτα από 30
λεπτά.
Διακοπή μη αυτόματης άρδευσης
Î Περιστρέψτε το ρυθμιστή της διάρκειας άρδευσης στη θέση OFF.
Η λυχνία σηματοδότησης ανάβει στιγμιαία με κόκκινο και η
βαλβίδα κλείνει.
80 Ελληνικά
Page 81

Υπόδειξη: Εάν έχει επιλεγεί κάποιο πρόγραμμα άρδευσης στο
αυτόματο σύστημα, ο ρυθμιστής διάρκειας άρδευσης πρέπει να
επανέλθει ξανά στην επιθυμητή διάρκεια μετά τη λήξη της μη
αυτόματης άρδευσης. Εάν ο ρυθμιστής βρίσκεται στη θέση OFF, δεν
πραγματοποιείται άρδευση, αν και συνεχίζει να τρέχει ο εσωτερικός
χρόνος άρδευσης.
Τερματισμός λειτουργίας
Στο τέλος της σεζόν άρδευσης
Î Κλείστε τη βάνα νερού.
Î Αποσυνδέστε το αυτόματο σύστημα άρδευσης από τη βάνα
νερού και τον ελαστικό σωλήνα νερού.
Î Ενεργοποιήστε τη μη αυτόματη άρδευση, ώστε να εκρεύσει από
το αυτόματο σύστημα άρδευσης το νερό που έχει απομείνει.
Î Περιστρέψτε το ρυθμιστή της συχνότητας άρδευσης στη θέση
RES.
Î Αφαιρέστε τη μπαταρία.
Ελληνικά 81
Page 82

Φροντίδα και συντήρηση
Καθαρισμός της μόνωσης φίλτρου
Î Αφαιρείτε τακτικά τη μόνωση φίλτρου της σύνδεσης νερού και
ξεπλένετέ την με τρεχούμενο νερό.
Μπαταρία
Αντικατάσταση μπαταρίας
Πριν από κάθε περίοδο άρδευσης ή όταν ανάβει με κόκκινο η λυχνία
σηματοδότησης.
Î Αφαιρέστε το άνω μέρος του περιβλήματος.
Î Τοποθετήστε μια μπαταρία 9V (τύπος 6LR61 / Alkaline).
Διαθέστε τις χρησιμοποιημένες μπαταρίες σύμφωνα με τις
ισχύουσες διατάξεις.
Σημείωση: Η διάταξη ασφαλείας του αυτόματου συστήματος
άρδευσης κλείνει αυτόματα τη βαλβίδα, όταν η μπαταρία είναι
άδεια.
Î Κλείστε το περίβλημα, φροντίστε για τη σταθερή του έδραση.
Συντήρηση
Το μηχάνημα δεν χρειάζεται συντήρηση.
Αποθήκευση
Î Αδειάστε εντελώς το νερό από το αυτόματο σύστημα άρδευσης.
Î Αφαιρέστε τη μπαταρία.
Î Φυλάξτε το αυτόματο σύστημα άρδευσης σε ξηρό χώρο που
προστατεύεται από τον παγετό.
82 Ελληνικά
Page 83

Αντιμετώπιση βλαβών
Βλάβη Αιτία Αντιμετώπιση
Η άρδευση δεν
πραγματοποιείται
παρά τον
προγραμματισμό
.
Διαρροή στη
σύνδεση νερού.
Σε περίπτωση αποριών ή βλαβών μπορείτε να απευθύνεστε στο
πλησιέστερο υποκατάστημα του Οίκου Kδrcher, το οποίο θα σας
βοηθήσει ευχαρίστως. Για τη διεύθυνση βλ. στην πίσω σελίδα.
Κλειστή βάνα νερού. Ανοίξτε τη βάνα νερού.
Άδεια μπαταρία. Τοποθετήστε μια
μπαταρία 9V (τύπος
6LR61 / Alkaline).
Οξειδωμένες επαφές
σύνδεσης μπαταρίας.
Φρασμένη μόνωση φίλτρου. Καθαρίστε τη μόνωσης
Μη αυτόματη διακοπή του
προγράμματος άρδευσης. Ο
ρυθμιστής της διάρκειας
άρδευσης βρίσκεται στη θέση
OFF.
Βλάβη στη μόνωση φίλτρου. Αντικαταστήστε τη
Αποσυνδέθηκε η διάταξη
σύνδεσης νερού στη βάνα.
Καθαρίστε τις επαφές.
φίλτρου.
Ρυθμίστε
για την επιθυμητή
διάρκεια άρδευσης,
π.χ. 15 λεπτά.
μόνωση φίλτρου.
Σφίξτε ξανά τη
σύνδεση νερού.
το ρυθμιστή
Ελληνικά 83
Page 84

Τεχνικά χαρακτηριστικά
Πίεση λειτουργίας 0,1 - 1,0 (1 - 10) MPa (bar)
Θερμοκρασία προσαγωγής (μέγ.) 35 °C
Θερμοκρασία περιβάλλοντος +1 -> +60 °C
Τύπος μπαταρίας 9V (6LR61 / Alkaline)
Με την επιφύλαξη τεχνικών αλλαγών!
84 Ελληνικά
Page 85

Page 86

 Loading...