

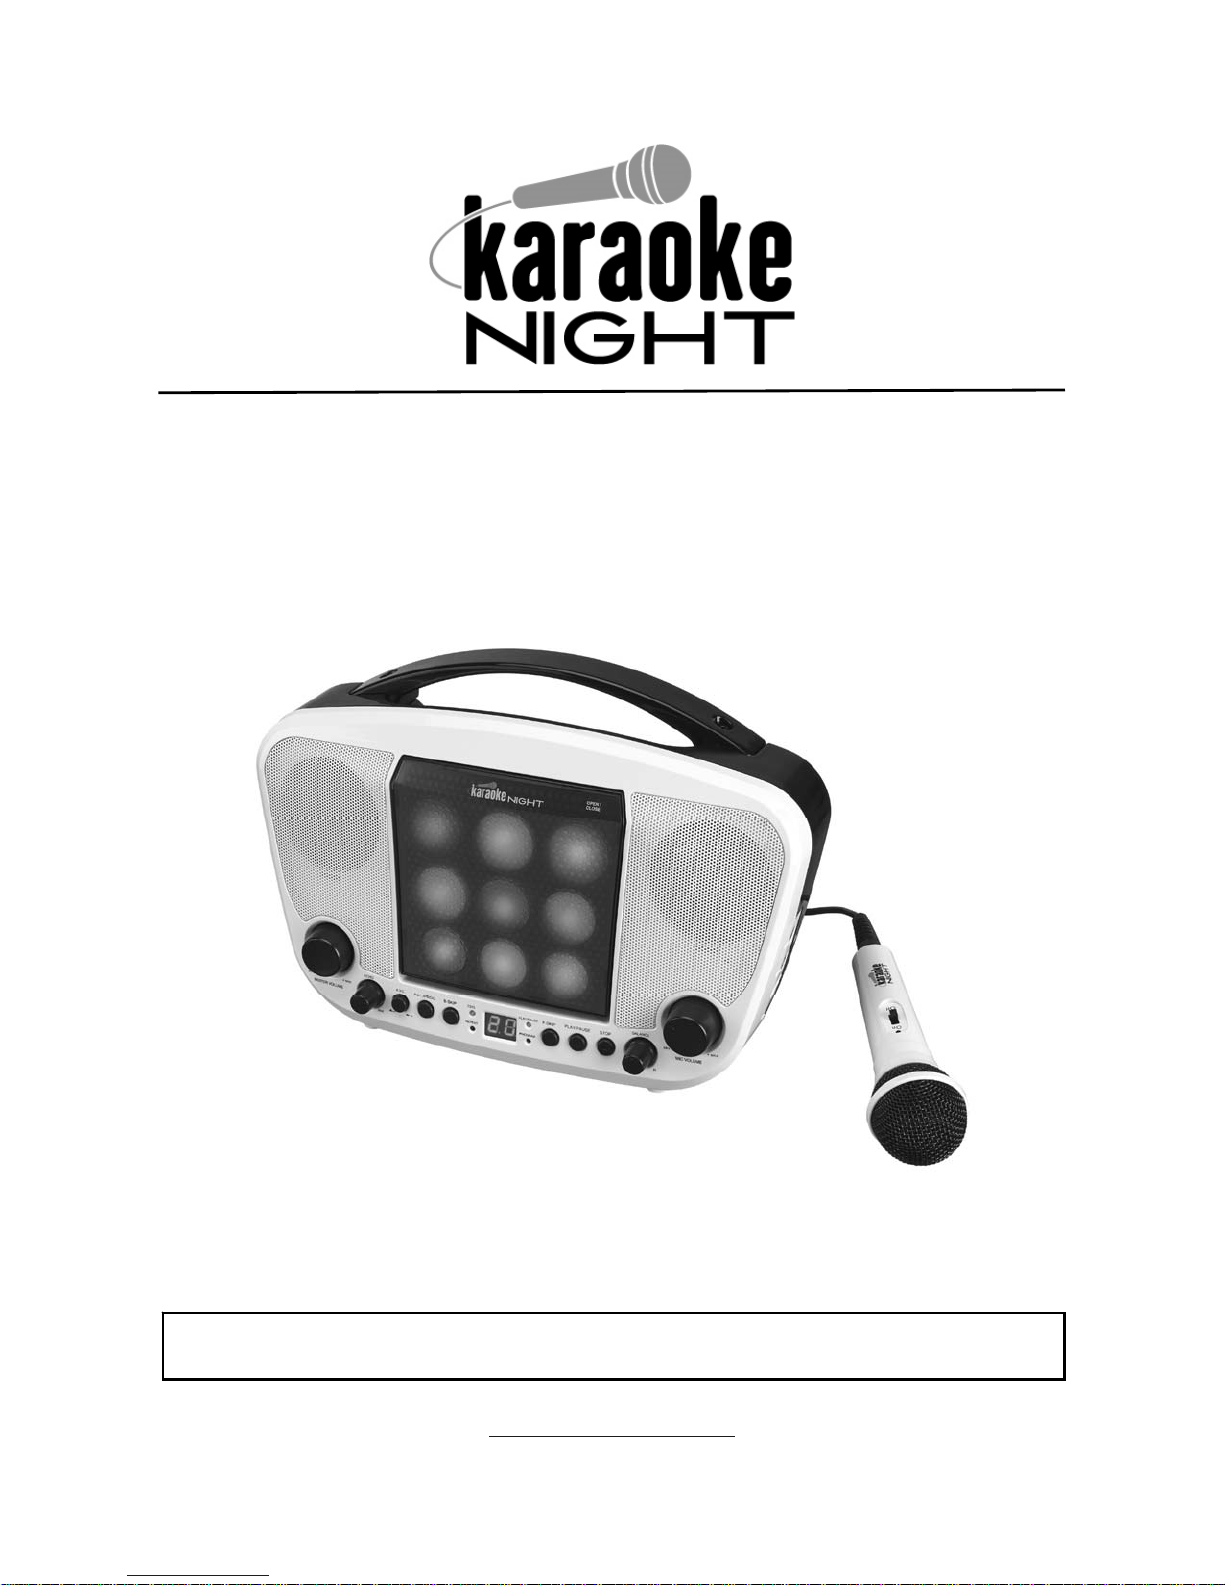
CD+G KARAOKE SYSTEM WITH
LED LIGHT SHOW
MODEL: KN104
USER MANUAL
PLEASE READ THIS USER MANUAL COMPLETELY BEFORE OPERATING THIS
UNIT AND RETAIN THIS BOOKLET FOR FUTURE REFERENCE.
For further information on this model and the entire lineup of Karaoke Night products, please visit
www.karaokenightusa.com
CAUTION
Follow the advice below for safe operations.
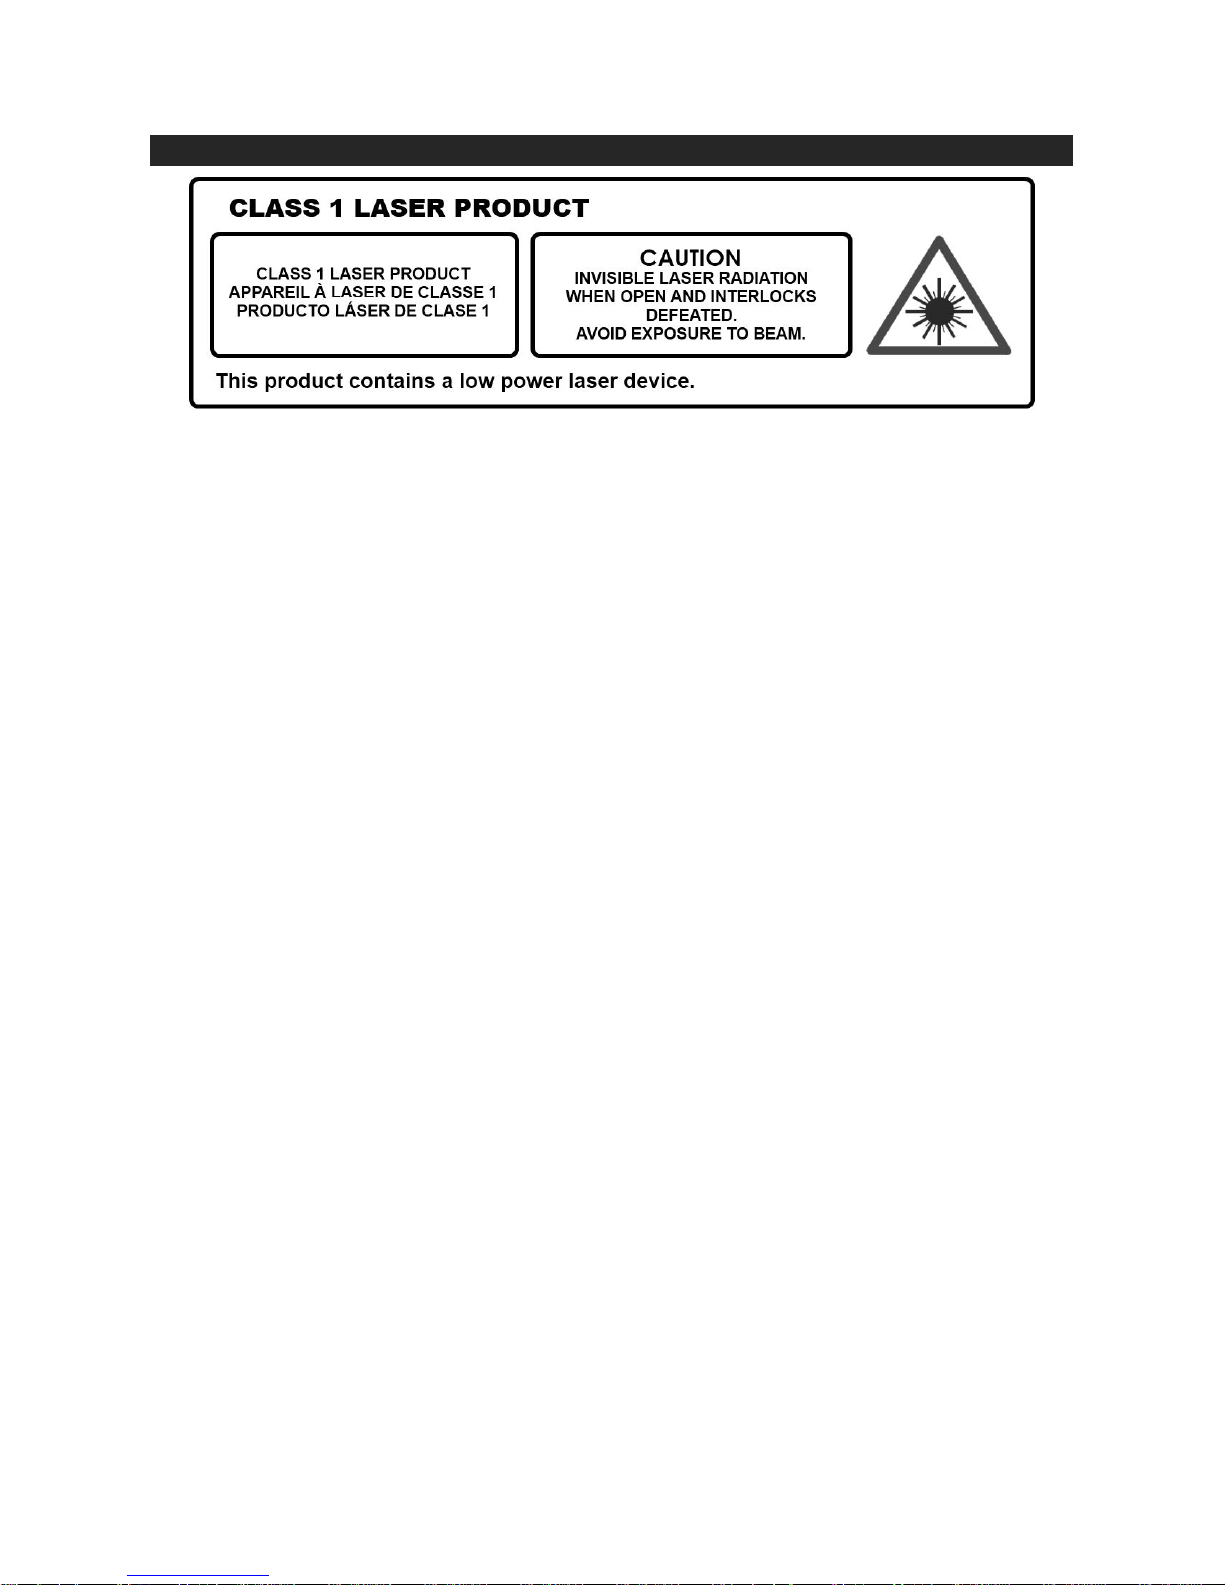
ON PROTECTION AGAINST LASER ENERGY EXPOSURE
As the laser beam used in this compact disc player is harmful to the eyes, do not attempt to
disassemble
Stop operation immediately if any liquid or solid object should fall into the cabinet.
Do not touch the lens or poke at it. If you do, you may damage the lens and the player may not
operate
Do not put anything in the safety slot. If you do, the laser diode will be ON when the CD door
is still
open.
If the unit is not to be used for a long period of time, make sure that all power sources are
disconnected
the casing.
properly.
from the unit. Remove all batteries from the battery compartment, and unplug the
AC adapter from the wall outlet. Make it a practice to remove the AC adapter by grasping the
plug and not by pulling the cord.
This unit employs a laser. The use of controls or adjustment or performance of procedures
other than
those specified here may result in exposure to hazardous radiation.
ON SAFETY
Before use, check that the rated voltage of your unit matches your local voltage.
When you are not going to use the unit for a long period of time, disconnect the AC adapter.
ON CONDENSATION
When left in a heated room where it is warm and damp, water droplets or condensation may
form inside the CD player.
When there is condensation inside the unit, the unit may not function normally.
If condensation occurs, let unit stand for 1 to 2 hours before turning the power on, or gradually
heat the room up and dry the unit before use.
Ensure a minimum distance of 2 inches (5 cm) around the apparatus for sufficient ventilation.
Ensure that the ventilation is not impeded by covering the ventilation openings with items, such
as newspapers, table cloths, curtains, etc.
Do not place naked flame sources, such as lighted candles on the apparatus.
Take attention to the environmental aspects of battery disposal.
Use the apparatus only in moderate climates.
Do not expose the apparatus to dripping or splashing.
Do not place objects filled with liquids, such as vases, on the apparatus.
Battery should not be exposed to excessive heat such as sunshine, fire or the like.
The mains plug of apparatus should not be obstructed and should be easily accessed during
intended use.
Should any trouble occur, disconnect the AC Adapter and refer servicing to qualified
personnel.
E-1

COMPLIANCE WITH FCC REGULATIONS
This device complies with Part 15 of the FCC Rules. Operation is subject to the following two
conditions:
(1) this device may not cause harmful interference, and
(2) this device must accept any interference received, including interference that may cause
undesired operation.
NOTE: This equipment has been tested and found to comply with the limits for a Class B digital
device, pursuant to Part 15 of the FCC Rules. These limits are designed to provide reasonable
protection against harmful interference in a residential installation. This equipment generates, uses
and can radiate radio frequency energy and, if not installed and used in accordance with the
instructions, may cause harmful interference to radio communications. However, there is no
guarantee that interference will not occur in a particular installation. If this equipment does cause
harmful interference to radio or television reception, which can be determined by turning the
equipment off and on, the user is encouraged to try to correct the interference by one or more of the
following measures:
- Reorient or relocate the receiving antenna.
- Increase the separation between the equipment and receiver.
- Connect the equipment into an outlet on a circuit different from that to which the receiver is
connected.
- Consult the dealer or an experienced radio/TV technician for help.
CAUTION: Changes or modifications not expressly approved by the party responsible for
compliance could void the user’s authority to operate the equipment.
DEAR KARAOKE NIGHT CUSTOMER
Selecting fine audio equipment such as the unit you've just purchased is only the start of your
musical enjoyment. Now it's time to consider how you can maximize the fun and excitement your
equipment offers. This manufacturer and the Electronic Industries Association's Consumer
Electronics Group want you to get the most out of your equipment by playing it at a safe level.
One that lets the sound come through loud and clear without annoying blaring or distortion and,
most importantly, without affecting your sensitive hearing.
Sound can be deceiving. Over time your hearing "comfort level" adapts to higher volumes of
sound. So what sounds "normal" can actually be loud and harmful to your hearing. Guard against
this by setting your equipment at a safe level BEFORE your hearing adapts.
To establish a safe level:
Start your volume control at a low setting.
Slowly increase the sound until you can hear it comfortably and clearly, and without distortion.
Once you have established a comfortable sound level:
Set the dial and leave it there.
Taking a minute to do this now will help to prevent hearing damage or loss in the future. After all,
we want you listening for a lifetime.
We Want You Listening For a Lifetime
Used wisely, your new sound equipment will provide a lifetime of
fun and enjoyment. Since hearing damage from loud noise is
often undetectable until it is too late, this manufacturer and the
Electronic Industries Association's Consumer Electronics Group
recommend you avoid prolonged exposure to excessive noise.
Customer's Record:
The serial number of this product is found on its bottom. You should note the serial number of this
unit in the space provided as a permanent record of your purchase to aid in identification in the
event of theft of loss.
Model Number: KN104
Serial Number :
___________________
E-2

PROTECT YOUR FURNITURE
This model is equipped with non-skid rubber 'feet' to prevent the product from moving when you
operate the controls. These 'feet' are made from non-migrating rubber material specially formulated
to avoid leaving any marks or stains on your furniture. However certain types of oil based furniture
polishes, wood preservatives, or cleaning sprays may cause the rubber 'feet' to soften, and leave
marks or a rubber residue on the furniture. To prevent any damage to your furniture we strongly
recommend that you purchase small self-adhesive felt pads, available at hardware stores and home
improvement centers everywhere, and apply these pads to the bottom of the rubber 'feet' before you
place the product on fine wooden furniture.
GLOSSARY OF KARAOKE
In addition to all of the terminology associated with consumer electronics products, a few additional
terms are used almost exclusively in karaoke. These terms are meant to familiarize you with the
world of karaoke. The features listed below may not necessarily apply to the particular model that you
have. Following are some brief explanations:
Echo:
Echo adds depth and resonance to a singer's voice, without affecting the music. This echo is
produced by creating minor controlled feedback in the singer's voice.
CDGMs (Compact Disc Plus Graphics Multiplex):
They are CD’s that contain songs that include the lead singer's voice, which can be removed with a
karaoke system that has a balance or multiplex control. The idea is to sing along with the lead singer
or replace the lead singer’s voice with yours. Background vocals and backup singers are provided.
Automatic Voice Control (AVC):
When the AVC function is activated, the vocals on a multiplex recording are eliminated as soon as
the singer begins singing into the microphone. When the singer stops singing, the vocals on the
multiplex recording are automatically re-activated. This useful function is used primarily during
practice sessions while a singer is learning a song. Please note that the AVC function only works with
multiplex recordings and not with standard audio recordings.
CD+G:
This is an acronym for Compact Disc plus Graphics. You will also see variations CD+G and
CD+Graphics. This is a regular CD with information stored on a data track simultaneous to music.
CD+G has video output for simple graphics (not full motion video). In the case of karaoke, the
graphics function is used to store song lyrics and display the lyrics in sync with music. In most cases,
CD+G software displayed lyrics change color as they are to be sung. A regular television with a
video-in RCA jack is all that is required to display CD+G lyrics.
IMPORTANT NOTES ON CD-R/CE-RW DISC
PLEASE READ THIS IMPORTANT INFORMATION:
CD mechanisms used in devices like this are designed to fully read all commercial CDs. They will
also read self-compiled CD-R/CD-RW discs but it may take up to 10 seconds for playback to start. If
playback does not start, it is likely due to the quality of the CD-R/RW disc and/or the compatibility of
the CD compilation software. Manufacturer is not responsible for the playback quality of CD-R/RW
discs.
Do not attach a label or seal to either side of the CD-R/RW disc. It may cause a malfunction.
E-3

INTRODUCTION
Your CD+Graphics Karaoke System will provide you with many years of fun and entertainment. It
makes you a "star" as you sing along with your favorite karaoke discs and hear your voice with the
music through the system's speakers.
This Karaoke System has a compact design and is full of features yet it is easy to use. Just a few
simple instructions and you will become an expert.
Before using your unit, please read this manual to familiarize yourself with all the features available
and the sections of the manual that describe their operations. Next go to the section for the specific
operation you wish to perform.
For your easy reference, listed here are some of the main features of this Karaoke System.
Lyrics on TV screen - displays lyrics in rhythm with the music when playing CD+G discs.
Balance Control - lets you adjust the balance between the pre-recorded original singer's voice and
the music if you use a multiplex karaoke disc.
Automatic Voice Control (AVC) - lets you replace the original singer's voice with your own voice
when any pre-recorded multiplex karaoke disc is played. To activate, just turn on the Auto Voice
Control and adjust the MIC Volume for the best balance between playback and microphone levels.
Echo Control - lets you add echo to enrich your voice for a concert hall effect.
Built-in Speakers - lets you share the music with your family and friends.
Audio Out Jacks - lets you connect to another audio output component, such as an
equalizer/booster or a PA system.
Video Out Jacks - lets you connect to your TV/monitor for displaying the lyrics from CD+G discs.
E-4

LOCATION OF CONTROLS
1 SPEAKERS 14 CD-G INDICATOR
2 CARRYING HANDLE 15 BACK SKIP BUTTON
3 CD DOOR 16 REPEAT/PROGRAM BUTTON
4 CD DOOR OPEN/CLOSE BUTTON 17 AVC ON/OFF
5 MIC VOLUME CONTROL 18 ECHO CONTROL
6 BALANCE CONTROL 19 MASTER VOLUME CONTROL
7 STOP BUTTON 20 DC IN JACK
8 PLAY / PAUSE BUTTON 21 BATTERY DOOR
9 FORWARD SKIP BUTTON 22 VIDEO OUT JACK
10 PLAY/PAUSE INDICATOR 23 AUDIO OUT JACK
11 PROGRAM INDICATOR 24 POWER SWITCH,
12 LED DISPLAY 25 MIC1,MIC2 JACKS
13 REPEAT INDICATOR 26 AUX IN JACK
E-5

POWER SOURCE
The KN104 operates using the supplied AC Adapter (Operate at 120V ~ 60Hz) or 8 X ‘C' size
(UM-2) batteries (not included).
AC ADAPTER OPERATION
Note: Only use the supplied adapter.
1. Plug the AC adapter into normal AC power outlet socket.
2. Insert the DC plug of the AC adapter cord into the DC IN JACK (#20) at the back of the unit.
3. When the unit is operated using AC adapter, the battery source
disconnected.
WARNING: Before connecting to the power supply, ensure that the supply corresponds to the
information on the rating label at the back of the apparatus.
BATTERY OPERATION
Notes: Disconnect AC adapter before installing batteries.
For best performance and longer operating time, we recommend the use of alkaline
1. Remove the BATTERY DOOR (#21) on the back of the unit.
2. Follow the polarity diagram shown in the BATTERY COMPARTMENT to insert 8 X ‘C’ size
(UM-2) batteries and close the door.
will
automatically be
batteries.
BATTERY WARNINGS
1. Be sure that the batteries are installed correctly. Wrong polarity may damage the unit.
2. Use only the size and type of batteries specified.
3. Do not mix old and new batteries.
4. Do not mix alkaline, standard (carbon-zinc) or rechargeable (nickel-cadmium) batteries.
5. For better performance and longer operating time, we recommend the use of alkaline-type
batteries.
6. If the unit is not to be used for an extended period of time, remove the batteries. Old or leaking
batteries can cause damage to the unit and may void the warranty.
7. Do not try to recharge batteries not intended to be recharged; they can overheat and rupture.
(Follow battery manufacturer’s directions).
8. Do not dispose of batteries in fire, batteries may leak or explode.
E-6

CONNECTING TO AN EXTERNAL TV/MONITOR
The karaoke system provides a patch cord to give you the option of connecting your unit to an
external audio/video device. The patch cord has three RCA jacks at each end. White and Red are
for left and right audio connections and the Yellow is for video. Modern flat panel digital TV sets and
home music systems are usually equipped with corresponding color-coded RCA jacks to assist
correct connections. Make sure that you have a CD+G disc in the karaoke system playing when you
are making this connection. You will know you have the proper settings on your TV as soon as you
see the lyrics on the screen.
Video connection
Please follow the steps below to display CD+G lyrics on the TV screen:
1. Locate the color-coded patch cords.
2. Connect video cable (Yellow) to the VIDEO OUT (#22) on the back of the karaoke system.
3. Connect the other end of the video cable (Yellow) to the VIDEO/AV INPUT on your TV.
If your television does not have the required Video Input, you will need a RF modulator (Radio
Frequency Modulator), which connects through your TV Antenna or cable line and serves as your
Video Input. The RF Modulator can be purchased at almost any consumer electronics retailer. If you
are connecting the video from the karaoke system to a television video input jack, you must specify
the source the TV is to display. Your TV user guide can tell you how to display the video signal from
the 'Video In' jack. If you do not have the manual for your TV, we suggest calling the TV
manufacturer's customer service department. Only the manufacturer will be able to tell you
accurately how to configure your TV to display the video signal coming from the 'Video Input' jack.
Note: Some projection TV sets do not properly display the standard blue background used on most
CD+G discs. If the background color is inconsistent or flashing, please try connecting your karaoke
system to a standard CRT/LCD television instead.
Common ways to configure your TV
1. You karaoke system is designed to connect to your TV. The karaoke system is constantly
sending the video and audio signals to the VIDEO OUT JACK (#22) and AUDIO OUT JACK (#23)
whenever you play a CD+G disc. So, load a CD+G into your karaoke system before you start
making these connections. You will see lyrics on the TV screen as soon as you have completed
the setup correctly.
E-7

2. The setup of your TV is the most difficult part of making the connection for displaying your lyrics.
In most homes, the TV has either cable connected or an antenna in use. Once you connect your
karaoke system to the TV, you must 'tell' your TV to display the input from the karaoke system
instead of the usual input from the cable or antenna.
3. Check your TV user manual for the easiest way to setup your particular entertainment system. If
you do not have your manual, you can always call your TV manufacturer for that information or try
their website for online assistance. We have listed below the most common ways of setting up a
TV:
♦ In the setup menu for configuring the TV there may be an 'Input Selection' option where you
may choose between 'Cable/Ant.', 'Video 1', or 'Video 2' etc. as the input source.
♦ Try looking for a 'Video' channel between the highest channel and the lowest channel on your
TV (i.e. between 2 and 99 may be 'VIDEO' or 'INPUT').
♦ Look for buttons on the remote control for the TV you are connecting to that say 'VIDEO',
'VIDEO 1', 'AUX', 'EXT', 'LINE 1. The 'LINE-IN' button will display the Video input source.
Audio connection
Connect the unit to your TV or home stereo system using the White and Red connections on the
supplied patch cord. Plug the white end of the patch cord into the white AUDIO OUT JACK (#23) on
the unit. Plug the red end of the patch cord into the red AUDIO OUT JACJ (#23) on the unit. Now
connect the other end of the cable's white (left channel) and red (right channel) plugs to your TV or
home stereo system's 'AUDIO IN' or 'AUX IN' jacks.
CONNECTING A MICROPHONE
Plug a microphone (one microphone is included) into the MIC 1 or MIC 2
JACKS (#25) on the right side of your unit. The MIC output will be mixed with
an audio source from CD/CD+G.
CAUTION - Tapping or dropping the microphone while it is on can cause
permanent damage to it. Never grip and swing the microphone
around by the connecting cord
.
UNDERSTANDING THE CONTROL FUNCTIONS
POWER AND PLAYBACK FUNCTIONS
1. Slide the POWER SWITCH (#24) to POWER ON or LIGHT SHOW position to turn on the
KN104.
♦ Once the AUX IN JACK (#26) is plugged into, the KN104 will automatically enter the AUX
mode. You can attach other music sources (iPod, MP3 or other digital audio players) through
the AUX IN JACK (#26) to your external player’s audio out jack or headphone jack.
2. PLAY/PAUSE BUTTON
Tap once to play a selected song when playing a CD/CD+G/CD-R/CD-RW disc,The
PLAY/PAUSE INDICATOR (#10) will light.
3. STOP BUTTON
(#7)
While a selected song is playing, tap this to stop.
4. FORWARD SKIP BUTTON
Tap once to skip forward to the following song during playback or stop mode.
(#8)
(#9)
E-8

5. BACK SKIP BUTTON (#15)
Tap once to skip back to the start of the current song during playback or skip back to the
previous song during stop mode.
6. REPEAT/PROGRAM BUTTON (#16)
REPEAT FUNCTION
During CD/CD+G playback on CD/CD-R/CD-RW
A. tap once for Repeat 1, REPEAT INDICATOR (#13) will flash to playback current song only;
B. tap again for Repeat All, REPEAT INDICATOR (#13) will light steadily to repeat all available
tracks on the disc;
C. tap again to cancel Repeat mode, REPEAT INDICATOR (#13) will be OFF.
PROGRAM FUNCTION
This function allows music tracks to be played in a programmed sequence.
NOTE: Program function can only be set in STOP mode.
A. Press the REPEAT/PROGRAM BUTTON (#16) once. Program Number 01 will display and
PROGRAM INDICATOR will flash.
B. Press the FORWARD SKIP BUTTON
(#9) or BACK SKIP BUTTON (#15) to select
the track to be programmed.
C. Press the REPEAT/PROGRAM BUTTON (#16) again to store the selection. The Program
number. will advance to 02 to prompt for the next input.
D. You may repeat steps #B to #C to program up to 20 tracks. As soon as you have entered
the 20
th
track, the LED DISPLAY (#12) will show “FU”, indicating that program is full.
E. Press the PLAY button to complete and start program play. Press STOP BUTTON (#7) to
stop program play.
F. You may use the REPEAT function to repeatedly play a certain track (Repeat 1) or all tracks
(Repeat All) in the Program Play Mode.
G. The CD player will stop when all the programmed tracks have been played through once.
To repeat program play, press the PLAY/PAUSE BUTTON
(#8).
H. To cancel program play, press the STOP BUTTON (#7) twice while program play is running
or open the CD DOOR (#3) in stop mode.
Up to 20 tracks can be programmed. If you attempt to program more than 20 tracks, “FU” will
appear in the LED DISPLAY (#12).
Program Play mode:
When finished programming, tap PLAY/PAUSE BUTTON
(#8) to confirm and start program
play. The PROG INDICATOR (#11) will light. While playing, you may tap the FORWARD SKIP
BUTTON
(#9) or BACK SKIP BUTTON (#15) to skip to a desired song in the program
list.
To stop program play temporarily, tap the STOP BUTTON (#7) once. The PROG
INDICATOR (#11).
Tap PLAY/PAUSE BUTTON (#8) to resume program play.
Notes:
1. if you tap the STOP BUTTON (#7) twice consecutively, you will cancel program play and
erase the program list permanently. The PROG INDICATOR (#11) and TV screen will go
OFF.
2. In stop mode, you can review the program list by pressing the FORWARD SKIP BUTTON
(#9) or BACK SKIP BUTTON (#15).
E-9

INPUT FUNCTIONS
7. DC IN JACK (#20)
Connect the DC plug of the DC12V output AC Adapter (included) to this jack.
8. AUX IN JACK (#26)
Connect the 3.5mm stereo plug of a stereo audio cable to this jack and the other end to an
external audio player for playback.
9. MIC 1 / MIC 2 JACKS (#25)
Connect the microphone (one included) to either one of the jacks to sing
.
OUTPUT FUNCTIONS
10. VIDEO OUT JACK (#22)
Connect the yellow coded RCA plug of the A/V cable (included) to this jack and the other end
to the VIDEO/AV INPUT of your TV.
11. AUDIO OUT JACKS (L/R) (#23)
Connect the white coded RCA plug (L) and red coded plug (R) of the A/V cable (included) to
these jacks and the other end to the audio inputs of your TV.
KARAOKE CONTROL FUNCTIONS
12. MASTER VOLUME CONTROL (#19)
Adjust this to obtain the desired volume level from the built-in speaker.
13. BALANCE CONTROL (#6)
Adjust this to obtain the optimum music and vocal levels while playing a CD+G or file or as left
(L) and right (R) channel balance while playing ordinary stereo sound tracks of CD or MP3.
14. AVC (AUTOMATIC VOICE CONTROL) BUTTON (#17)
When AVC is On, the vocals on a multiplex recording are eliminated as soon as the singer
begins singing into the microphone. When the singer stops singing, the vocals on the
multiplex recording are automatically re-activated. This function is used primarily during
practice sessions.
15. MIC VOLUME CONTROL (#5)
Adjust this control to obtain the desired mic volume output during singing.
Volume level of both Mic 1 and Mic 2 will be adjusted at the same time.
16. ECHO CONTROL (#18)
Turn this control clockwise for a more significant echo effect to enrich your voice for a concert
hall effect.
SING WITH CD+G OR AUX IN MUSIC SOURCE
GETTING PREPARED FOR YOUR SINGING SESSION
You will need to do the following things:
- Connect your unit to a compatible TV using the included A/V cable.
- Plug in the included MICROPHONE into either the MIC 1 or MIC 2 JACK (#25).
Note: Always set the mic to OFF until you are ready to sing to avoid possible sharp feedback noises.
SINGING ALONG WITH CD+G, CD, CD-R/CD-RW
1. Set the POWER SWITCH (#24) To POWER ON or LIGHT SHOW position.
2. Load a CD/CD+G disc as follows:
a) Grip the top front edge on the CD DOOR where indicated and pull gently to open it. The LED
DISPLAY will display “OP”.
b) Load a disc vertically into the compartment with the printed side facing you.
c) Gently close the CD DOOR. The unit begins to read the disc. The LED DISPLAY will display
the total number of tracks. (If no disc is loaded or the disc cannot be recognized, “No” will be
displayed in the LED DISPLAY).
d) When a CD+G disc is detected and being played, the CDG INDICATOR (#14) will light.
E-10

3. Press PLAY/PAUSE BUTTON (#8) to play the disc. If a CD+G track is being played, the
title of the track will appear on the TV screen.
4. Select your favorite song using the FORWARD SKIP BUTTON (#9) or BACK SKIP BUTTON
(#15).
5. Tap PLAY/PAUSE BUTTON
6. Turn ON your microphone and starting singing. Adjust the MASTER VOLUME CONTROL (#19),
MIC VOLUME CONTROL (#5) and TV VOLUME if necessary.
SINGING ALONG FROM AUX INPUT SOURCES
This karaoke unit features an AUX-IN JACK (#26) for connecting your iPod, MP3 player or other
digital music player.
1. Connect the headphone jack of your external device to the AUX IN JACK (#26) located on the
right side of this unit.
2. Turn on the unit and it will enter the AUX function mode once an external device is plugged into
the AUX IN JACK (#26).
3. Connect the line out or headphone jack of your external audio device (e.g. a CD player, MP3
player, iPhone, iPod, etc.) to the unit with the audio cable.
4. Select your favorite song on your external audio device to play. You may need to adjust the
output volume of your external audio device if the headphone jack is used for making the
connection.
5. Turn on your microphone and start singing. Adjust the MASTER VOLUME CONTROL (#19)
and/or MIC VOLUME CONTROL (#5) if necessary
6. You may also use the BALANCE CONTROL (#6) and ECHO CONTROL (#18) to enhance your
singing experience.
7. Turn off both devices after use.
(#8) to start playing.
NOTE: Once the AUX IN jack has been plugged into, the unit automatically enters the AUX
mode .Remember to disconnect the Aux In cable from the unit after use in order to listen to the CD
input again.
USING THE UNIT AS A PUBLIC ADDRESS SYSTEM
This unit can also be used as a PA (Public Address System).
Note: To prevent feedback or whistling from occurring, please be sure that the microphone is not
held too close to unit’s speaker.
1. With unit stopped at CD mode, unplug any 3.5mm audio cable connected to the AUX IN JACK
(#26) previously.
2. Turn on your MICROPHONE (one included) and start your performance. Adjust the
MASTER VOLUME CONTROL (#19), MIC VOLUME CONTROL (#5) and ECHO
CONTROL (#18) if necessary.
LIGHT SHOW
Slide the POWER SWITCH (#24) to Light Show On position. The different LED colors will light up
on the CD DOOR. Slide the POWER SWITCH (#24) to Power On position to turn it off.
RESETTING THE UNIT
If the system does not respond or exhibits erratic or intermittent operation, you may have
experienced an electrostatic discharge (ESD) or a power surge that triggered the internal
microcontroller to shut down automatically. If this occurs, simply disconnect the AC Adapter and
remove the batteries. Wait for at least 3 minutes and then setup the unit again as if you were using it
for the very first time.
E-11

y
CARE AND MAINTENANCE
1. Clean your unit with a damp (never wet) cloth. Solvent or
detergent should never be used.
2. Avoid leaving your unit in direct sunlight or in hot, humid or
dusty places.
3. Keep your unit away from heating appliances and sources of
electrical noise such as fluorescent lamps or motors.
4. If drop-outs or interruptions occur in the music during CD play,
or if the CD fails to play at all, its bottom surface may require
cleaning. Before playing, wipe the disc from the center outwards with a good soft cleaning cloth
TROUBLESHOOTING GUIDE
PROBLEM POSSIBLE CAUSE REMEDY
The unit does not respond (no
power)
Unit is ON but there is low or no
volume
CD player of Karaoke System
does not work normally or the “No”
appears on the LED DISPLAY.
No sound - If audio is going
through TV/ home stereo
The unit is disconnected
from the AC outlet.
The AC outlet has not
power.
The master volume control
has been turned all the
way down.
Volume control on TV
set/PA system is set to
minimum
Disc is inserted upside
down.
Disc is dirty. Wipe it clean with soft cloth.
Disc is scratched. Use a new disc.
Disc is warped. Use a new disc.
A non-standard disc is
inserted.
Lens is dirty.
Moisture has condensed
inside the CD deck.
Karaoke system needs to
be reset.
Source Selection on your
TV/home stereo is not set
properly.
Improper connection to
stereo system or PA.
Reconnect to the AC Adapter.
Try the unit on another outlet.
Turn the master volume control
to a higher output.
Turn up the volume of the TV/PA
system.
Insert disc correctly.
Only use compatible discs
mentioned in this manual.
Clean the optical pickup with a
CD lens cleaner.
Wait about 20 to 30 minutes to let
it dr
out.
Disconnect the machine from
power source for 30 seconds.
Select AV INPUT as the source
for your TV/home stereo.
Follow directions on ‘Audio
Connection’ section for
connecting to a home stereo
system.
E-12

Video cable is not
connected properly to the
TV.
Source selector on TV is
No song lyrics appear on the TV
screen
not set to VIDEO or A/V IN.
TV does not have video
line input.
A CD+G disc is loaded but
the CDG indicator is not lit.
No image on TV screen TV input is not properly set.
Improper MIC volume
setting.
Cannot sing through the mic
MIC is off.
MIC is not properly
plugged in.
SPECIFICATIONS
Connect the video cable to the
VIDEO OUT of the unit and to the
TV’s Video In jack.
Use your TV Remote to select
VIDEO or A/V input.
Connect from VIDEO OUT of the
unit to a RF modulator and then
to the TV cable input.
Check the disc to be sure it is a
CD+G.
Check disc to ensure it is clean.
Set TV input to correct A/V input
that is connected to the unit.
Adjust MIC and MASTER
VOLUME CONTROLS to
appropriate levels.
Turn on MIC with the ON/OFF
switch located on the
microphone.
Insert the mic plug fully into either
MIC 1 or MIC 2 JACK of the unit
properly.
Output power : 1.5 W + 1.5 W (RMS)
Speakers : 2 x 3 " 8 ohms
Aux In jack : 3.5 mm
Microphone Input : 600 ohms Impedance with 6.3 mm jack
Microphone : 1 x Dynamic Microphone
Power source :
AC Adapter: Input AC 120V~ 60Hz
Output DC 12V
Battery: 8 x 1.5V
"C" size (UM-2)
1A
Due to continuing improvement, the features and the design are subject to change without notice.
Karaoke Night products are designed and engineered by Marino Andriani, LLC.
E-13

90 DAY LIMITED WARRANTY AND SERVICE
VALID IN THE U.S.A ONLY
SPECTRA MERCHANDISING INTERNATIONAL, INC. warrants this unit to be free from defective
materials or factory workmanship for a period of 90 days from the date of original customer
purchase and provided the product is utilized within the U.S.A. This warranty is not assignable or
transferable. Our obligation under this warranty is the repair or replacement of the defective unit or
any part thereof, except batteries, when it is returned to the SPECTRA Service Department,
accompanied by proof of the date of original consumer purchase, such as a duplicate copy of a
sales receipt.
You must pay all shipping charges required to ship the product to SPECTRA for warranty service. If
the product is repaired or replaced under warranty, the return charges will be at SPECTRA’s
expense. There are no other express warranties other than those stated herein.
This warranty is valid only in accordance with the conditions set forth below:
1. The warranty applies to the SPECTRA product only while:
a. It remains in the possession of the original purchaser and proof of purchase is
demonstrated.
b. It has not been subjected to accident, misuse, abuse, improper service, usage outside the
descriptions and warnings covered within the user manual or non-SPECTRA approved
modifications.
c. Claims are made within the warranty period.
2. This warranty does not cover damage or equipment failure caused by electrical wiring not in
compliance with electrical codes or SPECTRA user manual specifications, or failure to provide
reasonable care and necessary maintenance as outlined in the user manual.
3. Warranty of all SPECTRA products applies to residential use only and is void when products
are used in a nonresidential environment or installed outside the United States.
This warranty gives you specific legal rights, and you may also have other rights which vary from
state to state. TO OBTAIN SERVICE please remove all batteries (if any) and pack the unit carefully
and send it freight prepaid to SPECTRA at the address shown below. IF THE UNIT IS RETURNED
WITHIN THE WARRANTY PERIOD shown above, please include a proof of purchase (dated cash
register receipt) so that we may establish your eligibility for warranty service and repair of the unit
without cost. Also include a note with a description explaining how the unit is defective. A customer
service representative may need to contact you regarding the status of your repair, so please
include your name, address, phone number and email address to expedite the process.
IF THE UNIT IS OUTSIDE THE WARRANTY PERIOD, please include a check for $20.00 to cover
the cost of repair, handling and return postage. All out of warranty returns must be sent prepaid.
It is recommended that you contact SPECTRA first at 1-800-777-5331 or by email at
custserv@spectraintl.com for updated information on the unit requiring service. In some cases the
model you have may be discontinued, and SPECTRA reserves the right to offer alternative options
for repair or replacement.
SPECTRA MERCHANDISING INTERNATIONAL, INC.
4230 North Normandy Avenue,
Chicago, IL 60634, USA.
1-800-777-5331
To register your product, visit the link on the website below to enter your information.
http://www.spectraintl.com/wform.htm
0816 Printed in China
E-14
 Loading...