

KAPSCH TRAFFICCOM CANADA 802120 User Manual
Kapsch TrafficCom IVHS
Janus® HOTPass® Interior Transponder
Mounting Instructions
The HOTPass® interior transponder mounts on the vehicle windshield. The preferred mounting location
is between the roofline and the rear view mirror post. If there is not enough room in the preferred
mounting location to accommodate the HOTPass® transponder, the transponder can be mounted beside
the rear view mirror post. The HOTPass® transponder is secured using 3M™ Dual Lock™ fasteners.
Requirements
n
For reliable operation of the transponder, the vehicle must be
equipped with only one transponder while passing through a toll
facility. Other transponders present in or on the vehicle must be
switched off or enclosed in an RF shield.
n
The mounting location must provide direct line-of-sight
communication between the transponder and the toll facility
overhead antenna.
n
Do not mount the HOTPass
u
with non-metallic roofs.
u
with windshields covered in RF-blocking material (ex. metal oxide).
u
with a metallic center windshield dividing post.
u
without center-mounted rear view mirrors.
n
Handheld mobile communication devices must not be located within
12 in. of the transponder.
n
Metal objects (except for the rear view mirror and the roof) must not
be located within 6 in. of the transponder.
n
HOTPass® transponders cannot be used where local regulations prohibit
mounting transponders on the windshield.
n
Apply Dual Lock™ fasteners in accordance with 3M™ document.
70-0709-4029-4.
®
transponder on vehicles:
HOTPass® Interior Transponder Mounting
Instructions
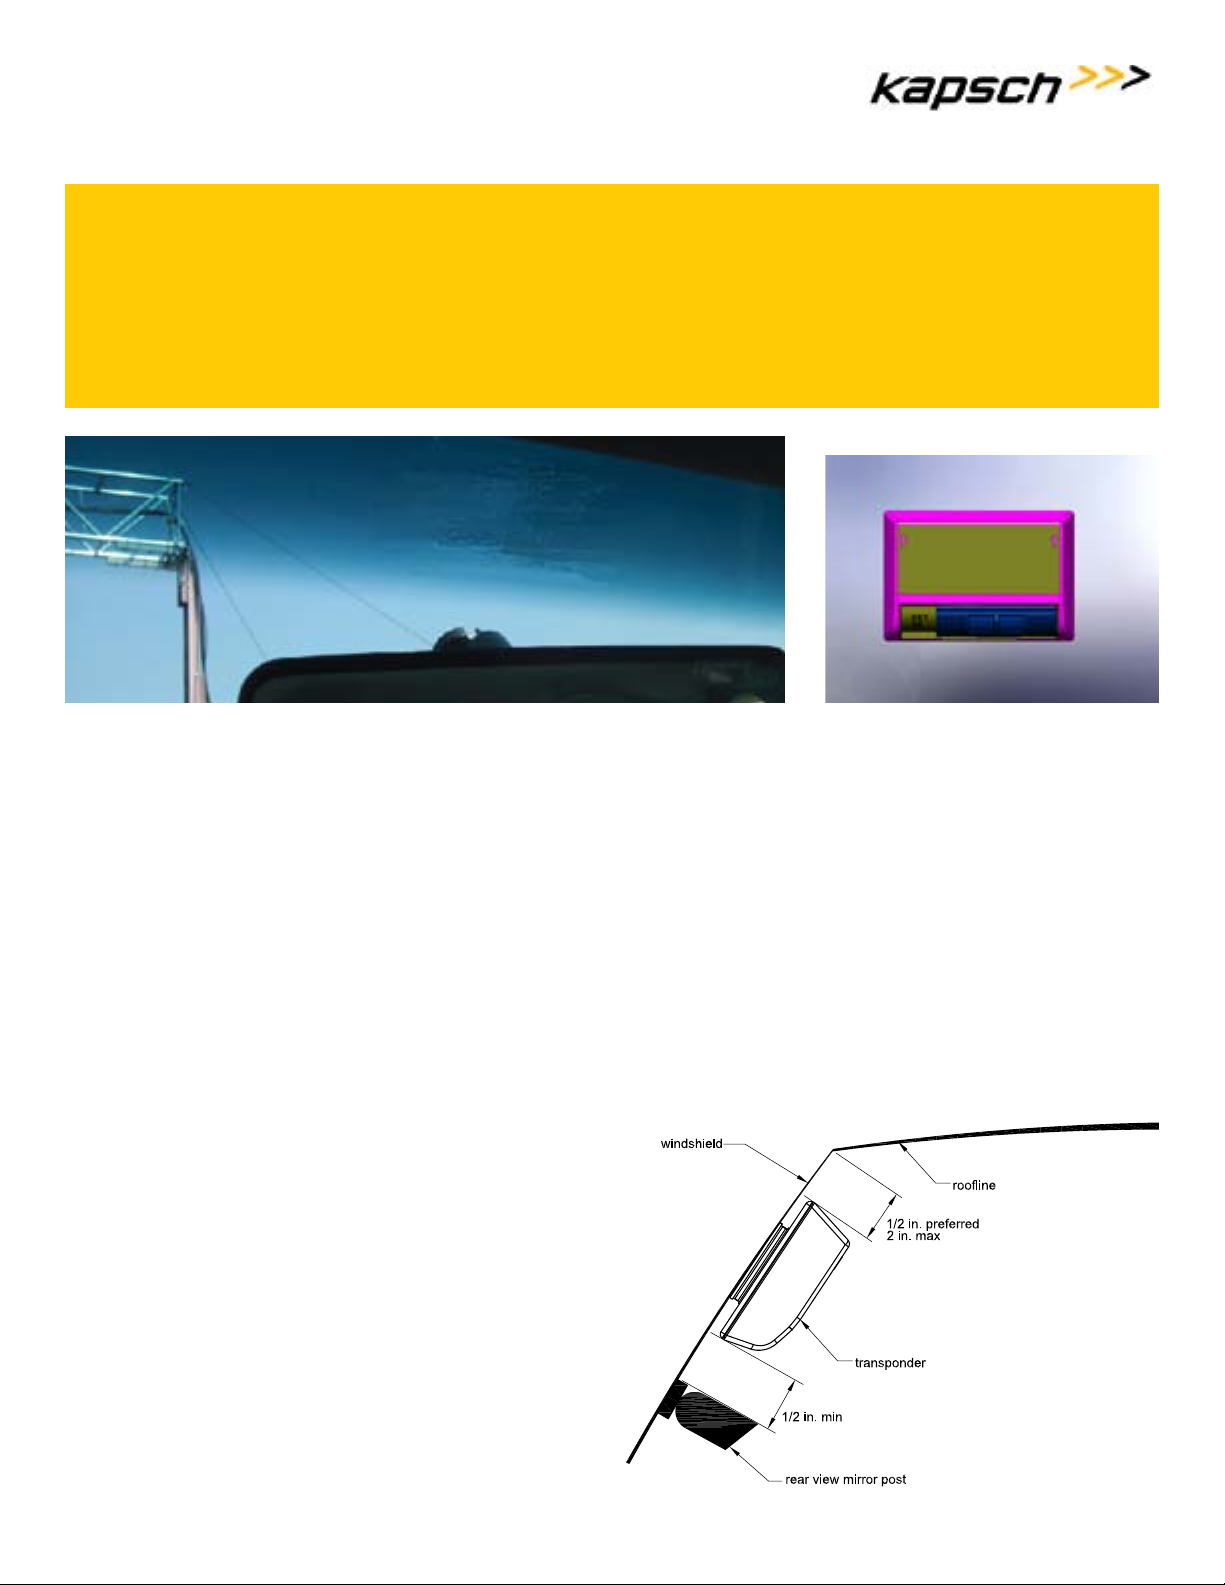
1. Select a mounting location on the front windshield. The HOTPass®
transponder should be mounted � in., but no more that 2 in. from the
roofline. The preferred mounting location is between the roofline and the
rear view mirror mounting post, with a minimum of � in. between the
transponder and the rear view mirror post.
� in. preferred,
2 in. maximum
orientation
arrow
� in. minimum
roofline
transponder
rear view mirror post
Preferred Mounting Location - Front View
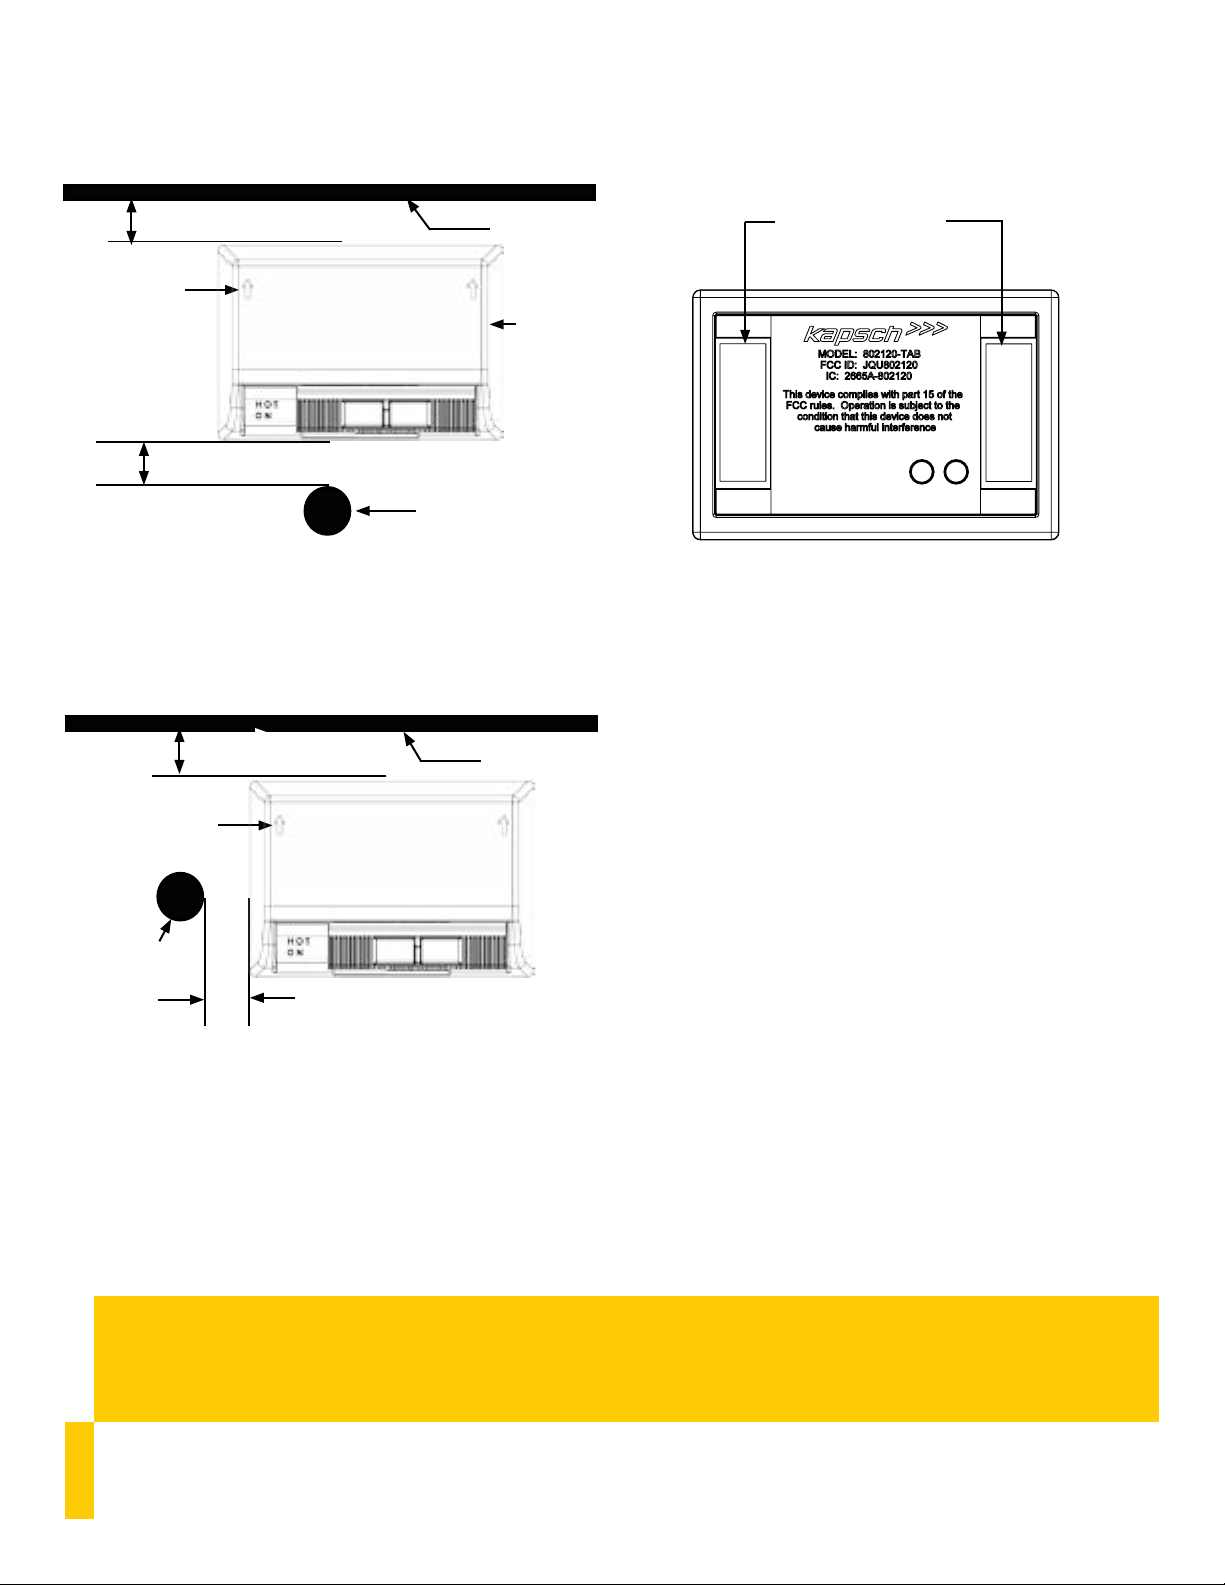
4. Remove the protective backing from the two Dual Lock fasteners.
3M™ Dual Lock™ strips
©Kapsch TrafficCom IVHS. All rights reserved. Subject to alteration without notice.
HOTPass® Transponder - Rear View
2. If there is insufficient space in the preferred location, select an
alternate mounting location beside the rear view mirror post:
� in. preferred,
orientation arrow
rear view
mirror post
2 in. maximum
� in. min., 1� in. max
roofline
Alternate Mounting Location - Front View
3. Two 3M
™
Dual Lock™ on the back of the HOTPass® transponder are used
to mount the transponder to the windshield. Prepare the mounting
location in accordance with 3M™ document 70-0709-4029-4.
®
5. Firmly press the HOTPass
transponder against the windshield in the
mounting location, ensuring the orientation arrows are pointing skyward.
Maintain pressure for 15 seconds to ensure a good bond.
6. Remove the transponder by lifting any corner with sufficient force to
separate the Dual Lock™ strips. Do not reuse the Dual Lock™ strips after
removing them from the windshield. Obtain new strips as required.
Kapsch Group
The Kapsch Group and its entities Kapsch TracCom, Kapsch CarrierCom and Kapsch BusinessCom are specialised in the future-oriented market
segments of Intelligent Transportation Systems (ITS) and Information and Communication Technology (ICT). Kapsch. Always one step ahead.
Kapsch TracCom IVHS | 6020 Ambler Drive | Mississauga, Ontario L4W 2P1 | CANADA | Phone +1 905 624 3020 | Fax +1 905 625 6197
54 S. Commerce Way, Suite 100 | Bethlehem, PA 18017 | Phone +1 610 419 1479 | Fax +1 610 419 1489
E-Mail ktc.ca.info@kapsch.net | ktc.us.info@kapsch.net | www.kapsch.net
801850-022 Rev A1
 Loading...