

Page 1

KanguruWireless LAN
USER’S GUIDE
Copyright 2003, All Rights Reserved.
This manual applies to 1.1.4 or later versions of the KanguruWireless LAN
- 1 -
Page 2

KanguruWireless LAN
Please be aware of the following points before using the KanguruWireless LAN adapter.
Copyright© 2003, Kanguru Solutions. All rights reserved.
®
DOS
ME
Macintosh
, Windows 95
®,
and Windows XP® are registered trademarks of Microsoft Inc. Apple® and
®
are registered trademarks of Apple Computer Inc. IBM and OS/2 are
®,
Windows 98®, Windows NT
®,
Windows 2000
®,
Windows
registered trademarks of the International Business Machines Corporation. All
other brand or product names are trademarks of their respective companies or
organizations.
Kanguru Solutions will not be held responsible for any illegal use of this product
nor any losses incurred while using this product. The user himself is responsible
for the copyright laws, and is fully responsible for any illegal actions taken.
CUSTOMER SERVICE
To obtain service or technical support for your system, please contact Kanguru
Solutions Technical Support Department at 508-376-4245, or visit
www.Kanguru.com
for web support.
Kanguru Solutions
1360 Main St., Millis, MA 02054
508.376.4245 • Fax 508.376.4462
www.kanguru.com
- 2 -
Page 3

KanguruWireless LAN
FCC Class B Radio Frequency
Interference Statement
Note:
This equipment has been tested and found to comply with the limits for a Class B
digital device, pursuant to Part 15 of FCC Rules. These limits are designed to
provide reasonable protection against harmful interference in a residential
installation. This equipment generates, uses, and can radiate radio frequency
energy and, if not installed and used in accordance with the instructions, may
cause harmful interference to radio communications. However, there is no
guarantee that interference will not occur in a particular installation. If this
equipment does cause harmful interference to radio or television reception, which
can be determined by turning the equipment off and on, the user is encouraged
to try and correct the interference by one or more of the following measures:
1. Reorient or relocate the receiving antenna.
2. Increase the separation between the equipment and receiver.
3. Connect the equipment into an outlet on a circuit different from that to
which the receiver is connected.
4. Consult the dealer or an experienced radio/television technician for
help.
The user should not modify or change this equipment with written approval from
Kanguru Solutions. Modification could void authority to use this equipment.
Notice 1:
Changes or modifications not expressly approved by the party responsible for
compliance could void the user’s authority to operate the equipment.
Notice 2:
To comply with the FCC RF exposure compliance requirements, no change to
the antenna or the device is permitted. Any change to the antenna or the device
could result in the device exceeding the RF exposure requirements and void the
user’s authority to operate the device.
- 3 -
Page 4

KanguruWireless LAN
CCHHAAPPTTEERR 11
Welcome .................................................................................................................................................... 5
KanguruWireless LAN Package Contents: ........................................................................................... 5
Features:.................................................................................................................................................... 5
Specifications: ........................................................................................................................................... 6
System Requirements:............................................................................................................................. 6
IInnttrroodduuccttiioon
n
..........................................................................................................................................................................5
5
CCHHAAPPTTEERR 22
Attention Win 98 users:............................................................................................................................ 7
Overview.................................................................................................................................................... 7
WLAN Utility Introduction........................................................................................................................10
CCHHAAPPTTEERR 33
Opening the WLAN Utility Software ......................................................................................................11
Status ........................................................................................................................................................11
Profile ........................................................................................................................................................13
Profile-Advance........................................................................................................................................14
Profile-Encryption ....................................................................................................................................14
Survey .......................................................................................................................................................16
Statistics....................................................................................................................................................16
About .........................................................................................................................................................18
Warranty....................................................................................................................................................18
Tech Support............................................................................................................................................18
IInnssttaallllaattiioon
CCoonnffiigguurraattiioon
n
..............................................................................................................................................................................7
n
..................................................................................................................................................................111
7
1
- 4 -
Page 5

KanguruWireless LAN
CHAPTER 1 Introduction
Welcome
Thank you for purchasing the KanguruWireless LAN adapter from Kanguru
Solutions. You can now easily connect your PC to your wireless network without
every opening your PC. Unlike other USB WLAN adapters on the market, the
Kanguru Wireless LAN also comes with built in flash storage to transfer files in
this pocket-sized device. You now get two great products in one; the WLAN
adapter, and a USB Flash drive to store your valuable data.
The adapter’s compact design and plug-and play abilities make it ideal for
notebook users. Take the drive wherever you go to store files as well as connect
to a Wireless network. Another great benefit is the fact the adapter draws power
from your USB ports, so there’s no a need for an external power supply.
KanguruWireless LAN Package Contents:
• 1 – KanguruWireless LAN adapter.
• 1 – Notebook mounting kit.
• 1 – USB extension cable.
• 1 – Driver CD.
• 1 – User registration form.
If any of the above items are missing, please call Kanguru Solutions’ Tech
Support department at: (508) 376-4245, extension 2 and replacement parts will
be shipped to you ASAP.
Features:
• High speed data transfer rate of up to 11Mbps
• 40, 60, and 128-bit WEP encryption to ensure privacy.
• Automatic Rate fallback to adjust to distances.
• One-year Standard Warranty: This device comes complete with a one-
year parts and labor warranty.
• Compatible with Win98/98SE, ME, 2000, XP
• Compliant with 802.11b, DSSS, and 2.4GHz Standards.
- 5 -
Page 6

KanguruWireless LAN
Specifications:
Standards: IEEE 802.11b and USB1.1
Interface: USB1.1
RF Output Power: 16dB, (max)
Modulation: CCK, DQPSK, DBPSK
Network Protocols IPX/SPX, TCP/IP, NetBEUI
RF Data Rate: 11, 5.5, 2, and 1 w/ Auto Detect
LEDs: Link Status
Antenna: Onboard Gain 25dBm
Operating Channels 11 N. America, 13 Europe
Dimensions: 3.9” L x 1.25” W x 0.5” H
Operating Temperature: 5° ~ 55° C
Storage Temperature: -20° ~ 80° C
Relative Humidity: 5% ~ 80%
Weight: 30g
Power: 5V drawn from USB port
Certifications: FCC, CE
Warranty: 1 year limited
System Requirements:
• Pentium Class PC
• Available USB port
• Windows 98/98SE, Me, 2000, or XP
• 2MBs of free hard drive space
• CD-Rom drive
- 6 -
Page 7
KanguruWireless LAN
CHAPTER 2 Installation
Attention Win 98 users:
Windows 98 SE users must first install the Flash Driver (Steps 1 to 3 below). All
other users do not need to install the Flash Driver.
1. Plug-in the Kanguru WLAN first and choose Search for the best driver
for your device when the wizard begins, then click Next.
2. Uncheck the box CD-ROM drive and check the box Specify a location.
Choose E:\KanguruWireless LAN\Flash Driver, where E is your CDROM drive letter. Click Next to continue.
3. The wizard will find the location of the driver to be:
E:\KanguruWirelessLAN \FLASHD~5\USTORAGE.INF. Click Next then
Finish to complete the Flash Driver installation.
Overview
Please follow these instructions to ensure a proper configuration of your wireless
connection. Please note there is a WLAN Management Utility used to configure
your connection in Windows 98SE, Me, and 2000. Windows XP uses its built-in
WLAN utility.
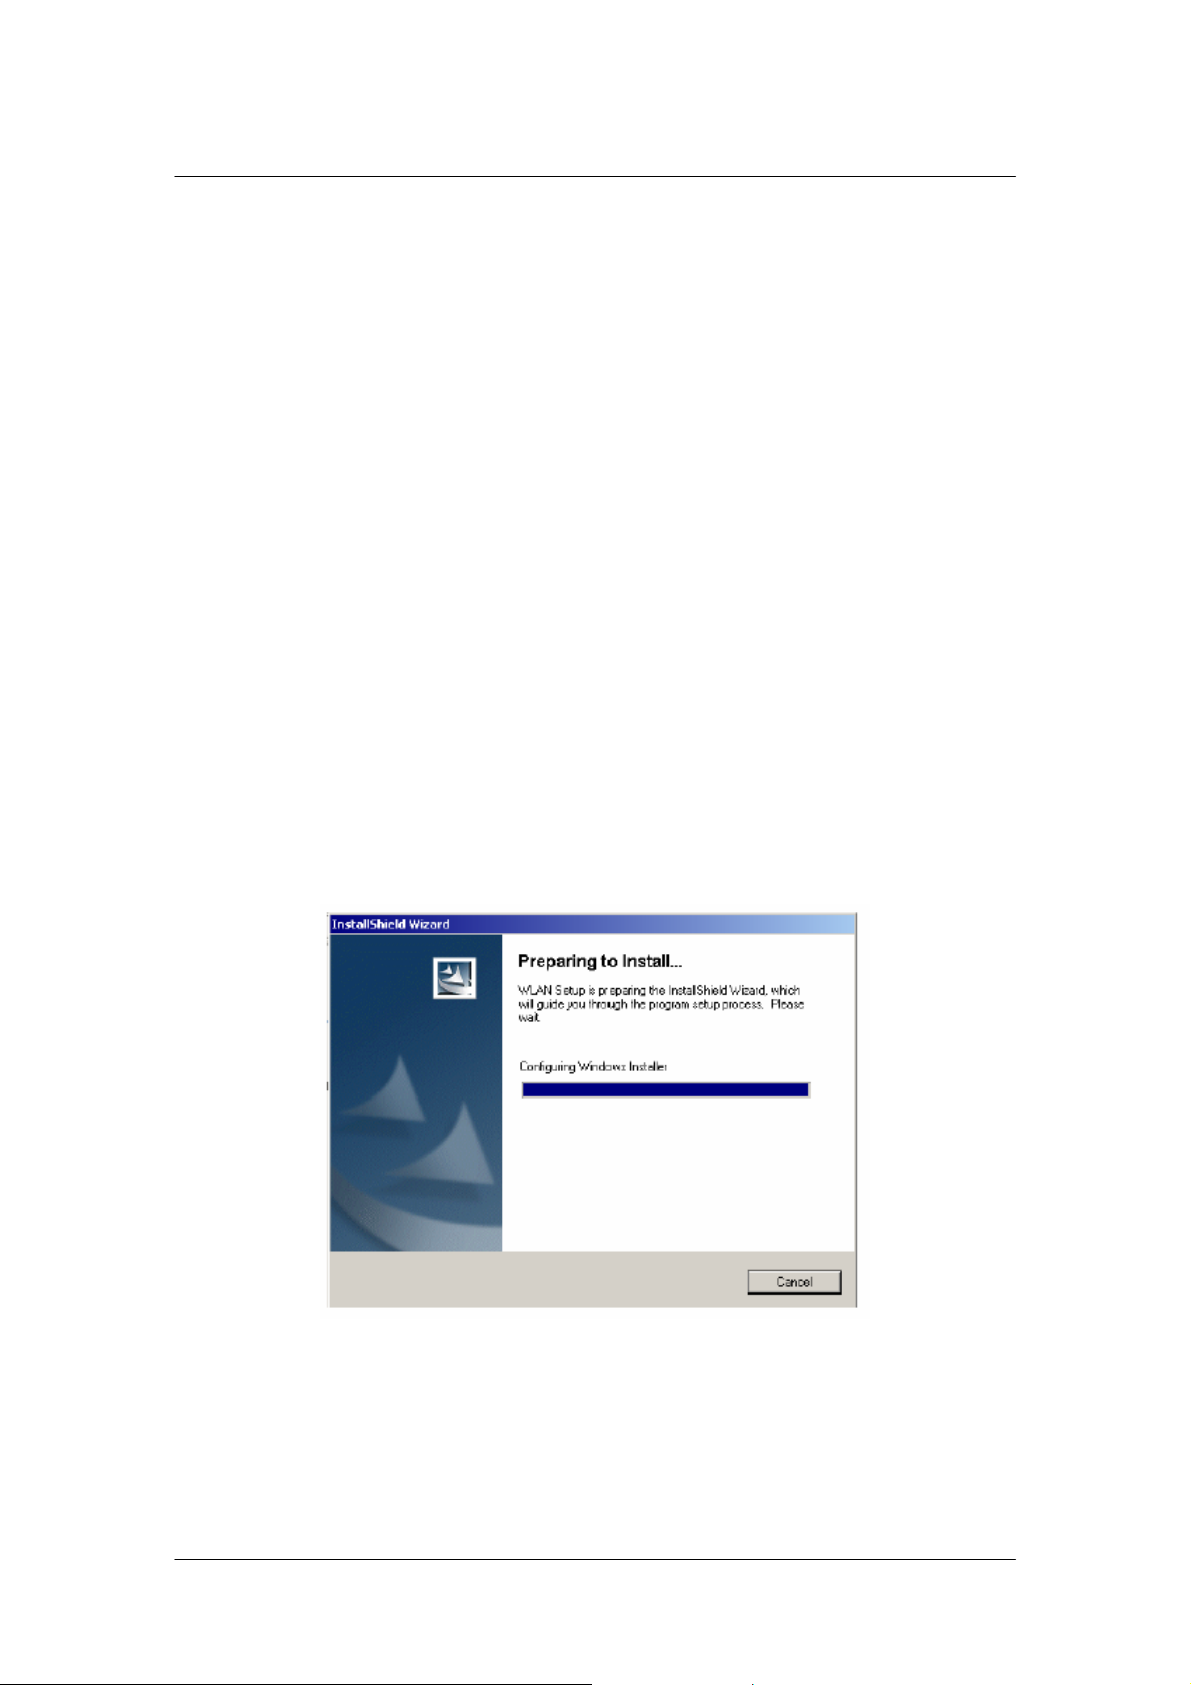
1. Insert the installation CD into your CD-ROM drive. The setup program will
start automatically.
2. Click “Next” to go to the next screen.
- 7 -
Page 8

KanguruWireless LAN
3. Select the destination folder to save the program. To install to the default
folder as shown below, click “Next” to go the next screen.
4. During the installation, Driver and Utility files will be copied to your system
directory.
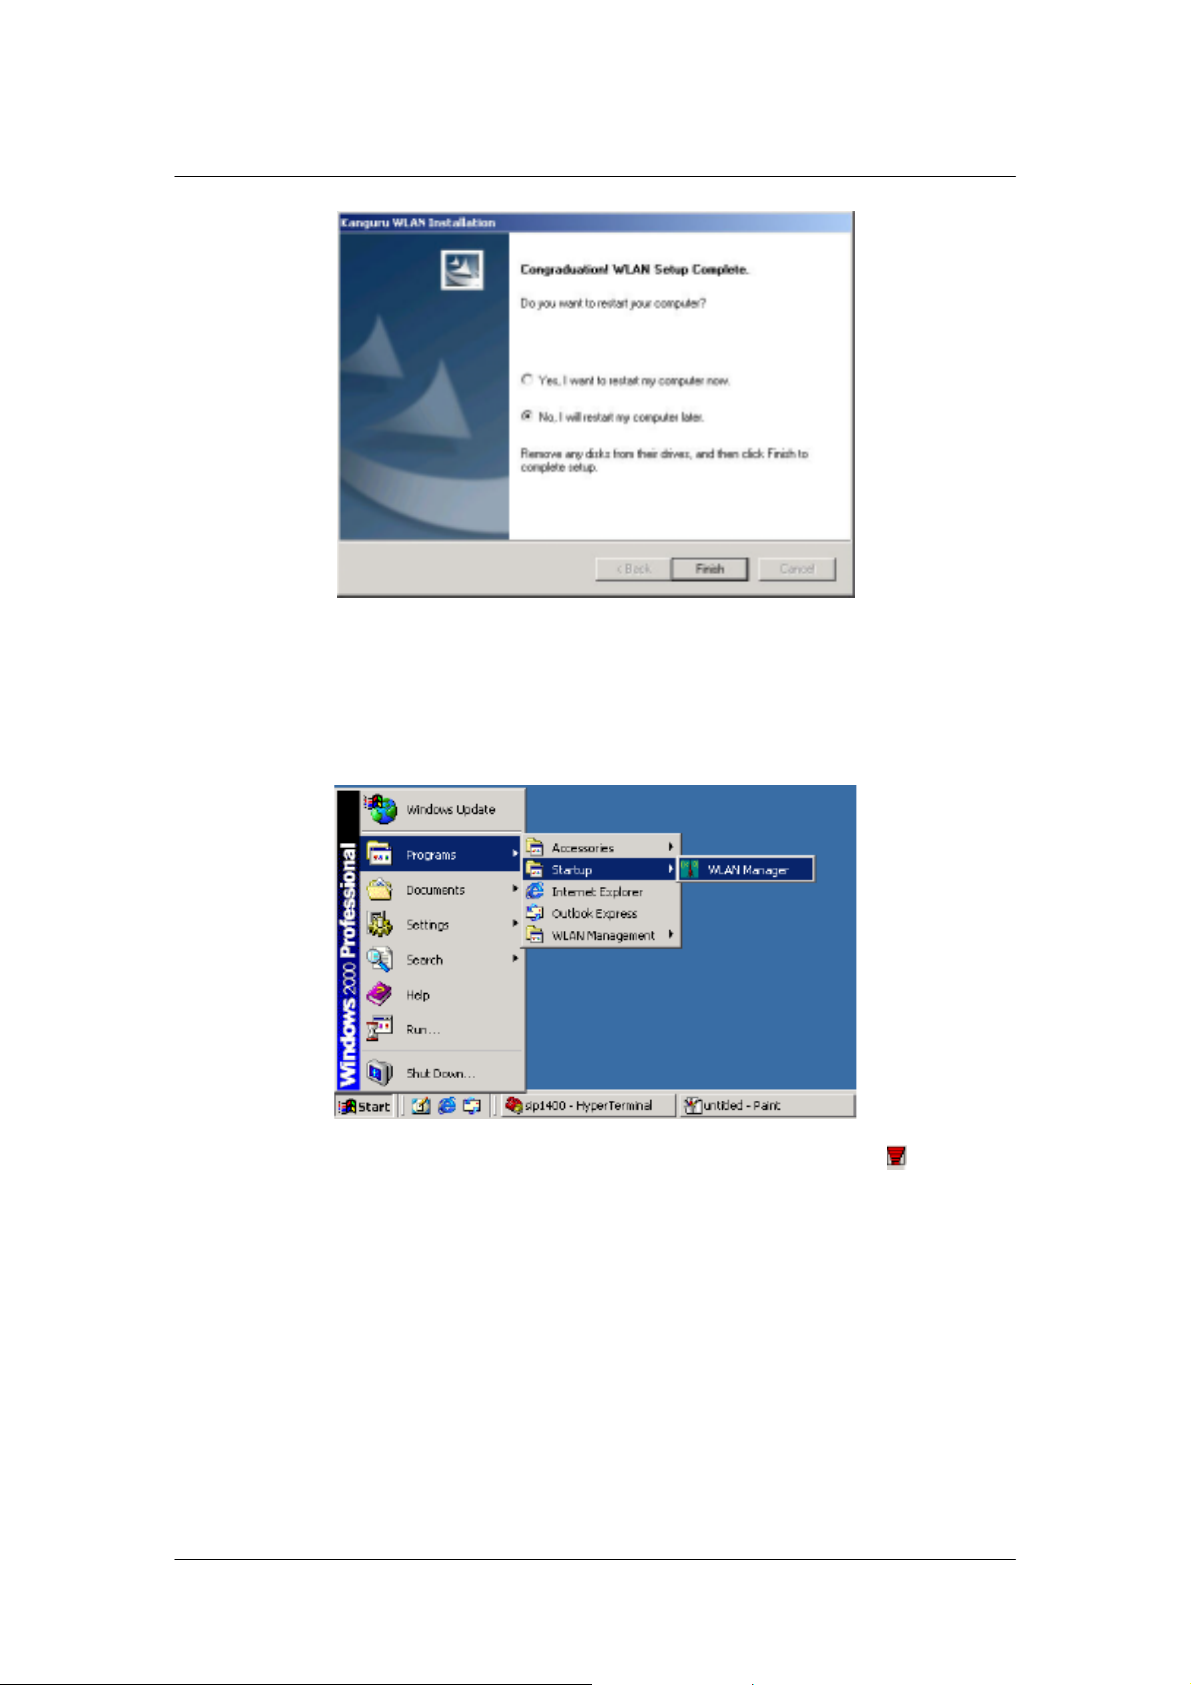
5. Select “No” and then Click “Finish” to complete the installation (you must
to select “Yes” for Windows 98 and Me).
- 8 -
Page 9
KanguruWireless LAN
6. The WLAN Manager Shortcut will appear on your desktop. By clicking on
this icon, you can run the Utility program to configure your connection.
You will also find “WLAN Manager” at Start\Programs\Startup Menu as
shown below.
7. After clicking on the shortcut, an inverse red pyramid-like icon
appear in the bottom right corner of your screen. Right click the icon and
select Open, and the WLAN Utility will open.
- 9 -
will
Page 10

KanguruWireless LAN
WLAN Utility Introduction
The KanguruWireless LAN adapter has its own management software. Users
can control all of the functions provided by the application named WLAN Utility.
The Utility icon will appear on the taskbar by double clicking the WLAN Utility
shortcut on your desktop.
Please Note: Three colors are used to describe the status of the connection:
• Green indicates an excellent connection.
• Yellow indicates a poor connection.
• Red indicates a dead connection.
WLAN Utility contains five major functions, each described below:
1. Status: provides the information of the current wireless connection.
2. Profile: allows users to easily configure different settings for each user.
3. Survey: supports the site survey tool to list the active access points that
are within range of your KanguruWireless LAN adapter.
4. Statistics: provides statistical counters of data transmission and reception.
5. About: provides information about the firmware and software, Mac
address, etc.
- 10 -
Page 11

KanguruWireless LAN
CHAPTER 3 Configuration
Opening the WLAN Utility Software
The KanguruWireless LAN adapter uses a program called “WLAN Utility” to
configure the adapter to work with a wireless network. To open the program,
simply double click the
sections, each described in detail below.
Status
The Status tab provides information on the current profile, if any, being used in
the wireless connection. The information listed on the Status tab is indicated
below.
icon located in your taskbar. The program has five
• Profile Name: displays the name of the profile currently in use.
• SSID: displays the name of the SSID (Service Set Identification)
associated with the profile
• State: displays the current state of the driver
• Mode:
o Access Point: this mode of operation requires the presence of an
access point. All communication is done via the access point, which
relays packets to other wireless client s in the BSS as well as to
nodes on a wired network such as Ethernet.
- 11 -
Page 12

KanguruWireless LAN
o Peer-to-Peer: all communication is done from client to client
without the use of an access point.
• Channel: displays the channel being used, if any, for this wireless
connection. The communication channel ranges from 1 to 11 (US/FCC,
Canada/RSS) 1 to 13 (Europe/ETSI) or 1 to 14 (Japan/TELEC)
• Setting Tx Rate: displays the transfer rate being used for an active
connection. The value is masked when the state shows the “scanning”
message.
• Power Saving Mode: power saving mode can reduce the power
consumption by temporarily disconnecting wireless connections when the
connection is idle.
• Connection Status Diagrams:
Access Point / WEP disable
The receiver can receive excellent signals.
There is no encryption in use.
The receiver can not receive any AP’s signal.
There is no encryption in use.
Peer-to-Peer / WEP disable
The receiver can receive excellent signals.
There is no encryption in use.
The receiver can not receive any PC’s signal.
There is no encryption in use.
Peer-to-Peer / WEP enable
The receiver can receive excellent signals.
Encryption is enabled and matched each
other.
The receiver can not receive any PC’s signal.
Encryption is enabled and not matched each
other.
- 12 -
Page 13

KanguruWireless LAN
Profile
The Profile tab is used to configure the various profiles available to you for
wireless connections. This section contains some of the same fields as the
Status tab, but unlike the Status tab, these options can be modified.
• Profile Name: after assigning a new profile name and completing related
fields, you can then click on “Apply to” save the profile. Click “Apply” or
“OK” to activate the options that have set. Please note: you can create up
to 20 different profiles.
• Restore Defaults: Click the “Restore Defaults” to return to the original
settings
• SSID: The identification of BSS (Basic Service Set) is associated with the
current profile. The default value is “ANY”. This allows your wireless client
to automatically associate to any access point in the vicinity of your
wireless client.
• Mode: This field allows you to select from a list of supported networks
modes. The modes displayed will have “Access Point” and “Peer-to-Peer”.
The default value is “Access Point”.
- 13 -
Page 14

KanguruWireless LAN
• Tx Rate: This is the rate at which the data packets are transmitted. You
can set this to 1 Mbps, 2 Mbps, Auto 1 or 2Mbps, 5.5 Mbps, 11 Mbps,
or Fully Automatic. The default value is “Fully Automatic”.
• Peer-to-Peer Channel: Changing the channel is only effective in Ad-Hoc
networks. Networks operating in infrastructure mode automatically scan
for a channel. When Peer-to-Peer mode is selected, be sure to set your
wireless stations with the same channel.
• Power Saving Mode: This field allows you to enable or disable the power
saving mode. Power saving mode can reduce power consumption by
temporarily disconnecting wireless connections when idle. The default
value is “Disabled”.
Profile-Advance
RTS Threshold: This field allows you to enable or disable the RTS Threshold.
When the field is set to Enabled, you can adjust the value between 0 and 2432.
RTS threshold is a mechanism implemented to prevent the “Hidden Node”
problem. “Hidden Node” is a situation in which two stations are within range of
the same access point, but are not within range of each other. Thus, it provides a
solution to prevent data collisions. Enabling RTS Threshold may cause
redundant network overhead that could negatively affect the throughput
performance.
Fragment Threshold: This field allows you to enable or disable the Fragment
Threshold. When the field is set to Enabled, you can adjust the value between
0 and 2346. The Fragmentation mechanism is used for improving the efficiency
when your wireless network experiences high traffic flows. If your wireless
devices often transmit large files, you can enable this option to transmit split
packets.
Profile-Encryption
The Encryption function is used to add a measure of security to your wireless
network, which can be achieved by using the WEP (Wired Equivalent Privacy)
encryption. WEP supports secure data encryption to prevent unauthorized
wireless stations from accessing data transmitted over the network. WEP
encrypts each frame transmitted by using one of the Keys entered from this
panel. When an encrypted frame is received, it will only be accepted if it decrypts
correctly. This will only happen if the receiver has the same WEP Key as the
transmitter.
- 14 -
Page 15

KanguruWireless LAN
WEP Key: Choose from either Disable, 64-bit, or 128-bit. You can choose
“Create Key Manually” or “Create Key with Pass-phrase” to enter encryption
keys. It allows the entry of four keys for 64-bit and 128 bit according to the WEP
function selected. To be written to the driver and registry, each key must consist
of the correct sequence of digits. Please refer to the sections below for detailed
instructions.
• Create Key Manually: First you must select the desired encryption
strength, and then fill in the keys according to the following:
o For 64-bit encryption:
5 alphanumeric characters in the range of “a-z”, “A-Z”, and
“0-9”.
10 digit hexadecimal values in the range of “a-f”, “A-F” and
“0-9”.
o For 128-bit encryption:
13 alphanumeric characters in the range of “a-z”, “A-Z”, and
“0-9”.
26 digit hexadecimal values in the range of “a-f”, “A-F” and
“0-9”.
• Create Key with Pass-phrase: A pass-phrase can be entered which is
used as a “seed” to randomly generate the four keys. This saves a
considerable amount of time since the same keys must be entered into
each node on the wireless network.
Once you have created the keys either manually or with a pass-phrase, you can
then select the Key to use for the encryption.
- 15 -
Page 16
KanguruWireless LAN
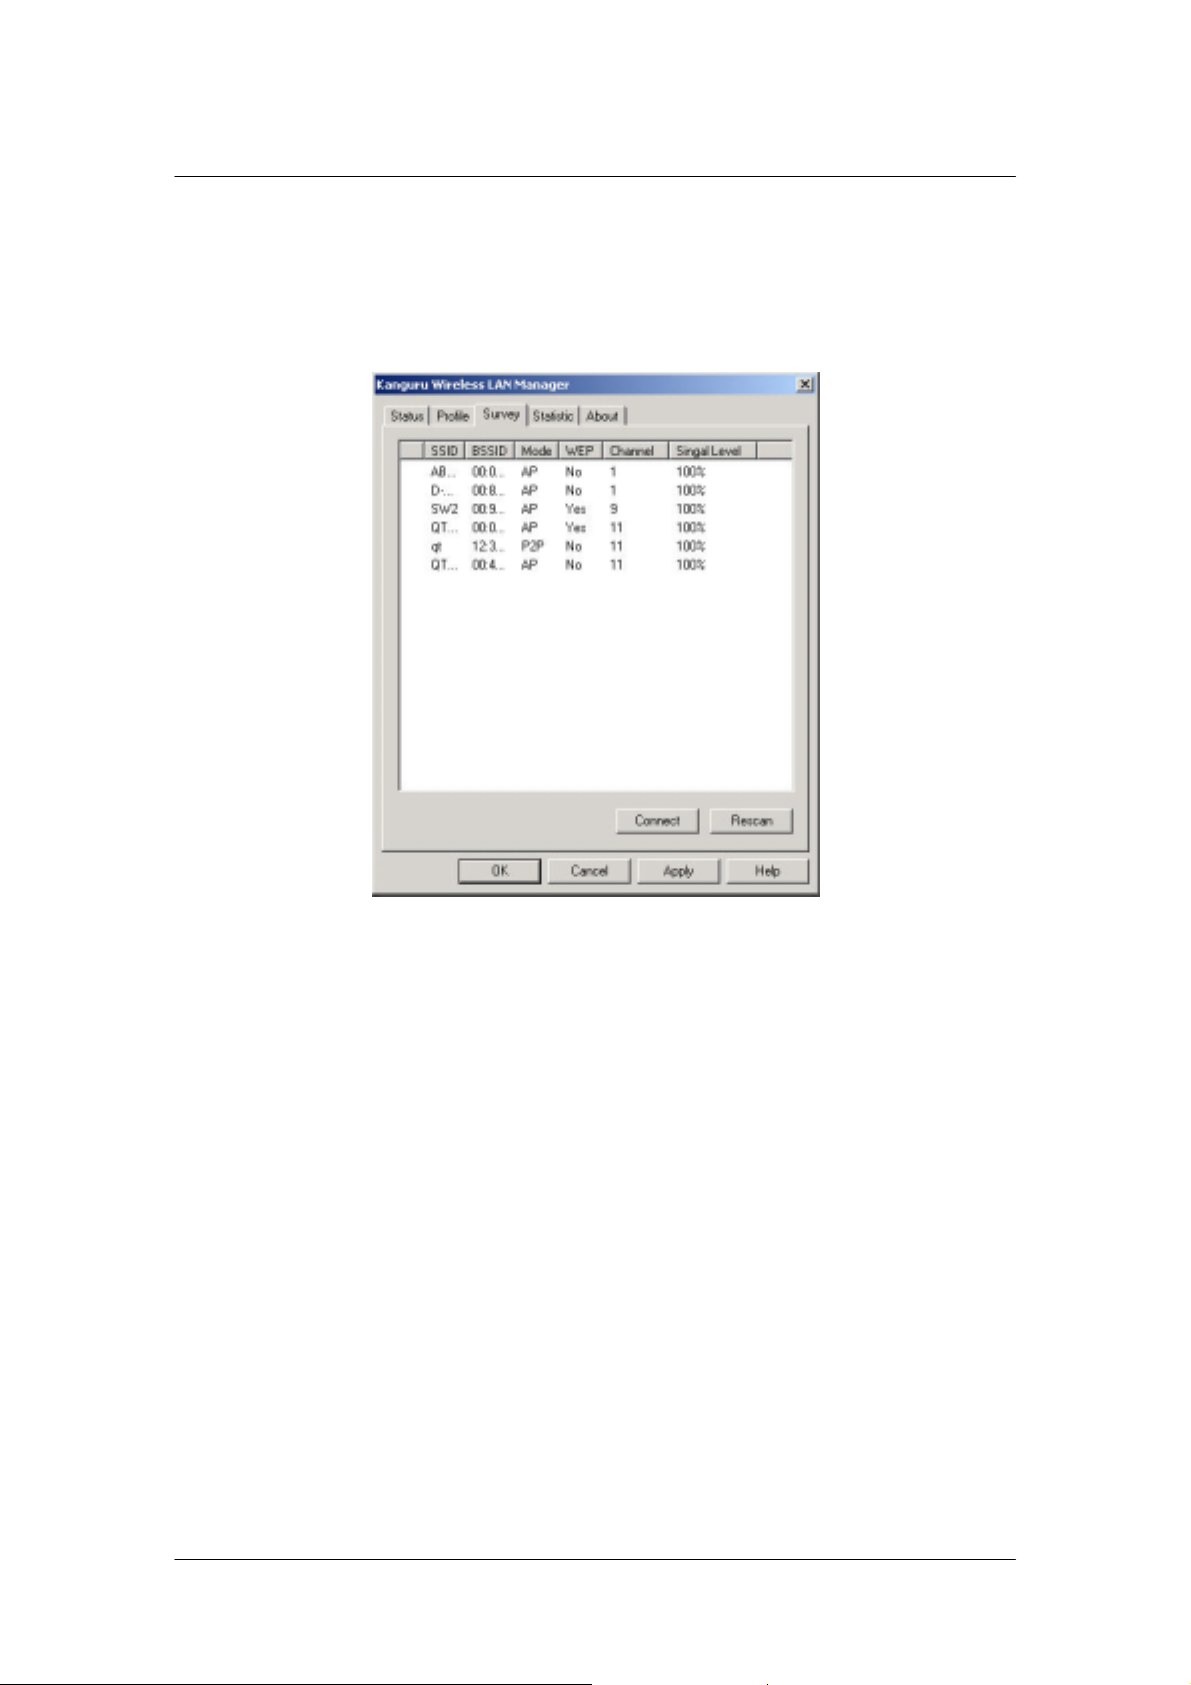
Survey
The Survey section supports the powerful Site-Survey tool to identify all active
wireless devices in the radio range. This will display all of the significant
information about the devices connected to your wireless network.
Statistics
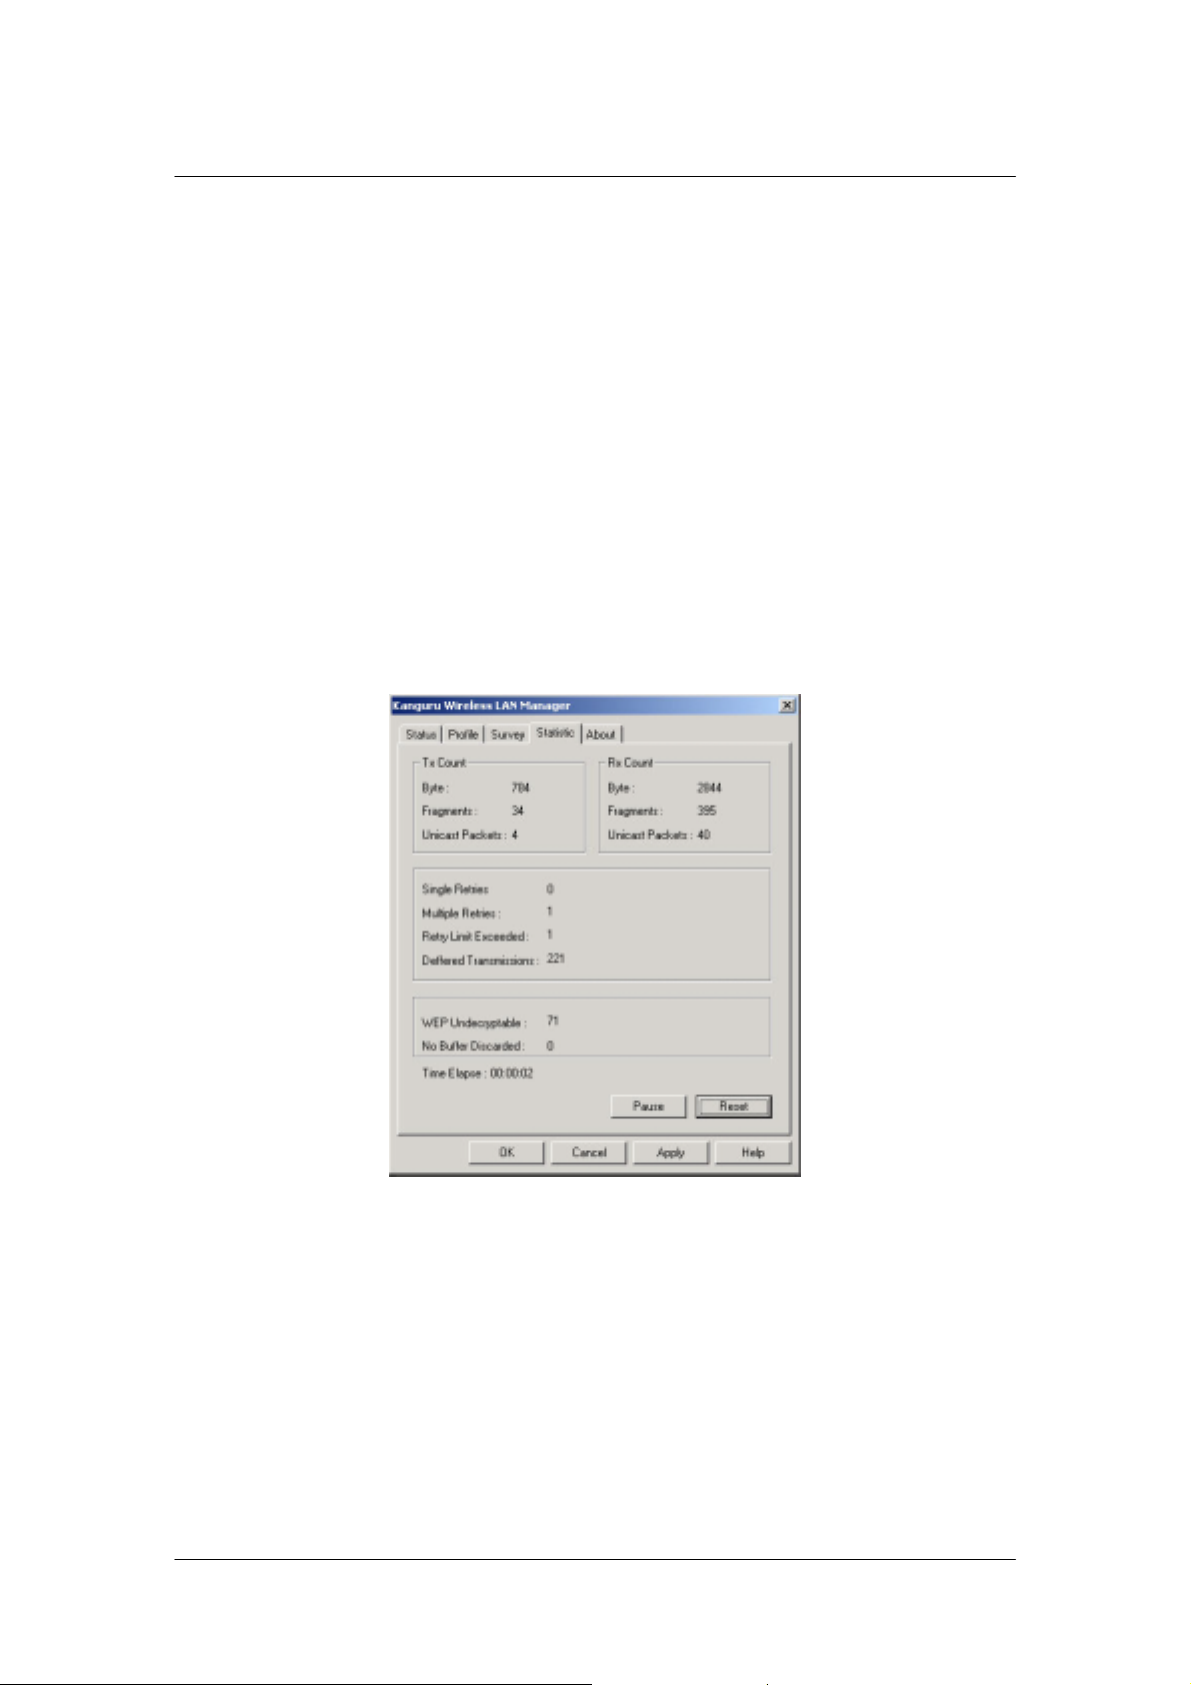
The Statistics section is used to monitor TX and RX traffic on the wireless
network. It also displays detailed information about errors in wireless packets that
the other WLAN devices have transmitted. The statistics are reset to start
counting from zero each time this page is opened. Press the “reset” button to
restart the counter again. To temporarily freeze the counters for analysis, press
the “pause” button. The fields used in this section are described below:
TX Count:
o Byte: the total number of bytes from any kind of wireless packets.
o Fragments: the total number of successfully delivered/received
MPDUs or type Data or Management.
o Unicast Packets: the number of wireless unicast (point to point)
TX packets.
RX Count:
o Byte: the total number of bytes from any kind of wireless packets.
- 16 -
Page 17
KanguruWireless LAN
o Fragments: the total number of successfully delivered/received
MPDUs or type Data or Management.
o Unicast Packets: the number of wireless unicast (point to point)
RX packets.
Single Retries: the number of MSDUs successfully transmitted after one
(and only one) retransmission.
Retry Limit Exceeded: the number of times a MSDU was not transmitted
successfully because the retry limit (7 for short frame and 4 for long frame)
was reached, due to no acknowledgement or CTS received.
Deferred Transmissions: the number of MSDUs for which one or more
transmission attempt(s) was deferred to avoid a collision.
WEP Undercryptable: the number of received MPDUs, with WEP sub
field in the Frame Control field set to one, that were discarded because
either it should not have been encrypted, or due to the receiving station
not implementing the WEP option.
No Buffer Discard: the number of received MPDUs that were discarded
because of the lack of buffer space on the NIC.
- 17 -
Page 18

KanguruWireless LAN
About
The About section is used to show Wireless Client Management Utility version
info, Serial Number, and Mac Address of this Network adapter. Users may need
these version numbers if they need to contact Kanguru Solutions’ technical
support department.
Warranty
This product carries a 1-year limited warranty from the date of purchase. Any claims for
loss or damage must be made to carrier directly. Claims for shipping errors should be
reported to Kanguru Solutions within three (3) working days of receipt of merchandise.
Tech Support
If you experience any problems installing your KanguruWireless LAN adapter or have any
technical questions regarding any of our products, please call our tech support department.
Our tech support is free and available Monday through Friday, 9am to 5pm EST.
Call 1-508-376-4245 or
Visit our website at http://www.kanguru.com
- 18 -
 Loading...