

Page 1
FCC COMPLIANCE STATEMENTS
This equipment has been tested and found to comply with the limits for a Class B digital device, pursuant to Part 15 of the FCC Rules. These limits are designed to provide
reasonable protection against harmful interference in a residential installation. This equipment generates, uses and can radiate radio frequency energy and, if not installed and
used in accordance with the instructions, there is no guarantee that interference will not occur in a particular installation. If this equipment does cause harmful interference to
equipment off and on, the user is encouraged to try to correct the interference by one or more of the following measures:
Reorient or relocate the receiving antenna.
Increase the Distance between the equipment and receiver.
Connect the equipment into an outlet on a circuit different from that to which the receiver is connected.
Consult the dealer or an experienced radio/TV technician for help.
TRADEMARKS
MS-DOS, Windows, Windows 98/NT/2000/ME/XP are trademarks of Microsoft Corporation.
Macintosh and Mac are trademarks of Apple Computer
*All of the third-party brands and names are the property of their respective owners.
Page 2

TABLE OF CONTENTS
1. INTRODUCTION ............................................................................................................................................................................................ 2
2. SYSTEM REQUIREMENTS............................................................................................................................................................................... 3
3. HARDWARE INSTALLATION........................................................................................................................................................................... 3
USB2.0 PCI Card / Combo Hub ........................................................................................................................................................................... 3
Installing USB 2.0 Drivers................................................................................................................................................................................ 3
Installing USB 2.0 drivers in Windows 98........................................................................................................................................................ 3
Finalizing USB 2.0 Hi-Speed hardware settings............................................................................................................................................... 5
Connecting the Kanguru DataBank....................................................................................................................................................................... 6
Labeling your Kanguru Disks ............................................................................................................................................................................... 6
4. DRIVER INSTALLATION................................................................................................................................................................................... 6
4.1WINDOWS 98SE ............................................................................................................................................................................................ 6
4.2 WINDOWS ME/2000/XP............................................................................................................................................................................... 7
4.3 Mac OS............................................................................................................................................................................................................ 8
5. OPERATING THE KANGURU DATABANK.................................................................................................................................................... 9
5.1 Connecting your Kanguru DataBank:............................................................................................................................................................. 9
5.2 Disconnecting your Kanguru DataBank: ........................................................................................................................................................ 9
5.2.1 Windows 98:............................................................................................................................................................................................. 9
5.2.2 Windows 2000:......................................................................................................................................................................................... 9
5.2.3 MAC OS................................................................................................................................................................................................. 10
Inserting/Removing Drives ................................................................................................................................................................................. 10
Windows 98:.................................................................................................................................................................................................... 10
Windows 2000/ME/XP................................................................................................................................................................................... 10
6. PARTITIONING AN INDIVIDUAL KANGURU DISK FROM YOUR KANGURU DATABANK............................................................. 11
6.1 Partition under Windows 98/ME................................................................................................................................................................... 11
6.2 Partition under Windows 2000 ...................................................................................................................................................................... 12
Tech Support ............................................................................................................................................................................................................ 13
Call 1-508-663-0105 or................................................................................................................................................................................... 13
1. INTRODUCTION
The KanguruData Bank is a first of its kind, patent pending, storage device designed to simplify network data storage. Functioning as
either a network attached or direct attached storage device, the KanguruData Bank offers true plug and play ability with little or no need
for special configurations to connect it to your network. Just plug it into an existing USB or USB2.0 port!
Each KanguruData Bank starts with 80GB of internal drive space, which can easily be increased by inserting various capacity
KanguruDisks
. Add massive amounts of storage with each KanguruDisk you insert.
Note1: In order to reach USB 2.0 speed, you must have a computer or host adapter card that has USB 2.0
support. This device will automatically sense the speed of your USB port and adjust between USB 1.1
and USB 2.0 speed. If you do not have USB 2.0 support, the device will work at USB 1.1 speeds.
Your Kanguru DataBank comes supplied with a PCI USB2.0 card. This card must be installed before
Page 3
you use your DataBank if you want to reach maximum transfer speeds.
Note2: Kanguru DataBanks can be custom built to include CDRW, DVDRW, and Card Reader drives. If
your Databank has one of these custom drives, then follow the instructions for operating that
particular drive. If not, then disregard the custom drive instructions.
Note3: Depending on your system’s configuration, your Kanguru DataBank may conflict with your current
networked drives and cause the drives’ paths to be changed. For example, you computer connects to
drives E and F on your network, and when you plug in your DataBank these networked drives get
bumped to J and K. To avoid this change the Drive Letter and Path for each of the Kanguru Disks.
For example, change drives E:F:G:H to W:X:Y:Z. This ensures that networked drives E:F:G:H will
remain unchanged, and the Kanguru Disks will always show up as W:X:Y:Z.
2. SYSTEM REQUIREMENTS
Hardware:
Notebook or desktop computer with USB or USB2.0 port supported.
Operation system:
Win98SE, Win-ME, Win2000, Win XP, Mac OS 8.6 or above.
3. HARDWARE INSTALLATION
USB2.0 PCI Card / Combo Hub
Every DataBank comes supplied with a USB2.0 PCI card that is required to meet USB2.0 speeds. However, if you already have a
USB2.0 connection, then there is no need to install the supplied card. First insert your USB2.0 PCI card into a free PCI slot, and then
follow the Driver instructions below.
Installing USB 2.0 Drivers
Once the card is installed and the computer has restarted, Windows will detect the board
and attempt to load the drivers for it.
Installing USB 2.0 drivers in Windows 98
• Windows will detect a “NEC USB
Open Host Controller”. Click “Next.”
• Select “Search for the best driver for
your device.” Click “Next.”
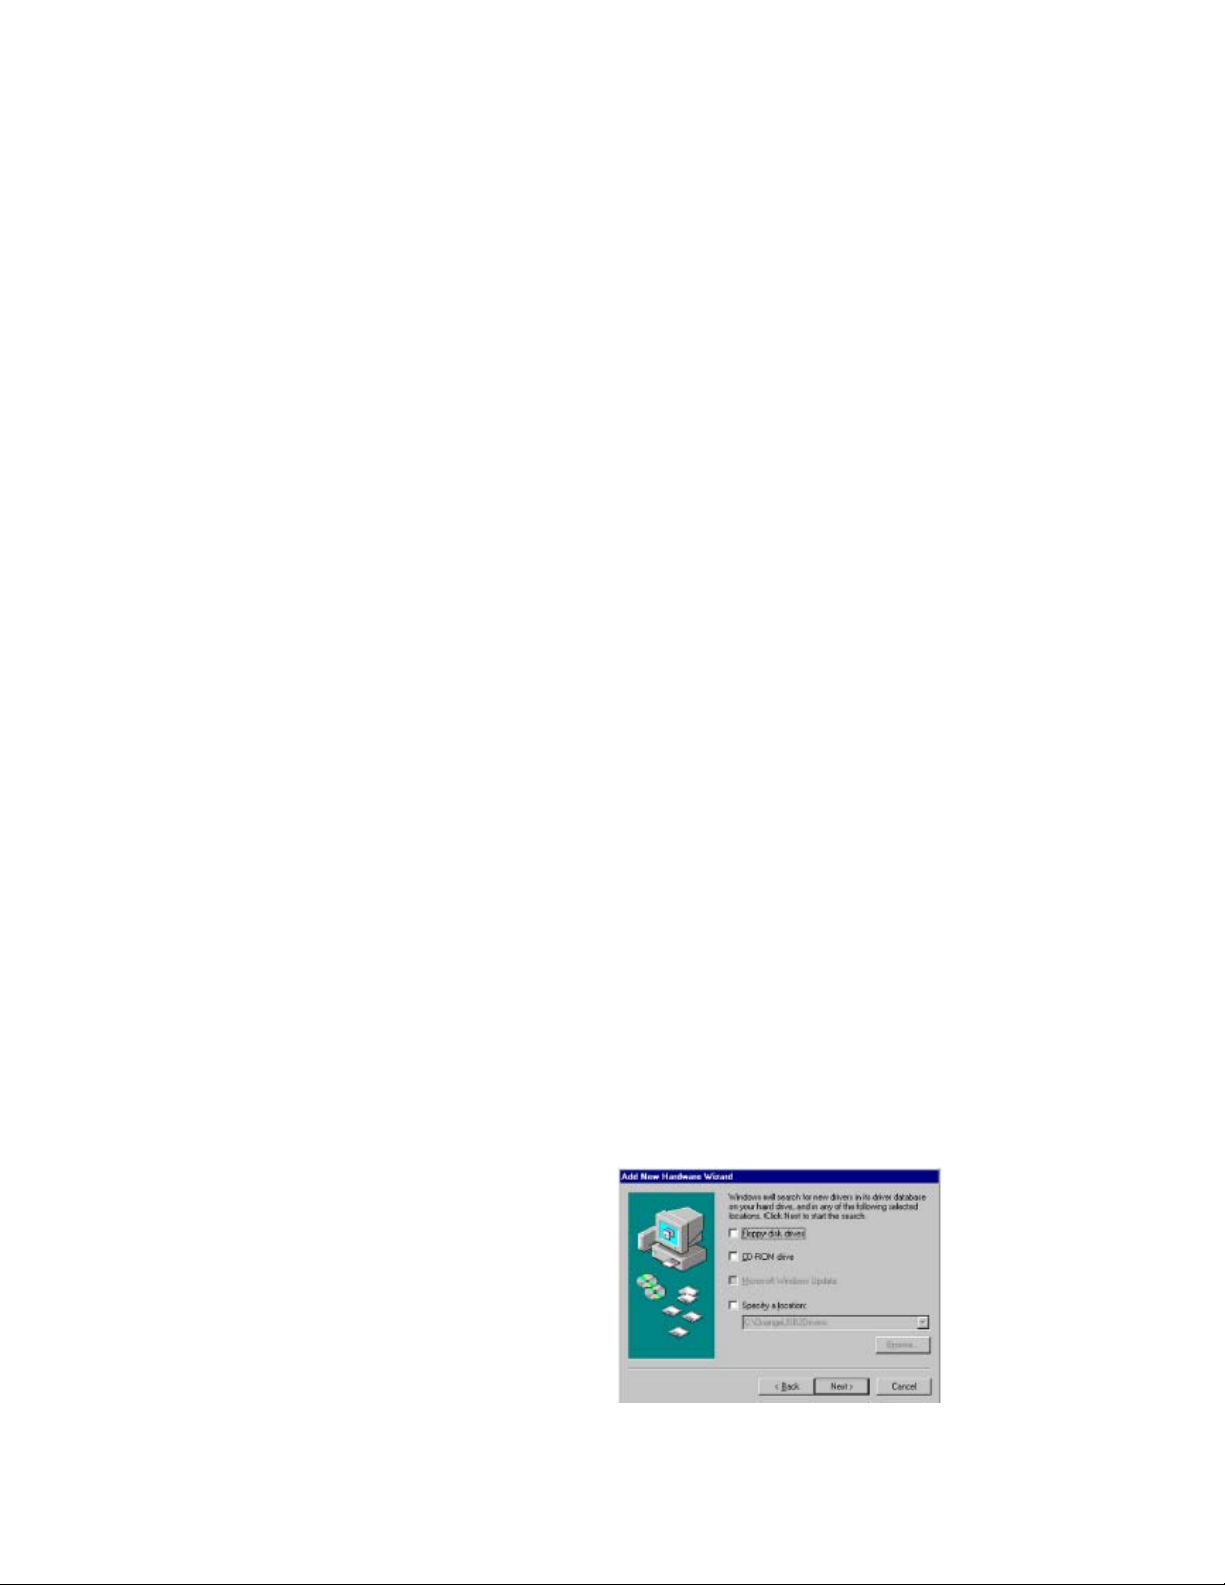
• Uncheck all boxes in Figure 1. Click
“Next.”
• Windows has found an updated driver
for this device. Click “Next.” Then
Click “Next” again.
Figure 1
Page 4
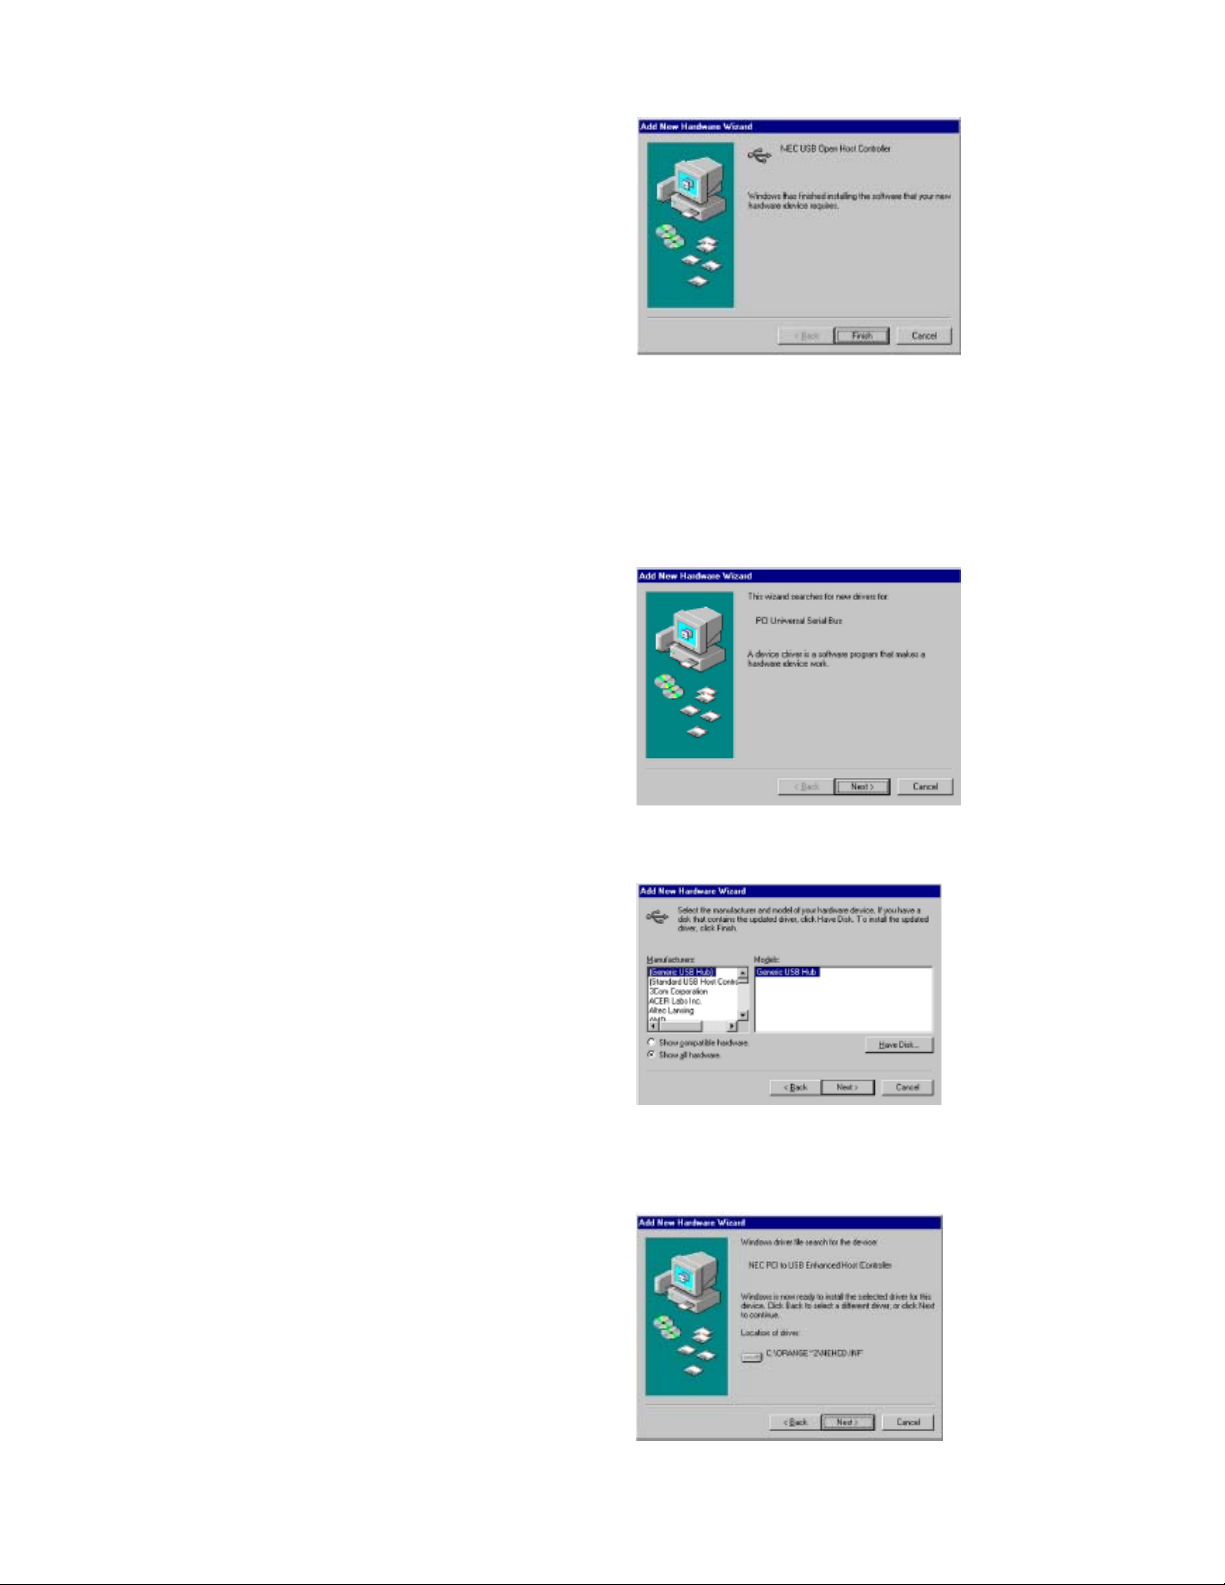
• The “Windows has finished installing
the software that your new hardware
device requires” dialog appears. Click
“Finish.”
• Repeat the above process for the
second NEC USB Open Host
Controller.
• After you have installed the two NEC
USB Open Host Controllers, Windows
will find a “PCI Universal Serial Bus”
device. Click “Next” to continue.
• Another dialog will appear. Select
“Display a list of all the drivers in a
specific location, so you can select the
driver you want”. Click “Next.”
• In the dialog that appears, highlight
“USB Controllers”. Click “Next.”
• Click on the “Have Disk” button as
shown in figure 4.
• In the dialog that appears, click on the
“Browse” button.
• Navigate to the folder that contains
the USB 2.0 drivers. Click “OK.”
• A dialog will appear with “NEC PCI to
USB Enhanced Host Controller”
highlighted, click “Next” to continue.
• The “Windows driver file search for
the device” dialog appears with the
location of the driver. Click “Next” to
continue.
• The “Window has finished installing
the software that your new hardware
device requires” dialog appears. Click
“Finish.”
• Restart Windows.
Figure 2
Figure 3
Figure 4
Figure 5
Page 5

Finalizing USB 2.0 Hi-Speed hardware settings
USB 2.0 Hi-Speed products that use an NEC chipset have 3 USB host controller engines on
board. Two of the host controller engines handle USB 1.1 transactions. One of the host
controllers engines handle, USB 2.0 transactions.
USB data traffic is automatically routed to the proper host controller engine depending on the
speed of the device that is plugged into the USB 2.0 port. This essentially creates 3 concurrent
USB buses. These USB buses allow devices to run in a less congested traffic environment. This
helps devices such as color printers, scanners, video cameras and mass storage devices, which
require a high bandwidth, to work well together.
The NEC PCI to USB Enhanced Host Controller driver handles USB 2.0 Hi-Speed (480 Mbits/s)
traffic. The two NEC PCI to USB Open Host Controllers handle Full-Speed (12 Mb/s) and Low-
Speed (1.5 Mb/s) traffic.
Check your Windows System/Device Manager to confirm proper
installation of USB 2.0 Hi-Speed drivers:
NEC PCI to USB Enhanced Host Controller
NEC PCI to USB Open Host Controller
NEC PCI to USB Open Host Controller
USB Root Hub
USB Root Hub
Page 6

Connecting the Kanguru DataBank
1.) Boot-up your computer and make sure the USB / USB2.0
port device driver has been installed and is available in operating system.
2.) Plug the USB2.0 cable into the USB2.0 Port of computer.
3.) Plug the AC power cord to the inlet of your Kanguru DataBank and
power on the DataBank. Your Kanguru DataBank will be ready to use.
4.) Follow the Software Installation as seen below.
NOTE:
Labeling your Kanguru Disks
One of features of the Kanguru DataBank is that the Kanguru Disks are hot swappable. This feature allows you to
take any of the Kanguru Disks out while the DataBank is still operating, and replace it at a later time. When you
want to remove a disk you have to disconnect it from the OS first. We highly recommend that users label their
Kanguru Disk both internally and externally. By internally we are suggesting that you change the label of the
drive. You can change a drive’s label by going into DEVICE MANAGER, and then into DISK MANAGEMENT.
From here you can right click on the drive that you want to rename, then select PROPERTIES. This is where
you can change the name of the drive. For example, if you were using a Kanguru Disk as an email backup, you
may want to rename the drive “EMAIL.” So after renaming your drives internally you need a way to tell which
Kanguru Disks are which. For this we suggest labeling the Kanguru Disks separately with the labels that are
provided with the DataBank.
This labeling system is very important for Kanguru Disk management. Without both labels, drives can easily be
mistaken for one another, which could result in removing the wrong KanguruDisk from the DataBank. This
could be especially undesirable in a network environment if someone is accessing the drive which is being
removed.
4. DRIVER INSTALLATION
4.1WINDOWS 98SE
If this is the first time you are installing the Kanguru
DataBank, you have to run the TPPINST.EXE
from the Drivers CD before you connect your
Kanguru DataBank to your computer.
1. Insert your Drivers CD in your CD-ROM drive.
2. Open the folder labeled “701 Kanguru Data Bank”.
3. Next open the “Drivers” folder.
4. Followed by the “USB Drivers” folder
Page 7

5. Then open the “USB WinME-98-2000-XP” folder
6. Run the “TPPINST.EXE” to install drivers for
the Kanguru DataBank.
7. Choose the language that you use and click “OK”.
A dialog box appears as shown, Click “NEXT
8. Choose “Typical” and click “NEXT”.
6.
After the needed files are copied onto your
hard drive, the installation is complete.
You can connect your Kanguru DataBank to the computer now.
After you have installed the drivers, double click on
My Computer, and you will see a new 80GB drive
(if a 80GB drive was included with you unit),
plus any additional Kanguru Disks you have purchased.
A green Unplug or Eject hardware icon
will appear in system tray at the bottom of your screen.
Double click this icon and click stop before unplugging
the USB cable to prevent data loss.
Please note: the Kanguru DataBank Hard Drives come pre-partitioned FAT32 and formatted on
Windows 98.
4.2 WINDOWS ME/2000/XP
Step1 If you are plugging the Kanguru DataBank
into your computer for the first time, the system
will detect USB2.0 Storage Device and install
the driver of [USB Mass Storage Device ]
from system files automatically.
Step2 Once these drivers have been installed you can
double click “My Computer” and find your Kanguru
DataBank drives there.
Page 8

This Kanguru DataBank is supported by the Mass Storage Device drivers in WIN ME/2000/XP systems directly .You don’t need to
install any drivers. If the Kanguru DataBank has been repartitioned by the user, please refer to the Partition the Kanguru DataBank
chapter to prepare your unit.
4.3 Mac OS
Step1
After the system boots up, insert the
Drivers CD in your CD-ROM.
Open the folder labeled “701 Kanguru Data Bank”.
Next open the “Drivers” folder.
Followed by the “USB Drivers” folder
Then open the “USB Mac OS” or the “USB Mac OS X” folder (depending on you OS)
Double click the “USB2.0 SETUP” icon, and
double click “USB installer” icon.
Step2 Click on “OK” when finished.
Step3 Restart your computer to finish
the driver installation .
Step4 After the restart, locate the USB
port for your Macintosh.
Step5 Connect the USB cable to your Macintosh.
Step6 Connect the USB cable to your Kanguru DataBank USB 2.0 External Drive.
Step7 The icon of USB2.0 drive will now be shown on your desktop screen and the drive
is now ready for use.
Tips:
The Kanguru DataBank USB 2.0 can be used to share information on both Windows and
Macintosh platforms. To set up your drive for cross-platform use, make sure you have the latest version of File Exchange Running on
MAC.
Page 9
5. OPERATING THE KANGURU DATABANK
Once the DataBank has been installed you can connect or disconnect individual Kanguru Disks at anytime without powering down the
DataBank or your system. Please follow the steps below when you want to remove a drive while the DataBank is still running:
5.1 Connecting your Kanguru DataBank:
Step1 Plug the USB cable into the back of your Kanguru DataBank.
Step2 Plug the USB cable into the USB 2.0 port of computer.
Plug the AC power cord to the INLET of your Kanguru DataBank and
turn on the power switch on your Kanguru DataBank
Step3 If you have properly installed the drivers, your computer will recognize the built in 80GB hard drive plus
any additional Kanguru Disks in your DataBank.
NOTE: Make sure you have properly inserted the Kanguru Disks into your DataBank. To do so push the Kanguru Disks
firmly into the DataBank until you feel it snap into place. Also you shouldn’t move the Kanguru Disks from side to side while
they are in the DataBank, as this may cause them to disconnect from the system.
5.2 Disconnecting your Kanguru DataBank:
5.2.1 Windows 98:
Step1 Click the green Unplug or Eject hardware
icon in system tray and click the device that
you want to remove.
Step2 When the system prompts
‘You may safely remove this device’.
Unplug the USB cable from the USB port
of computer.
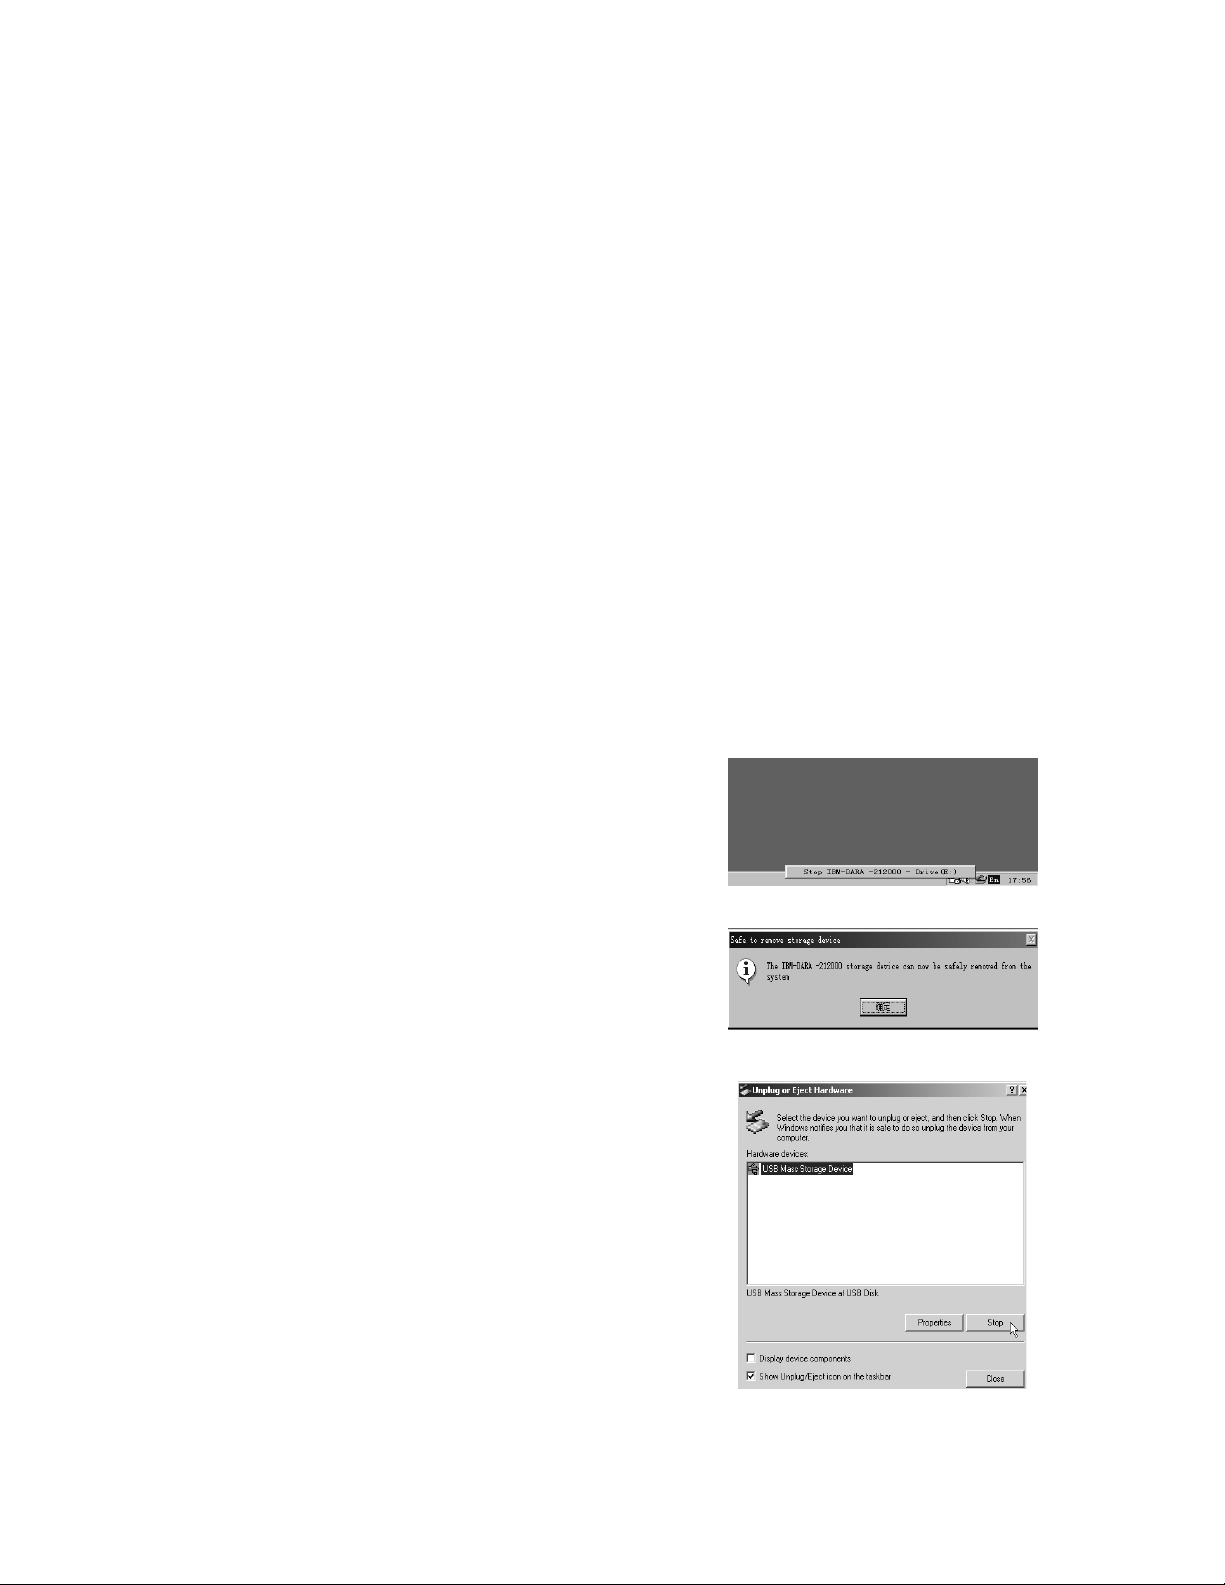
5.2.2 Windows 2000:
Step1 Double-click on the
[Unplug or Eject Hardware]
icon in system tray.
Dialog box appears as seen to right.
Step2 Highlight the [USB Mass Storage Device]
in the dialog box, click on [Stop], choose
the Kanguru DataBank USB 2.0 External Drive that you want
to disconnect, then click on [OK].
Step3 Wait for few seconds, the system prompts
“You may safely remove this device”.
Unplug the USB cable from the USB port of computer.
Page 10
5.2.3 MAC OS
When disconnecting your Kanguru DataBank USB 2.0 External Drive from computer, close all windows and quit all running applications
that are stored on the Kanguru DataBank USB 2.0 External Drive. Drag the Kanguru DataBank USB 2.0 External Drive’s icon into
“Trash” to dismount it from the Desktop prior to unplugging the Kanguru DataBank USB 2.0 External Drive from the USB port.
Failure to do so may result in a loss of data or possible file corruption.
CAUTION !!
Do not unplug the Kanguru DataBank from the USB port of your computer or HUB while copying files to or from the device or
while files or applications stored on the Kanguru DataBank are in use.
DOING SO MAY RESULT IN LOSS OF DATA.
Inserting/Removing Drives
Your Kanguru DataBank allows for removal of any individual Kanguru Disk without having to shutdown your DataBank. You can
also re-connect a Kanguru Disk into any bay at any time. If you have properly removed a Kanguru Disk, then it can be reconnected at
any time without any installation process. Simply follow the instructions below for REMOVING Kanguru Disks:
Windows 98:
Step1 Click the green Safely Remove Storage Device icon
icon in system tray and click the device that
you want to remove.
Step2 When the system prompts
‘You may safely remove this device’.
Click OK, and remove the KanguruDisk from the DataBank.
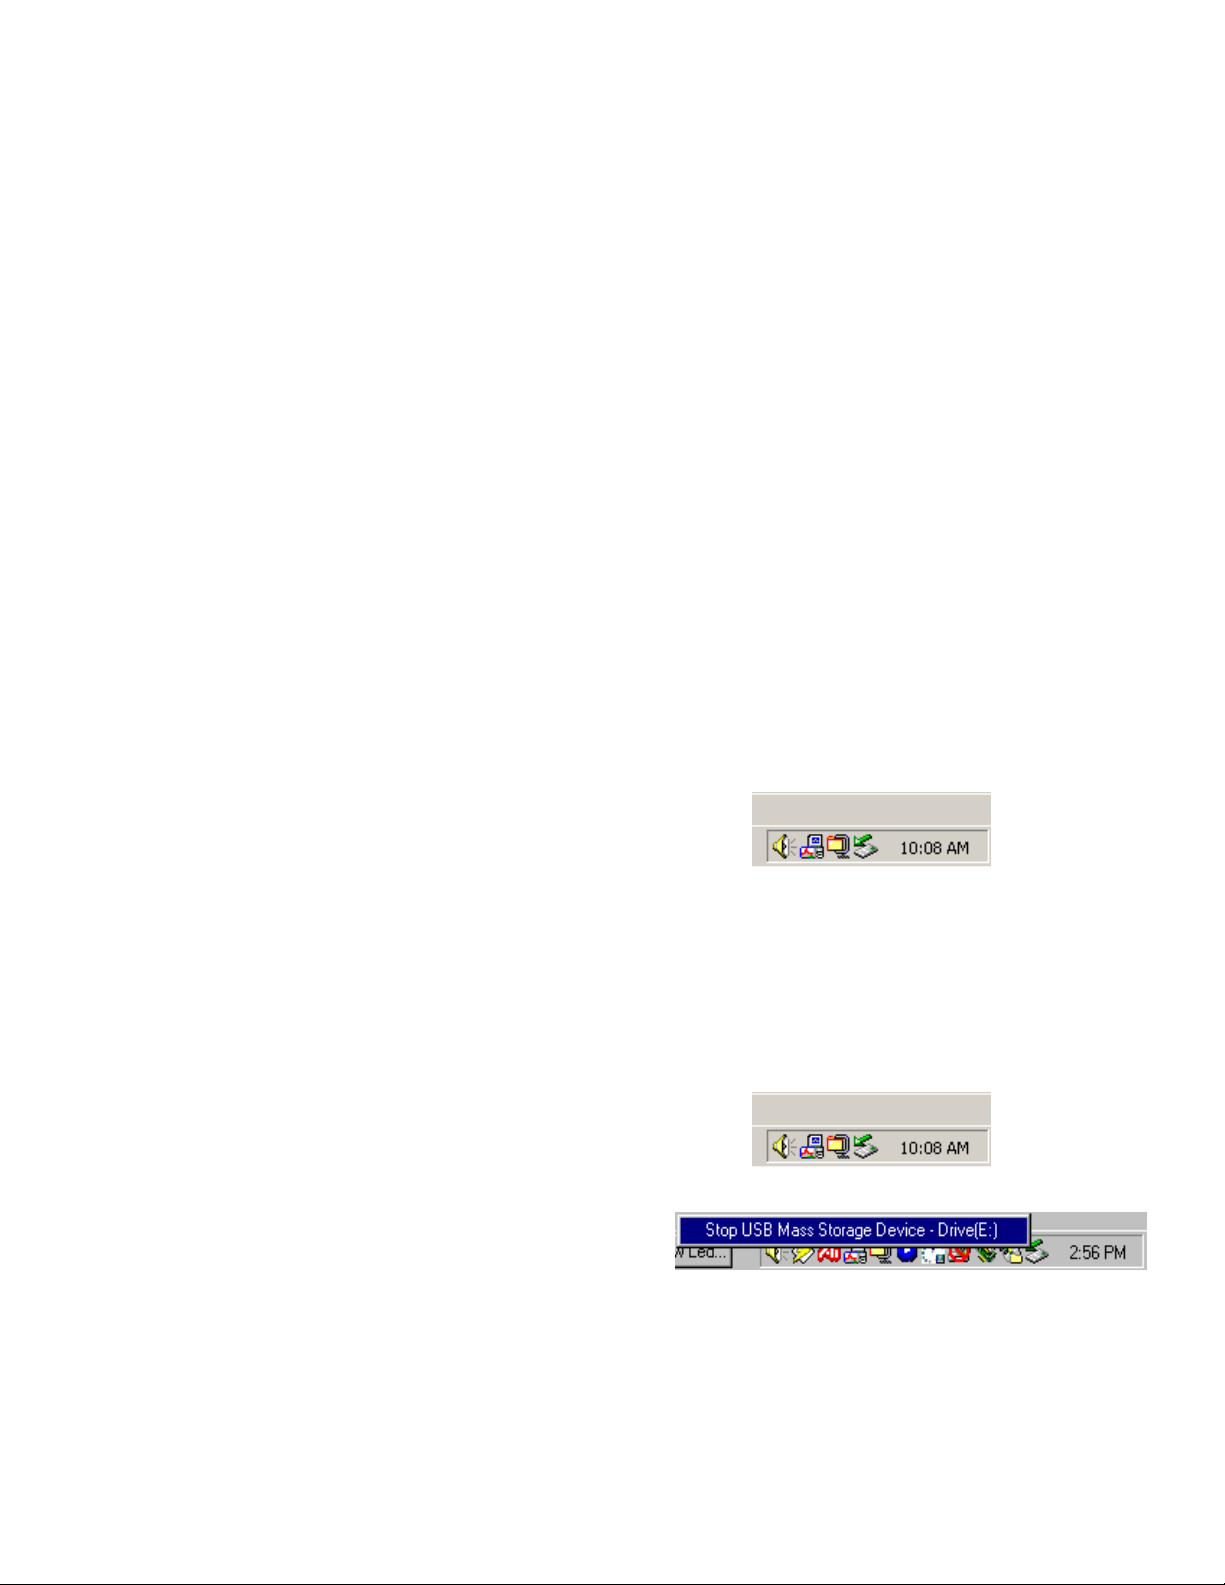
Windows 2000/ME/XP
Step1 Click on the Unplug or Eject Hardware
Located on your icon bar.
Step2 Click on the Stop USB Mass Storage Device – Drive [x]
With Drive [x] being the drive that you want to disconnect.
Step3 Wait for few seconds, the system prompts:
“The ‘USB Mass Storage’ device can now be safely removed from the system”
Click OK, and remove the KanguruDisk from the DataBank.
NOTE: Refer back to the “LABELING YOUR KANGURU DISKS” section to correctly remove and connect the
correct Kanguru Disks.
Page 11

6. PARTITIONING AN INDIVIDUAL KANGURU DISK FROM
YOUR KANGURU DATABANK.
6.1 Partition under Windows 98/ME
Boot-up the computer into Windows 98/ME system.
Plug the Kanguru DataBank into a computer.
There are two methods to partition and format
Individual KanguruDisk in the DataBank:
Method 1.
Step1 Click on [Start], choose [Control Panel]
in [Settings],double click [System] and open
[Hard Disk] . A screen appears as shown.
Step2 You can see the hard drive you just
added. Highlight the USB Hard Disk and choose
[Properties], select [Setting]. Set the
Kanguru DataBank to [Removable].
Screenshot to right.
Step3 After restarting the system, a removable hard
Drive is added to [My Computer ]. Choose the
removable HDD and click right button of
mouse. Select [Format] to format your
Kanguru DataBank.
You only can set the USB2.0 Hard Disk Drive
to one partition in this method.
PLEASE BE CAREFUL THAT THE DRIVE YOU ARE FORMATTING OR PARTITIONING IS THE CORRECT DRIVE!!!!
Method 2
Step1 Go into MS-DOS mode by clicking on [Start] and choose the [MS-DOS Prompt]
in [Programs ]
Step2 At the DOS prompt, type [FDISK] and press Enter.
Step3 If FDISK exits without any messages, go back to the Windows 98 screen, unplug the
Kanguru DataBank, re-boot computer , plug in unit again and go back
Page 12

to step 1 to proceed.
Step4 In the first screen of FDISK, answer the
Questions as follows:
Do you want to enable large disk support ?
[Y] if you want to build a partition larger than 2GB.
[N] if you want to build a partition small than 2GB.
Step5 The next screen is [FDISK OPTIONS],
and type “5” to select disk. The screen
shown on right.
IMPORTANT:
You must type [5] in this screen to change the current fixed disk drive to build the partition.
The default fixed drive set by FDISK is your internal hard drive.
If you don’t change the fixed disk drive to the KanguruDisk, the data of your internal hard drive will be
DESTROYED and UNRECOVERABLE
Step6 In the [Change Current Fixed Disk Drive], type the disk drive number that was
assigned to the KanguruDisk.
Step7 Back to [FDISK OPTIONS] screen, now you can create or delete the partition
of the KanguruDisk.
Step9 After you finish FDISK procedure, go back to the Windows screen, unplug and plug in
the KanguruDisk again to activate these changes. Double click on
[My Computer] icon, the KanguruDisk that you already partitioned
will appear.
6.2 Partition under Windows 2000
Step1 To partition a KanguruDisk
under Windows 2000, please plug
in the disk , then click on [Start], choose
[Control Panel] in [Settings], open
[Administrative Tools] , double click
[Computer Management]. A window appears (right).
Step2 Click on [Disk Management] on the
left part of this window, all the connected
disk drives will be listed in the right
part. Locate the KanguruDisk that
you added. On the right of disk # is the
status of the partitions of this disk drive,
Page 13

you can create a new or delete an existing
partition by right-clicking in this area.
Step3. Right-click on the right area of the KanguruDisk.
Click on [Create Partition....] and ”Create partition wizard” will appear.
Step4. Follow the instructions of the wizard to partition and format your KanguruDisk.
Now, you have built a partition in the KanguruDisk and you can write data to it.
Tech Support
If you experience any problems installing your KanguruData Bank or have any technical questions regarding any
of our products, please call our tech support department. Our tech support is free and available Monday thru
Friday, 9am to 5pm EST.
Call 1-508-663-0105 or
Visit our website at www.KanguruSolutions.com
 Loading...