

Page 1
KRMC Cloud Device Provisioning Guide
For use with Kanguru Remote Management Console Cloud edition
Kanguru Remote Management Console: Cloud Edition (referred to throughout this manual as KRMC Cloud)
is a revolutionary product that places a complete USB security policy into your hands giving you the ability to
remotely manage your secure Kanguru USB storage devices from anywhere in the world.
KRMC Cloud was designed to work specically with Kanguru secure drives by remotely managing your devices
through a secure internet communication. You MUST congure and register each of your Kanguru secure ash
drives in order for it to communicate with your KRMC Cloud account.
The steps that need to be taken to enable KRMC functionality and to register your devices depend on whether or
not you are using Kanguru’s Local Administrator software (UKLA) to manage your devices locally.
1. My devices ARE already managed using Kanguru’s Local Administrator tool (UKLA) ................ p.2
2. My devices ARE NOT managed using Kanguru’s Local Administrator tool (UKLA) ................... p.4
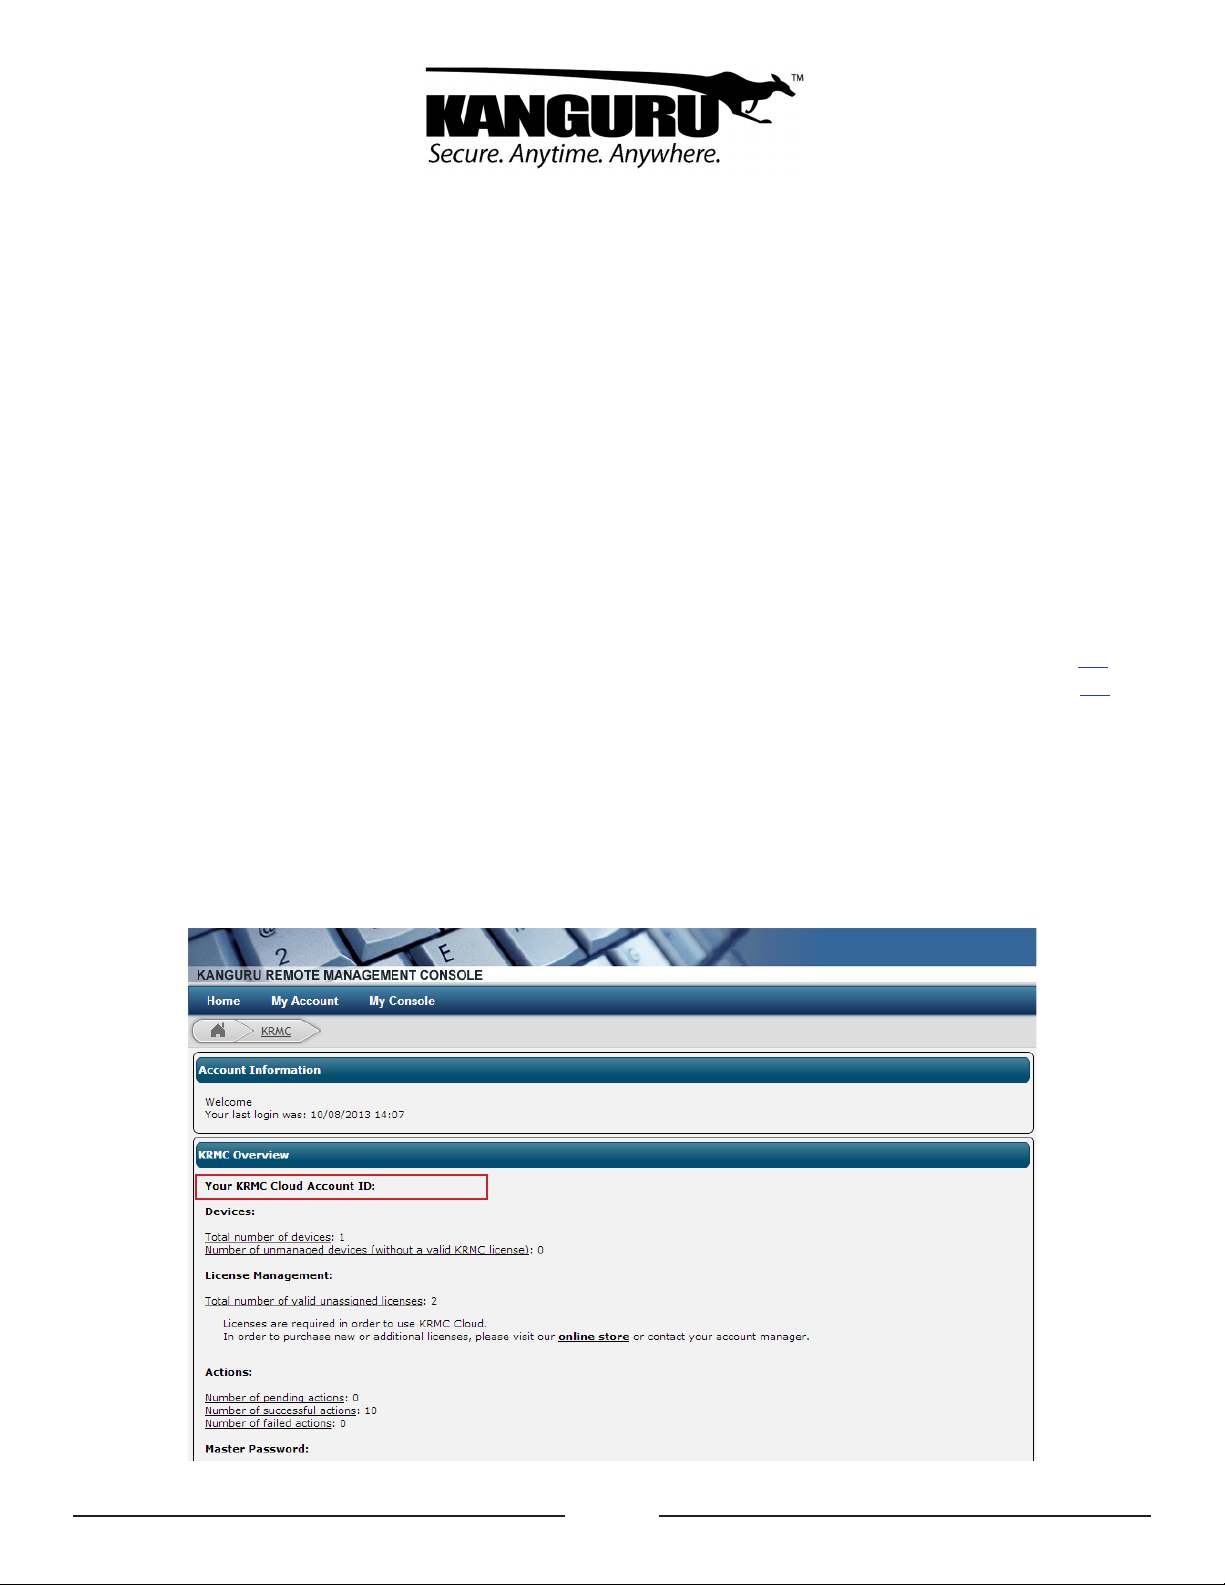
Important! Regardless of your situation, you will need your KRMC Cloud Account ID in order to register your
devices with your KRMC Cloud account. Your KRMC Cloud Account ID can be found either in the e-mail
notication that was sent to you when you created your KRMC Cloud account, or on your KRMC Cloud account’s
System Overview page. Please note that your KRMC Cloud Account ID is case-sensitive. Make sure that you
have recorded your KRMC Cloud Account ID accurately before proceeding further.
1
Page 2
1. My devices are already managed using UKLA
This section only applies if your secure devices are being managed locally with Kanguru’s Local Administrator
tool (UKLA) and you want to use KRMC Cloud to manage your device remotely. If your devices are currently
in the possession of the end users, they will have to be returned to the UKLA administrator. Contact the device
end users and advise them to backup their data and to return their devices to the UKLA administrator. For this
document, we will assume that you are the UKLA administrator.
Once you have all of your devices in your possession:
1. Connect your devices to your computer and launch UKLA.
Note: The connected devices should all be the same model. Although UKLA is capable of conguring
multiple devices simultaneously, it is unable to congure more than one device type at a time. So for
example, it is possible to congure ten Defender Elites and then ten Defender 2000s, but you could not
congure ve Defender Elites and ve Defender 2000s at the same time.
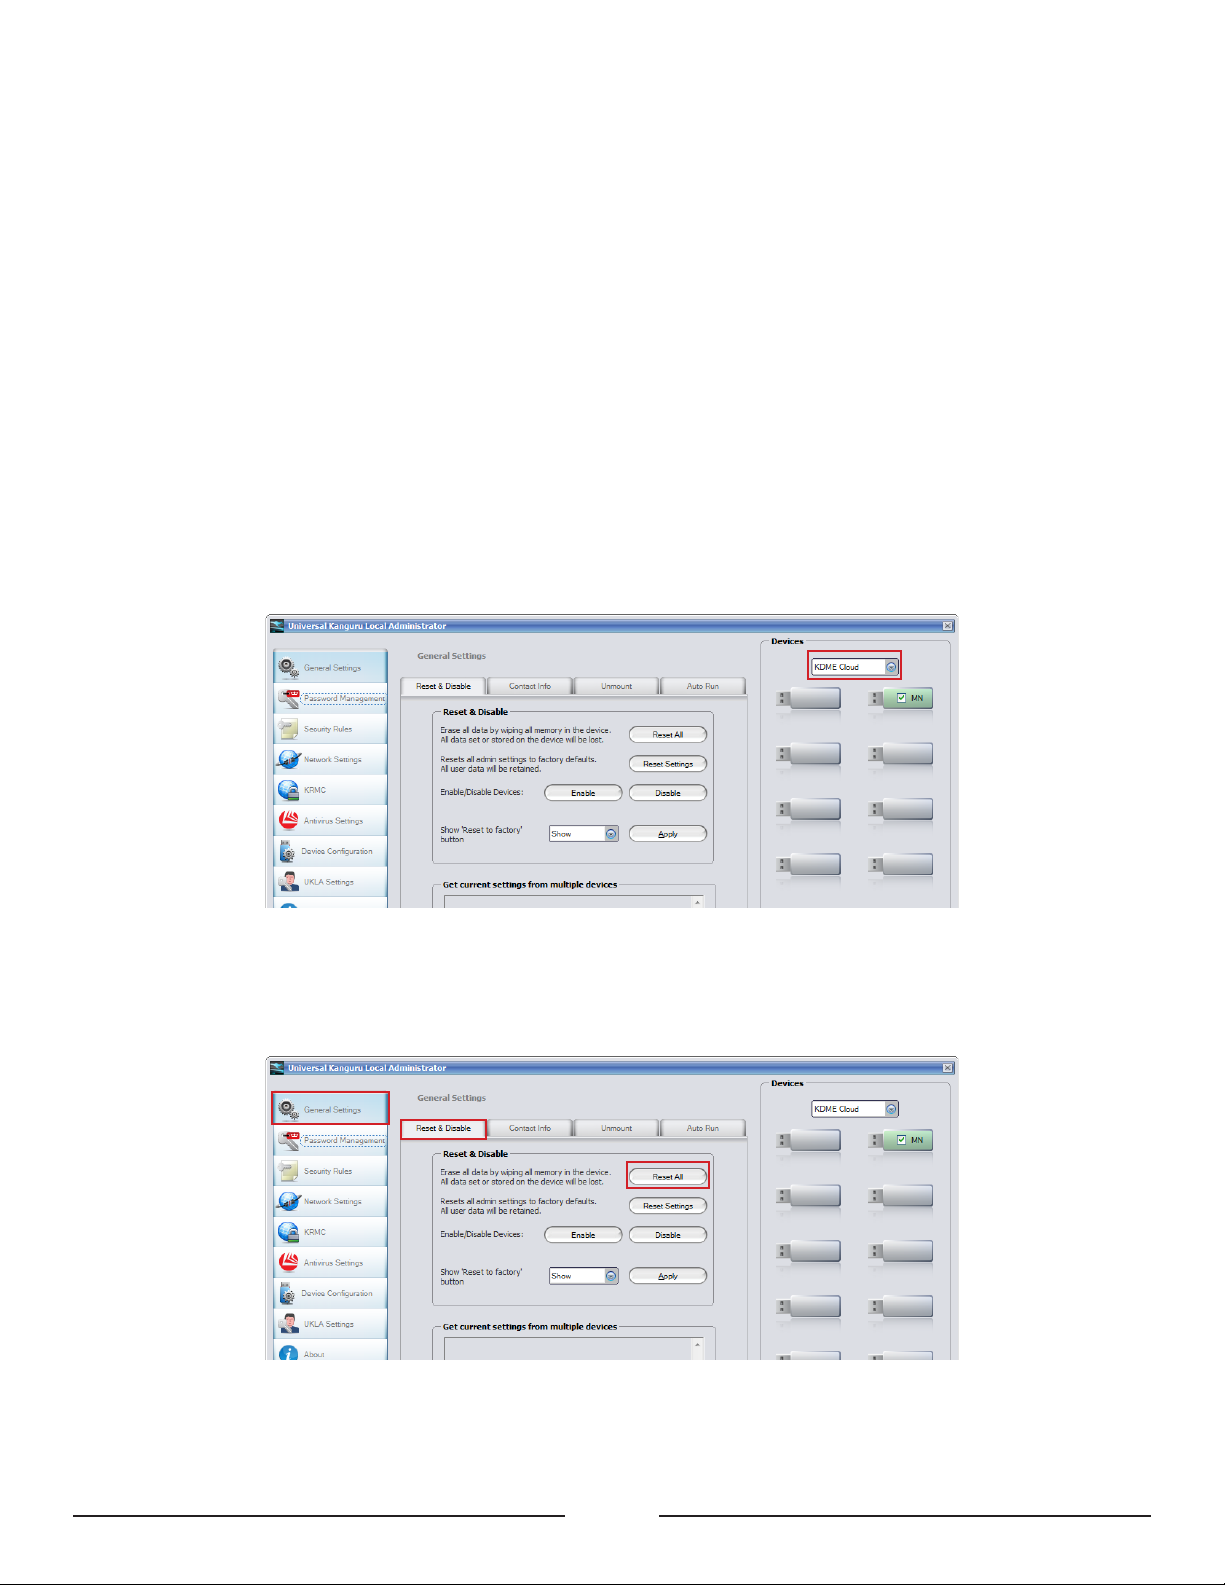
2. Once you have logged into UKLA, select the device type from drop-down menu located at the top of the
Device Grid.
3. Make sure all of your devices are selected in the Device Grid and then click on General Settings in the
navigation menu on the left. Under the Reset & Disable tab, click on Reset All.
2
Page 3

4. Once your devices have been reset, you can congure them to work with KRMC Cloud. Click on KRMC
in the navigation menu on the left. Under the Status tab, set the Enable/Disable KRMC Cloud setting
to Enable.
5. Click on the Save settings to selected devices button and then exit UKLA.
6. Restart UKLA. Make sure all of your devices are selected in the Device Grid and then click on KRMC
in the navigation menu on the left. You will now see a section called Register devices to KRMC Cloud
Account ID.
7. Enter your KRMC Cloud Account ID in the Enter Account ID eld and then click Register.
Congratulations! Your devices have now been congured and registered for use with your KRMC Cloud account.
Repeat these instructions for each Defender device type in your possession until all of your devices have been
registered with your KRMC Cloud account.
3
Page 4

2. My devices are not managed by UKLA
This section only applies if your secure devices are NOT being managed locally with Kanguru’s Local Administrator
tool (UKLA) and you want to enable KRMC Cloud functionality for your devices. Devices not managed by
UKLA can be manually congured and registered with KRMC Cloud by anyone as long as they have your KRMC
Cloud Account ID.
If your devices are in your possession then you can follow these instructions to manually congure and register
your devices with your KRMC Cloud account. If your devices are in the possession of the end user, send a copy of
these instructions to the end user along with your KRMC Cloud Account ID and each end user will be responsible
for conguring and registering their own devices.
1. Plug your device into the computer and run the KDM application from the device’s CD-ROM partition to
launch the Setup Wizard.
Note: If the device has been congured previously, you will see a login screen instead of the Setup Wizard
when you run the KDM application. If you see the login screen, click on the Reset button to reset the
device. When the device is nished resetting, unplug it from the computer, plug it back in and then run the
KDM application again to launch the Setup Wizard.
2. Follow the Setup Wizard instructions until you reach step “4. KRMC Cloud”.
3. Click on the radio button for Enable KRMC Cloud and then click on the Apply button. You will see the
following message appear:
4
Page 5

4. In the Setup Wizard is a eld Enter KRMC Cloud Account ID. Enter your KRMC Cloud Account ID in
the Enter KRMC Cloud Account ID eld and then click Register.
5. Continue following the on-screen instructions until you have completed the Setup Wizard.
Congratulations! Your device has now been congured and registered for use with your KRMC Cloud account.
Repeat these instructions for each of your Defender devices.
5
Kanguru Solutions © 2013 All Rights Reserved
 Loading...