

Page 1
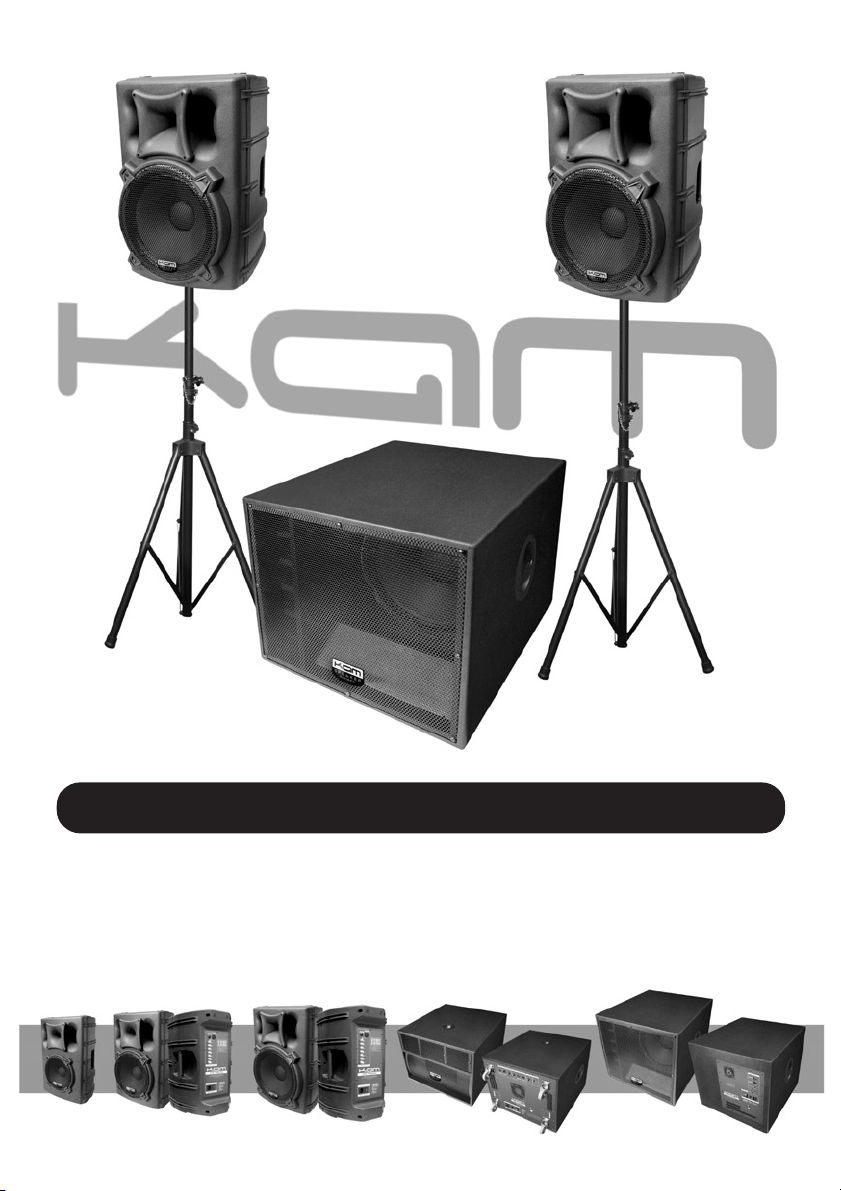
KAM IMSPRO & PROSUB
Professional active & passive 2 way PA enclosures
and active sub woofer speaker systems
INSTRUCTION MANUAL
Page 2

OVERVIEW
Congratulations on your choice of new speakers… cool aren’t they? We are certainly very
proud of them. We believe in giving you products with the features and performance you want
at a price you can afford and the IMS Pro Speaker series is living proof of our commitment to
meeting that goal. We know you’re itching to get them fired up but bear with us and we’ll run
through a few things you should know that will help you get the best from your new speakers
and ensure that they last as long as you want them to.
There are seven products in the IMS series:
IMS Pro10 200W RMS passive speaker
IMS Pro12 300W RMS passive speaker
IMS Pro15 400W RMS passive speaker
IMS Pro12A 300W RMS active speaker
IMS Pro15A 400W RMS active speaker
PRO Sub15A 2 x 200W + 350W RMS active sub bass cabinet with
integrated additional amplification for satellite speakers
PRO Sub18A 450W RMS active sub bass cabinet
IMS PRO10, IMS PRO12 & IMS PRO15
These are all two way, full frequency passive loudspeakers and they need to be connected to
an external amplifier.
What sort of amplifier is right for your speakers?
So that you get the best sound and avoid unnecessary damage to your IMS Pro speakers it is
important that you only use them with an appropriate amplifier.
Your speakers have a maximum power rating;
IMS Pro10 can tolerate a 200W Continuous or a 400W Peak signal.
IMS Pro12 can tolerate a 300W Continuous or a 600W Peak signal.
IMS Pro15 can tolerate a 400W Continuous or an 800W Peak signal.
These figures are there to guide you in your choice of amplifier. If you use an amplifier which is
too powerful or not powerful enough you could damage either your amplifier or your speakers
so you need to find an amplifier with a stated maximum power output that is just right for
your speakers.
Only use amplifiers with a stated power output rating of
200W RMS (per channel) with your IMS Pro10 speakers.
Only use amplifiers with a stated power output rating of
300W RMS (per channel) with your IMS Pro12 speakers.
Only use amplifiers with a stated power output rating of
400W RMS (per channel) with your IMS Pro15 speakers.
page 2
Page 3

Your speakers also have another rating. We call it ‘Impedance’. It is actually a measurement of
the amount of resistance the speaker presents to your amplifier. Your IMS Pro speakers have an
impedance rating of 8 Ohms.
• It is important that you only ever use your speakers with an amplifier which has an
output impedance rating of 8 Ohms. Some amplifiers and speakers have an impedance
rating of 4 or 6 Ohms.
• Using mis-matched amplifiers and speakers can damage both your speakers and
your amplifier.
• Your speakers are guaranteed against manufacturing defects but they are not
guaranteed against accidental user damage or normal wear and tear.
HOW TO CONNECT YOUR IMS PRO10, IMS PRO12 & IMS PRO15 SPEAKERS
TO YOUR AMPLIFIER
Connection types
Your speakers have two ‘Speakon’ type connection sockets (pro multi-pole speaker sockets)
on the back. One is marked ‘input’ - this is the one you use to connect the speakers to your
amplifier. The second socket is marked ‘through’ - this one is used for connecting several sets
of IMS Pro speakers ‘in series’ to the same amplifier.
On the back of your amplifier you will find a set of connections marked either ‘speakers’ or
‘output’. The type of connections you will find will vary according to the type of amplifier you
have. You may need to consult your amplifier’s user manual to find out what type of speaker
output connections your amplifier has and how you should connect your speakers to it.
You will need an appropriate speaker cable (there is a free cable in the box) to connect your
speakers to your amplifier. Each cable will need to have a pro multi-pole speaker plug correctly
attached at one end and the appropriate connection type for your amplifier at the other.
The pro multi-pole speaker connections on your IMS Pro speaker are internally wired with
a standard four pin, +2/-2 configuration so you should ONLY use speaker cables configured
in this way. Using incorrectly wired cables could damage your speakers.
• Always ensure that the amplifier has its volume controls turned to zero and that it’s
mains power is switched off when making connections.
page 3
LATCH
2+
2-
STANDARD +2/-2 SPEAKER PLUG WIRING
Page 4

1. Place your amplifier and speakers where you want them but ensure that you can access
the connections.
2. Connect one end of each cable to the speaker output connections on your amplifier and
the other end of each cable to the ‘input’ sockets on your speakers.
3. Make sure you follow the rules of stereo connection;
If you are using a professional Power Amplifier you should find that if you look at the front
of the amplifier the left channel is marked ‘A’ and the right channel is marked ‘B’. If you
look at the back of the amplifier you should find that the speaker output connections are
also marked ‘A’ and ‘B’. Connect the left speaker to channel ‘A’ and the right speaker to
channel ‘B’.
4. Once you have connected your speakers, ensure that you have made the right connection
between your amplifier and the rest of your set up… DJ mixer, CD player etc. You may
need to consult your other equipment’s user manuals for help with this.
Always turn on your equipment in the following order;
1. Turntables, CD players etc - but don’t start playing any music yet
2. DJ mixer (if you use one) - but make sure that the output volume is at zero
3. Amplifier
Now you are ready to play some music;
1. Put on a record, slide in a CD etc and start it playing
2. If you use a DJ mixer, use it to set up optimum input and output signal levels - the level
meter should be peaking at around zero dB
3. Slowly turn up the volume control(s) on your amplifier - if you have used the right cables
and made all of your connections correctly you should clearly hear music.
4. If you do not hear any music or it sounds all wrong, even at low volumes, check all your
connections and cables.
5. When the music reaches the desired listening level, stop turning up the amplifiers volume
controls.
6. Your IMS Pro speakers are designed to deliver quality sound reproduction and plenty of
power but it is possible to overload them. If your sound becomes distorted at very high
listening levels you probably need to turn down your amplifier or DJ mixer.
IMS PRO12A & IMS PRO15A
Your IMS Pro12A & IMS Pro15A speakers are ‘active’, which means they have built in
amplification and therefore do not require the use of an external amplifier. You can connect
either a microphone or any line level equipment directly to your speakers but there are a few
simple rules to follow.
Signal Levels and Types
On the back panel you will find a single ‘Jack’ type socket marked Input. This is a balanced TRS
socket that accepts cables fitted with either balanced TRS or unbalanced TS type ‘Jack’ plugs.
This socket is accompanied by a switch that adjusts the input to accept either microphone or
line level signals.
page 4
Page 5

CONNECTION PROCEDURE
• Always ensure that the volume control on your IMS Pro12A or 15A is turned to zero and
that it’s mains power is switched off when making connections.
Line Level Connection
1. To use Line Level equipment (DJ mixer, Mixing Console, CD player etc) with your
IMS Pro12A or IMS Pro15A, switch the input to ‘Line’ before making any connections.
2.
Connect the Left Output on your Line Level equipment to the input of one of your IMS Pro15A.
Connect the Right Output to the input of your other IMS Pro15A.
Microphone Connection
1. To use a microphone connected directly to your IMS Pro12A or IMS Pro15A, switch the
input to ‘Mic’ before making any connections.
2. Connect a microphone to the input on the speaker.
• Connecting a Line Level signal to a Microphone Level input may overload the input and
damage your active IMS Pro speaker.
• Never switch from Line Level to Mic Level whilst the volume control on your active IMS
Pro speaker is turned up… this can damage your speakers.
CONNECTING ADDITIONAL SPEAKERS TO YOUR IMS PRO12A & IMS PRO15A
On each of your speakers you will find an XLR type socket marked ‘output’. This is a standard,
balanced line level audio output. It is there to enable more than one active IMS Pro speaker to
be connected in series. To use it you will need to connect an appropriate cable between this
‘Output’ socket and the Input of another IMS Pro12A or 15A speaker.
USING THE EQ
On the back panel of each of your speakers you will find a full set of EQ (Equalisation) controls.
This is ‘parametric’ EQ - here’s how it works;
You have control over three frequency bands; bass, mid and high.
Each frequency band has two controls; the lower one, the ‘gain’, acts just like a normal tone
control in that it raises or lowers the volume of the associated band of frequencies. The upper
one is what we call a ‘sweep’ control because it enables you to choose which frequencies the
lower control will attenuate.
To get a feel for how this works in action try this;
• Set all EQ controls to zero and follow the procedures above for getting some music
playing through your speaker system.
• Turn one of the EQ gain controls so that it is set to -15dB.
• Slowly turn the associated sweep control right the way through it’s possible range.
• Listen to the results.
• Return the EQ gain control to zero and repeat the process with the other two
frequency bands.
page 5
Page 6

Parametric EQ gives you an enormous amount of control over the sound produced by your
active IMS Pro speakers and can be particularly useful for adjusting the sound of a
microphone connected directly to the system.
• Your Parametric EQ is very powerful. Excessive boosting of frequencies
may damage your speakers.
PRO SUB15A & PRO SUB18A
Your Pro Sub speakers are designed to be used in conjunction with other products from the
Kam IMS Pro speaker series.
The two Pro Sub models are suited to different applications.
• The Pro Sub15A & Pro Sub18A are ‘active’, which means they have built in amplification.
• The Pro Sub15A actually has three built in amplifiers so it is able to power not only it’s
own bass driver but two additional passive speakers… so it is ideal for use with a pair of
IMS Pro10 passive speakers.
• The Pro Sub15A also has balanced XLR audio through connections so a single
Pro Sub15A can also be used in conjunction with a pair of IMS Pro12A speakers.
• Each Pro Sub18A has one built in amplifier to power it’s own bass driver but does not
have additional amplifiers to power additional passive speakers - so it needs to be used in
conjunction with additional active speakers. This also means that you need two
Pro Sub18A speakers to configure a stereo system. So a pair of Pro Sub18A and a pair
of IMS Pro12A or IMS 15A make an excellent combination.
PRO SUB15A CONNECTIONS
On the back panel of the Pro Sub15A you will find various controls and they are all
clearly labeled.
Up at the top you have two sections marked ‘left channel’ and ‘right channel’. Here you will find
balanced XLR audio connections marked ‘input’ and ‘through’. These are accompanied by some
LED’s - one is marked ‘signal’ and it lights up whenever the Pro Sub is receiving a signal at the
input connections (and the gain control is turned up). The other is marked ‘peak’ and this one
lights up only if the input signal is too large - it’s ok for a peak LED to illuminate occasionally
but if it lights up continuously you should turn down the incoming signal at source to avoid
unpleasant distortion and damage to your Pro Sub. Here you will also find recessed screw
type controls marked ‘lock’. Using a screwdriver to turn this will temporarily disengage the
Left and Right Gain controls to prevent tampering.
Beside the Main Volume control you’ll find another pair of signal LED’s, these two show you
when there is a signal leaving the Pro Sub15A and when that signal is overloading. Still with
the main Volume control you’ll also find another recessed screw marked ‘bass’. This one is a
crossover control. The crossover splits up your incoming signal and sends the bass
frequencies to the Pro Sub and sends the mid/high frequencies out via the through
connections to your satellite speakers. This cutoff control sets the dividing frequency. With a
page 6
Page 7

little practice adjusting the crossover frequency can make a considerable difference to the
clarity of sound reproduction. It is worth experimenting with this control (it is quite safe to
adjust it slowly whilst music is playing through your system) to hear how different settings
affect the way your system sounds.
You’ll find a button marked ‘ground’. This turns the earth connection for the Pro Sub15A on
and off. Sometimes when using different combinations of equipment you may experience a
persistent hum that is caused by problems with mains electricity interference with audio
signals. If are experiencing persistent hum problems you may wish to try disengaging the
earth using this button.
You will also find pro multi-pole speaker output sockets. These are wired in standard 4 pin
+2/-2 configuration and are rated at 8 Ohm impedance.
PRO SUB18A CONNECTIONS
On the back panel of the Sub18A you will find various controls and they are all clearly labeled.
You will find balanced XLR audio connections marked ‘input’ and ‘through’. These are
accompanied by ‘signal’ and peak’ LED’s as described in the Pro Sub15A connections section
of this manual. The Pro Sub18A also has a recessed screw type gain control, recessed cutoff
control marked ‘frequency’ and there is a ‘ground’ button… all of these are also described in
the Pro Sub15A connections section. There’s also a recessed control marked ‘bass’ and this
is an EQ. It can be used to reduce the proportion of lower frequencies produced by your Pro
Sub18A… this is useful when you need to reduce the amount of bass to avoid upsetting the
neighbours or to help compensate for awkward room acoustics.
Connecting two IMS Pro10 speakers to a Pro Sub15A
We suggest using IMS Pro10 speakers in conjunction with the IMS Pro Sub15A because the
Pro 10 are rated at 200W and so is the mid/high amplification within the Pro Sub15A.
• Always ensure that the volume controls are turned to zero and that the mains power is
switched off when making connections.
1. Place your speakers where you want them but ensure you can easily access the controls.
2. Connect the mains supply but don’t turn your system on yet.
3. Use an appropriate cable to connect the output from any line level equipment (DJ mixer,
Mixing Console, CD player etc) to the inputs of your Pro Sub15A. Follow the rules of
stereo connection with Left to Left and Right to Right.
4. Using two appropriately configured +2/-2 multi-pole speaker cables, connect one end of
each cable to the speaker output connections on your IMS Pro Sub15A and the other end
of each cable to the ‘input’ sockets on each IMS Pro10.
5. Ensure all volume controls are set to zero and switch on the mains.
6. Set some music playing and ensure that your sound source is producing an optimum
signal level. Slowly turn up each of the input gain controls on the Pro Sub15A until you see
the input signal LED’s illuminate. If the peak LED lights persistently you need to reduce the
input gain.
page 7
Page 8

7. Slowly turn up the main Volume control on the Pro Sub15A until you see the signal LED
illuminate and have reached the desired listening volume. If the peak LED lights
persistently you need to reduce the Volume setting.
8. You may now wish to adjust the cutoff frequency on the Pro Sub15A using the bass
control until you achieve a good aesthetic balance between the bass frequencies coming
from the Pro Sub and the mid/high frequencies coming from the IMS Pro. Generally you
should not really need to adjust this setting each time you set up your system.
Connecting two IMS Pro12A speakers to a single Pro Sub15A
We suggest using IMS Pro12A speakers in conjunction with the IMS Pro Sub15A because the
IMS Pro 12A are rated at 300W RMS each and this presents a good power match with the
Pro Sub15A bass amplification at 350W RMS.
• Always ensure that the volume controls are turned to zero and that the mains power is
switched off when making connections.
1. Place your speakers where you want them but ensure you can easily access the controls.
2. Connect the mains supply but don’t turn your system on yet.
3. Use an appropriate cable to connect the output from any line level equipment (DJ mixer,
Mixing Console, CD player etc) to the inputs of your Pro Sub15A. Follow the rules of
stereo connection with Left to Left and Right to Right.
4. Use an appropriate cable (balanced XLR to balanced TRS Jack) to connect each ‘through’
connection from Pro Sub15A to the input of each of your IMS Pro12A speakers.
5. Ensure all volume and EQ controls are set to zero and switch on the mains.
6. Set some music playing and ensure that your sound source is producing an optimum
signal level. Slowly turn up each of the input gain controls on the Pro Sub15A until you see
the input signal LED’s illuminate. If the peak LED lights persistently you need to reduce the
input gain.
7. Slowly turn up the main Volume control on the Pro Sub15A until you see the signal LED
illuminate. If the peak LED lights persistently you need to reduce the Volume setting. You
should hear sound from the Pro Sub only at this time.
8. Slowly turn up the gain control on each IMS Pro12A in turn until you reach a desired
listening volume and a good aesthetic balance between the bass frequencies coming from
the Pro Sub and the mid/high frequencies coming from the IMS Pro.
9. You may now wish to adjust the cutoff frequency on the Pro Sub15A using the bass
control… but generally you should not really need to adjust this setting each time you set
up your system.
Connecting a pair of IMS Pro15A to a pair of Pro Sub18A
We suggest using IMS Pro15A speakers in conjunction with the Pro Sub18A because the Pro
15A are rated at 400W RMS each and this presents a good power match with the Pro
Sub18A bass amplification at 450W RMS each.
• Always ensure that the volume controls are turned to zero and that the mains power is
switched off when making connections.
page 8
Page 9

1. Place your speakers where you want them but ensure you can easily access the controls.
2. Connect the mains supply but don’t turn your system on yet.
3. Use an appropriate cable to connect the output from any line level equipment (DJ mixer,
Mixing Console, CD player etc) to the inputs of each Pro Sub18A. You will need to connect
the Left output from your equipment to one Pro Sub18A input and the Right output from
you equipment to the input on your other Pro Sub18A.
4. Use an appropriate cable (balanced XLR to balanced TRS Jack) to connect the ‘through’
connection from each Pro Sub18A to the input of each of your IMS Pro15A speakers.
5. Ensure all volume and EQ controls are set to zero and switch on the mains.
6. Set some music playing and you should see the signal LED illuminate periodically on each
Pro Sub18A. If your sound source is producing an optimum signal level but the signal LED
is not illuminating or the peak signal is illuminating persistently you may need to adjust the
input gain controls on each Pro Sub18A.
7. Slowly turn up the gain control on each IMS Pro15A in turn until you reach a desired
listening volume and a good aesthetic balance between the bass frequencies coming from
the Pro Sub and the mid/high frequencies coming from the IMS Pro.
8. You may now wish to adjust the cutoff frequency on each Pro Sub18A… but generally you
should not really need to adjust this setting each time you set up your system.
• Sending excessive signals from your line level equipment, to your IMS Pro system will
cause a distorted sound and can damage your equipment. Speakers which have been
damaged in this way are not covered by your guarantee.
You will find loads more advice and information about setting up Kam audio equipment within
the Tuition area at www.kam.co.uk.
Thank you for reading these guidelines and enjoy your Kam IMS Pro speakers!
page 9
Page 10

IMS Pro10 two way passive loudspeaker
Frequency response 55Hz-18KHz (±3dB)
Woofer 10"
Tweeter Compressed horn
Directivity 100 x 100 degrees
Impedance 8 Ohms
Continuous power handling 200W RMS
Peak power handling 400W
Sensitivity 96dB (1w/1m)
Input connectors 2 x pro multi-pole +2 /-2
Grille Reinforced
Colour Black
Cabinet Injection moulded polypropylene
Dimensions 400 x 370 x 530mm
Weight 18Kg
IMS Pro12 two way passive loudspeaker
Frequency response 50Hz -18KHz (±3dB)
Woofer 12"
Tweeter Compressed horn
Directivity 60 x 60 degrees
Impedance 8 Ohms
Continuous power handling 300W RMS
Peak power handling 600W
Sensitivity 98dB (1w/1m)
Input connectors 2 x pro multi-pole +2 /-2
Grille Reinforced
Colour Black
Cabinet Injection moulded polypropylene
Dimensions 500 x 450 x 650mm
Weight 23Kg
IMS Pro15 two way passive loudspeaker
Frequency response 45Hz-18KHz (±3dB)
Woofer 15"
Tweeter Compressed horn
Directivity 90 x 60 degrees
Impedance 8 Ohms
Continuous power handling 400W RMS
Peak power handling 800W
Sensitivity 100dB (1w/1m)
Input connectors 2 x pro multi-pole +2 /-2
Grille Reinforced
Colour Black
Cabinet Injection moulded polypropylene
Dimensions 555 x 510 x 760mm
Weight 31Kg
page 10
Page 11

IMS Pro12 A two way active loudspeaker
Frequency response 50Hz -18KHz (±3dB)
Woofer 12"
Tweeter Compressed horn
Directivity 60 x 60 degrees
Impedance 8 Ohms
Continuous power handling 300W RMS
Peak power handling 600W
Amplifier power output 250W
Sensitivity 99dB (1w/1m)
Input connection Balanced TRS jack
Output connection Balanced XLR
Grille Reinforced
Colour Black
Cabinet Injection moulded polypropylene
Dimensions 500 x 450 x 650mm
Weight 31Kg
IMS Pro15 A two way active loudspeaker
Frequency response 45Hz -18KHz (±3dB)
Woofer 15"
Tweeter Compressed horn
Directivity 90 x 60 degrees
Impedance 8 Ohms
Continuous power handling 400W RMS
Peak power handling 800W
Amplifier power output 300W
Sensitivity 100dB (1w/1m)
Input connection Balanced TRS jack
Output connection XLR
Grille Reinforced
Colour Black
Cabinet Injection moulded polypropylene
Dimensions 555 x 510 x 760mm
Weight 39Kg
page 11
Page 12

PRO Sub15 A active sub bass cabinet
Bass amplifier 350W RMS
Mid/high amplifiers 2 x 200W RMS
Frequency response 25Hz-350Hz
THD <0.05%
Sensitivity 98dB (1w/1m)
Audio Input/output connectors Balanced XLR
Speaker output connectors 2 x pro multi-pole +2 /-2
Impedance 8 Ohms
Grille Reinforced
Colour Black
Dimensions 655 x 500 x 620mm
Weight 70Kg
PRO Sub18 A active sub bass cabinet
Frequency response 25Hz-350Hz
THD <0.05%
Impedance 8 Ohms
Continuous power handling 450W
Sensitivity 99dB (1w/1m)
Input/through connectors Balanced XLR
Grille Reinforced
Colour Black
Dimensions 700 x 720 x 800mm
Weight 100Kg
page 12
Due to continuous product development, specifications are subject to change. E&O E.
KAM IMSPRO & PROSUB
Professional active & passive 2 way PA enclosures
and active sub woofer speaker systems
www.kam.co.uk
 Loading...