

Kallista Vir Stil .75, Vir Stil 1.0, Vir Stil 1.5 Installation Instructions Manual

INSTALLATION INSTRUCTIONS
P74205, P74209, P74202-SM P74210, P74211, P74212 P74213, P74214, P74215
Vanity
1207801-2-B
© 2013 KALLISTA
1 of 8
Questions? Problems? For additional assistance, please contact KALLISTA’s Customer
Service Department at 1-888-4-KALLISTA (1-888-452-5547) or kallista.com.

INSTALLATION INSTRUCTIONS
THANK YOU FOR CHOOSING KALLISTA
We appreciate your commitment to KALLISTA quality products. Please take a moment to review this manual
before you install your KALLISTA product. If you encounter any installation or performance problems, please do
not hesitate to contact us at the phone number listed at the bottom of the page or visit us on line at kallista.com.
BEFORE YOU BEGIN
The Vir Stil® .75 Vanity consists of the following:
● P74205 – .75 Wood Vanity ● P74202-SM – Small Metal Base with (1 ea.) Handle
● P74209 – Stone Top ● P72040 – Undercounter Basin
The Vir Stil® 1.0 Vanity consists of the following:
● P74210 – 1.0 Wood Vanity ● P74212 – Metal Base with (4 ea.) Handles
● P74211 – Stone Top ● P72040 – Undercounter Basin
The Vir Stil® 1.5 Vanity consists of the following:
● P74213 – 1.5 Wood Vanity ● P74215 – Large Metal Base with (5 ea.) Handles
● P74214 – Large Stone Top ● P72040 – Undercounter Basin
Vanity
Prior to installation, unpack all products and inspect them for damage. If the product is damaged, contact
Kallista’s Customer Service immediately at the phone number listed at the bottom of the page.
NOTE: Although your vanity may differ from the one shown in the illustrations, the installation steps are the
same.
This installation requires a minimum of two people. Do not install this xture alone.
The stone console lavatory can be installed with three different faucet congurations:
● Single-Hole for a monoblock faucet
● Three-Hole for a widespread faucet
● No-Hole for a wall-mount faucet
Refer to your faucet installation instructions to determine which conguration is necessary for your lavatory.
To create the holes necessary for your faucet installation, refer to the instructions in section 2.
KALLISTA reserves the right to make revisions in the design of products without notice, as specied in the
Price Book.
1207801-2-B
© 2013 KALLISTA
2 of 8
Questions? Problems? For additional assistance, please contact KALLISTA’s Customer
Service Department at 1-888-4-KALLISTA (1-888-452-5547) or kallista.com.
INSTALLATION INSTRUCTIONS
TOOLS AND MATERIALS
Vanity
Flat Head
Cap Screws
Pliers File
Level
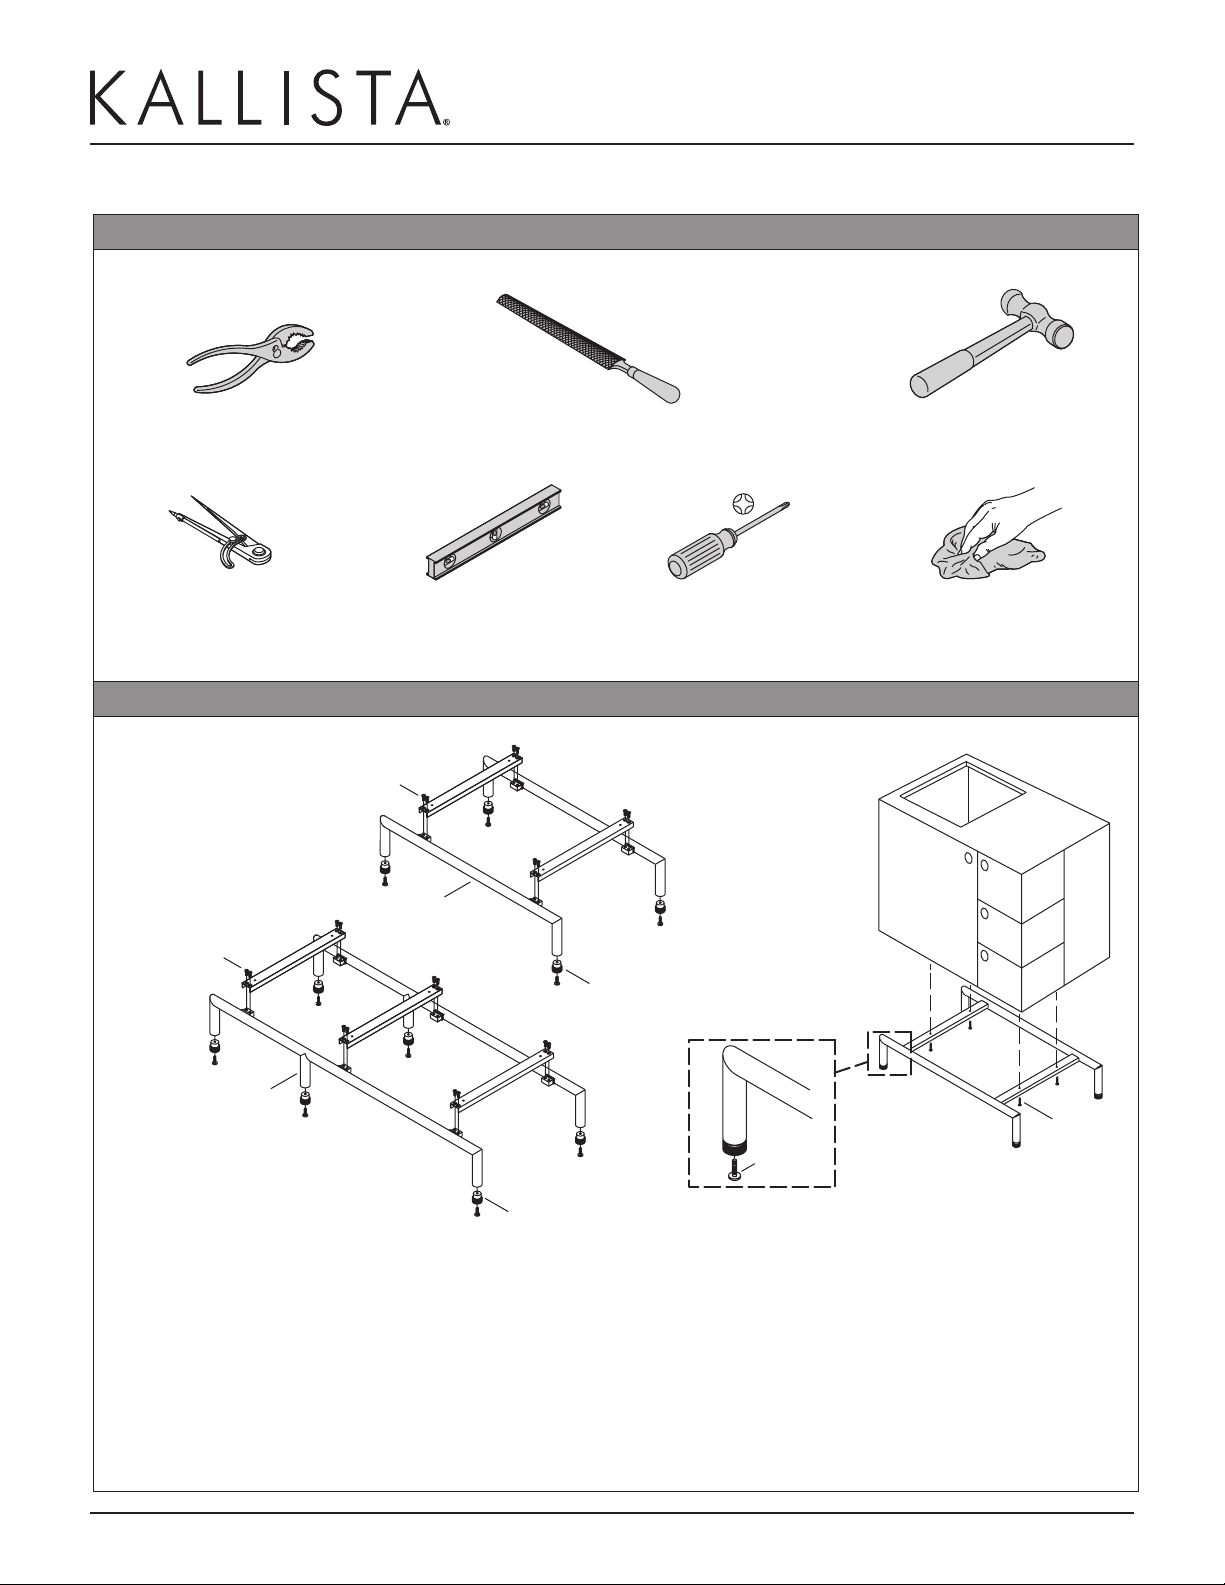
1. ATTACH VANITY TO METAL BASE
Flat Head
Cap Screws
Vir Stil
Vanity Base
Phillips ScrewdriverCompass
Base Foot
Hammer
Rags
Vir Stil 1.5
Vanity Base
Base Foot
Assemble the metal base.
Position the metal base in the desired nal location. If the oor is uneven, use a pair of pliers to adjust the
leveler located in the foot of the base.
NOTE: Lowering the vanity into place is a two person task.
Mount the vanity to the metal base using the supplied wood screws.
1207801-2-B
© 2013 KALLISTA
3 of 8
Wood
Leveler
Questions? Problems? For additional assistance, please contact KALLISTA’s Customer
Service Department at 1-888-4-KALLISTA (1-888-452-5547) or kallista.com.
Screws
 Loading...