

Kallista P34000-00 Installation Manual

Installation Guide
P34000-00
Sink Strainer
Français, page “Français-1”
Español, página “Español-1”
1035389-2-B

Thank You For Choosing Kallista
We appreciate your commitment to Kallista quality. Please take a few
minutes to review this manual before you start installation. If you
encounter any installation or performance problems, please don’t
hesitate to contact us. Our phone numbers and website are listed on
the back cover. Thanks again for choosing Kallista.
Tools and Materials
Adjustable
Wrench
Plumbers
Putty
Various
Screwdrivers
1035389-2-B 2 Kallista
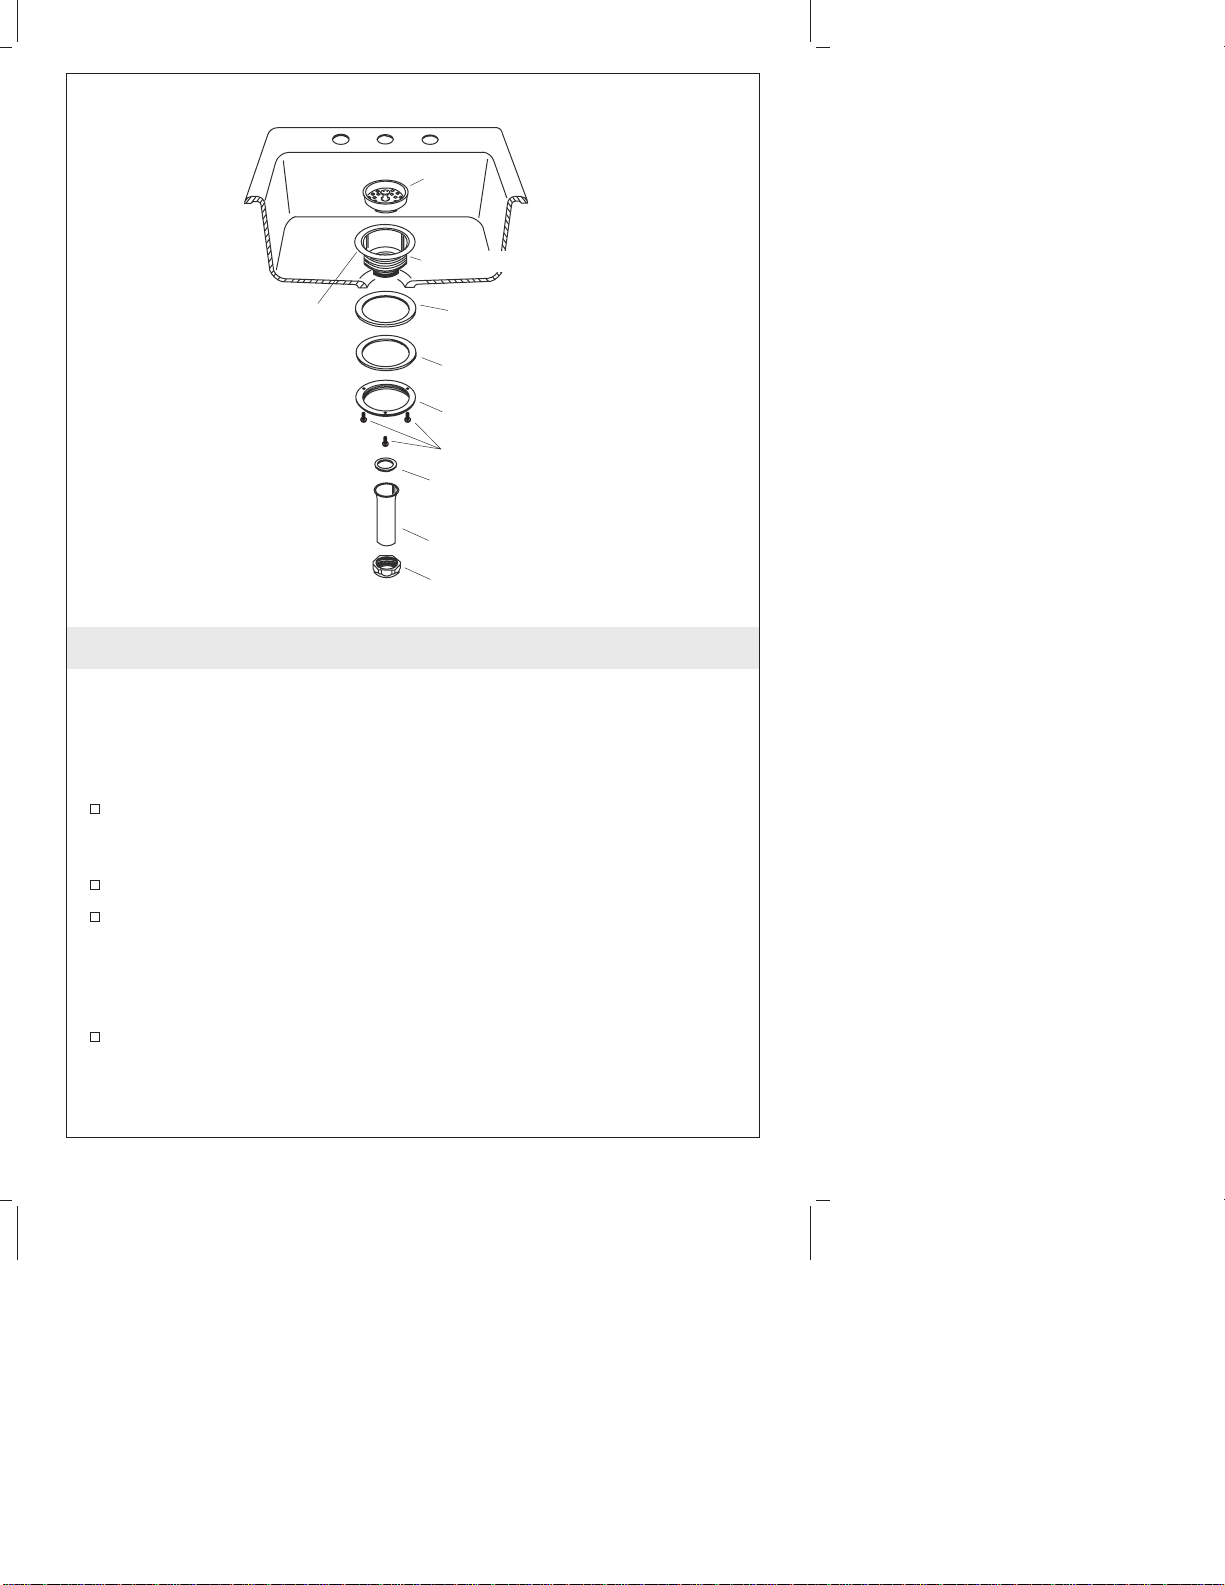
Cup
Drain Body
Apply plumbers
Rubber Washer
putty here.
Steel Washer
Mounting Nut
Screws
Small Gasket
Tailpiece
Nut
1. Install the Duostrainer
All information in these instructions is based upon the latest product
information available at the time of publication. Kallista reserves the
right to make changes in product characteristics at any time without
notice.
Apply a ring of plumbers putty or other sealant to the underside
of the edge of the drain body according to the manufacturer’s
instructions.
Insert the drain body in the sink.
Partially thread the screws into the mounting nut until they
protrude slightly through the mounting nut. From under the sink,
slide the rubber washer and steel washer on the drain body, and
then thread the mounting nut onto the drain body until it is
about 1/4″ (6 mm) from the sink bottom.
Tighten the three mounting screws to draw the body tight against
the basin of the sink.
NOTE: Do not reposition the drain body after it has been tightened.
Kallista 3 1035389-2-B

Install the Duostrainer (cont.)
Position the small gasket on the drain body.
Align the wide end of the tailpiece with the drain or strainer
body, slide the nut onto the tailpiece, and thread the nut to the
drain body.
Position the P-trap (not shown) on the end of the tailpiece.
Tighten the P-trap nut, and remove any excess sealant.
1035389-2-B 4 Kallista
 Loading...