

Page 1

X150 | WiFi Pro-Action Camera
USER GUIDE
Page 2

2
EN
/kaiserbaas
Share your footage with us on our social media
Register this product for 12 month warranty
and updates. www.kaiserbaas.com/updates
Need help? www.kaiserbaas.com/support
For the full Kaiser Baas accesories range visit
www.kaiserbaas.com
Page 3

3
EN
Table of Contents
Safety Precautions 5
What’s in the Box 6
Product Diagram 7
Wrist Remote Diagram 9
Set Up Your X150 Camera 10
Installing the X150 into the Waterproof Case 11
Using Your X150 Camera 12
Video Mode 15
Video Settings 16
General Settings 19
Slo-mo Mode 24
Picture Mode 25
Picture Settings 26
WiFi Setup 31
Page 4

4
EN
Using The Wrist Remote 33
Saving And Viewing Options 36
FAQ 38
Specifications 40
System requirements 41
Contact Us 42
Page 5

5
EN
Safety Precautions
Before using the X150 Camera please ensure you read
and understand the safety precautions.
• Do not attempt to open the case of the X150 or modify
it in any way. If the X150 has been opened the warranty
will be void. Maintenance and repairs should only be
performed by Kaiser Baas.
• Keep the X150 away from water and other liquids (unless
housed in the waterproof case). Do not handle the X150
with wet hands (unless used in the waterproof case). This
may cause the X150 to malfunction.
• Recharge the battery using the Micro USB
Cable (5V). Any variation to voltage can cause the X150
to fail.
• The X150 should not be used in heat
exceeding 55°C (131°F).
• DO NOT drop the X150.
• Avoid placing heavy objects on the X150.
• Do not dispose of this unit in domestic waste.
• If you have any questions please contact us at
www.kaiserbaas.com/support.
Page 6

6
EN
What’s in the Box
Please ensure the product package has the following
contents:
A
X150 Camera
E
Wrist Remote
B
Waterproof Case
F
2 x 3M Adhesive Pads
C
Micro USB Cable
G
Quick Release Mount
D
Screw Bolt
H
Flat & Curved Base
A B C D
E F G H
Page 7

7
EN
Product Diagram
A
WiFi Activation Button
B
LED POWER Indicator
C
LCD Screen
C
Front Back
A
B
Page 8

8
EN
POWER SHOOT
H
I
D
USB
HDMI
TF CARD
E
F
To p
Left Side
Right Side
G
J
D
SHOOT(menu select)
H
Micro SD Card Port
E
Microphone
I
Mini HDMI Interface
F
POWER (and menu)
J
Battery
G
Micro USB Interface
Page 9

9
EN
Wrist Remote Diagram
NOTE: The Wrist Remote cannot turn the X150 on. Please
ensure the remote is paired with the X150 before use. Please
see instruction Using the Wrist Remote
A
LED Indicators
B
SHOOT Photo
C
RECORD Video
D
POWER O - HOLD for 5
seconds
E
Micro USB Charging Port
On the Back of Remote
D
C
A
B
E
Page 10

10
EN
Set Up Your X150 Camera
Turn the X150 on – press and HOLD the POWER button for a
few seconds.
When the X150 is on the Kaiser Baas logo will appear on the
screen and the Red LED lights will glow. The X150 is now in
Video Mode.
Insert a Micro SD Card (A Class-6 or Class-10 Micro SD Card
up to 32GB is recommended)
Logo on screen Red LED Light
Red LED light
Red LED
Light
Page 11

11
EN
Installing the X150 into the Waterproof Case
The X150 is designed to be used in the
waterproof case.
TIPS:
• Ensure the case is dry and clean
• Insert the X150, ensuring the lens fits neatly
into the lens cavity. Close the security latch.
• The X150 can be mounted using the accessories
provided or using the other options at:
www.kaiserbaas.com
NOTE: Audio recordings will be dampened by using
the waterproof case. For full audio recording,
please use a skeleton or exoshell case
Page 12

12
EN
Using Your X150 Camera
Preparation
Charging the battery
Before using the X150 for the first time you
should fully charge the battery.
Procedure:
Connect the X150 to a computer (or other USB POWER
source) using the USB cable provided, to charge.
If the X150 is on when charging, 3 red lights will blink until
the battery is fully charged. Only one red light will blink
if the X150 is o when charging.
A completely flat battery will take about 5 hours to fully
charge. The red light (below mini HDMI port) will turn o
when the battery is fully charged.
Page 13

13
EN
Insert the Micro SD Card*
• It is recommended to use Class-6 or Class-10
Micro SD card to film smooth video files. Higher
resolutions will not work with SD cards lower
than a Class-6.
• There is only one correct way to insert the
Micro SD card into the slot. Do not force the card into the
card slot, as it may damage both the
X150 and the card.
• It is recommended to format new cards or cards that
have been previously used in other devices.
To format the Micro SD card:
1. Enter the General Settings menu by pressing the
POWER button.
2. Press and HOLD the SHOOT button for 3 seconds to
enter the General Settings.
3. Use the WiFi button on the front of the X150 to navigate down the menu. The Format card option is on the
thirdpage of the General Settings.
NOTE: Formatting the card will permanently delete contents
of the card. Be sure to save any important files.
* Micro SD cards are also called TF cards.
Page 14

14
EN
Buttons and Navigation
POWER Button
In Video
Mode
PRESS - Video Mode Settings
HOLD - Off
In Picture
Mode
PRESS - Picture Mode Settings
HOLD - Off
Menus PRESS - Back
HOLD - Off
SHOOT Button
In Video
Mode
PRESS - Start/Stop recording
1st HOLD - Swap to Slo-mo Mode
2nd HOLD - Swap to Picture Mode
In Picture
Mode
PRESS - Capture Image
HOLD - Swap to Playback Mode
In Playback
Mode
PRESS - Enter
HOLD - Swap to Video Mode
Menus PRESS - Enter
HOLD - Swap to General Settings
WiFi Button
In Video/
Picture Mode
PRESS - Turn WiFi on/off
Menus PRESS - Scroll
Page 15

15
EN
Video Mode
30fps
00:56:20
Video Mode Screen
Once the X150 is turned on, Video Mode is selected by
default. Press the SHOOT button to start recording. When the
recording starts, you will see all three red lights on the X150
start flashing. To end recording, press the SHOOT button
again.
NOTE : 2.7K resolution is not recomended for capturing footage that
involves quick movements.
KB TIP: For footage with quick movements, we recommend using the
lower 1080p 60fps or 720p 120fps instead of 2.7K.
Page 16

16
EN
Video Settings
To enter the Settings menu, press the POWER button (press
and release immediately – if it is held too long the X150 will
switch o).
NOTE: The Setup menu accessed will depend on the current mode of
the X150. If the “Video Mode ” is active, it will display video capture
settings or if the “Picture Mode” is active, it will display the Image
capture settings. By default, Video Mode is the active mode when you
turn the device on.
Video Settings Screen (Page 1)
This allows user to adjust video quality settings:
Navigation: WiFi button - Scroll
SHOOT button - Enter
POWER button - Back
Page 17

17
EN
Resolution
This allows you to set the video recording resolution:
• 2.7K 15fps* • 1080P 30fps
• 1440P 30fps • 720P 120fps
• 1080P 60fps • 720P 60fps
NOTE: High resolutions become inactive if the Micro SD card is
incompatible. Class-6 or Class-10 Micro SD cards up to 32GB are
recommended.
*2.7K resolution is not recommended for capturing footage that
involves quick movements.
Video Looping
This allows you to set the recording mode:
OFF – In this mode the X150 will generate a new file every 30
minutes. These files will be saved into the Video Folder.
NOTE: When the SD card is full, the X150 will stop recording
if Video Looping is OFF. If the Loop mode is ON, the X150
will continue recording over the previous files when the SD
card is full.
Page 18

18
EN
• 2 Min – In this mode, the X150 will generate a new file
every 2 minutes.
• 5 Min - In this mode, the X150 will generate a new file
every
• 10 Min - In this mode, the X150 will generate a new file
every 10 minutes.
White Balance
The default setting is Auto. If you switch Auto OFF,
remember to adjust when lighting conditions change.
The following pre-set modes are also available:
Daylight, Cloudy, Tungsten, Fluor (fluoroscent).
Microphone
SELECT ON to record audio, SELECT OFF for video only.
Date Stamp
• O: Turn o the date stamp display on footage.
• Date: Display date on footage.
• Date & Time: Display date & time on footage.
NOTE: This
feature is not available when the resolution is set to 2.7K.
Page 19

19
EN
General Settings
General Settings Screen (Page 1)
This allows you to adjust the general device settings for the
X150.
To access the General Settings, press the POWER button to
access the Video or Picture Settings, then HOLD the SHOOT
button to swap to the General Settings.
Navigation: WiFi button - Scroll
SHOOT button - Enter
POWER button - Back
Time-lapse
Time-lapse is a creative technique that records footage at a
very low frame rate. Playing it back at a higher frame
Page 20

20
EN
rate shows a rapid change over time. This technique is most
eective when recording scenes or objects which have a slow
state of change, e.g. a sunset or a flower blossoming.
NOTE: This feature is inactive when the resolution is set to 2.7K.
KB TIP: You can also set the Time-lapse feature just to capture Photos
to save as a sequence of image files. To activate the Time-lapse for
image capture, press and HOLD the SHOOT button when the Timelapse is ON. This feature can also be accessed from Picture Settings.
Available time intervals:
• O – Disable Time-lapse
• 3 Sec - Cap tures frame every 3 seconds
• 5 Sec - Captures frame every 5 seconds
• 10 Sec – Captures frame every 10 seconds
• 20 Sec- Captures frame every 20 seconds
• 30 Sec- Captures frame every 30 seconds
• 60 Sec- Captures frame every 60 seconds
To turn o the Time-lapse mode, go to the Setup menu,
HOLD the SHOOT button to the enter General Settings page
> Time-lapse and turn it OFF.
Page 21

21
EN
Auto LCD O
This will set the LCD screen to turn o after 1 minute, 3
minutes or 5 minutes. Press any key to turn the screen on.
Select OFF to keep the LCD running continuously during use.
Auto POWER O
This will set the X150 to automatically power o after 1
minute, 3 minutes or 5 minutes. Select OFF to keep the X150
on during periods of inactivity.
Beep
Turn the key tone ON or OFF.
Date & Time
This allows you to adjust the date & time.
NOTE: Use the WiFi button to change the details, HOLD
the SHOOT button to jump to the next character. You can
also change the date format here. Press the SHOOT
button to save & exit.
Page 22

22
EN
Language
Select the device language.
Light Frequency
Selecting the correct light frequency will avoid the possibility
of strobing. Strobing is the flickering eect on screen when
recording light or other elements. If this occurs, try switching
to a dierent light frequency setting.
Screen Rotation
Rotate the screen.
System
• Factory Reset - Resets the X150 to factory
default settings.
• System Info - Checks the firmware version.
• Card Info - See the SD card status.
Page 23

23
EN
WiFi Passsword
This will allow you to change the WiFi password. Use the
WiFi button to change the digits, HOLD the SHOOT button
to jump to the next digit. When finished, press the SHOOT
button to save & exit.
WiFi SSID (SSID - Service Set Identifier)
This will allow you to change the last 3 digits of the SSID. Use
WiFi button to change the digits, HOLD the SHOOT button
to jump to next digit and at the end press the SHOOT button
to save & exit.
Format
This will format the Micro SD card and permanently erase all
data on the card. Use wisely.
Slo-mo Mode
General Settings Screen (Page 2)
Page 24

24
EN
Slo-mo Mode
One of the great features of X150 is the ability to capture
slow motion footage.
NOTE: Slo-mo mode can only be activated at a video
resolution of 1080P @ 60fps or 720P @ 120fps.
To activate this mode:
• Turn the X150 on.
• Press and HOLD the SHOOT button for 3 seconds.
• You will see ( ) at the left hand side of the screen.
• Press the SHOOT button to start/stop recording.
Slo-mo Mode Screen
Page 25

25
EN
Picture Mode
This mode will allow you to take snapshots.
9999
To activate this mode:
• Turn the X150 on.
• Press and HOLD the SHOOT button for 3 seconds.
• The X150 will enter into Slo-mo mode, press and HOLD
the SHOOT button again.
• You will see (
) on top left corner of the screen.
• Press the SHOOT button to take snapshots.
Picture Mode Screen
Page 26

26
EN
Picture Settings
To enter the Set-up menu for Picture Mode, ensure the X150
is set in Picture Mode and press the POWER button (press
and release immediately – don’t forget, if it is held too long,
the X150 will switch o).
Resolution
Select the image resolution to capture Photos.
Quality
Sets the image capture quality.
Picture Settings Screen
Page 27

27
EN
Metering
Metering refers to the way in which a camera
determines the exposure.
White Balance
The factory default is Auto. If you switch Auto OFF,
remember to adjust when lighting conditions change.
ISO
This is the measurement of how sensitive a camera sensor is
to light.
We recommend you use the auto feature until you’re more
familiar with ISO settings.
Picture Settings Screen 2
Page 28

28
EN
Exposure
This allows you to set the light exposure value.
Self-timer
This allows you to set the timer for auto image capture.
Date Stamp
O: Turn o the date stamp display on images.
Date: Display the date stamp on images
Date & Time: Display the date & time stamp on images.
Page 29
29
EN
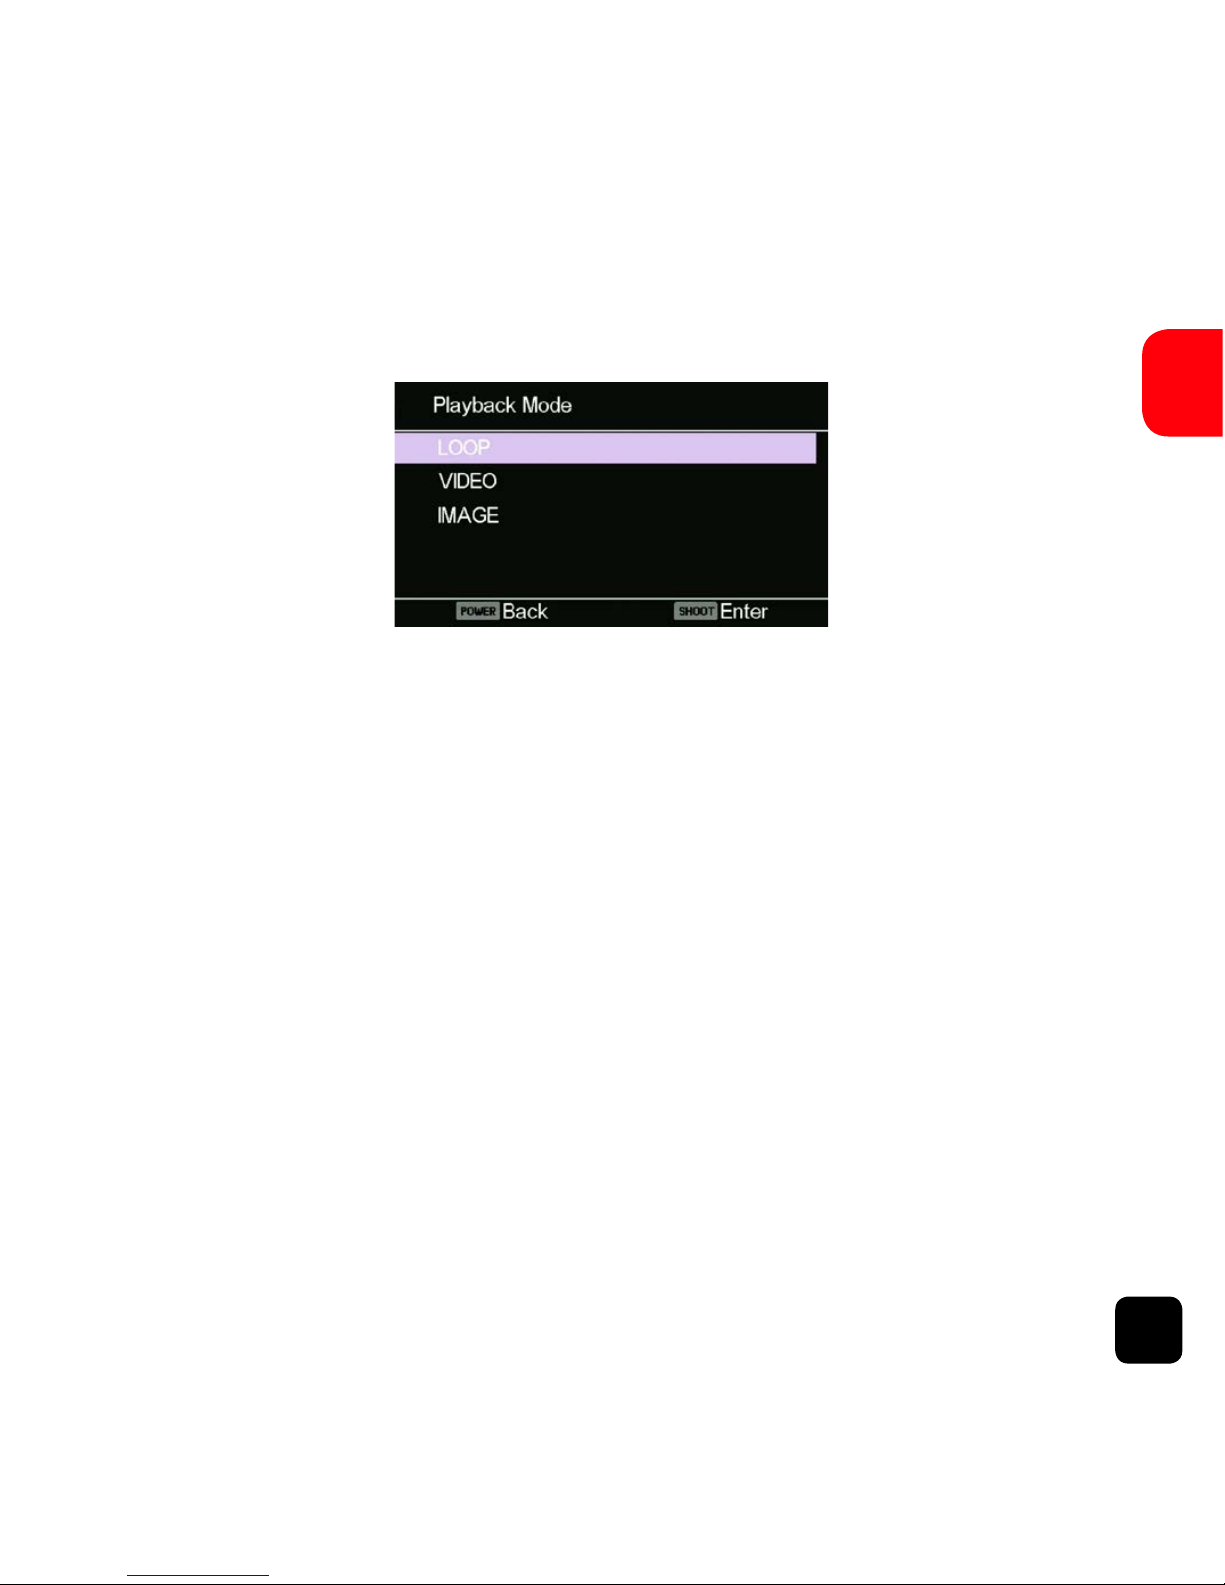
Playback Mode
Navigation: Use the WiFi button to navigate, SHOOT button to
Enter/Confirm selection and the POWER button to go back.
This will allow you to view captured videos &
images. Enter the Picture Mode first, then press and HOLD
the SHOOT button for 3 seconds.
Loop - Video files that are recorded with Loop mode ON are
saved to this folder.
Video - Video files that are recorded with Loop mode OFF
are saved to this folder.
Image - Images are saved to this folder.
Playback Mode Screen
Page 30

30
EN
To delete files, select the file and press the POWER button.
You will see the delete option there. You can
select the option to delete a single file or all files. You can also
protect files from accidental deletion.
To exit the Playback Mode press and HOLD the SHOOT
button to return to normal recording mode.
Connecting to a TV
You can mirror the X150 screen to a compatible TV screen.
Note: You will need a Mini HDMI to HDMI cable.
• Turn the X150 OFF.
• Connect the Mini HDMI cable-end to the port on
the X150 and the HDMI end to HDMI port on the TV.
• Select the right source on the TV.
• Turn the X150 ON.
Page 31

31
EN
WiFi Setup
The X150 allows full camera control, live previewing and
playback of photos/videos on most Smart Phones and
Tablets.
1. Download the Kaiser Baas X150 App onto your Smart
Device:
www.kaiserbaas.com/apps/x150-app
Kaiser Baas X150
2. Activate WiFi on your X150 by pressing WiFi button.
3. Go to the WiFi settings on your device, you will see the
Kaiser Baas X150 in the list of available Wireless Networks.
4. Connect your device to the Kaiser Baas X150 via WiFi
5. The password will be displayed on the screen of the X150
once the WiFi is turned ON (e.g. 1234567890).
Page 32

32
EN
Note: WiFi will be turned o automatically if
the X150 is not connected within 2 minutes.
6. Once your device is connected to the X150, launch the
‘Kaiser Baas X150’ app.
Important: Make sure the app is downloaded on to your
Smart Phone or Tablet before co nnecting it to the X150
via WiFi.
App Interface Diagram
RecordPlayback Mode
Battery Icon Video Resolution Settings
Switch Photo/Mode
Page 33

33
EN
Using The Wrist Remote
The water-resistant Wrist Remote connects wirelessly to your
X150 and allows easy ‘hands-free’ operation, when the X150 is
mounted in hard-to-reach places; your helmet, vehicle etc.
Your X150 camera will already be paired with the wrist
remote.
If it is not responding please check it is charged and follow
the pairing instructions on the next page.
Remote Pairing Instructions
Page 34

34
EN
NOTE: The Wrist Remote must be fully charged before
it is paired. Charging takes an hour or so, using the Micro
USB cable provided.
1. Make sure the X150 is turned o.
2. Press and HOLD the RECORD Video & SHOOT Photo
buttons on the Wrist Remote together, for 3 seconds,
then release.
3. Turn the X150 on
4. A blue light will appear on the Wrist Remote once the
pairing is complete.
NOTE: Once paired, the X150 will recognise
the Wrist Remote automatically.
Wrist Remote LED Indicators
Flashing Green: Video is being recorded. This light will also
appear when an image is being captured.
KB TIP: You can check the battery status of the Wrist Remote by pressing Image
Capture button (located between the LED lights and Red button) when the X150 is
OFF. If the Wrist Remote has charge in it, the green light will flash.
Solid Blue Light : This indicates that the X150 and the Wrist
Page 35

35
EN
Remote are succesfully paired. The light will turn o a few
seconds after the X150 is turned o.
Solid Purple Light : This light will appear when the wrist
remote is being charged whilst the X150 is turned on. You can
still use the Wrist Remote when it is charging.
Red : This indicates that the Wrist Remote is being charged
or that the X150 is not be paired, nor in range.
Wrist Remote Battery Life
The Wrist Remote takes approximately 1 hour to charge.
In standby mode it will last approximately 5 days.
Whilst recording it will last approximately 4.5 hours.
Page 36

36
EN
Saving And Viewing Options
Transferring files to a PC
Use the USB cable supplied to connect the X150 to your
computer.
Mass Storage Mode will appear on the X150 screen and the
computer will detect the X150 as an external storage device.
Alternatively, you can remove the Micro SD card and use a
card reader (not included) to achieve the same result.
1. Select the file(s) you want to transfer to your computer
by highlighting them.
2. Either drag the files to the desired location on your com-
puter (this will make a copy of the file) OR right-click the
file, select ‘Copy’ and right-click in the desired location on
your computer and select ‘Paste’.
KB TIP: You can also transfer entire folders to your computer.
Page 37

37
EN
Using the X150 as a Webcam
Connect the X150 to your PC using the Micro USB cable,
when you see Mass Storage Mode on the X150 screen,
press and HOLD the SHOOT button for 3 seconds.
NOTE: You will not be able to record video or take
pictures when the X150 is in Webcam Mode.
Page 38

38
EN
FAQ
My X150 freezes and unable to switch o. Why?
A. Reset the X150 by HOLDING the SHOOT button for
15 seconds. Please make sure to use a compatible Micro
SD card. A Class-6 or Class-10 Micro SD up to 32GB is
recommended.
Q. My X150 will NOT turn on. Why?
A1. Try re-inserting the battery.
A2. The battery could be flat. You need to recharge it (full
recharge from flat will take about 5 hours).
Q. I cannot select higher resolutions. Why?
A. High resolutions are only available when you use a Class-6
or Class-10 Micro SD. Certain modes will also only operate at
lower resolution (e.g. Time-lapse with 2.7K).
Q. The volume is too low on my video recordings. Why?
A. When the X150 is secured in a Waterproof case, it is
normal to find a decrease in recording volume. Try using an
exoshell or skeleton case.
Page 39

39
EN
Q. The volume is too low on my video recordings. Why?
A. When the X150 is secured in a Waterproof case, it is
normal to find a decrease in recording volume. Try using an
exoshell or skeleton case.
Page 40

40
EN
Specifications
Waterproof Down to 30m (with waterproof casing)
Sensor 1/2.5" 8.0 megapixels CMOS sensor
Resolution Video:
2.7K@15fps, 1440P@30fps,
1080P@60fps, 1080P@30fps,
720P@120fps,720P@60fps.
Still photo:
12M(4032*3024), 8M(3264*2448),
5M(2592*1944), 3M(2048*1536)
Storage type Micro SD card up to 32GB (not included)
FOV 150°- view fixed lens
Lens aperture F/2.8 f=2.65mm
Lens Focus 0.5m to infinity
Shutter speed 1/30 to 1/2000 sec
Video Looping Every 2mins, every 5 mins, Every 10 mins
Sensitivity Automatic ISO 100-1600
Microphone In-built
Display 2” TFT LCD
Page 41

41
EN
Format Video: MOV H.264
Still photo: JPEG
POWER supply 3.7V/1000mAh Li-Battery
Battery life Video: 2 hours without WiFi
Language English
Dimensions 54x37x51mm
Casing 49.5×76×84mm
System requirements
Operating system Windows XP / Vista / 7 / 8 / MAC OS
App Requirements Apple iOS & Android
Interface Mini HDMI (HDMI cable not included)
High speed USB 2.0
Language English
Page 42

42
EN
Contact Us
Need further assistance? Please visit:
www.kaiserbaas.com/support
Or email:
helpdesk@kaiserbaas.com
For the full Kaiser Baas accesories range visit
www.kaiserbaas.com
 Loading...