

Page 1
R10 CAR DVR
Capture your journey
USER GUIDE
Page 2

Page 3

3
English
Languages
English 4
Page 4

4
English
Community
Tech support:
e: helpdesk@kaiserbaas.com
w: www.kaiserbaas.com/support
p: Australia 1300 302 306
p: New Zealand 0800 302 306
(business hours, AEST)
/kaiserbaas
Register this product for 12 month warranty:
www.kaiserbaas.com/register
Get product updates:
www.kaiserbaas.com/updates
Page 5

5
English
Contents
Safety Precautions 6
What’s in the Box 7
Product Diagram 8
Setting up the R10 Car DVR 9
In Car Operation 10
Computer Connection 11
Interface 12
Specifications 16
Frequently Asked Questions 18
Contact Us 19
Page 6

6
English
Safety Precautions
Before using your R10 Car DVR, please ensure you have read
and understand all of the safety precautions below.
• Only use the provided power cables to charge the
device.
• Do not expose the R10 camera to water, dust, oil and
temperatures over 70˚C.
• Avoid leaving your R10 camera in direct sunlight for
prolonged periods of time.
• Please do not attempt to adjust the camera settings
while you are operating your vehicle.
PLEASE USE YOUR CAMERA WITHIN YOUR COUNTRIES ROAD
LAWS. PLEASE CHECK YOUR LOCAL ROAD LEGISLATION
BEFORE USE.
Page 7

7
English
What’s in the Box
Please ensure the product package has all the following
contents:
B
A
B
D
C
D
C
R10 Car DVR
Mount
Micro USB Cable
User Guide
Car Charger
E
E
Page 8

8
English
Product Diagram
micro SD HDMI AV OUT POWER/USB
REC
MENU
MODE
1
Wide Angle Lens
2
Mounting Socket
3
2” Display
4
Power Button
5
Menu / Back Button
6
Mode Button
7
Record /OK Button
8
Up Button
9
Down Button (hold during
recording for light on/o)
10
Micro SD Slot
11
HDMI Mini Port (adapter
required for HDMI)
12
AV Out Port
13
Micro USB Port
14
Reset Button
3
1
2
6
9
10 11 12 13
14
5
8
4
7
Front
Sides
Back
To p
Bottom
Page 9

9
English
micro SD HDMI AV OUT POWER/USB
micro SD HDMI AV OUT POWER/USB
To p
To p
Setting up the R10 Car DVR
• Insert Micro SD card in the
Micro SD card slot on the top
of the camera.
• Camera will power up and
start recording as soon as it
receives power from the USB
Mini power connection (eg.
when you start your car).
• Clean the area on your windscreen making sure desired
placement is not blocking the drivers view.
• Attach the camera to the mount by sliding the camera
connection from front to back along the mount connection until latched.
• With the base latch up secure the suction cup into the
desired position on the windscreen.
• Switch the suction cap base latch into the lock position
securing the mount to the windscreen.
• Adjust the nut to ensure that the camera is correctly
angled.
• Finally connect the R10 to power using the USB Mini
cable and the USB car charge adaptor.
General:
Car set up:
Page 10

10
English
In Car Operation
• Once camera is set up and connected to USB Mini
power, the camera will automatically power on and start
recording when the car is started.
• The car camera requires a class 6 or above Micro SD
card (not included) with at least 8GB of free space.
• The internal G sensor will register any bumps that could
be accidents and registers them as an “Event”. These
event files will be stored as a SOS file and will not be
recorded over by regular footage. These files need to be
manually deleted from your SD card manually by connecting your R10 to your computer.
For more information on the R10 interface please see section
marked “Interface”.
Page 11

11
English
Computer Connection
• Either connect the Camera via USB Mini, or connect the
Micro SD (not included) to your computer via a SD card
adapter.
• Camera will appear as an external storage device.
• Video files will be kept in directory within the external
storage under DCIM/100_DSC.
• Click on any of the video files to play them back.
• Event files can be found and managed here with the
prefix SOS, it is only in this file that you can delete these
SOS files.
Mac users may need to download a third party player such as
‘VLC’ to play these files as AVI is not natively supported on Apple
computers.
VLC can be found at www.videolan.org/VLC
VLC is not a product of Kaiser Baas.
Page 12

12
English
Interface
Recording / View Finder Screen
From this screen you can manually start and stop recording
using the REC button, navigate to the menu screen using
the MENU button and cycle through the Recording, Photo,
Video Playback, and Photo Playback, modes using the mode
key. To cycle through these modes you will need to ensure
that the camera is not recording. In Photo mode the up and
down buttons are used to control the zoom function.
Recording / View Finder Screen
1
Stand By / Record
2
Recording Settings
3
Mode (photo/video)
4
Battery
5
Date / Time
1 2 43
5
Page 13
13
English
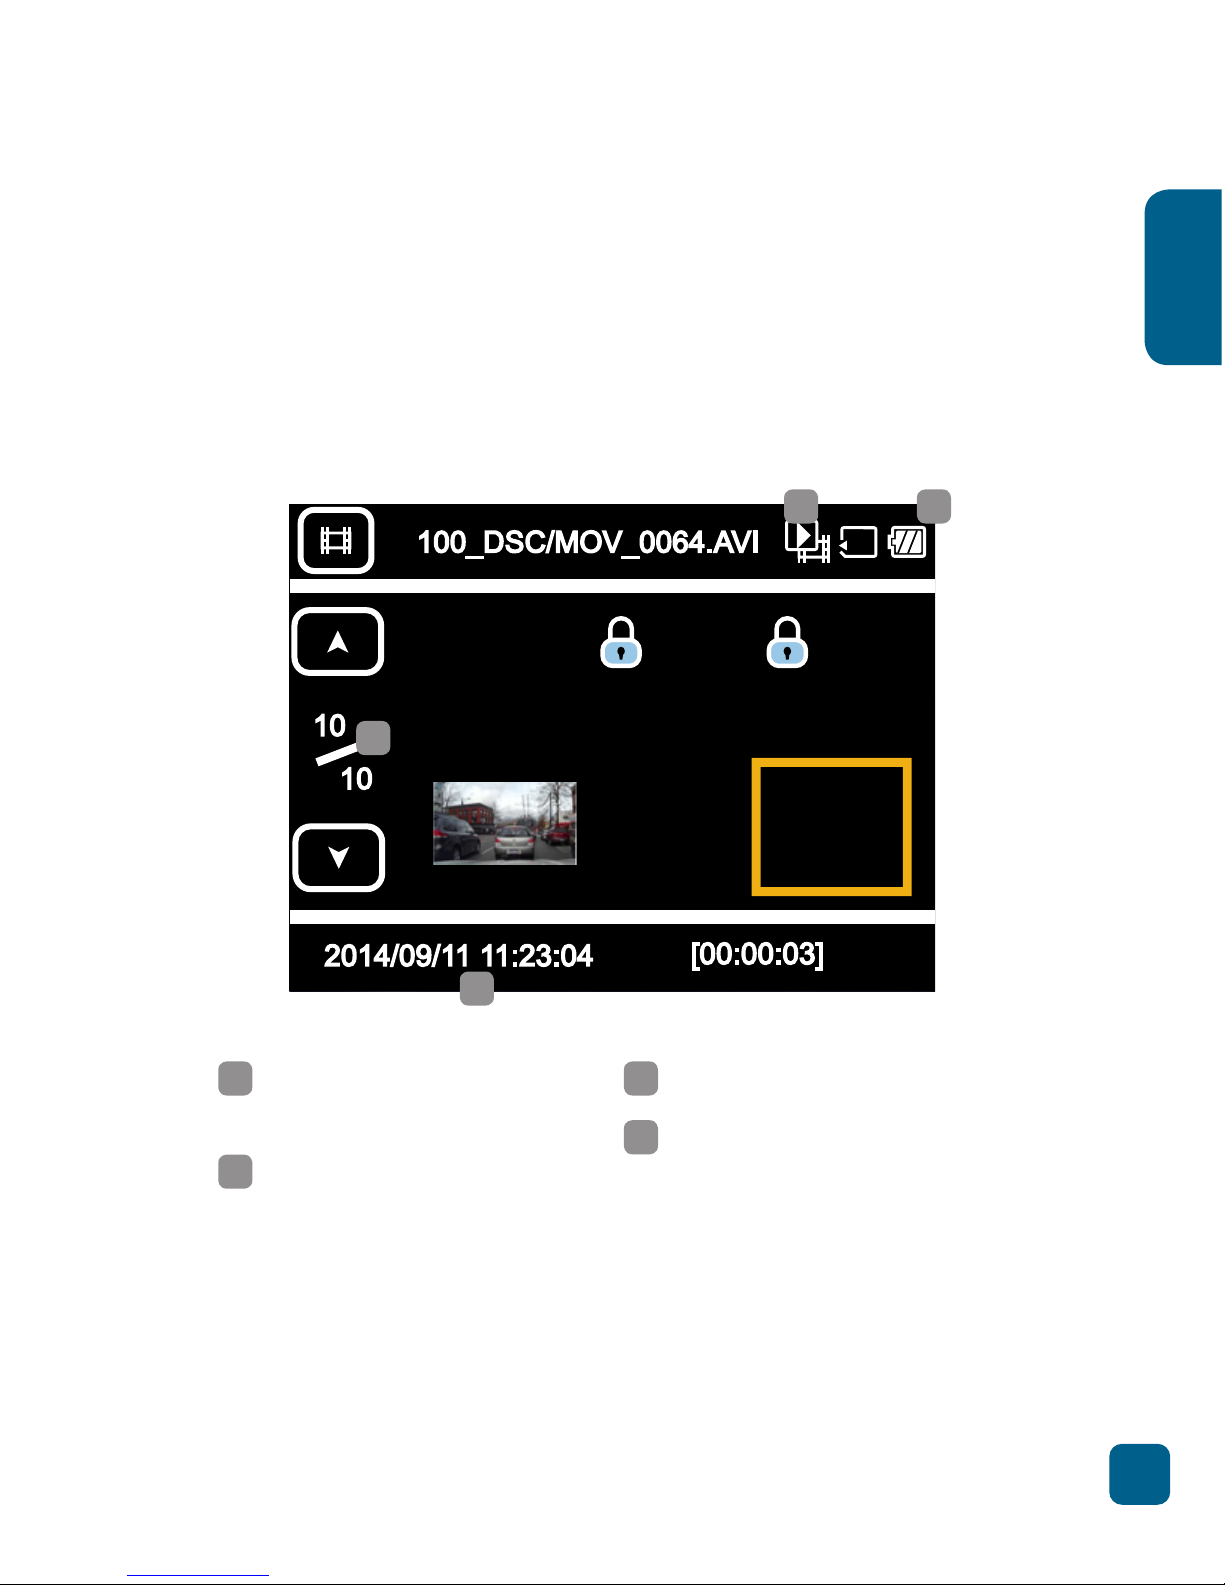
Playback Video/Photo
In these screens the up and down buttons are used to
navigate media, the record button is used to playback media
and the mode button is used to navigate back. SOS files will
be indicated with a lock icon.
For information on deleting media, see section Deleting Media.
Playback Video/Photo Screen
1
Media Format
(Photo/Video)
2
Battery
3
Page Number
4
Date / Time
1 2
3
4
Page 14

14
English
Menu
The R10’s menu can be accessed by pushing the MENU
button on the side of the device. The menu can then be
navigated with the mode button to cycle through the
dierent menus. The Up and Down buttons are used to
navigate though the sub menus, and the REC and MENU
buttons are used to select and navigate back.
Media Screen
1
Video
2
Photo
3
Playback
4
Media Tool
5
General Settings
1 2 3 4 5
Page 15

15
English
Deleting Media
This is the player screen, which is controlled by using the
buttons on the side of the screen.
Deleting media can be done through two methods, via
computer or via the camera’s interface.
Computer
Connect the R10 to your computer using the
instructions in section
Computer Connection.
Once you have connected your R10 camera, files can be
manually deleted from the 100_DSC file.
Camera Interface
In the R10’s Playback menu (Menu/Playback/Delete),
this will open the option to delete one or delete all. If
delete one is selected the R10 will display the playback
and the media can be selected for deletion by using the
up and down buttons to navigate, and the Rec button
to select.
Protected media needs to be unprotected before it
can be deleted. This can be done through the Menu/
Playback/Protect, function.
Page 16

16
English
Specifications
Dimension (L x W x H) 71 x 31 x 56 mm
Weight 48g
Lens 120° Wide Angle Lens
CMOS AR0330 300pixel
Focus length 3.5M
Aperture 2.8
LCD 2.0 inch
Resolution • 1920 x 1080 FHD 30fps
• 1280 x 720 HD 30fps
• 1280 x 720 HD 60fps
• 640 x 480 VGA 30fps
Compresson format H.264
Cigarette adaptor
Input voltage
DC 12/24 V
Main unit Input voltage DC 5 V
Power Current DC5V Recording current 450mA/
Standby 350mA
Power Consumption 2.3W
Battery 170mAh Lithium polymer
Page 17

17
English
Storage microSD CLASS 4 up
max support 32GB
Output AV OUT
Voice recording On / o
Operation Temperature -20°C - 65°C
Storage Temperature -20°C - 75°C
Page 18

18
English
Frequently Asked Questions
Q. The image is blurry
A. Try repositioning the camera. For best results, try and
aim the camera through a section of the windshield that
is not overly curved or angled as this can cause a
blurring eect with footage.
Q. My device will not record
A. Please ensure that you have power connected to the
camera using the supplied USB Mini power cable, and
that you have a SD card inserted that is Cat 4 or above
and 32GB or below.
Q. My HDMI cable will not fit in the HDMI socket on the
camera.
A. The socket on the top of the camera is a Mini HDMI port,
and requires a Mini HDMI adapter (not included).
Q. I can’t delete files o of my SD card using the camera
interface.
A. Please see section Deleting Media, if you still cannot
delete files o the SD card, ensure that they are not
protected. If trouble persists, the SD card may need to
be formatted.
Page 19

19
English
Contact Us
Having trouble setting your R10 Car DVR up?
Please contact us. No question too big or small and we are
more than happy to help.
Please visit:
www.kaiserbaas.com/support
Or email:
helpdesk@kaiserbaas.com
For further information please visit:
www.kaiserbaas.com
Tech support:
e: helpdesk@kaiserbaas.com
w: www.kaiserbaas.com/support
p: Australia 1300 302 306
p: New Zealand 0800 302 306
(business hours, AEST)
Page 20

 Loading...