

130mm W x 100mm H
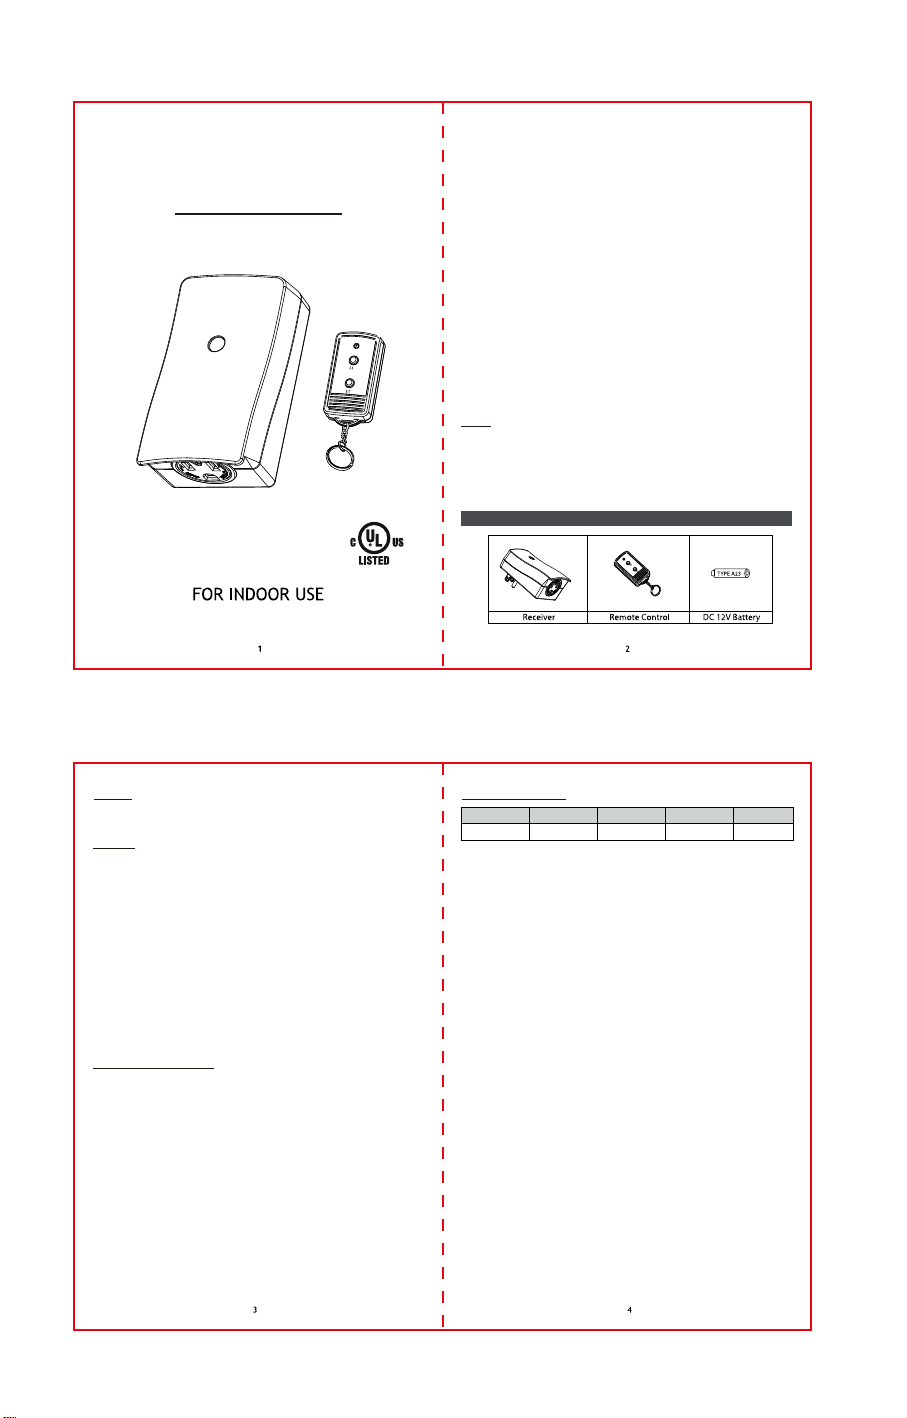
Remote Control Outlets
Operating Instructions
Front
IMPORTANT INFORMATION REQUIRED BY THE FCC
This device complies with Part 15 of the FCC Rules. Operation is subject to the
following two conditions: (1) this device may not cause harmful interference, and
(2) this device must accept any interference received, including interference that
may cause undesired operation.
NOTE: This equipment has been tested and found to comply with the limits for a
Class B digital device, pursuant to part 15 of the FCC Rules. These limits are
designed to provide reasonable protection against harmful interference in a
residential installation. This equipment generates, uses and can radiate radio
frequency energy and, if not installed and used in accordance with the instructions,
may cause harmful interference to radio communications. However, there is no
guarantee that interference will not occur in a particular installation. If this
equipment does cause harmful interference to radio or television reception. Which
can be determined by turning the equipment off and on, the user is encouraged to
try to correct the interference by one or more of the following measures:
--Reorient or relocate the receiving antenna.
--Increase the separation between the equipment and receiver.
--Connect the equipment into an outlet on a circuit different from that to which the
receiver is connected.
--Consult the dealer or an experienced radio/TV technician for help.
Any changes or modifications not expressly approved by the party responsible for
compliance could void the user's authority to operate this equipment.
To Use
1. To activate the Receiver, press the ON Button of the Remote Control. The
red LED of the Remote Control will illuminate momentarily and the LED of the
Receiver will remain illuminated.
NOTE: The Remote Control must be within 50 feet of the Receiver.
2. To turn the Receiver off, press the OFF Button of the Remote Control. The
LED on the Receiver will shut off.
SAVE THESE INSTRUCTIONS FOR FUTURE REFERENCE
Back
Features
• Controls electrical outlet up to a distance of 50 feet
• Has one three-prong receptacle
To Set Up
1. Mount the Receiver near a three-prong, grounded, standard 125-volt AC
electrical outlet:
a. Choose a location on the wall to insert a nail or wood screw (not included)
for mounting the Receiver. Please note the following when choosi ng the
location:
• When hung from the nail/screw, the Receiver must be close enough to
the outlet for the cord to plug into the outlet.
• The device must be mounted vertically with its outlets facing downward
and not reaching ground level.
b. Insert the nail/screw into the wall in the chosen location. The nail or
screw head must extend at least 3/16” from the wall.
c. Hang the keyhole of the Receiver on the nail or screw.
2. Plug the Receiver into a standard 125-volt AC electrical outlet.
3. Confirm that the electrical specifications of an item you wish to use with this
product do not exceed those specified in the “Electrical Specifications” section.
Plug the item into an outlet of the Receiver.
4. Remove the plastic battery tab from the Battery Compartment in the back of
the Remote Control to activate the DC 12V Type A23 pre-installed battery.
Battery Handling and Usage
WARNING: Keep batteries away from children and pets.
• Follow the battery manufacturer’s safety and usage instructions.
• Insert the battery observing the proper polarity (+/−) as indicated inside the
Battery Compartment.
CAUTION: Failure to properly align the battery polarity can cause personal
injury and/or property damage.
• Remove a spent or discharged battery from the product. Remove the battery
when not using the product for an extended period.
• Never throw batteries into a fire. Do not expose batteries to fire or other heat
sources.
• Dispose or recycle spent/discharged batteries in compliance with all applicable
laws. For detailed information, contact your local solid waste authority.
Battery Replacement:
1. Remove the Battery Compartment Cover from the back of the Remote Control
by sliding the Cover in the direction that its treads curve.
2. Remove the spent battery and place a new DC 12V Type A23 battery into the
Battery Compartment, correctly observing the polarity indications (+/−) inside
the Battery Compartment.
3. Replace the Battery Compartment Cover.
Electrical Specifications
Voltage Frequency Wattage Amperage Horse Power
*Maximum combined wattage for items using a tungsten bulb plugged into the
Receiver is 1000W.
*Maximum combined wattage for appliances plugged into the Receiver is 1625W.
RECEIVER MODEL: RC-015
TRANSMITTTER MODEL: TR-009N
FCC ID: PAGTR-009N
SAVE THESE INSTRUCTIONS!
Made in China
*1000W-1625W 60Hz120VAC 13A 1/3HP
 Loading...