

K2 Mounts K2-F-Series, K2-T-Series, K3-F-Series, K3-T-Series Installation Manual


Table of Contents
Before You Begin . . . . . . . . . . . . . . . . . . . . . . . . . . . . . . . . ...................................... 2
Update kit
3
What You Will Need 5
Installation 6
Determine the Wall Mounting Location 6
Attach the Mounting Plate to a Wood Stud Wall 7
Attach the Mounting Plate to a Concrete or Concrete Block W all 9
Attach the Screen Mounting Brackets to the TV 11
Hang the TV on the Mounting Plate 13
Adjust the Screen Angle (K2-T-SERIES and K3-T-SERIES)
14
Position the Cables 14
K2 Mounts Warranty 16
Package Contents 2. . . . . . . . . . . . . . . . . . . . . . . . . . . . . . . . ..............................
. . . . . . . . . . . . . . . . . . . . . . . . . . . . . . . ......................................
. . . . . . . . . . . . . . . . . . . . . . . . . . . . . . . ..............................
. . . . . . . . . . . . . . . . . . . . . . . . . . . . . . . .............................................
. . . . . . . . . . . . . . . . . . . . . . . . . . . . . . . ..........
. . . . . . . . . . . . . . . . . . . . . . . . . . . . . . . ..
. . . . . . . . . . . . . . . .
. . . . . . . . . . . . . . . . . . . . . . . . . . . . . . . ...
. . . . . . . . . . . . . . . . . . . . . . . . . . . . . . . ..............
. . . . . . . . . . . . . . . . . . . . . . ....
. . . . . . . . . . . . . . . . . . . . . . . . . . . . . . . ..............................
. . . . . . . . . . . . . . . . . . . . . . . . . . . . . . . . . . ................................

2
Before You Begin
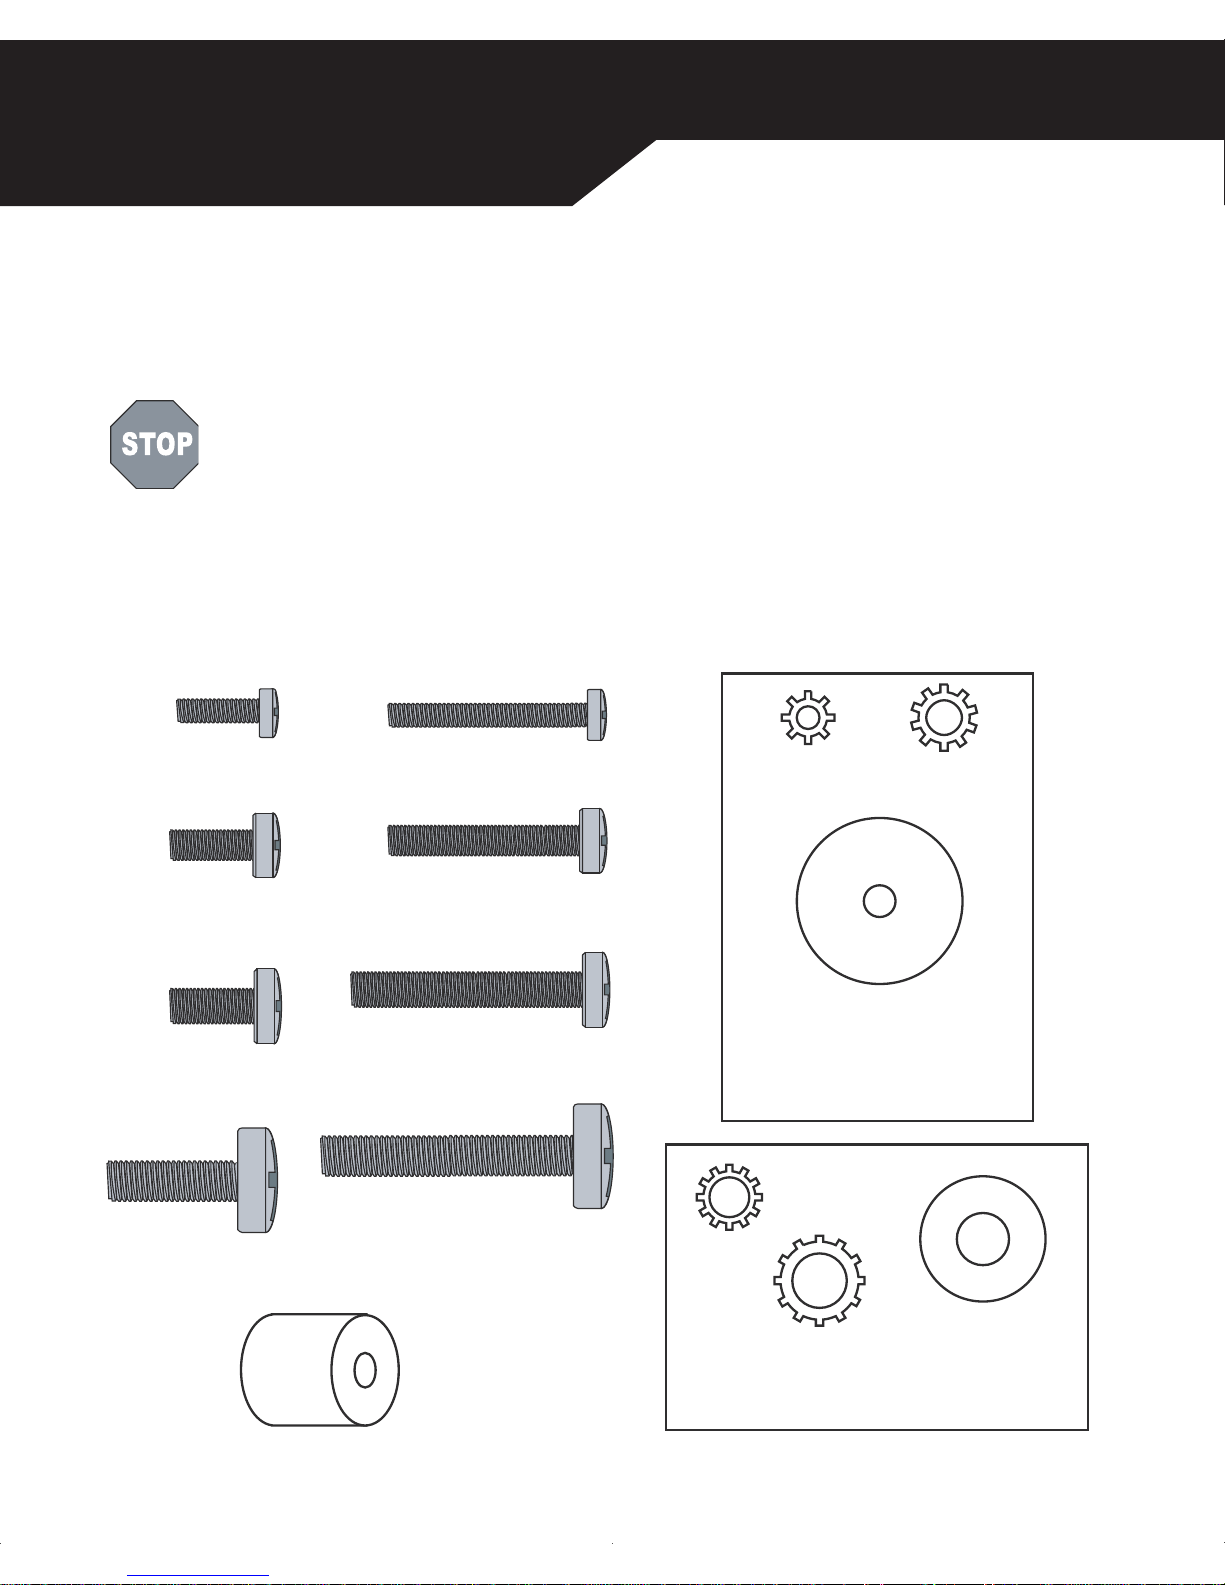
Package Contents
Verify that you have received all of the parts listed below:
If any parts are missing or damaged, contact K2 Mounts at support@k2mounts.com f
or a
replacement. K2 Mounts is not liable for damage or injury caused by incorrect mounting,
incorrect assembly or incorrect usage.
1/2" Concrete
Anchors
Mounting Plate
W ashers
1/4" x 2-1/2"
Lag Bolts
K3-F-SERIES & K3-T-SERIES
Screen Hardware Kit (To attach to TV)
Mounting Plate Hardware
(To secure Mounting Plate to Wall)
K2-F-SERIES, K2-T-SERIES, K3-F-SERIES,
K3-T-SERIES
The Screen Hardware Kit
is used to attach the TV.
Refer to the instructions
included with the kit
on next page.
K2-F-SERIES
K3-F-SERIES
K2-T-SERIES
K3-T-SERIES
Left and Right Screen Mounting Brackets
o
r
Stop: Read this entire manual! Do not attempt to install this product if
you do not understand the instructions or if there are missing or defective
parts. If you are in doubt, contact a qualified contractor to install the
mounting bracket. Improper installation may result in damage to the
screen, other property, or in personal injury.
www.k2mounts.com
Rev00
Mounting Plate(Attach to wall)
All models have 1 unit
K2-F-SERIES & K2-T-SERIES
Rev00
UPDATE
Selecting Screen Mounting Bracket Hardware
These instructions should be used when attaching the Screen Mounting Brackets to your
TV.
Stop: If screws are included in your TV’s four rear mounting holes, use those
screws to attach the Screen Mounting Brackets. You will not need the hardware
included in this kit.
If your TV does not include rear mounting screws, use these instructions to find appropriate
hardware within the hardware kit. Verify that you have received all of the parts listed below:
(4) M4 x 16
Pack A
(4) M4 x 30
Pack B
(4) M5 x 12
Pack C
(4) M5 x 30
Pack D
(4) M6 x 12
Pack E
(4) M6 x 35
Pack F
(4) M8 x 16
Pack G
(4) M8 x 35
Pack H
(4) M4 Lock
W asher
(4) M5 Lock
W asher
(4) M6 Lock
(4) M8 Lock
Washer
(8) M4/M5
Screen Bracket
Washer
Screen Bracket Screws
(8) M6/M8
Screen Bracket
W asher
(4) M6/M8 Spacer
Washer
Pack I
Pack J
Pack K
www.k2mounts.com
3
4
Rev00
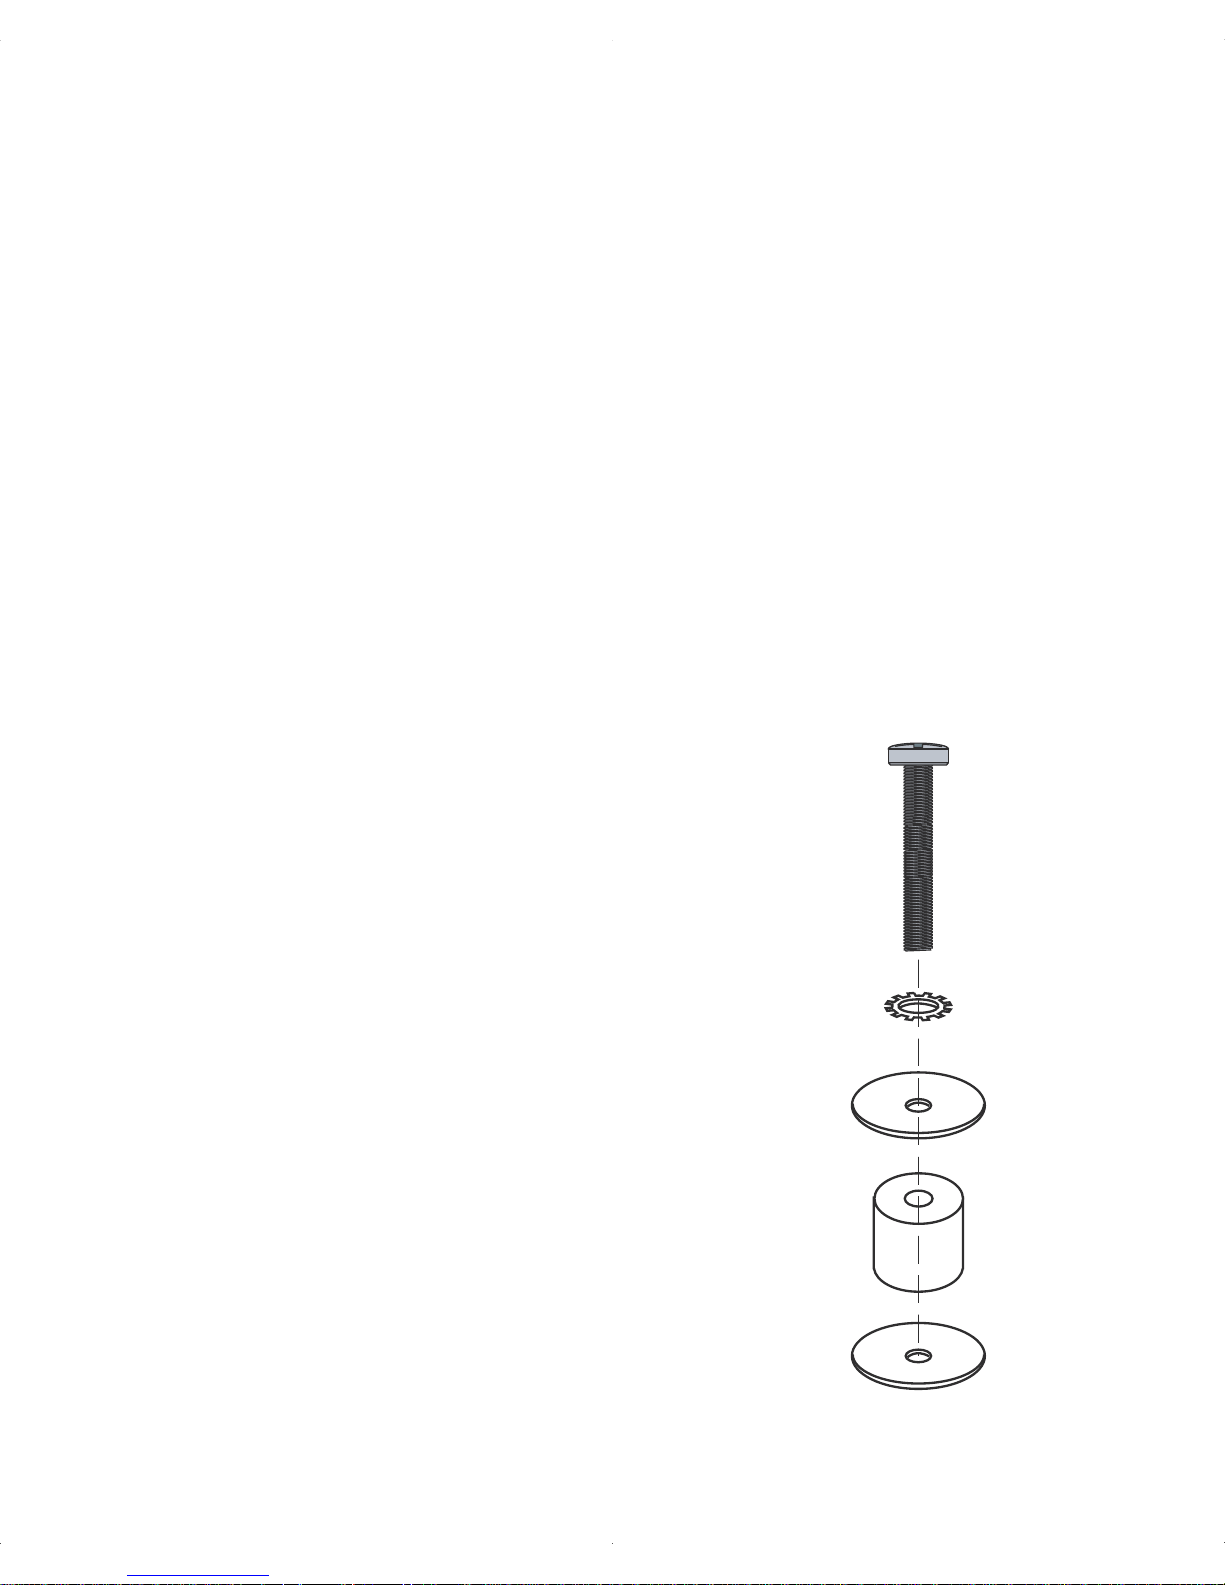
Find Screen Bracket Screws
Find the screws from this hardware kit that best fit your TV. Note that there are screws
with four different diameters: M4, M5, M6, and M8.
Determine which of these thread diameters should be used by gently threading one
ew into a rear mounting hole, until you find the appropriate size.
Only thread these screws by hand, and DO NOT
force a screw into the mounting hole.
After finding the correct diameter, determine the screw length. If your TV has a
flat back, the shor ter length should be used. If your TV has a curved back, or if the
mounting holes are recessed in a slot or channel, use the longer length of the
appropriate diameter screw.
Use only the set of four screws that fits your TV. The rest are not needed to attach the
Screen Mounting Brackets.
Find Other Hardware
Next select the washers that match your screw
diameter; for example, if the M8 screws match your TV,
select the M8 lock washers; if the M4 screws match,
select the M4 washers and the M4 lock washers. If you
are using long M6 or M8 screws, you will also need the
spacers.
You only need this hardware to attach the Screen
Mounting Brackets. The rest of the hardware is not
needed.
Your hardware should be installed as shown at right.
Don’t include the Spacer or bottom Screen Bracket
W asher if you are using a short screw.
Attach the Screen Mounting Brackets to the TV as
shown in the Installation Manual.
of each diameter scr
www.k2mounts.com

What You Will Need
You will need these tools to install your wall mount bracket:
Measuring Tape
Level
Stud Finder (for wood stud wall installation)
Pencil or Pen
Electric Drill
1/8” Drill Bit (for wood stud wall installation)
1/2” Masonry Drill Bit (for concrete or concrete wall installation)
Hammer
Ratchet with 7/16” Socket
Phillips Screwdriver
.
.
.
.
.
.
.
.
.
.
Rev00
www.k2mounts.com
5
 Loading...