

K2 Mounts K1-UC-S, K1-F-S, K1-TS-S, K2-A1-S User Manual
1
Table of Contents
Before You Begin 2
K1-F-S Installation 3
K1-TS-S & K1-A1-S Installation 6
K2-A1-S Installation 11
K1-UC-S (Under-Cabinet Mount) Installation 15
Specications 19
K1 & K2 Series Manual 6.0W X 4 R1.indd 12/15/2005, 8:57 AM1
2
3
Before You Begin
STOP
Do not attempt to install this product if you do not understand the
instructions or if there are missing or defective parts. Improper
installation may result in property damage or in personal injury.
What You Will Need:
• Stud Finder
• Phillips Screwdriver
• Electric Drill
• 1/8” Drill Bit
• 9/16” Wrench (K1-F-S only)
• 1/2” Wrench (K2-A1-S only)
• 1/4” Drill Bit (K1-UC-S only)
To start installation, go to the section pertaining to your specic model. You can
nd the page number in the Table of Contents.
K1 & K2 Series Manual 6.0W X 4 R1.indd 12/15/2005, 8:57 AM2

3
K1-F-S Installation Instructions
Attach the Screen Plate to the Screen
!
Caution: With the screen plate in place, test the screw length to ensure that
they do not extend past the screen hole depth and damage the screen.
1. Position the screen plate
on the screen as shown.
2. Attach the plate with the
original screen screws. If
they are not long enough
to securely mount the
screen, try the included
screws.
K1 & K2 Series Manual 6.0W X 4 R1.indd 12/15/2005, 8:57 AM3
4
5
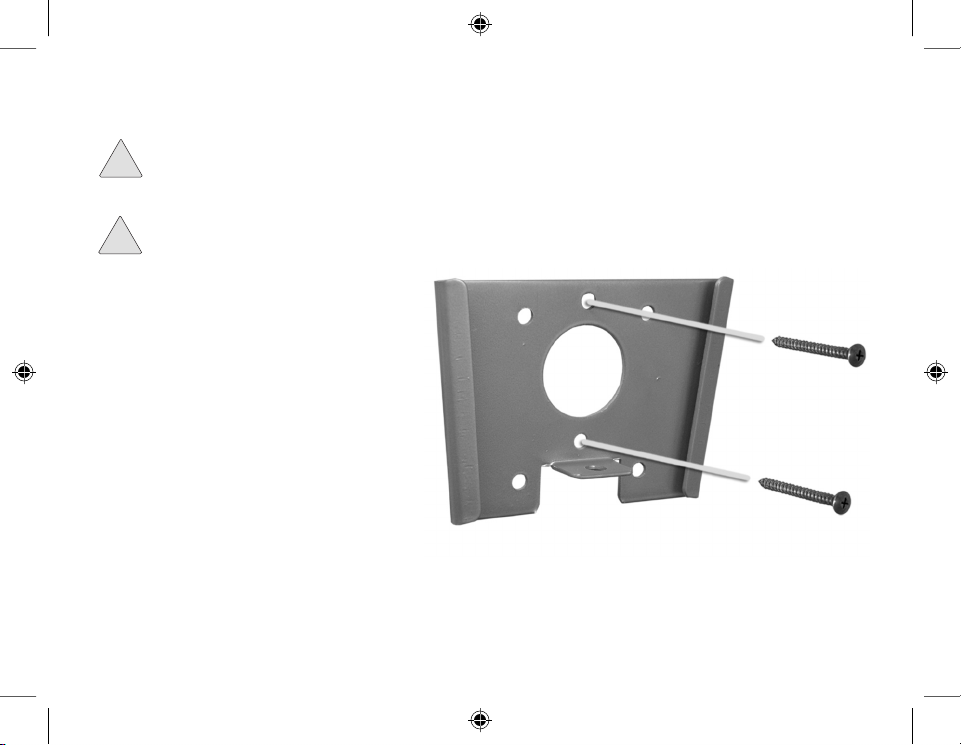
Attach the Wall Plate to the Wall
!
Concrete anchors are not provided. To mount to a brick or concrete
wall, purchase concrete anchors to accomodate the provided screws.
!
When mounting to a drywall or plaster wall, you should attach the wall plate
to a 2X4 or larger wood stud to avoid property damage or personal injury.
1. Locate a stud in the wall
where you want to mount
the screen.
2. Drill pilot holes with a 1/8”
drill bit.
3. Attach the wall plate to a
stud using the provided
black 2” long screws.
K1 & K2 Series Manual 6.0W X 4 R1.indd 12/15/2005, 8:57 AM4
5
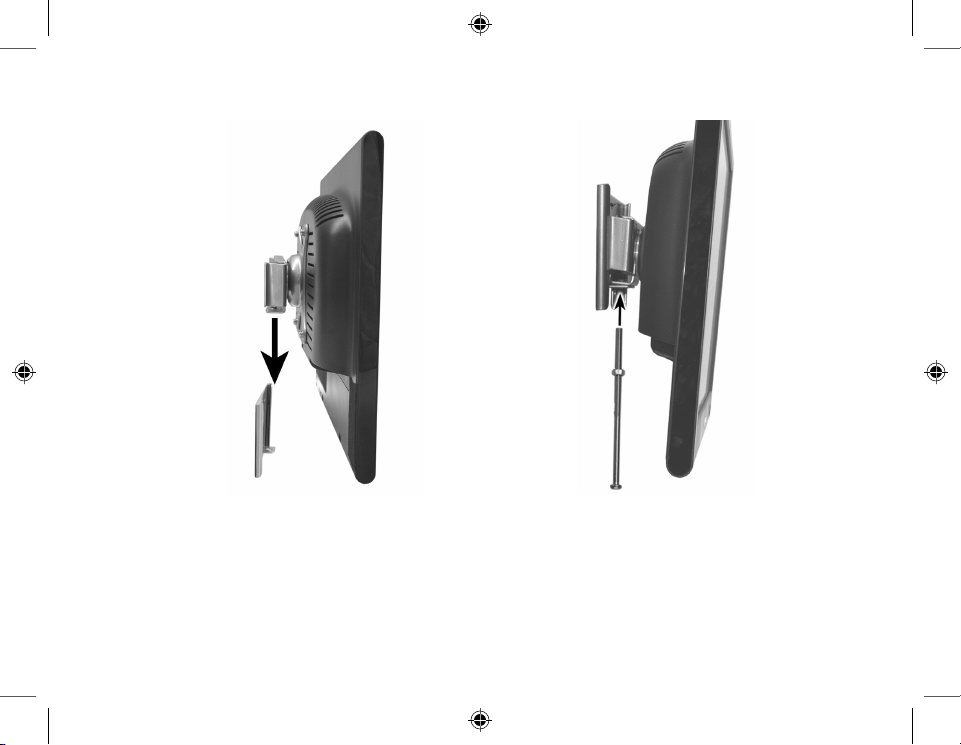
Attach the Screen to the Wall Plate
1. Push the screen plate against
the wall plate and then let it
slide down into place.
2. Fasten the screw through
the screw hole in the bottom
of the bracket until it seats
against the nut.
K1 & K2 Series Manual 6.0W X 4 R1.indd 12/15/2005, 8:57 AM5
6
7
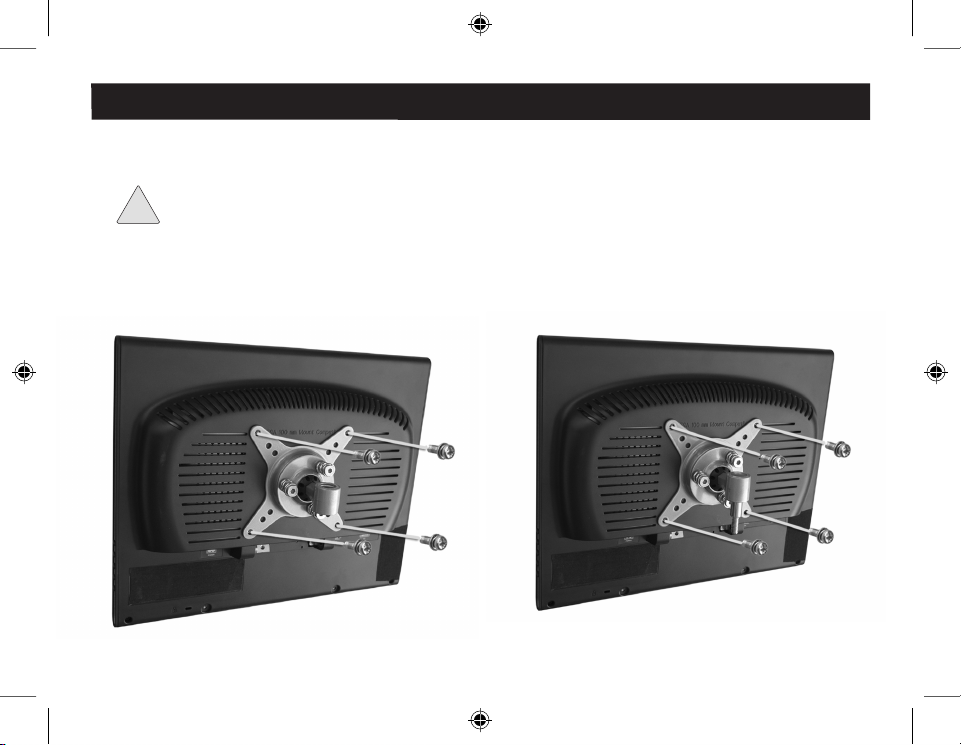
K1-TS-S & K1-A1-S Installation
Attach the Screen Plate to the Screen
!
Caution: With the screen plate in place, test the screw length to ensure that
they do not extend past the screen hole depth and damage the screen.
1. Position the screen plate on the screen as shown.
2. Attach the plate with the original screen screws. If they are not long
enough to securely mount the screen, try the included screws.
K1-TS-S K1-A1-S
K1 & K2 Series Manual 6.0W X 4 R1.indd 12/15/2005, 8:57 AM6
 Loading...