

Küppersbusch EMWK6260 User Manual

BEDIENUNGS- UND MONTAGE
ANWEISUNG
EN User Manual
EMWK6260

28
EN
Contents
ContentsContents
Contents
Safety Instructions
Safety InstructionsSafety Instructions
Safety Instructions ................................................................................................................................. 29
Installation instructions
Installation instructionsInstallation instructions
Installation instructions ........................................................................................................................... 31
The advantages of microwaves
The advantages of microwavesThe advantages of microwaves
The advantages of microwaves ................................................................................................................ 32
Description of microwave oven
Description of microwave ovenDescription of microwave oven
Description of microwave oven ................................................................................................................ 33
Basic settings
Basic settingsBasic settings
Basic settings ........................................................................................................................................ 35
Basic functions
Basic functionsBasic functions
Basic functions ...................................................................................................................................... 36
When the oven is working...
When the oven is working...When the oven is working...
When the oven is working... .................................................................................................................... 40
Defrosting
DefrostingDefrosting
Defrosting ............................................................................................................................................. 41
Cooking with a microwave oven
Cooking with a microwave ovenCooking with a microwave oven
Cooking with a microwave oven ............................................................................................................... 43
Cooking with the grill
Cooking with the grillCooking with the grill
Cooking with the grill .............................................................................................................................. 45
What kind of ovenware can be us
What kind of ovenware can be usWhat kind of ovenware can be us
What kind of ovenware can be used?
ed?ed?
ed? ........................................................................................................ 48
Oven Cleaning and Maintenance
Oven Cleaning and MaintenanceOven Cleaning and Maintenance
Oven Cleaning and Maintenance ............................................................................................................... 50
What should I do if the oven doesn’t work?
What should I do if the oven doesn’t work?What should I do if the oven doesn’t work?
What should I do if the oven doesn’t work? ............................................................................................... 52
Technical characteristics
Technical characteristicsTechnical characteristics
Technical characteristics ......................................................................................................................... 53
Installation
InstallationInstallation
Installation ............................................................................................................................................ 55
Dear Costumer:
Thank you for choosing this Küppe
KüppeKüppe
Küppersbusch
rsbuschrsbusch
rsbusch product.
We ask you to read the instructions in this booklet very carefully as this will allow you to get the best results from
using it.
KEEP THE DOCUMENTATION OF THIS PRODUCT FOR FUTURE REFERENCE.
Always keep the instruction manual handy. If you
Always keep the instruction manual handy. If you Always keep the instruction manual handy. If you
Always keep the instruction manual handy. If you lend the Steam oven to someone else give them the manual as
lend the Steam oven to someone else give them the manual as lend the Steam oven to someone else give them the manual as
lend the Steam oven to someone else give them the manual as
well!
well!well!
well!
The user manual is also available for download at
www.kueppersbusch.de.

29
EN
Safety Instructions
Safety Instructions Safety Instructions
Safety Instructions
• Warning!
Warning!Warning!
Warning! Do not leave the oven
unsupervised.
• Warning!
Warning!Warning!
Warning! If you see smoke or fire,
keep the door closed in order to
smother the flames. Switch off the
oven and take the plug out of the
socket or cut off the oven power
supply.
• WARNING: The appliance and its
WARNING: The appliance and its WARNING: The appliance and its
WARNING: The appliance and its
accessible p
accessible paccessible p
accessible parts become hot during
arts become hot during arts become hot during
arts become hot during
use.
use.use.
use.
Care should be taken to avoid
Care should be taken to avoid Care should be taken to avoid
Care should be taken to avoid
touching heating elements. Children
touching heating elements. Children touching heating elements. Children
touching heating elements. Children
less than 8 years of age shall be kept
less than 8 years of age shall be kept less than 8 years of age shall be kept
less than 8 years of age shall be kept
away unless continuously
away unless continuously away unless continuously
away unless continuously
supervised.
supervised.supervised.
supervised.
• This appliance can be used by
This appliance can be used by This appliance can be used by
This appliance can be used by
children aged from 8 years and
children aged from 8 years and children aged from 8 years and
children aged from 8 years and
above and persons with re
above and persons with reabove and persons with re
above and persons with reduced
duced duced
duced
physical, sensory or mental capa
physical, sensory or mental capaphysical, sensory or mental capa
physical, sensory or mental capa
bilities or lack of experience and
bilities or lack of experience and bilities or lack of experience and
bilities or lack of experience and
knowledge if they have been given
knowledge if they have been given knowledge if they have been given
knowledge if they have been given
supervision or instruction
supervision or instruction supervision or instruction
supervision or instruction
concerning use of the appliance in a
concerning use of the appliance in a concerning use of the appliance in a
concerning use of the appliance in a
safe way and understand the hazards
safe way and understand the hazards safe way and understand the hazards
safe way and understand the hazards
involved. Children shall not play with
involved. Children shall not play with involved. Children shall not play with
involved. Children shall not play with
the appli
the applithe appli
the appliance. Cleaning and user
ance. Cleaning and user ance. Cleaning and user
ance. Cleaning and user
maintenance shall not be made by
maintenance shall not be made by maintenance shall not be made by
maintenance shall not be made by
children without supervision.
children without supervision.children without supervision.
children without supervision.
• Children must be supervised to
ensure that they do not play with the
appliance. Use the safety locks.
• Warning!
Warning!Warning!
Warning! During use the appliance
becomes very hot. Care should be
taken to avoid touching heating
elements inside the oven. RISK OF
RISK OF RISK OF
RISK OF
BURNS!
BURNS!BURNS!
BURNS!
• Warning!
Warning!Warning!
Warning! Accessible parts may
become hot during use. Young
children should be kept away.
• Warning! When opening the door
Warning! When opening the door Warning! When opening the door
Warning! When opening the door
during or upon completion of the
during or upon completion of the during or upon completion of the
during or upon completion of the
cooking cycle, be careful of t
cooking cycle, be careful of tcooking cycle, be careful of t
cooking cycle, be careful of the flow
he flow he flow
he flow
of hot air and/or steam and water
of hot air and/or steam and water of hot air and/or steam and water
of hot air and/or steam and water
drops coming out of the cooking
drops coming out of the cooking drops coming out of the cooking
drops coming out of the cooking
chamber.
chamber. chamber.
chamber. Step back or to the side to
Step back or to the side to Step back or to the side to
Step back or to the side to
avoid burns.
avoid burns.avoid burns.
avoid burns.
• Warning!
Warning!Warning!
Warning! Make sure you never catch
the power cables of other electrical
appliances in the hot door or the
oven. The cable insulation may melt.
Danger of short
Danger of shortDanger of short
Danger of short----circuiting!
circuiting!circuiting!
circuiting!
This oven is exclusively for domestic use!
This oven is exclusively for domestic use!This oven is exclusively for domestic use!
This oven is exclusively for domestic use!
The appliance is designed for use in the
The appliance is designed for use in the The appliance is designed for use in the
The appliance is designed for use in the
home for preparing food. No liability is
home for preparing food. No liability is home for preparing food. No liability is
home for preparing food. No liability is
assumed for any damage caused by
assumed for any damage caused by assumed for any damage caused by
assumed for any damage caused by
improper or incorrect use.
improper or incorrect use.improper or incorrect use.
improper or incorrect use.

30
EN
Safety Instructions
Safety Instructions Safety Instructions
Safety Instructions
Avoid
Avoid Avoid
Avoid damaging the oven or other
damaging the oven or other damaging the oven or other
damaging the oven or other
dangerous situations by following these
dangerous situations by following these dangerous situations by following these
dangerous situations by following these
instructions:
instructions:instructions:
instructions:
• Please cover the socket inside the
Please cover the socket inside the Please cover the socket inside the
Please cover the socket inside the
oven as you are not using the food
oven as you are not using the food oven as you are not using the food
oven as you are not using the food
probe.
probe.probe.
probe. This will prevent possible
damages.
. .
.
• Only use the recommended food
Only use the recommended food Only use the recommended food
Only use the recommended food
probe for this oven.
probe for this oven.probe for this oven.
probe for this oven.
• This will prevent possible damages
on the appliance
• Do not cover or obstruct the
ventilation openings
ventilation openingsventilation openings
ventilation openings.
• Do not keep any inflammable object
inflammable object inflammable object
inflammable object
inside the oven as it may burn if the
oven is switched on.
• Do not use the oven as a pantry
pantrypantry
pantry.
• Do not pour spirits (e.g. brandy,
whisky, schnapps, etc.) over hot
food. Danger of explosion!
• Accessories such as wire racks and
trays, etc. get hot in the cooking
space. Always wear protective gloves
or use oven cloths.
• To avoid being burnt
To avoid being burntTo avoid being burnt
To avoid being burnt, always use
oven gloves for handling dishes and
containers and touching the oven.
• Do not lean or sit on the open oven
Do not lean or sit on the open oven Do not lean or sit on the open oven
Do not lean or sit on the open oven
door.
door.door.
door. This may damage the oven,
especially in the hinge zone. The
door can bear a maximum weight of
8 kg.
• The racks can bear a maximum load
of 8 kg. To avoid damaging the oven,
do not exceed this load.
Cleaning:
Cleaning:Cleaning:
Cleaning:
• The appliance will remain hot for
some time after it is switched off and
cool down only slowly to room
temperature. Please allow sufficient
time for the appliance to cool down
before, for instance, cleaning it.
• Do not use harsh abrasive cleaners
or sharp metal scrapers to clean the
oven door glass since they can
scratch the surface, which may result
in shattering of the glass.
• Do not use high pressure or steam
jet cleaning appliances.
• Please follow the instructions
regarding cleaning in the section
“Oven Cleaning and Maintenance”.
Repairs:
Repairs:Repairs:
Repairs:
• If the power cable is damaged it
should be substituted by the
manufacturer, authorised agents or
technicians qualified for this task in
order to avoid dangerous situations.
Furthermore, special tools are
required for this task.
Repair and maintenance work, especially
of current carrying parts, can only be
carried out by technicians authorized by
the manufacturer.
31
EN
Installation instructions
Installation instructions Installation instructions
Installation instructions
Before insta
Before instaBefore insta
Before installation
llation llation
llation
Check that the input voltage
Check that the input voltage Check that the input voltage
Check that the input voltage indicated on the
characteristics plate is the same as the voltage of the
power outlet you are going to use.
Open the oven door and take out all the accessories
take out all the accessories take out all the accessories
take out all the accessories and
remove the packing material.
Do not remove the mica co
Do not remove the mica coDo not remove the mica co
Do not remove the mica cover
verver
ver on the ceiling of the
interior! This cover stops fat and pieces of food
damaging the microwave generator.
Warning!
Warning!Warning!
Warning! The front surface of the oven may be wrapped
with a protective film
protective filmprotective film
protective film. Before using the oven for the first
time, carefully remove this film, starting on the inside.
Make sure that the oven is not damaged in any way.
Make sure that the oven is not damaged in any way.Make sure that the oven is not damaged in any way.
Make sure that the oven is not damaged in any way.
Check that the oven door closes correctly and that the
interior of the door and the front of the oven opening are
not damaged. If you find any damage contact the
Technical Assistance Service.
DO NOT USE THE OVEN
DO NOT USE THE OVENDO NOT USE THE OVEN
DO NOT USE THE OVEN if the power cable or the plug
are damaged, if the oven does not function correctly or
if it has been damaged or dropped. Contact the
Technical Assistance Service.
Put the oven on a flat and stable surface. The oven must
not be put close to any sources of heat, radios or
televisions.
During installation, make sure that the power cable does
During installation, make sure that the power cable does During installation, make sure that the power cable does
During installation, make sure that the power cable does
not come into contact with any moisture or objects with
not come into contact with any moisture or objects with not come into contact with any moisture or objects with
not come into contact with any moisture or objects with
sharp edges behind the oven. High temperatures can
sharp edges behind the oven. High temperatures can sharp edges behind the oven. High temperatures can
sharp edges behind the oven. High temperatures can
damage the cable.
damage the cable.damage the cable.
damage the cable.
Warning: aft
Warning: aftWarning: aft
Warning: after the oven is installed you must make sure
er the oven is installed you must make sure er the oven is installed you must make sure
er the oven is installed you must make sure
you can access the plug.
you can access the plug.you can access the plug.
you can access the plug.
After installation
After installation After installation
After installation
The oven is equipped with a power cable and a plug for
single phase current.
If the oven is to be installed on a permanent basis
If the oven is to be installed on a permanent basis If the oven is to be installed on a permanent basis
If the oven is to be installed on a permanent basis it
should be installed by a qualified technician. In such a
case, the oven should be connected to a circuit with an
all-pole circuit breaker with a minimum separation of 3
mm between contacts.
WARNING: THE OVEN MUST BE EARTHED.
WARNING: THE OVEN MUST BE EARTHED.WARNING: THE OVEN MUST BE EARTHED.
WARNING: THE OVEN MUST BE EARTHED.
The manufacturer and retailers do not accept
The manufacturer and retailers do not accept The manufacturer and retailers do not accept
The manufacturer and retailers do not accept
responsibility
responsibilityresponsibility
responsibility for any damage that may be caused to
people, animals or property if these installation
instructions are not observed.
The oven only functions
The oven only functionsThe oven only functions
The oven only functions when the door is closed
correctly.
After the first use, clean the inside of the oven and the
accessories, following the cleaning instructions given in
the section “Oven cleaning and maintenance”.
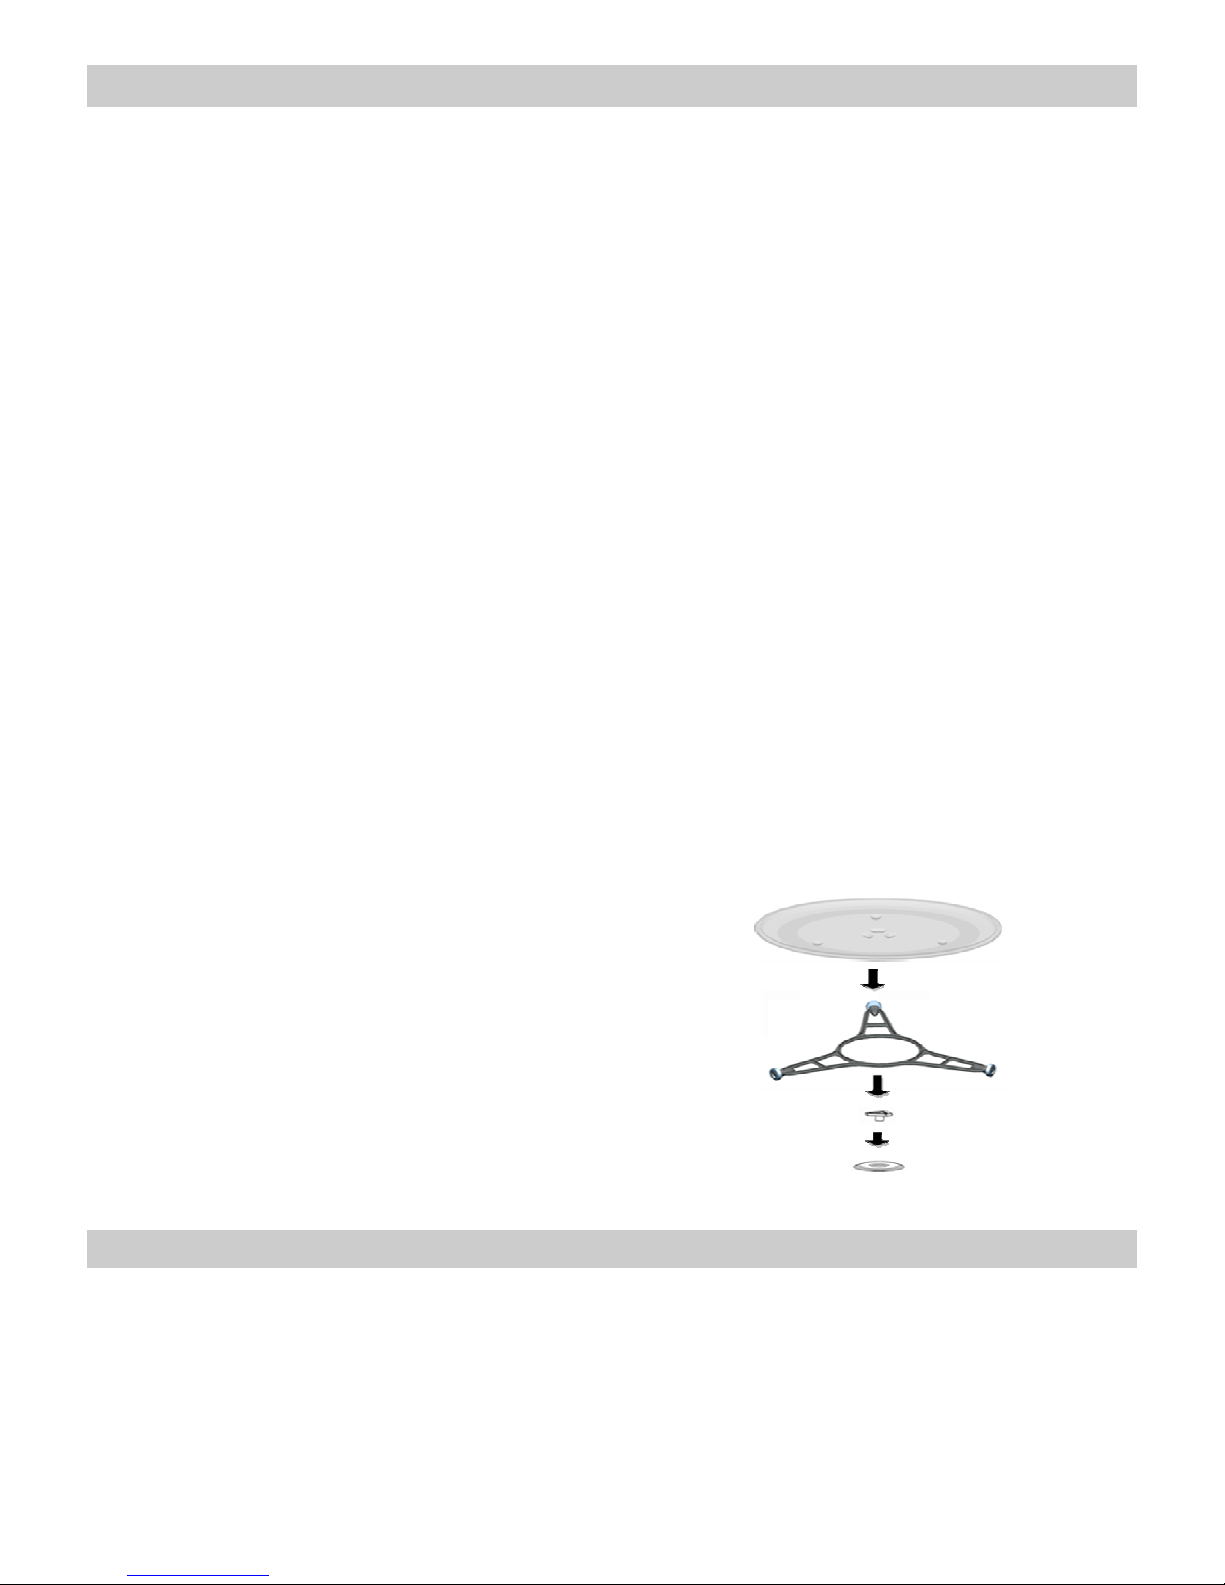
Fit the Turntable support in the centre of the oven cavity
and put the Turntable ring and the Turntable plate on
top, making sure they slot in. Whenever you use the
microwave, the turntable plate and the respective
accessories must be inside and correctly fitted. The
The The
The
turntable plate can rotate in both directions.
turntable plate can rotate in both directions.turntable plate can rotate in both directions.
turntable plate can rotate in both directions.
During installation,
During installation,During installation,
During installation, follow the instructions supplied separately.

32
EN
The advantages of microwaves
The advantages of microwaves The advantages of microwaves
The advantages of microwaves
In conventional ovens, heat radiated by electrical
elements or gas burners slowly penetrates the food from
outside to inside. On account of this there is a major
amount of energy is wasted heating the air, the oven
components and the food containers.
In a microwave oven, heat is generated by the food itself
and the heat travels from inside to outside. No heat is
lost to the air, the walls of the oven cavity or the dishes
and containers (if these are suitable for use in
microwave oven), in other words, only the food is
heated.
Microwave ovens have the following advantages:
1. Shorter cooking times; in general these are up to
3/4 less than the time required for conventional
cooking.
2. Ultra-fast food defrosting, thus reducing the
danger of bacterial development.
3. Energy savings.
4. Conservation of the nutritional value of foods due
to the shorter cooking times.
5. Easy to clean.
How a microwave oven works
How a microwave oven worksHow a microwave oven works
How a microwave oven works
In a microwave oven there is a high tension valve called
a magnetron which converts electrical energy into
microwave energy. These electromagnetic waves are
channelled to the interior of the oven through a wave
guide and distributed by a metallic spreader or through
a turntable.
Inside the oven the microwaves propagate in all
directions and are reflected by the metal walls, uniformly
penetrating the food.
Why food heats up
Why food heats upWhy food heats up
Why food heats up
Most foods contain water and water molecules vibrate
when subjected to microwaves.
The friction between molecules produces heat which
raises the temperature of the food, de-freezing it,
cooking it or keeping it hot.
Since the heat arises inside the food:
• This can be cooked with little or no liquid or
fats/oils;
• De-freezing, heating or cooking in a microwave
oven is quicker than in a conventional oven;
• The vitamins, minerals and nutritional substances
in the food are conserved;
• The natural colour and aroma of the food are
unchanged.
Microwaves pass through china, glass, cardboard or
plastic but do not go through metal. For this reason,
metal containers or ones with metal parts must not be
used in a microwave oven.
Microwaves are reflected by metal...
... but go through glass and china...
and are absorbed by foods.
33
EN
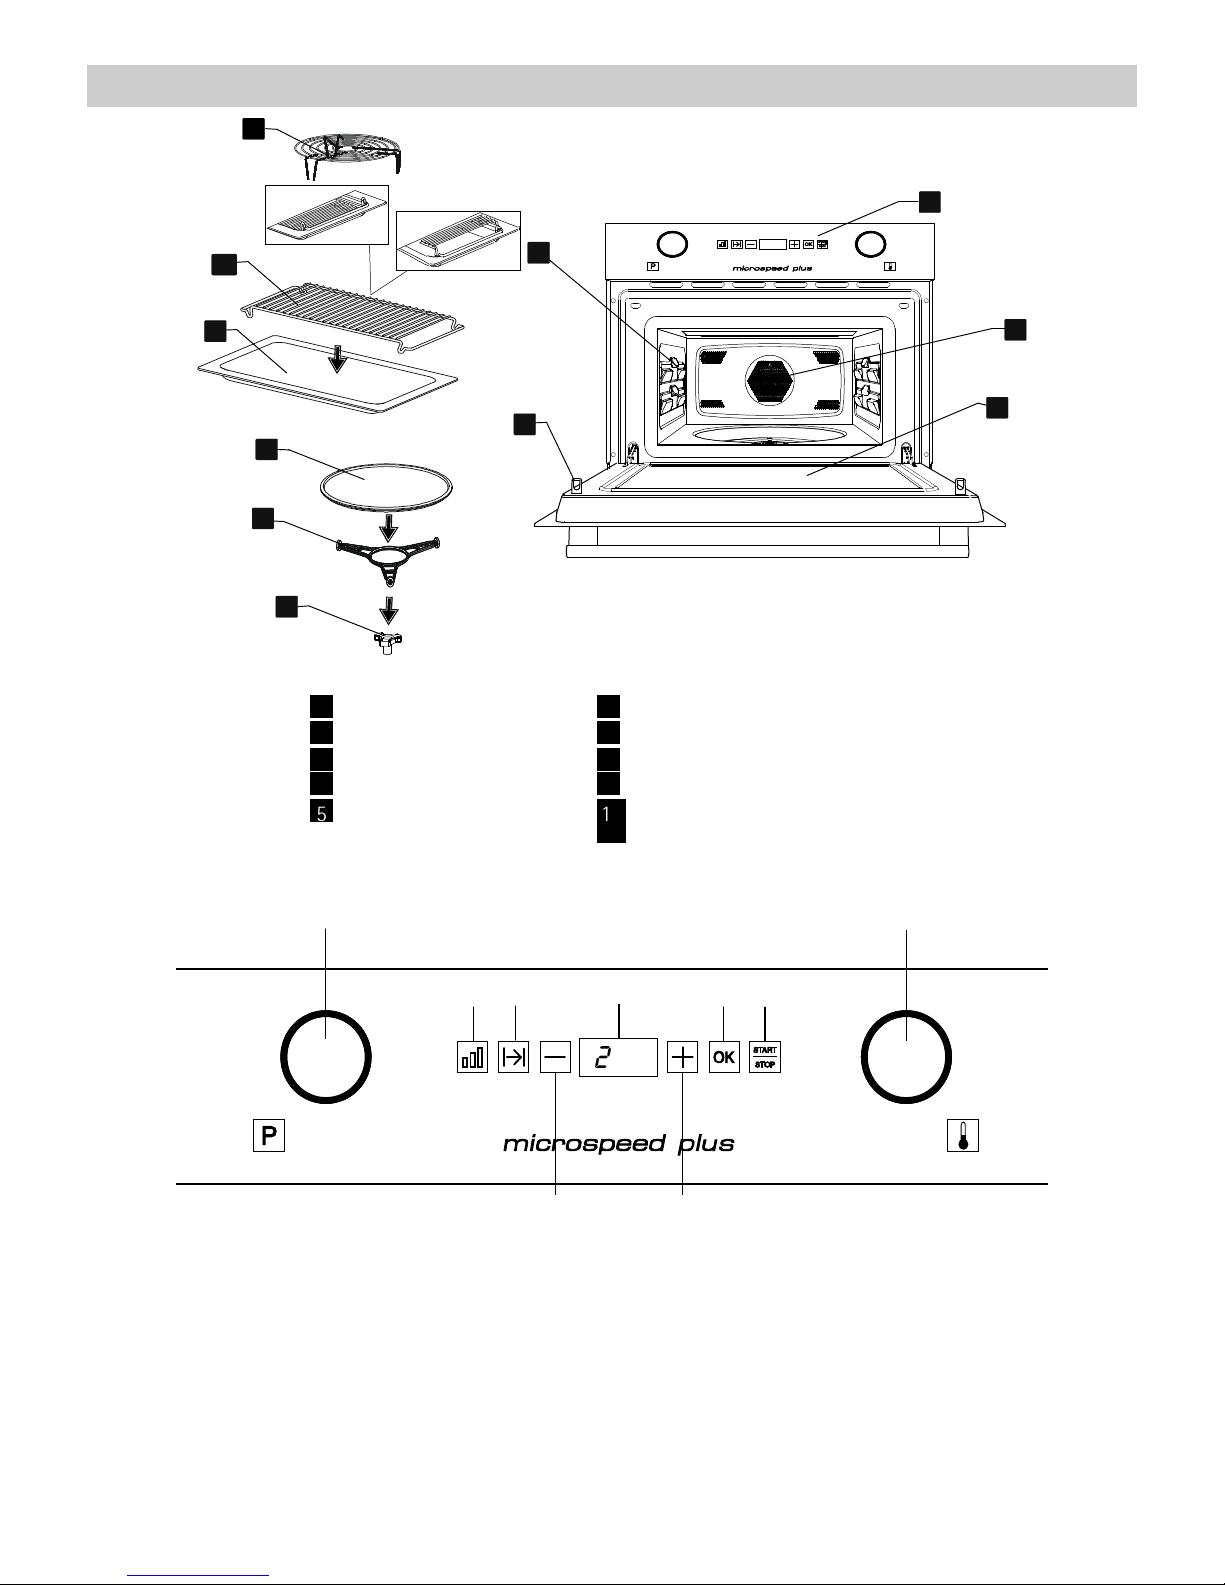
Description of microwave oven
Description of microwave ovenDescription of microwave oven
Description of microwave oven
1
5
2
3
4
6
7
9
8
10
11
12:45
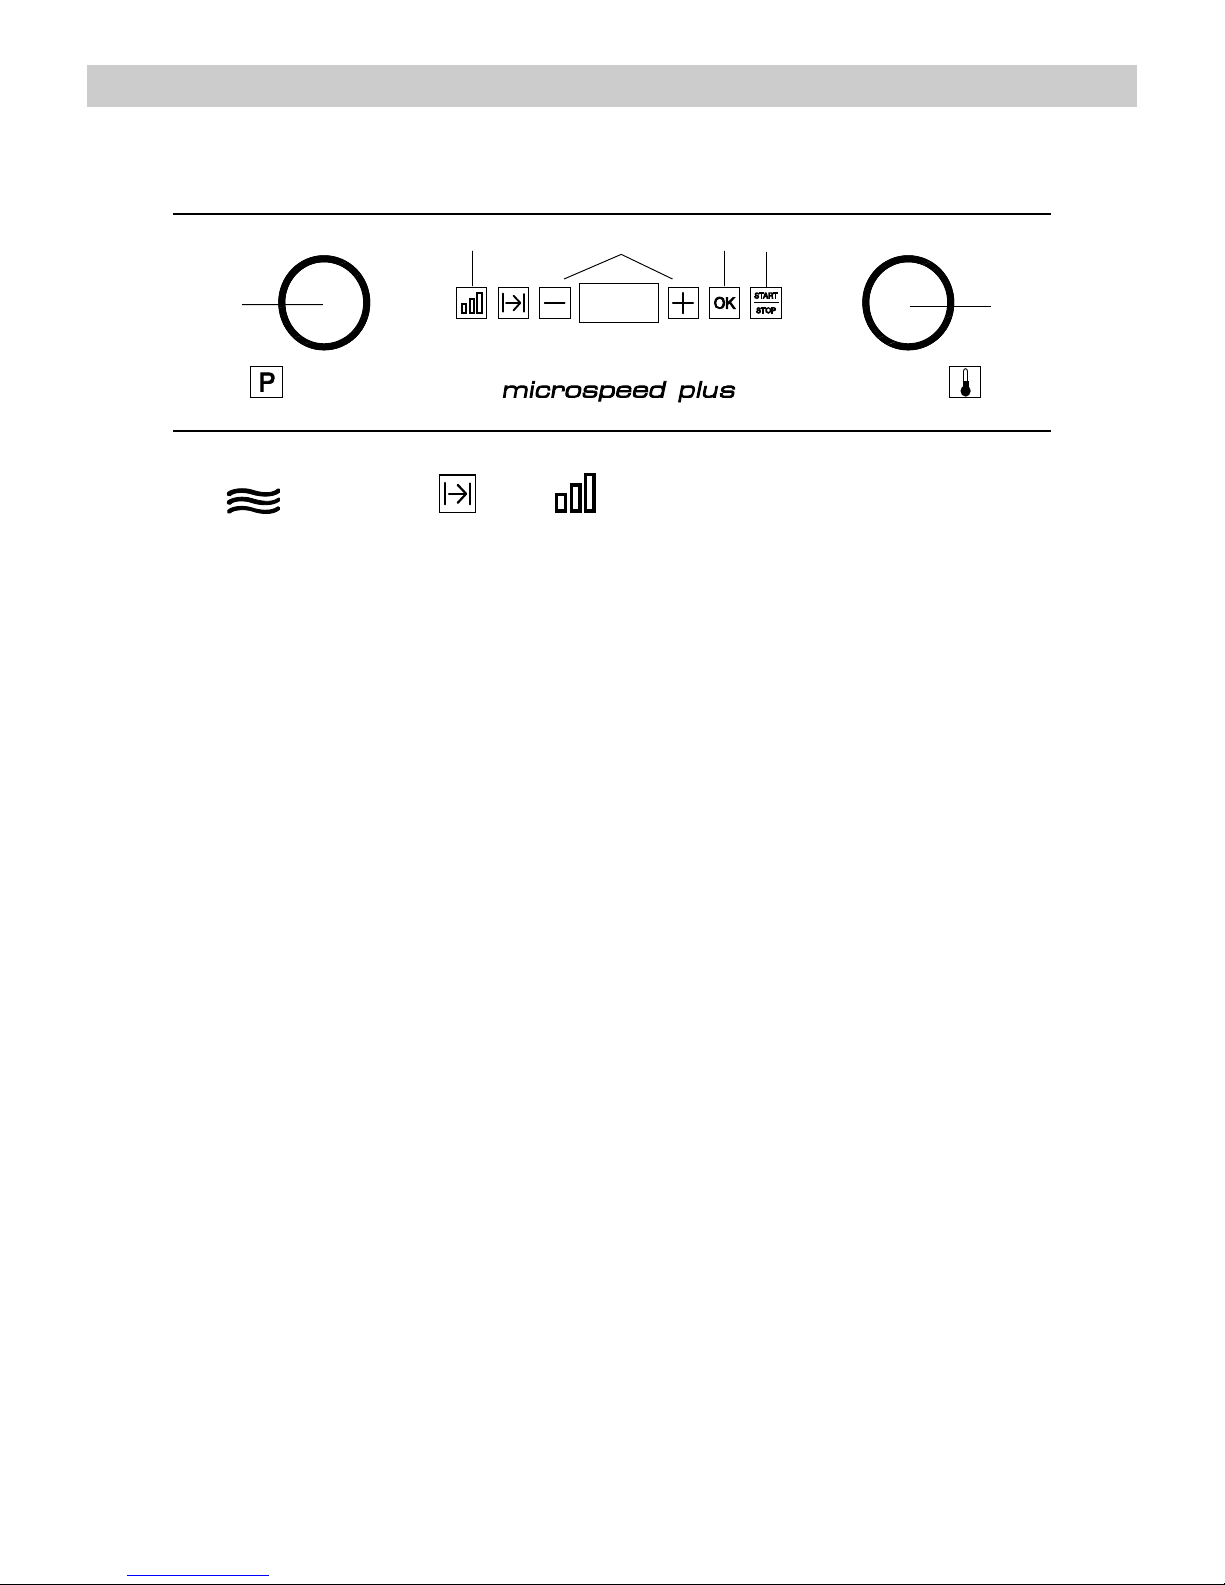
Control panel
Turntable support
Door window glass
Turntable ring
Lateral supports
Turn
table plate
Catches
Rectangular Glass tray
Hot Air Output
Rectangular Rack
Low Grill
12:45
2
5
1
8
4
4
7
3
9
6
1.
1.1.
1. – Function Selector 6.
6.6.
6. – ”-“ Key
2.
2.2.
2. – Display 7.
7.7.
7. – Start/Stop key
3.
3. 3.
3. –––– Temperature selector
4.
4.4.
4. – Power selector key
5.
5.5.
5. – “+” Key
8.
8.8.
8. – Duration key
9.
9.9.
9. – Confirmation key / Child lock key

34
EN
Description of microwave oven
Description of microwave ovenDescription of microwave oven
Description of microwave oven
Description of Functions
Description of Functions Description of Functions
Description of Functions
Function
FunctionFunction
Function
Microwaves Power
Microwaves PowerMicrowaves Power
Microwaves Power
Foods
FoodsFoods
Foods
Microwave
150 W
Slow defrosting for delicate foods; keeping food hot
300 W
Cooking with little heat; boiling rice. Rapid defrosting
550 W
Melting butter. Heating baby food
750 W
Cooki
ng vegetables and food. Cooking and heating carefully. Heating
and cooking small portions of food. Heating delicate food
1000 W
Cooking and rapidly heating liquids and pre-cooked foods
Microwave
+ Grill
150 W
Toasting food
300 W
Grilling poultry and meat
550 W
Cooking pies and cheese-topped dishes
750 W
Use carefully: food might burn.
1000 W
Use carefully: food might burn.
Grill
---
Grilling food
Hot – Air
---
Microwave +
Hot-Air
---
Grill + Hot-Air
---

35
EN
BBBBasic settings
asic settings asic settings
asic settings
Setting the clock
Setting the clock Setting the clock
Setting the clock
After your microwave oven is first plugged-in or after a power failure, the clock display will flash to indicate that the
time shown is not correct.
12:45
3,5
1,2,4
1. Press the “+“ and “-“ keys until the current
current current
current time
time time
time
display flashes. Press the start
start start
start key
keykey
key until the hour
flashes (not necessary when you have just
plugged it in or after a power cut).
2. Press the “+” or “-“keys until the hour flashes.
(Key the hour symbol until it flashes.)
3. Press the OK
OKOK
OK key
key key
key to confirm the hour set.
4. To set the minutes, press the “+” or “-“keys until
the minute flashes.
5. Press the OK
OKOK
OK key
key key
key to confirm the minute.
Child lock key
Child lock keyChild lock key
Child lock key
12:45
1,2
1. - You can hide the clock by pressing the OK key for 3
seconds.
2. - If you want to see the clock display again, press the
OK key again for 3 seconds.
36
EN
Basic Settings
Basic SettingsBasic Settings
Basic Settings
Microwave
Microwave Microwave
Microwave
Use this function to cook and heat up vegetables, potatoes, rice, fish and meat.
12:45
2,4 5
1
6
73
1. Turn the function selector
function selector function selector
function selector to the microwave
position . The duration power
icon and the numbers begin to flash.
2. With the “+” and “-“keys, select the desired power
power power
power
level
levellevel
level.
3. Press the “OK” key.
4. With the “+” and “-“keys, select the duration
durationduration
duration.
5. Press the “OK” key.
6. Spin the temperature selector of the microwave in
the wanted position.
7. Press the SSSStart
tarttart
tart/Stop
/Stop/Stop
/Stop key
keykey
key. The Oven will start to
operate.
 Loading...