

Kärcher HD 10-23-4 SX Plus operation manual
HD 10/23-4 S
HD 10/23-4 SX
Deutsch 6
English 15
Français 24
Italiano 34
Nederlands 44
Español 54
Português 64
Dansk 74
Norsk 83
Svenska 92
Suomi 101
Ελληνικά 110
Türkçe 120
Русский 129
Magyar 140
Čeština 149
Slovenščina 158
Polski 167
Româneşte 177
Slovenčina 187
Hrvatski 196
Srpski 205
Български 214
Eesti 225
Latviešu 234
Lietuviškai 243
Українська 252
001
59668640 07/16

2

3
HD 10/23-4 S
4
HD 10/23-4 SX
5

Lesen Sie vor der ersten Benut-
zung Ihres Gerätes diese Originalbetriebsanleitung, handeln Sie danach
und bewahren Sie diese für späteren Gebrauch oder für Nachbesitzer auf.
Inhaltsverzeichnis
Geräteelemente . . . . . . . . . . . DE 1
Sicherheitshinweise . . . . . . . . DE 1
Bestimmungsgemäße Verwen-
dung . . . . . . . . . . . . . . . . . . . . DE 2
Sicherheitseinrichtungen. . . . . DE 2
Umweltschutz . . . . . . . . . . . . . DE 3
Vor Inbetriebnahme. . . . . . . . . DE 3
Inbetriebnahme. . . . . . . . . . . . DE 4
Bedienung. . . . . . . . . . . . . . . . DE 4
Transport. . . . . . . . . . . . . . . . . DE 6
Lagerung. . . . . . . . . . . . . . . . . DE 6
Pflege und Wartung . . . . . . . . DE 6
Hilfe bei Störungen . . . . . . . . . DE 7
Zubehör und Ersatzteile . . . . . DE 8
Garantie . . . . . . . . . . . . . . . . . DE 8
EU-Konformitätserklärung. . . . DE 8
Technische Daten . . . . . . . . . . DE 9
Geräteelemente
siehe Umschlagseite
1 Handspritzpistole EASY!Lock
2 Abzugshebel
3 Sicherungshebel
4 Hochdruckschlauch EASY!Lock
5 Halter für Handspritzpistole
6 Reinigungsmittel-Dosierventil
7 Verschlussdeckel für Reinigungsmittel-
tank
8 Reinigungsmitteltank
9 Reinigungsmittel-Saugschlauch mit Filter
10 Befestigungsschraube Gerätehaube
11 Geräteschalter
12 Gerätehaube
13 Manometer
14 Hochdruckanschluss EASY!Lock
15 Düsenablage
16 Wasseranschluss
17 Feinfilter
18 Ölstandsanzeige
19 Ölbehälter
20 Schlauchablage
21 Entlüftung Reinigungsmitteltank
22 Zubehörfach
23 Kabelhalter
24 Schlauchtrommel
25 Kurbel
26 Griff
27 Überwurfmutter
28 Düse
29 Strahlrohr EASY!Lock
30 Druck-/Mengenregulierung
(nur 1.286-911.0)
31 Sicherungsraste
Farbkennzeichnung
– Bedienelemente für den Reinigungs-
prozess sind gelb.
– Bedienelemente für die Wartung und
den Service sind hellgrau.
Sicherheitshinweise
– Vor erster Inbetriebnahme Sicherheits-
hinweise Nr. 5.951-949.0 unbedingt lesen!
– Jeweilige nationale Vorschriften des
Gesetzgebers für Flüssigkeitsstrahler
beachten.
– Jeweilige nationale Vorschriften des
Gesetzgebers zur Unfallverhütung beachten. Flüssigkeitsstrahler müssen regelmäßig geprüft und das Ergebnis der
Prüfung schriftlich festgehalten werden.
– Am Gerät/Zubehör dürfen keine Verän-
derungen vorgenommen werden.
Gefahrenstufen
GEFAHR
Hinweis auf eine unmittelbar drohende Gefahr, die zu schweren Körperverletzungen
oder zum Tod führt.
몇 WARNUNG
Hinweis auf eine möglicherweise gefährliche Situation, die zu schweren Körperverletzungen oder zum Tod führen kann.
몇 VORSICHT
Hinweis auf eine möglicherweise gefährliche Situation, die zu leichten Verletzungen
führen kann.
ACHTUNG
Hinweis auf eine möglicherweise gefährliche Situation, die zu Sachschäden führen
kann.
6 DE
– 1
Symbole auf dem Gerät
Hochdruckstrahlen können bei
unsachgemäßem Gebrauch gefährlich sein. Der Strahl darf nicht auf Personen, Tiere, aktive elektrische Ausrüstung
oder auf das Gerät selbst gerichtet werden.
Gemäß gültiger Vorschriften darf
das Gerät nie ohne Systemtrenner
am Trinkwassernetz betrieben
werden. Es ist ein geeigneter Systemtrenner der Fa. KÄRCHER oder alternativ ein Systemtrenner gemäß EN 12729
Typ BA zu verwenden.
Wasser, das durch einen Systemtrenner
geflossen ist, wird als nicht trinkbar eingestuft.
몇 VORSICHT
Systemtrenner immer an der Wasserversorgung, niemals direkt am Gerät anschließen.
Bestimmungsgemäße
Verwendung
Diesen Hochdruckreiniger ausschließlich
verwenden
– zum Reinigen mit dem Niederdruck-
strahl und Reinigungsmittel (z.B. Reinigen von Maschinen, Fahrzeugen, Bauwerken, Werkzeugen),
– zum Reinigen mit Hochdruckstrahl
ohne Reinigungsmittel (z.B. Reinigen
von Fassaden, Terrassen, Gartengerä-
ten).
Für hartnäckige Verschmutzungen empfehlen wir den Dreckfräser als Sonderzubehör.
Anforderungen an die Wasserqualität:
ACHTUNG
Als Hochdruckmedium darf nur sauberes
Wasser verwendet werden. Verschmutzungen führen zu vorzeitigem Verschleiß oder
Ablagerungen im Gerät.
Wird Recyclingwasser verwendet, dürfen
folgende Grenzwerte nicht überschritten
werden.
pH-Wert 6,5...9,5
elektrische Leitfähigkeit * Leitfähigkeit
Frischwasser
+1200 µS/cm
absetzbare Stoffe ** < 0,5 mg/l
abfiltrierbare Stoffe *** < 50 mg/l
Kohlenwasserstoffe < 20 mg/l
Chlorid < 300 mg/l
Sulfat < 240 mg/l
Kalzium < 200 mg/l
Gesamthärte < 28 °dH
< 50 °TH
< 500 ppm
(mg CaCO
Eisen < 0,5 mg/l
Mangan < 0,05 mg/l
Kupfer < 2 mg/l
Aktivchlor < 0,3 mg/l
frei von üblen Gerüchen
* Maximum insgesamt 2000 µS/cm
** Probevolumen 1 l, Absetzzeit 30 min
*** keine abrasiven Stoffe
/l)
3
Sicherheitseinrichtungen
Sicherheitseinrichtungen dienen dem
Schutz des Benutzers und dürfen nicht außer Betrieb gesetzt oder in ihrer Funktion
umgangen werden.
Überströmventil mit Druckschalter
Beim Reduzieren der Wassermenge mit
der Druck-/Mengenregulierung öffnet das
Überströmventil und ein Teil des Wassers
fließt zur Pumpensaugseite zurück.
Wird der Abzugshebel an der Handspritzpistole losgelassen, schaltet der Druckschalter die Pumpe ab, der Hochdruckstrahl stoppt. Wird der Abzugshebel gezogen, schaltet die Pumpe wieder ein.
Überströmventil und Druckschalter sind
werkseitig eingestellt und plombiert. Einstellung nur durch den Kundendienst.
Bei zu hoher Stromaufnahme schaltet der
Motorschutzschalter das Gerät ab.
– 2
7DE
Umweltschutz
2.
1.
Die Verpackungsmaterialien sind
recyclebar. Bitte werfen Sie die
Verpackungen nicht in den Hausmüll, sondern führen Sie diese einer Wiederverwertung zu.
Altgeräte enthalten wertvolle recyclingfähige Materialien, die einer
Verwertung zugeführt werden sollten. Batterien, Öl und ähnliche
Stoffe dürfen nicht in die Umwelt
gelangen. Bitte entsorgen Sie Altgeräte deshalb über geeignete
Sammelsysteme.
Elektrische und elektronische Geräte enthalten oft Bestandteile, die bei falschem
Umgang oder falscher Entsorgung eine potentielle Gefahr für die menschliche Gesundheit und die Umwelt darstellen können. Für den ordnungsgemäßen Betrieb
des Gerätes sind diese Bestandteile jedoch
notwendig. Mit diesem Symbol gekennzeichnete Geräte dürfen nicht mit dem
Hausmüll entsorgt werden.
Hinweise zu Inhaltsstoffen (REACH)
Aktuelle Informationen zu Inhaltsstoffen finden Sie unter:
www.kaercher.de/REACH
Vor Inbetriebnahme
Auspacken
Packungsinhalt beim Auspacken prüfen.
–
– Bei Transportschaden sofort Händler
informieren.
Ölstand kontrollieren
Ölstandsanzeige bei stehendem Gerät
ablesen. Der Ölstand muss oberhalb
der beiden Zeiger liegen.
Entlüftung Ölbehälter aktivieren
Befestigungsschraube der Gerätehau-
be herausdrehen, Gerätehaube abnehmen.
Spitze des Ölbehälterdeckels ab-
schneiden.
Gerätehaube befestigen.
Handspritzpistole, Strahlrohr und
Düse montieren
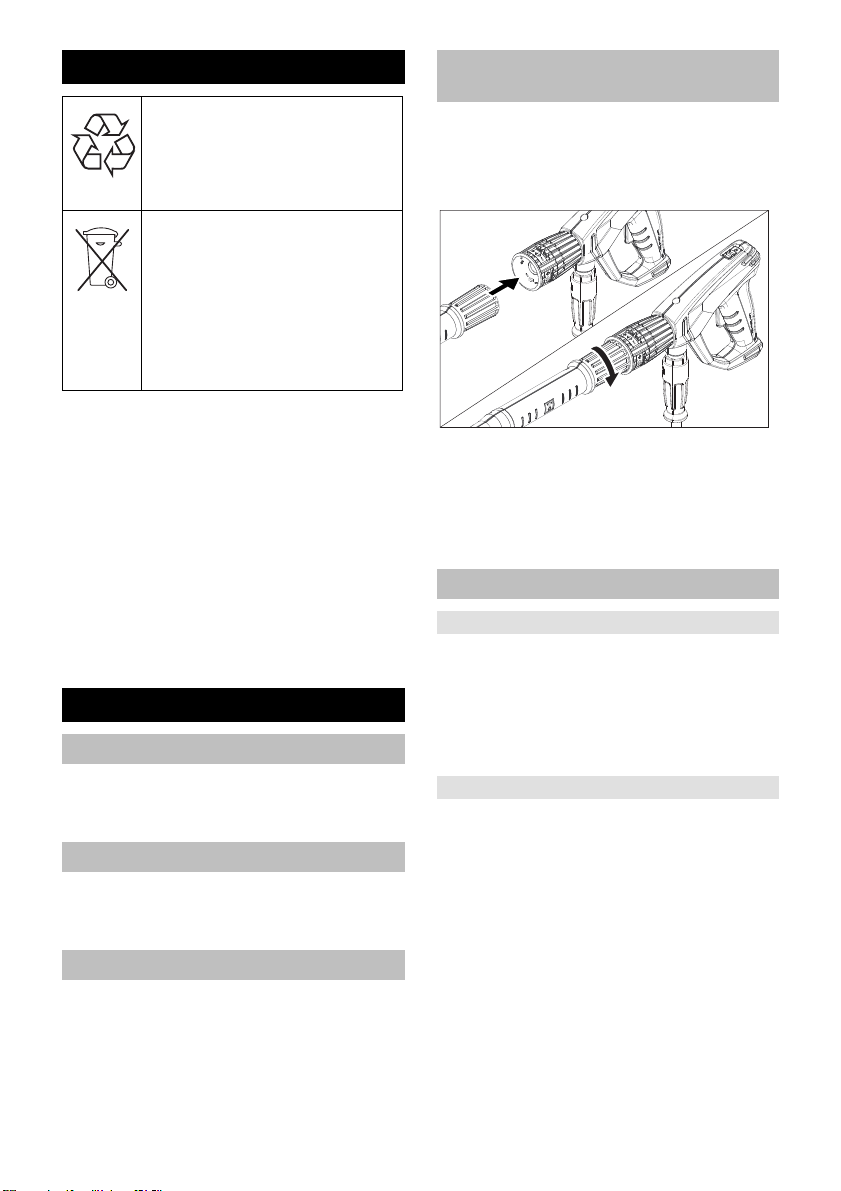
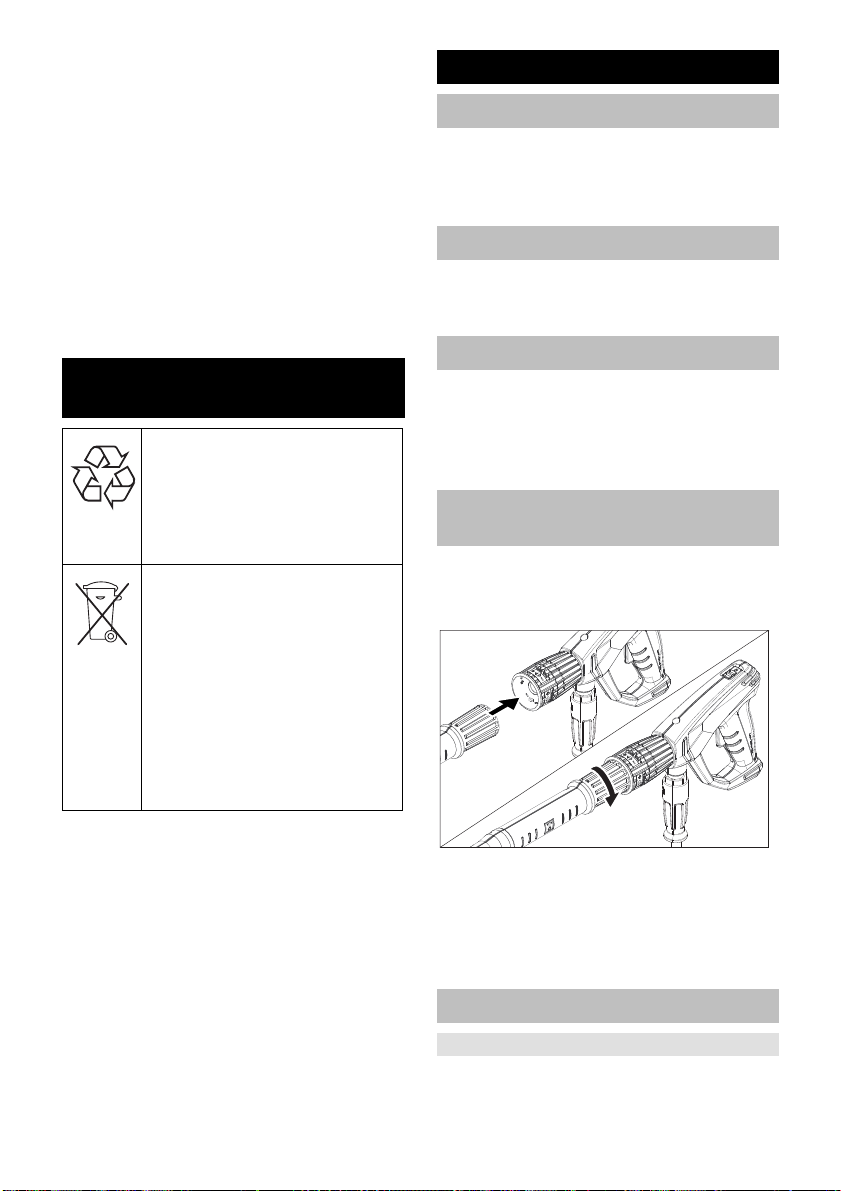
Hinweis: Das EASY!Lock-System verbin-
det Komponenten durch ein Schnellgewinde mit nur einer Umdrehung schnell und sicher.
Hochdruckdüse auf Strahlrohr stecken.
Überwurfmutter montieren und hand-
fest anziehen (EASY!Lock).
Strahlrohr mit Handspritzpistole verbin-
den und handfest anziehen (EASY!Lock).
Zubehör montieren
Bei Geräten ohne Schlauchtrommel:
Hochdruckschlauch mit Handspritzpis-
tole und Hochdruckanschluss des Gerätes verbinden und handfest anziehen
(EASY!Lock).
Kabelhalter in die seitliche Bohrung am
Griff einrasten.
Bei Geräten mit Schlauchtrommel:
Kurbel in die Schlauchtrommelwelle
einstecken und einrasten.
Hochdruckschlauch vor dem Aufwi-
ckeln gestreckt auslegen.
Hochdruckschlauch durch Drehen der
Kurbel in gleichmäßigen Lagen auf die
Schlauchtrommel aufwickeln. Drehrichtung so wählen, dass der Hochdruckschlauch nicht geknickt wird.
Hochdruckschlauch mit Handspritzpis-
tole verbinden und handfest anziehen
(EASY!Lock).
8 DE
– 3

Inbetriebnahme
몇 WARNUNG
Verletzungsgefahr! Gerät, Zubehör, Zuleitungen und Anschlüsse müssen in einwandfreiem Zustand sein. Falls der Zustand nicht einwandfrei ist, darf das Gerät
nicht benutzt werden.
Elektrischer Anschluss
몇 GEFAHR
Verletzungsgefahr durch elektrischen Schlag.
Das Gerät muss zwingend mit einem Ste-
–
cker an das elektrische Netz angeschlossen werden. Eine nicht trennbare Verbindung mit dem Stromnetz ist verboten. Der
Stecker dient zur Netztrennung.
– Gerät nur an Wechselstrom anschließen.
– Mindestabsicherung der Steckdose
(siehe Technische Daten).
– Die maximal zulässige Netzimpedanz
am elektrischen Anschlusspunkt (siehe
Technische Daten) darf nicht überschritten werden. Bei Unklarheiten bezüglich der an Ihrem Anschlusspunkt
vorliegenden Netzimpedanz setzen Sie
sich bitte mit Ihrem Energieversorgungsunternehmen in Verbindung.
– Verlängerungskabel mit ausreichen-
dem Querschnitt verwenden (siehe
„Technische Daten“) und ganz von der
Kabeltrommel abwickeln.
Anschlusswerte siehe Typenschild/Technische Daten.
Netzkabel abwickeln und auf dem Bo-
den ablegen.
Netzstecker in eine Steckdose stecken.
Wasseranschluss
Anschluss an die Wasserleitung
몇 WARNUNG
Vorschriften des Wasserversorgungsunternehmens beachten.
Gemäß gültiger Vorschriften darf
das Gerät nie ohne Systemtrenner
am Trinkwassernetz betrieben
werden. Es ist ein geeigneter Systemtrenner der Fa. KÄRCHER oder alter-
nativ ein Systemtrenner gemäß EN 12729
Typ BA zu verwenden.
Wasser, das durch einen Systemtrenner
geflossen ist, wird als nicht trinkbar eingestuft.
Anschlusswerte siehe Technische Daten.
Zulaufschlauch (Mindestlänge 7,5 m,
Mindestdurchmesser 3/4“) am Wasseranschluss des Gerätes und am Wasserzulauf (zum Beispiel Wasserhahn)
anschließen.
Hinweis:
Der Zulaufschlauch ist nicht im Lieferumfang enthalten.
Wasserzulauf öffnen.
Wasser aus offenen Behältern ansaugen
Saugschlauch mit Filter (Bestell-Nr.
4.440-238.0) am Wasseranschluss anschrauben.
Gerät entlüften:
Düse abschrauben.
Gerät so lange laufen lassen bis das
Wasser blasenfrei austritt.
Gerät ausschalten und Düse wieder
aufschrauben.
Bedienung
GEFAHR
Verletzungsgefahr! Gerät nie ohne montiertes Strahlrohr verwenden. Strahlrohr vor
jeder Benutzung auf festen Sitz überprüfen. Verschraubung des Strahlrohrs muss
handfest angezogen sein.
Explosionsgefahr!
Keine brennbaren Flüssigkeiten versprühen.
Beim Einsatz des Gerätes in Gefahrbereichen (z.B. Tankstellen) sind die entsprechenden Sicherheitsvorschriften zu beachten.
Verletzungsgefahr! Beim Arbeiten
Handspritzpistole und Strahlrohr mit beiden
Händen halten.
Verletzungsgefahr! Der Abzugshebel und
der Sicherungshebel dürfen bei Betrieb
nicht festgeklemmt werden.
Verletzungsgefahr! Bei defektem Sicherungshebel Kundendienst aufsuchen.
– 4
9DE

Verletzungsgefahr durch Hochdruckwasserstrahl. Vor allen Arbeiten am Gerät Sicherungsraste an der Handspritzpistole
nach vorne schieben.
몇 VORSICHT
Motoren nur an Stellen mit entsprechendem
Ölabscheider reinigen (Umweltschutz).
ACHTUNG
Verstopfungsgefahr. Düsen nur mit der
Mündung nach oben in das Zubehörfach
legen.
Handspritzpistole öffnen/schließen
Handspritzpistole öffnen: Sicherungs-
hebel und Abzugshebel betätigen.
Handspritzpistole schließen: Sicherungs-
hebel und Abzugshebel loslassen.
Betrieb mit Hochdruck
Hinweis:
Das Gerät ist mit einem Druckschalter ausgestattet. Der Motor läuft nur an, wenn die
Handspritzpistole geöffnet ist.
Hochdruckschlauch ganz von der
Schlauchtrommel abrollen.
Geräteschalter auf „I“ stellen.
Kontrollleuchte leuchtet grün.
Handspritzpistole entsichern, dazu Si-
cherungsraste nach hinten schieben.
Handspritzpistole öffnen.
Nur 1.286-911.0:
GEFAHR
Beim Einstellen der Druck-/Mengenregulierung darauf achten, dass sich die Verschraubung des Strahlrohrs nicht löst.
Arbeitsdruck und Wassermenge durch
Drehen (stufenlos) an der Druck- und
Mengenregulierung einstellen(+/-)
Betrieb mit Reinigungsmittel
몇 WARNUNG
Ungeeignete Reinigungsmittel können das
Gerät und das zu reinigende Objekt beschädigen. Nur Reinigungsmittel verwenden, die von Kärcher freigegeben sind. Dosierempfehlung und Hinweise, die den Reinigungsmitteln beigegeben sind, beachten.
Zum Schonen der Umwelt sparsam mit
Reinigungsmitteln umgehen
Sicherheitshinweise auf den Reinigungsmitteln beachten.
Kärcher-Reinigungsmittel garantieren ein
störungsfreies Arbeiten. Bitte lassen Sie
sich beraten oder fordern Sie unseren Katalog oder unsere Reinigungsmittel-Informationsblätter an.
Reinigungsmitteltank füllen.
GEFAHR
Verletzungsgefahr! Gerät vor Düsenwechsel ausschalten und Handspritzpistole betätigen, bis Gerät drucklos ist.
Handspritzpistole sichern, dazu Siche-
rungsraste nach vorne schieben.
Hockdruckdüse durch Niederdruckdü-
se (Größe 250, Zubehör) ersetzen.
Reinigungsmittel-Dosierventil auf ge-
wünschte Konzentration stellen.
Reinigungsmittelkonzentration [%] (bei
max. Fördermenge)
Stellung Dosierventil
Reinigungsmittelkonzentration [%]
(bei max. Fördermenge)
Empfohlene Reinigungsmethode
Reinigungsmittel sparsam auf die tro-
ckene Oberfläche sprühen und einwir-
ken (nicht trocknen) lassen.
Gelösten Schmutz mit dem Hochdruck-
strahl abspülen.
Nach dem Betrieb Filter in klares Was-
ser tauchen. Dosierventil auf höchste
Reinigungsmittel-Konzentration dre-
hen. Gerät starten und eine Minute lang
klarspülen.
1357
0,5 2,5 5,0 7,0
Betrieb unterbrechen
Handspritzpistole schließen.
Das Gerät schaltet sich ab.
Handspritzpistole sichern, dazu Siche-
rungsraste nach vorne schieben.
Nach der Unterbrechung:
Handspritzpistole entsichern, dazu Si-
cherungsraste nach hinten schieben.
Handspritzpistole öffnen.
Das Gerät schaltet sich wieder ein.
10 DE
– 5

Gerät ausschalten
Wasserzulauf schließen.
Handspritzpistole öffnen.
Pumpe mit Geräteschalter einschalten
und 5-10 Sekunden laufen lassen.
Handspritzpistole schließen.
Geräteschalter auf „0/OFF“ stellen.
Netzstecker nur mit trockenen Händen
aus Steckdose ziehen.
Wasseranschluss entfernen.
Handspritzpistole betätigen, bis Gerät
drucklos ist.
Handspritzpistole sichern, dazu Siche-
rungsraste nach vorne schieben.
GEFAHR
Verbrühungsgefahr durch heißes Wasser. Im
ausgeschalteten Gerät enthaltenes Restwasser kann sich erhitzen. Beim Entfernen des
Schlauchs vom Wasserzulauf kann das erhitzte Wasser herausspritzen und Verbrühungen verursachen. Schlauch erst abnehmen, wenn das Gerät abgekühlt ist.
Gerät aufbewahren
Handspritzpistole in den Halter stecken.
Hochdruckschlauch aufwickeln und
über die Schlauchablage hängen.
oder
Hochdruckschlauch auf die Schlauchtrommel aufwickeln. Griff der Kurbel
einschieben, um die Schlauchtrommel
zu blockieren.
Anschlusskabel um den Kabelhalter wi-
ckeln.
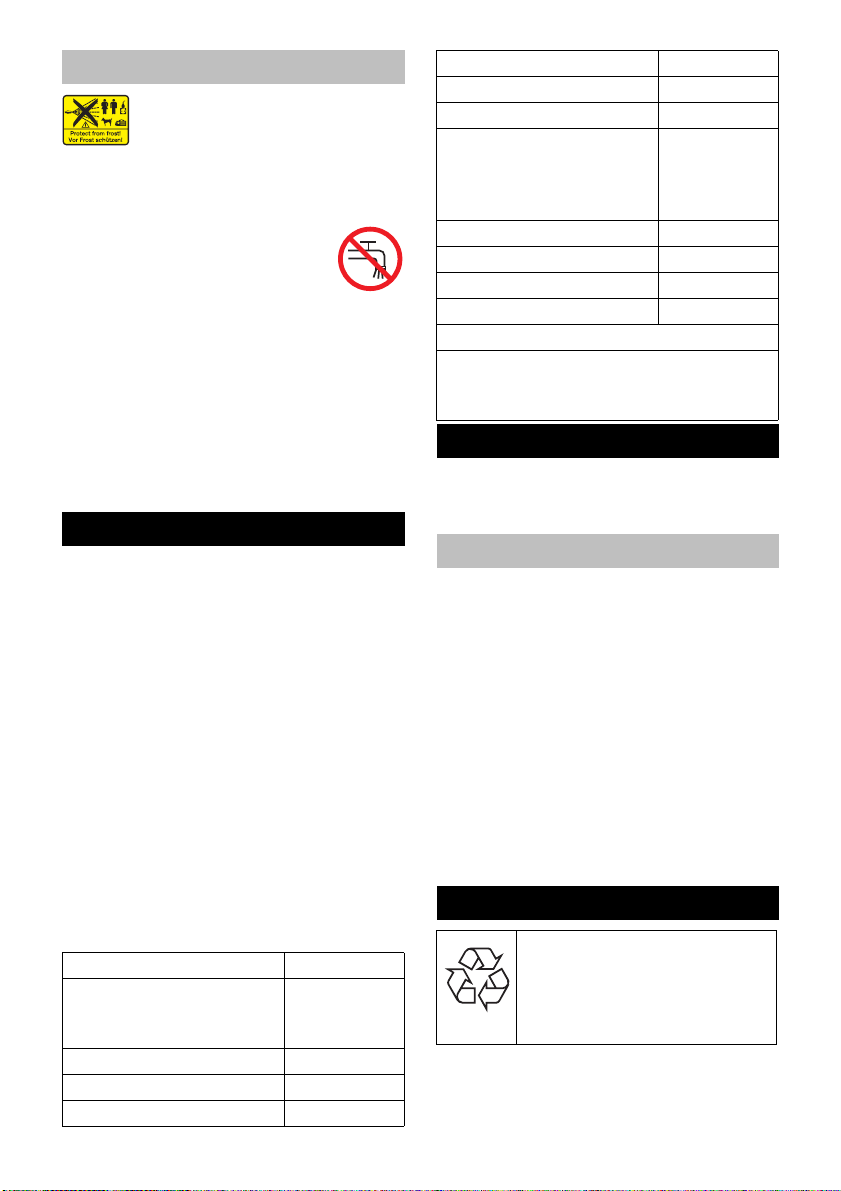
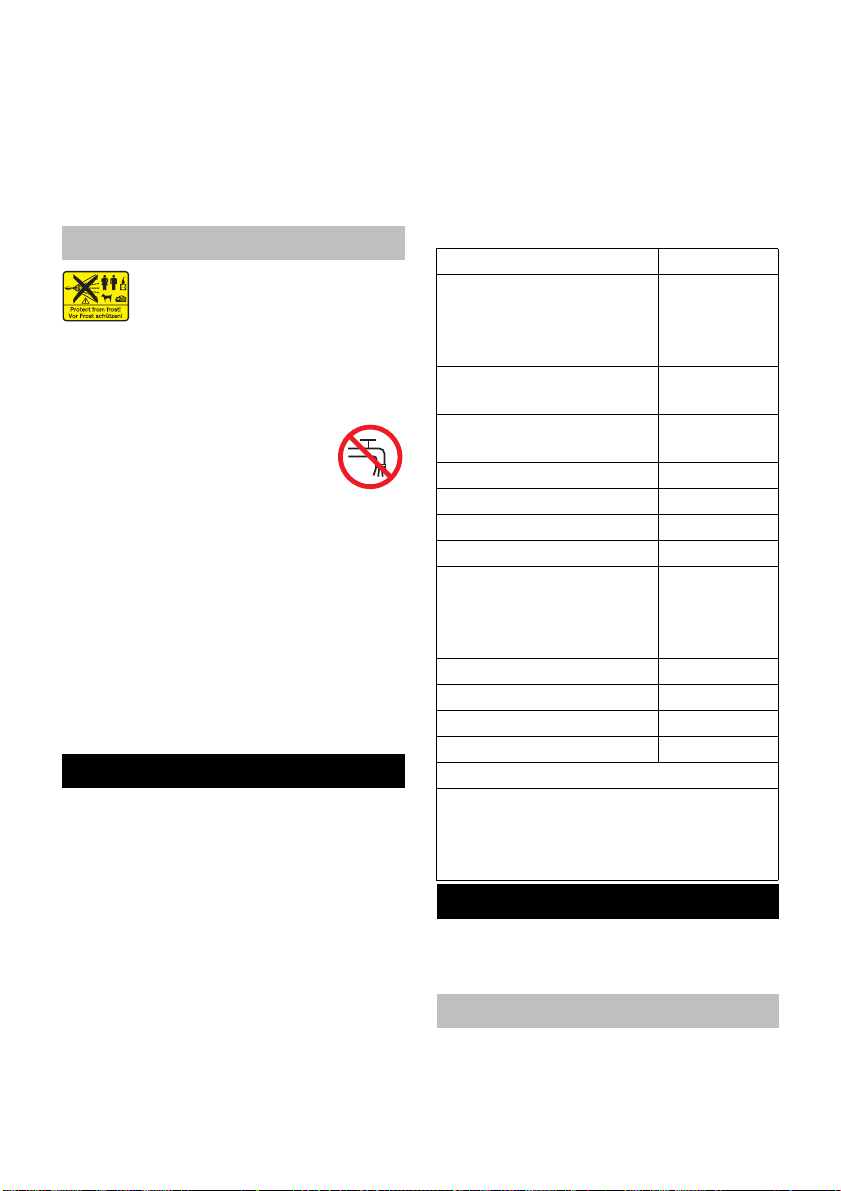
Frostschutz
ACHTUNG
Frost zerstört das nicht vollständig von
Wasser entleerte Gerät.
Gerät an einem frostfreien Ort aufbewahren.
Ist eine frostfreie Lagerung nicht möglich:
Reinigungsmitteltank leeren (siehe
„Pflege und Wartung/Bei Bedarf“).
Wasser ablassen.
Handelsübliches Frostschutzmittel
durch das Gerät pumpen.
Hinweis:
Handelsübliches Frostschutzmittel für Automobile auf Glykolbasis verwenden.
Handhabungsvorschriften des Frostschutzmittelherstellers beachten.
Gerät max. 1 Minute laufen lassen bis
Pumpe und Leitungen leer sind.
Transport
몇 VORSICHT
Verletzungs- und Beschädigungsgefahr!
Gewicht des Gerätes beim Transport beachten.
ACHTUNG
Abzugshebel während des Transports vor
Beschädigung schützen.
Zum Transport über längere Strecken
Gerät am Griff hinter sich herziehen.
Vor liegendem Transport Reinigungs-
mitteltank entleeren.
Beim Transport in Fahrzeugen Gerät
nach den jeweils gültigen Richtlinien
gegen Rutschen und Kippen sichern.
Lagerung
몇 VORSICHT
Verletzungs- und Beschädigungsgefahr!
Gewicht des Gerätes bei Lagerung beachten.
Dieses Gerät darf nur in Innenräumen gelagert werden.
Pflege und Wartung
GEFAHR
Verletzungsgefahr durch unabsichtlich anlaufendes Gerät und elektrischen Schlag.
Vor allen Arbeiten am Gerät, Gerät ausschalten und Netzstecker ziehen.
Hinweis:
Altöl darf nur von den dafür vorgesehenen
Sammelstellen entsorgt werden. Bitte geben Sie anfallendes Altöl dort ab. Verschmutzen der Umwelt mit Altöl ist strafbar.
Sicherheitsinspektion/
Wartungsvertrag
Mit Ihrem Händler können Sie eine regelmäßige Sicherheitsinspektion vereinbaren
oder einen Wartungsvertrag abschließen.
Bitte lassen Sie sich beraten.
– 6
11DE

Vor jedem Betrieb
Anschlusskabel auf Schaden prüfen
(Gefahr durch elektrischen Schlag), beschädigtes Anschlusskabel unverzüglich durch autorisierten Kundendienst/
Elektrofachkraft austauschen lassen.
Hochdruckschlauch auf Beschädigung
überprüfen (Berstgefahr).
Beschädigten Hochdruckschlauch unverzüglich austauschen.
Gerät (Pumpe) auf Dichtheit prüfen.
3 Tropfen Wasser pro Minute sind zulässig und können an der Geräteunterseite austreten. Bei stärkerer
Undichtigkeit Kundendienst aufsuchen.
Wöchentlich
Ölstand prüfen. Bei milchigem Öl (Wasser
im Öl) sofort Kundendienst aufsuchen.
Feinfilter reinigen.
Gerät drucklos machen.
Befestigungsschraube der Gerätehaube
herausdrehen, Gerätehaube abnehmen.
Deckel mit Filter abschrauben.
Filter mit sauberem Wasser oder
Druckluft reinigen.
In umgekehrter Reihenfolge zusammenbauen.
Filter am Reinigungsmittel-Saug-
schlauch reinigen.
Alle 500 Betriebsstunden,
mindestens jährlich
Wartung des Gerätes vom Kunden-
dienst durchführen lassen.
Öl wechseln.
Ölwechsel
Hinweis:
Ölmenge und -sorte siehe „Technische Daten“.
Befestigungsschraube der Gerätehau-
be herausdrehen, Gerätehaube abnehmen.
Ölablassschraube vorne am Motorge-
häuse herausdrehen.
Öl in Auffangbehälter ablassen.
Ölablassschraube eindrehen.
Neues Öl langsam einfüllen; Luftblasen
müssen entweichen.
Deckel des Ölbehälters anbringen.
Gerätehaube befestigen.
Bei Bedarf
Reinigungsmitteltank entleeren und rei-
nigen.
Verschlussdeckel für Reinigungsmittel-
tank mit Saugschlauch herausziehen.
Gerät auf die Rückseite legen.
Reinigungsmitteltank entleeren und rei-
nigen.
Hilfe bei Störungen
GEFAHR
Verletzungsgefahr durch unabsichtlich anlaufendes Gerät und elektrischen Schlag.
– Vor allen Arbeiten am Gerät, Gerät aus-
schalten und Netzstecker ziehen.
– Elektrische Bauteile nur vom autorisier-
ten Kundendienst prüfen und reparie-
ren lassen.
– Bei Störungen, die in diesem Kapitel
nicht genannt sind, im Zweifelsfall und
bei ausdrücklichem Hinweis einen auto-
risierten Kundendienst aufsuchen.
Gerät läuft nicht
Anschlusskabel auf Schaden prüfen.
Bei elektrischem Defekt Kundendienst
aufsuchen.
Gerät kommt nicht auf Druck
Hochdruckdüse montieren.
Düse reinigen/erneuern.
Feinfilter reinigen, bei Bedarf erneuern.
Gerät entlüften (siehe „Inbetriebnahme“).
Wasserzulaufmenge prüfen (siehe
Technische Daten).
Sämtliche Zulaufleitungen zur Pumpe
prüfen.
Bei Bedarf Kundendienst aufsuchen.
Pumpe undicht
3 Tropfen Wasser pro Minute sind zulässig
und können an der Geräteunterseite austreten. Bei stärkerer Undichtigkeit Kundendienst aufsuchen.
Bei stärkerer Undichtigkeit Gerät durch
Kundendienst prüfen lassen.
12 DE
– 7

Pumpe klopft
CEO
Head of Approbation
Saugleitungen für Wasser und Reini-
gungsmittel auf Undichtheit prüfen.
Gerät entlüften (siehe „Inbetriebnah-
me“).
Feinfilter reinigen.
Bei Bedarf Kundendienst aufsuchen.
Reinigungsmittel wird nicht
angesaugt
Hochdruckdüse durch mitgelieferte
Niederdruckdüse ersetzen.
Reinigungsmittel-Saugschlauch mit Fil-
ter prüfen/reinigen.
Rückschlagventil im Anschluss des
Reinigungsmittel-Saugschlauches reinigen/erneuern.
Reinigungsmittel-Dosierventil öffnen
oder prüfen/reinigen.
Entlüftungsbohrung des Reinigungs-
mitteltanks im Gehäuse reinigen.
Bei Bedarf Kundendienst aufsuchen.
Zubehör und Ersatzteile
Nur Original-Zubehör und Original-Ersatzteile verwenden, sie bieten die Gewähr für
einen sicheren und störungsfreien Betrieb
des Gerätes.
Informationen über Zubehör und Ersatzteile finden Sie unter www.kaercher.com.
schlägigen grundlegenden Sicherheitsund Gesundheitsanforderungen der EURichtlinien entspricht. Bei einer nicht mit
uns abgestimmten Änderung der Maschine
verliert diese Erklärung ihre Gültigkeit.
Produkt: Hochdruckreiniger
Typ: 1.286-xxx
Typ: 1.292-xxx
Typ:
1.441-xxx
Einschlägige EU-Richtlinien
2006/42/EG (+2009/127/EG)
2014/30/EU
2000/14/EG
Angewandte harmonisierte Normen
EN 55014–1: 2006+A1: 2009+A2: 2011
EN 55014–2: 2015
EN 60335–1
EN 60335–2–79
EN 61000–3–2: 2006+A1: 2009+A2: 2009
EN 61000–3–3: 2013
EN 61000–3–11: 2000
EN 62233: 2008
Angewandtes Konformitätsbewertungsverfahren
2000/14/EG: Anhang V
Schallleistungspegel dB(A)
Gemessen: 85
Garantiert: 87
Die Unterzeichnenden handeln im Auftrag
und mit Vollmacht der Geschäftsführung.
Garantie
In jedem Land gelten die von unserer zuständigen Vertriebsgesellschaft herausgegebenen Garantiebedingungen. Etwaige
Störungen an Ihrem Gerät beseitigen wir
innerhalb der Garantiefrist kostenlos, sofern ein Material- oder Herstellungsfehler
die Ursache sein sollte. Im Garantiefall
wenden Sie sich bitte mit Kaufbeleg an Ihren Händler oder die nächste autorisierte
Kundendienststelle.
EU-Konformitätserklärung
Hiermit erklären wir, dass die nachfolgend
bezeichnete Maschine aufgrund ihrer Konzipierung und Bauart sowie in der von uns
in Verkehr gebrachten Ausführung den ein-
Dokumentationsbevollmächtigter:
S. Reiser
Alfred Kärcher GmbH & Co. KG
Alfred-Kärcher-Str. 28 - 40
71364 Winnenden (Germany)
Tel.: +49 7195 14-0
Fax: +49 7195 14-2212
Winnenden, 2016/03/01
– 8
13DE
Technische Daten
HD 10/23-4 S
1.286-922.0
HD 10/23-4 S
1.286-911.0
1.286-923.0
HD 10/23-4 SX
1.286-924.0
Netzanschluss
Spannung V 400 220
Stromart Hz 3~ 50 3~60
Anschlussleistung kW 9,0
Absicherung (träge, Char. C) A 13 25
Schutzart IPX5
Maximal zulässige Netzimpedanz Ohm (0,189+j0,118) (0,145+j0,090)
Verlängerungskabel 10 m mm
Verlängerungskabel 30 m mm
2
2
2,5
4
Wasseranschluss
Zulauftemperatur (max.) °C 60
Zulaufmenge (min.) l/h (l/min) 1200 (20)
Saughöhe aus offenem Behälter (20 °C) m 0,5
Zulaufdruck (max.) MPa (bar) 1 (10)
Leistungsdaten
Arbeitsdruck Wasser (mit Standarddüse) MPa (bar) 23 (230) 3...23 (30...230)
Düsengröße der Standarddüse 050
Max. Betriebsüberdruck MPa (bar) 25,3 (253)
Fördermenge l/h (l/min) 1000 (16,7)
Reinigungsmittelansaugung l/h (l/min) 0...80 (0...1,3)
Rückstoßkraft der Handspritzpistole (max.) N 62
Ermittelte Werte gemäß EN 60335-2-79
Hand-Arm Vibrationswert
Handspritzpistole m/s
Strahlrohr m/s
Unsicherheit K m/s
Schalldruckpegel L
Unsicherheit K
Schallleistungspegel L
pA
pA
+ Unsicherheit K
WA
WA
2
2
2
<2,5
<2,5
dB(A) 72
dB(A) 2
dB(A) 87
1
Betriebsstoffe
Ölmenge l 1,2
Ölsorte SAE 90
Maße und Gewichte
Länge x Breite x Höhe mm 560 x 500 x 1090
Gewicht ohne Zubehör (SX) kg 66(68)
Inhalt Reinigungsmitteltank l 6
14 DE
– 9

Please read and comply with
these original instructions prior
to the initial operation of your appliance and
store them for later use or subsequent owners.
Contents
Device elements . . . . . . . . . . . EN 1
Safety instructions. . . . . . . . . . EN 1
Proper use . . . . . . . . . . . . . . . EN 2
Safety Devices . . . . . . . . . . . . EN 2
Environmental protection . . . . EN 2
Before Startup . . . . . . . . . . . . . EN 3
Start up . . . . . . . . . . . . . . . . . . EN 3
Operation . . . . . . . . . . . . . . . . EN 4
Transport. . . . . . . . . . . . . . . . . EN 6
Storage . . . . . . . . . . . . . . . . . . EN 6
Care and maintenance . . . . . . EN 6
Troubleshooting . . . . . . . . . . . EN 7
Accessories and Spare Parts . EN 8
Warranty . . . . . . . . . . . . . . . . . EN 8
EU Declaration of Conformity . EN 8
Technical specifications . . . . . EN 9
Device elements
see cover page
1 Trigger gun EASY!Lock
2 Triggering lever
3 Safety lever
4 High pressure hose EASY!Lock
5 Trigger gun storage clip
6 Dosage valve for detergent
7 Locking cap for detergent tank
8 Detergent Tank
9 Detergent suction hose with filter
10 Fastening screw for device hood
11 Power switch
12 Cover
13 Manometer
14 High-pressure connection EASY!Lock
15 Storage compartment for nozzles
16 Water connection
17 Fine filter
18 Oil level indicator
19 Oil tank
20 Storage compartment for hoses
21 Deaerating the detergent tank
22 Accessory compartment
23 Cable clamp
24 Hose drum
25 Crank
26 Handle
27 Union joint
28 Nozzle
29 Spray lance EASY!Lock
30 Pressure/ quantity regulation
(1.286-911.0 only)
31 Safety catch
Colour coding
– The operating elements for the cleaning
process are yellow.
– The controls for the maintenance and
service are light gray.
Safety instructions
– Before first start-up it is definitely nec-
essary to read the operating instructions and safety indications Nr. 5.951-
949.0!
– Please follow the national rules and
regulations for fluid spray jets of the respective country.
– Please follow the national rules and
regulations for accident prevention of
the respective country. Fluid spray jets
must be tested regularly and the results
of these tests must be documented in
writing.
– The appliance/accessories must not be
modified.
Hazard levels
DANGER
Pointer to immediate danger, which leads
to severe injuries or death.
몇 WARNING
Pointer to a possibly dangerous situation,
which can lead to severe injuries or death.
몇 CAUTION
Pointer to a possibly dangerous situation,
which can lead to minor injuries.
ATTENTION
Pointer to a possibly dangerous situation,
which can lead to property damage.
– 1
15EN
Symbols on the machine
High-pressure jets can be dan-
gerous if improperly used. The
jet may not be directed at persons, animals,
live electrical equipment or at the appliance
itself.
According to applicable regulations, the appliance must never be
used on the drinking water net
without a system separator. A suitable system separator by KÄRCHER or alternatively a system separator according to
EN 12729 type BA must be used.
Water that was flowing through a system
separator is considered non-drinkable.
몇 CAUTION
Always connect the system separator to
the water supply, never directly to the appliance!
Proper use
Use this high pressure cleaner exclusively
for
– Cleaning using low pressure jet and de-
tergent (for e.g. for cleaning machines,
cars, buildings, tools),
– For cleaning using high pressure jet
without detergent (for e.g. for cleaning
facades, terraces, garden appliances).
For stubborn dirt, we recommend the use of
the dirt blaster as a special accessory.
Quality requirements for water:
ATTENTION
Only clean water may be used as high
pressure medium. Impurities will lead to increased wear and tear or formation of deposits in the appliance.
If recycled water is used, the following limit
values must not be exceeded.
pH value 6,5...9,5
electrical conductivity * Conductivity
fresh water
+1200 µS/cm
settleable solids ** < 0,5 mg/l
total suspended solids *** < 50 mg/l
Hydrocarbons < 20 mg/l
Chloride < 300 mg/l
Sulphate < 240 mg/l
Calcium < 200 mg/l
Total hardness < 28 °dH
< 50 °TH
< 500 ppm
(mg CaCO
Iron < 0,5 mg/l
Manganese < 0,05 mg/l
Copper < 2 mg/l
Active chloride < 0,3 mg/l
free of bad odours
* Maximum total 2000 µS/cm
** Test volume 1 l, settling time 30 min
*** no abrasive substances
/l)
3
Safety Devices
Safety devices serve to protect the user
and must not be rendered in operational or
their functions bypassed.
Overflow valve with pressure switch
While reducing the water supply/quantity
regulation at the pump head, the overflow
valve opens and part of the water flows
back to the pump suck side.
If the pulling lever on the trigger gun is released the pressure switch turns off the
pump, the high-pressure jet is stopped. If
the pulling lever is pulled the pump is
turned on again.
The overflow valve and pressure switch are
set and sealed at the factory. Setting only
by customer service.
The motor protection switch switches off
the device if the power consumption is high.
Environmental protection
The packaging material can be
recycled. Please do not throw
the packaging material into
household waste; please send it
for recycling.
16 EN
– 2
Old appliances contain valuable
2.
1.
materials that can be recycled;
these should be sent for recycling. Batteries, oil, and similar
substances must not enter the
environment. Please dispose of
your old appliances using appro-
priate collection systems.
Electrical and electronic devices often contain components which could potentially
pose a danger to human health and the environment if handled or disposed of incorrectly. However, these components are
necessary for the proper operation of the
device. Devices marked with this symbol
must not be disposed of with regular household rubbish.
Notes about the ingredients (REACH)
You will find current information about the
ingredients at:
www.kaercher.com/REACH
Before Startup
Unpacking
– Check the contents of the pack before
unpacking.
– In case of transport damage inform ven-
dor immediately.
Check oil level
Read the oil level display when the de-
vice is not running. The oil level must be
above the two pointers.
Activate deaeration of oil container
Unscrew the fastening screws of the
device hood; remove the device hood.
Cut off tip of oil container cover
Fasten the device hood.
Install hand spray gun, spray lance
and nozzle
Note: The EASY!Lock system joins com-
ponents with a quick-fasten thread solidly
and securely with just one turn.
Insert the high pressure nozzle onto the
spray lance.
Install union nut and hand-tighten it
(EASY!Lock).
Join the spray lance with the trigger gun
and tighten until hand-tight
(EASY!Lock).
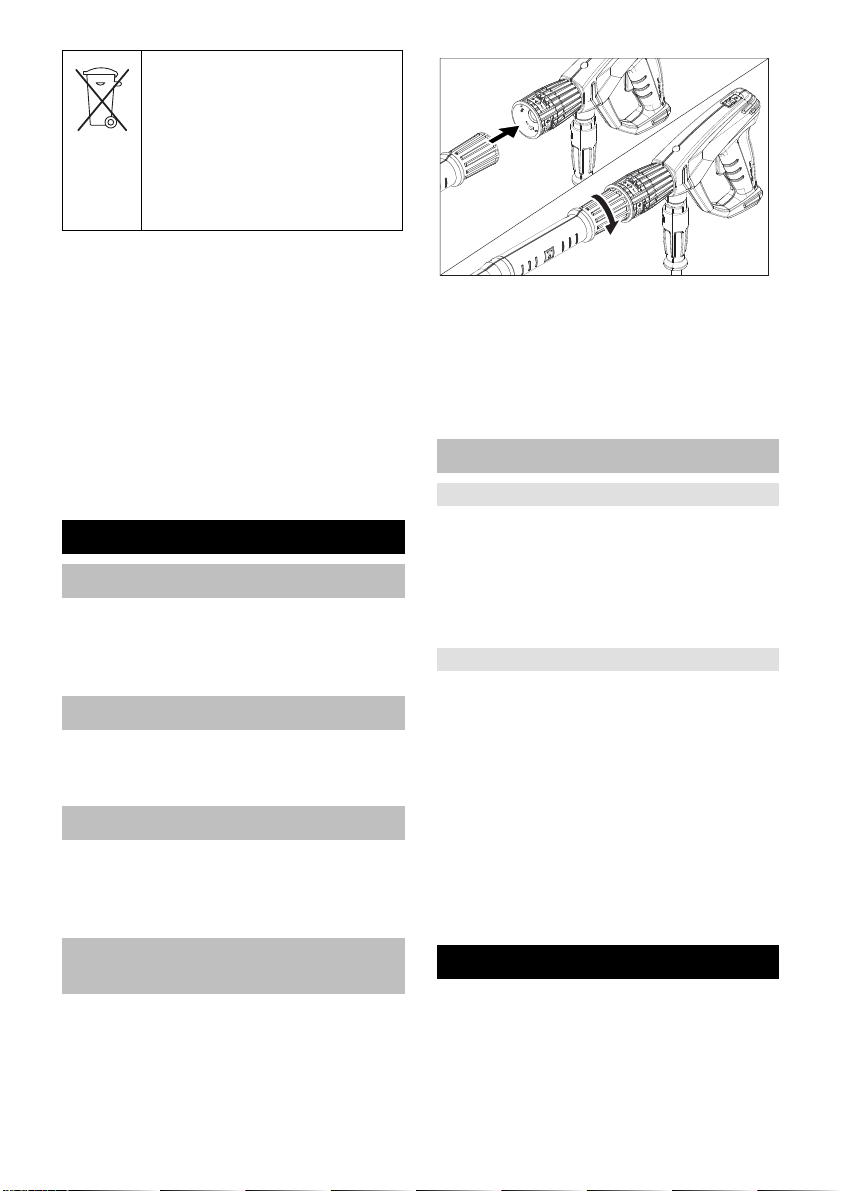
Attaching the Accessories
In devices without hose drum:
Join the high-pressure hose with trigger
gun and high-pressure connection of
the appliance and tighten until handtight (EASY!Lock).
Lock a cable clip in the side-hole on the
handle.
In devices with hose drum:
Insert the crank in the hose drum shaft
and lock it in.
Before rolling up, stretch out the high
pressure hose.
Wind the high pressure hose in uniform
layers on the hose drum by rotating the
crank. Select the rotation direction in
such a way that the high pressure hose
does not get bent.
Join the high pressure hose with trigger
gun and tighten until hand-tight
(EASY!Lock).
Start up
몇 WARNING
Risk of injury! Appliance, accessories, supply lines and connections must be in faultfree condition. If they are not in a perfect
state then the appliance must not be used.
– 3
17EN
Electrical connection
몇 DANGER
Danger of injury by electric shock.
– It is imperative to connect the appliance
to the electric mains by means of a plug.
It is forbidden to permanently connect
the appliance to the power supply. The
plug serves for the disconnection from
the mains.
– The appliance may only be connected
to alternating current.
– Minimum fuse strength of the socket
(see Technical Data).
– The highest allowed net impedance at
the electrical connection point (refer to
technical data) is not to be exceeded. In
case of confusion regarding the power
impedance present on your connection,
please contact your utilities provider.
– Use the extension cord that has an ad-
equate cross-section (see "Technical
Data") and unwind it fully from the cable
drum.
For connection values, see type plate/technical data.
Unwind the mains cable and place it on
the floor.
Insert the mains plug into a socket.
Water connection
Connection to the water supply
몇 WARNING
Observe regulations of water supplier.
According to applicable regulations, the appliance must never be
used on the drinking water net
without a system separator. A suitable system separator by KÄRCHER or alternatively a system separator according to
EN 12729 type BA must be used.
Water that was flowing through a system
separator is considered non-drinkable.
For connection values refer to technical
specifications.
Connect the supply hose (minimum
length 7.5 m, minimum diameter 3/4“) to
the water connection point of the ma-
chine and at the water supply point (for
e.g. a tap).
Note:
The supply hose is not included.
Open the water supply.
Drawing in water from open reservoirs
Screw the suction hose with filter (order
no. 4.440-238.0) to the water connection.
Deaerate the appliance:
Unscrew the nozzle.
Switch on the appliance and let it run
until the water exiting is bubble-free.
Switch off the appliance and fit the noz-
zle again.
Operation
DANGER
Risk of injury! Never use the appliance
without the spray lance attached. Check
and ensure proper fitting of the spray lance
prior to each use. The screw connection of
the spray lance must be finger-tight.
Risk of explosion!
Do not spray flammable liquids.
If the appliance is used in hazardous areas
(e.g. filling stations) the corresponding
safety regulations must be observed.
Risk of injury! Hold the hand spray gun and
the spray pipe firmly with both hands.
Risk of injury! The trigger and safety lever
may not be locked during the operation.
Risk of injury! Contact Customer Service if
the safety lever is damaged.
Risk of injury from high-pressure water jet.
Slide the safety catch on the trigger gun forward before performing any work with the
appliance.
몇 CAUTION
Clean engines only at places with corresponding oil separators (environmental
safety).
ATTENTION
Risk of blocking. Place the nozzles in the
accessory compartment with their joint
pointing upward.
18 EN
– 4
Opening/closing the trigger gun
To open the trigger gun: Actuate the
safety lever and trigger.
To close the hand spray gun: Release
the safety lever and trigger.
High pressure operation
Note:
The appliance is equipped with a pressure
switch. The motor starts up only when the
trigger gun is open.
Roll off the high pressure hose totally
from the hose drum.
Set the appliance switch to "I".
Control lamp glows green.
Release the trigger gun. To do so, push
the safety catch towards the back.
Open the hand spray gun.
Only 1.286-911.0:
DANGER
When adjusting the pressure/quantity regulation, make sure that the screw connection
of the spray lance does not become loose.
Set working pressure and flow rate
through turning (runless) at the pressure- and amount regulation (B) (+/-).
Operation with detergent
몇 WARNING
Unsuitable detergents can cause damage
to the appliance and to the object to be
cleaned. Use only those detergents that
have been approved by Kärcher. Observe
the dosage and other instructions provided
with these detergents. For considerate
treatment of the environment use detergent
economically.
Follow the safety instructions for using detergents.
Kärcher detergents ensure smooth functioning. Please consult us or ask for our catalogue or our detergent information sheets.
Fill detergent tank.
DANGER
Risk of injury! Switch the appliance off prior
to replacing nozzle and activate hand spray
gun until device is pressureless.
Secure the trigger gun. To do so, push
the safety catch towards the front.
Replace high pressure nozzle with a
low pressure nozzle (size 250, attachment).
Set dosing value for detergent to the
desired concentration.
Detergent concentration [%] (for max. flow
quantity)
Position of the dosing valve
Detergent concentration [%]
(for max. flow
quantity)
Recommended cleaning method
Spray the detergent sparingly on the
dry surface and allow it to react, but not
to dry.
Spray off loosened dirt with the high-
pressure ray.
After operations, dip the filter in clear
water. Turn the dosing valve to the
highest detergent concentration. Start
the appliance and rinse for one minute.
1357
0,5 2,5 5,0 7,0
Interrupting operation
Close the hand spray gun.
The appliance switches off.
Secure the trigger gun. To do so, push
the safety catch towards the front.
After the interruption:
Release the trigger gun. To do so, push
the safety catch towards the back.
Open the hand spray gun.
The appliance will switch on again.
Turn off the appliance
Shut off water supply.
Open the hand spray gun.
Switch on the pump with the power
switch and allow to run for about 5-10
seconds.
Close the hand spray gun.
Set the appliance switch to "0/OFF“.
Pull main plug out of socket with dry
hands only.
Remove water connection.
– 5
19EN

Activate hand spray gun until device is
pressure less.
Secure the trigger gun. To do so, push
the safety catch towards the front.
DANGER
Danger of scalding on account of hot water.
The water remaining in the switched off device can get heated up. When you remove
the hose from the water inlet, the heated
water can spray out and cause scalding. Do
not remove the hose before the device has
cooled down.
Storing the Appliance
Insert the hand-spray gun in the holder.
Wind up the high-pressure hose and
hang it over the hose storage.
or
Wind up the high-pressure hose on the
hose drum. Push in the handle of the
crank to block the hose drum.
Wind the connection cable around the
cable holder.
Frost protection
ATTENTION
Frost will destroy the not completely water
drained device.
Store the appliance in a frost free area.
If you cannot store it in a frost-free place:
Emptying the detergent tank (see "Care
and Maintenance/ as required").
Drain water.
Pump in conventional frost protection
agents through the appliance.
Note:
Use normal glycol-based anti-freezing
agents for automobiles.
Observe handling instructions of the antifreeze agent manufacturer.
Operate device for max. 1 minute until
the pump and conduits are empty.
Transport
몇 CAUTION
Risk of personal injury or damage! Mind the
weight of the appliance during transport.
ATTENTION
Protect the trigger from damage during
transport.
Pull the device behind you at the handle
for transporting it over longer distances.
Empty the detergent tank before trans-
porting in horizontal position.
When transporting in vehicles, secure
the appliance according to the guide-
lines from slipping and tipping over.
Storage
몇 CAUTION
Risk of personal injury or damage! Consider the weight of the appliance when storing
it.
This appliance must only be stored in interior rooms.
Care and maintenance
DANGER
Risk of injury by inadvertent startup of appliance and electrical shock.
Prior to all work on the appliance, switch off
the appliance and pull the power plug.
Note:
Used oil must only be disposed of by the
designated collection points. Please turn in
used oil there. Polluting the environment
with used oil is prosecutable.
Safety inspection/ maintenance
contract
You can sign with your dealer a contract for
regular safety inspection or even sign a
maintenance contract. Please take advice
on this matter.
Before each use
Check connection cable for damages
(risk of electrical shock); get the dam-
aged connection cable replaced imme-
diately by an authorised customer ser-
vice person/ electrician.
Check the high pressure hose for dam-
ages (risk of bursting).
Please arrange for the immediate ex-
change of a damaged high-pressure
hose.
20 EN
– 6

Check appliance (pump) for leaks.
3 drops per minute are permitted and
can come out from the lower side of the
appliance. Call Customer Service if
there is heavy leakage.
Weekly
Check oil level Please contact Custom-
er Service immediately if the oil is milky
(water in oil).
Clean the fine filter.
Unpressurize the appliance.
Unscrew the fastening screws of the
device hood; remove the device hood.
Unscrew lid with filter.
Clean the filter with clean water or compressed air.
Reinstall in reverse sequence.
Clean filter at the detergent suck hose.
Every 500 operating hours, at least
annually
Have the maintenance of the device
performed by the customer service.
Oil change.
Oil change
Note:
See "Specifications" for oil volume and
type.
Unscrew the fastening screws of the
device hood; remove the device hood.
Turn out the oil drain screw at the front
on the motor casing.
Drain the oil in a collection basin.
Screw in the oil drain screw.
Fill in new oil slowly; air bubbles should
go out.
Attach the lid of the oil container.
Fasten the device hood.
If required
Empty and clean the detergent tank.
Pull out the locking cap for the detergent tank along with the suction hose.
Lay the device on the reverse.
Empty and clean the detergent tank.
Troubleshooting
DANGER
Risk of injury by inadvertent startup of appliance and electrical shock.
– Prior to all work on the appliance,
switch off the appliance and pull the
power plug.
– Get the electrical components checked
and repaired only by authorised cus-
tomer service persons.
– Contact an authorised customer service
person in case of problems not men-
tioned in this chapter or if you are in
doubt or when you have been explicitly
asked to do so.
Appliance is not running
Check connection cable for damages.
Call Customer Service in case of elec-
trical defects.
Pressure does not build up in the
appliance
Install the high pressure nozzle.
Clean/ replace nozzle.
Clean the fine filter; replace it, if neces-
sary.
Deaerate the appliance (see "Start-up")
Check water supply level (refer to tech-
nical data).
Check all inlet pipes to the pump.
Contact Customer Service if needed.
Pump leaky
3 drops per minute are permitted and can
come out from the lower side of the appliance. Call Customer Service if there is
heavy leakage.
With stronger leak, have device
checked by customer service.
Pump is vibrating
Check suction pipes for water and de-
tergent and ensure that they are leak-
proof.
Deaerate the appliance (see "Start-up")
Clean the fine filter.
Contact Customer Service if needed.
– 7
21EN

Detergent is not getting sucked in
CEO
Head of Approbation
Replace the high-pressure nozzle with
the included low-pressure nozzle.
Check/ clean detergent suction hose
with filter.
Clean/ replace backflow valve in the
connection of the detergent suction
hose.
Open or check/clean detergent dosing
valve.
Clean the deaerating hole of the deter-
gent tank in the casing.
Contact Customer Service if needed.
Accessories and Spare Parts
Only use original accessories and spare
parts, they ensure the safe and trouble-free
operation of the device.
For information about accessories and
spare parts, please visit www.kaercher.com.
Warranty
The warranty terms published by the relevant sales company are applicable in each
country. We will repair potential failures of
your appliance within the warranty period
free of charge, provided that such failure is
caused by faulty material or defects in manufacturing. In the event of a warranty claim
please contact your dealer or the nearest
authorized Customer Service centre.
Please submit the proof of purchase.
EU Declaration of Conformity
We hereby declare that the machine described below complies with the relevant
basic safety and health requirements of the
EU Directives, both in its basic design and
construction as well as in the version put
into circulation by us. This declaration shall
cease to be valid if the machine is modified
without our prior approval.
Product: High pressure cleaner
Type: 1.286-xxx
Type: 1.292-xxx
Type: 1.441-xxx
Relevant EU Directives
2006/42/EC (+2009/127/EC)
2014/30/EU
2000/14/EC
Applied harmonized standards
EN 55014–1: 2006+A1: 2009+A2: 2011
EN 55014–2: 2015
EN 60335–1
EN 60335–2–79
EN 61000–3–2: 2006+A1: 2009+A2: 2009
EN 61000–3–3: 2013
EN 61000–3–11: 2000
EN 62233: 2008
Applied conformity evaluation method
2000/14/EC: Appendix V
Sound power level dB(A)
Measured: 85
Guaranteed: 87
The undersigned act on behalf and under
the power of attorney of the company management.
Authorised Documentation Representative
S. Reiser
Alfred Kärcher GmbH Co. KG
Alfred-Kärcher-Str. 28 - 40
71364 Winnenden (Germany)
Phone: +49 7195 14-0
Fax: +49 7195 14-2212
Winnenden, 2016/03/01
22 EN
– 8

Technical specifications
HD 10/23-4 S
1.286-922.0
HD 10/23-4 S
1.286-911.0
1.286-923.0
HD 10/23-4 SX
1.286-924.0
Main Supply
Voltage V 400 220
Current type Hz 3~ 50 3~60
Connected load kW 9,0
Protection (slow, char. C) A 13 25
Type of protection IPX5
Maximum allowed net impedance Ohm (0,189+j0,118) (0,145+j0,090)
Extension cable 10 m mm
Extension cord 30 m mm
2
2
2,5
4
Water connection
Max. feed temperature °C 60
Min. feed volume l/h (l/min) 1200 (20)
Suck height from open container (20 °C) m 0,5
Max. feed pressure MPa (bar) 1 (10)
Performance data
Operating pressure of water (using standard
nozzle)
MPa (bar) 23 (230) 3...23
(30...230)
Size of standard nozzle 050
Max. operating over-pressure MPa (bar) 25,3 (253)
Flow rate l/h (l/min) 1000 (16,7)
Detergent suck in l/h (l/min) 0...80 (0...1,3)
Max. recoil force of trigger gun N 62
Values determined as per EN 60335-2-79
Hand-arm vibration value
Hand spray gun m/s
Spray lance m/s
Uncertainty K m/s
Sound pressure level L
Uncertainty K
pA
Sound power level L
pA
+ Uncertainty K
WA
WA
2
2
2
<2,5
<2,5
dB(A) 72
dB(A) 2
dB(A) 87
1
Fuel
Amount of oil l 1,2
Oil grade SAE 90
Dimensions and weights
Length x width x height mm 560 x 500 x 1090
Weight without accessories (SX) kg 66(68)
Content detergent tank l 6
– 9
23EN

Lire ce manuel d'utilisation origi-
nal avant la première utilisation
de votre appareil, le respecter et le conserver pour une utilisation ultérieure ou pour le
futur propriétaire.
Table des matières
Éléments de l'appareil. . . . . . . FR 1
Consignes de sécurité . . . . . . FR 1
Utilisation conforme . . . . . . . . FR 2
Dispositifs de sécurité. . . . . . . FR 2
Protection de l’environnement FR 3
Avant la mise en service. . . . . FR 3
Mise en service. . . . . . . . . . . . FR 4
Utilisation . . . . . . . . . . . . . . . . FR 5
Transport. . . . . . . . . . . . . . . . . FR 7
Entreposage . . . . . . . . . . . . . . FR 7
Entretien et maintenance . . . . FR 7
Assistance en cas de panne . . FR 8
Accessoires et pièces de re-
change . . . . . . . . . . . . . . . . . . FR 9
Garantie . . . . . . . . . . . . . . . . . FR 9
Déclaration UE de conformité . FR 9
Caractéristiques techniques . . FR 10
Éléments de l'appareil
cf. page de couverture
1 Pistolet de pulvérisation à main EA-
SY!Lock
2 Levier de départ
3 Manette de sécurité
4 Flexible haute pression EASY!Lock
5 Support de poignée-pistolet
6 Vanne de dosage du détergent
7 Couvercle de fermeture du réservoir de
détergent
8 Réservoir de détergent
9 Flexible d'aspiration du détergent avec
filtre
10 Vis de fixation du capot
11 Interrupteur principal
12 Capot
13 Manomètre
14 Raccordement haute pression EA-
SY!Lock
15 Récepteur de buse
16 Arrivée d'eau
17 Filtre fin
18 Indicateur de niveau d'huile
19 Réservoir d'huile
20 Dépose du flexible
21 Ventilation du réservoir de détergent
22 Espace de rangement pour les acces-
soires
23 Attache-câble
24 Dévidoir
25 Manivelle
26 Poignée
27 Écrou chapeau
28 Buse
29 Tube d’acier EASY!Lock
30 Régulateur de pression et de quantité
(seulement 1.286-911.0)
31 Cran de sécurité
Repérage de couleur
– Les éléments de commande pour le
processus de nettoyage sont jaunes.
– Les éléments de commande pour la
maintenance et l'entretien sont en gris
clair.
Consignes de sécurité
– Avant la première mise en service, vous
devez impérativement avoir lu les
consignes de sécurité N° 5.951-949.0 !
– Respecter les dispositions légales na-
tionales respectives pour les jets de li-
quide.
– Respecter les dispositions légales na-
tionales respectives pour la prévention
des accidents. Les jets de liquides
doivent être contrôlés régulièrement et
le résultat du contrôle consigné par
écrit.
– Il est interdit d'effectuer des modifica-
tion sur l'appareil/les accessoires.
Niveaux de danger
DANGER
Signale la présence d'un danger imminent
entraînant de graves blessures corporelles
et pouvant avoir une issue mortelle.
몇 AVERTISSEMENT
Signale la présence d'une situation éventuellement dangereuse pouvant entraîner
de graves blessures corporelles et même
avoir une issue mortelle.
24 FR
– 1
몇 PRÉCAUTION
Remarque relative à une situation potentiellement dangereuse pouvant entraîner
des blessures légères.
ATTENTION
Remarque relative à une situation éventuellement dangereuse pouvant entraîner
des dommages matériels.
Des symboles sur l'appareil
Une utilisation incorrecte des
jets haute pression peut présenter des dangers. Le jet ne doit pas être dirigé sur des personnes, animaux, installations électriques actives ni sur l'appareil luimême.
Selon les directives en vigueur,
l'appareil ne doit jamais être exploité sans séparateur de système
sur le réseau d'eau potable. Utiliser un séparateur de système approprié de
la société KÄRCHER ou en alternative un
séparateur système selon EN 12729 type
BA.
L'eau qui s'est écoulée à travers un séparateur système est classifiée comme non potable.
몇 PRÉCAUTION
Toujours connecter le séparateur de système à l'alimentation en eau, et jamais directement à l'appareil.
Utilisation conforme
Utiliser exclusivement ce nettoyeur haute
pression
– pour nettoyer au jet basse pression et
avec du détergent (par exemple pour le
nettoyage de machines, véhicules, bâtiments, outils),
– pour nettoyer au jet haute pression
sans détergent (par ex. nettoyage de
façades, de terrasses, d'appareils de
jardinage).
Pour des salissures tenaces nos recommandons le fraiseur de saleté comme accessoire en option.
Exigences à la qualité d'eau :
ATTENTION
Utiliser uniquement de l'eau propre comme
fluide haute pression. Des saletés entraînent une usure prématurée ou des dépôts dans l'appareil.
Si de l'eau de recyclage est utilisée, les valeurs limites suivantes ne doivent pas être
dépassées.
Valeur de pH 6,5...9,5
conductivité électrique * Conductivité
de l'eau du robinet +1200
µS/cm
substances qui se déposent **
substances qui peuvent
être filtrées ***
Hydrocarbures < 20 mg/l
Chlorure < 300 mg/l
Sulfate < 240 mg/l
calcium < 200 mg/l
Dureté globale < 28 °dH
Fer < 0,5 mg/l
Manganèse < 0,05 mg/l
Cuivre < 2 mg/l
Chlore actif < 0,3 mg/l
exempt de mauvaises odeurs
* Total maximal 2000 µS/cm
** Volume d'essai 1 l, temps de dépose 30
min
*** pas de substance abrasive
< 0,5 mg/l
< 50 mg/l
< 50 °TH
< 500 ppm
(mg CaCO
/l)
3
Dispositifs de sécurité
Les dispositifs de sécurité ont pour but de
protéger l'utilisateur et ils ne doivent donc
jamais être désactivés ni évités.
Clapet de décharge avec pressostat
En cas de réduction de la quantité d'eau
avec le réglage de pression/quantité, la clapet de décharge s'ouvre et une partie de
– 2
25FR
l'eau est évacuée vers le côté aspiration de
2.
1.
la pompe.
Si vous relâchez la gâchette du pistolet manuel, la pompe est coupée par un pressostat, le jet haute pression est arrêté. Si vous
tirez sur la gâchette, la pompe est remise
en service.
Le clapet de dérivation et l'interrupteur de
pression sont réglé et plombé par l'usine.
Seul le service après-vente est autorisé à
effectuer le réglage.
Si la consommation de courant est trop élevée, le disjoncteur de protection moteur
met l’appareil hors marche.
Protection de
l’environnement
Les matériaux constitutifs de
l’emballage sont recyclables. Ne
pas jeter les emballages dans
les ordures ménagères, mais les
remettre à un système de recyclage.
Les appareils usés contiennent
des matériaux précieux recyclables lesquels doivent être apportés à un système de recyclage. Il est interdit de jeter les
batteries, l'huile et les substances similaires dans l'environnement. Pour cette raison, utiliser des systèmes de collecte
adéquats afin d'éliminer les appareils hors d'usage.
Les appareils électriques et électroniques
renferment souvent des composants qui
peuvent représenter un danger potentiel
pour l'intégrité physique et l'environnement
s'ils sont mal utilisés ou éliminés. Ces composants sont pourtant nécessaires au bon
fonctionnement de l'appareil. Les appareils
qui présentent ce symbole ne doivent pas
être jetés avec les déchets ménagers.
Instructions relatives aux ingrédients
(REACH)
Les informations actuelles relatives aux ingrédients se trouvent sous :
www.kaercher.com/REACH
Avant la mise en service
Déballage
– Vérifier le contenu du paquet lors de
l'ouverture de l'emballage.
– Contactez immédiatement le revendeur
en cas d'avarie de transport.
Contrôle du niveau d'huile
Affichage du niveau d'huile avec l'appa-
reil à l'arrêt. Le niveau d'huile doit reposer au-dessus des deux indicateurs.
Activer la purge du carter d'huile
Dévisser la vis de fixation du capot et
retirer celui-ci.
Couper la pointe du couvercle du réser-
voir d'huile.
Fixer le capot.
Monter la poignée pistolet, la lance
et la buse
Remarque : Le système EASY!Lock relie
les composants au moyen d’un filetage rapide et fiable avec une seule rotation.
Brancher la buse haute pression au
tube d’acier.
Monter l'écrou-raccord et le serrer à la
main (EASY!Lock).
Relier le tube d’acier au pistolet à main
et serrer à la main (EASY!Lock).
Montage des accessoires
Pour les appareils sans dévidoir :
Relier le flexible haute pression au pis-
tolet à main et au flexible haute pres-
26 FR
– 3

sion de l’appareil et serrer à la main
(EASY!Lock).
Enclencher le support de câble dans
l'alésage latéral sur la poignée.
Pour les appareils avec dévidoir :
Enficher en enclencher la manivelle
dans l'arbre de dévidoir.
Avant d'enrouler le flexible haute pres-
sion, veiller à le placer de manière ten-
due.
Enrouler uniformément le flexible haute
pression sur le dévidoir en tournant la
manivelle. Choisir le sens de rotation de
telle sorte que le flexible haute pression
ne soit pas plié.
Relier le flexible haute pression au pis-
tolet à main et serrer à la main (EA-
SY!Lock).
Mise en service
몇 AVERTISSEMENT
Risque de blessure ! L'appareil, les accessoires, les conduites et les raccords doivent
être dans un parfait état. Ne pas utiliser
l'appareil si son état n'est pas irréprochable.
Branchement électrique
몇 DANGER
Risque d'électrocution.
– L'appareil doit impérativement être rac-
cordé au réseau électrique avec une
fiche. Une connexion au secteur ne
pouvant pas être coupée est interdite.
La fiche électrique sert à la séparation
du secteur.
– Branchement de l’appareil uniquement
à du courant alternatif.
– Protection minimale par fusible de la
prise de courant (voir les données tech-
niques)
– L'impédance de réseau maximale ad-
missible au niveau du point de raccor-
dement ne doit en aucun cas être dé-
passée (voir Caractéristiques tech-
niques). En cas de doute concernant
l'impédance de réseau présente sur
votre point de raccordement, veuillez
vous adresser à l'entreprise responsable de votre alimentation énergétique.
– Utiliser un câble de prolongation avec
une section suffisante (voir "Caractéristiques techniques") et le dérouler complètement de l'enrouleur.
Données de raccordement, voir plaque signalétique / caractéristiques techniques
Dérouler le câble secteur et le poser sur
le sol.
Brancher la fiche secteur dans une
prise de courant.
Arrivée d'eau
Raccordement à la conduite d'eau
몇 AVERTISSEMENT
Respecter les prescriptions de votre société distributrice en eau.
Selon les directives en vigueur,
l'appareil ne doit jamais être exploité sans séparateur de système
sur le réseau d'eau potable. Utiliser un séparateur de système approprié de
la société KÄRCHER ou en alternative un
séparateur système selon EN 12729 type
BA.
L'eau qui s'est écoulée à travers un séparateur système est classifiée comme non potable.
Pour les valeurs de raccordement, se reporter à la section Caractéristiques techniques.
Raccorder la conduite d'alimentation
(longueur minimale 7,5 m, diamètre minimum 3/4") au raccord pour l'arrivée
d'eau de l'appareil et à l'alimentation en
eau (ex. un robinet).
Remarque :
La conduite d'alimentation n'est pas comprise dans la livraison.
Ouvrir l'alimentation d'eau.
Aspiration d'eau depuis des réservoirs ouverts
Visser le flexible d’aspiration avec le
filtre (n° de commande 4.440-238.0) sur
la prise d’eau.
Purge d'air de l'appareil :
– 4
27FR

Dévisser l'injecteur.
Laisser l'appareil en route jusqu'à l'eau
sorte sans faire de bulles.
Arrêter l'appareil et dévisser de nou-
veau l'injecteur.
Utilisation
DANGER
Risque de blessure ! Ne jamais utiliser l'appareil si la lance n'est pas montée. Contrôler avant chaque utilisation la bonne fixation de la lance. Le raccord vissé de la
lance doit être serré à la main.
Risque d'explosion !
Ne pas pulvériser de liquides inflammables.
Si l’appareil est utilisé dans des zones de
danger (par exemple des stations essence), il faut tenir compte des consignes
de sécurité correspondantes.
Risque de blessure ! Pendant le travail, retenir la poignée pistolet et la lance des deux
mains.
Risque de blessure ! Lors du fonctionnement, ne pas coincer le levier de départ et
le levier de sécurité.
Risque de blessure ! En cas de levier de
sécurité défectueux, se rendre au service
après-vente.
Risque de blessure dû au jet d’eau sous
haute pression. Pousser, avant tout travail
sur l’appareil, le cran de sécurité du pistolet
manuel vers l’avant.
몇 PRÉCAUTION
Nettoyer les moteurs uniquement à des endroits équipés des séparateurs d'huile nécessaires (protection de l'environnement).
ATTENTION
Risque d'obturation. Poser les buses uniquement avec l'embouchure vers le haut
dans le compartiment des accessoires.
Ouvrir/fermer le pistolet de
pulvérisation à main
Ouvrir le pistolet de pulvérisation à
main : Actionner le levier de sécurité et
le levier de départ.
Fermer le pistolet de pulvérisation à
main. Relâcher le levier de sécurité et le
levier de départ.
Fonctionnement à haute pression
Remarque :
L'appareil est équipé d'un pressostat. Le
moteur ne tourne que lorsque le pistolet
manuel est ouvert.
Dérouler complètement le flexible haute
pression de l'enrouleur.
Régler l'interrupteur principal sur "I".
Le témoin de contrôle s'allume (vert).
Enlever la sécurité du pistolet de pulvé-
risation à main en poussant le loquet de
sécurité vers l’arrière.
Ouvrir le pistolet manuel.
Uniquement 1.286-911.0:
DANGER
Lors du réglage de la régulation de quantité/de pression, veiller que le raccord vissé
de la lance ne se desserre pas.
Régler (+/-) la pression de service et le
débit en tournant (en continu) le dispositif régulateur de pression et de quantité.
Fonctionnement avec détergent
몇 AVERTISSEMENT
Des détergents non appropriés peuvent
endommager l'appareil et l'objet à nettoyer.
N'utiliser que des détergents homologués
par Kärcher. Respecter les consignes et recommandations de dosage jointes aux détergents. Protéger l'environnement en utilisant les détergents avec parcimonie.
Respecter les consignes de sécurité mentionnées sur les détergents.
Des détergents de Kärcher garantissent un
travail sans défauts. Veuillez-vous conseiller ou demander notre catalogue ou notre
bulletins d'information sur des produits de
nettoyage.
Remplir le réservoir de détergent.
DANGER
Risque de blessure ! Mettre l'appareil hors
service et actionner la poignée-pistolet jusqu'à ce que l'appareil soit hors pression
avant de procéder au remplacement de la
buse.
28 FR
– 5
Sécuriser le pistolet de pulvérisation à
main en poussant le loquet de sécurité
vers l’avant.
Remplacer la buse haute pression par
la buse basse pression (taille 250, ac-
cessoires).
Régler le clapet de dosage du dé-
tergent sur la concentration souhaitée.
Concentration du détergent [%] (avec le
débit max.)
Réglage de la soupape de dosage
Concentration de
détergent [%]
(avec le débit max.)
Méthode de nettoyage conseillée
Pulvériser le détergent sur la surface
sèche et laisser agir sans toutefois le
laisser sécher complètement.
Ôter les salissures décollées à l'aide du
jet haute pression.
Après utilisation, plonger le filtre dans
de l'eau claire. Tourner la valve de do-
sage sur la concentration en détergent
la plus élevée. Démarrer l'appareil et
rincer à l'eau claire pendant une minute.
1357
0,5 2,5 5,0 7,0
Interrompre le fonctionnement
Fermer la poignée-pistolet.
L'appareil se coupe automatiquement.
Sécuriser le pistolet de pulvérisation à
main en poussant le loquet de sécurité
vers l’avant.
Après une interruption :
Enlever la sécurité du pistolet de pulvé-
risation à main en poussant le loquet de
sécurité vers l’arrière.
Ouvrir le pistolet manuel.
L'appareil démarre de nouveau.
Mise hors service de l'appareil
Couper l'alimentation en eau.
Ouvrir le pistolet manuel.
Activer la pompe à l’aide de l’interrup-
teur principal et laisser tourner 5 à 10
secondes.
Fermer la poignée-pistolet.
Positionner l'interrupteur sur '0/OFF'.
En veillant à avoir les mains bien
sèches, débrancher la fiche secteur.
Déconnecter l'arrivée d'eau.
Actionner la poignée-pistolet jusqu'à ce
que l'appareil soit hors pression.
Sécuriser le pistolet de pulvérisation à
main en poussant le loquet de sécurité
vers l’avant.
DANGER
Risque de brûlure provoquée par l'eau
chaude . lorsque l'appareil est hors service,
l'eau résiduelle contenue peut se réchauffer. Lors de l'enlèvement du tuyau de l'arrivée d'eau, l'eau réchauffée peut être projetée et provoquer des ébouillantements. Retirer tout d'abord le tuyau lorsque l'appareil
a refroidi.
Ranger l’appareil
Enficher la poignée-pistolet dans le
support.
Enrouler le flexible haute pression et
l'accrocher sur la dépose du flexible.
ou
Enrouler le flexible haute pression sur
le dévidoir. Enfoncer la poignée de la
manivelle pour bloquer le dévidoir.
Enrouler le câble d'alimentation autour
de l'attache-câbles.
Protection antigel
ATTENTION
Le gel peut endommager l'appareil si l'eau
n'a pas été intégralement vidée.
Conserver l'appareil dans un lieu à l'abri du
gel.
Si un entreposage à l'abri du gel n'est pas possible :
Vidanger le réservoir de détergent (voir
"Maintenance et entretien/si nécessaire").
Purger l'eau.
Pomper produit antigel d'usage par l'ap-
pareil.
Remarque :
utiliser un produit antigel courant pour automobile à base de glycol.
– 6
29FR

Respecter les consignes d'utilisation du fabricant du produit antigel.
Faire tourner l'appareil au max. 1 mi-
nute jusqu'à ce que la pompe et les
conduites soient entièrement vides.
Transport
몇 PRÉCAUTION
Risque de blessure et d'endommagement !
Respecter le poids de l'appareil lors du
transport.
ATTENTION
Protéger le levier de départ contre tout endommagement lors de son transport.
Pour transporter l’appareil sur de plus
longues distances, le tirer derrière soi
au moyen du manche de poussée.
Vidanger le réservoir de détergent
avant un transport en position allongée.
Sécuriser l'appareil contre les glisse-
ments ou les basculements selon les di-
rectives en vigueur lors du transport
dans des véhicules.
Entreposage
몇 PRÉCAUTION
Risque de blessure et d'endommagement !
Prendre en compte le poids de l'appareil à
l'entreposage.
Cet appareil doit uniquement être entreposé en intérieur.
Entretien et maintenance
DANGER
Risque de blessure et de choc électrique
par un démarrage inopiné de l'appareil.
Avant d'effectuer des travaux sur l'appareil,
couper l'interrupteur principal et débrancher la fiche secteur.
Remarque :
L'huile usagée doit impérativement être éliminée auprès d'un point de collecte prévu à
cet effet. Y apporter l'huile usagée. L'huile
usagée est polluante. Toute élimination incorrecte est passible d'une amende.
Inspection de sécurité/Contrat
d'entretien
Vous pouvez accorder avec votre commerçant une inspection de sécurité régulière
ou passer un contrat d'entretien. Conseillez-vous.
Avant chaque mise en service
Contrôler que le câble d'alimentation
n'est pas endommagé (risque de choc
électrique), faire remplacer immédiatement tout câble d'alimentation endommagé par un service après-vente autorisé/un électricien spécialisé.
Vérifier le tuyau à haute pression s'il est
endommagé (danger d'éclatement).
Un flexible haute pression endommagé
doit immédiatement être remplacé.
Vérifier l'étanchéité de l'appareil
(pompe).
3 gouttes d'eau par minute sont admissibles et peuvent s'écoulent au côté inférieure de l'appareil. En cas de non
étanchéité plus forte, adressez-vous au
Centre de Service Après-vente.
Hebdomadairement
Vérifier le niveau d'huile Si l'huile est lai-
teux (eau dans l'huile), adressez-vous
immédiatement au Centre de Service
Après-vente.
Nettoyer le filtre fin.
Mettre l'appareil hors pression.
Dévisser la vis de fixation du capot et
retirer celui-ci.
Dévisser le couvercle et le filtre.
Nettoyer le filtre à l'eau propre ou à l'air
comprimé.
Remonter en suivant les étapes dans
l'ordre inverse.
Nettoyer le filtre situé sur le tuyau d'as-
piration de détergent.
Toutes les 500 heures de service, au
moins une fois par an.
Faire effectuer la maintenance de l'ap-
pareil par le service après-vente.
Remplacer l'huile.
30 FR
– 7
 Loading...