

Kärcher B 60 Quick Start Manual

QUICKSTART
5.964-272.0 10/12
Warning
These are only brief instructions! Please read and comply with these instructions prior to using or servicing your
appliance.
The non-compliance of the operating and safety instructions may lead to damages of the appliance and to dangers
for the operator and other persons.
Start up
1
A B A Unplug the charger from the mains.
B Wind the mains cable around the cable hold-
ers.
2
A B A Open the lock of the fresh water reservoir.
Fill fresh water (maximum 60 °C) until the
lower edge of the filling nozzle.
Close the lock of the fresh water reservoir.
or
B Connect the hose to the automatic filling
system and open the water supply
(max. 60 °C, max. 5 bars).
3
A B Model with dosing equipment "Dose"
A Place the detergent bottle into the holder.
Close the bottle lid.
Insert the suction hose of the dosaging
equipment into the bottle.
Model without dosing equipment "Dose"
B Add the detergent to the fresh water
reservoir.
Operation
1
A B Starting the machine
A Turn the program selection switch to "OFF".
B Plug in the Intelligent Key.
B 60
QUICKSTART
5.964-272.0 10/12
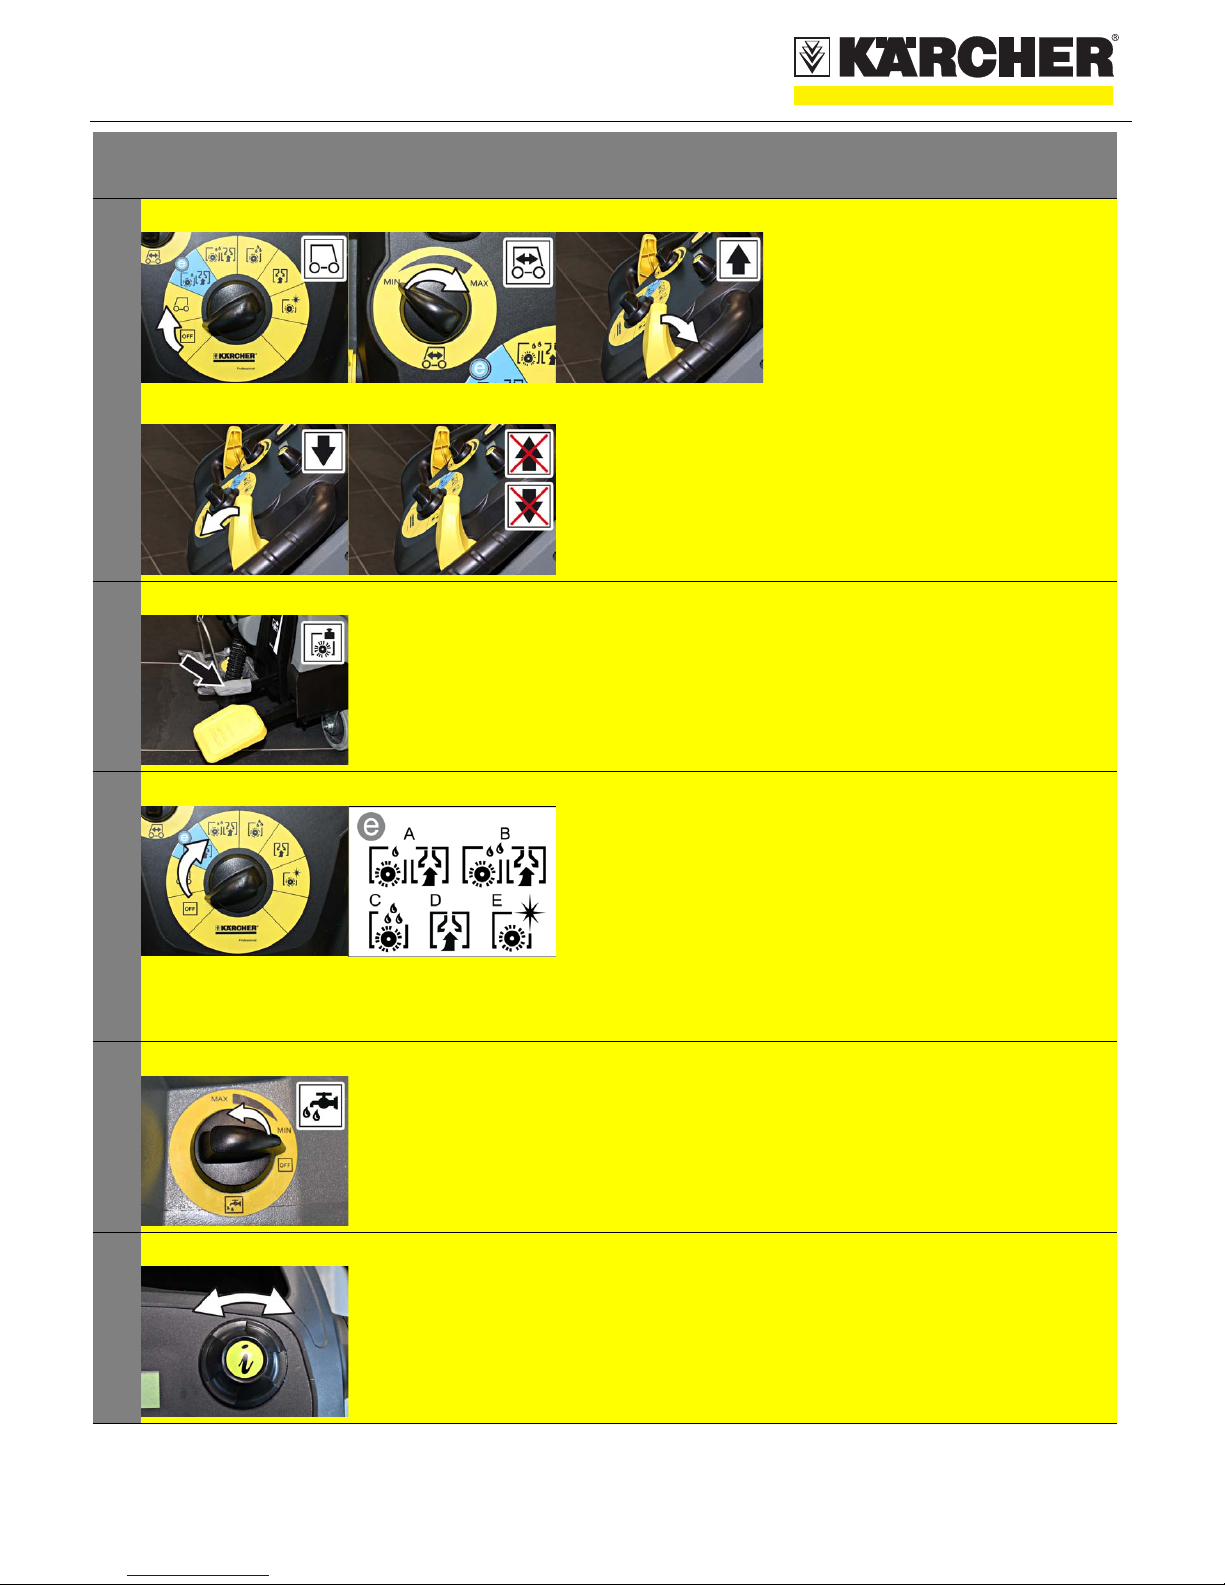
2
A
D
B
E
C Driving
A Turn the programme selector switch to
position 1 "Transport mode".
B First select the driving speed at the rotary
knob.
Drive forward
C Press the driving lever to the front.
Stop the machine: Release driving lever.
Reverse drive
D Press the driving lever to the rear.
Stop the machine: Release driving lever.
Stop
E Release driving lever.
3
A Adjusting the brush contact pressure
A Arrest the lever in the desired position.
Upper position: higher contact pressure
Lower position: reduced contact pressure
4
Cleaning Programs
A Eco!efficiency mode
Wet clean the floor and vacuum up dirt water.
B Normal mode
Wet clean the floor and vacuum up dirt water.
C Intense mode
Wet clean the floor and allow the detergent to
react.
D Vacuum mode
Vacuum the wastewater.
E Polishing mode
Polishing the floor without the application of
liquid.
5
A Setting the water quantity
A Adjust the water quantity using the regulating
button according to the dirt on the floor cover-
ing.
6
A Info button
Use the Info button to select the menu items and
do the settings.
A Turning the button to the right/left scrolls
through the menus forward/ backward.
The selected setting gets accepted by
pressing the button.
Operation
 Loading...