

Page 1
MODEL # JX-CD678
CD PLAYER WITH BASS BOOST,
60-SECOND SUPER A.S.P.
INSTRUCTION MANUAL
Visit our web site www.jwin.com
Page 2
WARNING
To prevent fire or shock hazard, do not expose the unit to rain or moisture.
To avoid el ectrical shock, do not open the cabinet. Refer servicing to qualified person-
nel only.
SAFETY PR ECA UTION
1. As the laser beam used in this compact disc player is harmful to the eyes, do not attempt
t o d isa ss em b le th e c as ing .
2. Stop operation immediately if any liquid or solid object should fall into the cabinet. Unplug
the unit and have it checked by qualified personnel.
3. Do not touch the lens or poke at it. If you do, you may damage the lens and the player
may not operate properly.
4. Do not put anything in the safety slot. If you do, the laser diode will be ON when the lid
is still opened.
5. If the unit is not to be used for a long period of time, make sure that all power sources
are disconnected from the unit. Remove all batteries from the battery compartment, and
unplug the AC adaptor from the wall outlet. Make it a practice to remov e the AC adaptor by
gras ping the main body and not by pulling the cord.
6. This unit employs a laser. The use of controls or adjustment or performance of
p roce du re s o ther than tho se s pe ci fi ed herein ma y result in exposure to hazardous radiat io n.
Warning :
Th e ap par a tus sho ul d n ot b e exposed to dr i pp ing or splashing and tha t no o bj ect s fill ed with
liqu id s, such as vas e s, sha ll b e pl ace d o n the apparatus.
CLASS 1 LASER PRODU CT
CLASS 1 LASER PRODUCT
APPAREIL LASER DE CLASSE 1
PRODUCTO LASER DE CLASE 1
WHE N OP EN AND INT ERLO CKS
CAUTI ON
INVISIBLE LASER RADIATION
DEFEATED.
AVOID EXPOSURE TO BEAM
This product contains a low power laser device.
COMPLIANCE WITH FCC REGULATIONS
Th i s e qu i pm en t ha s been t este d a nd f ou nd to com p ly with t he limits for a Class B di g ital device,
pursuant to Part 15 of the FCC Rules. These limits are designed to provide reasonable
protection against harmful Interference in a residential installation. This equipment generates,
u ses and ca n r a diat e radio freq ue nc y en er gy and, if no t ins tal led a nd use d in a cc ordance w ith
the instructions, may cause harmful interference to radio communications. However, there is no
guarantee that interference will not occur in a particular installation. If this equipment does
ca use harmful i nte rfe re nce to radi o or tel evi sio n r ecep tion, w hi ch can be dete rmined b y tu rnin g
the equipment off and on, the user is encouraged to try to correct the interference by one or
more of the fo llow ing meas ures :
• Reorientate or relocate the receiving antenna.
• Increase the separation between the equipment and receiver.
• Connect the equipment into an outlet on a circuit different from that to which the receiver is
con necte d.
• Co ns u lt th e d ea ler or an experien ced rad i o te c hn ician for help.
EN-1
Page 3

IMPORTANT NOTES
Your hearing is very important to you and to us so please take care when operating
this equipment. It is strongly recommended that you follow the listed guidelines in
order to pre vent possible damage or loss of hea ring:
ESTABLISH A SAFE SOUND LEVEL
• Over time your hearing will ad apt to continuous loud sounds and will give the
impression that the volume has in fact been reduced. What seems normal to
you may in fact be harmful. To guard against this BEFORE YOUR HEARING
ADAPTS set the volume at a low level.
• Slowly increase the level until you can hear comfortably and clearly and without
distortion.
• Damage to your hearing is accumulative and is irreversible.
• Any ringing or discomfort in the ears indicates that the volume is too loud.
Once you have established a comfortable listening level, DO NOT INCRE ASE TH E
SOUND LEVEL FUR THER.
The following list of typical sound levels may assist you in recognizing just how loud
you have set the volume level.
DECIBEL
Level dB Example
30dB Quiet Library, soft whispers
40 Living room, fridge freezer bedroom away from traffic.
50 Normal conversation, quiet office, light traffic.
60 Electric sewing machine.
70 Vacuum cleaner, hair dryer, noisy restaurant.
z
T HE F OL LOWING NOIS ES CA N BE H ARMF UL UNDE R CON STANT EX POSUR E
80dB Average city traffic, alarm clock buzzer at 2 feet, food mixer.
90 Motorcycle, heavy goods v ehicle, petrol law n mowe r.
100 Pneumatic drill, chain saw, garbage truck, discotec / ni ght - club .
120 Rock band concert, thunderclap.
PE RMAN ENT L OSS OF HE ARIN G
140 THRESHOLD OF PA IN Gunshot 2 feet away.
180 Rocket Launching pad.
Mode No: Serial No:
EN-2
Page 4
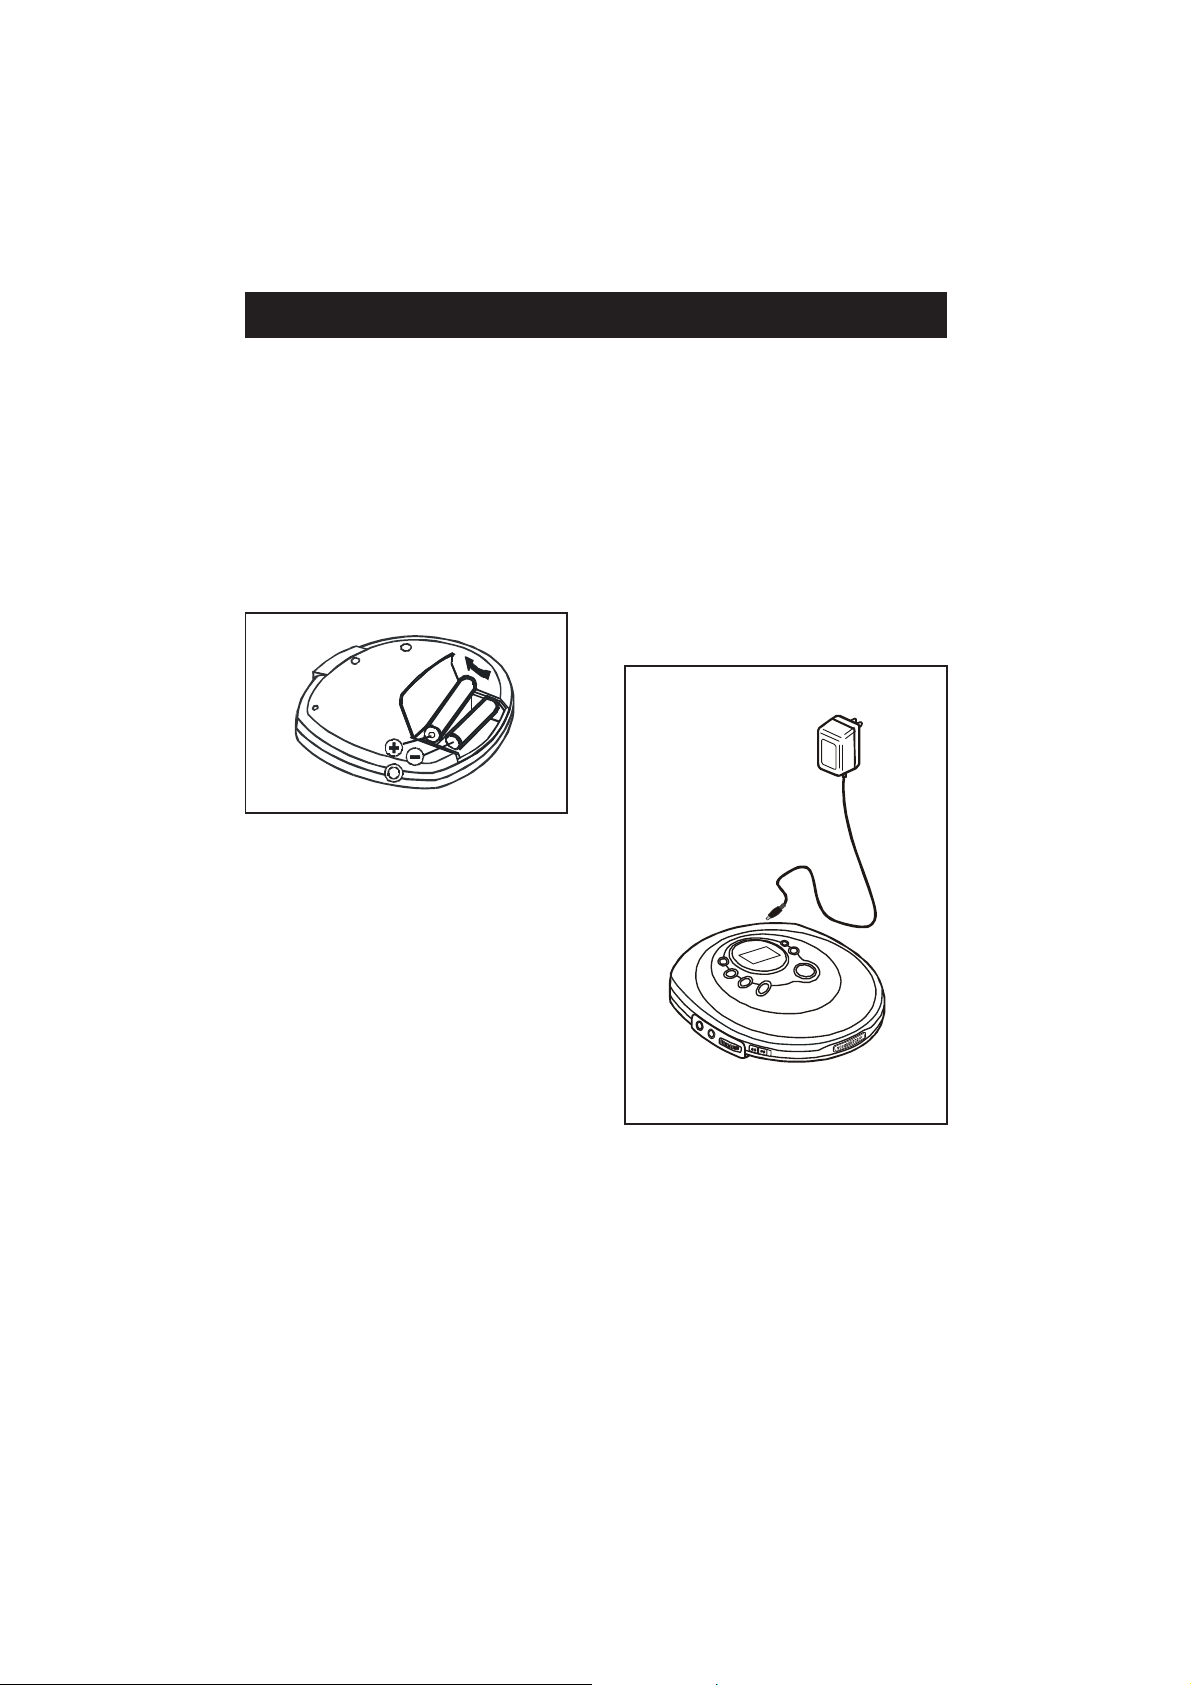
POWER SOURCES NORMAL BATTERIES / AC ADAPTOR
Battery Power Operation
1. Open the battery compartment
cover and insert two “AA” (UM-3)
alkaline batteries (not included)
inside the battery compartment.
F ollow the p ola ri ty as in dica ted
in the battery compartment.
2. Close the battery compartment
cover.
Note: When the unit is to be operated
using batteries, always unplug the AC
adaptor from the AC power outlet and
the DC input jack from the set.
Otherwise the player will not operate.
AC Adaptor Op eration
( AC adaptor not included )
Only use a 4.5V/500mA DC, positive
center pin power adapter. Any other
adapter may damage the set.
1. Make sure the l ocal voltage corresponds to the adapter’s voltage.
2. Connect the power adapter to the
4.5V DC jack of the player and to
the wall outlet.
2
1
3. For better performance and longer
operatin g time, we recommend the
use of alkaline batteries.
4. (a) Do not mix old and new
batteries.
(b) Do not mix alkaline, standard
( car bo n- zinc ) or rech a rge able
(nickel-cadmium) batteries.
5. If the unit is not to be used for an
ext ende d per iod of time, rem ove
the batt er ies. Ol d or le ak i ng
batteries can cause d amage to t he
unit and may void the warranty.
EN-3
Page 5
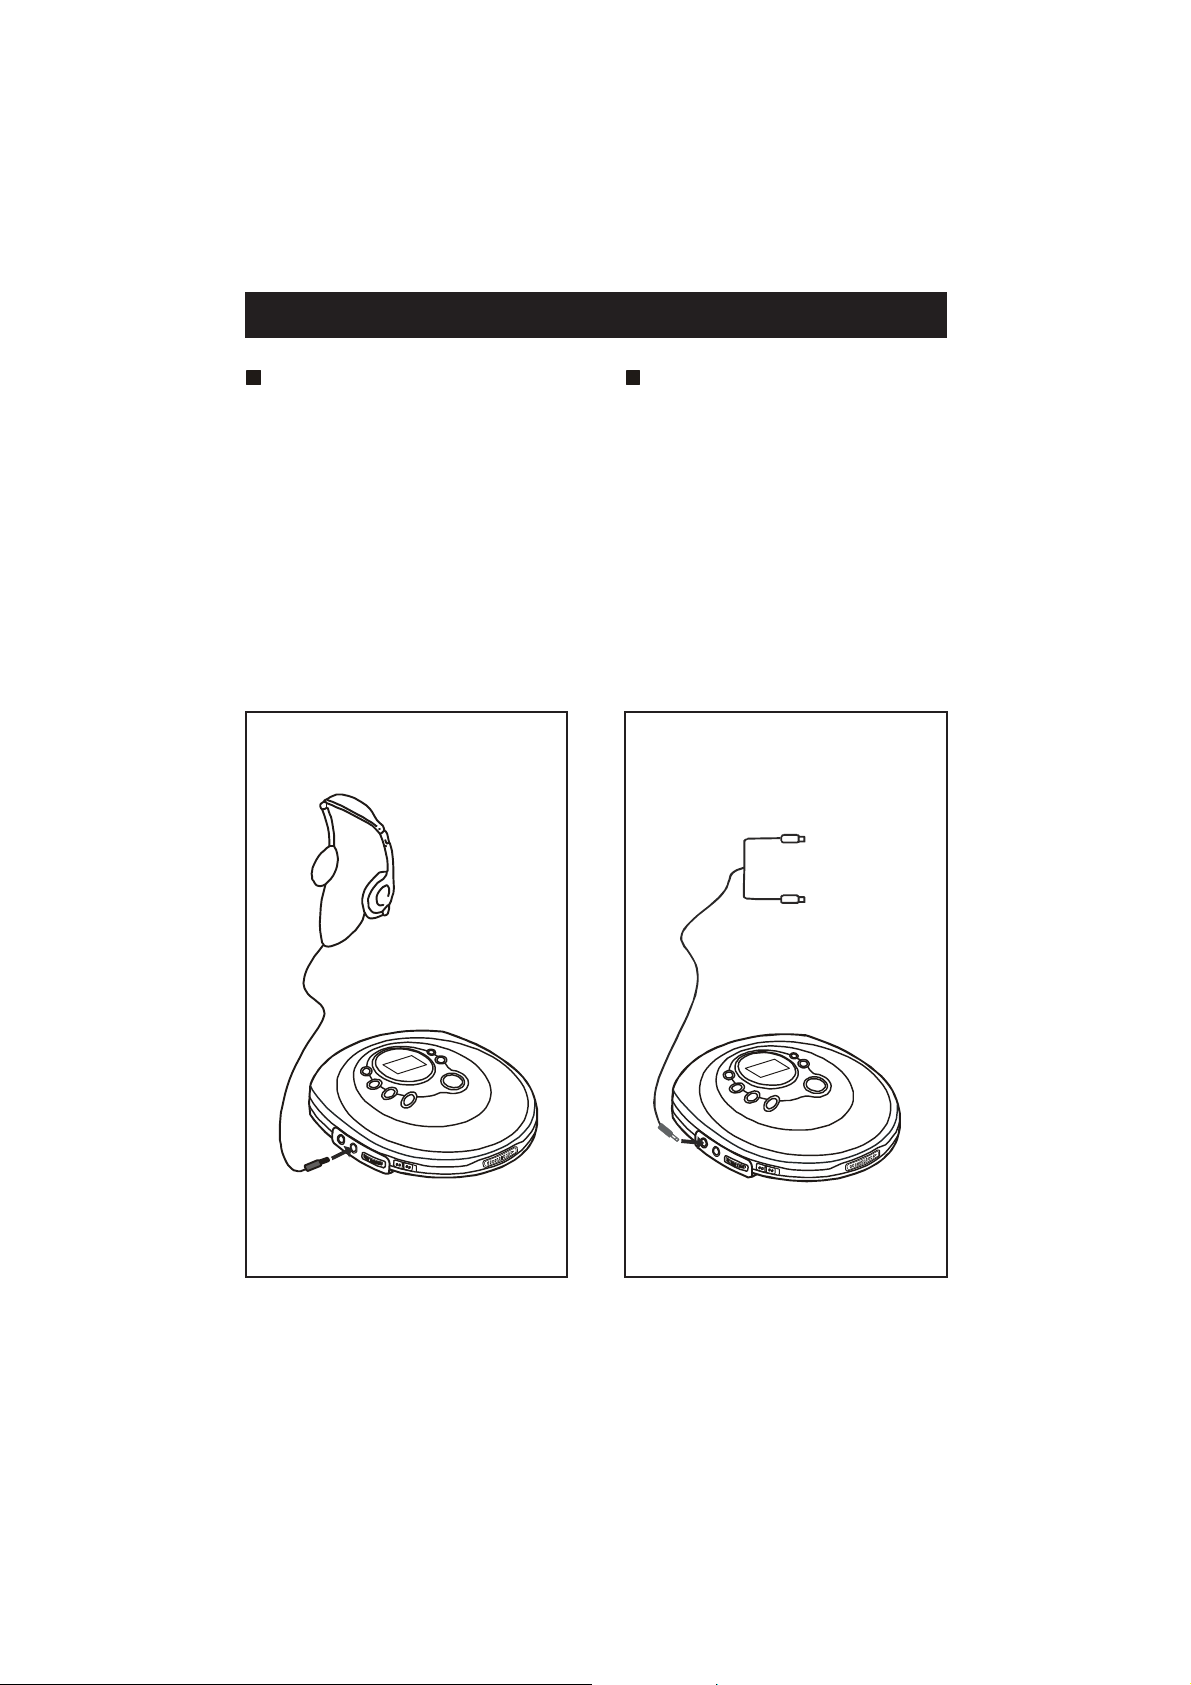
HEADPHONE AND HI-FI CONNECTION
Listening with th e
headphones
Connect the plug of the stereo
headphones ( included ) into the
PHONES ( GREEN ) socket.
Caution: Avoid excessive volume levels for a long period of time
when using headphones, as this may
im pair your heari ng.
Connecting to component
audio systems
Connect the stereo connection
cable ( not included ) into the LINE
OUT ( BLACK ) socket of the
unit and the CD / AUX inputs of
an audio system.
Note: Always switch the power off
before ma king any con nections
between the player and another unit.
TO CD / AUX
INPUT
TO PHONES
TO LINE OUT
EN-4
Page 6

1
2
8
7
9
10
11
12
13
14
LOCATION OF CONTROLS
3
4
5
6
1. DISPLAY WINDOW
2. PROGRAMME BUTTON
3. MODE BUTTON
4 . L INEOUT S OCKE T
5. PHO NES SOCK ET
6 . V OLUME C ONT ROL
7. BASS BOOST SWITCH
8 . O P EN SW ITCH
9. PLAY/PAUSE BUTTON
10. S TOP BUTTON
11. SKIP/SEARCH FORWARD
BUTTON
12. SKIP/SEARCH BACKWARD
BUTTON
13. DC 4.5V INPUT SOC KET
14. ASP BUTTON
EN-5
Page 7

BASI C DI SC PLAY
1
2
6
5
4
3
Remove the disc
Hold the edge and gently press the
ce nt e r pi vot as ill us tr ated, the n pi ck
up the disc.
1. Connect the Headphones to the
PHONES ( GREEN ) socket.
2. Slide the OPEN switch to open
the CD compartment lid.
3. Adjust the VOLUME to minimum.
4. Insert the disc with the label side
facing up.
5. Close the lid securely un til a
click is heard.
6. Press the PLAY/PAUSE
button to start playing.
To enhance the bass
effect
Set the BASS BOOST switch to
the ON position.
Note: The bass boost performance will
be dependent on the VOLUME
control setting.
Turning Power on and off
This unit h as no ON / OFF switch.
To turn on and off, press the
following buttons.
Caut io n:
Wait for the disc to stop rotating
before pressing the OPEN button.
NOTE:
This unit can play 3” ( 8cm ) single
CD’s without an adaptor. Do not use
a CD single adaptor for these discs.
To turn on : Press PLAY / PAUSE
( playback starts )
To turn off : Press STOP button
once f or standby mode.
Press STOP button
again to turn off t he
power.
Auto power-off function
When the unit is stopped ( standby
mode ) for approximately 1 minute,
the power is automatically turn ed
off.
EN-6
Page 8

LCD DISPLAY INFORMATION
During PLAY mode
Th e tr ack n umber and the ela p sed playing
time are displayed.
During STOP mode
The total number of tracks and the total playing
time of the disc are displayed.
During PAUSE mode
The track playback is paused, the elapsed time
and track number is flashing.
This sixth track has
elapsed 2 min 30sec.
Note:
When lid is opened during play mode
the door is open.
Note:
A flashing indication appears in the display when the batteries need to
be changed.
EN-7
_ _ _ _
sh ow s in t h e di spl ay in dic atin g
Page 9

REPEAT / PLAY MODES
Every time the MO DE button is pressed, the corresponding mode appears
in the display window, in the following sequence :
Shown in the LCD display.
The current track on the
disc will be repeated.
Shown in the LCD display.
All t racks on the disc will
be repeated.
NOTE: In normal mode none of the above
symbols show in the display.
NORMAL PLAYBACK
Play the whole disc
EN-8
During play
X1press
During play
X2 presses
Press once to play
X1press
Page 10

INTRO SCAN AND PROGRAMMED TRACK PLAY
INTRO
Plays the first 10 seconds of each track on the disc.
Press to st a rt pl ayi ng “ INTRO ” s can.
During play
X3 presses
PROGRAM
This allows selected tracks on the disc to be played in any desired order.
To set the program play
Programs can be set in the STOP mode.
*
1. Press the PROGRAM button when the
unit is in the stop mode.
The t rack num ber will a ppe ar in the
display with the indicator flashing.
2. Press or to select the desired
track.
3. Press the PROGRAM button to enter the
track into the memory.
4. Repeat step 2 and 3 to program up to 24
tracks memory.
5. Press to start the programmed play.
6. To erase the program , press the
STOP button twice.
Track no. of the first
desired selection
The second selection
During STOP mode
EN-9
X1 press
Page 11

RANDOM PLAY/SKIP AND SEARCH FUNCTIONS
To search backward at a high speed
To skip to the beginning of the
following tracks
To skip back to the beginning of the
current or a pr evious track
Press lightly and repeatedly.
Press lightly and repeatedly.
RANDOM
Enables all the tracks on a disc to be played in a Random ( RAND ) sequence.
For example : If “RAND” is selected while playing track 8, the random function
wi ll commence o n ce tr ack 8 ha s ended.
When all tracks on a disc have been played the player will automatically stop
and power down in approx. 1 minute to preserve battery life.
During pla y
X4 presses
Press MODE button again to return to the NORMAL play mode.
Locating a Particular track
Locating a Particular Point in a track
Low level audio will be heard during the search process to assist in locating the
co rrect po int in the track.
EN-10
Page 12

SUPER ANTI-SKIP OPERATION
This player incorporates a superior electronic anti-skip circuit which prevents
interruption of the sound output when the unit is subjected to shock,
vibration or rolling during disc playback. If in use the player is likely to be
subjected to shock, vibration or rolling ( i.e. while walking or if used in a vehicle )
press the Super ASP button to provide uninterrupted playback.
When the Super ASP butto n is pre ssed in the play m ode the disp lay w ill sho w
and the function is initialised. When shows in the display the data buffer is
full.
Super ASP Indicator Super ASP Indicator Super ASP Indicator
The sound will mute for approximately 1 second while the buffer fills. Once
filled the buffer will give approximately 60 seconds of protection against
interruption of sound output. If t he player is subjected to shock or rolling of
over 60 seconds duration some interruption of sound output will occur. This
is normal and to be expected and t he sound will resume once the player
has stabilized from t he shock or rolling distu rbances.
To turn this function off press the Super ASP button.
Notes:
1. When using the Super ASP function the battery power consumption increases
because the disc rotates faster than normal and the dynamic menory is
active.
2. While the Super ASP function provides for continuous sound output
when the unit is subjected to continuous shock, vibration or rolling it will not
correct errors arising from the use of defective, scratched or dirty discs.
3. When powering the player solely from batteries, only use the Super ASP
function where necessary to preserve battery life.
EN-11
Page 13

PLAYER MAINTENANCE
Cleaning the Cabinet
Wipe with a soft cloth. If the cabinet is very dirty, dampen the cloth with a
weak solution of neutral detergent and water, and then wipe clean.
Cleaning the Lens
A dirty len s will cause sound skipping. If the lens is very dirty, open the
CD compartment lid and clean the lens as follows :
Dust or Dry Particles
Using a camera lens brush / blower, blow on the lens couple times, then
wipe it lightly with the brush to remove dust. Then, blow on the lens once
more.
Fingerprints
If the lens cannot be cleaned using brush / blower, use a cotton swab
starting in the middle and working to the outside edge.
EN-12
Page 14

DISC CLEANING AND TROUBLESHOOTING GUIDE
Cleaning the Disc
When a disc becomes dirty,
clean it with a cleaning cloth.
Wipe the disc from the center
out.
Note: Do not use solvents such as benzene, thinner, commercially available
cleaners or anti-static spray intended for analog discs.
EN-13
 Loading...