

Page 1
jWIN
PORTABLE COMPACT
DISC PLAYER WITH 15 SEC.
ELECTRONIC ANTI-SKIP
PLEASE READ CAREFULLY BEFORE USINGYOUR UNIT
MODEL : JX-CD415
Page 2
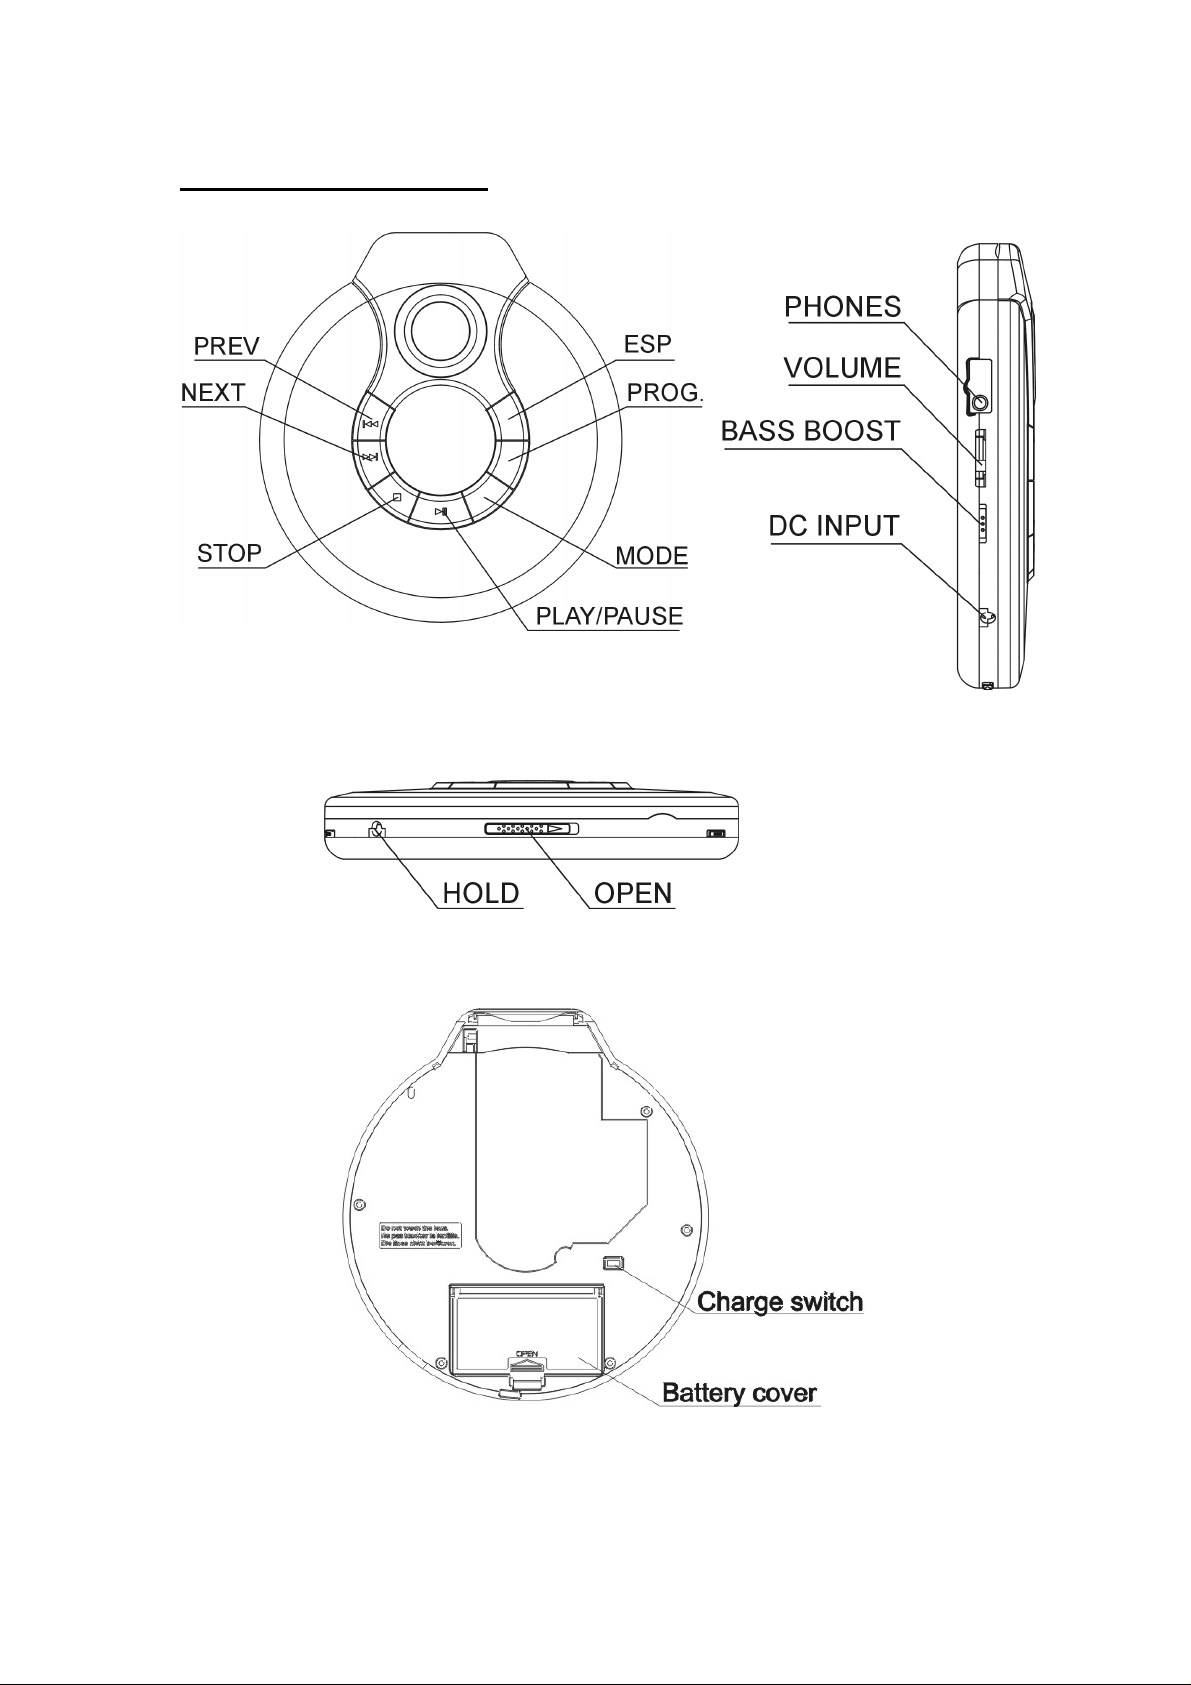
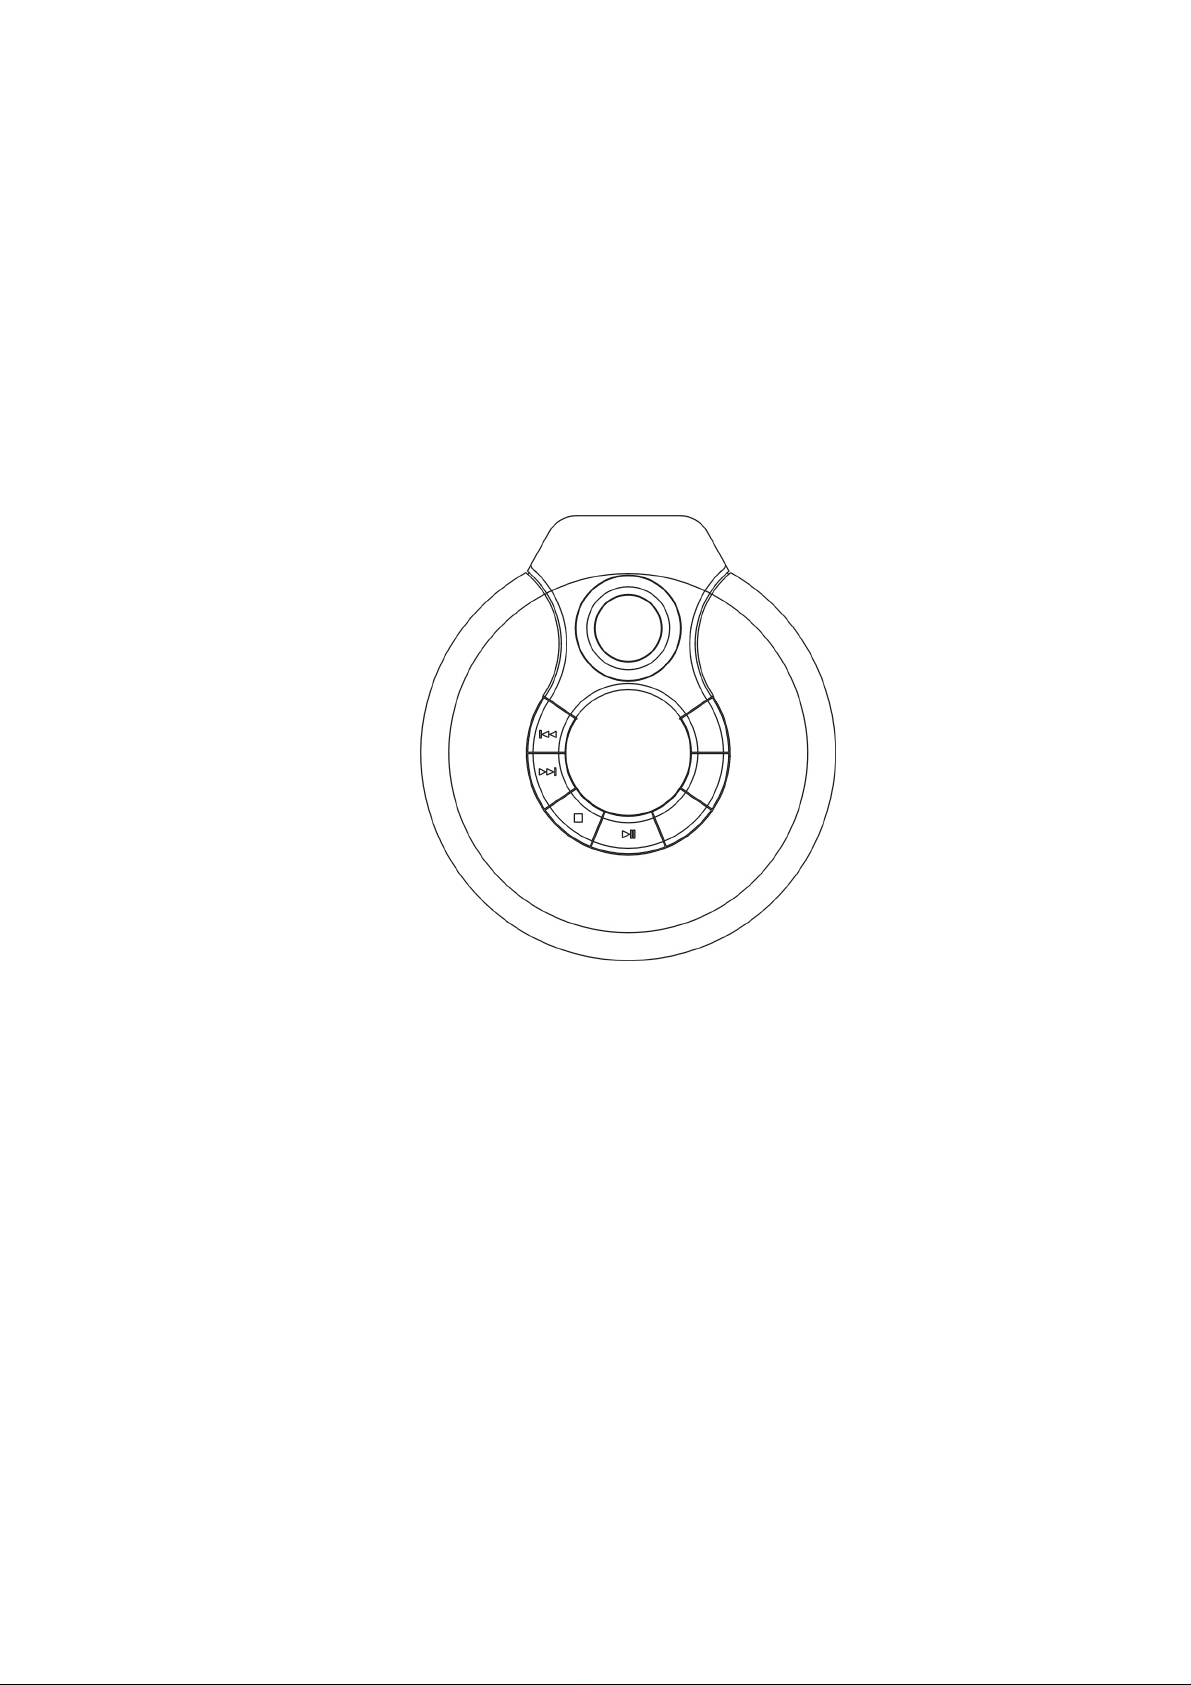
LOCATION OFCONTROLS
Page 3

OPERATION
Power Supply
This CD player requires 2 x AA batteries (not included) or an External AC adaptor
4.5V 600mA (not included) to operate.
AC adaptor Operation
Plug one end of the AC adaptor into the DC 4.5V jack, and then plug the other end
into AC wall outlet (adaptor not included).
Precautions on using theAC Adaptor
Please make sure that you purchase the correct type of AC adaptor. Use of an
incorrect AC adaptor will damage the unit. Don’t touch the adaptor with wet hands.
Doing so is dangerous and could result in an electric shock.
DC Operation
A. Battery Installation
1. Open the CD door by sliding the CD Door open switch.
2. Lift the battery door following the direction of the “Open” indication.
3. Insert 2 x AA batteries into the battery compartment. Remember to follow proper
polarity as the directions of battery location are engraved inside the battery
compartment.
4. Close the battery door and make sure that the door is locked securely in place.
5. Please remove batteries from the battery compartment if you are not going to use
the unit for long time.
B. Charging Circuit
This unit is equipped with a built-in charging circuit.
1. Slide the Charging switch inside the CD compartment to the “ON” position
2. Insert the Rechargeable batteries (Ni-Cd or Ni-Mh 650mAh, not supplied) into the
battery compartment according to the “Battery Installation” directions above.
3. Connect the DC socket of the AC Adaptor (not supplied) into the DC jack of the
unit as mentioned above.
4. The rechargeable batteries should be recharged before they are used for the first
time or if they have not been used for a long period of time (over 60 days).
Rechargeable batteries can be charged in approximately 15 hours.
5. Please make sure to unplug the AC adaptor and slide the charging switch to the
“OFF” position after 15 hours of charging.
Note: Please make sure that only Nickel-Cadmium or Ni-Mh batteries are used for
Page 4

re-charging. Do not attempt to charge any regular kinds of non-rechargeable batteries.
Charging of other kinds of batteries will damage the unit. Performance of
rechargeable batteries will deteriorate as a result of regular depreciation. Purchase a
new set of batteries when the operating time decreases drastically, even when the
rechargeable batteries are properly recharged.
Listening with Headphones
Connect the plug of the stereo headphones into the headphone jack (marked phones).
Warning: Before listening from the Headphones, please make sure that you have set
the volume output to a reasonable level. Listening at excessive volume levels can
damage your ears and result in a hearing loss. It is always advisable to avoid
listening for too long a period of time or at high volume.
Playing a Disc
Make sure that you have reduced the volume before plugging in the headphones.
1. Plug the 3.5mm earphone plug into the earphone socket labeled “PHONES”.
2. Slide the switch labeled “OPEN” to open the CD door.
3. Take a CD and hold the disc firmly with the label side up facing you.
4. Press the CD onto the center spindle until the CD is securely locked into
place.
5. Close the CD door and press the PLAY/PAUSE button. This will activate the
disc to spin.
6. The display will show the number of tracks and total playing time. Play
will start immediately from track 1 after display of the above information.
7. Slide the Volume control to adjust the volume level as desired.
8. Set the Bass Boost button to the ON position for enhancement of Bass effect.
9. To temporarily pause CD play during playback, press the PLAY/PAUSE
button once. The time indicator on the display will flash to denote PAUSE
mode. Pressing the PLAY/PAUSE button again will resume CD play from
the position at which it stopped.
10. To stop CD playback completely, press the STOP button. The power turns
off automatically in less than 30 seconds. Pressing the STOP button again
will turn off the unit instantly.
Page 5

Note: This unit is capable of playing both 8 cm and 12 cm discs. However, please
make sure to place only one disc in the CD compartment.
SKIP/SEARCH
During CD playback, the following SKIP/SEARCH functions can be activated:
1. Press and hold the NEXT button to search forward for a particular portion of
the track currently playing.
2. Press the NEXT button to skip from the current track to the beginning of next
track.
3. Press the NEXT button repeatedly to reach the beginning of consecutive tracks
on the Disc.
4. Press and hold the PREV button to search backward for a particular portion of
a track currently playing.
5. Press the PREV button to skip to the beginning of current track.
6. Press the PREV button twice or more to skip to the beginning of previous
tracks.
PROGRAMMED PLAY
A total of 20 tracks can be programmed in any order. Programming is possible
during both unit Play or Stop mode.
1. Press the “PROGRAM” button during CD Play or Stop mode. “PROG 00 01”
appears in the LCD display. The first 2 digits denote the track being
programmed and the second 2 smaller digits denote the location of program
memory.
2. Press the PREV/NEXT buttons ( or ) to select the track to be programmed.
3. Press the PROGRAM button again to store the track number into memory. The
display shows “PROG 00 02”.
4. Repeat steps 2 and 3 above for a maximum of 20 programs.
5. The programming will be cancelled when the CD door is opened or the unit is
turned OFF.
Page 6

REPEAT
Repeat 1
During CD play, pressing the CD MODE button once will enable the unit to play the
current track repeatedly until the STOP button is pressed. The symbol
will appear in the display during “Repeat 1” mode.
Repeat All
During CD repeat play mode, pressing the CD mode again will enable the unit to play
the whole disc repeatedly until the STOP button is pressed. The symbol
will appear in the display during “Repeat All” mode.
INTRO PLAY
1. During CD play or CD Stop condition, press the CD MODE button three times.
This will activate the Intro function of the unit.
2. The “INTRO” indicator on the LCD will light up. Press the PLAY/PAUSE button
and the first 10 seconds of each song will be played until the STOP button is
pressed.
RANDOM PLAY
1. Press the MODE button four times and then the PLAY/PAUSE button during CD
Play or Stop mode to enable the unit to play the tracks from the Disc randomly.
The “SHUFF” indicator on the LCD will light up.
2. Press the NEXT () button to skip to the next randomly selected track;
3. Press the MODE or STOP button to cancel the Random Play function. The
“SHUFF” indicator will go out.
HOLD
1. To avoid accidental operation of the unit and consume batteries, slide the
“HOLD” switch to the right. This will lock all the CD keys and prevent
unintentional operation.
2. When the unit is under “HOLD” condition and the Play/Pause button is being
pressed, “HOLD” will flash on the LCD.
3. Sliding the “HOLD” switch to the left will enable all the CD keys to operate
normally.
Page 7

ANTI-SHOCK BUTTON (ESP)
* Press the ANTI-SHOCK button to switch the ESP function on or off. An
“Anti-Shock” will light up on the LCD.
Maintenance
Cleaning the lens
A dirty lens will cause sound skipping or poor performance. It is advisable to
maintain the CD lens in good order by means of regular cleaning of the lens using a
cotton swab from the middle and working to the outside edge.
Cleaning the cabinet
Wipe the unit with a soft cloth. Dampen the cloth with a weak solution of soap and
water. Do not use corrosive cleaners, gasoline or benzene to clean the unit because
they will damage the housing of the unit.
TECHNICAL SPECIFICATION
CD Play Section
Frequency Response ……….………20 Hz –20k Hz
Wow and Flutter ………………. Lower than measurable
Sampling Frequency .………….…... 44.1 kHz
D/A Converter ………………. 1-bit
Error Correction ………………. CIRC
Pick Up ……………….Optical 3-Beam Semiconductor laser
General Specification
Power Supply ………………… 3V, 2 x AA batteries or 4.5V 600mA AC
Adaptor
Output Power ………………… 2 x 20mW (32 Ohm)
Page 8

TROUBLE SHOOTING GUIDE
SYMPTOM CAUSE REMEDY
Dead or weak batteries Replace both batteriesCD player does not
turn on
Disc does not play
No sound from
headphones
AC adaptor not properly
connected
HOLD switch set to right (ON)
position
Disc inserted incorrectly Re-insert with label side facing
Defective or wrong type of CD Try another Audio CD
CD door not closed Secure CD door
Moisture has condensed inside
the CD deck
Headphones not properly
inserted
Volume control set to minimum Adjust the volume control
Weak batteries Replace with fresh batteries or
Defective CD Try another Audio CD
The lens or CD is dirty Clean the CD lens and CDSound is skipping
Check the AC adaptor
connection at AC outlet and unit
Set HOLD switch to left (OFF)
position
up.
Open the CD door and let the
unit dry for about an hour
Re-insert the headphones plug
use an AC adaptor
Sound is distorted
Tracks do not change
or set does not play
normally
Too much movement when
playing CD
Music is too loud Adjust the volume
Weak batteries Replace with fresh batteries or
Bass Boost is ON and volume
is too loud.
Batteries are too low and the
battery symbol is flashing in the
display
Reduce movement of CD player
use an AC adaptor
Lower the volume or set the
Bass Boost to the OFF position
Replace with fresh batteries or
use an AC adaptor
 Loading...