

Page 1
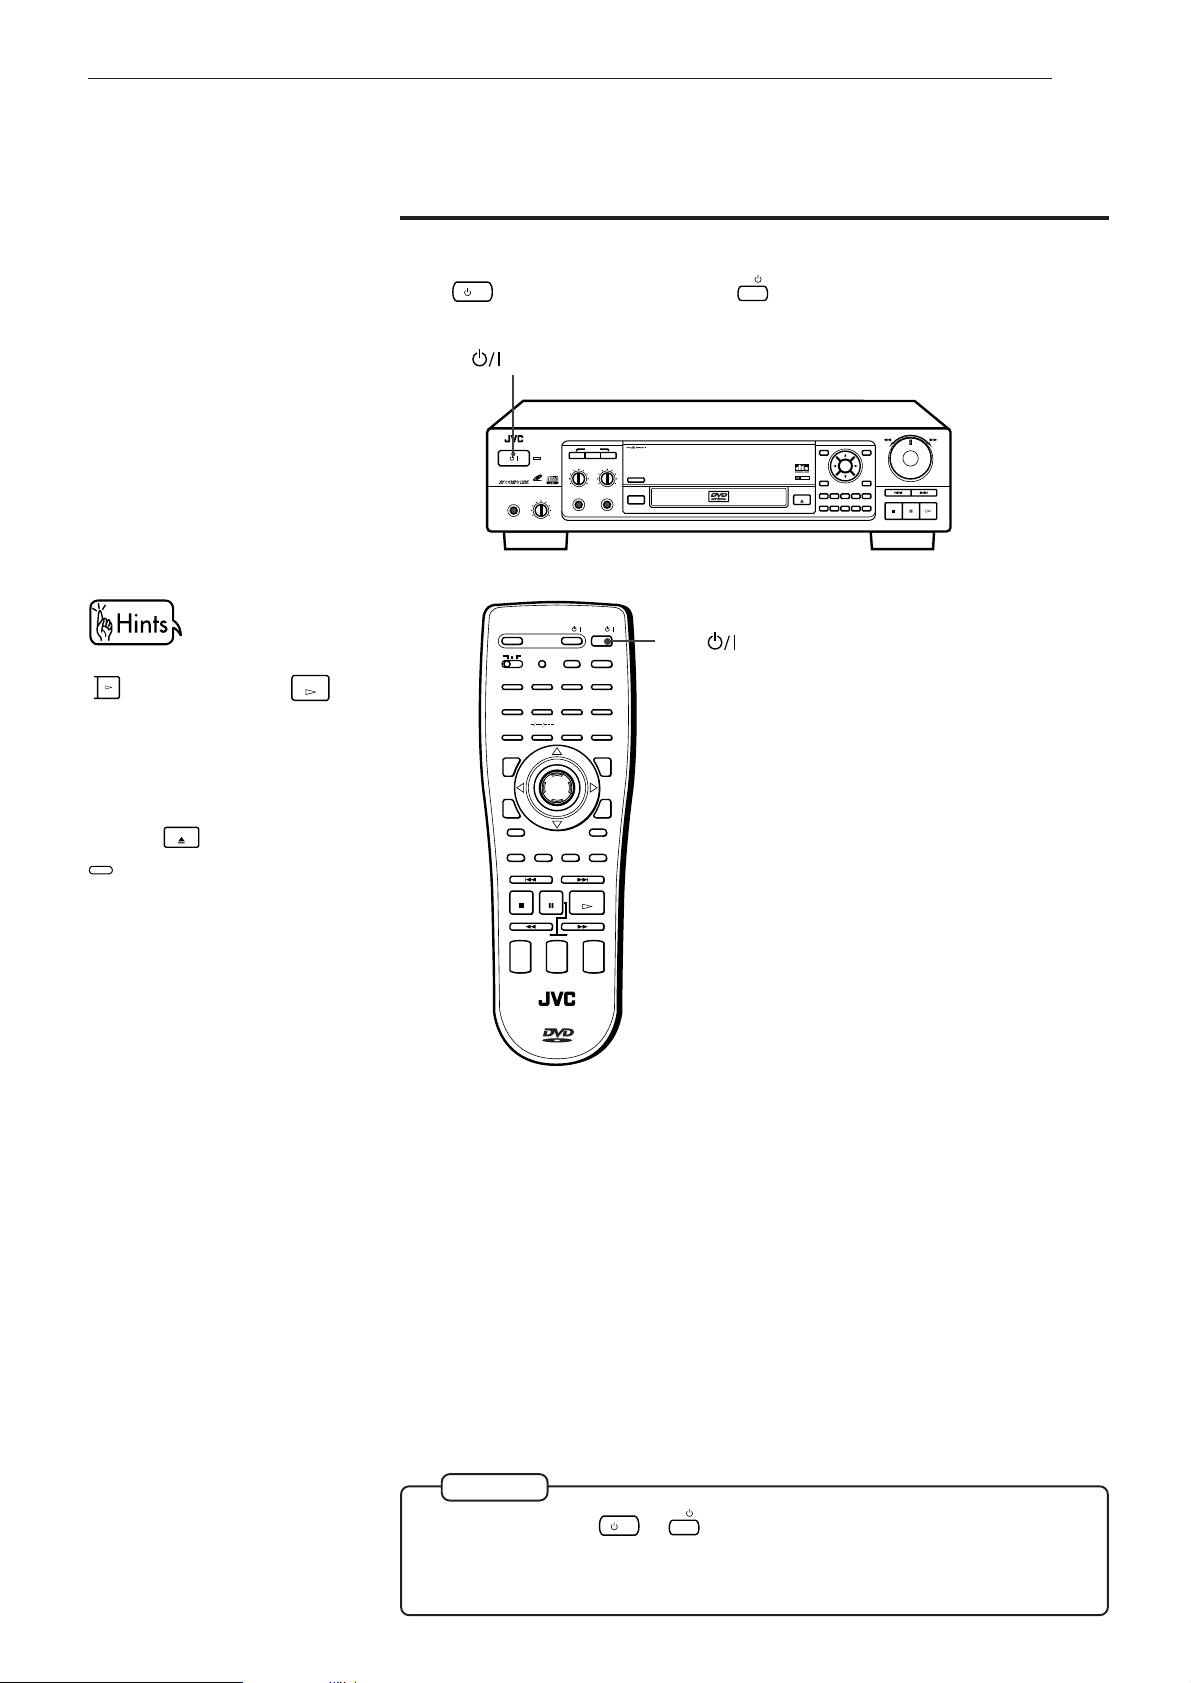
COMPACT COMPONENT SYSTEM
SHUTTLE
SKIP
STOP PAUSE PLAY
OPEN/CLOSE
3D PHONIC
DIGEST
PHONES LEVELPHONES
MIN MAX
STANDBY
DVD / VIDEO CD / CD
DVD PLAYER
VIDEO CD
MIC 1 LEVEL
MIN MAX
MIC 2 LEVEL
MIC 1 MIC 2
MIN MAX
ON/OFF RESERVE
KARAOKE
CANCEL
DOLBY
DIGITAL
ON SCREEN
+10
54321
1009876
TITLERESUME MENU
ENTER
STANBAY/ON
/
DVD PLAYER
XV-D705GD/XV-D703TN
OPEN/
/
/
TV
CLOSE
TV
DVD
1234
5678
9100
TITLE
3D PHONIC ANGLE
ECHO
RETURN
STOP
CLEAR SELECT
KARAOKE
CANCEL RESUME
TV/VIDEOSET
SCORING
ENTER
SUBTITLE ZOOM
KARAOKE
VOCAL
SOUND
EFFECT
PAUSE
STROBE
SLOW(–) SLOW(+)
+
+
TV
CH
VOLUME
–
–
DVD
KEY CONTROL
VOCAL
REPLACE
NEXTPREVIOUS
PLAY
AUDIO
VOLUME
KARAOKE
RESERVE
+10
MENU
DIGESTON SCREEN
+
–
KARAOKE
ON / OFF
RM–SV501U REMOTE CONTROL
VIDEO CD
INSTRUCTIONS
For Customer Use:
Enter below the Model No. and Serial
Enter below the Model No. and Serial No.
No. which are located either on the rear,
which are located on the rear, bottom or
bottom or side of the cabinet. Retain this
side of the cabinet. Retain this information
information for future reference.
for future reference.
Model No.
Serial No.
LET0142-003A
[ 2U, 3U, 4U, US, UB, UT ]
Page 2

Warnings, Cautions and Others
CAUTION - - LASER RADIATION WHEN OPEN.
DO NOT STARE INTO BEAM.
ATTENTION RAYONNEMENT LASER EN CAS D’OUVERTURE.
NE PAS REGARDER DANS LE FAISCEAU.
- VORSICHT LASERSTRAHLUNG, WENN ABDECKUNG GEÖFFENET.
NICHT IN DEN STRAHL BLICKEN.
- ADVARSEL LASERSTRÅLING VED ÅBNING.
SE IKKE IND I STRÅLEN.
- ADVARSEL LASERSTRÅLING NÅR DEKSEL ÅPNES.
STIRR IKKE INN I STRÅLEN.
-
VARNING LASERSTRÅLNING NÄR DENNA DEL ÄR ÖPPNAD.
STRRA EJ IN I STRÅLEN.
VARO! AVATTAESSA OLET ALTTIINA LASERSÄTEILYLLE.
ÄLÄ TUIJOTA SÄTEESEEN.
-
-
˚
CAUTION
To reduce the risk of electrical shocks, fire, etc.:
1. Do not remove screws, covers or cabinet.
2. Do not expose this appliance to rain or moisture.
Caution –– button!
Disconnect the mains plug to shut the power off completely. The button
in any position does not disconnect the mains line. The power can be remote
controlled.
IMPORTANT FOR LASER PRODUCTS
REPRODUCTION OF LABELS
1 CLASSIFICATION LABEL, PLACED ON REAR ENCLOSURE 2 WARNING LABEL, PLACED INSIDE THE UNIT
CLASS 1
LASER PRODUCT
1. CLASS 1 LASER PRODUCT
2. DANGER:Visible laser radiation when open and interlock
failed or defeated. Avoid direct exposure to beam.
3. CAUTION: Do not open the top cover. There are no user
serviceable parts inside the Unit; leave all servicing to qualified service personnel.
Caution: Proper Ventilation
To avoide risk of electric shock and fire and to protect from damage.
Locate the apparatus as follows:
Front: No obstructions open spacing.
Sides: No obstructions in 3 cm from the sides.
Top: No obstructions in 5 cm from the top.
Back: No obstructions in 15 cm from the back
Bottom: No obstructions, place on the level surface.
Page 3
Introduction
English
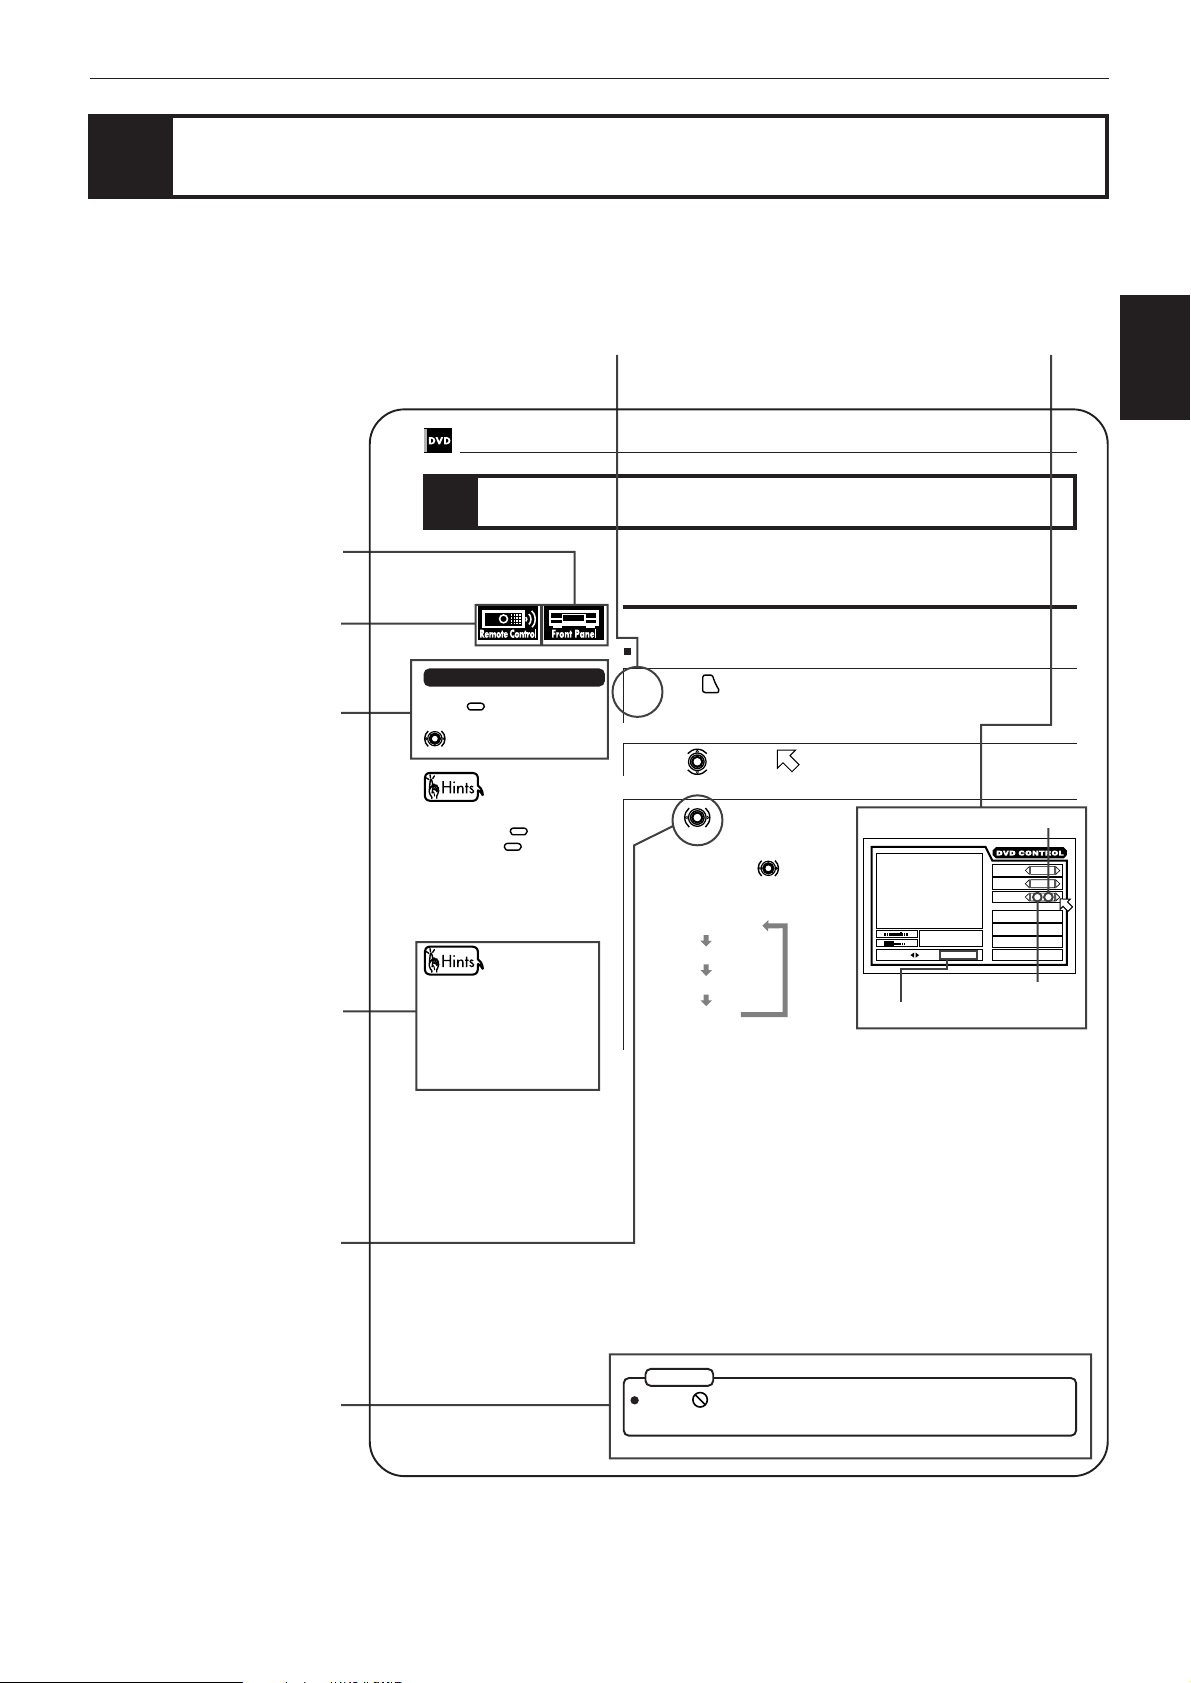
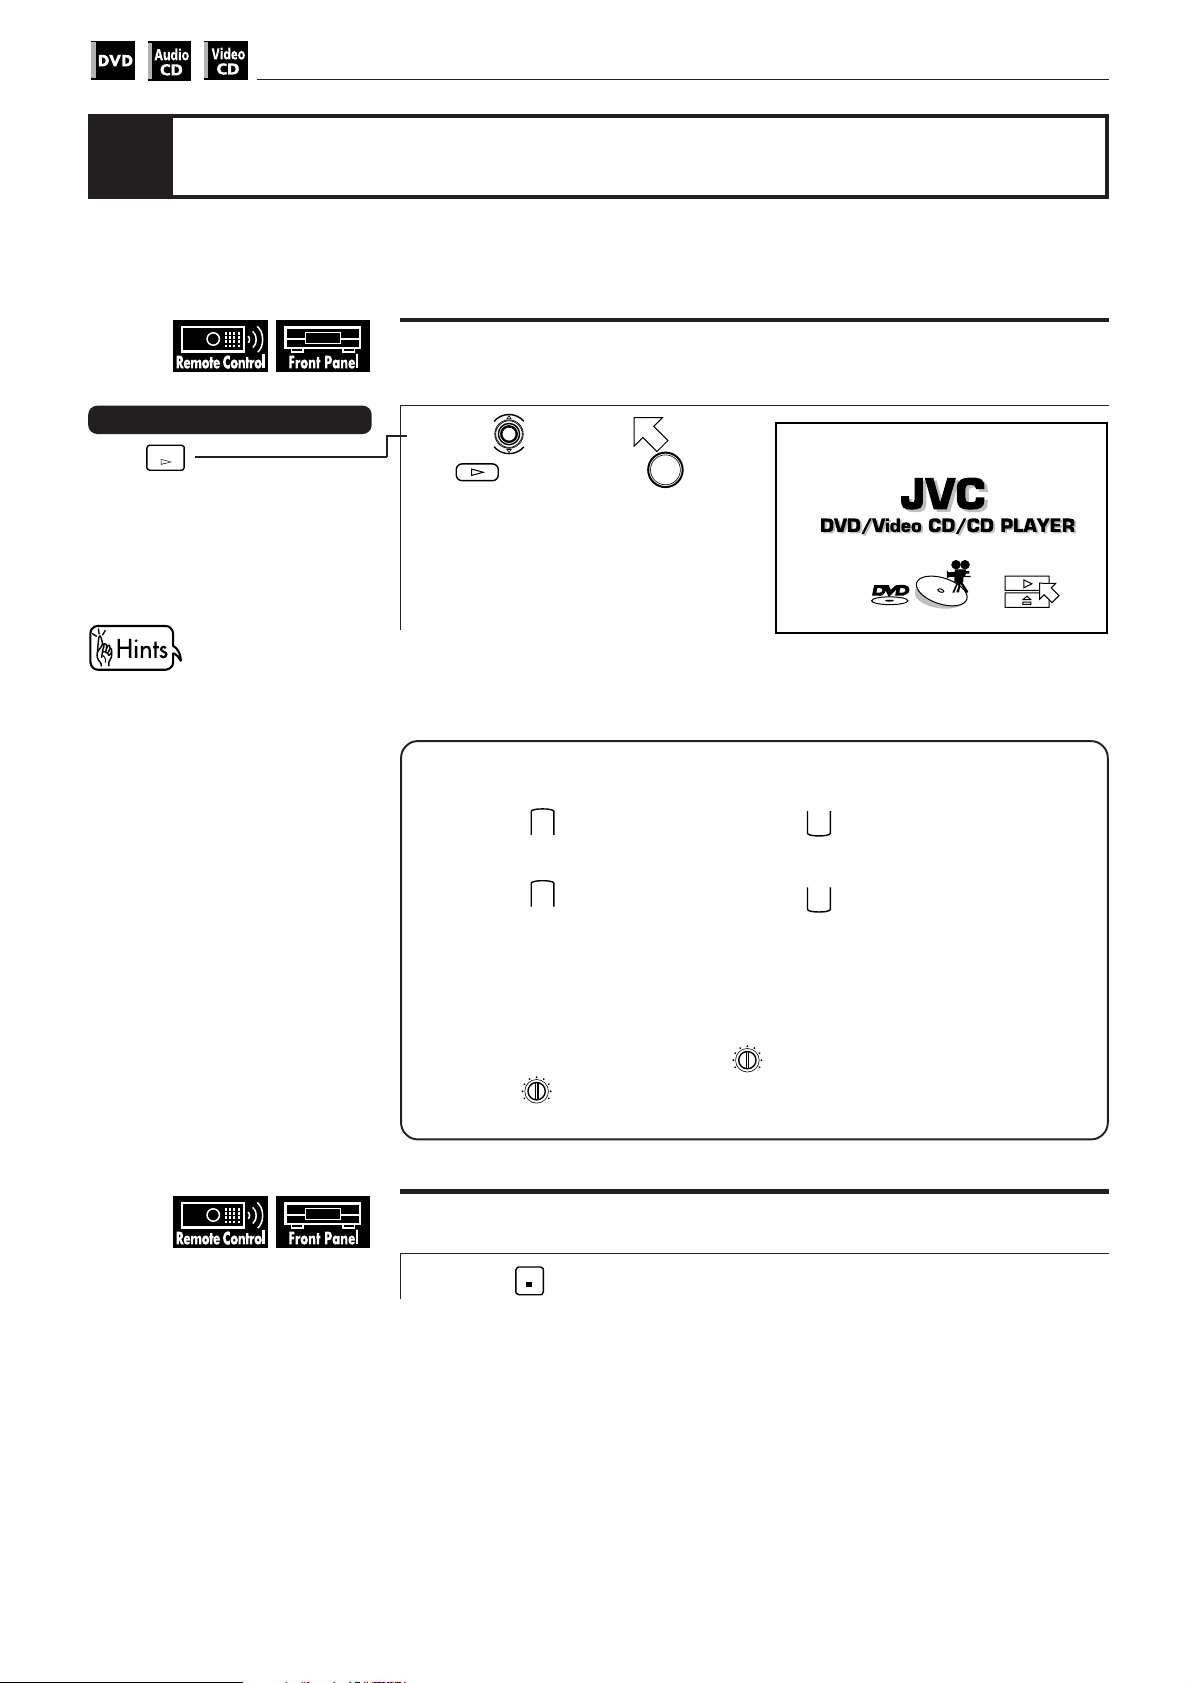
Using the instructions
The instructions basically explain operations as follows:
The number indicates the procedural step.
DVD VIDEO Operations
Changing the language and sound
You can operate from
the front panel.
You can operate with
the remote control unit.
Short cuts
Short cuts:
Procedures that you can
shorten.
SUBTITLE
Press
desired subtitle by using
and select the
.
The on-screen display displayed
during the operation.
You can choose the sub-title or audio language from among the languages
included on a disc and select the sound from a variety of sounds included on a
disc.
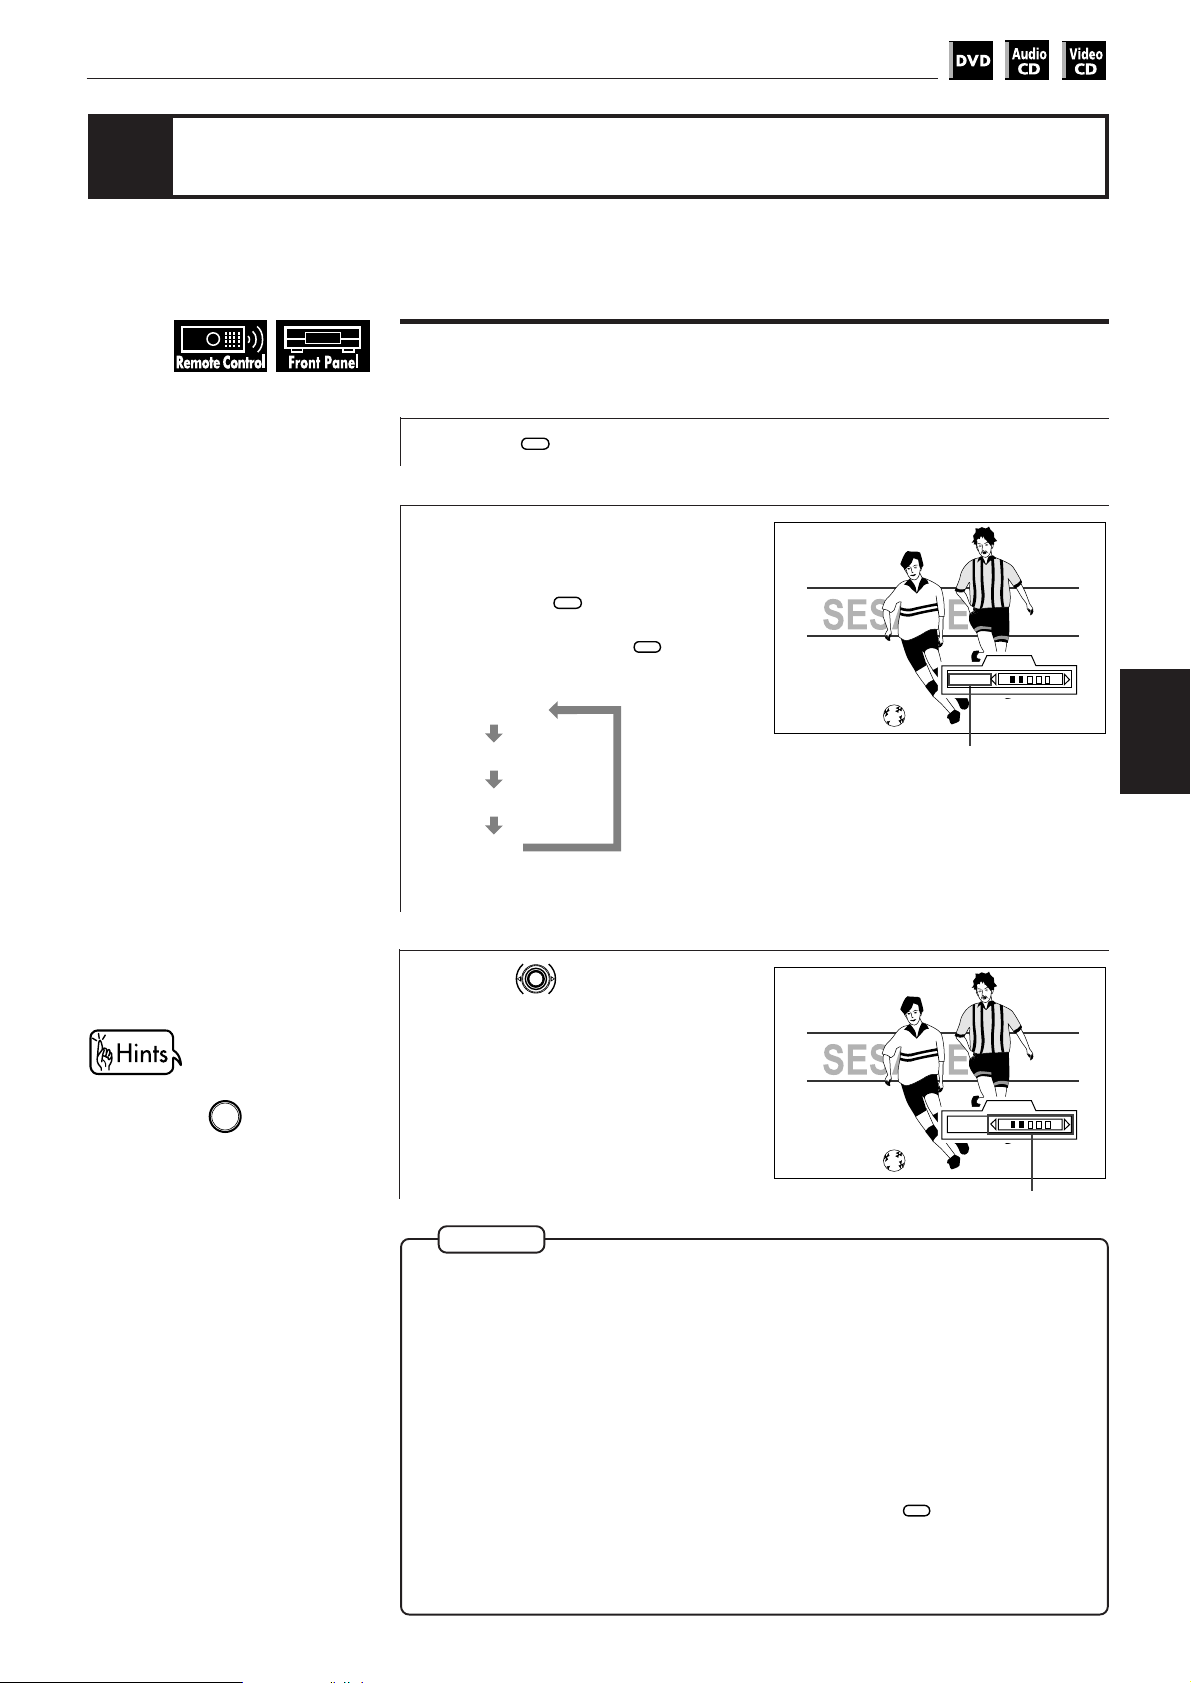
To select the subtitle language [SUBTITLE]
During playback
Press
1
The on-screen display appears on the TV screen.
Use to move to [SUBTITLE].
2
ON SCREEN
.
Español
Portugés
Chinese
Introduction
Hints:
Other convenient
procedures.
The buttons used in steps
are shown as illustlations.
Note:
Additional supplemental
remarks
You can turn ON/OFF the subtitle by pressing
time you press
OFF status is switched. When
the subtitle function is ON, the
subtitle language appears on the
TV screen.
When you select the language, if
the abbreviation appears on the
TV screen, select the
abbreviation corresponding to
the desired language. For
details on abbreviations, see
the end of this instruction.
46
44
SUBTITLE
SUBTITLE
. Each
, the ON/
Use to select the desired
3
subtitle.
Each time you use , the subtitle
changes.
Example:
1/3 ENGLISH
2/3 FRENCH
3/3 SPANISH
–/3 (off)
NOTE
When
appears on the TV screen:
You cannot select the subtitle.
St. End
TITLE
03
TIME
010 Mb
SELECT KEY ENGLISH
Selected subtitle
1 : 34 : 58
Selected subtitle number
CHAP.
03
Total number
1 / 3
ANGLE
2 / 3
AUDIO
SUB-
1 / 3
TITLE
REPEAT
A-B REPEAT
TIME SEARCH
CHAP.SEARCH
Page 4

Introduction
Table of contents
Introduction
Page 1
Preliminary Knowledge
Page 5
Getting started
Page 15
Using the instructions
Notes on care and handling
Names of parts and controls
Front panel ................................................................................................................. 6
Display window ......................................................................................................... 7
Rear panel .................................................................................................................. 7
Remote control unit .................................................................................................. 8
Display information
On-screen displays .................................................................................................. 10
To prevent the monitor from burning out – SCREEN SAVER ............................. 12
On-screen guide icons ............................................................................................12
Preliminary knowledge about discs
Playable disc types.................................................................................................. 13
Disc construction ..................................................................................................... 14
Connections
Before making any connections ............................................................................ 16
To connect to a TV, monitor, or projector with the audio input and video input jacks..........
To connect to an audio amplifier or receiver ....................................................... 17
To connect to an amplifier/receiver equipped with Dolby Digital 5.1-channel inputs ..
To connect to audio equipment with a digital input ........................................... 19
Turn on the unit
To connect the power cord ..................................................................................... 20
To install batteries in the remote control unit ...................................................... 21
To turn on/off the unit .............................................................................................22
Using the remote control unit
To use the remote control unit for TV operation ................................................. 23
16
18
Basic operations
Page 25
Before operation
To turn on your TV and the unit ............................................................................ 26
To select the source you want to operate ............................................................. 26
Inserting and removing discs
To insert or remove discs ....................................................................................... 27
Playing back a DVD VIDEO or CD disc
To playback a disc from the beginning ................................................................. 28
To stop playback completely ................................................................................. 28
To stop playback temporarily ................................................................................ 29
To advance or reverse play rapidly while monitoring ........................................ 29
To locate the beginning of the scene or song ...................................................... 29
Resuming Playback
To store the point where you want to resume playback from – RESUME ........ 30
To resume playback from the stored point – RESUME ....................................... 30
Adjusting the surround sound
To simulate the surround sound – 3D PHONIC .................................................... 31
Summary of basic operations ................................................................................ 32
Page 5

Introduction
English
Español
Portugés
Chinese
DVD VIDEO operations
Page 33
Setting and adjustment
Page 49
Audio CD operations
Page 65
Video CD operations
Page 75
Playing a specific scene on a DVD disc ............................................................... 34
Playing in slow-motion ............................................................................................ 40
Playing a scene close-up ......................................................................................... 41
Repeat playback ........................................................................................................ 42
Viewing from multiple angles ............................................................................... 44
Changing the language and sound ...................................................................... 46
Selecting preferences............................................................................................... 50
Limiting playback by children................................................................................ 62
Playing a specific track on a disc .......................................................................... 66
Changing the track order ........................................................................................68
Repeat playback ........................................................................................................ 70
Sampling all tracks ................................................................................................... 72
Checking the elapsed time or remaining time ................................................. 73
Information about CD TEXT ................................................................................... 74
Playing a specific scene on a Video CD............................................................... 76
Playing in slow-motion ............................................................................................ 81
Playing a scene close-up ......................................................................................... 82
Changing the track order ........................................................................................83
Repeat playback ........................................................................................................ 85
Sampling all tracks ................................................................................................... 87
Adjusting the sound to suit preferences ............................................................88
Checking the total disc time .................................................................................. 89
Introduction
KARAOKE operations
Page 91
Additional information
Page 101
Preparation .................................................................................................................. 92
Reserving songs ........................................................................................................ 93
Selecting audio .......................................................................................................... 94
Adding an effect to your voice .............................................................................. 98
Shifting the musical key .......................................................................................... 99
Rating your voice .................................................................................................... 100
Care and handling of discs ................................................................................... 102
Troubleshooting ....................................................................................................... 103
AV COMPU LINK remote control system ......................................................... 104
Specifications ........................................................................................................... 106
Table of languages and their abbleviations ....................................... Appendix A
Country code list for parental lock ....................................................... Appendix B
Page 6

Introduction
Notes on care and handling
Important cautions
Installation of the unit
• Select a place which is level, dry and neither too hot
nor too cold (between 5˚C and 35˚C, 41˚F and 95˚F).
• Leave sufficient distance between the unit and a TV.
• Do not use the player in a place subject to vibrations.
Power cord
• Do not handle the power cord with wet hands!
• A small amount of power (2 watts) is always consumed
while the power cord is connected to the wall outlet.
• When unplugging the player from the wall outlet,
always pull the plug, not the power cord.
To prevent malfunction of the unit
• There are no user serviceable parts inside. If anything
goes wrong, unplug the power cord and consult your
dealer.
• Do not insert any metallic object into the unit.
• Do not use any non-standard shaped disc available on
the market, because it may damage the unit.
• Do not use a disc with tape, seals, or paste on it,
because damage to the unit may result.
Note about copyright laws
• Please check the copyright laws in your country to
record from DVD VIDEO, Audio CD, Video CD discs.
Recording of copyrighted material may infringe
copyright laws.
Note about the copyguard system
• The DVD VIDEO disc is protected by the copyguard
system. When you connect the unit to your VCR
directly, the copyguard system activates and the
picture may not be played back correctly.
Safety precautions
Avoid moisture, water and dust
Do not place your player in moist or dusty places.
Avoid high temperatures
Do not expose the unit to direct sunlight or place it near
a heating device.
When you’re away
When away on travel or otherwise for an extended
period of time, remove the plug from the wall outlet.
Do not insert foreign objects into the unit
Do not insert wires, hairpins, coins, etc. into the unit.
Do not block the vents
Blocking the vents may damage the unit.
Care of the cabinet
When cleaning the unit, use a soft cloth and follow the
relevant instructions on the use of chemically-coated
cloths. Do not use benzene, thinner or other organic
solvents and disinfectants. These may cause
deformation or discoloring.
If water gets inside the unit
Turn off the power switch and remove the plug from the
wall outlet, then call the store where you made your
purchase. Using the unit in this state may cause a fire or
electrical shock.
This product incorporates copyright protection technology that is protected by method claims of certain
U.S. patents and other intel-lectual property rights owned by Macrovision Corporation and other rights
owners. Use of this copyright protection technology must be authorized by Macrovision Corporation, and
is intended for home and other limited viewing uses only unless otherwise authorized by Macrovision
Corporation. Reverse engineering or disassembly is prohibited.
Manufactured under license from Dolby Laboratories. “Dolby” and double-D symbol are trademarks of
Dolby Laboratories.
Confidential Unpublished Works.
© 1992-1997 Dolby Laboratories, Inc. All rights reserved.
Manufactured under license from Digital Theater Systems, Inc. US Pat. No. 5,451,942 and other world-wide
patents issued and pending. “DTS”, “DTS Digital Surround”, are trademarks of Digital Theater System, Inc.
© 1996 Digital Theater Systems, Inc. All Rights Reserved.
Page 7

Preliminary knowledge
Preliminary knowledge
This chapter explains names of parts and controls of the unit and
information about discs and displays. For successful operation, read
this chapter before set-up and operation of the unit.
English
Español
Portugés
Chinese
Introduction
Table of contents of this chapter
7 Names of parts and controls
Front panel ................................................................................................................ 6
Display window ........................................................................................................ 7
Rear panel .................................................................................................................. 7
Remote control unit .................................................................................................. 8
7 Display information
On-screen displays ................................................................................................. 10
To prevent the monitor from burning out – SCREEN SAVER ............................ 12
On-screen guide icons ........................................................................................... 12
7 Preliminary knowledge about discs
Playable disc types ................................................................................................. 13
Disc construction .................................................................................................... 14
knowledge
knowledge
Preliminary
Preliminary
Getting started
Basic
operations
operations
DVD VIDEO
adjustment
Setting and
Audio CD
operations
Video CD
operations
KARAOKE
operations
Additional
information
5
Page 8
Preliminary knowledge
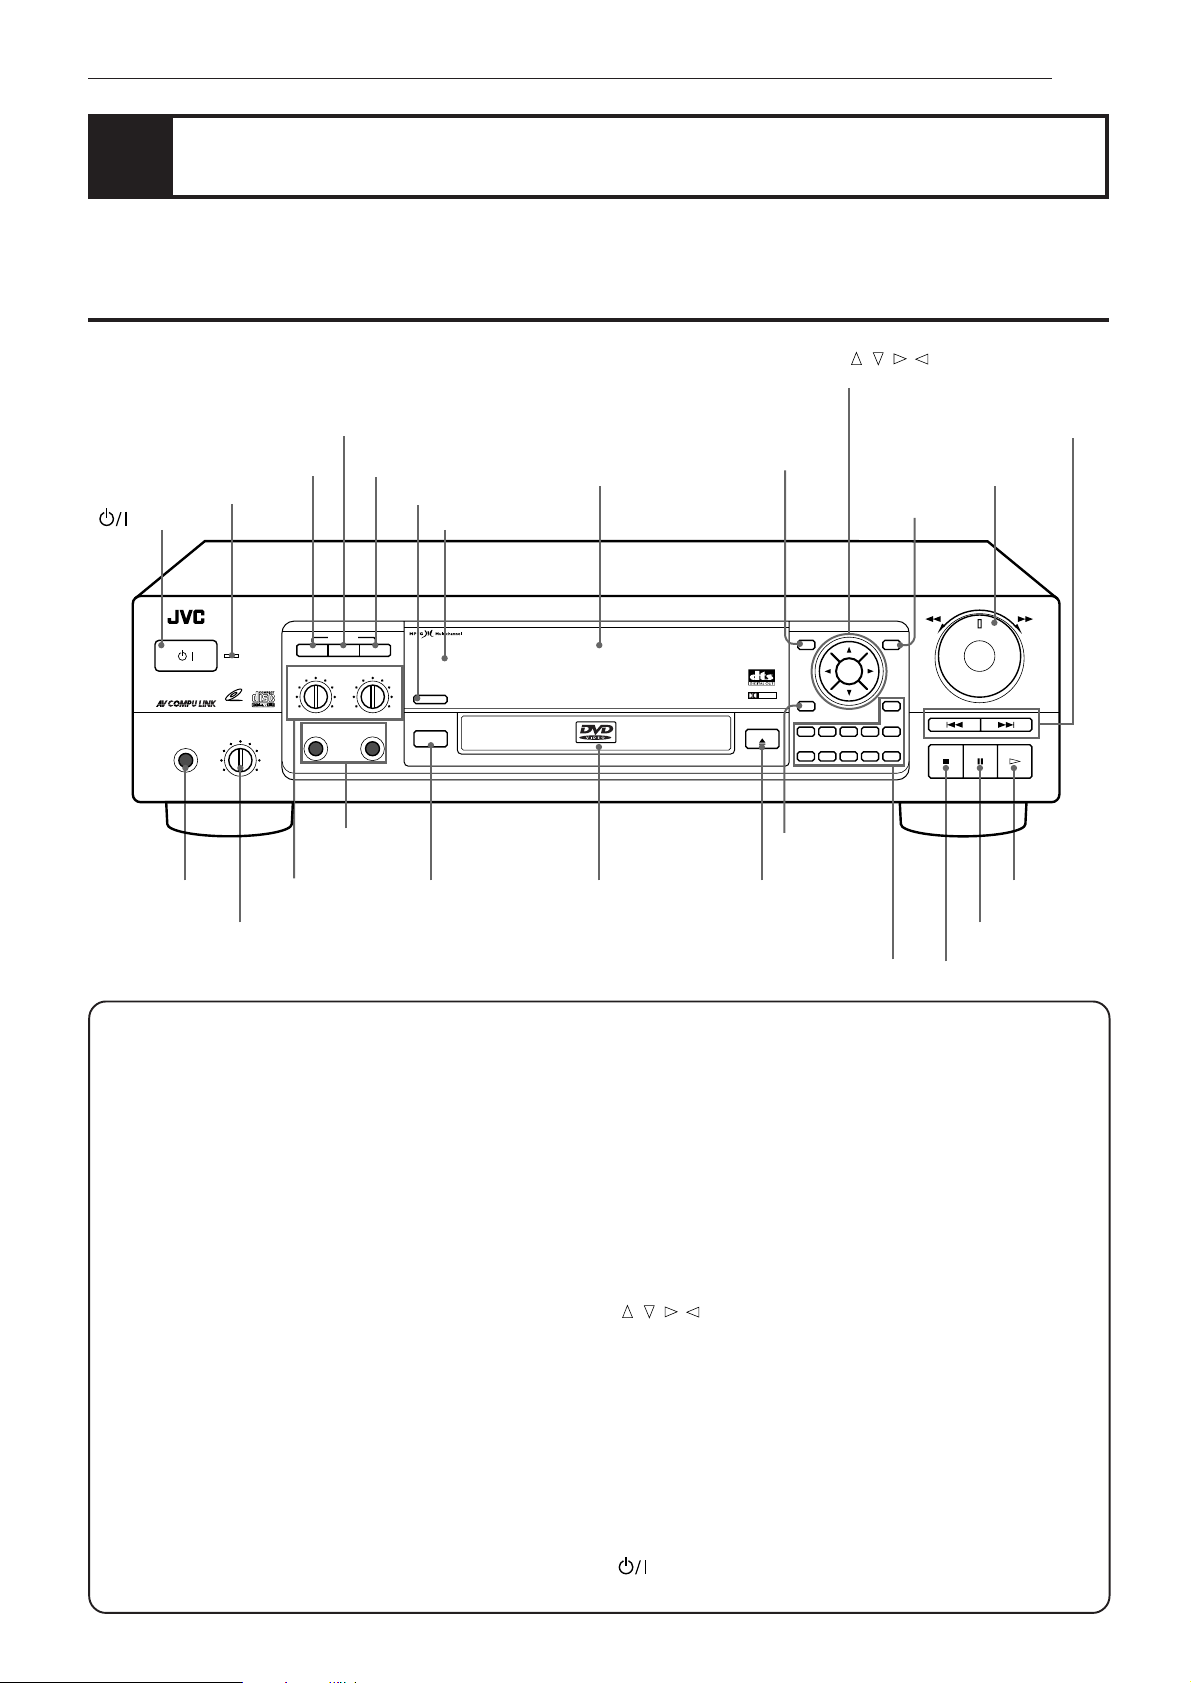
Names of parts and controls
Refer to the corresponding pages indicated in () for details.
Front panel
KARAOKE ON/OFF button
STANDBY indicator
button
STANDBY
/
STANBAY/ON
VIDEO CD
PHONES LEVELPHONES
MIN MAX
PHONES jack
PHONES LEVEL
control
KARAOKE RESERVE button
KARAOKE CANCEL button
DIGEST button
Remote sensor
DVD PLAYER
KARAOKE
ON/OFF RESERVE
MIC 1 LEVEL
MIN MAX
MIC 2 LEVEL
MIN MAX
MIC 1 MIC 2
CANCEL
DIGEST
3D PHONIC
MIC 1/2 input
jacks
MIC 1/2 LEVEL
controls
3D PHONIC
button
ENTER,
(Cursor) buttons
TITLE button
Display window
RESUME
DOLBY
DVD / VIDEO CD / CD
D I G I T A L
OPEN/CLOSE
ON SCREEN
button
Disc tray 0 (Open/Close)
button
MENU button
TITLE MENU
ENTER
ON SCREEN
Numeric
buttons
///
4 ¢ (Skip) buttons
SHUTTLE knob
SHUTTLE
+10
54321
1009876
SKIP
STOP PAUSE PLAY
8 (Pause) button
7 (Stop) button
3 (Play) button
3D PHONIC button (31)
Get a simulated surround effect.
Disc tray (27)
Used to load discs.
Display window
Indicates the current status of the unit.
DIGEST button (39, 80)
Display beginning scenes of each title, chapter, or track on the
TV screen.
ENTER button
Executes a selected item in a menu or on-screen display.
KARAOKE CANCEL button (93)
Cancel reserved songs.
KARAOKE ON/OFF button (for Karaoke) (92)
Turns the Karaoke function on/off.
KARAOKE RESERVE button (93)
Reserve the songs for karaoke.
MENU button (34)
Displays a menu of DVD on the TV screen or monitor.
MIC 1/2 input jacks (92)
Connection jacks for microphones.
MIC 1/2 LEVEL control (92)
Adjusts the volume level of microphones connected to the MIC
1/2 input jacks.
Numeric buttons (32)
Reserve songs for karaoke.
ON SCREEN button (10)
Displays an on-screen display of the unit on the TV screen or
monitor.
PHONES jack
Connection jack for headphones.
PHONES LEVEL control
Adjusts the volume level of headphones connected to the
PHONES jack.
Remote sensor
Senses the signal from the remote control unit.
SHUTTLE knob (29, 40, 81)
Performs fast forward/backward and slow motion playback.
STANDBY indicator
Lights when the power cord is connected and the unit is on
standby. When the unit is turns on, the STANDBY indicator
goes off.
TITLE button (34)
Displays a title menu on the TV screen or monitor.
///
(Cursor) buttons
Selects an item in on-screen displays or menus.
0 (Open/Close) button (27)
Opens and closes the disc tray.
3 (Play) button (28)
Starts playback. Also, used a SELECT button for PBC of Video
CD.
8 (Pause) button (29)
Pauses during playback.
4 ¢ (Skip) button (29, 66, 77)
Performs skip or previous/next.
7 (Stop) button (28)
Stops playback.
(Standby/On) button (22)
Turns the unit on or off (standby).
6
Page 9
Preliminary knowledge
English
Español
Portugés
Chinese
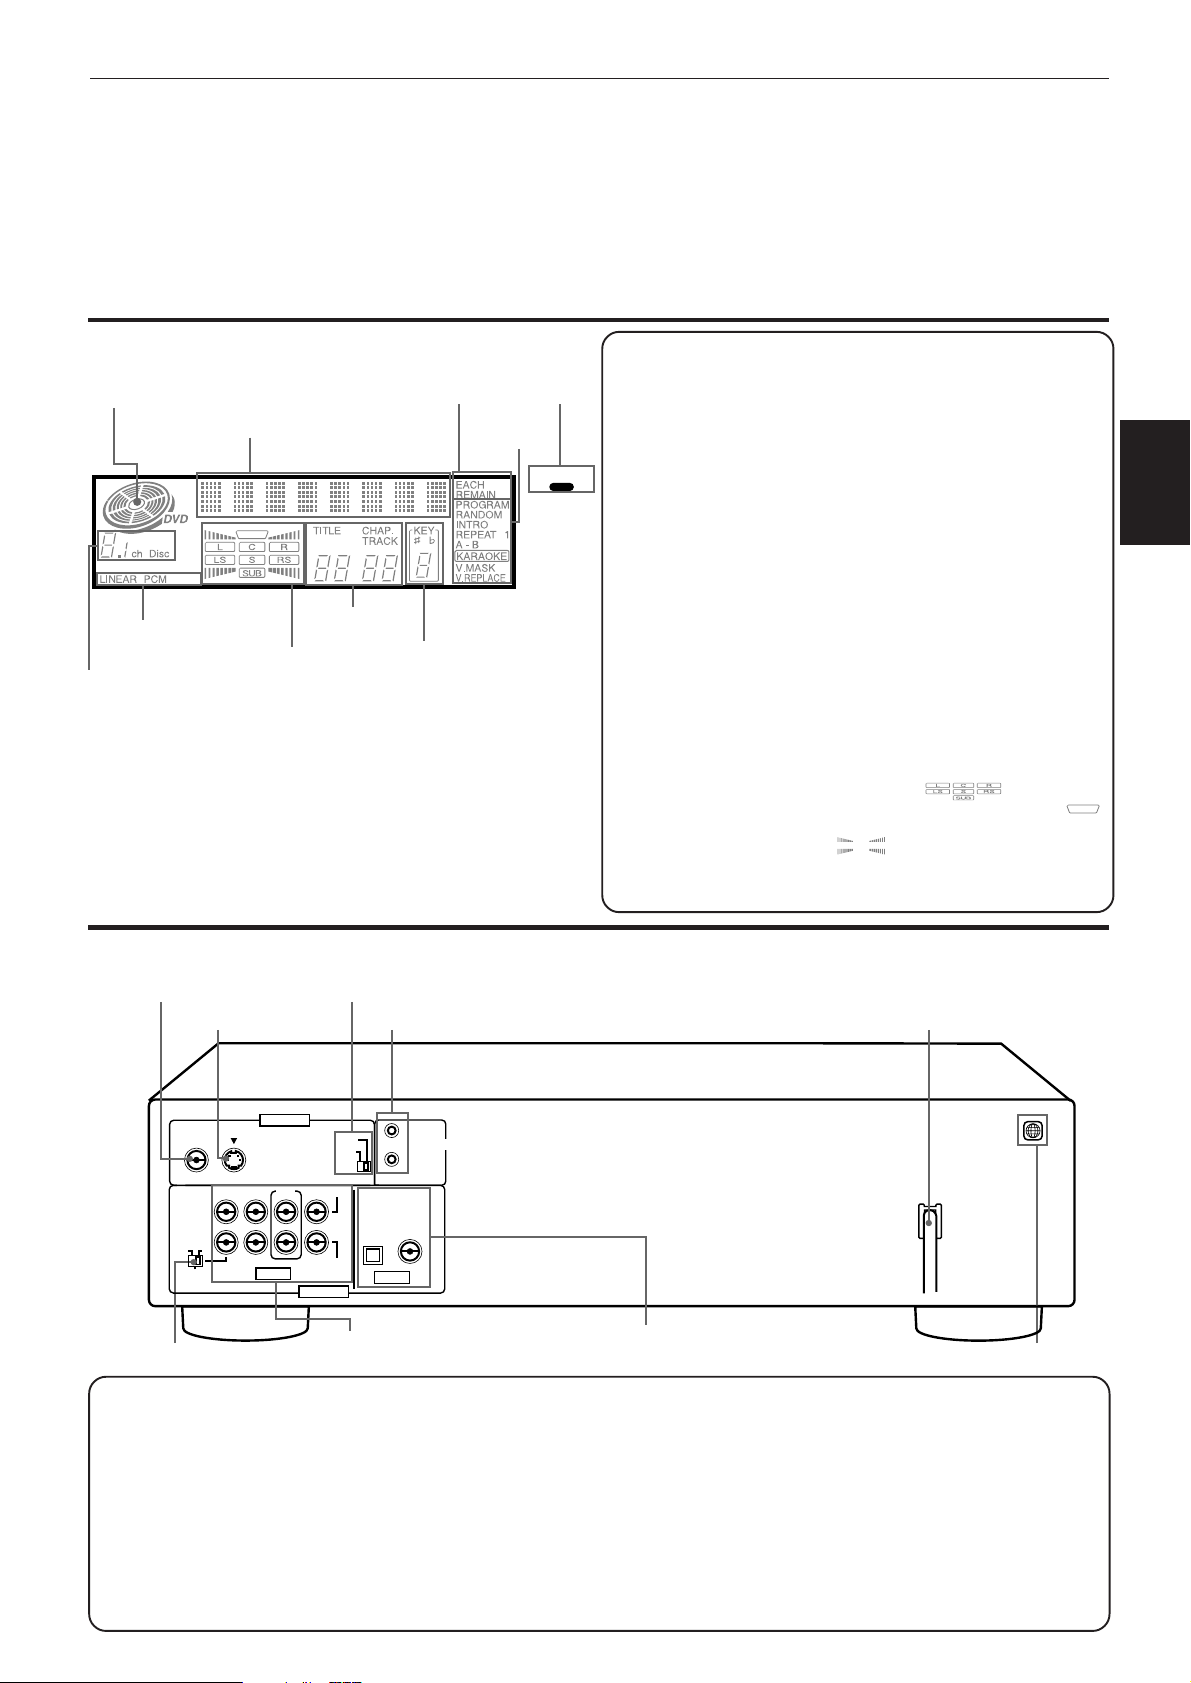
Display window
Disc indicator
Multi-information window
Linear PCM indicator
Speaker indicator
Channel indicator
Chapter, title,
track indicator
Time select
indicator
Function
indicator
KEY indicator
RESUME
indicator
RESUME
Channel indicator
Displays number of channels in the currently selected audio
Playback format.
Chapter, title, track indicator
Displays chapter, title, or track number.
Disc indicator
Lights when a disc is in the unit. “DVD” also appears when a
DVD disc is in the unit.
Function indicator (PROGRAM, RANDOM, INTRO,
REPEAT, KARAOKE, V.MASK, V.REPLACE)
Activated function indicators light up.
KEY indicator
Displays the selected key number.
Multi-information window
Displays time, text, and additional information.
RESUME indicator
Lights when a point to be resumed from is stored.
Linear PCM indicator
Lights only when the playback disc contains linear PCM data. This
indicator also lights while an Audio CD is placed in the unit.
Speaker indicator
Lights during disc playback. The display shows all possible audio output
channels contained in the 5.1ch. format. lights when
signals are output from the corresponding audio output jacks.
lights when signals are output from the video output jacks. When
the 3D PHONIC function is ON, also lights.
Time select indicator
Shows what the time information in the Multi-information window means.
knowledge
Preliminary
Rear panel
VIDEO OUT jack
S-VIDEO OUT jack
VIDEO S-VIDEO
2CH
LEFT
RIGHT
ON
OFF
ATTENUATOR
ATTENUATOR switch
AC power cord (20)
Connects to the wall outlet.
ATTENUATOR switch (16)
Attenuates the output level when it is set to ON.
AUDIO OUT jacks (ANALOG) (16, 17, 18, 19)
FRONT (RIGHT and LEFT), REAR (RIGHT and LEFT), CENTER, and
SUBWOOFER terminals output 5.1ch analog audio signals (Dolby
Digital). 2CH terminals output Stereo analog audio signals.
AV COMPU LINK jacks (104)
Connects with other JVC equipment supporting the AV
Compulink function to facilitate integrated operations.
NTSC/PAL switch
VIDEO OUT
FRONT REAR CENTER
SUBWOOFER
ANALOG
AUDIO OUT
AUDIO OUT jacks (ANALOG)
AV COMPU LINK jacks
NTSC
PAL
PCM/STREAM
COAXIALOPTICAL
DIGITAL
AV COMPU LINK
AC power cord
AUDIO OUT jacks (DIGITAL)
Region Code label
AUDIO OUT jacks (DIGITAL) (19)
Outputs digital audio signals. Both coaxial and optical
connectors are provided.
NTSC/PAL switch
Select NTSC or PAL according to the color system of your TV.
Region Code label (13)
Shows Region Code number.
S-VIDEO OUT jack (16)
Outputs an S-video signal.
VIDEO OUT jack (16)
Outputs a composite video signal.
7
Page 10

Preliminary knowledge
Remote control unit
Infrared signal-emitting window
OPEN/CLOSE button
DVD/TV/KARAOKE switch
SET button
Numeric buttons
SCORING button
TITLE button
ON SCREEN button
3D PHONIC button
ECHO button
RETURN button (for DVD/Video CD)
SUBTITLE button (for DVD)
KARAOKE SOUND button
4 ¢ (Skip), PREVIOUS, NEXT
buttons
7 (Stop), CLEAR button
1 ¡ (Search) buttons
SLOW buttons (for DVD/Video CD)
CH button
TV VOLUME button
DVD
OPEN/
CLOSE
TV
KARAOKE
/
TV
CANCEL RESUME
TV/VIDEOSET
1234
5678
9 10 0 +10
TITLE
3D PHONIC ANGLE
ECHO
RETURN
STOP
CLEAR SELECT
SLOW(–) SLOW(+)
+
CH
–
SCORING
ENTER
SUBTITLE ZOOM
KARAOKE
SOUND
PAUSE
STROBE
+
TV
VOLUME
–
VOCAL
EFFECT
KEY CONTROL
NEXTPREVIOUS
PLAY
DVD
KARAOKE
RESERVE
MENU
DIGESTON SCREEN
VOCAL
REPLACE
+
AUDIO
VOLUME
–
/
KARAOKE
ON / OFF
TV button
DVD
button
CANCEL button
TV/VIDEO button
RESUME button
KARAOKE RESERVE button
MENU button (for DVD)
ENTER,
///
(Cursor) button
KARAOKE ON/OFF button
DIGEST button (for DVD/Video CD)
ANGLE button (for DVD)
KEY CONTROL button
VOCAL REPLACE button
ZOOM button (for DVD/Video CD)
VOCAL EFFECT button
8 (Pause)/STROBE button
3 (Play)/SELECT button
AUDIO VOLUME button
RM–SVD701UG REMOTE CONTROL
8
Page 11
Preliminary knowledge
English
Español
Portugés
Chinese
3D PHONIC button (31)
Produces a simulated surround effect.
ANGLE button (for DVD) (44)
Changes camera angles during playback of a DVD containing
multiple camera angles.
AUDIO VOLUME button (28)
Adjusts the volume of a JVC AV amplifier or receiver.
CANCEL button (68, 93)
Cancels the previous settings.
CH button (23)
Changes the channels of TV or CATV converter/satellite tuner.
CLEAR button
Clears the selected item.
DIGEST button (for DVD/Video CD) (39, 80)
Display beginning scenes of each title, chapter, or track on
the TV screen.
DVD/TV/KARAOKE switch (26)
Selects the function of the buttons on the reomte control unit
to control the corresponding one.
DVD button (26)
Turns the unit on or off (standby).
ECHO button (98)
Adds the echo effects to your voice.
ENTER,
Executes a selected item in a menu or on-screen display when
pressing the button. Selects an item in the on-screen display
or title menus or menus of DVD when tilting.
///
(Cursor) button
Infrared signal-emitting window
Point this window toward the remote sensor on the front
panel when pressing buttons.
KARAOKE ON/OFF button (92)
Turns the Karaoke function on/off.
KARAOKE RESERVE button (93)
Reserve the songs for karaoke.
KARAOKE SOUND button (95)
Select the KARAOKE sound.
KEY CONTROL button (99)
Change the key of songs.
MENU button (for DVD) (34)
Displays a menu of DVD on the TV screen or monitor.
NEXT button (for DVD/Video CD) (29)
Performs “next” operation.
Numeric buttons (32)
Depending on the selection of the DVD/TV/KARAOKE switch,
they are used for entering a title, track or chapter number,
selecting a TV channel, reserving songs for karaoke.
ON SCREEN button (10)
Displays an on-screen display of the player on the TV screen
or monitor.
OPEN/CLOSE button (27)
Opens and closes the disc tray.
PREVIOUS button (29)
Performs “previous” operation.
RESUME button (30)
Stores the location to resume playback from later.
RETURN button (for DVD/Video CD)
Returns to the previous menu.
SCORING button (for KARAOKE) (100)
Scores your voice.
SELECT button (for Video CD)
Selects the item.
SET button (23)
Used to set the manufacturer’s code for operating another
manufacturer’s TV from the remote control unit.
SLOW button (for DVD/Video CD) (40, 81)
Starts slow-motion playback.
STROBE button (for DVD/Video CD) (40, 81)
Displays 9 still pictures on the TV screen.
SUBTITLE button (for DVD) (46)
Turns subtitles on or off.
TITLE button (34)
Displays a title menu of DVD on the TV screen or monitor.
Switches the display in the display window (for Audio CD).
TV/VIDEO button
Switches input of the TV (either TV or VIDEO).
TV VOLUME button (23, 28)
Adjusts the TV volume.
TV button (26)
Turns the TV on or off.
VOCAL EFFECT button (98)
Takes various effects on your voice.
VOCAL REPLACE button (96)
Masks the vocal part from the recoded source.
ZOOM button (for DVD/Video CD) (41, 82)
Scene in a close-up view.
8 (Pause) button (29)
Pauses during playback.
3 (Play) button (28)
Starts playback.
1 ¡ (Search) buttons (29)
Performs fast forward/backward playback operations.
4 ¢ (Skip) buttons (29, 66, 77)
Performs skipping.
7 (Stop) button (28)
Stops playback.
knowledge
Preliminary
9
Page 12
Preliminary knowledge
Display information
The unit provides several on-screen displays and on-screen guide icons to help
you operate the unit.
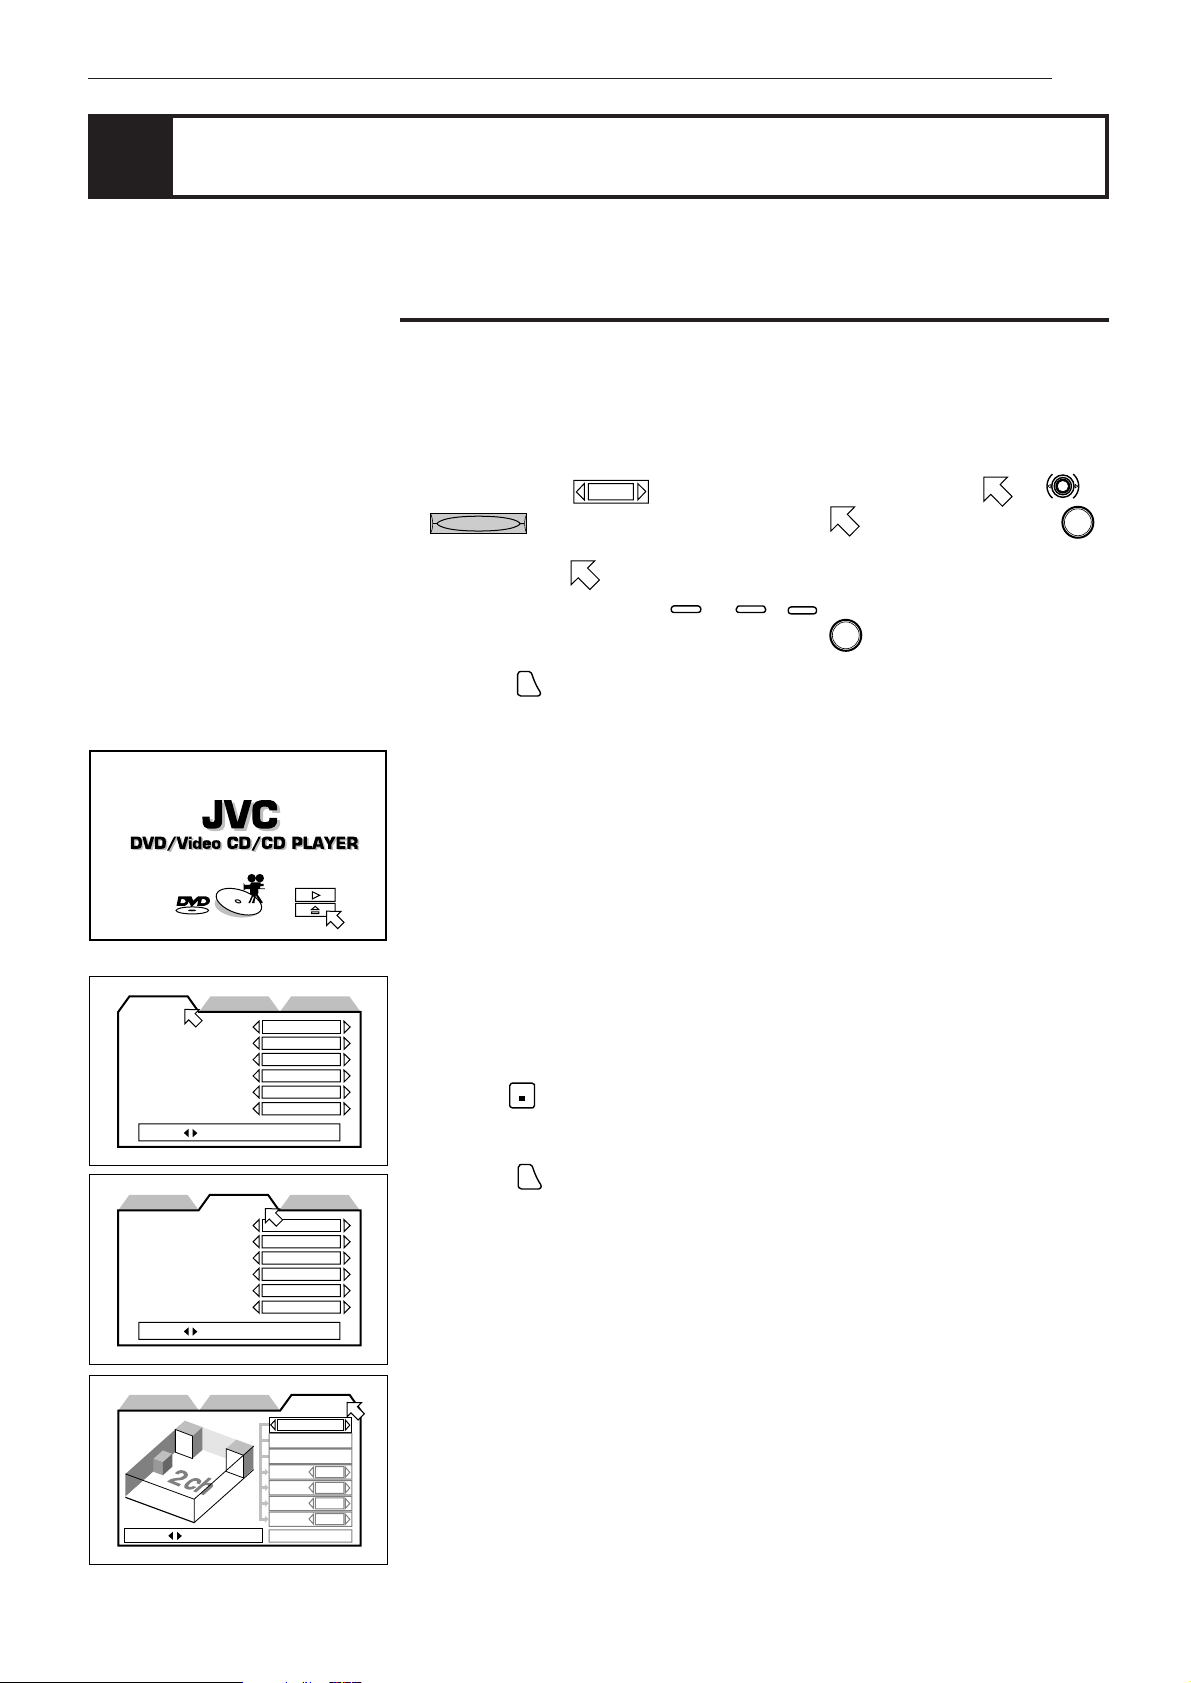
On-screen displays
The unit provides several on-screen displays as shown below for choosing
preferences for initial settings and functions which are not frequently used.
Basic operations in on-screen display
• With an item like
REPEAT
•
- type item works when you place on the item and press
• In the message box, the operation to be done is displayed according to the
item pointed by
• Numbers are entered using
• Some functions become effective by pressing
entries.
• Pressing
ON SCREEN
1 / 3
, you can change the setting by placing on .
.
0
to
10
+10
,
.
again exits the on-screen display.
ENTER
after specifying necessary
ENTER
.
MENU LANGUAGE
AUDIO LANGUAGE
SUBTITLE
ON SCREEN LANGUAGE
ON SCREEN GUIDE
MONITOR TYPE
PRESS KEY
DIGITAL AUDIO OUTPUT
DOWN MIX
COMPRESSION
SCREEN SAVER
AV COMPULINK MODE
AUTO STANDBY
PRESS KEY
SPK.SETTINGPREFERENCE2PREFERENCE1
ENGLISH
ENGLISH
JAPANESE
ENGLISH
ON
16:9 WIDE
SPK.SETTINGPREFERENCE2PREFERENCE1
STREAM/PCM
Lt / Rt
ON
MODE1
DVD1
OFF
Opening display
Appears when the unit turns on.
Preference (1 and 2) and Speaker setting displays (see page 50)
You can set preferences on these displays.
To display the Preference display
1 Press
2 Press
STOP
to stop the unit.
If the current disc is not a DVD disc, you have to remove the disc from the
tray.
.
ON SCREEN
10
PRESS KEY
PREFERENCE2PREFERENCE1
SPK.SETTING
2 CHANNEL
LEVEL
DELAY
F. SP
C. SP None
R. SP None
BASS
TEST TONE
Large
None
Page 13
PARENTAL LOCK
Country Code
Set Level
PASSWORD
NEW PASSWORD? • • • PRESS 0~9 KEY
St. End
010 Mb
PRESS ENTER EXECUTE
TITLE
TIME
CHAP.
03
1 : 34 : 58
03
CN
LEVEL 8
– – – –
EXIT
ANGLE
AUDIO
SUB-
TITLE
REPEAT
A-B REPEAT
TIME SEARCH
CHAP.SEARCH
Preliminary knowledge
English
Español
Portugés
Chinese
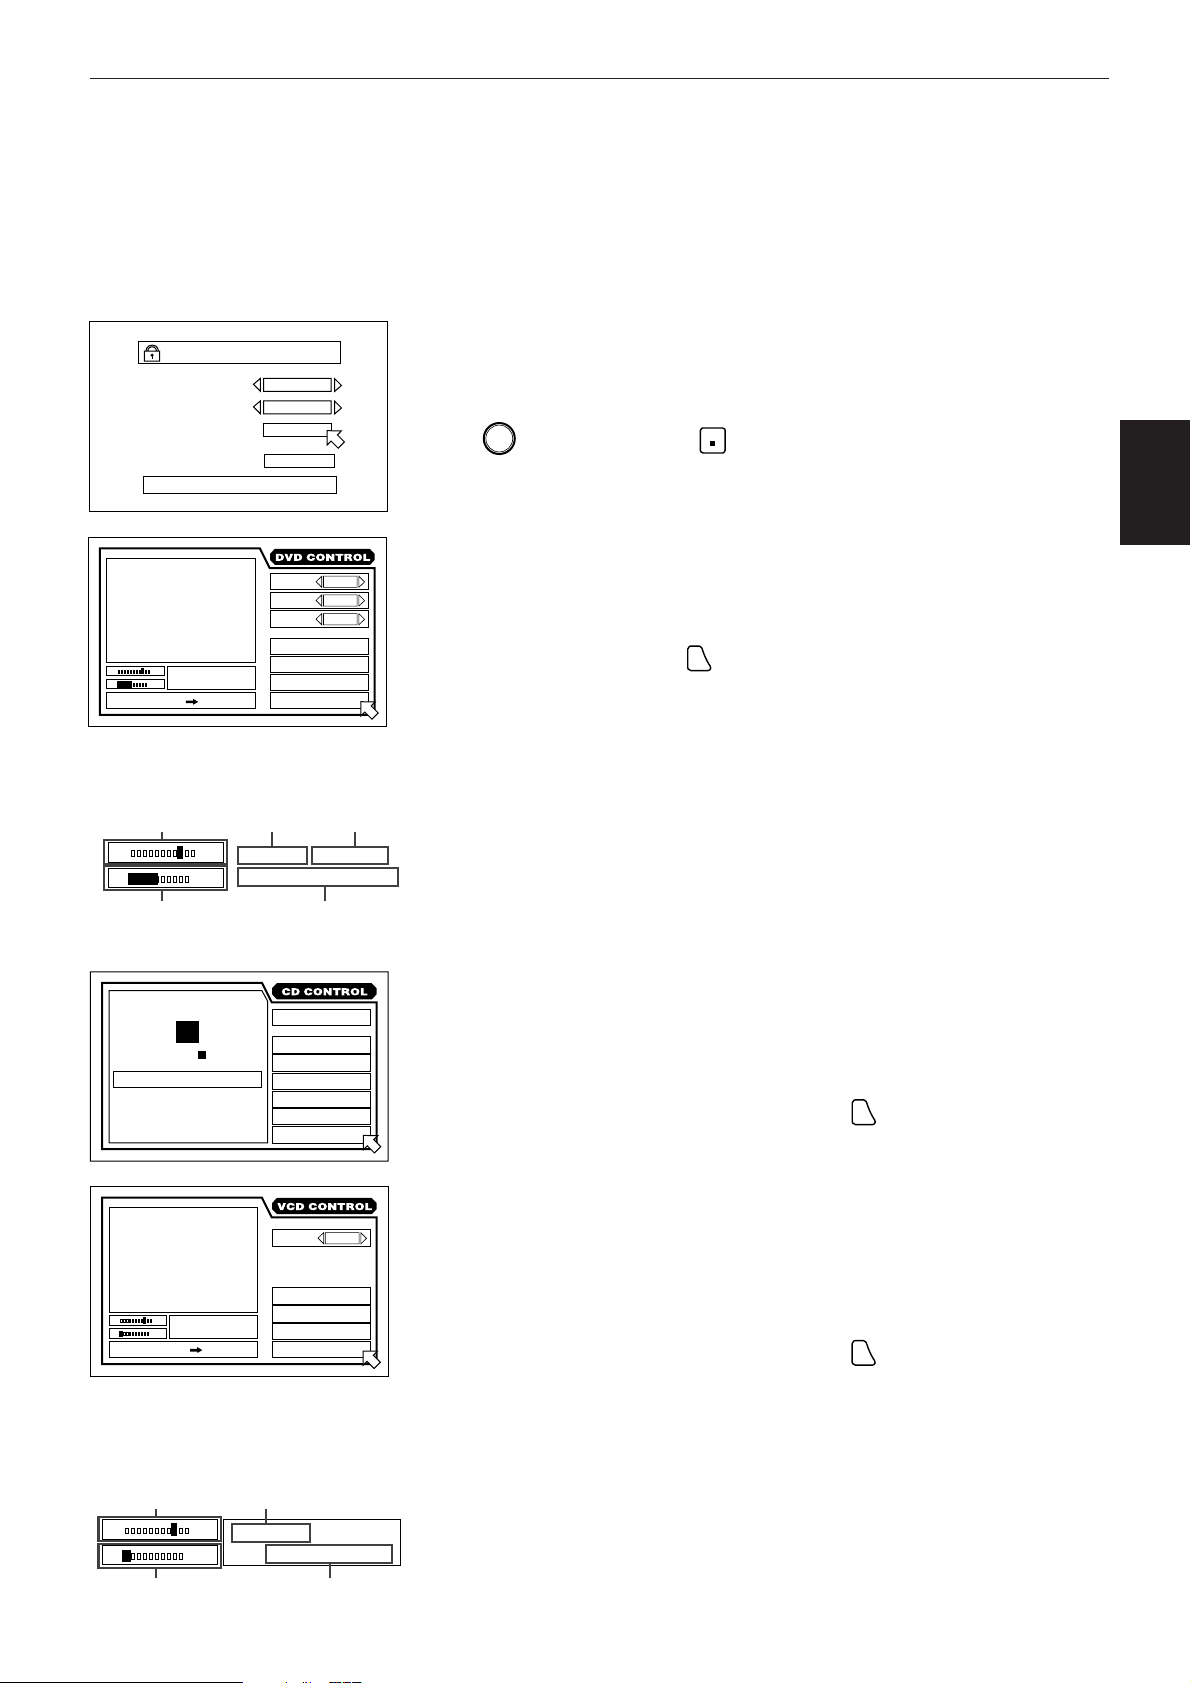
Parental Lock on-screen display (see page 62)
You can set the parental lock from this display.
To display the Parental Lock on-screen display
Press
ENTER
while holding down
STOP
.
The Parental Lock on-screen display appears on the TV screen.
knowledge
Preliminary
The DVD on-screen display during playback
1 / 3
2 / 3
1 / 3
You can select and set various function for DVD playback from this display.
To display the DVD on-screen display
During DVD playback, press
ON SCREEN
.
Current relative
position the title
(St: start, End:
end).
St. End
010
Mb
Transmission
rate
STOP
TRK.
MIN SEC
03
TIME
4 : 58
TRACK 3 : 54TIME01
St. End
010 Mb
PRESS ENTER EXECUTE
Current title
number
TITLE
03
TIME
1 : 34 : 58
Current chapter
number
CHAP.
03
Elapsed time from the
beginning of the current title
The CD on-screen display
EACH
REMAIN
TIME SELECT
REPEAT
A-B REPEAT
TIME SEARCH
PROGRAM
RANDOM
INTRO
You can select and set various function for Audio CD playback from this
display.
To display the CD on-screen display
During Audio CD playback or stop mode, press
The Video CD on-screen display during playback
AUDIO
REPEAT
A-B REPEAT
TIME SEARCH
PBC CALL
L / R
You can select and set various function for Video CD playback on this display.
When a Video CD disc is stopped, the same on-screen display which appears
when an Audio CD disc is stopped appears.
To display the Video CD on-screen display
During Video CD playback or stop mode, press
ON SCREEN
ON SCREEN
.
.
Current relative
position of the
track
(St: start, End:
end).
St. End
010
Mb
Transmission
rate
Current track
number
TRK.
03
TIME
4 : 58
Elapsed time from the
beginning of the current track
11
Page 14
Preliminary knowledge
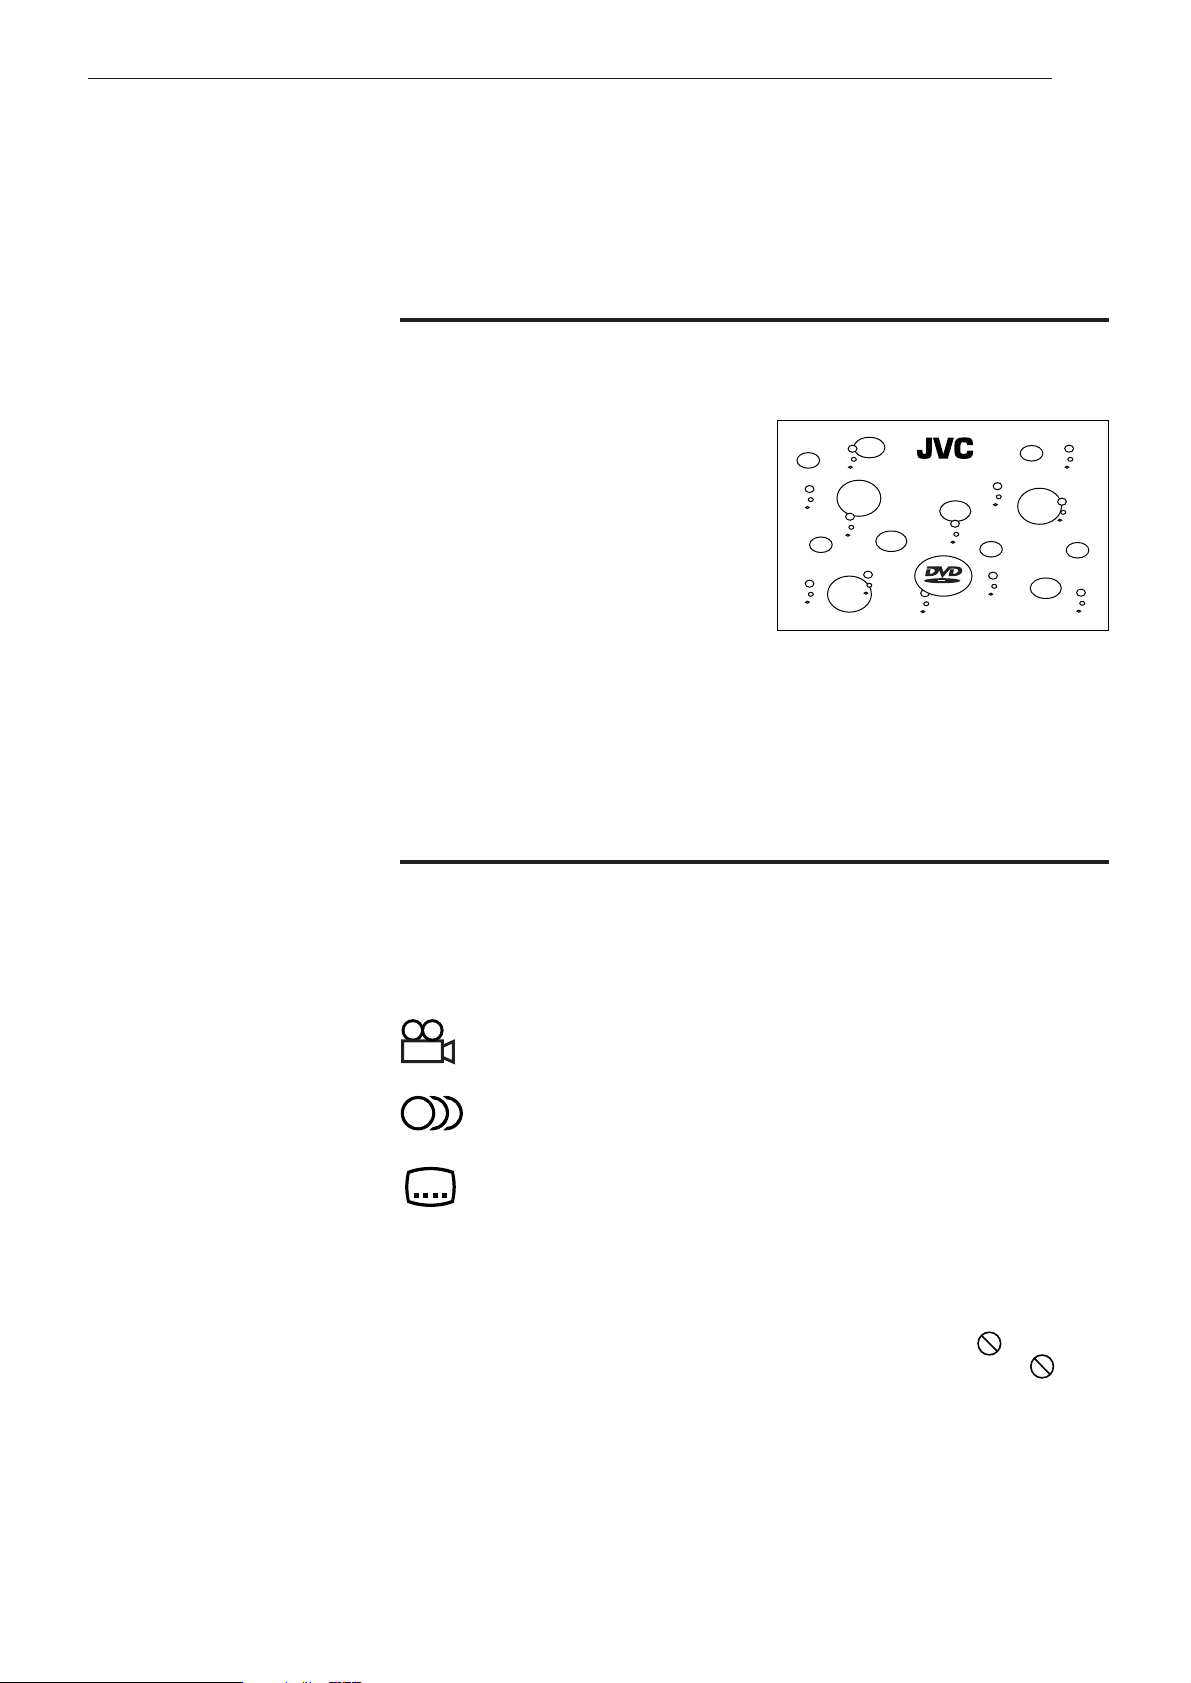
To prevent the monitor from burning out
[SCREEN SAVER]
A television monitor screen may be
burned out if a static picture is displayed
for a long time. To prevent this, the unit
automatically activates the screen saver
function if a static picture, such as an onscreen display or menu, is displayed for
over 5 minutes.
DVD/Video CD/CD PLAYER
• Pressing any button on the unit or the remote control unit will release the
screen saver function and return to the previous display.
• You can select one of several screen saver pictures available (see page 56).
• When this function is set to “DIMMER”, the display window on the panel
always gets dark (FL Dimmer) in addition to the screen saver function (see
page 56).
On-screen guide icons
During DVD playback, you may see icons displayed over the picture. These have
the following meanings.
: Displayed at the beginning of a scene recorded from multiple angles.
(See page 44.)
: Displayed at the beginning of a scene recorded with multiple audio
languages. (See page 47.)
: Displayed at the beginning of a scene recorded with multiple subtitles
language. (See page 46.)
You can set the unit not to display on-screen icons above via the preference
settings described on page 53.
12
About invalid operation icon
When you press a button, if the unit does not accept its operation, appears on
your television screen. Operations are occasionally unacceptable even if
displayed.
Note that some operations may not be accepted. For example, some discs may
not allow fast forward, fast backward or slow-motion playback.
is not
Page 15
Preliminary knowledge
English
Preliminary knowledge about discs
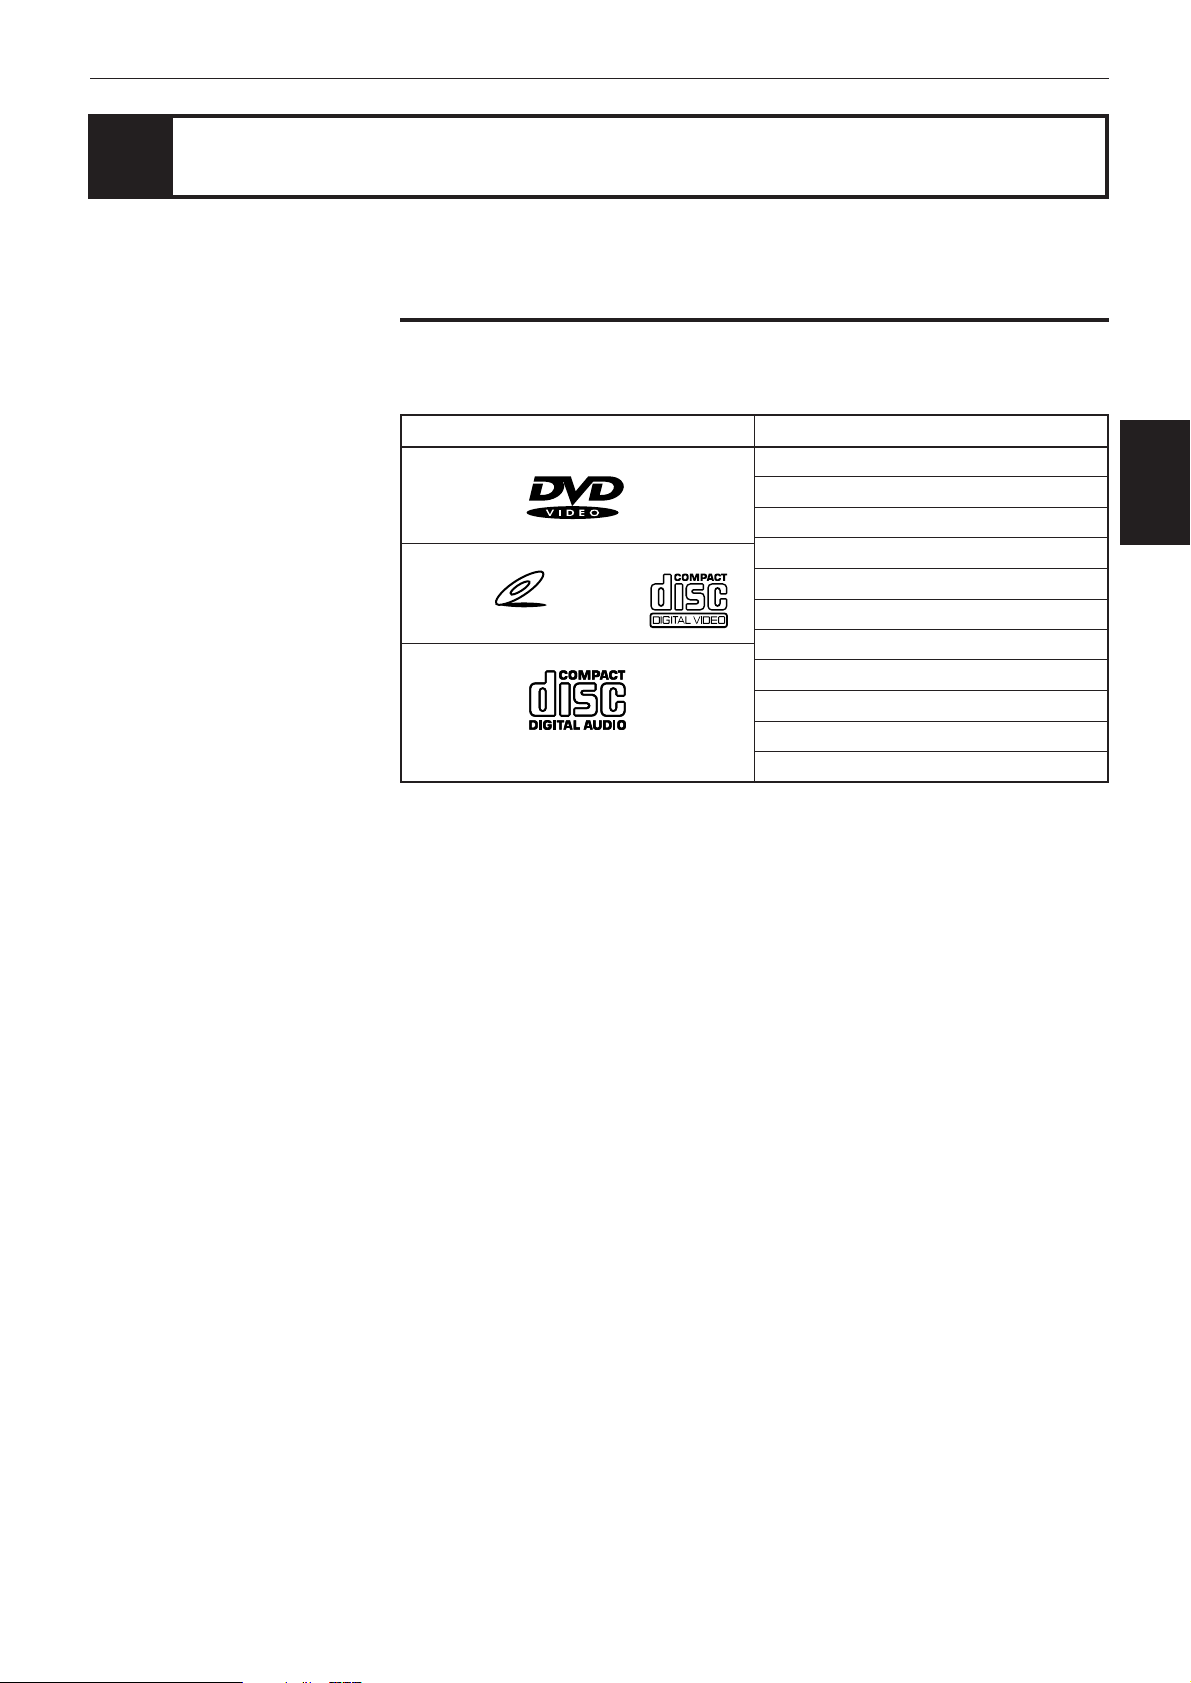
Playable disc types
Playable and non-playback disc types are as follows:
Playable discs
DVD VIDEO
Video CD
VIDEO CD
Audio CD
Non-playable discs
DVD-ROM
DVD-RAM
DVD Audio
DVD-R
DVD-RW
CD-G
CD-R
CD-ROM
PHOTO CD
CD-RW
CD-EXTRA
Español
Portugés
Chinese
knowledge
Preliminary
• Playing back discs listed as “Non-playable discs” in the table above may
generate noise and damage speakers.
About the Region Code
• DVD players and DVD discs have their own Region Code numbers. The unit
only can play back DVD discs whose Region Code numbers includes the unit’s
Region Code, which is indicated on the region code symbol on the rear panel.
13
Page 16
Preliminary knowledge
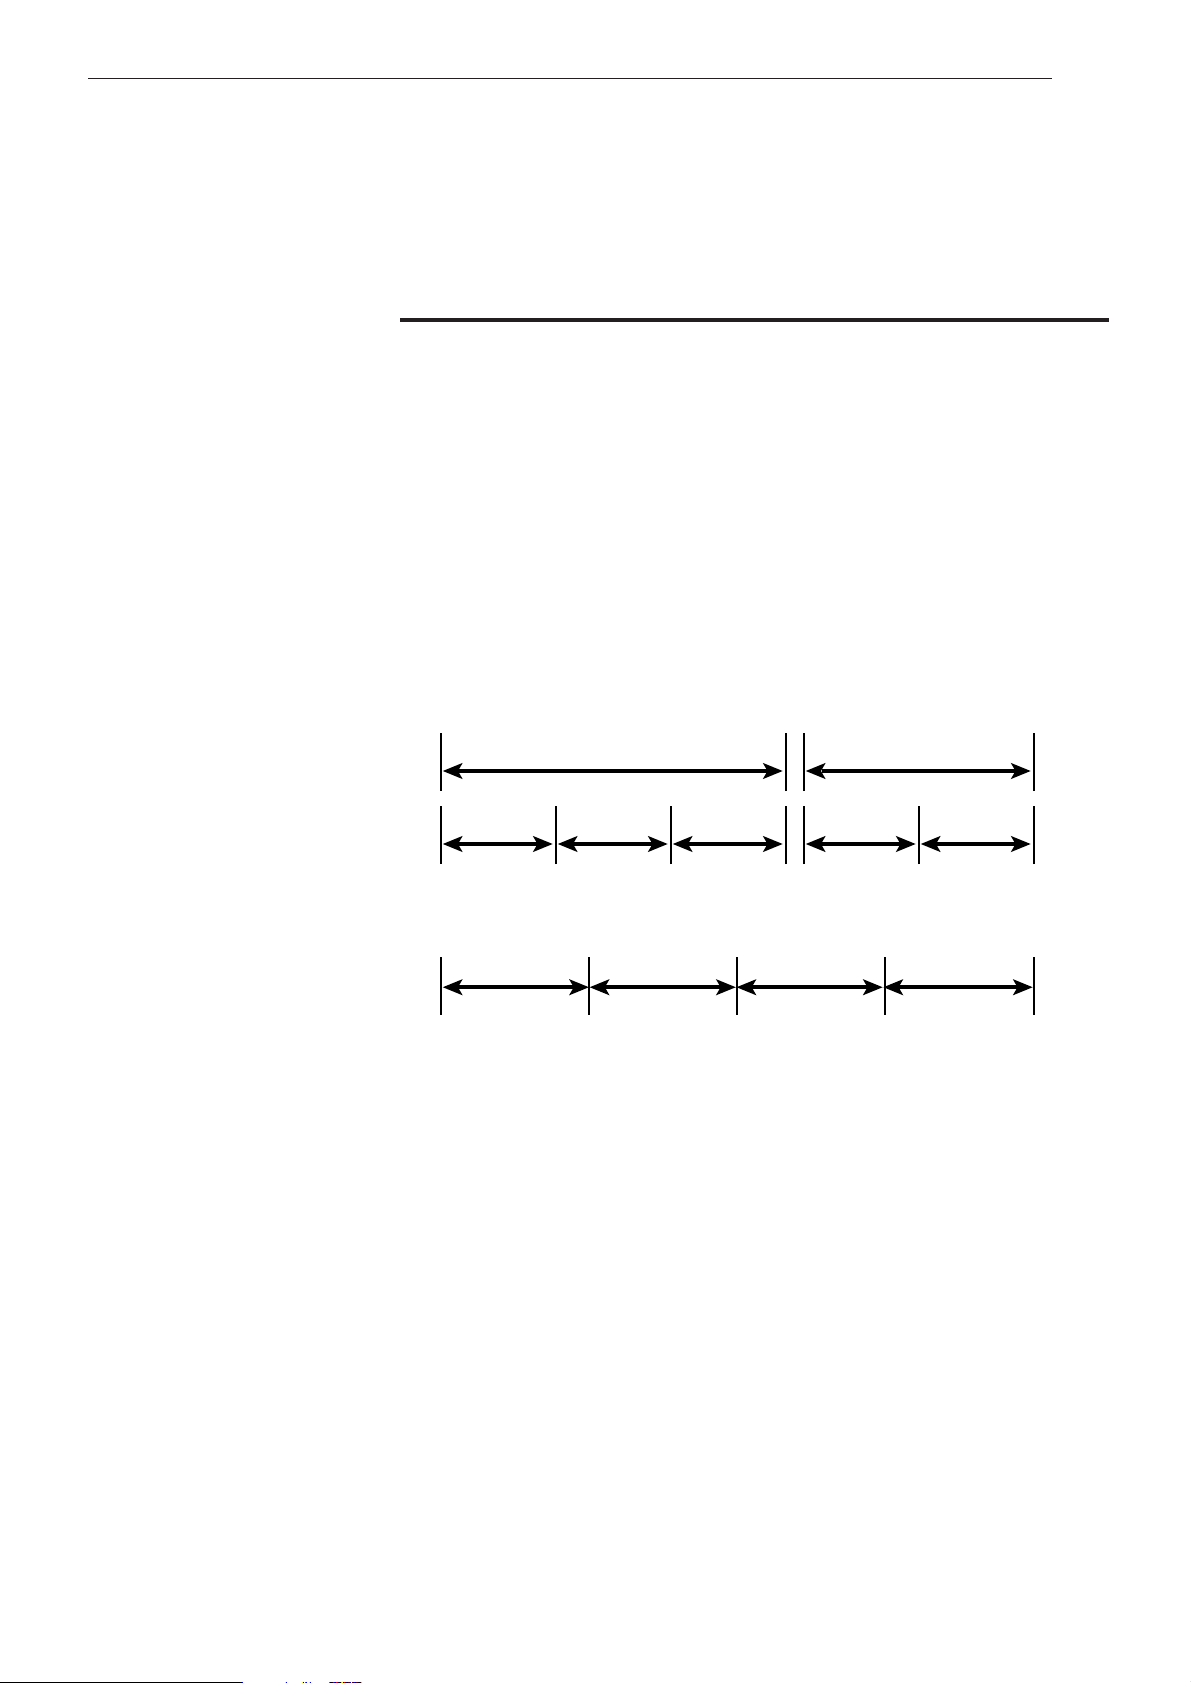
Disc construction
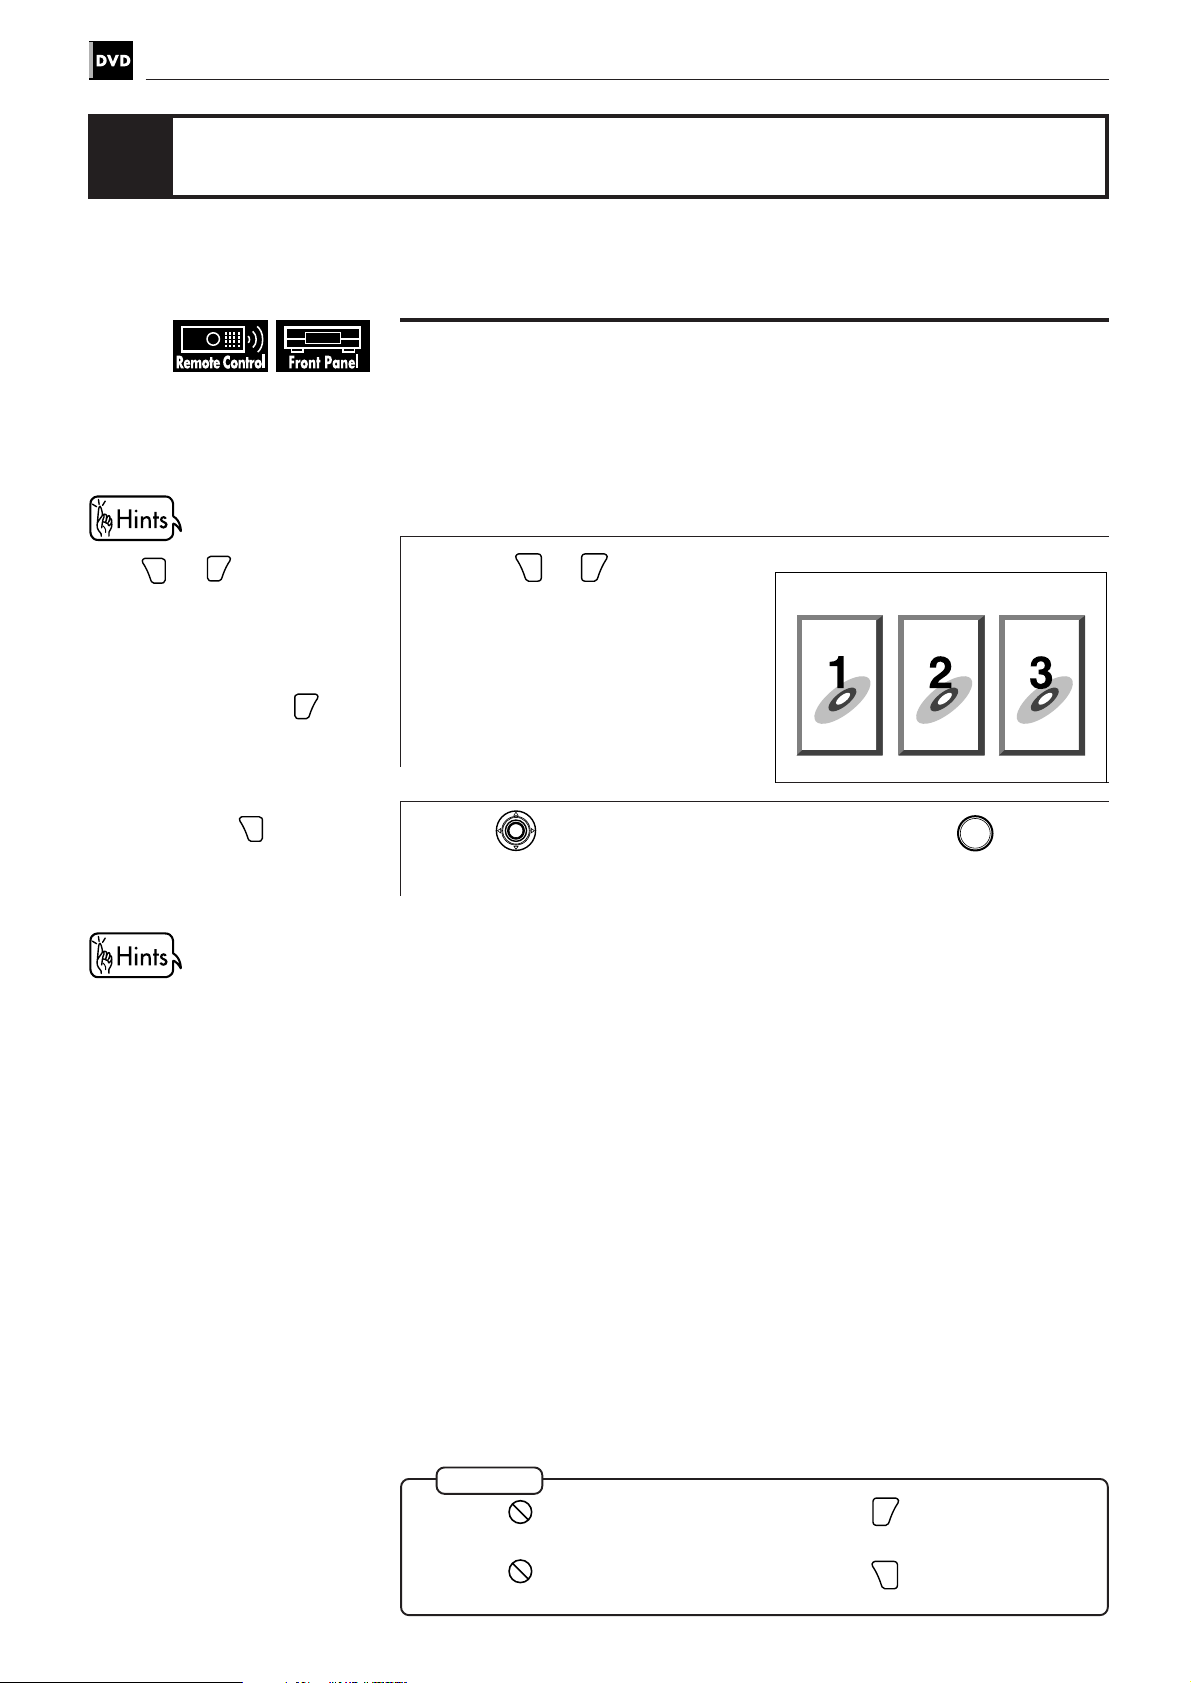
In general, a disc comprises of units which separate recorded audio and/or video
materials.
In the case of a DVD disc, “titles” and “chapters” are the units. a disc comprises
“titles,” and each title may be divided into some “chapters.” Each title has an
independent content, while each chapter in the same title has continuity. For
example, if a disc contains some movies, each movie may have its own title
number, and each movie may be divided into some chapters. In a karaoke disc,
each song usually has its own title number and does not have chapters.
In the case of an Audio or Video CD, “tracks” are the units. Each song usually has
a track number.
Each unit described above has a continuous number, which helps you to find the
desired position in a disc.
(Example: DVD disc)
Title 1 Title 2
Chapter 1 Chapter 2 Chapter 3 Chapter 1 Chapter 2
(Example: Audio CD/Video CD)
Track 1 Track 2 Track 3 Track 4
14
Page 17

Getting started
Getting started
Before you can enjoy DVD VIDEO, Audio CD, and Video CD playback,
you have to prepare the unit. This chapter explains how to get started,
including connecting to a variety of components, turning on the unit,
and using the remote control unit.
English
Español
Portugés
Chinese
Introduction
Table of contents of this chapter
7 Connections
Before making any connections ............................................................................ 16
To connect to a TV, monitor, or projector
with the audio input and video input jacks .......................................................... 16
To connect to an audio amplifier or receiver ....................................................... 17
To connect to an amplifier/receiver equipped with
Dolby Digital 5.1-channel inputs ........................................................................... 18
To connect to audio equipment with a digital input ........................................... 19
7 Turn on the unit
To connect the power cord .................................................................................... 20
To install batteries in the remote control unit ..................................................... 21
To turn on/off the unit ............................................................................................ 22
7 Using the remote control unit
To use the remote control unit for TV operation ................................................. 23
knowledge
Preliminary
Getting started
Getting started
Basic
operations
operations
DVD VIDEO
adjustment
Setting and
Audio CD
operations
Video CD
operations
KARAOKE
operations
Additional
information
15
Page 18
Getting started
Connections
Before using the unit, you have to connect the unit to a TV or amplifier. By connecting to an amplifier which has a
digital terminal or Dolby digital capability, you can enhance the sound quality.
Before making any connections
• Do not connect the AC power cord until all other connections have been made.
• Since different components often have different terminal names, carefully read the instructions supplied with the
component you wish to connect.
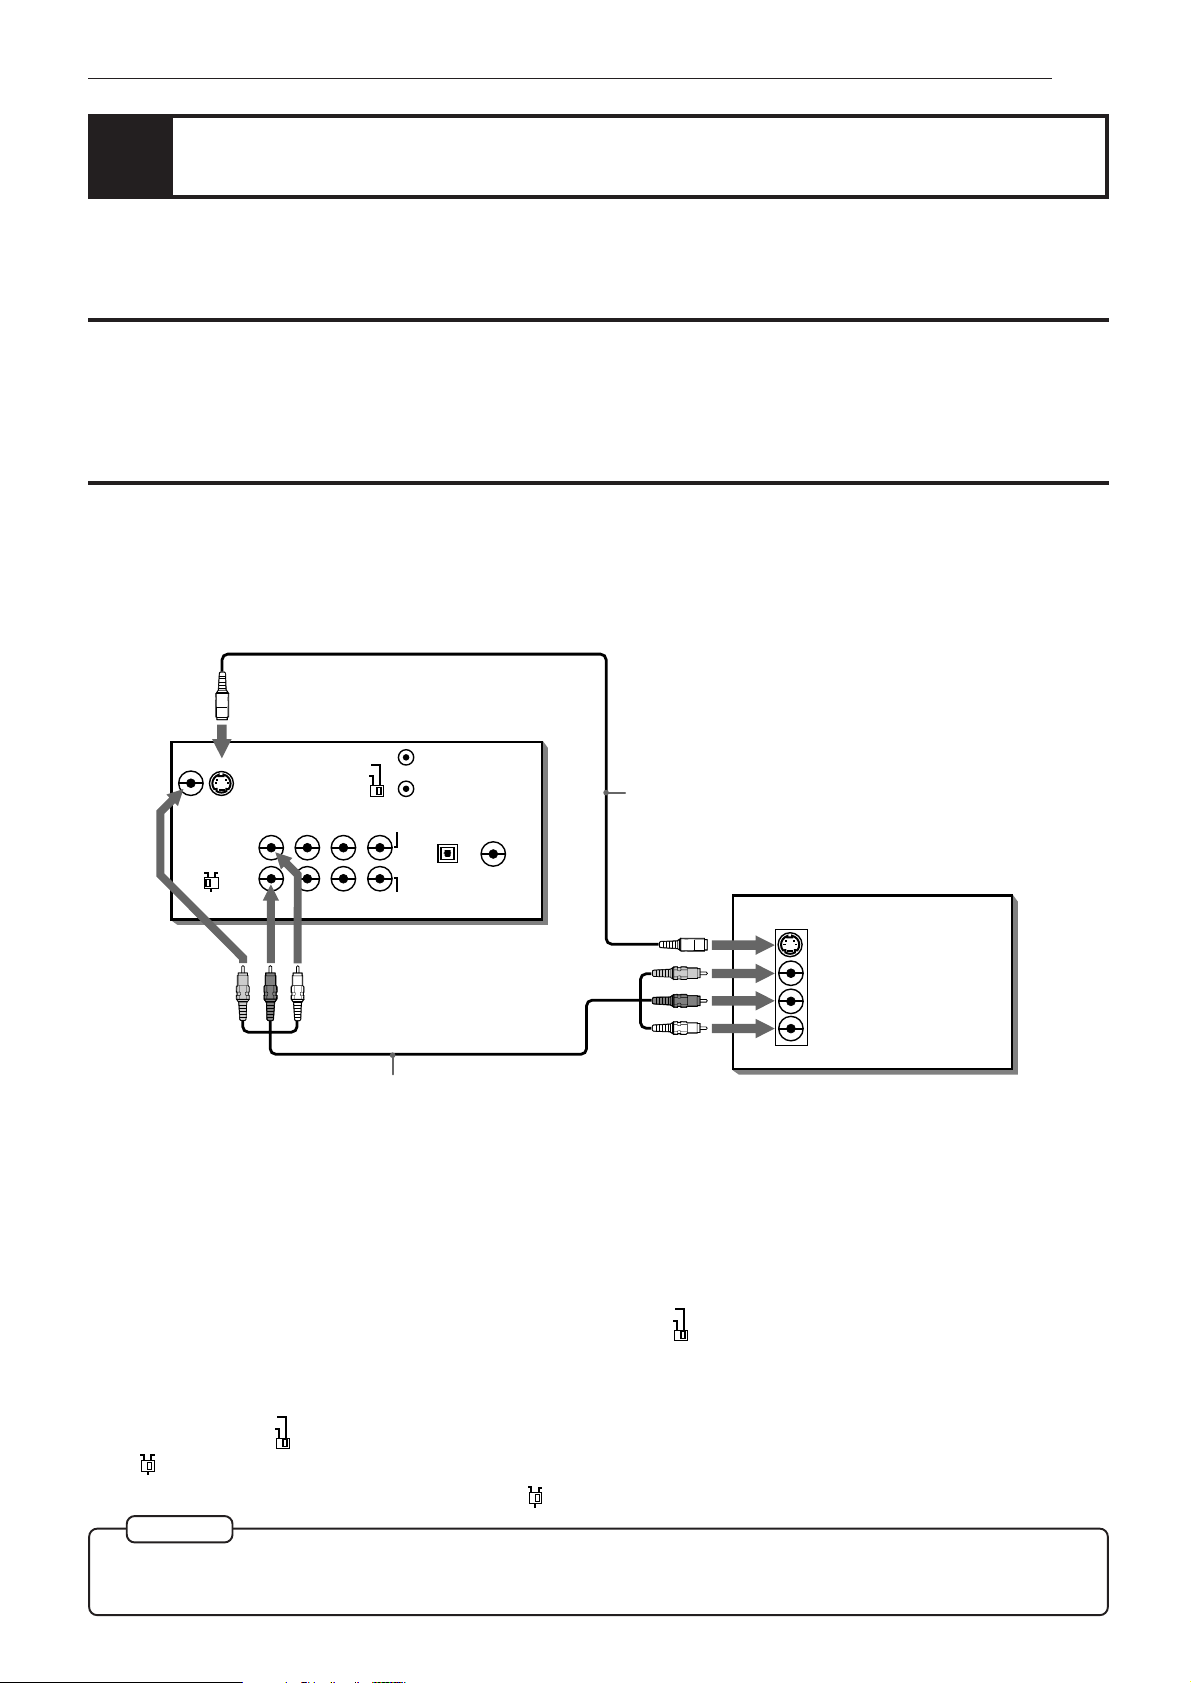
To connect to a TV, monitor, or projector with the audio input and video input
jacks
You can enjoy using the unit by simply connecting it to a television set. To hear improved audio sound quality,
connect the audio outputs to your audio equipment. (See the following pages.)
* If the TV has an AV COMPU LINK terminal, see “AV
COMPU LINK remote control system” on page 104.
The unit
VIDEO OUT
VIDEO S-VIDEO
NTSC
AV COMPU LINK
PAL
S-video cable
Yellow
Red
(supplied)
White
TV, monitor, or projector
IN
S-VIDEO
VIDEO
RIGHT
AUDIO
LEFT
OFF ON
ATTENUATOR
Yellow
2CH FRONT REAR CENTER
LEFT
RIGHT
ANALOG OUT
White
Red
SUBWOOFER
PCM/DOLBY DIGITAL
OPTICAL COAXIAL
DIGITAL OUT
Audio/video cable
(supplied)
Connect the unit to a television set equipped with stereo audio input and video input jacks using the supplied audio/
video cables.
• If your television set has a monaural audio input instead of stereo, you need to use an optional audio cable which
converts stereo audio output to monaural.
• If your television set has an S-video input, you should connect it with the S-VIDEO output of the unit using the
supplied S-video cable in addition to the (standard) video connection to get better picture quality.
NTSC
The unit is compatible with the PAL and NTSC color systems. Set
PAL
according to the color system of your TV,
monitor, or projector. (Make sure the color system of the DVD disc labeled of the package. If you play the disc
recorded on the different color system, the unit play it incorrectly. Use the disc recorded of the same color system.)
When you use the multi-system TV, monitor, or projector, you can play the disc recorded on both the PAL and NTSC
color systems. Set
ON
OFF
The
beside the AUDIO OUT jacks should be normally set to OFF. If you hear the audio distorted because the
ATTENUATOR
sensitivity of the TV’s audio input is too high, set
NTSC
according to the color system of the disc.
PAL
ON
OFF
to ON.
ATTENUATOR
NOTE
Connect VIDEO OUT of the unit to the video input of a television set. Connecting VIDEO OUT of the unit to a TV
via a VCR may cause a monitor problem when playing back a copy-protected disc.
16
Page 19
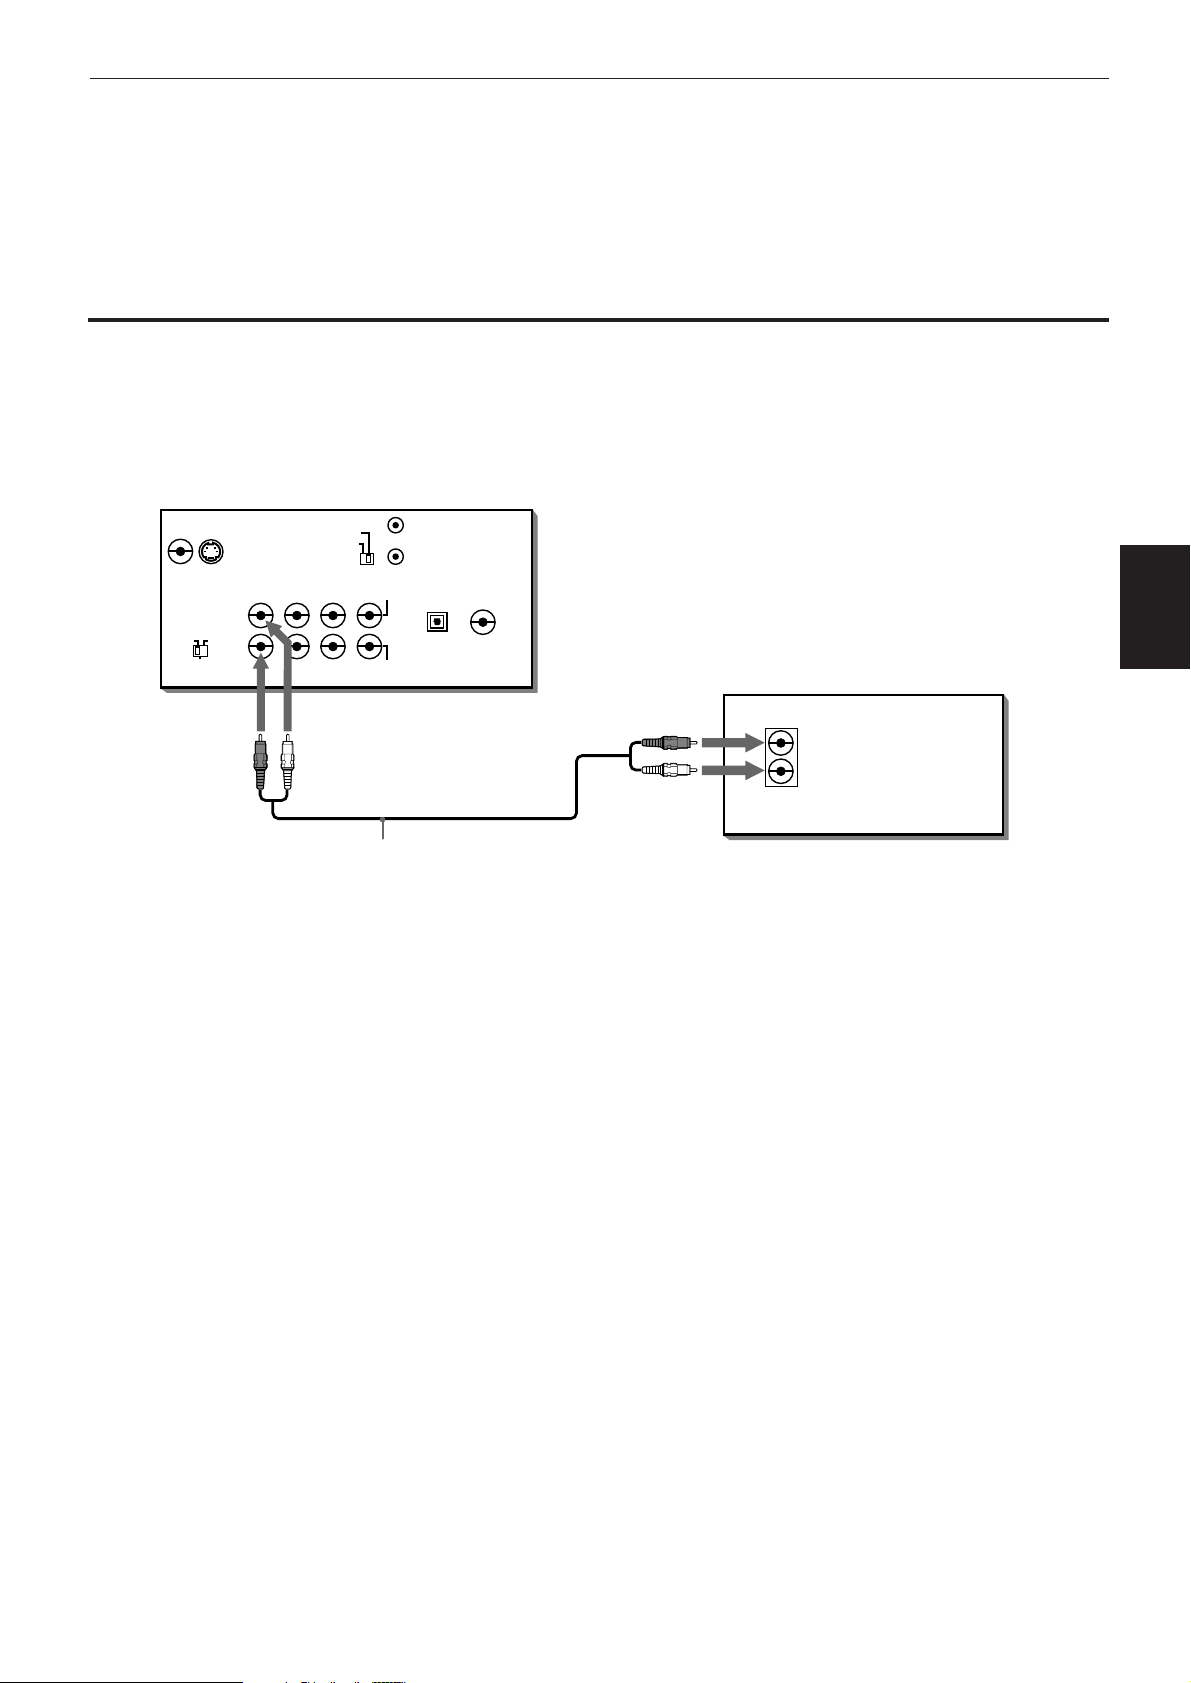
To connect to an audio amplifier or receiver
Connection to an audio amplifier or receiver
You can enjoy high-quality audio by connecting the unit's audio outputs to your amplifier or receiver.
The unit
VIDEO S-VIDEO
VIDEO OUT
NTSC
AV COMPU LINK
PAL
Getting started
English
Español
Portugés
Chinese
PCM/DOLBY DIGITAL
OPTICAL COAXIAL
DIGITAL OUT
Red
Amplifier or receiver
IN
RIGHT
AUDIO
LEFT
OFF ON
ATTENUATOR
Red
2CH FRONT REAR CENTER
LEFT
RIGHT
ANALOG OUT
White
SUBWOOFER
White
Audio cable
(supplied)
• Connect the unit's AUDIO OUT to any line-level inputs (such as AUX, DVD, CD, etc.) of an audio amplifier or
receiver.
Getting started
17
Page 20
Getting started
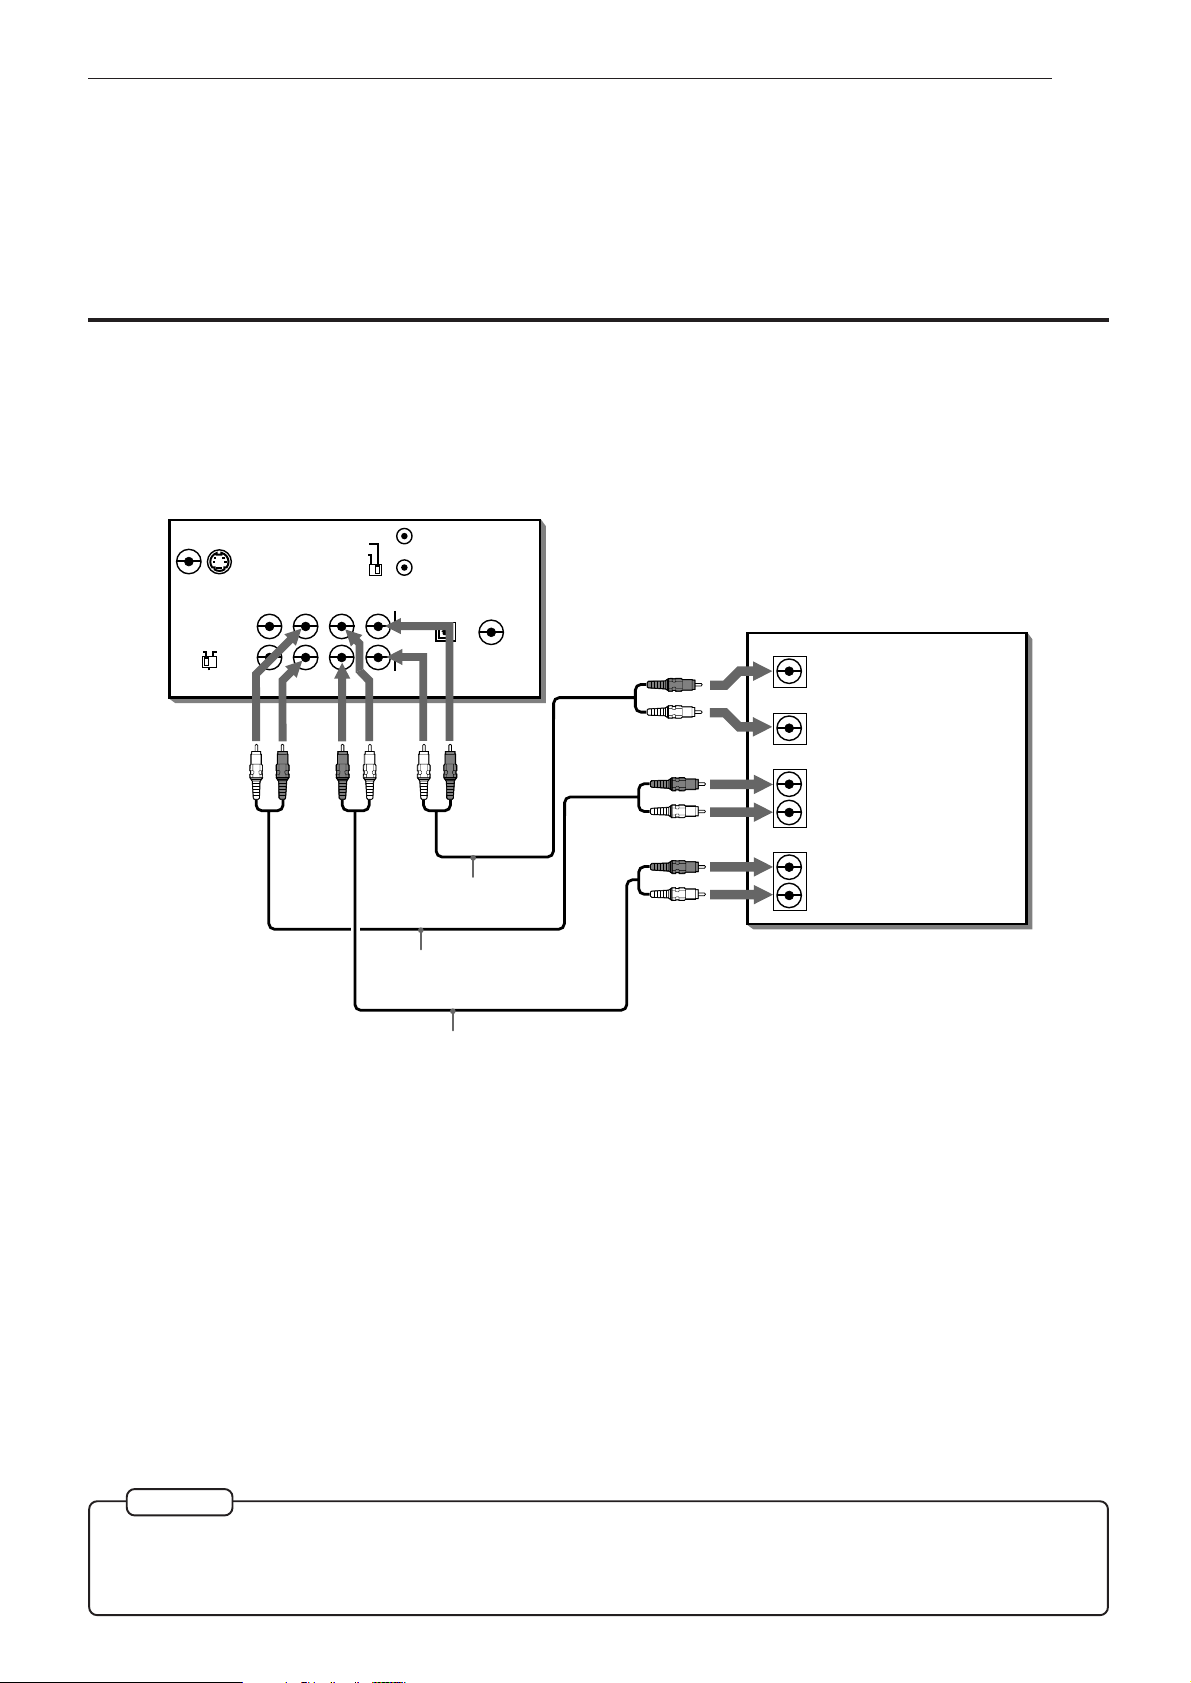
To connect to an amplifier/receiver equipped with Dolby Digital 5.1-channel inputs
The Dolby Digital decoder is built in the unit, so you can enjoy the Dolby digital surround sound without the need of
an external decoder.
Connect the unit’s 5.1-channel outputs to the Dolby Digital 5.1-channel inputs of an amplifier or receiver using the
supplied audio cables.
The unit
VIDEO OUT
VIDEO S-VIDEO
NTSC
AV COMPU LINK
PAL
PCM/DOLBY DIGITAL
OPTICAL COAXIAL
DIGITAL OUT
Red
Amplifier or receiver
CENTER
SUBWOOFER
OFF ON
ATTENUATOR
2CH FRONT REAR CENTER
LEFT
RIGHT
ANALOG OUT
SUBWOOFER
White
FRONT
REAR
AUDIO IN
RIGHT
LEFT
RIGHT
LEFT
White
Red
Red
White
White
Audio cable (supplied)
Red
Red
White
Red
White
Audio cable (supplied)
Audio cable (supplied)
• Be sure to connect correctly between corresponding terminals. The order of the 5.1-channel terminals depend on
units.
18
NOTE
When using the 5.1-channel outputs of the unit, set the "DOWN MIX" in the "PREFERENCE 2" on-screen display
to "OFF" and select "5.1 CHANNEL" or "EXPERT" in the "SPK.SETTING" on-screen display. If the "EXPERT" is
selected, you can control the audio output balance of the speakers (see pages 55 and 58).
Page 21
Getting started
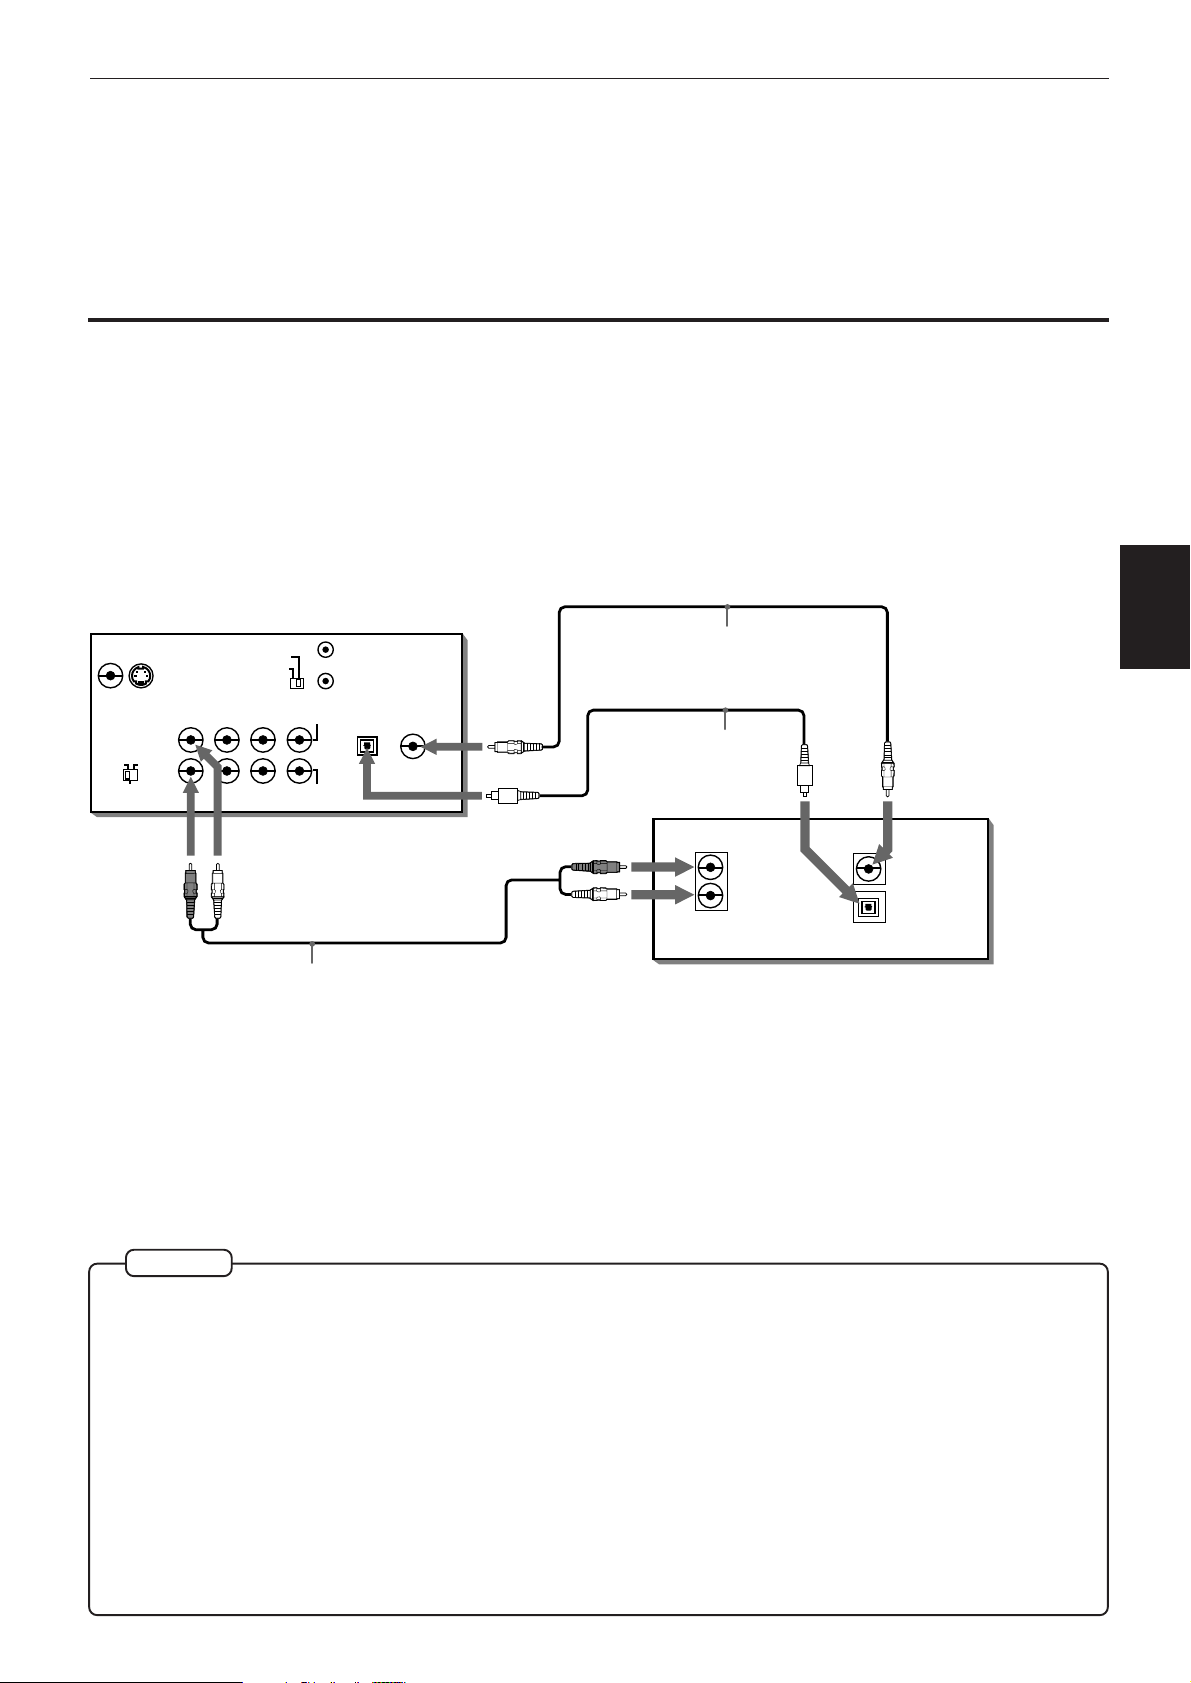
To connect to audio equipment with a digital input
Connection to an amplifier/receiver with digital input, Dolby Digital decoder/amplifier with
built-in Dolby Digital decoder, or an amplifier with built-in DTS and Dolby Digital decoder
You can enhance the sound quality by connecting the unit’s DIGITAL OUT (coaxial or optical) with the digital input of
an amplifier, DAT or MD by using a digital cable. The digital stereo audio signal from a disc is directly transferred.
And, if you connect with a Dolby Digital decoder or an amplifier with built-in Dolby Digital decoder by using a coaxial
or optional digital cable, you can enjoy high-quality audio and surround sound. The unit also is compatible with the
DTS function. When you make a digital connection, leave the 2 channel analog audio connection as it is. Otherwise,
depending on the disc type, no audio may be reproduced.
The unit
VIDEO S-VIDEO
VIDEO OUT
NTSC
AV COMPU LINK
PAL
Coaxial digital cable
(not supplied)
English
Español
Portugés
Chinese
Getting started
PCM/DOLBY DIGITAL
OPTICAL COAXIAL
DIGITAL OUT
Optical digital cable
(not supplied)
Red
White
IN
RIGHT COAXIAL
AUDIO
LEFT
IN
DIGITAL
OPTICAL
Amplifier/receiver with digital input,
Dolby Digital decoder/amplifier with
OFF ON
ATTENUATOR
2CH FRONT REAR CENTER
LEFT
RIGHT
ANALOG OUT
WhiteRed
Audio cable
(supplied)
SUBWOOFER
built-in Dolby Digital decoder, or an
amplifier with built-in DTS and Dolby
Digital decoder
• For digital connection, connect the unit’s DIGITAL out (coaxial or optical) to the digital input of a Dolby Digital
decoder or an amplifier with built-in Dolby Digital decoder using an optional digital cable.
NOTES
¶ DTS (Digital Theater System)
DTS is a newly-developed surround system which can handle more amount of data than Dolby Digital, providing
better audio quality.
Though the number of audio channels is 5.1 which is same as Dolby Digital, DTS provides fat sound and better
signal-to-noise ratio, thanks to the lower audio compression ratio format. It also provides wide dynamic range
and better separation, resulting magnificent sound.
¶ When you connect the audio equipment with a digital input, before using, change the “DIGITAL AUDIO OUTPUT”
setting in the “PREFERENCE 2” on-screen display according to the connected audio equipment with a digital
input. When the “DIGITAL AUDIO OUTPUT” setting is not set correctly, loud noise may be played back from
speakers, and it cause of the breakdown of your speakers. See “DIGITAL AUDIO OUTPUT” on page 54.
¶ With this connection, the unit’s settings for “COMPRESSION” and “DOWN MIX” in the PREFERENCE 2 on screen
display are invalid. Settings for these items must be made from the decoder.
19
Page 22
Getting started
Turn on the unit
To connect the power cord
When all the connections have been made, insert the power plug into the wall
outlet firmly. The STANDBY indicator lights and setup is completed.
Warning
• Disconnect the power cord if you are not going to use the unit for a long time.
• Disconnect the power cord before cleaning the unit.
• Disconnect the power cord before moving the unit.
• Do not connect or disconnect the power cord with wet hands.
• Do not pull the power cord when disconnecting it, as this may damage the cord
and cause fire, electric shock, or other accidents.
Caution
• Do not damage, remodel, twist, or pull the power cord, as this may cause fire,
electric shock, or other accidents.
• Contact a dealer and get a new power cord if the cord is damaged. A damaged
cord may cause fire, electric shock, or other accidents.
• Do not put anything heavy or the unit on the power cord, as this may cause fire,
electric shock, or other accidents.
20
Page 23
Getting started
English
Español
Portugés
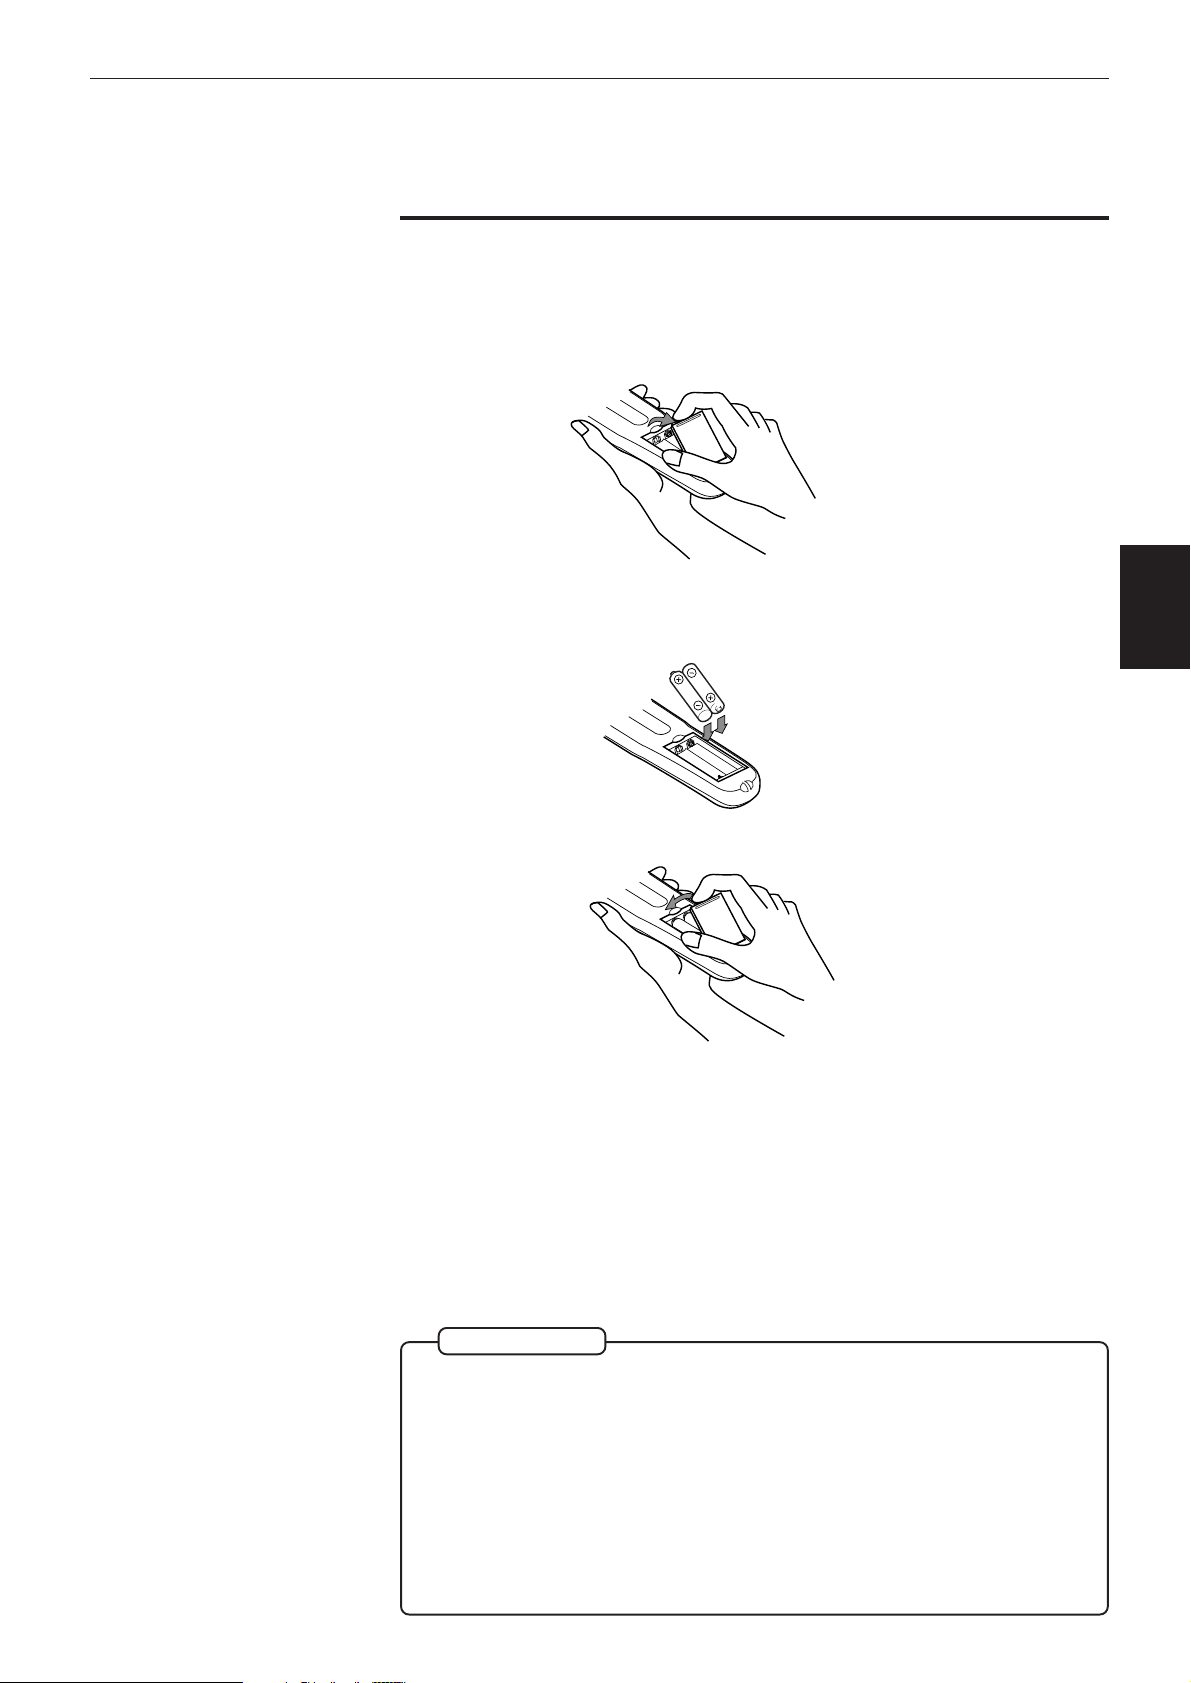
To install batteries in the remote control unit
The battery compartment is located on the back of the remote control unit.
1 Press down on the point shown by the arrow at the top of the compartment
cover, and pull up the cover to open the compartment.
2 Place the two accessory R6P (SUM-3)/AA(15F) batteries in the remote control
according to the polarity markings (“+” and “–”) inside the compartment and
on the batteries.
Chinese
Getting started
3 Place the cover over the compartment, and press down lightly.
• The batteries will last about six months with normal use. If the functions of the
remote control become erratic, replace the batteries. See “Precautions for the
safe use of batteries” below for more information.
Precautions for the safe use of batteries
Observe the following precautions for the safe use of batteries. If they are used
improperly, their life will be shortened, they may burst or their contents may leak.
Precaution
Remove the batteries from the remote control if it is not going to be used
for a long period of time.
¶ Remove dead batteries and dispose of them properly.
¶ Never leave dead batteries lying around, take them apart, mix them with
other refuse, or throw them into an incinerator.
¶ Never touch liquid that has leaked out of a battery.
¶ Do not mix new and old batteries, or batteries of different types, when
replacing them.
21
Page 24
Getting started
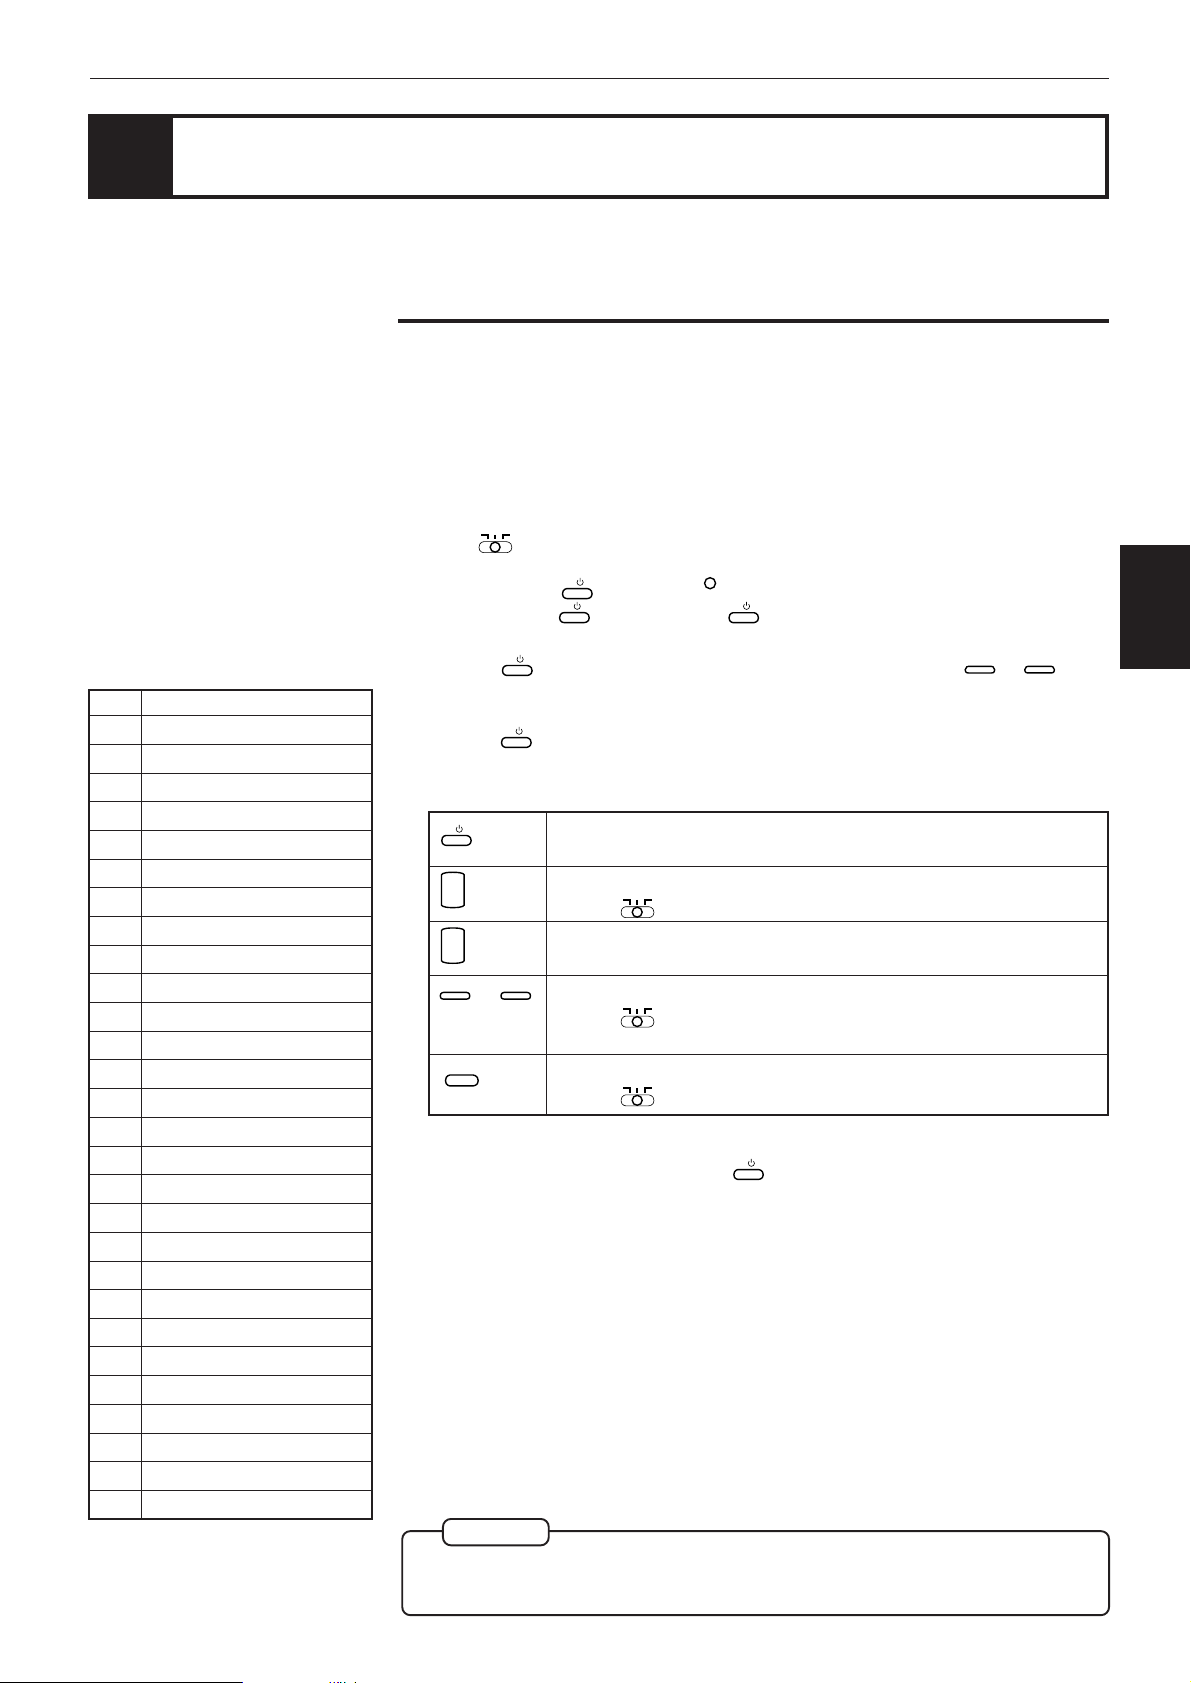
To turn on/off the unit
Press
/ I
on the front panel or press
button
/ I
DVD
on the remote control unit.
You can turn on the unit by pressing
PLAY
on the front panel or
PLAY
on
the Remote control unit. In this
operation, the unit starts playback
when the disc is set. If not set, the
disc tray opens.
You can also turn on the unit by
pressing
OPEN/
CLOSE
OPEN/CLOSE
on the front panel or
on the remote control unit. In
this case, the disc tray opens.
ON/OFF RESERVE
STANDBY
/
STANBAY/ON
OPEN/
CLOSE
TV
DVD
1234
5678
9100
TITLE
3D PHONIC ANGLE
ECHO
RETURN
MIC 1 LEVEL
VIDEO CD
MIN MAX
MIC 1 MIC 2
PHONES LEVELPHONES
MIN MAX
/
TV
KARAOKE
CANCEL RESUME
TV/VIDEOSET
SCORING
ENTER
SUBTITLE ZOOM VFP
KARAOKE
VOCAL
SOUND
EFFECT
NEXTPREVIOUS
PAUSE
STOP
STROBE
CLEAR SELECT
SLOW(–) SLOW(+)
+
+
TV
CH
VOLUME
–
–
DVD PLAYER
KARAOKE
MIN MAX
DVD
KARAOKE
RESERVE
+10
MENU
DIGESTON SCREEN
KEY CONTROL
VOCAL
REPLACE
PLAY
+
AUDIO
VOLUME
–
CANCEL
MIC 2 LEVEL
KARAOKE
ON / OFF
RESUME
TITLE MENU
DIGEST
3D PHONIC
/
DVD
DVD / VIDEO CD / CD
button
ENTER
DOLBY
ON SCREEN
DIGITAL
OPEN/CLOSE
SHUTTLE
+10
SKIP
54321
STOP PAUSE PLAY
1009876
MADE IN JAPAN
22
RM–SVD701U REMOTE CONTROL
NOTE
/ I
DVD
Even if you press
from the AC power source as long as it is connected to the wall outlet. This
state is called the standby mode. In this state, the unit is designed to
consume a very small quantity of power.
/ I
or
to turn off the unit, the unit is not disconnected
Page 25
Getting started
English
Using the remote control unit
Manufacturer code list
No. Manufacturer
01 JVC
02 PANASONIC
03 SONY
04 SHARP
05 TOSHIBA
06 MITSUBISHI
07 HITACHI
08 SANYO
09 FUNAI
10 AIWA
11 DAEWOO
12 SAMSUNG
13 LG (GOLDSTAR)
14 THOMSON
15 FERGUSON
16 PHILIPS
17 GRUNDIG
18 ITT
19 MIVER
20 FINLUX
21 NOKIA
22 NEC
23 JINXING/PEONY1
24 PEONY2
25 PEONY3
26 KONKA
27 PEWIN/NOBLEX
28 TCL
You can operate the unit with the remote control unit, and you can also operate
your TV or other components with the remote control unit.
To use the remote control unit for TV operation
You can operate a JVC TV with the remote control unit. To operate another
manufacture’s TV, you have to change the remote control signal. Also refer to the
manual supplied with your TV.
Changing the remote control signal
TV
KARAOKE
1 Set
2 Press and hold
3 Holding
4 Release
5 Try to operate your TV by pressing
DVD
Do not release
on the remote control unit to TV.
/ I
TV
, then press
/ I
TV
. Keep holding
/ I
TV
, enter the manufacturer’s code (two digits) using 0 to 9.
.
SET
/ I
TV
until the next step is completed.
See the lists on the left to find the manufacturer’s code.
/ I
TV
.
The following buttons can be used for operating the TV:
/ I
TV
+
CH
–
+
TV
VOLUME
–
0
CANCEL
TV/VIDEO
to
Turns the TV on or off.
Change the TV channels.
(with
DVD
TV
KARAOKE
set to TV only)
Adjusts the TV volume.
9
Selects the TV channels.
(with
You can switch input mode (either TV or VIDEO).
(with
DVD
DVD
TV
TV
KARAOKE
set to TV only)
KARAOKE
set to TV only)
/ I
TV
.
If your TV turns on or off, you have entered the correct code.
NOTE
If there is more than one code listed for your brand of TV, try each one until
the correct one is entered.
Español
Portugés
Chinese
Getting started
23
Page 26

Getting started
24
Page 27

Basic Operations
Basic operations
This chapter explains how to perform basic common DVD, Audio CD
and Video CD playback operations.
For more advanced operations, see page 33 for DVD operations, page
65 for Audio CD, page 75 for Video CD.
English
English
Español
Portugés
Chinese
Introduction
Table of contents of this chapter
7 Before operation
To turn on your TV and the unit ............................................................................ 26
To select the source you want to operate ............................................................ 26
7 Inserting and removing discs
To insert or remove discs....................................................................................... 27
7 Playing back a DVD VIDEO or CD disc
To playback a disc from the beginning ................................................................ 28
To stop playback completely ................................................................................. 28
To stop playback temporarily ................................................................................ 29
To advance or reverse play rapidly while monitoring ........................................ 29
To locate the beginning of the scene or song ..................................................... 29
7 Resuming Playback
To store the point where you want to resume playback from – RESUME ....... 30
To resume playback from the stored point – RESUME ...................................... 30
7 Adjusting the surround sound
To simulate the surround sound – 3D PHONIC ................................................... 31
7 Summary of basic operations ............................................................... 32
knowledge
Preliminary
Getting started
Basic
Basic
operations
operations
operations
DVD VIDEO
adjustment
Setting and
Audio CD
operations
Video CD
operations
KARAOKE
operations
Additional
information
25
Page 28
Basic operations
Before operation
To turn on your TV and the unit
To operate your TV from the remote control unit, you have to set the remote
control unit to operate your TV (see page 23).
1
2
Press
Press
TV
DVD
/ I
to turn on your TV.
/ I
to turn on the unit.
You can adjust the volume level,
select the TV channel, and
change the input source of your
TV from the remote control unit.
To select the source you want to operate
You can operate the unit with the remote control unit and operate some functions
of your TV.
TV
KARAOKE
DVD
DVD
TV
on the remote control unit
KARAOKE
on the remote control unit to
To operate the unit, set
•
to DVD.
To operate the unit, point the remote control unit at the remote sensor of the
unit.
To operate the TV, set
•
TV.
To operate the TV, point the remote control unit at the remote sensor of the
TV.
26
Page 29
Basic Operations
English
English
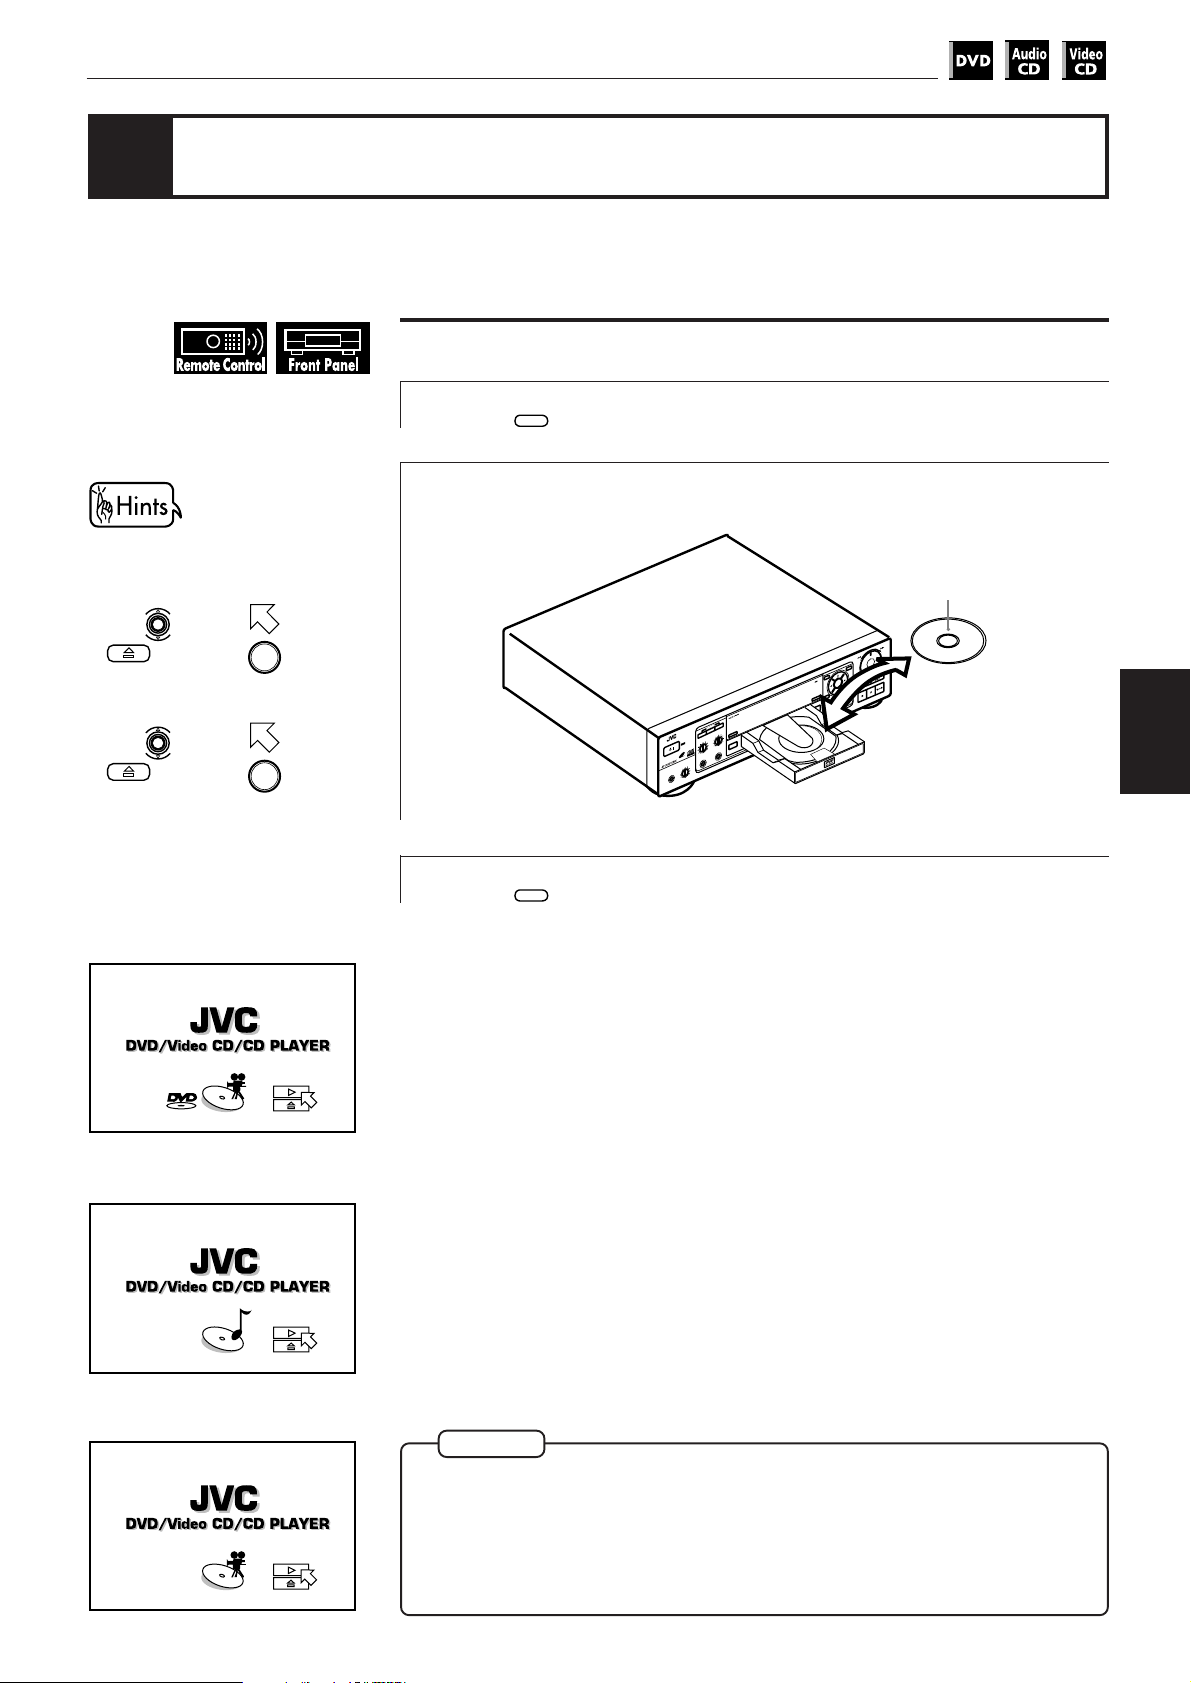
Inserting and removing discs
You can also insert and remove
the disc from the on-screen
display.
1. Use to move to
, then press
open the disc tray.
2. Place or remove the disc.
3. Use to move to
, then press
close the disc tray.
ENTER
ENTER
to
to
To insert or remove discs
OPEN/
Press
1
Place the disc in the tray.
2
CLOSE
to open the disc tray.
ON/OFF RESERVE
STANDBY
MIC 1 LEVEL
/
MIN MAX
STANBAY/ON
MIC 1 MIC 2
VIDEO CD
Español
Portugés
Chinese
With the label side up.
CANCEL
KARAOKE
MIC 2 LEVEL
MIN MAX
• If a disc is 8-cm
disc, place it fitting
in the inner recess.
Basic
operations
Information about the opening
display
When you insert a DVD
VIDEO disc
When you insert an
Audio CD disc
When you insert a Video
CD disc
OPEN/
3
Press
CLOSE
to close the disc tray.
NOTES
¶ The unit can playback DVD VIDEO, Audio CD, and Video CD discs only. Do
not load other disc types. For details, see page 13.
¶ When loading a disc in the tray, be sure to position the disc inside the recess.
Otherwise, the disc may be damaged when the tray is closed, and the disc
may not be removed from the unit.
27
Page 30
Basic operations
Playing back a DVD VIDEO or CD disc
Now, you can play a DVD VIDEO or a CD disc. First, let’s enjoy simple playback
according to following procedure.
To playback a disc from the beginning
Short cuts
Press
The unit starts playback from the
beginning.
When you play a Video CD disc
with PBC function or DVD disc,
the menu display may appears
on the TV screen. In this case,
you can operate some functions
such as playback from the
selected one by viewing the
menu displayed on the TV
screen.
For the operation using the
menu of DVD, see page 34.
For the operation using the
menu of Video CD, see page 76.
PLAY
.
Use to move to
1
], then press
[
ENTER
.
7 The unit starts playback from the beginning.
To adjusting the volume level
• For TV
Press
• For JVC amplifier
Press
• For other amplifier or receiver
Adjust the volume level of the connected amplifier or receiver.
See the instructions of the amplifier or receiver.
+
TV
to increase the volume, and
VOLUME
+
AUDIO
to increase the volume, and
VOLUME
TV
VOLUME
to decrease the volume.
–
AUDIO
to decrease the volume.
VOLUME
–
• For headphones
To increase the volume, turn
PHONES LEVEL
turn
to the left.
MIN MAX
PHONES LEVEL
MIN MAX
To stop playback completely
Press
1
7 The unit stops playback.
STOP
.
to the right. To decrease the volume,
28
Page 31

To stop playback temporarily
SLOW(–)
PREVIOUS
Basic Operations
English
English
Español
Portugés
Chinese
You can also advance or reverse
play rapidly with the SHUTTLE
knob on the front panel. To
advance play rapidly, turn the
shuttle knob to the right and
hold, and to reverse play rapidly,
turn the shuttle knob to the left
and hold. When you release the
shuttle knob, the unit returns to
normal playback. The playback
speed changes according to the
amount you turn the shuttle
knob.
SHUTTLE knob
Press
1
7 The unit pauses playback. To continue playback, press
PAUSE
.
PLAY
.
To advance or reverse play rapidly while monitoring
7 During playback
Press
1
Press
SLOW(+)
rapidly. Each time you press the button, advance playback or reverse
playback speed increases. To return to the normal playback, press
SLOW(+)
or
.
to advance playback rapidly, and
to reverse playback
SLOW(–)
PLAY
Basic
.
operations
DVD / VIDEO CD / CD
Keep pressing
RESUME
DOLBY
D I G I T A L
OPEN/CLOSE
TITLE MENU
ENTER
ON SCREEN
NEXT
+10
54321
0109876
or
SHUTTLE
SKIP
STOP PAUSE PLAY
PREVIOUS
advance or reverse play rapidly.
When you release the button, the
unit returns to normal playback.
to
To locate the beginning of the scene or song
7 During playback
Press
1
Press
PREVIOUS
press
The unit locates the beginning of the track when you play a Video CD disc
without the PBC function or Audio CD disc. When you play a video CD disc
with the PBC function or DVD VIDEO disc, the unit may locate anywhere, but
mostly it locates on the beginning of the title or chapter or track.
NEXT
or
.
to locate the beginning of the current chapter, title, or track, and
to locate the beginning of the next chapter, title, or track.
NEXT
29
Page 32
Basic operations
Resuming playback
The unit stores the position on a disc you want to interrupt playback at, and
resumes playback from that position later.
To store the point where you want to resume playback from
[RESUME]
7 During playback
You can store the position on a
disc you want to interrupt
playback at by pressing
instead of
The unit also starts resume
playback by pressing
during standby mode.
RESUME
.
RESUME
DVD
/ I
Press
1
The unit stores the current playback position of the disc, and the RESUME
indicator on the front panel lights.
The last stored memory overrides the previous memory.
RESUME
.
To resume playback from the stored point [RESUME]
7 During stop mode
Press
1
The unit starts playback from the stored position.
RESUME
.
30
NOTES
When you resume playback during playback of a Video CD disc with PBC
function, the unit may resume playback from a point slightly earlier than
the point you stored.
¶ To clear the memory
Take out the disc from the unit.
Page 33
Basic Operations
English
English
Adjusting the surround sound
You can select the simulated surround effect depending on the disc contents. If
you connect the unit to your stereo system, you can enhance sound quality and
produce a greater surround effect.
To simulate the surround sound [3D PHONIC]
7 During playback
Press
1
Within 10 seconds, select
2
the desired effect mode by
pressing
Each time you press
effect mode changes as follows:
ACTION*
DRAMA
THEATER
3D PHONIC
.
3D PHONIC
.
, the
3D PHONIC
3D PHONIC
THEATER
LH
Selected effect mode
Español
Portugés
Chinese
Basic
operations
To erase the 3D PHONIC
ENTER
screen, press
PHONIC screen disappears if
there are no operations for
more than 10 seconds.
. The 3D
OFF
* When you play the DVD disc recorded in Dolby Digital and contains more
than 3 channel sound, ACTION does not appears.
Press to adjust the
3
effect level.
You can adjust the effect level in
5 steps.
Toward L : Reduce the effect
Toward H : Enhance the effect
NOTES
¶ The sound effect (3D PHONIC) is possible only on discs which are recorded
in DOLBY SURROUND or DOLBY DIGITAL. However, some DOLBY
SURROUND or DOLBY DIGITAL discs do not contain the rear sound signal,
in this case, the setting can be changed but the sound effect cannot be
obtained.
¶ You can change the setting of the discs which do not contain the rear sound
signal, but the sound effect cannot be obtained.
¶ The sound effect is not possible, and will not work even if set when the unit
outputs the DTS or Dolby Digital bitstream signal from the DIGITAL OUT
jack.
¶ The sound effect will not be set or operate, even if
sound of DVD discs recorded in Linear PCM.
3D PHONIC
¶ When you set the 3D PHONIC function to on, the DOWN MIX and
COMPRESSION setting in the PREFERENCE 2 display are disabled.
3D PHONIC
THEATER
LH
Effect level
is pressed, on the
31
Page 34
Basic operations
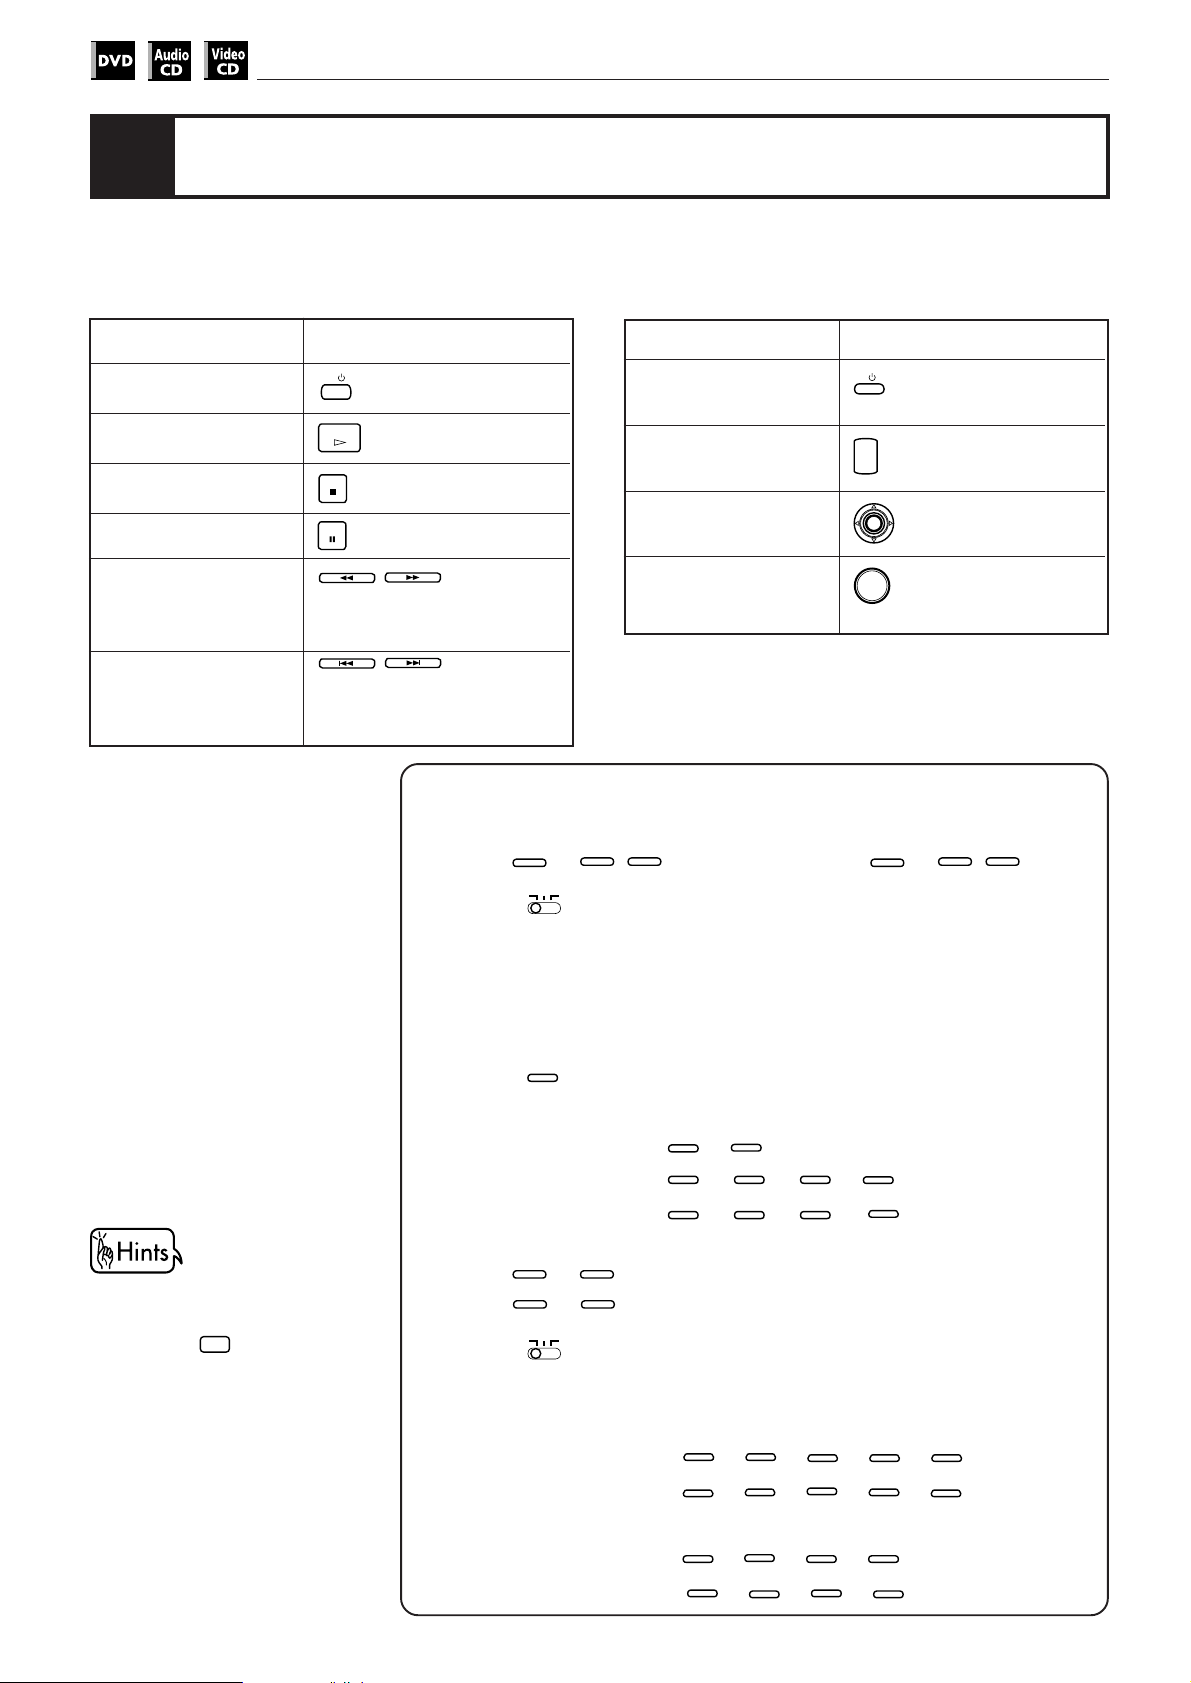
Summary of basic operations
The basic operation and buttons for basic operation are shown in table below:
To
Turn on/off the unit
Play
Stop
Pause
Advance or reverse
play rapidly while
monitoring
Locate the beginning
of the scene or song
Press
/ I
DVD
PLAY
STOP
PAUSE
SLOW(–)
/
or turn the
SLOW(+)
shuttle knob and hold.
PREVIOUS
/
NEXT
until it
clicks.
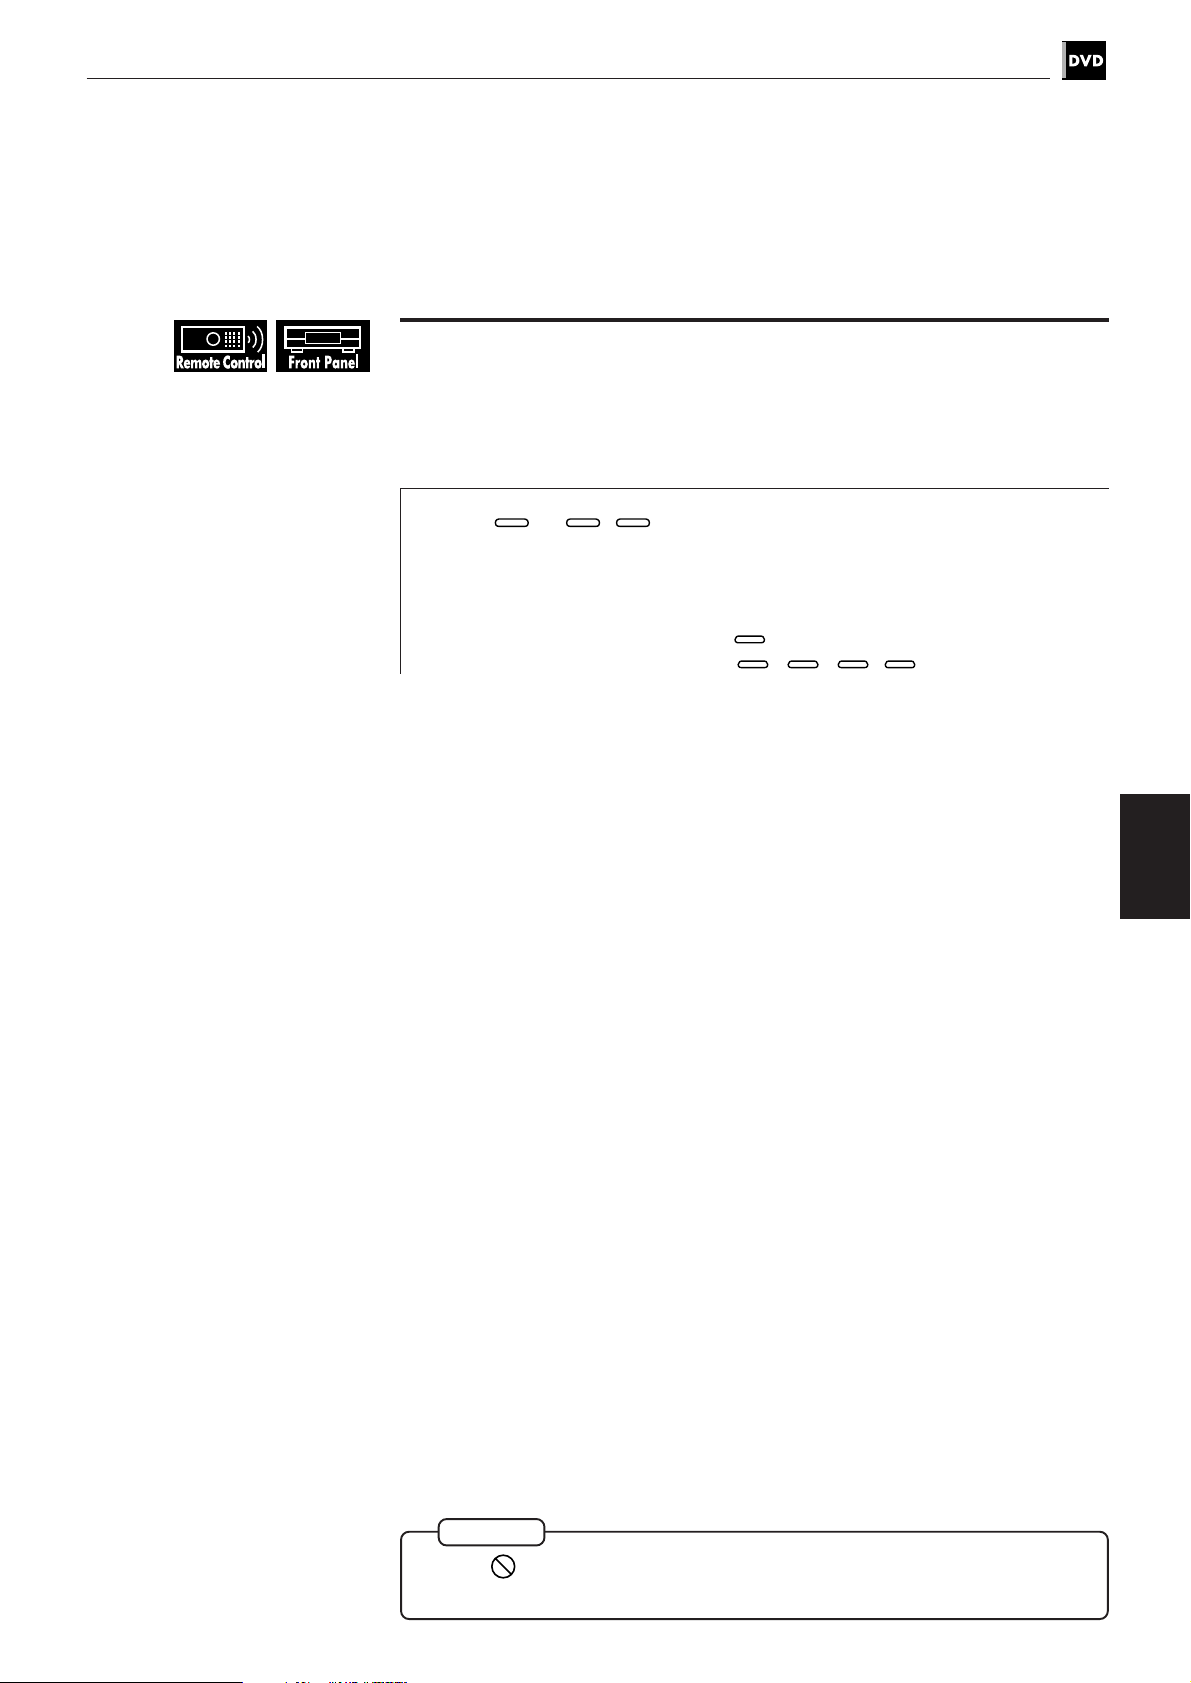
How to use numeric buttons on the remote control unit
The numeric buttons are used to select a track or title number.
To use 1 to 10,
1. Set
DVD
TV
KARAOKE
To
Turn on your TV
Adjust the volume
of your TV
Move the cursor on
the TV screen
Decide the cursor
position
+10
(described as “press 1 to 10,
to DVD.
Press
/ I
TV
+
TV
VOLUME
–
ENTER
+10
”).
To enter 10 or 0 using the
numeric buttons on the front
panel, press
0
.
10
2. Select the desired track or title number.
• To select a number between 1 and 10
Press the corresponding button for the number.
• To select a number higher than 10
+10
Use
.
Example :
To select 13
To select 34
To select 40
+10
+10
+10
→
→
→
3
+10
+10
→
→
+10
+10
→
→
4
10
To use 0 to 9 (usually used for time search and described as
“press 0 to 9”).
TV
CATV
1. Set
DVD
to DVD.
2. Select the time.
Example (for DVD VIDEO):
1 hour 20 minutes
3 minutes 20 seconds
1
→ 2 → 0 → 0 →
0
→ 0 → 3 → 2 →
Example (for Audio CD/Video CD):
3 minutes 20 seconds
65 minutes 30 seconds
0
→ 3 → 2 →
6
→ 5 → 3 →
0
0
0
0
32
Page 35

DVD VIDEO Operations
DVD VIDEO operations
This chapter explains all the functions of the player for playing back
DVD discs. You can enjoy DVD in various ways such as selecting the
subtitle and audio languages, viewing from multiple angle, some of
which only DVD can offer.
English
English
Español
Portugés
Chinese
Introduction
Table of contents of this chapter
7 Playing a specific scene on a DVD disc
To locate a desired scene from the menu ............................................................ 34
To locate a desired scene by specifying the title number .................................. 35
To locate a desired scene by specifying the chapter number – CHAP. SEARCH ............
To locate a desired scene by specifying the time – TIME SEARCH ................... 37
To locate a desired scene by watching the opening scene digest display
– DIGEST .................................................................................................................. 39
7 Playing in slow-motion
To display still pictures – STROBE ........................................................................ 40
To playback in slow-motion – SLOW .................................................................... 40
7 Playing a scene close-up
To playback a scene close-up – ZOOM ................................................................. 41
7 Repeat playback
To repeat a title or chapter – REPEAT .................................................................. 42
To repeat a desired part – A-B REPEAT ................................................................ 43
7 Viewing from multiple angles
To select a scene angle from the normal screen – ANGLE ............................... 44
To select a scene angle from the on-screen display – ANGLE .......................... 44
To select a scene angle from the angle list display – ANGLE ........................... 45
7 Changing the language and sound
To select the subtitle language – SUBTITLE ....................................................... 46
To change the audio language or sound selection – AUDIO ............................ 47
36
knowledge
Preliminary
Getting started
Basic
operations
operations
operations
DVD VIDEO
DVD VIDEO
adjustment
Setting and
Audio CD
operations
Video CD
operations
KARAOKE
operations
Additional
information
33
Page 36
DVD VIDEO Operations
Playing a specific scene on a DVD disc
and
TITLE
MENU
TITLE
.
.
MENU
About
A DVD disc which contains more
than one title may have the
menu like as a list of the title. In
this case, the menu appears on
the TV screen by pressing
On the other hand, a DVD disc
which contains only one title
may have the menu. In this case,
the menu appears on the TV
screen by pressing
You can play from a selected scene. You can locate the desired scene on a DVD
disc by selecting the title, chapter number, or time. You can also select it from the
menu recorded on a DVD disc.
To locate the desired scene from the menu
DVD discs generally have their own menus which show the disc contents. These
menus contain various items such as titles of a movie, names of songs, or artist
informations, and displayed on the TV screen. You can locate the desired scene
by using the menu.
7 Insert the DVD disc.
MENU
Press
1
The menu appears on the TV screen.
Use to select the desired item, then press
2
or
TITLE
.
Example
ENTER
.
With some discs, you can select
the item by entering the
corresponding number using the
numeric buttons, causing the
unit to automatically start
playback.
34
7 The unit starts playback of the selected item.
NOTES
¶ When appears on the TV screen by pressing
The disc does not have the menu such as a list of the title.
¶ When appears on the TV screen by pressing
The disc does not have the menu data.
TITLE
in step 1:
MENU
in step 1:
Page 37
DVD VIDEO Operations
To locate the desired scene by specifying the title number
Each title is usually assigned a title number on DVD discs. You can play the
desired title by selecting the title number.
7 During stop mode
English
English
Español
Portugés
Chinese
Use 1 to 10,
1
The selected title number appears in the display window on the front panel.
Example:
To select title number 8: Press 8.
To select title number 37: Press
+10
to select the desired title number.
+10
+10
›
+10
›
› 7.
7 The unit begins playback from the selected title.
operations
DVD VIDEO
NOTE
When is displayed in the TV screen
The title you have selected is not contained in the disc.
35
Page 38
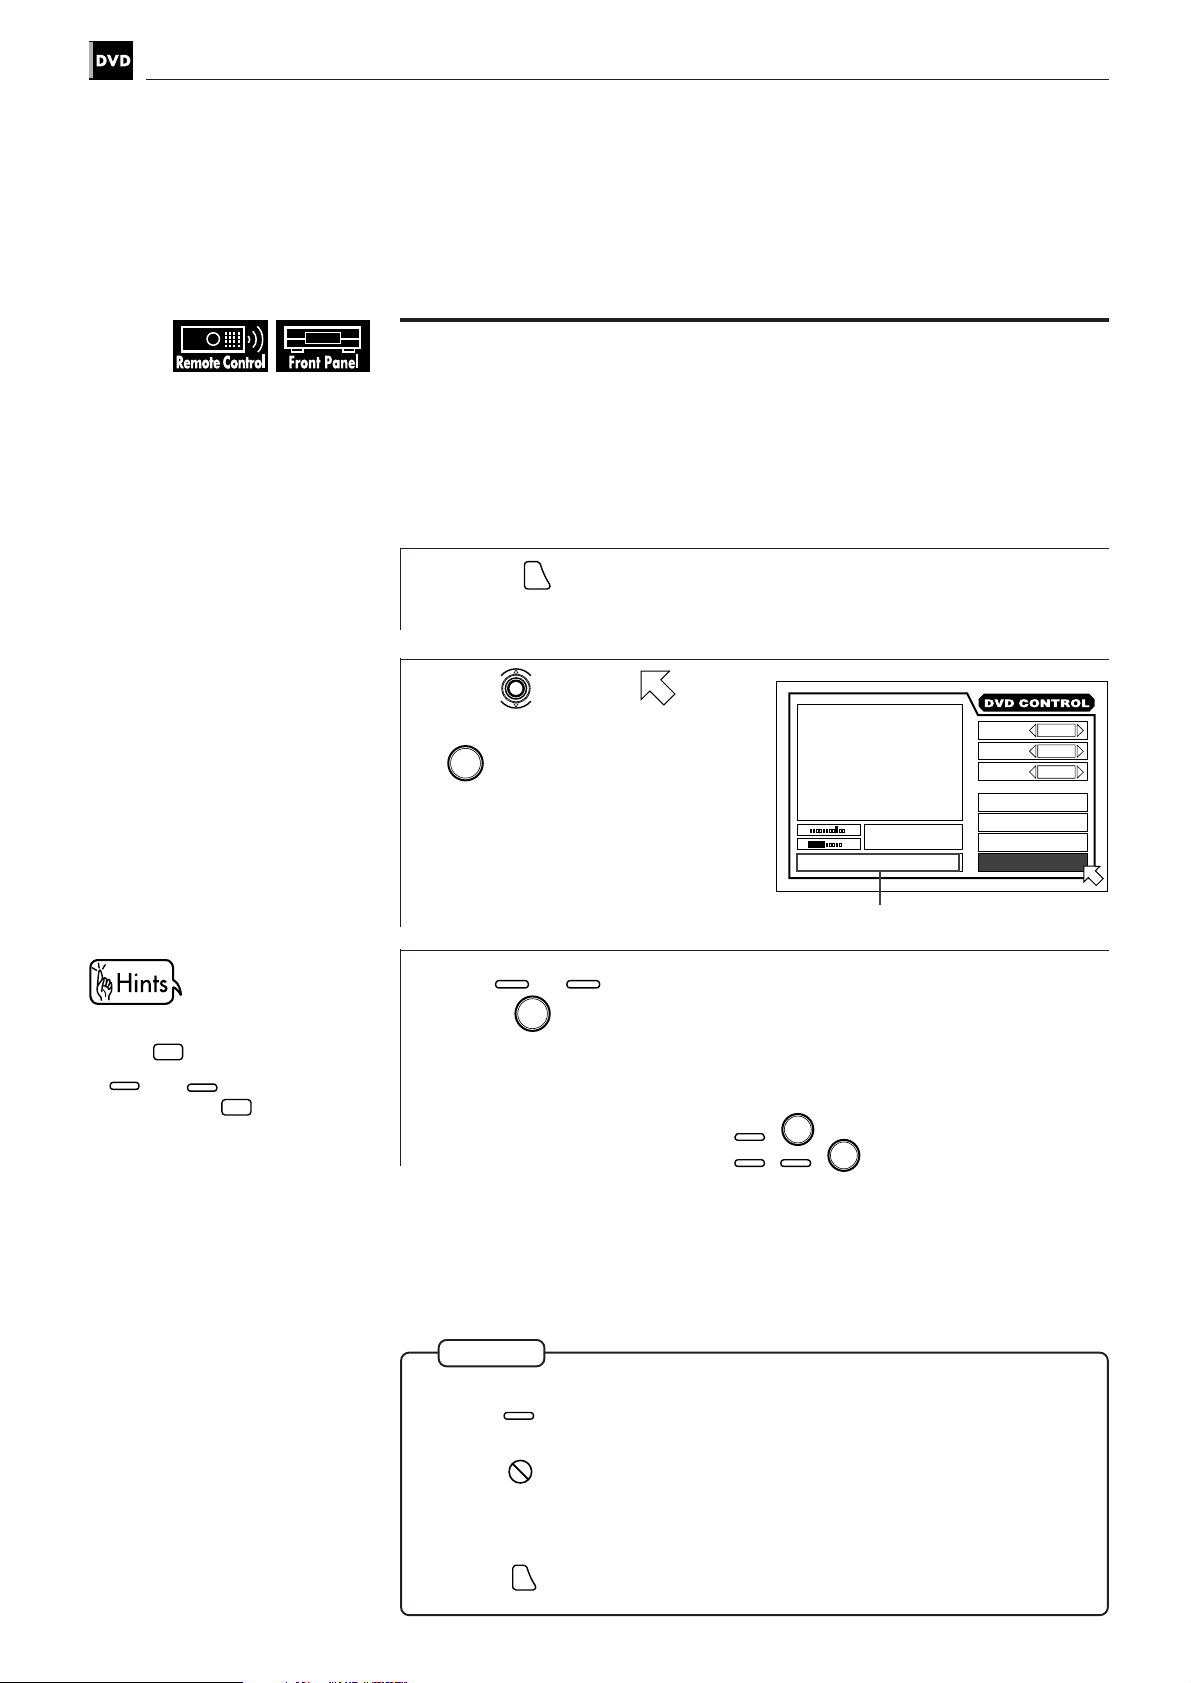
DVD VIDEO Operations
To locate the desired scene by specifying the chapter
number [CHAP. SEARCH]
Each chapter is usually assigned a chapter number on DVD discs (except Karaoke
discs). You can play the desired chapter by selecting the chapter number from the
on-screen display.
7 During playback
• To enter 0 on the front panel,
•
0
press
10
control unit or
front panel are not used in this
function.
10
and
.
+10
on the remote
+10
on the
1
Press
ON SCREEN
.
The on-screen display appears on the TV screen.
Use to move to
2
[CHAP. SEARCH], then press
ENTER
.
<GO TO CHAPTER> appears in the
message area.
The color of [CHAP. SEARCH]
St. End
010 Mb
GO TO CHAPTER:
changes.
Use 0 to 9 to select the desired chapter number, then
3
ENTER
press
.
Selected chapter number appears in the message area.
Example:
To select chapter number 8: Press 8 ›
To select chapter number 37: Press 3 › 7 ›
ENTER
TITLE
CHAP.
03
TIME
1 : 34 : 58
Message area
.
ENTER
.
03
ANGLE
AUDIO
SUB-
TITLE
REPEAT
A-B REPEAT
TIME SEARCH
CHAP.SEARCH
1 / 3
2 / 3
1 / 3
36
7 The unit begins playback from the selected chapter.
NOTES
When the chapter number is incorrect in step 3:
Press
0
to erase the number previously selected, and select the desired
number using the numeric buttons.
¶ When is displayed in the TV screen in step 3:
The chapter you have selected is not contained in the disc, or chapter
search does not work on the disc.
¶ To return to the regular display:
Press
ON SCREEN
.
Page 39
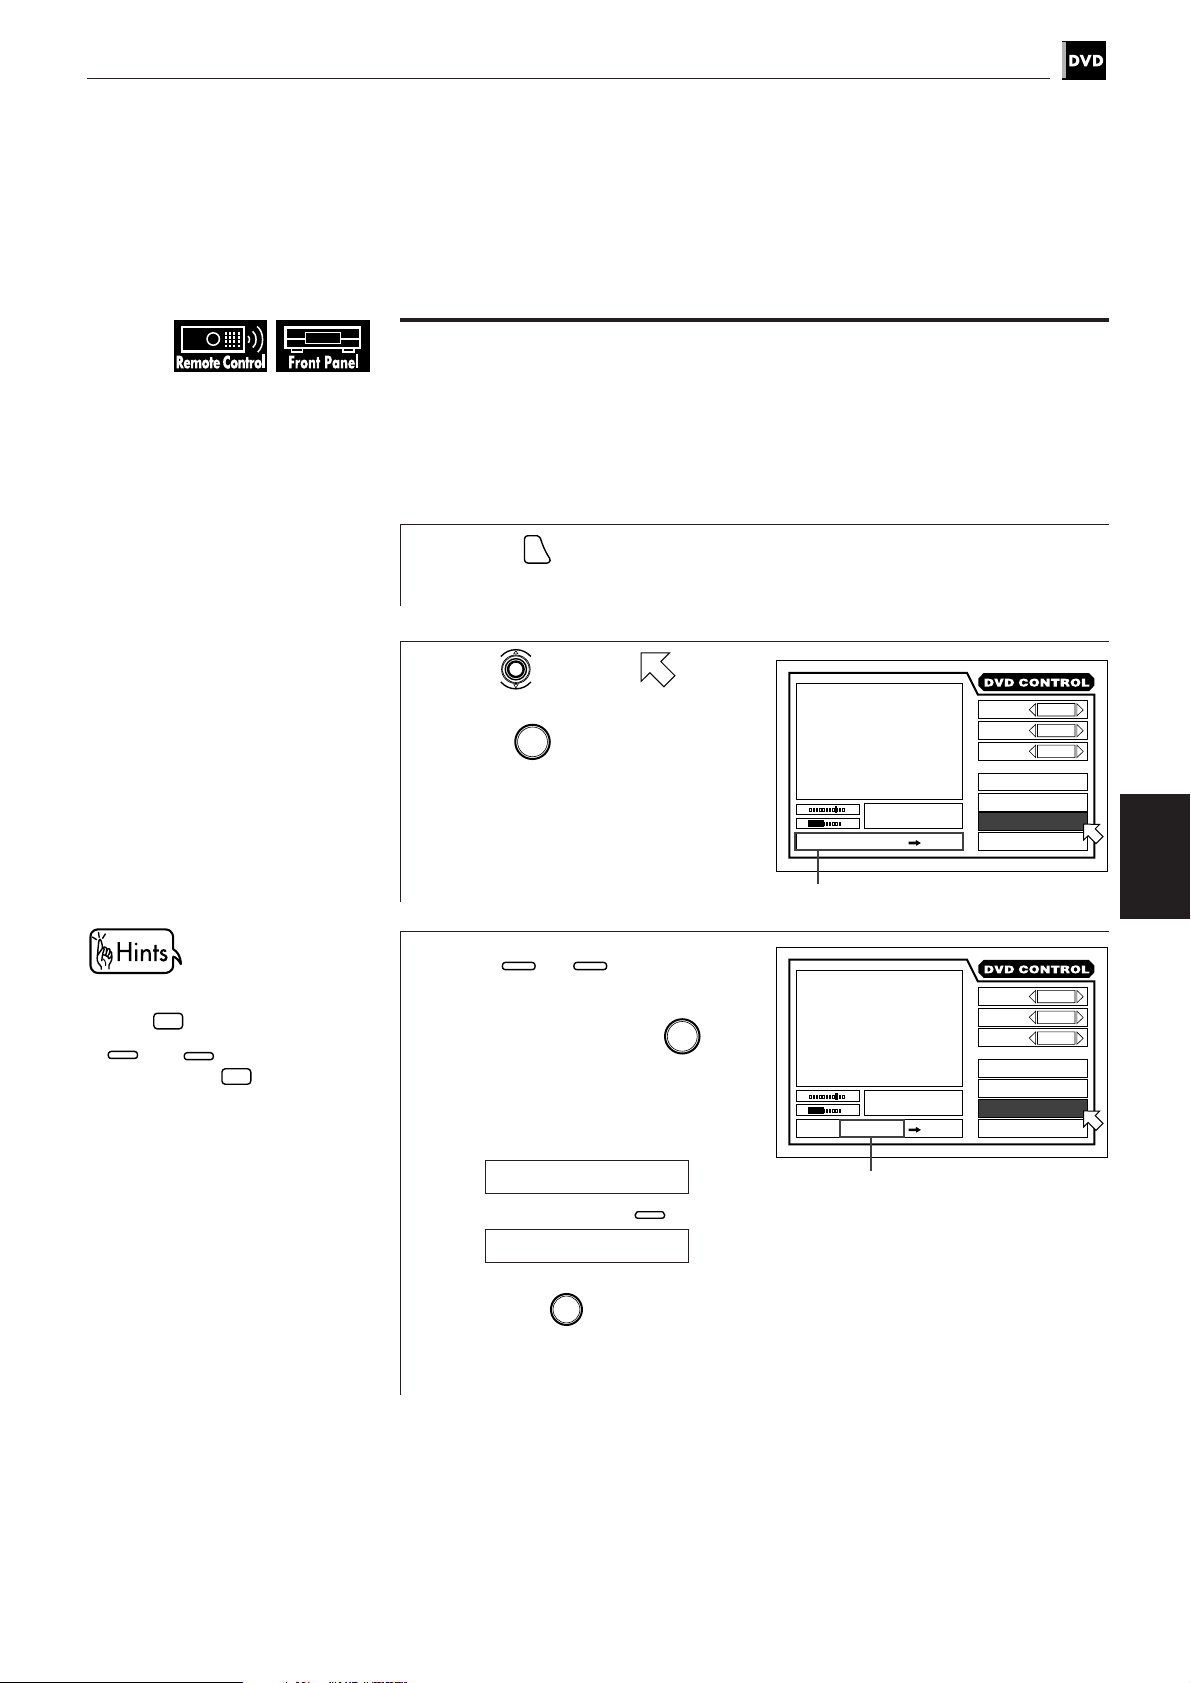
DVD VIDEO Operations
To locate the desired scene by specifying the time
[TIME SEARCH]
If the DVD disc contains time information, elapsed time appears on the TV screen.
You can play the desired scene by selecting the time from the on-screen display.
7 During playback
English
English
Español
Portugés
Chinese
• To enter 0 on the front panel,
•
0
press
10
10
and
.
+10
control unit or
on the remote
+10
on the
front panel are not used in this
function.
1
Press
ON SCREEN
.
The on-screen display appears on the TV screen.
Use to move to
2
[TIME SEARCH], then
ENTER
press
.
<GO TO> appears in the message
area.
The color of [TIME SEARCH]
changes.
Message area
Use 0 to 9 to select the
3
time (hour, minute, and
ENTER
second) then press
Example 1:
To playback from the 1 hour point.
.
St. End
010 Mb
GO TO _ : : ENTER
St. End
010 Mb
GO TO 1 3 4: 00: ENTER
TITLE
TIME
TITLE
TIME
CHAP.
03
1 : 34 : 58
CHAP.
03
1 : 34 : 58
03
03
ANGLE
AUDIO
SUB-
TITLE
REPEAT
A-B REPEAT
TIME SEARCH
CHAP.SEARCH
ANGLE
AUDIO
SUB-
TITLE
REPEAT
A-B REPEAT
TIME SEARCH
CHAP.SEARCH
1 / 3
2 / 3
1 / 3
1 / 3
2 / 3
1 / 3
operations
DVD VIDEO
GO TO _ : :
↓
Press 1.
GO TO 1 : _ :
↓
ENTER
Press
.
Selected time
continued
37
Page 40
DVD VIDEO Operations
Short cuts
After pressing 4, press
ENTER
.
You can input the time by
pressing
0
position.
ENTER
without pressing
twice to input the second
Example 2:
To select playback from 2 hour 34 minutes:
GO TO _ : :
↓
Press 2.
GO TO 2 : _ :
↓
Press 3.
GO TO 2 : 3 _ :
↓
Press 4.
GO TO 2 : 3 4 : _
Press
0
.
↓
GO TO 2 : 3 4 : 0
Press
0
.
↓
GO TO 2 : 3 4 : 0 0
↓
ENTER
Press
7 The unit starts playback from the selected time.
NOTES
¶ When you make a mistake in step 3:
Move the cursor to the mistaken value, then press the correct value to reselect the value.
GO TO 2 : 3 5 : _
↓
Press .
GO TO 2 : 3 5:
↓
Press 4.
38
GO TO 2 : 3 4 : _
¶ When appears in the TV screen in step 2:
The time you select is not contained on the disc, or time search does not
work on the disc.
¶ To return to the regular display:
Press
ON SCREEN
.
Page 41
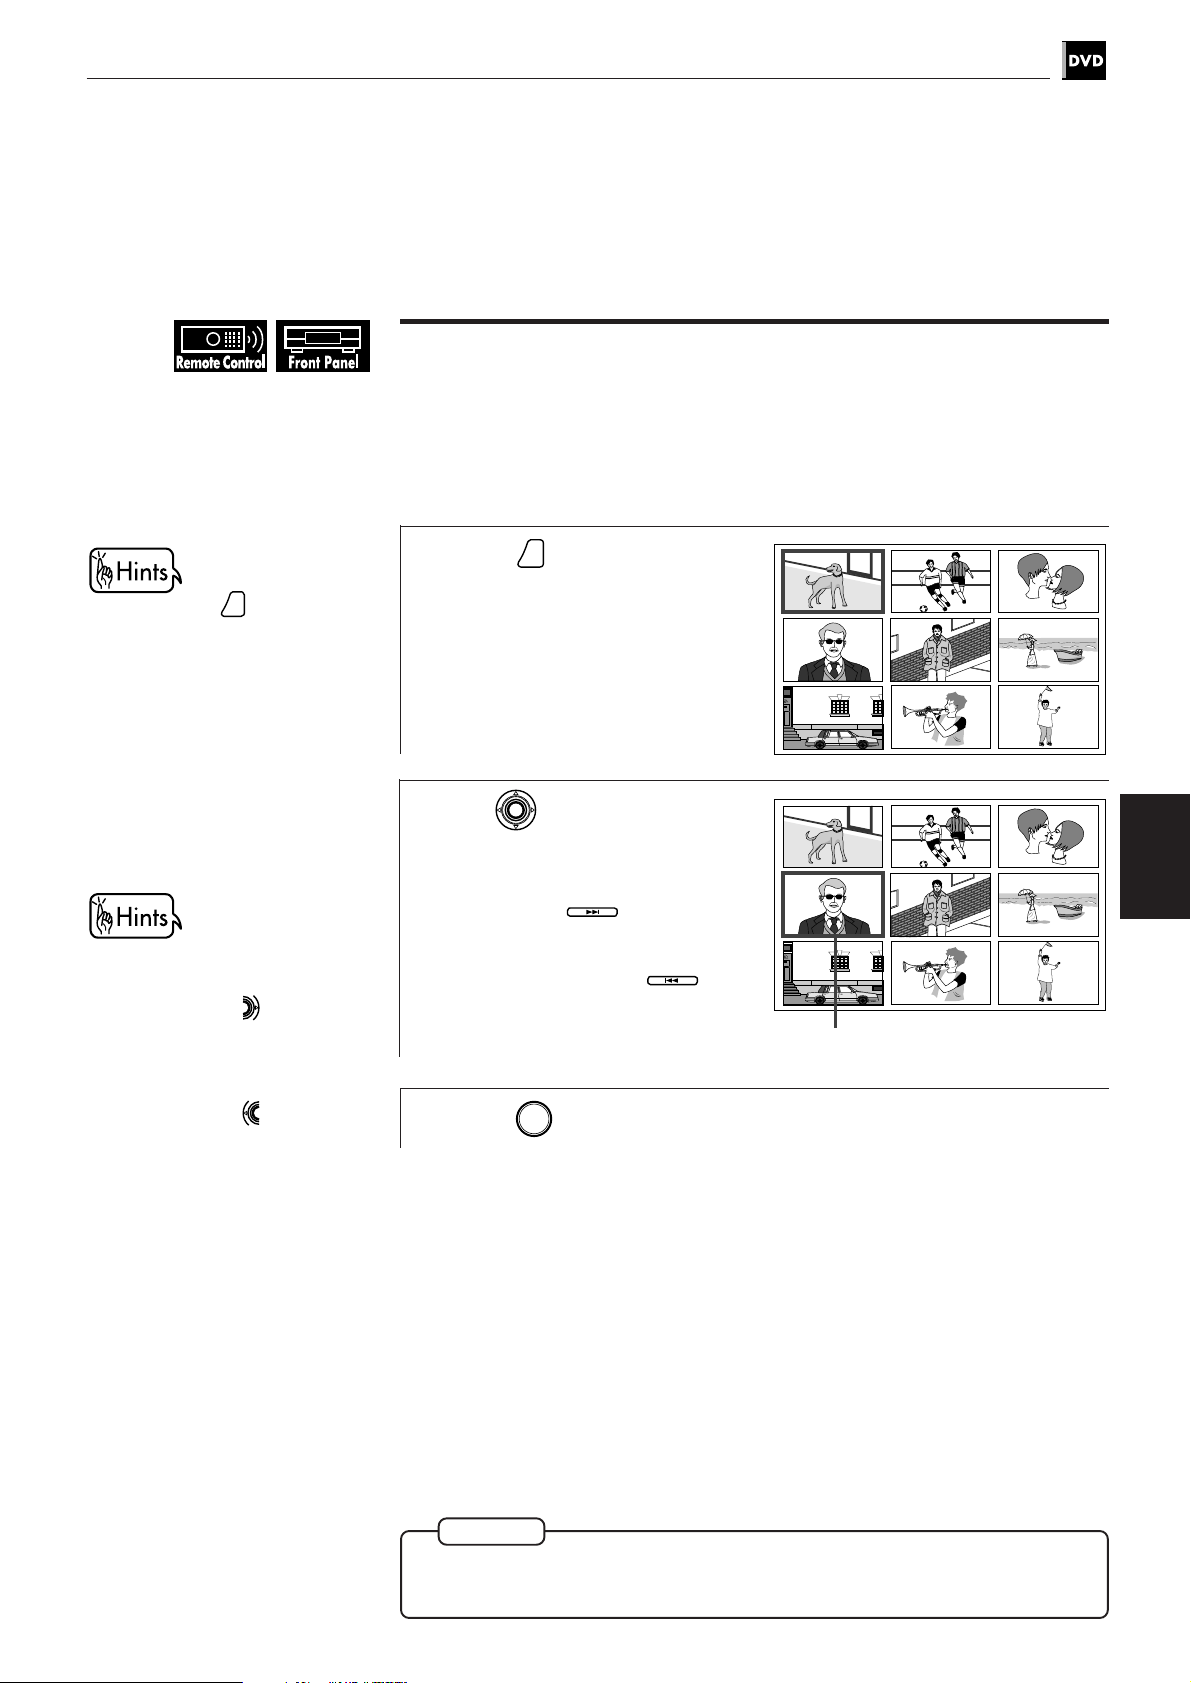
DVD VIDEO Operations
To locate a desired scene by watching the opening scene
digest display [DIGEST]
The unit can display the opening scene of each title. You can select a desired title
from the opening scenes displayed on the TV screen.
7 During stop mode
English
English
Español
Portugés
Chinese
When you press
playback, the unit displays the
opening scene of each chapter
and you can select the desired
chapter. In this case, opening
scenes are displayed from
chapter 1.
• When the selected title is in
the lower right-hand corner of
the screen, press to check
next scenes.
• When the selected title is in
the upper left-hand corner of
the screen, press to return
to previous scenes.
DIGEST
during
Press
1
The opening scene of each title
appears on the TV screen.
The up to nine opening scenes are
displayed.
Use to select the
2
DIGEST
.
desired title.
When you want to check more
scenes, press
scenes appear on the TV screen.
When you want to return to
previous scenes, press
3
Press
ENTER
.
. Additional
NEXT
PREVIOUS
operations
DVD VIDEO
.
Selected title
7 The unit begins playback from the selected title.
NOTE
With some discs depending on the contents, it may take some time until all
the scenes appear on the screen.
39
Page 42

DVD VIDEO Operations
PAUSE
Playing in slow-motion
The unit can display a list of the still pictures, and playback a disc in slow-motion.
You can view video in more detail using these functions.
To display still pictures [STROBE]
7 During playback
During this function, when you
PAUSE
press
appear on the TV screen and
playback pauses. When you
press
continuously appear on the TV
screen.
, next nine still pictures
PLAY
, nine still pictures
1
Press
PAUSE
at the point you want to view like as a continuous
photograph.
Press and hold
2
for more
than 1 seconds.
The nine still pictures appear on the
TV screen and playback pauses.
To cancel strobe play
Press and hold
PAUSE
more than 1 second.
To playback in slow-motion [SLOW]
You can enjoy advancing the
picture frame-by-frame by
pressing
time you press
advances one frame.
You can also use the SHUTTLE
knob for slow-motion play.
1. Press
2. Turn the SHUTTLE knob to the
PAUSE
during pause. Each
PAUSE
, the picture
PAUSE
to pause playback.
right to play in slow-motion,
and turn the SHUTTLE knob to
the left to play in slow-motion
in reverse. You can adjust the
playback speed by turning the
SHUTTLE knob.
7 During playback
Press
1
To play in slow-motion, press
press
these buttons, the playback speed increases. To return to normal playback,
press
PAUSE
, then press
. First, the unit play the slowest speed, and each time you press
SLOW(–)
PLAY
.
SLOW(+)
or
, and to play in slow motion in reverse,
SLOW(+)
SLOW(–)
.
To pause slow-motion play
PAUSE
Press
.
NOTES
To cancel slow-motion play
Press
PLAY
.
¶ The sound is muted during slow-motion play.
40
Page 43

DVD VIDEO Operations
English
English
Playing a scene close-up
The unit can zoom in a part of the scene. You can view any part of the scene
close-up.
To playback a scene close-up [ZOOM]
7 During playback or pause
Press
1
[ZOOM] appears on the TV screen.
The unit zooms in to the center part
of the scene to produce a doublesized image.
ZOOM
.
Español
Portugés
Chinese
Use to move the
2
zoomed-in scene.
To pause zoom play
PAUSE
Press
To resume zoom play, press
.
PLAY
ZOOM
operations
DVD VIDEO
ZOOM
.
NOTES
To cancel zoom play
ZOOM
Press
.
¶ During zoom play, the picture may be garbled or noisy.
41
Page 44

DVD VIDEO Operations
Repeat playback
The unit can repeat playback of the current title or current chapter and you can
also select the desired part for repeat playback.
To repeat a title or chapter [REPEAT]
7 During playback
1
Press
ON SCREEN
.
The on-screen display appears on the TV screen.
Use to move to
2
ENTER
[REPEAT], then press
Each time you press
ENTER
, the repeat
.
mode changes as follows:
T. REPEAT (title repeat)
C. REPEAT (chapter repeat)
No indication (off)
7 The current title or chapter will be repeated.
ANGLE
AUDIO
SUB-
TITLE
T. REPEAT
REPEAT
St. End
010 Mb
PRESS ENTER EXECUTE
TITLE
TIME
CHAP.
03
1 : 34 : 58
03
A-B REPEAT
TIME SEARCH
CHAP.SEARCH
Selected repeat mode appears
on the TV screen.
1 / 3
2 / 3
1 / 3
42
NOTES
To turn off the on screen display
Press
ON SCREEN
.
¶ To cancel repeat playback
Move
until [REPEAT] returns to its original color.
to [REPEAT] in the on screen display and press
¶ If appears when pressing ENTER in step 2
You cannot repeat the title because of the disc contents.
ENTER
repeatedly
Page 45

To repeat a desired part [A-B REPEAT]
7 During playback
DVD VIDEO Operations
English
English
Español
Portugés
Chinese
1
Press
ON SCREEN
.
The on-screen display appears on the TV screen.
Use to move to [A-B
2
ENTER
REPEAT], then press
at
the beginning of the part you
want to repeat (point A).
The color of “A-B REPEAT” changes.
3
Press
ENTER
at the end of the
part you want to repeat
(point B).
The unit locates “A” and starts
repeat playback between “A” and
“B.”
St. End
010 Mb
A 0 0 : 0 3 0 : B: :
TITLE
TIME
CHAP.
03
0 : 00 : 03
Point A
St. End
010 Mb
A 0 0 : 0 3 0 : B 0 0 : 8 2 5 :
TITLE
TIME
CHAP.
03
0 : 08 : 52
01
01
ANGLE
AUDIO
SUB-
TITLE
REPEAT
A-B REPEAT
TIME SEARCH
CHAP.SEARCH
ANGLE
AUDIO
SUB-
TITLE
REPEAT
A-B REPEAT
TIME SEARCH
CHAP.SEARCH
1 / 3
2 / 3
1 / 3
1 / 3
2 / 3
1 / 3
operations
DVD VIDEO
7 The selected portion will be repeated.
Point B
NOTES
To turn off the on screen display
Press
ON SCREEN
.
¶ To cancel A-B repeat playback
Move
[A-B REPEAT] returns to its original color.
to [A-B REPEAT] in the on screen display and press
¶ If appears when pressing ENTER in step 2
You cannot repeat the selected portion because of the disc contents.
ENTER
until
43
Page 46

DVD VIDEO Operations
Viewing from multiple angles
You can enjoy a variety of scene angles if the DVD disc contains “multi angle”
parts, where multiple cameras were used to shoot the same scene from different
angles. You can select one of these viewing angles from the normal screen or onscreen display.
To select a scene angle from the normal screen [ANGLE]
7 During playback
Press
1
Press
2
Each time you press
.
ANGLE
or to select the desired angle.
ANGLE
or , the scene changes.
ANGLE
To select a scene angle from the on-screen display [ANGLE]
7 During playback
Press
1
The on-screen display appears on the TV screen.
Use to move to
2
[ANGLE].
ON SCREEN
.
The total number of recorded angles
1 / 3
2 / 3
1 / 3
TITLE
REPEAT
A-B REPEAT
TIME SEARCH
CHAP.SEARCH
St. End
010 Mb
SELECT KEY
TITLE
TIME
CHAP.
03
1 : 34 : 58
ANGLE
AUDIO
SUB-
03
44
Use to select the desired angle number.
3
Example:
1 / 3
2 / 3
3 / 3
NOTES
¶ To turn off the on screen display
Press
ON SCREEN
.
¶ When appears on the TV screen
The current scene is not recorded from multiple angles.
The current angle number
Page 47

DVD VIDEO Operations
ANGLE
To select a scene angle from the angle list display [ANGLE]
7 During playback
English
English
Español
Portugés
Chinese
Press and hold
1
for more
than 1 seconds.
Up to nine angle scenes recorded
on a disc appear on the TV screen.
The selected scene angle
Use to select desired angle.
2
Press
3
7 The selected angle appears on the TV screen.
ENTER
.
operations
DVD VIDEO
NOTE
When appears on the TV screen in step 1:
The current scene is not recorded from multiple angles.
45
Page 48
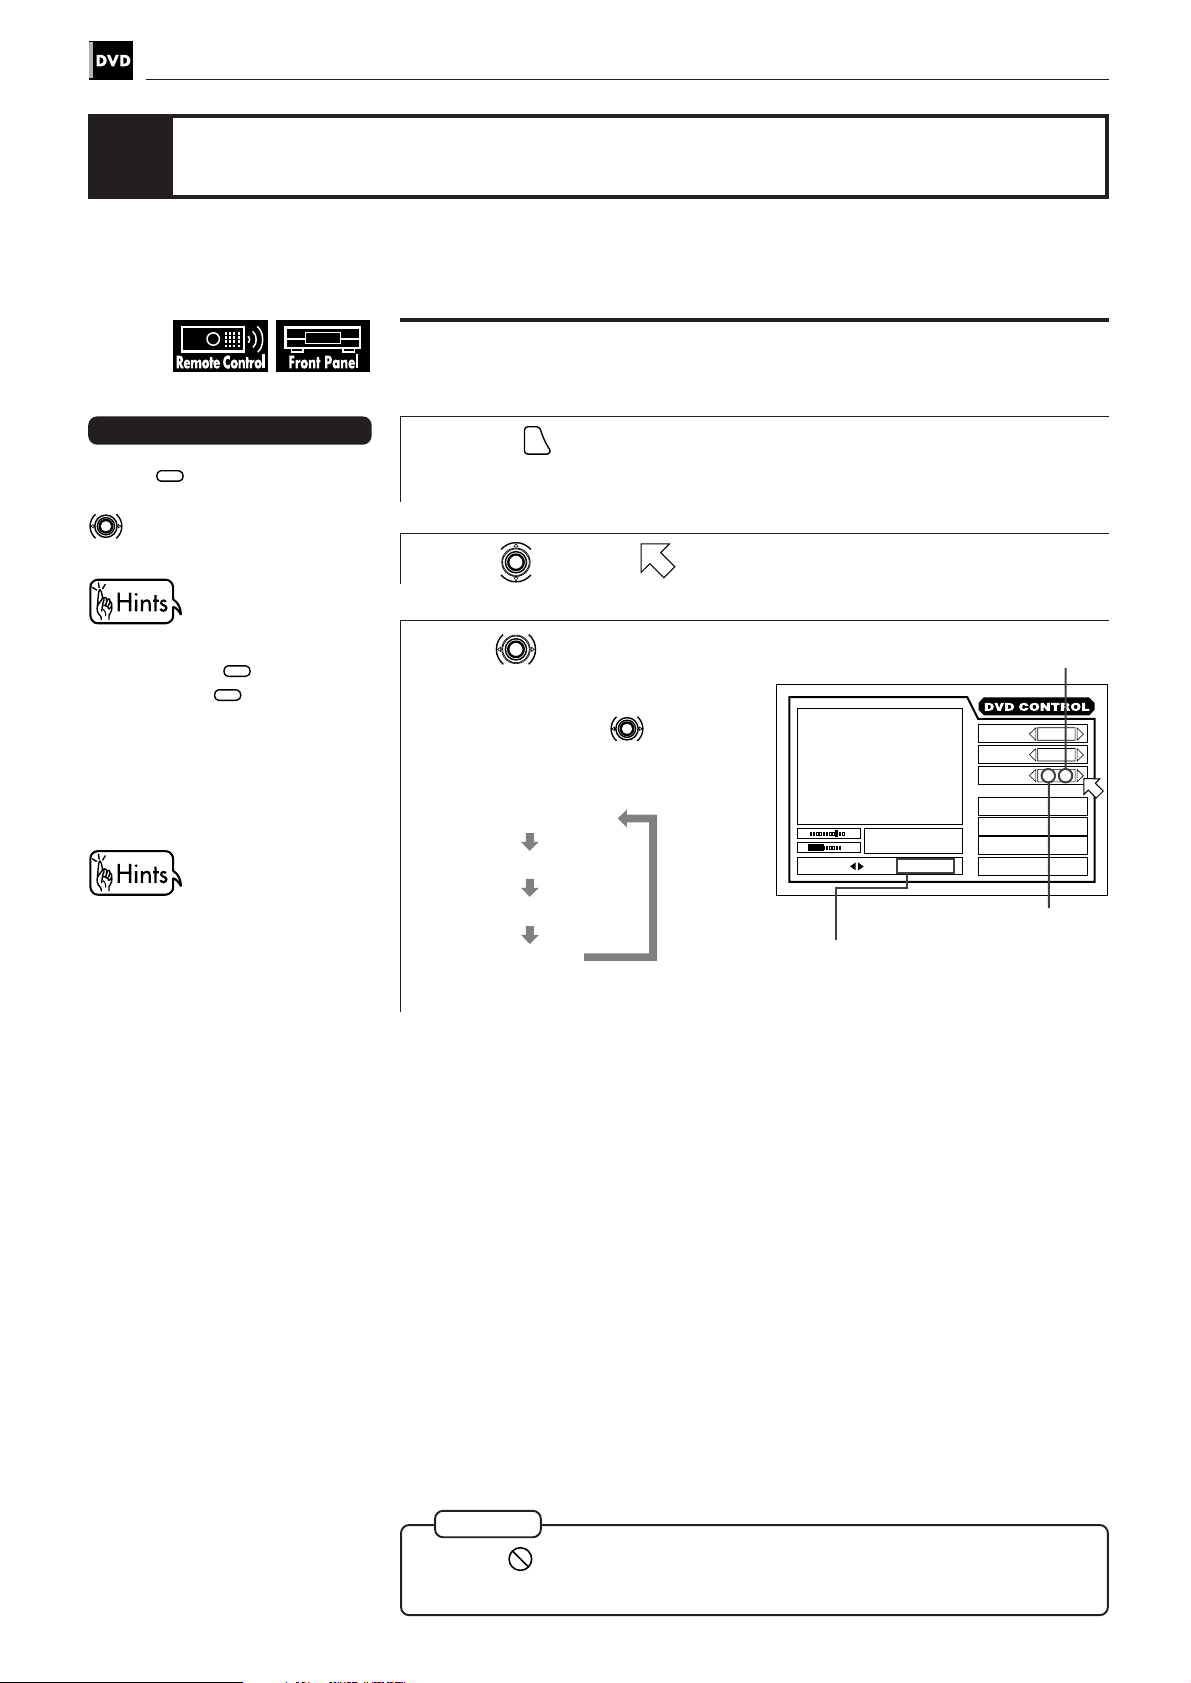
DVD VIDEO Operations
Changing the language and sound
You can choose the sub-title or audio language from among the languages
included on a disc and select the sound from a variety of sounds included on a
disc.
To select the subtitle language [SUBTITLE]
7 During playback
Short cuts
Press
desired subtitle by using
You can turn ON/OFF the sub-
title by pressing
time you press
OFF status is switched. When
the subtitle function is ON, the
subtitle language appears on the
TV screen.
When you select the language, if
the abbreviation appears on the
TV screen, select the
abbreviation corresponding to
the desired language. For
details on abbreviations, see the
end of this instruction.
SUBTITLE
and select the
.
SUBTITLE
. Each
SUBTITLE
, the ON/
1
Press
ON SCREEN
.
The on-screen display appears on the TV screen.
Use to move to [SUBTITLE].
2
Use to select the desired
3
subtitle.
Each time you use , the subtitle
changes.
Example:
1/3 ENGLISH
2/3 FRENCH
3/3 SPANISH
–/3 (off)
Selected subtitle
St. End
010 Mb
SELECT KEY ENGLISH
TITLE
TIME
CHAP.
03
1 : 34 : 58
Selected subtitle number
03
Total number
AUDIO
TITLE
REPEAT
A-B REPEAT
TIME SEARCH
CHAP.SEARCH
1 / 3
2 / 3
1 / 3
ANGLE
SUB-
46
NOTE
¶ When appears on the TV screen:
You cannot select the subtitle.
Page 49
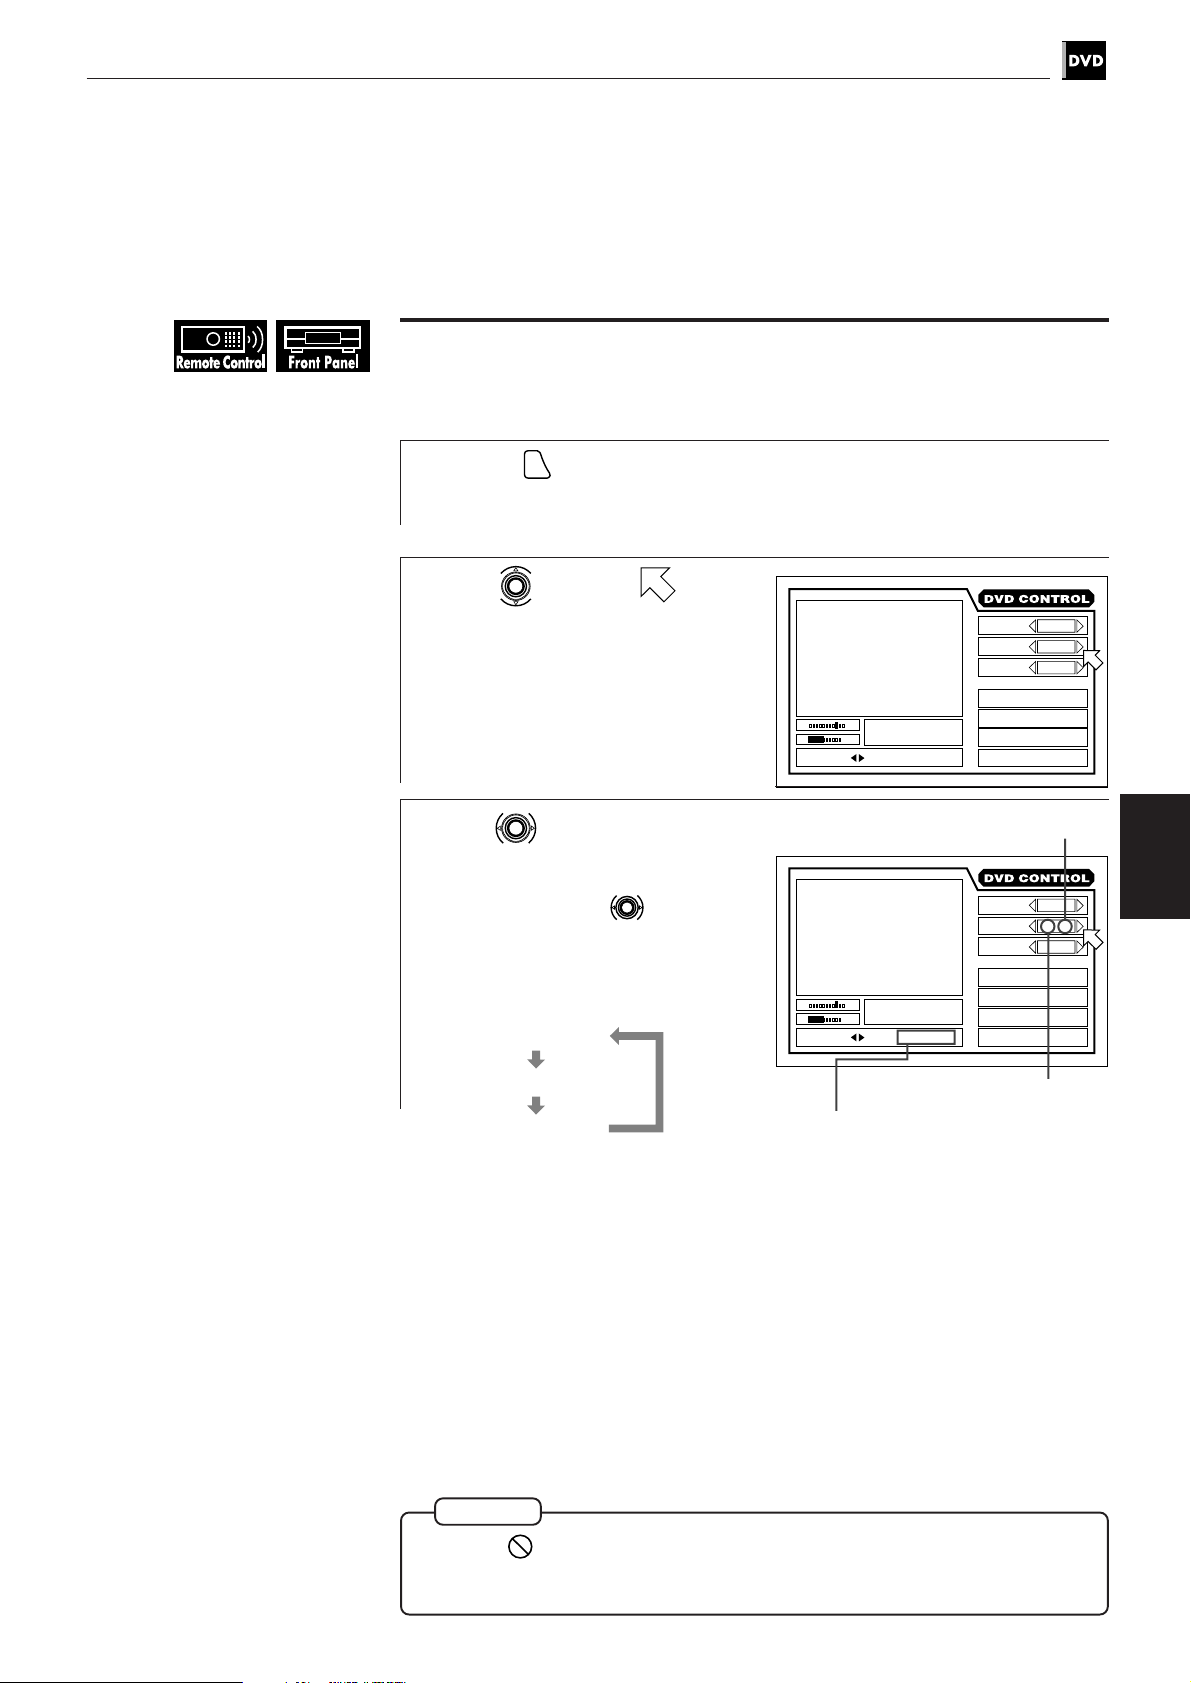
DVD VIDEO Operations
To change the audio language or sound selection [AUDIO]
7 During playback
English
English
Español
Portugés
Chinese
1
Press
ON SCREEN
.
The on-screen display appears on the TV screen.
Use to move to
2
[AUDIO].
Use to select desired
3
audio language or sound.
Each time you use , the audio
language or sound changes.
Example:
1/3 ENGLISH
St. End
010 Mb
SELECT KEY ENGLISH
St. End
010 Mb
SELECT KEY ENGLISH
TITLE
TIME
TITLE
TIME
CHAP.
03
1 : 34 : 58
CHAP.
03
1 : 34 : 58
03
03
ANGLE
AUDIO
SUB-
1 / 3
2 / 3
1 / 3
TITLE
REPEAT
A-B REPEAT
TIME SEARCH
CHAP.SEARCH
Total number
ANGLE
AUDIO
SUB-
1 / 3
2 / 3
1 / 3
TITLE
REPEAT
A-B REPEAT
TIME SEARCH
CHAP.SEARCH
operations
DVD VIDEO
2/3 FRENCH
3/3 SPANISH
Selected audio language
Selected audio number
NOTE
When appears on the TV screen:
You cannot select the audio or sound because the disc contains only one
of audio language or sound selection (1/1 appears on the display).
47
Page 50

DVD VIDEO Operations
48
Page 51

Setting and adjustment
Setting and adjustment
This chapter explains unit settings for playing back DVD discs. You can
change the initial settings in various ways, for example, selecting the
subtitle and audio language, type of monitor, and the cutting out violent
scenes with the Parental lock function in order not to be viewed by
children .
Table of contents of this chapter
7 Selecting preferences
How to set preferences on the “PREFERENCE1/2”
and “SPK.SETTING” display ................................................................................. 50
To set the language and display preference items ............................................. 51
To set other preference items ................................................................................ 54
Speaker setting ....................................................................................................... 58
English
Español
Portugés
Chinese
Introduction
knowledge
Preliminary
Getting started
7 Limiting playback by children
To set Parental Lock for the first time – PARENTAL LOCK ................................. 62
To change the settings – PARENTAL LOCK .......................................................... 63
To temporarily release the Parental lock – PARENTAL LOCK ............................ 64
Basic
operations
operations
DVD VIDEO
adjustment
Setting and
Setting the unit
Audio CD
operations
Video CD
operations
KARAOKE
operations
Additional
information
49
Page 52
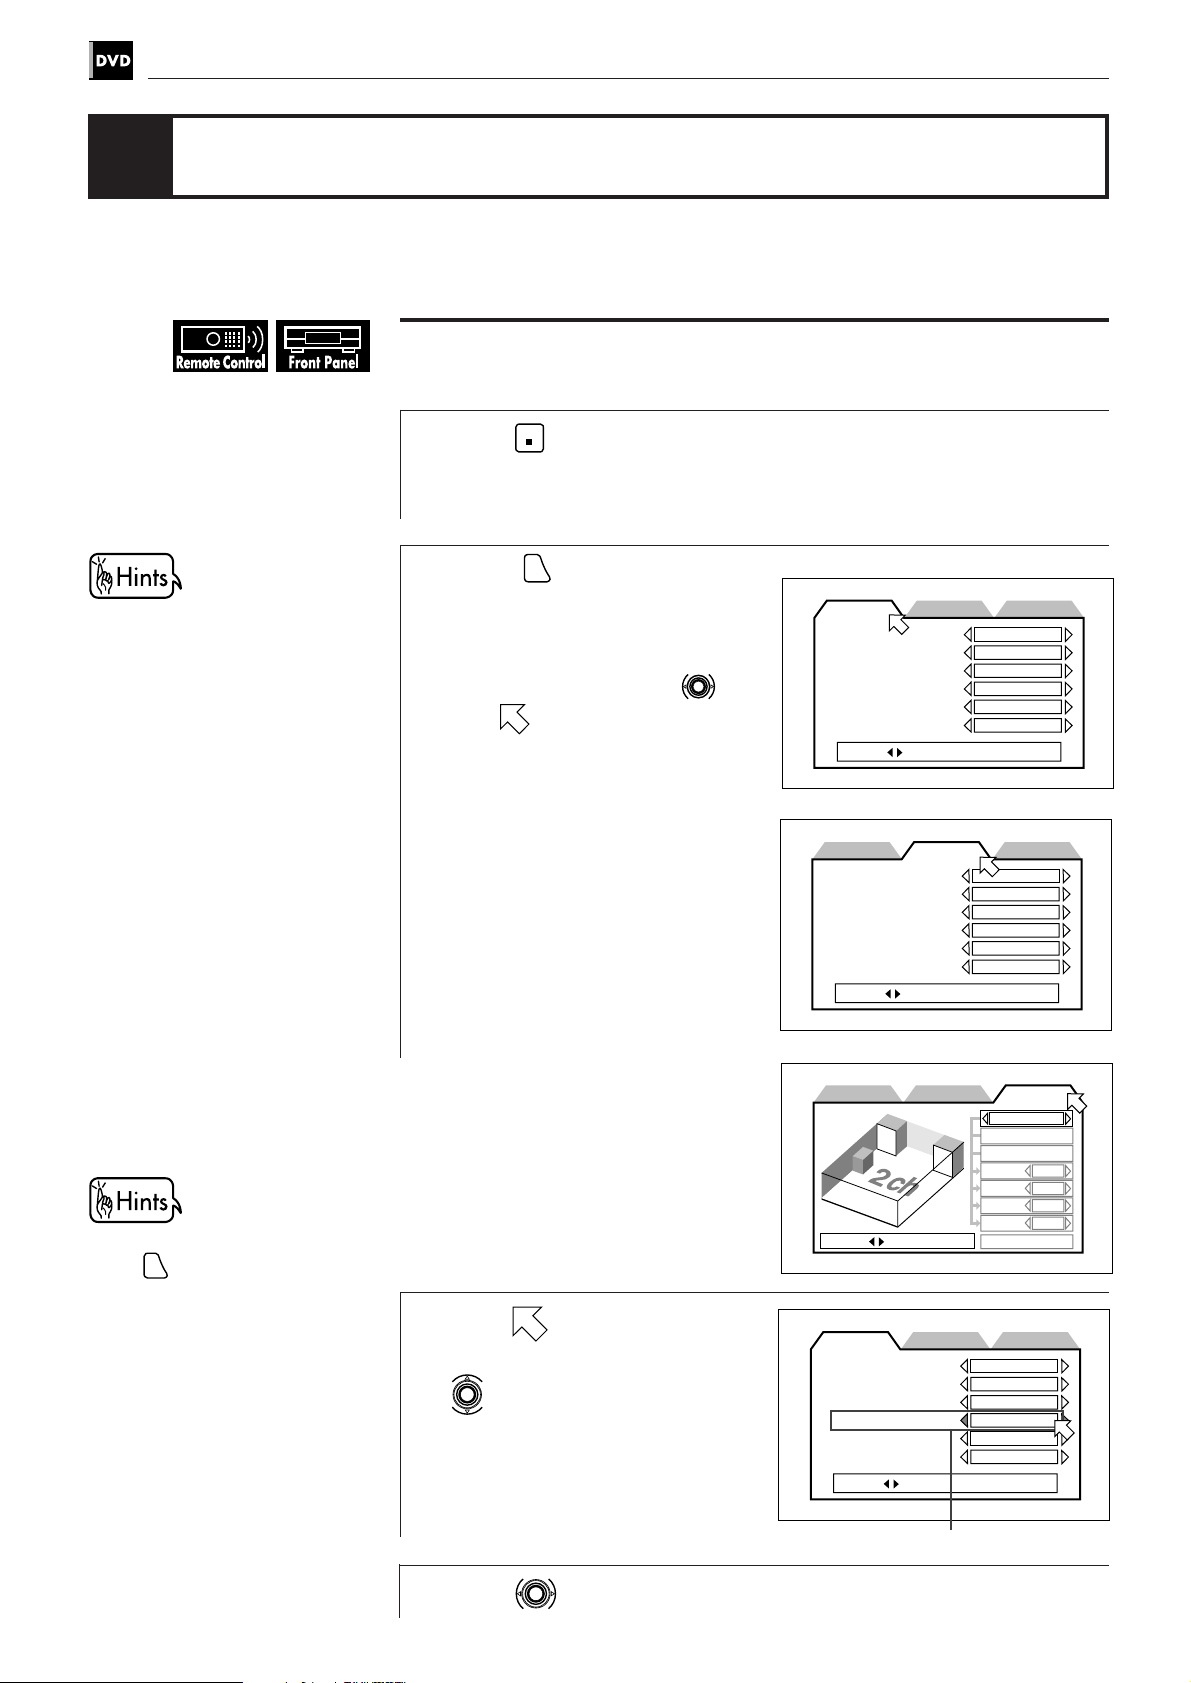
Setting and adjustment
SPK.SETTING
PREFERENCE2PREFERENCE1
DIGITAL AUDIO OUTPUT
STREAM/PCM
DOWN MIX
Lt / Rt
COMPRESSION
SCREEN SAVER
ON
MODE1
AV COMPULINK MODE
DVD1
AUTO STANDBY
PRESS KEY
OFF
SPK.SETTING
2 CHANNEL
LEVEL
DELAY
TEST TONE
F. SP
Large
C. SP None
R. SP None
None
BASS
PREFERENCE2PREFERENCE1
PRESS KEY
Selecting preferences
You can set various preferences for DVD playback via the “PREFERENCE” display.
How to set preferences on the “PREFERENCE1/2” and
“SPK.SETTING” display
For details of each setting, see
the following pages:
PREFERENCE 1
MENU LANGUAGE (51)
AUDIO LANGUAGE (51)
SUBTITLE (52)
ON SCREEN LANGUAGE (52)
ON SCREEN GUIDE (53)
MONITOR TYPE (53)
PREFERENCE 2
DIGITAL AUDIO OUTPUT (54)
DOWN MIX (55)
COMPRESSION (55)
SCREEN SAVER (56)
AV COMPULINK MODE (57)
AUTO STANDBY (57)
SPK.SETTING (58)
1
Press
STOP
to stop the unit.
If the current disc is not a DVD disc, you have to remove the disc from the
tray before setting up.
to
Preference 1
MENU LANGUAGE
AUDIO LANGUAGE
SUBTITLE
ON SCREEN LANGUAGE
ON SCREEN GUIDE
MONITOR TYPE
PRESS KEY
PREFERENCE2PREFERENCE1
ENGLISH
ENGLISH
JAPANESE
ENGLISH
16:9 WIDE
2
Press
ON SCREEN
.
The on-screen display appears on
the TV screen. The Preference 1,
Preference 2 and Speaker setting
displays are available. Use
move
to the desired tab.
Preference 2
Speaker setting
SPK.SETTING
ON
To return to the normal screen,
press
50
ON SCREEN
.
Move to select the item
3
you want to set by using
.
Press to select the setting you want.
4
PREFERENCE2PREFERENCE1
MENU LANGUAGE
AUDIO LANGUAGE
SUBTITLE
ON SCREEN LANGUAGE
ON SCREEN GUIDE
MONITOR TYPE
PRESS KEY
Selected item
SPK.SETTING
ENGLISH
ENGLISH
JAPANESE
ENGLISH
ON
16:9 WIDE
Page 53

Setting and adjustment
SPK.SETTING
PREFERENCE2PREFERENCE1
MENU LANGUAGE
ENGLISH
AUDIO LANGUAGE
ENGLISH
SUBTITLE
JAPANESE
ON SCREEN LANGUAGE
ENGLISH
ON SCREEN GUIDE
ON
MONITOR TYPE
PRESS KEY
16:9 WIDE
To set the language and display preference items
The PREFERENCE 1 can be set as follows:
MENU LANGUAGE
You can select a default “display”
language to be displayed if it is
contained on the disc.
English
Español
Portugés
Chinese
Each time you press
, the language
setting changes in the following order:
ENGLISH = SPANISH = FRENCH =
CHINESE = GERMAN = ITALIAN =
Selected language
JAPANESE = language code from AA to
ZU (See “Table of languages and their
abbreviations” at the end of this
instruction.)
Pressing
changes the language setting in the reverse order of the above.
* If the selected language is not recorded, the disc’s default display language is
displayed.
AUDIO LANGUAGE
You can select the default audio
language to be played if it is contained
on the disc.
Each time you press
, the language
setting changes in the following order:
ENGLISH = SPANISH = FRENCH =
CHINESE = GERMAN = ITALIAN =
JAPANESE = language code from AA to
ZU (See “Table of languages and their
abbreviations” at the end of this
instruction.)
PREFERENCE2PREFERENCE1
MENU LANGUAGE
AUDIO LANGUAGE
SUBTITLE
ON SCREEN LANGUAGE
ON SCREEN GUIDE
MONITOR TYPE
PRESS KEY
Selected language
SPK.SETTING
ENGLISH
ENGLISH
JAPANESE
ENGLISH
ON
16:9 WIDE
Setting the unit
Pressing
changes the language setting in the reverse order of the above.
* If the selected language is not recorded, the disc’s default audio language is
played.
51
Page 54
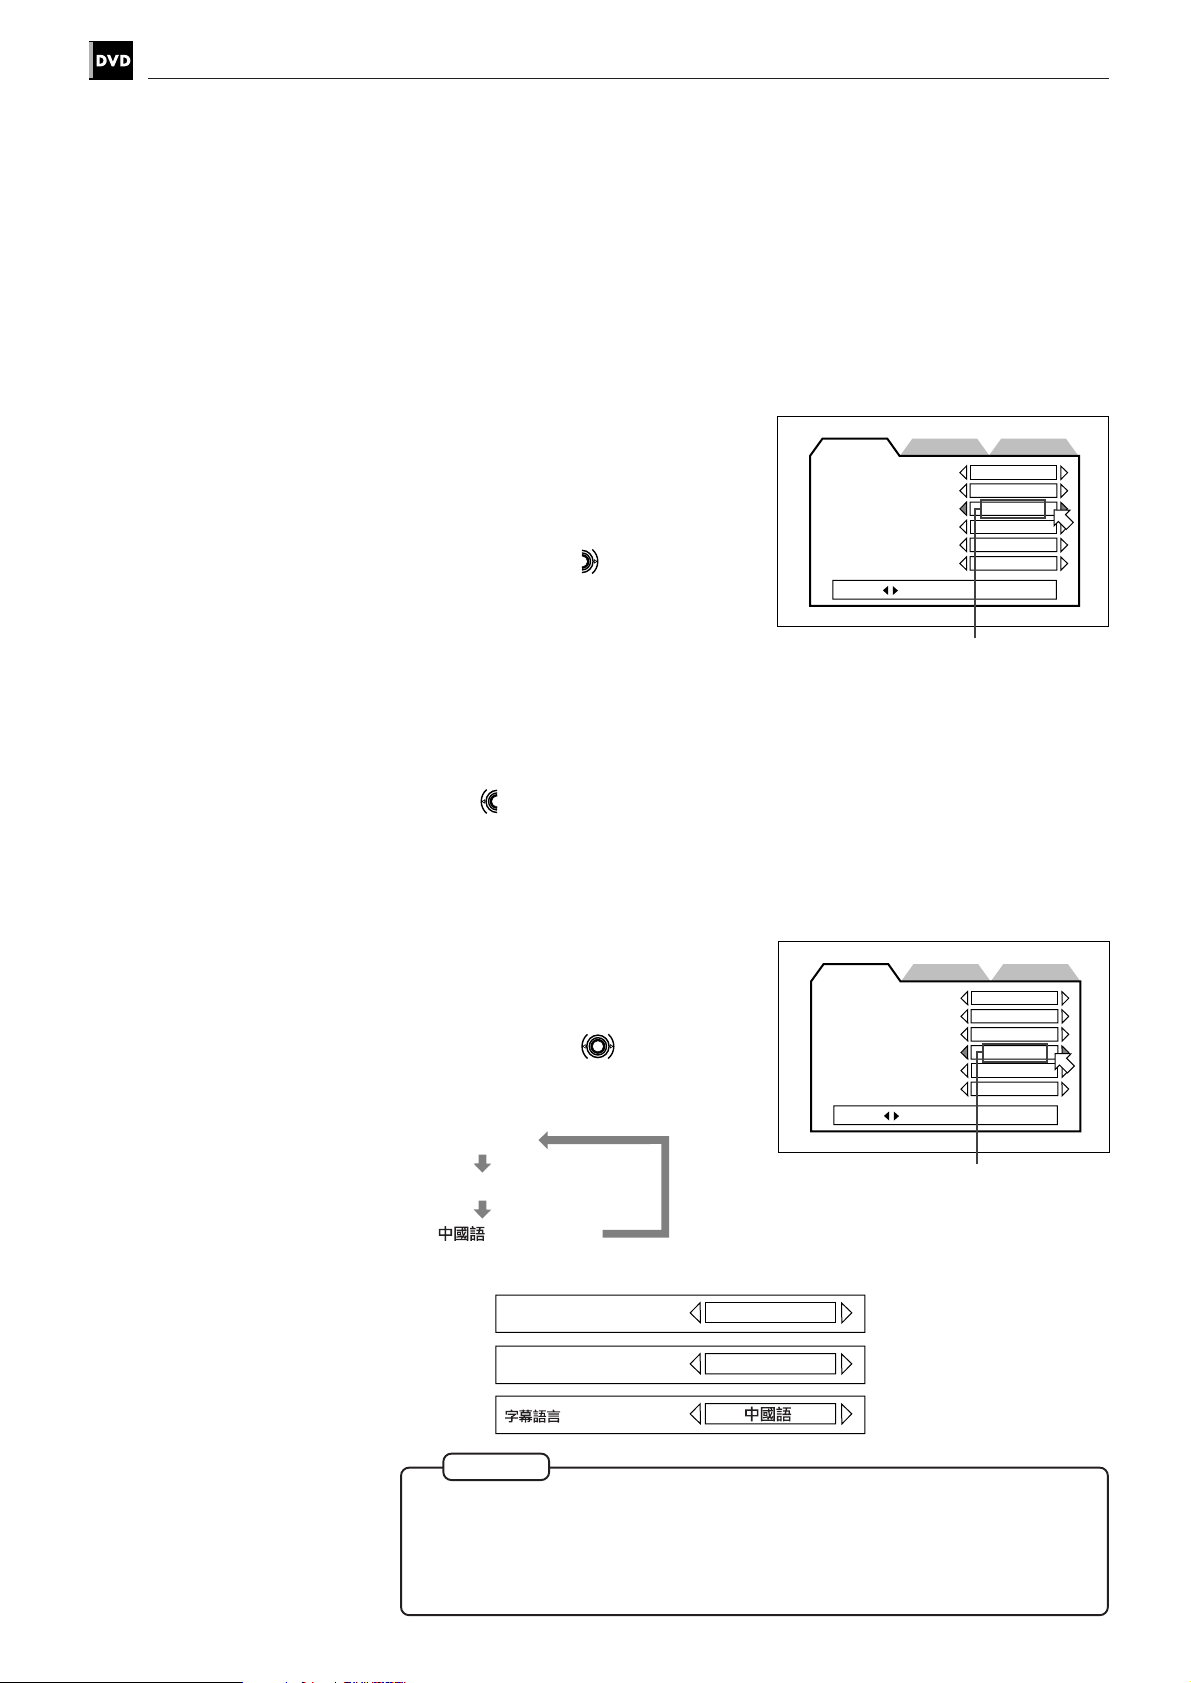
Setting and adjustment
SPK.SETTING
PREFERENCE2PREFERENCE1
MENU LANGUAGE
ENGLISH
AUDIO LANGUAGE
ENGLISH
SUBTITLE
JAPANESE
ON SCREEN LANGUAGE
ENGLISH
ON SCREEN GUIDE
ON
MONITOR TYPE
PRESS KEY
16:9 WIDE
SUBTITLE
You can select the default subtitle
language to be displayed when it is
contained on a playback disc.
Each time you press
, the language
setting changes in the following order:
ENGLISH = SPANISH = FRENCH =
CHINESE = GERMAN = ITALIAN =
Selected language
JAPANESE = language code from AA to
ZU (See “Table of languages and their
abbreviations” at the end of this
instruction.)
Pressing
changes the language setting in the reverse order of the above.
* If the selected language is not recorded, the disc’s default subtitle language is
displayed.
ON SCREEN LANGUAGE
You can select the on-screen display
language to be displayed.
Each time you press , the language
setting changes as follows:
ENGLISH
PREFERENCE2PREFERENCE1
MENU LANGUAGE
AUDIO LANGUAGE
SUBTITLE
ON SCREEN LANGUAGE
ON SCREEN GUIDE
MONITOR TYPE
PRESS KEY
SPK.SETTING
ENGLISH
ENGLISH
JAPANESE
ENGLISH
ON
16:9 WIDE
52
ESPAÑOL (Spanish)
Selected language
(Chinese)
English
Spanish
ON SCREEN LANGUAGE
IDIOMA EN PANTALLA
ENGLISH
ESPAÑOL
Chinese
NOTE
If Chinese is selected for the on-screen language, some complex Chinese
characters on the on-screen display may not look clear because of the
resolution of the television. This is not a malfunction of the unit.
If you cannot read such characters, see the corresponding illustration of the
on-screen display shown in this instructions.
Page 55
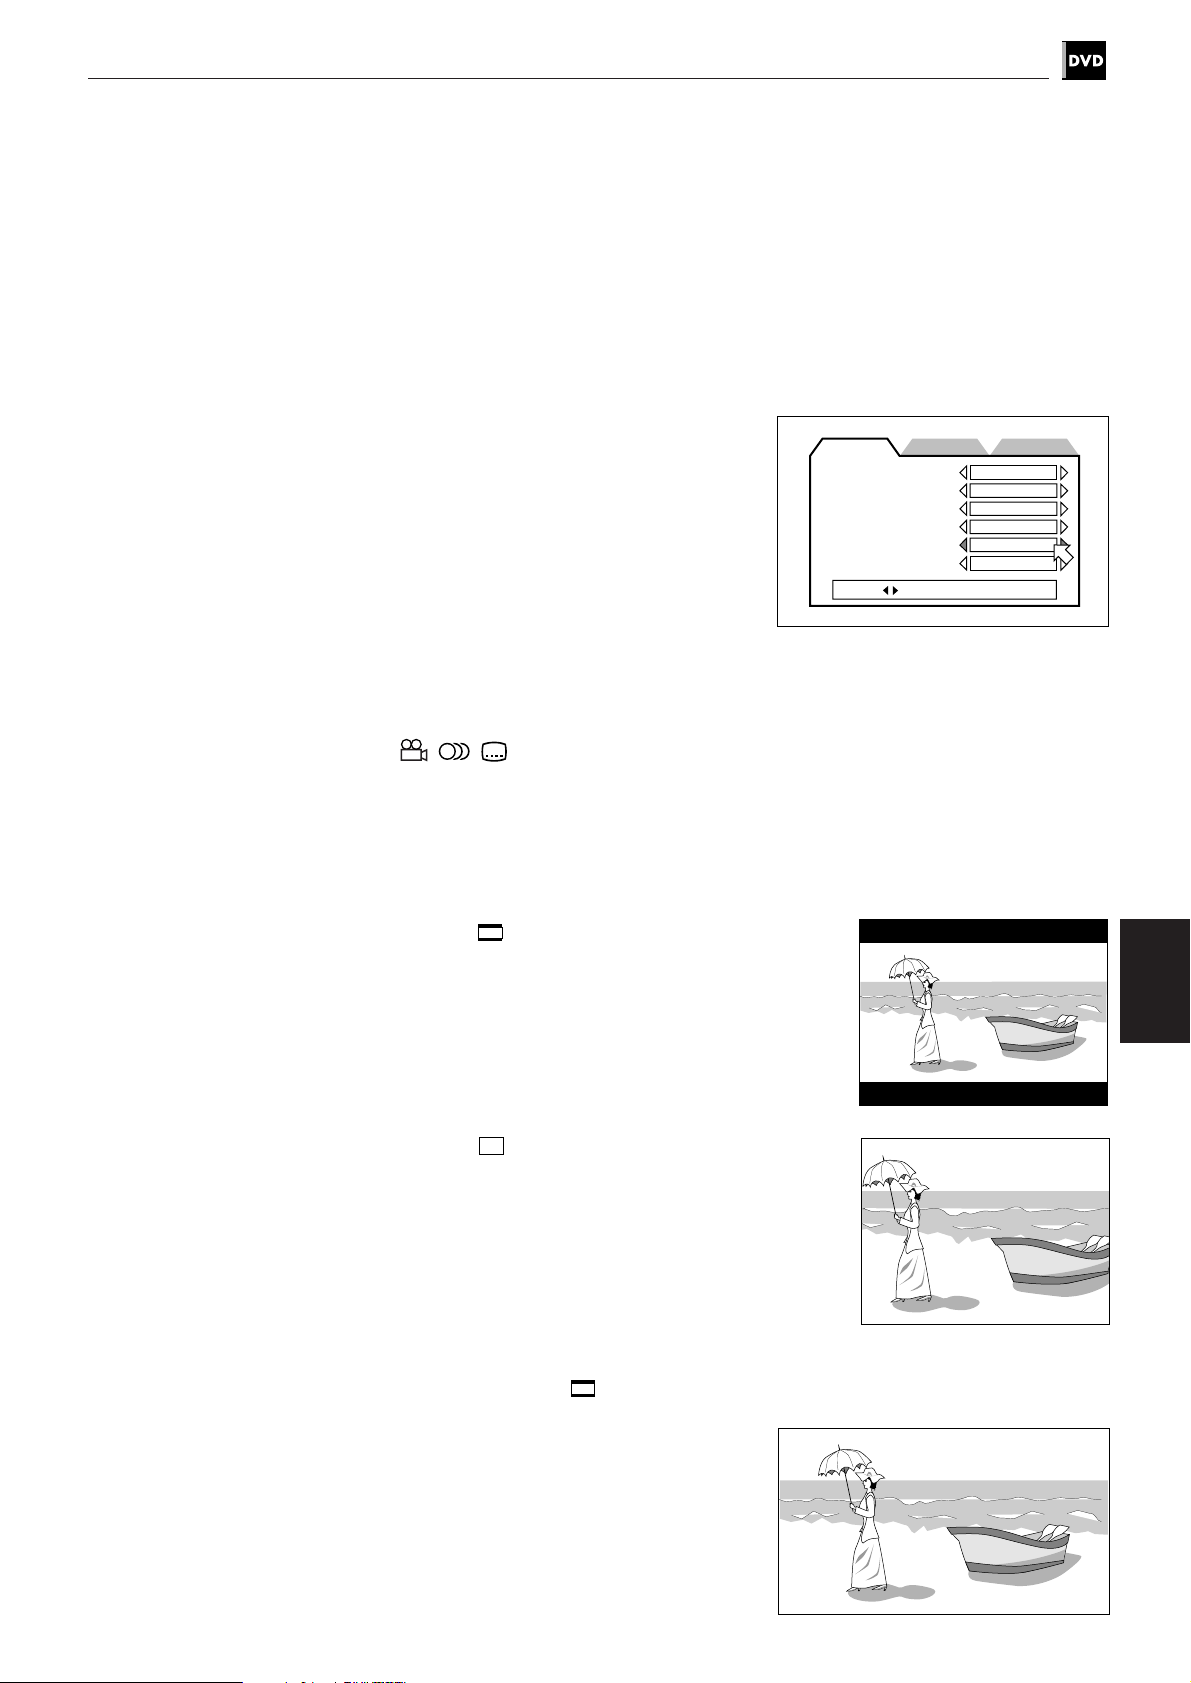
ON SCREEN GUIDE
SPK.SETTING
PREFERENCE2PREFERENCE1
MENU LANGUAGE
ENGLISH
AUDIO LANGUAGE
ENGLISH
SUBTITLE
JAPANESE
ON SCREEN LANGUAGE
ENGLISH
ON SCREEN GUIDE
ON
MONITOR TYPE
PRESS KEY
16:9 WIDE
The unit can display “on screen guide”
icons or characters on the picture, which
show what is happening to the disc or
the unit.
•ON
The guide display turns on.
Setting and adjustment
English
Español
Portugés
Chinese
• OFF
The guide display turns off.
Examples of “On-screen guide” icons or characters to be off:
, ,
MONITOR TYPE
You can select the monitor type to match your TV when you playback DVD discs
recorded for wide screen televisions.
• 4:3 LB (Letter Box Conversion)
When you connect a normal TV to the
unit.
When you play a wide picture recorded
on a DVD VIDEO, the picture is
displayed with bands across the upper
and lower portions of the screen.
• 4:3 PS
When you connect a normal TV to the
unit.
When you play a wide picture recorded
on a DVD VIDEO, a portion of the
picture is automatically cut off from
the left and right sides of the image.
According to the disc, it is prohibited
to playback on this mode. In this case,
the picture is played back like as the
picture on 4:3 LB
(Pan scan Conversion)
mode.
Setting the unit
• 16:9 WIDE (Wide Television screen)
When you connect a wide-screen TV to
the unit.
53
Page 56
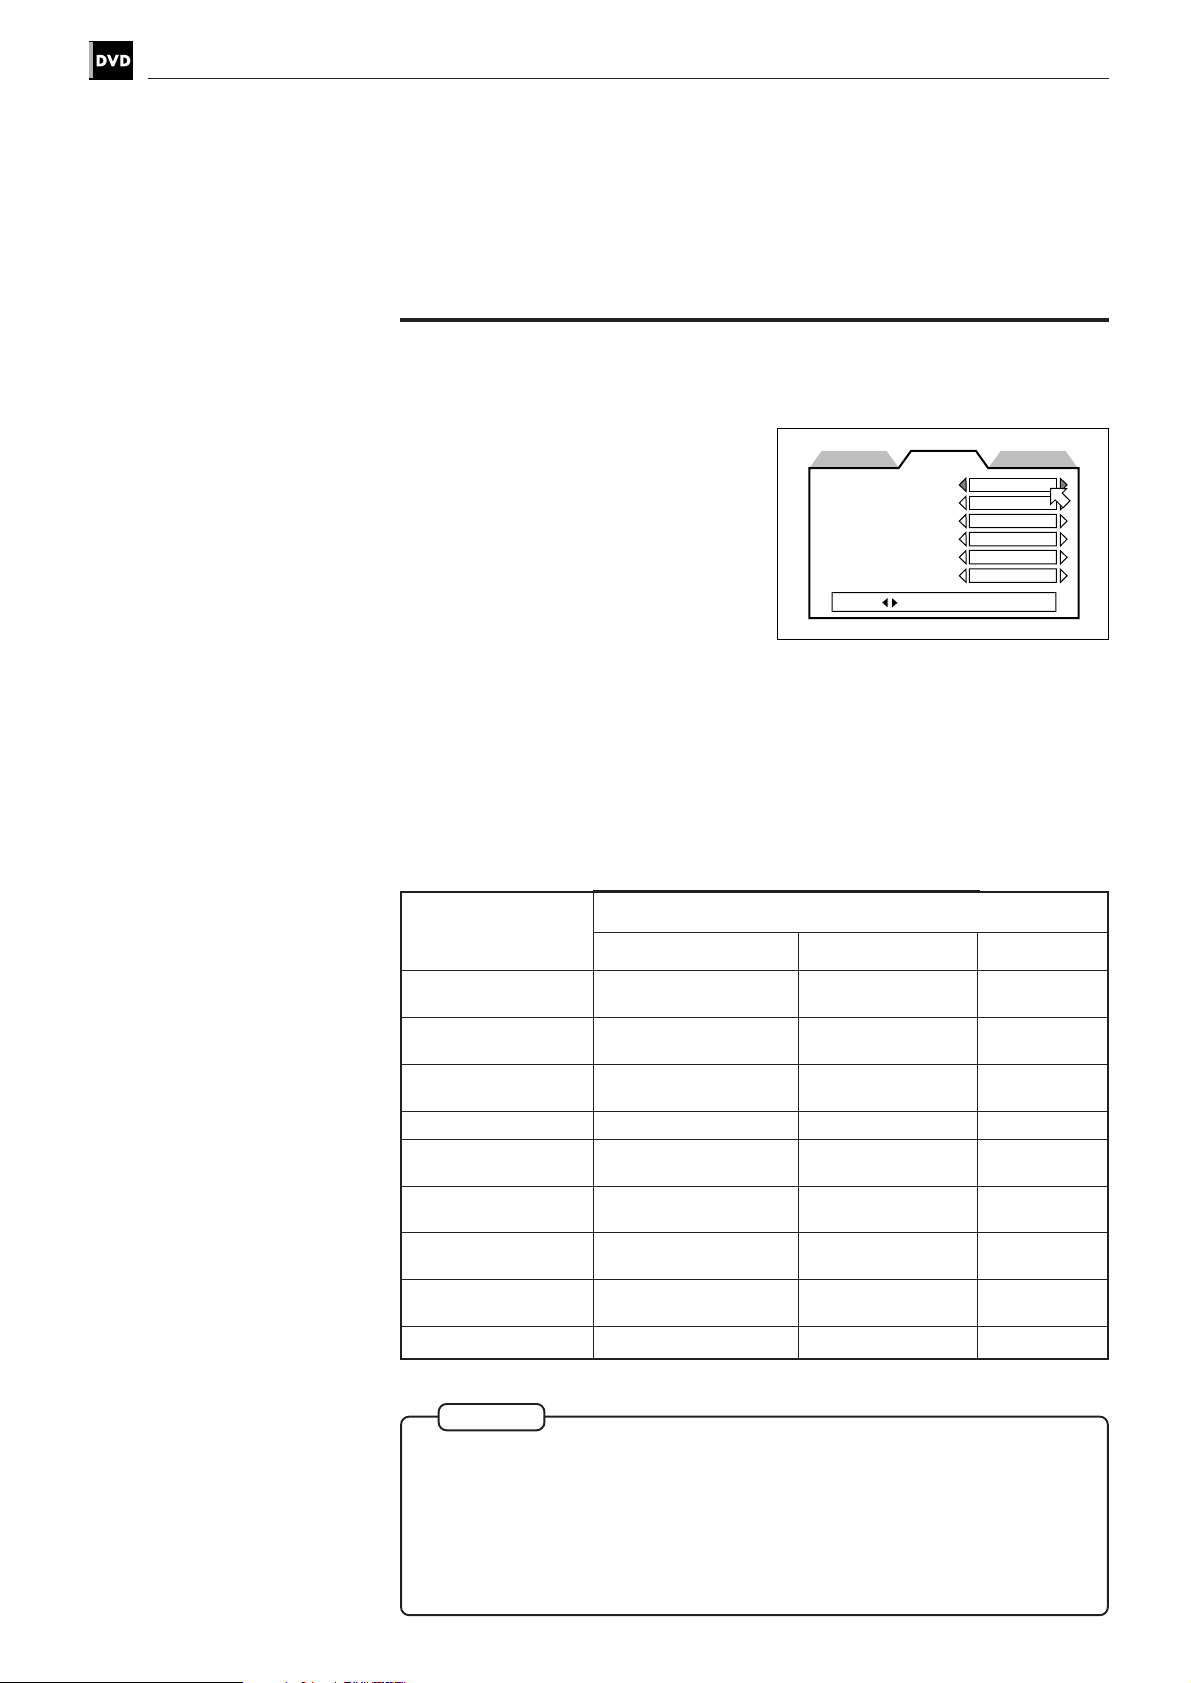
Setting and adjustment
To set other preference items
The PREFERENCE 2 can be set as follows:
DIGITAL AUDIO OUTPUT
To connect the unit‘s digital output to an
external amplifier or receiver equipped
with a digital input, this item must be set
correctly.
• PCM ONLY:
When you connect the DIGITAL OUT
DIGITAL AUDIO OUTPUT
DOWN MIX
COMPRESSION
SCREEN SAVER
AV COMPULINK MODE
AUTO STANDBY
PRESS KEY
PREFERENCE2PREFERENCE1
jack of the unit and the linear PCM
digital input of an audio equipment.
• STREAM/PCM:
When you connect to the Dolby digital input of an amplifier with built-in DTS
and Dolby Digital decoder.
• DOLBY DIGITAL/PCM:
When you connect to the Dolby digital input of a Dolby Digital decoder, an
amplifier with built-in Dolby Digital decoder.
SPK.SETTING
STREAM/PCM
Lt/Rt
ON
MODE1
DVD1
OFF
The following chart shows the relationship between types of playback discs and
output signals.
Playback discs
DVD with 48-kHz,
16-bit linear PCM
DVD with 48-kHz,
20/24-bit linear PCM
DVD with 96-kHz,
STREAM/PCM
48-kHz, 16-bit linear
PCM
48-kHz, 20-bit linear
PCM
No output
Output
DOLBY DIGITAL/PCM
←
←
←
PCM ONLY
←
←
←
linear PCM
DVD with DTS
DVD with Dolby
Digital
DVD with MPEG
audio
Video CD
DTS bitstream
Dolby Digital
bitstream
MPEG bitstream
44.1-kHz, 16-bit linear
No output
Dolby Digital
bitstream
48-kHz, 16-bit linear
PCM
←
No output
48-kHz, 16-bit
linear PCM
48-kHz, 16-bit
linear PCM
←
PCM
Audio CD
44.1-kHz, 16-bit linear
←
←
PCM
Audio CD with DTS
DTS bitstream
←
←
54
NOTES
When you play a CD disc with DTS, unnecessary audio signal output from
the AUDIO OUT (analog) jack. Adjust the volume level of an amplifer
connected to the AUDIO OUT jack of the unit to minimum.
¶ When you do not connect the unit to the DTS decoder, a CD disc with DTS
cannot be played back. Do not play a CD disc with DTS when the unit is
connected to the DIGITAL jack other than it of the DTS decoder. If you do
so, loud noise may be played back from speakers, and it cause of the
breakdown of your speakers.
Page 57

Setting and adjustment
English
Español
Portugés
Chinese
DOWN MIX
By setting DOWN MIX correctly, you can
get the optimum stereo mix for your
audio system from DVD discs recorded
with Dolby Digital surround multichannel
audio.
• Lt/Rt:
DIGITAL AUDIO OUTPUT
DOWN MIX
COMPRESSION
SCREEN SAVER
AV COMPULINK MODE
AUTO STANDBY
PRESS KEY
PREFERENCE2PREFERENCE1
You can monitor the unit’s audio
output signals via an amplifier with
built-in Dolby Pro Logic Decoder.
• L
0/R0:
You can monitor the unit’s audio output signals via a TV, an amplifier with no
built-in Dolby Pro Logic Decoder, or the unit’s headphone jack. Also for
recording DVD audio output to a cassette tape, MD, etc.
• OFF:
When you monitor the unit’s 5.1-channel audio output signals via an amplifier
equipped with Dolby Digital 5.1-channel inputs.
SPK.SETTING
STREAM/PCM
Lt/Rt
ON
MODE1
DVD1
OFF
COMPRESSION
You can compress the dynamic range of
the sound if you need. Using this
function, you can listen to sound in small
volume easily.
•ON
Audio is played back with the dynamic
range compressed.
PREFERENCE2PREFERENCE1
DIGITAL AUDIO OUTPUT
DOWN MIX
COMPRESSION
SCREEN SAVER
AV COMPULINK MODE
AUTO STANDBY
PRESS KEY
SPK.SETTING
STREAM/PCM
Lt/Rt
ON
MODE1
DVD1
OFF
Setting the unit
• OFF
Audio is played back as it was recorded.
NOTES
The compression function works only when playing back the disc recorded
on DOLBY DIGITAL 1 CH or 2CH. The setting is not effective on other discs.
¶ The compression function is automatically set to ON when the downmix
function is set to Lt/Rt or L
0/R0.
¶ The compression function does not work when the 3D PHONIC function is
activated.
¶ The downmix function does not work when the 3D PHONIC fucntion is
activated.
55
Page 58

Setting and adjustment
PREFERENCE2PREFERENCE1
SPK.SETTING
DIGITAL AUDIO OUTPUT
STREAM/PCM
DOWN MIX
Lt/Rt
COMPRESSION
SCREEN SAVER
ON
MODE1
AV COMPULINK MODE
DVD1
AUTO STANDBY
PRESS KEY
OFF
SCREEN SAVER
A television monitor screen may be
burned out if a static picture is displayed
for a long time. To prevent this, the unit
automatically activates the screen saver
function if a static picture, such as an onscreen display or menu, is displayed for
over 5 minutes.
• MODE 1
The picture is scrolled.
DVD/Video CD/CD PLAYER
• MODE 2
The picture is not scrolled.
• DIMMER
The picture gets dark.
• OFF
The screen saver function is off.
NOTES
When screen saver mode is set to DIMMER, the display window on the
front panel also gets dark (FL Dimmer). To return to normal brightness, set
to the other mode.
¶ The monitor screen of a projector or projection TV is easily to burned out if
a static picture is displayed for a long time. Be careful not to allow the
monitor screen to be burned out when you set the screen saver mode to
OFF.
¶ The TV screen may be noisy when you set the screen saver mode to MODE
1. In this case, set to the other mode.
56
Page 59

AV COMPULINK MODE
SPK.SETTING
PREFERENCE2PREFERENCE1
DIGITAL AUDIO OUTPUT
STREAM/PCM
DOWN MIX
Lt/Rt
COMPRESSION
SCREEN SAVER
ON
MODE1
AV COMPULINK MODE
DVD1
AUTO STANDBY
PRESS KEY
OFF
SPK.SETTING
PREFERENCE2PREFERENCE1
DIGITAL AUDIO OUTPUT
STREAM/PCM
DOWN MIX
Lt/Rt
COMPRESSION
SCREEN SAVER
ON
MODE1
AV COMPULINK MODE
DVD1
AUTO STANDBY
PRESS KEY
60
If you use the AV Compulink system, you
must set this item correctly.
Select from the three options: “DVD1,”
“DVD2” and “DVD3” according to the
equipment to be connected.
See page 104.
Setting and adjustment
English
Español
Portugés
Chinese
AUTO STANDBY
When the unit is in stop mode for more
than 30 minutes or 60 minutes, the unit
enters standby mode automatically.
•60
Time is set to 60 minutes.
•30
Time is set to 30 minutes.
• OFF
The auto standby function is off.
Setting the unit
57
Page 60

Setting and adjustment
Speaker setting
You can make speaker setting according to your system. Normally, simply select
“5.1 CHANNEL” or “2 CHANNEL”. However, if you select “EXPERT”, you can set
various settings to match your speakers.
SPEAKER CHANNELS
You can select the speaker channels
according to the speaker system connected
to
• 2 CHANNEL
When you connect to a 2-channel
amplifier, or use 2 speakers.
PRESS KEY
PREFERENCE2PREFERENCE1
SPK.SETTING
5.1 CHANNEL
LEVEL
DELAY
F. SP
C. SP
R. SP
BASS
TEST TONE
Large
Small
Small
S.woofer
• 5.1 CHANNEL
When you connect to a 5.1-channel amplifier and use the front, rear , center and
sub-woofer speakers.
• EXPERT
When you want to set the various settings to match your speakers. The
following five setting items are available.
58
NOTES
When selecting 5.1 CHANNEL or EXPERT, set DOWN MIX to OFF (see page
55).
¶ Dolby Digital LFE (Low Frequency Effect) signals are always fed from the
SUBWOOFER output on the rear panel of the unit regardless of speaker
setting.
¶ When playing back digital audio output signals of the unit using an external
decoder, speaker setting above is invalid. Make setting of the external
decoder properly.
Page 61

Setting and adjustment
1 Speaker size (available only when selecting EXPERT)
Sets the speaker size according to your
speakers.
1 Select the speaker to be set using .
• F.SP: front speakers
• C.SP: center speaker
• R.SP: rear speakers
PRESS KEY
PREFERENCE2PREFERENCE1
BASS
SPK.SETTING
EXPERT
LEVEL
DELAY
F. SP
C. SP
R. SP
BASS
TEST TONE
Large
Small
Small
S.woofer
English
Español
Portugés
Chinese
2 Select the size using
.
• Large: large speaker(s) which can fully reproduce the low-frequency range.
• Small: small speaker(s) which can not fully reproduce the low-frequency
range.
• None: No speaker(s) connected.
If you set the front speakers to “Small”, you cannot set the other speakers to
“Large”.
2 Bass redirect (available only when selecting EXPERT)
When you use small speakers which do not
fully reproduce the low-frequency range,
PREFERENCE2PREFERENCE1
you can boost up the low-frequency signals
of the sub-woofer or front speakers
BASS
1 Select [BASS] using
2 Select Sub-woofer or L/R using .
• S.woofer: the low-frequency signals
fed from the sub-woofer
output are boosted up.
• L/R: the low-frequency signals fed from the front speaker output are
boosted up.
.
PRESS KEY
SPK.SETTING
EXPERT
LEVEL
DELAY
F. SP
C. SP
R. SP
BASS
TEST TONE
Large
Small
Small
S.woofer
Setting the unit
The “Bass redirect” setting is effective only when at least any one of the
speaker sizes is set to “Small”. If none of them is set to “Small”, this setting is
not activated (“None” appears in the setting field).
Please note that when playing back a Dolby Digital disc, LFE (Low Frequency
Effect) signals are fed from the SUBWOOFER output even if “BASS” shows
“None” or “L/R”. So you may use a sub-woofer even in such case.
If the front speaker size is set to “Small”, the Bass redirect setting is fixed to
“S.woofer”.
59
Page 62

Setting and adjustment
For the speaker(s) whose size is set
to “None”, Speaker level and Delay
cannot be set (“——” appears in the
setting field).
However, when playing back a
Dolby Digital disc, LFE singal is
output from SUBWOOFER output
even if S. WOOFER shows “——”,
allowing to activate a sub-woofer
connected. In such case, adjust the
output level using the level control
on the sub-woofer.
3 Speaker level (available only when selecting EXPERT)
You can adjust the output level of each
speaker.
1 Select [LEVEL] using , then press
ENTER
.
The color of "LEVEL" changes.
2 Select the desired speaker(s) to be set
using
.
• F.SP: front speakers. the level
is fixed to 0db.
• C.SP: center speaker
• R.SP: rear speakers
• S.WOOFER: sub-woofer
The setting range is -6 db to +6 db in 1 db units.
3 Set the level using
.
PRESS KEY
PREFERENCE2PREFERENCE1
BASS
SPK.SETTING
EXPERT
LEVEL
DELAY
F. SP
C. SP
R. SP
S.WOOFER
TEST TONE
0db
0db
0db
0db
Delay of S.WOOFER cannot be set.
4 Delay (available only when selecting EXPERT)
You can adjust the delay time of each
speakers.
1 Select [DELAY] using , then press
ENTER
.
The color of "DELAY" changes.
2 Select the desired speaker(s) to be set
using
.
PRESS KEY
• F.SP: front speakers. the delay is fixed
to 0ms.
• C.SP: center speaker (selectable from 0 to -5 mS in 1 mS units)
• R.SP: rear speakers (selectable from 0 mS, -5mS, -10 mS, and -15 mS)
3 Set the delay time using
.
PREFERENCE2PREFERENCE1
BASS
SPK.SETTING
EXPERT
LEVEL
DELAY
F. SP
C. SP
R. SP
S.WOOFER
TEST TONE
0mS
0mS
0mS
0mS
60
NOTES
To exit the speaker level (or delay) setting mode
Move
until [LEVEL] (or [DELAY]) returns to its original color.
to [LEVEL] (or [DELAY]) in the on-screen display and press
ENTER
Page 63

In Test tone mode, you hear pink
noise, which includes all frequencies
in the audible range, from the
speakers. This is not a malfunction.
The test tone is not output from the
SUBWOOFER output.
Setting and adjustment
5 Test tone (available only while setting LEVEL or DELAY)
You can check the level or delay setting by
monitoring the test tone.
PREFERENCE2PREFERENCE1
1 Select [TEST TONE] using , then press
ENTER
.
BASS
The color of "TEST TONE" changes.
PRESS KEY
2 Select the desired speaker(s) using .
• F.SP: front speakers
• C.SP: center speaker
• R.SP: rear speakers
After selecting the Test tone, if you do not move the cursor, the test tone is
output from each speaker one by one.
In Test tone mode, if you move
continues to output from the rear speakers as long as
than “F.SP” and “C.SP”. Similarily, if you move
down from “R.SP” position, the test tone
is any position other
up from “F.SP” position,
the test tone continues to output from the front speakers as long as
position other than “C.SP” and “R.SP”.
SPK.SETTING
F. SP
C. SP
R. SP
S.WOOFER
TEST TONE
EXPERT
LEVEL
DELAY
0db
0db
0db
0db
is any
English
Español
Portugés
Chinese
3 Set the level or delay using again, if necessary.
Setting the unit
NOTES
¶ To exit the test tone mode
Move
[TEST TONE] returns to its original color.
to [TEST TONE] in the on-screen display and press
ENTER
until
61
Page 64
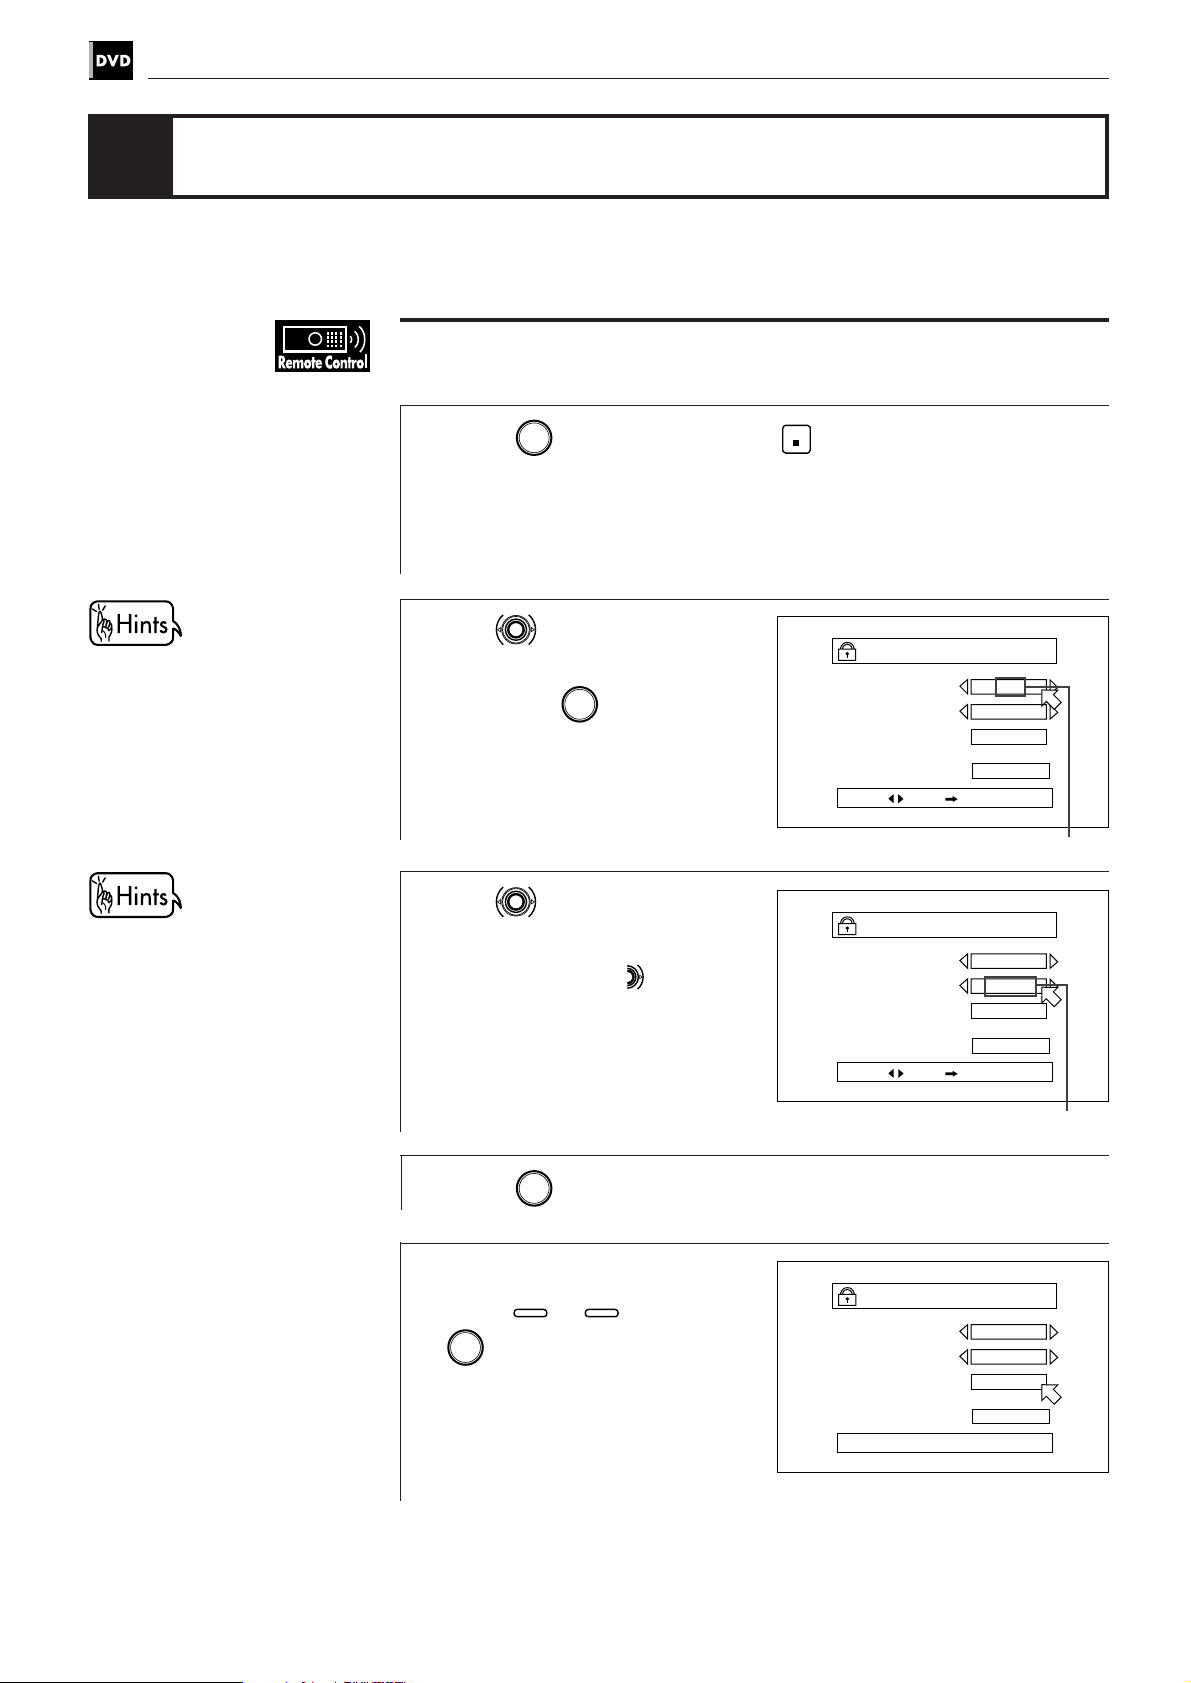
Setting and adjustment
Limiting playback by children
This function restricts playback of DVD discs which contain violent (and other)
scenes according to the level set by the user. For example, if a movie which
includes violent scenes supports the parental lock feature, such scenes which you
do not want to let children view can be cut or replaced with other scenes.
To set Parental Lock for the first time [PARENTAL LOCK]
For details of the country code,
see “Country code list for
parental lock” at the end of this
instruction.
”LEVEL1” is the strictest level.
Press
1
If the current disc is not a DVD disc, you have to remove the disc from the
tray before setting up.
The Parental Lock on-screen display appears on the TV screen.
(The parental lock function is operated with the remote control unit only.)
Use to select the
2
ENTER
while holding down
STOP
.
PARENTAL LOCK
country code of your area
and press
Use to select the
3
ENTER
.
Country Code
Set Level
PASSWORD
PRESS KEY ENTER
PARENTAL LOCK
LEVEL 8
– – – –
EXIT
Country code
parental lock level.
Each time you press , the
parental level changes from LEVEL
1 to LEVEL 8.
Country Code
Set Level
PASSWORD
PRESS KEY ENTER
LEVEL1
– – – –
EXIT
CN
CN
62
Press
4
Enter your 4-digit password
5
using
ENTER
ENTER
.
0
to 9 and press
.
7 The parental level and password are set.
Selected level
PARENTAL LOCK
Country Code
Set Level
PASSWORD
NEW PASSWORD? • • • PRESS 0~9 KEY
CN
LEVEL1
– – – –
EXIT
Page 65

Setting and adjustment
PARENTAL LOCK
Country Code
CN
Set Level
LEVEL1
PASSWORD
– – – –
EXIT
CURRENT PASSWORD? • • • PRESS 0~9 KEY
PARENTAL LOCK
Country Code
CN
Set Level
LEVEL8
PASSWORD
– – – –
EXIT
PRESS KEY ENTER
To change the settings [PARENTAL LOCK]
English
Español
Portugés
Chinese
”LEVEL1” is the strictest level.
Press
1
down
If the current disc is not a DVD disc,
you have to remove the disc from
the tray before setting up.
The Parental Lock on-screen display
appears on the TV screen.
Enter your current 4-digit password using 0 to 9 and
2
press
If you enter the wrong password, <WRONG ENTRY……> appears on the TV
screen, and you cannot go to next step.
Use to move to [Set
3
Level], then use
ENTER
while holding
STOP
.
ENTER
.
to select
the parental lock level.
Selected level
Press
4
Enter your new 4-digit password using 0 to 9 and press
5
ENTER
ENTER
.
.
7 The new setting is effective.
NOTES
When you enter the wrong password more than 3 times in step 2 above,
moves to <EXIT> automatically and does not work.
¶ If you forget your password in step 2
Enter “8888.”
Setting the unit
63
Page 66
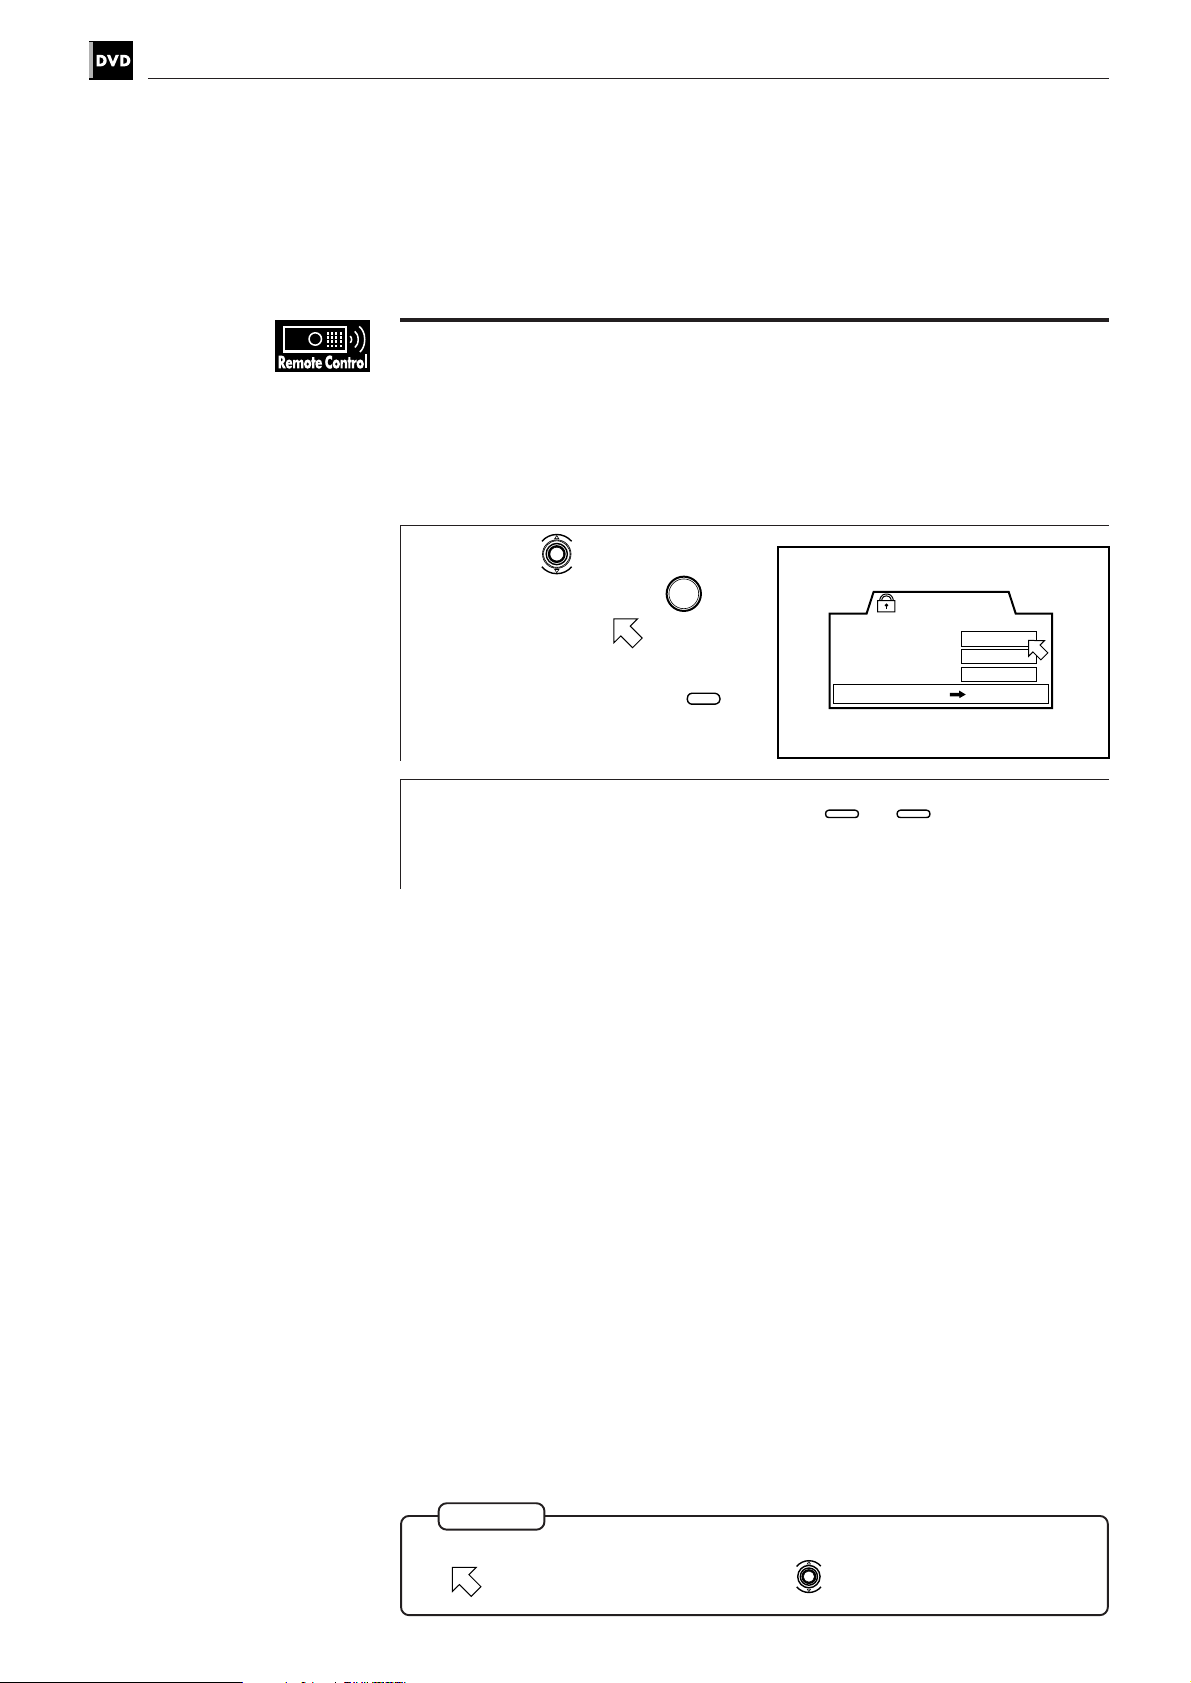
Setting and adjustment
To temporarily release the Parental lock [PARENTAL LOCK]
When you set the parental level strictly, some discs may not be played back at all.
When you insert such a disc and try to play it, the Parental Lock on-screen display
appears on the TV screen, and the unit will ask you whether you want the
parental lock to be released temporarily or not.
Use the to select [YES]
1
ENTER
OPEN/
CLOSE
.
PARENTAL LOCK
This DISC can’t play now!
Temporary
Level Change ?
PASSWORD
PRESS ENTER EXECUTE
YES
NO
– – – –
or [NO], then press
If you select [YES], moves to
the PASSWORD field.
When selecting [NO], press
button to remove the disc.
Enter your 4-digit password using 0 to 9.
2
If you enter the wrong password, “WRONG! RETRY…” appears on the TV
screen, and you cannot go to next step.
7 The Parental lock is released, and the unit starts playback.
64
NOTE
When you enter the wrong password more than 3 times in step 2 above,
moves to <NO> automatically and does not work.
Page 67
Audio CD operations
Audio CD operations
This chapter explains all the unit functions for playing back Audio CD
discs. You can enjoy Audio CDs in various ways such as listening to
only the desired track, changing the track order, and repeating tracks.
English
Español
Portugés
Chinese
Introduction
Table of contents of this chapter
7 Playing a specific track on a disc
To locate the desired track using
To locate the desired track directly ....................................................................... 66
To locate the desired position by specifying the time – TIME SEARCH ........... 67
NEXT
or
............................................... 66
PREVIOUS
7 Changing the track order
To playback in the desired order – PROGRAM .................................................... 68
To playback tracks in random order – RANDOM ................................................. 69
7 Repeat playback
To repeat a current track or all tracks – REPEAT.................................................. 70
To repeat a desired part – A-B REPEAT ................................................................ 71
7 Sampling all tracks
To playback only the beginning of each track – INTRO ...................................... 72
7 Checking the elapsed time or remaining time
To select the time display mode – TIME SELECT ................................................ 73
7 Information about CD TEXT ................................................................... 74
knowledge
Preliminary
Getting started
Basic
operations
operations
DVD VIDEO
adjustment
Setting and
Audio CD
Audio CD
operations
operations
Video CD
operations
KARAOKE
operations
Additional
information
65
Page 68
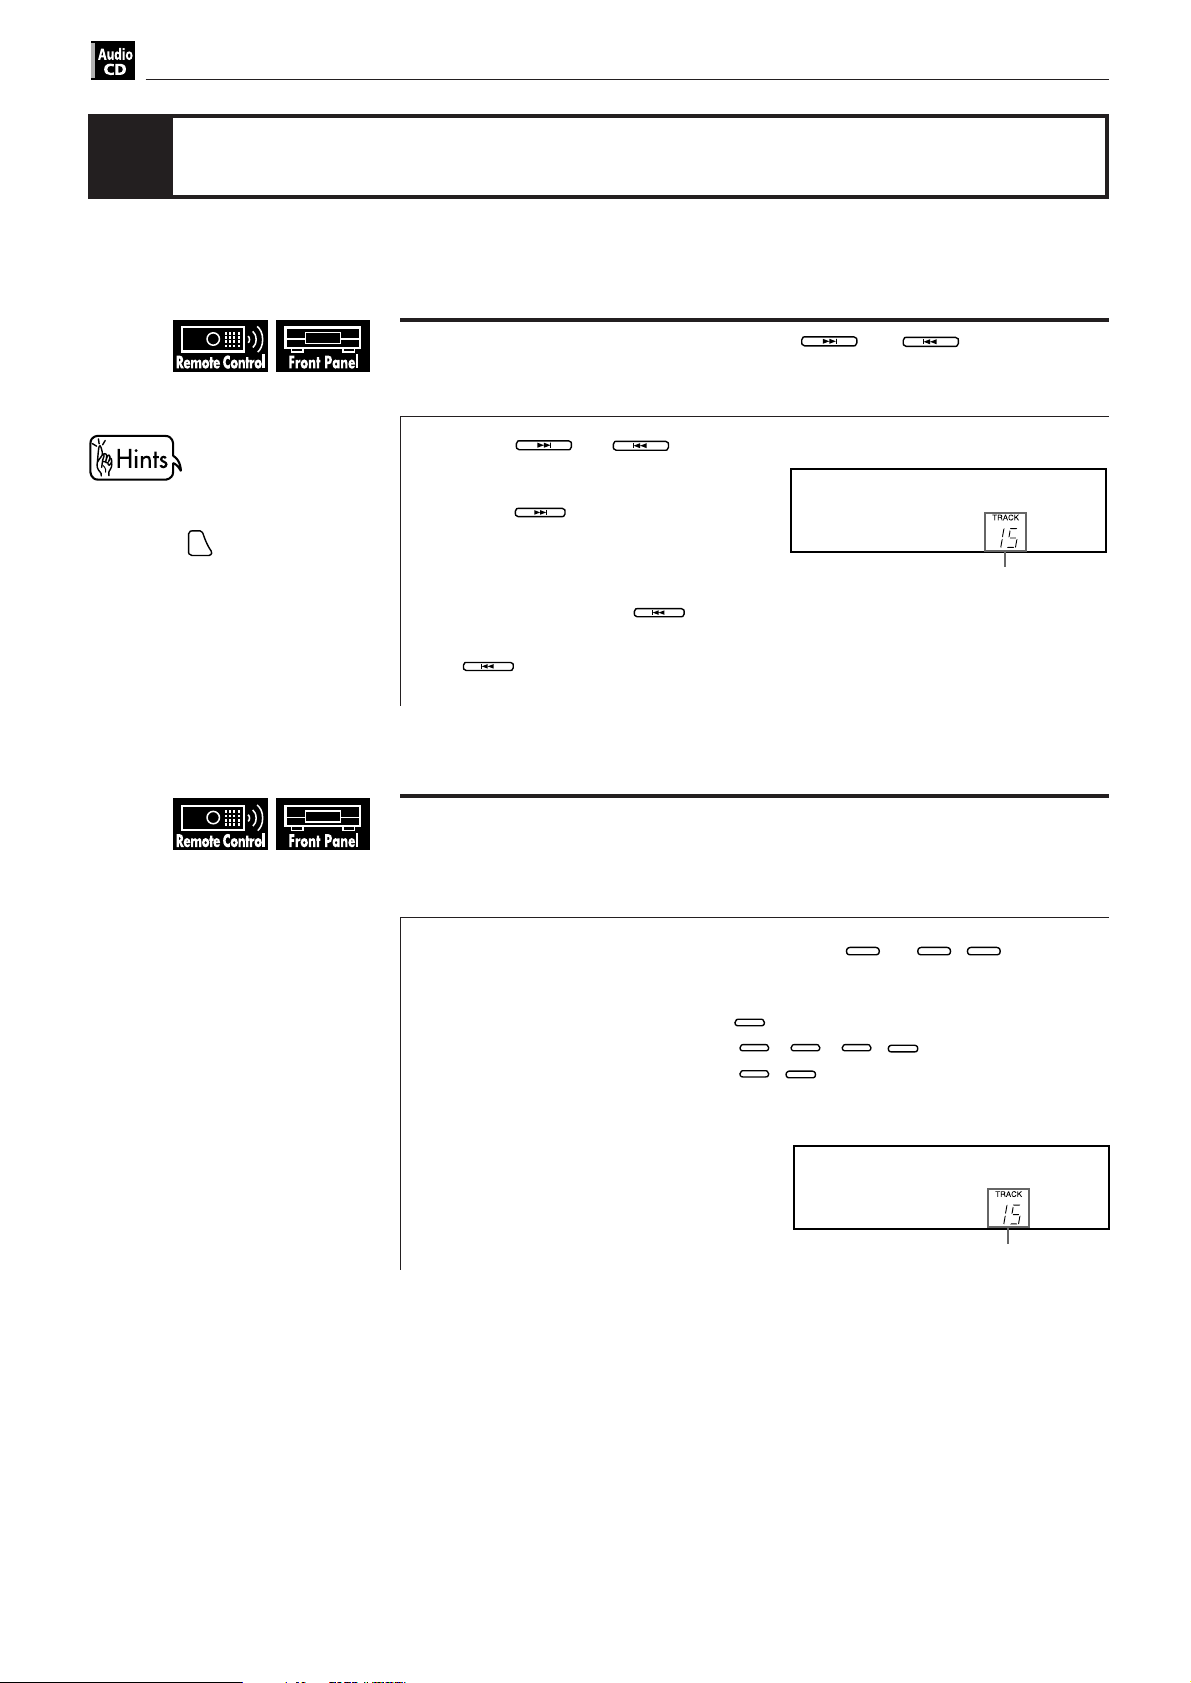
Audio CD operations
PREVIOUS
Playing a specific track on a disc
You can play a specific track on a disc by selecting the track number or time. You
can select it from the on-screen display on the TV screen, or using remote
control.
You can display the desired track
number on the TV screen. In this
case, press
Audio CD on-screen display,
then select the desired track.
to display the
ON SCREEN
To locate a desired track using
7 During playback
Press
1
• To skip to a succeeding track,
press
until the desired track appears in
the display.
• To skip to beginning of the
current track, press
• To skip to a preceding track, press
PREVIOUS
track appears in the display.
or
NEXT
once or repeatedly
NEXT
PREVIOUS
repeatedly until the desired
.
once.
Display window
To locate a desired track directly
7 During playback or stop mode
or
NEXT
PREVIOUS
Selected track number
Select a desired track number using 1 to 10,
1
Example:
To select track number 8: Press 8.
+10
+10
To select track number 37: Press
To select track number 15: Press
+10
›
› 5.
+10
›
Display window
7 The unit starts playback from the selected track.
+10
.
› 7.
Selected track number
66
Page 69
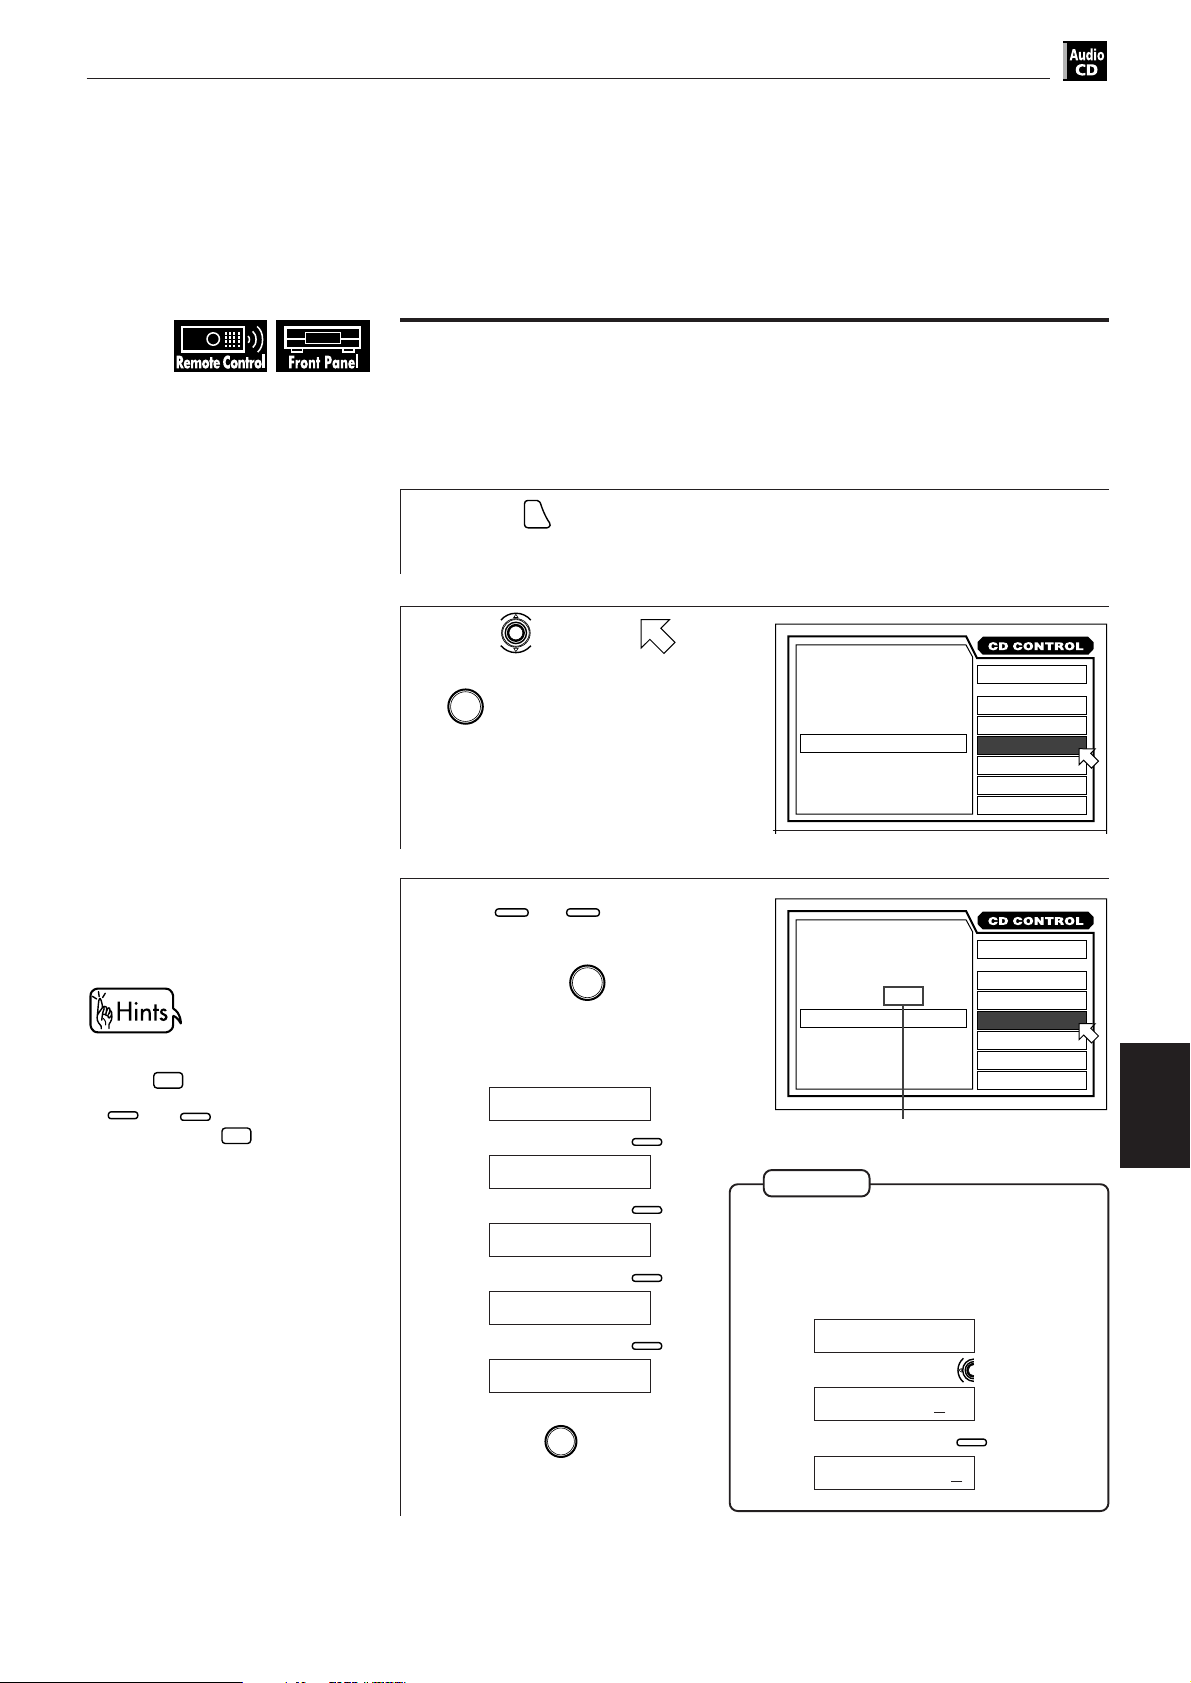
Audio CD operations
To locate a desired position by specifying the time
[TIME SEARCH]
You can playback a disc from the desired position by specifying the elapsed time
from the beginning of the disc.
English
Español
Portugés
Chinese
• To enter 0 on the front panel,
•
0
press
10
control unit or
front panel are not used in this
function.
and
.
10
+10
on the remote
+10
on the
1
Press
ON SCREEN
.
The on-screen display appears on the TV screen.
Use to move to
2
[TIME SEARCH] and press
ENTER
.
The color of “TIME SEARCH”
changes.
Use 0 to 9 to select the
3
time (minute and second)
ENTER
↓
↓
↓
↓
↓
ENTER
.
0
Press
Press 2.
Press 3.
Press 4.
.
¶ When you make a mistake in step 3:
Move the cursor to the mistaken
value, then press the correct value to
re-select the value.
then press
Example:
To playback from 2 minutes 34 seconds.
GO TO _ :
GO TO 0_ :
GO TO 02 : _
GO TO 02 : 3 _
GO TO 02 : 3 4
Press
TRACK 01
PRESS NUMERIC KEY
GO TO
TRACK 01
PRESS NUMERIC KEY
GO TO
Selected time
NOTE
GO TO 02 : 3 5
GO TO 02 : 35
GO TO 2 : 2 5
MIN SEC
3 : 54TIME
MIN SEC
_ :
MIN SEC
3 : 54TIME
MIN SEC
02 : 34
↓
Press .
↓
Press 2.
EACH
REMAIN
EACH
REMAIN
TIME SELECT
REPEAT
A-B REPEAT
TIME SEARCH
PROGRAM
RANDOM
INTRO
TIME SELECT
REPEAT
A-B REPEAT
TIME SEARCH
PROGRAM
RANDOM
INTRO
Audio CD
operations
7 The unit starts playback from the selected time.
67
Page 70
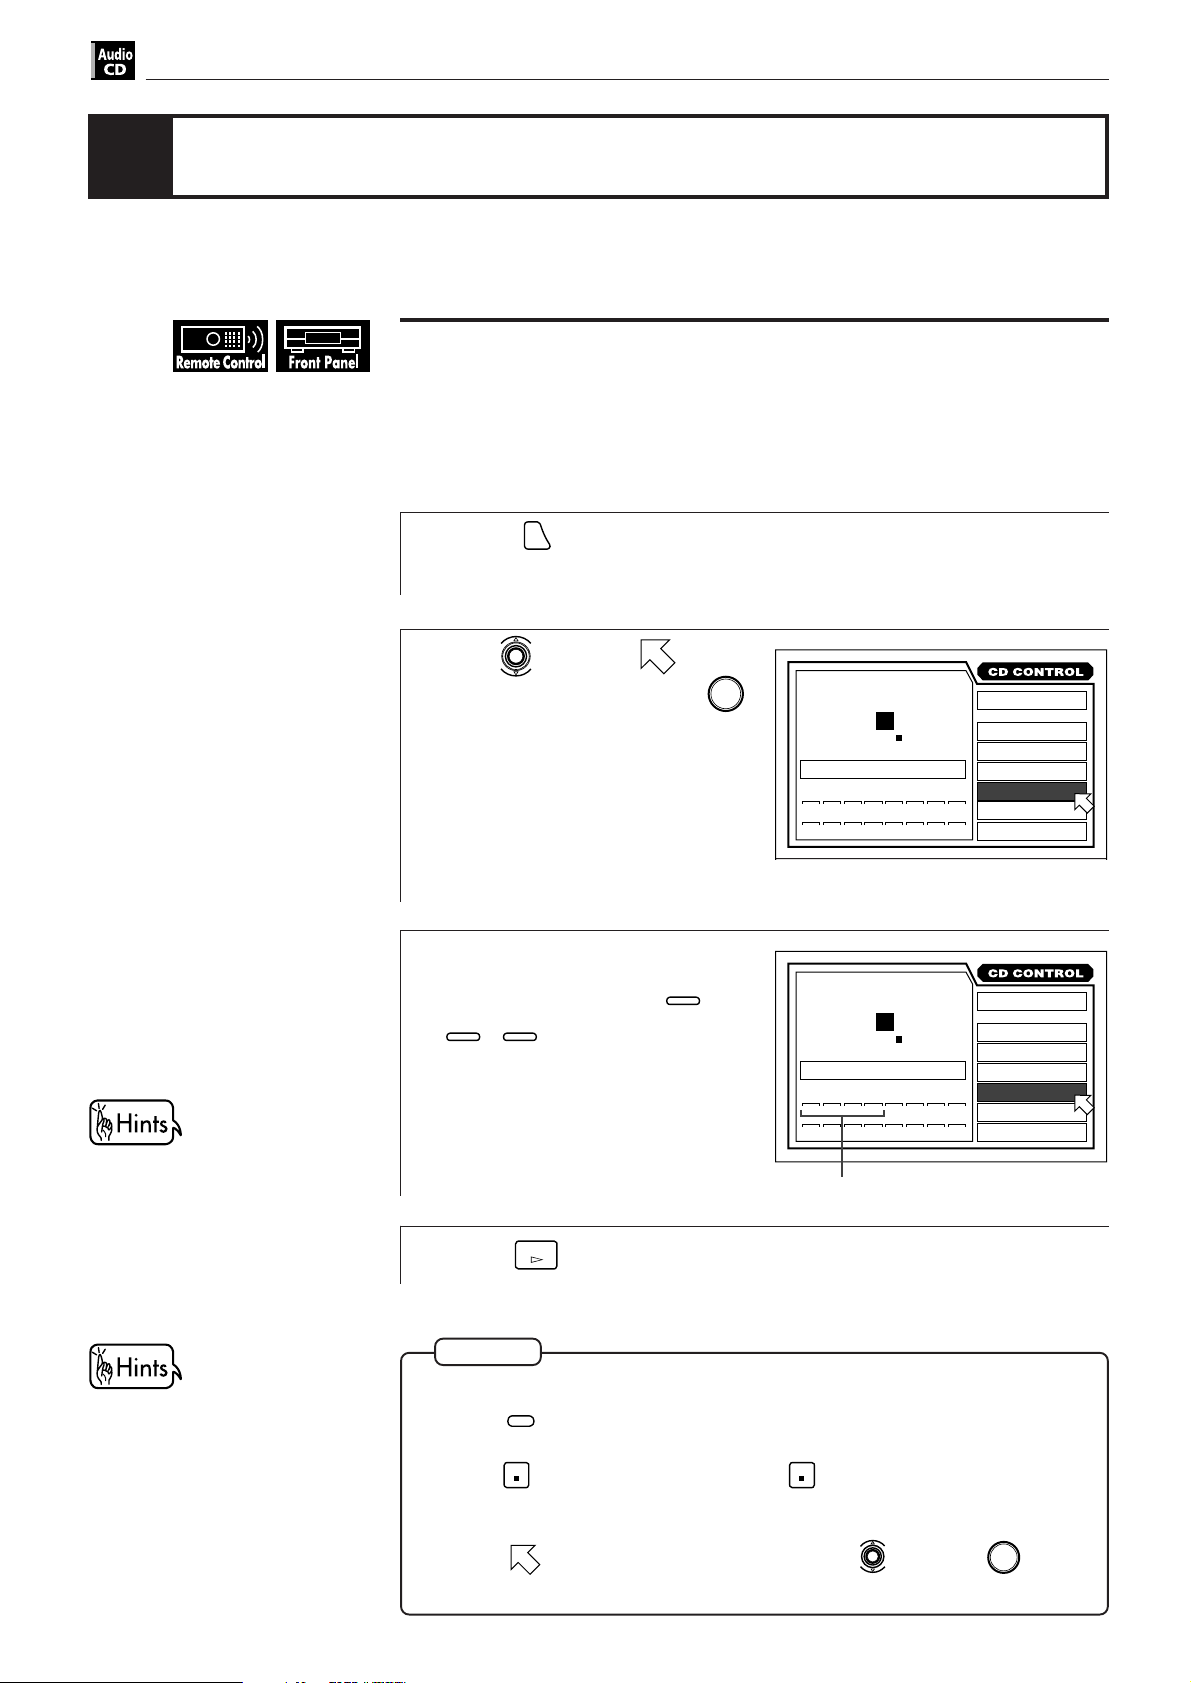
Audio CD operations
Changing the track order
You can listen to CD tracks in the desired order, or in random order. You can
program up to 16 tracks.
To playback in the desired order [PROGRAM]
By creating a program, you can enjoy listening to your favorite tracks in any
order.
7 During stop only
When all of the programmed tracks
have finished playback, the unit
stops but the program remains.
1
Press
ON SCREEN
.
The on screen display appears on the TV screen.
Use to move to
2
ENTER
[PROGRAM] and press
.
The color of “PROGRAM” changes.
Select the tracks in the
3
1
desired order using
10
+10
,
.
to
Up to 16 tracks can be
programmed. You may select the
same track more than once.
Selected track number
STOP
STOP
3
4125136147159
8
4
11
MIN SEC
3 : 54TIME
MIN SEC
3 : 54TIME
TRACK 01
PRESS NUMERIC KEY
192103114125136147159
TRACK 01
PRESS NUMERIC KEY
1
2
1
5
9
10
EACH
REMAIN
EACH
REMAIN
16
16
TIME SELECT
REPEAT
A-B REPEAT
TIME SEARCH
PROGRAM
RANDOM
INTRO
TIME SELECT
REPEAT
A-B REPEAT
TIME SEARCH
PROGRAM
RANDOM
INTRO
You can program tracks during
program playback.
68
4
Press
PLAY
to start program play.
NOTES
¶ When you make a mistake in step 3:
Press
CANCEL
. The last track programmed is erased.
¶ To clear program play
STOP
Press
to stop playback, then press
tracks are erased.
¶ To quit the program play
Move
“PROGRAM” returns to its original color.
to [PROGRAM] in the display using and press
STOP
again. All the programmed
ENTER
.
Page 71
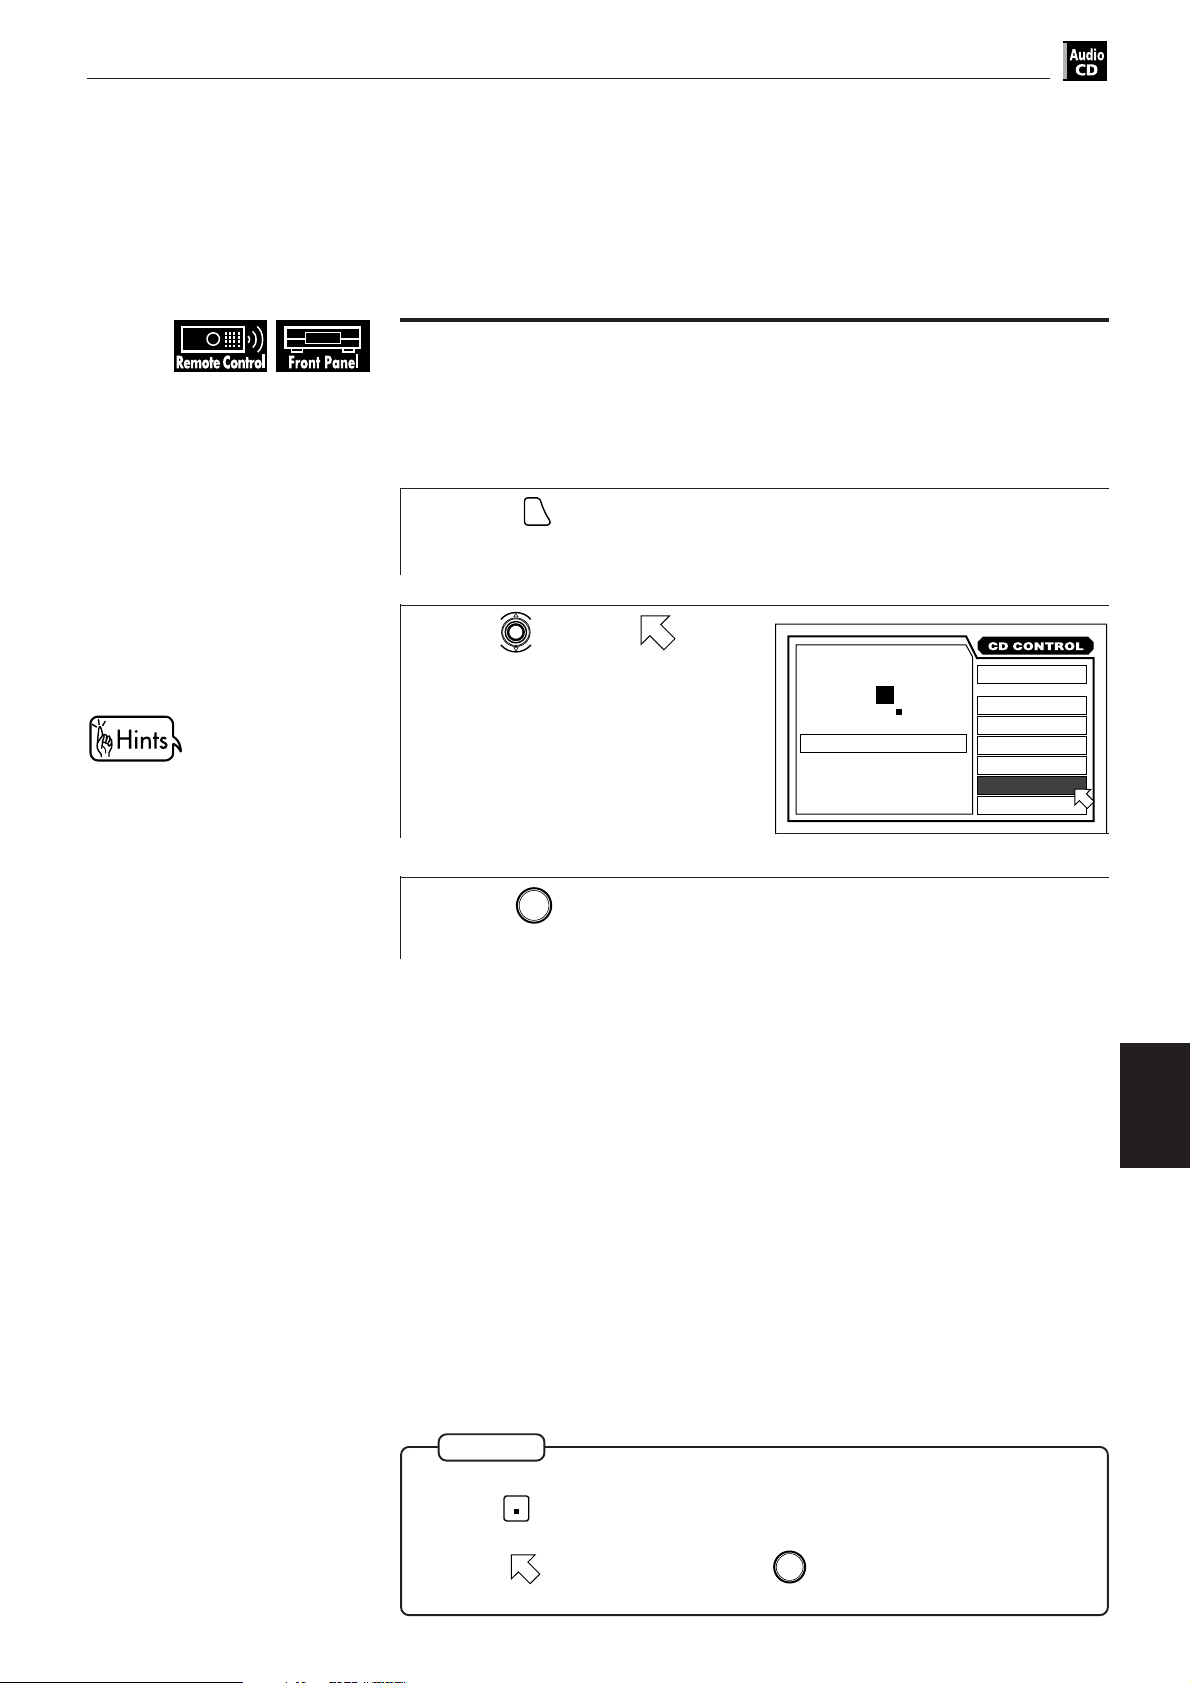
Audio CD operations
To playback tracks in random order [RANDOM]
The unit can play tracks in random order.
7 During stop mode
English
Español
Portugés
Chinese
• When all tracks have been played
once, random play ends.
• The same track will not be played
back more than once during
random play.
1
Press
ON SCREEN
.
The on screen display appears on the TV screen.
Use to move to
2
[RANDOM].
Press
3
The color of “RANDOM” changes.
7 Random play begins.
ENTER
.
TRACK 01 3 : 54TIME
STOP
MIN SEC
EACH
REMAIN
TIME SELECT
REPEAT
A-B REPEAT
TIME SEARCH
PROGRAM
RANDOM
INTRO
NOTES
To stop random play
STOP
Press
.
¶ To quit random play
Move
original color.
to [RANDOM], then press
ENTER
. “RANDOM” returns to its
Audio CD
operations
69
Page 72
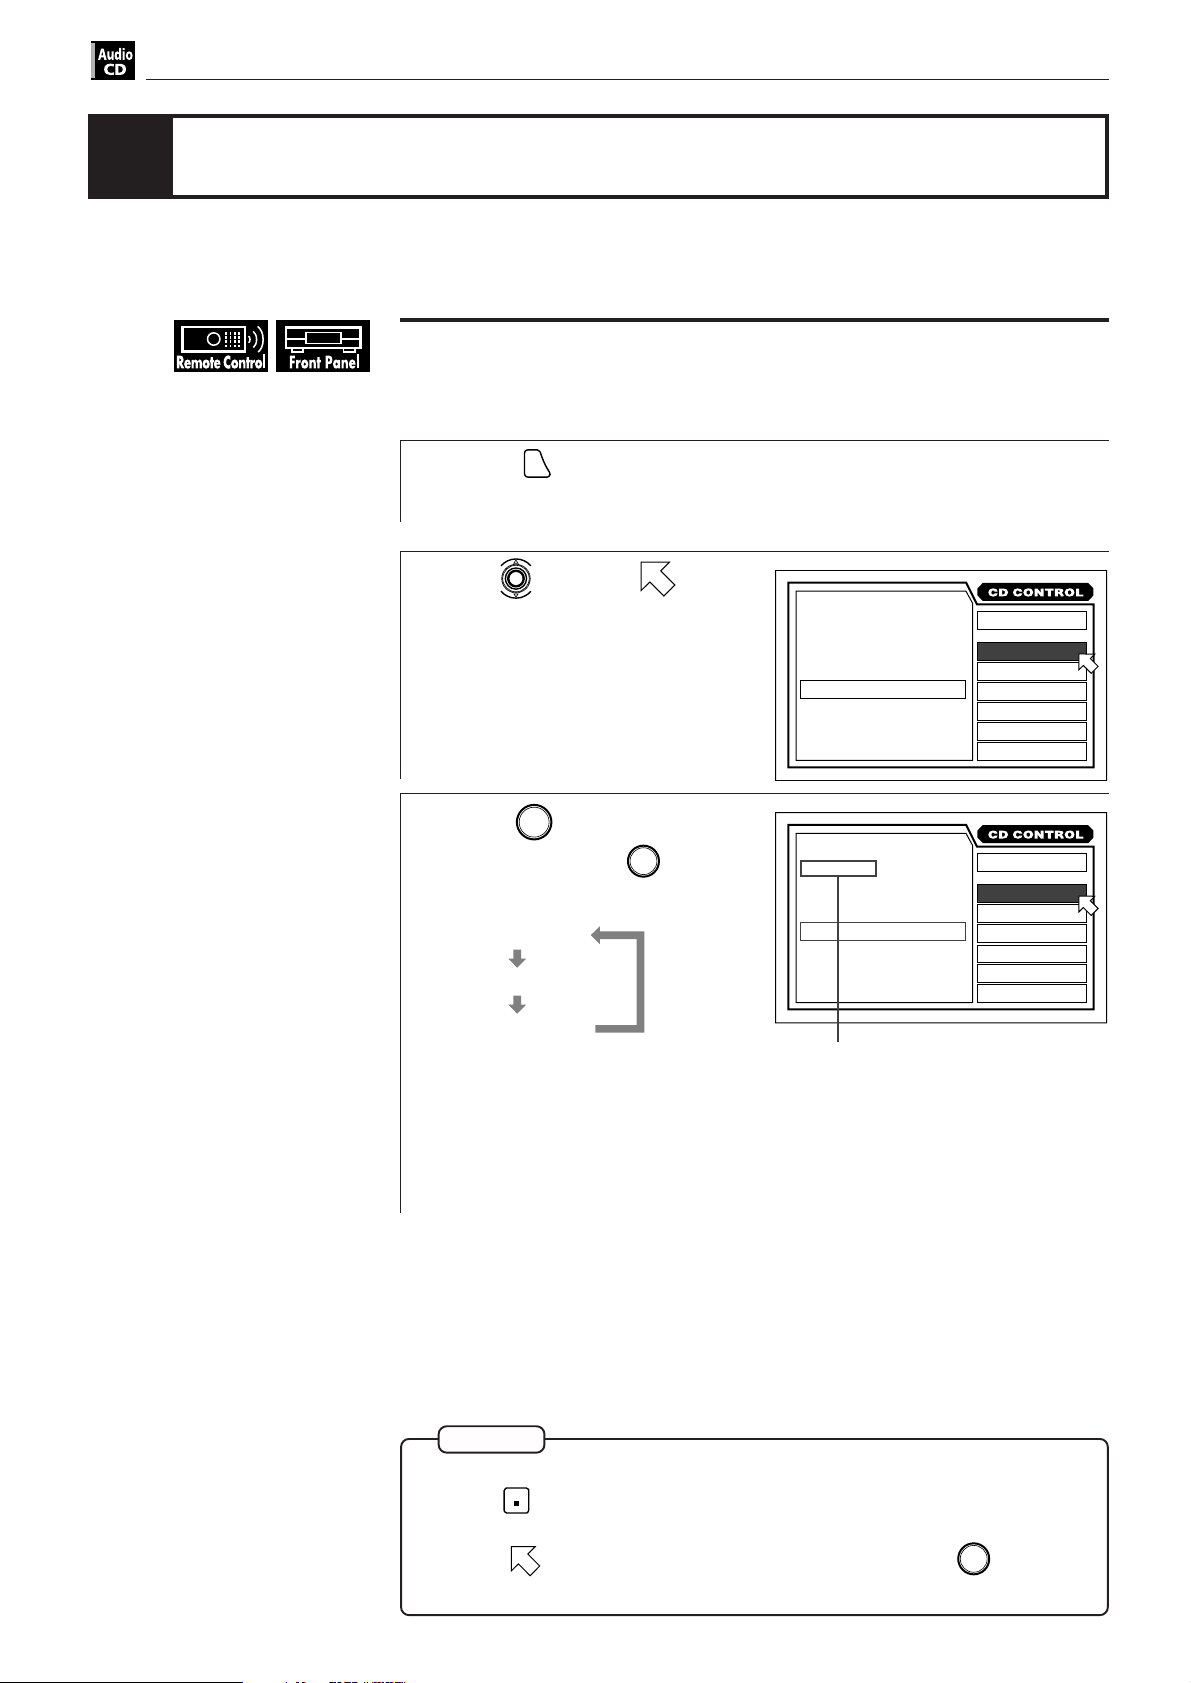
Audio CD operations
Repeat playback
The unit can repeat playback of all tracks or the current track and you can also
select a desired section for repeat playback.
To repeat a current track or all tracks [REPEAT]
7 During playback
1
Press
ON SCREEN
.
The on-screen display appears on the TV screen.
Use to move to
2
[REPEAT].
Press
3
Each time you press
mode changes as follows:
REPEAT ALL
No indication
ENTER
REPEAT 1
(off)
.
ENTER
, the repeat
MIN SEC
TRACK 08
REPEAT 1
TRACK 08
REPEAT ALL
0 : 58TIME
MIN SEC
0 : 58TIME
EACH
EACH
Selected repeat mode
TIME SELECT
REPEAT
A-B REPEAT
TIME SEARCH
PROGRAM
RANDOM
INTRO
TIME SELECT
REPEAT
A-B REPEAT
TIME SEARCH
PROGRAM
RANDOM
INTRO
70
REPEAT ALL:
All the tracks are played repeatedly.
REPEAT 1:
The current track is played repeatedly.
7 The current track or all the tracks is/are played repeatedly.
NOTES
To quit repeat playback
STOP
Press
. The unit stops but remains in repeat play mode.
¶ To cancel repeat playback
Move
until [REPEAT] returns to its original color.
to [REPEAT] in the on screen display and press
ENTER
repeatedly
Page 73
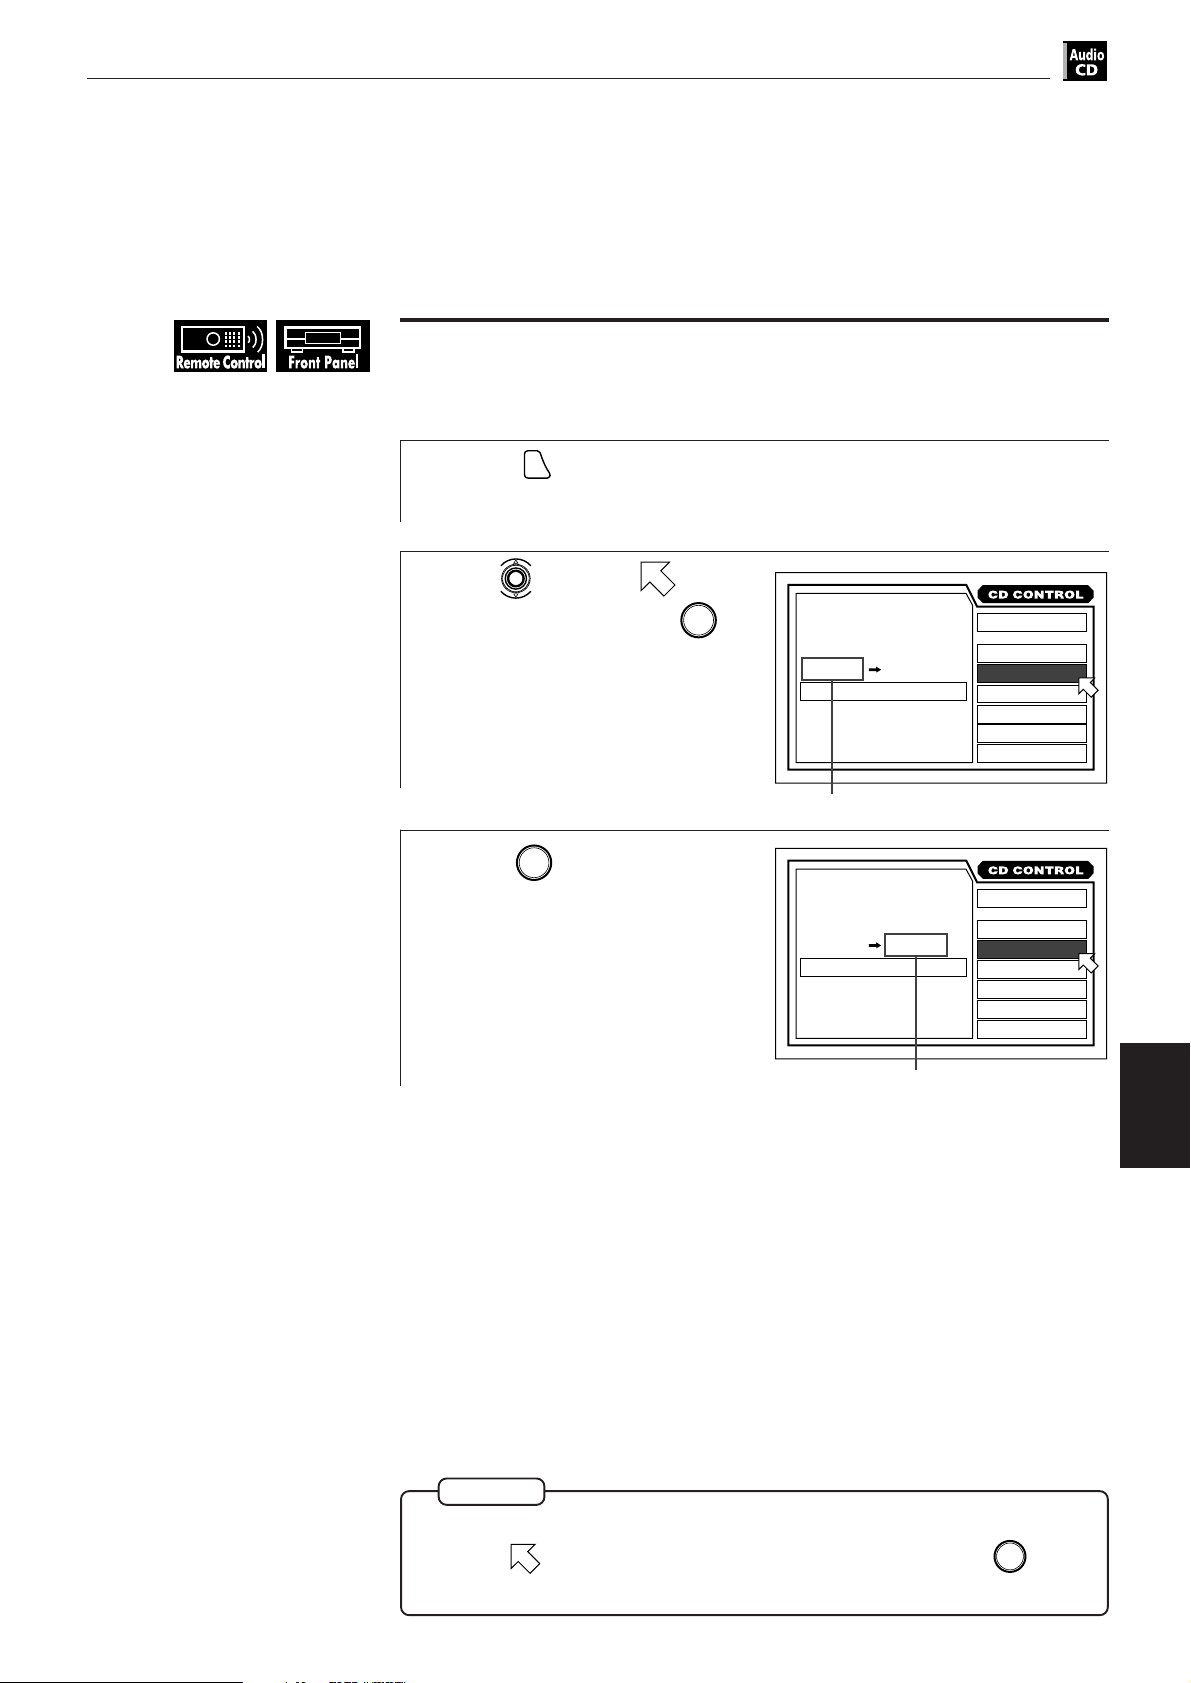
To repeat a desired part [A-B REPEAT]
7 During playback
Audio CD operations
English
Español
Portugés
Chinese
1
Press
ON SCREEN
.
The on-screen display appears on the TV screen.
Use to move to [A-B
2
ENTER
REPEAT], then press
at
the beginning of the part you
want to repeat (point A).
The color of “A-B REPEAT” changes.
3
Press
ENTER
at the end of the
part you want to repeat
(point B).
TRACK 08 0 : 12TIME
MIN SEC MIN SEC
A29 32: B:
MIN SEC
Point A
TRACK 08 0 : 58TIME
MIN SEC MIN SEC
A29 32: B30 90:
MIN SEC
EACH
TIME SELECT
REPEAT
A-B REPEAT
TIME SEARCH
PROGRAM
RANDOM
INTRO
EACH
TIME SELECT
REPEAT
A-B REPEAT
TIME SEARCH
PROGRAM
RANDOM
INTRO
Point B
7 The unit locates “A” and starts repeat playback between “A” and “B.”
NOTE
To cancel A-B repeat playback
Move
to [A-B REPEAT] in the on screen display and press
[A-B REPEAT] returns to its original color.
ENTER
until
Audio CD
operations
71
Page 74

Audio CD operations
Sampling all tracks
You can sample the tracks by listening to a short segment of each track in order.
The unit plays the first 10 seconds of each track.
To playback only the beginning of each track [INTRO]
7 During stop
• When all tracks have been played
once, INTRO scan stops.
1
Press
ON SCREEN
.
The on-screen display appears on the TV screen.
Use to move to
2
[INTRO].
Press
3
The color of “INTRO” changes.
ENTER
.
TRACK 01 3 : 54TIME
STOP
TRACK 02 0 : 09TIME
PLAY
MIN SEC
MIN SEC
EACH
REMAIN
EACH
TIME SELECT
REPEAT
A-B REPEAT
TIME SEARCH
PROGRAM
RANDOM
INTRO
TIME SELECT
REPEAT
A-B REPEAT
TIME SEARCH
PROGRAM
RANDOM
INTRO
72
7 The first 10 seconds of each track on a disc are played back in numerical order
from the first track.
NOTE
To stop INTRO scan
Press
STOP
or move to [INTRO], then press
ENTER
.
Page 75

Audio CD operations
English
Checking the elapsed time or remaining time
Español
Portugés
You can check the elapsed time of the current track or entire disc, and check
remaining time of the current track or entire disc from the on-screen display on
Chinese
the TV screen or the display window on the front panel.
To select the time display mode [TIME SELECT]
You can choose the time mode in the display on the front panel and in the onscreen display.
7 During playback
Press
1
The on-screen display appears on the TV screen.
Use to move to
2
[TIME SELECT].
ON SCREEN
.
MIN SEC
TRACK 08 0 : 58TIME
PLAY
EACH
TIME SELECT
REPEAT
A-B REPEAT
TIME SEARCH
PROGRAM
RANDOM
INTRO
When you select the time mode
during stop mode, the time mode
changes as follows:
EACH REMAIN
↓
Recorded time of the current
track
↓
TOTAL (0:00)
↓
TOTAL REMAIN
Total recorded time of the disc
↓
EACH (0:00)
Press
3
Each time you press
ENTER
.
ENTER
EACH
MIN SEC
TRACK 08 3 : 45TIME
EACH
TIME SELECT
PLAY
REPEAT
A-B REPEAT
TIME SEARCH
PROGRAM
RANDOM
INTRO
Elapsed time of the current track
TOTAL REMAIN
MIN SEC
TRACK 08 41 : 59TIME
Total remaining time of the disc
TOTAL
REMAIN
TIME SELECT
PLAY
REPEAT
A-B REPEAT
TIME SEARCH
PROGRAM
RANDOM
INTRO
, the time mode changes as follows:
EACH REMAIN
TRACK 08 2 : 18TIME
Remaining time of the current track
MIN SEC
PLAY
TOTAL
TRACK 08 12 : 38TIME
Total elapsed time of the disc
MIN SEC
PLAY
EACH
REMAIN
TIME SELECT
REPEAT
A-B REPEAT
TIME SEARCH
PROGRAM
RANDOM
INTRO
Audio CD
operations
TOTAL
TIME SELECT
REPEAT
A-B REPEAT
TIME SEARCH
PROGRAM
RANDOM
INTRO
73
Page 76

Audio CD operations
Information about CD TEXT
The unit is compatible with the CD TEXT function. CD TEXT discs have
information, such as the album title, artist names, and track names. If the played
disc is a CD TEXT disc, CD text data appears on the TV screen.
JVC HITS
SONG NO1
MIN SEC
0 : 00TIME1
JVC HITS
EACH
TIME SELECT
REPEAT
A-B REPEAT
TIME SEARCH
PROGRAM
RANDOM
INTRO
CD TEXT data also appears in the
display window. In this case, each
time you press
TITLE
, CD TEXT data
and time appears alternately.
CD TEXT
What is CD TEXT?
CD TEXT, a new feature of audio CD discs, includes text information
for album title, song titles, artist names, etc. in addition to audio
information.
CD TEXT
74
NOTES
The album title, artist names, or track names may not be displayed with
some CD TEXT discs.
¶ When you insert a CD TEXT disc which contains many tracks, the time until
the unit is ready for playback is longer than usual. The time is necessary for
the unit to read the CD TEXT information, and this is not a malfunction.
Page 77

Video CD Operations
Video CD operations
This chapter explains all the functions of the unit for playing back Video
CD discs. You can also enjoy Video CDs in various ways such as
enjoying only a desired track, changing the track order, and repeating
track playback.
English
Español
Portugés
Chinese
Introduction
Table of contents of this chapter
7 Playing a specific scene on a Video CD
To use the menu of the Video CD recorded on PBC ........................................... 76
To locate a desired track using
To locate a disired track directly ........................................................................... 77
To locate a desired position by specifying the time – TIME SEARCH ............... 78
To locate a desired scene by watching the opening scene digest display
– DIGEST ................................................................................................................. 80
NEXT
or
............................................... 77
PREVIOUS
7 Playing in slow-motion
To display still pictures – STROBE ........................................................................ 81
To playback in slow-motion – SLOW .................................................................... 81
7 Playing a scene close-up
To playback a scene close-up – ZOOM ................................................................. 82
7 Changing the track order
To playback in the desired order – PROGRAM .................................................... 83
To playback tracks in random order – RANDOM ................................................. 84
7 Repeat playback
To repeat a current track or all tracks – REPEAT.................................................. 85
To repeat a desired part – A-B REPEAT ................................................................ 86
knowledge
Preliminary
Getting started
Basic
operations
operations
DVD VIDEO
adjustment
Setting and
7 Sampling all tracks
To playback only the beginning of each track – INTRO ...................................... 87
7 Adjusting the sound to suit preferences
To change the audio channel – AUDIO ................................................................. 88
7 Checking the total disc time
To select the time display mode – TIME SELECT ................................................ 89
Audio CD
operations
Video CD
Video CD
operations
operations
KARAOKE
operations
Additional
information
75
Page 78

Video CD Operations
Playing a specific scene on a Video CD
You can play a specific scene on a Video CD disc by selecting the time, the track
number, the opening scene digest display, or the item on the menu displayed on
the TV screen.
To use the menu of the Video CD recorded on PBC
Some Video CD discs are compatible with the PBC function. PBC is an
abbreviation of “PlayBack Control.” Video CD disc recorded on PBC have own
menus such as the list of the songs of the disc and items recorded in a disc. You
can also locate the specific scene by using the menu.
7 When the menu appears on the TV screen during playback with PBC
When you play a Video CD disc
using the PBC function, “PBC”
appears in the display window
on the front panel. When the
PBC function is not activate,
STOP
press
activate the PBC function. You
can also operate from the on-
screen display as follows:
1. Press
2. Use to move to [PBC
When you want to set to off the
PBC function, press
press the numeric buttons to
play a disc. See page 77.
, then press
ON SCREEN
.
CALL], then press
STOP
ENTER
PLAY
.
, then
to
Use 1 to 10,
1
+10
to select
Example:
the desired number of the
item.
Playback starts from the selected
item.
You can return to the menu by
pressing
When “NEXT” or “PREVIOUS”
appears on the TV screen, the unit
generally work as:
• succeeding to the next page by pressing
• return to the previous page by pressing
*The method of the operation is different depending on the disc.
RETURN
.
.
NEXT
.
PREVIOUS
76
Page 79

Video CD Operations
PREVIOUS
English
Español
Portugés
Chinese
To locate a desired track using
NEXT
or
PREVIOUS
7 During playback without the PBC function
Press
1
• To skip to succeeding tracks, press
desired track appears in the display.
• To skip to beginning of the current track, press
• To skip to preceding tracks, press
appears in the display.
NEXT
or
.
once or repeatedly until the
NEXT
once.
PREVIOUS
repeatedly until the desired track
PREVIOUS
NOTE
This function does not works when playback with the PBC function.
To locate a disired track directly
7 During playback without the PBC function or stop mode
Select a desired track number using 1 to 10,
1
Example:
To select track number 8: Press 8.
+10
+10
To select track number 37: Press
›
+10
›
› 7.
7 The unit starts playback from the selected track.
NOTE
This function does not works when playback with the PBC function.
+10
.
Video CD
operations
77
Page 80
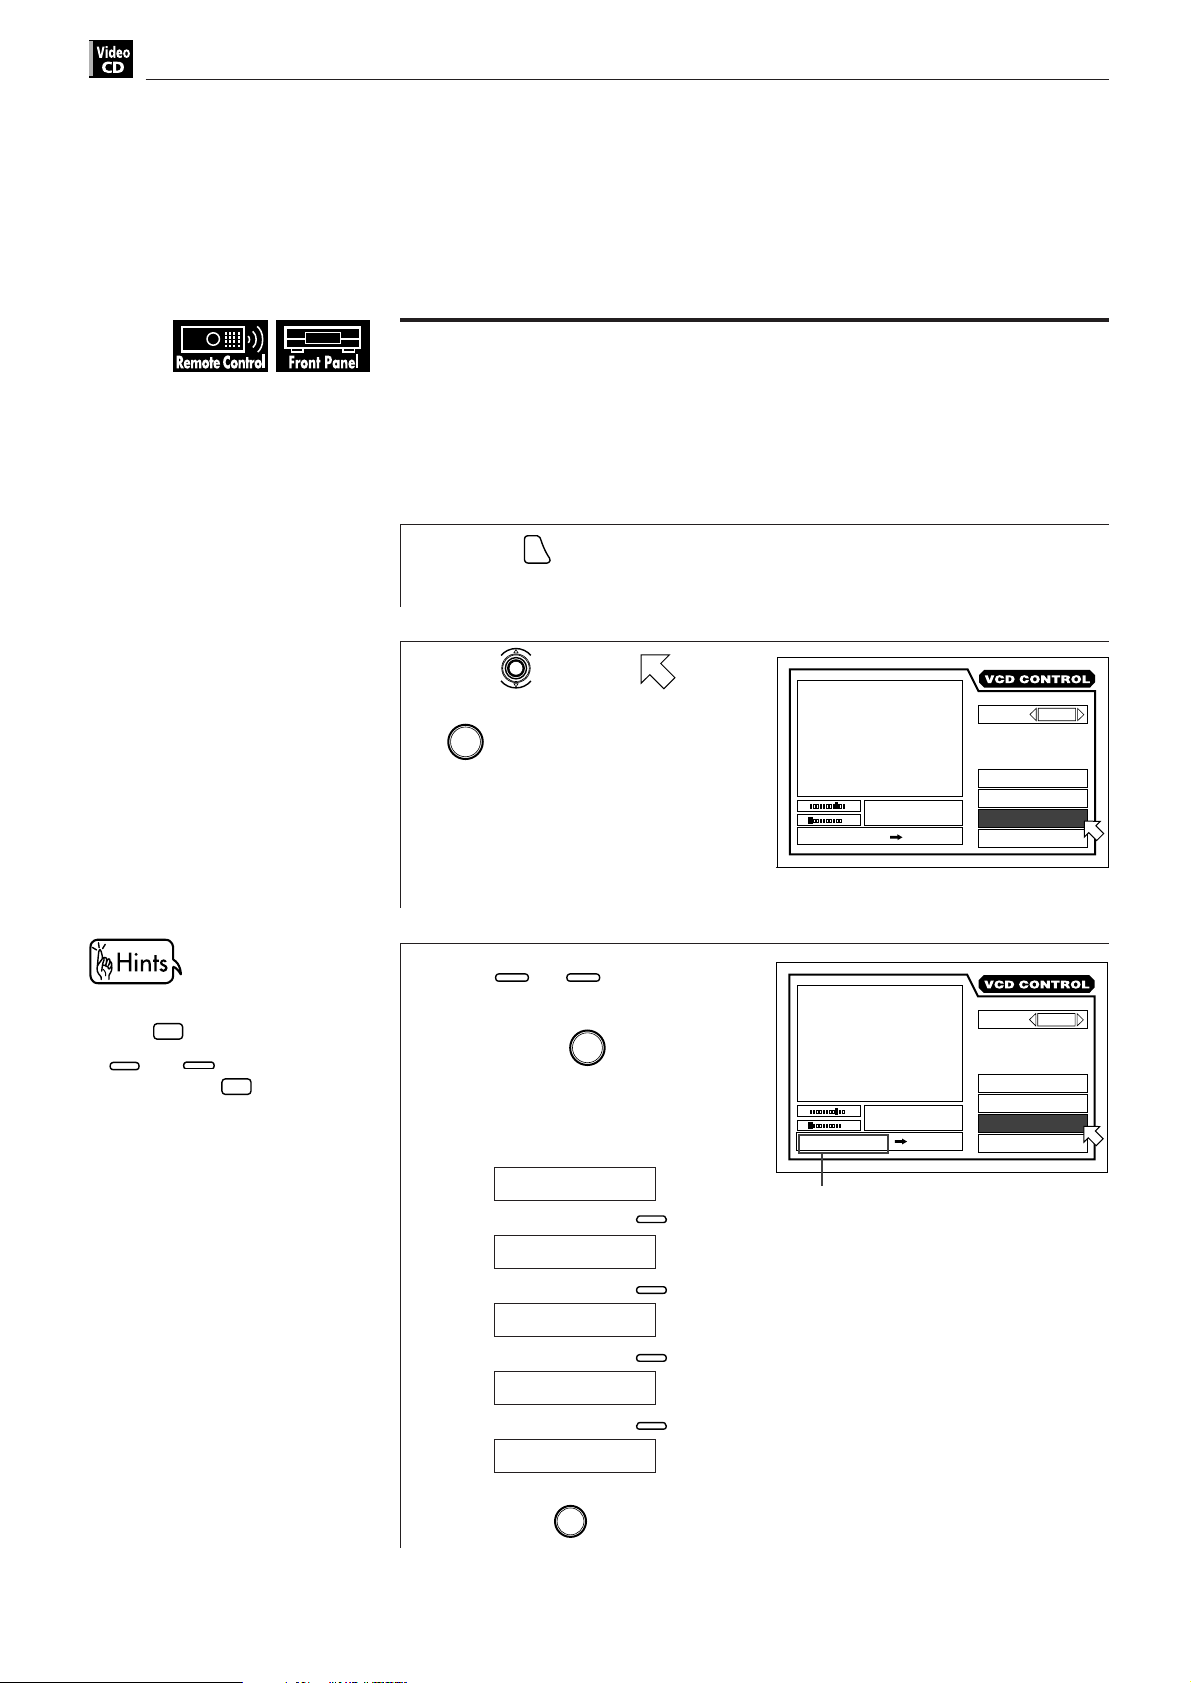
Video CD Operations
To locate a desired position by specifying the time
[TIME SEARCH]
You can playback a disc from the desired position by specifying the elapsed time
from the beginning of the disc.
7 During playback without the PBC function
• To enter 0 on the front panel,
•
0
press
10
control unit or
front panel are not used in this
function.
10
and
.
+10
on the remote
+10
on the
1
Press
ON SCREEN
.
The on-screen display appears on the TV screen.
Use to move to
2
[TIME SEARCH] and press
ENTER
.
The color of “TIME SEARCH”
changes.
Use 0 to 9 to select the
3
time (minute and second)
ENTER
then press
Example:
To select playback from 2 minutes 34
seconds.
.
St. End
010 Mb
GO TO _ : ENTER
St. End
010 Mb
GO TO 0 2 43:
TRK.
03
TIME
TRK.
03
TIME
ENTER
34 : 58
34 : 58
AUDIO
REPEAT
A-B REPEAT
TIME SEARCH
PBC CALL
AUDIO
REPEAT
A-B REPEAT
TIME SEARCH
PBC CALL
L / R
L / R
78
GO TO _ :
↓
Press
0
.
Selected time
GO TO 0_ :
↓
Press 2.
GO TO 02 : _
↓
Press 3.
GO TO 02 : 3 _
↓
Press 4.
GO TO 02 : 3 4
↓
ENTER
Press
7 The unit starts playback from the selected time.
Page 81
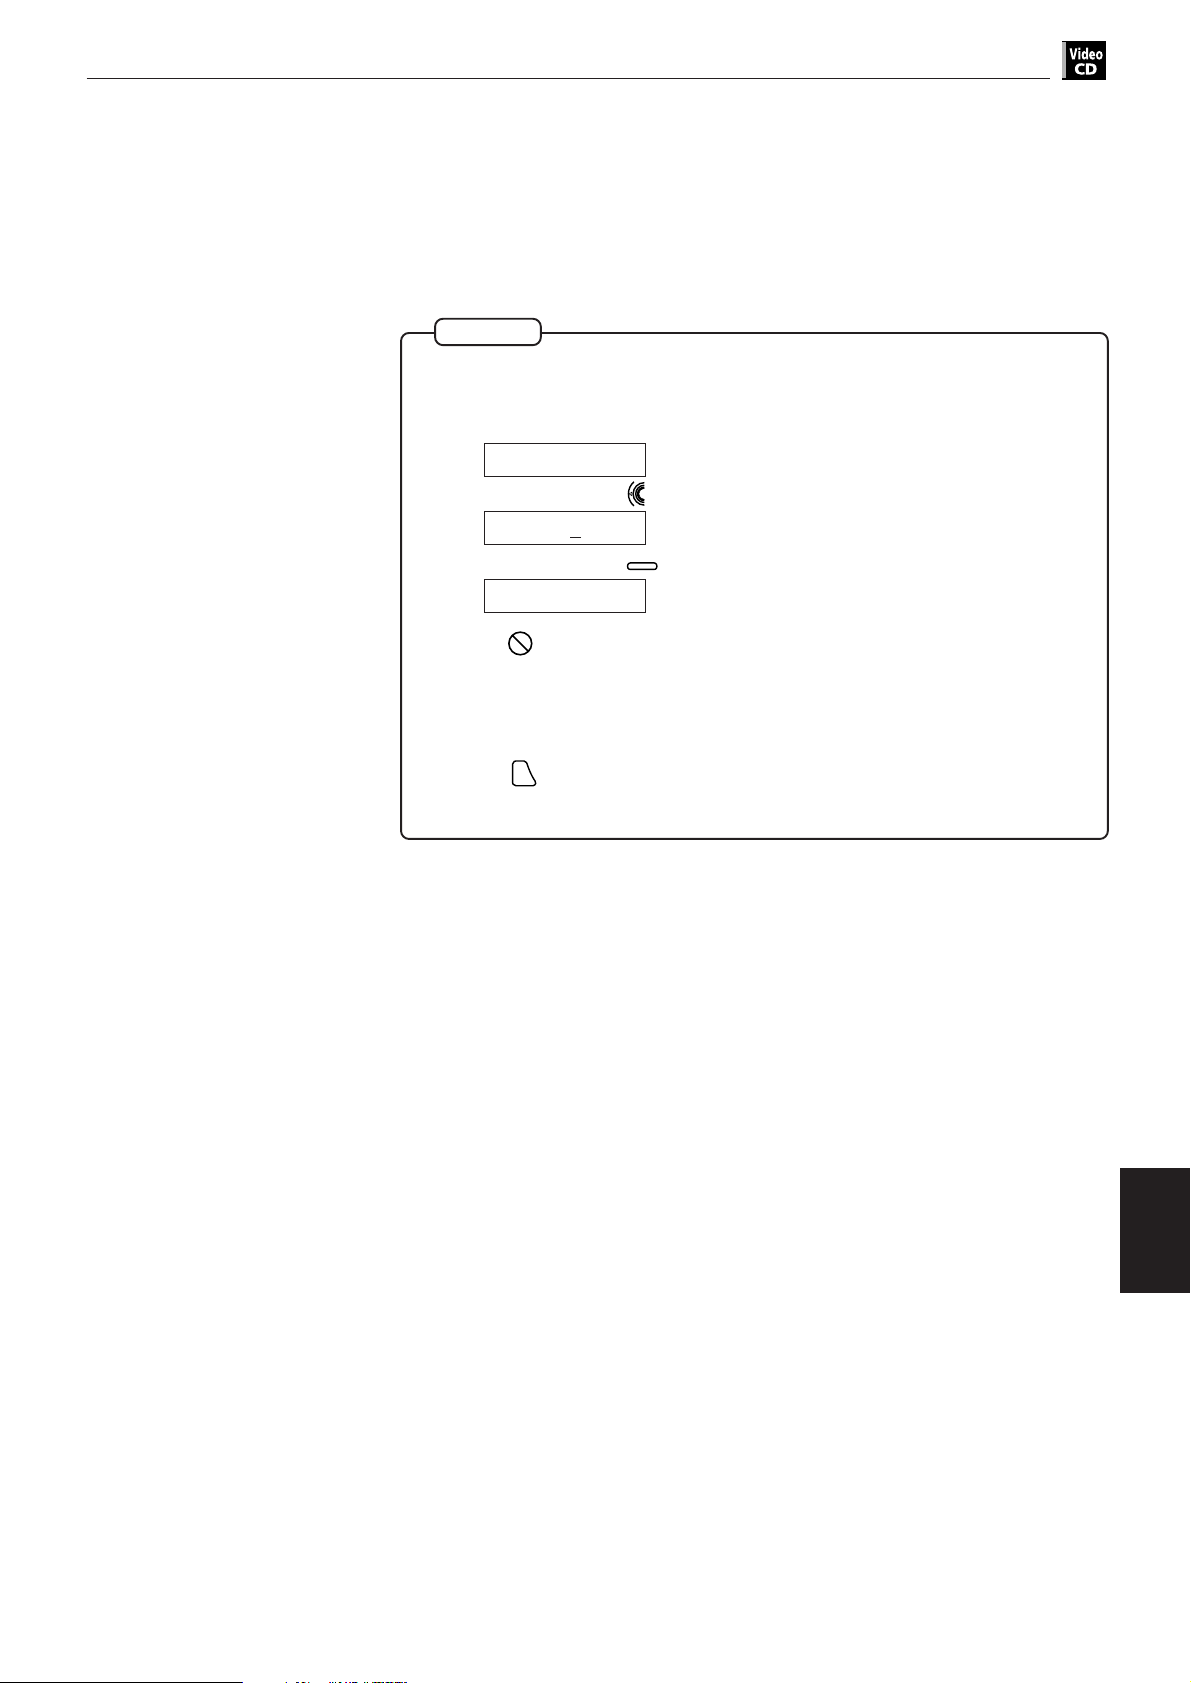
Video CD Operations
NOTES
¶ When you make a mistake in step 3:
Move the cursor to the mistaken value, then press the correct value to reselect the value.
GO TO 02 : _
↓
Press
GO TO 02:
4
Press
↓
GO TO 04 : _
¶ When appears in the TV screen in step 2:
The time you selected is not contained on the disc, or time search does
not work for the part you selected. When you play a Video CD disc with
the PBC function, there is a part where time search does not work.
English
Español
Portugés
Chinese
¶ To return to the regular display:
Press
and the on-screen display will return to the regular display.
ON SCREEN
¶ The time search function does not work during PBC playback.
Video CD
operations
79
Page 82

Video CD Operations
To locate a desired scene by watching the opening scene
digest display [DIGEST]
The unit can display the opening scene of each track. You can select a desired
track from the opening scenes displayed on the TV screen.
7 During stop mode or playback without PBC function
• When the selected track is in
the lower right-hand corner of
the screen, press to check
next scenes.
• When the selected track is in
the upper left-hand corner of
the screen, press to return
to previous scenes.
Press
1
The opening scene of each track
appears on the TV screen.
Up to nine opening scenes are
displayed.
Use to select the
2
DIGEST
.
desired track.
When you want to check more
scenes, press
scenes appear on the TV screen.
When you want to return to
previous scenes, press
. Additional
NEXT
PREVIOUS
.
Selected track
80
3
Press
ENTER
.
7 The unit begins playback from the selected track.
Page 83
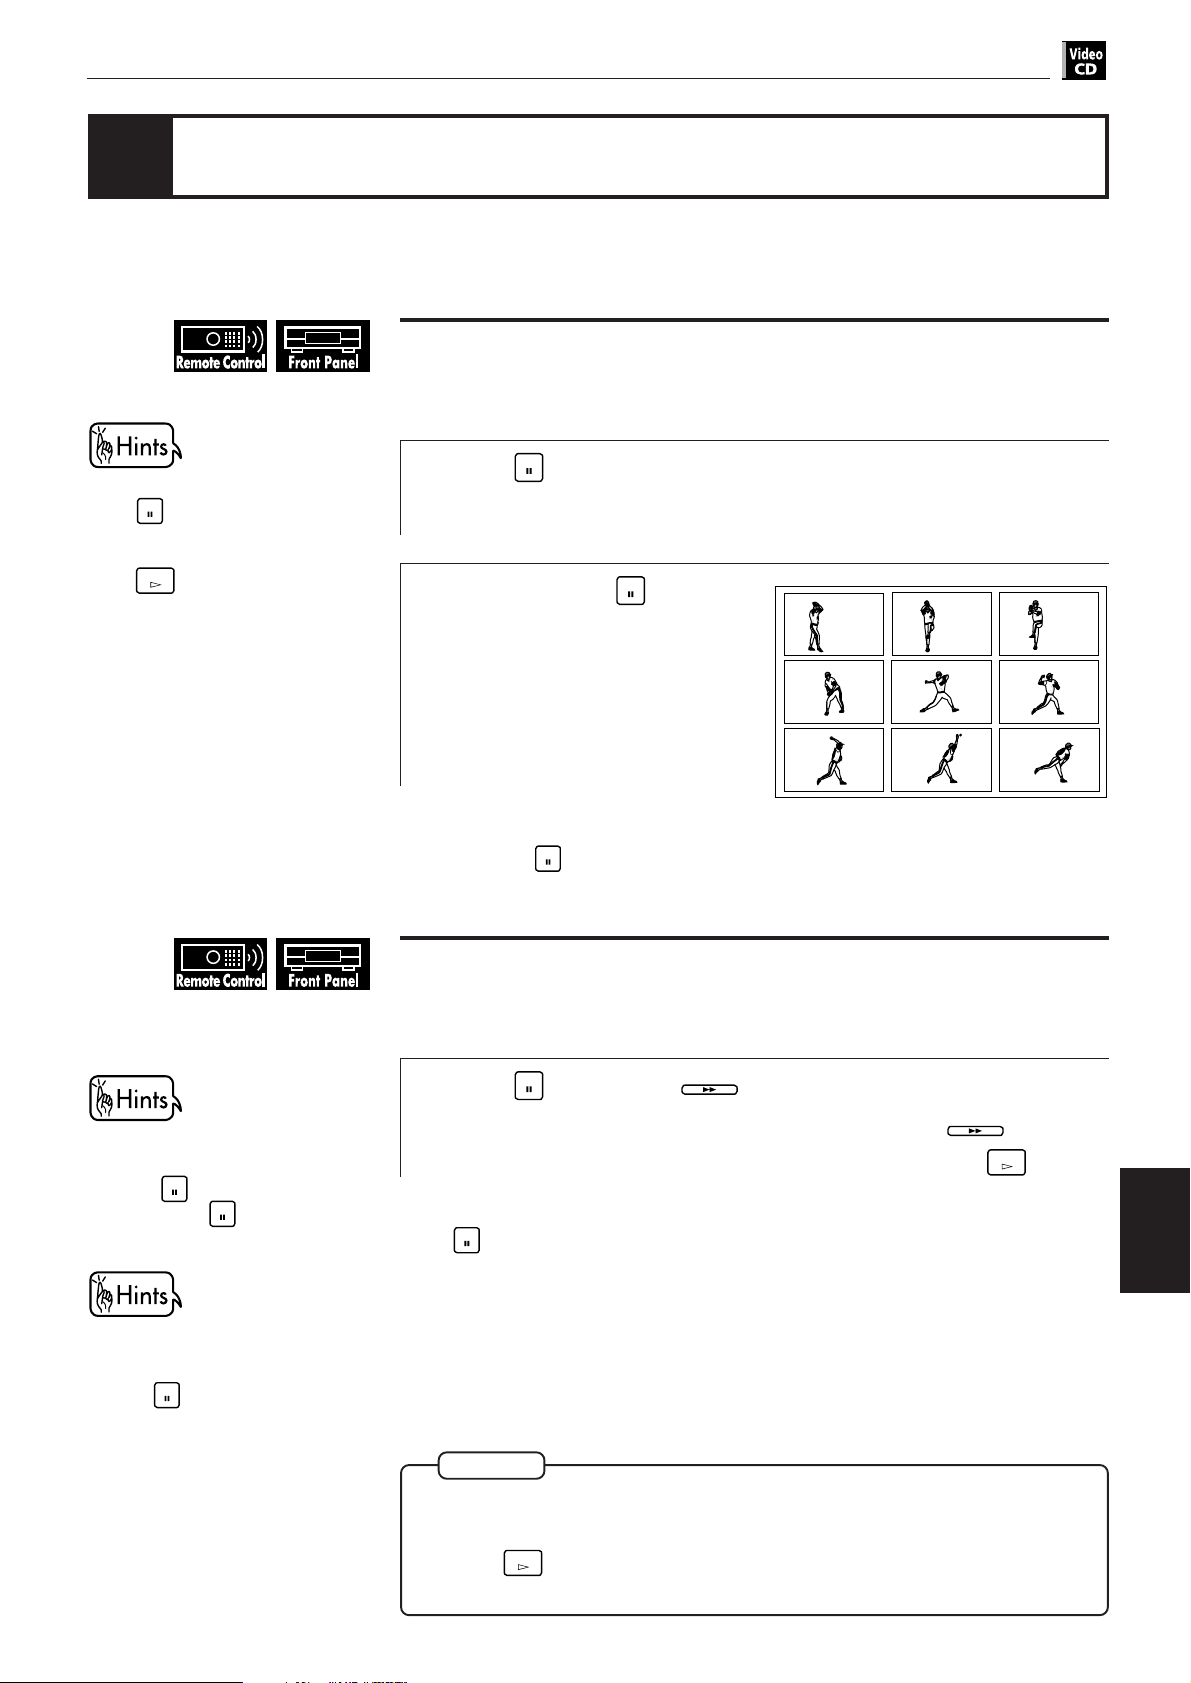
Video CD Operations
PAUSE
English
Playing in slow-motion
During this function, when you
PAUSE
press
appear on the TV screen and
playback pauses. When you
press
continuously appear on the TV
screen.
, next nine still pictures
PLAY
, nine still pictures
The unit can display a list of the still pictures, and playback a disc in slow-motion.
You can view video in more detail using these functions.
To display still pictures [STROBE]
7 During playback
Press
1
photograph.
Press and hold
2
than 1 seconds.
The nine still pictures appear on the
TV screen and playback pauses.
PAUSE
at the point you want to view like as a continuous
for more
Español
Portugés
Chinese
You can enjoy advancing the
picture frame-by-frame by
pressing
time you press
advances one frame.
You can also use the SHUTTLE
knob for slow-motion play.
1. Press
PAUSE
during pause. Each
PAUSE
, the picture
PAUSE
to pause playback.
To cancel strobe play
Press and hold
PAUSE
more than 1 second.
To playback in slow-motion [SLOW]
7 During playback
Press
1
The unit play the slowest speed, and each time you press
playback speed increases. To return to normal playback, press
To pause slow-motion play
PAUSE
Press
PAUSE
, then press
.
SLOW(+)
.
SLOW(+)
, the
PLAY
.
Video CD
operations
2. Turn the SHUTTLE knob to the
right to play in slow-motion.
You can adjust the playback
speed by turning the SHUTTLE
knob.
NOTES
The sound is muted during slow-motion play.
¶ To cancel slow-motion play
Press
PLAY
.
¶ Reverse slow playback is not possible on a Video CD disc.
81
Page 84
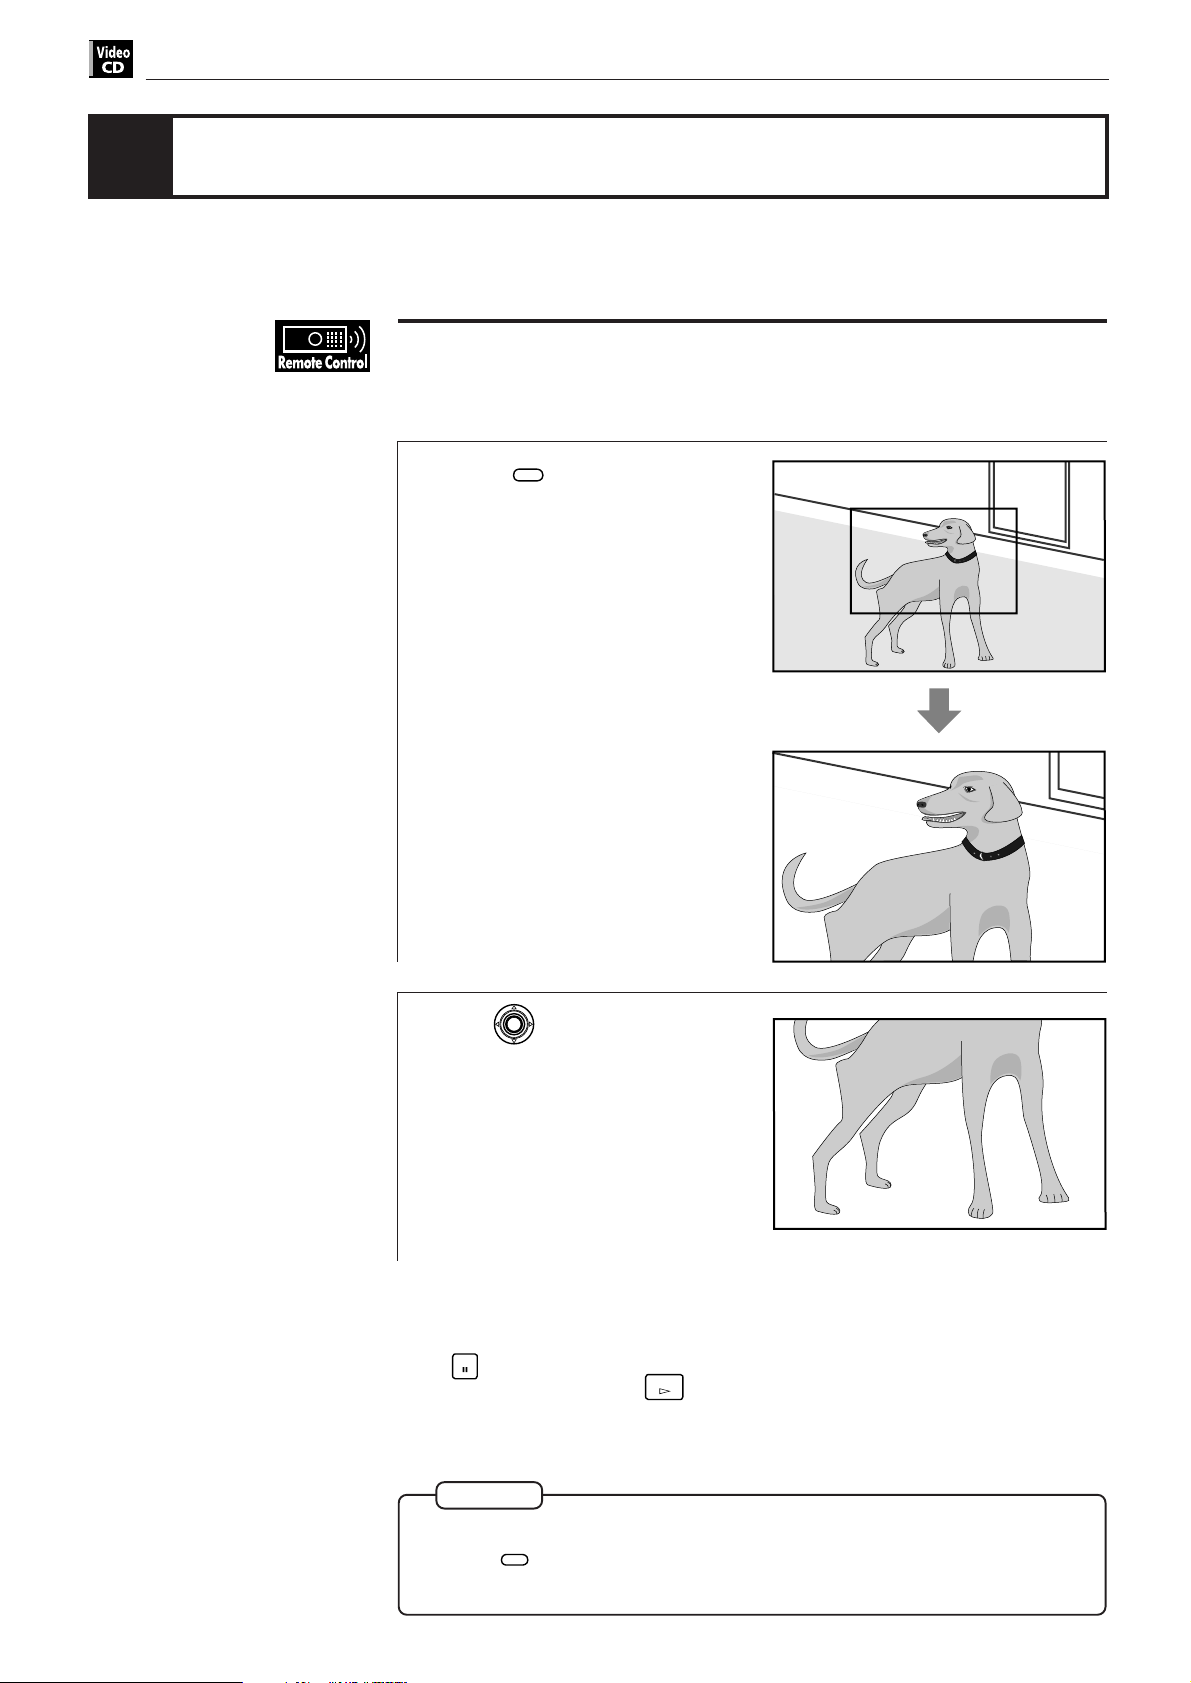
Video CD Operations
Playing a scene close-up
The unit can zoom in a part of the scene. You can view any part of the scene
close-up.
To playback a scene close-up [ZOOM]
7 During playback or pause
Press
1
[ZOOM] appears on the TV screen.
The unit zooms in to the center part
of the scene to produce a doublesized image.
Use to move the
2
ZOOM
.
zoomed-in scene.
ZOOM
ZOOM
82
To pause zoom play
PAUSE
Press
To resume zoom play, press
.
PLAY
.
NOTES
To cancel zoom play
ZOOM
Press
.
¶ During zoom play, the picture may be garbled or noisy.
Page 85
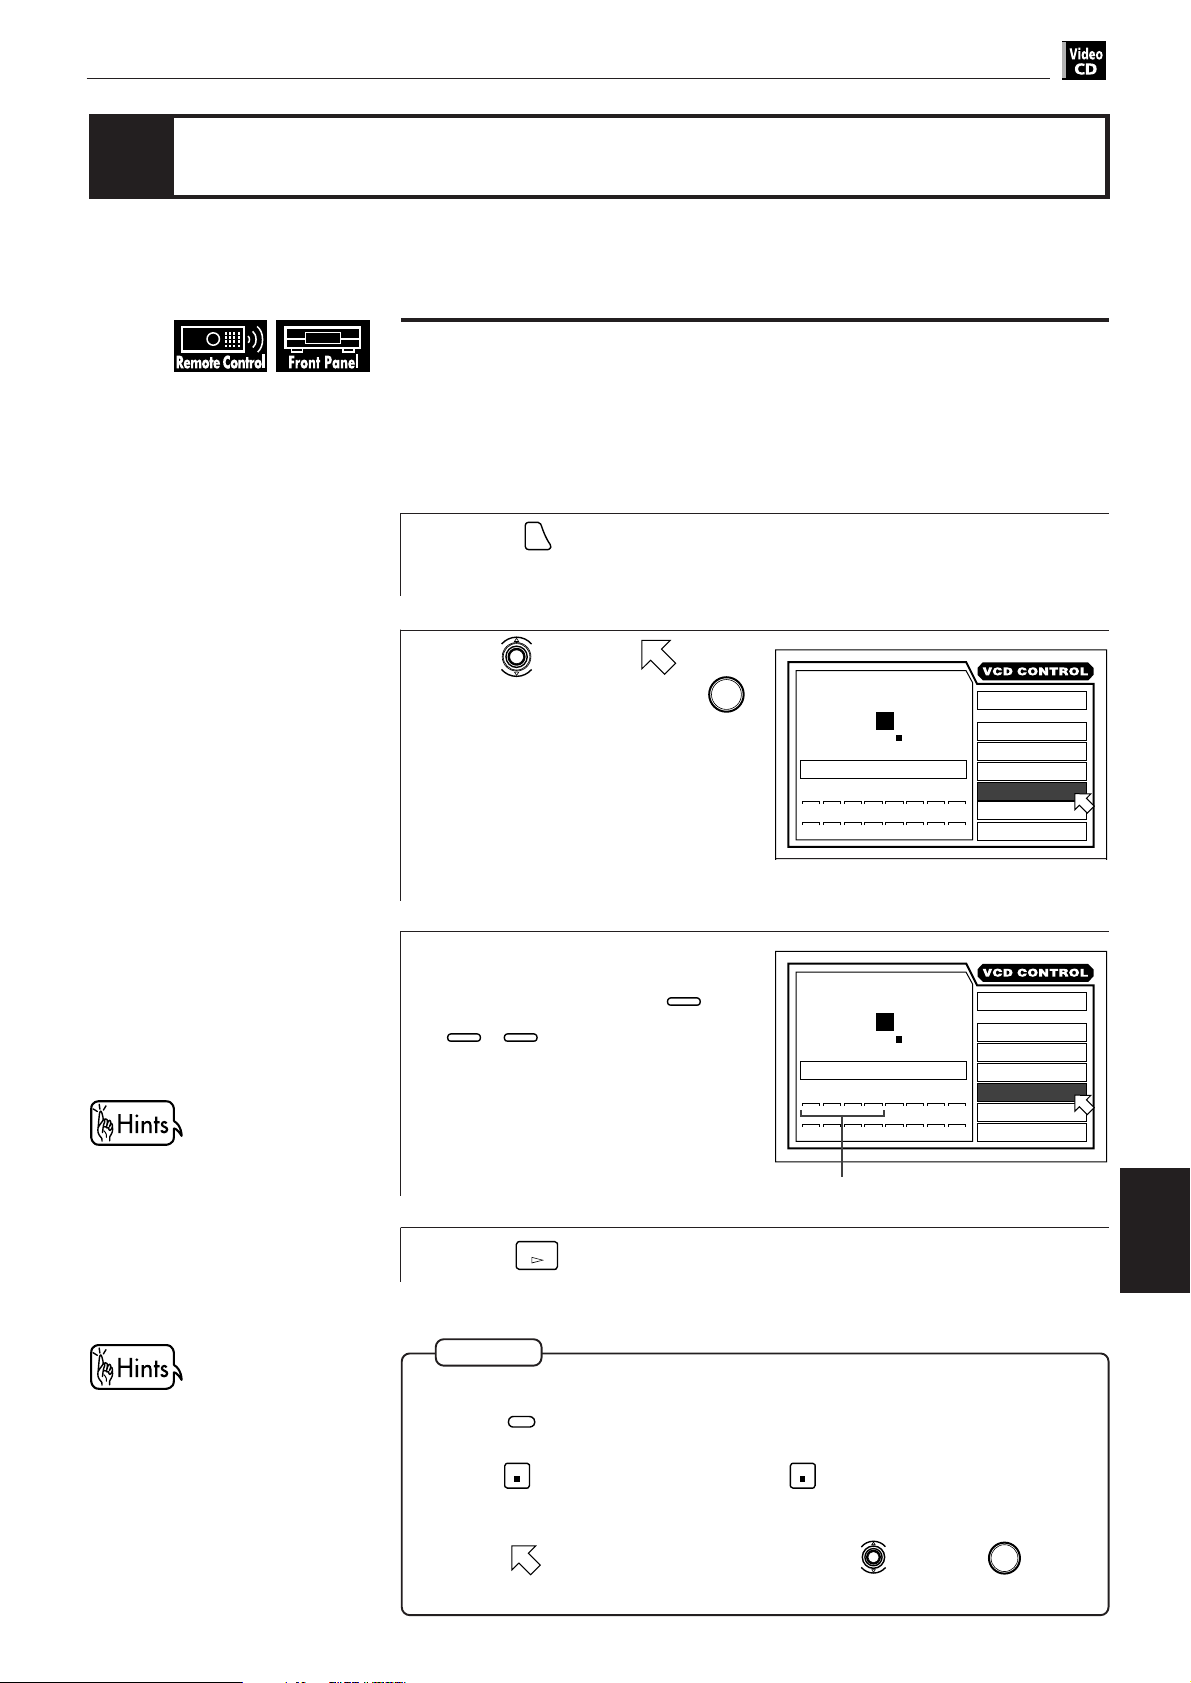
Video CD Operations
English
Changing the track order
You can play tracks on a Video CD in the desired order or in random order.
To playback in the desired order [PROGRAM]
By creating a program, you can enjoy listening to your favorite tracks in any
order.
7 During stop mode only
Press
1
The on screen display appears on the TV screen.
Use to move to
2
[PROGRAM] and press
The color of “PROGRAM” changes.
ON SCREEN
.
ENTER
Español
Portugés
Chinese
MIN SEC
TRACK 01
.
STOP
PRESS NUMERIC KEY
192103114125136147159
EACH
3 : 54TIME
REMAIN
TIME SELECT
REPEAT
A-B REPEAT
TIME SEARCH
PROGRAM
RANDOM
16
INTRO
When all of the programmed tracks
have finished playback, the unit
stops but the program remains.
You can program tracks during
playback.
Select the tracks in the
3
1
desired order using
10
+10
,
.
to
Up to 16 tracks can be
programmed. You may select the
same track more than once.
4
Press
PLAY
to start program play.
NOTES
¶ When you make a mistake in step 3:
Press
CANCEL
. The last track programmed is erased.
¶ To clear program play
STOP
Press
to stop playback, then press
tracks are erased.
¶ To quit the program play
Move
“PROGRAM” returns to its original color.
to [PROGRAM] in the display using and press
MIN SEC
TRACK 01
PRESS NUMERIC KEY
1
2
3
1
5
8
9
10
11
STOP
4125136147159
4
EACH
3 : 54TIME
REMAIN
16
Selected track number
STOP
again. All the programmed
TIME SELECT
REPEAT
A-B REPEAT
TIME SEARCH
PROGRAM
RANDOM
INTRO
ENTER
.
Video CD
operations
83
Page 86

Video CD Operations
To playback tracks in random order [RANDOM]
The unit can play tracks in random order.
7 During stop
• When all tracks have been played
once, random play ends.
• The same track will not be played
back more than once during
random play.
Press
1
The on screen display appears on the TV screen.
Use to move to
2
ON SCREEN
.
[RANDOM].
Press
3
7 Random play begins.
ENTER
.
TRACK 01 3 : 54TIME
STOP
MIN SEC
EACH
REMAIN
TIME SELECT
REPEAT
A-B REPEAT
TIME SEARCH
PROGRAM
RANDOM
INTRO
84
NOTE
¶ To stop random play
STOP
Press
.
Page 87
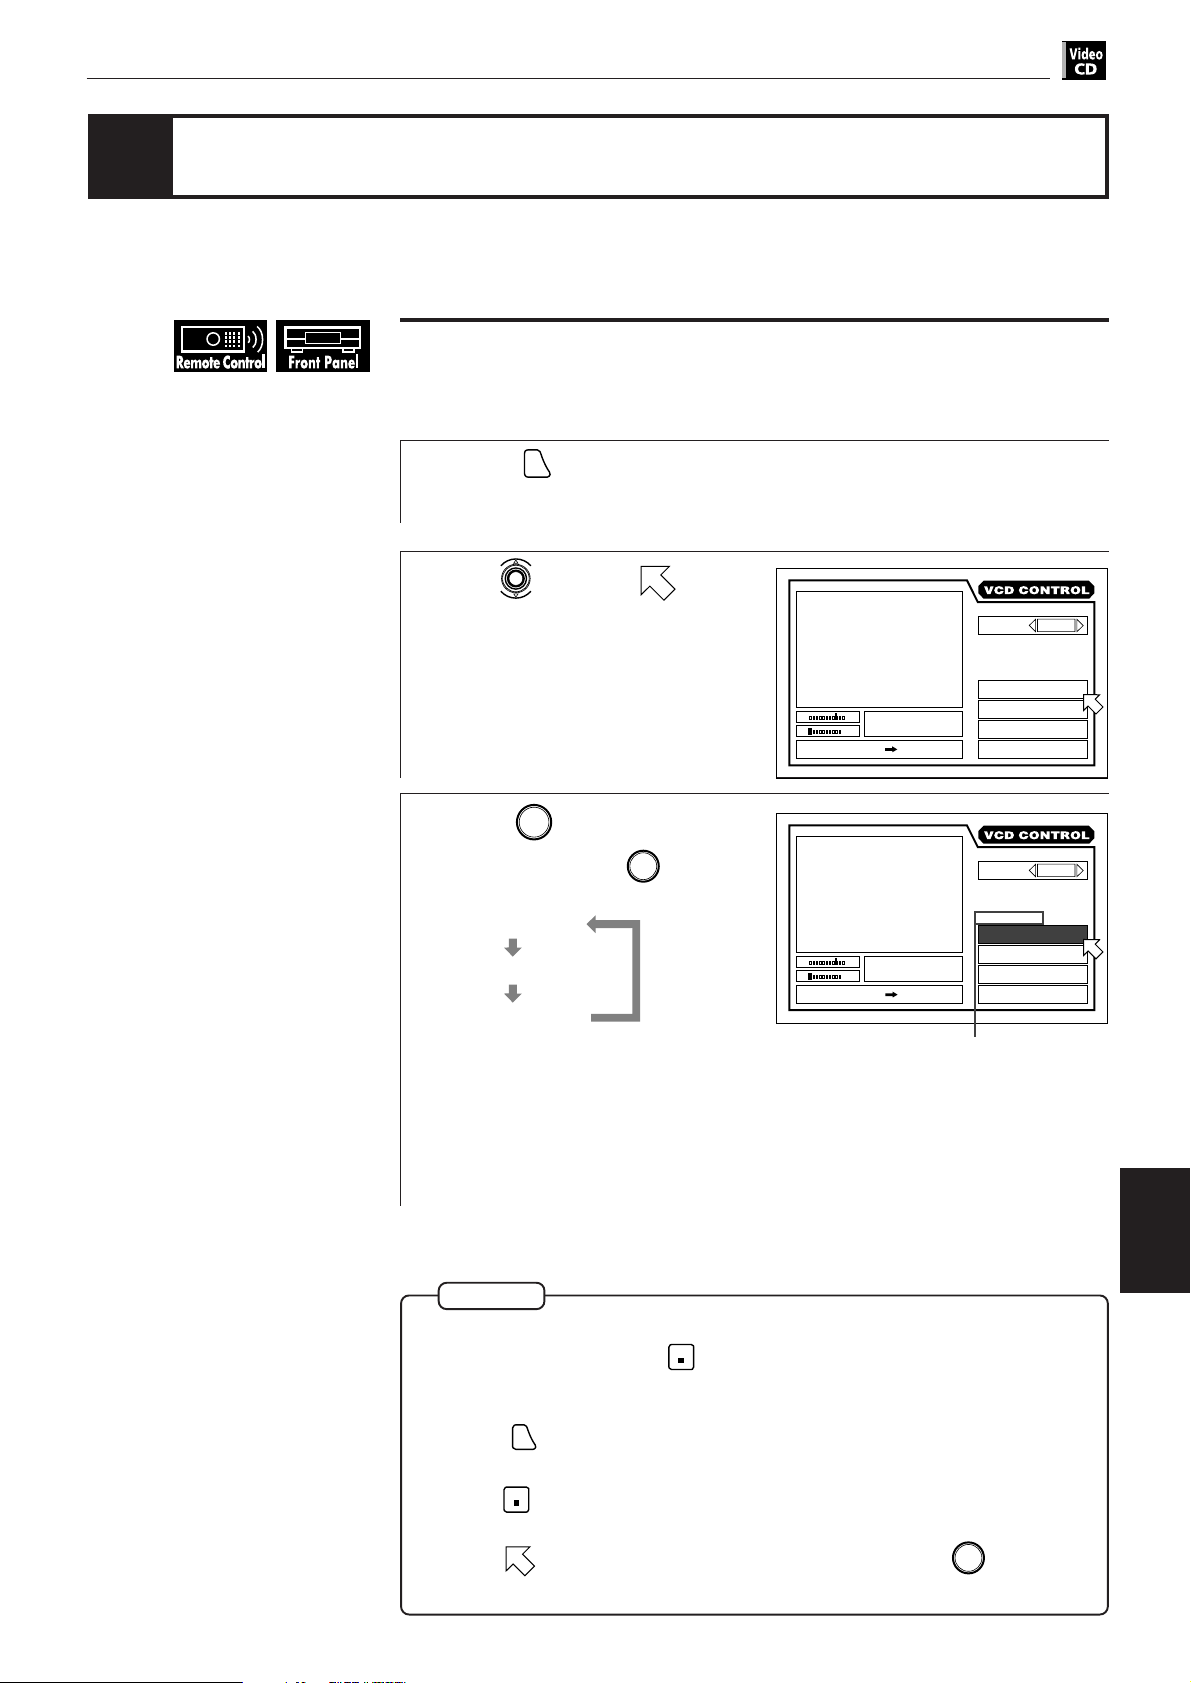
Video CD Operations
English
Repeat playback
The unit can repeat playback the current title or current chapter and you can also
select a desired part for repeat playback.
To repeat a current track or all tracks [REPEAT]
7 During playback without PBC function
Press
1
The on-screen display appears on the TV screen.
Use to move to
2
[REPEAT].
ON SCREEN
Español
Portugés
Chinese
.
L / R
REPEAT
A-B REPEAT
TIME SEARCH
PBC CALL
St. End
010 Mb
PRESS ENTER EXECUTE
TRK.
03
TIME
34 : 58
AUDIO
Press
3
Each time you press
ENTER
.
ENTER
, the repeat
AUDIO
mode changes as follows:
REPEAT ALL
REPEAT 1
St. End
010 Mb
PRESS ENTER EXECUTE
TRK.
03
TIME
34 : 58
REPEAT ALL
A-B REPEAT
TIME SEARCH
No indication
(off)
Selected repeat mode
REPEAT ALL:
All the tracks are played repeatedly.
REPEAT 1:
The current track is played repeatedly.
7 The current track or all tracks is/are played repeatedly.
NOTES
Repeat play function cannot be used during playback with PBC function. To
use this function, press
number by using the numeric buttons.
STOP
to stop playback and then specify any track
REPEAT
PBC CALL
L / R
Video CD
operations
¶ To turn off the on-screen display
Press
ON SCREEN
.
¶ To quit repeat playback
STOP
Press
. The unit stops but remains in repeat play mode.
¶ To cancel repeat playback
Move
until [REPEAT] returns to its original color.
to [REPEAT] in the on screen display and press
ENTER
repeatedly
85
Page 88
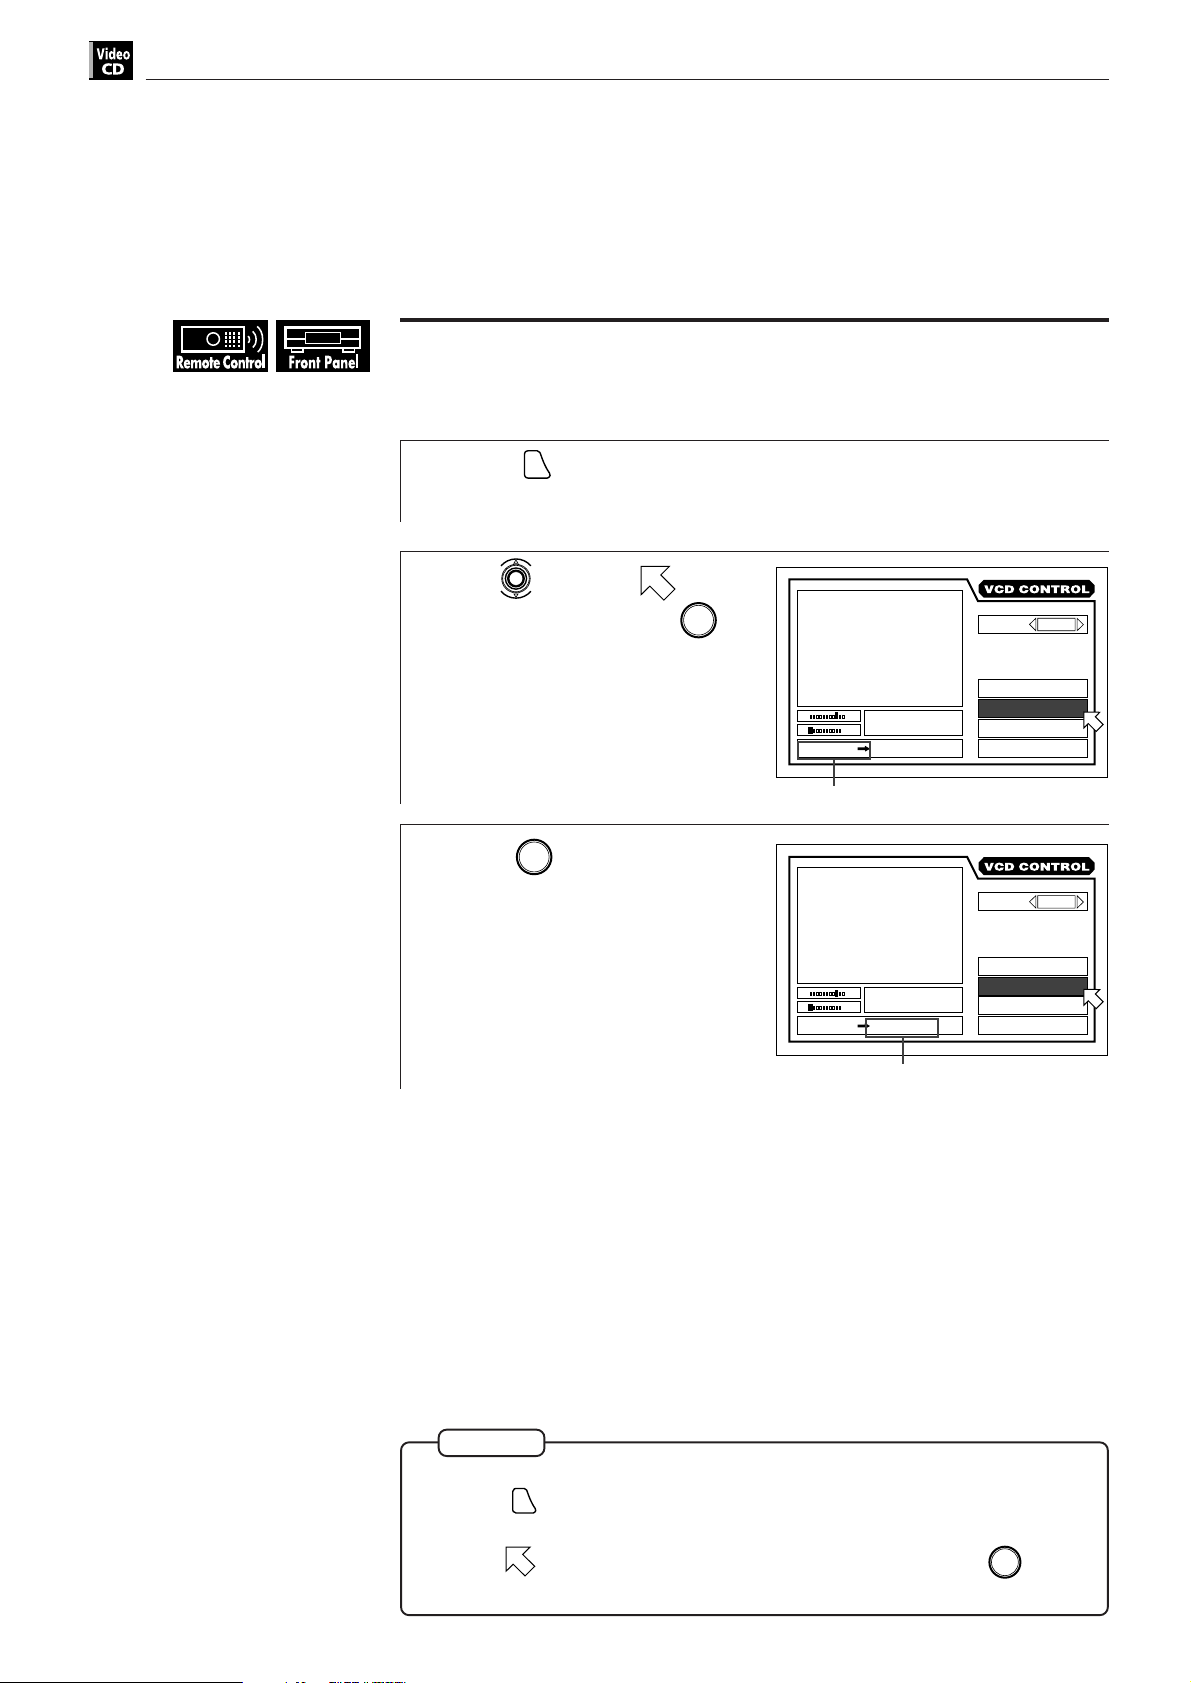
Video CD Operations
To repeat a desired part [A-B REPEAT]
7 During playback
1
Press
ON SCREEN
.
The on-screen display appears on the TV screen.
Use to move to [A-B
2
ENTER
REPEAT], then press
at
the beginning of the part you
want to repeat (point A).
The color of “A-B REPEAT” changes.
3
Press
ENTER
at the end of the
part you want to repeat
(point B).
St. End
010 Mb
A 3 4 8 5 : B:
TRK.
TIME
Point A
St. End
010 Mb
A 3 4 8 5 : B 3 522:
TRK.
TIME
L / R
AUDIO
REPEAT
03
34 : 58
03
35 : 22
A-B REPEAT
TIME SEARCH
PBC CALL
AUDIO
REPEAT
A-B REPEAT
TIME SEARCH
PBC CALL
L / R
86
Point B
7 The unit locates “A” and starts repeat playback between “A” and “B.”
NOTES
To turn off the on-screen display
Press
ON SCREEN
.
¶ To cancel A-B repeat
Move
to [A-B REPEAT] in the on screen display and press
[A-B REPEAT] returns to its original color.
ENTER
until
Page 89
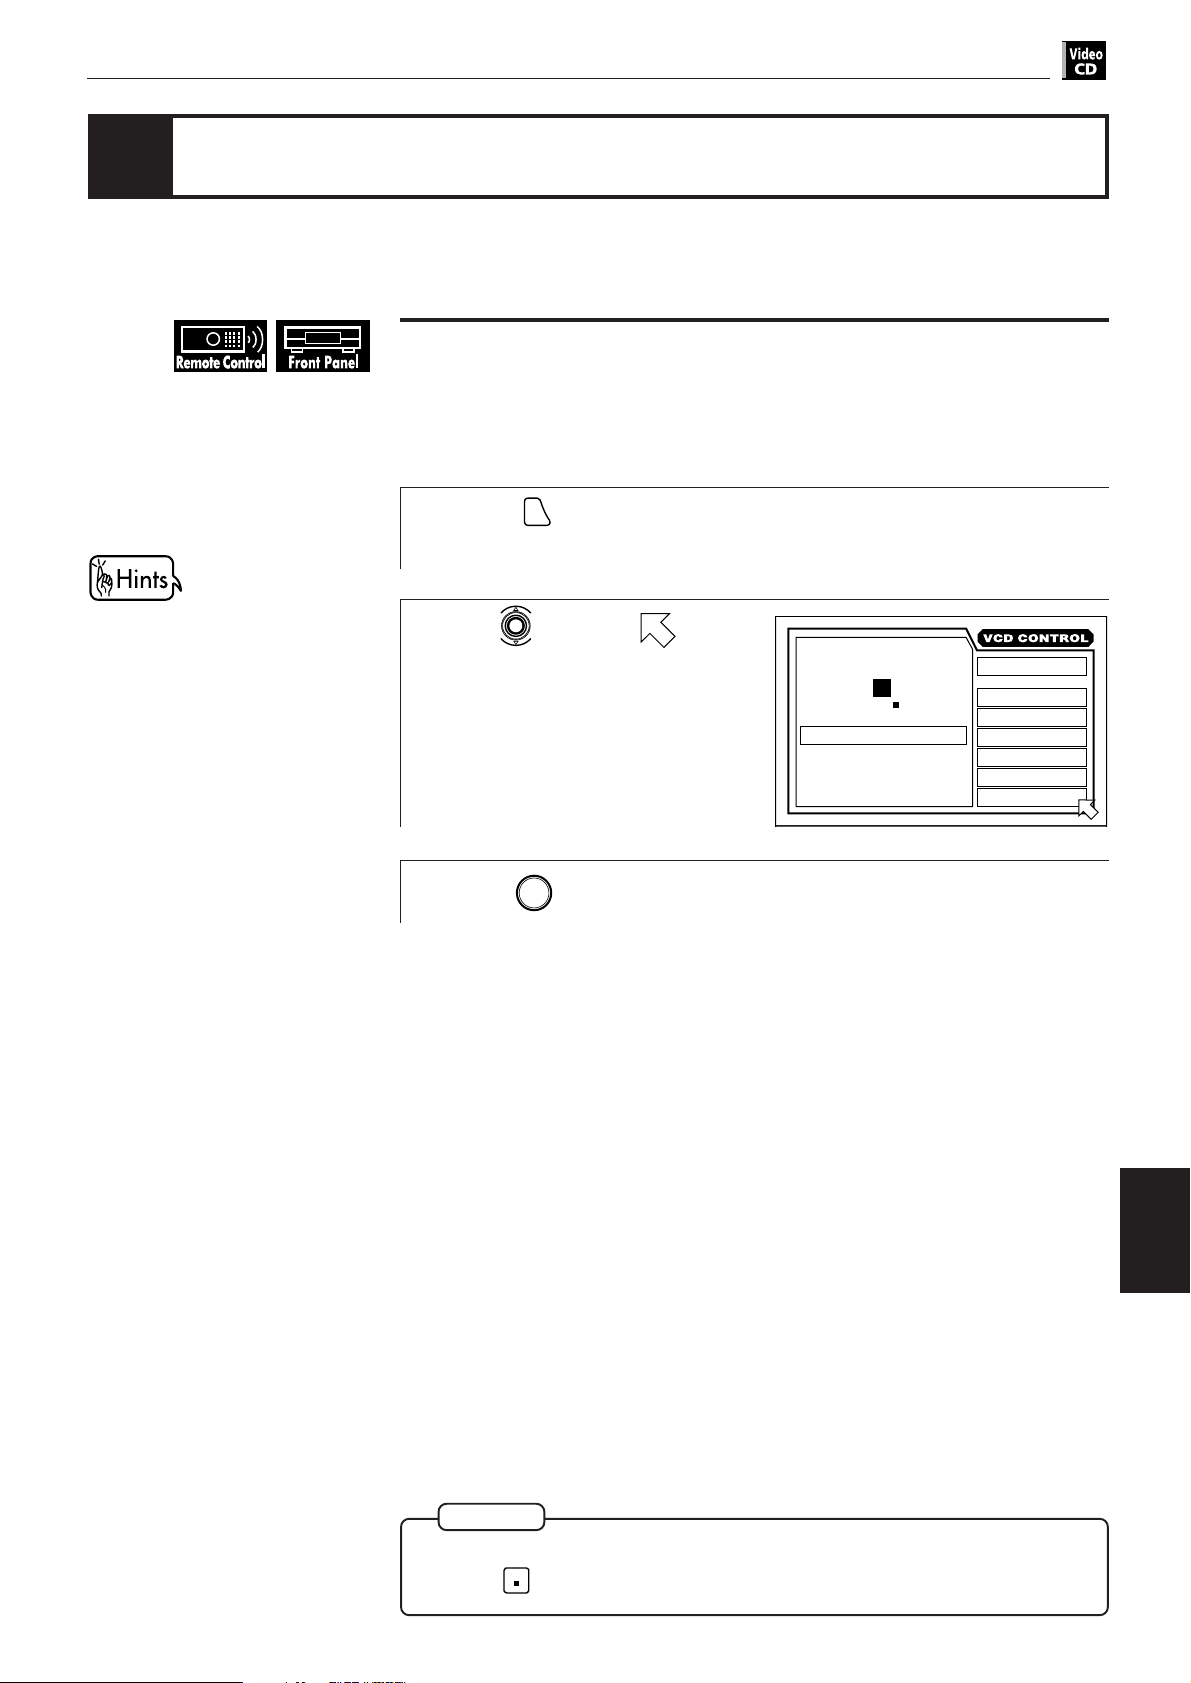
Video CD Operations
English
Sampling all tracks
When all tracks have been played
once, INTRO scan quits.
You can sample the tracks by listening to a short segment of each track in order.
The unit plays the first 10 seconds of each track.
To playback only the beginning of each track
[INTRO]
7 During stop mode
Press
1
The on-screen display appears on the TV screen.
Use to move to
2
[INTRO].
ON SCREEN
.
MIN SEC
TRACK 01 3 : 54TIME
STOP
EACH
REMAIN
TIME SELECT
REPEAT
A-B REPEAT
TIME SEARCH
PROGRAM
RANDOM
INTRO
Español
Portugés
Chinese
3
Press
ENTER
.
7 The first 10 seconds of each track on a disc are played back in numerical order
from the first track.
Video CD
operations
NOTE
¶ To stop INTRO scan
STOP
Press
.
87
Page 90

Video CD Operations
Adjusting the sound to suit preferences
You can select the prefered audio channel.
To change the audio channel [AUDIO]
In some karaoke discs, one of the audio channels includes a vocal while the other
does not. With such discs, you can choose to enjoy karaoke without the vocal or
with the vocal by selecting the audio channel to be played back.
7 During playback
1
Press
ON SCREEN
.
The on-screen display appears on the TV screen.
Use to move to
2
[AUDIO].
Select the audio channel(s)
3
to be played back using
.
L/R: You hear normal stereo
playback.
L: You hear the L (Left) channel
signal played back from both
the left and right speakers.
R: You hear the R (Right)
channel signal played back
from both the left and right
speakers.
St. End
010 Mb
SELECT KEY
St. End
010 Mb
SELECT KEY
AUDIO
REPEAT
TRK.
03
TIME
34 : 58
TRK.
03
TIME
34 : 58
A-B REPEAT
TIME SEARCH
PBC CALL
AUDIO
REPEAT
A-B REPEAT
TIME SEARCH
PBC CALL
Selected audio channel
L / R
L
88
NOTES
¶ To turn off the on-screen display
Press
ON SCREEN
.
¶ This function may not work correctly when the 3D PHONIC function is on.
Page 91
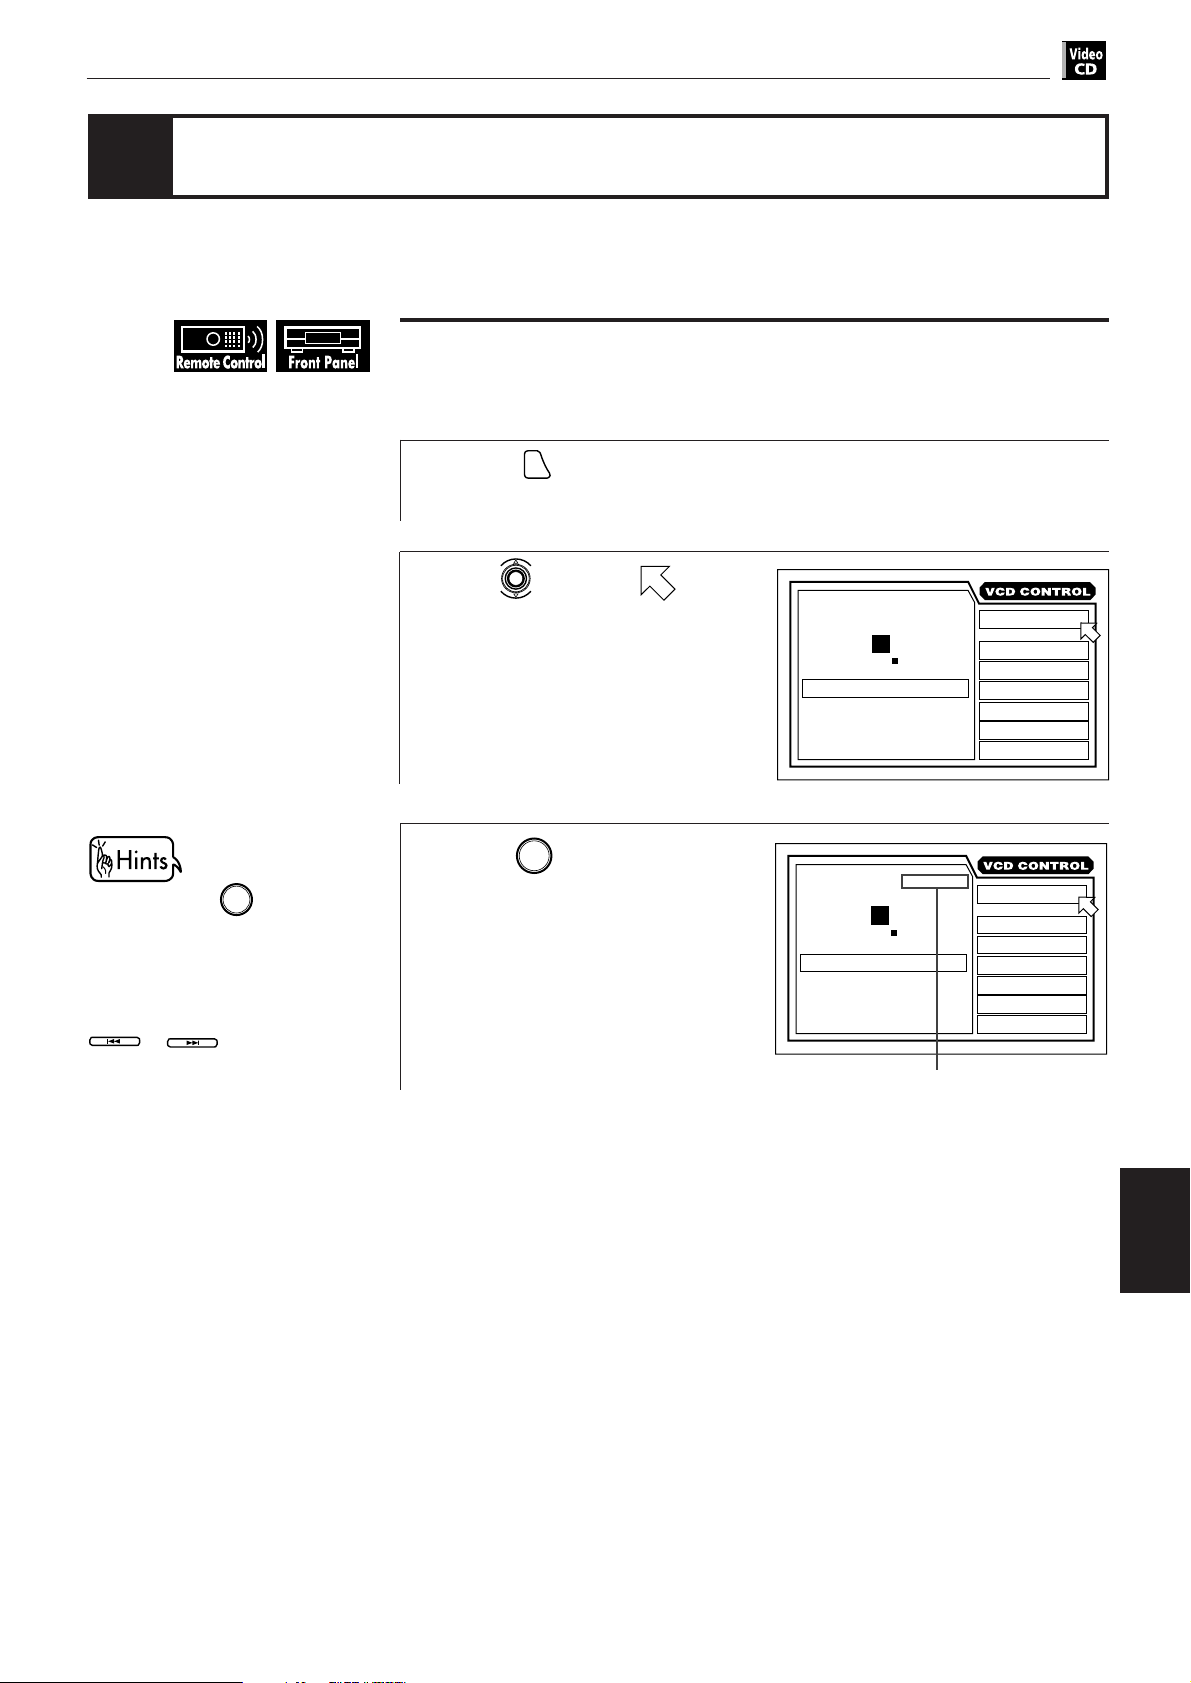
Video CD Operations
English
Checking the total disc time
You can check the total and each time from the on screen display on the TV
screen or display window on the front panel.
To select the time display mode [TIME SELECT]
7 During stop mode
Press
1
The on-screen display appears on the TV screen.
Use to move to
2
[TIME SELECT].
ON SCREEN
.
TRACK 01 3 : 54TIME
STOP
MIN SEC
EACH
REMAIN
Español
Portugés
Chinese
TIME SELECT
REPEAT
A-B REPEAT
TIME SEARCH
PROGRAM
RANDOM
INTRO
NEXT
ENTER
repeatedly
.
When you press
until [EACH REMAIN] appears on
the TV screen, the recorded time
of the displayed track appears
on the TV screen. You can
change the track by pressing
or
PREVIOUS
3
Press
ENTER
until [TOTAL
REMAIN] appears on the TV
screen.
Total disc time appears on the TV
screen.
MIN SEC
TRACK 16 55 : 22TIME
STOP
TOTAL
REMAIN
TIME SELECT
A-B REPEAT
TIME SEARCH
PROGRAM
RANDOM
Total disc time of the disc
REPEAT
INTRO
Video CD
operations
89
Page 92

Video CD Operations
90
Page 93

KARAOKE Operations
KARAOKE operations
This chapter explains KARAOKE functions of the unit. You can enjoy
singing Karaoke using various functions including echo and chorus
effects. In addition, the unit can score your performances.
English
Español
Portugés
Chinese
Introduction
Table of contents of this chapter
7 Preparation
Set the remote control unit to KARAOKE mode ................................................. 92
Turning on the KARAOKE function ....................................................................... 92
Connecting microphones ....................................................................................... 92
7 Reserving songs ............................................................................................ 93
7 Selecting audio
Selecting audio track(s) – AUDIO .......................................................................... 94
Selecting Karaoke sound – KARAOKE SOUND ................................................... 95
Masking the vocal recorded on a disc – VOCAL MASK ..................................... 96
Playing back the guide vocal only when you stop singing – VOCAL REPLACE.... 97
7 Adding an effect to your voice
Adding an echo effect – ECHO .............................................................................. 98
Adding various effects to vocal – VOCAL EFFECT .............................................. 98
7 Shifting the musical key ........................................................................... 99
7 Rating your voice ........................................................................................ 100
knowledge
Preliminary
Getting started
Basic
operations
operations
DVD VIDEO
adjustment
Setting and
Audio CD
operations
Video CD
operations
KARAOKE
KARAOKE
operations
operations
Additional
information
91
Page 94

KARAOKE operations
Preparation
Set the remote control unit to KARAOKE mode
1
Turning on the KARAOKE function
7 When the switch above is at the KARAOKE position,
1
Set
KARAOKE
Press
Each press of
on the remote control unit to KARAOKE.
ON/OFF
to turn on the KARAOKE function.
KARAOKE
ON/OFF
toggles ON and OFF. When ON, “KARAOKE” appears in
TV
KARAOKE
DVD
the display on the front panel.
When you connect the
microphone(s) to the unit, the
KARAOKE function turns on
automatically. When disconnecting
the microphone(s), it turns off
automatically.
To enjoy Karaoke using a menu
screen:
7 Insert a DVD Karaoke disc, then
1. Press
MENU
or
TITLE
.
The menu appears on the TV
screen.
2. Use to select the desired
song, then press
ENTER
.
The unit starts playback from
the selected song. See page 34
for detailed information.
Connecting microphones
Connect microphone(s) to the MIC 1/2 jack(s) on the front
1
panel.
DVD PLAYER
KARAOKE
ON/OFF RESERVE
STANBAY/ON
STANDBY
/
VIDEO CD
PHONES LEVELPHONES
MIN MAX
MIC 1 LEVEL
MIN MAX
MIC 1 MIC 2
CANCEL
MIC 2 LEVEL
MIN MAX
DIGEST
3D PHONIC
MIC 1/2 jacks
NOTES
¶ To play back the disc, press
¶ To stop playback, press
¶ To pause playback, press
STOP
PAUSE
DVD / VIDEO CD / CD
.
RESUME
TITLE MENU
ENTER
DOLBY
ON SCREEN
D I G I T A L
OPEN/CLOSE
PLAY
.
.
SHUTTLE
+10
SKIP
54321
STOP PAUSE PLAY
1009876
92
¶ When playing back a DVD recorded with linear PCM or MPEG audio, you
cannot turn on the KARAOKE function.
¶ To adjust the microphone volume, use
Turning it clockwise raises the level, while turning it counter-clockwise
drops the level.
MIC 1 LEVEL
MIN MAX
.
Page 95

KARAOKE Operations
English
Reserving songs
To check the reserved
songs
KARAOKE
Press
bar appears on the TV screen. The
reserved songs appears on the bar.
To add song(s) to be
reserved
Press
bar appears in the TV screen. Then
press 1 to 10, and
the song number you want to
reserve.
To insert a song to be
reserved
When the reservation bar appears in
the TV screen, move to the
position you want to insert a song
using , then press 1 to 10,
and
you want to reserve.
When the on-screen
display appears on the TV
screen
you can also reserve song(s).
Pressing
reservation bar. Pressing
again returns to the previous
position.
T.
RESERVE
so that the reservation
RESERVE
KARAOKE
so that the reservation
RESERVE
+10
+10
to select the song number
KARAOKE
move to the
RESERVE
AUDIO
KARAOKE
SOUND
VOCAL
ECHO
EFFECT
KEY
CHAP.
TIME
- - -
03
- : - - : - -
CONTROL
A-B REPEAT
to select
KARAOKE
RESERVE
1 / 3
1
NORMAL
1
CHORUS
+3
You can reserve songs to play in the order you want while the disc is stopped. Up
to 12 songs can be reserved.
7 When the KARAOKE function is on,
Press
1
Press
2
The reservation bar appears in the
TV screen.
Press 1 to 10, and
3
STOP
KARAOKE
RESERVE
.
.
+10
to
RESERVE
RESERVE
1584
Reservation bar
select the song number you
want to reserve.
The song you entered is reserved
and
the bar.
Repeat step 3 to make more
reservations.
Press
4
7 The unit starts playback of reserved songs in the order you entered.
To cancel the reserved song(s)
Use to the song number you want to cancel, then press
To hide the reservation bar
Press
NOTES
¶ When appears on the TV screen in step 3:
12 songs are reserved.
¶ To cancel all songs
Press
mode.
¶ When playing back a DVD recorded with linear PCM or MPEG audio, you
cannot turn on the KARAOKE function.
moves to the next box in
PLAY
.
KARAOKE
.
RESERVE
STOP
when reservation bar appears on the TV screen during stop
CANCEL
.
Español
Portugés
Chinese
KARAOKE
operations
¶ For Audio CDs, the A-B repeat function cannot be operated while playing
back a reserved song.
93
Page 96
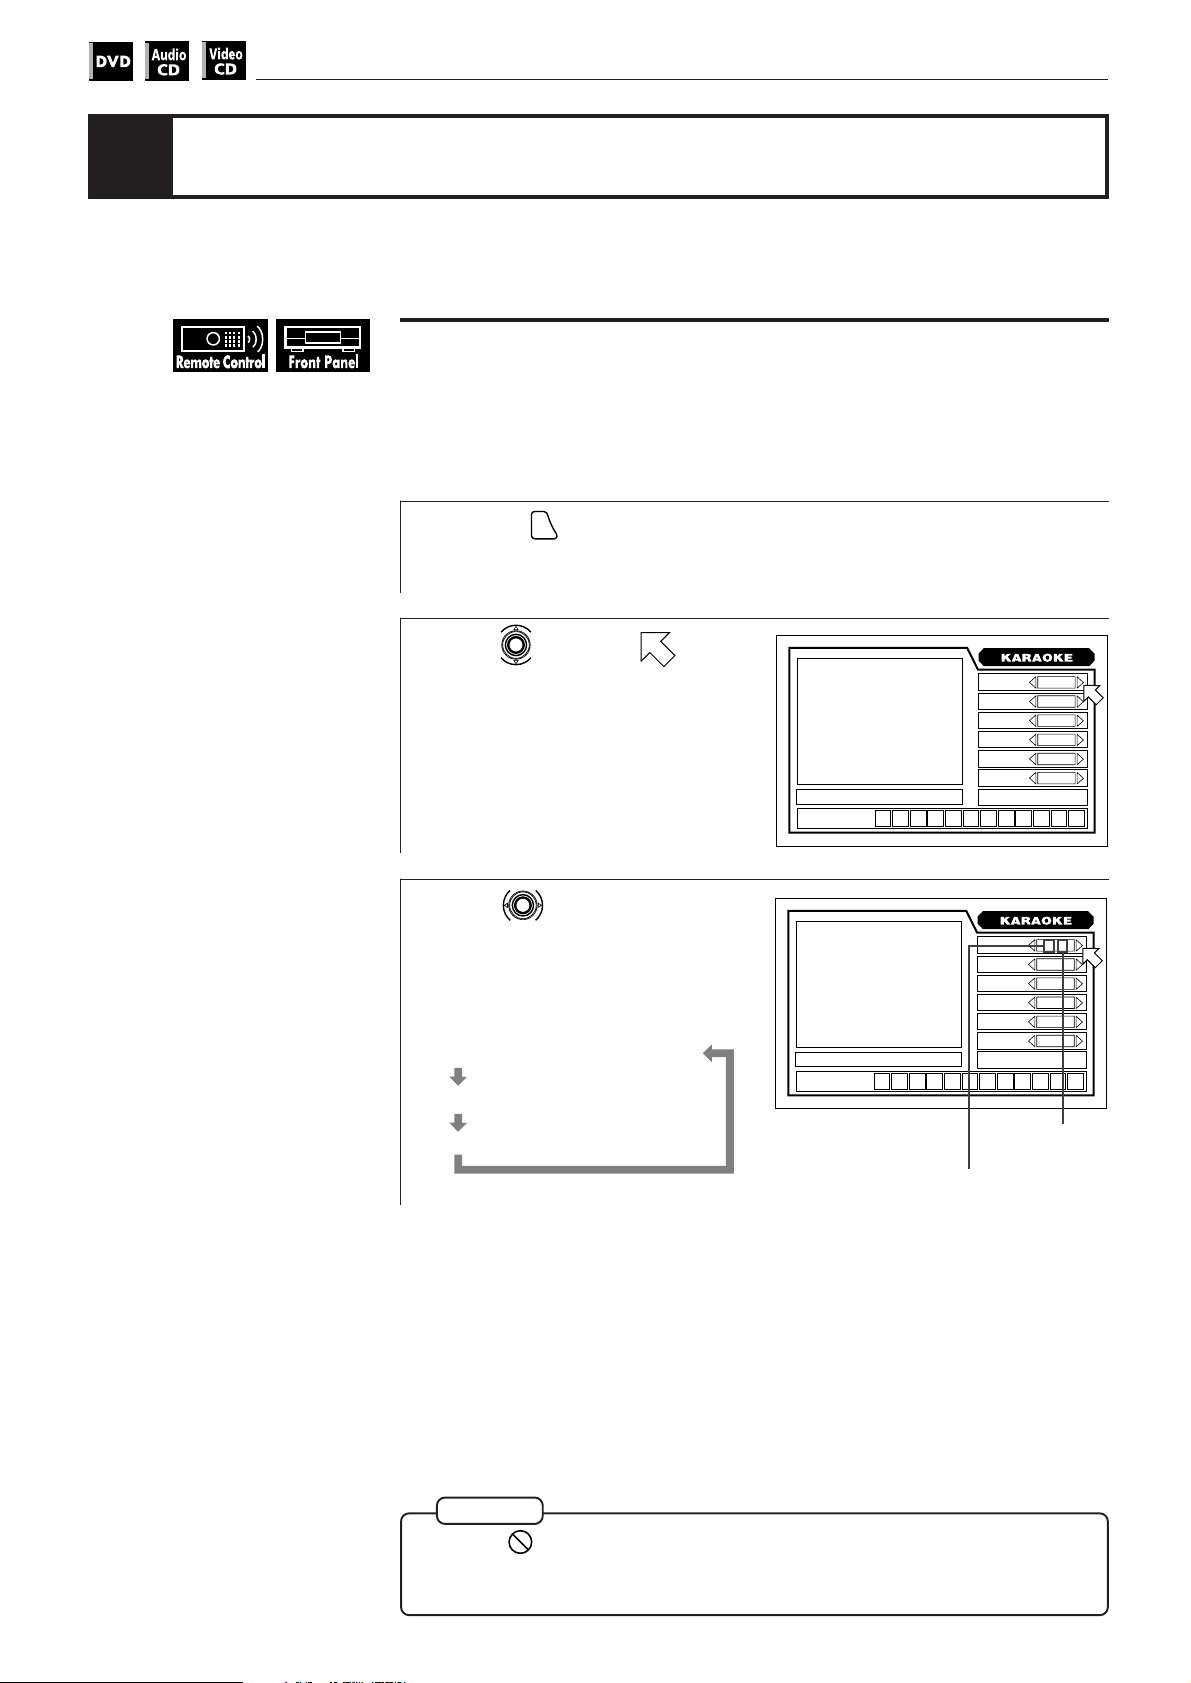
KARAOKE operations
Selecting audio
Most Karaoke discs have the capability of adding “Guide vocal” or “Guide
melody” to the Karaoke accompaniment.
Selecting audio track(s) [AUDIO]
With most DVD Karaoke discs, you can choose audio track(s) from some options
such as “with guide vocal”, “with guide melody” and “accompaniment only”.
You can select “AUDIO” only for DVD discs.
7 During playback, when the KARAOKE function is on
1
Press
ON SCREEN
.
The on-screen display for KARAOKE appears on the TV screen.
Use to move to
2
[AUDIO].
CHAP.
TIME
- - -
- : - - : - -
Use to select the
3
T.
03
RESERVE
desired audio to be played
back.
Example:
Multi audio karaoke1/3
With guide vocal2/3
CHAP.
T.
03
RESERVE
TIME
- - -
- : - - : - -
AUDIO
KARAOKE
SOUND
VOCAL
ECHO
EFFECT
KEY
CONTROL
A-B REPEAT
AUDIO
KARAOKE
SOUND
VOCAL
ECHO
EFFECT
KEY
CONTROL
A-B REPEAT
1 / 3
1
NORMAL
1
CHORUS
+3
1 / 3
1
NORMAL
1
CHORUS
+3
94
Accompaniment only3/3
Total number
of Audio track
Selected sound or channel
NOTE
¶ When appears on the TV screen
The disc does not contain multi audio tracks. Or the disc inhibits the audio
selection.
Page 97
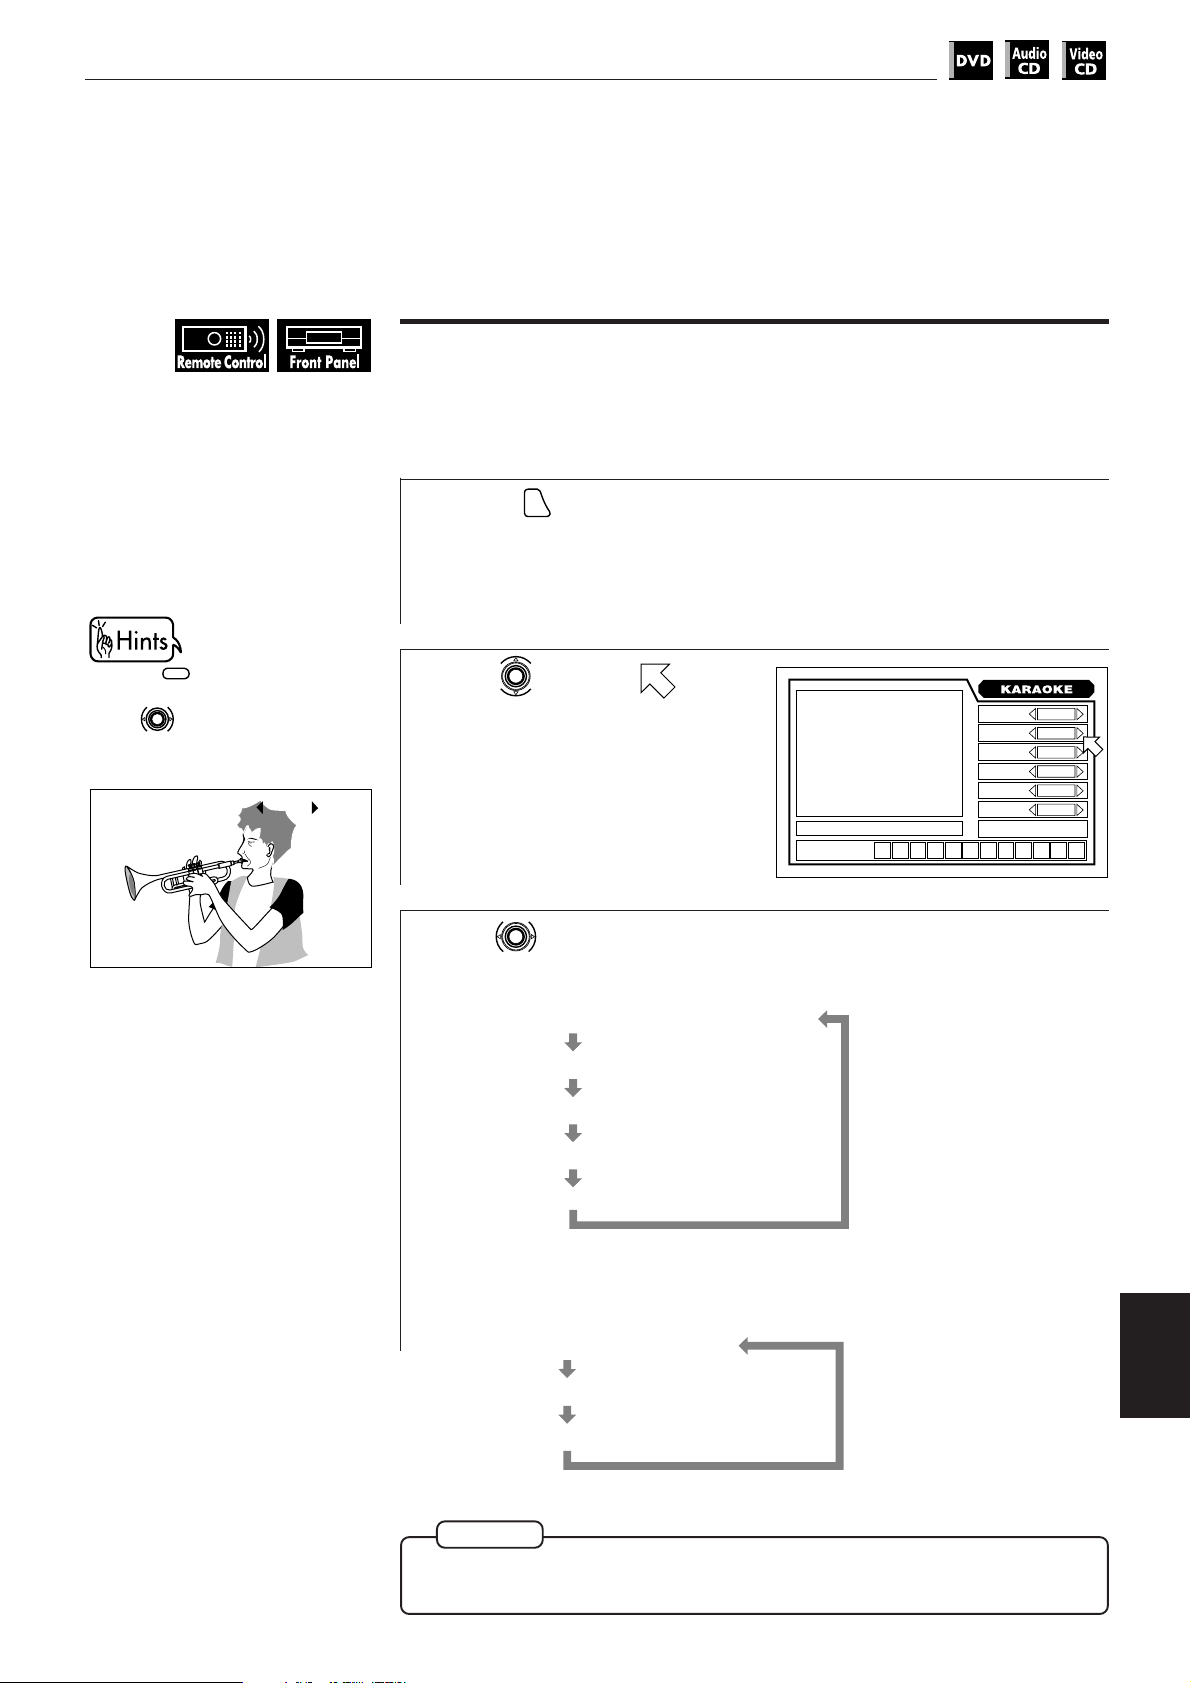
KARAOKE Operations
Selecting Karaoke sound [KARAOKE SOUND]
Among “Karaoke” DVD discs, there are “Multi-sound Karaoke” discs. With such a
disc, for example, you can duet with the other vocal part recorded in a disc.
7 During playback, when the KARAOKE function is on,
English
Español
Portugés
Chinese
1. Press
2. Use to select the desired
KARAOKE
during playback.
SOUND
sound to be played back within 10
seconds.
KARAOKE SOUND OFF
1
Press
ON SCREEN
.
The on-screen display for KARAOKE appears on the TV screen.
When playing back a “Multi-sound Karaoke” disc, [AUDIO] should be set to
1 (See page 94).
Use to move to
2
[KARAOKE SOUND].
CHAP.
T.
03
RESERVE
Use to select the desired sound to be played back.
3
TIME
- - -
- : - - : - -
AUDIO
KARAOKE
SOUND
VOCAL
ECHO
EFFECT
KEY
CONTROL
A-B REPEAT
Example 1: a multi-sound Karaoke DVD
With guide vocal (1)
1
2
ith guide vocal (2)
W
1 / 3
1
NORMAL
1
CHORUS
+3
W
1+2
PRO
OFF
ith guide vocal (1+2)
Only accompaniment
With guide melody
“2” and “1+2” above appear only with materials for vocal duet.
Example 2: a video or audio CD with Karaoke
Stereo audioL/R
L
Left channel audio
Right channel audio
R
NOTE
¶ With a DVD disc which does not contain “Multi-sound Karaoke”, [KARAOKE
SOUND] cannot be changed.
KARAOKE
operations
95
Page 98
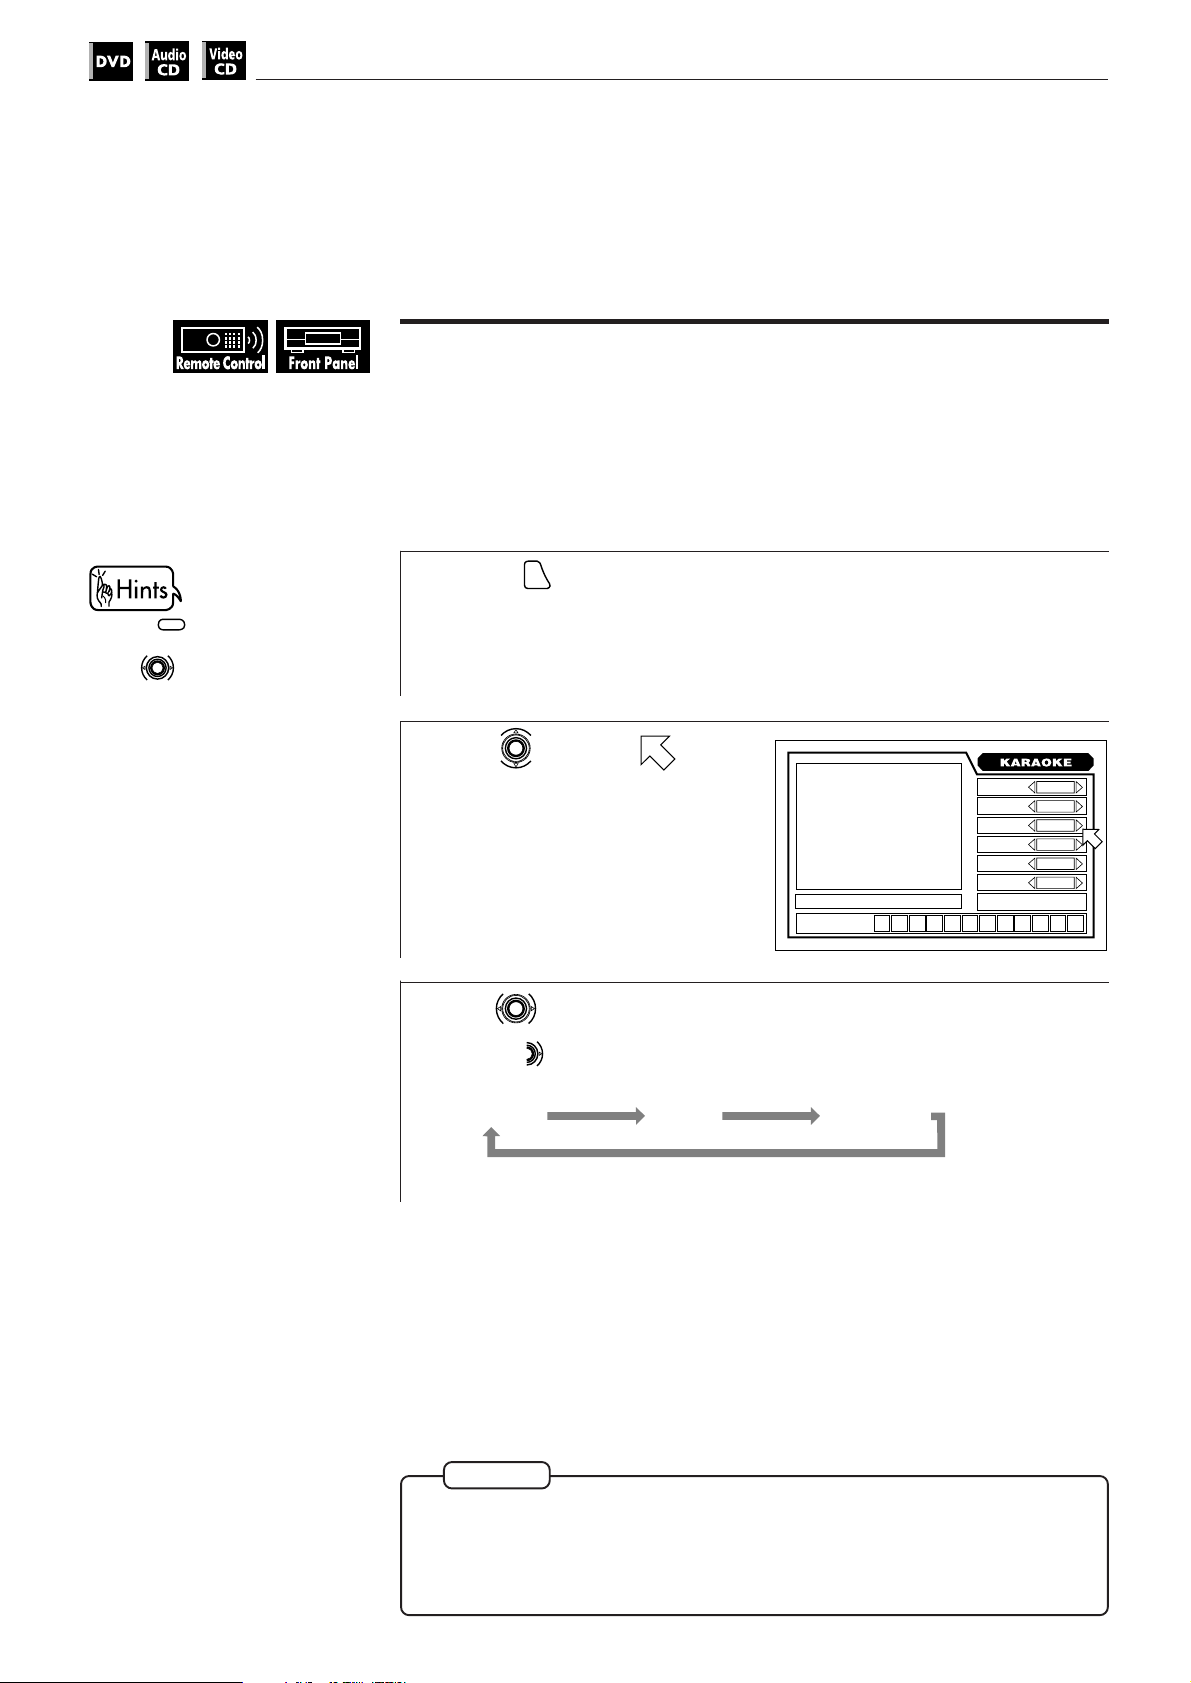
KARAOKE operations
Masking the vocal recorded on a disc [VOCAL MASK]
Using the Voice cancel function, you can mask the vocal recorded on the normal
disc which is not for Karaoke.
When playing back a Karaoke disc, such as a disc with the multiplex audio and
multi-sound Karaoke, eliminate the vocal by selecting “KARAOKE SOUND”,
instead of “VOCAL MASK”
7 During playback, when the KARAOKE function is on,
1. Press
2. Use to select [MASK] within
10 seconds.
during playback.
VOCAL
REPLACE
1
Press
ON SCREEN
.
The on-screen display for KARAOKE appears on the TV screen.
If [KARAOKE SOUND] is set to L or R, the voice cancel function does not
work correctly. Change the setting to L/R (See page 95).
Use to move to
2
[VOCAL].
Use to select [MASK].
3
CHAP.
T.
03
RESERVE
TIME
- - -
- : - - : - -
AUDIO
KARAOKE
SOUND
VOCAL
ECHO
EFFECT
KEY
CONTROL
Pressing cycled the mode as
shown below.
REPLACEMASKNORMAL
1 / 3
1
NORMAL
1
CHORUS
+3
A-B REPEAT
96
NOTES
¶ If [KARAOKE SOUND] is set to L or R, the vocal mask function does not
work correctly.
¶ With some materials, such as recorded in monaural and sung by duet, the
voice may not be satisfactorily masked.
Page 99
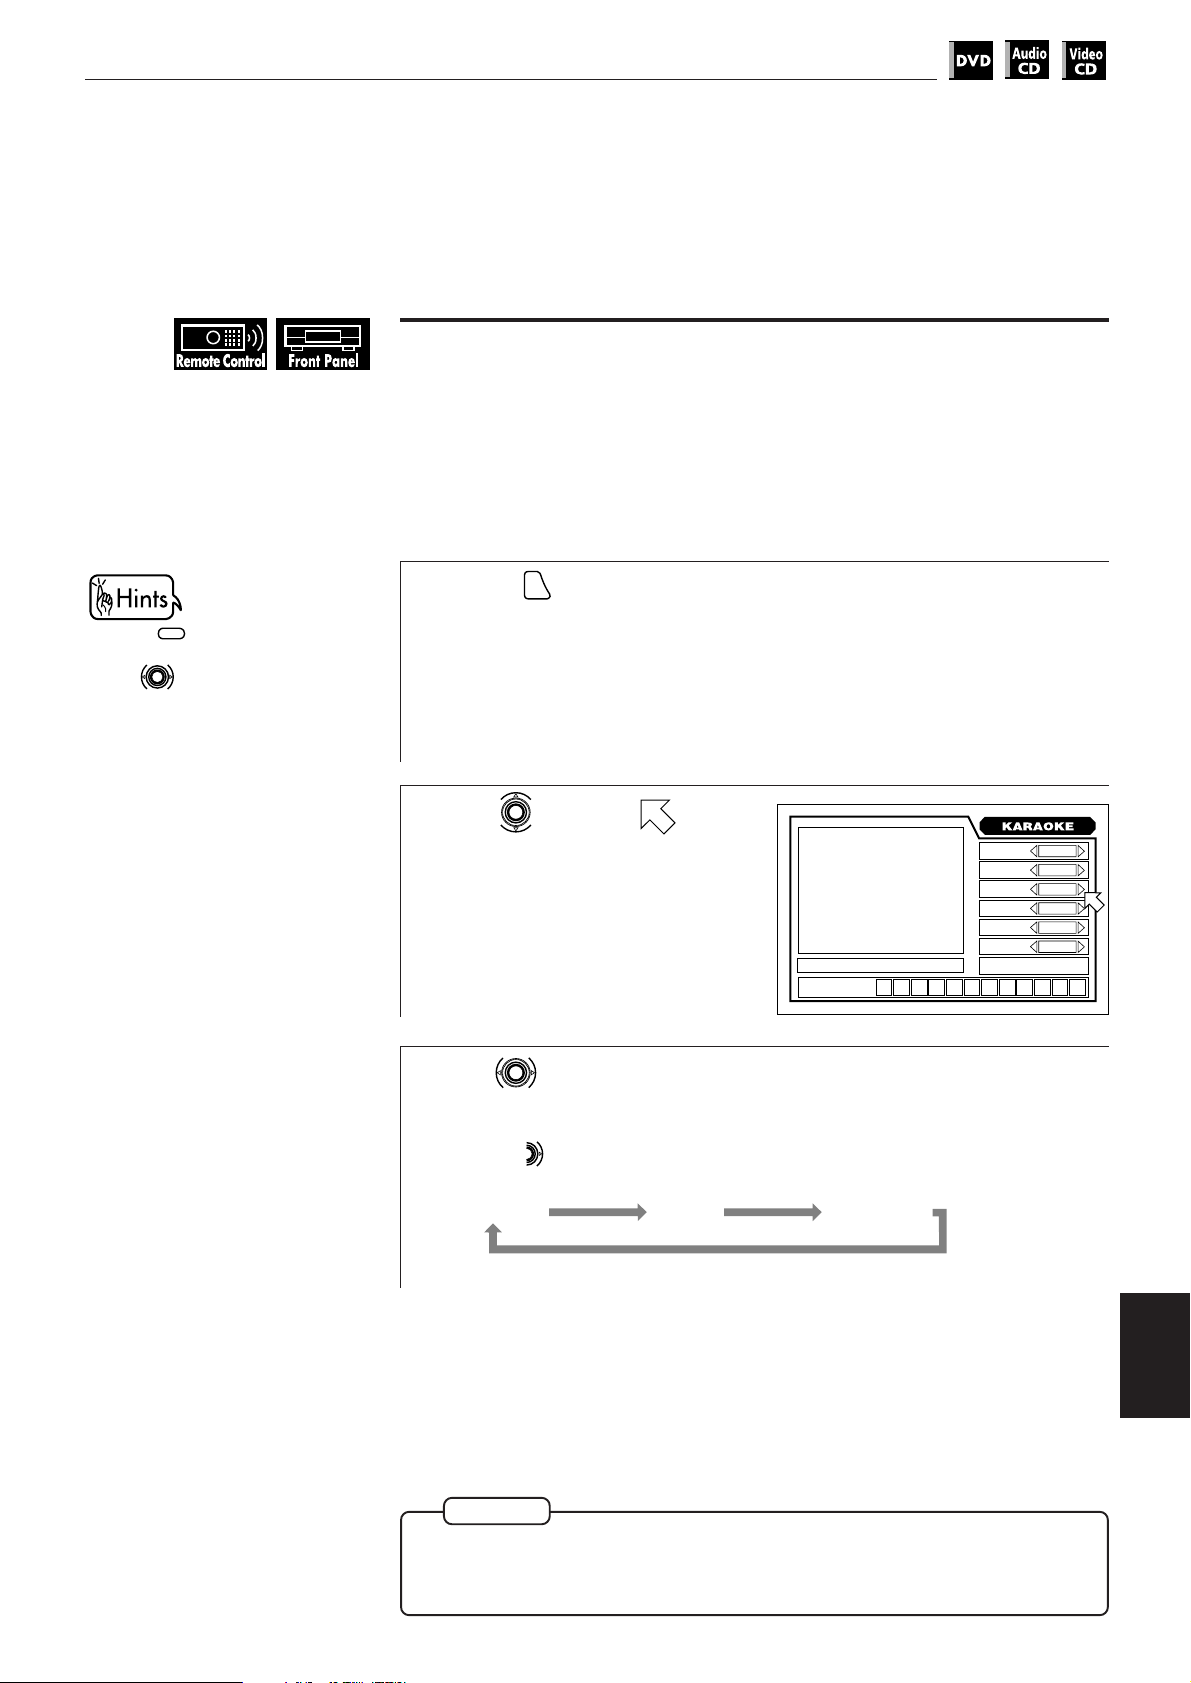
KARAOKE Operations
Playing back the guide vocal only when you stop singing
[VOCAL REPLACE]
You may have experiences that you could not sing in the middle of Karaoke
because you forgot the melody, etc. In such case, using the vocal replace
function, the guide vocal automatically replaces your voice when you stop
singing. It may be useful for practicing Karaoke.
7 During playback, when the KARAOKE function is on,
English
Español
Portugés
Chinese
1. Press
2. Use to select [REPLACE]
within 10 seconds.
during playback.
VOCAL
REPLACE
1
Press
ON SCREEN
.
The on-screen display for KARAOKE appears on the TV screen.
If the disc is recorded by the multiplex audio, set [KARAOKE SOUND] to L or
R for playing back the guide vocal.
If the disc is not recorded for Karaoke, set [KARAOKE SOUND] to L/R (See
page 95).
Use to move to
2
[VOCAL].
Use to select [VOCAL
3
CHAP.
T.
03
RESERVE
TIME
- - -
- : - - : - -
AUDIO
KARAOKE
SOUND
VOCAL
ECHO
EFFECT
KEY
CONTROL
A-B REPEAT
REPLACE].
Pressing cycled the mode as
shown below.
1 / 3
1
NORMAL
1
CHORUS
+3
REPLACEMASKNORMAL
7 The recorded voice (guide vocal) is played back only when no sound is fed to
the microphone(s).
NOTE
¶ When playing back a disc with the multiplex audio or with multi-sound
Karaoke, the guide vocal is not played back at all. With other discs, the
voice may not be satisfactorily masked.
KARAOKE
operations
97
Page 100
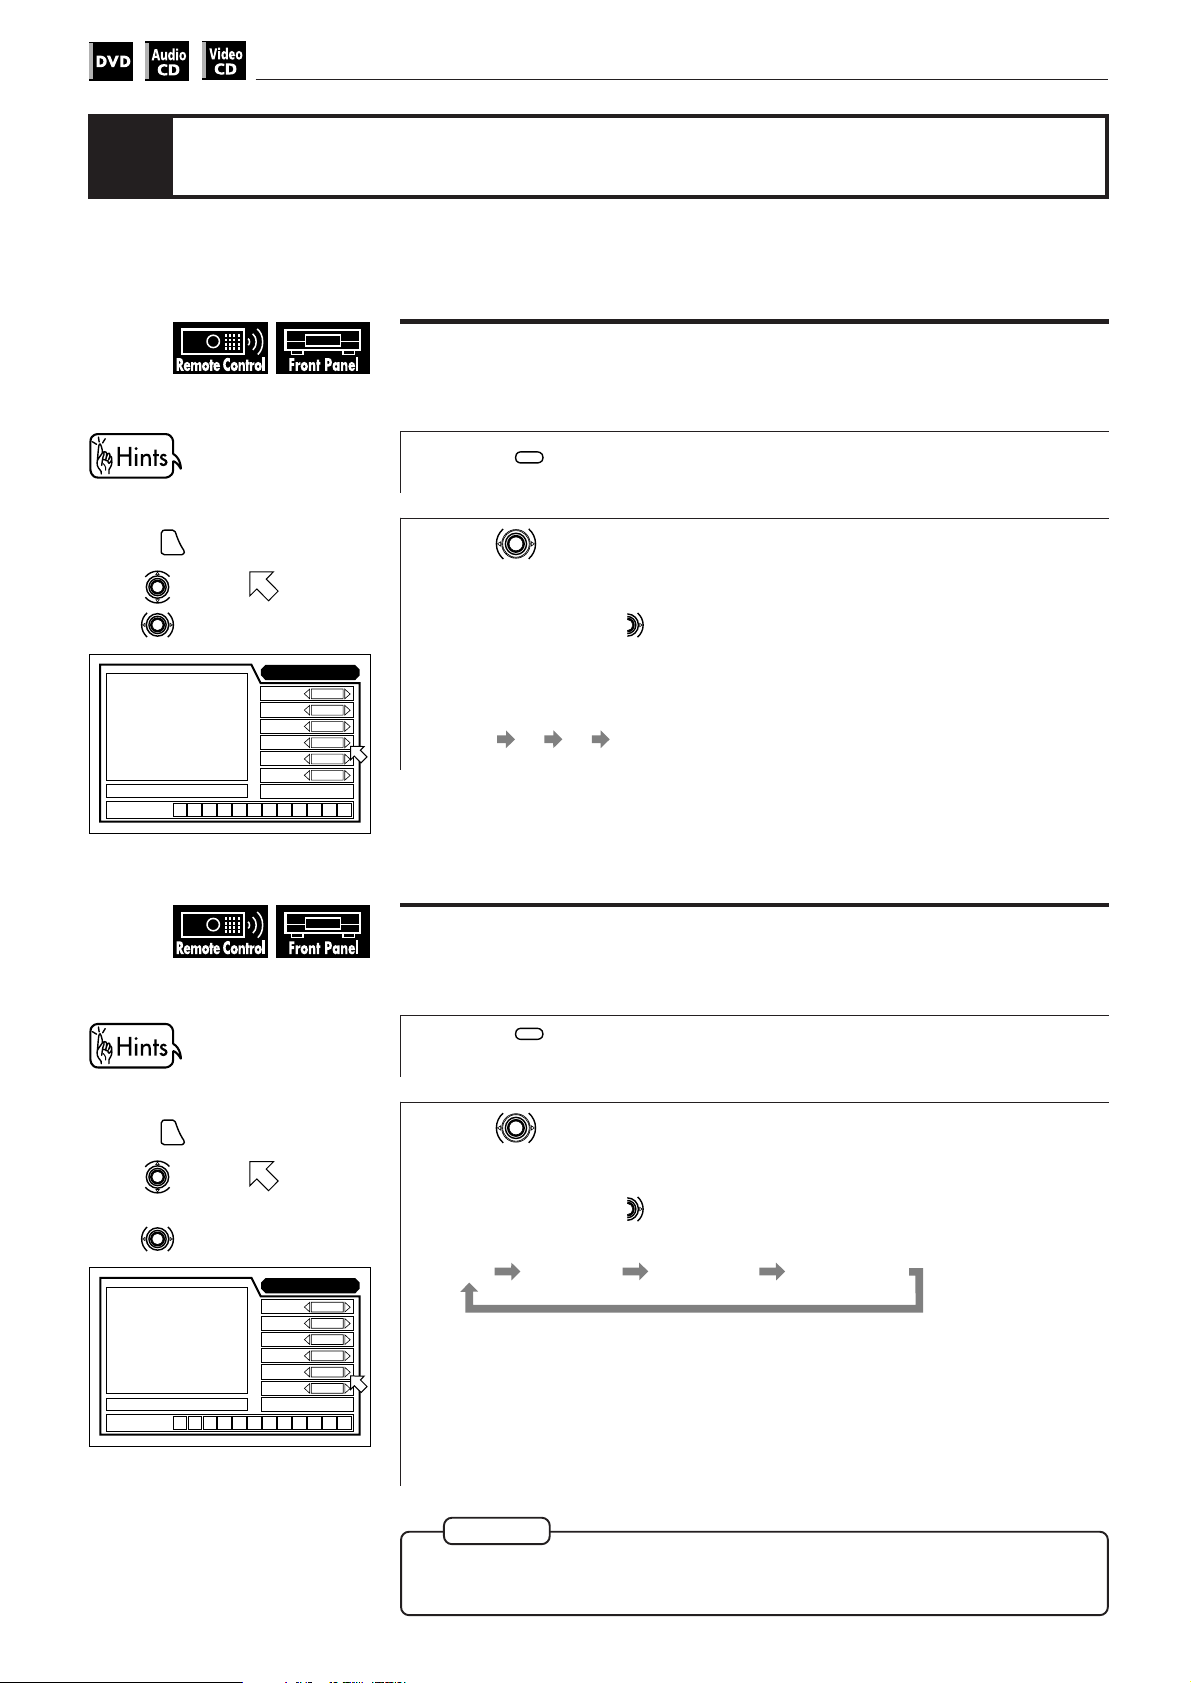
KARAOKE operations
Adding an effect to your voice
You can add various effects to your voice using the Echo and Vocal Effect
functions.
Adding an echo effect [ECHO]
7 When the KARAOKE function is on,
You can also adjust the echo level
via the on-screen display.
1. Press
ON SCREEN
.
2. Use to move to [ECHO].
3. Use to adjust the echo level.
KARAOKE
1 / 3
AUDIO
CHAP.
T.
03
RESERVE
KARAOKE
SOUND
VOCAL
ECHO
EFFECT
KEY
TIME
- - -
- : - - : - -
CONTROL
1
NORMAL
OFF
CHORUS
+3
A-B REPEAT
You can also select the vocal effect
via the on-screen display.
1. Press
ON SCREEN
.
2. Use to move to
[EFFECT].
3. Use to select the vocal effect.
Press
1
Use to adjust the echo
2
ECHO
.
level.
Each time you press , the echo
level changes as follows.
The bigger number is the stronger
echo.
OFF 1 2 3
Adding various effects to vocal [VOCAL EFFECT]
7 When the KARAOKE function is on,
Press
1
Use to select the vocal
2
effect.
Each time you press , the vocal
effect changes as follows.
VOCAL
EFFECT
.
98
CHAP.
T.
03
RESERVE
KARAOKE
1 / 3
AUDIO
KARAOKE
SOUND
VOCAL
ECHO
EFFECT
KEY
TIME
- - -
- : - - : - -
CONTROL
NORMAL
CHORUS
A-B REPEAT
1
1
+3
CHORUS: Produces a doubling effect on your vocal, as if another person sings
in unison.
FLANGER: Adds a wet, metallic sweeping sound to your voice, similar to some
FLANGER HARMONYCHORUSOFF
electric guitar sound.
HARMONY: Add a harmony vocal to your voice.
NOTE
¶ When playing back an Audio CD, the ECHO and VOCAL EFFECT functions
can be controlled only when the on-screen display appear on the TV screen.
 Loading...