

Page 1
Cover
Page 2

ABOVE ALL
Safety and Cautions
"SOME DO'S AND DON'TS ON THE SAFE USE OF EQUIPMENT"
This equipment has been designed and manufactured to meet international safety standards but, like any
electrical equipment, care must be taken if you are to obtain the best results and safety is to be assured.
--------------------------------------------------------------------------------
Do
read the operating instructions before you attempt to use the equipment.
Do
ensure that all electrical connections (including the mains plug, extension leads and inter-connections
between pieces of equipment) are properly made and in accordance with the manufacturer's instructions.
Switch off and withdraw the mains plug when making or changing connections.
Do
consult your dealer if you are ever in doubt about the installation, or operation or safety of your equipment.
Do
be careful with glass panels or doors on equipment.
--------------------------------------------------------------------------------
DON'T
continue to operate the equipment if you are in any doubt about it working normally, or if it is damaged in
any way-switch off-withdraw the mains plug and consult your dealer.
DON'T
remove any fixed cover as this may expose dangerous voltages.
DON'T
leave equipment switched on when it is unattended unless it is specifically stated that it is designed for
unattended operation or has a standby mode.
Switch off using the switch on the equipment and make sure that your family know how to do this.
Special arrangements may need to be made for infirm or handicapped people.
DON'T
use equipment such as personal stereos or radios so that you are distracted from the requirements of road
safety. It is illegal to watch television when driving.
DON'T
listen to Digital Audio Player at high volume as such use can permanently damage your hearing.
DON'T
obstruct the ventilation of the equipment, for example with curtains or on soft furnishings. Overheating will
cause damage and shorten the life of the equipment.
DON'T
use makeshift stands and NEVER fix legs with wood screws. To ensure complete safety always fit the
manufacturer's approved stand or legs with the fixing screws supplied according to the instructions.
DON'T
allow electrical equipment to be exposed to rain or moisture.
Page 3

NEVER let anyone especially children push anything into holes, slots or any other opening in the case.
This could result in a fatal electrical shock.
NEVER guess or make changes with electrical equipment of any kind. It is better to be safe than sorry!
Page 4
About FCC information
FCC INFORMATION
This device complies with Part 15 of the FCC Rules. Operation is subject to the following two conditions:
1. This device may not cause harmful interference.
2. This device must accept any interference received, including interference that may cause undesired
operation.
NOTE:
This equipment has been tested and found to comply with the limits for a Class B digital device,
pursuant to Part 15 of the FCC rules. These limits are designed to provide reasonable protection against
harmful interference in a residential installation. This equipment generates, uses and can radiate radio
frequency energy and, if not installed and used in accordance with the instructions, it may cause harmful
interference to radio communications. However, there is no guarantee that interference will not occur in
a particular installation. If this equipment does cause harmful interference to radio or television
reception, which can be determined by turning the equipment off and on, the user is encouraged to try to
correct the interference by one or more of the following measures:
- Reorient or relocate the receiving antenna.
- Increase the separation between the equipment and receiver.
- Connect the equipment into an outlet on a circuit different from that to which the receiver is connected.
- Consult the dealer or an experienced radio/TV technician for help.
CAUTION:
Changes or modifications not approved by JVC could void userfs authority to operate the equipment.
Contact
Address: JVC AMERICAS CORP.,
1700 Valley Road, Wayne, New Jersey 07470
Telephone: (973) 317-5000
INFORMATION (for CANADA)
This Class B digital apparatus complies with Canadian ICES-003.
RENSEIGNEMENT (Pour le CANADA)
Cet appareil numerique de la classe B est conforme a la norme NMB-003 du Canada.
Page 5
Cautions
1. For your safety
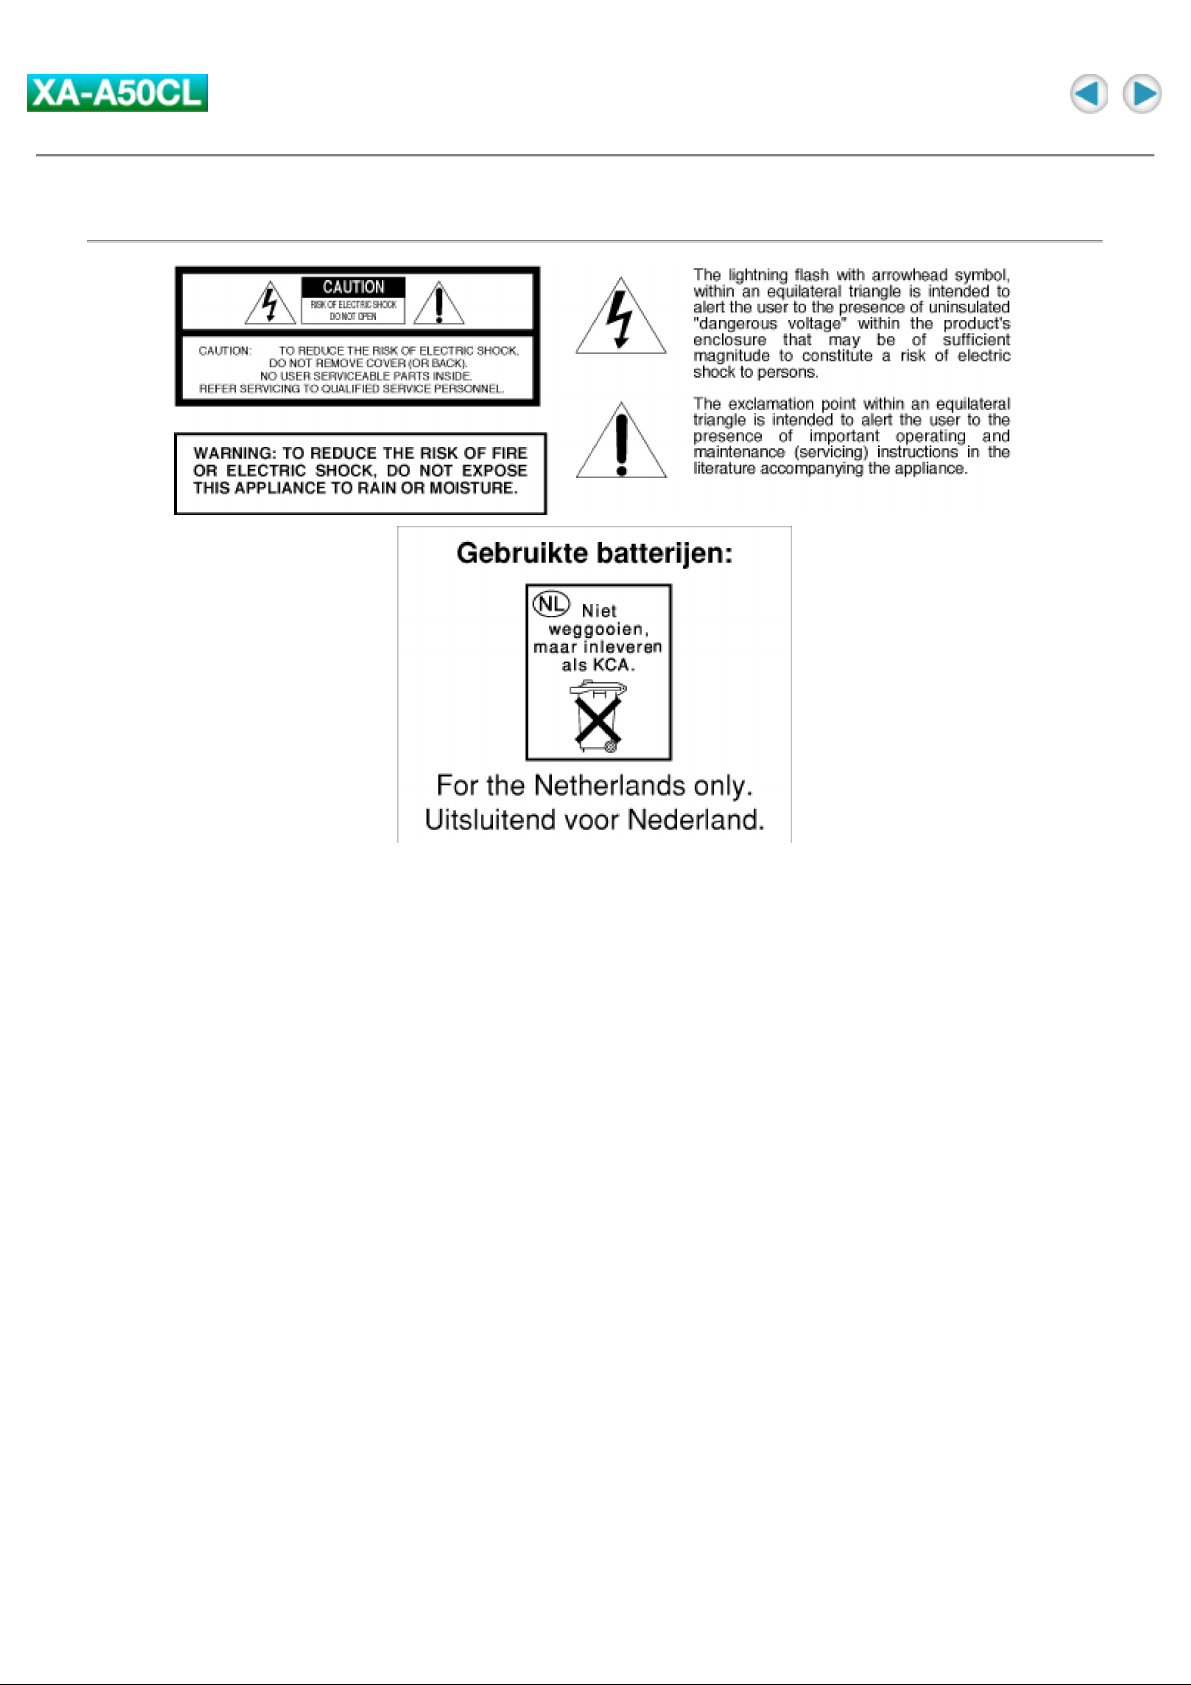
TO REDUCE THE RISK OF FIRE OR ELECTRIAL SHOCK, DO NOT EXPOSE THIS APPLIANCE TO
RAIN OR MOISTURE.
Never use the Digital Audio Player when driving a car, motorcycle, or bicycle. This could result in an
accident.
Pay close attention to traffic around you when using the Digital Audio Player while walking. Not doing so
could result in an accident.
Be careful not to turn the sound volume up too high when using the Digital Audio Player. Your hearing can
be damaged by listening to sounds at excessive volume for long periods.
Do not disassemble or modify the Digital Audio Player.
Do not allow inflammables, water or metallic objects to enter the Digital Audio Player.
2. Avoid using the Digital Audio Player
in places subject to excessive humidity or dust
in places subject to extremely high (over 40°C or 104°F) or low (under 0°C or 32°F) temperatures
3. DO NOT leave the Digital Audio Player
in direct sunlight
near a heater
4. To protect the Digital Audio Player, DO NOT
allow them to get wet. If this occur, DO NOT use the Digital Audio Player to avoid the electrical shock and
damage.
drop them or shake them against hard objects.
connect any USB cable to the Digital Audio Player except the one supplied.
Page 6

disconnect the USB cable when transferring the files.
About ALKALINE BATTERIES
(1) For safe use, DO NOT
attempt to charge the alkaline batteries.
reverse the polarities of the batteries.
carry or store a battery together with objects such as metal pens, necklaces, coins or hairpins. This could
short-circuit the positive and negative poles of the battery.
heat or attempt to disassemble a battery.
expose the battery to water or fire.
subject a battery to strong impacts, such as hitting it with a hammer, stepping on it or dropping it.
forget to remove the batteries from the unit if the Digital Audio Player is not to be used for an extended
period of time, so as to prevent leakage.
Any of these may cause the battery to split or leak, causing fire or injury.
(2) Use only the specified batteries with this Digital Audio Player. The use of other power
sources may cause a fire.
(3) When discarding batteries, environmental problems must be considered and the local
rules or laws governing the disposal of these batteries must be followed strictly.
HOW TO HANDLE A CD-ROM
Take care not to soil or scratch the mirror surface (opposite to the printed surface). Do not write anything
or put a sticker on either the front or back surface. If the CD-ROM gets dirty, gently wipe it with a soft cloth
outward from the center hole using a circular motion.
Do not use conventional disc cleaners or cleaning spray.
Do not bend the CD-ROM or touch its mirror surface.
Do not store your CD-ROM in a dusty, hot or humid environment. Keep it away from direct sunlight.
Page 7
Introduction
Thank you for purchasing the JVC product. Before you begin operating this unit, please read this operating
instructions carefully to be sure you get the best possible performance. If you have any questions, consult
your JVC dealer.
CAUTION:
This unit is compatible with WMA-DRM. When you transfer the files other than the following files and
folders into this unit, the filles (including non-copyright protect music files) and folders will be deleted on
the next time you connect the unit to PC:
WMA-DRM files, playlist files, MUSIC folder, VOICE folder
Page 8
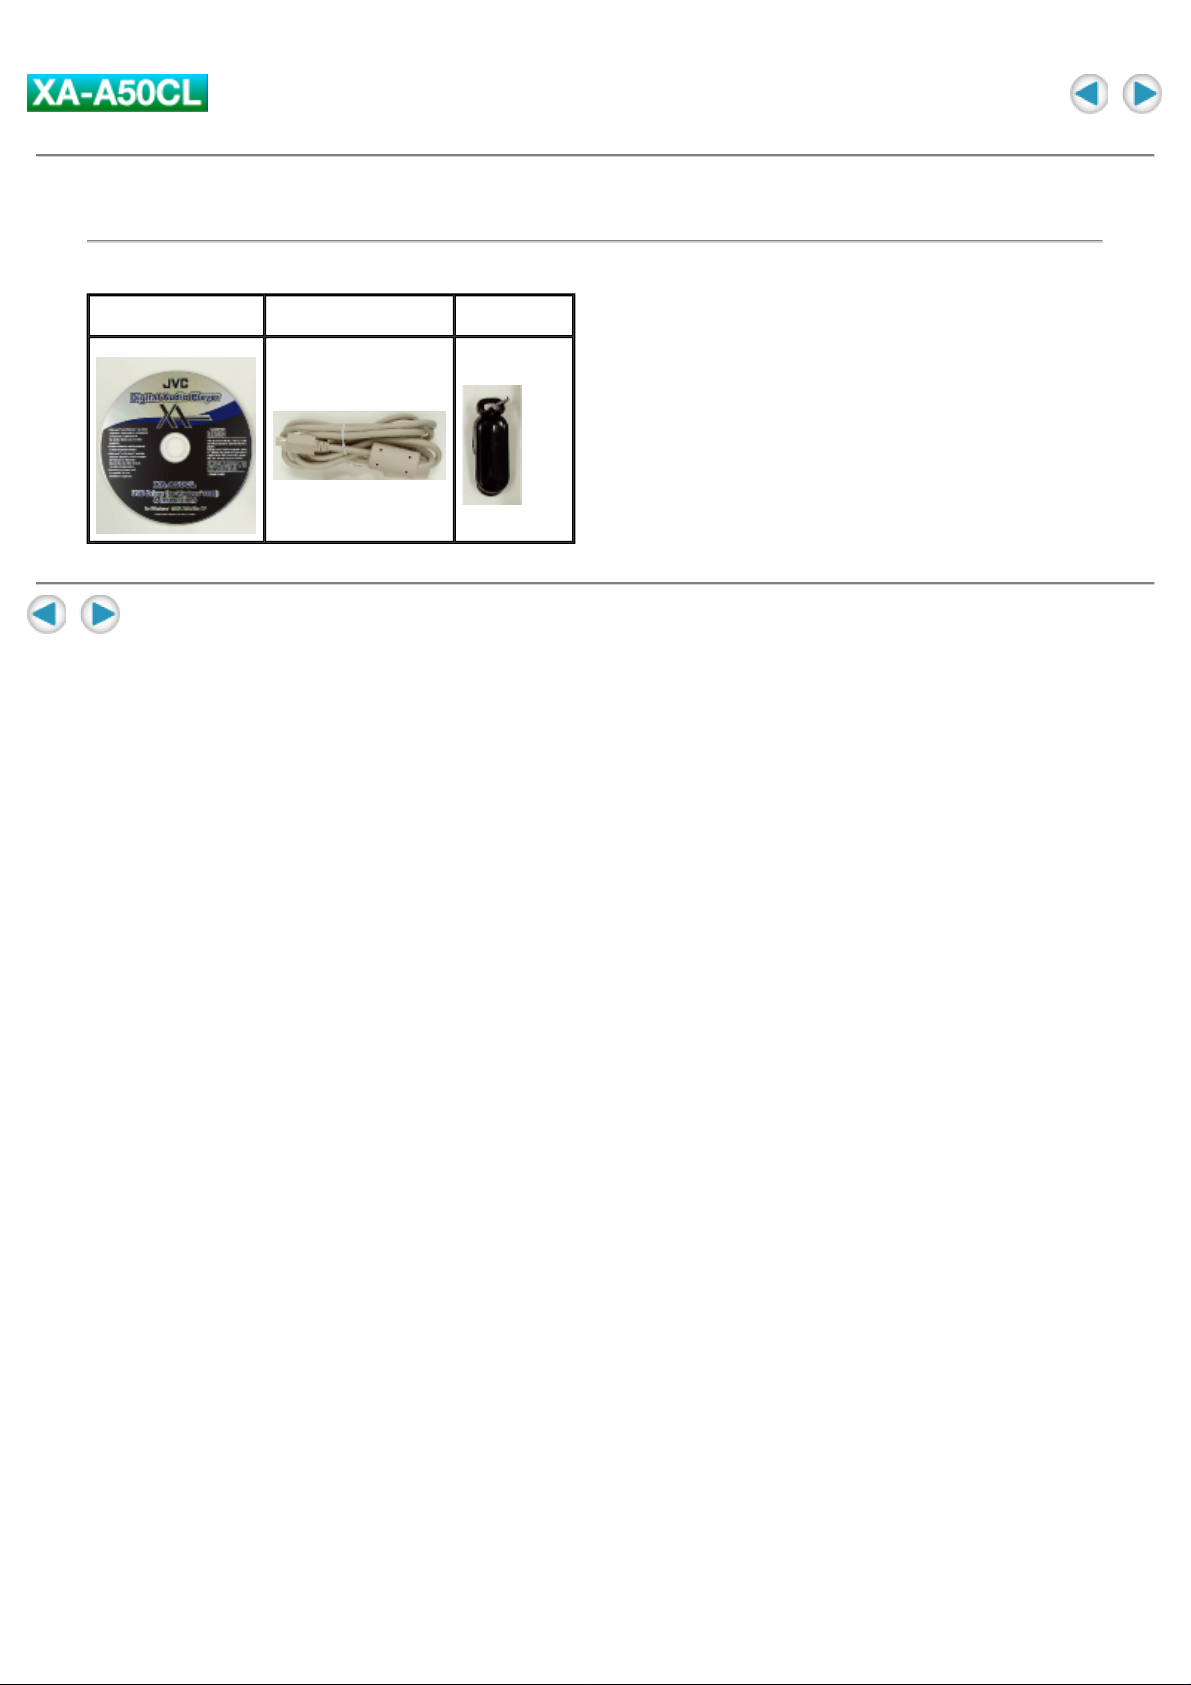
Accessories
Check the supplied accessories after unpacking.
CD-ROM USB 1.1 cable Cable clip
Page 9
Features
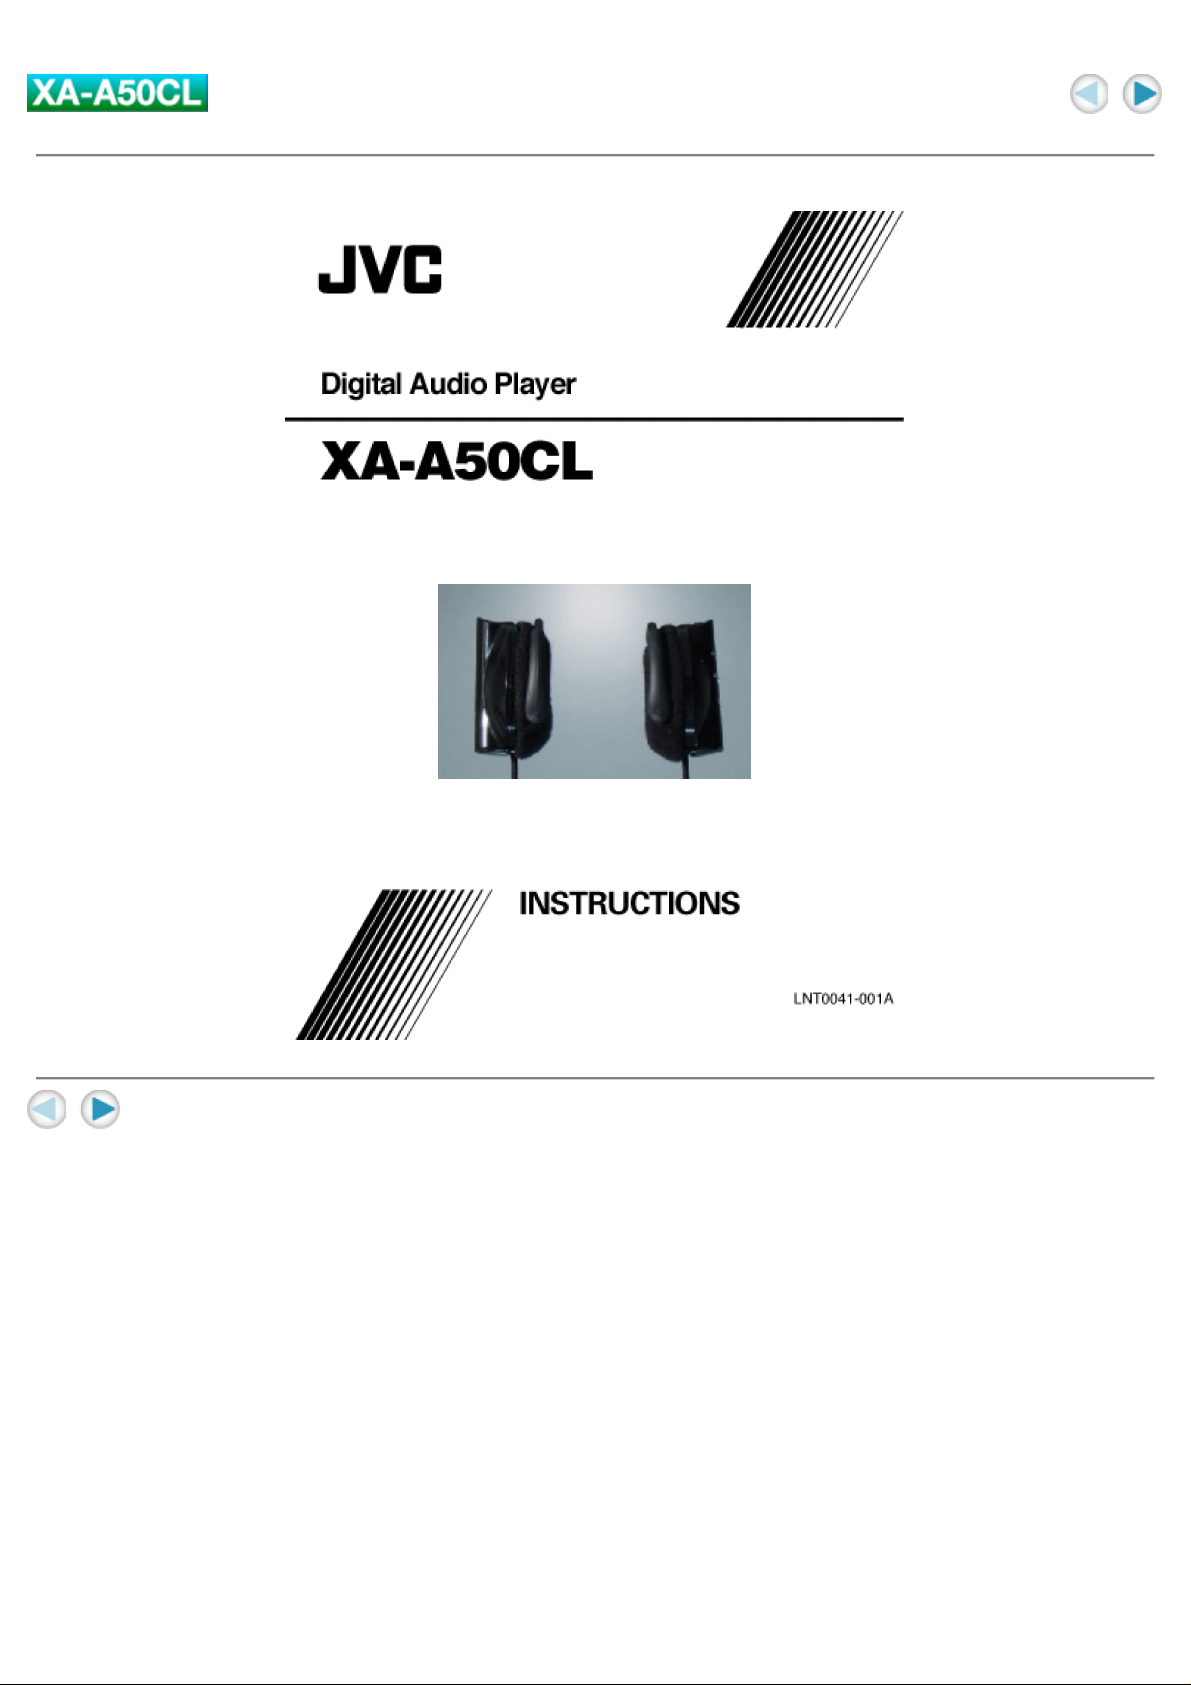
What is Digital Audio Player XA-A50CL?
XA-A50CL is an Ear-Clip headphone type Digital Audio Player, which creates a high quality sound
reproduced by the 30 mm diameter Neodymium driver unit in an innovative design shell.
You can store the music files-MP3 (up to about 30 files) or WMA / WMA-DRM (up to about 60 files)-in the
built-in 128 MB memory, and enjoy playback continuously for 20 hours using a single AAA alkaline battery.
You can directly transfer the music files from your PC to Digital Audio Player over the Full-speed USB
port.
Voice guidance helps you to operate and set up Digital Audio Player even if you are listening to the music.
System requirements
To access the Digital Audio Player, your PC need to satisfy the following conditions:
Operating system
Disk drive
Multimedia player
Browser
Some PC may not work correctly even if they satisfy the conditions above.
Windows 98SE/Windows Me/Windows 2000/Windows XP
CD-ROM (to see this manual and install the driver for Windows 98SE)
Windows Media Player 8.0 or later
Internet Explorer 6.0 or later (to see this manual)
Music file requirements
Bit rate and sampling frequency
Digital Audio Player supports MP3, WMA, and WMA-DRM files recorded with the following:
Bit rate
Sampling frequency
According to the recording application, MP3, WMA, and WMA-DRM files are not suitable for playback or
cannot be played back.
32 to 192 kbps
16 kHz, 22.05 kHz, 32 kHz, 44.1 kHz, 48 kHz
NOTE:
It is recommended that record each file at a sampling frequency of 44.1 kHz and at a bit rate of 128 kbps
for MP3, 96 kbps for WMA and WMA-DRM.
Extension
Digital Audio Player can only recognize and play files with one of the following extensions, which can be in
any combination of upper and lower case:
MP3
WMA and WMA-DRM
".MP3", ".mp3"
".WMA", ".wma"
NOTE:
Some files may not be played normally because of their characteristics or recording conditions.
Page 10

Copyright protection
For copyright protection, Digital Audio Player has a limitation on importing files.
Digital Audio Player is compatible with WMA-DRM. When you transfer the files other than the following
files and folders into this unit, the filles (including non-copyright protect music files) and folders will be
deleted on the next time you connect the unit to PC:
WMA-DRM files, playlist files, MUSIC folder, VOICE folder
License
Microsoft®, Windows®, Windows® 98SE, Windows® Me, Windows® 2000, Windows® XP, Windows
Media® are either registered trademarks or trademarks of Microsoft Corporation in the United States
and/or other countries.
WOW, SRS and symbol are trademarks of SRS Labs, Inc.
WOW technology is incorporated under license from SRS Labs, Inc.
Page 11

About this instruction
Configuration of this instruction
This instruction is configured with the following 4 sections:
Introduction
Basic Operation
Advanced Operation:
Information
The screens used in this instruction are from Windows XP.
The screens and procedures explained may differ depending on your PC. Also, software images for
explanation may differ from the actual look.
Basic information about Digital Audio Player such as its outline and installation.
Basic operations to play back the music files with Digital Audio Player.
Advanced operations to play back and to change the settings.
Troubleshooting and specification
Page 12

Parts Identification
1.
2.
3.
4.
5.
6.
7.
8.
9.
(Stop/Play/Power) button
Operation indicator
Lights: When setting up the unit
Flashes 2 times every 5 seconds: During playback
Flashes every 2 seconds: During pause
(Skip) buttons
(Volume) buttons
button
USB port cover
Battery cover
Ear hook
Ear pad
Page 13

About Voice Guidance
Digital Audio Player has Voice Guidance system, which informs you the operational information of the
Digital Audio Player.
For example, when you press (next) button while listening to the music, you will hear "Next" through
the Digital Audio Player to confirm the operation.
You can change the voice of Voice Guidance system for your preference or other languages.
You can also turn off the Voice Guidance system except for the voice for the setting. See "Voice guide
setting".
Page 14

Preparation
Driver installation (For Windows 98SE user ONLY)
When using Windows 98SE, install the USB driver for accessing the Digital Audio Player.
1. Connect the Digital Audio Player to your PC using the supplied USB
cable.
Check "CD-ROM" for the driver selection on the dialog.
2. Load the supplied CD-ROM on your PC, then click "Next" on the dialog.
3. Install the driver, by following the message.
Page 15
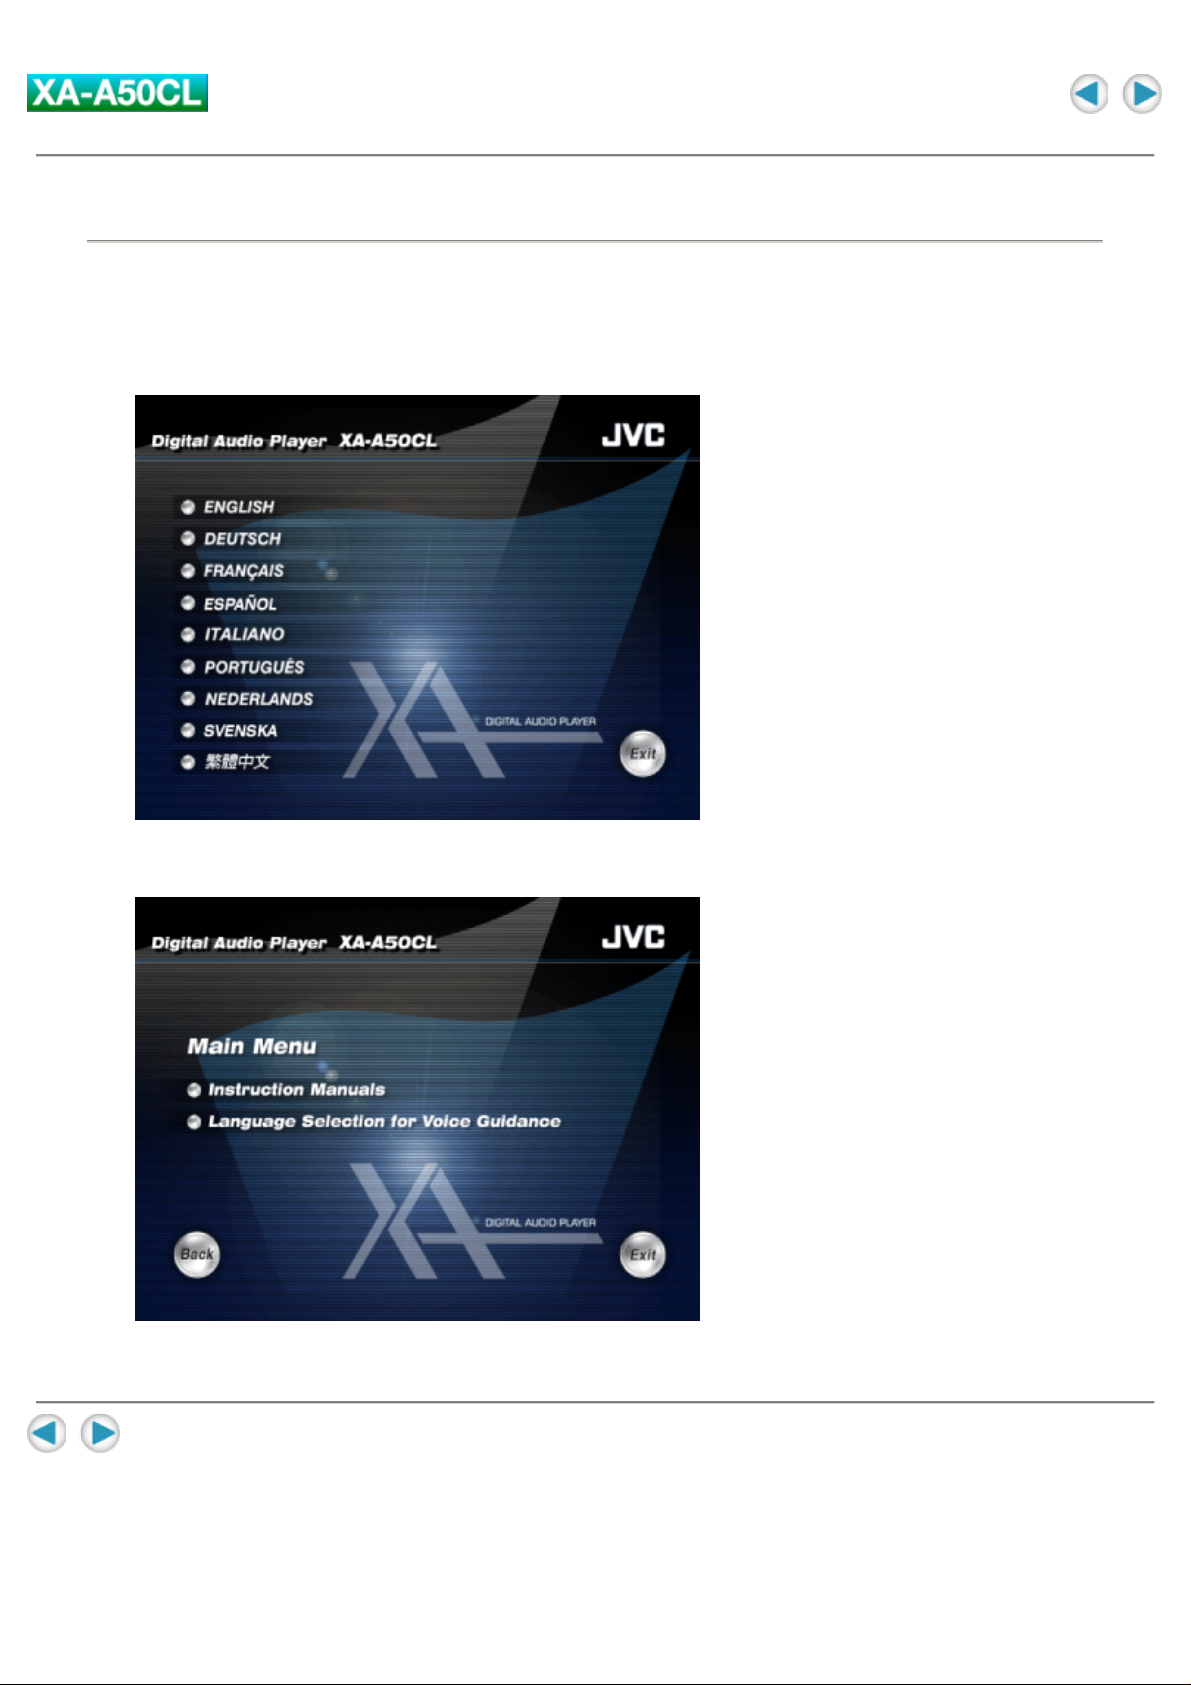
Selecting the language for the Voice Guidance
You can change the language of the guide voice by selecting the guide voice files stored in the supplied
CD-ROM. The initial language is set to English.
1. Load the supplied CD-ROM on your PC.
The language selection screen appears.
2. Click the desired language.
Ex.: When selecting "English"
3. Import the guide voice files, by following the message.
Page 16

Putting the battery
1. Slide open the battery cover.
2. Insert the alkaline battery, matching the + and -.
Press in on - end first and down on + end.
3. Close the battery cover.
About changing the battery
The battery should be changed when the operation indicator fades or does not turn on. Change the battery
as necessary to maintain the proper performance of the Digital Audio Player or when "Please change the
battery" is heard.
NOTES:
It is recommended to use an alkaline battery.
IMPORTANT:
Misuse of battery could result in leakage. This could cause a fire or explosion. To prevent this, pay special
attention to the following points:
- Be sure to insert the battery with correct positive + and negative - polarities.
- Do not heat, disassemble or short-circuit batteries and never dispose of batteries by throwing them in a
fire.
- Read the caution displayed on the battery when in use.
Page 17

Basic Operation
Transferring the music files into the Digital Audio Player
In this instruction, the file-transferring procedure is explained using the Windows Media Player.
CAUTION:
This Digital Audio Player is compatible with WMA-DRM. When you transfer the files other than the
following files and folders into this unit, the filles
folders will be deleted on the next time you connect the unit to PC:
(including non-copyright protect music files)
and
WMA-DRM files, playlist files, MUSIC folder, VOICE folder
Notes on making WMA files
It is recommended to check "Copy protect music" of "Copy Music" tab on Options window in Windows
Media Player 9 for making WMA files. Otherwise, WMA files you made will be deleted on the next time you
connect the Digital Audio Player to the PC.
NOTES:
For in depth information, see the help for Windows Media player 9.
The lower the bit rate of the files you made is, the longer the life of Digital Audio Player battery is.
For Windows 98SE user ONLY: You need to install the driver before connecting the Digital Audio Player to
your PC. See "Driver installation (For Windows 98SE user ONLY)".
Page 18

To connect to your PC
1. Open the USB port cover of the right headphone.
2. Connect the Digital Audio Player to your PC using the supplied USB
cable.
The operation indicator of the Digital Audio Player starts flashing.
3. Press to permit the access to the Digital Audio Player from the PC.
When pressing the button, the non-protected files and folders are deleted. You can disconnect the
USB cable before pressing the button to avoid the deletion of the files and folders.
NOTE:
We cannot bear any responsibility for any loss or alterlation to the files stored in the internal memory of
Digital Audio Player or the external memory.
To transfer the music files
1. Start Windows Media Player 9 and click "Copy to CD or Device".
2. Select the desired music files on the left column of Windows Media Player
9.
3. Select the Digital Audio Player as the device on the right column of
Windows Media Player 9.
Windows Media Player 9 detects the Digital Audio Player as "JVC_XA_A".
4. Select "music" folder on the Digital Player as the transferring destination
of the music files.
5. Click "Copy" to start to import the music files from your PC to the Digital
Audio Player.
The operation indicator of the Digital Audio Player is flashing while the files are transferred.
NOTES:
You cannot use the playlist made with Windows Media Player 9.
You can transfer the music files to the Digital Audio Player by dragging-and-dropping the music files to the
"MUSIC" folder in the Digital Audio Player.
Page 19

When dragging-and-dropping the music files to the Digital Audio Player, use "Copy" command to select
the files. When you do this operation using "Cut" command, the music files and folders are deleted on your
PC.
To disconnect the Digital Audio Player from your PC, use "Safety Remove Hardware".
Page 20

Putting on the headphones
1. Open the Ear Hook outward slightly.
2. Put the Ear Hook on your ear and adjust the Ear Hook position to fit your
ear.
3. Close the Ear Hook.
NOTE:
Stretching the ear hook on the headphone too wide from its original position may result in damage to the
ear hook.
Page 21
Turning on the power
1. Press and hold from 2 to 5 seconds to turn on the Digital Audio
Player.
The Operation indicator lights up and the Digital Audio Player is turned on, then the playback starts.
When the playback position is memorized, playback starts from the memorized position. (See "To
stop playback".)
NOTE:
The Digital Audio Player has a function to avoid to turn on the power by the unexpected touch of the
objects to the Digital Audio Player.
When you press and hold more than 5 seconds or less than 2 seconds, the Digital Audio Player
cannot turn on.
The playback order of the music files may be different from the order on the PC. To play back the music
files in the desired order, see "Playing back with playlist".
Page 22

Adjusting volume
1. Press .
: Increases the volume with a high beep sound.
: Decreases the volume with a low beep sound.
When pressing and holding the button, the volume is changed continuously with a single beep sound.
NOTES:
When activating Voice Guidance system, the volume adjustment does not take effect to the guide voice.
When one of the "Various effects and setting" mode is selected, the buttons do not work for the
volume adjustment. In this case, press repeatedly until "Playback" is heard, or finish the setting
("Complete" is heard when the setting is finished).
Page 23

Basic playback
To stop playback
1. Press .
The playback is stopped with the current position of the playback memorized, then the Digital Audio
Player is turned off 10 seconds later.
When pressing and holding for 2 seconds, the Digital Audio Player turns off without the memory
of the current position.
NOTES:
Keep the volume level of the Digital Audio Player to a minimum before turning off.
To skip to the desired track
1. Press .
: Skips to the next tracks.
: Skips to the beginning of the current track or the previous tracks.
To locate a desired portion
1. Press and hold .
: Fast-forwords the tracks.
: Fast-reverses the tracks.
Page 24

Advanced Operation
Playing back with playlist
You can make up to three playlists to customize the playback files you want to. Using a playlist, you can
edit the playback files and their order.
NOTE:
When the music file listed in the playlist does not exist on the Digital Audio Player, the step is skipped.
To make a playlist
You can make a playlist file using WordPad application.
A playlist need to be a text file with the ".m3u"extension, and the Digital Audio Player can detect a file as
playlist only when the file name is "P_List1.m3u", "P_List2.m3u", or "P_List3.m3u".
1. Open WordPad.
2. Make or edit a playlist as follows:
"/MUSIC/the target file name including the extension"
Ex.:
/MUSIC/Track05.mp3
/MUSIC/Track02.mp3
/MUSIC/Track04.mp3
/MUSIC/Track01.mp3
/MUSIC/Track03.mp3
3. Save the file as Unicode format.
Select "Unicode Text Document" for "Save as type" in the "Save As" dialog of WordPad.
To import the playlist
1. Connect the Digital Audio Player to your PC.
2. Open "My Computer" on the "start" menu.
3. Copy the playlists you made to "MUSIC" folder on the Digital Audio
Player, which is detected as the Removable Disk in the "My Computer"
window.
To play back with a playlist
1. During playback, press and hold until "Playlist 1" is heard.
NOTE:
When no playlist is imported, "No playlist" is heard.
Page 25

To switch a playlist
1. During playback with a playlist, press and hold until the desired
playlist is selected.
To turn off the playback with a playlist, press and hold until "Playlist off" is heard.
Page 26

To change the mode
Various effects and setting
You can add various effects to the music sound and changing the basic setting using the button.
NOTE:
There is a time limit in doing the following procedures. If you do not press any button about 10 seconds,
the mode setting is canceled after setting the current item and playback resumes.
Configuration of the mode setting
Page 27

1. Press repeatedly to select the desired item.
Voice guide setting
Each time you press the button, the item changes as follows:
Mode item
(Guide voice)
Play mode setting Changes the playback mode.
Sound setting Selects the sound mode.
Voice guide setting Activates/deactivates the voice guidance function.
LED setting Turns on/off the operation indicator.
Format setting Deletes all the data and formats the built-in memory.
Normal playback
Function
2. Press repeatedly to select the setting.
3. Press .
Without pressing the button for 10 seconds, the setting is finished ("Complete" is heard.) and playback
starts.
Play mode setting
Setting item
(Guide voice)
All repeat Repeats all the music files.
Random Plays back all the music files in random order.
Random repeat Repeats all the music files in random order.
Repeat Repeats the current music file.
Off Cancels repeat/random mode.
Function
Sound setting
Setting item
(Guide voice)
CLASSIC Selects the setting suitable for classical music.
LIVE Selects the setting suitable for live-recording music.
POP Selects the setting suitable for pop music.
ROCK Selects the setting suitable for rock music.
WOW MODE1 Selects for the minimum effect for SRS WOW.
Function
WOW MODE2 Selects for the medium effect for SRS WOW.
WOW MODE3 Selects for the maxmum effect for SRS WOW.
SRS TruBass Selects for SRS TruBass mode.
Off Cancels sound mode.
Page 28

Setting
item
(Guide
voice)
Function
Voice guide
on
Voice guide
off
Activates the voice guidance function.
Activates beep sound instead of the voice guidance.
The voice for the mode setting can be always heard though the voice guide is set to off. "Please
change the battery." and "Power off" can be also heard as the low battery warning.
LED setting
Setting item
(Guide voice)
LED on Turn on the operation indicator.
LED off Turns off the operation indicator.
Function
Format setting
After "Format setting" is heard...
1. Press so that "Format" is heard, then press .
"Please select `Start format' or `Cancel format'" is heard.
When you do not press , the format setting is canceled and playback starts.
2. Press so that "Start format" is heard, then press .
The format process starts.
After finishing the format process, the Digital Audio Player turns off.
When you do not press , the format setting is canceled and playback starts.
Setting item
(Guide voice)
Format Enters into the format mode.
Cancel format Cancels format.
When you select "Format" and "Please select `Start format' or `Cancel format'" is heard:
Setting item
(Guide voice)
Start format Starts format. The format process starts.
Cancel format Cancels format.
Function
Function
CAUTION:
Once you starts formatting all the music files including WMA-DRM are deleted.
DO NOT remove the battery until the Digital Audio Player is turned off. Otherwise, the built-in memory may
be broken.
NOTE:
The following setting is not cleared by the format process:
Volume, Play mode setting, Sound setting, Voice guide setting, LED setting
Page 29

The following setting is cleared:
The memory of the playback position, Playlist selection, the order of the Random play
Page 30
Troubleshooting
Connection
Symptom Cause Action
Restart your PC, then connect the
Digital Audio Player again.
Press after connection.
Installe the driver.
Connect directly using the supplied
USB cable.
The PC cannot detect the
Digital Audio Player.
Your PC may work incorrectly.
Your PC needs the access permission
from the Digital Audio Player.
For Windows 98 users: The driver is not
installed.
A USB hub or a USB extension cable is
used.
Transfer
Symptom Cause Action
Some transferred files
are missing.
The PC cannot detect
this Digital Audio
Player.
The Digital Audio Player deletes other than the
following folder/files: VOICE folder and voice files,
MUSIC folder and WMA-DRM files, and Playlist files.
The built-in memory may be full.
The device name of the unit is set to other than
"JVC_XA-A".
Check the files and import them
again.
Check the remaining memory
size, and delete the unwanted
files if necessary.
Rename the device name of the
unit as "JVC_XA-A" manually.
Playback
Symptom Cause Action
A WMA file is not played back.
Operation indicator does not turn on.
Guide voice cannot be heard during
playback operation.
The music files in the playlist cannot
be played back.
The guide voice cannot be heard after
formatting Digital Audio Player
through the PC
WMA-DRM files are transferred by
dragging and dropping.
The LED setting may be set to "LED
off".
The battery is low. Change the battery.
The Voice guide setting may be set to
"Off".
The target music files do not exist on
the built-in memory of the Digital
Audio Player.
The guide voice files are missing.
Transfer WMA-DRM files using
Windows Media Player.
Change the LED setting.
Change the Voice guide setting.
Change the playlist or import the
music files.
Import the guide voice files into
the "voice" folder on the Digital
Audio Player.
Page 31

Specification
Memory type:
Playable files:
Headphones driver
unit:
Power supply:
Battery life:
Cord length:
Mass:
128 MB Flash memory
MP3, WMA, WMA-DRM (copyright-protected)
30 mm diameter Neodymium
AAA alkaline battery (DC 1.5 V) x 1
approx. 20 hours (Playback of MP3 files created at 64 kbps/22 kHz with LED setting
set to off.)
0.5 m (19-11/16 inch)
57 g (2.01 oz) (incl. an alkaline battery)
Design and specifications subject to change without notice.
 Loading...