

Page 1
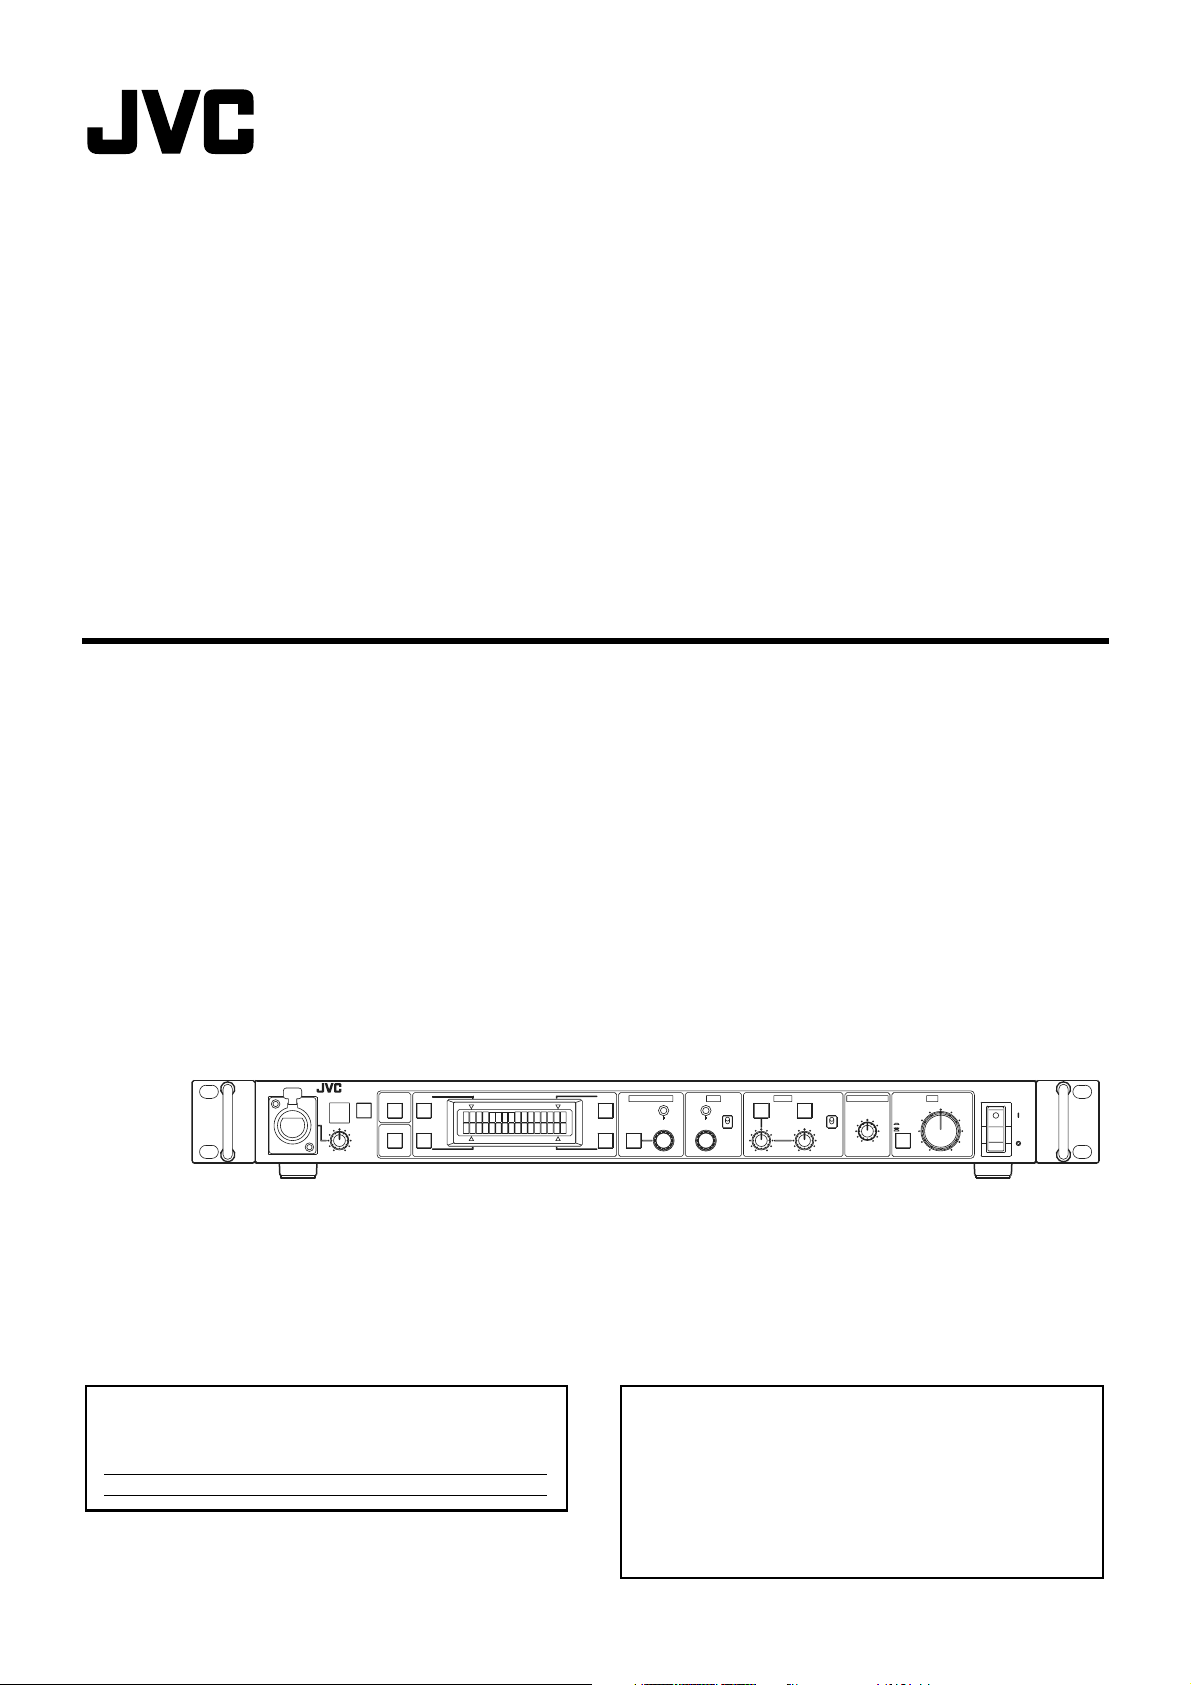
REMOTE CONTROL UNIT
RM-HP790DU
RM-HP790DE
INSTRUCTIONS
TALLY CALL FULL AUTO
INTERCOM
LEVEL
BARS
F1
F2
For Customer Use:
Enter below the Serial No. which is located on the body.
Retain this information for future reference.
Model No. RM-HP790DU
Serial No.
SHUTTER
MENU/SHUTTER GAIN WHITE MASTER BLACK IRIS
F3
VARIABLE
SHUTTER
PUSH-ON
F4
GAIN
MENU
DOWN UP
DOWN UP
PUSH-ON
STEP
HIGH
LOW
PAIN TRAUTO
MID
REMOTE CONTROL UNIT RM-HP790
W.BAL
B
A
B
PRESET
AUTO
MANU
CLOSE OPEN
POWER
Please read the following before getting started:
Thank you for purchasing this JVC product.
Before operating this unit, please read the instructions
carefully to ensure the best possible performance.
In this manual, each model number is described without the last letter
(U/E) which means the shipping destination. (U: for USA and Canada,
E: for Europe)
Only “U”models (RM-HP790DU) have been evaluated by UL.
LST1153-001A
Page 2
Introduction
FOR USA
These are general IMPORTANT SAFEGUARDS and certain items may not apply to all appliances.
IMPORTANT SAFEGUARDS
Read all of theseinstructions.
1.
Save theseinstructions for later use.
2.
All warnings on the product and in the operating instructionsshould be adhered to.
3.
Unplug thisappliance system from the wall outlet before cleaning. Do not use liquid cleaners or aerosol
4.
cleaners.Use a damp cloth for cleaning.
Do not use attachments not recommended by the appliance manufacturer as they maycausehazards.
5.
Do not use thisappliance nearwater - for example, near abathtub,washbowl, kitchen sink, or laundry tub,ina wet
6.
basement, or near aswimming pool, etc.
Do not place thisappliance on an unstable cart, stand, or table. The appliance mayfall,
7.
causing serious injury to a child or adult, and serious damage to the appliance.
Use only with a cart or stand recommended by the manufacturer, or sold with the appliance.
Wall or shelf mounting should follow the manu
mounting kit approved by the manufacturer. An appliance and cart combination should be
moved with care.
Quick stops, excessive force, and uneven surfaces maycause the appliance and cart
combination to overturn.
Slotsand openings in the cabinet and the back or bottom are provided for ventilation, and to insure reliable operation of
8.
the appliance and to protect it from overheating, these openings must not be blocked or covered. The openingsshould
never be blocked byplacing the appliance on abed, sofa,rug, or other similar surface.
Thisappliance should never beplaced near or over a radiator or heat regi
Thisappliance should not beplaced in abuilt-in installation such asabookcase unless proper ventilation is provided.
Thisappliance should be operated only from the type of power source indicated on the marking label. If youare not sure
9.
of the type of power supplied to your home, consult yourdealer or local power company. For appliance designed to
operate from battery power, refer to the operating instructions.
Thisappliance system is equipped with a3-wire grounding type plug(a plughaving a third (grounding pin).
10.
This plug will only fit into a grounding-type power outlet. This isasafety feature. If youare unable to insert the plug into
the outlet, contact your electriciantoreplace yourobsolete outlet. Do not defeat the safety purpose of the grounding plug.
For added protection for this product during a lightning storm, or when it is left unattended and unused for long periods
11.
of time, unplug it form the wall outlet and disconnect the antenna or cable system. This will prevent damage to the
product due to lightning and power-line surges.
Do not allow anything to rest on the power cord. Do not locate thisappliance where the cord will be abused by persons
12.
walking on it.
Follow all warningsand instructions marked on the appliance.
13.
Do not overloadwall outletsand extension cordsasthis canresult in fire or electric shock.
14.
Never pushobjects of any kind into thisappliance through cabinet slotsasthey maytouch dangerous voltage points or
15.
short outparts thatcould result in a fire or electric shock. Never spill liquid of any kind on the appliance.
Do not attempt to service thisappliance yourself as opening or removing covers may exposeyou to dangerous voltage
16.
or other hazards. Refer all servicing to qualified service personnel.
Unplug thisappliance from the wall outlet and refer servicing to qualified service personnel under the following conditions:
17.
a. When the power cord or plugis damaged or frayed.
b. If liquid has been spilled into the appliance.
c. If the appliance has been exposed to rain or water.
d.
If the appliance does not operate normally by following the operating instructions. Adjus
are covered by the operating instructionsasimproper adjustment of other controls mayresult in damage and will
often require extensive work by a qualified techniciantorestore the appliance to normal operation.
e. If the appliance has been dropped or the cabinet has been damaged.
f.
When the appliance exhibitsadistinct change in performance - this indicatesaneed for service.
When replacement partsare required, be sure the service technicianhas used replacement partsspecified by the
18.
manufacturer thathave the same characteristicsasthe originalpart. Unauthorized substitutions mayresult in fire,
electric shock, or other hazards.
Upon completion of any service or repairs to thisappliance, ask the service technician to perform routine safety checks
19.
to determine that the appliance is in safe operating condition.
facturer's instructions, and should use a
ster.
PORTABLE CART WARNING
(symbol provided by RETAC)
S3125A
t only those controls that
II
Page 3
Safety Precautions
FOR USA AND CANADA
CAUTION
RISK OF ELECTRIC SHOCK
DO NOT OPEN
CAUTION:
TO REDUCE THE RISK OF ELECTRIC SHOCK.
DO NOT REMOVE COVER (OR BACK).
NO USER-SERVICEABLE PARTSINSIDE.REFER
SERVICING TO QUALIFIED SERVICE PERSONNEL.
The lightning flash with arrowhead symbol,
within an equilateral triangle is intended to
alert the user to the presence of uninsulated
“dangerous voltage” within the product’s
enclosure that may be of sufficient magnitude
to constitute a risk of electric shock to
persons.
The exclamation point within an equilateral
triangle is intended to alert the user to the
presence of important operating and
maintenance (servicing) instructions in the
literature accompanying the appliance.
POUR CANADA
ATTENTION
RISQUE D’ELECTROCUTION
NE PAS OUVRIR
ATT ENTION:
POUR EVITER TOUT RISQUE D’ELECTROCUTION
NE PAS OUVRIR LE BOITER. AUCUNE PIECE
INTERIEURE N’EST A REGLER PAR L’UTILISATEUR.
SE REFERER A UN AGENT QUALIFIE EN CAS DE
PROBLEME.
Le symbole de l’éclair à l’intérieur d’un triangle
équilatéral est destiné à alerter l’utilisateur sur la
présence d’une “tension dangereuse” non isolée
dans le boîtier du produit. Cette tension est
suffisante pour provoquer l’électrocution de
personnes.
Le point d’exclamation à l’intérieur d’un triangle
équilatéral est destiné à alerter l’utilisateur sur la
présence d’opérations d’entretien importantes au
sujet desquelles des renseignements se trouvent
dans le manuel d’instructions.
Ces symboles ne sont utilisés qu’aux Etats-Unis.
INFORMATION (FOR CANADA)
RENSEIGNEMENT (POUR CANADA)
This Class A digital apparatus complies with Canadian
ICES-003.
Cet appareil numérique de la Class A est conforme à
la norme NMB-003 du Canada.
INFORMATION:
This equipment has been tested and found to comply
with the limits for a Class A digital device, pursuant to
Part 15 of the FCC Rules.
These limits are designed to provide reasonable
protection against harmful interference when the
equipment is operated in a commercial environment.
This equipment generates, uses, and can radiate
radio frequency energy and, if not installed and used
in accordance with the instruction manual, may cause
harmful interference to radio communications.
Operation of this equipment in a residential area is
likely to cause harmful interference in which case the
user will be required to correct the interference at his
own expense.
CAUTION:
CHANGES OR MODIFICATIONS NOT APPROVED
BY JVC COULD VOID USER’S AUTHORITY TO
OPERATE THE EQUIPMENT.
THIS DEVICE COMPLIES WITH PART 15 OF THE
FCC RULES. OPERATION IS SUBJECT TO THE
FOLLOWING TWO CONDITIONS: (1) THIS DEVICE
MAY NOT CAUSE HARMFUL INTERFERENCE, AND
(2) THIS DEVICE MUST ACCEPT ANY
INTERFERENCE RECEIVED, INCLUDING
INTERFERENCE THAT MAY CAUSE UNDESIRED
OPERATION.
WARNING:
TO REDUCE THE RISK OF FIRE OR ELECTRIC SHOCK,
DO NOT EXPOSE THIS APPLIANCE TO RAINOR MOISTURE.
CAUTION:
This unit should be used with 120V AC only. (RM-HP790DU)
To prevent electric shocks and fire hazards, do NOT use
anyother power source.
AVERTISSEMENT:
POUR EVITER LES RISQUES D’INCENDIE OU
D’ELECTROCUTION, NE PAS EXPOSER L’APPAREIL
A L’HUMIDITE OU A LA PLUIE.
ATTENTION:
Ce magnétoscope ne doit être utilisé que sur du courant
direct en 120V.
Afin d’eviter tout resque d’incendie ou d’electrocution, ne
pas utillser d’autres sources d’alimentation électrique.
NOTE:
The rating plate and the safety caution are on the top of the unit.
REMARQUE:
La plaque d'identification (numéro de série) se trouve sur
le panneau arrière de l'appareil.
CAUTION:
To prevent electric shock, do not open the cabinet.
No user serviceable parts inside. Refer servicing to
qualified service personnel.
Due to design modifications, data given in this instruction
book are subject to possible change without prior notice.
The apparatus shall not be exposed to dripping or
splashing and that no objects filled with liquids, such as
vases, shall be placed close to the apparatus.
III
Page 4
Introduction
Safety Precautions
(continued)
IMPORTANT (In the United Kingdom)
Mains Supply (AC 230 V)
WARNING - THIS APPARATUS
MUST BE EARTHED
The wires in this mains lead are coloured in accordance
with the following code;
GREEN-and-YELLOW : EARTH
BLUE : NEUTRAL
BROWN : LIVE
As the colours of the wires in the mains lead of this
apparatus may not correspond with the coloured
markings identifying the terminals in your plug, proceed
as follows.
The wire which is coloured GREEN-AND-YELLOW
must be connected to the terminal in the plug which is
marked with the letter E or by the safety earth symbol or
coloured GREEN or GREEN-AND-YELLOW.
The wire which is coloured BLUE must be connected to
the terminal which is marked with the letter N or which
is coloured BLACK. The wire which is coloured BROWN
must be connected to the terminal which is marked with
the letter L or coloured RED.
POWER SYSTEM
Connection to the mains supply
This unit operates on voltage of 230 V AC, 50 Hz
(RM-HP790DE).
FOR EUROPE
This equipment is in conformity with the provisions and
protection requirements of the corresponding European
Directives. This equipment is designed for professional video
appliances and can be used in the following environments:
●
Controlled EMC environment (for example, purpose-built
broad-casting or recording studio), and rural outdoors
environments.
In order to keep the best performance and furthermore for
electromagnetic compatibility we recommend to use cables
not exceeding the following lengths:
Port Cable Length
[CAMERA CABLE] Shielded Cable 5 m
[REMOTE] Shielded Cable 5 m
[HD/SD SDI INTPUT] Shielded Cable 10 m
[HD/SD SDI OUTPUT] Shielded Cable 10 m
[COMPOSITE VIDEO] Shielded Cable 10 m
[VIDEO OUTPUT]
([Y/G], [P
[GENLOCK INPUT] Shielded Cable 10 m
[AUX VIDEO INPUT] Shielded Cable 10 m
Intercom connector
(CANNON)
[INTERCOM]
([H], [C], [G])
[TALLY]
([PVW], [PGM], [C])
[ACHIN] Unshielded Cable 2.5 m
The inrush currant of this apparatus is 7.4A.
B/B], [PR/R])
Shielded Cable 10 m
Shielded Cable 1.5 m
Shielded Cable 3 m
Unshielded Cable 3 m
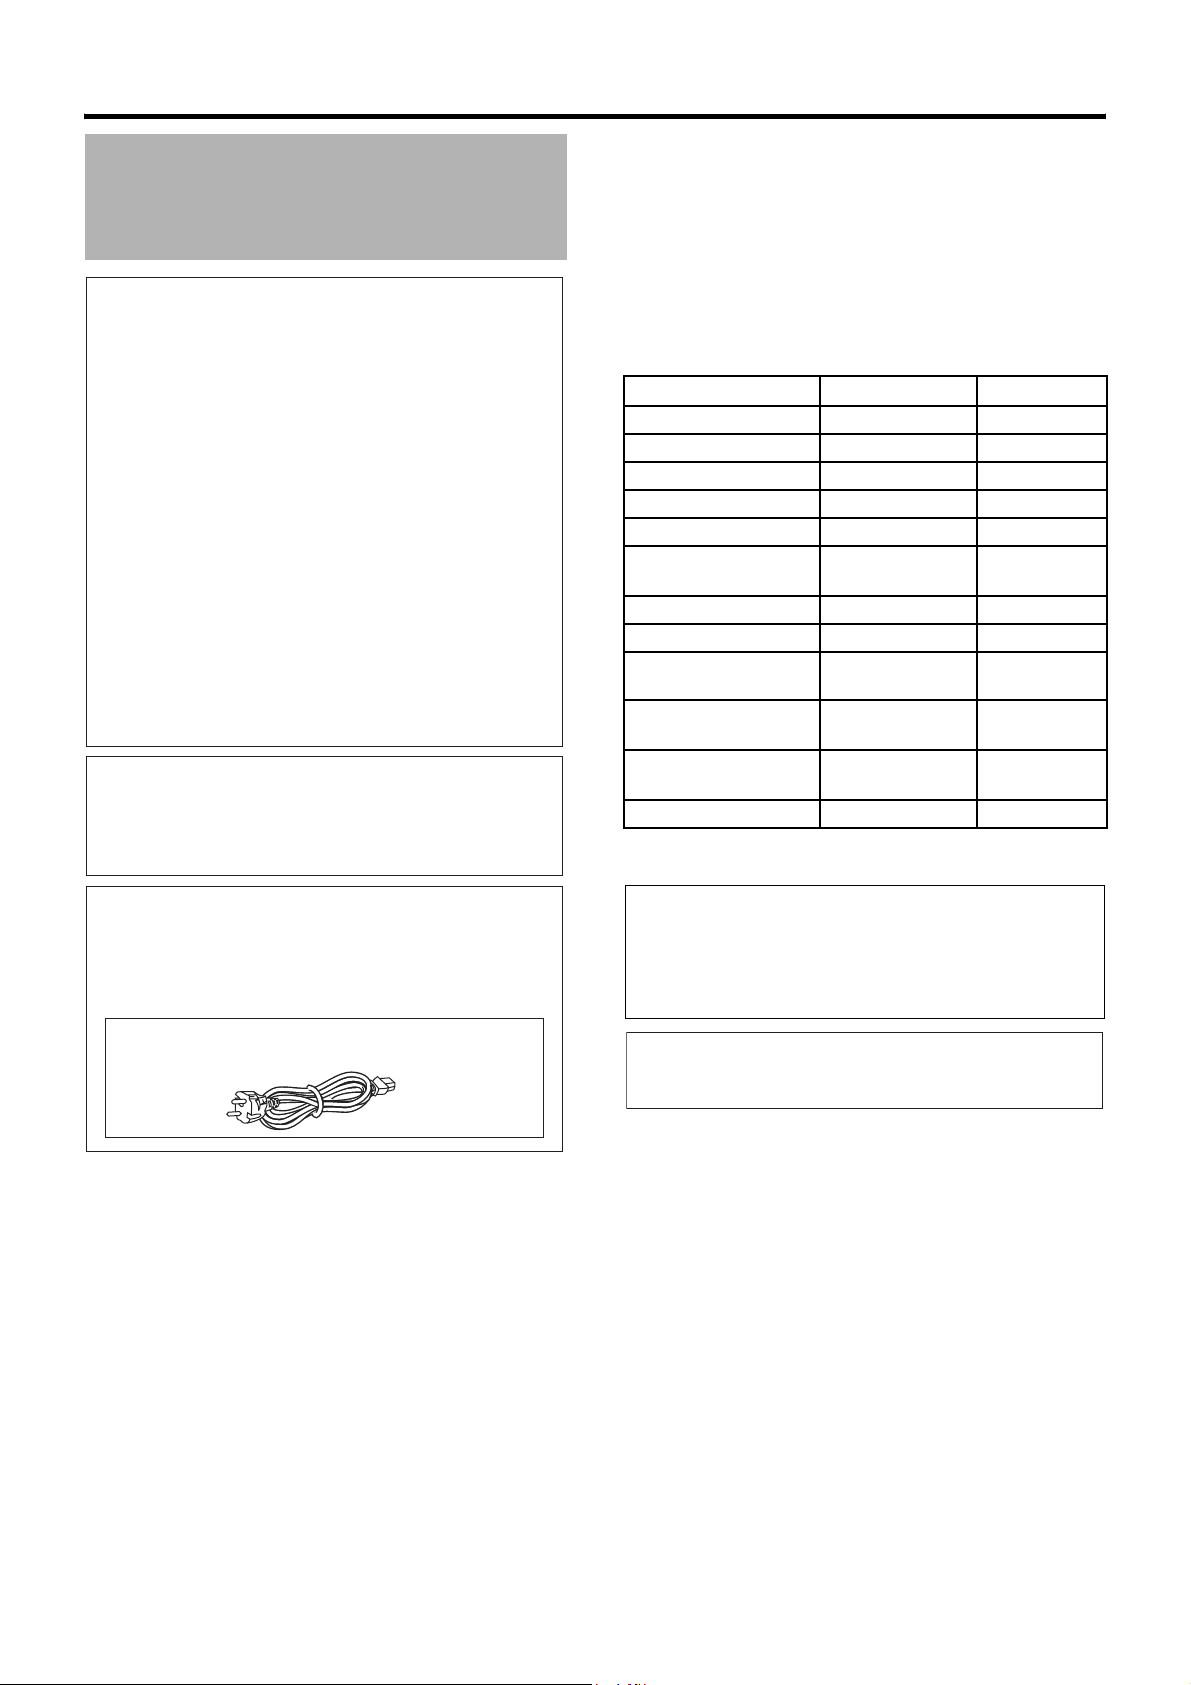
Caution for AC Power Cord
FOR YOUR SAFETY PLEASE READ THE
FOLLOWING TEXT CAREFULLY.
Appropriate AC Power Cord must be used in each local
area.
FOR CONTINENTAL EUROPE, ETC.
Not to be used in the U.K.
Caution:
Where there are strong electromagnetic waves or
magnetism, for example near a radio or TV transmitter,
transformer, motor, etc., the picture and the sound may
bedisturbed. In such case, please keep the apparatus
away from the sources of the disturbance.
WARNING–THIS APPARATUS
MUST BE EARTHED
Changes or modifications not approved by JVC could void
the user's authority to operate the equipment.
This unit is designed for professional use only.
IV
Page 5
CAUTION:
RED color indications on the operation panel are
provided but they are not safety related, RED color
indications :
(1) For Tally Indicator
(2) For Calling Indicator
Information for Users on Disposal of Old Equipment
[European Union]
WARNING
This is a Class A product. In a domestic environment
this product may cause radio interference in which case
the user may be required to take adequate measures.
WARNING
For PLUGGABLE EQUIPMENT, the socket outlet shall
be installed near the equipment and shall be easily
accessible.
Dear Customer,
This apparatus is in conformance with the valid European
directives and standards regarding electromagnetic
compatibility and electrical safety.
European representative of Victor Company of Japan,
Limited is:
JVC Technical Services Europe GmbH
Postfach 10 05 04
61145 Friedberg
Germany
FOR USE IN CHINA ONLY
Attention:
Thissymbol is only valid in the European
Union.
Thissymbol indicates that the electrical and electronic
equipment should not bedisposed as generalhousehold
waste atits end-of-life. Instead, the product should be
handed over to the applicable collection point for the
recycling of electrical and electronic equipment for proper
treatment, recovery and recycling in accordance with your
national legislation.
By disposing of this product correctly, you will help to
conserve naturalresourcesand will help prevent potential
negative effects on the environment and humanhealth
which could otherwise becaused byinappropriate waste
handling of this product. For more information about
collection point and recycling of this product, please contact
your localmunicipal office, yourhousehold waste disposal
service or the shop where you purchased the product.
Penalties may be applicable for incorrect disposal of this
waste, in accordance with national legislation.
(Business users)
If you wishtodisposeofthis product, pleasevisit ourweb
page http://www.jvc.eu to obtain information about the
take-back of the product.
[Other Countries outside the European Union]
If you wishtodisposeofthis produ
accordance with applicable national legislation or other
rules in yourcountry for the treatment of old electrical and
electronic equipment.
ct, pleasedosoin
V
Page 6

Introduction
Safety Precautions
(continued)
Place of storage and use
䡵 Avoid storing or using the unit in the following places.
Failure to do so may lead to malfunction or breakdown.
● Extremely hot or cold places beyond the allowable
temperature for operation (-5 f to 40 f)
● Humid or dry places beyond the allowable humidity
range for operation (30 % to 80 %)
● Places that generate strong magnetic fields, e.g.
transformers or motors
● Places near devices that generate electric waves, e.g.
transceivers or mobile phones
● Dusty or sandy places
● Places exposed to strong vibration
● Places prone to condensation, such as by a window
● Places that generate radiation, X-rays or corrosive
gases
Handling the unit
䡵 Do not stack units on top of each other.
Doing so may cause malfunction or failure due to
overheating or noise, or lead to fire.
䡵 Do not block the ventilation openings.
If the openings are blocked, heat will build up inside the
unit, leading to fire. Do not use the unit in a vertical
position or when it is placed upside down or face up.
䡵 Do not place any objects on the unit.
Placing a heavy object such as a TV monitor or a large
object that protrudes over the edge of the unit on top of
the unit may cause it to overbalance and topple over or fall
off and cause injury.
䡵 Do not climb on the unit.
Doing so may cause the unit to topple over or be
damaged. Particular attention should be paid to small
children.
䡵 Do not place anything containing water on the unit (such
as a vase, plant pot, glass, cosmetics or chemicals).
If water gets inside the unit, it may lead to fire or electric
shock.
䡵 Do not insert foreign objects into the unit.
If any metal object or flammable item gets into the unit
through the ventilation openings, etc., it may lead to fire or
electric shock.
Moving the unit
䡵 Disconnect the cords before moving the unit.
Before moving the unit, turn off the power and be sure to
unplug the power cord from the electric outlet.
Failure to do so may result in damage to the cord or lead
to fire or electric shock.
䡵 Wrap the unit in protective packing to prevent physical
shocks.
䡵 Handle the unit with care. Do not subject it to vibration or
physical shocks.
Saving power
䡵 For safety reasons and to save energy, unplug the power
cord when the unit is not in use for long periods.
Power cord
䡵 Do not use the power cord supplied with the unit on other
devices.
䡵 Do not place heavy items on the power cord or trap the
cord under the unit.
Doing so may result in damage to the cord or lead to fire
or electric shock.
䡵 Be sure to use the power cord supplied with the unit.
Using a different type or damaged cord may lead to fire or
electric shock.
Maintaining the unit
䡵 Wipe the unit with a soft cloth.
Do not use thinner or benzene as this may cause the
surface to dissolve or tarnish. For stubborn stains, wipe
first with a water-diluted neutral detergent and then wipe
dry.
VI
Page 7
Sicherheitsvorkehrungen
(für Deutschland)
SPANNUNGSVERSORGUNG
Anschluss am Netz
Die Betriebsspannung für dieses Gerät beträgt
AC230 V, 50 Hz (RM-HP790DE)
FÜR DEUTSCHLAND
Dieses Gerät entspricht den Bestimmungen und
Schutzanforderungen der anwendbaren EU-Richtlinien.
Dieses Gerät wurde für professionelle Videoanwendungen
entwickelt und kann in den folgenden Umgebungen
eingesetzt werden:
Kontrollierte EMC-Umgebung (z.B. spezielles Rundfunkund
●
Aufnahmestudio) sowie ländliche Außenumgebungen.
Zu Erzielung der bestmöglichen Leistung und außerdem
zum Zwecke der elektromagnetischen Kompatibilität
empfehlen wir die Verwendung von Kabeln, die folgende
Längenwerte nicht überschreiten:
Anschluss Kabel Kabellänge
(max.)
[CAMERA CABLE] Geschirmtes Kabel 5 m
[REMOTE] Geschirmtes Kabel 5 m
[HD/SD SDI INTPUT] Geschirmtes Kabel 10 m
[HD/SD SDI OUTPUT] Geschirmtes Kabel 10 m
[COMPOSITE VIDEO] Geschirmtes Kabel 10 m
[VIDEO OUTPUT]
([Y/G], [P
[GENLOCK INPUT] Geschirmtes Kabel 10 m
[AUX VIDEO INPUT] Geschirmtes Kabel 10 m
Intercom connector
(CANNON)
[INTERCOM]
([H], [C], [G])
[TALLY]
([PVW], [PGM], [C])
[ACHIN] Ungeschirmtes
Die inrush-Strömung dieses Apparates ist 7,4A.
B/B], [PR/R])
Geschirmtes Kabel 10 m
Geschirmtes Kabel 1,5 m
Geschirmtes Kabel 3 m
Ungeschirmtes
Kabel
Kabel
3 m
2,5 m
ACHTUNG:
UM DER GEFAHR VON BRÄNDEN UND
ELEKTRISCHEN SCHLÄGEN VORZUBEUGEN,
DARF DIESES GERÄT WEDER DEM REGEN NOCH
HOHER FEUCHTIGKEIT AUSGESETZT WERDEN.
ACHTUNG
Um elektrische Schläge zu vermeiden, das Gehäuse
nie öffnen. Im Innern befinden sich keine Teile, die vom
Benutzer gewartet werden können. Überlassen Sie die
Wartung qualifiziertem Service-Personal.
WARNUNG
Bei dem Gerät handelt es sich um ein
Klasse-A-Produkt.
In Haushaltsumgebungen kann ein solches Produkt
Funkstörungen verursachen. In einem solchen Fall
muss der Benutzer geeignete Maßnahmen ergreifen.
WARNUNG
Uebermaessiger Schalldruck von Ohrhoerern bzw.
Kopfhoerern kann einen Hoerverlust bewirken. Eine
Einstellung des Ausgangs auf Maximalwerte erhoeht
die Ausgangsspannung am Ohrhoerer- bzw.
Kopfhoererausgang und damit auch den
Schalldruckpegel.
Sehr geehrter Kunde, sehr geehrte Kundin,
dieses Gerät stimmt mit den gültigen europäischen
Richtlinien und Normen bezüglich elektromagnetischer
Verträglichkeit und elektrischer Sicherheit überein.
Die europäische Vertretung für die Victor Company of
Japan, Limited ist:
JVC Technical Services Europe GmbH
Postfach 10 05 04
61145 Friedberg
Deutschland
Achtung:
In Bereichen, in denen ein hohes Maß an
elektromagnetischer oder magnetischer Strahlung
vorhanden ist – etwa in der Nähe eines Radio- oder
TVSenders,
eines Transformators, Motors usw. –, können
Bild- und Tonstörungen auftreten. Bitte stellen Sie das
Gerät in solchen Fällen in größerer Entfernung zur
Störquelle auf.
VII
Page 8
Introduction
Sicherheitsvorkehrungen
(Fortsetzung)
Benutzerinformationen zur Entsorgung alter Geräte
[Europäische Union]
Hinweis:
Dieses Symbol ist nur in der
Europäischen Union gültig.
Dieses Symbol zeigt an, dass das elektrische bzw.
elektronische Gerät nicht als normaler Haushaltsabfall
entsorgt werden soll. Stattdessen sollte das Produkt zur
fachgerechten Entsorgung, Weiterverwendung und
Wiederverwertung in Übereinstimmung mit der
Landesgesetzgebung einer entsprechenden Sammelstelle
für das Recycling elektrischer und elektronischer Geräte
zu
geführt werden.
Die korrekte Entsorgung dieses Produkts dient dem
Umweltschutz und verhindert mögliche Schäden
für die Umwelt und die menschliche Gesundheit, welche
durch unsachgemäße Behandlung des Produkts auftreten
können. Weitere Informationen zu Sammelstellen und dem
Recycling dieses Produkts erhalten Sie bei Ihrer
Gemeindeverwaltung, Ihrem örtlichen
Entsorgungsunternehmen oder in dem Geschäft, in dem
Sie das Produkt gekauft haben.
Für die nicht fachgerechte Entsorgung dieses Abfalls
können gemäß der Landesgesetzgebung Strafen
ausgesprochen werden.
Erklärung zum Rauschen (für die Bundesrepublik
Deutschland) :
Maschinenlärminformations-Verordunung 3. GPSGV,
06.01.2004: Der höchste Schalldruckpegel beträgt 70
dB (A) oder weniger gemäß EN ISO 7779
Hinweis zum Netzanschlußkabel
Zu Ihrer Sicherheit lesen Sie bitte das folgende
sorgfältig.
Verwenden Sie ausschließlich ein in Ihrem Land
zulässiges Netzkabel.
Für Kontinentaleuropa
Nicht für den Gebrauch in Großbritannien.
Das Geraet ist nicht fuer die Benutzung am
Bildschirmarbeitsplatz gemaess BildscharbV
vorgesehen.
(Geschäftskunden)
Wenn Sie dieses Produkt entsorgen möchten, besuchen
Sie bitte unsere Webseite http://www.jvc.eu,
um Informationen zur Rücknahme des Produkts zu
erhalten.
[Andere Länder außerhalb der Europäischen Union]
Wenn Sie dieses Produkt entsorgen möchten, h
sich dabei bitte an die entsprechenden Landesgesetze und
andere Regelungen in Ihrem Land zur Behandlung
elektrischer und elektronischer Geräte.
alten Sie
VIII
Page 9

WICHTIGE SICHERHEITSHINWEISE
Alle Warnungen auf dem Produkt sowie in der Betriebsanleitung sind unbedingt zu beachten.
1.
Ziehen Sie den Netzstecker dieses Systems aus der Steckdose, bevor Sie das Gerät reinigen. Benutzen Sie keine
2.
Flüssigreiniger und keine Sprühreiniger. Verwenden Sie zum Reinigen lediglich ein leicht angefeuchtetes Tuch.
Benutzen Sie keine Zubehörteile, die nicht vom Hersteller empfohlenen werden; diese können Gefahren und Risiken
3.
verursachen.
Benutzen Sie das Gerät nicht in der Nähe von Wasser und sonstigen Flüssigkeiten - beispielsweise nicht in der Nähe
4.
von Badewannen, Handwaschbecken, Spülen, Waschbecken, nicht in feuchten Kellern, nicht in der Nähe von
Schwimmbecken, und so weiter.
Stellen Sie das Gerät nicht auf instabile Wagen, Ständer oder Tische. Das Gerät kann herunterfallen, ernsthafte
5.
Verletzungen bei Kindern und Erwachsenen hervorrufen und auch selbst schwer beschädigt werden. Benutzen Sie
ausschließlich Wagen oder Ständer, die vom Hersteller empfohlen oder mit dem Gerät verkauft wurden. Bei der
Aufstellung im Regal halten Sie sich an die Anweisungen des Herstellers.
Z
usätzlich sollten Sie einen vom Hersteller zugelassenen Montagesatz verwenden. Eine Kombination aus Gerät und
Wagen sollte grundsätzlich mit großer Sorgfalt bewegt werden. Schnelle Stopps, übermäßiger Krafteinsatz und
unebener Untergrund können zum Umkippen der Gerät-Wagen-Kombination führen.
Schlitze und Öffnungen im Gehäuse sowie an Rückwand und Unterseite dienen der Belüftung des Gerätes und sorgen
6.
dafür, dass das Gerät zuverlässig arbeiten und sich nicht üb erhitzen kann. Daher dürfen Sie diese Öffnungen auf keinen
Fall blockieren oder abdecken. Die Öffnungen können beispielsweise blockiert werden, wenn Sie das Gerät auf ein Bett,
ein Sofa, einen Teppich oder einen ähnlichen Untergrund stellen.
Dies darf au
die Wärme abstrahlen, aufgestellt werden. Geschlossene Aufstellungsorte wie Bücherregale eignen sich nur dann zur
Aufstellung des Gerätes, wenn eine ordnungsgemäße Belüftung jederzeit gewährleistet ist.
Das Gerät ist mit einem Schutzkontaktstecker (einem Stecker mit Erdungsbügeln an beiden Seiten) ausgestattet. Dieser
7.
Stecker lässt sich nur in eine geerdete Schutzkontaktsteckdose einstecken. Dies dient Ihrer Sicherheit. Falls sich der
Stecker nicht problemlos in die Steckdose einstecken lassen sollte, lassen Sie die (veraltete) Steckdose von einem
Elektriker austauschen. Versuchen Sie niemals
Weise außer Kraft zu setzen.
Um das Gerät während eines Gewitters oder für einen längeren unbeaufsichtigten Zeitraum zu schützen, ziehen Sie
8.
den Netzstecker aus der Steckdose, und trennen Sie die Antenne oder das Kabelsystem ab.
Dadurch vermeiden Sie Produktschäden, die als Folge eines Blitzeinschlags oder Stromstosses auftreten können.
Sorgen Sie dafür, dass nichts auf dem Netzkabel zu liegen kommt. Platzieren Sie das Gerät nicht an Stellen, an denen
9.
Personen auf das Kabel treten und es beschädigen können.
Beachten Sie alle Warnungen und Anleitungen, die auf dem Gerät vermerkt sind.
10.
Überlasten Sie niemals Steckdosen oder Verlängerungskabel: Dies kann leicht zu Stromschlägen und Bränden führen.
11.
Stecken Sie niemals Gegenstände gleich welcher Art durch die Gehäuseöffnungen in das Gerät; dabei können
12.
Hochspannung führende Teile berührt und Kurzschlüsse verursacht werden: Es besteht akute Brand- und
Stromschlaggefahr. Lassen Sie niemals Flüssigkeiten gleich welcher Art auf oder in das Gerät gelangen.
Unter folgenden Bedingungen ziehen Sie den Netzstecker und lassen das Gerät von einem qualifizierten Techniker
13.
überprüfen und reparieren:
a.
Wenn das Netzkabel oder der Netzs
Auswirkungen haben.
b.Falls Flüssigkeit auf oder in das Gerät gelangt sein sollte.
c. Wenn das Gerät mit Regen oder Wasser in Berührung gekommen ist.
d.
Wenn das Gerät nicht normal funktioniert, obwohl die Betriebsanleitung befolgt wurde. Passen Sie nur die
Steuer
zu Schäden führen, die dann sehr aufwändig von einem qualifizierten Techniker
repariert werden müssen, damit das Gerät wieder einwandfrei funktioniert.
e. Falls das Gerät fallen gelassen oder das Gehäuse beschädigt wurde.
f.
Falls sich die Leistung des Gerätes spürbar ändern sollte - in diesem Fall muss das Gerät dringend überprüft
und/oder repariert werden.
f keinen Fall geschehen. Das Gerät sollte niemals in der Nähe oder über Heizgeräten oder anderen Geräten,
, die Sicherheit, die Ihnen ein Schutzkontaktstecker bietet, auf irgendeine
tecker beschädigt ist; auch kleinste Beschädigungen können große
ungen an, die in der Betriebsanleitung vermerkt sind. Die Anpassung anderer Steuerungen kann ansonsten
IX
Page 10

Introduction
Sicherheitsvorkehrungen
(Fortsetzung)
ACHTUNG
䡵 Stellen Sie keine wasserhaltigen Gegenstände auf dem
Gerät ab (beispielsweise Vase, Blumentopf, Gläser,
Kosmetika oder Chemikalien). Tritt Wasser in das Innere
des Geräten ein, kann dies einen Brand oder einen
Kurzschluss verursachen.
䡵 Stecken Sie keine Fremdkörper in den Gerät. Dringen
metallische oder brennbare Gegenstände durch die
Belüftungsschlitze o.ä. in den Gerät ein, kann dies einen
Brand oder einen Kurzschluss verursachen.
1) Nehmen Sie nicht die Frontabdeckung ab.
2) Falls sich die Frontabdeckung lösen sollte, setzen Sie sie
sofort wieder auf.
Lager- und Verwendungsort:
䡵 Vermeiden Sie, den Gerät an folgenden Plätzen zu lagern
oder zu verwenden. Eine Missachtung kann zu einem
Fehler oder einer Störung führen.
● Extrem heiße oder kalte Plätze, die außerhalb der
zulässigen Betriebstemperatur liegen (-5 f bis 40 f)
● Feuchte oder trockene Plätze, die außerhalb der
zulässigen Feuchtigkeit für den Betrieb liegen
(30% bis 80%)
● Plätze, an denen starke Magnetfelder erzeugt werden,
beispielsweise Tranformatoren oder Motoren
● Plätze in der Nähe von Geräten, die elektrische Wellen
erzeugen, beispielsweise Sender-Empfänger oder
Handys
● Staubige oder sandige Plätze
● Plätze, die starken Erschütterungen ausgesetzt sind
● Plätze, die zu Kondensationsbildung neigen,
beispielsweise ein Fenster
● Plätze, die Strahlung, Röntgenstrahlen oder ätzende
Gase erzeugen
Handhabung des Geräten:
䡵 Stapeln Sie Gerät nicht aufeinander. Dies kann zu
erhöhter Geräuschentwicklung und aufgrund von
Überhitzung zu Fehlfunktionen oder zum Totalausfall der
Geräte bis hin zu Bränden führen.
䡵 Blockieren Sie nicht die Belüftungsschlitze. Sind die
Öffnungen blockiert, bildet sich im Inneren des Geräten
Hitze, wodurch ein Brand entstehen kann. Benutzen Sie
den Gerät nicht in vertikaler Position, nicht auf dem Kopf
stehend, nicht mit der Front nach oben.
䡵 Legen Sie keine Gegenstände auf dem Gerät ab. Wenn
Sie einen schweren Gegenstand, beispielsweise einen
Fernsehbildschirm oder einen großen Gegenstand, der
über die Kante des Geräten hinausragt, auf den Gerät
stellen, kann dieser aus dem Gleichgewicht geraten.
Dadurch besteht die Gefahr, dass der Gerät kippt oder auf
den Boden fällt und Verletzungen verursacht.
䡵 Steigen Sie nicht auf den Gerät. Der Gerät könnte
umfallen oder beschädigt werden. Achten Sie besonders
auf kleine Kinder.
Pflege des Geräten
䡵 Wischen Sie den Gerät mit einem weichen Tuch ab.
Verwenden Sie keine Verdünner oder Benzol. Dies könnte
dazu führen, dass die Oberfläche zersetzt oder matt wird.
Im Fall von hartnäckigen Flecken, wischen Sie diese
zunächst mit einem neutralen und mit Wasser verdünnten
Reiniger ab, und wischen Sie die Fläche dann trocken.
Transport des Geräten
䡵 Trennen Sie vor dem Transport des Geräten alle Kabel ab.
Schalten Sie den Gerät vor dem Transport aus und stellen
Sie sicher, dass der Netzstecker aus der Steckdose
entfernt wurde. Wird dies nicht beachtet, kann dies zu
Beschädigungen am Kabel, einem Brand oder einem
Stromschlag führen.
䡵 Achten Sie bei der Verpackung darauf, dass der Gerät vor
Stößen geschützt ist.
䡵 Gehen Sie vorsichtig mit dem Gerät um. Setzen Sie ihn
keinesfalls Erschütterungen oder Stößen aus.
Netzkabel
䡵 Verwenden Sie das mit dem Gerät gelieferte Netzkabel
ausschließlich für dieses Gerät.
䡵 Stellen Sie keine schweren Gegenstände auf das
Netzkabel und vermeiden Sie, dass das Netzkabel unter
dem Gerät eingeklemmt wird. Wird dies nicht beachtet,
kann dies zu Beschädigungen am Kabel, einem Brand
oder einem Stromschlag führen.
䡵 Benutzen Sie grundsätzlich das mit dem Gerät gelieferte
Netzkabel. Die Verwendung eines anderen oder
beschädigten Kabels kann zu Stromschlägen und
Bränden führen.
Einbau des RM-HP790DE in einem EIARack mit Montageklammern:
1) Entfernen Sie 4 Schrauben und 4 Füße vom Boden des
RM-HP790DE.
2) Befestigen Sie diese mit M5-Schrauben am Rack. Diese
Schrauben sind im Lieferumfang des RM-HP790DE
enthalten.
X
Page 11
Achtung
● Stellen Sie keinerlei Gegenstände auf den RM-HP790DE,
wenn dieser in einem Rack montiert ist. Dies kann durch
Ungleichgewicht zum Herunterfallen des Geräten führen
und Verletzungen oder Schäden verursachen.
● Werden zwei oder mehrere Gerät in dem Rack eingebaut,
achten Sie darauf, dass der Abstand mindestens die
Größe eines Geräten beträgt.
● Bauen Sie den RM-HP790DE nicht in ein Rack ein, wenn
die Umgebungstemperatur 40f oder mehr beträgt.
● Wenn Sie das Gerät in einem Rack montieren, halten Sie
einen Abstand von mindestens 15 cm zwischen Rack und
der Rückwand des Gerätes ein.
● Vor dem Einbau in das Rack ist sicherzustellen, dass das
Rack sicher und vor dem Umfallen geschützt ist.
Beachten Sie im Fall eines Einbaus oder Wartung dieses
Geräts in einem Rack die speziellen Vorsichtsmaßnahmen,
um sicherzustellen, dass das System nicht an Stabilität
verliert.
Folgende Richtlinien dienen zur Sicherstellung Ihrer
Sicherheit. Ist dieses Gerät die einzige Einheit, die in dem
Rack einzubauen ist, so sollte es auf dem Rack-Boden
angebracht werden. Wird das Rack teilweise genutzt, bauen
Sie die Teile von unten nach oben ein. Die schwerste
Komponente sollte stets unten im Rack eingebaut werden.
Ist das Rack mit stabilisierendem Zubehör ausgestattet,
montieren Sie zunächst diese Stabilisatoren, bevor Sie das
Gerät in das Rack einbauen oder warten.
How to use this manual
䡵 Symbols used
Note
Memo
A
Describes precautions concerning the
:
operation of this product.
Describes reference information, such as
:
functions and usage restrictions of this
product.
Indicates the reference page numbers and
:
reference items.
䡵 Content of this manual
● All rights reserved by JVC. Unauthorized duplication or
reprinting of this manual, in whole or in part, is strictly
prohibited.
● All other product names used in this manual are
trademarks or registered trademarks of their respective
companies. Marks such as <Arial Regular>™, 姞, 姝 have
been omitted in this manual.
● Illustrated designs, specifications and other contents of
this manual are subject to change for improvement
without prior notice.
Technische Daten
Allgemein
Zulässiger Temperaturbereich bei der
Lagerung
Zulässige Luftfeuchtigkeit für Lagerung 85 % (max.)
Stromaufnahme 0,4 A (max.)
Gewicht etwa 5,5 kg
-20f bis 60f
XI
Page 12

Introduction
Contents
Introduction
Features . . . . . . . . . . . . . . . . . . . . . . . . . . . . . . . . . . . . . . .2
Precautions for Proper Use . . . . . . . . . . . . . . . . . . . . . . . . .3
Names of Parts . . . . . . . . . . . . . . . . . . . . . . . . . . . . . . . . . .4
Connection
Example of Basic Connection . . . . . . . . . . . . . . . . . . . . . . .8
Example of Connection with 2 Units . . . . . . . . . . . . . . . . . . 9
Rack Mounting . . . . . . . . . . . . . . . . . . . . . . . . . . . . . . . . . .11
Turning the Power ON . . . . . . . . . . . . . . . . . . . . . . . . . . . .11
Preparations and Main Functions
Camera Cable Length Setup . . . . . . . . . . . . . . . . . . . . . . .12
Adjustments for Genlock Operation . . . . . . . . . . . . . . . . . .12
Intercom . . . . . . . . . . . . . . . . . . . . . . . . . . . . . . . . . . . . . .14
Camera Operator Call . . . . . . . . . . . . . . . . . . . . . . . . . . . . 14
Tally . . . . . . . . . . . . . . . . . . . . . . . . . . . . . . . . . . . . . . . . . . 14
Function Buttons . . . . . . . . . . . . . . . . . . . . . . . . . . . . . . . .15
Camera Adjustments
Features
This is a remote control unit to program the HD studio
system together with the HD Memory Card Camera
Recorder (GY-HM790 series: GY-HM790U/GY-HM790CHU/
GY-HM790E/GY-HM790CHE) and Multicore Remote
Adapter (KA-M790G).
Maximum 100m of HD analog component
signals can be transferred
You can use the optional camera cable VC-P110 series to
extend the distance between the camera and the remote
control unit up to 100m and transfer the HD analog
component signals.
There is no need to prepare a separate power source as the
power to the studio adapter will be supplied by RMHP790DU/RM-HP790DE.
Equipped with HD/SD SDI connector
The unit can distribute and output (2 outputs) the input SDI
signals from the SDI input connector. It can be connected to
SDI switcher, monitor or other VTR equipment.
The camera can be remotely controlled
The camera can be remotely controlled by serial
communication. You can also control the camera by
connecting the optional remote control panel RM-LP25U.
Shutter Speed Adjustment . . . . . . . . . . . . . . . . . . . . . . . .16
Gain Adjustment . . . . . . . . . . . . . . . . . . . . . . . . . . . . . . . .17
Iris Adjustment . . . . . . . . . . . . . . . . . . . . . . . . . . . . . . . . . .17
White Balance Adjustment . . . . . . . . . . . . . . . . . . . . . . . .18
Menu Operation
Flow of Menus . . . . . . . . . . . . . . . . . . . . . . . . . . . . . . . . . .19
Menu Setup Method . . . . . . . . . . . . . . . . . . . . . . . . . . . . . 20
GENLOCK Menu . . . . . . . . . . . . . . . . . . . . . . . . . . . . . . . .21
CABLE Menu . . . . . . . . . . . . . . . . . . . . . . . . . . . . . . . . . . .21
FILE Menu . . . . . . . . . . . . . . . . . . . . . . . . . . . . . . . . . . . . .22
PROCESS Menu . . . . . . . . . . . . . . . . . . . . . . . . . . . . . . . .23
OPERATION Menu . . . . . . . . . . . . . . . . . . . . . . . . . . . . . .25
LCD MODE Menu . . . . . . . . . . . . . . . . . . . . . . . . . . . . . . .26
SYSTEM Menu . . . . . . . . . . . . . . . . . . . . . . . . . . . . . . . . .26
General
Warning Messages . . . . . . . . . . . . . . . . . . . . . . . . . . . . . .28
Error Messages . . . . . . . . . . . . . . . . . . . . . . . . . . . . . . . . . 28
Operable Camera Features . . . . . . . . . . . . . . . . . . . . . . . .29
Operation of Connected Camera . . . . . . . . . . . . . . . . . . . .30
Troubleshooting . . . . . . . . . . . . . . . . . . . . . . . . . . . . . . . . . 31
Specifications . . . . . . . . . . . . . . . . . . . . . . . . . . . . . . . . . .32
External synchronization of HD studio
system is possible
External synchronization of SD reference sync signal or
(VBS or BB), HD tri-level reference sync signal for HD studio
system is possible. H phase and SC phase (SD signal) can
be adjusted on the front panel.
2
Page 13

Precautions for Proper Use
䡵 RM-HP790DU/RM-HP790DE can be connected to the
following equipment:
● GY-HM790 series (HD Memory Card Camera Recorder)
● KA-M790G (Multicore Remote Adapter)
● KA-790G (Studio Adapter)
● VF-HP790G (Studio Viewfinder)
䡵 To prolong the service life of the RM-HP790DU/RM-
HP790DE, do not use it or store it in the following places.
● A place subject to extremely high or low temperatures.
● A place subject to excessive vibration.
● A place subject to excessive dust.
● A place subject to high humidity.
● A place near to a strong source of noise.
䡵 Do not apply strong vibrations or impact to the RM-
HP790DU/RM-HP790DE during installation or
transportation.
䡵 If the supply voltage is too high or low, the service life of
the RM-HP790DU/RM-HP790DE may be reduced or it may
not be able to provide an optimum performance.
䡵 Do not connect or disconnect the camera cable connector
while the RM-HP790DU/RM-HP790DE is ON.
䡵 After turning the RM-HP790DU/RM-HP790DE OFF, wait
at least 10 seconds before turning it ON again.
䡵 Noise may interfere with the video when the RMHP790DU/RM-HP790DE is installed near a source of strong
magnetism, such as a radio or TV transmitting antenna,
power transformer or motor.
䡵 While the values set by using the menus are retained in
the memory even after the unit is turned off, those set using
the front panel switches and controls are retained for about
10 days only and then the factory-set defaults are reset.
䡵 As the LCD contrast is reduced at low temperatures, it
should be re-adjusted before use in such conditions.
(A Page 26 [CONTRAST])
䡵 When a transceiver or cellular phone is used near to a
RM-HP790DU/RM-HP790DE or to a camera connected to it,
noise may interfere with the video. However, this is not a
malfunction.
䡵 When an intercom is used, radio interference may
occasionally affect any system that is connected to the RMHP790DU/RM-HP790DE.
䡵 In such a case the INTERCOM G (GND) terminal
provided to the RM-HP790DU/RM-HP790DE should be
grounded.
䡵 In a multiple camera setup, if the adjustments made to the
different cameras deviate significantly, the cameras may not
be able to function satisfactorily. Be sure to adjust the
cameras accordingly before using them with the RMHP790DU/RM-HP790DE.
䡵 Use camera cables with standard lengths, as specified.
Otherwise, the camera cable compensation may not be able
to work efficiently.
Functions not available on the camera cannot be controlled
from this unit.
(A Page 29 [Operable Camera Features])
䡵 If the RM-HP790DU/RM-HP790DE is rack-mounted, be
sure to insert ventilated panels above and below it in order to
improve ventilation, Do not stack two RM-HP790DU/RMHP790DE units or place any object on top of a RMHP790DU/RM-HP790DE unit.
In addition, make sure to keep surrounding temperature of
this unit below 40f during use.
䡵 To save power consumption, turn the RM-HP790DU/RMHP790DE OFF when it is not in use.
3
Page 14
Introduction
Names of Parts
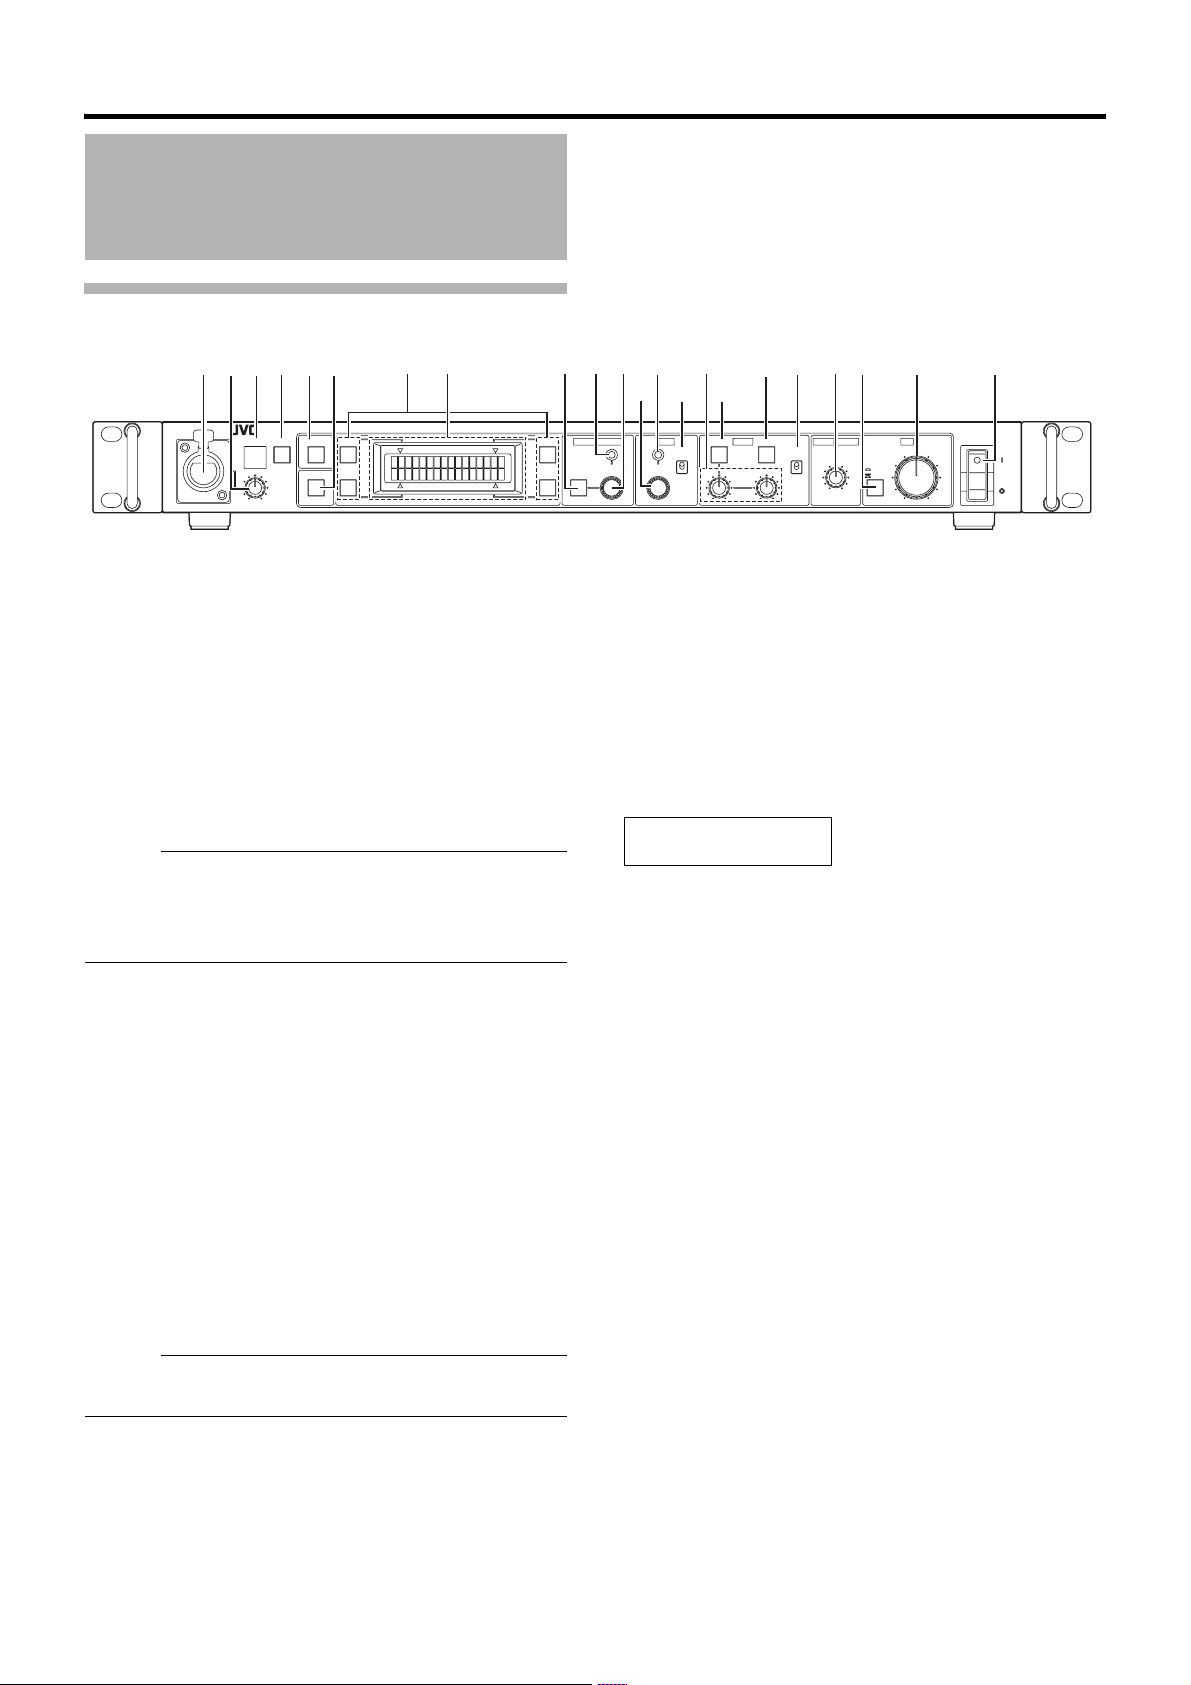
Front panel
A CDB E
A
Intercom connector
TALLY CALL FULL AUTO
F G H I JKLM
INTERCOM
LEVEL
BARS
F1
F2
SHUTTER
GAIN
F3
F4
Connect the intercom headset to this connector.
(A Page 14 [Intercom])
B
[INTERCOM LEVEL] control
Use this knob to adjust the intercom earphone volume.
C
[TALLY] lamp
This lamp lights when a signal is input to the [TALLY]
terminals B on the rear panel.
It lights in red when a tally signal is input to the [TALLY PGM]
terminal on the rear panel or in green when a tally signal is
input to the [TALLY PVW] terminal.
Memo :
● The button lamps will light up and blink as below.
● During CALL : [CALL] button blinks in red
● TALLY PGM : [TALLY] lamp lights up in red
● TALLY PVW : [TALLY] lamp lights up in green
D
[CALL] button and indicator light*
The camera operator can also be called without using the
intercom. When this button is pressed once, the light in it
lights up and the tally lamp on the camera blinks to inform
the camera operator of a call. Pressing this button again
turns off both the button light and tally light on the camera. It
blinks in red when there is a CALL signal from the camera.
E
[FULL AUTO] button and indicator light*
When this button is pressed, the light in it lights up and the
connected camera enters the FAS (Full-Auto Shooting)
mode. Pressing the button again turns the light off.
In the FAS mode, the BARS mode is switched OFF, and the
auto level control, auto iris control and full-auto white balance
control functions are performed automatically in an
integrated manner.
(A Page 29 [Operable Camera Features])
1
2
Memo :
● Functions not available on the camera cannot be
controlled from this unit.
F
[BARS] button and indicator light*
When this button is pressed, the light in it lights up and the
connected camera outputs the color bars signal.
(A Page 12 [Adjustments for Genlock Operation])
2
Q R S T U V
NOP
MENU/SHUTTER GAIN WHITE MASTER BLACK IRIS
SHUTTER
VARIABLE
PUSH-ON
MENU
DOWN UP
DOWN UP
G
PAIN TRAUTO
STEP
HIGH
MID
PUSH-ON
LOW
[F1] to [F4] function buttons and indicator light*
REMOTE CONTROL UNIT RM-HP790
W.BA L
B
A
B
PRESET
AUTO
MANU
CLOSE OPEN
Each of these buttons can turn the function assigned to it
alternately ON and OFF.
(A Page 15 [Function Buttons])
H
LCD display
This panel shows the [SHUTTER] and [GAIN] settings as
well as the functions assigned to the function buttons.
This panel is also used to show menus and various operation
messages.
The following display appears when the remote control panel
is connected and during operate on.
EXT. REMOTE
CONNECTED
I
[MENU] button and indicator light
When this button is held depressed for about 1 second, the
button light is lit and the menu becomes variable. (The
[SHUTTER] and [GAIN] lights should be off.)
Pressing this button terminates a menu and turns the light in
the button off.
(A Page 20 [Menu Setup Method])
J
[SHUTTER] light
This light is turned on when the shutter speed variation
facility is ON.
Adjust the shutter speed using the [SHUTTER] control K.
K
[SHUTTER] control with ON/OFF button*
When this knob is pressed, the shutter speed variation
function is turned alternately ON and OFF.
When the shutter speed variation is ON, the [SHUTTER] light
J is turned on and turning the knob will vary the shutter
speed.
(A Page 16 [Shutter Speed Adjustment])
In [STEP] mode the shutter speed is varied in stages, fine
adjustments can be made in [VARIABLE] mode.
(A Page 25 [SHUTTER])
When the [MENU] light I is lit, turn the knob to switch
between menu items, press the knob (to the ON position) to
select an item.
(A Page 20 [Menu Setup Method])
POWER
2
2
4
Page 15

2
and
3
[B]
L
[GAIN-VARIABLE] control with ON/OFF button*2*
When the button is pressed, the Variable Gain mode is
switched AONB and AOFFB alternately.
The [GAIN] light M is turned on when the Variable Gain
mode is AONB.
When the [GAIN] mode is set to AVARIABLEB, the Gain value
can be varied from 0.1dB (or 1.0dB) to 18dB in 0.1dB (or
1.0dB) steps. The variation per step and the maximum gain
value can be changed under the following items.
( A Page 25 [V. GAIN STEP] and [V. GAIN MAX])
M
[GAIN] light*
This light is turned on when the gain control is in the Variable
Gain mode.
N
[GAIN-STEP LOW/MID/HIGH] switch*
The gain value can be selected according to the position of
this switch.
[HIGT]
[MID]
[LOW]
The selected gain value is shown in the LCD display H every
time that the position of this switch is changed.
(A Page 17 [Gain Adjustment])
O
[R]
[B]
(A Page 18 [White Balance Adjustment])
P
When this button is pressed so that the light in it lights up, the
R and B gain values can be adjusted using the
controls O. If the
white paint adjustment (fine adjustment of the R and B gain)
can be performed using the
If the
button lights up and the
and B gain values by a larger amount than usual O.
Q
Press this button to start an auto white balance adjustment
of the camera (within a second). This button is activated only
when the
When the camera in use has the Auto Set function, pressing
and holding this button for more than a second initiates the
Auto Set mode and then starts the auto blackbalance and
auto white balance adjustment operations. If the camera
does not have an Auto Set function, pressing and holding
this button for more than a second starts only the auto white
balance adjustment operation.
(A Page 18 [White Balance Adjustment])
: A
: A
: A
[WHITE-R/B] gain controls*
: Use this knob to fine-adjust the R gain during the
white paint operation or adjust the R gain during
manual white balance adjustment.
: Use this knob to fine-adjust the B gain during the
white paint operation or adjust the B gain during
manual white balance adjustment.
[WHITE-PAINT] button and indicator light*
[W. BAL]
[WHITE-AUTO] button and indicator light*
[W. BAL]
3
2
Page 25 [GAIN HIGH]
Page 25 [GAIN MID]
Page 25 [GAIN LOW]
2
[R]
[W. BAL]
switch R is set to APRESETB, the light in this
switch R is set to AAB or ABB.
switch R is set to AAB or ABB, the
[R]
and
[B]
controls O.
[R]
and
[B]
controls can vary the R
2
Memo :
● When the camera performs the auto white operation or
other Auto Set operations, the light in this button normally
lights up and turns off when the camera completes the
operation. If the adjustment has not been done correctly,
the LCD display H shows an error message.
● The light in this button also lights up when the FAW (Fulltime Auto White balance) adjustment function of the
camera is functioning.
R
[WHITE-W. BAL B/A/PRESET] switch*
This switch switches the white balance control setting
between the value stored in Memory ABB (AUTO 2), that
stored in Memory AAB (AUTO 1) and the
(3200K).
When the white balance adjustment is APRESETB and the
[WHITE-PAINT] button P is pressed so that the light in it
lights up, the white balance adjustment is set to the manual
mode, in which the white balance can be adjusted with the
[R]
and
[B]
controls O.
(A Page 18 [White Balance Adjustment])
S
[MASTER BLACK] control*
Use this knob to adjust the pedestal level, which is the black
reference (master black) value.
T
[IRIS-AUTO/MANU] button and indicator light*
When this button is pressed so that the light in it lights the
lens iris is set to the manual iris control mode. The lens iris
level may be adjusted in this mode by using the [IRISCLOSE OPEN] control U.
When this button is pressed so that the light in it turns off, the
lens iris is set to the auto iris control mode. The auto iris level
can be fine adjusted with the [IRIS-CLOSE OPEN] control
U.
U
[IRIS-CLOSE OPEN] control*
When the manual iris control mode is set (which is indicated
by the lighting of the light in the [IRIS-AUTO/MANU] button
T), use this knob to adjust the iris aperture between
[CLOSE] and [OPEN].
When the iris mode is AAUTOB (when the light in the button is
not lit up), the auto iris level can be fine adjusted with this
knob.
(A Page 17 [Iris Adjustment])
V
[POWER] switch
Press this switch to turn the power ON and OFF.
*1 : When CALL function is available at the remote control
panel, operation cannot be performed from the main
unit when connected to the remote control panel.
*2 : Operation cannot be performed from the main unit
when connected to the remote control panel.
*3 : L and M are unavailable when connected to
GY-HM790 series.
2
2
2
[PRESET]
value
2
5
Page 16

Introduction
Names of Parts (continued)
Rear panel
䡵 RM-HP790DU
OUTPUT
VIDEO OUTPUT
Y/G PB/B PR/R
COMPOSITE VIDEO
AC
H
IN AC120V 60Hz
TALLY
PGM PVW C
INTERCOM
H
CG
RTS
AUX VIDEO INPUT GENLOCK INPUT
A B C D E F G H I J
䡵 RM-HP790DE
INPUT
HD/SD SDI
REMOTE
CAMERA CABLE
AC
IN 230V
H
TALLY
PGM PVW C
H
50Hz
INTERCOM
HCG
AUX VIDEO INPUT GENLOCK INPUT
VIDEO OUTPUT
Y/G PB/B PR/R
COMPOSITE VIDEO
INPUT
OUTPUT
HD/SD SDI
A B C D E F G H I J
A [ACHIN]
Connect this socket to a commercial power supply outlet
using the power cord provided.
B [TALLY] Terminals
These terminals input the tally control signals.
(A Page 14 [Tally])
C [INTERCOM] Terminals
These terminals input and output the intercom signals.
In a system composed of multiple cameras and remote
control units, the intercom function provides
intercommunication between operators.
(A Page 14 [Intercom])
D [AUX VIDEO INPUT] Connectors
These connectors are used to input the return video signal,
which returns the SEG (Special Effects Generator) or
switcher output signal to the camera viewfinder.
These two connectors are loop-through connected inside to
enable a bridge connection.
They are terminated automatically when they are not bridgeconnected. Input VBS.
E [GENLOCK INPUT]
Connectors
These connectors are for reference sync signal input.
These two connectors are loop-through connected inside to
enable a bridge connection.
They are terminated automatically when they are not bridgeconnected.
Input BB or Tri-level sync signal.
Connector
Synchronous Signal Input
F
[Y/G, PB/B, PR/R] Component Video Signal Output
Connectors
The settings of the output signals from these connectors can
be switched between Y/P
Serect switch on the connected camera or by using the menu
setup of the camera.
G [COMPOSITE VIDEO]
This connector outputs VBS (composite video) signal.
H [HD/SD SDI INPUT/OUTPUT]
output connectors
These are HD/SD SDI signal input/output connectors.
SDI signal that is input will be output from the [HD/SD SDI
OUTPUT] connectors.
Memo :
● Transferred signals cannot be output via the camera cable
from the [HD/SD SDI OUTPUT] connector on
RM-HP790DU/RM-HP790DE. Signals will be output in the
same format as the input signals to [HD/SD SDI INTPUT]
connector.
I [REMOTE]
Panel
This connector connects to the remote control panel and
controls the camera.
When connected, remote control panel operations will take
priority over operations from RM-HP790DU/RM-HP790DE
(3: FILE, 4: PROCESS, 5: OPERATION).
REMOTE
CAMERA CABLE
B/PR, G/B/R using the Signal
Signal Output Connector
SDI signal input and
Connection Connector of Remote Control
6
Page 17

J [CAMERA CABLE] Connector (26-pin)
Connect the optionally available camera cables to the
camera.
Camera Cable (Optional)
The VC-P110 series camera cables that can be used to
connect a camera to the RM-HP790DU/RM-HP790DE are
available in four lengths as listed below.
VC-P110 :
VC-P112 :
VC-P113 :
VC-P114 :
A menu setup is required according to the cables in use.
(A Page 12 [Camera Cable Length Setup])
5 meters
20 meters
50 meters
100 meters
Memo :
● If it is required to extent the cable, use the KA-280
extension connector.
● The total cable length should not exceed 100 meters.
7
Page 18

Connection
Example of Basic Connection
Standard connection of the RM-HP790DU/
RM-HP790DE (Connection of a single unit)
䡵 When the RM-HP790DU/RM-HP790DE is connected to a camera.
Memo :
●
When the RM-HP790DU/RM-HP790DE is connected to a camera, a local remote controller cannot be connected to the camera.
* 1 When connect the remote control unit cable to the [REMOTE] connector, please be careful to the following points.
● To reduce the emission of unwanted radio waves and to avoid electrostatic influence, be sure to attach the provided clamp
filter attached in RM-LP25U as shown in the figure.
● Attach the clamp filter as close to connector as possible.
Studio Viewfinder
VF-HP790G
GY-HM790U/GY-HM790CHU/
GY-HM790E*/GY-HM790CHE*
Headset
(Beyerdynamic)
Camera Cable (26Pin)
VC-P110U (5m)
VC-P112U (20m)
VC-P113U (50m)
VC-P114U (100m)
Coaxial cable
Studio Adapter KA-790G
Camera Remote Control Unit
RM-HP790DU/RM-HP790DE
(The illustration shows the RM-HP790DU.)
Multicore Remote Adapter
KA-M790G
TALLY
PGM PVW C
ACHIN AC120V 60Hz
H
INTERCOM
CG
RTS
AUX VIDEO INPUT GENLOCK INPUT
VIDEO OUTPUT
Y/G PB/B PR/R
COMPOSITE VIDEO
OUTPUT
INPUT
HD/SD SDI
REMOTE
CAMERA CABLE
*1
To power s u p pl y
Monitor
Remote Control Unit
* Models with an E suffix are for the European market and the UL Listing mark is not applicable.
(Beyerdynamic)
RM-LP25U
Headset
Clamp filter
Wind once
8
Page 19

Example of Connection
LEV
IR
AUT
IS
-3dB
-6dB
ALC
LOLUX
VARIABLE
LEVEL
LEVEL
LEVEL
GAMMA
DETAIL
KNEE POINT
AUTO
KNEE
BLACK
COMPRESS
STRETCH
WHITE BALANCE MODE
WHITE PAINT
R
R
BLACK PAINT
B
B
PAINT
PAINT
AUTO WHITE
AUTO BLACK
AUTO
OVER
OPEN
UNDER
CLOSE
MASTER
BLACK
TALLY
CALL
PREVIEW
1
OPERATEC
BARS
LOCK
PART
OFF
FULL
CENE FILES
2 3 54
SPEED
VARIABLE
PART
SHUTTER
NORMAL
1/100
1/120
1/250
1/500
1/1000
1/2000
GAIN
18dB
0dB
3dB
6dB 9dB
12dB
15dB
MANUAL
PRESET
FAW
AW A
AW B
PART
PRESET
LEVEL
IRIS MODE
FULL
PRE
SET
FULL
with 2 Units
䡵 Standard connection of RM-HP790DU (Connection of 2 units)
Memo :
●
When the RM-HP790DU/RM-HP790DE is connected to a camera, a local remote controller cannot be connected to the camera.
* 1 When connect the remote control unit cable to the [REMOTE] connector, please be careful to the following points.
● To reduce the emission of unwanted radio waves and to avoid electrostatic influence, be sure to attach the provided clamp
filter attached in RM-LP25U as shown in the figure.
● Attach the clamp filter as close to connector as possible.
Studio Viewfinder
VF-HP790G
Y-HM790CHU/GY-HM790U
Studio Adapter KA-790G
Camera Remote Control Unit
Multicore Remote Adapter
KA-M790G
RM-HP790DU
To power supply
[INTERCOM]
RTS unit
[INTERCOM]
Headset
(Beyerdynamic)
Coaxial cable
TALLY
PGM PVW C
ACHIN AC120V 60Hz
H
INTERCOM
CG
Camera Cable (26Pin)
VC-P110U (5m)
VC-P112U (20m)
VC-P113U (50m)
VC-P114U (100m)
AUX VIDEO INPUT GENLOCK INPUT
RTS
Monitor
Y/G PB/B PR/R
Remote Control Unit
RM-LP25U
OUTPUT
VIDEO OUTPUT
COMPOSITE VIDEO
External synchronous
signal
INPUT
HD/SD SDI
Return video
Ta ll y
(Contact supply)
BLACK
MASTER
CLOSE
UNDER
CALL
PREVIEW
TALLY
FULL
AUTO
SET
PRE
FULL
LEVEL
IRIS MODE
PRESET
OVER
OPEN
PART
PAINT
AUTO BLACK
BLACK PAINT
PAINT
AUTO WHITE
WHITE PAINT
MANUAL
FAW
AW A
COMPRESS
STRETCH
PRESET
AW B
BLACK
WHITE BALANCE MODE
KNEE
LEVEL
LEVEL
GAMMA
DETAIL
KNEE POINT
AUTO
VARIABLE
-3dB
-6dB
ALC
LOLUX
LEVEL
3dB
18dB
6dB
12dB
15dB
0dB
GAIN
NORMAL
1/120
1/250
1/500
1/1000
1/2000
VARIABLE
1/100
SHUTTER
PART
SPEED
CENE FILES
OFF
FULL
PART
OPERATEC
BARS
LOCK
Clamp filter
Wind once
Headset
(Beyerdynamic)
*1
REMOTE
CAMERA CABLE
SDI
Special effects
generator, etc.
SDI
Camera Remote Control Unit
Studio Viewfinder
VF-HP790G
GY-HM790CHU/GY-HM790U
Studio Adapter KA-790G
RM-HP790DU
To power supply
Headset
(Beyerdynamic)
Multicore Remote Adapter
KA-M790G
TALLY
PGM PVW C
ACHIN AC120V 60Hz
H
INTERCOM
CG
AUX VIDEO INPUT GENLOCK INPUT
RTS
Coaxial cable
Camera Cable (26Pin)
VC-P110U (5m)
VC-P112U (20m)
VC-P113U (50m)
VC-P114U (100m)
VIDEO OUTPUT
Y/G PB/B PR/R
Monitor
Remote Control Unit
COMPOSITE VIDEO
INPUT
RM-LP25U
HD/SD SDI
OUTPUT
REMOTE
CAMERA CABLE
*1
Clamp filter
Wind once
OPERATEC
BARS
LOCK
PART
OFF
FULL
CENE FILES
SPEED
PART
SHUTTER
1/100
VARIABLE
NORMAL
1/120
1/250
1/500
1/1000
1/2000
GAIN
0dB
18dB
6dB
12dB
15dB
3dB
LEVEL
-3dB
-6dB
ALC
LOLUX
VARIABLE
AUTO
LEVEL
LEVEL
GAMMA
DETAIL
KNEE POINT
KNEE
BLACK
WHITE BALANCE MODE
AW B
COMPRESS
STRETCH
PRESET
MANUAL
FAW
AW A
WHITE PAINT
AUTO WHITE
PAINT
BLACK PAINT
AUTO BLACK
PAINT
PART
OVER
OPEN
PRESET
IRIS MODE
LEVEL
FULL
PRE
SET
AUTO
FULL
TALLY
CALL
PREVIEW
UNDER
CLOSE
MASTER
BLACK
9
Page 20

Connection
LEV
IR
AUT
IS
-3dB
-6dB
ALC
LOLUX
VARIABLE
LEVEL
LEVEL
LEVEL
GAMMA
DETAIL
KNEE POINT
AUTO
KNEE
BLACK
COMPRESS
STRETCH
WHITE BALANCE MODE
WHITE PAINT
R
R
BLACK PAINT
B
B
PAINT
PAINT
AUTO WHITE
AUTO BLACK
AUTO
OVER
OPEN
UNDER
CLOSE
MASTER
BLACK
TALLY
CALL
PREVIEW
1
OPERATEC
BARS
LOCK
PART
OFF
FULL
CENE FILES
2 3 54
SPEED
VARIABLE
PART
SHUTTER
NORMAL
1/100
1/120
1/250
1/500
1/1000
1/2000
GAIN
18dB
0dB
3dB
6dB 9dB
12dB
15dB
MANUAL
PRESET
FAW
AW A
AW B
PART
PRESET
LEVEL
IRIS MODE
FULL
PRE
SET
FULL
Example of Connection
with 2 Units (continued)
䡵 Standard connection of RM-HP790DE (Connection of 2 units)
Memo :
●
When the RM-HP790DU/RM-HP790DE is connected to a camera, a local remote controller cannot be connected to the camera.
* 1 When connect the remote control unit cable to the [REMOTE] connector, please be careful to the following points.
● To reduce the emission of unwanted radio waves and to avoid electrostatic influence, be sure to attach the provided clamp
filter attached in RM-LP25U as shown in the figure.
● Attach the clamp filter as close to connector as possible.
Studio Viewfinder
VF-HP790G
GY-HM790E*/GY-HM790CHE*
Studio Adapter KA-790G
Camera Remote Control Unit
Multicore Remote Adapter
KA-M790G
RM-HP790DE*
To power supply
Headset
(Beyerdynamic)
Coaxial cable
TALLY
PGM PVW C
ACHIN 230VH 50Hz
INTERCOM
HCG
Camera Cable (26Pin)
VC-P110U (5m)
VC-P112U (20m)
VC-P113U (50m)
VC-P114U (100m)
Monitor
AUX VIDEO INPUT GENLOCK INPUT
Y/G PB/B PR/R
Remote Control Unit
RM-LP25U
VIDEO OUTPUT
COMPOSITE VIDEO
OUTPUT
INPUT
HD/SD SDI
External synchronous
signal
Return video
Ta ll y
(Voltage supply)
BLACK
MASTER
CLOSE
UNDER
CALL
PREVIEW
TALLY
FULL
AUTO
SET
PRE
FULL
LEVEL
IRIS MODE
PRESET
OVER
OPEN
PART
PAINT
AUTO BLACK
BLACK PAINT
PAINT
AUTO WHITE
WHITE PAINT
MANUAL
FAW
AW A
COMPRESS
STRETCH
PRESET
AW B
BLACK
WHITE BALANCE MODE
KNEE
LEVEL
LEVEL
GAMMA
DETAIL
KNEE POINT
AUTO
VARIABLE
-3dB
-6dB
ALC
LOLUX
LEVEL
3dB
18dB
6dB
12dB
15dB
0dB
GAIN
NORMAL
1/120
1/250
1/500
1/1000
1/2000
VARIABLE
1/100
SHUTTER
PART
SPEED
CENE FILES
OFF
FULL
PART
OPERATEC
BARS
LOCK
Clamp filter
Wind once
Headset
(Beyerdynamic)
*1
REMOTE
CAMERA CABLE
SDI
Special effects
generator, etc.
SDI
Camera Remote Control Unit
Studio Viewfinder
VF-HP790G
GY-HM790E*/GY-HM790CHE*
RM-HP790DE*
PGM PVW C
ACHIN 230VH 50Hz
To power supply
Headset
(Beyerdynamic)
TALLY
INTERCOM
HCG
AUX VIDEO INPUT GENLOCK INPUT
Coaxial cable
Y/G PB/B PR/R
Monitor
VIDEO OUTPUT
COMPOSITE VIDEO
Remote Control Unit
RM-LP25U
Camera Cable (26Pin)
VC-P110U (5m)
Studio Adapter KA-790G
Multicore Remote Adapter
KA-M790G
* Models with an E suffix are for the European market and the UL Listing mark is not applicable.
10
VC-P112U (20m)
VC-P113U (50m)
VC-P114U (100m)
OUTPUT
INPUT
HD/SD SDI
REMOTE
CAMERA CABLE
*1
Clamp filter
OPERATEC
BARS
LOCK
PART
OFF
FULL
CENE FILES
SPEED
PART
SHUTTER
1/100
VARIABLE
NORMAL
1/120
1/250
1/500
1/1000
1/2000
GAIN
0dB
18dB
6dB
12dB
15dB
3dB
LEVEL
-3dB
-6dB
ALC
LOLUX
VARIABLE
AUTO
LEVEL
LEVEL
GAMMA
DETAIL
KNEE POINT
KNEE
BLACK
WHITE BALANCE MODE
AW B
COMPRESS
STRETCH
PRESET
MANUAL
FAW
AW A
WHITE PAINT
AUTO WHITE
PAINT
BLACK PAINT
AUTO BLACK
PAINT
PART
OVER
OPEN
PRESET
IRIS MODE
LEVEL
FULL
PRE
SET
AUTO
FULL
TALLY
CALL
PREVIEW
UNDER
CLOSE
MASTER
BLACK
Wind once
Page 21

Rack Mounting
A
Turning the Power ON
Mount this unit to the EIA rack.
1 Remove the screws A on the four stands at the
bottom
Remove the stands.
2 Mount the unit to the rack using the screws
Secure to the rack with the optional screws x4 (M5 x 10 mm)
.
Rack mount bracket
B
B
(x4)
Memo :
● If the RM-HP790DU/RM-HP790DE is rack-mounted, be
sure to insert ventilated panels above and below it in order
to improve ventilation. Do not stack two RM-HP790DU/
RM-HP790DE units or place any object on top of a RMHP790DU/RM-HP790DE unit.
● In addition, make sure to keep surrounding temperature of
this unit below 40f during use.
B
1
Connect the camera to the RM-HP790DU/RM-HP790DE
using a proper connection method
2 Press the [POWER] switch of the RM-HP790DU/RM-
HP790DE to ON
WHITE MASTER BLACK
PAINT AUTO
MID
REMOTE CONTROL UNIT RM-HP790
W.BAL
B
A
BR
PRESET
MANU
AUTO
IRIS
CLOSE OPEN
Memo :
● When an item is controllable from both the RM-HP790DU/
RM-HP790DE and the camera, the control from the
camera is defeated. Functions not available on the
camera cannot be controlled from this unit.
● When connecting the RM-HP790DU/RM-HP790DE to the
camera, do not connect a local remote controller to the
camera.
● After turning the RM-HP790DU/RM-HP790DE OFF, wait
at least 10 secends before turning it ON again.
POWER
I
O
[POWER] switch
11
Page 22

Preparations and Main Functions
P
P
Camera Cable Length Setup
Cable length setup is required when a camera is connected
to the RM-HP790DU/RM-HP790DE for the first time or when
the camera cable length is changed.
The cable length setup value is stored in the memory inside
the RM-HP790DU/RM-HP790DE and is held even after it is
turned OFF.
FULL AUTO F1
BARS
F2
2. CABLE
SHUTTER
GAIN
LCD display
1
Press and hold the [MENU] button for about 1 second
until the LCD display shows the menu display.
Turn the control knob to move the cursor (
A
2: CABLE
Cursor
B
MENU/SHUTTER GAIN
F3
SHUTTER
MENU
PUSH-ON
DOWN UP
F4
[SHUTTER] control
knob
[MENU] Button
DOWN UP
J
VARIABLE
PUSH-ON
) to
STEP
HIGH
MID
R
LOW
Adjustments for Genlock Operation
Genlocking is required for a system, which uses an SEG
(special effects generator) as the main signal source.
(A Page 9 [Example of Connection with 2 Units])
Memo :
● The following adjustments can be made more accurately
when using a vectorscope and waveform monitor.
● Be sure to use an underscanned video monitor.
● It is not permitted to genlock the system components
using a VCR playback signal.
● Before phase adjustment, wait a little for the phases of the
connected components to stabilize.
FULL AUTO F1
BARS
F2
[BARS] Button
SHUTTER
1: GENLOCK
2: CABLE
GAIN
LCD display
MENU/SHUTTER GAIN
F3
SHUTTER
PUSH-ON
F4
MENU
DOWN UP
[MENU] Button
STEP
HIGH
MID
VARIABLE
PUSH-ON
R
LOW
DOWN UP
[SHUTTER] contro
knob
1: GENLOCK
2: CABLE
2
Press the [SHUTTER] control
A
2A: LENGTH
B
knob
to display
Cursor
2A: LENGTH
5M
Setting
Setting the cable length
1 Press the
(
J
) to the currently set length
2A: LENGTH
2 Turn the
length that is to be used in meters (Variable to
A
20MB, A50MB or A100MB)
[SHUTTER]
control knob to move the cursor
Cursor
[SHUTTER] control
5M
knob to select the cable
A
5MB,
Preparation
1
Press the [BARS] button to output the color bar signal.
The button light should light up
2 Output the built-in color bar signal of the SEG from
the program connector on the front panel of the SEG
( A Refer to the [Instructions Manual] of the SEG)
3 Observing the monitor screen at the same time,
adjust the H PHASE (horizontal phase) and SC PHASE
(subcarrier phase) while using the switch on the SEG to
alternately change between color bars of the internal
RM-HP790DU/RM-HP790DE that of the SEG
2A: LENGTH
100M
Setting
3 After setting the value, press the
knob to move the cursor (
J
) back to A2A: LENGTHB
12
[SHUTTER] control
Page 23

Adjusting the H PHASE
1 Press and hold the
seconds until the LCD display shows the menu display
Cursor
1: GENLOCK
2: CABLE
[MENU]
button for about 3
Adjusting SC phase (Only for SD signal)*
*1 This function is unavailable when connected to GY-HM790
series.
1 Turn the [SHUTTER] control knob to display
A1C: SC COARSEB
1C: SC COARSE
0
1
2 Ensure that the cursor (
A
1: GENLOCKB, then press the control knob to display
A
1A: SD H PHASEB or A1B: HD H PHASEB
Item
1A: SD H PHASE
1B: HD H PHASE
3 Press the
(
J
) to the currently set value, then turn the
control
(HD: -1024 to 1023, SD: -128 to 127)
1A: SD H PHASE
1B: HD H PHASE
[SHUTTER] control
knob to adjust the H PHASE value
J
) is located on
Setting
0
0
knob to move the cursor
[SHUTTER]
Cursor
127
1023
4 After the adjustment, press the control knob to move
the cursor (
Memo :
● Screens 2 and 3 differ according to the Video Format of
the camera.
J
) back to A1: GENLOCKB
2 Press the [SHUTTER] control knob to move the
cursor (
[SHUTTER] control knob to adjust the SC COARSE value
(to 0⬚, 90⬚, 180⬚ or 270⬚)
J
) to the currently set value, then turn the
1C: SC COARSE
90
3 After the coarse adjustment, press the [SHUTTER]
control knob to move the cursor (
COARSEB, then press the [SHUTTER] control knob to
display A1D: SC FINEB
1D: SC FINE
J
) back to A1C: SC
0
4 Press the [SHUTTER] control knob to move the
cursor (
[SHUTTER] control knob to adjust the SC FINE value
(from -128 to 127)
Memo :
● [SC COARSE] and [SC FINE] are linked. When the upper
J
) to the currently set value, then turn the
1D: SC FINE
127
or lower limit of [SC FINE] is exceeded, the value of [SC
COARSE] changes.
For example, when the value of [SC COARSE] is A0⬚B and
[SC FINE] is increased, once [SC FINE] exceeds A127B,
[SC COARSE] will become A90⬚B and [SC FINE] will
become A-128B.
5 After the adjustment, press the
return to the previous display
STR
CMP
6 Press the
output
OFF
0 dB
[BARS]
button to stop the color bar signal
ALC
LUX
[MENU]
button to
13
Page 24

Preparations and Main Functions
C
Intercom
Intercommunications between operators are necessary in a
system composed of multiple cameras and remote control
units.
䡵
The factory settings vary depending on the model.
CG
RTS
1
1
AUX VIDEO INPUT GENLOCK INPUT
AUX VIDEO INPUT GENLOCK INPUT
RM-HP790DU : RTS system. *
TALLY
PGM PVW C
AC ` IN AC120V 60Hz
INTERCOM
H
RM-HP790DE : 2-wire system, which uses the [H] and [C]
terminals. *
TALLY
PGM PVW C
AC ` IN 230V` 50Hz
*1 If tally and intercom settings (for changing model from DU to DE
or vice versa) are required, the setting of the internal circuitry
should be changed; consult the nearest JVC-authorized service
agent. (The modifications and adjustments will be carried out
with charge.)
INTERCOM
HCG
Camera Operator Call
This function makes it possible to call the camera operator
without using the intercom. The camera operator is informed
of the call by the blinking of the tally lamp on the camera.
When the [CALL] button is pressed, the button light is lit and
the tally lamp on the camera blinks. Pressing the button
again turns off both the button light and the blinking of the
camera’s tally lamp.
CALLTAL LY
INTERCOM
LEVEL
FULL AUTO F1
BARS
F2
2. CABLE
SHUTTER
GAIN
[CALL] Button
Memo :
● The tally lamp on the camera does not blink or light when
either the camera or the RM-HP790DU/RM-HP790DE are
switched off. When the [CALL] button of the camera is
pressed, the [CALL] button of RM-HP790DU/RMHP790DE blinks in red.
Tally
An intercom connector
An intercom connector is provided on the front panel of the
RM-HP790DU/RM-HP790DE
The volume level of the headset’s earphone can be adjusted
using the [INTERCOM LEVEL] control.
[INTERCOM LEVEL] control
Intercom connector
Intercom Input Connector (XLR 5 Pin)
Input connector for intercom headset. (Dynamic only)
Recommended headset: DT109 (Beyerdynamic)
A
B
(Surface profile)
E
D
Memo :
● Examples of suitable headsets
DT109 (Beyerdynamic)
Headsets from other manufacturers with:
Microphone output impedance: 50 K to 200 K
Earphone input impedance: 50 K to 400 K
.
CALLTALLY
FULL AUTO F1
BARS
F2
INTERCOM
LEVEL
A MIC (H)
B MIC (C)
C EAR (C)
D EAR (H) - LEFT
E EAR (H) - RIGHT
2. CABLE
SHUTTER
GAIN
Signal
The [TALLY] lamp on the front panel lights when signals are
applied to the [TALLY] terminals on the rear panel.
䡵
The factory settings vary depending on the model.
RM-HP790DU : Contact supply mode*
RM-HP790DE : Voltage supply mode*
TALLY
PGM PVW C
INTERCOM
HCG
1
1
AUX VIDEO INPUT GENLOCK INPUT
[C] (Common) terminal
[PVW] (Preview) terminal
[PGM] (Program) terminal
● [TALLY] lamp will light up in red when [PGM] (Program)
terminal and [C] (Common) terminal are in the contact
status (RM-HP790DU) or when 2 points of rated voltage
are ignited (RM-HP790DE).
● [TALLY] lamp will light up in green when [PVW] (Preview)
terminal and [C] (Common) terminal are in the contact
status (RM-HP790DU) or when 2 points of rated voltage
are ignited (RM-HP790DE).
*1 If tally and intercom settings (for changing model from DU to DE
or vice versa) are required, the setting of the internal circuitry
should be changed; consult the nearest JVC-authorized service
agent.
(The modifications and adjustments will be carried out with
charge.)
14
Page 25

Function Buttons
O
O
O
O
2 When the
STRETCH]
[F1]
button is pressed again, the
function is switched from ON to OFF and the
light in the button turns off
[BLACK
Up to four of the functions listed at the bottom of this page
can be assigned to function buttons [F1] to [F4] so that each
function can be switched on or off by pressing the
corresponding button.
(For the assignment of functions: A Page 25 [FUNC1] to
[FUNC4] in the [OPERATION Menu].)
Example of factory setting
[F1] button
FULL AUTO F1
BARS
[F2] button
STR
F2
CMP
SHUTTER
OFF
0 dB
GAIN
LCD display
ALC
KNE
In the example above, the functions are assigned as shown
in the following table.
Button Display Function
[F1] STR BLACK STRETCH
[F2] CMP BLACK COMPRESS
[F3] ALC ALC + EEI
[F4] KNE AUTO KNEE
In the figure above, the lights in all the function buttons are
off, this indicates that all these functions are OFF.
When a function is not available on the camera, A---B will be
displayed.
[F3] button
MENU/S
F3
F4
MENU
[F4] button
D
䡵 Switching an assigned function on/off
1
When the [F1] button is pressed, the [BLACK STRETCH]
function assigned to the [F1] button is switched from OFF
to ON and the light in the button lights up
FULL AUTO F1
BARS
BLACK STRETCH
F2
SHUTTER
ON
GAIN
MENU/S
F3
F4
MENU
D
FULL AUTO F1
BARS
BLACK STRETCH
F2
SHUTTER
OFF
GAIN
MENU/S
F3
MENU
F4
D
䡵 Checking the assigned functions
Press the [MENU] button to display the functions assigned to
the function buttons for about 3 seconds, in up to 7
characters per function as shown in the figure below.
FULL AUTO F1
BARS
BLK STR
F2
BLK CMP
SHUTTER
GAIN
ALC+EEI
AT KNEE
MENU/S
F3
MENU
F4
D
[MENU] Button
Memo :
● When BLACK STRETCH and BLACK COMPRESS are
assigned to two of the [F1] to [F4] buttons, it is not
permitted to switch the two functions ON simultaneously.
It is not permitted to switch both ALC + EEI and LOLUX
ON.
Function Name
Display
(3-Character)
NONE --- ------BLACK STRETCH STR BLK STR
BLACK COMPRESS CMP BLK CMP
ALC + EEI ALC ALC + EEI
ALC ALC ALC
LOLUX
*
LUX LOLUX
1
FAW FAW FAW
AUTO KNEE KNE AT KNEE
SKIN DETAIL SKN SKN DTL
COLOR MATRIX
*
MAT COL MAT
1
DETAIL DTL DETAIL
DNR DNR DNR
*1 This function is unavailable when connected to GY-HM790
series.
Display
(7-Character)
Memo :
● The on/off condition of each function button can be set
independently.
15
Page 26

Camera Adjustments
P
Shutter Speed Adjustment
Turning the [SHUTTER] control knob can vary the shutter
speed of the camera. The LCD display shows the shutter
speed during the adjustment operation.
Memo :
● When the FAS (Full Auto Shooting) is ON, the shutter
speed becomes EEI. However, the shutter speed is OFF
in the Lolux mode.
● When FAS is ON, the [SHUTTER] control knob cannot be
used to vary the shutter speed.
● When [ALC + EEI] is ON, the shutter speed becomes EEI.
At this time, the [SHUTTER] control knob cannot be used
to vary the shutter speed.
[SHUTTER] light
FULL AUTO F1
BARS
SHUTTER
F2
1/1000
GAIN
LCD display
MENU/SHUTTER GAIN
F3
SHUTTER
PUSH-ON
F4
MENU
DOWN UP
VARIABLE
PUSH-ON
DOWN UP
STEP
HIGH
MID
LOW
[SHUTTER] control knob
R
1 Press the [SHUTTER] control knob to activate the
shutter speed variation facility, which is indicated by the
lighting of the [SHUTTER] light
2 Turn the [SHUTTER] control knob to vary the shutter
speed. The LCD display shows the shutter speed during
the adjustment operation
The shutter speed can be adjusted in either
adjustments in steps or in
[VARIABLE]
adjustments.
(A Page 25 [SHUTTER])
(A Page 29 [Operable Camera Features])
[STEP]
: Change the shutter speed with the fixed
values.
The fixed values differ depending on the
Video Format of the camera.
Format STEP value
[VARIABLE]
HDV-HD60P
HDV-HD30P
DV-60I
HDV-HD24P
DV-24P
DV-24PA
HDV-HD50P
HDV-HD25P
DV-50I
DV-25P
: Use this mode when shooting an image on a
1/100, 1/250, 1/500,
1/1000, 1/2000, 1/4000,
1/10000
1/120, 1/250, 1/500,
1/1000, 1/2000, 1/4000,
1/10000
computer monitor, etc.
(Variation range: approx 1/50 to 1/2000)
A
VARIABLEB function is unavailable when connected
*The
to GY-HM790 series.
[STEP]
mode for fine
mode for
Memo :
● Values that are not available on the camera cannot be set
on this unit.
(A Page 29 [Operable Camera Features])
● The shutter speed displayed on the RM-HP790DU/RMHP790DE may be slightly different from the actual shutter
speed of the camera.
16
Page 27

Gain Adjustment
L
A
Iris Adjustment
When the illumination of the object is insufficient, the
electrical gain can be boosted as described below.
Memo :
● When the [FULL AUTO] or [ALC + EEI] is ON, the gain
becomes ALC. However, the Gain is Lolux in the Lolux
mode. The gain cannot be varied in this mode.
[GAIN] light
SHUTTER
9dB
GAIN
MENU/SHUTTER GAIN
F3
MENU
F4
DOWN UP
SHUTTER
PUSH-ON
VARIABLE
PUSH-ON
DOWN UP
STEP
HIGH
LOW
PAINT AUTO
MID
WHITE
W.BA
B
BR
PRESET
[GAIN-STEP] switch
Gain display
[GAIN] control knob
1 The gain is boosted according to the position of the
[GAIN-STEP] switch as shown below
(The gain boost values shown below are factory
settings.)
LOW
MID
HIGH
The gain boost values of these switch positions can be
modified to the following values.
(Available values: -3 dB, 0 dB, 3 dB, 6 dB, 9 dB, 12 dB, 15dB,
18 dB)
( A Page 25 [GAIN LOW], [GAIN MID] and [GAIN HIGH])
: 0 dB (No gain boost)
: 9 dB (Gain approximately tripled.)
: 18 dB (Gain approximately octupled.)
The camera lens iris can be adjusted from the
RM-HP790DU/RM-HP790DE.
Memo :
● When the light in the [IRIS-AUTO/MANU] button is not lit,
the iris control is set to Auto mode, in which the iris level is
controlled automatically according to the light intensity.
The auto iris value cannot be adjusted with the [IRISCLOSE OPEN] control knob.
1 When the light in the [IRIS-AUTO/MANU] button is lit
by pressing the button, the iris control is set to Manual
mode, in which the iris level can be controlled using the
[IRIS-CLOSE OPEN] control
[IRIS-CLOSE OPEN] control knob
WHITE MASTER BLACK IRIS
PAIN TRAUTO
P
MID
REMOTE CONTROL UNIT RM-HP790
W.BA L
B
A
B
PRESET
AUTO
MANU
CLOSE OPEN
[IRIS-AUTO/MANU] button
Memo :
● Set [IRIS MODE] switch of lens to side AAB.
POWER
Memo :
● Values that are not available on the camera cannot be set
on this unit.
● A-3 dBB is not displayed when connected to GY-HM790
series.
(A Page 29 [Operable Camera Features])
2 When the [GAIN] control knob is pressed, the Variable
Gain mode starts and the [GAIN] light is turned on
Memo :
● The gain value set in the Variable Gain mode is applied in
priority over the gain switch setting.
● This function is unavailable when connected to
GY-HM790 series.
3 The gain can be fine adjusted between 0.1dB and
18dB in 0.1dB steps in the Variable Gain mode. Also, in
this mode, the maximum gain value can be set to A9 dBB,
A12 dBB or A18 dBB
When the variation step is set to A1.0 dBB, the gain can be
varied from 1dB to 18dB in 1dB steps.
( A Page 25 [V. GAIN STEP] and [V. GAIN MAX])
W
T
[IRIS MODE] switch
● When [ALC + EEI] or [FULL AUTO] is AONB, the [IRIS-
AUTO/MANU] button is forced to the Auto mode.
( A Consult the [INSTRUCTION MANUAL] of the camera
in use.)
17
Page 28

Camera Adjustments
White Balance Adjustment
Since color temperature varies depending on the light
source, the white balance should be adjusted whenever the
main light source illuminating the object being shot changes.
AUTO white balance adjustment
(Auto Set)
1
Press the [W. BAL] switch to select memory ABB or AA
2 Press the
balance adjustment of the camera within a second
● When the connected camera has an Auto Set function,
pressing and holding the button for more than a second
initiates the Auto Set mode and starts the auto
blackbalance and auto white balance adjustment
operations.
● When the camera does not have the Auto Set function, it
is only the auto white balance adjustment that is started
by this button.
● When the white balance is adjusted properly, the LCD
display shows AAUTO WHITE A(B) OKB.
[WHITE-AUTO]
button to start the auto white
White paint operation
This can be performed after completion of the auto white
balance adjustment and enables the fine adjustment of the
white balance using the
1 Press the
[WHITE-PAINT]
[R] and [B] gain controls.
button so that the light in it
lights up
2 While observing the color monitor screen, finely
adjust the [R] and [B] gain levels using their respective
controls
B
[WHITE-PAINT] button
/SHUTTER GAIN WHITE MASTER BLACK IRIS
SHUTTER
VARIABLE
PUSH-ON
PUSH-ON
DOWN UP
DOWN UP
STEP
HIGH
LOW
PAINTRAUTO
MID
REMOTE CONTROL UNIT RM-HP790
W.BA L
B
A
B
PRESET
AUTO
MANU
CLOSE OPEN
POWER
[WHITE-B] gain control
[WHITE-R] gain control
Memo :
● The white paint operation is not capable of making large
variations in the
[R] and [B] gain levels.
● The white paint operation is turned OFF automatically
when the auto white balance adjustment is starte
[WHITE-AUTO] button
/SHUTTER GAIN WHITE MASTER BLACK IRIS
SHUTTER
VARIABLE
PUSH-ON
PUSH-ON
DOWN UP
DOWN UP
STEP
HIGH
LOW
PAINTRAUTO
MID
REMOTE CONTROL UNIT RM-HP790
W.BA L
B
A
B
PRESET
AUTO
MANU
CLOSE OPEN
POWER
[W. BAL] switch
Memo :
● The light in the button lights up during an auto white
balance adjustment or an Auto Set of the camera and
turns off when it completes.
● The light in the button also lights up when the FAW (Full
Auto White) balance adjust function of the camera is
working.
● The LCD display shows the operating status of the auto
white balance adjustment or Auto Set operation.
● If the white balance is not adjusted properly, the LCD
display shows an error message.
(A Page 28 [Error Messages])
MANUAL white balance adjustment
This function enables the manual adjustment of the white
balance using the
[R] and [B] gain controls.
Use an oscilloscope or waveform monitor for this adjustment.
1
Set the [W. BAL] switch to APRESET
2 Press the
[WHITE-PAINT]
button so that the light in it
B
turns off, indicating the manual white balance adjust
mode
3 While observing the oscilloscope or waveform
monitor, adjust the [R] and [B] gain levels using their
respective controls
[WHITE-AUTO] button
[WHITE-PAINT] button
/SHUTTER GAIN WHITE MASTER BLACK IRIS
SHUTTER
VARIABLE
PUSH-ON
PUSH-ON
DOWN UP
DOWN UP
STEP
HIGH
LOW
PAINTRAUTO
MID
[WHITE-R] gain control
[W. BAL] switch
REMOTE CONTROL UNIT RM-HP790
W.BA L
B
A
B
PRESET
[WHITE-B] gain
control
POWER
AUTO
MANU
CLOSE OPEN
[IRIS-AUTO/MANU]
button
18
Memo :
● When [FULL AUTO] or FAW is ON, the white balance
adjustment becomes the FAW (Full-time Auto white)
mode. In this mode, the light in the [IRIS-AUTO/MANU]
button lights and all of the white balance-related operation
([GAIN] control knob, [W. BAL] switch or [WHITE-PAINT])
are defeated.
Page 29

Menu Operation
Flow of Menus
Memo :
● The items and values that are not available with the
camera are not menus displayed.
The menus displayed on the RM-HP790DU/RM-HP790DE are provided in the form shown below.
Category Item Variable Value
1: GENLOCK
2: CABLE
*3
3: FILE
*3
4: PROCESS
*3
5: OPERATION
6: LCD MODE
7: SYSTEM
8: EXIT
(墌 Page 21)
1A: SD H PHASE
1B: HD H PHASE
1C: SC COARSE
1D: SC FINE -128 to 0 to 127
1Z: BACK
墌
Page 21)
(
2A: LENGTH 5M, 20M, 50M, 100M
2Z: BACK
墌
Page 22)
(
3A: LOAD FILE
3B: STORE FILE
3C: RESET FILE
3Z: BACK
墌
Page 23, 24)
(
4A: DETAIL
4B: DETAIL LEVEL
4C: DETAIL V/H
4D: DETAIL FRQ. LOW, MIDDLE, HIGH, AUTO
4E: SKIN DETAIL OFF, ON
4F: AUTO KNEE OFF, ON
4G: KNEE POINT -10 to NORMAL to 10
4H: COLOR MATRIX OFF, ON
4I: V.RESOLUTION NORMAL, V.MAX
4J: GAMMA OFF, ON
4K: GAMMA LEVEL -10 to NORMAL to 10
4L: BLACK NORMAL, STRETCH, COMPRESS
4M: ASPECT RATIO 4:3, 16:9, LETTER
4N: DNR OFF, ON
4O: DNR LEVEL LOW, MIDDLE, HIGH, AUTO
4Z: BACK
墌
Page 25)
(
5A: SHUTTER
5B: V. GAIN STEP 0.1 dB, 1.0 dB
5C: V. GAIN MAX
5D: GAIN LOW
5E: GAIN MID -3 dB, 0 dB, 3 dB, 6 dB, 9 dB, 12 dB, 15 dB, 18 dB
5F: GAIN HIGH -3 dB, 0 dB, 3 dB, 6 dB, 9 dB, 12 dB, 15 dB, 18 dB
5G: SMOOTH TRANS OFF, ON
5H: FUNC1
5I: FUNC2
5J: FUNC3
5K: FUNC4
5Z: BACK
墌
(
Page 26)
6A: CONTRAST
6B: BACKLIGHT
6Z: BACK
(墌 Page 26)
7A: SYSTEM RESET
7Z: BACK
-128 to 0 to 127
-1024 to 0 to 1023
0 , 90 , 180 , 270
A, B, C, D, BACK
*1
A, B, C, D, BACK
*1
A, B, C, D, BACK
Netted items are saved in the scene file.
OFF, ON
-10 to NORMAL to 10
-10 to NORMAL to 10
Netted items are saved in the scene file.
STEP, VARIABLE
9.0 dB, 12.0 dB, 18.0 dB
-3 dB, 0 dB, 3 dB, 6 dB, 9 dB, 12 dB, 15 dB, 18 dB
*2
*2
*2
*2
-5 to NORMAL to 5
OFF, ON
*3
CANCEL, OK
1 Check screens are provided for items LOAD FILE
*
and STORE FILE.
2 The options for FUNC1 to FUNC4 are common:
*
BLACK STRETCH, BLACK COMPRESS,
ALC + EEI, ALC,
LOLUX, FAW,
AUTO KNEE, SKIN DETAIL,
COLOR MATRIX, DETAIL,
DNR, NONE
This is not displayed when connected to the remote
*3
control panel. Operation cannot be performed from the
main unit.
19
Page 30

Menu Operation
P
S
Menu Setup Method
Each menu is displayed on the LCD display and can be set
up using the [MENU] button and the control knob.
The values set in the [4: PROCESS] and [5: OPERATION]
menus can be saved in files A, B, C and D.
䡵 Example of changing the camera cable
length from 20 m to 100 m
FULL AUTO F1
BARS
F2
SHUTTER
STR
OFF
+0 dB
ALC
LUX
GAIN
CMP
LCD display
1 Press and hold the [MENU] button for about 1 second
until the LCD display shows the menu display
The cursor (
be varied.
ursor
J
) indicates that the item being pointed to can
MENU/SHUTTER GAIN
F3
VARIABLE
SHUTTER
PUSH-ON
DOWN UP
PUSH-ON
DOWN UP
F4
MENU
[SHUTTER] control knob
[MENU] button
STEP
HIGH
MID
R
LOW
6 Press the
(
J
) back to the item
2A: LENGTH
7 Turn the
(
J
) to A2Z: BACKB
2Z: BACK
8 Press the
[SHUTTER]
[SHUTTER]
[SHUTTER]
control knob to move the cursor
100M
control knob to move the cursor
control knob to return to the
previous menu
1: GENLOCK
2: CABLE
9 After completing the setup, move the cursor (
A8: EXITB and press the
return to the normal display
7: SYSTEM
8: EXIT
[SHUTTER]
control knob to
J
) to
1: GENLOCK
2: CABLE
2 Turn the
(
J
) to the desired item
1: GENLOCK
2: CABLE
3 Press the
[SHUTTER]
[SHUTTER]
control knob to move the cursor
control knob to display the
name and current setting of the next item
Item
2A: LENGTH
4 Press the
(
J
) to the position of the currently set value
2A: LENGTH
[SHUTTER]
etting
20M
control knob to move the cursor
20M
5 Turn the control knob
2A: LENGTH
20
[SHUTTER]
100M
to adjust the setting
Page 31

GENLOCK Menu
This menu is used to set the camera cable length to the length actually used.
(A Page 12 [Adjustments for Genlock Operation])
* Default values are indicated in bold characters.
No. Item Setting Values Function
1
1A SD H PHASE
1B HD H PHASE
1C SC COARSE
1D SC FINE
1Z BACK
*1 This function is unavailable when connected to GY-HM790 series.
*
1
*
Memo :
● Either [1A: SD H PHASE] or [1B: HD H PHASE] will appear depending on the Video Format of the camera.
-128 to 0 to 127 Adjustment of the Horizontal sync phase of genlocking.
*
-1024 to 0 to 1023 Adjustment of the Horizontal sync phase of genlocking.
1
0⬚,
90⬚, 180⬚, 270⬚
-128 to 0 to 127 Fine adjustment of the color phase, which should be performed after completing the
^ Return to the previous display.
Coarse adjustment of the color phase of genlocking. Use a vectorscope, etc.
[SC COARSE] adjustment.
If the subcarrier cannot be adjusted with [SC FINE], restart the adjustment from
[SC COARSE].
CABLE Menu
This menu sets the camera cable length according to the actual length used.
(A Page 12 [Camera Cable Length Setup])
* Default values are indicated in bold characters.
No. Item Setting Values Function
2A LENGTH
2Z BACK
5M,
20M,
50M, 100M
^ Return to the previous display.
Set according to the total length of the camera cables in use.
21
Page 32

Menu Operation
P
FILE Menu
The values set with the menu and applied to the
RM-HP790DU/RM-HP790DE can be saved in four files
named A, B, C and D.
FULL AUTO F1
BARS
F2
SHUTTER
STR
OFF
CMP
+0 dB
GAIN
LCD display
ALC
LUX
1 Press and hold the [MENU] button for 3 seconds until
the LCD display shows the menu display
The cursor (
be varied.
ursor
1: GENLOCK
2: CABLE
2 Turn the
(
J
) to A3: FILEB
Cursor
3: FILE
4: PROCESS
J
) indicates that the item being pointed to can
[SHUTTER]
control knob to move the cursor
MENU/SHUTTER GAIN
F3
SHUTTER
VARIABLE
PUSH-ON
DOWN UP
PUSH-ON
DOWN UP
MENU
F4
[SHUTTER] control knob
[MENU] button
STEP
HIGH
MID
R
LOW
5 Press the
cursor (
3B: STORE FILE
J
) to AAB
[SHUTTER]
control knob again to move the
A
6 To store data in file B, turn the control knob to move
the cursor (
3B: STORE FILE
7 If the
LCD display shows ASTORE FILE BB and the cursor (
moves to ACANCELB
If it is not required to write data now, the [SHUTTER] control
knob should be pressed again.
3B: STORE FILE
8
To store data in a selected file, turn the [SHUTTER]
control knob to move the cursor (
3B: STORE FILE
9 Press the
selected file and return to the previous display
STR
CMP
J
) to file AAB (Similar for ACB, ADB)
B
[SHUTTER]
control knob is pressed now, the
CANCEL
J
EXECUTE
[SHUTTER]
OFF
0 dB
control knob to write data in a
ALC
LUX
J
) moves to AEXECUTE
)
B
3 Press the
(
J
) below to A3A: LOAD FILEB
3A: LOAD FILE
[SHUTTER]
control knob to move the cursor
A
䡵 Storing data in a file
4 To store data in one of the two files, press the
[SHUTTER]
A3B: STORE FILEB
3B: STORE FILE
control knob to move the cursor (J) to
A
䡵 Loaging the data in a file
To read previously written data, in step 3 move the cursor
(
J
) to A3A: LOAD FILEB, then perform the same operations
as in steps
4 to 9.
䡵 Resetting data in a file
To reset saved data to the factory settings, in step 3 move
the cursor (
operations as those in steps
Memo :
● During LOAD FILE and RESET FILE, ANOW
INITIALIZINGB and AJUST A MOMENTB will be displayed
on the LCD.
J
) to A3C: RESET FILEB, then perform the same
4 to 9.
22
Page 33

PROCESS Menu
This menu sets the functions built into the camera.
* Default values are indicated in bold characters.
Memo :
● Functions not available on the camera cannot be controlled from this unit.
No. Item Setting Values Function
1
*
1
*
OFF
ON
-10 to
NORMAL to
(21 steps)
-10 to
NORMAL to
(21 steps)
LOW
MIDDLE
HIGH
AUTO
OFF
ON
OFF
ON
-10 to
NORMAL to 10Sets the knee point level at which the [AUTO KNEE] function is deactivated.
OFF
ON
NORMAL
V. M AX
4A DETAIL
4B DETAIL LEVEL
4C DETAIL V/H
4D DETAIL FRQ
4E SKIN DETAIL
4F AUTO KNEE
4G KNEE POINT
4H COLOR MATRIX
4I V.RESOLUTION
*1 This function is unavailable when connected to GY-HM790 series.
ON/OFF setting of the detail enhancement function.
OFF : Detail enhancement is activated.
ON : Detail enhancement is deactivated.
10
Adjusts the detail enhancement level.
Increasing the level : Sharpens details.
Decreasing the level : Softens details.
Selects whether the detail enhancement is applied more strongly in a horizontal or
10
vertical direction.
Increasing the level : Applies detail enhancement more strongly in a H direction.
Decreasing the level : Applies low detail enhancement in the H direction.
Memo :
● This item cannot vary the detail enhancement in the V direction.
Sets the detail enhancement frequency according to the object.
LOW : Low frequency to be used when shooting a coarsely patterned object.
MIDDLE : Standard frequency.
HIGH : High frequency to be used when shooting a small or finely patterned object.
1
AUTO
*
: Automatic adjustment of the detail enhancement frequency according to
the object.
ON/OFF setting of the skin tone detail function, which displays natural, wet skin colors by
reducing detail enhancement on the skin areas.
OFF : Skin tone detail function is deactivated.
ON : Skin tone detail function is activated.
ON/OFF setting whether the [AUTO KNEE] function is activated according to the knee
point setting to be made below.
OFF : [AUTO KNEE] function is deactivated.
ON : [AUTO KNEE] function is activated.
Increasing the level : The knee function is activated at a higher video level.
Decreasing the level : The knee function is activated at a lower video level.
Memo :
● The actual variation in the knee point occurs step by step because this is set as a
result of the knee point setting of the camera.
ON/OFF setting of whether the color matrix function.
OFF : The color matrix function is deactivated.
ON : The color matrix function improves the color reproducibility. Note that noise
Increases the vertical resolution.
NORMAL : Standard value.
V.MAX : Increased value.
increases with this setting.
Memo :
● When the vertical resolution is increased, the sensitivity deteriorates and bright areas
of objects may appear to be colored.
23
Page 34

Menu Operation
PROCESS Menu (continued)
* Default values are indicated in bold characters.
No. Item Setting Values Function
4J GAMMA
4K GAMMA LEVEL
4L BLACK
4M ASPECT RATIO
4N DNR
4O DNR LEVEL
1
*
4Z BACK
OFF
ON
-10 to
NORMAL
STRETCH
COMPRESS
1
4:3
*
16:9
LETTER
OFF
ON
LOW
MIDDLE
HIGH
AUTO
NORMAL to 10Adjusts the gamma correction level.
^ Return to the previous display.
ON/OFF setting of the gamma curve correction, which determines the reproduction of
black.
OFF : Gamma correction is deactivated.
ON : Gamma correction is activated.
Increasing the level : Improves the reproduction of black but leads to loss of gradation
Decreasing the level : To be used when the reproduction of black is not strongly
Sets the gain in the dark areas according to the captured video signal.
NORMAL : Standard gain.
STRETCH : Stretches the signals of the dark areas in the image to enhance them
COMPRESS : When the captured image is bright in overall and has few contrast, The
Sets the picture size of the video signal.
4:3 : 4:3 screen output.
16:9 : 16:9 screen output.
LETTER : Letter size (16:9) screen output.
ON/OFF setting of the DNR (Digital Noise Reduction).
OFF : DNR is deactivated.
ON : DNR is activated.
Sets the DNR effect level.
LOW : Low DNR level (effective for fast-moving objects).
MIDDLE : Standard DNR level (residual image is noticeable).
HIGH : High DNR level (residual image is noticeable).
AUTO : Automatic adjustment of the DNR level according to the object.
of white.
required.
and clarify the difference between the bright and dark areas.
gain of the dark areas is compressed to provide contrast.
*1 This function is unavailable when connected to GY-HM790 series.
24
Page 35

OPERATION Menu
This menu sets the functions built into the RM-HP790DU/RM-HP790DE.
* Default values are indicated in bold characters.
No. Item Setting Values Function
5A SHUTTER
1
*
5B V. GAIN STEP
5C V. GAIN MAX
5D GAIN LOW
5E GAIN MID
5F GAIN HIGH
5G SMOOTH TRANS
5H FUNC1
5I FUNC2
5J FUNC3
STEP
VARIABLE
1
1.0 dB
*
0.1 dB
1
9.0 dB
*
12.0 dB
18.0 dB
-3 dB*1,
0 dB,
3 dB, 6 dB, 9 dB,
12 dB, 15 dB, 18 dB
-3 dB*1, 3 dB, 6 dB,
9 dB,
12 dB, 15 dB, 18 dB
-3 dB*1, 3 dB, 6 dB,
12 dB, 15 dB,
18 dB
OFF
ON
NONE,
BLACK STRETCH,
BLACK
COMPRESS,
ALC + EEI*
ALC*
FAW, AUTO KNEE,
SKIN DETAIL,
COLOR MATRIX*
DETAIL, DNR
1*2
2
, LOLUX*1,
Selects whether the front panel [SHUTTER] control varies the shutter speed in steps or in
fine variation.
STEP : Shutter speed variation in steps.
VARIABLE : Fine, continual variation to be used when shooting a computer monitor, etc.
Selects the step of the gain variation using the [GAIN] control in the Variable Gain mode.
1.0 dB : Turning the [GAIN] control varies the gain in 0.1 dB steps.
0.1 dB : Turning the [GAIN] control varies the gain in 1.0 dB steps.
Selects the maximum gain value in the Variable Gain mode.
9.0 dB : Turning the [GAIN] control can vary the gain up to 9.0 dB.
12.0 dB : Turning the [GAIN] control can vary the gain up to 12.0 dB.
18.0 dB : Turning the [GAIN] control can vary the gain up to 18.0 dB.
Selects the gain value when the front panel [GAIN] switch is set to the ALOWB position.
Selects the gain value when the front panel [GAIN] switch is set to the AMIDB position.
Selects the gain value when the front panel [GAIN] switch is set to the AHIGHB position.
ON/OFF setting of the smooth transition function which prevents sudden change when
the position of the [GAIN] switch or [W. BAL] switch on the front panel is changed.
OFF : SMOOTH TRANS is deactivated.
ON : SMOOTH TRANS is activated.
Sets the function assigned to function button [F1] on the front panel.
(Default values: BLACK STRETCH)
Sets the function assigned to function button [F2] on the front panel.
,
(Default values: BLACK COMPRESS)
Sets the function assigned to function button [F3] on the front panel.
1
(Default values: ALC + EEI)
5K FUNC4
5Z BACK
*1 This function is unavailable when connected to GY-HM790 series.
*2 AALC + EEIB and AALCB cannot be registered at the same time.
^ Return to the previous display.
Sets the function assigned to function button [F4] on the front panel.
(Default values: AUTO KNEE)
25
Page 36

Menu Operation
P
LCD MODE Menu
This menu sets up the LCD display.
* Default values are indicated in bold characters.
No. Item Setting Values Function
-5 to
6A CONTRAST
NORMAL to 5Adjusts the contrast of the LCD display.
6B BACKLIGHT
OFF
ON
Adjusts the setting of the backlight of the LCD display.
OFF : Backlight is turned off.
ON : Backlight is turned on.
6Z BACK
^ Return to the previous display.
SYSTEM Menu
This menu performs setting regarding System.
* Default values are indicated in bold characters.
No. Item Setting Values Function
7A CONTRAST
CANCEL
EXECUTE
7Z BACK
^ Return to the previous display.
SYSTEM RESET
This menu resets the values set by the user to the initial
values.
Resets the values set by the user to the initial values.
(A Page 26 [SYSTEM RESET])
3 Press the
[SHUTTER]
A7A: SYSTEM RESETB
control knob to display
FULL AUTO F1
BARS
SHUTTER
STR
1/1000
CMP
F2
ALC
+9dB
LUX
GAIN
MENU/SHUTTER GAIN
F3
MENU
F4
DOWN UP
SHUTTER
PUSH-ON
VARIABLE
PUSH-ON
DOWN UP
STEP
HIGH
MID
R
LOW
[SHUTTER] control knob
LCD display
[MENU] button
1 Press and hold the [MENU] button (approx. 1 second)
until the LCD display shows the menu display
2 Turn the
(
J
) to A7: SYSTEMB
ursor
6: LCD MODE
7: SYSTEM
[SHUTTER]
control knob to move the cursor
26
7A: SYSTEM RESET
CANCEL
4 Press the
(
J
) to ACANCELB
[SHUTTER]
control knob to move the cursor
If you do not want to reset the values you have set, press the
control knob now.
7A: SYSTEM RESET
CANCEL
Page 37

5 If you want to reset the values, turn the
control knob to move the cursor (
J
) to AEXECUTEB
[SHUTTER]
ANOW INITIALIZINGB and AJUST A MOMENTB will be
displayed during SYSTEM RESET.
7A: SYSTEM RESET
EXECUTE
NOW INITIALIZING
JUST A MOMENT
6 Press the
[SHUTTER]
control knob to reset the values
you have set to the initial values and return to the normal
display
STR
CMP
OFF
0 dB
ALC
LUX
Initial values
● The values you’ve set in the menu items will be reset to
the initial values shown on pages 21 to 26.
● Other status settings are reset as shown below.
Status Setting
[IRIS-AUTO/MANU] button [MANUAL]
[W. BAL] switch Switch position
[WHITE-PAINT] button OFF
[WHITE-PAINT] switch [A] [B] ch
[R] ch
[B] [B] ch
[R] ch
[WHITE-PAINT] switch [B] ch
[R] ch
[GAIN-STEP] switch Switch position
[GAIN-VARIABLE] control [0.1 dB]
SHUTTER [OFF]
V.SCAN LEVEL Approx.1/100(AU),1/120(DE)
[FULL AUTO] [OFF]
[BARS] [OFF]
[F1] to [F4] buttons Initial value, [OFF]
[LOLUX] [OFF]
[ALC + EEI] [OFF]
Default values
Central value of the control
Central value of the control
Central value of the control
27
Page 38

General
Warning Messages
To prevent operational errors, the LCD display shows one of the following warning messages when an erroneous operation is
performed.
Displayed Message Cause Check Point
INVALID ENTRY
GAIN : LOLUX
INVALID ENTRY
FULL AUTO : ON
INVALID ENTRY
GAIN : ALC + EEI
INVALID ENTRY
GAIN : ALC
INVALID ENTRY
W.BAL : FAW
INVALID ENTRY
W.BAL : PRESET
INVALID ENTRY
W.BAL : MANUAL
INVALID ENTRY
BARS : ON
The gain is set to the Lolux mode. Exit from the Lolux mode, and then adjust the gain again.
The [FULL AUTO] button is ON. Press the [FULL AUTO] button so that the lamp in it turns off, then retry
operation.
[ALC + EEI] is AONB. Exit from the [ALC + EEI] mode, and then retry operation.
[ALC] is AONB. Exit from the [ALC] mode, and then retry operation.
The white balance is set to the FAW
mode.
The [W. BAL] button is set to
APRESETB.
The white balance adjustment is set to
manual mode by the [WHITE-AUTO]
button.
The [BARS] button is pressed. Press the [BARS] button so that the lamp in it turns off, then retry
Cancel FAW and start the white balance adjustment.
Auto white balance adjustment cannot be started in this mode.
Auto white balance adjustment cannot be started in this mode.
operation.
Error Messages
When the LCD display shows one of the following error messages during an auto white balance adjustment and Auto Set mode,
check ACauseB and ACheck PointB below and then retry the auto white balance adjustment. (The error message is displayed for
about 5 seconds.)
Displayed Message Cause Check Point
AUTO WHITE A (B)
ERROR: LOW LIGHT
AUTO WHITE A (B)
NG: OBJECT
AUTO WHITE A (B)
ERROR: OVER LIGHT
AUTO BLACK LENS NOT
CLOSED?
AUTO BLACK ERROR!
The light intensity is insufficient. Increase the lighting (illumination) or boost the gain with the [GAIN]
button.
(Note that the sensitivity deteriorates when the gain is boosted.)
The object is not suitable for shooting. Check if the object is white and change the object if required.
The amount of incident light is too
high.
The color temperature conversion filter
is not set properly.
The lens will not close for auto blackbalance adjustment.
Auto black adjustment is not working
properly.
Check if a strong light source, such as the sun, is shining into the
camera either directly or as a result of a reflection caused by the
object.
Set the color temperature conversion filter to the correct position.
Set the camera so that the lens can be closed.
Check the setups of the RM-HP790DU/RM-HP790DE and camera
again.
28
Page 39

Operable Camera Features
GY-HM790 series
Function
IRIS AUTO IRIS 3
AI LEVEL 3
MANUAL IRIS 3
IRIS LEVEL 3
MASTER BLACK 3
WHITE MODE
MANUAL 3
PRESET 3
AUTO1 3
AUTO2 3
FAW 3
AUTO
SET -
WHITE 3
MANUAL LEVEL
R, B 3
WHITE PAINT
R, B 3
FAW 3
GAIN -3 dB -
0 dB 3
3 dB 3
6 dB 3
9 dB 3
12 dB 3
15 dB 3
18 dB 3
24 dB ALC + EEI 3
ALC 3
VARIABLE -
LOLUX OFF -
ON OFF 3
1/100 or 1/120 3*
1/250 3
1/500 3
1/1000 3
1/2000 3
1/4000 3
1/10000 3
VARIABLE -
SHUTTER*
TA LLY
PREVIEW
CALL
1
3: Available
-: Not available
2
3
3
3
GY-HM790 series
Function
BARS
DETAIL
(CONTOUR)
DETAIL LEVEL
DETAIL V/H
DETAIL FRQ*
AUTO KNEE
KNEE POINT
COLOR MATRIX
GAMMA OFF 3
GAMMA LEVEL
BACK
ASPECT RATIO
DNR OFF 3
DNR LEVEL SMOOTH TRANS OFF 3
FULL AUTO OFF 3
SD H PHASE
HD H PHASE
SC COARSE
SC FINE
1
OFF 3
ON 3
OFF 3
ON 3
LOW 3
MIDDLE 3
HIGH 3
AUTO OFF 3
ON 3
OFF ON -
ON 3
ON 3
ON 3
ON 3
3: Available
-: Not available
3*
*1 : Equivalent to [DTL H FREQ] on the camera.
*2 : Changes depending on the Video Format.
3
3
3
3
3
-
-
2
-
-
29
Page 40

General
Operation of Connected Camera
When RM-HP790DU/RM-HP790DE is connected to a
camera, all features that are available on RM-HP790DU/RMHP790DE can only be controlled by RM-HP790DU/RMHP790DE, and control of these features using the camera is
disabled.
Switches on the camera that are disabled, as well as
disabled menu items are as follows.
Standard connection of RM-HP790DU/RMHP790DE (Connection of 2 units)
● GAIN
● SHUTTER
● WHT.BAL
● FULL AUTO
● User 1, 2 and 3 with the following features assigned
● BARS
● B.STRETCH1-5
● B.COMPRESS1-5
● AE LEVEL +
● AE LEVELⴑ
*1 : [SHUTTER] will also be disabled if the setting is
AVARIABLEB or below A1/30B (When Frame rate is A60/
24B) or
*2 : Setting is configured from RM-HP790DU/RM-
HP790DE regardless of the status of the [FULL AUTO]
switch.
1
*
2
*
A1/25B (When Frame rate is A50B).
Menu items that are disabled
Menu Display on
Menu Page Function
CAMERA
OPERATION
CAMERA PROCESS
[1/2]
CAMERA PROCESS
[2/2]
ADVANCED
PROCESS
WHITE BALANCE WHITE PAINT R
GENLOCK
AE LEVEL
BARS
MASTER BACK
DETAIL
DETAIL V/H
DETAIL FRQ
SKIN DETECT
BACK
KNEE
LEVEL
DNR
CINEMA [OFF]*
GAMMA [STANDARD]*
LEVEL REMOTE
WHITE PAINT B
SD H PHASE
HD H PHASE
SC COARSE
SC FINE
*3 : [CINEMA] is forcibly set to AOFFB. To adjust MATRIX,
make ues of the menu on the camera.
*4 : [GAMMA] is fixed at the menu setting value of the
camera before connecting to the remote control.
However, when the menu setting value is AOFFB,
[GAMMA] will be forcibly set to ASTANDARDB.
RM-HP790DU/RM-
HP790DE
REMOTESMOOTH TRANS
REMOTE
REMOTE
3
4
[CINEMA]*
[FILMOUT]*
REMOTE
REMOTE
4
4
30
Page 41

Troubleshooting
Symptom Check Points Action
Colors in the monitor screen are
abnormal. (During genlocking)
Video
troubles
Control
troubles
Synchronization is not possible. ● Are the Tri-level sync signal or BB signals applied to the
Pressing the corresponding
button cannot start the operation.
A
<EXT>B is displayed on the LCD.
The LCD display keeps on
displaying ANOW INITIALIZING
JUST A MOMENTB.
The LCD display keeps on
display APLEASE CHECK THE
CAMERAB.
LCD display shows A---B. ● The connected camera does not have the assigned function.
white balance adjustment cannot
be started.
The white balance adjustment will
not complete.
The tally lamp does not light. ● Is the tally system of the RM-HP790DU/RM-HP790DE compatible
Incorrect operation even when
FAS button is ON.
A
E.02B will be displayed on RM-
LP25U
[OPERATE] button of RM-LP25U
keeps blinking.
● Is the SC phase adjusted properly?
[GENLOCK INPUT] connectors?
● Is the VTR playback signal supplied directly without passing
through a TBC?
● Functions that are not available on the camera cannot be
controlled.
hCheck the camera functions again.
● Are cables connected properly?
● Is the power switch of the camera set to ON?
● Are cables connected properly?
● Is the power switch of the camera set to ON?
(When power of camera is turned off while RM-HP790DU/RMHP790DE is on, APLEASE CHECK THE CAMERAB will be
displayed after about 20 seconds if RM-HP790DU/RM-HP790DE
is operated. In addition, when turning on RM-HP790DU/RMHP790DE while the power switch of camera is off, similar display
will appear after about 30 seconds. )
Check the camera functions again and assign the proper functions
to the [F1] to [F4] buttons.
● Is the [W. BAL] switch set to AAB or ABB?
● Is FAS or FAW ON (which is indicated by the lighting of the
[AUTO] light)?
● Are the color temperature filters and lighting conditions
appropriate?
● Does the object have colors?
with that of the camera system?
The RM-HP790DU/RM-HP790DE has been set to the voltage
supply at the factory.
If it is required to use the [TALLY] input in the contact supply mode,
the setting of the internal circuitry should be changed ; consult the
nearest JVC-authorized service agent.
● Is the Studio cable of KA-M790G pulled out or loose?
hConnect the cable properly.
● Are cables connected properly?
● Is the power switch of the camera set to ON?
(When power of camera is turned off while RM-HP790DU/RMHP790DE/RM-LP25U is on, similar display will appear after about
10 seconds.)
● Are cables connected properly?
● Is the power switch of the camera set to ON?
(When turning on RM-HP790DU/RM-HP790DE/RM-LP25U while
the power switch of camera is off, the [OPERATE] button will keep
blinking.)
A P12
A
P12
^
A P8
A P9
A P10
P8
A
A P9
A P10
A P25
A P18
A P18
A P14
^
A
P8
A P9
A P10
A P8
A P9
A P10
31
Page 42

General
Specifications
Output Signals
Composite video signal : 1 V (p-p), 75 K, 1 output
R/G/B signals : 0.7 V (p-p), 75 K, x1 each (without
sync)
Y/PB/PR signals
Y : 1 V (p-p), 75 K
PB : 0.7 V (p-p), 75 K
PR : 0.7 V (p-p), 75 K
(75% color bar)
Intercom
RM-HP790DU : 2-line system, -10 dB, 220 K,
unbalanced RTS
(The RTS terminals are not designed
to accept a voltage supply.)
RM-HP790DE : 2-line system, -10 dB,
600 K, balanced
Remote : 5.0 V (p-p)
[HD/SD SDI OUTPUT]
HD SDI : SMPTE292M-compliant
Signal level: 0.8 V(p-p)
Max transfer distance: 100 m
SD SDI : SMPTE259M-compliant
Signal level: 0.8 V(p-p)
Max transfer distance: 100 m
TC : Supported
AUDIO : Supported
No. of output
connectors
: 2 outputs
Input Signals
Ta ll y
RM-HP790DU :
RM-HP790DE :
Intercom
RM-HP790DU : 2-line system, -10 dB, 220 K,
RM-HP790DE : 2-line system, -10 dB,
Remote : 5.0 V (p-p)
[HD/SD SDI INTPUT]
HD SDI : SMPTE292M-compliant
SD SDI : SMPTE259M-compliant
No. of output
connectors
[GENLOCK INPUT]
HD : Y signal: 1 Vp-p, 75 K or Tri-level
SD
RM-HP790DU
RM-HP790DE : VBS signal: 1 V(p-p), 75 K or Black
[AUX VIDEO INPUT]
SD : VBS signal: 1 V(p-p), 75 K loop-
Contact supply : DC 10 V, 3 mA or more
Voltage supply : AC 6.3 V, DC 5 to 24 V
Non-switching between AC and DC
unbalanced RTS
(The RTS terminals are not designed
to accept a voltage supply.)
600 K, balanced
720p/60/50
1080i/60/50
480i/60
576i/50
: 1 input
sync signal: 0.6 V(p-p), 75 K loopthrough output
:
VBS signal: 1 V(p-p), 75 K or Black
Burst signal: 0.43 V(p-p), 75 K loopthrough output
Burst signal: 0.45 V(p-p), 75 K loopthrough output
through output
32
Page 43

General
Input Voltage
RM-HP790DU : AC 120V, 60 Hz
RM-HP790DE : AC 230V, 50 Hz
Power Consumption (Consumed current)
RM-HP790DU : 80 W
(GY-HM790 series+KA-M790G+
VF-HP790G+RM-LP25U+Headset)
RM-HP790DE : 0.4 A
(GY-HM790 series+KA-M790G+
VF-HP790G+RM-LP25U+Headset)
Mass : Approx. 5.5 kg
Allowable operating temperature
: -5 f to 40 f (23 J to 104 J)
Allowable storage temperature
: -20 f to 60 f (-4 J to 140 J)
Allowable operating humidity
: 30 %RH to 80 %RH
Allowable storage humidity
: 85 %RH and below
Accessories
Power Cord (2.5 m) .................................................................... 1
Instructions .................................................................................. 1
Warranty Card (RM-HP790DU only) ........................................... 1
Dimensional Outline Drawing (Unit: mm)
CALLTALLY
FULL AUTO F1
BARS
F2
INTERCOM
LEVEL
䡵 RM-HP790DU
TALLY
PGM PVW C
H
H
AC
IN AC120V 60Hz
INTERCOM
CG
SHUTTER
GAIN
AUX VIDEO INPUT GENLOCK INPUT
RTS
MENU/SHUTTER GAIN
F3
SHUTTER
PUSH-ON
MENU
F4
DOWN UP
340 to 370
465
483
Y/G PB/B PR/R
VARIABLE
DOWN UP
VIDEO OUTPUT
STEP
HIGH
PUSH-ON
LOW
COMPOSITE VIDEO
WHITE MASTER BLACK
PAINT AUTO
MID
REMOTE CONTROL UNIT RM-HP790
W.BAL
B
A
BR
PRESET
OUTPUT
INPUT
HD/SD SDI
REMOTE
AUTO
MANU
IRIS
CLOSE OPEN
CAMERA CABLE
POWER
306
283
I
O
32
44
52
203
272
䡵 RM-HP790DE
PGM PVW C
AC H IN 230V H 50Hz
TALLY
INTERCOM
AUX VIDEO INPUT GENLOCK INPUT
HCG
VIDEO OUTPUT
Y/G PB/B PR/R
COMPOSITE VIDEO
* The specifications and appearance of this product are subject to changes for further improvement without prior notice.
OUTPUT
INPUT
HD/SD SDI
REMOTE
CAMERA CABLE
33
Page 44

REMOTE CONTROL UNIT
RM-HP790DU/RM-HP790DE
2010 Victor Company of Japan, Limited
LST1153-001A
 Loading...