

Page 1
PIXELA ImageMixer
ENGLISH
INSTRUCTIONS
LYT1015-001A
Page 2

EN
2
CONTENTS
INTRODUCTION .......................................................................................... 4
Reading this document .................................................................................................. 4
Meanings of symbols .................................................................................................... 5
Copyrights ................................................................................................................... 5
ENDLESS POSSIBILITIES ............................................................................... 6
PIXELA ImageMixer ...................................................................................................... 6
ImageMixer (Windows® and Macintosh) .................. 7
IMAGEMIXER ............................................................................................. 8
Capabilities .................................................................................................................. 8
For more detailed information ....................................................................................... 9
PIXELA User Support Center .......................................................................................... 9
CAPTURING VIDEO ................................................................................... 10
Capturing video in real time ........................................................................................ 10
Capturing video from tape (Windows
®
only) ................................................................ 12
MANAGING FILES ..................................................................................... 14
EDITING VIDEO ........................................................................................ 15
Appendix ............................................................ 17
CONDUCTING A VIDEO CONFERENCE OVER THE INTERNET .......................... 18
Using iVisit ................................................................................................................ 18
LOADING FILES FROM A MEMORY CARD THROUGH AN ADAPTER .............. 19
TROUBLESHOOTING ................................................................................. 20
Page 3

EN
CAUTION:
● Operate this equipment according to the operating procedures described in this manual.
● Use only the provided CD-ROM. Never use any other CD-ROM to run this software.
● Do not attempt to modify this software.
● Changes or modifications not approved by JVC could void user’s authority to operate the equipment.
How to handle a CD-ROM
● Take care not to soil or scratch the mirror surface (opposite to the printed surface). Do not write anything
or put a sticker on either the front or back surface. If the CD-ROM gets dirty, gently wipe it with a soft
cloth outward from the center hole using a circular motion.
● Do not use conventional disc cleaners or cleaning spray.
● Do not bend the CD-ROM or touch its mirror surface.
● Do not store your CD-ROM in a dusty, hot or humid environment. Keep it away from direct sunlight.
®
● Microsoft
United States and/or other countries.
● Macintosh is a registered trademark of Apple Computer, Inc.
● Other product and company names included in this instruction manual are trademarks and/or registered
trademarks of their respective holders.
and Windows® are either registered trademarks or trademarks of Microsoft Corporation in the
3
Page 4

EN
4
INTRODUCTION
Reading this document
This document consists of the following sections.
Before use, please read the Software Installation and USB Connection Guide for preparation.
䡲䡲䡲䡲
ImageMixer (Windows
This section introduces the ImageMixer software. In addition to capturing still images and creating albums,
ImageMixer is used for a variety of other functions, including color and brightness adjustment, and capturing
videos through a USB cable or a DV cable. For details, refer to the ImageMixer online help.
䡲䡲䡲䡲
Appendix
This appendix explains how to use a camcorder to hold a video conference over the Internet and how to load
images into the PC that does not have a USB connector. This appendix also contains troubleshooting and
index.
®
and Macintosh)
Page 5

EN
5
INTRODUCTION (cont.)
Meanings of symbols
The following symbols are used in this document.
NOTE:
Indicates problems that could occur while using these softwares, phenomena that may appear to be a
problem, limitations on the use of these softwares, or other information that is useful to know.
墌
Indicates pages where related information can be found.
CONTINUED ON NEXT PAGE
Indicates that the explanation continues on the next page.
Copyrights
Under copyright law, any material that you may edit with this software cannot be used for any purpose other
than your own personal enjoyment without the permission of the copyright holder. Note that this restriction
applies when dubbing tracks from a CD as background music for your own movies.
Page 6

EN
6
ENDLESS POSSIBILITIES
PIXELA ImageMixer
Edit your own movies
Edit your own original movies by processing and re-arranging video clips and still images that you have
loaded into your PC. Now you can be the director! Just shoot video with your camcorder and then edit it on
your PC.
Once you have finished your movie, you can play back it on your PC, send it through e-mail, or even show it
on the Internet.
Add a camera to your PC
You can transform your camcorder into a peripheral for your PC.
For example, when you are shooting a video, you can record on your PC instead of on a cassette. You can
also use Windows
conference over the Internet. (In order to conduct a video conference over the Internet with Windows
NetMeeting, you must register with MSN Messenger and Microsoft HotMail.)
®
NetMeeting (or similar software) in combination with this software to hold a video
®
Page 7
EN
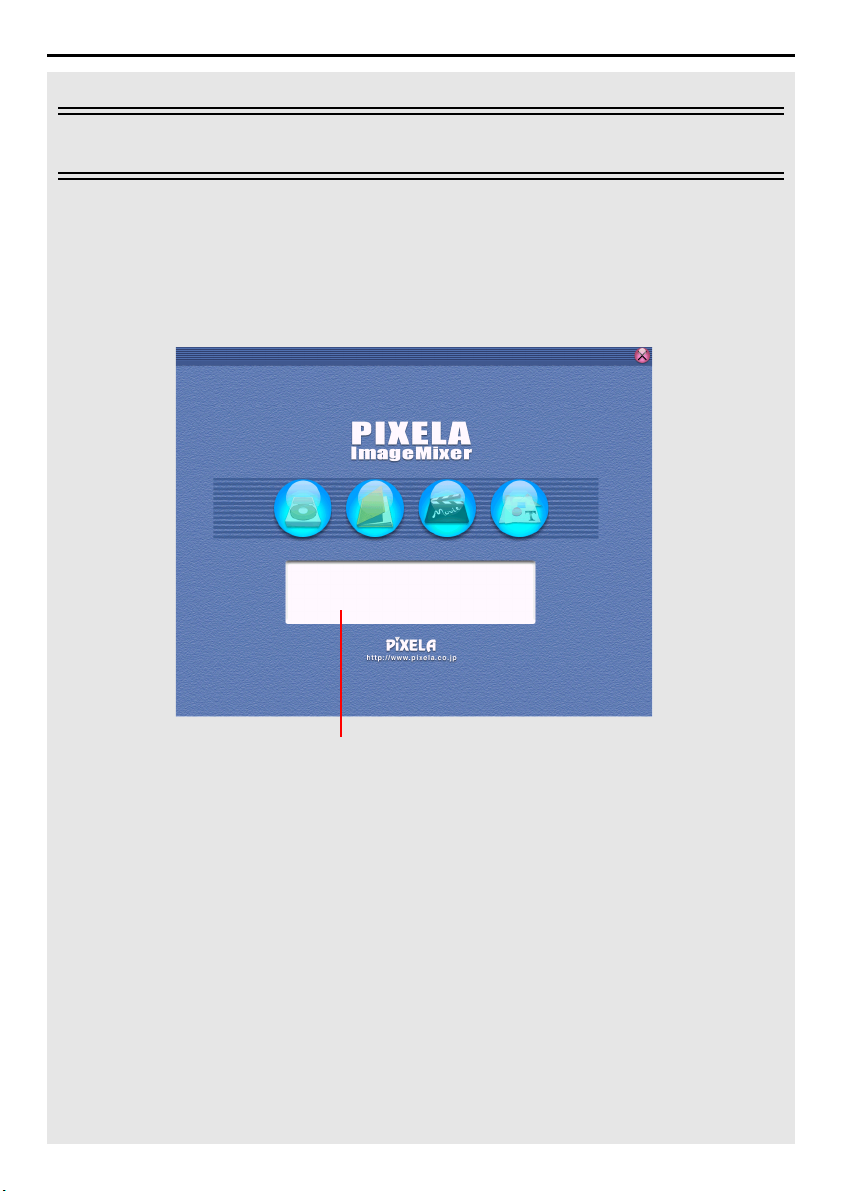
ImageMixer (Windows® and Macintosh)
In addition to capturing still images and creating albums, ImageMixer is
used for a variety of other functions, including color and brightness
adjustment, and capturing video through a USB cable or a DV cable.
Read this section whether you are using a Windows
operating system.
®
or a Macintosh
7
Explanations of mode buttons are
displayed here.
Page 8

EN
8
IMAGEMIXER
Capabilities
The ImageMixer software possesses a variety of functions. Its primary applications are described below.
Editing your own original movies
ImageMixer allows you to capture video from a camcorder, rearrange scenes, add special effects when
changing scenes, insert still images, and otherwise freely edit your own movies. ImageMixer also allows you
to add audio and background music.
The edited movie is stored in MPEG1 format, which provides a comparatively smaller file size. This makes it
more convenient to distribute it to your friends, for example, expanding the range of possibilities for which
you can use your camcorder.
Capturing video from tape
Connect the camcorder to the PC with a DV cable. ImageMixer can then convert the video on tape to MPEG1
format and store it in the PC. (Windows
Capturing video in real time
Connect the camcorder to the PC with a USB cable. ImageMixer can then record on the hard disk in the PC,
instead of on the tape. (Exclude Windows
Loading still images from a memory card
Connect the camcorder to the PC with a USB cable. ImageMixer can then load still images from a memory
card.
Capturing audio from a microphone or CD
ImageMixer can record audio from the PC’s microphone. Because the recording can be made while playing
the video back at the same time, it is easy to add audio that is in sync with previously recorded video.
ImageMixer can also add music from a CD as background music for your movie.
Editing still images
ImageMixer can adjust the brightness and contrast of still images and extract only the necessary portions.
ImageMixer also has a variety of functions for correcting eye color tones that are too red.
In addition, ImageMixer allows you to freely lay out still images, pictures, text, and other elements to create
your own postcards, CD-R labels, etc.
®
Me and Windows® 2000 Professional only)
®
98)
Page 9

EN
9
IMAGEMIXER (cont.)
Managing files on hard disk
ImageMixer can manage elements that can be used in movie editing (video, still images, audio) as albums.
Aside from permitting checking of files in list format or through a slide show, ImageMixer can also perform
file operations such as search, move, duplicate, and delete. In addition to making movie editing easier, these
functions are also useful for classifying and managing images with a camcorder.
IMPORTANT:
ImageMixer only registers the location of an image file and its thumbnail image in albums. When images
are handled by ImageMixer, the original file is affected by the operation. For example, if an image is deleted
from an album, the original file is deleted. If a file is moved, ImageMixer loses track of where the file
resides. Therefore, file operations should be conducted carefully.
For more detailed information
This manual only provides an overview of ImageMixer. For more details on how to use its many functions,
refer to the online help.
To display online help for Windows
screen. Clicking this button launches the web browser and displays the online help.
To display online help for Macintosh, double-click the “manual.html” file in the [PIXELA ImageMixer] folder.
®
, click the [?] button located in the upper right corner of the ImageMixer
PIXELA User Support Center
For more details on how to use ImageMixer, refer to the following User Support Center.
North America (Los Angeles)
Telephone: +1-213-341-0163
Europe (U.K.)
Telephone: +44-1489-564-764
Asia (Philippines)
Telephone: +63-2-438-0090
Page 10

EN
10
CAPTURING VIDEO
Capturing video in real time
When a camcorder is connected to the PC with a USB cable, the video from the camcorder can be recorded
on the PC’s hard drive instead of on tape or in a memory card (real-time capture).
1
Connect the camcorder to the PC with a USB cable.
● Refer to “Connections (Windows
Installation and USB Connection Guide.
2
Set the camcorder to the memory card recording mode.
The camcorder is now on.
[Web CAMERA] appears on the camcorder’s LCD monitor.
● If [Web CAMERA] does not appear, install [USB Stream driver]. Refer to “Software Installation
(Windows
and USB Connection Guide.
● Camcorder operations are limited to the zoom switch, the focus button, and the still image button.
NOTE:
The procedure is different when reading or writing a memory card.
3
Select [Start] – [Programs] – [Pixela] –
[ImageMixer] – [PIXELA ImageMixer
Ver.1.0].
®
)” (墌 pg. 5) and “Software Installation (Macintosh)” (墌 pg. 14) in the Software Installation
®
)” (墌 pg. 9) or “Connections (Macintosh)” (墌 pg. 13) in the Software
● For Macintosh, double-click the
[ImageMixer] icon on the PC.
ImageMixer starts up.
4
Click the Input button.
The input mode screen appears.
Input
CONTINUED ON NEXT PAGE
Page 11

CAPTURING VIDEO (cont.)
5
Click the USB input (USB) button.
The USB input mode screen appears.
6
Click the Video button.
The amount of available storage space is
displayed in the information display panel.
7
Click the Capture button.
The capture operation begins, and the message
[Capture in progress] appears.
8
Click the Capture button again.
The capture operation ends, and the message
[Converting to MPEG] appears. Once
conversion ends, the video file (extension
“.mpg”) is registered in the album.
NOTE:
If you are using Windows
files cannot be converted to MPEG4 files with
ImageMixer, install Windows Media™ Player
(version 7 or later). Windows Media™ Player can
be loaded from Microsoft’s web site:
http://www.microsoft.com/
Capturing still images
1
Click the Still image button.
The message [Still image capture enabled]
appears on the information display panel.
2
Click the Capture button.
The video image at the moment that the button
was clicked is captured, and the resulting still
image file (extension “.jpg”) is registered in the
album.
● Camcorder operations are limited to the
zoom switch, the focus button, and the still
image button.
NOTES:
● It is not possible to capture videos or still images
if the USB Mass Storage Class driver is not
installed properly. In this case, refer to “Updating
[Device Manager] (Windows
Software Installation and USB Connection
Guide.
● On the information display panel or the file
information dialog, some information such as
file-created date may be incorrect.
®
2000 and the MPEG1
®
)” (墌 pg. 8) in the
Information display panel
Still image
Information display panel
EN
USB input (USB)
Capture
Video
Capture
11
Disconnecting the USB cable
1
Disconnect the USB cable.
2
Set the Power Switch on the camcorder to “OFF”.
The camcorder turns off.
Page 12

EN
12
CAPTURING VIDEO (cont.)
Capturing video from tape (Windows® only)
When a camcorder is connected to the PC with a DV cable, video can be copied from the camcorder tape to
the PC.
1
Set the camcorder to the tape playback mode.
The camcorder is now on.
2
Select [Start] – [Programs] – [Pixela] –
[ImageMixer] – [PIXELA ImageMixer
Ver.1.0].
ImageMixer starts up.
3
Click the Input button.
The input mode screen appears.
Input
4
Click the Digital video camera input (1394) button.
The Digital video camera input mode screen appears. After
a while, a blue screen appears.
Digital video camera input (1394)
Page 13

13
EN
CAPTURING VIDEO (cont.)
Copying video
1
Click the Video button.
The amount of available storage space is
displayed in the information display panel.
2
Click the Play button.
The camcorder begins playing back the video,
and the same image appears on the PC screen.
3
Click the Capture button.
The capture operation begins, and the message
[Video capture in progress] appears.
4
Click the Capture button again.
The capture operation ends, and the message
[Converting to MPEG] appears. Once conversion
ends, the video file (extension “.mpg”) is
registered in the album.
● The camcorder stops playback automatically.
NOTES:
● If you are using Windows
files cannot be converted to MPEG4 files with
ImageMixer, install Windows Media™ Player
(version 7 or later). Windows Media™ Player can be loaded from Microsoft’s web site:
http://www.microsoft.com/
● The signals output from the camcorder’s DV connector have an aspect ratio different from the signals for the
PC screen. In the Digital video camera input mode screen, the image displayed on the PC screen looks
vertically stretched in comparison with those on the camcorder’s LCD monitor or on the TV connected to
the camcorder.
®
2000 and the MPEG1
Information display panel
Play
Capture
Vid eo
Disconnecting the DV cable
1
Disconnect the DV cable.
2
Set the Power Switch on the camcorder to “OFF”.
The camcorder turns off.
NOTES:
● To copy a video as a still image, click the Still image button in step 1 of “Copying video” and perform
steps 2 – 4.
● It is not possible to capture video keeping DV format. Use other DV capture application software available.
Page 14

EN
14
ImageMixer can group and search for files (still images, video, and audio) registered in an album, according
to their purpose. To playback a file, double-click on its thumbnail.
Menu
Select album Image editing
MANAGING FILES
Change
display
Search
Change display
Thumbnail
Page 15

EDITING VIDEO
ImageMixer can edit video files registered in an album. ImageMixer can also insert still images and add
audio.
EN
15
Select video editing
Edit
Preview
Arrange
thumbnails
Arrange audio
Double-clicking on one of the (video or still image) thumbnails arranged at the bottom of the screen causes
the editing window to appear. The beginning/ending of videos can be deleted and the volume can be
adjusted. The display time for still images can be adjusted.
Material selection
Create video
Thumbnail
Apply scene
change effects
Page 16

EN
16
Cropping editing
Sound editing
OK
To check the results of editing, click the Preview button. Once editing is complete, click the Create video
button to save the final product.
EDITING VIDEO (cont.)
Cropping
Page 17

EN
17
Appendix
This appendix explains how to use a camcorder to hold a video conference
over the Internet and how to load images into the PC that does not have a
USB connector. This appendix also contains troubleshooting and index.
Page 18

EN
18
Using iVisit
CONDUCTING A VIDEO CONFERENCE OVER THE INTERNET
Use iVisit (from Eyematic of the U.S.) if you are using a Macintosh or if you are conducting a videoconference
between a Macintosh system and a Windows
between a system using iVisit and a system using NetMeeting
®
system. It is not possible to conduct a videoconference
®
.
Operating requirements
Windows : Windows® 98,
Windows
Windows
Macintosh : Mac OS 9.0.4 to 9.1
For other requirements, refer to the Software Installation and USB Connection Guide.
®
98SE,
®
2000 Professional
How to use
The English version of iVisit can be downloaded for free from the web site indicated below (as of November,
2001). Details on how to use iVisit are expected to be available on the JVC web site.
iVisit web site:
http://www.ivisit.com/
JVC web site:
http://www.jvc-victor.co.jp/english/index-e.html
NOTE:
If you are using Windows
microphone to the PC, or use the PC’s own microphone.
®
98, you cannot use the microphone in the camcorder. Either connect a third-party
Page 19

EN
19
LOADING FILES FROM A MEMORY CARD THROUGH AN ADAPTER
You can read and write files on a camcorder memory card by using an adapter (sold separately).
Floppy disk adapter
(CU-VFSD50)
PC card adapter
(CU-VPSD60)
USB reader/writer
(CU-VUSD70)
The following description assumes that a floppy disk adapter is being used. For details on how to use each
specific type of adapter, refer to the instructions provided with that adapter.
1
Remove the memory card from the camcorder.
2
Insert the memory card in the floppy disk adapter.
3
Insert the floppy disk adapter into the floppy disk drive of the PC.
4
Copy the necessary files from the floppy disk to the hard disk.
: For PCs that do not have a USB connector, or which are running Windows® 95/
NT.
: For PCs with a PC card slot
: For applications that use numerous memory cards
Page 20

20
EN
TROUBLESHOOTING
Windows
Although the USB cable is
connected, PC operating
system does not recognize the
memory card in the
camcorder.
Cannot copy or save files. •Make sure that there is enough free space available in the
The colors displayed on the PC
are odd.
NOTE:
When using a laptop PC, operation may be interrupted by a warning when the battery is nearly exhausted.
● If there is software which monitors the status of the battery running in the [StartUp] folder…
● If you are using your PC’s power management function…
®
SYMPTOM CORRECTIVE ACTION REFER TO:
•Make sure that the AC Adapter is connected to the
camcorder and that the power is on.
•Make sure that the USB cable is connected securely.
•Either use a USB hub that has its own power supply, or
connect the USB cable directly to the PC’s USB
connector.
•Windows
Make sure that the Universal Serial Bus controller is
enabled on the [System Properties] sheet in the [Control
Pa n el ] .
drive where you are trying to copy or save a file.
•Make sure that the drive where you are trying to copy or
save a file is not write-protected.
•Make sure that a file with the same name does not
already exist where you are trying to copy or save a file.
•Either use a USB hub that has its own power supply, or
connect the USB cable directly to the PC’s USB
connector.
•Images will not be displayed correctly if the display is set
for 256-color (or fewer) display.
Close the application, or delete/move its icon from the [StartUp] folder and reboot your PC.
Right-click the [My Computer] icon, then select [Properties]–[System Properties]–[Device Manager]–
[System Devices]–[Advanced Power Management Support]. Desactivate the power management
function.
®
might not be recognizing the USB connector.
Software
Installation and
USB
Connection
Guide
(墌 pg. 9)
—
—
Page 21

TROUBLESHOOTING (cont.)
Macintosh
SYMPTOM CORRECTIVE ACTION REFER TO:
Although the USB cable is
connected, PC operating
system does not recognize the
memory card in the
camcorder.
Cannot copy or save files. •Make sure that there is enough free space available in the
•Make sure that the AC Adapter is connected to the
camcorder and that the power is on.
•Make sure that the USB cable is connected securely.
•Either use a USB hub that has its own power supply, or
connect the USB cable directly to the PC’s USB
connector.
drive where you are trying to copy or save a file.
•Make sure that the drive where you are trying to copy or
save a file is not write-protected.
•Make sure that a file with the same name does not
already exist where you are trying to copy or save a file.
•Either use a USB hub that has its own power supply, or
connect the USB cable directly to the PC’s USB
connector.
EN
21
Software
Installation and
USB
Connection
Guide
(墌 pg. 13)
—
Page 22

PIXELA ImageMixer
COPYRIGHT© 2002 VICTOR COMPANY OF JAPAN, LTD.
M2D2 WEBCAM
Macintosh
0102 HOV*ID
 Loading...