

Page 1
DVD PLAYER
XV-511BK
Introduction 1
Preliminary knowledge 4
Getting started 12
Basic operations 17
Advanced operations 20
OPEN/
TV POWER
RETURN
CLOSE
STOP PAUSE
PLAY
TITLE
ENTER
THEATER
POSITION
3D PHONICSUBTITLE
STROBE ANGLE
CANCEL RESUME ZOOM DIGEST
1234
5678
9100+10
TV/VIDEO
++
TV ch TV VOL.
SHIFT
––
RM-SV511U REMOTE CONTROL
POWER
ON SCREEN
DVD
MENU
'
XV-511 DVD PLAYER
STANDBY
POWER
3D PHONIC
D I G I T A L
DOLBY
DVD / VIDEO CD / CD
OPEN/CLOSE
PLAY
PAUSESTOP
SKIP
SHUTTLE
Setting and adjustment 34
Additional information 39
INSTRUCTIONS
MANUEL D'INSTRUCTIONS
For Customer Use:
Enter below the Model No. and Serial No.
which are located on the rear, bottom or
side of the cabinet. Retain this information for future reference.
Model No.
Serial No.
LVT0336-003A
[C]
Page 2
Warnings, Cautions and Others
Mises en garde, précautions et indications diverses
CAUTION
RISK OF ELECTRIC SHOCK
DO NOT OPEN
CAUTION: TO REDUCE THE RISK OF ELECTRIC SHOCK.
DO NOT REMOVE COVER (OR BACK)
NO USER SERVICEABLE PARTS INSIDE.
REFER SERVICING TO QUALIFIED SERVICE PERSONNEL.
The lightning flash with arrowhead symbol,
within an equilateral triangle is intended to
alert the user to the presence of uninsulated
"dangerous voltage" within the product's
enclosure that may be of sufficient
magnitude to constitute a risk of electric
shock to persons.
The exclamation point within an equilateral
triangle is intended to alert the user to the
presence of important operating and
maintenance (servicing) instructions in the
literature accompanying the appliance.
CAUTION
To reduce the risk of electrical shocks, fire, etc.:
1. Do not remove screws, covers or cabinet.
2. Do not expose this appliance to rain or moisture.
ATTENTION
Afin d'éviter tout risque d'électrocution, d'incendie, etc.:
1. Ne pas enlever les vis ni les panneaux et ne pas ouvrir le coffret de
l'appareil.
2. Ne pas exposer l'appareil à la pluie ni à l'humidité.
Caution –– POWER switch!
Disconnect the mains plug to shut the power off completely. The
POWER switch in any position does not disconnect the mains line. The
power can be remote controlled.
Attention –– Commutateur POWER!
Déconnecter la fiche de secteur pour couper complètement le courant.
Le commutateur POWER ne coupe jamais complètement la ligne de
secteur, quelle que soit sa position. Le courant peut être télécommandé.
For U.S.A.
This equipment has been tested and found to comply with the limits
for a Class B digital device, pursuant to part 15 of the FCC Rules.
These limits are designed to provide reasonable protection against
harmful interference in a residential installation.
This equipment generates, uses and can radiate radio frequency
energy and, if not installed and used in accordance with the
instructions, may cause harmful interference to radio
communications. However, there is no guarantee that interference
will not occur in a particular installation. If this equipment does cause
harmful interference to radio or television reception, which can be
determined by turning the equipment off and on, the user is
encouraged to try to correct the interference by one or more of the
following measures:
Reorient or relocate the receiving antenna.
Increase the separation between the equipment and receiver.
Connect the equipment into an outlet on a circuit different from that
to which the receiver is connected.
Consult the dealer or an experienced radio/TV technician for help.
WARNING: TO REDUCE THE RISK OF FIRE
OR ELECTRIC SHOCK, DO NOT EXPOSE
THIS APPLIANCE TO RAIN OR MOISTURE.
For Canada/pour le Canada
CAUTION: TO PREVENT ELECTRIC SHOCK, MATCH WIDE
BLADE OF PLUG TO WIDE SLOT, FULLY INSERT
ATTENTION: POUR EVITER LES CHOCS ELECTRIQUES,
INTRODUIRE LA LAME LA PLUS LARGE DE LA FICHE DANS LA
BORNE CORRESPONDANTE DE LA PRISE ET POUSSER
JUSQUAU FOND
IMPORTANT FOR LASER PRODUCTS
IMPORTANT POUR LES PRODUITS LASER
1. CLASS 1 LASER PRODUCT
2. DANGER: Visible laser radiation when open and interlock failed or
defeated. Avoid direct exposure to beam.
3. CAUTION: Do not open the top cover. There are no user service-
able parts inside the Unit; leave all servicing to qualified service
personnel.
1. PRODUIT LASER CLASSE 1
2. ATTENTION: Radiation laser visible quand l'appareil est ouvert ou
que le verrouillage est en panne ou désactivé. Eviter une exposition
directe au rayon.
3. ATTENTION: Ne pas ouvrir le couvercle du dessus. Il n'y a aucune
pièce utilisable à l'intérieur. Laisser à un personnel qualifié le soin
de réparer votre appareil.
For Canada/pour le Canada
THIS DIGITAL APPARATUS DOES NOT EXCEED THE CLASS B
LIMITS FOR RADIO NOISE EMISSIONS FROM DIGITAL
APPARATUS AS SET OUT IN THE INTERFERENCE-CAUSING
EQUIPMENT STANDARD ENTITLED "DIGITAL APPARATUS",
ICES-003 OF THE DEPARTMENT OF COMMUNICATIONS.
CET APPAREIL NUMERIQUE RESPECTE LES LIMITES DE
BRUITS RADIOELECTRIQUES APPLICABLES AUX APPAREILS
NUMERIQUES DE CLASSE B PRESCRITES DANS LA NORME
SUR LE MATERIEL BROUILLEUR: "APPAREILS NUMERIQUES",
NMB-003 EDICTEE PAR LE MINISTRE DES COMMUNICATIONS.
Page 3

Table of contents
Introduction
Features .................................................................... 1
Supplied accessories ............................................... 1
About this instruction manual ............................... 2
Notes on handling ................................................... 3
Preliminary Knowledge
Names of parts and controls
Front panel ................................................................... 4
Display window ........................................................... 5
Rear panel .................................................................... 5
Remote control unit .................................................... 6
Operational Principles
On-screen displays ...................................................... 8
To prevent the monitor from burning out
[SCREEN SAVER] .................................................... 10
On-screen guide icons .............................................. 10
How to use numeric buttons .................................... 10
About discs
Playable disc types .................................................... 11
Disc structure ............................................................. 11
Getting started
Connections
Before making any connections .............................. 12
To connect to a TV..................................................... 12
To connect to a TV with the component video jacks.......
To connect to an audio amplifier or receiver ......... 13
To connect to audio equipment with a digital input......
To connect the power cord ........................................ 14
Using the remote control unit
To install batteries in the remote control unit ........ 15
To use the remote control unit for TV operation ... 16
Page 1
Page 4
Page 12
13
14
Introduction
English
Français
To locate a desired scene from the opening
scene digest display [DIGEST] ............................... 23
Special picture playback
To advance a still picture frame by frame .............. 24
To display still pictures [STROBE] ........................... 24
To playback in slow-motion [SLOW] ....................... 25
To zoom a scene [ZOOM] ......................................... 25
Changing the track order
To playback in the desired order [PROGRAM] ....... 26
To playback tracks in random order [RANDOM] ... 26
Repeat playback
To repeat a current title, chapter or track, or all
tracks [REPEAT] ....................................................... 27
To repeat a desired part [A-B REPEAT] ................... 28
Sampling all tracks
To playback only the beginning of each track
[INTRO] ..................................................................... 28
Viewing from multiple angles
To select a scene angle from the normal screen
[ANGLE] ................................................................... 29
To select a scene angle from the on-screen
display [ANGLE] ...................................................... 29
To select a scene angle from the angle list
display [ANGLE] ...................................................... 30
Changing the language and sound
To select the subtitle language [SUBTITLE] ........... 30
To change the audio language or sound
[AUDIO] .................................................................... 31
To change the audio channel [AUDIO] ................... 31
Selecting the picture character
To select the picture character [THEATER
POSITION] ................................................................ 32
Enjoying virtual surround sound
To simulate surround sound [3D PHONIC] ............. 32
Checking the disc time
To select the time display mode [TIME SELECT] ... 33
Basic operations
Page 17
Turning on/off the unit .......................................... 17
Inserting and removing discs ............................... 17
Basic playback
To play a disc from the beginning........................... 18
To stop playback completely ................................... 18
To stop playback temporarily .................................. 18
To advance or reverse play rapidly while
monitoring ............................................................... 18
To locate the beginning of a scene or song ........... 19
Resuming playback
To store the point you want to resume playback
from .......................................................................... 19
To resume playback from the stored point ............ 19
Advanced operations
Page 20
Playing from a specific position on a disc ............ 20
To locate a desired scene from the DVD menu ...... 20
To locate a desired scene from the menu
of the Video CD with PBC ....................................... 20
To locate a desired scene or track directly ............. 21
To locate a desired chapter or track using
¢ or 4 ................................................................ 21
To locate a desired scene by specifying the
chapter number [CHAP SEARCH] .......................... 22
To locate a desired position by specifying the
time [TIME SEARCH] ............................................... 22
Setting and adjustment
Page 34
Selecting preferences
How to set preferences on the "PREFERENCE"
display ...................................................................... 34
To set the language and display preference
items ......................................................................... 34
To set other preference items .................................. 35
Limiting playback by children
To set Parental Lock for the first time [PARENTAL
LOCK] ....................................................................... 37
To change the settings [PARENTAL LOCK] ............. 38
To temporarily release the Parental lock
[PARENTAL LOCK]................................................... 38
Additional information
Page 39
Care and handling of discs.................................... 39
AV COMPU LINK remote control system
Connection and Setup .............................................. 40
Operation ................................................................... 41
Troubleshooting ..................................................... 42
Specifications ......................................................... 43
Table of languages and their
abbleviations .............................................. Appendix A
Country code list for parental lock ......... Appendix B
Page 4
Introduction
Introduction
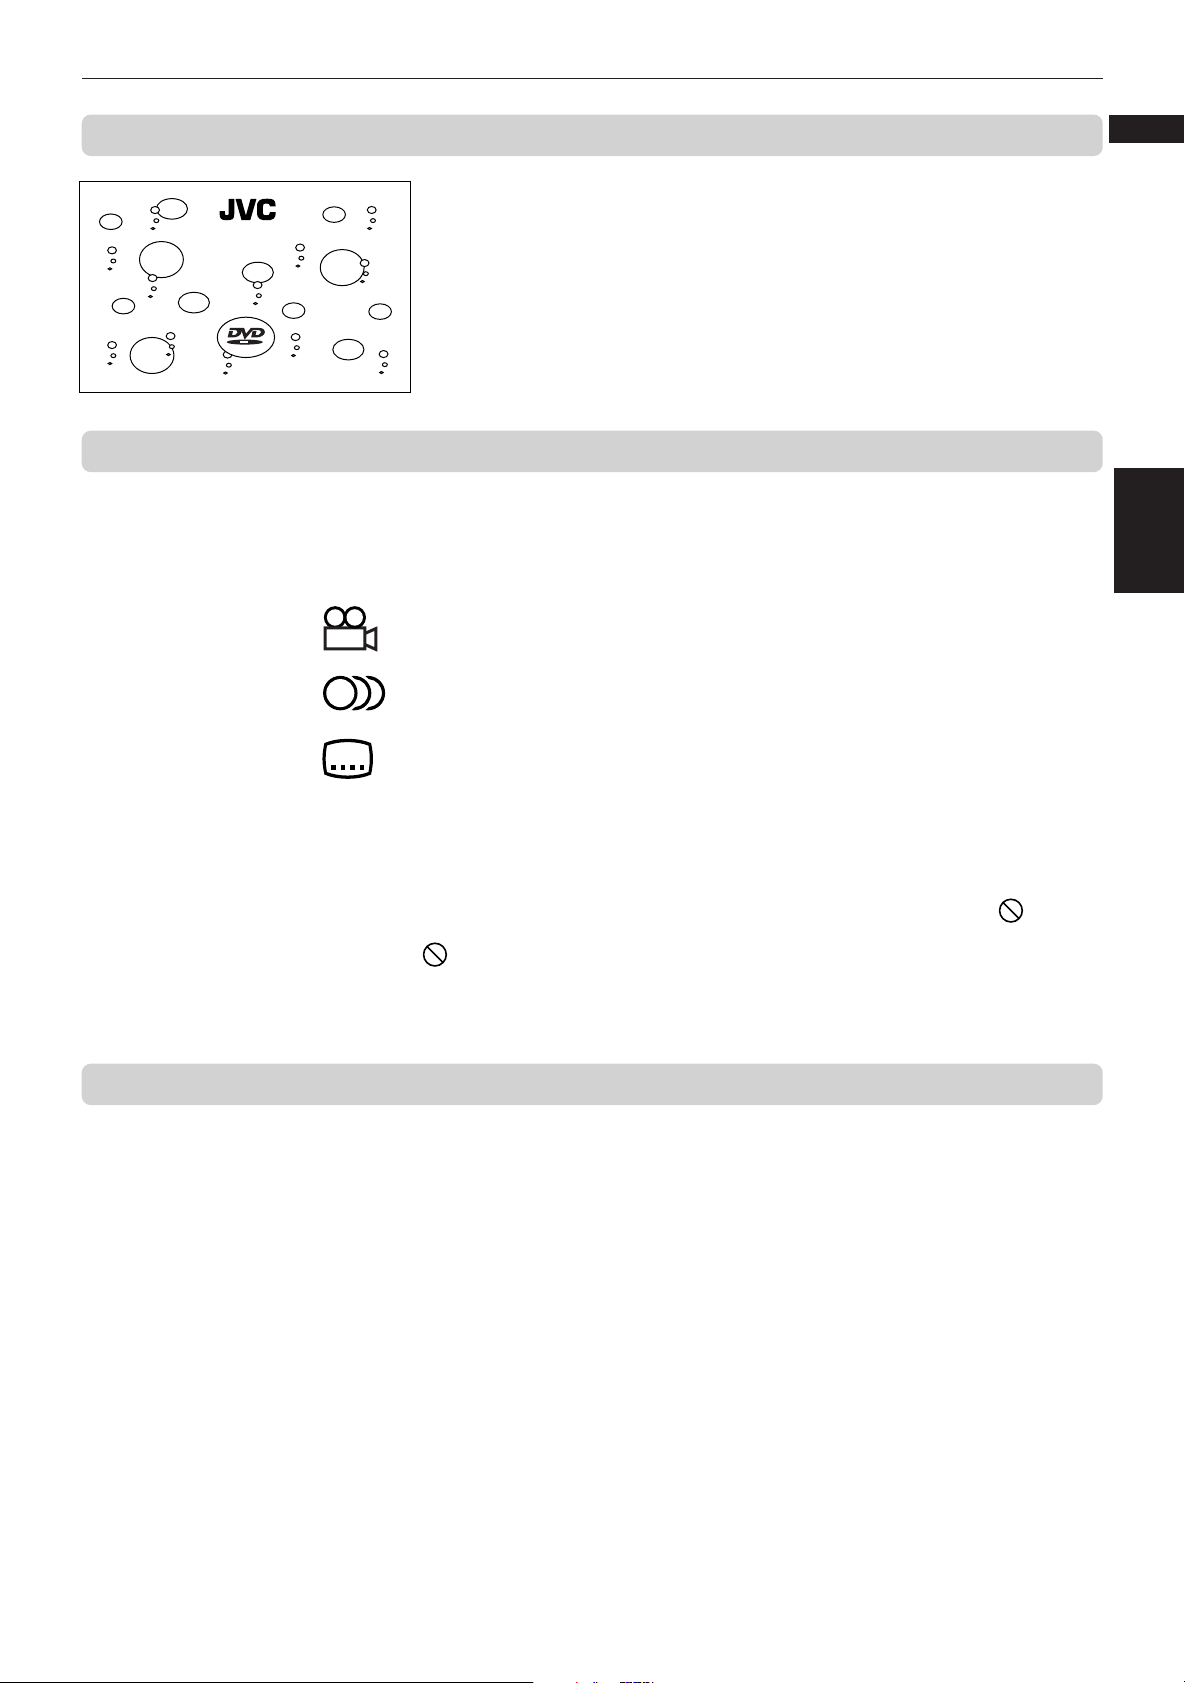
Features
Picture functions
7 Strobe function
The unit can display nine continuous still pictures on
the TV screen.
7 Digest function
You can select the desired title from the opening
scenes displayed on the TV screen.
7 Angle function*
Introduction
You can select a desired angle from multiple camera
angles recorded on the DVD disc.
7 Zoom function
You can view scenes close-up.
7 Parental lock*
You can restrict the playback of DVD discs with scenes
which you do not want your child to see, such as adult
or violent films.
7 Theater position
You can select the picture character according to the
lighting of your room.
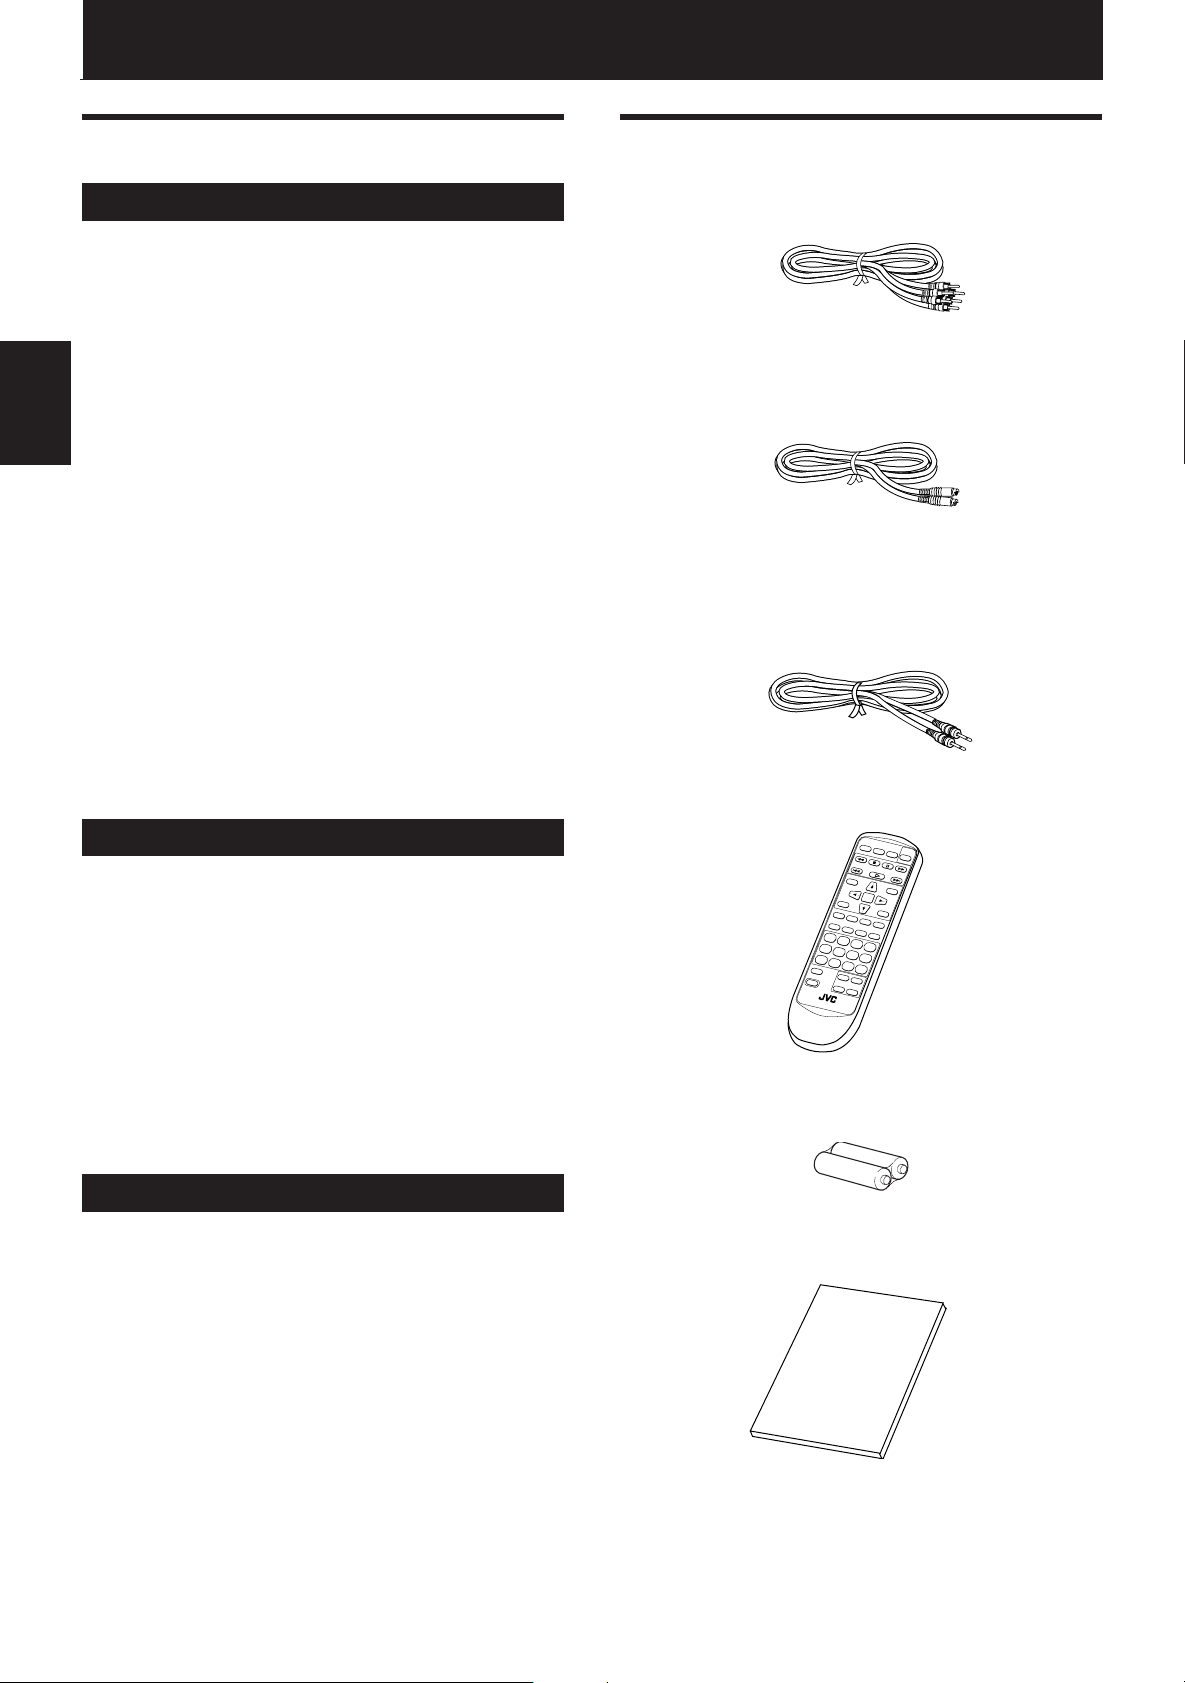
Supplied accessories
• Audio/video cable (x 1)
• S-video cable (x 1)
• AV compulink cord (x 1)
Audio functions
7 High quality digital sound
You can enjoy high quality sound with Dolby Digital
or Linear-PCM.
7 Surround function*
The unit is compatible with Dolby Digital surround and
DTS surround.
7 3D Phonic function
You can enjoy surround sound with your 2-channel
system.
Other functions
7 Multi-language subtitles and sound*
You can select a subtitle or sound language from those
recorded on the DVD disc.
7 Multi-disc playback
You can enjoy Audio CD discs and Video CD discs, as
well as DVD discs.
• Remote Control Unit (x 1)
OPEN/
CLOSE
RETURN
TV POWER
DVD
POWER
STOP PAUSE
PLAY
TITLE
MENU
ENTER
THEATER
POSITION
ON SCREEN
3D PHONICSUBTITLE
STROBE ANGLE
CANCEL RESUME ZOOM DIGEST
1234
5678
9100
TV/VIDEO
+
10
SHIFT
++
TV ch TV VOL.
––
RM-SV511U REMOTE CONTROL
• R6P(SUM-3)/AA(15F) batteries (x 2)
• Instruction manual (x 1)
7 Operation from the on-screen display
User-friendly on-screen displays allow you to operate
the unit easily.
Functions with (*) mark only work on a DVD disc that is
compatible with each function.
1
Page 5
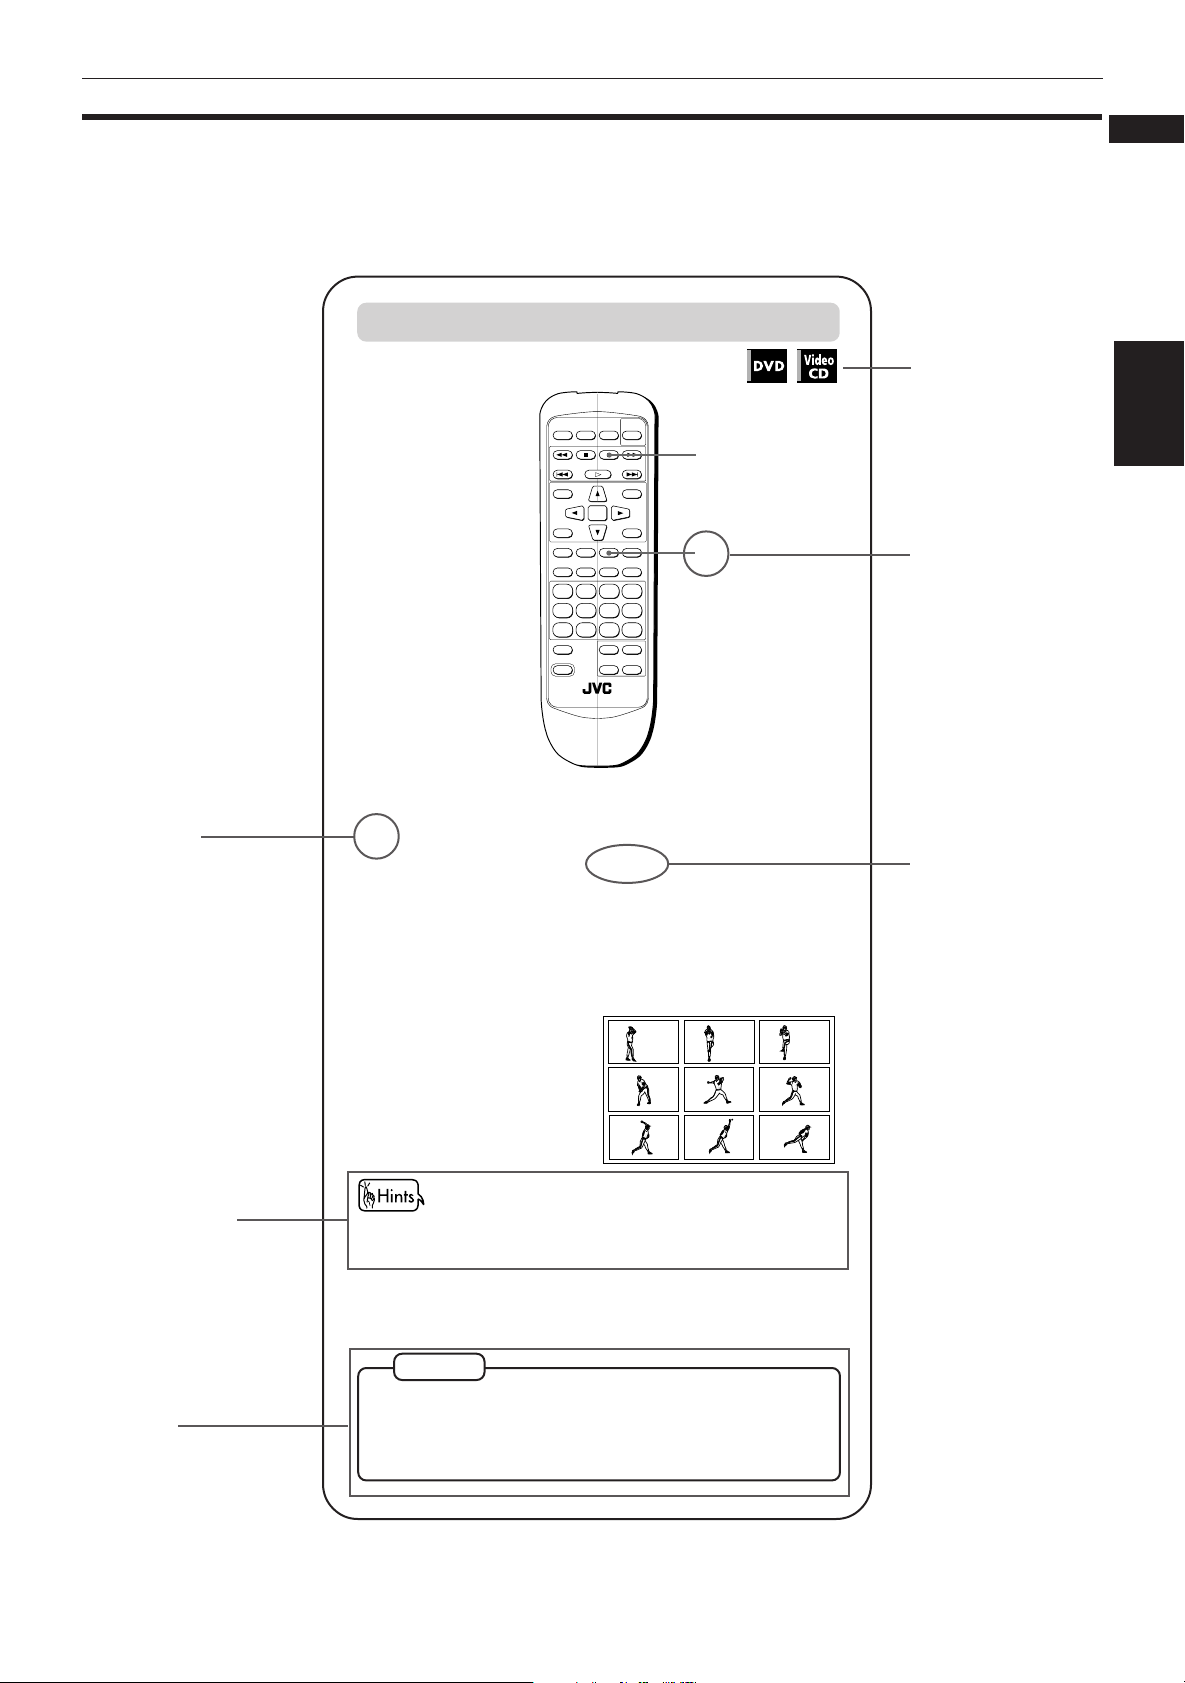
About this instruction manual
This instruction manual basically explains operations as follows:
To display still pictures [STROBE]
OPEN/
TV POWER
RETURN
7 During playback
CLOSE
TITLE
THEATER
POSITION
3D PHONIC SUBTITLE
CANCEL RESUME ZOOM DIGEST
1234
5678
9100+10
TV/VIDEO
SHIFT
STOP PAUSE
PLAY
ENTER
STROBE ANGLE
++
TV ch TV VOL.
––
RM-SV511U REMOTE CONTROL
POWER
ON SCREEN
Introduction
English
Français
These symbols
indicate the types of
DVD
1
1
MENU
2
2
discs which the
operation can be
used for.
The number
Introduction
indicates the
following procedural
step(s) in which the
button(s) is(are)
used.
You may also use
the corresponding
buttons on the front
panel of the unit if
available.
The number
indicates the
procedural step.
Other convenient
procedures, etc.
Additional
supplemental
remarks
At the point you want to view as continuous
1
photographs, press PAUSE.
The unit pauses playback.
Press STROBE.
2
Nine continuous still
pictures appear on
the TV screen.
• Pressing PAUSE when the nine still pictures appear
advances to the next nine still pictures.
• To cancel strobe play
Press STROBE.
NOTES
• Pressing and holding PAUSE for more than 1 second also
activates the Strobe function.
• If you press STROBE during playback, nine still pictures
also appear but they advance in realtime.
The names of
buttons on the
remote control unit
(or on the front
panel of the unit) are
all given in
uppercase letters.
2
Page 6

Introduction
Notes on handling
Important cautions
Installation of the unit
• Select a place which is level, dry and neither too hot
nor too cold (between 5˚C and 35˚C, 41˚F and 95˚F).
• Leave sufficient distance between the unit and the TV.
• Do not use the player in a place subject to vibrations.
Power cord
• Do not handle the power cord with wet hands!
Introduction
• A small amount of power (2 watts) is always
consumed while the power cord is connected to the
wall outlet.
• When unplugging the player from the wall outlet,
always pull the plug, not the power cord.
To prevent malfunction of the unit
• There are no user-serviceable parts inside. If
anything goes wrong, unplug the power cord and
consult your dealer.
• Do not insert any metallic object into the unit.
• Do not use any non-standard shape disc available on
the market, because it may damage the unit.
• Do not use a disc with tape, seals, or paste on it,
because damage to the unit may result.
Note about copyright laws
• Please check the copyright laws in your country
before recording from DVD VIDEO, Audio CD, and
Video CD discs. Recording of copyrighted material
may infringe copyright laws.
Note about the copyguard system
• The DVD VIDEO disc is protected by the copyguard
system. When you connect the unit to your VCR
directly, the copyguard system activates and the
picture may not be played back correctly.
Safety precautions
Avoid moisture, water and dust
Do not place your player in moist or dusty places.
Avoid high temperatures
Do not expose the unit to direct sunlight or place it
near a heating device.
When you’re away
When away on travel or otherwise for an extended
period of time, remove the plug from the wall outlet.
Do not insert foreign objects into the unit
Do not insert wires, hairpins, coins, etc. into the unit.
Do not block the vents
Blocking the vents may damage the unit.
Care of the cabinet
When cleaning the unit, use a soft cloth and follow the
relevant instructions on the use of chemically-coated
cloths. Do not use benzene, thinner or other organic
solvents and disinfectants. These may cause
deformation or discoloring.
If water gets inside the unit
Turn off the power switch and remove the plug from
the wall outlet, then call the store where you made
your purchase. Using the unit in this state may cause a
fire or electrical shock.
This product incorporates copyright protection technology that is protected by method claims of certain U.S.
patents and other intellectual property rights owned by Macrovision Corporation and other rights owners. Use of
this copyright protection technology must be authorized by Macrovision Corporation, and is intended for home
and other limited viewing uses only unless otherwise authorized by Macrovision Corporation. Reverse engineering
or disassembly is prohibited.
Manufactured under license from Dolby Laboratories. “Dolby” and double-D symbol are trademarks of Dolby
Laboratories.
Confidential Unpublished Works.
© 1992-1997 Dolby Laboratories, Inc. All rights reserved.
Manufactured under license from Digital Theater Systems, Inc. US Pat. No. 5,451,942 and other world-wide patents
issued and pending. “DTS”, “DTS Digital Surround”, are trademarks of Digital Theater System, Inc.
© 1996 Digital Theater Systems, Inc. All Rights Reserved.
3
Page 7
Preliminary knowledge
Names of parts and controls
Refer to the corresponding pages indicated in () for details.
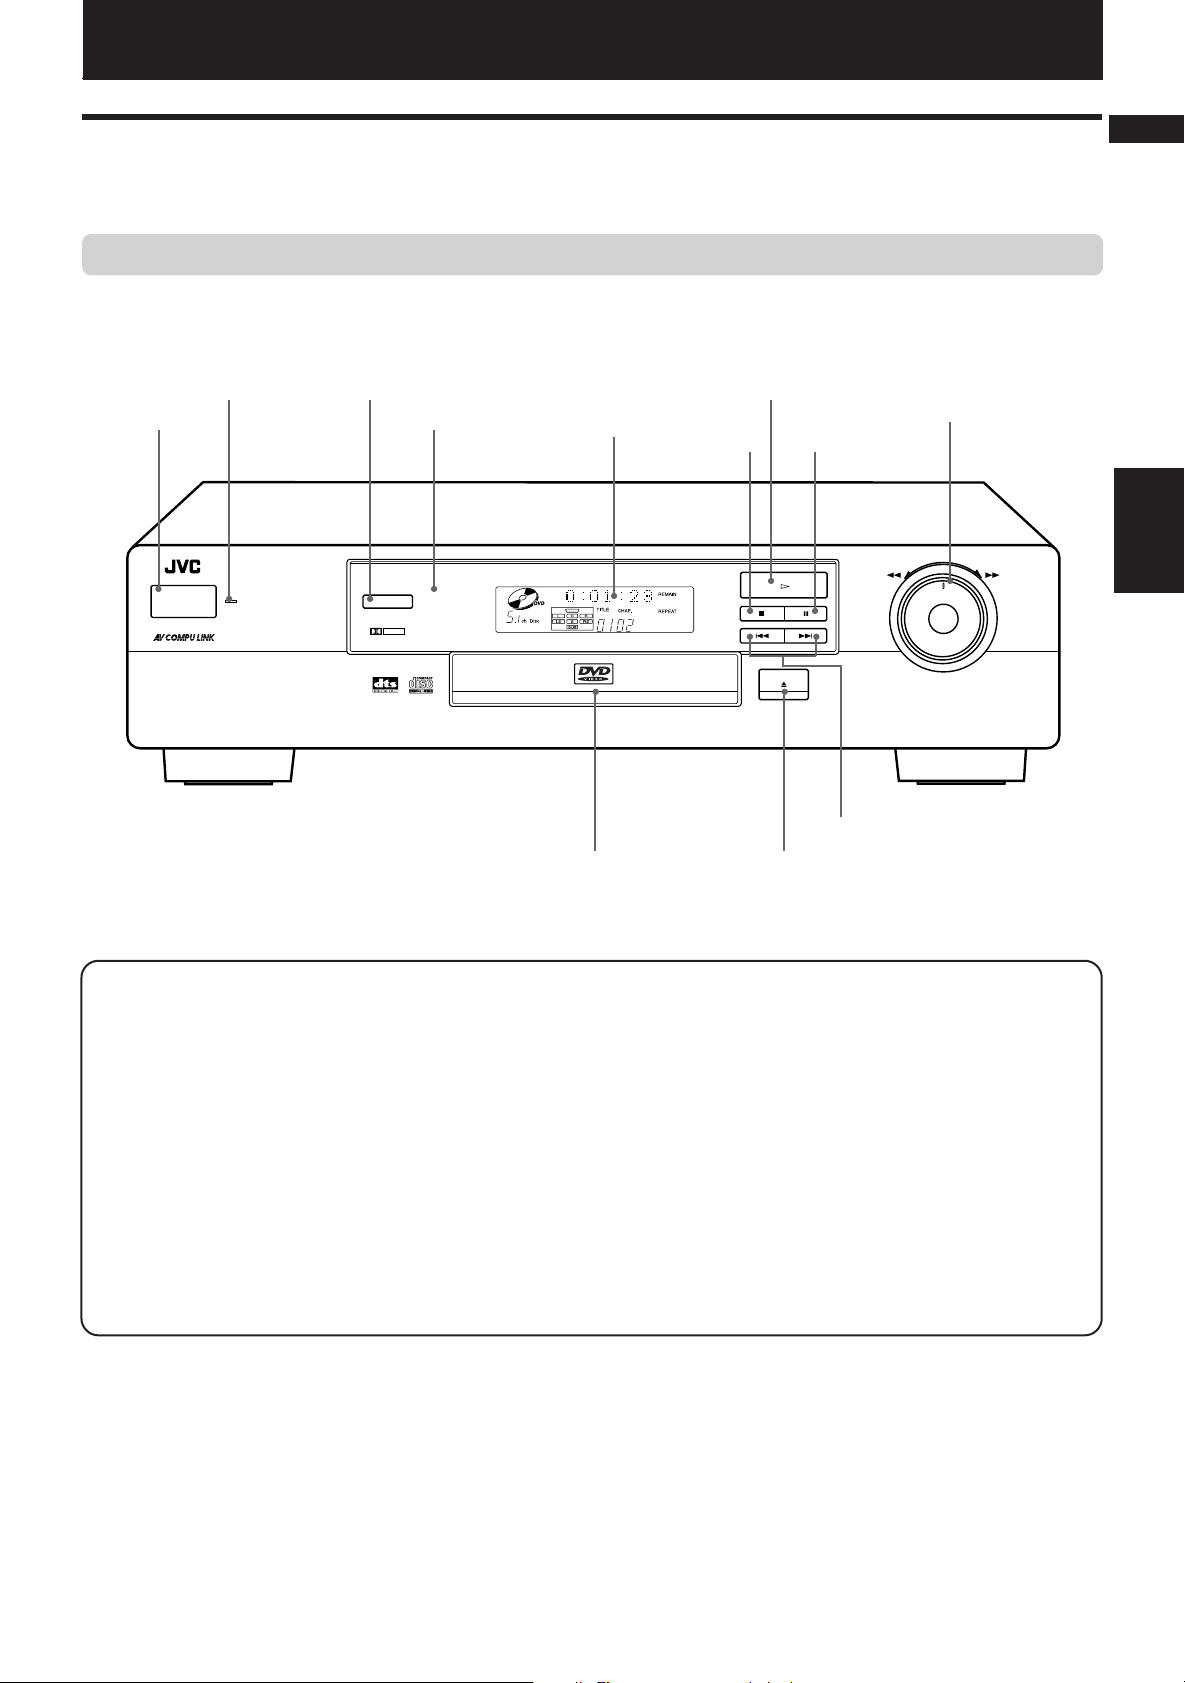
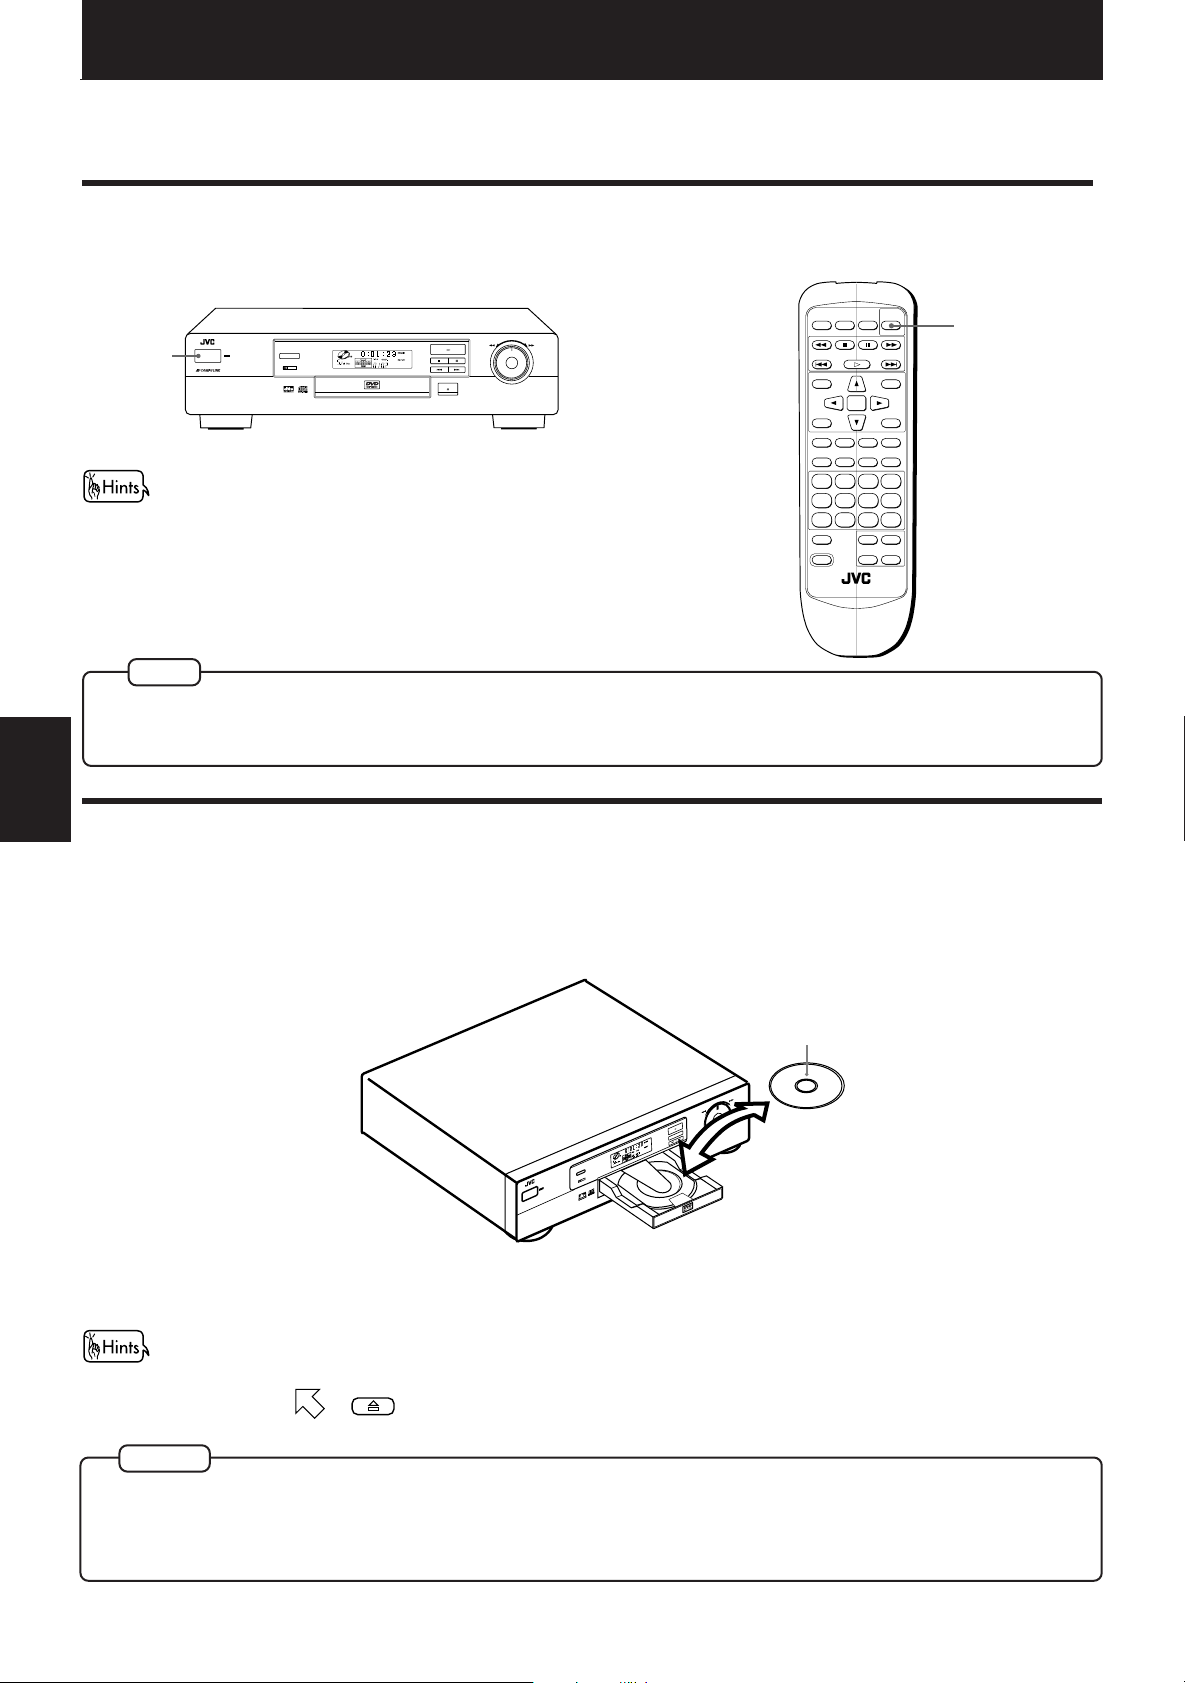
Front panel
Preliminary knowledge
English
Français
2 STANDBY indicator
1 POWER button
POWER
XV-511 DVD PLAYER
STANDBY
3 3D PHONIC button
4 Remote sensor
3D PHONIC
DOLBY
D I G I T A L
5 Display
window
DVD / VIDEO CD / CD
= Disc tray
6
#(PLAY) button
7 7 (STOP)
button
8 8(PAUSE)
button
PLAY
PAUSESTOP
SKIP
OPEN/CLOSE
0 4 ¢ (SKIP) buttons
- 0 (OPEN/CLOSE) button
9 SHUTTLE knob
SHUTTLE
Knowledge
Preliminary
1 POWER button (17)
Turns the unit on or off (standby).
2 STANDBY indicator
Lights when the power cord is connected and the unit is on
standby. When the unit is turned on, the STANDBY indicator
goes off.
3 3D PHONIC button (32)
Produces a simulated surround effect.
4 Remote sensor
Receives the signal from the remote control unit.
5 Display window
Indicates the current status of the unit.
6 # (PLAY) button (18)
Starts playback. Also, used as a SELECT button for PBC of
Video CDs.
7 7 (STOP) button (18)
Stops playback.
8 8 (PAUSE) button (18)
Pauses playback.
9 SHUTTLE knob (18)
Performs rapid advance/reverse playback operations.
Also used for slow-motion playback of a picture (for DVD/
Video CD).
0 4 ¢ (SKIP) buttons (19)
Performs skipping a chapter, title or track.
Also used for the page selection of a menu screen (for
DVD).
- 0 (OPEN/CLOSE) button (17)
Opens and closes the disc tray.
= Disc tray (17)
Used to load discs.
4
Page 8
Preliminary knowledge
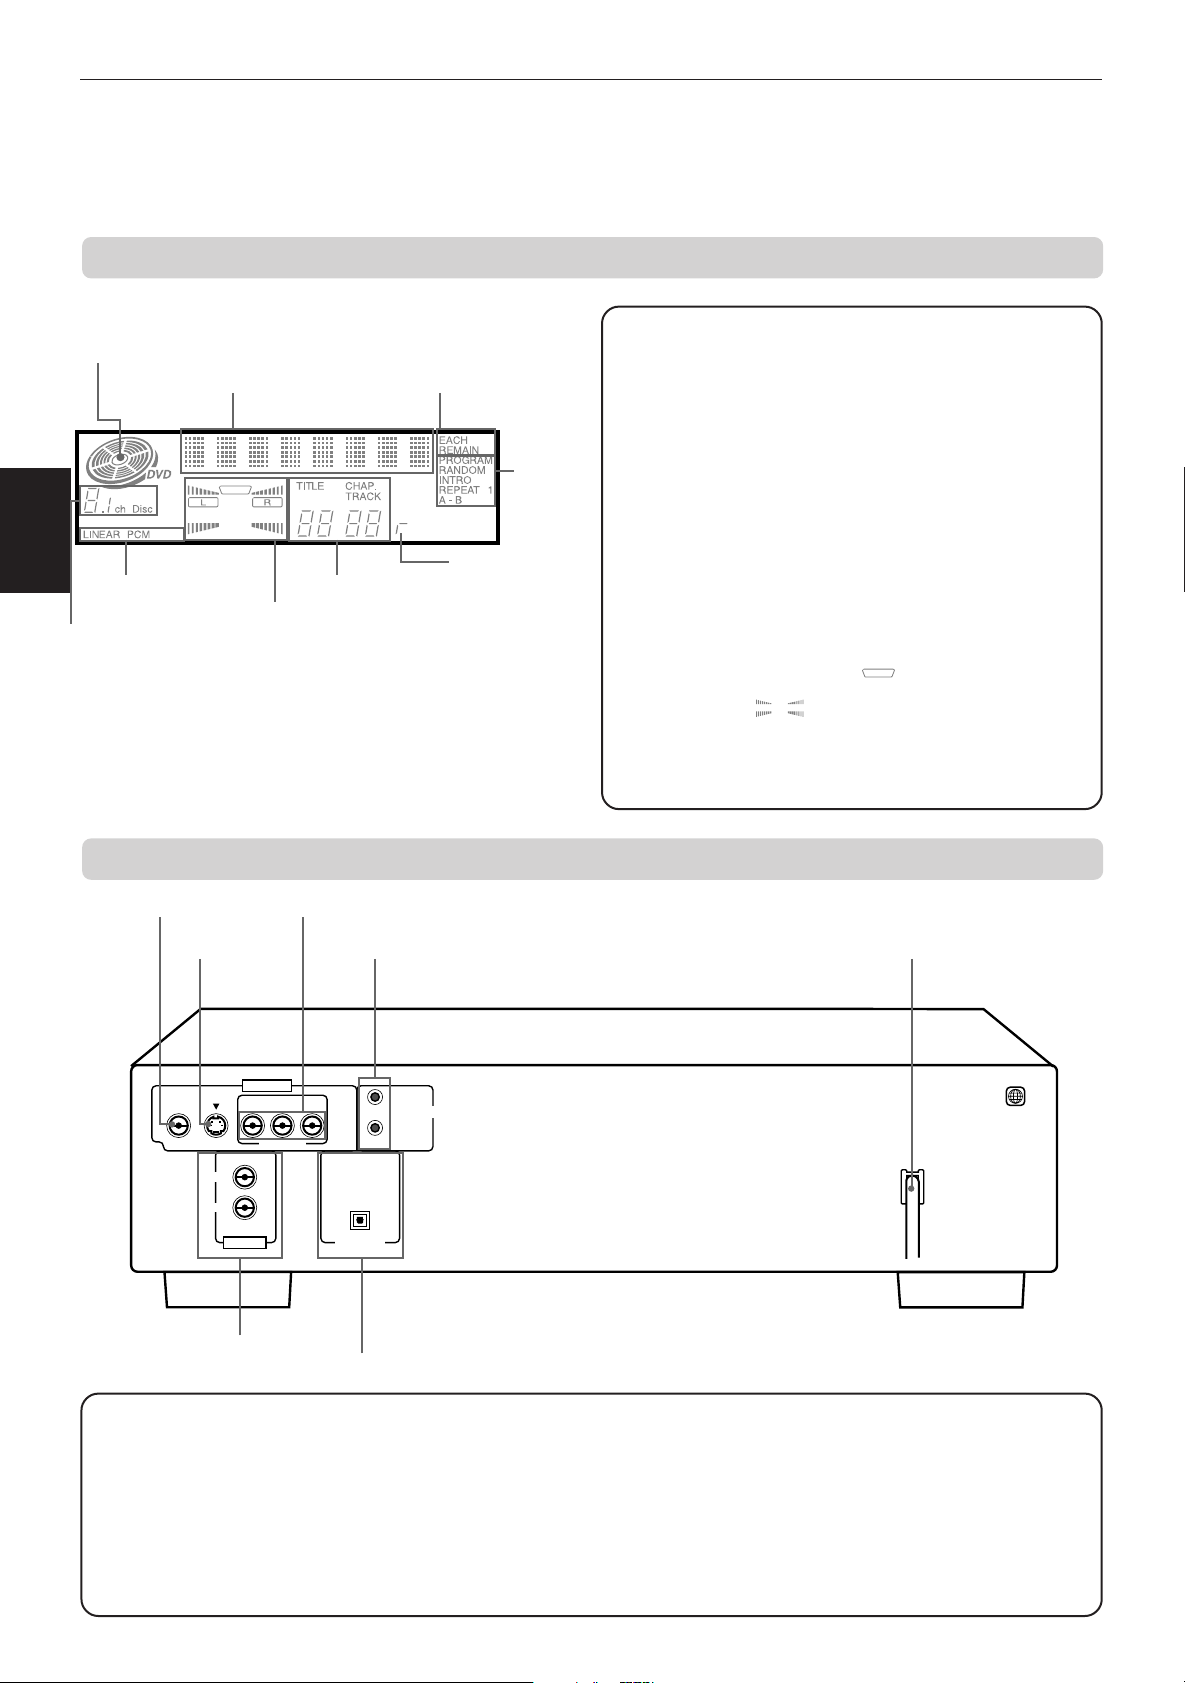
Display window
1 Disc indicator
2 Multi-information
window
Knowledge
Preliminary
6 Linear PCM indicator
7 Speaker indicator
5 Channel indicator
3 Time selection
indicator
8 Chapter, title,
track indicator
4 Function
indicator
9 Resume
indicator
1 Disc indicator
Lights when a disc is in the unit. “DVD” also appears when a
DVD disc is in the unit.
2 Multi-information window
Displays time and status information.
3 Time selection indicator
Shows what the time information in the Multi-information
window means.
4
Function indicator
Activated function indicators light up.
5 Channel indicator
Displays number of channels in the currently selected audio
playback format.
6 Linear PCM indicator
Lights only when the playback disc contains linear PCM data.
This indicator also lights while an Audio CD is placed in the unit.
7 Speaker indicator
Lights during disc playbak. lights when signals are
output from the video output jacks. When the 3D PHONIC
function is ON, also lights.
8 Chapter, title, track indicator
Displays chapter, title, or track number.
9 Resume indicator
Lights when the "RESUME" position is stored.
Rear panel
7 VIDEO OUT jack
6 S-VIDEO
OUT jack
VIDEO S-VIDEO
LEFT
RIGHT
AUDIO OUT
2 AUDIO OUT jacks
(LEFT/RIGHT) 5 DIGITAL OUT jack (OPTICAL)
1 AC power cord (14)
Connects to the wall outlet.
2 AUDIO OUT jacks (LEFT/RIGHT) (12)
Outputs stereo analog audio signals.
3 AV COMPU LINK jacks (37, 40)
Connects with other JVC equipment supporting the AV
Compulink function to facilitate integrated operations.
4 COMPONENT VIDEO OUT jacks (Y/PB/PR) (13)
Outputs component video signals.
5
4 COMPONENT VIDEO OUT jacks (Y/P
3 AV COMPU LINK jacks
VIDEO OUT
Y
PBP
R
COMPONENT
PCM/STREAM
DIGITAL OUT
AV COMPU LINK
OPTICAL
B/PR)
1 AC power cord
1
5DIGITAL OUT jack (OPTICAL) (14)
Outputs digital audio signals. Only an optical connector is
provided.
6S-VIDEO OUT jack (12)
Outputs an S-video signal.
7VIDEO OUT jack (12)
Outputs a composite video signal.
Page 9
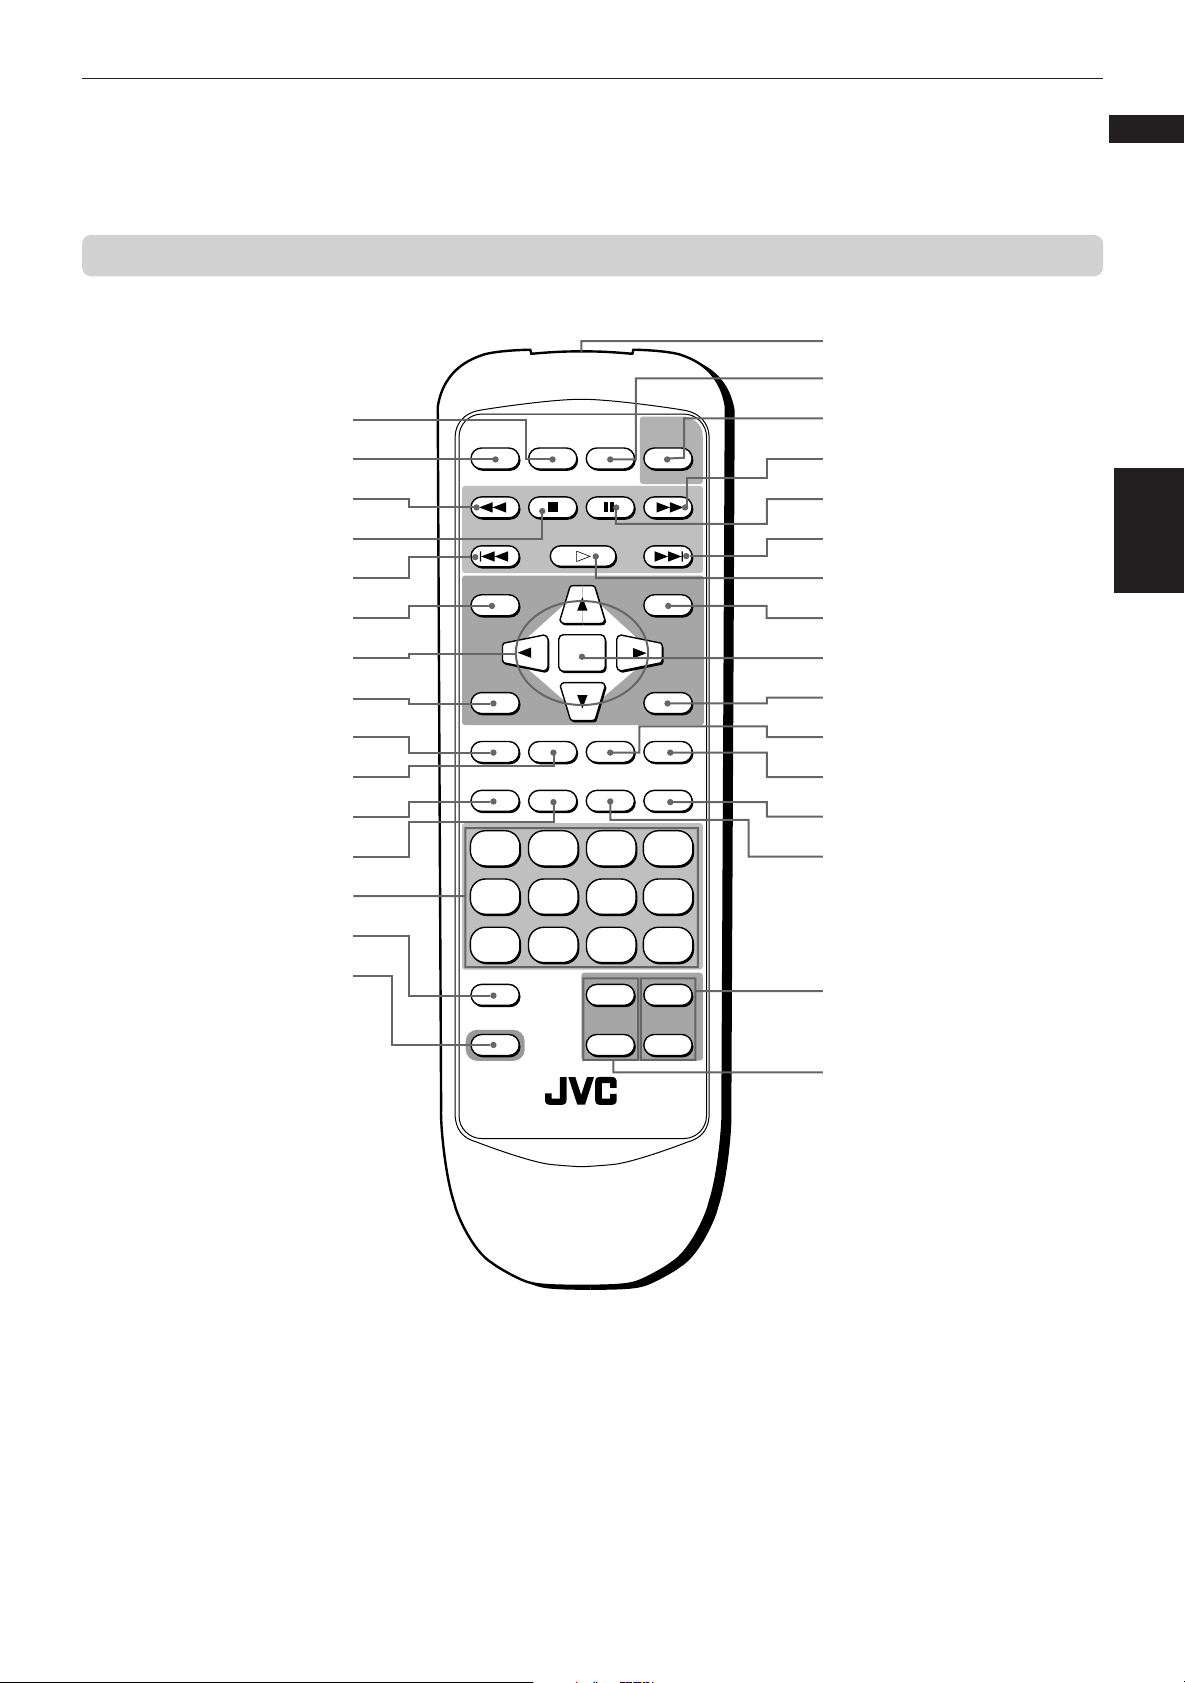
Remote control unit
Preliminary knowledge
Infrared signal-emitting window
#
$ TV POWER button
English
Français
1 RETURN button
2 OPEN/CLOSE button
3 1 button
4 7(STOP) button
5 4 button
6
TITLE button
7 5/∞/3/2 (Cursor)
buttons
8 THEATER POSITION button
9 3D PHONIC button
0 SUBTITLE button
- CANCEL button
= RESUME button
~ Numeric buttons
! TV/VIDEO button
@ SHIFT button
OPEN/
CLOSE
TITLE
THEATER
POSITION
3D PHONIC SUBTITLE
CANCEL RESUME ZOOM DIGEST
TV POWER
RETURN
STOP PAUSE
PLAY
ENTER
STROBE ANGLE
DVD
POWER
MENU
ON SCREEN
1234
5678
9100
TV/VIDEO
+
10
++
SHIFT
TV ch TV VOL.
––
% DVD POWER button
3 ¡ button
^ 8(PAUSE) button
5 ¢ button
& #(PLAY) button
* MENU button
( ENTER button
) ON SCREEN button
_ STROBE button
+ ANGLE button
¡ DIGEST button
™ ZOOM button
£ TV VOL buttons
¢ TV ch buttons
Knowledge
Preliminary
RM-SV511U REMOTE CONTROL
6
Page 10

Preliminary knowledge
1 RETURN button (for DVD/Video CD) (20)
2 OPEN/CLOSE button (17)
3 1/¡ buttons (18)
4 7 (STOP) button (18)
Knowledge
Preliminary
5 4 ¢ buttons (19)
6 TITLE button (20)
7 5/∞/3/2 (Cursor) buttons
8 THEATER POSITION button (32)
9 3D PHONIC button (32)
0 SUBTITLE button (for DVD) (30)
- CANCEL button (26)
= RESUME button (19)
~ Numeric buttons (10)
! TV/VIDEO button (16)
Returns to the previous menu.
Opens and closes the disc tray.
Performs fast forward/backward playback operations.
Also used for slow-motion playback of a picture (for DVD/
Video CD).
Stops playback.
Also used to erase all the programmed tracks for the
program play (for Audio CD/Video CD).
Performs skipping a chapter, title or track.
Also used for the page selection of a menu screen (for
DVD/Video CD).
Displays a title menu of DVD on the TV screen or monitor.
Switches the display in the display window (for Audio CD).
Used to select an item from a menu or on-screen display,
or to change the setting of an item in the on-screen display,
etc.
Selects a picture character from 4 settings.
Produces a simulated surround effect.
Turns subtitles on or off.
Cancels the previous settings.
Stores the location to resume playback from later.
Mainly used to select a title/track number, or a TV channel.
Also used to enter a time for the Time search and a chapter
number for the Chapter search.
Switches the TV input mode.
@ SHIFT button (16)
When pressing and holding this button, the numeric keys (0 -
9) selects the TV channels. Also used to display the PARENTAL
LOCK display.
# Infrared signal-emitting window
Point this window toward the remote sensor on the front panel
when pressing buttons.
$ TV POWER button (16)
Turns the TV on or off.
% DVD POWER button (17)
Turns the unit on or off (standby).
^ 8 (PAUSE) button (18)
Pauses playback.
& # (PLAY) button (18)
Starts playback.
Also used as a SELECT button for PBC of Video CDs.
* MENU button (for DVD) (20)
Displays a DVD menu on the TV screen or monitor.
( ENTER button
Executes the selected item in a menu or on-screen display
when pressing the button.
) ON SCREEN button (8)
Displays an on-screen display of the unit on the TV screen or
monitor.
_ STROBE button (for DVD/Video CD) (24)
Displays nine continuous still pictures (for DVD/Video CD).
+ ANGLE button (for DVD) (29)
Changes camera angles during playback of a DVD containing
multiple camera angles.
¡ DIGEST button (for DVD/Video CD) (23)
Displays beginning scenes of each title, chapter, or track on
the TV screen.
™ ZOOM button (for DVD/Video CD) (25)
Scene in a close-up view.
£ TV VOL buttons (16)
Adjust the TV volume.
¢ TV ch buttons (16)
Changes the TV channels.
7
Page 11
Preliminary knowledge
OPEN/
CLOSE
RETURN
STOP PAUSE
TV POWER
PLAY
3D PHONIC SUBTITLE
STROBE ANGLE
CANCEL RESUME ZOOM DIGEST
TV/VIDEO
RM-SV511U REMOTE CONTROL
DVD
POWER
MENU
TITLE
THEATER
POSITION
ON SCREEN
TV ch TV VOL.
++
––
1234
5678
9100+10
SHIFT
ENTER
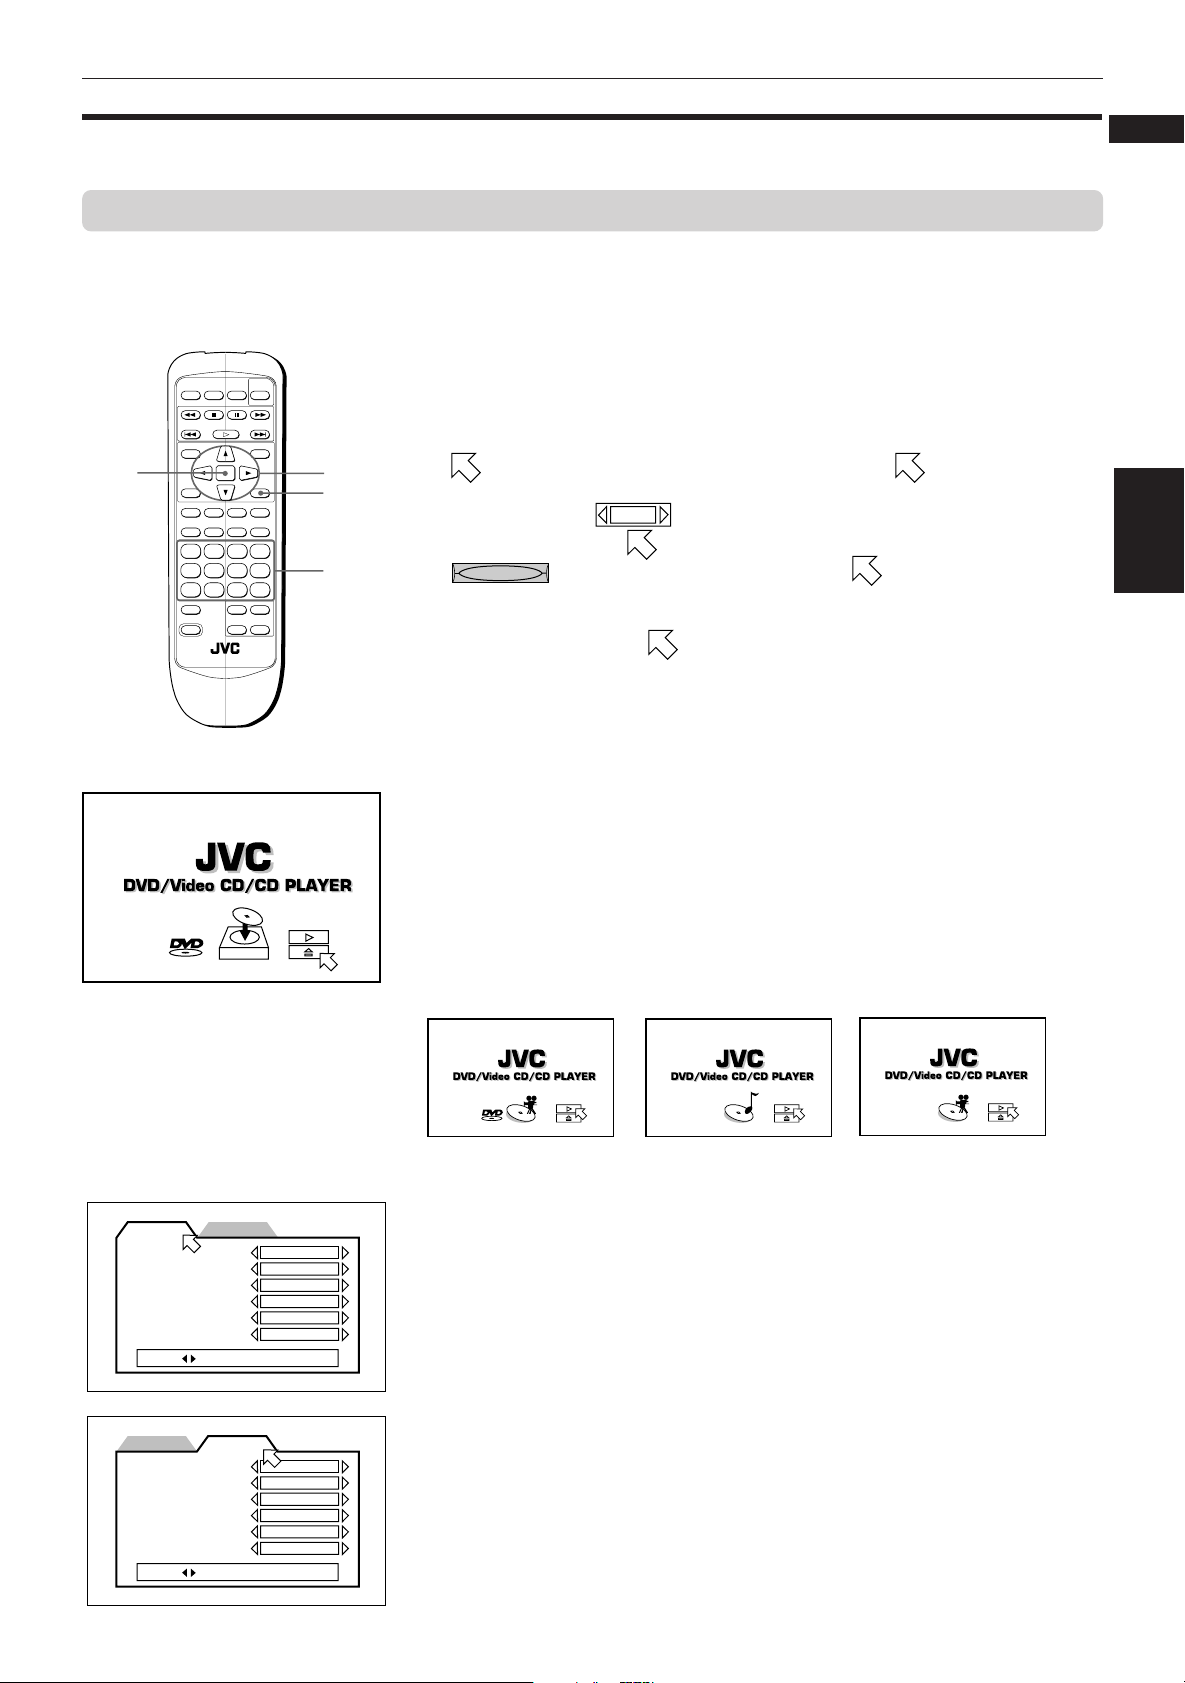
Operational Principles
On-screen displays
The unit provides several on-screen displays as shown below for choosing preferences for initial settings and
functions which are not frequently used.
To access on-screen displays
Press ON SCREEN. (Note that operation for accessing the “PARENTAL LOCK”
on screen displays is different.) Depending on the type of disc inserted ( or
“no disc”) and the player’s mode, a proper on-screen display is accessed.
Basic operations in on-screen displays
ENTER
5/∞/2/3
ON SCREEN
Numeric
buttons
• appers at the on-screen display. You can move using 5/∞/3/2
cursor buttons to select items you want to work with.
• With an item like
cursor buttons when
•
REPEAT
- type item works when you place on the item and press
1 / 3
, you can change the setting by using the 2/3
is on the item.
ENTER.
• In the message box, the operation to be performed is displayed according
to the item pointed by .
• Numbers are entered using the numeric buttons.
• Some functions become effective by pressing ENTER after specifying
necessary entries.
• Pressing ON SCREEN again exits the on-screen display.
English
Français
Preliminary
Knowledge
MENU LANGUAGE
AUDIO LANGUAGE
SUBTITLE
ON SCREEN LANGUAGE
ON SCREEN GUIDE
MONITOR TYPE
PRESS KEY
DIGITAL AUDIO OUTPUT
DOWN MIX
COMPRESSION
SCREEN SAVER
AV COMPULINK MODE
AUTO STANDBY
PRESS KEY
Opening display
An opening display appears automatically (without pressing the ON SCREEN
button) in some conditions.
The display shown on the left appears when the unit turns on with no disc
inserted.
One of the similar displays shown below appears when a corresponding disc
is set and stopped. For Audio CD, the opening display does not disappear
even during playback.
for DVD
for Audio CD
for Video CD
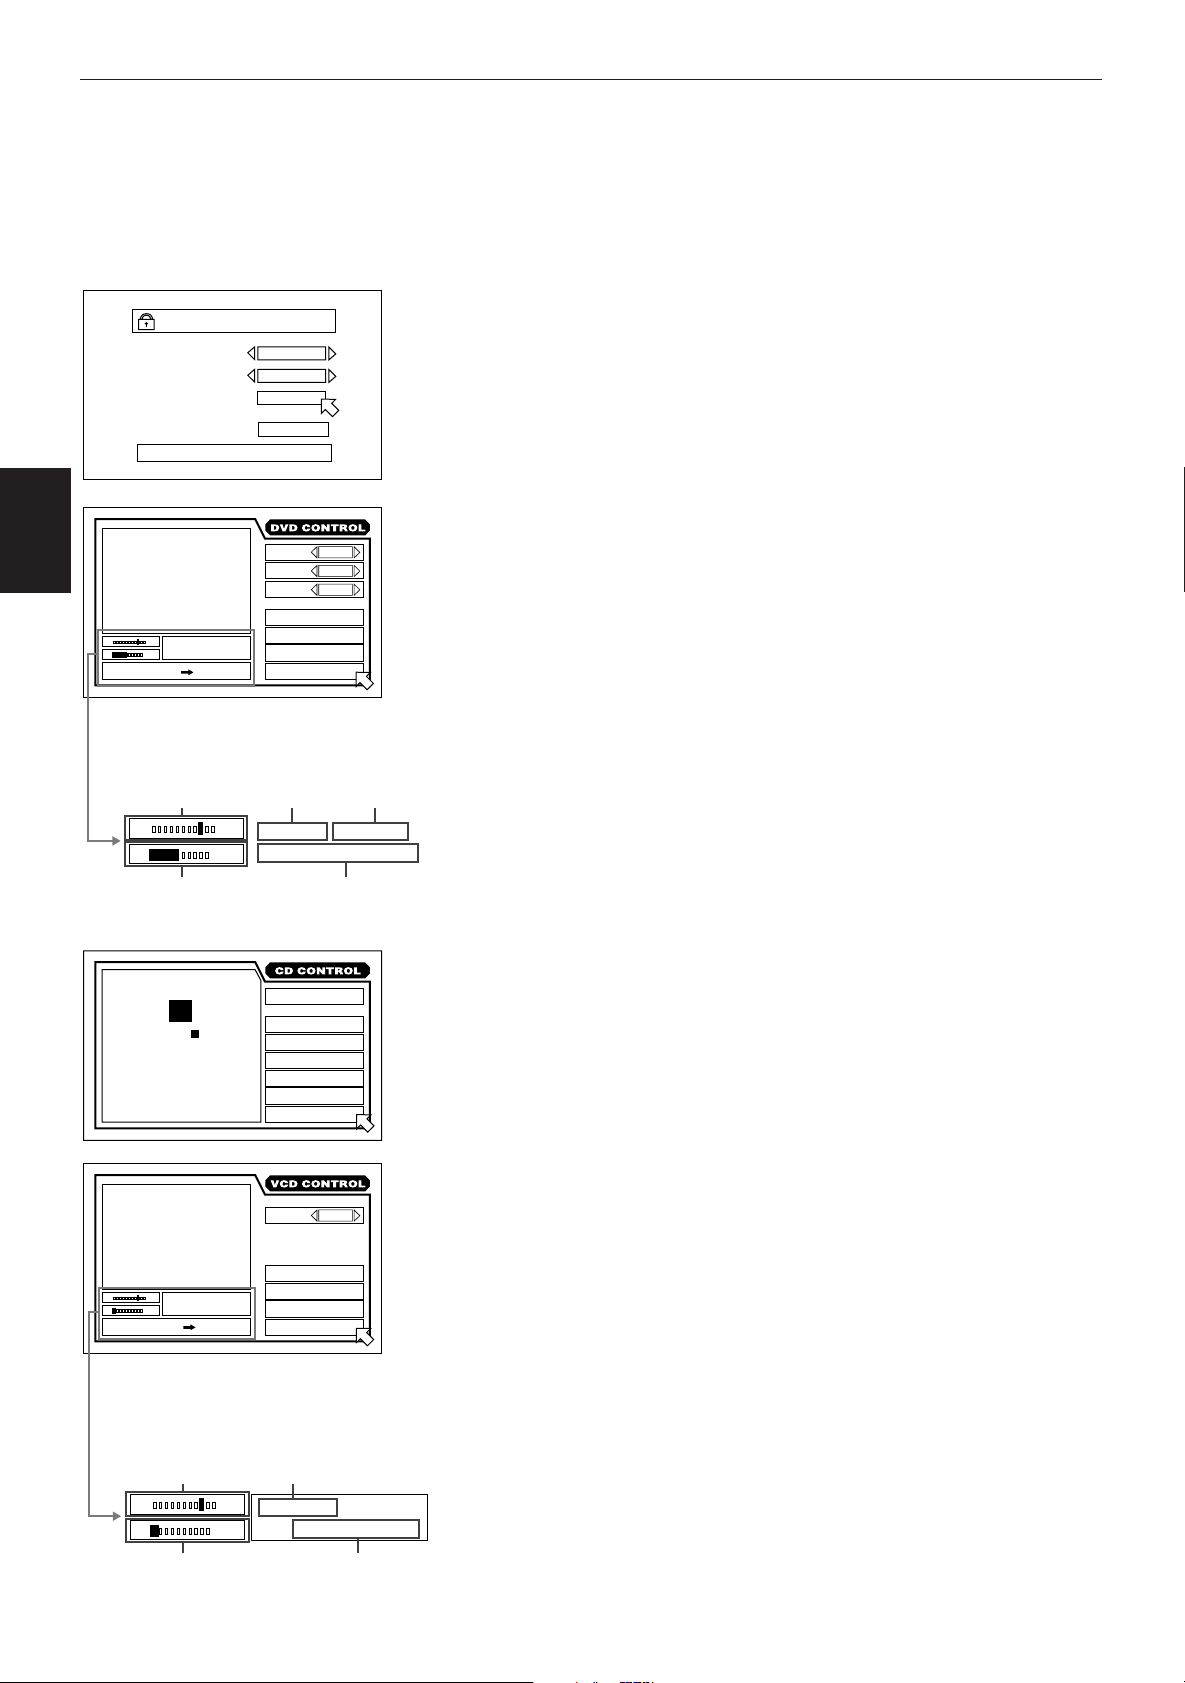
PREFERENCE (1, 2) displays (see page 34)
PREFERENCE2PREFERENCE1
ENGLISH
ENGLISH
ENGLISH
ENGLISH
ON
16:9 WIDE
PREFERENCE2PREFERENCE1
STREAM/PCM
Lt / Rt
OFF
MODE1
DVD1
OFF
You can set preferences on these displays.
To display the PREFERENCE display
When a DVD disc is set and stopped or no disc is inserted, press ON SCREEN.
8
Page 12
Preliminary knowledge
Knowledge
Preliminary
St. End
010 Mb
PRESS ENTER EXECUTE
Current relative
position of the
title (St: start,
End: end)
Transmission rate
PARENTAL LOCK
03
CA
LEVEL 8
– – – –
EXIT
ANGLE
AUDIO
SUB-
A-B REPEAT
TIME SEARCH
CHAP.SEARCH
Country Code
Set Level
PASSWORD
NEW PASSWORD? • • • PRESS 0~9 KEY
TITLE
CHAP.
03
TIME
1 : 34 : 58
Current title
number
St. End
010 Mb
TITLE
TIME
PARENTAL LOCK display (see page 37)
You can set the parental lock from this display.
To display the PARENTAL LOCK display
Press ENTER while holding down SHIFT.
The Parental Lock on-screen display appears on the TV screen.
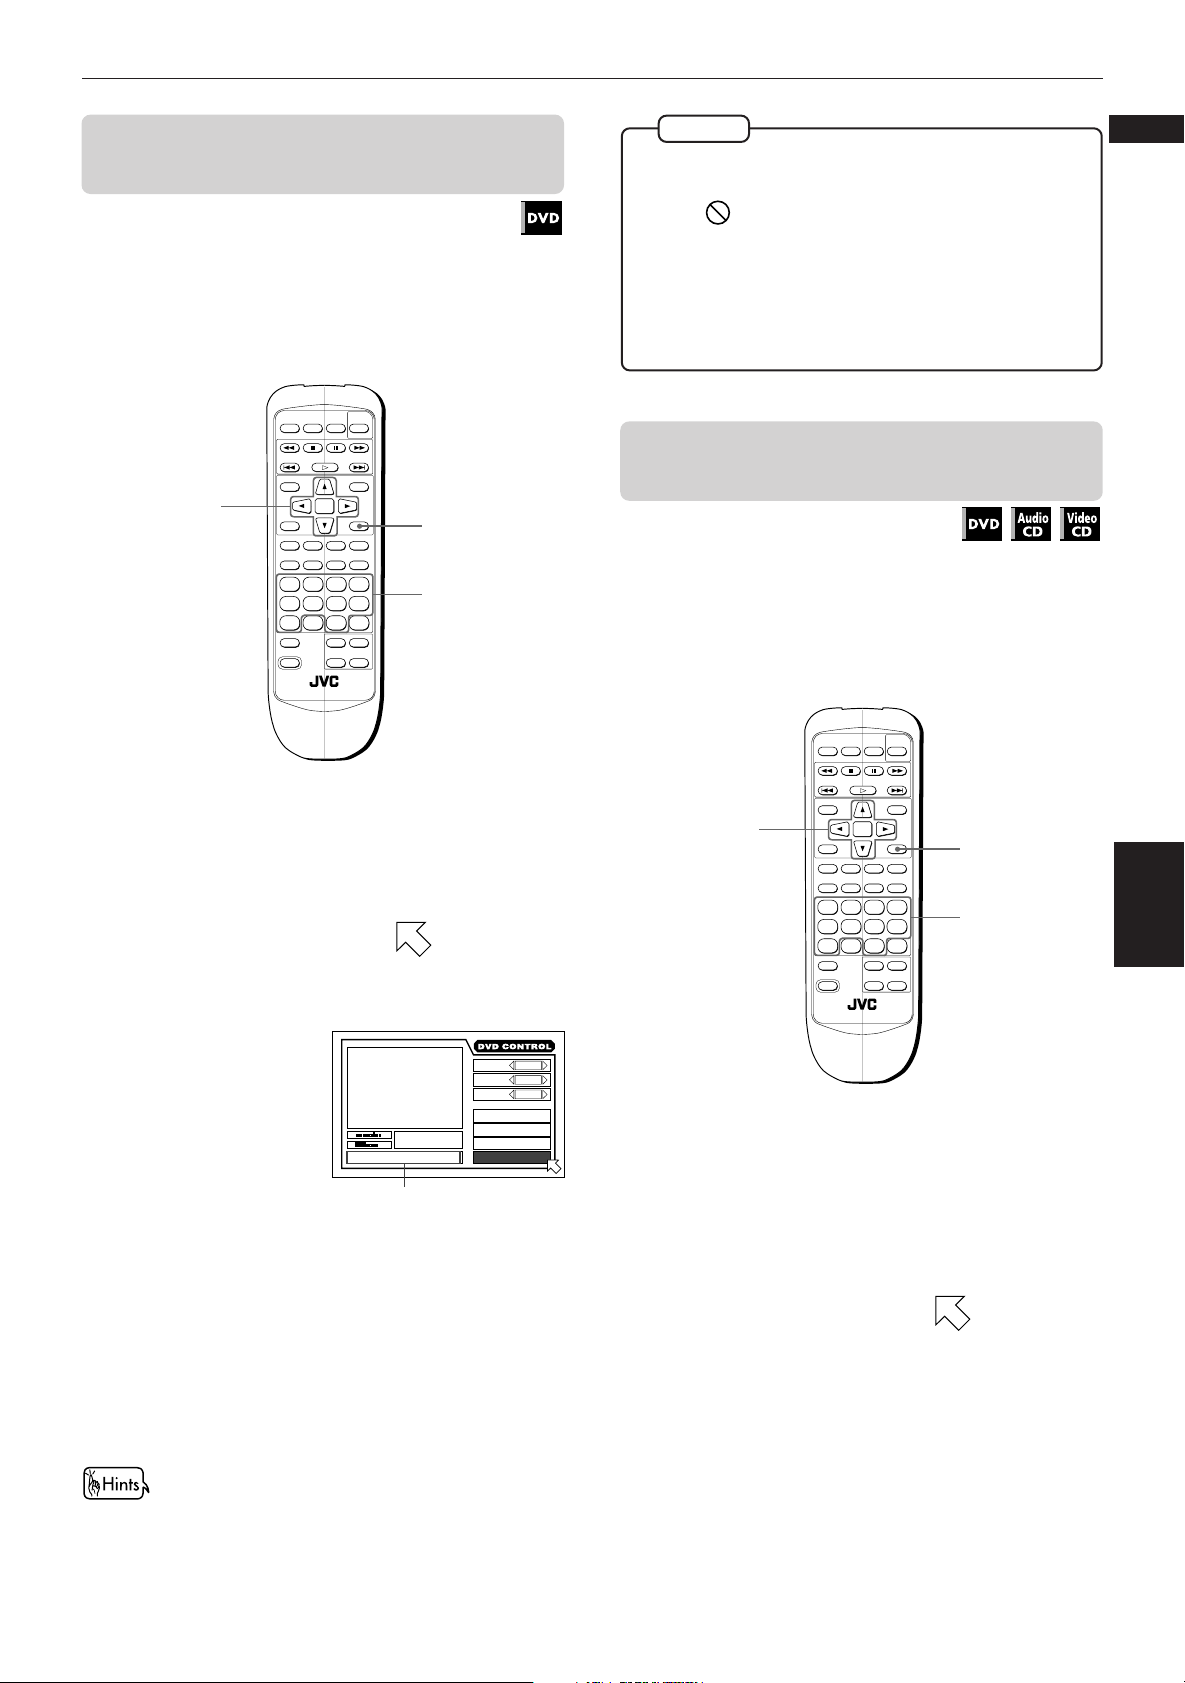
DVD CONTROL display
1 / 3
2 / 3
1 / 3
TITLE
REPEAT
Current chapter
number
CHAP.
03
1 : 34 : 58
Elapsed time from the beginning
of the current title
You can select and set various functions for DVD playback from this display.
This display appears only during DVD playback.
To display the DVD CONTROL display
During DVD playback, press ON SCREEN.
03
STOP
MIN SEC
TRK.
03
TIME
4 : 58
TRACK 3 : 54TIME01
St. End
010 Mb
PRESS ENTER EXECUTE
Current relative
position of the
track
(St: start, End:
end)
St. End
010 Mb
EACH
REMAIN
TIME SELECT
REPEAT
A-B REPEAT
TIME SEARCH
PROGRAM
RANDOM
INTRO
AUDIO
REPEAT
A-B REPEAT
TIME SEARCH
PBC CALL
Current track
number
TRK.
03
TIME
L / R
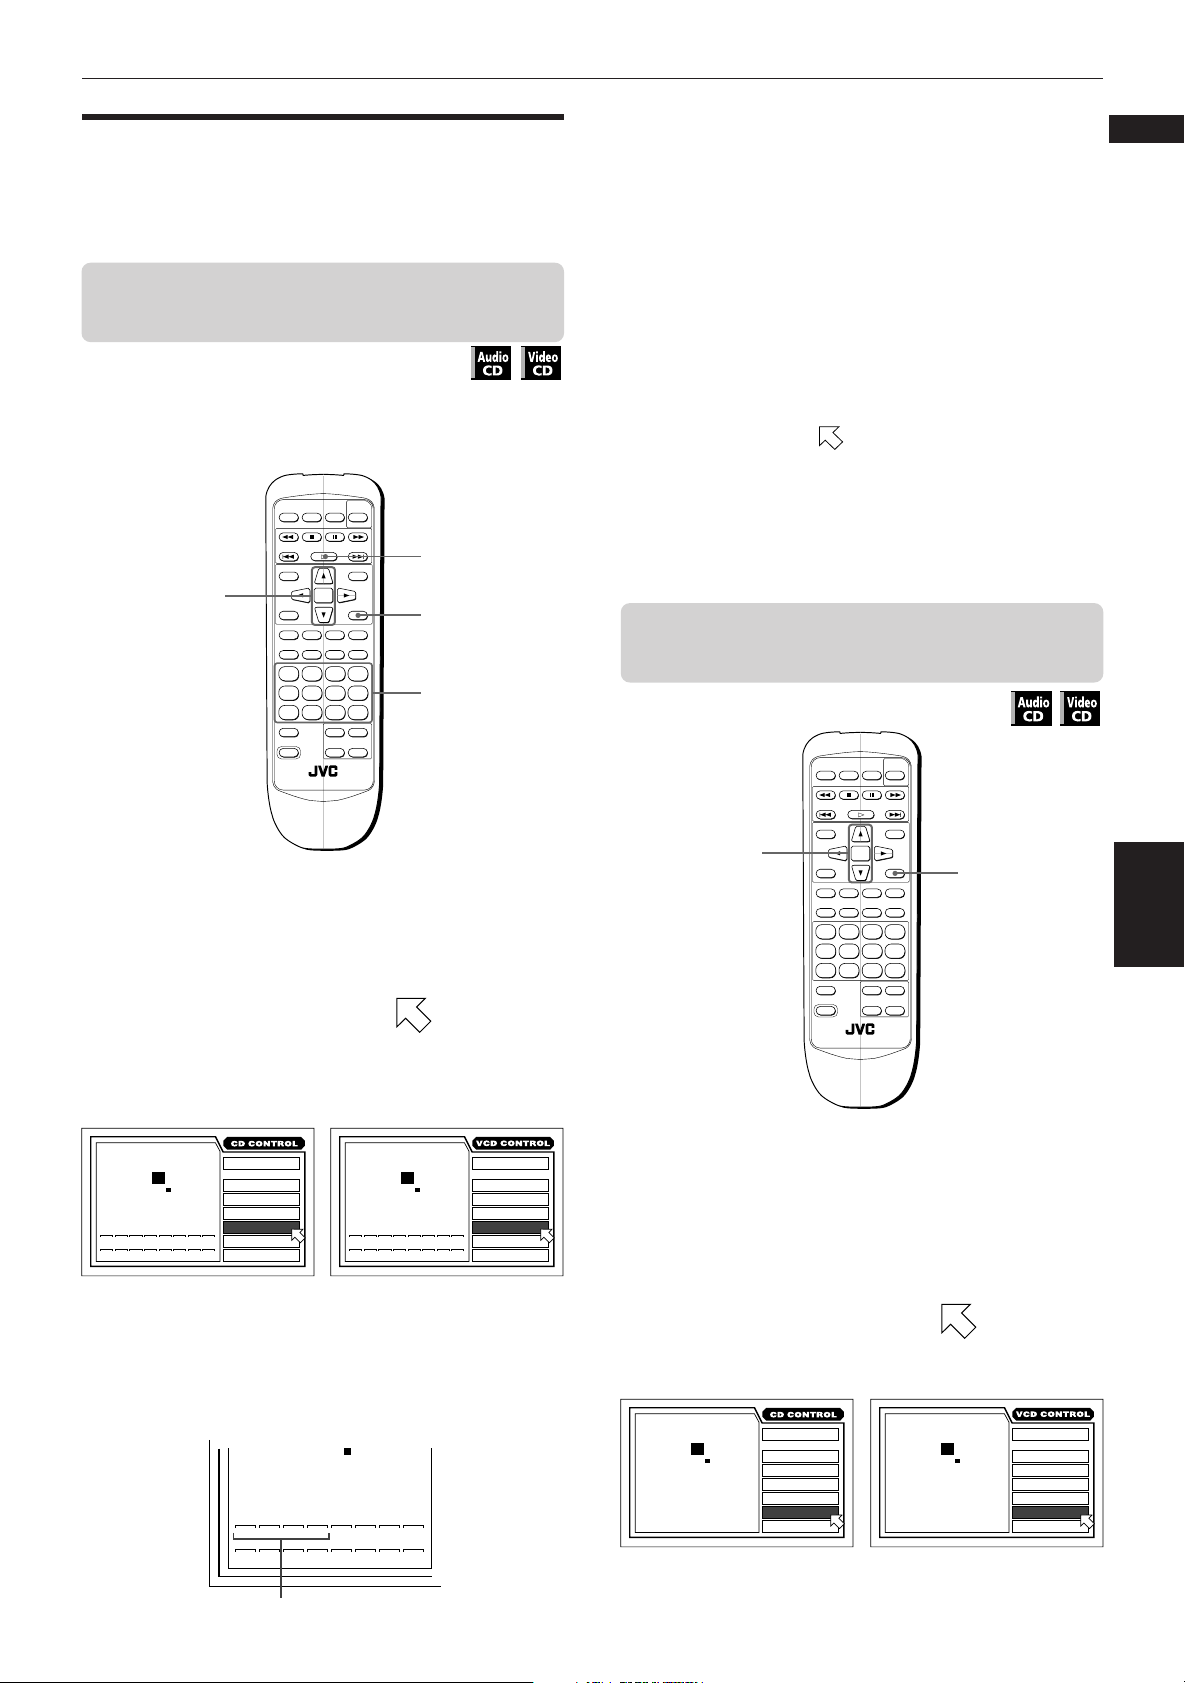
CD CONTROL display
You can select and set various functions for Audio CD playback from this
display.
To display the CD CONTROL display
Whenever an Audio CD is inserted, press ON SCREEN.
VCD CONTROL display
There are two types of the VCD CONTROL display. The display shown on the
left appears only during Video CD playback.
When a Video CD disc is stopped, a display similar to the CD CONTROL
display shown above appears.
To display the VCD CONTROL display
When a Video CD is inserted, press ON SCREEN.
4 : 58
Transmission rate
9
Elapsed time from the
beginning of the current track
Page 13
Preliminary knowledge
To prevent the monitor from burning out [SCREEN SAVER]
A television monitor screen may be burned out if a static picture is displayed
DVD/Video CD/CD PLAYER
for a long time. To prevent this, the unit automatically activates the screen
saver function if a static picture, such as an on-screen display or menu, is
displayed for over 5 minutes.
• Pressing any button on the unit or the remote control unit will release the
screen saver function and return to the previous display.
• You can select one of several screen saver modes available (see page 36).
On-screen guide icons
During DVD playback, you may see icons displayed over the picture. These
have the following meanings.
: Displayed at the beginning of a scene recorded from multiple angles. (See
page 29.)
: Displayed at the beginning of a scene recorded with multiple audio
languages. (See page 31.)
English
Français
Preliminary
Knowledge
How to use numeric buttons
: Displayed at the beginning of a scene recorded with multiple subtitle
languages. (See page 30.)
You can set the unit not to display on-screen icons above via the preference
settings described on page 35.
About invalid operation icon
When you press a button, if the unit does not accept its operation, appears
on your television screen. Operations are occasionally unacceptable even if
is not displayed.
Note that some operations may not be accepted. For example, some discs
may not allow fast forward, fast backward or slow-motion playback.
To select a track/title number
• To select a number between 1 and 10
Press the corresponding button for the number.
• To select a number higher than 10
Use the +10 button.
Examples:
To select 13 +10 → 3
To select 34 +10 → +10 → +10 → 4
To select 40 +10 → +10 → +10 → 10
To enter a time or chapter number
The method for entering a time for the Time search or chapter number for the
Chapter search is different from above. See the corresponding sections in this
manual for the details.
To select a TV channel.
Press the corresponding numeric buttons (between 0 and 9) while holding
down the SHIFT button.
10
Page 14
Preliminary knowledge
About discs
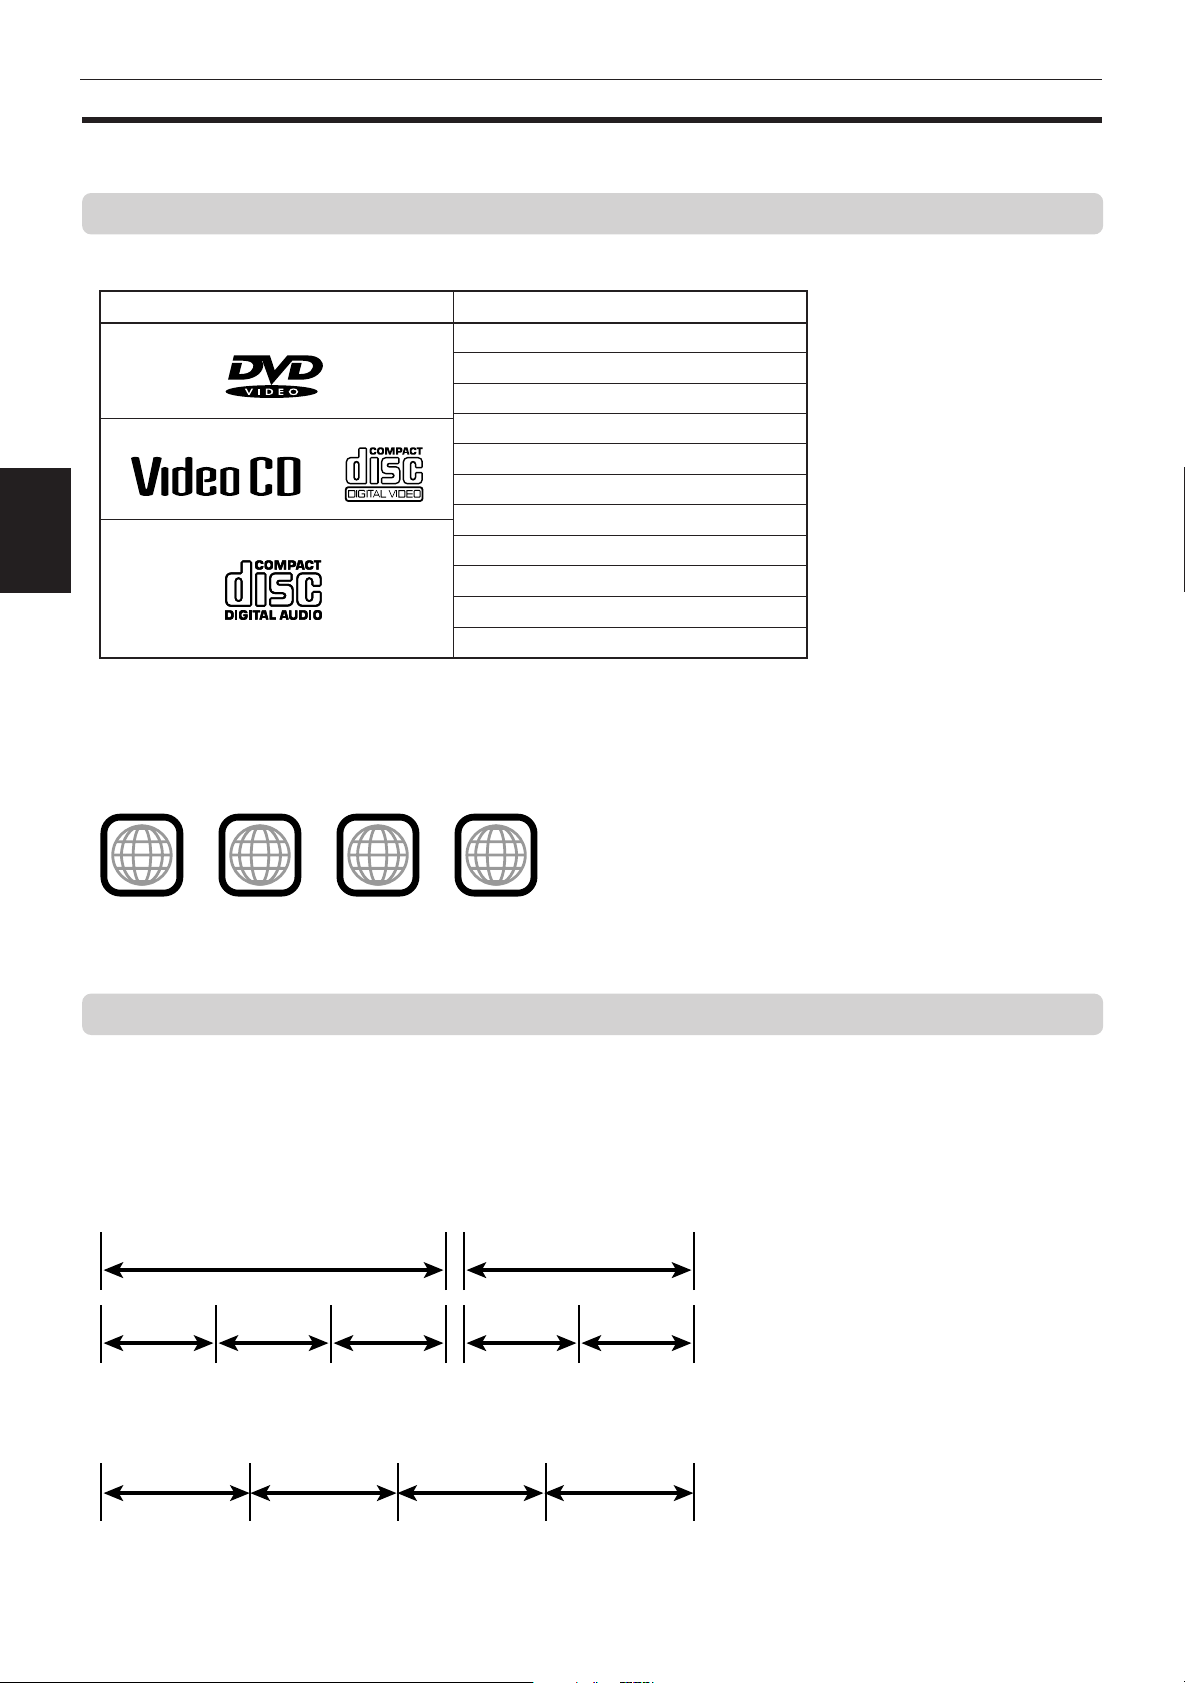
Playable disc types
Playable and non-playable disc types are as follows:
Playable discs
DVD VIDEO
Video CD
Audio CD
Knowledge
Preliminary
Non-playable discs
DVD-ROM
DVD-RAM
DVD Audio
DVD-R
DVD-RW
CD-G
CD-R
CD-ROM
PHOTO CD
CD-RW
CD-EXTRA
The DVD Logo is a trademark.
Notes on DVD VIDEO discs
• DVD players and DVD discs have their own Region Code numbers. This unit only can play back DVD discs whose
Region Code numbers include “1.”
Examples of playable DVD discs:
2
ALL
1
21
1
3
4
• This unit is designed to use the NTSC system. The unit cannot playback the disc recorded on the PAL system.
• Playing back discs listed as “Non-playable discs” in the table above may generate noise and damage speakers.
Disc structure
A DVD disc is comprised of “titles,” while an Audio CD or Video CD is comprised of “tracks.” Each title may be
divided into some “chapters.” For example, if a DVD disc contains some movies, each movie may have its own title
number, and each movie may be divided into some chapters. In a DVD karaoke disc, each song usually has its own
title number and does not have chapters. In general, each title has independent content, while each chapter in the
same title has continuity.
(Example: DVD disc)
Title 1 Title 2
Chapter 1 Chapter 2 Chapter 3 Chapter 1 Chapter 2
(Example: Audio CD/Video CD)
Track 1 Track 2 Track 3 Track 4
11
Page 15
Getting started
Getting started
Connections
*In the following despription, "TV" may be substituted with "monitor" or "projector."
*Before using the unit, you have to connect the unit to a TV and/or amplifier.
Before making any connections
• Do not connect the AC power cord until all other connections have been made.
• Since different components often have different terminal names, carefully read the instructions supplied with the
component you are going to connect.
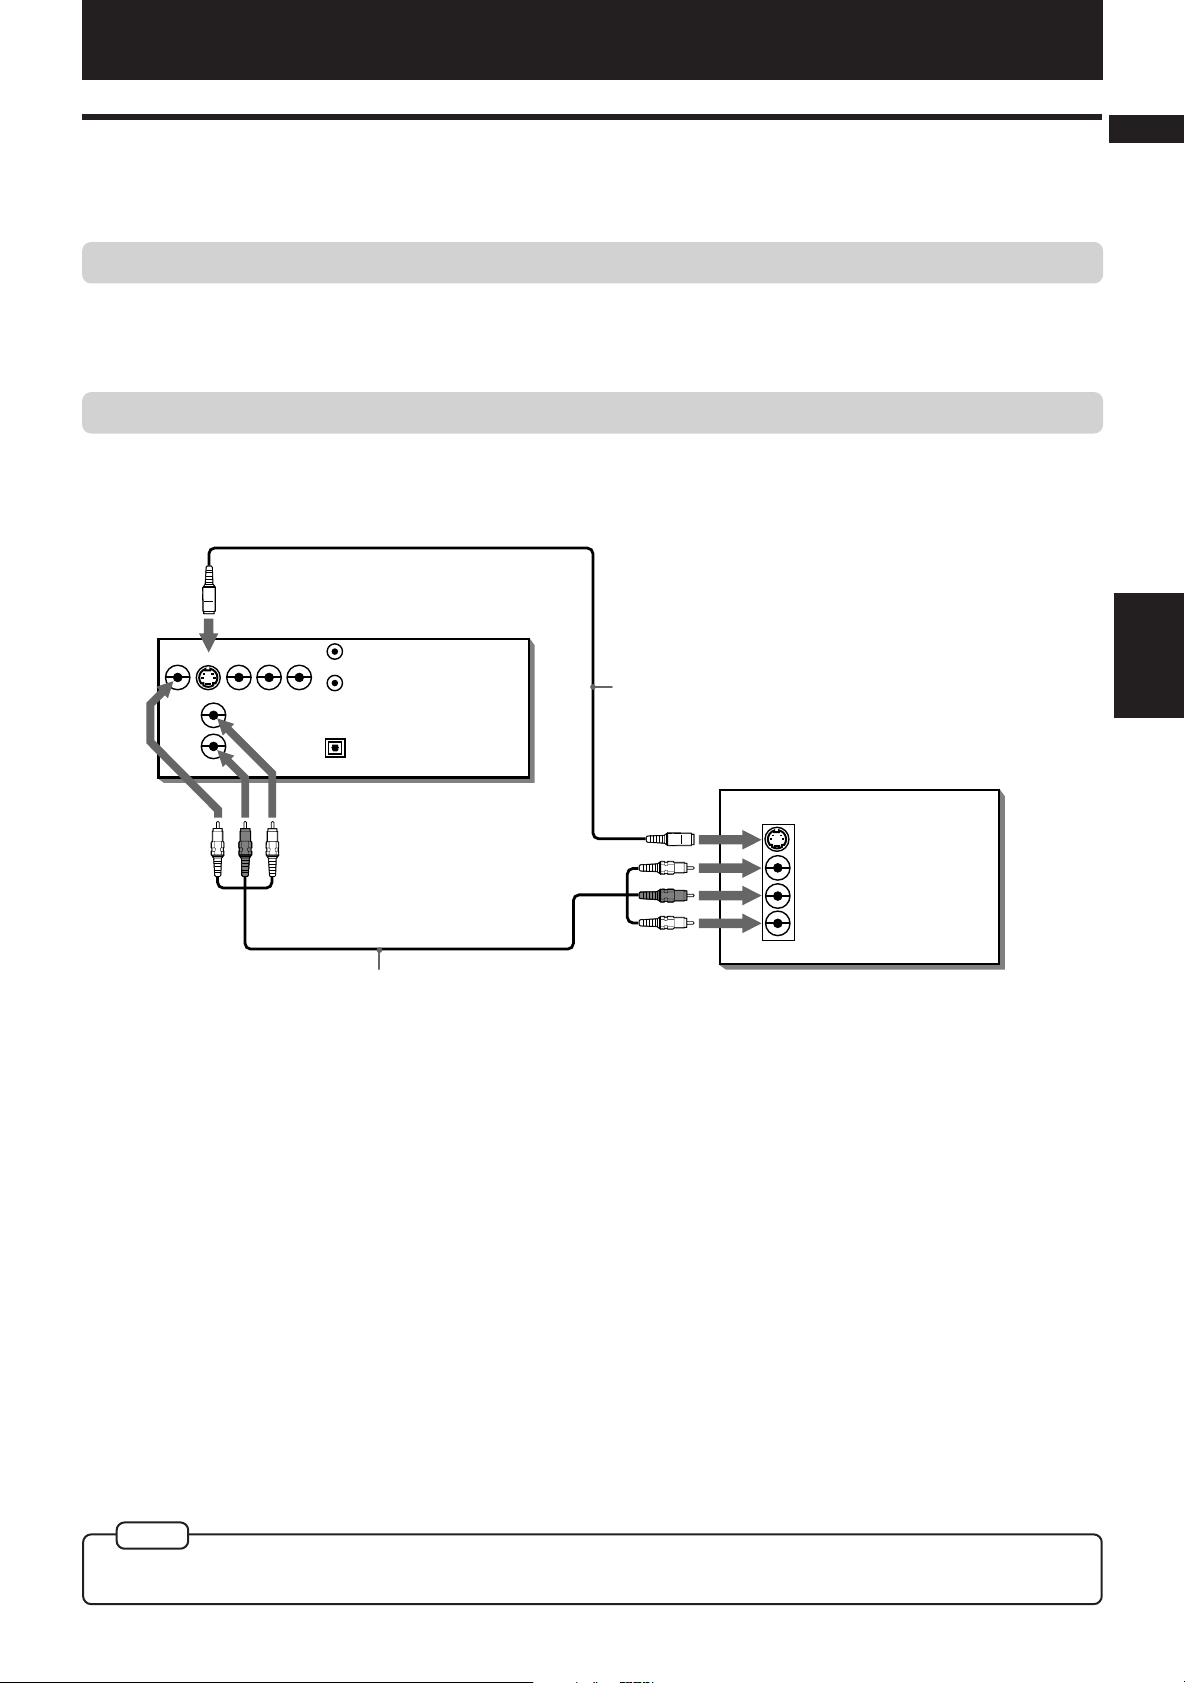
To connect to a TV
You can enjoy using the unit by simply connecting it to a TV. To improve audio sound quality, connect the audio
outputs to your separate audio equipment. (See the following pages.)
The unit
VIDEO OUT
VIDEO S-VIDEO
LEFT
RIGHT
AUDIO OUT DIGITAL OUT
Y
COMPONENT
P
P
B
R
AV COMPU LINK
S-video cable
PCM/STREAM
OPTICAL
(supplied)
TV
English
Français
Getting
started
IN
Yellow
Red
White
Yellow
Red
S-VIDEO
VIDEO
RIGHT
LEFT
AUDIO
White
Audio/video cable
(supplied)
Connect the unit to a TV equipped with stereo audio input and video input jacks using the supplied audio/video
cables.
• If your TV has a monaural audio input instead of stereo, you need to use an optional audio cable which converts
stereo audio output to monaural.
• If your TV has an S-video input, you should connect it with the S-VIDEO output of the unit using the supplied Svideo cable in addition to the (standard) video connection to get better picture quality.
NOTE
• Connect VIDEO OUT of the unit directly to the video input of your TV. Connecting VIDEO OUT of the unit to a TV via a VCR may
cause a monitor problem when playing back a copy-protected disc.
12
Page 16
Getting started
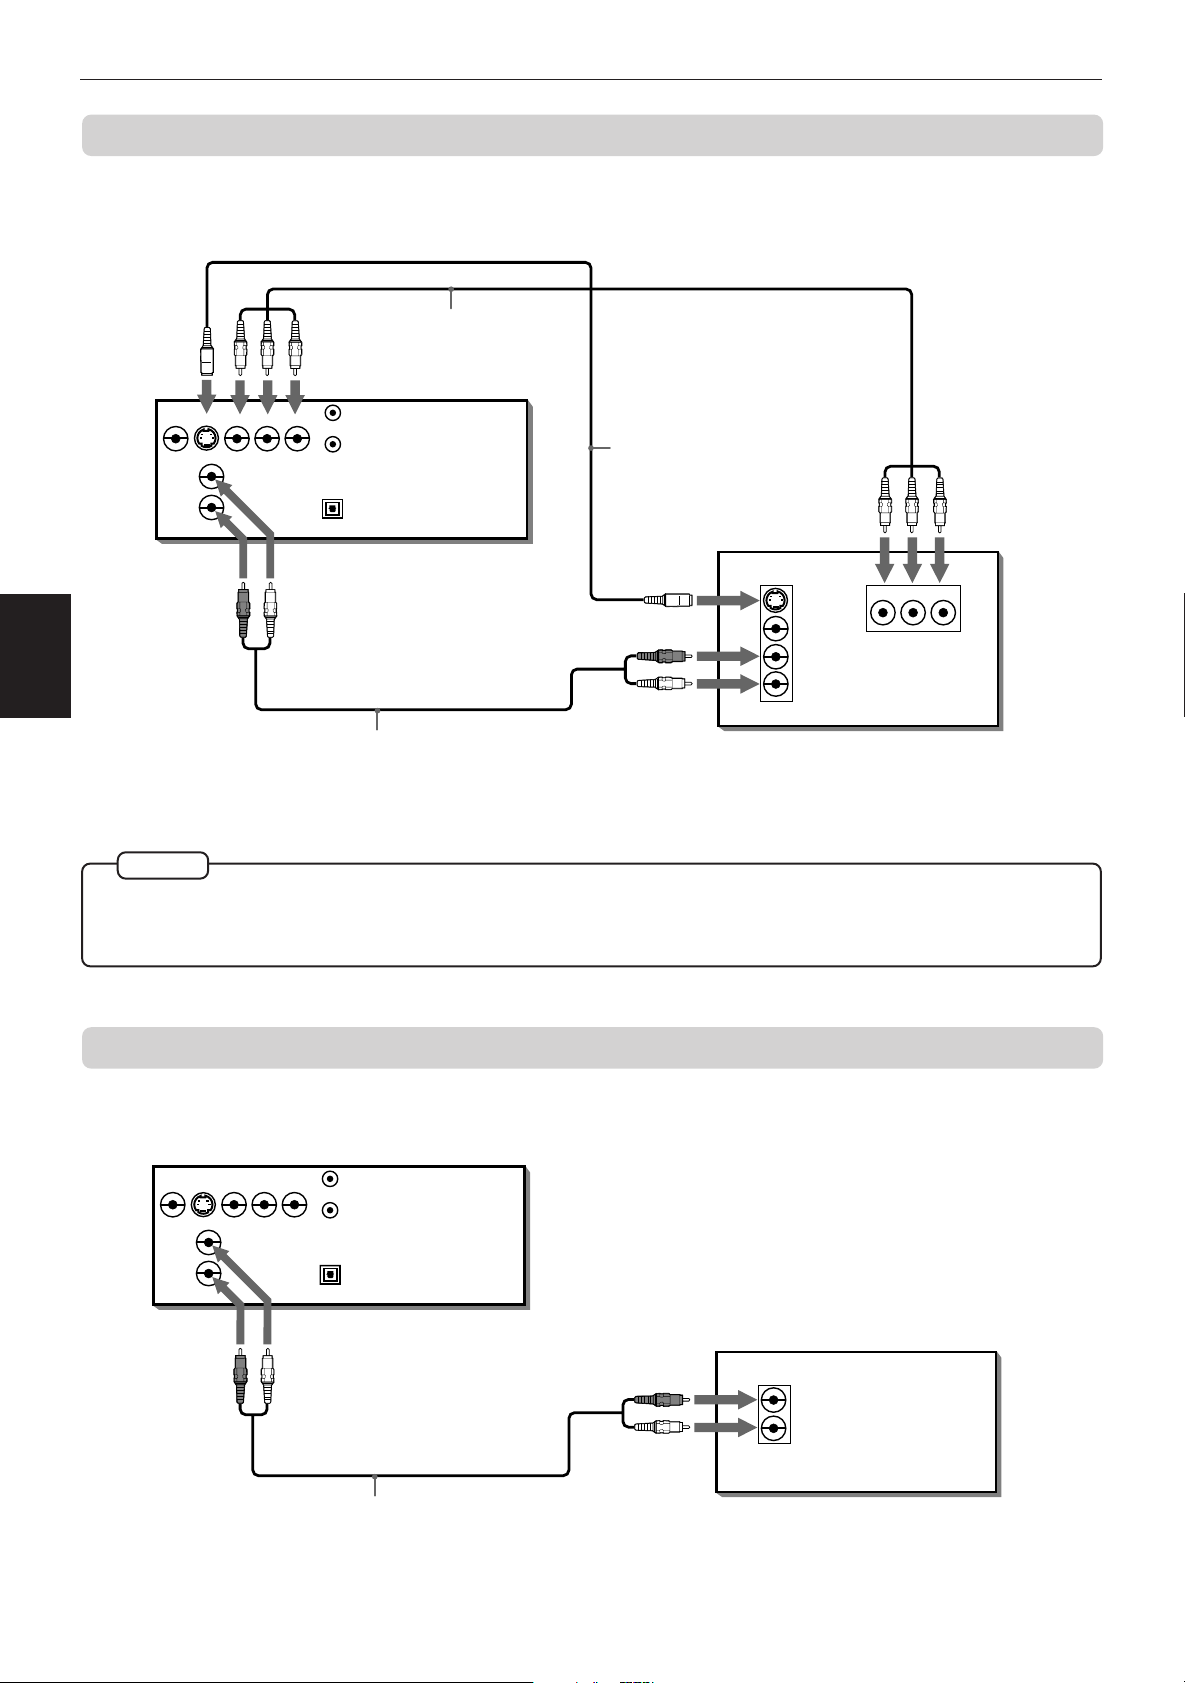
To connect to a TV with the component video input jacks
You can enjoy high picture quality by connecting the unit’s COMPONENT VIDEO OUT jacks to the COMPONENT
VIDEO IN jacks of your TV with the video cables.
VIDEO S-VIDEO
RIGHT
started
Getting
• Connect “Y” to “Y,” “P
NOTES
• When the component video input jacks of the TV is of the BNC type, use an adapter to convert a pin jack to a BNC jack
(optional).
• If you do not connect the unit with the S-video cable, some functions of your TV may not work.
Green
Blue
Red
VIDEO OUT
Y
PBP
R
LEFT
COMPONENT
AUDIO OUT DIGITAL OUT
PCM/STREAM
OPTICAL
WhiteRed
Audio cable
(not supplied)
B” to ”PB,” “PR” to “PR” correctly.
The unit
AV COMPU LINK
Component video
cable (not supplied)
S-video cable
(supplied)
Red
White
TV
IN
Green
S-VIDEO
VIDEO
RIGHT
LEFT
AUDIO
Blue
YPBP
R
IN
Red
To connect to an audio amplifier or receiver
You can enjoy high-quality audio by connecting the unit's audio outputs to your amplifier or receiver.
VIDEO OUT
VIDEO S-VIDEO
Y
PBP
LEFT
RIGHT
COMPONENT
AUDIO OUT DIGITAL OUT
• Connect the unit's AUDIO OUT to any line-level inputs (such as AUX, DVD, CD, etc.) of an audio amplifier or
receiver.
13
The unit
R
AV COMPU LINK
PCM/STREAM
OPTICAL
WhiteRed
Audio cable
(not supplied)
Red
White
Amplifier or receiver
IN
RIGHT
AUDIO
LEFT
Page 17
Getting started
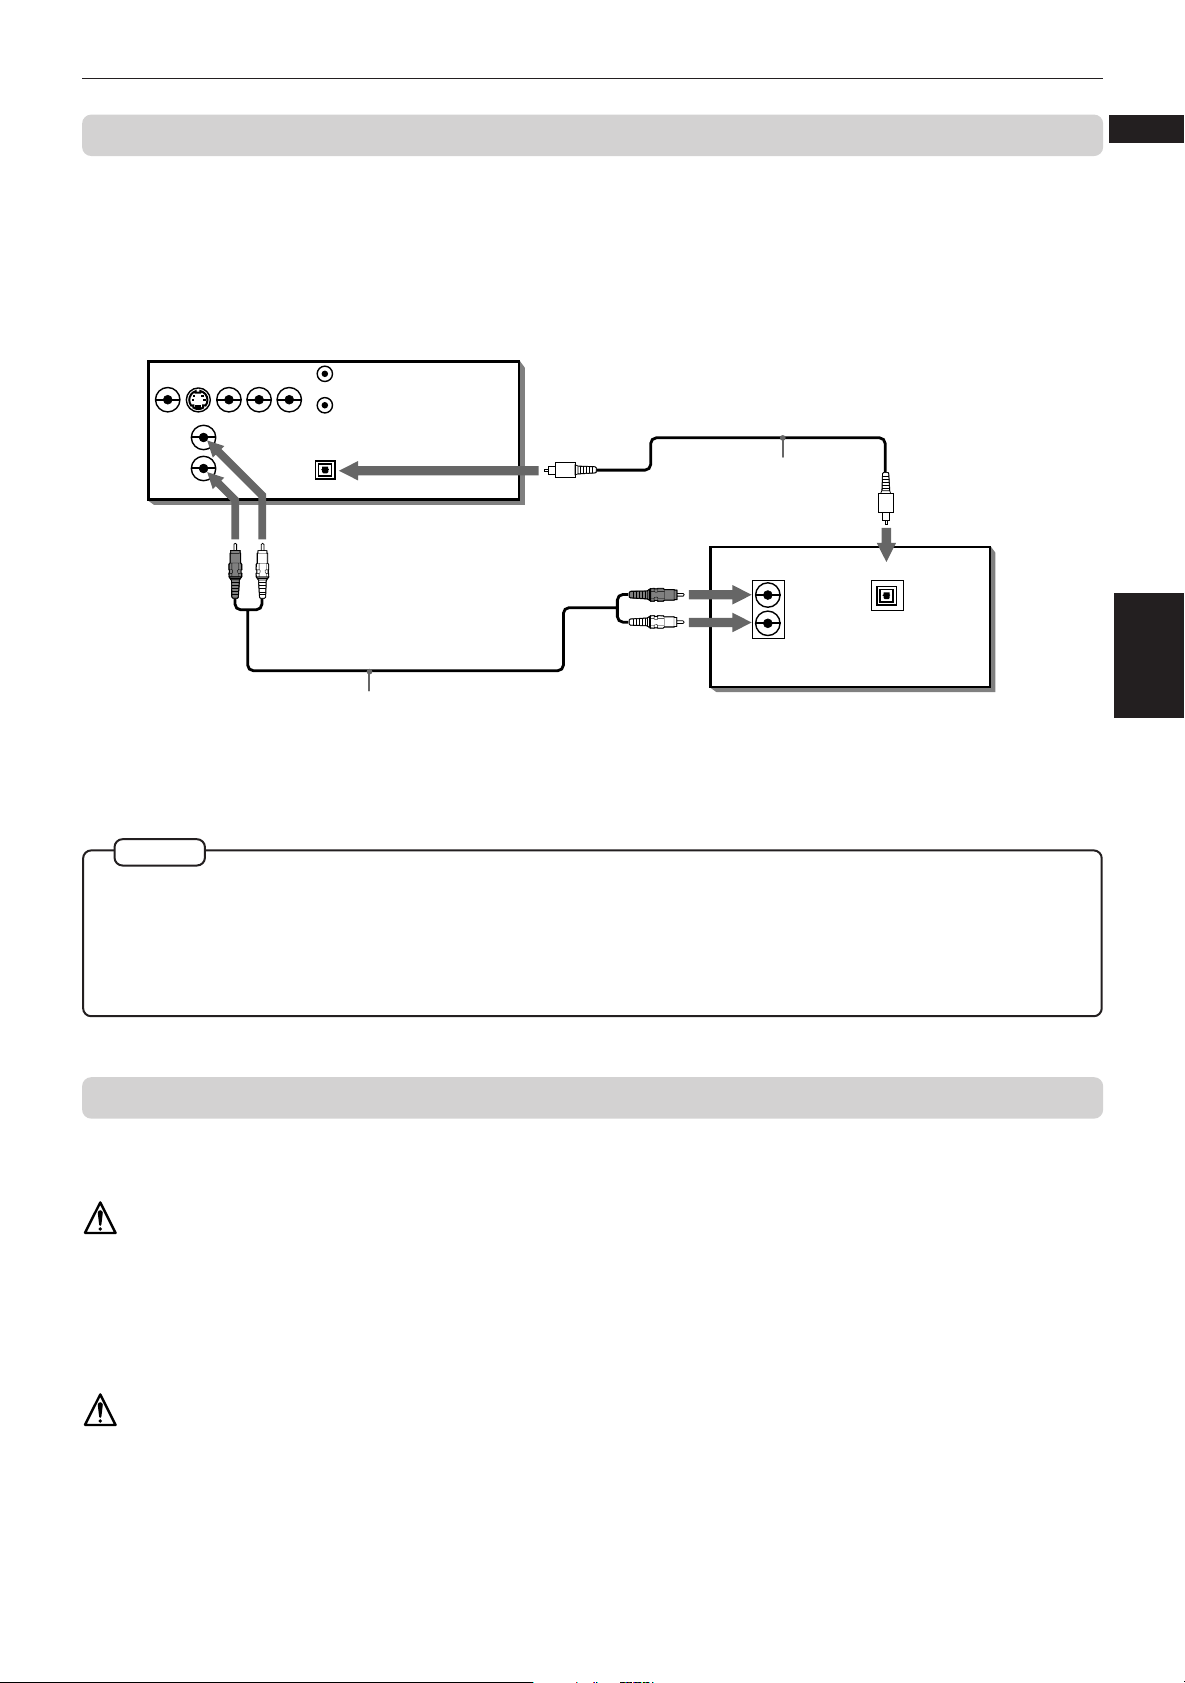
To connect to audio equipment with a digital input
You can enhance the sound quality by connecting the unit’s DIGITAL OUT (optical) to the digital input of an amplifier,
DAT or MD by using an optional digital cable. The digital stereo audio signal from a disc is directly transferred. If
you connect the unit to a Dolby Digital or DTS decoder or an amplifier with built-in the decoder by using an optional
digital cable, you can enjoy high-quality surround sound.
When you make the digital connection, also make the analog connection, because, depending on the disc type, no
audio may be reproduced from the DIGITAL OUT.
PBP
WhiteRed
The unit
R
AV COMPU LINK
PCM/STREAM
OPTICAL
Audio cable
(not supplied)
Red
White
Optical digital cable
(not supplied)
Digital equipment
IN
RIGHT
AUDIO
LEFT
IN
DIGITAL
OPTICAL
VIDEO OUT
VIDEO S-VIDEO
Y
COMPONENT
LEFT
RIGHT
AUDIO OUT DIGITAL OUT
English
Français
Getting
started
• For digital connection, connect the unit’s DIGITAL OUT (optical) to the digital input of an audio equipment using an
optional digital cable.
NOTES
• When you connect the unit's DIGITAL OUT to digital audio equipment, before using, make the “DIGITAL AUDIO OUTPUT”
setting in the “PREFERENCE 2” on-screen display correctly according to the connected audio equipment. If the “DIGITAL
AUDIO OUTPUT” is not set correctly, loud noise may be generated from speakers, causing damage of your speakers. See
“DIGITAL AUDIO OUTPUT” on page 35.
• With the digital connection, the unit’s settings for COMPRESSION and DOWN MIX are invalid. Settings for these items must be
made from the decoder.
To connect the power cord
When all the connections have been made, insert the power plug into the wall outlet firmly. The STANDBY indicator
lights and setup is completed.
Warning
• Disconnect the power cord if you are not going to use the unit for a long time.
• Disconnect the power cord before cleaning the unit.
• Disconnect the power cord before moving the unit.
• Do not connect or disconnect the power cord with wet hands.
• Do not pull the power cord when disconnecting it, as this may damage the cord and cause fire, electric shock, or
other accidents.
Caution
• Do not damage, alter, twist, or pull the power cord, as this may cause fire, electric shock, or other accidents.
• Contact a dealer and get a new power cord if the cord is damaged. A damaged cord may cause fire, electric shock,
or other accidents.
• Do not put anything heavy, or the unit, on the power cord, as this may cause fire, electric shock, or other accidents.
14
Page 18
Getting started
Using the remote control unit
Using the remote control, you can operate not only all the functions of the unit but also basic functions of your TV.
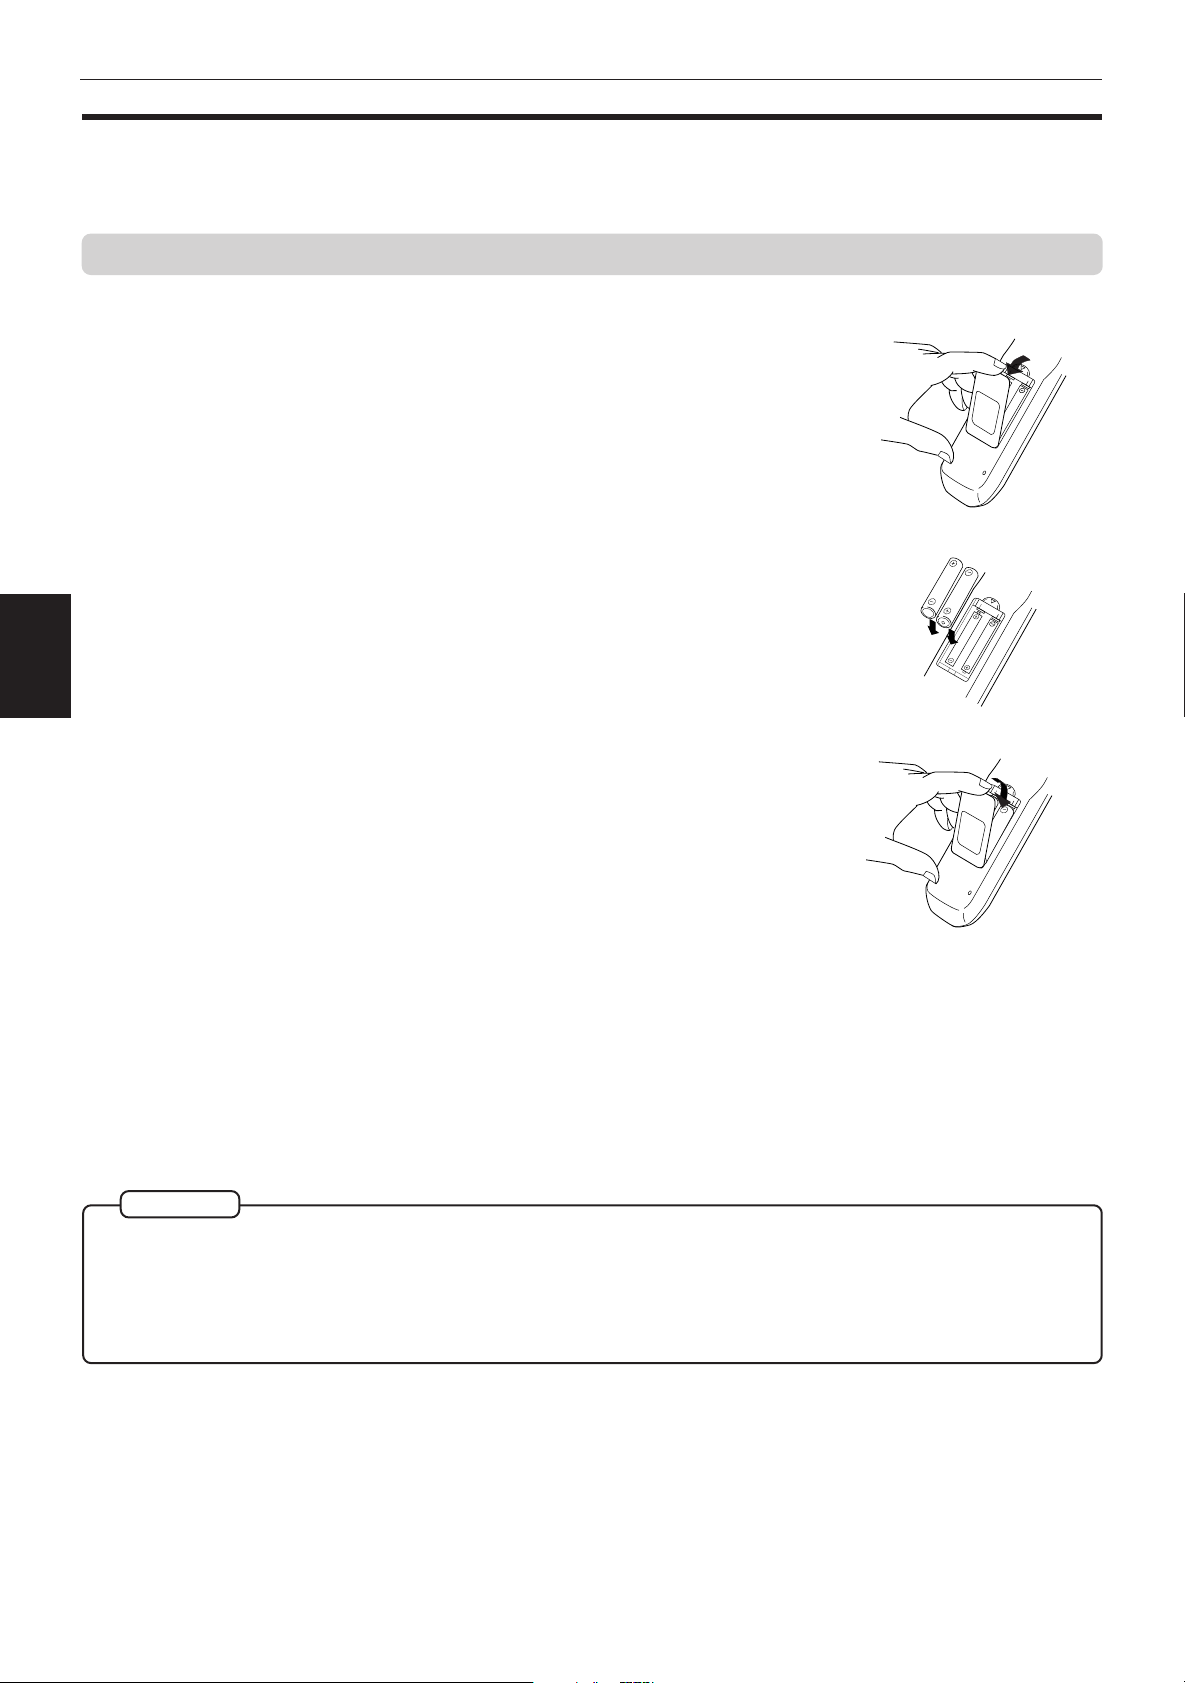
To install batteries in the remote control unit
The battery compartment is located on the back of the remote control unit.
1 Press down on the point shown by the arrow at the top of the compartment cover,
and pull up the cover to open the compartment.
2 Place the two accessory R6P (SUM-3)/AA(15F) batteries in the remote control
according to the polarity markings (“+” and “–”) inside the compartment and on the
batteries.
started
Getting
3 Place the cover over the compartment, and press down lightly.
• The batteries will last about six months with normal use. If the functions of the remote control become erratic,
replace the batteries. See below for more information.
Precautions for the safe use of batteries
Observe the following precautions for the safe use of batteries. If they are used improperly their life will be shortened,
they may burst or their contents may leak.
Precaution
• Remove the batteries from the remote control if it is not going to be used for a long period of time.
• Remove dead batteries and dispose of them properly.
• Never leave dead batteries lying around, take them apart, mix them with other refuse, or throw them into an incinerator.
• Never touch liquid that has leaked out of a battery.
• Do not mix new and old batteries, or batteries of different types, when replacing them.
15
Page 19
Getting started
To use the remote control unit for TV operation
You can operate your TV from the remote control unit.
Setting the remote control signal for operating your TV.
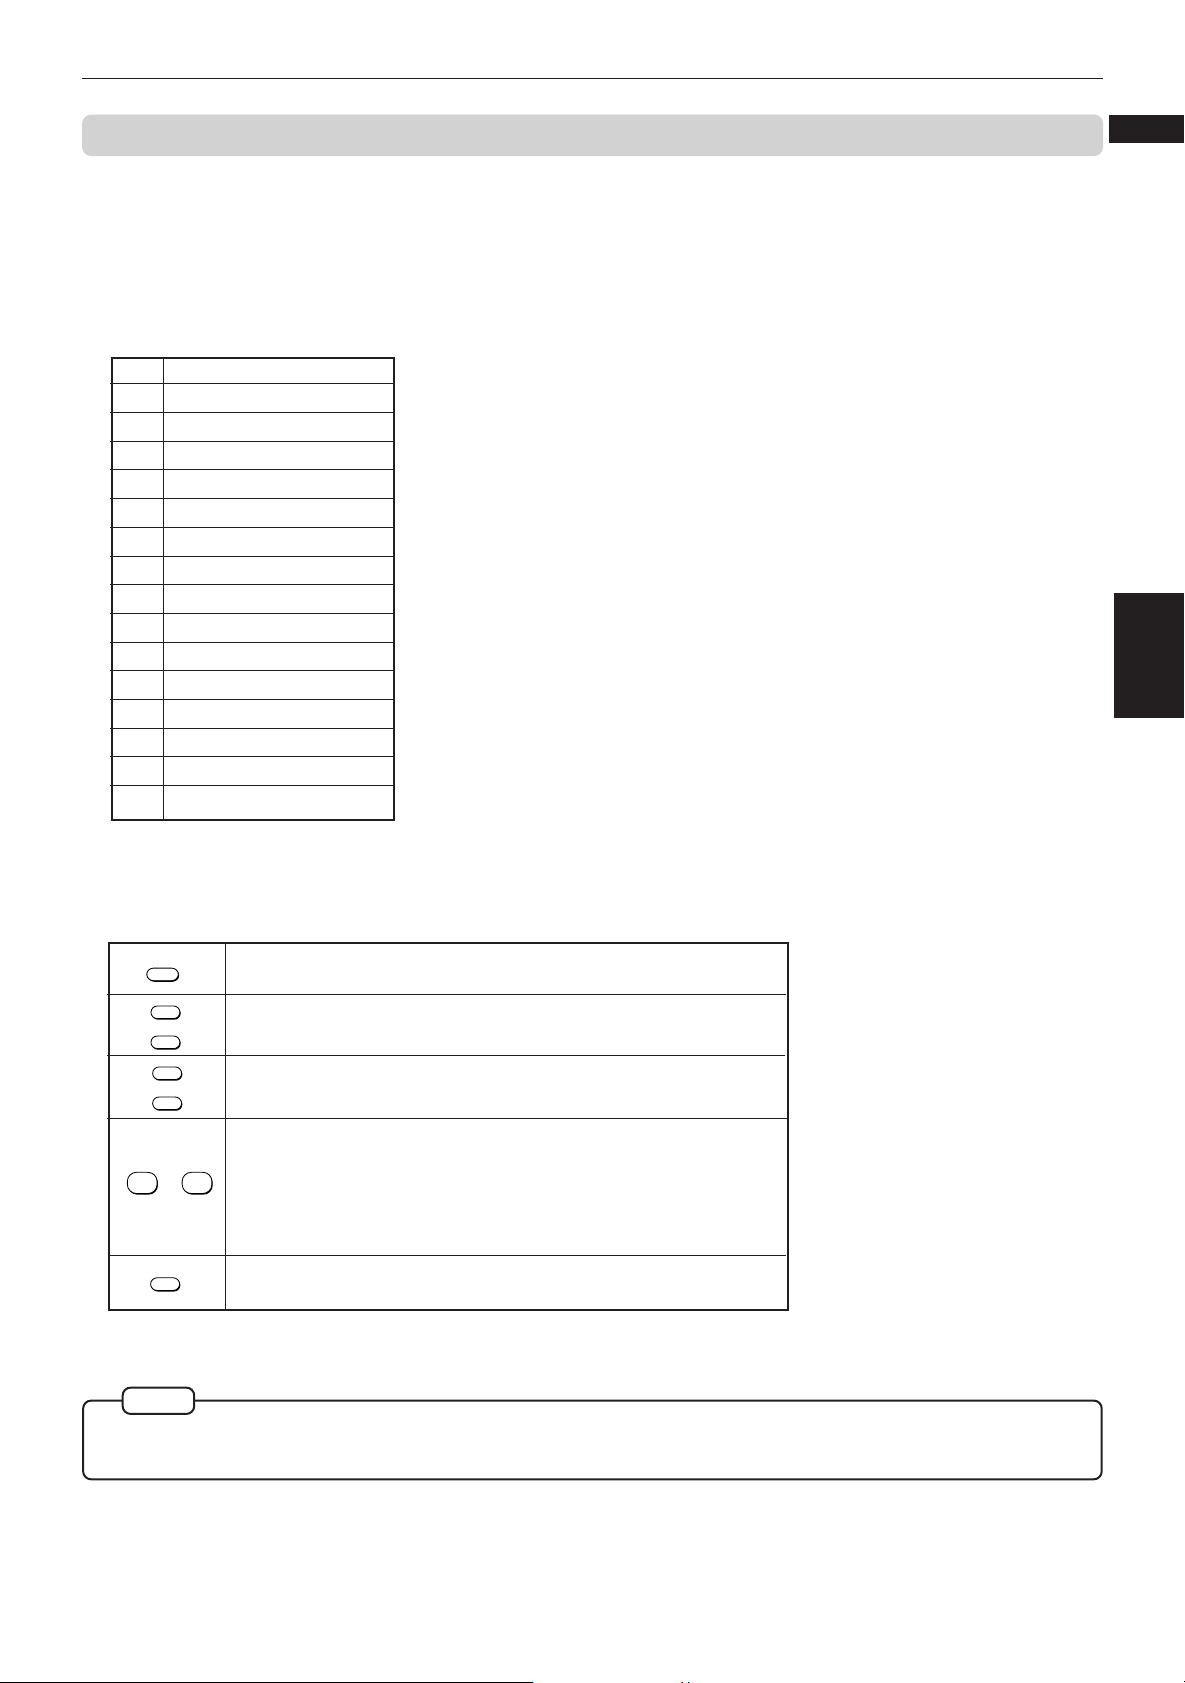
1 Holding down TV/VIDEO, enter the manufacturer code of your TV listed below by using the numeric buttons (0 - 9).
Do not release TV/VIDEO. Keep holding it until the next step is completed.
Manufacturer code list
No. Manufacturer
01 JVC
02 MAGNAVOX
03 MITSUBISHI
04 PANASONIC
05 RCA
06 SHARP
07 SONY
08 TOSHIBA
09 ZENITH
10 HITACHI
11 PANASONIC
12 SAMSUNG
13 SANYO
14 SANYO
15 SAMSUNG
Example:
To enter the manufacturer code "01":
Press "0" then "1."
English
Français
Getting
started
2 Press STOP while holding down TV/VIDEO.
The following buttons can be used for operating the TV:
TV POWER
+
TV ch
–
+
TV VOL.
–
Turns the TV on or off.
Changes the TV channels.
Adjusts the TV volume.
Selects the TV channels
(while holding down the SHIFT button).
90
to
*For some TVs, pressing "+10" while holding down SHIFT
functions as the "+100," and pressing "10" while holding down
SHIFT functions as the "RETURN" button.
TV/VIDEO
Switches input mode (either TV or VIDEO).
3 Try to operate your TV by pressing TV POWER.
If your TV turns on or off, you have successfully set the control signal.
NOTE
• The remote control unit is initially set for operating a JVC TV.
• If there is more than one code listed for the manufacturer of your TV, try them one by one until you succeed.
16
Page 20
Basic operations
OPEN/
CLOSE
RETURN
STOP PAUSE
TV POWER
PLAY
3D PHONIC SUBTITLE
STROBE ANGLE
CANCEL RESUME ZOOM DIGEST
TV/VIDEO
RM-SV511U REMOTE CONTROL
DVD
POWER
ENTER
MENU
TITLE
THEATER
POSITION
ON SCREEN
TV ch TV VOL.
++
––
1234
5678
9100+10
SHIFT
Basic operations
In the following description, the buttons on the remote control unit are used, however, you may use the
corresponding buttons on the front panel of the unit if available.
Turning on/off the unit
Press POWER on the front panel or press DVD POWER on the remote control unit.
SHUTTLE
PAUSESTOP
POWER
XV-511 DVD PLAYER
STANDBY
POWER
3D PHONIC
DOLBY
D I G I T A L
DVD / VIDEO CD / CD
PLAY
SKIP
OPEN/CLOSE
• You can turn on the unit by pressing the PLAY button on the front
panel or the Remote control unit. In this operation, the unit starts
playback when the disc is set. If no disc is set, the disc tray opens.
• You can also turn on the unit by pressing the OPEN/CLOSE button on
the front panel or the remote control unit. In this case, the disc tray
opens.
NOTE
• Even if you press the POWER or DVD POWER button to turn off the unit, the unit is not disconnected from the AC power source
as long as it is connected to the wall outlet. This state is called the standby mode. In this state, the unit is designed to consume
a very small quantity of power.
Basic
operations
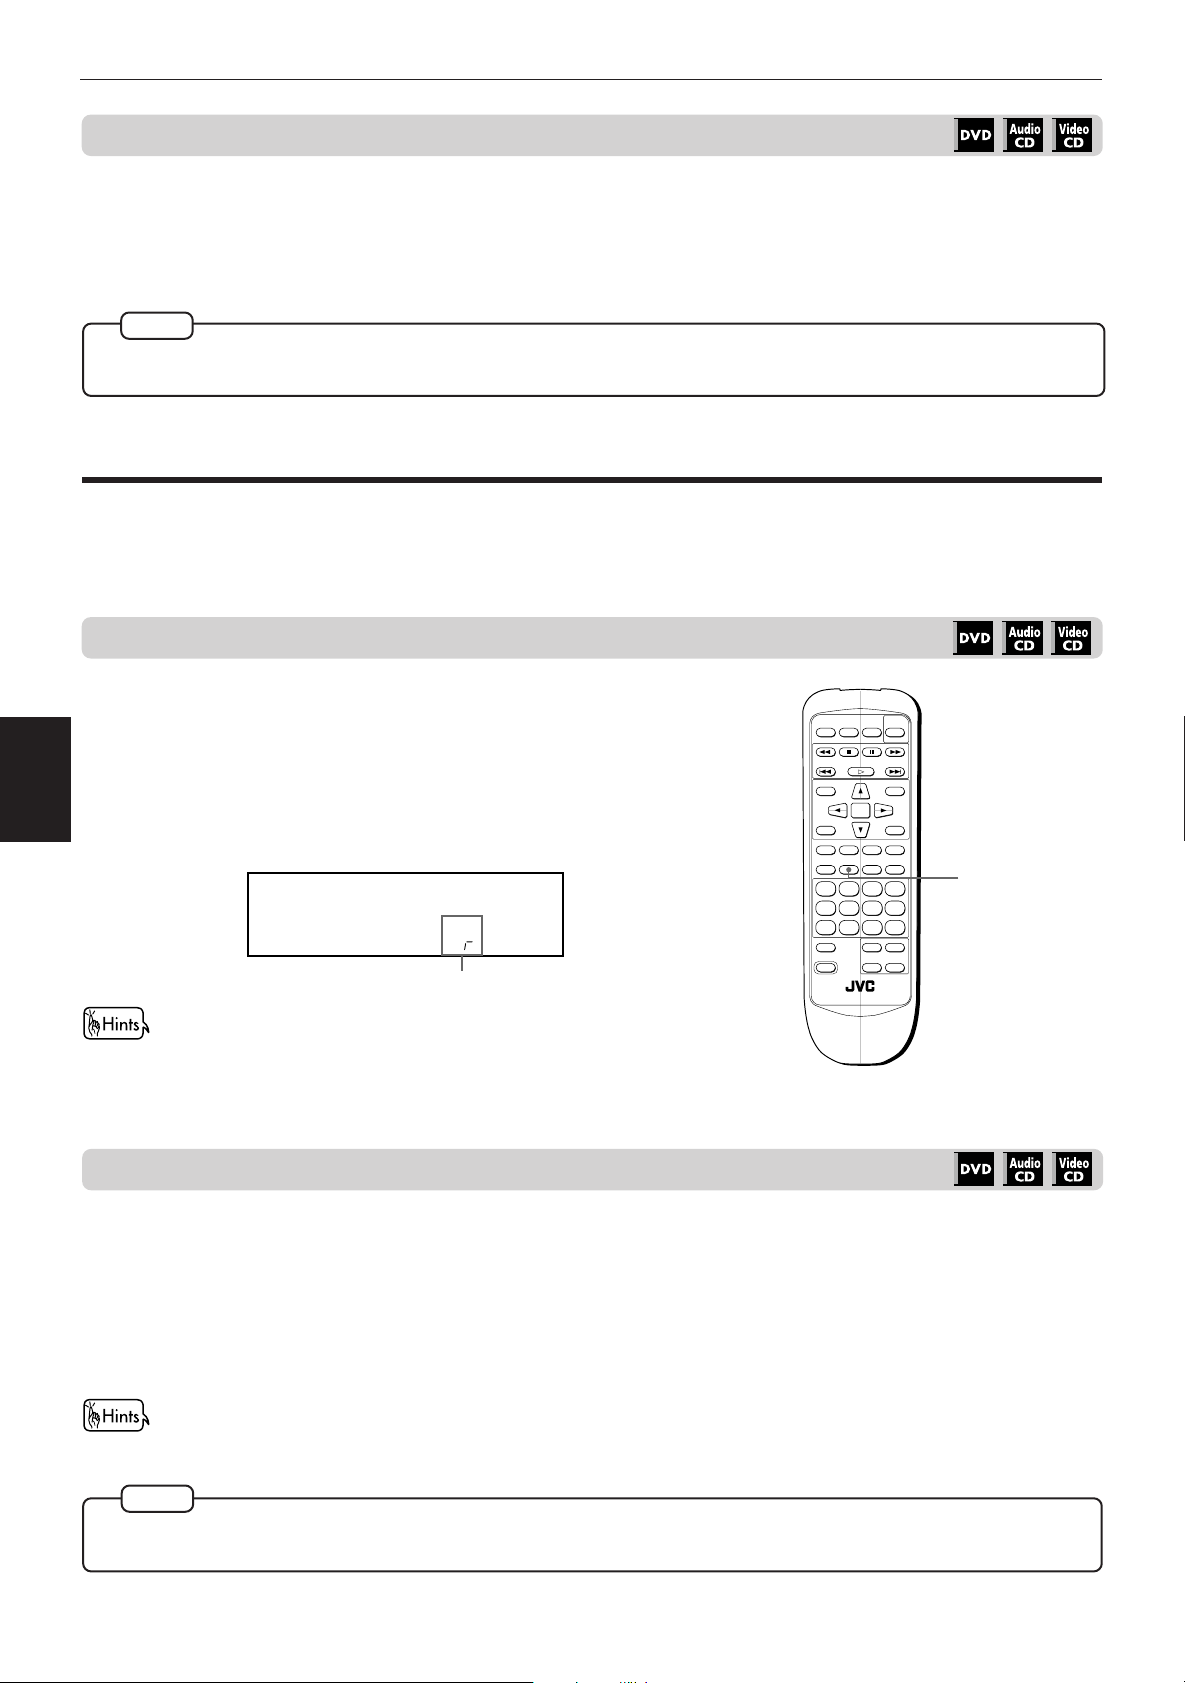
Inserting and removing discs
Press OPEN/CLOSE to open the disc tray.
1
DVD POWER
You can also open and close the disc tray from the opening on-screen display.
Use CURSOR 5/∞ to move to , then press ENTER to open or close the disc tray.
17
Place the disc in the tray.
2
With the playback side
(non-label side) down.
Y
LA
P
E
S
U
A
P
P
O
T
S
IP
K
S
Press OPEN/CLOSE to close the disc tray.
3
DVD / VIDEO CD / CD
DOLBY
XV-511 DVD PLAYER
DIGITAL
STANDBY
POWER
• To insert an 8-cm disc, place it
in the inner recess.
NOTES
• The unit can playback DVD VIDEO, Audio CD, and Video CD discs only. Do not load other disc types. For details about
playable disc types, see page 11.
• When loading a disc in the tray, be sure to position the disc inside the recess. Otherwise, the disc may be damaged when the
tray is closed, and the disc may not be removed from the unit.
Page 21

Basic playback
OPEN/
CLOSE
RETURN
STOP PAUSE
TV POWER
PLAY
3D PHONIC SUBTITLE
STROBE ANGLE
CANCEL RESUME ZOOM DIGEST
TV/VIDEO
RM-SV511U REMOTE CONTROL
DVD
POWER
ENTER
MENU
TITLE
THEATER
POSITION
ON SCREEN
TV ch TV VOL.
++
––
1234
5678
9100+10
SHIFT
Now you can play a disc. First, let’s enjoy simple playback according to following procedure.
To play a disc from the beginning
Press PLAY.
The unit starts playback from the beginning.
Basic operations
English
Français
NOTES
• With Video CD discs with PBC control or some DVD discs, the menu display may
appear on the TV screen after pressing PLAY. In such a case, select an item to be
played back from the menu.
For operation using a menu, see page 20.
• With some DVD discs, the unit starts playback automatically after inserting the disc.
To stop playback completely
Press STOP.
The unit stops playback.
To stop playback temporarily
Basic
control
buttons
Basic
operations
7 During playback
Press PAUSE.
The unit pauses playback. To continue playback, press PLAY.
To advance or reverse play rapidly while monitoring
From the remote control unit
Press ¡ or 1.
Pressing ¡ advances playback rapidly, while pressing 1 reverses playback rapidly. Each time you press the
button, advance or reverse playback speed increases. To return to normal playback, press PLAY.
From the front panel
Use the SHUTTLE knob.
To advance playback rapidly, turn the shuttle knob to the right and hold, and to reverse play rapidly, turn the
shuttle knob to the left and hold. When you release the shuttle knob, the unit returns to normal playback. The
playback speed changes according to the amount you turn the shuttle knob.
SHUTTLE knob
SHUTTLE
DVD / VIDEO CD / CD
OPEN/CLOSE
PLAY
PAUSESTOP
SKIP
18
Page 22
Basic operations
OPEN/
CLOSE
RETURN
STOP PAUSE
TV POWER
PLAY
3D PHONIC SUBTITLE
STRIBE ANGLE
CANCEL RESUME ZOOM DIGEST
TV/VIDEO
RM-SV511U REMOTE CONTROL
DVD
POWER
ENTER
MENU
TITLE
THEATER
POSITION
ON SCREEN
TV ch TV VOL.
++
––
1234
5678
9100+10
SHIFT
To locate the beginning of the scene or song
7 During playback
Press ¢ or 4.
Press 4 to locate the beginning of the current chapter, title, or track, and press ¢ to locate the beginning of
the next chapter, title, or track.
NOTE
When you play a Video CD disc with the PBC function or a DVD disc, the unit may locate different place, but it will generally
locate the beginning of the title or chapter or track.
Resuming playback
The unit stores the position on a disc where you want to interrupt playback at, and resumes playback from that
position later.
To store the point you want to resume playback from
7 During playback
Press RESUME.
The unit stores the current playback position of the disc, and the
Basic
operations
Resume indicator in the display window on the front panel lights.
The last stored memory overrides the previous memory.
Display window
Resume indicator
Instead of pressing RESUME, you can also store the current position on
a disc by pressing DVD POWER (on the remote control unit) or POWER
(on the front panel of the unit) during playback.
To resume playback from the stored point
7 While stopped.
Press RESUME.
The unit resumes playback from the stored position.
RESUME
The unit will also resume playback by pressing RESUME during standby mode.
19
¶ To clear the memory
Take out the disc from the unit.
NOTE
• When you press RESUME during playback of a Video CD disc with PBC function, the unit may resume playback from a point
slightly earlier than the resume point you stored.
Page 23
Advanced Operations
OPEN/
CLOSE
RETURN
STOP PAUSE
TV POWER
PLAY
3D PHONIC SUBTITLE
STROBE ANGLE
CANCEL RESUME ZOOM DIGEST
TV/VIDEO
RM-SV511U REMOTE CONTROL
DVD
POWER
ENTER
MENU
TITLE
THEATER
POSITION
ON SCREEN
TV ch TV VOL.
++
––
1234
5678
9100+10
SHIFT
Advanced Operations
Playing from specific position
on a disc
You can play a disc from the selected track, title or
chapter, or from the specified time.
To locate a desired scene from the DVD menu
DVD discs generally have their own menus which show
the disc contents. These menus contain various items
such as titles of a movie, names of songs, or artist
information, and display them on the TV screen. You
can locate a desired scene by using the menu.
1
OPEN/
CLOSE
TITLE
THEATER
POSITION
3D PHONIC SUBTITLE
CANCEL RESUME ZOOM DIGEST
1234
5678
9100+10
TV/VIDEO
SHIFT
RM-SV511U REMOTE CONTROL
TV POWER
RETURN
STOP PAUSE
PLAY
ENTER
STROBE ANGLE
DVD
POWER
MENU
ON SCREEN
++
TV ch TV VOL.
––
1
2
NOTES
• When appears on the TV screen by pressing TITLE in
step 1:
The disc does not have a menu listing the titles.
• When appears on the TV screen by pressing MENU
in step 1:
The disc does not have a menu.
To locate a desired scene from the menu
of the Video CD with PBC
Some Video CD discs are compatible with the PBC
function. PBC is an abbreviation of “PlayBack Control.”
A Video CD disc recorded with PBC has its own menus
such as a list of the songs of the disc and items
recorded on the disc. You can also locate the specific
scene by using the menu.
1
English
Français
7 Insert the DVD disc.
About menu
Normally, a DVD disc which
contains more than one title
may have a "title" menu
which lists the titles. In this
case, the menu appears on
the TV screen by pressing
the TITLE button. Some DVD
discs may also have a
different menu which
appears by pressing the
MENU button.
See the instructions of each DVD
disc for its particular menu.
With some discs, you can also select items by entering the
corresponding number using the numeric buttons, which may
cause the unit to automatically start playback.
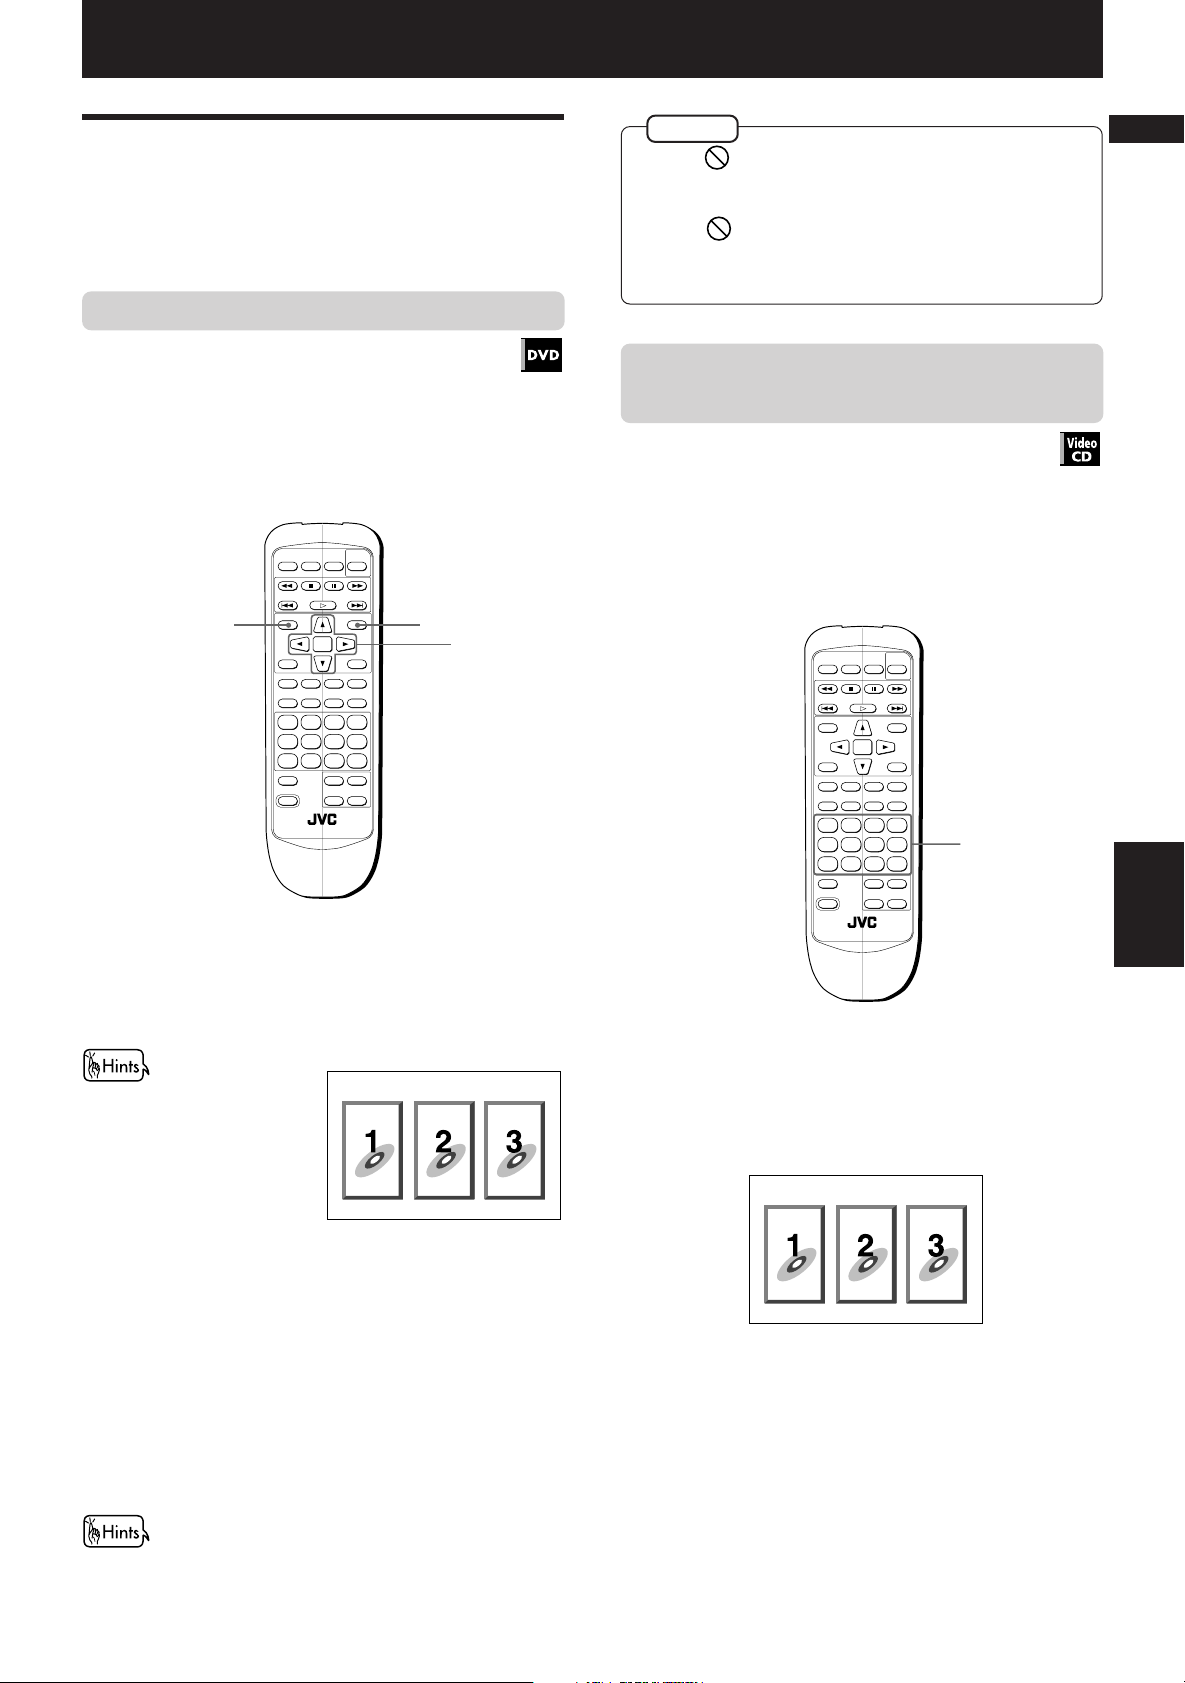
Press MENU or TITLE.
1
The menu appears on the TV screen.
Example
Use CURSOR 2/3/5/∞ to select a desired
2
item, then press ENTER.
The unit starts playback of the selected item.
7 When the menu appears on the TV screen during
playback with PBC
Use the numeric buttons to select the desired
1
number of the item.
Example:
• See page 10 for details about how to use the
numeric buttons.
Playback starts from the selected item.
You can return to the menu by pressing RETURN.
When “NEXT” or “PREVIOUS” appears on the TV
screen, the unit generally works as follows:
• Pressing ¢ turns to the next page.
• Pressing 4 returns to the previous page.
* The method of the operation is different
depending on the disc.
Advanced
20
operations
Page 24
Advanced Operations
OPEN/
CLOSE
RETURN
STOP PAUSE
TV POWER
PLAY
3D PHONIC SUBTITLE
STROBE ANGLE
CANCEL RESUME ZOOM DIGEST
TV/VIDEO
RM-SV511U REMOTE CONTROL
DVD
POWER
ENTER
MENU
TITLE
THEATER
POSITION
ON SCREEN
TV ch TV VOL.
++
––
1234
5678
9100+10
SHIFT
• To activate the PBC function when a PBC-compatible Video
CD disc is being played back without the PBC function,
press STOP then press PLAY.
• You can also activate the PBC function using the on-screen
display as follows.
1. Press ON SCREEN.
2. Use the5/∞buttons to move
to [PBC CALL], then
press ENTER.
If you want to playback a PBC-compatible Video CD disc
without activating the PBC function, start playback by using
the numeric buttons instead of the PLAY button. See the next
paragraph.
To locate a desired scene or track directly
You can play the desired scene or track by specifying
the title (for DVDs) or track (for CDs).
Advanced
operations
7 For DVD: While stopped
For Audio CD: During playback or while stopped
For Video CD: During playback without PBC
OPEN/
CLOSE
TITLE
THEATER
POSITION
3D PHONIC SUBTITLE
CANCEL RESUME ZOOM DIGEST
1234
5678
9100+10
TV/VIDEO
SHIFT
RM-SV511U REMOTE CONTROL
function or while stopped
TV POWER
RETURN
STOP PAUSE
PLAY
ENTER
STROBE ANGLE
DVD
POWER
MENU
ON SCREEN
++
TV ch TV VOL.
––
You can also see the selected title or track number on the onscreen display.
NOTES
• When appears on the TV screen.
The title or track you have selected is not contained in
the disc.
• This function does not work during Video CD playback
with PBC function
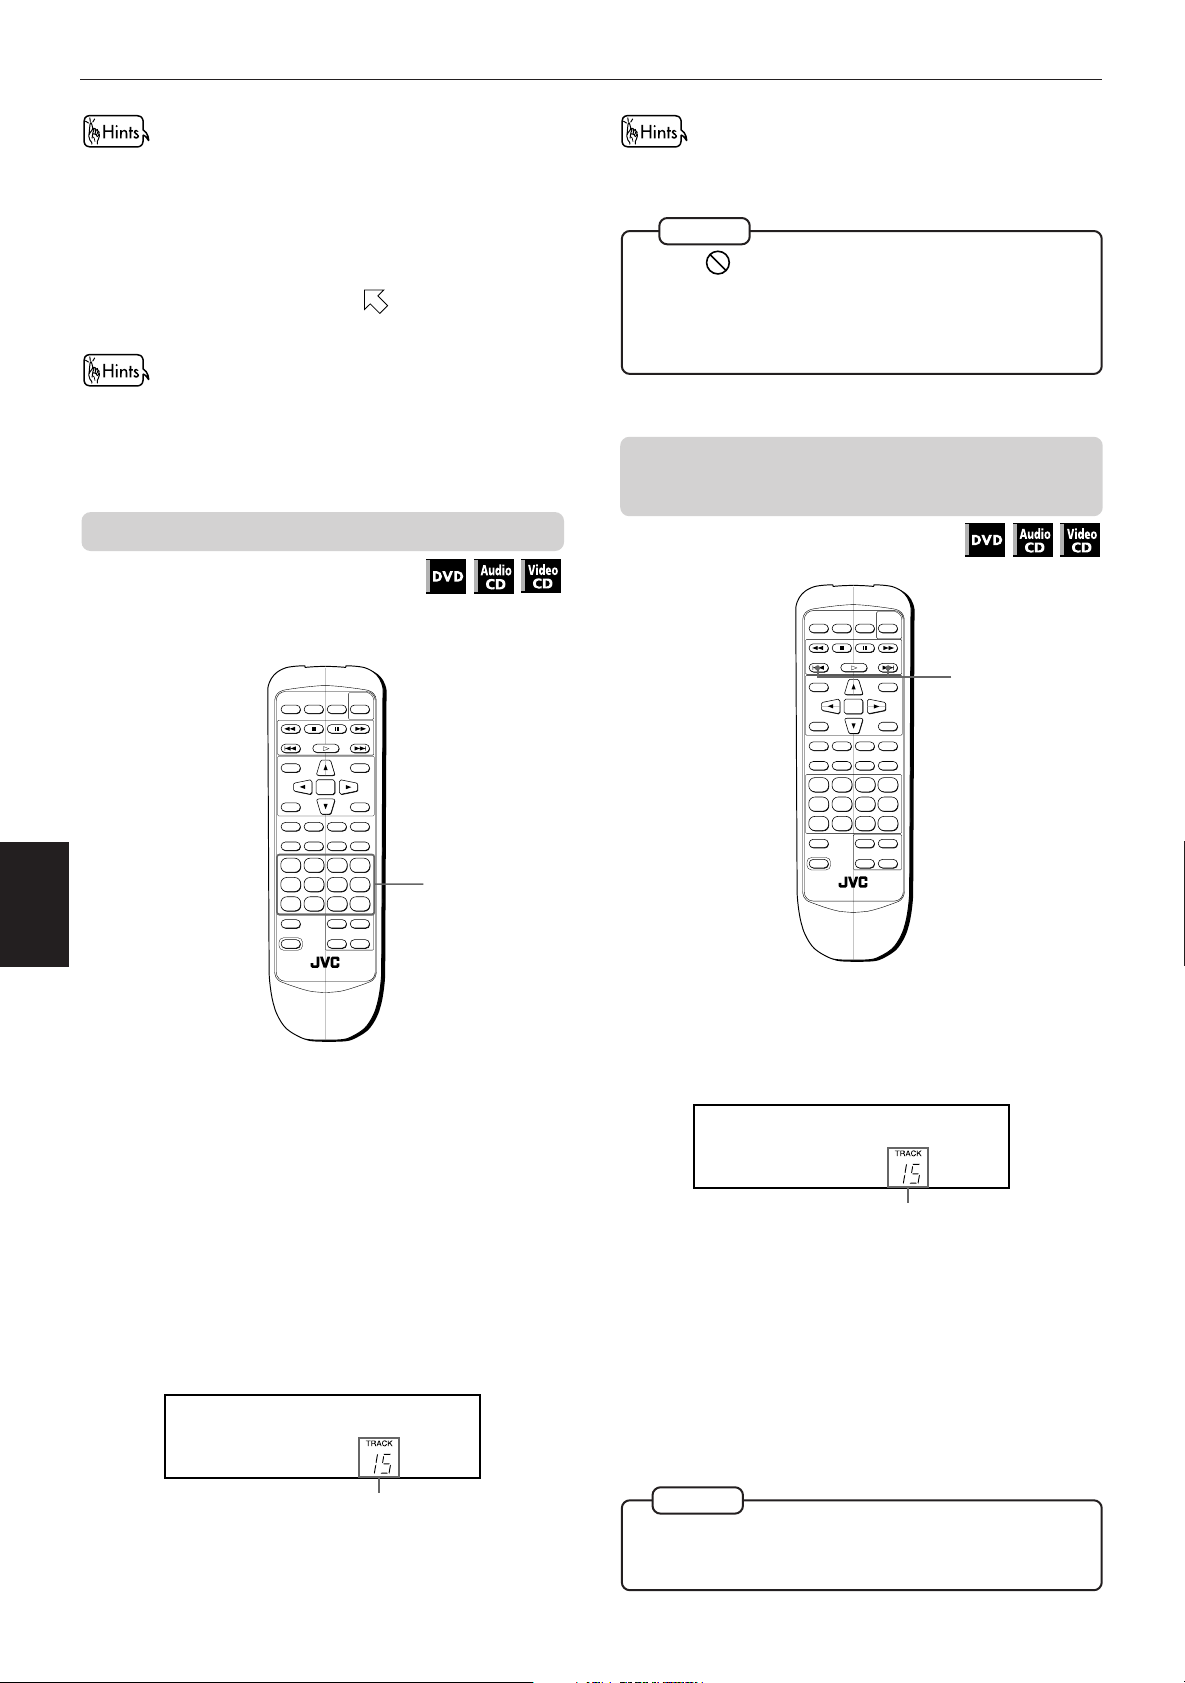
To locate a desired chapter or track using
¢ or 4
1
1
7 For DVD: During playback
For Audio CD: During playback or while stopped
For Video CD: During playback without PBC
function
Display window
The unit starts playback from the selected title or track.
21
Use the numeric buttons to select the desired
1
title or track number.
• See page 10 for details about how to use the
numeric buttons.
The selected title or track number appears in the
display window on the front panel.
Display window
Selected title or track number
Selected track number
Press ¢ or 4.
1
• To skip to a succeeding track, press ¢ once or
repeatedly until the desired track appears in the
display.
• To skip to beginning of the current track, press
4 once.
• To skip to a preceding track, press ¢
repeatedly until the desired track appears in the
display.
NOTES
• This function may not work with some DVD discs.
• This function does not work during Video CD playback
with PBC function
Page 25
Advanced Operations
To locate a desired scene by specifying
the chapter number [CHAP. SEARCH]
If the current title of a DVD disc being played is divided
into chapters, you can skip to a desired chapter by
specifying the chapter number using the on-screen
display.
2, 4
OPEN/
CLOSE
TITLE
THEATER
POSITION
3D PHONIC SUBTITLE
CANCEL RESUME ZOOM DIGEST
1234
5678
9100+10
TV/VIDEO
SHIFT
RM-SV511U REMOTE CONTROL
RETURN
STOP PAUSE
PLAY
ENTER
TV POWER
POWER
ON SCREEN
STROBE ANGLE
++
TV ch TV VOL.
––
DVD
MENU
1
3
NOTES
• When the chapter number is incorrect in step 3:
Overwrite the incorrect number with the correct number.
• When
is displayed in the TV screen in step 4:
The chapter you have selected is not contained in the
disc, or chapter search does not work on the disc.
•
With some discs, the unit automatically starts searching
for the chapter after entering the chapter number in step 3.
• To return to the regular display:
Press ON SCREEN.
To locate a desired position by specifying
the time [TIME SEARCH]
You can play a disc from the the desired position by
specifying the elapsed time from the beginning of the
disc using the TIME SEARCH function.
Note that some DVD discs do not contain time
information, and the TIME SEARCH function cannot be
used.
English
Français
7 During playback
Press ON SCREEN.
1
The on-screen display appears on the TV screen.
Use CURSOR 5/∞ to move to [CHAP.
2
SEARCH], then press ENTER.
"GO TO CHAPTER"
appears in the
message area.
The color of [CHAP.
SEARCH] changes.
Use the numeric buttons (0 ~ 9) to enter the
3
St. End
TITLE
03
TIME
010 Mb
GO TO CHAPTER:
Message area
1 : 34 : 58
CHAP.
03
desired chapter number.
The selected chapter number appears in the
message area.
Press ENTER.
4
The unit starts playback from the selected chapter.
ANGLE
AUDIO
SUB-
TITLE
REPEAT
A-B REPEAT
TIME SEARCH
CHAP.SEARCH
OPEN/
CLOSE
TITLE
2, 3
1 / 3
2 / 3
1 / 3
THEATER
POSITION
3D PHONIC SUBTITLE
CANCEL RESUME ZOOM DIGEST
1234
5678
9100+10
TV/VIDEO
SHIFT
RM-SV511U REMOTE CONTROL
RETURN
STOP PAUSE
PLAY
ENTER
TV POWER
POWER
ON SCREEN
STROBE ANGLE
++
TV ch TV VOL.
––
DVD
MENU
1
3
Advanced
operations
7 For DVD: During playback
For Audio CD: During playback or while stopped
For Video CD: During playback without PBC
function
Press ON SCREEN.
1
The on-screen display appears on the TV screen.
Use CURSOR 5/∞ to move to [TIME
2
SEARCH], then press ENTER.
"GO TO" appears in the message area.
The color of [TIME SEARCH] changes.
The "10" and "+10" buttons are not used in this function.
Example:
To select chapter number 8: Press "8" → ENTER.
To select chapter number 37: Press "3" → "7" → ENTER.
Use the numeric buttons (0 ~ 9) to enter the
3
time.
The specified time appears in the message area.
Press ENTER.
4
The unit starts playback from the selected time.
22
Page 26
Advanced Operations
OPEN/
CLOSE
RETURN
STOP PAUSE
TV POWER
PLAY
3D PHONIC SUBTITLE
STROBE ANGLE
CANCEL RESUME ZOOM DIGEST
TV/VIDEO
RM-SV511U REMOTE CONTROL
DVD
POWER
ENTER
MENU
TITLE
THEATER
POSITION
ON SCREEN
TV ch TV VOL.
++
––
1234
5678
9100+10
SHIFT
(for DVD)
1 / 3
ANGLE
2 / 3
AUDIO
SUB-
1 / 3
TITLE
REPEAT
St. End
010 Mb
GO TO 1 3 4: 00: ENTER
Message
TITLE
CHAP.
03
TIME
1 : 34 : 58
Selected time
A-B REPEAT
03
TIME SEARCH
CHAP.SEARCH
area
(for Video CD)
• "10" and "+10" buttons are
not used in this function.
• You can specify the time in
hour/minute/second
format for DVD discs, and
in minute/second format
for Audio and Video CD
discs.
Message
area
Example (for DVD):
To playback from 2(H):34(M):00(S)
GO TO _ : :
→→
Press "2".
(for Audio CD)
PRESS NUMERIC KEY
MIN SEC
GO TO
02 : 34
Selected time
TRK.
03
TIME
Selected time
MIN SEC
3 : 54TIME
ENTER
34 : 58
TRACK 01
Message
area
St. End
010 Mb
GO TO 0 2 43:
EACH
REMAIN
TIME SELECT
REPEAT
A-B REPEAT
TIME SEARCH
PROGRAM
RANDOM
INTRO
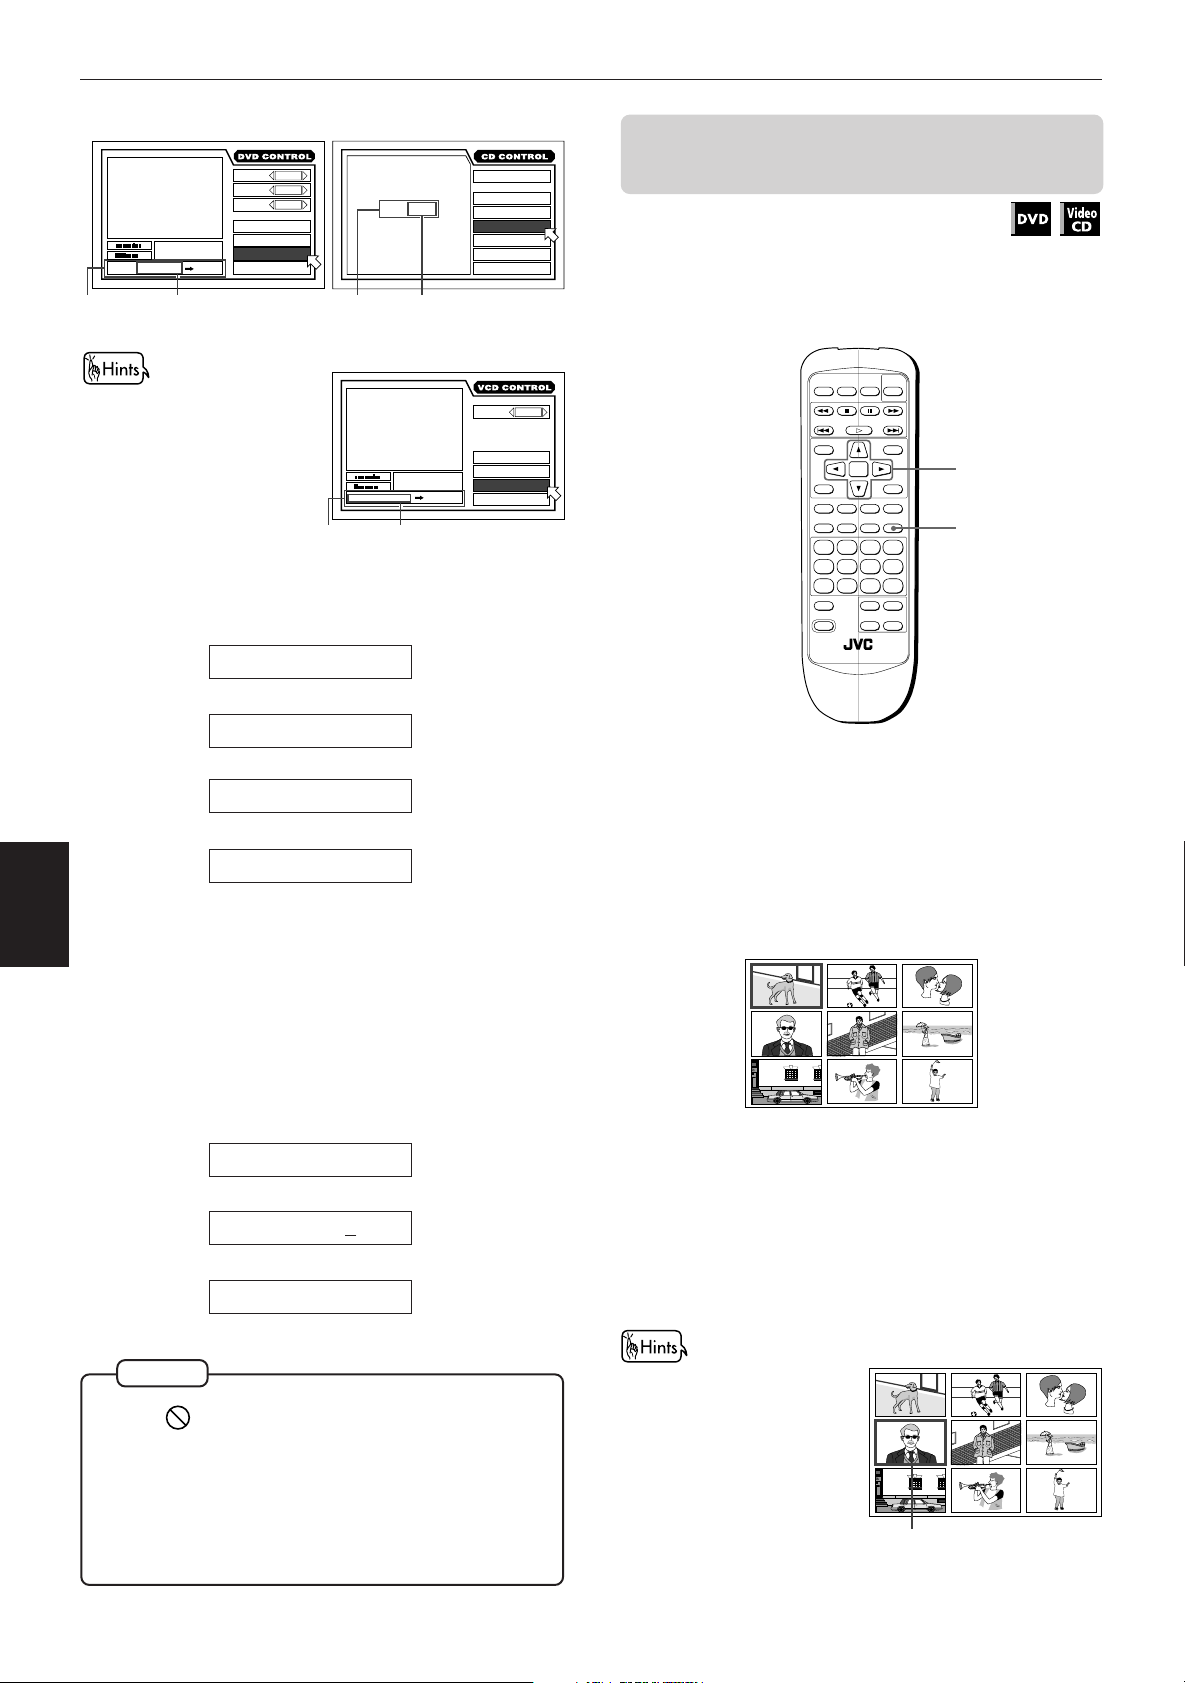
scene digest display [DIGEST]
The unit can display the opening scene of each title on
a DVD or each track of a Video CD. You can select a
desired title or track from the opening scenes displayed
on the TV screen.
L / R
AUDIO
REPEAT
A-B REPEAT
TIME SEARCH
PBC CALL
2, 3
1
To locate a desired scene from the opening
Advanced
operations
You do not have to press "0" to enter the trailing zeros (for the
last two digits in the example above). Of course, it is possible to
enter them.
• When you make a mistake
23
GO TO 2 : _ :
Press "3".
GO TO 2 : 3 _ :
→→
Press "4".
GO TO 2 : 3 4 : _
Press ENTER.
Move the cursor to the incorrect value, then press the correct
value to re-select the value.
GO TO 2 : 3 5 : _
→
Press CURSOR 2.
GO TO 2 : 35:
→
Press "4".
GO TO 2 : 3 4 : _
NOTES
• When appears on the TV screen in step 2:
The time you have selected is not contained on the disc,
or the time search function does not work on the disc.
Also note that the time search function does not work
during Video CD playback with the PBC function.
• To return to the regular display:
Press ON SCREEN .
7 For DVD: While stopped
For Video CD: While stopped or during playback
without PBC function.
Press DIGEST.
1
The opening scene of each title or track appears
on the TV screen.
Up to nine opening scenes are displayed.
Use CURSOR 2/3/5/∞ to select the desired
2
title or track.
When the disc contains more than 9 titles or
tracks, the digest screen will have more than one
page. In this case, pressing ¢ advances to the
next page, while pressing 4 returns to the
previous page.
• When the selected title or
track is in the lower righthand corner of the screen,
pressing CURSOR 3
advances to the next page.
• When the selected title or
track is in the upper lefthand corner of the screen,
pressing CURSOR 2
returns to the previous
page.
Selected title
Page 27
Advanced Operations
OPEN/
CLOSE
RETURN
STOP PAUSE
TV POWER
PLAY
3D PHONIC SUBTITLE
STROBE ANGLE
CANCEL RESUME ZOOM DIGEST
TV/VIDEO
RM-SV511U REMOTE CONTROL
DVD
POWER
ENTER
MENU
TITLE
THEATER
POSITION
ON SCREEN
TV ch TV VOL.
++
––
1234
5678
9100+10
SHIFT
Press ENTER.
3
The unit starts playback from the selected title or
track.
When you press DIGEST during DVD playback, the unit
displays the opening scene of each chapter and you can select
the desired chapter. In this case, opening scenes are displayed
from chapter 1. The operation for selecting a chapter is the
same as mentioned above.
NOTE
• With some discs, depending on the contents, it may take
some time until all the scenes appear on the screen.
Special picture playback
The unit provides special picture playback functions
including Frame-by-frame, Strobe, Slow-motion and
Zoom.
To display still pictures [STROBE]
1
2
7 During playback
At the point you want to view as continuous
1
photographs, press PAUSE.
English
Français
To advance a still picture frame by frame
7 While paused (still)
OPEN/
CLOSE
TITLE
THEATER
POSITION
3D PHONIC SUBTITLE
CANCEL RESUME ZOOM DIGEST
1234
5678
9100+10
TV/VIDEO
SHIFT
TV POWER
RETURN
STOP PAUSE
PLAY
ENTER
STROBE ANGLE
++
TV ch TV VOL.
––
RM-SV511U REMOTE CONTROL
DVD
POWER
MENU
ON SCREEN
1
The unit pauses playback.
Press STROBE.
2
Nine continuous still
pictures appear on
the TV screen.
• Pressing PAUSE when the nine still pictures appear
advances to the next nine still pictures.
• To cancel strobe play
Press STROBE.
NOTES
• Pressing and holding PAUSE for more than 1 second also
activates the Strobe function.
• If you press STROBE during playback, nine still pictures
also appear but they advance in realtime.
Advanced
operations
Press PAUSE.
1
Each time you press PAUSE, the still picture
advances to the next frame.
Pressing PLAY returns to the normal playback
mode.
24
Page 28
Advanced Operations
ZOOM
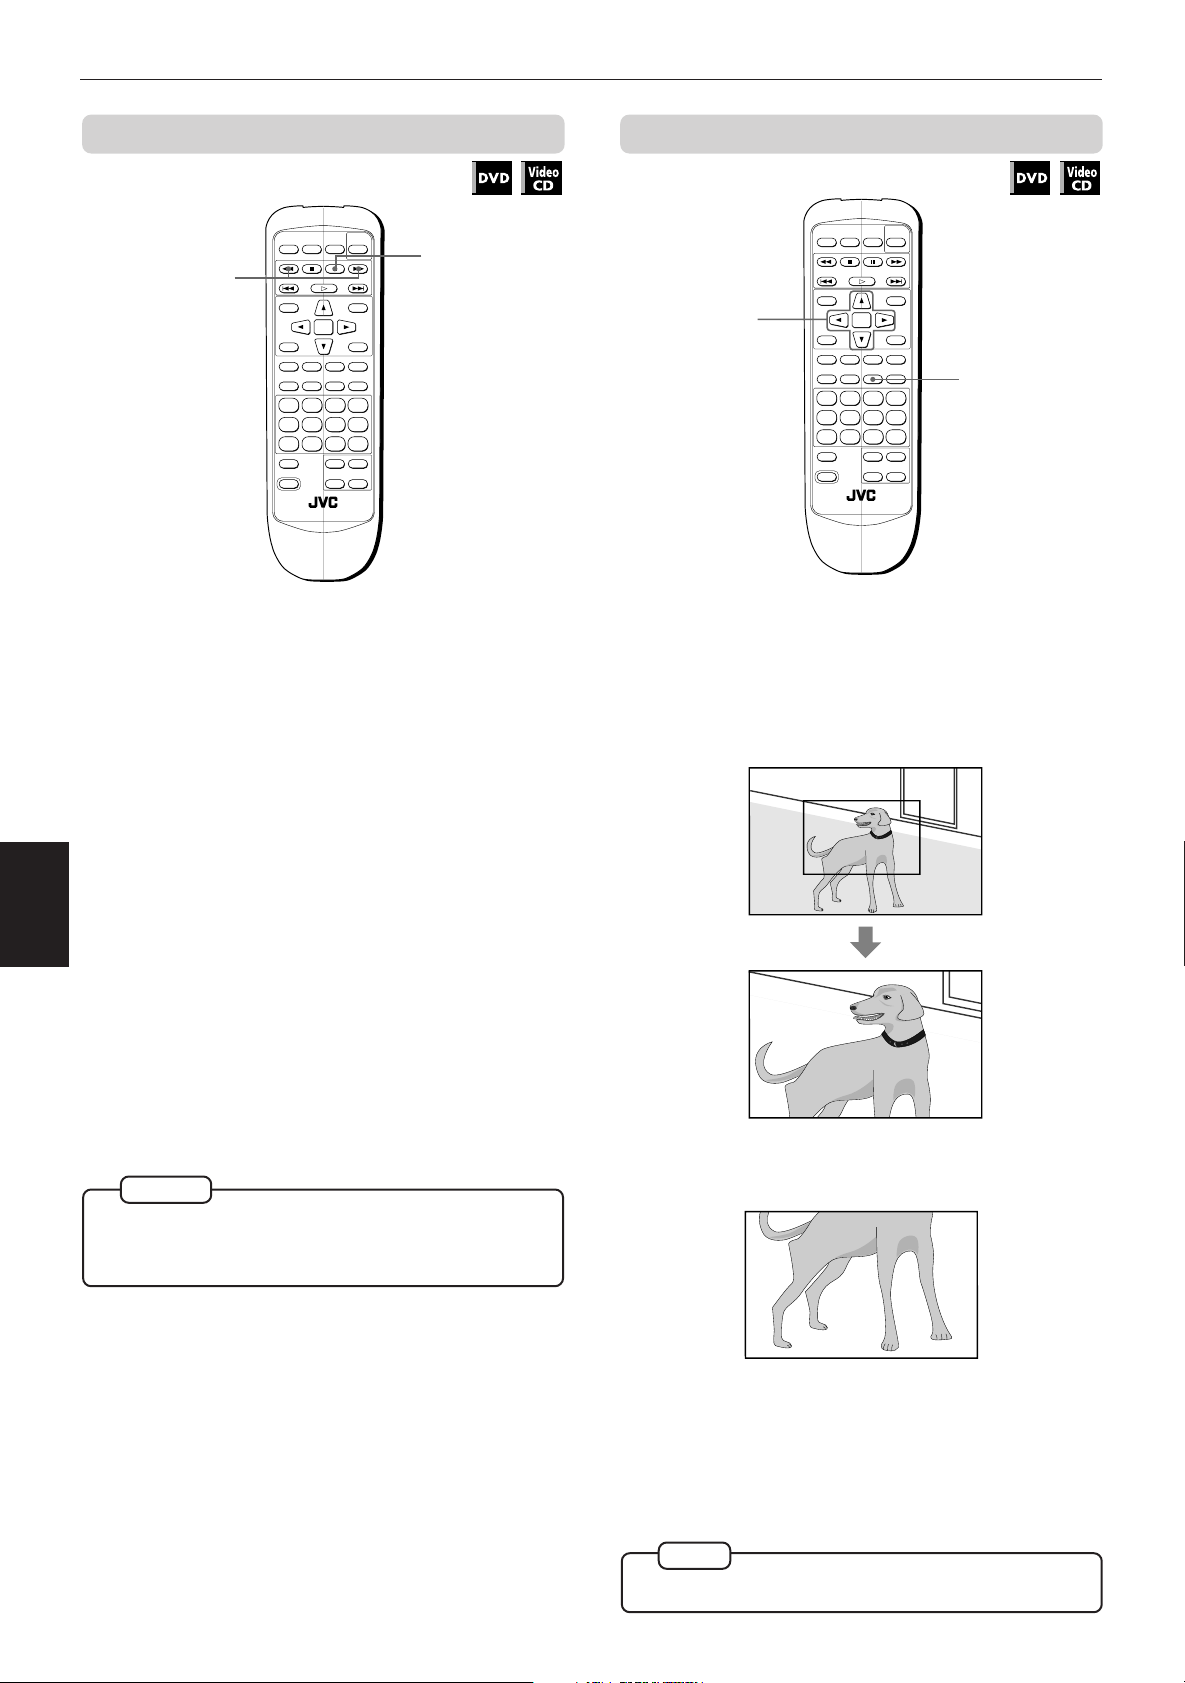
To playback in slow-motion [SLOW] To zoom a scene [ZOOM]
1
OPEN/
CLOSE
TITLE
THEATER
POSITION
3D PHONIC SUBTITLE
CANCEL RESUME ZOOM DIGEST
1234
5678
9100+10
TV/VIDEO
SHIFT
RM-SV511U REMOTE CONTROL
RETURN
STOP PAUSE
PLAY
ENTER
TV POWER
ON SCREEN
STROBE ANGLE
++
TV ch TV VOL.
––
POWER
MENU
DVD
1
7 During playback
From the remote control unit
Press PAUSE, then press ¡ or 1.
1
To play forward slow-motion, press ¡, and to
play reverse slow-motion (for DVD discs only),
press 1. First, the unit plays the slowest speed
(1/32), and each time you press these buttons, the
playback speed increases.
2
OPEN/
CLOSE
TITLE
THEATER
POSITION
3D PHONIC SUBTITLE
CANCEL RESUME ZOOM DIGEST
1234
5678
9100+10
TV/VIDEO
SHIFT
RM-SV511U REMOTE CONTROL
RETURN
STOP PAUSE
PLAY
ENTER
TV POWER
STROBE ANGLE
++
TV ch TV VOL.
––
DVD
POWER
MENU
ON SCREEN
1
7 During playback or while paused
Press ZOOM.
1
"ZOOM" appears on the TV screen.
The unit zooms in to the center part of the scene
to produce a double-sized image.
From the front panel
Press PAUSE, then use the SHUTTLE knob.
1
Advanced
operations
To play forward slow-motion, turn the SHUTTLE
knob to the right. To play reverse slow-motion (for
DVD discs only), turn it to the left. The more you
turn the knob, the more the slow-motion speed
increases.
• To return to normal playback
Press PLAY.
• To pause slow-motion playback
Press PAUSE.
NOTES
• The sound is muted during slow-motion playback.
• Reverse slow-motion playback is not possible for a
Video CD.
Use CURSOR 2/3/5/∞ to move the
2
zoomed-in scene.
ZOOM
• To pause zoom play
Press PAUSE.
To resume zoom play, press PLAY.
• To return to normal playback
Press ZOOM.
NOTE
• During Zoom play, the picture may be garbled or noisy.
25
Page 29
Advanced Operations
TRACK 01 3 : 54TIME
MIN SEC
EACH
REMAIN
INTRO
RANDOM
PROGRAM
TIME SEARCH
A-B REPEAT
REPEAT
TIME SELECT
STOP
TRACK 01 3 : 54TIME
MIN SEC
EACH
REMAIN
INTRO
RANDOM
PROGRAM
TIME SEARCH
A-B REPEAT
REPEAT
TIME SELECT
STOP
Changing the track order
You can play tracks on a Audio CD or Video CD in the
desired order or in random order.
To playback in the desired order
[PROGRAM]
By programming tracks, you can play tracks in any
order.
OPEN/
CLOSE
TITLE
2
THEATER
POSITION
3D PHONIC SUBTITLE
CANCEL RESUME ZOOM DIGEST
1234
5678
9100+10
TV/VIDEO
SHIFT
RM-SV511U REMOTE CONTROL
7 While stopped
Press ON SCREEN.
1
The on-screen display appears on the TV screen.
Use CURSOR 5/∞ to move to
2
[PROGRAM] and press ENTER.
The color of [PROGRAM] changes.
(for Audio CD)
MIN SEC
TRACK 01
PRESS NUMERIC KEY
1
9210311412513614715916
EACH
3 : 54TIME
REMAIN
TIME SELECT
STOP
REPEAT
A-B REPEAT
TIME SEARCH
PROGRAM
RANDOM
INTRO
DVD
TV POWER
RETURN
POWER
STOP PAUSE
PLAY
MENU
ENTER
ON SCREEN
STROBE ANGLE
++
TV ch TV VOL.
––
(for Video CD)
TRACK 01
PRESS NUMERIC KEY
1
9210311412513614715916
4
1
3
MIN SEC
EACH
3 : 54TIME
REMAIN
TIME SELECT
STOP
REPEAT
A-B REPEAT
TIME SEARCH
PROGRAM
RANDOM
INTRO
• When you make a mistake
Press CANCEL. The last track programmed is
erased.
Press PLAY to start program play.
4
When all of the programmed tracks have finished
playback, the unit stops but the program remains.
• To clear the program
Press STOP to stop playback, then press STOP again.
All the programmed tracks are erased.
• To quit program playback
Press ENTER when (
points [PROGRAM].
[PROGRAM] returns to its original color.
(When playing back a Video CD, you have to press
STOP and then press ON SCREEN to display the onscreen display.)
To playback tracks in random order
[RANDOM]
OPEN/
CLOSE
TITLE
2, 3
THEATER
POSITION
3D PHONIC SUBTITLE
CANCEL RESUME ZOOM DIGEST
1234
5678
9100+10
TV/VIDEO
SHIFT
RM-SV511U REMOTE CONTROL
You can play tracks in random order.
7 While stopped
Press ON SCREEN.
1
The on-screen display appears on the TV screen.
RETURN
STOP PAUSE
PLAY
ENTER
TV POWER
POWER
ON SCREEN
STROBE ANGLE
++
TV ch TV VOL.
––
DVD
MENU
1
English
Français
Advanced
operations
Select the tracks in the desired order using
3
the numeric buttons.
Up to 16 tracks can be programmed. You may
select the same track more than once.
STOP
PRESS NUMERIC KEY
1
2
3
1
9
Selected track number
5
8
10
11
4125136147159
4
16
Use CURSOR 5/∞ to move to
2
[RANDOM].
(for Audio CD)
(for Video CD)
26
Page 30

Advanced Operations
TITLE
TIME
03
CHAP.
03
1 : 34 : 58
T. REPEAT
CHAP.SEARCH
TIME SEARCH
A-B REPEAT
REPEAT
1 / 3
AUDIO
2 / 3
ANGLE
1 / 3
SUB-
TITLE
PRESS ENTER EXECUTE
St. End
010 Mb
TRACK 08
REPEAT ALL
0 : 58TIME
MIN SEC
EACH
INTRO
RANDOM
PROGRAM
TIME SEARCH
A-B REPEAT
REPEAT
TIME SELECT
TRK.
TIME
03
34 : 58
PBC CALL
TIME SEARCH
A-B REPEAT
REPEAT
REPEAT ALL
AUDIO
L / R
PRESS ENTER EXECUTE
St. End
010 Mb
Press ENTER.
3
The color of [RANDOM] changes.
Random play begins.
• When all tracks have been played once, random play ends.
• The same track will not be played back more than once
during random play.
• To quit random playback
Press STOP. The unit stops playback and quits
random mode.
During Audio CD playback, pressing ENTER when points
[RANDOM] quits random mode and continues playback in the
normal order.
Repeat playback
(for DVD)
The selected repeat mode appears
on the TV screen.
Each time you press ENTER, the repeat mode
changes as follows:
T. REPEAT (title repeat)
C. REPEAT (chapter repeat)
No indication (off)
(for Video CD)(for Audio CD)
You can repeat playback of the current title or chapter
(for DVD), or current or all tracks (for Audio/Video CD).
You can also repeat playback of a desired part.
To repeat a current title, chapter or track,
or all tracks [REPEAT]
Advanced
operations
7 For DVD, Audio CD: During playback
1
2
27
2
OPEN/
CLOSE
TITLE
THEATER
POSITION
3D PHONIC SUBTITLE
CANCEL RESUME ZOOM DIGEST
1234
5678
9100+10
TV/VIDEO
SHIFT
RM-SV511U REMOTE CONTROL
RETURN
STOP PAUSE
PLAY
ENTER
TV POWER
ON SCREEN
STROBE ANGLE
++
TV ch TV VOL.
––
POWER
MENU
DVD
1
For Video CD: During playback without PBC
funciton
Press ON SCREEN.
The on-screen display appears on the TV screen.
Use CURSOR 5/∞ to move to [REPEAT],
then press ENTER.
Selected repeat mode
Selected repeat mode
The current title or chapter will be repeated.
REPEAT ALL
REPEAT 1
No indication
(off)
(for Audio CD/Video CD)
REPEAT ALL:
All the tracks are played repeatedly.
REPEAT 1:
The current track is played repeatedly.
The current track or all tracks is/are played repeatedly.
• To stop repeat playback
Press STOP.
When a DVD disc is set, the unit stops playback and
quits repeat mode.
When an Audio or Video CD is set, the unit stops
playback but remains in repeat mode.
• To quit repeat playback
When
points [REPEAT], press ENTER repeatedly
until [REPEAT] returns to its original color.
NOTES
• Repeat play function cannot be used during Video CD
playback with PBC function.
• To turn off the on-screen display
Press ON SCREEN.
• If
appears when pressing ENTER in step 2 during DVD
playback
You cannot repeat the title or chapter because of the disc
contents.
Page 31

Advanced Operations
TRACK 01 3 : 54TIME
MIN SEC
EACH
REMAIN
INTRO
RANDOM
PROGRAM
TIME SEARCH
A-B REPEAT
REPEAT
TIME SELECT
STOP
TRACK 01 3 : 54TIME
MIN SEC
EACH
REMAIN
INTRO
RANDOM
PROGRAM
TIME SEARCH
A-B REPEAT
REPEAT
TIME SELECT
STOP
To repeat a desired part [A-B REPEAT]
OPEN/
CLOSE
TITLE
2, 3
THEATER
POSITION
3D PHONIC SUBTITLE
CANCEL RESUME ZOOM DIGEST
1234
5678
9100+10
TV/VIDEO
SHIFT
RM-SV511U REMOTE CONTROL
7 During playback
Press ON SCREEN.
1
The on-screen display appears on the TV screen.
Use CURSOR 5/∞ to move to [A-B
2
REPEAT], then press ENTER at the beginning
of the part you want to repeat (point A).
The color of [A-B REPEAT] changes.
Press ENTER at the end of the part you want
3
to repeat (point B).
The unit locates “A” and starts repeat playback
between “A” and “B.”
(for DVD)
1 / 3
ANGLE
2 / 3
AUDIO
SUB-
1 / 3
TITLE
REPEAT
St. End
TITLE
CHAP.
03
TIME
010 Mb
A 0 0 : 0 3 0 : B 0 0 : 8 2 5 :
0 : 08 : 52
01
A-B REPEAT
TIME SEARCH
CHAP.SEARCH
DVD
TV POWER
RETURN
POWER
STOP PAUSE
PLAY
MENU
ENTER
ON SCREEN
STROBE ANGLE
++
TV ch TV VOL.
––
(for Audio CD)
TRACK 08 0 : 58TIME
MIN SEC MIN SEC
A 2 9 3 2 : B3 0 90:
1
MIN SEC
EACH
TIME SELECT
A-B REPEAT
TIME SEARCH
PROGRAM
REPEAT
RANDOM
INTRO
NOTES
• To turn off the on-screen display
Press ON SCREEN.
• If
appears when pressing ENTER in step 2 during
DVD playback
You cannot repeat the selected portion because of the
disc contents.
Sampling all tracks
You can sample the tracks of an Audio CD or Video CD
by playing back only the beginning 10 seconds of each
track in order.
To playback only the beginning of each
track [INTRO]
OPEN/
CLOSE
TITLE
2, 3
THEATER
POSITION
3D PHONIC SUBTITLE
CANCEL RESUME ZOOM DIGEST
1234
5678
9100+10
TV/VIDEO
SHIFT
RM-SV511U REMOTE CONTROL
7 While stopped
Press ON SCREEN.
1
The on-screen display appears on the TV screen.
Use CURSOR 5/∞ to move to [INTRO].
2
(for Audio CD)
DVD
TV POWER
RETURN
POWER
STOP PAUSE
PLAY
MENU
ENTER
ON SCREEN
STROBE ANGLE
++
TV ch TV VOL.
––
(for Video CD)
1
English
Français
Advanced
operations
Point A
Point B
Point BPoint A
(for Video CD)
L / R
AUDIO
REPEAT
St. End
TRK.
010 Mb
A 3 4 8 5 : B 3 522:
03
TIME
35 : 22
A-B REPEAT
TIME SEARCH
PBC CALL
Point BPoint A
• To quit A-B repeat playback
Press STOP. The unit stops playback and quits A-B
repeat mode.
During playback, pressing ENTER when points [A-B
REPEAT] quits A-B repeat mode and continues playback.
Press ENTER.
3
The first 10 seconds of each track on a disc are
played back in numerical order from the first
track.
When all tracks have been played once, INTRO
scan mode quits.
• To quit INTRO scan
Press STOP. The unit stops and quits INTRO scan
mode.
During Audio CD playback, pressing ENTER when points
[INTRO] quits INTRO scan mode and continues playback.
28
Page 32

Advanced Operations
Viewing from multiple angles
You can enjoy a variety of scene angles if the DVD disc
contains “multi-angle” parts, where multiple cameras
were used to shoot the same scene from different
angles. You can select one of these viewing angles
from the normal screen or on-screen display.
At the beginning of "multi-angle" parts, appears on the
TV screen.
To select a scene angle from the
normal screen [ANGLE]
2
OPEN/
CLOSE
TITLE
THEATER
POSITION
3D PHONIC SUBTITLE
CANCEL RESUME ZOOM DIGEST
1234
5678
9100+10
TV/VIDEO
SHIFT
RM-SV511U REMOTE CONTROL
RETURN
STOP PAUSE
PLAY
ENTER
TV POWER
ON SCREEN
STROBE ANGLE
++
TV ch TV VOL.
––
POWER
MENU
DVD
1
To select a scene angle from the onscreen display [ANGLE]
OPEN/
CLOSE
TITLE
THEATER
POSITION
3D PHONIC SUBTITLE
CANCEL RESUME ZOOM DIGEST
1234
5678
9100+10
TV/VIDEO
SHIFT
RM-SV511U REMOTE CONTROL
7 During playback
Press ON SCREEN.
1
The on-screen display appears on the TV screen.
Use CURSOR 5/∞ to move to [ANGLE].
2
The total number of recorded angles
RETURN
STOP PAUSE
PLAY
ENTER
TV POWER
STROBE ANGLE
++
TV ch TV VOL.
––
DVD
POWER
MENU
ON SCREEN
2, 3
1
Advanced
operations
7 During playback
1
2
Press ANGLE.
Press ANGLE or CURSOR 2/3 to select the
desired angle.
Each time you press ANGLE or CURSOR 2/3, the
angle changes.
1 / 3
ANGLE
2 / 3
AUDIO
SUB-
1 / 3
TITLE
REPEAT
St. End
010 Mb
SELECT KEY
TITLE
CHAP.
03
TIME
1 : 34 : 58
03
A-B REPEAT
TIME SEARCH
CHAP.SEARCH
The current angle number
Use CURSOR 2/3 to select the desired angle
3
number.
Example:
1 / 3
2 / 3
3 / 3
NOTES
• To turn off the on-screen display
Press ON SCREEN.
• When appears on the TV screen
The current scene is not recorded from multiple angles.
29
Page 33

Advanced Operations
OPEN/
CLOSE
RETURN
STOP PAUSE
TV POWER
PLAY
3D PHONIC SUBTITLE
STROBE ANGLE
CANCEL RESUME ZOOM DIGEST
TV/VIDEO
RM-SV511U REMOTE CONTROL
DVD
POWER
ENTER
MENU
TITLE
THEATER
POSITION
ON SCREEN
TV ch TV VOL.
++
––
1234
5678
9100+10
SHIFT
To select a scene angle from the angle
list display [ANGLE]
OPEN/
CLOSE
TITLE
THEATER
POSITION
3D PHONIC SUBTITLE
CANCEL RESUME ZOOM DIGEST
1234
5678
9100+10
TV/VIDEO
SHIFT
RM-SV511U REMOTE CONTROL
7 During playback
Press and hold ANGLE for more than 1
1
second.
Up to nine camera
angles recorded on
a disc appear on the
TV screen.
RETURN
STOP PAUSE
PLAY
ENTER
TV POWER
ON SCREEN
STROBE ANGLE
++
TV ch TV VOL.
––
POWER
MENU
DVD
2, 3
1
English
Changing the language and
Français
sound
For DVD discs, you can select the subtitle language, as
well as the audio language/sound included on a disc.
For Video CD discs, you can select the audio channel(s).
To select the subtitle language [SUBTITLE]
7 During playback
Using SUBTITLE button
2
1
The selected camera angle
Use CURSOR 5/∞/2/3 to select the desired
2
angle.
Press ENTER.
3
7 The selected angle appears on the TV screen.
NOTES
• When appears on the TV screen in step 1:
The current scene is not recorded from multiple angles.
• During the operation above, audio is muted.
Press SUBTITLE.
1
Use CURSOR 2/3 to select the desired
2
subtitle.
Using on-screen display
2, 3
OPEN/
CLOSE
TITLE
THEATER
POSITION
3D PHONIC SUBTITLE
CANCEL RESUME ZOOM DIGEST
1234
5678
9100+10
TV/VIDEO
SHIFT
RM-SV511U REMOTE CONTROL
TV POWER
RETURN
STOP PAUSE
PLAY
ENTER
POWER
ON SCREEN
STROBE ANGLE
++
TV ch TV VOL.
––
DVD
MENU
1
Advanced
30
operations
Page 34

Advanced Operations
Press ON SCREEN.
1
The on-screen display appears on the TV screen.
Use CURSOR 5/∞ to move to
2
[SUBTITLE].
Total number
1 / 3
ANGLE
2 / 3
AUDIO
SUB-
1 / 3
TITLE
REPEAT
St. End
TITLE
CHAP.
03
TIME
010 Mb
SELECT KEY ENGLISH
1 : 34 : 58
03
A-B REPEAT
TIME SEARCH
CHAP.SEARCH
Selected subtitle number
Selected subtitle
Use CURSOR 2/3 to select the desired
3
subtitle.
Each time you press CURSOR 2/3, the subtitle
changes.
Example:
1/3 ENGLISH
2/3 FRENCH
7 During playback
Press ON SCREEN.
1
The on-screen display appears on the TV screen.
Use CURSOR 5/∞ to move to [AUDIO].
2
Total number
1 / 3
ANGLE
2 / 3
AUDIO
SUB-
1 / 3
TITLE
REPEAT
St. End
TITLE
CHAP.
03
TIME
010 Mb
SELECT KEY ENGLISH
1 : 34 : 58
Selected audio number
Selected audio language
Use CURSOR 2/3 to select the desired audio
3
03
A-B REPEAT
TIME SEARCH
CHAP.SEARCH
language or sound.
Each time you press CURSOR 2/3, the audio
language or sound changes.
Example:
1/3 ENGLISH
Advanced
operations
To change the audio language or sound
[AUDIO]
3/3 SPANISH
–/3 (off)
NOTES
• The selected language may abbreviated on the TV screen.
See "Appendix A: Table of languages and their
abbreviations" in this manual.
• When
You cannot select the subtitle.
appears on the TV screen:
OPEN/
CLOSE
TITLE
THEATER
POSITION
3D PHONIC SUBTITLE
CANCEL RESUME ZOOM DIGEST
1234
5678
9100+10
TV/VIDEO
SHIFT
RM-SV511U REMOTE CONTROL
RETURN
STOP PAUSE
PLAY
ENTER
TV POWER
POWER
ON SCREEN
STROBE ANGLE
++
TV ch TV VOL.
––
DVD
MENU
2, 3
1
2/3 FRENCH
3/3 SPANISH
NOTE
• When appears on the TV screen:
You cannot select the audio.
To change the audio channel [AUDIO]
For in some karaoke Video CDs, one of the audio channels
includes a vocal while the other does not. With such
discs, you can choose to enjoy karaoke without the vocal
or with the vocal by selecting the audio channel to be
played back.
OPEN/
CLOSE
TITLE
THEATER
POSITION
3D PHONIC SUBTITLE
CANCEL RESUME ZOOM DIGEST
1234
5678
9100+10
TV/VIDEO
SHIFT
RM-SV511U REMOTE CONTROL
RETURN
STOP PAUSE
PLAY
ENTER
TV POWER
POWER
ON SCREEN
STROBE ANGLE
++
TV ch TV VOL.
––
DVD
MENU
2, 3
1
31
Page 35

Advanced Operations
THEATER
3D PHONIC
LH
ACTION*
DRAMA
THEATER
OFF
THEATER
1
7 During playback
Press ON SCREEN.
1
The on-screen display appears on the TV screen.
Use CURSOR 5/∞ to move to [AUDIO].
2
L / R
AUDIO
REPEAT
St. End
TRK.
03
010 Mb
SELECT KEY
Select the audio channel(s) to be played back
3
TIME
34 : 58
A-B REPEAT
TIME SEARCH
PBC CALL
using CURSOR 2/3.
L/R: You hear normal stereo playback.
L: You hear the L (Left) channel signal played
back from both the left and right speakers.
R: You hear the R (Right) channel signal played
back from both the left and right speakers.
7 During playback
Press THEATER POSITION to select the
1
desired picture character.
Each time you press
the button, the
picture character
changes as follows:
1
2
3
"Off" is the normal
position. Selecting
a higher number
results in a darker
picture character.
Selected effect mode
OFF
Enjoying virtual surround
sound
Using the 3D Phonic function, you can get a simulated
surround effect from your stereo system.
English
Français
• To turn off the on-screen display
Press ON SCREEN.
Selecting the picture
character
You can select the quality of the image from among
four options (OFF, 1, 2 and 3) according to the type of
programming, picture tone or personal preferences.
To select the picture character [THEATER
POSITION]
1
OPEN/
CLOSE
TITLE
THEATER
POSITION
3D PHONIC SUBTITLE
CANCEL RESUME ZOOM DIGEST
1234
5678
9100+10
TV/VIDEO
SHIFT
RM-SV511U REMOTE CONTROL
RETURN
STOP PAUSE
PLAY
ENTER
TV POWER
ON SCREEN
STROBE ANGLE
++
TV ch TV VOL.
––
POWER
DVD
MENU
To simulate surround sound [3D PHONIC]
OPEN/
CLOSE
TITLE
THEATER
POSITION
1, 2
3D PHONIC SUBTITLE
CANCEL RESUME ZOOM DIGEST
1234
5678
9100+10
TV/VIDEO
SHIFT
RM-SV511U REMOTE CONTROL
7 During playback
Press 3D PHONIC.
1
Select the desired effect mode by pressing 3D
2
PHONIC.
Each time you press
3D PHONIC, the
effect mode changes
as follows:
RETURN
STOP PAUSE
PLAY
ENTER
TV POWER
ON SCREEN
STROBE ANGLE
++
TV ch TV VOL.
––
POWER
MENU
DVD
3
Advanced
operations
Selected effect mode
32
Page 36

Advanced Operations
TRACK 08 0 : 58TIME
MIN SEC
EACH
INTRO
RANDOM
PROGRAM
TIME SEARCH
A-B REPEAT
REPEAT
TIME SELECT
PLAY
EACH REMAIN
Recorded time of the current track
TOTAL (0:00)
EACH (0:00)
TOTAL REMAIN
Total time of the disc.
TRACK 01 3 : 54TIME
MIN SEC
EACH
REMAIN
INTRO
RANDOM
PROGRAM
TIME SEARCH
A-B REPEAT
REPEAT
TIME SELECT
STOP
* When you play a DVD disc recorded in Dolby
Digital which contains more than 2 channels,
ACTION does not appear.
Press CURSOR 2/3 to adjust the effect
3
level.
You can adjust the
effect level in 5 level.
Toward L:
Reduces the effect.
Toward H:
Enhances the effect.
To turn off the 3D PHONIC screen, press ENTER. The 3D
PHONIC screen disappears if no operations are made
for more than 10 seconds.
NOTES
• The 3D phonic function works correctly when playing
back discs recorded in the Dolby Surround or Dolby
Digital 5.1-CH format.
It also works when playing back discs other than those
above, but does not provide the correct effect.
• The 3D Phonic function does not affect the DTS or
Dolby Digital bitstream signal from the DIGITAL OUT
jack.
• The sound effect will not be set or operate, even if 3D
PHONIC is pressed, for the sound of DVD discs
recorded in Linear PCM.
• When you set the 3D PHONIC function to on, the
DOWN MIX and COMPRESSION setting in the
PREFERENCE 2 display are disabled.
Advanced
operations
Checking the disc time
3D PHONIC
THEATER
LH
Effect level
7 For Audio CD: During playback or while stopped
For Video CD: While stopped
Press ON SCREEN.
1
The on-screen display appears on the TV screen.
Use CURSOR 5/∞ to move to [TIME
2
SELECT].
(for Audio CD)
Time display
Press ENTER.
3
Each time you press ENTER, the time mode
changes as follows:
• During playback (for Audio CD)
(Elapsed time of the current track)
(Remaining time of the current track)
(Total elapsed time of the disc)
(Total remaining time of the disc)
EACH
EACH REMAIN
TOTAL
TOTAL REMAIN
• While stopped
(for Video CD)
Time display
You can choose the displayed time mode for an Audio
or Video CD disc in the display on the front panel and
in the on-screen display.
To select the time display mode [TIME
SELECT]
2, 3
33
OPEN/
TV POWER
RETURN
CLOSE
STOP PAUSE
PLAY
TITLE
ENTER
THEATER
POSITION
3D PHONIC SUBTITLE
CANCEL RESUME ZOOM DIGEST
1234
5678
9100+10
TV/VIDEO
SHIFT
STROBE ANGLE
++
TV ch TV VOL.
––
RM-SV511U REMOTE CONTROL
ON SCREEN
DVD
POWER
MENU
When you select "EACH REMAIN" while stopped, you can
change the track by pressing 4 or ¢.
1
Page 37

Setting and adjustment
PREFERENCE2PREFERENCE1
MENU LANGUAGE
ENGLISH
AUDIO LANGUAGE
ENGLISH
SUBTITLE
ENGLISH
ON SCREEN LANGUAGE
ENGLISH
ON SCREEN GUIDE
ON
MONITOR TYPE
PRESS KEY
16:9 WIDE
PREFERENCE2PREFERENCE1
MENU LANGUAGE
ENGLISH
AUDIO LANGUAGE
ENGLISH
SUBTITLE
ENGLISH
ON SCREEN LANGUAGE
ENGLISH
ON SCREEN GUIDE
ON
MONITOR TYPE
PRESS KEY
16:9 WIDE
Setting and adjustment
Selecting preferences
You can set various preferences for playback via the
“PREFERENCE” display.
How to set preferences on the
“PREFERENCE” display
OPEN/
CLOSE
TITLE
THEATER
POSITION
3D PHONIC SUBTITLE
CANCEL RESUME ZOOM DIGEST
1234
5678
9100+10
TV/VIDEO
SHIFT
RM-SV511U REMOTE CONTROL
RETURN
STOP PAUSE
PLAY
ENTER
TV POWER
ON SCREEN
STROBE ANGLE
++
TV ch TV VOL.
––
POWER
MENU
DVD
2, 3
1
To set the language and display preference
items
PREFERENCE 1 can be set as follows:
MENU LANGUAGE
You can select a default
“display” language to be
displayed if it is contained
on the disc.
Each time you press
CURSOR 3, the language
setting changes in the
following order:
ENGLISH = SPANISH = FRENCH = CHINESE =
GERMAN = ITALIAN = JAPANESE = language code
from AA to ZU
(See “Table of languages and their abbreviations” at
the end of this manual.)
Pressing CURSOR 2 changes the language setting in
the reverse order of the above.
Selected language
English
Français
1
Preference 1
2
3
While a DVD disc is stopped or no disc is
inserted, press ON SCREEN.
The “PREFERENCE” display appears on the TV
screen.
The “PREFERENCE” display consists of two
pages. To turn the page, move
to the desired
tab using CURSOR 5/∞.
Preference 2
PREFERENCE2PREFERENCE1
MENU LANGUAGE
AUDIO LANGUAGE
SUBTITLE
ON SCREEN LANGUAGE
ON SCREEN GUIDE
MONITOR TYPE
PRESS KEY
ENGLISH
ENGLISH
ENGLISH
ENGLISH
ON
16:9 WIDE
PREFERENCE2PREFERENCE1
DIGITAL AUDIO OUTPUT
DOWN MIX
COMPRESSION
SCREEN SAVER
AV COMPULINK MODE
AUTO STANDBY
PRESS KEY
STREAM/PCM
Lt / Rt
OFF
MODE1
DVD1
OFF
Move to select the item you want to set
by using CURSOR 5/∞.
PREFERENCE2PREFERENCE1
MENU LANGUAGE
AUDIO LANGUAGE
SUBTITLE
ON SCREEN LANGUAGE
ON SCREEN GUIDE
MONITOR TYPE
PRESS KEY
ENGLISH
ENGLISH
ENGLISH
ENGLISH
ON
16:9 WIDE
Selected item
Press CURSOR 2/3 to select the setting you
want.
• For details about each setting, see the following
paragraphs:
• To return to the normal screen, press ON
SCREEN.
* If the selected language is not recorded, the disc’s
default display language is displayed.
AUDIO LANGUAGE
You can select the default
audio language to be
played if it is contained
on the disc.
Each time you press
CURSOR 3, the language
setting changes in the
following order:
Selected language
ENGLISH = SPANISH = FRENCH = CHINESE =
GERMAN = ITALIAN = JAPANESE = language code
from AA to ZU
(See “Table of languages and their abbreviations” at
the end of this manual.)
Pressing CURSOR 2 changes the language setting in
the reverse order of the above.
* If the selected language is not recorded, the disc’s
default audio language is played.
SUBTITLE
You can select the default
subtitle language to be
displayed when it is
contained on a playback
disc.
Each time you press
CURSOR 3, the language
setting changes in the
following order:
PREFERENCE2PREFERENCE1
MENU LANGUAGE
AUDIO LANGUAGE
SUBTITLE
ON SCREEN LANGUAGE
ON SCREEN GUIDE
MONITOR TYPE
PRESS KEY
Selected language
ENGLISH
ENGLISH
ENGLISH
ENGLISH
ON
16:9 WIDE
adjustment
Setting and
34
Page 38

Setting and adjustment
ENGLISH = SPANISH = FRENCH = CHINESE =
GERMAN = ITALIAN = JAPANESE = language code
from AA to ZU
(See “Table of languages and their abbreviations” at
the end of this manual.)
Pressing CURSOR 2 changes the language setting in
the reverse order of the above.
* If the selected language is not recorded, the disc’s
default subtitle language is displayed.
ON SCREEN LANGUAGE
You can select the onscreen display language
to be displayed.
Each time you press
CURSOR 2/3, the
language setting changes
as follows:
ENGLISH
ESPAÑOL (Spanish)
FRANCAIS (French)
English
Spanish
French
ON SCREEN LANGUAGE
IDIOMA EN PANTALLA
LANGUE D’ECRAN
PREFERENCE2PREFERENCE1
MENU LANGUAGE
AUDIO LANGUAGE
SUBTITLE
ON SCREEN LANGUAGE
ON SCREEN GUIDE
MONITOR TYPE
PRESS KEY
Selected language
ENGLISH
ESPAÑOL
FRANCAIS
ENGLISH
ENGLISH
ENGLISH
ENGLISH
ON
16:9 WIDE
MONITOR TYPE
You can select the monitor type to match your TV when
you playback DVD discs recorded for wide screen
televisions.
• 4:3 LB
Conversion)
When you connect a normal
TV to the unit.
When you play a wide picture
recorded on a DVD disc, the
picture is displayed with
bands across the upper and
lower portions of the screen.
• 4:3 PS
Conversion)
When you connect a normal
TV to the unit.
When you play a wide picture
recorded on a DVD disc, a
portion of the picture is
automatically cut off from the
left and right sides of the
image.
Depending on the disc, it may
not be possible to playback on
this mode. In this case, the
picture is played back as in 4:3
LB
• 16:9 WIDE (Wide
Television screen)
When you connect a
wide-screen TV to the
unit.
(Letter Box
(Pan scan
mode.
ON SCREEN GUIDE
The unit can display “onscreen guide” icons or
characters on the picture,
which show what is
adjustment
Setting and
happening to the disc or
the unit.
•ON
The guide display turns on.
• OFF
The guide display turns off.
Examples of “on-screen guide” icons or characters to
be off:
, ,
MENU LANGUAGE
AUDIO LANGUAGE
SUBTITLE
ON SCREEN LANGUAGE
ON SCREEN GUIDE
MONITOR TYPE
PRESS KEY
PREFERENCE2PREFERENCE1
ENGLISH
ENGLISH
ENGLISH
ENGLISH
ON
16:9 WIDE
To set other preference items
PREFERENCE 2 can be set as follows:
DIGITAL AUDIO OUTPUT
To connect the unit‘s
digital output to an
external device equipped
with a digital input, this
item must be set
correctly.
• PCM ONLY:
When you connect the DIGITAL OUT jack of the unit
with the linear PCM digital input of other audio
equipment.
• STREAM/PCM:
When you connect to the digital input of an amplifier
with built-in DTS, Dolby Digital, and MPEG audio
decoder.
• DOLBY DIGITAL/PCM:
When you connect to the digital input of a Dolby
Digital decoder, or an amplifier with built-in Dolby
Digital decoder
PREFERENCE2PREFERENCE1
DIGITAL AUDIO OUTPUT
DOWN MIX
COMPRESSION
SCREEN SAVER
AV COMPULINK MODE
AUTO STANDBY
PRESS KEY
STREAM/PCM
Lt/Rt
OFF
MODE1
DVD1
OFF
35
Page 39

Setting and adjustment
PREFERENCE2PREFERENCE1
DIGITAL AUDIO OUTPUT
STREAM/PCM
DOWN MIX
Lt/Rt
COMPRESSION
SCREEN SAVER
ON
MODE1
AV COMPULINK MODE
DVD1
AUTO STANDBY
PRESS KEY
OFF
PREFERENCE2PREFERENCE1
DIGITAL AUDIO OUTPUT
STREAM/PCM
DOWN MIX
Lt/Rt
COMPRESSION
SCREEN SAVER
OFF
MODE1
AV COMPULINK MODE
DVD1
AUTO STANDBY
PRESS KEY
OFF
The following chart shows the relationship between
types of playback discs and output signals.
Playback discs
DVD with 48-kHz,
16-bit linear PCM
DVD with 48-kHz,
20/24-bit linear
PCM
DVD with 96-kHz,
linear PCM
DVD with DTS
DVD with Dolby
Digital
DVD with MPEG
audio
Video CD
Audio CD
Audio CD with
DTS
STREAM/PCM
48-kHz, 16-
bit linear
PCM
48-kHz, 20-
bit linear
PCM
No output
DTS
bitstream
Dolby Digital
bitstream
MPEG
bitstream
44.1-kHz, 16-
bit linear
PCM
44.1-kHz, 16-
bit linear
PCM
DTS
bitstream
Output
DOLBY DIGITAL/PCM
←
←
←
No output
←
48-kHz, 16-bit
linear PCM
←
←
←
PCM ONLY
←
←
←
←
48-kHz, 16-bit
linear PCM
←
←
←
←
NOTES
• The unit does not provide the DTS decoding function.
• When playing a DVD or Audio CD disc with DTS, use a
DTS decoder to get correct signals from your speakers.
Never use the unit's analog output jacks, which output
incorrect signals that may damage your speakers.
If you connect the analog outputs and digital outputs
simultaneously, be sure to select the source of the
amplifier correctly, or set the level control of the amplifier
connected to the analog outputs to minimum.
COMPRESSION
You can compress the
dynamic range of the
sound if you need. Using
this function, you can
listen to sound at low
volumes easily.
•ON
Audio is played back with the dynamic range
compressed.
• OFF
Audio is played back as it was recorded.
NOTES
• The Compression function works only when playing back
a disc recorded with DOLBY DIGITAL 1 CH or 2CH. The
setting is not effective for other discs.
• The Compression function does not work when the 3D
PHONIC function is activated.
SCREEN SAVER
A television monitor
screen may be burned out
if a static picture is
displayed for a long time.
To prevent this, the unit
automatically activates
the screen saver function
if a static picture, such as
an on-screen display or
menu, is displayed for
over 5 minutes.
• MODE 1
The "screen saver" picture appears and scrolls.
English
Français
DOWN MIX
By setting DOWN MIX
correctly, you can get the
optimum stereo mix for
your audio system from
DVD discs recorded with
Dolby Digital surround
multichannel audio.
• Lt/Rt (Dolby Digital disc only):
For monitoring the unit's 2-channel audio output
signals via a Dolby Pro Logic decoder.
• L
0/R0:
For monitoring the unit's 2-channel audio output
signals via a TV or an amplifier with no built-in Dolby
Pro Logic decoder. Also for recording DVD audio to a
cassette tape, MD, etc.
NOTE
• The Down mix function does not work when the 3D
PHONIC function is activated.
PREFERENCE2PREFERENCE1
DIGITAL AUDIO OUTPUT
DOWN MIX
COMPRESSION
SCREEN SAVER
AV COMPULINK MODE
AUTO STANDBY
PRESS KEY
STREAM/PCM
Lt/Rt
OFF
MODE1
DVD1
OFF
• MODE 2
The "screen saver" picture appears and does not
scroll.
• DIMMER
The current picture gets dark.
• OFF
The screen saver function is off.
NOTES
• When the screen saver mode is set to DIMMER, the
display window on the front panel also gets dark (FL
Dimmer). To return to normal brightness, set to another
mode.
• The monitor screen of a projector or projection TV is
easily burned out if a static picture is displayed for a long
time. Be careful not to allow the monitor screen to be
burned out when you set the screen saver mode to OFF.
• The TV screen may be garbled when you set the screen
saver mode to MODE 1. In this case, set to another mode.
adjustment
Setting and
36
Page 40

Setting and adjustment
PARENTAL LOCK
Country Code
CA
Set Level
LEVEL 8
PASSWORD
– – – –
EXIT
NEW PASSWORD? • • • PRESS 0~9 KEY
PARENTAL LOCK
Country Code
CA
Set Level
LEVEL 8
PASSWORD
– – – –
EXIT
PRESS KEY ENTER
PARENTAL LOCK
Country Code
CA
Set Level
NONE
PASSWORD
– – – –
EXIT
PRESS KEY ENTER
NONE (No restriction)
G
PG
NC-17
RPG13
AV COMPULINK MODE
If you use the AV
Compulink system, you
must set this item
correctly.
Select from the three
options: “DVD1,” “DVD2”
and “DVD3” according to
the equipment to be
connected.
See page 40.
AUTO STANDBY
When the unit is in stop
mode for more than 30
minutes or 60 minutes,
the unit enters standby
mode automatically.
•60
Time is set to 60 minutes.
•30
Time is set to 30 minutes.
• OFF
The auto standby function is off.
PREFERENCE2PREFERENCE1
DIGITAL AUDIO OUTPUT
DOWN MIX
COMPRESSION
SCREEN SAVER
AV COMPULINK MODE
AUTO STANDBY
PRESS KEY
PREFERENCE2PREFERENCE1
DIGITAL AUDIO OUTPUT
DOWN MIX
COMPRESSION
SCREEN SAVER
AV COMPULINK MODE
AUTO STANDBY
PRESS KEY
STREAM/PCM
Lt/Rt
OFF
MODE1
DVD1
OFF
STREAM/PCM
Lt/Rt
OFF
MODE1
DVD1
60
Use CURSOR 5/∞ to move to [Country
2
Code], then use CURSOR 2/3 to select the
country code and press ENTER.
The country code
whose standards
were applied to rate
the DVD video disc
should be selected.
See “Appendix B:
Country code list for
parental lock”.
Use CURSOR 5/∞ to move to [Set
3
Level], then use CURSOR 2/3 to select the
parental lock level.
If you select “US” in
step 2, the parental
level changes as
follows.
Selected level
Country code
Limiting playback by children
This function restricts playback of DVD discs which
contain violent (and other) scenes according to the level
set by the user. For example, if a movie which includes
violent scenes supports the parental lock feature, such
scenes which you do not want to let children view can be
cut or replaced with other scenes.
To set Parental Lock for the first time
[PARENTAL LOCK]
adjustment
Setting and
1
OPEN/
CLOSE
TITLE
THEATER
POSITION
3D PHONIC SUBTITLE
CANCEL RESUME ZOOM DIGEST
1234
5678
9100+10
TV/VIDEO
SHIFT
RM-SV511U REMOTE CONTROL
RETURN
STOP PAUSE
PLAY
ENTER
TV POWER
ON SCREEN
STROBE ANGLE
++
TV ch TV VOL.
––
POWER
MENU
DVD
5
1, 2, 3,
4, 5
If you select the country code other than “US”,
the parental level changes between LEVEL 1 and
LEVEL 8.
”G” (for US) or “LEVEL 1” (for other countries) is the lowest
level.
Discs rated higher than the selected level are restricted.
Press ENTER.
4
Enter your 4-digit password using the
5
numeric buttons (0 to 9) and press ENTER
The parental level and password are set.
7 While a DVD disc is stopped or no disc is inserted
Press ENTER while holding down SHIFT.
1
37
The Parental Lock on-screen display appears on
the TV screen.
Page 41

Setting and adjustment
To change the settings [PARENTAL LOCK]
OPEN/
CLOSE
TITLE
THEATER
POSITION
3D PHONIC SUBTITLE
CANCEL RESUME ZOOM DIGEST
1234
5678
9100+10
TV/VIDEO
SHIFT
1
RM-SV511U REMOTE CONTROL
7 While a DVD disc is stopped or no disc is inserted
Press ENTER while holding down SHIFT.
1
The Parental Lock
on-screen display
appears on the TV
screen.
RETURN
STOP PAUSE
PLAY
ENTER
DVD
TV POWER
POWER
MENU
ON SCREEN
STROBE ANGLE
++
TV ch TV VOL.
––
Country Code
Set Level
PASSWORD
CURRENT PASSWORD? • • • PRESS 0~9 KEY
1, 2, 3,
4, 5
2, 5
PARENTAL LOCK
CA
LEVEL 8
– – – –
EXIT
To temporarily release the Parental
lock [PARENTAL LOCK]
OPEN/
CLOSE
TITLE
THEATER
POSITION
3D PHONIC SUBTITLE
CANCEL RESUME ZOOM DIGEST
1234
5678
9100+10
TV/VIDEO
SHIFT
RM-SV511U REMOTE CONTROL
When you set the parental level strictly, some discs
may not be played back at all. When you insert such a
disc and try to play it, the Parental Lock on-screen
display appears on the TV screen, and the unit will ask
you whether you want the parental lock to be
temporarily released or not.
RETURN
STOP PAUSE
PLAY
ENTER
TV POWER
ON SCREEN
STROBE ANGLE
++
TV ch TV VOL.
––
POWER
DVD
MENU
1
2
English
Français
Enter your current 4-digit password using the
2
numeric buttons (0 to 9) and press ENTER.
If you enter the wrong password, "WRONG!
RETRY……" appears on the TV screen, and you
cannot go to next step.
Use CURSOR 5/∞ to move to [Set
3
Level], then use CURSOR 2/3 to select the
parental lock level.
PARENTAL LOCK
Country Code
Set Level
PASSWORD
PRESS KEY ENTER
CA
LEVEL 8
– – – –
EXIT
Selected level
Press ENTER.
4
Enter your new 4-digit password using the
5
numeric buttons (0 to 9) and press ENTER.
The new setting is effective.
NOTES
• When you enter the wrong password more than 3 times
in step 2 above, moves to [EXIT] automatically and
CURSOR 5/∞ does not work.
• If you forget your password in step 2
Enter “8888.”
Use the CURSOR 5/∞ to move to
1
[Temporary], then use CURSOR 2/3 to
select [YES] or [NO], then press ENTER.
If you select [YES],
moves to the
PASSWORD field.
When selecting [NO],
press OPEN/CLOSE
PARENTAL LOCK
This DISC can’t play now!
Temporary
Level Change ?
PASSWORD
PRESS ENTER EXECUTE
YES
– – – –
NO
to remove the disc.
Enter your 4-digit password using the
2
numeric buttons (0 to 9).
If you enter the wrong password, <WRONG!
RETRY…> appears on the TV screen, and you
cannot go to next step.
The Parental lock is released, and the unit starts playback.
NOTE
• When you enter the wrong password more than 3 times
in step 2 above, moves to [NO] automatically and
CURSOR 5/∞ does not work.
adjustment
Setting and
38
Page 42

Additional information
Additional information
Care and handling of discs
How to handle discs
When handling a disc, do not touch the surface of the disc.
Since discs are made of plastic, they are easily damaged. If a disc gets dirty, dusty, scratched or warped, the images
and sound will not be picked up correctly, and such a disc may cause the player to malfunction.
Even on label side
Do not damage the label side, stick paper to or use any adhesive on its surface.
Storage
Make sure that discs are kept in their cases. If discs are piled on top of one another without their protective cases,
they can be damaged. Do not put discs in a location where they may be exposed to direct sunlight, or in a place
where the humidity or temperature is high. Avoid leaving discs in your car!
Maintenance of discs
If there are fingerprints or other dirt adhering to a disc, wipe with a soft dry cloth, moving from the center outwards.
If a disc is difficult to clean, wipe with a cloth moistened with water. Never use record cleaners, petrol, alcohol or any
anti-static agents.
CAUTION
Sometimes during play noise or images may be garbled. This is sometimes due to the disc. (It may not be up to
industry standards.)
These symptoms are caused by the discs, not by the malfunction of the unit.
Additional
information
39
Page 43

Additional information
AV COMPU LINK remote control system
When you buy a separate TV, VCR, DVD player, receiver, or other components and connect them to each other, you
have to operate each component individually. JVC’s AV COMPU LINK remote control system meets the demand for a
system made up of single components and has the ease of operation of a single unit.
Connection and setup
Using the AV COMPU LINK cable, connect the AV COMPU LINK terminals of each component to one another.
To AV COMPU LINK (II or EX)
TV
DVD player
• If you connect a DVD player with a television via AV COMPU LINK, set the DVD player’s AV COMPU LINK setting as
follows.
English
Français
• When connecting with VIDEO-1 input terminal of the television: DVD2
• When connecting with VIDEO-2 input terminal of the television: DVD3
To AV COMPU LINK (II or EX)
To AV COMPU LINK
TV
DVD player VCR (Video Cassette Recorder)
• If you connect a DVD player with a television and VCR via AV COMPU LINK, set the VCR’s Remote Control Code and
DVD player’s AV COMPU LINK setting as follows.
• When connecting with VIDEO-1 input terminal of the television:
DVD player’s AV COMPU LINK setting: DVD2
VCR’s Remote Control Code: B
• When connecting with VIDEO-2 input terminal of the television:
DVD player’s AV COMPU LINK setting: DVD3
VCR’s Remote Control Code: A
Additional
information
TV
Receiver DVD player
• If you connect a DVD player with a television and receiver via AV COMPU LINK, set the DVD player’s AV COMPU
LINK setting to DVD1.
• The DVD player’s AV COMPU LINK setting is operated in the “PREFERENCE” display. See page 37 for
operation.
• About the connection between the TV and the Receiver, refer to Receiver’s Instructions.
40
Page 44

Additional information
Notes for connection
If you connect a DVD player with a receiver via AV COMPU LINK in a system including a Dolby digital decoder,
some functions may not be performed automatically.
¶ The AV COMPU LINK terminal on some televisions indicates “II”. Do not connect the terminal indicating “II”
with the AV COMPU LINK terminal on a receiver. If connected, the system will not work correctly.
¶ Connect the AUDIO OUT jacks of the DVD player to the audio input jacks of a receiver indicating “DVD”. Otherwise,
the system will not work correctly.
¶ There is no description about connections to a DVD player in the instruction manual of a television or VCR. But
a television or VCR with AV COMPU LINK terminals indicating “II” or “EX” can be connected to a DVD player.
Operation
You can enjoy pictures and/or sound by just putting a source component (which plays back the pictures and/or sound
such as a DVD player or VCR) into play mode. You do not have to operate the TV and receiver including not having to
perform power switching.
Turn on the main power of the television.
1
Insert a disc into the source component.
2
Press 3 of the source component.
3
The following actions are performed automatically:
• Turning on the power for the television.
• Setting the source of the television to the external input (VIDEO-1 or VIDEO-2).
• Turning on the power for the receiver.
• Setting the source of the receiver to the component which has started playback.
Additional
information
41
Page 45

Additional information
Troubleshooting
What appears to be a malfunction may not always be serious. Please go through the following list before requesting
service.
English
Français
Symptom
Power does not come on.
Remote control does not work.
No picture is displayed on the
monitor.
Picture is noisy.
No audio is reproduced.
Possible case
Power plug is not inserted securely.
Too far from the unit.
The tip of the remote unit is not
pointed in the right direction.
Batteries are exhausted.
Battery polarity is incorrect.
Connection of video cable is
incorrect.
Input selection of TV is incorrect.
Disc is not playable.
The unit is connected to a VCR
directly and the copyguard function
is activated.
Connection is incorrect.
Input selection of amplifier is
incorrect.
Remedy
Plug in securely.
More closer to the unit.
Point the infrared light- emitting window
toward the remote sensor on the front panel.
Replace the batteries with new ones.
Take out the batteries and insert them again
in the correct direction.
Connect the cable correctly.
Select correctly.
Use a playable disc. (See page 11.)
Connect the unit so that the picture signal
flows directly to the TV.
Check the connections.
Select correctly.
No audio is reproduced when
playing back a DVD disc recorded
with 96-kHz, linear PCM audio.
Sound is distorted or noise is
generated.
Picture is garbled.
Picture does not fit the television
screen.
Operation is not possible.
The audio signal derives from the
unit's DIGITAL OUT.
Disc is dirty.
The screen saver mode is set to
MODE 1, and the screen saver
function is activated.
MONITOR TYPE is not correctly set.
Television is not correctly set.
Microcomputer malfunctions due to
lightning or static electricity.
Moisture condensation occurs by a
sudden change of temperature or
humidity.
Use the AUDIO OUT when playing back such
discs.
Wipe the disc surface.
Set the screen saver mode to the other mode.
Select monitor type correctly. (See page 35.)
Set the television correctly.
Turn off the power and unplug the power
cord, then connect the power cord again.
Turn off the power, then turn it on a few
hours later.
Additional
information
42
Page 46

Additional information
Specifications
General
Readable discs: DVD VIDEO, Audio CD, Video CD
Video format: NTSC
Other
Power requirements: AC 120V , 60Hz
Power consumption: 23 W (POWER ON), 2 W (STANDBY mode)
Mass: 4.3 kg (9.5 lbs)
Dimensions (W x H x D): 435 x 112 x 338 mm
17-3/16 x 4-7/16 x 13-5/16 inch
Video output
COMPONENT (pin jack): Y Output: 1.0 Vp-p (75 ohms)
P
B/PR Output: 0.7 Vp-p (75 ohms)
VIDEO OUT (pin jack): 1.0 Vp-p (75 ohms)
S-VIDEO OUT (S jack): Y Output: 1.0 Vp-p (75 ohms)
C Output: 286 mVp-p (75 ohms)
Horizontal resolution: 500 Lines
Signal to noise ratio: 65 dB
Audio output
ANALOG OUT (pin jack): 2.0 Vrms (10 k ohms)
DIGITAL OUT (optical): – 21 to –15 dBm (Peak)
Audio characteristics
Frequency response: CD (sampling frequency 44.1 kHz): 2 Hz to 20 kHz
DVD (sampling frequency 48 kHz): 2 Hz to 22 kHz
DVD (sampling frequency 96 kHz): 2 Hz to 44 kHz
Dynamic range: 16 bit: More than 100 dB
20 bit: More than 108 dB
24 bit: More than 108 dB
Wow and flutter: Unmeasurable (less than ± 0.002%)
Total harmonic distortion: Less than 0.002%
* Specifications and appearance subject to change without prior notice.
Additional
information
43
Page 47

Table des matières
Introduction
Caractéristiques ................................................................ 1
Accessoires fournis .......................................................... 1
À propos de ce manuel .................................................... 2
Notes sur l’entretien et la manipulation........................ 3
Connaissances préliminaires
Appellation des éléments et des commandes
Platine avant ........................................................................... 4
Écran d’affichage .................................................................... 5
Platine arrière ......................................................................... 5
Module de télécommande .................................................... 6
Principes de fonctionnement
Visualisations d’écran ............................................................ 8
Pour éviter un claquage d’écran [PROTECTION ÉCRAN] ......
Guidage par icônes d’écran ................................................ 10
Comment utiliser les touches du pavé numérique .......... 10
Sur les disques
Types de disques lisibles..................................................... 11
Construction d’un disque .................................................... 11
Préparatifs avant le lancement
Connexions
Avant de procéder à toute connexion ................................ 12
Pour connecter à un téléviseur ........................................... 12
Connexion à un récepteur de télévision à l’aide des
prises jack d’entrée vidéo du composant. ...................... 13
Pour connecter à un amplificateur ou un récepteur audio ...
Connexion à un équipement audio avec une entrée
numérique .......................................................................... 14
Branchement du cordon d’alimentation ............................ 14
Utilisation du module de télécommande
Insertion des piles dans le module de télécommande. ... 15
Exploitation du téléviseur à l’aide du module de
télécommande ................................................................... 16
Commandes de base
Mise sous/hors tension de l’unité ................................ 17
Chargement et déchargement des disques ................ 17
Lecture de base
Pour lire un disque depuis le début ................................... 18
Pour arrêter complètement la lecture ................................ 18
Pour suspendre temporairement la lecture. ..................... 18
Pour défilement rapide avant/arrière sous contrôle moniteur ..
Pour repérer le début d’une séquence ou d’une chanson ....
Reprise de la lecture
Pour mémoriser le point où l’on désire reprendre la
lecture ................................................................................. 19
Pour reprendre la lecture à partir du point mémorisé ..... 19
Commandes complexes
Lecture à partir d’une position déterminée sur le disque
Repérage de la séquence recherchée à partir du menu
DVD ..................................................................................... 20
Pour repérer la scène recherchée à partir du menu
d’un CD Vidéo avec PBC (Pilotage de Lecture) .............. 20
Pour repérer directement une scène ou une piste voulue ....
Pour repérer le chapitre ou la piste voulue à l’aide
de ¢ ou de 4 ................................................................ 21
Repérage de la scène recherchée en spécifiant le numéro
du chapitre [RECH.CHAP.] ................................................. 22
Page 1
Page 4
10
Page 12
13
Page 17
18
19
Page 20
21
Introduction
Pour repérer la position recherchée en précisant le
temps [RECH.TEMPS] ........................................................ 22
Repérage de la scène recherchée en visionnant le
digest des scènes d’ouverture [DIGEST] ........................ 23
Lectures spéciales de l’image
Pour faire défiler une image fixe image par image.......... 24
Pour afficher des images fixes [STROBE] ......................... 24
Pour lire au ralenti [SLOW] ................................................. 25
Pour lire une séquence en gros plan [ZOOM] .................. 25
Changement de l’ordre des pistes
Pour lire les pistes dans l’ordre voulu [PROGRAME] ....... 26
Pour lire des pistes dans un ordre aléatoire [ACCES DIRECT] ..
26
Lecture répétée
Pour répéter un titre, chapitre ou piste courants ou
toutes les pistes [REPETITION] ........................................ 27
Pour répéter un passage désiré [REPET.A-B].................... 28
Échantillonnage de toutes les pistes
Pour lire seulement le commencement de chaque piste
[INTRO] ............................................................................... 28
Vue sous angles multiples
Pour sélectionner un angle de séquence à partir d’un
écran normal [ANGLE] ...................................................... 29
Pour sélectionner un angle de séquence à partir d’une
visualisation d’écran [ANGLE] ......................................... 29
Pour sélectionner un angle de séquence à partir d’une
visualisation de la liste d’angles disponibles [ANGLE] . 30
Changement de la langue et du son
Pour sélectionner la langue des sous-titres [SOUS-TITRE] ..
Pour changer la langue audio ou le son [AUDIO] ............ 31
Pour changer le canal audio [AUDIO] ................................ 31
30
Réglage du caractère de l’image à ses préférences
Pour régler le caractère de l’image [THEATER POSITION] ...
32
Pour bénéficier du son Surround virtuel
Pour simuler le osn Surround [3D PHONIC] ..................... 32
Vérification du temps sur le disque
Pour choisir le mode d’affichage de temps
[SELECT. TEMPS] ............................................................... 33
Programmations et réglages
Page 34
Choix des préférences
Comment régler les préférences sur l’affichage
“PREFERENCE” .................................................................. 34
Comment régler les éléments de préférence de lange et
d’affichage .......................................................................... 34
Comment régler d’autres éléments de préférence .......... 35
Lecture limitée pour les enfants
Programmation de la censure parentale pour la
première fois [CENSURE PARENTALE] ........................... 37
Pour modifier les réglages [CENSURE PARENTALE] ....... 38
Pour lever temporairement la [CENSURE PARENTALE] .. 38
Informations complémentaires
Page 39
Soins à apporter dans la manipulation et l’entretien
des disques ................................................................... 39
Système de tél´écommande AV COMPU LINK
Connexions et montage ...................................................... 40
Exploitation ........................................................................... 41
Dépannage ...................................................................... 42
Fiche technique ............................................................... 43
Tableau des langues de travail et de leurs sigles
Fiche technique ............................................................. 43
Table of languages and their abbleviations.. Appendix A
Liste des Codes Pays pour la Censure
Parentale........................................................ Appendix B
English
Français
Page 48

Introduction
Introduction
Caractéristiques
Fonctions image
7 Fonction stroboscopique
L’unité peut afficher neuf images fixes continues sur
l’écran de télévision.
7 Fonction digest
Permet de choisir son titre d’après les séquences
d’ouverture affichées sur l’écran de télévision.
7 Fonction angulaire*
Introduction
Permet de choisir l’angle désiré parmi une variété
d’angles de prise de vue enregistrés dur le disque DVD.
7 Fonction zoom
Permet de voir des séquences en gros plan.
7 Censure parentale*
Permet d’expurger la lecture du disque DVD de
séquences violentes inconvenantes pour les enfants.
7 Position salle de cinéma
Permet de moduler le caractère de l’image suivant
l’éclairage de la pièce.
Accessoires fournis
• Câble Audio/vidéo (x 1)
• Câble S-vidéo (x 1)
• Cordon AV compulink (x 1)
Fonctions audio
7 Son numérique de grande qualité
Permet de bénéficier d’un son de toute première
qualité grâce au Dolby Digital ou au PCM-Linéaire.
7 Fonction Surround*
L’unité est compatible avec Dolby Digital Surround et
DTS Surround.
7 Fonction 3D Phonic
Permet de bénéficier d’un son Surround sur une chaîne
2-canaux.
Autres fonctions
7 Sous-titres et son multi-langues*
Permet de choisir la langue des sous-titres ou du dialogue parmi ceux enregistrés sur le disque DVD.
7 Lecteur multi-disques
Permet de bénéficier à la fois des disques CD Audio,
CD Vidéo et DVD.
• Module de télécommande (x 1)
OPEN/
CLOSE
RETURN
STOP PAUSE
PLAY
TITLE
ENTER
THEATER
POSITION
ON SCREEN
3D PHONICSUBTITLE
STROBE ANGLE
CANCEL RESUME ZOOM DIGEST
1234
5678
9100
TV/VIDEO
+
10
SHIFT
++
TV ch TV VOL.
––
RM-SV511U REMOTE CONTROL
• Piles R6P(SUM-3)/AA(15F) (x 2)
• Manuel d’instructions (x1)
TV POWER
DVD
POWER
MENU
7 Exploitation à partir de la visualisation
d’écran
Système très convivial permettant de commander
facilement l’unité à partir d’une visualisation d’écran.
* Les fonctions marquées de l’astérisque (*) sont
opérantes seulement sur un disque DVD compatible
avec chaque fonction.
1
Page 49

À propos de ce manuel
Fondamentalement ce manuel de l’utilisateur explique la marche à suivre comme indiquè ci-dessous :
Pour afficher des images fixes [STROBE]
Ces symboles
indiquent les types
de disques
compatibles avec
l’opération.
Le chiffre indique la
ou les étape (s) de la
procédure dans
laquelle la ou les
touches (s) sont
utilisées.
Il est également
possible d’utiliser
les touches
correspondantes sur
la platine avant de
l’unité, dans la
mesure ou celle-ci
est disponible.
Les noms des
touches sur le
module de
télécommande (ou
sur la platine avant
de l’unité)
apparaissent en
capitales.
Le chiffre
indique l’étape
de la manipulation.
OPEN/
CLOSE
TITLE
THEATER
POSITION
3D PHONIC SUBTITLE
CANCEL RESUME ZOOM DIGEST
1234
5678
9100+10
TV/VIDEO
SHIFT
RM-SV511U REMOTE CONTROL
TV POWER
RETURN
STOP PAUSE
PLAY
ENTER
STROBE ANGLE
DVD
POWER
MENU
ON SCREEN
++
TV ch TV VOL.
––
1
2
7 En cours de lecture
Au point où l’on désire visionner comme s’il
1
s’agissait d’une séquence de photos, appuyer
sur PAUSE.
L’unité met la lecture
au repos.
Appuyer sur STROBE.
2
Neuf images fixes continues apparaissent sur
l’écran du téléviseur.
Introduction
English
Français
Introduction
Manipulations
alternatives pouvant se
révéler commodes, etc.
Remarques
additionnelles.
Recommandations
• Une pression sur PAUSE lorsque les neuf images fixes sont
à l’écran fait passer aux neuf images fixes suivantes.
• Pour annuler la lecture en strobo
Appuyer sur STROBE.
REMARQUES
• Maintenir la pression sur PAUSE pendant plus de 1
seconde active également la fonction Strobo.
• Une pression sur STROBE en cours de lecture, fait
également apparaître neuf images fixes mais elles
avanceront en temps réel.
2
Page 50

Introduction
Notes sur l’entretien et la manipulation
Précautions impératives
Installation de l’unité
• Choisir un emplacement de niveau et d’aplomb, bien
sec, ni trop chaud ni trop froid (entre 5°C et 35°C ou
41°F et 95°F).
• Toujours ménager une distance suffisante entre le
lecteur et un récepteur de télévision.
• Ne jamais utiliser le lecteur dans un emplacement
sujet à des vibrations.
Introduction
Cordon d’alimentation
• Ne jamais manipuler le cordon d’alimentation avec
des mains mouillées!
• Une faible quantité de courant (2 Watts) est
consommée en permanence lorsque le cordon
d’alimentation est branché sur la prise murale.
• Lorsqu’on déconnecte le lecteur de la prise murale,
toujours saisir le cordon par sa prise, ne jamais tirer
sur le cordon lui-même.
Pour éviter les dysfonctionnements de l’unité.
• Le lecteur ne contient aucun élément intérieur
réparable par l’utilisateur. Si une anomalie se déclare,
déconnecter de la prise murale et appeler le
revendeur.
• Ne jamais introduire d’objets métalliques dans le
lecteur.
• Ne jamais utiliser des disques de format non
standard vendus dans le commerce, ils risquent
d’endommager l’unité.
• Ne jamais utiliser des disques avec des rubans, des
sceau et étiquettes collés à leur surface, ils risquent
d’endommager l’unité.
Remarque sur les lois régissant les droits d’auteur.
• Veuillez vous renseigner sur les lois en vigueur le
pays d’utilisation si vous enregistrez à partir de
disques VIDÉO DVD, CD Audio ou CD Vidéo.
L’enregistrement de matériel couvert par des droits
d’auteur peut constituer une infraction à la loi sur les
droits d’auteurs.
Mesures de sécurité
Éviter l’humidité, l’eau et la poussière.
Ne pas installer le lecteur dans les endroits humides ou
poussiéreux.
Éviter les températures excessivement élevées.
Ne jamais placer le lecteur dans un endroit directement
exposé au soleil ou à proximité d’un appareil de
chauffage.
En cas d’absence.
Lorsqu’on part en voyage ou que l’on s’absente
pendant longtemps, retirer le cordon d’alimentation de
la prise murale.
Ne jamais introduire d’objets étrangers dans le lecteur.
Ne jamais introduire dans le lecteur des fils, épingles à
cheveux, pièces de monnaie, etc.
Ne pas obstruer les ouvertures d’aération.
Des ouvertures d’aération obstruées risquent
d’endommager le lecteur.
Entretien du coffret
Pour nettoyer le lecteur, utiliser un chiffon doux et
suivre les instructions concernant l’usage des chiffons
traités aux enduits chimiques. Ne jamais utiliser ni
benzène, ni diluant, ni un quelconque dissolvant
organique, pas plus que des désinfectants. Tous ces
produits risquent de provoquer des déformations, ou
du moins de décolorer la robe du coffret.
Si de l’eau a pénétré dans le lecteur
Mettre l’appareil hors tension en coupant le
commutateur et retirer le cordon d’alimentation de la
prise murale; contacter ensuite la maison qui vous a
vendu l’appareil. Utiliser le lecteur dans ces conditions
risquerait de provoquer un incendie ou une
électrocution.
Remarque sur le système de protection anticopie.
• Le disque VIDÉO DVD est protégé par un système de
protection anticopie. Connecter l’unité directement
sur un magnétoscope déclenche le système anticopie
et la lecture de l’image peut être défectueuse.
Ce produit incorpore une technologie de protection de droits d’auteur qui se trouve protégée par des revendications
de méthodes de certains brevets U.S. et autres droits de propriété intellectuelle détenus par Macrovision Corporation
et autres ayants droit. L’utilisation de cette technologie de protection des droits d’auteur est soumise à l’autorisation
de Macrovision Corporation et est destinée à des fins de visualisation domestique grand public et autre visualisation
limitée, à moins d’une autorisation expresse de Macrovision Corporation. Toute tentative de démembrement pour
percer le fonctionnement ainsi que tout autre démontage sont interdits.
Fabriqué sous licence de Dolby Laboratories.
“DOLBY” ainsi que le symbole “double-D” sont des marques déposées de Dolby Laboratories.
Oeuvres Confidentielles Inédites (Confidential Unpublished Works).
© 1992-1997 S.A. Dolby Laboratories Inc.; tous droits réservés.
Fabriqué sous licence de Digital Theater Systems, Inc., US Pat. No. 5.451.942, et autres brevets mondiaux homologués
ou en cours d’homologation.
“DTS”, “DTS Digital Surround “, sont des marques de fabrique de Digital Theater Systems, Inc.
© 1996 Digital Theater Systems, Inc.; tous droits réservés.
3
Page 51

Connaissances préliminaires
Appellation des éléments et des commandes
Se reporter aux pages correspondantes indiquées entre parenthèses () pour les détails.
Platine avant
Connaissances préliminaires
English
Français
1 Touche
POWER
2 Témoin
STANDBY 6 Touche (#) (PLAY = lecture)
3 Touche 3D
PHONIC
4 Capteur de
télédétection
5 Écran
d’affichage
8 Touche (8)
7 Touche (7)
(STOP)
POWER
XV-511 DVD PLAYER
STANDBY
3D PHONIC
DOLBY
D I G I T A L
DVD / VIDEO CD / CD
= Trappe à disque
- Touche (0) (OPEN/CLOSE = ouvrir/fermer)
PLAY
SKIP
OPEN/CLOSE
9 Bouton SHUTTLE
(PAUSE)
SHUTTLE
PAUSESTOP
0 Touches (4 ¢ ) (SKIP = saut)
préliminaires
Connaissances
1 Touche POWER (17)
Met l’unité sous/hors tension (standby = position d’attente).
2 Témoin STANDBY (Position d’attente)
S’allume lorsque le cordon d’alimentation est connecté et
que l’unité se trouve en position d’attente. Lorsque l’unité
est mise sous tension, le Témoin STANDBY s’éteint.
3 Touche 3D PHONIC (32)
Produit une simulation d’effet Surround.
4 Capteur de télédétection
Reçoit le signal émis par le module de télécommande.
5 Écran d’affichage
Indique le statut en vigueur de l’unité
6 Touche (#) (PLAY = lecture) (18)
Lance la lecture. Sert également de touche SELECT pour le
PBC (play-back control = pilotage en lecture) des CD Vidéo.
7 Touche (7) (STOP) (18)
Arrête la lecture.
8 Touche (8) (PAUSE) (18)
Suspend momentanément la lecture.
9 Bouton SHUTTLE (18)
Exécute le défilement rapide avant/arrière en lecture.
Sert également à la lecture au ralenti d’une image (pour
disques DVD/CD Vidéo).
0 Touches (4 ¢ ) (SKIP = saut) (19)
Exécutent les sauts pour passer aux chapitres, titres ou
pistes suivants/précédents.
Servent également à la sélection d’une page sur un menu
d’écran (pour disques DVD).
- Touche (0) (OPEN/CLOSE = ouvrir/fermer) (17)
Ouvre et ferme la trappe à disque.
= Trappe à disque (17)
Sert à charger le disques dans l’unité.
4
Page 52

Connaissances préliminaires
Écran d’affichage
1 Témoin de disque
2 Fenêtre multi-informations
6 Témoin de PCM
préliminaires
Connaissances
linéaire
7 Témoin de haut-parleur
5 Indicateur de canal
3 Témoin de sélection de temps
4 Indicateur
de
fonction
9 Témoin
8 Témoin de
chapitre, titre,
RESUME
(Reprise)
piste
1 Témoin de disque
S’allume lorsqu’un disque est chargé dans l’unité. “DVD” apparaît
également lorsqu’un disque DVD se trouve chargé dans l’unité.
2 Fenêtre multi-informations
Affiche le temps et autres informations complémentaires sur le
statut.
3 Témoin de sélection de temps
Indique la signification de l’information de temps dans la fenêtre
Multi-informations.
4 Indicateur de fonction
Les témoins de la fonction activée s’allument.
5 Indicateur de canal
Affiche le nombre de canaux dans le format de lecture audio
sélectionné en cours.
6 Témoin de PCM linéaire
S’allume seulement lorsque le disque mis en lecture contient des
données en PCM Linéaire. Ce témoin s’allume également pendant
qu’un CD Audio est chargé dans l’unité.
7 Témoin de haut-parleur
S’allume en cours de lecture d’un disque. s’allume lorsque
les signaux proviennent de prises jack de sortie vidéo. Lorsque la
fonction 3D PHONIC est activée (ON),
s’allume également.
8 Témoin de chapitre, titre, piste
Affiche le numéro du chapitre, du titre ou de la piste.
9 Témoin RESUME (Reprise)
S’allume lorsque la position “RESUME” est mémorisée.
Platine arrière
7 Prise jack VIDEO OUT
6 Prise jack S-
VIDEO OUT
VIDEO S-VIDEO
LEFT
RIGHT
AUDIO OUT
2 Prises jack AUDIO OUT
(LEFT/RIGHT)
1 Cordon d’alimentation CA (14)
Connexion à la prise murale de secteur.
2 Prises jack AUDIO OUT (LEFT/RIGHT) (12)
Délivre les signaux audio analogiques stéréophoniques.
3 Prises jack AV COMPU LINK (37, 40)
Assurent la connexion avec un autre équipement JVC
supportant la fonction AV Compulink pour faciliter l’intégration
des commandes.
5
4 Prises jack COMPONENT VIDEO OUT (Y/P
3 Prises jack AV COMPU LINK 1 Cordon d’alimentation CA
VIDEO OUT
Y
PBP
R
COMPONENT
PCM/STREAM
OPTICAL
DIGITAL OUT
AV COMPU LINK
5 Prise jack DIGITAL OUT
(OPTICAL)
)
B/PR
1
4 Prises jack COMPONENT VIDEO OUT (Y/PB/PR) (13).
Délivre des signaux vidéo provenant d’un autre composant.
5 Prise jack DIGITAL OUT (OPTICAL) (14).
Délivre des signaux audio numériques. Seul est fourni le
connecteur optique.
6 Prise jack S-VIDEO OUT (12).
Délivre un signal S-vidéo.
7 Prise jack VIDEO OUT (12)
Délivre un signal vidéo composite.
Page 53

Module de télécommande
Connaissances préliminaires
English
Français
# Fenêtre émettrice du signal
infrarouge
$ Touche TV POWER
1 Touche RETURN
2 Touche OPEN/CLOSE
3 Touche (1)
4 Touche (7) (STOP)
5 Touche (4)
6 Touche TITLE
7 Touches (5/∞/3/2) (Curseur)
8 Touche THEATER POSITION
9 Touche 3D PHONIC
0 Touche SUBTITLE
- Touche CANCEL
= Touche RESUME
~ Pavé numérique
! Touche TV/VIDEO
@ Touche SHIFT
OPEN/
CLOSE
TITLE
THEATER
POSITION
3D PHONIC SUBTITLE
CANCEL RESUME ZOOM DIGEST
TV POWER
RETURN
STOP PAUSE
PLAY
ENTER
STROBE ANGLE
DVD
POWER
MENU
ON SCREEN
1234
5678
9100
TV/VIDEO
+
10
++
SHIFT
TV ch TV VOL.
––
% Touche DVD POWER
3 Touche (¡)
^ Touche (8) (PAUSE)
5 Touche (¢)
& Touche (#) (PLAY)
* Touche MENU
( Touche ENTER
) Touche ON SCREEN
_ Touche STROBE
+ Touche ANGLE
¡ Touche DIGEST
™ Touche ZOOM
£ Touches TV VOL
¢ Touches TV ch
préliminaires
Connaissances
RM-SV511U REMOTE CONTROL
6
Page 54

Connaissances préliminaires
1 Touche RETURN (pour DVD/CD Vidéo) (20)
Ramène au menu précédent.
2 Touche OPEN/CLOSE (17)
Ouvre et referme la trappe à disque.
3 Touches (1)/(¡) (18)
Effectuent les opérations de lecture rapide avant/arrière.
Servent également à la lecture au ralenti d’une image (pour
DVD/CD Vidéo).
4 Touche (7) (STOP) (18)
Arrête la lecture.
Sert également à effacer toutes les pistes programmées
préliminaires
Connaissances
pour la lecture programme (pour CD Audio/CD Vidéo).
5 Touches (4 ¢) (19)
Effectuent le saut d’un chapitre, titre ou piste.
Servent également à choisir une page d’un écran menu
(pour DVD/CD Vidéo).
6 Touche TITLE (20)
Affiche un menu de titres de DVD sur l’écran de télévision
ou sur l’écran moniteur.
Commute l’affichage sur l’écran de visualisation (pour CD
Audio ).
7 Touches (Curseur) (5/∞/3/2)
Sélectionnent un élément dans un menu ou en visualisation
d’écran. Servent également à modifier le réglage d’un
élément dans la visualisation d’écran, etc.
8 Touche THEATER POSITION (32)
Sélectionne un caractère d’image parmi quatre
configurations.
9 Touche 3D PHONIC (32)
Produit une simulation d’effet Surround.
0 Touche SUBTITLE (pour DVD) (30)
Fait apparaître ou disparaître les sous-titres.
- Touche CANCEL (26)
Annule les réglages précédents.
= Touche RESUME (19)
Mémorise l’emplacement afin de reprendre la lecture plus
tard.
~ Pavé numérique (10)
Sert principalement à choisir un numéro de titre/piste, ou
un canal de télévision.
Sert également à entrer un temps donné pour une
Recherche de temps et un numéro de chapitre pour la
Recherche par chapitre.
! Touche TV/VIDEO (16)
Commute sur le mode d’entrée télévision.
@ Touche SHIFT (16)
Lorsqu’on maintient cette touche enfoncée, les touches
numériques (0-9) sélectionnent les canaux télévision. Sert
également à afficher la CENSURE PARENTALE.
# Fenêtre émettrice du signal infrarouge
Lorsqu’on appuie sur les touches, il faut diriger cette fenêtre
vers le télédétecteur de la platine avant.
$ Touche TV POWER (16)
Met l’unité sous/hors tension.
% Touche DVD POWER (17)
Met l’unité sous/hors tension (En attente).
^ Touche (8) (PAUSE) (18)
Marque une pause en cours de lecture.
& Touche (#) (PLAY) (18)
Lance la lecture.
Sert également de touche de Sélection (SELECT) pour le
PBC (pilotage en lecture) des CD Vidéo.
* Touche MENU (pour DVD) (20)
Affiche un menu de DVD sur l’écran de télévision ou le
moniteur.
( Touche ENTER
Une pression sur cette touche fait exécuter l’élément
sélectionné dans un menu ou en visualisation d’écran.
) Touche ON SCREEN (8)
Affiche une visualisation d’écran du lecteur sur l’écran de
télévision ou sur l’écran moniteur.
_ Touche STROBE (pour DVD/CD Vidéo) (24)
Affiche neuf images fixes en continu (pour DVD/CD Vidéo).
+ Touche ANGLE (pour DVD) (29)
Change les angles de caméra en cours de lecture d’un DVD
contenant de multiples angles de prise de vue.
¡ Touche DIGEST (pour DVD/CD Vidéo) (23)
Affiche les séquences du commencement de chaque titre,
chapitre, ou piste sur l’écran de télévision.
™ Touche ZOOM (pour DVD/CD Vidéo) (25)
Fait apparaître une vue en gros plan.
£ Touches TV VOL (16)
Règlent le volume de la télévision.
¢ Touches TV ch (16)
Font défiler les canaux de télévision.
7
Page 55

Connaissances préliminaires
OPEN/
CLOSE
RETURN
STOP PAUSE
TV POWER
PLAY
3D PHONIC SUBTITLE
STROBE ANGLE
CANCEL RESUME ZOOM DIGEST
TV/VIDEO
RM-SV511U REMOTE CONTROL
DVD
POWER
MENU
TITLE
THEATER
POSITION
ON SCREEN
TV ch TV VOL.
++
––
1234
5678
9100+10
SHIFT
ENTER
Principes de fonctionnement
Visualisations d’écran
L’unité propose plusieurs visualisations d’écran énumérées ci-dessous permettant de sélectionner et programmer les
préférences des réglages initiaux et les fonctions qui ne sont pas fréquemment sollicitées.
Pour accéder aux visualisations d’écran
Appuyer sur ON SCREEN. (Noter cependant que la procédure d’accès à la
“CENSURE PARENTALE” en visualisation d’écran est différente.) L’on accède à
une visualisation d’écran appropriée en fonction du disque inséré (ou “pas de
disque inséré”) ainsi que le mode dans lequel a été placé le lecteur.
English
Français
ENTER
5/∞/2/3
ON SCREEN
Pavé
numérique
Commandes de base en visualisation d’écran
• La apparaît en visualisation d’écran. Il est possible de déplacer la à
l’aide des touches du curseur 5/∞/3/2 pour sélectionner les éléments avec
lesquels on désire travailler.
• À l’aide d’un élément d’information comme
changer le réglage à l’aide des touches du curseur 2/3 lorsque la
1 / 3
, il est possible de
se
trouve sur ledit élément.
• L’élément d’information de type
la
sur l’élément en question et que l’on appuie sur ENTER.
REPEAT
devient actif lorsqu’on amène
• Dans le rectangle de messages, la indique la commande à effectuer.
• Les chiffres se saisissent à l’aide des touches du pavé numérique.
• Certaines fonctions ne deviennent effectives que sur pression de ENTER,
après avoir spécifié les entrées nécessaires.
• Une nouvelle pression sur ON SCREEN fait sortir de la visualisation d’écran.
Visualisation d’ouverture
Une visualisation d’ouverture apparaît automatiquement (sans appuyer sur la
touche ON SCREEN) dans certaines conditions.
L’affichage figurant à gauche apparaît lors de la mise sous tension de l’unité
sans qu’un disque ne soit chargé.
Un des affichages ci-dessous apparaît lorsque le disque correspondant est
inséré et arrêté. Pour les CD Audio, la visualisation d’ouverture ne disparaîtra
pas même en cours de lecture.
préliminaires
Connaissances
LANGUE MENU
LANGUE AUDIO
SOUS-TITRE
LANGUE D’ÉCRAN
GUIDE ECRAN
TYPE MONTEUR
CHOISIR TOUCHE
SORTIE AUDIO NUM.
MIX.DEMULTI.
COMPRESSION
ÉCONOMIE ÉCRAN
MODE COMPULINK AV.
ATTENTE AUTOMATIQUE
CHOISIR TOUCHE
pour les DVD
PREFERENCE2PREFERENCE1
FRANCAIS
FRANCAIS
FRANCAIS
FRANCAIS
MARCHE
LARGE
Affichages des PREFERENCE (1, 2) (voir page 34)
Il est possible de régler les préférences sur ces affichages.
Pour visualiser l’affichage PREFERENCE
Lorsqu’un disque DVD est chargé, ou mis à l’arrêt, ou qu’aucun disque ne se
pour les CD Audio
pour les CD Vidéo
trouve chargé, appuyer sur ON SCREEN.
PREFERENCE2PREFERENCE1
FLUX/PCM
Lt/Rt
ARRET
MODE1
DVD1
ARRET
8
Page 56

Connaissances préliminaires
CODE PAYS
ETABLIR NIVEAU
CODE
NOUV. CODE? • • • SAISAR TOUCHE 0~9
préliminaires
Connaissances
St. End
010 Mb
APPUYER ENTER EXEC.
Position relative
en cours sur le
titre (St : Départ,
End : Arrivée)
St. End
010 Mb
Vitesse de
transmission
CENSURE PARENTALE
NIVEAU 8
– – – –
SORTIE
ANGLE
AUDIO
SOUS-
TITLE
CHAP.
03
1 : 34 : 58
03
RECH.TEMPS
TIME
No. du
titre en
cours
TITLE
TIME
Temps écoulé depuis le
commencement du titre en cours.
CA
1 / 3
2 / 3
1 / 3
TITRE
REPETITION
REPET.A-B
RECH.CHAP.
03
1 : 34 : 58
No. du chapitre
en cours
CHAP.
03
Affichage de CENSURE PARENTALE (voir page 37)
Il est possible d’établir la censure parentale à partir de cet affichage.
Pour afficher la CENSURE PARENTALE en visualisation d’écran
Appuyer sur ENTER tout en maintenant enfoncée la touche SHIFT.
La Censure Parentale en visualisation d’écran apparaîtra sur l’écran de
télévision.
Visualisation d’écran de COMMANDE DVD
Cet affichage permet de sélectionner et de programmer diverses fonctions
pour la lecture en DVD.
Cet affichage apparaît seulement en lecture de DVD.
Pour afficher la visualisation d’écran de COMMANDE DVD
En cours de lecture DVD, appuyer sur ON SCREEN.
STOP
TRK.
MIN SEC
03
TIME
4 : 58
PISTE 3 : 54TEMPS01
St. End
010 Mb
APPUYER ENTER EXEC.
Position relative
en cours sur la
piste (St : Départ,
End : Arrivée)
St. End
010 Mb
EACH
REMAIN
SELECT.TEMPS
REPETITION
REPET. A-B
RECH. TEMPS
PROGRAME
ACCES DIRECT
INTRO
L / R
AUDIO
REPETITION
REPET. A-B
RECH. TEMPS
APPEL PBC
No. de piste en cours
TRK.
03
TIME
4 : 58
Visualisation d’écran de COMMANDE CD
Il est possible de sélectionner et de programmer à partir de cet affichage
diverses fonctions pour la lecture en CD Audio.
Pour afficher la visualisation d’écran de COMMANDE CD
Appuyer sur ON SCREEN avec un disque CD Audio chargé.
Visualisation d’écran COMMANDE V.CD
Il existe deux types d’affichage COMMANDE V.CD. L’affichage présenté ici à
gauche n’apparaîtra qu’en lecture CD Vidéo.
Lorsqu’on arrête un CD Vidéo, il apparaît un affichage similaire à celui de
COMMANDE CD donné ci-dessus.
Pour afficher la visualisation d’écran COMMANDE V.CD
Appuyer sur ON SCREEN avec un disque CD Vidéo chargé.
Vitesse de
transmission
Temps écoulé depuis le
commencement de la piste en cours.
9
Page 57

Connaissances préliminaires
Pour éviter un claquage d’écran [PROTECTION ÉCRAN]
Un écran de moniteur de télévision peut être grillé si une image statique
DVD/Video CD/CD PLAYER
demeure trop longtemps affichée. Pour éviter cet accident, le lecteur mobilise
automatiquement une fonction protectrice d’écran dès qu’une image statique,
telle qu’une visualisation d’écran ou un menu, reste affichée plus de 5
minutes.
• Une action sur toute touche, du lecteur ou du module de télécommande,
libère la fonction protectrice d’écran et restitue l’affichage initial.
• On pourra choisir entre plusieurs configurations d’affichage
d’établissement de la fonction protectrice d’écran (voir page 36).
Guidage par icônes d’écran
En cours de lecture du DVD, l’on pourra voir se superposer des icônes sur
l’image. Leur signification est la suivante :
: S’affiche au commencement d’une séquence enregistrée sous des angles
multiples. (Voir page 29).
: S’affiche au commencement d’une séquence enregistrée en langues audio
multiples. (Voir page 31).
English
Français
préliminaires
Connaissances
: S’affiche au commencement d’une séquence enregistrée avec sous-titres en
plusieurs langues. (Voir page 30).
L’on pourra programmer l’unité en sorte qu’elle n’affiche pas ces icônes en
visualisation d’écran, à l’aide des réglages préférentiels décrits à la page 35.
À propos de l’icône de commande refusée
Au cas où le lecteur n’accepte pas la commande qui lui est intimée par l’action
sur une touche, l’icône
Occasionnellement, des opérations peuvent s’avérer inacceptables même si
l’icône
Il est à noter que certaines opérations sont irrecevables. Par exemple, certains
disques peuvent refuser le défilement rapide avant/arrière ou la lecture au
ralenti.
ne s’inscrivait pas dans l’écran.
Comment utiliser les touches du pavé numérique
Pour sélectionner un numéro de piste ou de titre.
• Pour sélectionner un chiffre entre 1 et 10
Appuyer sur la touche correspondant au chiffre.
• Pour sélectionner un chiffre supérieur à 10
Utiliser la touche +10
apparaît sur l’écran du récepteur de télévision.
Exemple :
Pour sélectionner 13 +10 → 3
Pour sélectionner 34 +10 → +10 → +10 → 4
Pour sélectionner 40 +10 → +10 → +10 → 10
Pour entrer un temps ou un numéro de chapitre
La méthode pour entrer un temps pour la Recherche par temps, ou un numéro
de chapitre pour la Recherche par chapitre diffère de celle donnée ci-dessus.
Se référer aux sections correspondantes de ce manuel pour les détails.
Pour choisir un canal télévision
Appuyer sur les touches du pavé numérique (entre 0 et 9) tout en maintenant
la touche SHIFT enfoncée.
10
Page 58

Connaissances préliminaires
Sur les disques
Types de disques lisibles
Les types de disques lisibles et illisibles sont les suivants:
Disques lisibles
DVD VIDÉO
CD
CD Audio
préliminaires
Connaissances
Disques illisibles
DVD-ROM
DVD-RAM
DVD Audio
DVD-R
DVD-RW
CD-G
CD-R
CD-ROM
PHOTO CD
CD-RW
CD-EXTRA
Le logo DVD est une marque déposée
Remarques sur les disques DVD VIDÉO :
• Les lecteurs DVD et les disques DVD possèdent leur propre numéros de Code Régional. Ce lecteur lit uniquement
les disques DVD dont les numéros du Code Régional contiennent le “1.”
Exemples de disques DVD lisibles :
2
ALL
1
21
1
3
4
• Ce lecteur est conçu pour le système NTSC (National Television System Committee). Il ne peut pas lire les disques
enregistrés selon le système PAL (Phase Alternation Line = Ligne à Phase Alternée).
• Tenter de lire les disques figurant dans la liste des non jouables donnée ci-dessus risque simplement de générer
des bruits et parasites, voire d’endommager les haut-parleurs.
Construction d’un disque
Un disque DVD comprend des “titres,” alors qu’un CD Audio ou un CD Vidéo comprend des “pistes.” Chaque titre
peut être divisé en plusieurs “chapitres.” Par exemple, si un disque contient des films, chaque film comportera son
propre numéro de titre, outre que chaque film peut lui-même se subdiviser en chapitres. Dans un disque DVD de
karaokè, chaque chanson possède normalement son numéro de titre particulier, mais ne possède pas de chapitres. En
général, chaque titre possède un contenu indépendant, tandis que chaque chapitre se rangeant sous un même titre
présente une continuité.
(Exemple : disque DVD)
Titre 1 Titre 2
Chapitre 1 Chapitre 2 Chapitre 3 Chapitre 1 Chapitre 2
(Exemple : CD Audio/CD Vidéo)
11
Piste 1 Piste 2 Piste 3 Piste 4
Page 59

Préparatifs avant le lancement
Préparatifs avant le lancement
Connexions
* Dans les descriptions qui vont suivre, les mots “TV”, ou télévision peuvent être remplacés par “moniteur” ou
“projecteur.”
* Avant d’utiliser l’unité, il est impératif de la connecter à un téléviseur et/ou un amplificateur.
Avant de procéder à toute connexion
• Ne jamais brancher le cordon d’alimentation AC avant d’en avoir terminé avec toutes les autres connexions.
• Étant donné que des éléments différents présentent souvent des appellations différentes pour leurs bornes, il
convient de lire attentivement le manuel d’instructions fourni avec le composant que l’on envisage de raccorder.
Pour connecter à un téléviseur
Il est possible de bénéficier des avantages de cette unité en branchant simplement celle-ci sur un récepteur de
télévision, par exemple. Afin d’améliorer la qualité du son audio, connecter les sorties audio à votre équipement
audio séparé. (Voir les pages qui suivent).
L’unité
VIDEO OUT
VIDEO S-VIDEO
LEFT
RIGHT
AUDIO OUT DIGITAL OUT
Y
COMPONENT
P
P
B
R
AV COMPU LINK
Câble S-VIDÉO
PCM/STREAM
OPTICAL
(fourni)
Récepteur de télévision
English
Français
le lancement
Préparatifs avant
IN
Jaune
Blanc
Rouge
Jaune
Rouge
S-VIDEO
VIDEO
RIGHT
LEFT
AUDIO
Blanc
Câble audio/vidéo
(fourni)
Connecter l’unité à un récepteur de télévision équipé des prises jack d’entrées stéréophoniques audio et vidéo à l’aide
des cordons audio/ vidéo fournis.
• Si le téléviseur est équipé d’une entrée audio monaurale au lieu d’une entrée stéréophonique, il sera nécessaire
d’utiliser le cordon audio optionnel qui convertit la sortie audio stéréophonique en monaural.
• Si votre récepteur de télévision a une entrée S-vidéo, nous vous recommandons, afin d’obtenir une meilleure
qualité d’image, de connecter celle-ci au S-VIDEO du lecteur à l’aide du câble S-vidéo qui est fourni, en plus de la
connexion vidéo (normale).
REMARQUE
• Connecter VIDEO OUT du lecteur à l’entrée vidéo d’un récepteur de télévision. Brancher directement VIDEO OUT du lecteur à
un récepteur de télévision via un VCR (magnétoscope à cassettes) peut causer des problèmes de moniteur lors de la lecture
d’un disque protégé contre la copie.
12
Page 60

Préparatifs avant le lancement
Connexion à un récepteur de télévision à l’aide des prises jack d’entrée vidéo du composant.
L’on bénéficiera d’une qualité d’image supérieure si l’on connecte les prises jack COMPONENT VIDEO OUT aux prises
jack COMPONENT VIDEO IN du téléviseur à l’aide des cordons vidéo.
Ve r t
Bleu
Rouge
VIDEO OUT
VIDEO S-VIDEO
Y
PBP
R
LEFT
RIGHT
COMPONENT
PCM/STREAM
AUDIO OUT DIGITAL OUT
WhiteRed
le lancement
Préparatifs avant
Cordon audio (non fourni)
•␣ Connecter correctement “Y” à “Y”, “P
REMARQUES
• Lorsque les prises jack d’entrée vidéo du composant de la source extérieure sont du type BNC, utiliser un adaptateur pour
convertir la prise jack miniature en prise jack BNC (optionnelle).
• Si l’on ne connecte pas l’unité à l’aide du cordon S-vidéo, certaines fonctions du téléviseur demeureront inopérantes.
AV COMPU LINK
OPTICAL
Cordon de
composant vidéo
(non fourni)
Unité
B” à “PB”, “PR” à “PR”.
Cordon S-vidéo
(fourni)
Téléviseur
Rouge
Blanc
IN
S-VIDEO
VIDEO
RIGHT
LEFT
AUDIO
Bleu
YPBP
R
IN
RougeVert
Pour connecter à un amplificateur ou un récepteur audio
L’on bénéficiera d’une qualité audio supérieure si l’on connecte les sorties audio de l’unité à son amplificateur ou son
récepteur.
BlancRouge
R
PCM/STREAM
OPTICAL
Unité
AV COMPU LINK
Rouge
Blanc
Amplificateur ou récepteur
IN
RIGHT
AUDIO
LEFT
VIDEO OUT
VIDEO S-VIDEO
Y
PBP
LEFT
RIGHT
COMPONENT
AUDIO OUT DIGITAL OUT
Cordon audio (non fourni)
• Connecter AUDIO OUT de l’unité à n’importe laquelle des entrées de niveau de ligne (telle que AUX, DVD, CD, etc.)
d’un amplificateur audio ou d’un récepteur audio.
13
Page 61

Préparatifs avant le lancement
Connexion à un équipement audio avec une entrée numérique
Il est possible d’optimiser la qualité du son en connectant DIGITAL OUT (optique) de l’unité à une entrée numérique
d’un amplificateur, DAT ou MD, à l’aide d’un cordon numérique optionnel. Le signal audio stéréophonique numérique
d’un disque se trouve directement transféré. Et, si l’on connecte avec un cordon numérique optionnel à un décodeur
Dolby Digital ou DTS ou à un amplificateur avec décodeur incorporé, l’on bénéficiera d’un son Surround de très haute
qualité. Lorsqu’on procède à une connexion numérique, il faut également procéder à la connexion audio analogique,
faute de quoi, suivant le type de disque, aucun son audio ne sera reproduit à la borne DIGITAL OUT.
VIDEO OUT
VIDEO S-VIDEO
Y
COMPONENT
LEFT
RIGHT
AUDIO OUT DIGITAL OUT
L’unité
PBP
R
AV COMPU LINK
PCM/STREAM
OPTICAL
BlancRouge
Cordon audio (non fourni)
Rouge
Blanc
Cordon numérique
optique (non fourni)
Équipement
numérique
IN
RIGHT
AUDIO
LEFT
IN
DIGITAL
OPTICAL
English
Français
le lancement
Préparatifs avant
• Pour la connexion numérique, connecter DIGITAL OUT (optique) de l’unité à l’entrée numérique d’un équipement
audio à l’aide du cordon numérique optionnel.
REMARQUES
• Lorsqu’on connecte DIGITAL OUT de l’unité à un équipement audio numérique, avant l’utilisation, il faudra effectuer correctement
le réglage de”SORTIE AUDIO NUM.” dans la visualisation d’écran “PREFERENCE 2”, en fonction de l’équipement audio qui a
été connecté. Si le réglage “SORTIE AUDIO NUM.” n’était pas exécuté correctement, les haut-parleurs pourraient émettre à la
lecture de forts bruits parasites, ce qui entraînerait de la casse pour les haut-parleurs. Voir “SORTIE AUDIO NUM.” à la page 35.
• Avec cette connexion numérique, les réglages de l’unité pour COMPRESSION, et MIX. DEMULTI. sont invalidés. Les réglages
pour ces éléments doivent se faire à partir du décodeur.
Branchement du cordon d’alimentation
Lorsque toutes les connexions sont établies, introduire bien à fond la fiche d’alimentation dans la prise murale. Le
voyant lumineux STANDBY s’allumera, indiquant par-là que l’installation est terminée.
MISE EN GARDE
• Débrancher le cordon d’alimentation si on n’a pas l’intention d’utiliser le lecteur pendant un temps relativement
long.
• Débrancher le cordon d’alimentation avant de nettoyer l’unité.
• Débrancher le cordon d’alimentation avant de déplacer l’unité.
• Ne jamais brancher ou débrancher le cordon d’alimentation avec des mains mouillées.
• Ne jamais tirer sur le cordon d’alimentation pour le débrancher, cela risque de provoquer un incendie, une
électrocution, et autres accidents.
ATTENTION
• Ne pas endommager, altérer, tordre, ou tirer sur le cordon d’alimentation, cela risque de provoquer incendie,
électrocution, et autres accidents.
• Au cas où le cordon d’alimentation se trouve endommagé, contacter un revendeur qui fournira un nouveau cordon
d’alimentation. Un cordon d’alimentation endommagé risque de provoquer incendie, électrocution, ou autres
accidents.
• Ne jamais déposer d’objets pesants sur l’unité ou sur le cordon d’alimentation car cela risque de provoquer incendie,
électrocution, et autres accidents.
14
Page 62

Préparatifs avant le lancement
Utilisation du module de télécommande
Avec le module de télécommande, il est possible non seulement de commander à toutes les fonctions de l’unité mai
également aux fonctions de base du téléviseur.
Insertion des piles dans le module de télécommande.
La trappe à piles se trouve au dos de module de télécommande.
1 Appuyer sur le point indiqué par la flèche au haut du couvercle de la trappe, et
dégager le couvercle pour ouvrir la trappe.
2 Introduire deux piles R6P (SUM-3)/AA(15F) dans la trappe du module de
télécommande en veillant à respecter les marques de polarité (“+” et “–”) figurant
dans la trappe et sur les piles.
le lancement
Préparatifs avant
3 Remettre le couvercle en place et presser légèrement vers le bas pour verrouiller.
• En usage normal, la longévité des piles est de six mois environ. Dès que l’action des fonctions du module de
télécommande devient aberrante, remplacer les piles. Voir ci-dessous les instructions complémentaires.
Précautions pour une utilisation sûre des piles
Observer les quelques précautions suivantes pour pouvoir utiliser les piles en toute sécurité. Un usage impropre leur
raccourcit l’existence, crée un risque d’explosion, ou de fuite de leur contenu.
Précautions d’usage
• Retirer les piles du module de télécommande si on n’a pas l’intention de l’utiliser pendant une période assez longue.
• Enlever les piles mortes du module de télécommande et s’en débarrasser selon les règles de voirie en vigueur.
• Ne jamais laisser traîner des piles mortes, ni les démanteler, ou les mêler à d’autres déchets domestiques, ni surtout les jeter
dans un incinérateur.
• Ne jamais toucher le liquide suintant d’une pile.
• Ne jamais mélanger des piles neuves avec d’anciennes, ni des piles de type différent lors de leur remplacement.
15
Page 63

Préparatifs avant le lancement
Exploitation du téléviseur à l’aide du module de télécommande
Il est possible d’exploiter l’unité à l’aide du module de télécommande.
Réglage du signal de télécommande pour l’exploitation du téléviseur
1 Tout en maintenant la touche TV/VIDEO enfoncée, saisir le code du fabricant (deux chiffres) de votre téléviseur à
l’aide des touches du pavé numérique (0–9).
Ne pas relâcher la touche TV/VIDEO. Maintenir celle-ci enfoncée jusqu’à ce que soit terminée l’étape suivante.
Liste des codes du fabricant
Code Fabricant
01 JVC
02 MAGNAVOX
03 MITSUBISHI
04 PANASONIC
05 RCA
06 SHARP
07 SONY
08 TOSHIBA
09 ZENITH
10 HITACHI
11 PANASONIC
12 SAMSUNG
13 SANYO
14 SANYO
15 SAMSUNG
Exemple :
Pour entrer le code du fabricant “01” : Appuyer sur “0” puis
sur “1.”
English
Français
le lancement
Préparatifs avant
2 Appuyer sur la touche STOP tout en maintenant enfoncée TV/VIDEO.
Les boutons suivants peuvent être utilisés pour commander le téléviseur:
TV POWER
+
TV ch
–
+
TV VOL.
–
Met le téléviseur sous/hors tension
Change les canaux de télévision.
Règle le volume du téléviseur.
Sélectionne les canaux de télévision.
(Tout en maintenant enfoncée la touche SHIFT).
90
to
* Avec certains téléviseurs, une pression sur “+10” tout en
maintenant enfoncée la touche SHIFT fait office de “+100”,
tandis qu’appuyer sur “10” tout en maintenant enfoncée la
touche SHIFT fonctionne comme la touche “RETURN.”
TV/VIDEO
Commute le mode d’entrée (soit TV ou VIDEO).
3 Essayer le fonctionnement du téléviseur en appuyant sur TV POWER.
Si le téléviseur se met sous/hors tension c’est que le signal de commande a été correctement saisi.
REMARQUE
• Le réglage initial du module de télécommande vaut pour un téléviseur JVC.
• S’il y a plus d’un code apparaissant sur la liste pour votre marque de téléviseur, essayer chacun d’eux jusqu’à ce qu’on arrive
à celui qui convient.
16
Page 64

Commandes de base
OPEN/
CLOSE
RETURN
STOP PAUSE
TV POWER
PLAY
3D PHONIC SUBTITLE
STROBE ANGLE
CANCEL RESUME ZOOM DIGEST
TV/VIDEO
RM-SV511UG REMOTE CONTROL
DVD
POWER
ENTER
MENU
TITLE
THEATER
POSITION
ON SCREEN
TV ch TV VOL.
++
––
1234
5678
9100+10
SHIFT
Commandes de base
Les descriptions qui vont suivre utilisent les touches du module de télécommande ; il reste toujours possible
toutefois d’utiliser les touches correspondante de la platine avant au cas où elles sont disponibles.
Mise sous/hors tension de l’unité
Appuyer sur la touche POWER sur la platine avant ou appuyer sur la touche DVD POWER sur le module de
télécommande.
SHUTTLE
PAUSESTOP
POWER
XV-511 DVD PLAYER
STANDBY
POWER
3D PHONIC
DOLBY
D I G I T A L
DVD / VIDEO CD / CD
PLAY
SKIP
OPEN/CLOSE
Recommandations
• On pourra mettre l’unité sous tension en en appuyant sur la touche
PLAY de la platine avant ou du module de télécommande. Cette
action met l’unité en lecture lorsqu’un disque se trouve chargé. Si
aucun disque n’est chargé la trappe à disque s’ouvre.
• Il est également possible de mettre l’unité sous tension en appuyant
sur la touche OPEN/CLOSE de la platine avant ou du module de
télécommande. Auquel cas, la trappe à disque s’ouvre.
REMARQUE
• Même si l’on appuie sur la touche POWER ou DVD POWER pour”éteindre” l’unité, celle-ci ne sera pas mise hors tension tant
qu’elle n’est pas déconnectée de la prise murale. Cet état est appelé “mode d’attente” (Standby). L’unité est conçue en sorte
de ne consommer qu’une infime quantité d’électricité dans cet état d’attente.
de base
Commandes
Chargement et déchargement des disques
Appuyer sur la touche OPEN/CLOSE pour ouvrir la trappe à disque.
1
DVD POWER
Il est également possible d’ouvrir et refermer la trappe à disque depuis la visualisation d’écran.
Agir sur le CURSEUR 5/∞ pour déplacer la
17
Poser un disque sur le plateau.
2
Avec la face de lecture (face
sans étiquette) vers le bas.
Y
LA
P
E
S
U
A
P
P
O
T
S
IP
K
S
DVD / VIDEO CD / CD
DOLBY
XV-511 DVD PLAYER
DIGITAL
STANDBY
POWER
• Pour charger un disque de 8cm,
le placer dans le renfoncement
intérieur.
Appuyer sur la touche OPEN/CLOSE pour refermer la trappe.
3
Recommandations
sur , appuyer ensuite sur ENTER pour ouvrir ou refermer la trappe à disque.
REMARQUES
• L’unité peut lire seulement les disques DVD VIDÉO, CD Audio, et CD Vidéo. Ne pas charger d’autres types de disques. Pour les
détails sur les types de disques jouables, voir page 11.
• En chargeant un disque sur le plateau, veiller à le positionner correctement dans son logement. Faute de quoi la fermeture de
la trappe risque d’endommager le disque, qui pourrait même demeurer bloqué dans le lecteur.
Page 65

Commandes de base
OPEN/
CLOSE
RETURN
STOP PAUSE
TV POWER
PLAY
3D PHONIC SUBTITLE
STROBE ANGLE
CANCEL RESUME ZOOM DIGEST
TV/VIDEO
RM-SV511U REMOTE CONTROL
DVD
POWER
ENTER
MENU
TITLE
THEATER
POSITION
ON SCREEN
TV ch TV VOL.
++
––
1234
5678
9100+10
SHIFT
Lecture de base
Vous pouvez à présent mettre un disque en lecture. Commençons par tirer tout l’agrément d’une lecture simplement
basique par la manipulation suivante.
Pour lire un disque depuis le début
Appuyer sur PLAY.
Le lecteur commence la lecture au début du disque.
REMARQUES
• Lorsqu’on lit des disques CD Vidéo avec la fonction de commande PBC (Pilotage en
lecture) ou certains disques DVD, l’affichage du menu peut apparaître sur l’écran du
téléviseur après qu’on a appuyé sur PLAY. Auquel cas, il est possible de sélectionner
dans le menu un élément à mettre en lecture.
Pour une exploitation à l’aide d’un menu, voir page 20.
• Avec certains disques DVD, l’unité lance automatiquement la lecture après le
chargement du disque.
Touches de
commandes
de base
English
Français
7 En lecture
Pour arrêter complètement la lecture
Appuyer sur STOP.
L’unité arrête la lecture.
Pour suspendre temporairement la lecture.
Appuyer sur PAUSE.
L’unité marque la pause dans la lecture. Une nouvelle pression sur PLAY fait reprendre la lecture interrompue.
Pour défilement rapide avant/arrière sous contrôle moniteur
Depuis le module de télécommande
Appuyer sur ¡ ou 1.
Appuyer sur ¡ pour une avance rapide en lecture, et sur 1 pour une régression rapide en lecture. Chaque
pression sur la touche accélère la vitesse de défilement avant ou arrière. Pour un retour à une lecture normale,
appuyer sur PLAY.
Depuis la platine avant
Agir sur le bouton SHUTTLE.
Pour une avance rapide en lecture, tourner le bouton vers la droite, et maintenir dans cette position ; et pour une
régression rapide en lecture, tourner le bouton vers la gauche, et maintenir dans cette position. Lorsqu’on
relâche le bouton navette, l’unité revient à une lecture normale. La vitesse de lecture change suivant la rotation
appliquée au bouton de navette.
DVD / VIDEO CD / CD
OPEN/CLOSE
PLAY
PAUSESTOP
SKIP
Bouton SHUTTLE
SHUTTLE
de base
Commandes
18
Page 66

Commandes de base
OPEN/
CLOSE
RETURN
STOP PAUSE
TV POWER
PLAY
3D PHONIC SUBTITLE
STRIBE ANGLE
CANCEL RESUME ZOOM DIGEST
TV/VIDEO
RM-SV511UG REMOTE CONTROL
DVD
POWER
ENTER
MENU
TITLE
THEATER
POSITION
ON SCREEN
TV ch TV VOL.
++
––
1234
5678
9100+10
SHIFT
Pour repérer le début d’une séquence ou d’une chanson
7 En lecture
Appuyer sur ¢ ou 4 .
Appuyer sur 4 pour repérer le commencement du chapitre, titre, ou piste courants, et appuyer sur ¢ pour
repérer le commencement du chapitre, titre, ou piste suivants.
REMARQUE
Lorsqu’on lit un disque CD Vidéo avec la fonction PBC ou un disque DVD, l’unité peut faire tomber le repérage sur un point
différent, mais en général ce sera en début de chapitre, titre, ou piste.
Reprise de la lecture
L’unité mémorise la position d’un disque à partir de laquelle l’on désire interrompre la lecture pour pouvoir reprendre
celle-ci sur cette position ultérieurement.
Pour mémoriser le point où l’on désire reprendre la lecture
7 En cours de lecture
Appuyer sur RESUME.
L’unité mémorise la position de lecture en cours sur le disque, et le
témoin Resume sur l’écran d’affichage de la platine avant s’allume.
de base
Commandes
La dernière mémorisation efface la précédente.
Écran d’affichage
Témoion Resume
Recommandations
Au lieu d’appuyer sur RESUME, il est également possible de mémoriser la
position en cours sur le disque en en appuyant sur la touche DVD POWER (sur
le module de télécommande) ou POWER (sur la platine avant de l’unité) en
cours de lecture.
Pour reprendre la lecture à partir du point mémorisé
7 À l’arrêt.
RESUME
Il est possible de reprendre la lecture en appuyant sur RESUME lorsque l’unité se trouve en mode attente.
19
Appuyer sur RESUME.
L’unité reprend la lecture à partir de la position mémorisée.
¶ Pour effacer la mémoire
Il suffit de retirer le disque de l’unité.
Recommandations
REMARQUE
• Lorsqu’on appuie sur RESUME en cours de lecture d’un disque CD Vidéo avec la fonction PBC, l’unité peut reprendre la lecture
interrompue à partir d’un point légèrement antérieur à celui mémorisé par la pression sur RESUME.
Page 67

Commandes complexes
OPEN/
CLOSE
RETURN
STOP PAUSE
TV POWER
PLAY
3D PHONIC SUBTITLE
STROBE ANGLE
CANCEL RESUME ZOOM DIGEST
TV/VIDEO
RM-SV511U REMOTE CONTROL
DVD
POWER
ENTER
MENU
TITLE
THEATER
POSITION
ON SCREEN
TV ch TV VOL.
++
––
1234
5678
9100+10
SHIFT
Commandes complexes
Lecture à partir d’une position
déterminée sur le disque
Il est possible de lire un disque à partir d’une piste,
d’un titre ou d’un chapitre sélectionnés, ou à partir d’un
temps spécifié.
Repérage de la séquence recherchée à
partir du menu DVD
Les disques DVD possèdent ordinairement leur menus
propres qui en montrent la teneur. Ces menus
contiennent des éléments d’information variés, tels que
les titres de films, de chansons, ou des informations
sur l’artiste ; ils se trouvent affichés sur l’écran du
téléviseur. Il est donc possible de repérer la séquence
désirée via le menu.
1
OPEN/
CLOSE
TITLE
THEATER
POSITION
3D PHONIC SUBTITLE
CANCEL RESUME ZOOM DIGEST
1234
5678
9100+10
TV/VIDEO
SHIFT
RM-SV511U REMOTE CONTROL
RETURN
STOP PAUSE
PLAY
ENTER
TV POWER
POWER
ON SCREEN
STROBE ANGLE
++
TV ch TV VOL.
––
DVD
MENU
1
2
Recommandations
Avec certains disques, il est possible de sélectionner l’élément
en saisissant le numéro correspondant à l’aide du pavé des
touches numériques, ce qui pourrait lancer automatiquement
la lecture.
REMARQUES
• Lorsque apparaît l’icône sur l’écran du téléviseur en
appuyant sur TITLE à l’étape 1:
Le disque ne possède pas de menu donnant une liste de
titres.
• Lorsqu’apparaît l’icône sur l’écran du téléviseur en
appuyant sur MENU à l’étape 1:
Le disque ne possède pas de menu.
Pour repérer la scène recherchée à partir
du menu d’un CD Vidéo avec PBC
(Pilotage de Lecture)
Certains disques CD Vidéo sont compatibles avec la
fonction PBC. PBC est le sigle de “Play Back Control”,
ou Pilotage de lecture. Les disques CD Vidéo
enregistrés en PBC possèdent leurs propres menus,
tels que la liste des chansons, ou morceaux de
musique et autres éléments d’information qui peuvent
s’enregistrer sur un disque. Il est également possible
de repérer une scène spécifique en recourant au menu.
English
Français
7 Introduire le disque DVD.
À propos du menu
Normalement un disque DVD qui
contient plus d’un titre pourrait
présenter un menu composé
d’une liste de titres. Dans ce cas,
le menu apparaît sur l’écran du
téléviseur par une pression sur la touche TITLE.
D’autre part, certains disques DVD peuvent également avoir
un menu différent qui apparaîtra sur l’écran du téléviseur
lorsqu’on appuie sur la touche MENU.
Voir les instructions figurant sur chaque concernant son
menu.
Consulter à cet égard les instructions données par chaque
disque DVD sur son menu particulier.
Appuyer sur MENU ou TITLE.
1
Le menu apparaît à l’écran du téléviseur.
Recommandations
Utiliser CURSEUR 2/3/5/∞ pour
2
Example
sélectionner l’élément recherché, appuyer
ensuite sur ENTER.
L’unité lance la lecture de l’élément sélectionné.
1
7 Lorsque le menu apparaît sur l’écran du téléviseur en
cours de lecture avec PBC
Utiliser le pavé des touches numériques pour
1
sélectionner le numéro de l’élément voulu.
• Voir page 10 pour les
détails sur l’utilisation
du pavé des touches
numériques.
La lecture est lancée à
partir de l’élément
sélectionné.
Il est possible de revenir au menu en appuyant
sur la touche RETURN.
Example:
complexes
Commandes
20
Page 68

Commandes complexes
OPEN/
CLOSE
RETURN
STOP PAUSE
TV POWER
PLAY
3D PHONIC SUBTITLE
STROBE ANGLE
CANCEL RESUME ZOOM DIGEST
TV/VIDEO
RM-SV511U REMOTE CONTROL
DVD
POWER
ENTER
MENU
TITLE
THEATER
POSITION
ON SCREEN
TV ch TV VOL.
++
––
1234
5678
9100+10
SHIFT
Lorsque ”SUIVANTE” ou “PRECEDENTE” apparaît
sur l’écran du téléviseur, l’unité fonctionne
généralement somme suit:
• accès à la page suivante en appuyant sur la
touche ¢.
• retour à la page précédente en appuyant sur la
touche 4.
* La façon de procéder varie suivant les disques.
Recommandations
• Pour activer la fonction PBC lorsqu’un disque CD Vidéo
compatible PBC se trouve en lecture avec la fonction PBC
désactivée, appuyer sur STOP, ensuite sur PLAY.
• Il est également possible d’intervenir pour activer la
fonction PBC à partir de la visualisation d’écran en
procédant comme suit:
1 Appuyer sur ON SCREEN.
2 Utiliser les touches 5/∞ pour amener la
sur [APPEL
PBC], appuyer ensuite sur ENTER.
Recommandations
Lorsqu’on désire lancer la lecture d’un disque CD Vidéo
compatible avec la fonction PBC, mais sans activer cette
dernière, il faudra lancer la lecture à l’aide du pavé des
touches numériques au lieu de la touche PLAY. Voir le
paragraphe suivant.
Écran d’affichage
Numéro de titre ou de piste sélectionné
L’unité lance la lecture à partir du titre ou de la piste
sélectionnée.
Recommandations
Il est également possible de vérifier le numéro de titre ou de
piste sur la visualisation d’écran.
REMARQUES
• Lorsqu’apparaît l’icône sur l’écran du téléviseur.
Le disque ne contient pas le titre ou la piste qui a été
sélectionné.
• Cette fonction demeure inopérante en lecture d’un CD
Vidéo avec la fonction PBC.
Pour repérer le chapitre ou la piste voulue
à l’aide de ¢ ou de 4
Pour repérer directement une scène ou une
piste voulue
Il est possible de lire la scène ou la piste recherchée en
spécifiant tout simplement le titre (pour les DVD) ou la
piste (pour les CD).
complexes
Commandes
7 Pour DVD: À l’arrêt
1
21
OPEN/
CLOSE
TITLE
THEATER
POSITION
3D PHONIC SUBTITLE
CANCEL RESUME ZOOM DIGEST
1234
5678
9100+10
TV/VIDEO
SHIFT
RM-SV511U REMOTE CONTROL
RETURN
STOP PAUSE
PLAY
ENTER
TV POWER
POWER
ON SCREEN
STROBE ANGLE
++
TV ch TV VOL.
––
DVD
MENU
1
Pour CD Audio: En cours de lecture ou à l’arrêt
Pour CD Vidéo: En cours de lecture sans la fonction
PBC ou à l’arrêt
Utiliser le pavé des touches numériques pour
sélectionner le numéro de titre ou de piste
désiré.
• Voir page 10 pour les détails concernant
l’utilisation du pavé des touches numériques.
Le numéro de titre ou de piste sélectionné s’inscrit
dans l’écran d’affichage de la platine avant.
1
7 Pour DVD: En cours de lecture
Pour CD Audio: En cours de lecture ou à l’arrêt
Pour CD Vidéo: En cours de lecture sans la fonction
PBC
Écran d’affichage
Numéro de piste choisi
Appuyer sur ¢ ou 4.
1
• Pour sauter sur une piste suivante, appuyer sur
¢, une fois, ou plusieurs fois en succession
jusqu’à ce que le numéro de la piste voulue
apparaisse sur l’affichage.
• Pour sauter au commencement de la piste en
cours appuyer une fois sur 4.
• Pour sauter sur une piste précédente, appuyer
sur ¢ autant de fois qu’il faudra pour faire
apparaître sur l’affichage le numéro de la piste
voulue.
Page 69

Commandes complexes
REMARQUES
• Cette fonction peut demeurer inopérante avec certains
disques DVD.
• Cette fonction demeure inopérante en cours de lecture
d’un CD Vidéo avec la fonction PBC.
Repérage de la scène recherchée en
spécifiant le numéro du chapitre
[RECH.CHAP.]
Si le titre courant du disque DVD en lecture est divisé
en chapitres, on pourra sauter sur le chapitre voulu en
spécifiant le numéro de ce chapitre à l’aide de la
visualisation d’écran.
OPEN/
CLOSE
TITLE
2, 4
THEATER
POSITION
3D PHONIC SUBTITLE
CANCEL RESUME ZOOM DIGEST
1234
5678
9100+10
TV/VIDEO
SHIFT
RM-SV511U REMOTE CONTROL
7 En mode lecture
Appuyer sur ON SCREEN.
1
La visualisation d’écran apparaît sur l’écran du
téléviseur.
Utiliser le CURSEUR 5/∞ pour amener la
2
sur [RECH.CHAP.], appuyer ensuite sur
ENTER.
“SAISIR CHAPITRE”
apparaît dans la zone
de messages.
La couleur de
[RECH.CHAP.]
change.
DVD
TV POWER
RETURN
POWER
STOP PAUSE
PLAY
MENU
ENTER
ON SCREEN
STROBE ANGLE
++
TV ch TV VOL.
––
St. End
010 Mb
SAISIR CHAPITRE:
zone de messages
TITLE
TIME
CHAP.
03
1 : 34 : 58
1
3
1 / 3
ANGLE
2 / 3
AUDIO
SOUS-
1 / 3
TITRE
REPETITION
REPET.A-B
03
RECH.TEMPS
RECH.CHAP.
Recommandations
Les touches “10” et “+10” n’interviennent pas pour cette
fonction.
Exemple:
Pour sélectionner le numéro de chapitre 8 : Appuyer sur
“8” → ENTER.
Pour sélectionner le numéro de chapitre 37 : Appuyer
sur “3” → ”7" → ENTER.
REMARQUES
• Lorsque le numéro du chapitre est incorrect à l’étape 3:
Saisir simplement le numéro correct, ce qui supprime le
numéro erroné.
• Lorsqu’apparaît l’icône
sur l’écran du téléviseur à
l’étape 4:
Le disque ne contient pas le chapitre qui a été sélectionné,
ou la recherche de chapitre est inopérante sur ce disque.
• Avec certains disques, l’unité lance automatiquement la
recherche du chapitre une fois qu’a été saisi le numéro à
l’étape 3.
• Pour revenir à un affichage normal:
Appuyer sur ON SCREEN.
Pour repérer la position recherchée en
précisant le temps [RECH.TEMPS]
Il est possible de lire un disque à partir de la position
désirée en spécifiant le temps écoulé depuis le
commencement du disque à l’aide de la fonction
RECH.TEMPS.
Il est à noter toutefois que certains disques DVD ne
contiennent pas d’information de temps, auquel cas, la
fonction REC. TEMPS demeure inaccessible.
2, 3
OPEN/
CLOSE
TITLE
THEATER
POSITION
3D PHONIC SUBTITLE
CANCEL RESUME ZOOM DIGEST
1234
5678
9100+10
TV/VIDEO
SHIFT
RM-SV511U REMOTE CONTROL
RETURN
STOP PAUSE
PLAY
ENTER
TV POWER
POWER
ON SCREEN
STROBE ANGLE
++
TV ch TV VOL.
––
DVD
MENU
1
3
English
Français
complexes
Commandes
Utiliser le pavé des touches numériques (0-9)
3
pour sélectionner le numéro de chapitre
désiré.
Le numéro du chapitre sélectionné apparaît dans
la zone de messages.
Appuyer sur ENTER.
4
L’unité lance la lecture à partir du chapitre
sélectionné.
7 Pour DVD: En cours de lecture
Pour CD Audio: En cours de lecture ou à l’arrêt
Pour CD Vidéo: En cours de lecture sans la fonction
PBC
Appuyer sur ON SCREEN.
1
La visualisation d’écran apparaît sur l’écran du
téléviseur.
22
Page 70

Commandes complexes
OPEN/
CLOSE
RETURN
STOP PAUSE
TV POWER
PLAY
3D PHONIC SUBTITLE
STROBE ANGLE
CANCEL RESUME ZOOM DIGEST
TV/VIDEO
RM-SV511U REMOTE CONTROL
DVD
POWER
ENTER
MENU
TITLE
THEATER
POSITION
ON SCREEN
TV ch TV VOL.
++
––
1234
5678
9100+10
SHIFT
Utiliser le CURSEUR 5/∞ pour amener la
2
sur [RECH.TEMPS], appuyer ensuite sur
ENTER.
“SAISIR” apparaît dans la zone de messages.
La couleur de [RECH.TEMPS] change.
Utiliser le pavé des touches numériques (0-9)
3
pour saisir le temps.
Le temps spècifique apparaît dans la zone de
messages.
Appuyer sur ENTER.
4
L’unité lance la lecture à partir du temps spécifié.
(Pour DVD)
ANGLE
AUDIO
SOUS-
TITRE
REPETITION
St. End
010 Mb
SAISIR 1 3 4: 00: ENTER
Zone de
messages
TITLE
CHAP.
03
TIME
1 : 34 : 58
Temps spécifié
REPET.A-B
03
RECH.TEMPS
RECH.CHAP
Recommandations
• Les touches “10” et “+10”
ne sont pas utilisés dans
cette fonction.
• On pourra spécifier le
temps en format heure/
minute/seconde pour les
disques DVD, et en format
Commandes
disques CD Audio et
minute/seconde pour les
complexes
Vidéo.
Exemple (pour DVD):
Pour sélectionner une lecture à partir de 2 (H):34 (M):00 (S):
(Pour CD Audio)
1 / 3
2 / 3
1 / 3
PISTE 01
ENTRER TOUCHES NUMERIQUES
Zone de
messages
(Pour CD Vidéo)
St. End
010 Mb
SAISIR 0 2 43:
Zone
de
messages
MIN SEC
SAISIR
02 : 34
Temps spécifié
TRK.
03
TIME
Temps spécifié
MIN SEC
3 : 54TEMPS
ENTER
34 : 58
EACH
REMAIN
SELECT.TEMPS
REPETITION
REPET.A-B
RECH.TEMPS
PROGRAME
ACCES DIRECT
INTRO
AUDIO
REPETITION
REPET.A-B
RECH.TEMPS
APPEL PBC
REMARQUES
• Lorsqu’apparaît l’icône sur l’écran du téléviseur à
l’étape 2:
Le temps sélectionné n’est pas contenu sur le disque, ou
la recherche de temps est inopérante sur ce disque.
Noter également que la fonction de recherche de temps
demeure inopérante en lecture de CD Vidéo avec la
fonction PBC.
• Pour revenir à un affichage normal:
Appuyer sur ON SCREEN.
Repérage de la scène recherchée en
visionnant le digest des scènes d’ouverture
[DIGEST]
L’unité peut afficher la séquence d’ouverture de chaque
titre du DVD ou de chaque piste du CD Vidéo. Il est
possible en outre de sélectionner un titre ou une piste
voulus à partir des séquences d’ouverture apparaissant
sur l’écran du téléviseur.
L / R
2, 3
1
Il est superflu, mais non interdit, d’appuyer sur les “0” pour
saisir les zéros de queue (pour les deux derniers chiffres de
l’exemple ci-dessus).
23
SAISIR _ : :
→→
Appuyer sur “2”.
SAISIR 2 : _ :
Appuyer sur “3”.
SAISIR 2 : 3 _ :
→→
Appuyer sur “4”.
SAISIR 2 : 3 4 : _
Appuyer sur ENTER
• Si l’on s’est trompé:
Amener le curseur sur le paramètre erroné, et appuyer
sur le chiffre correct pour redéfinir le paramètre.
SAISIR 2 : 3 5 : _
SAISIR 2 : 3 5:
→
Appuyer sur le CURSEUR 2.
→
Appuyer sur “4”.
SAISIR 2 : 3 4 : _
7 Pour DVD: À l’arrêt
Pour CD Vidéo: À l’arrêt en cours de lecture sans la
fonction PBC
Appuyer sur DIGEST.
1
La scène d’ouverture de chaque titre apparaît sur
l’écran du téléviseur.
Il peut s’afficher jusqu’à neuf scènes d’ouverture.
Utiliser le CURSEUR 2/3/5/∞ pour
2
sélectionner le titre ou la piste désirée.
Si le disque contient plus de 9 titres ou pistes, le
digest d’écran comportera plus d’une page. Dans
ce cas, appuyer sur ¢ amènera à la page
suivante, tandis qu’appuyer sur 4 ramènera à la
page précédente.
Page 71

Commandes complexes
OPEN/
CLOSE
RETURN
STOP PAUSE
TV POWER
PLAY
3D PHONIC SUBTITLE
STROBE ANGLE
CANCEL RESUME ZOOM DIGEST
TV/VIDEO
RM-SV511U REMOTE CONTROL
DVD
POWER
ENTER
MENU
TITLE
THEATER
POSITION
ON SCREEN
TV ch TV VOL.
++
––
1234
5678
9100+10
SHIFT
Recommandations
• Lorsque le titre ou la
piste sélectionné se
trouve dans le coin
inférieur droit de l’écran,
appuyer sur le
CURSEUR 3 tourne la
page suivante.
Titre sélectionné
• Lorsque le titre sélectionné se trouve dans le coin
supérieur gauche de l’écran, appuyer sur le CURSEUR 2
ramène à la page précédente.
Appuyer sur ENTER.
3
L’unité lance la lecture du titre ou de la piste
sélectionné.
Recommandations
Lorsqu’on appuie sur DIGEST en cours de lecture d’un DVD,
l’unité affiche la séquence d’ouverture de chaque chapitre et
l’on peut ainsi sélectionner le chapitre désiré. Auquel cas, les
séquences d’ouverture s’affichent à partir du chapitre 1. La
manipulation pour sélectionner un chapitre est la même que
celle mentionnée ci-dessus.
REMARQUE
• En fonction du contenu de certains disques, un certain
temps est nécessaires avant que toutes le scènes
apparaissent à l’écran.
Lectures spéciales de l’image
Pour afficher des images fixes [STROBE]
1
2
7 En cours de lecture
Au point où l’on désire visionner comme des
1
photos continues, appuyer sur PAUSE.
L’unité met la lecture
au repos.
Appuyer sur STROBE.
2
Neuf images fixes continues apparaissent sur
l’écran du téléviseur.
English
Français
L’unité est équipée de fonctions de Lectures spéciales
de l’image comprenant Image par image, Strobo,
Ralenti et Zoom.
7 En cours de pause (fixe)
Pour faire défiler une image fixe image par
image
OPEN/
CLOSE
TITLE
THEATER
POSITION
3D PHONIC SUBTITLE
CANCEL RESUME ZOOM DIGEST
1234
Appuyer sur PAUSE.
1
5678
9100+10
TV/VIDEO
SHIFT
RM-SV511U REMOTE CONTROL
Chaque pression sur PAUSE fait avancer l’image
fixe sur l’image suivante.
Une pression sur PLAY ramène au mode de
lecture normal.
RETURN
STOP PAUSE
PLAY
ENTER
TV POWER
ON SCREEN
STROBE ANGLE
++
TV ch TV VOL.
––
POWER
MENU
DVD
1
Recommandations
• Une pression sur PAUSE lorsque les neuf images fixes sont
à l’écran fait passer aux neuf images fixes suivantes.
• Pour annuler la lecture en strobo
Appuyer sur STROBE.
REMARQUES
• Maintenir la pression sur PAUSE pendant plus de 1
seconde active également la fonction Strobo.
• Une pression sur STROBE en cours de lecture, fait
également apparaître neuf images fixes mais elles
avanceront en temps réel.
complexes
Commandes
24
Page 72

Commandes complexes
ZOOM
Pour lire au ralenti [SLOW]
OPEN/
CLOSE
1
TITLE
THEATER
POSITION
3D PHONIC SUBTITLE
CANCEL RESUME ZOOM DIGEST
1234
5678
9100+10
TV/VIDEO
SHIFT
RM-SV511U REMOTE CONTROL
7 En cours de lecture.
Depuis le module de télécommande
Appuyer sur PAUSE, ensuite appuyer sur ¡
1
ou sur 1 .
Pour lire en ralenti en marche avant, appuyer sur
¡ et pour lire au ralenti en marche arrière,
appuyer sur 1 (seulement avec les disques
DVD). L’unité commence par lire sur le ralenti le
plus lent (1/32), mais chaque pression exercée sur
ces touches augmente la vitesse de lecture.
RETURN
STOP PAUSE
PLAY
ENTER
TV POWER
ON SCREEN
STROBE ANGLE
++
TV ch TV VOL.
––
POWER
MENU
DVD
1
Pour lire une séquence en gros plan
[ZOOM]
OPEN/
CLOSE
TITLE
2
THEATER
POSITION
3D PHONIC SUBTITLE
CANCEL RESUME ZOOM DIGEST
1234
5678
9100+10
TV/VIDEO
SHIFT
RM-SV511U REMOTE CONTROL
7 En cours de lecture ou en pause.
Appuyer sur ZOOM.
1
“ZOOM” apparaît sur l’écran du téléviseur.
L’unité effectue un zoom en avant sur la partie
centrale de la séquence pour doubler le format de
l’image.
RETURN
STOP PAUSE
PLAY
ENTER
TV POWER
STROBE ANGLE
++
TV ch TV VOL.
––
DVD
POWER
MENU
ON SCREEN
1
Depuis la platine avant
complexes
Commandes
Appuyer sur PAUSE, utiliser ensuite le bouton
1
SHUTTLE.
Imprimer une rotation au bouton SHUTTLE vers la
droite pour lecture au ralenti en marche avant, et
imprimer une rotation au bouton SHUTTLE vers la
gauche pour une lecture au ralenti en marche
arrière (pour disques DVD seulement). La vitesse
du ralenti croit en fonction de la rotation
imprimée au bouton SHUTTLE.
• Pour le retour à une lecture normale
Appuyer sur PLAY.
• Pour marquer la pause en lecture au ralenti
Appuyer sur PAUSE.
REMARQUES
• L’audio est silencieuse en lecture au ralenti.
• La lecture arrière au ralenti est impossible avec un CD
Vidéo.
Utiliser le CURSEUR 2/3/5/∞ pour déplacer
2
la séquence zoomée.
ZOOM
• Pour marquer la pause en lecture zoom.
Appuyer sur PAUSE.
Pour reprendre la lecture zoom, appuyer sur PLAY.
• Pour revenir à une lecture normale
Appuyer sur ZOOM.
REMARQUE
• En lecture zoom, l’image peut être brouillée ou bruyante.
25
Page 73

Commandes complexes
PISTE 01 3 : 54TEMPS
MIN SEC
EACH
REMAIN
INTRO
ACCES DIRECT
PROGRAME
RECH.TEMPS
REPET.A-B
REPETITION
SELECT.TEMPS
STOP
Changement de l’ordre des
pistes
Il est possible de lire des pistes sur un CD Audio ou un
CD Vidéo dans l’ordre choisi, ou dans un ordre
aléatoire.
Pour lire les pistes dans l’ordre voulu
[PROGRAME]
En programmant les pistes, il est possible de lire les
pistes dans n’importe quel ordre.
2
OPEN/
CLOSE
TITLE
THEATER
POSITION
3D PHONIC SUBTITLE
CANCEL RESUME ZOOM DIGEST
1234
5678
9100+10
TV/VIDEO
SHIFT
RM-SV511U REMOTE CONTROL
RETURN
STOP PAUSE
PLAY
ENTER
TV POWER
ON SCREEN
STROBE ANGLE
++
TV ch TV VOL.
––
POWER
MENU
DVD
4
1
3
• Lorsqu’une erreur a été commise
Appuyer sur CANCEL. La dernière piste
programmée s’effacera.
Appuyer sur PLAY pour lancer la lecture du
4
programme.
Lorsque toutes les pistes programmées ont
terminé leur lecture, l’unité s’arrête mais le
programme demeure en mémoire.
• Pour annuler le programme
Appuyer sur STOP pour arrêter la lecture, puis
appuyer une nouvelle fois sur STOP.
Toutes les pistes programmées seront effacées.
• Pour sortir de la lecture programmée.
Appuyer sur ENTER lorsque la
indique
[PROGRAME].
[PROGRAME] revient à sa couleur originale.
(Lorsque c’est un CD Vidéo qui est en lecture,
appuyer d’abord sur STOP et ensuite sur ON
SCREEN pour faire apparaître la visualisation
d’écran).
Pour lire des pistes dans un ordre aléatoire
[ACCES DIRECT]
English
Français
7 À l’arrêt
Appuyer sur ON SCREEN.
1
Le visualisation d’écran apparaît sur l’écran du
téléviseur.
Utiliser le CURSEUR 5/∞ pour amener la
2
sur [PROGRAME], appuyer ensuite sur
ENTER.
La coloration de [PROGRAME] change.
(pour CD Audio) (pour CD Vidéo)
MIN SEC
PISTE 01
ENTRER TOUCHES NUMERIQUES
1
9210311412513614715916
Sélectionner les pistes dans l’ordre voulu à
3
EACH
3 : 54TEMPS
REMAIN
SELECT.TEMPS
STOP
REPETITION
REPET.A-B
RECH.TEMPS
PROGRAME
ACCES DIRECT
INTRO
PISTE 01
STOP
ENTRER TOUCHES NUMERIQUES
1
9210311412513614715916
l’aide du pavé des touches numériques.
Jusqu’à 16 pistes
sont ainsi
programmables.
Il est évidemment
possible de choisir
plusieurs fois une
même piste.
ENTRER TOUCHES NUMERIQUES
1
2
3
1
5
8
9
10
11
Numéro de piste choisie.
MIN SEC
EACH
3 : 54TEMPS
REMAIN
SELECT.TEMPS
REPETITION
RECH.TEMPS
PROGRAME
ACCES DIRECT
STOP
4125136147159
4
REPET.A-B
INTRO
2, 3
OPEN/
CLOSE
TITLE
THEATER
POSITION
3D PHONIC SUBTITLE
CANCEL RESUME ZOOM DIGEST
1234
5678
9100+10
TV/VIDEO
SHIFT
TV POWER
RETURN
STOP PAUSE
PLAY
ENTER
STROBE ANGLE
++
TV ch TV VOL.
––
RM-SV511U REMOTE CONTROL
DVD
POWER
MENU
ON SCREEN
1
complexes
Commandes
L’unité peut lire les pistes en ordre aléatoire.
7 À l’arrêt
Appuyer sur ON SCREEN.
1
La visualisation d’écran apparaît sur l’écran du
téléviseur.
Utiliser le CURSEUR 5/∞ pour amener la
2
sur [ACCES DIRECT].
(pour CD Audio) (pour CD Vidéo)
16
PISTE 01 3 : 54TEMPS
MIN SEC
EACH
REMAIN
SELECT.TEMPS
STOP
REPEAT
REPET.A-B
RECH.TEMPS
PROGRAME
ACCES DIRECT
INTRO
26
Page 74

Commandes complexes
TITLE
TIME
03
CHAP.
03
1 : 34 : 58
T. REPEAT
RECH.CHAP.
RECH.TEMPS
REPET.A-B
REPETITION
1 / 3
AUDIO
2 / 3
ANGLE
1 / 3
SOUS-
TITRE
APPUYER ENTER EXÉC.
St. End
010 Mb
REPETITION T. (répétition de titre)
REPETITION C. (répétition de chapitre)
Pas d’indication (désactivé)
PISTE 08
REPETITION
0 : 58TEMPS
MIN SEC
EACH
INTRO
ACCES DIRECT
PROGRAME
RECH.TEMPS
REPET.A-B
REPETITION
SELECT.TEMPS
TRK.
TIME
03
34 : 58
APPEL PBC
RECH.TEMPS
REPET.A-B
REPETITION
REPETITION
AUDIO
L / R
APPUYER ENTER EXÉC.
St. End
010 Mb
Appuyer sur ENTER.
3
La coloration de [ACCES DIRECT] change.
La lecture aléatoire commence.
Recommandations
• Lorsque toutes les pistes ont été lues une fois, la lecture en
aléatoire prend fin.
• La même piste ne se représenta pas une deuxième fois en
lecture aléatoire.
• Pour quitter la lecture en aléatoire
Appuyer sur STOP. L’unité arrête sa lecture et quitte
le mode aléatoire.
Recommandations
En cours de lecture d’un CD Audio, une pression sur ENTER
lorsque la indique [ACCES DIRECT] fait quitter le mode
aléatoire et poursuivre la lecture dans l’ordre normal.
Lecture répétée
L’unité peut répéter la lecture du titre ou du chapitre en
cours (pour DVD), ainsi que de la piste en cours ou de
toutes les pistes (pour CD Audio/CD Vidéo), de même
qu’il est également possible de sélectionner une
section seulement pour la lecture répétée.
(pour DVD)
Le mode de répétition sélectionné
apparaît à l’écran du téléviseur.
Chaque pression sur ENTER fait changer le mode
répétition dans la séquence suivante:
(pour CD Audio) (pour CD Vidéo)
Mode de répétition sélectionné
Mode de répétition sélectionné
Le titre ou chapitre courant sera répété.
REPETITION
Pour répéter un titre, chapitre ou piste
courants ou toutes les pistes [REPETITION]
complexes
Commandes
2
7 Pour DVD, CD Audio: En cours de lecture
Pour CD Vidéo: En cours de lecture sans la
Appuyer sur ON SCREEN.
1
Le visualisation d’écran apparaît sur l’écran du
téléviseur
27
Utiliser le CURSEUR 5/∞ pour amener la
2
sur [REPETITION], appuyer sur ENTER.
OPEN/
CLOSE
TITLE
THEATER
POSITION
3D PHONIC SUBTITLE
CANCEL RESUME ZOOM DIGEST
1234
5678
9100+10
TV/VIDEO
SHIFT
RM-SV511U REMOTE CONTROL
DVD
TV POWER
RETURN
POWER
STOP PAUSE
PLAY
MENU
ENTER
ON SCREEN
STROBE ANGLE
++
TV ch TV VOL.
––
fonction PBC
1
REPETITION 1
Pas d’indication (désactivé)
(pour CD Audio /CD Vidéo )
REPETITION:
Toutes les piste sont lues répétitivement.
REPETITION 1:
Seule la piste courante est lue répétitivement.
La piste courante ou toutes les pistes sont lues
répétitivement.
• Pour quitter la lecture répétitive
Appuyer sur STOP.
Lorsque c’est un disque DVD qui est programmé,
l’unité arrête sa lecture et sort du mode répétition.
Lorsque c’est un CD Audio ou un CD Vidéo qui est
programmé, l’unité arrête la lecture mais reste en
mode de lecture répétée.
• Pour annuler la lecture répétitive
Lorsque la
indique [REPETITION], appuyer
répétitivement sur ENTER jusqu’à ce que
[REPETITION] revienne à sa coloration originale sur
l’affichage.
NOTES
• La fonction de lecture répétée ne peut pas être utilisé en
lecture de CD Vidéo avec la fonction PBC.
• Pour désactiver la visualisation d’écran
Appuyer sur ON SCREEN.
• Si l’icône
l’étape 2 au cours d’une lecture de DVD
Il n’est pas possible de répéter le titre ou le chapitre en
raison du contenu du disque.
apparaît lorsqu’on appuie sur ENTER à
Page 75

Commandes complexes
Pour répéter un passage désiré [REPET.AB]
OPEN/
CLOSE
TITLE
2, 3
THEATER
POSITION
3D PHONIC SUBTITLE
CANCEL RESUME ZOOM DIGEST
1234
5678
9100+10
TV/VIDEO
SHIFT
RM-SV511U REMOTE CONTROL
7 En cours de lecture
Appuyer sur ON SCREEN.
1
La visualisation d’écran apparaît sur l’écran du
téléviseur.
Utiliser le CURSEUR 5/∞ pour amener la
2
sur [REPET.A-B], appuyer ensuite sur ENTER
au commencement de la section que l’on
désirer répéter (Point A).
La coloration de [REPET.A-B] change.
Appuyer sur ENTER à la fin de la section que
3
l’on désirer répéter (Point B).
L’unité localise “A” et commence la lecture
répétitive entre “A” et “B”.
(pour DVD)
1 / 3
ANGLE
2 / 3
AUDIO
SOUS-
1 / 3
TITRE
REPETITION
St. End
TITLE
CHAP.
03
TIME
010 Mb
A 0 0 : 0 3 0 : B 0 0 : 8 2 5 :
0 : 08 : 52
Point BPoint A
• Pour sortir de la lecture répétée A-B
Appuyer sur STOP. L’unité arrête la lecture et quitte le
mode répété A-B.
Recommandations
Appuyer sur ENTER durant la lecture lorsque la indique
[REPET. A-B] fait sortir du mode répété A-B et poursuivre la
lecture.
REPET.A-B
01
RECH.TEMPS
RECH.CHAP.
(pour CD Vidéo)
St. End
TRK.
010 Mb
A 3 4 8 5 : B 3 522:
Point BPoint A
DVD
TV POWER
RETURN
POWER
STOP PAUSE
PLAY
MENU
ENTER
ON SCREEN
STROBE ANGLE
++
TV ch TV VOL.
––
(pour CD Audio)
PISTE 08 0 : 58TEMPS
MIN SEC MIN SEC
A 0 0 2 1 : B0 1 53:
AUDIO
REPETITION
03
TIME
35 : 22
REPET.A-B
RECH.TEMPS
APPEL PBC
1
MIN SEC
EACH
SELECT.TEMPS
REPETITION
REPET.A-B
RECH.TEMPS
PROGRAME
ACCES DIRECT
INTRO
Point BPoint A
L / R
REMARQUES
• Pour désactiver la visualisation d’écran
Appuyer sur ON SCREEN.
• Si l’icône
apparaît lorsqu’on appuie sur ENTER à
l’étape 2 au cours d’une lecture de DVD
Il n’est pas possible de répéter le titre ou le chapitre en
raison du contenu du disque.
Échantillonnage de toutes les
pistes
Il est possible de prélever des échantillons de toutes les
pistes d’un CD Audio ou d’un CD Vidéo en lisant
seulement le 10 premières secondes de chaque piste
dans l’ordre.
Pour lire seulement le commencement de
chaque piste [INTRO]
OPEN/
CLOSE
TITLE
2, 3
THEATER
POSITION
3D PHONIC SUBTITLE
CANCEL RESUME ZOOM DIGEST
1234
5678
9100+10
TV/VIDEO
SHIFT
RM-SV511U REMOTE CONTROL
7 À l’arrêt
Appuyer sur ON SCREEN.
1
Le visualisation d’écran apparaît sur l’écran du
téléviseur.
Utiliser le CURSEUR 5/∞ pour amener la
2
sur [INTRO].
(pour CD Audio) (pour CD Vidéo)
MIN SEC
PISTE 01 3 : 54TEMPS
Appuyer sur ENTER.
3
L’unité lit les 10 premières secondes de chaque
piste du disque, dans l’ordre numérique, à partir
de la première piste.
Lorsque toutes les pistes ont été lues une fois, le
mode balayage d’INTRO prend fin.
• Pour quitter le balayage d’INTRO
Appuyer sur STOP. L’unité s’arrête et sort du mode de
balayage d’INTRO.
EACH
REMAIN
SELECT.TEMPS
STOP
REPETITION
REPET.A-B
RECH.TEMPS
PROGRAME
ACCES DIRECT
INTRO
RETURN
STOP PAUSE
PLAY
ENTER
TV POWER
POWER
ON SCREEN
STROBE ANGLE
++
TV ch TV VOL.
––
PISTE 01 3 : 54TEMPS
DVD
MENU
1
MIN SEC
EACH
REMAIN
SELECT.TEMPS
STOP
REPETITION
REPET.A-B
RECH.TEMPS
PROGRAME
ACCES DIRECT
INTRO
English
Français
complexes
Commandes
28
Page 76

Commandes complexes
Recommandations
Appuyer sur ENTER durant la lecture d’un disque CD Audio
lorsque la indique [INTRO] fait sortir du mode de balayage
d’INTRO et poursuivre la lecture.
Vue sous angles multiples
Il est possible de bénéficier d’angles de vue différents
dans la mesure où le disque DVD contient des
passages “multi-angles,” pour lesquels une batterie de
caméras a été mobilisée pour prendre une même scène
sous des angles différents. Ces différents angles
peuvent être choisis à partir de l’écran normal ou en
visualisation d’écran.
Recommandations
Au commencement des passages “multi-angles”, l’icône
s’inscrit sur l’écran du téléviseur.
Pour sélectionner un angle de séquence à
partir d’un écran normal [ANGLE]
complexes
Commandes
2
OPEN/
CLOSE
TITLE
THEATER
POSITION
3D PHONIC SUBTITLE
CANCEL RESUME ZOOM DIGEST
1234
5678
9100+10
TV/VIDEO
SHIFT
RM-SV511U REMOTE CONTROL
RETURN
STOP PAUSE
PLAY
ENTER
TV POWER
ON SCREEN
STROBE ANGLE
++
TV ch TV VOL.
––
POWER
MENU
DVD
1
Pour sélectionner un angle de séquence à
partir d’une visualisation d’écran [ANGLE]
OPEN/
CLOSE
TITLE
THEATER
POSITION
3D PHONIC SUBTITLE
CANCEL RESUME ZOOM DIGEST
1234
5678
9100+10
TV/VIDEO
SHIFT
RM-SV511U REMOTE CONTROL
7 En cours de lecture
Appuyer sur ON SCREEN.
1
La visualisation d’écran apparaît sur l’écran du
téléviseur.
Utiliser ANGLE ou CURSEUR 5/∞ pour
2
amener la
Nombre total d’angles enregistrés
sur [ANGLE].
St. End
TITLE
03
TIME
010 Mb
CHOISIR TOUCHE
1 : 34 : 58
RETURN
STOP PAUSE
CHAP.
TV POWER
PLAY
ENTER
STROBE ANGLE
TV ch TV VOL.
03
DVD
POWER
MENU
ON SCREEN
++
––
ANGLE
AUDIO
SOUS-
TITRE
REPETITION
REPET.A-B
RECH.TEMPS
RECH.CHAP.
2, 3
1
1 / 3
2 / 3
1 / 3
7 En cours de lecture
Appuyer sur ANGLE.
1
Appuyer sur ANGLE ou CURSEUR 2/3 pour
2
sélectionner l’angle désiré.
Chaque pression sur la touche ANGLE ou
CURSEUR 2/3 fait changer l’angle.
29
Numéro de l’angle appelé
Utiliser CURSEUR 2/3 pour sélectionner le
3
numéro d’angle voulu.
Exemple:
REMARQUES
• Pour désactiver la visualisation d’écran
Appuyer sur ON SCREEN.
• Lorsqu’apparaît l’icône sur l’écran du téléviseur
La séquence en cours n’est pas enregistrée sous des
angles multiples.
1 / 3
2 / 3
3 / 3
Page 77

Commandes complexes
OPEN/
CLOSE
RETURN
STOP PAUSE
TV POWER
PLAY
3D PHONIC SUBTITLE
STROBE ANGLE
CANCEL RESUME ZOOM DIGEST
TV/VIDEO
RM-SV511U REMOTE CONTROL
DVD
POWER
ENTER
MENU
TITLE
THEATER
POSITION
ON SCREEN
TV ch TV VOL.
++
––
1234
5678
9100+10
SHIFT
Pour sélectionner un angle de séquence à
partir d’une visualisation de la liste
d’angles disponibles [ANGLE]
OPEN/
CLOSE
TITLE
THEATER
POSITION
3D PHONIC SUBTITLE
CANCEL RESUME ZOOM DIGEST
1234
5678
9100+10
TV/VIDEO
SHIFT
RM-SV511U REMOTE CONTROL
7 En cours de lecture
Appuyer et maintenir enfoncé ANGLE plus de
1
1 seconde.
Jusqu’à neuf angles
de caméra
enregistrés sur un
disque apparaissent
sur l’écran du
téléviseur.
RETURN
STOP PAUSE
PLAY
ENTER
TV POWER
ON SCREEN
STROBE ANGLE
++
TV ch TV VOL.
––
POWER
MENU
DVD
2, 3
1
English
Changement de la langue et
Français
du son
Il est possible avec les disques DVD de choisir la
langue des sous-titres, de même que la langue/son
audio parmi les langues incluses sur un disque. Pour
les disques CD Vidéo, on pourra également choisir le
ou les canaux audio.
Pour sélectionner la langue des sous-titres
[SOUS-TITRE]
7 En cours de lecture
En utilisant la touche SUBTITLE (SOUSTITRE)
2
1
Angles de caméra choisis.
Utiliser CURSEUR 5/∞/2/3 pour
2
sélectionner l’angle désiré.
Appuyer sur ENTER.
3
7 L’angle sélectionné apparaît sur l’écran du téléviseur.
REMARQUES
• Lorsqu’apparaît l’icône sur l’écran du téléviseur à
l’étape 1 :
La séquence en cours n’est pas enregistrée sous angles
multiples.
• Au cours de l’exploitation ci-dessus, l’audio est muette.
Appuyer sur SUBTITLE .
1
Utiliser le CURSEUR 2/3 pour choisir le
2
sous-titre voulu.
En utilisant la visualisation d’écran
2, 3
OPEN/
CLOSE
TITLE
THEATER
POSITION
3D PHONIC SUBTITLE
CANCEL RESUME ZOOM DIGEST
1234
5678
9100+10
TV/VIDEO
SHIFT
RM-SV511U REMOTE CONTROL
TV POWER
RETURN
STOP PAUSE
PLAY
ENTER
POWER
ON SCREEN
STROBE ANGLE
++
TV ch TV VOL.
––
DVD
MENU
1
complexes
Commandes
30
Page 78

Commandes complexes
1/3 ANGLAIS
2/3 FRANCAIS
3/3 ESPAGNOL
Appuyer sur ON SCREEN.
1
La visualisation d’écran apparaît sur l’écran du
téléviseur.
Utiliser le CURSEUR 5/∞ pour amener la
2
sur [SOUS-TITRE].
Nombre total
1 / 3
ANGLE
2 / 3
AUDIO
SOUS-
1 / 3
TITRE
REPETITION
St. End
TITLE
CHAP.
03
TIME
010 Mb
CHOISIR TOUCHE FRANCAIS
1 : 34 : 58
REPET.A-B
03
RECH.TEMPS
RECH.CHAP.
Numéro de sous-titre sélectionné
Sous-titrage sélectionné
Utiliser le CURSEUR 2/3 pour sélectionner
3
le sous-titre désiré.
Chaque pression sur le CURSEUR 2/3 fait
changer la langue des sous-titres dans la
séquence suivante:
Exemple:
1/3 ANGLAIS
7 En cours de lecture
Appuyer sur ON SCREEN.
1
La visualisation d’écran apparaît sur l’écran du
téléviseur.
Utiliser le CURSEUR 5/∞ pour amener la
2
sur [AUDIO].
Nombre total
1 / 3
ANGLE
2 / 3
AUDIO
SOUS-
1 / 3
TITRE
REPETITION
St. End
TITLE
CHAP.
03
TIME
010 Mb
CHOISIR TOUCHE FRANCAIS
1 : 34 : 58
REPET.A-B
03
RECH.TEMPS.
RECH.CHAP.
Numéro audio sélectionné
Langue audio sélectionnée
Utiliser le CURSEUR 2/3 pour sélectionner
3
la langue audio ou la sélection du son désirés.
Chaque pression sur le CURSEUR 2/3 change la
langue audio ou la sélection du son.
Exemple:
• La langue choisie peut apparaître abrégée sous forme
complexes
Commandes
de sigle sur l’écran du téléviseur. Voir “Annexe A” :
Tableau des langues et de leurs abréviations” en fin de
manuel.
• Lorsqu’apparaît l’icône sur l’écran du téléviseur :
On ne peut pas sélectionner le sous-titre.
Pour changer la langue audio ou le son
[AUDIO]
2/3 FRANCAIS
3/3 ESPAGNOL
-/3 (désactivé)
REMARQUES
OPEN/
TV POWER
RETURN
CLOSE
STOP PAUSE
PLAY
TITLE
ENTER
THEATER
POSITION
3D PHONIC SUBTITLE
CANCEL RESUME ZOOM DIGEST
TV/VIDEO
SHIFT
ON SCREEN
STROBE ANGLE
1234
5678
9100+10
++
TV ch TV VOL.
––
RM-SV511U REMOTE CONTROL
POWER
MENU
REMARQUE
• Lorsqu’apparaît l’icône sur l’écran du téléviseur :
On ne peut pas sélectionner l’audio.
Pour changer le canal audio [AUDIO]
Avec certains CD Vidéo de karaokè, l’un des canaux
audio inclut la chanson, l’autre non. Avec ce genre de
disques, l’on peut opter de se divertir avec le karaokè
avec ou sans chanson en choisissant le canal audio à
mettre en lecture.
DVD
2, 3
1
OPEN/
CLOSE
TITLE
THEATER
POSITION
3D PHONIC SUBTITLE
CANCEL RESUME ZOOM DIGEST
1234
5678
9100+10
TV/VIDEO
SHIFT
RM-SV511U REMOTE CONTROL
RETURN
STOP PAUSE
PLAY
ENTER
TV POWER
POWER
ON SCREEN
STROBE ANGLE
++
TV ch TV VOL.
––
DVD
MENU
2, 3
1
31
Page 79

Commandes complexes
ACTION*
DRAME
ARRET
CINÉMA
THEATER
1
7 En cours de lecture
Appuyer sur ON SCREEN.
1
La visualisation d’écran apparaît sur l’écran du
téléviseur.
Utiliser le CURSEUR 5/∞ pour amener la
2
sur [AUDIO].
L / R
AUDIO
REPETITION
St. End
TRK.
03
CHOISIR TOUCHE
TIME
010 Mb
Choisir à l’aide du CURSEUR 2/3 le, ou les
3
34 : 58
REPET.A-B
RECH.TEMPS
APPEL PBC
canaux audio à mettre en lecture.
L/R: Lecture en son stéréophonique normal.
L: On entend le signal du canal gauche (Left)
produit par les deux haut-parleurs gauche et
droit.
R: On entend le signal du canal droit (Right)
produit par les deux haut-parleurs gauche et
droit.
• Pour désactiver la visualisation d’écran
Appuyer sur ON SCREEN.
Réglage du caractère de
l’image à ses préférences
Il est possible de choisir la qualité de l’image parmi
quatre options (OFF, 1, 2, et 3) selon le type de
programmation, la tonalité de l’image ou ses
préférences personnelles.
Pour régler le caractère de l’image
[THEATER POSITION]
7 En cours de lecture
Appuyer sur THEATER POSITION pour
1
sélectionner le caractère d’image recherché.
Chaque pression sur
la touche, commute
le caractère de
l’image dans la
séquence suivante:
1
2
3
“OFF” (Désactivé)
“OFF” est la position normale.
Au nombre le plus élevé
correspond l’image la plus
sombre.
Mode d’effet sélectionné
Pour bénéficier du son
Surround virtuel
La fonction 3D Phonic permet d’obtenir du système
stéréophonique une simulation d’effet Surround.
Pour simuler le osn Surround [3D PHONIC]
1, 2
OPEN/
CLOSE
TITLE
THEATER
POSITION
3D PHONIC SUBTITLE
CANCEL RESUME ZOOM DIGEST
1234
5678
9100+10
TV/VIDEO
SHIFT
TV POWER
RETURN
STOP PAUSE
PLAY
ENTER
STROBE ANGLE
++
TV ch TV VOL.
––
RM-SV511U REMOTE CONTROL
DVD
POWER
MENU
ON SCREEN
3
English
Français
complexes
Commandes
7 En cours de lecture
Appuyer sur 3D PHONIC.
OPEN/
CLOSE
TITLE
THEATER
1
POSITION
3D PHONIC SUBTITLE
CANCEL RESUME ZOOM DIGEST
1234
5678
9100+10
TV/VIDEO
SHIFT
RM-SV511U REMOTE CONTROL
RETURN
STOP PAUSE
PLAY
ENTER
TV POWER
ON SCREEN
STROBE ANGLE
++
TV ch TV VOL.
––
POWER
MENU
DVD
1
Choisir le mode d’effet désiré en appuyant sur
2
3D PHONIC.
Chaque pression sur
3D PHONIC commute
l’effet dans la
séquence suivante:
CINÉMA
Mode d’effet sélectionné
3D PHONIC
LH
32
Page 80

Commandes complexes
EACH
(Temps écoulé pour la piste en cours)
EACH REMAIN
(Temps restant sur la piste en cours)
TOTAL REMAIN
(Total du temps de disque restant)
TOTAL
(Total du temps de disque écoulé)
OPEN/
CLOSE
RETURN
STOP PAUSE
TV POWER
PLAY
3D PHONIC SUBTITLE
STROBE ANGLE
CANCEL RESUME ZOOM DIGEST
TV/VIDEO
RM-SV511U REMOTE CONTROL
DVD
POWER
ENTER
MENU
TITLE
THEATER
POSITION
ON SCREEN
TV ch TV VOL.
++
––
1234
5678
9100+10
SHIFT
* Lorsqu’on lit un disque DVD enregistré en Dolby
Digital qui comprend plus de 2 canaux, ACTION
n’apparaîtra pas.
Appuyer sur le CURSEUR 2/3 pour régler le
3
niveau de l’effet.
Il est possible
d’ajuster l’effet sur 5
niveaux.
Vers L (low/faible):
Réduit l’effet.
Vers H (high/fort):
Intensifie l’effet.
Niveau d’intensité d’effet
CINÉMA
3D PHONIC
LH
2, 3
1
Recommandations
Pour désactiver l’écran 3D PHONIC, appuyer sur
ENTER. L’écran 3D PHONIC disparaît si aucune action
n’est exercée durant 10 secondes.
NOTES
• La fonction 3D Phonic fonctionne correctement lors de
la lecture des disques enregistrés en DOLBY SURROUND
ou en format DOLBY DIGITAL 5.1 canaux.
Toutefois, cette fonction est également opérante pour la
lecture de disques autres que ceux ne relevant pas des
systèmes ci-dessus, mais l’effet obtenu n’est pas correct.
• La fonction 3D Phonic n’affecte nullement le signal de
train de binaires DTS ou Dolby Digital délivré depuis le
prise jack DIGITAL OUT.
• L’effet sonore ne sera pas programmé et sera par
conséquent inopérant, même si l’on appuie sur 3D
PHONIC, pour le son des disques DVD enregistrés en PCM
linéaire.
complexes
Commandes
• Lorsqu’on active la fonction 3D PHONIC, les réglages MIX.
DEMULTI. et COMPRESSION sur l’affichage de
PREFERENCE 2 se trouvent désactivés.
Vérification du temps sur le
7 Pour CD Audio: En cours de lecture ou à l’arrêt.
Pour CD Vidéo: À l’arrêt.
Appuyer sur ON SCREEN.
1
La visualisation d’écran apparaît sur l’écran du
téléviseur.
Utiliser le CURSEUR 5/∞ pour amener la
2
sur [SELECT. TEMPS]
(pour CD Audio) (pour CD Vidéo)
MIN SEC
PISTE 08 0 : 58TEMPS
Affichage du temps
Appuyer sur ENTER.
3
EACH
SELECT.TEMPS
PLAY
REPETITION
REPET.A-B
RECH.TEMPS
PROGRAME
ACCES DIRECT
INTRO
PISTE 16 55 : 22TEMPS
Chaque pression sur ENTER change la modalité
de temps choisie dans la séquence suivante :
• En cours de lecture (pour CD Audio)
MIN SEC
TOTAL
REMAIN
SELECT.TEMPS
STOP
ACCES DIRECT
Affichage du temps
REPETITION
REPET.A-B
RECH.TEMPS
PROGRAME
INTRO
disque
Il est possible de choisir le mode d’affichage du temps
pour un disque CD Audio ou CD Vidéo dans l’affichage
de la platine avant et en visualisation d’écran .
Pour choisir le mode d’affichage de
33
temps [SELECT. TEMPS]
• À l’arrêt
EACH REMAIN
(Temps enregistré de la piste en cours)
TOTAL (0:00)
TOTAL REMAIN
(Temps de disque total)
EACH (0:00)
Recommandations
Lorsqu’on sélectionne “EACH REMAIN” à l’arrêt, on pourra
changer de piste en appuyant sur 4 ou ¢.
Page 81

Programmations et réglages
PREFERENCE2PREFERENCE1
LANGUE MENU
FRANCAIS
LANGUE AUDIO
FRANCAIS
SOUS-TITRE
FRANCAIS
LANGUE D’ECRAN
FRANCAIS
GUIDE ECRAN
MARCHE
TYPE MONITEUR
CHOISIR TOUCHE
LARGE
PREFERENCE2PREFERENCE1
LANGUE MENU
FRANCAIS
LANGUE AUDIO
FRANCAIS
SOUS-TITRE
FRANCAIS
LANGUE D’ECRAN
FRANCAIS
GUIDE ECRAN
MARCHE
TYPE MONITEUR
CHOISIR TOUCHE
LARGE
PREFERENCE2PREFERENCE1
LANGUE MENU
FRANCAIS
LANGUE AUDIO
FRANCAIS
SOUS-TITRE
FRANCAIS
LANGUE D’ECRAN
FRANCAIS
GUIDE ECRAN
MARCHE
TYPE MONITEUR
CHOISIR TOUCHE
LARGE
Programmations et réglages
Choix des préférences
Il est possible de programmer diverses préférences de
lecture via l’affichage “PREFERENCE”.
Comment régler les préférences sur
l’affichage “PREFERENCE”
OPEN/
CLOSE
TITLE
THEATER
POSITION
3D PHONIC SUBTITLE
CANCEL RESUME ZOOM DIGEST
1234
5678
9100+10
TV/VIDEO
SHIFT
RM-SV511U REMOTE CONTROL
RETURN
STOP PAUSE
PLAY
ENTER
TV POWER
ON SCREEN
STROBE ANGLE
++
TV ch TV VOL.
––
POWER
DVD
MENU
2, 3
1
Comment régler les éléments de
préférence de lange et d’affichage
La PREFERENCE 1 peut se programmer comme suit:
LANGUE MENU
Il est possible de
sélectionner une langue
d’”affichage” par défaut à
afficher si elle est contenue
sur le disque.
Chaque pression sur le
CURSEUR 3 commute le
choix de la langue dans la
séquence suivante:
ANGLAIS → ESPAGNOL → FRANÇAIS → CHINOIS →
ALLEMAND → ITALIEN → JAPONAIS → Code des
langues de AA à ZU
(Voir le “Tableau des Langues et leurs Sigles”, en fin
de manuel.)
Chaque pression sur le CURSEUR 2 commute la
langue dans la séquence inverse à celle ci-dessus.
Langue choisie
English
Français
1
PREFERENCE 1
2
3
Lorsqu’un disque DVD est arrêté ou qu’aucun
disque ne se trouve chargé, appuyer sur ON
SCREEN.
L’affichage PREFERENCE apparaît sur l’écran du
téléviseur.
L’affichage PREFERENCE consiste en deux pages.
Pour tourner la page, amener la
sur l’étiquette
voulue, à l’aide du CURSEUR 5/∞.
PREFERENCE 2
PREFERENCE2PREFERENCE1
LANGUE MENU
LANGUE AUDIO
SOUS-TITRE
LANGUE D’ECRAN
GUIDE ECRAN
TYPE MONITEUR
CHOISIR TOUCHE
FRANCAIS
FRANCAIS
FRANCAIS
FRANCAIS
MARCHE
LARGE
PREFERENCE2PREFERENCE1
SORTIE AUDIO NUM.
MIX.DEMULTI.
COMPRESSION
PROTECTION D'ECRAN
MODE COMPULINK AV
ATTENTE AUTOMATIQUE
CHOISIR TOUCHE
FLUX/PCM
Lt/Rt
ARRET
MODE1
DVD1
ARRET
Déplacer la pour sélectionner l’élément
que l’on désire programmer en utilisant le
CURSEUR 5/∞.
PREFERENCE2PREFERENCE1
LANGUE MENU
LANGUE AUDIO
SOUS-TITRE
LANGUE D’ECRAN
GUIDE ECRAN
TYPE MONITEUR
CHOISIR TOUCHE
FRANCAIS
FRANCAIS
FRANCAIS
FRANCAIS
MARCHE
LARGE
Élément sélectionné
Appuyer sur le CURSEUR 2/3 pour
sélectionner la programmation voulue.
• Pour les détails sur chaque réglage, voir les
paragraphes suivants:
• Pour revenir à l’écran normal, appuyer sur ON
SCREEN.
* Si la langue sélectionnée n’est pas enregistrée, c’est
la langue d’affichage par défaut qui apparaît.
LANGUE AUDIO
Il est possible de
sélectionner la langue
audio par défaut à mettre
en lecture, dans la mesure
où elle est contenue sur le
disque.
Chaque pression sur le
CURSEUR 3 commute le
Langue choisie
réglage de la langue dans la séquence suivante:
ANGLAIS → ESPAGNOL → FRANÇAIS → CHINOIS →
ALLEMAND → ITALIEN → JAPONAIS → Code de
langues de AA à ZU
(Voir le “Tableau des Langues et leurs Sigles”, en fin
de manuel.)
Chaque pression sur le CURSEUR 2 commute le
réglage de langue dans la séquence inverse à celle cidessus.
* Si la langue sélectionnée n’est pas enregistrée, c’est
la langue d’affichage par défaut qui apparaît.
SOUS-TITRE
Il est possible de
sélectionner une langue
de sous-titrage par défaut
à afficher dans la mesure
où elle est contenue sur le
disque en lecture.
Chaque pression sur le
CURSEUR 3 commute le
réglage de la langue de sous-titrage dans la séquence
suivante:
Langue choisie
et réglages
Programmations
34
Page 82

Programmations et réglages
(
)
ANGLAIS → ESPAGNOL → FRANÇAIS → CHINOIS-
ALLEMAND → ITALIEN → JAPONAIS → Code de
langue de AA à ZU
(Voir le “Tableau des Langues et leurs Sigles”, en fin
de manuel.)
Chaque pression sur le CURSEUR 2 commute le
réglage de langue dans la séquence inverse à celle cidessus.
* Si la langue sélectionnée n’est pas enregistrée, c’est
la langue de sous-titrage par défaut du disque qui
apparaît.
LANGUE D’ECRAN
Il est possible de
sélectionner la langue de
la visualisation d’écran.
Chaque pression sur le
CURSEUR 2/3 commute
le réglage de langue dans
la séquence suivante:
ENGLISH
(ANGLAIS)
ESPAÑOL
(ESPAGNOL)
FRANCAIS
FRANÇAIS
Anglais
ON SCREEN LANGUAGE
PREFERENCE2PREFERENCE1
LANGUE MENU
LANGUE AUDIO
SOUS-TITRE
LANGUE D’ECRAN
GUIDE ECRAN
TYPE MONITEUR
CHOISIR TOUCHE
Langue choisie
FRANCAIS
FRANCAIS
FRANCAIS
FRANCAIS
MARCHE
LARGE
ENGLISH
TYPE MONITEUR
Il est possible de choisir un type de moniteur qui
s’harmonise avec le téléviseur lorsque l’on met en
lecture des disques DVD enregistrés pour des
téléviseurs à écran large.
• B.L. 4:3
aux Lettres = nom donné au
format des films en format
large diffusé à la télévision
avec une bande noire en haut
et en bas de l’écran)
Lorsqu’on connecte un
téléviseur normal à l’unité.
Lorsqu’on met en lecture une image large enregistrée
sur un DVD, l’image apparaît avec une bande noire
dans la partie inférieure et supérieure de l’écran.
• P.S. 4:3
PanScan)
Lorsqu’on connecte un
téléviseur normal à l’unité.
Lorsqu’on met en lecture une
image large enregistrée sur un
DVD, un segment de l’image
est immédiatement amputé en marge gauche et
droite. Suivant le disque, ce genre de format de
lecture peut être incompatible. Auquel cas, l’image
sera lue en mode B.L. 4:3
• LARGE 16:9 (téléviseur à
écran large)
Lorsqu’on connecte un
téléviseur écran large à
l’unité.
(Conversion Boîte
(Conversion
comme ci-dessus.
Espagnol
Français
et réglages
GUIDE ECRAN
Programmations
IDIOMA EN PANTALLA
LANGUE D’ÉCRAN
L’unité peu afficher des
icônes “guide écran” ou
des caractères surimposés
à l’image pour informer
sur ce qui se passe pour le
disque ou pour l’unité.
LANGUE MENU
LANGUE AUDIO
SOUS-TITRE
LANGUE D’ECRAN
GUIDE ECRAN
TYPE MONITEUR
CHOISIR TOUCHE
• MARCHE
L’affichage des guides apparaît.
• ARRET
L’affichage des guides disparaît.
Exemples d’icônes “guide écran” ou de caractères
pouvant se désactiver:
, ,
ESPAÑOL
FRANCAIS
PREFERENCE2PREFERENCE1
FRANCAIS
FRANCAIS
FRANCAIS
FRANCAIS
MARCHE
LARGE
Comment régler d’autres éléments de
préférence
La PREFERENCE 2 peut être programmée comme suit:
SORTIE AUDIO NUM.
Pour connecter la sortie
numérique de l’unité à un
dispositif extérieur équipé
d’une entrée numérique, il
convient de programmer
correctement cet élément.
• PCM SEUL:
Lorsqu’on connecte la prise jack DIGITAL OUT de
l’unité à l’entrée numérique du PCM linéaire d’un
autre équipement audio.
• FLUX/PCM:
Lorsqu’on connecte à l’entrée numérique d’un
amplificateur avec DTS, Dolby Digital et décodeur
audio MPEG incorporés.
• DOLBY DIGITAL/PCM:
Lorsqu’on connecte à l’entrée numérique d’un
décodeur Dolby Digital, ou d’un amplificateur avec
décodeur Dolby Digital incorporé.
PREFERENCE2PREFERENCE1
SORTIE AUDIO NUM.
MIX.DEMULTI.
COMPRESSION
PROTECTION D'ECRAN
MODE COMPULINK AV
ATTENTE AUTOMATIQUE
CHOISIR TOUCHE
FLUX/PCM
Lt/Rt
ARRET
MODE1
DVD1
ARRET
35
Page 83

Programmations et réglages
PREFERENCE2PREFERENCE1
SORTIE AUDIO NUM.
FLUX/PCM
MIX.DEMULTI.
Lt/Rt
COMPRESSION
PROTECTION D'ECRAN
MARCHE
MODE1
MODE COMPULINK AV
DVD1
ATTENTE AUTOMATIQUE
CHOISIR TOUCHE
ARRET
PREFERENCE2PREFERENCE1
SORTIE AUDIO NUM.
FLUX/PCM
MIX.DEMULTI.
Lt/Rt
COMPRESSION
PROTECTION D'ECRAN
ARRET
MODE1
MODE COMPULINK AV
DVD1
ATTENTE AUTOMATIQUE
CHOISIR TOUCHE
ARRET
Le tableau ci-dessous indique la relation existant entre
les types de disques mis en lecture et les signaux de
sortie.
Disques lus
DVD 48-kHz,
PCM linéaire 16
bits
DVD 48-kHz,
PCM linéaire
20/24 bits
DVD 96-kHz,
PCM linéaire
DVD avec DTS
DVD avec
Dolby Digital
DVD avec
MPEG audio
CD Vidéo
CD Audio
CD Audio avec
DTS
FLUX/PCM
DVD 48-kHz,
PCM linéaire
16 bits
48-kHz, PCM
linéaire 20
bits
Pas de sortie
Train de
bits DTS
Train de bits
Dolby Digital
Train de bits
MPEG
44,1-kHz,
PCM linéaire
16 bits
44,1-kHz,
PCM linéaire
16 bits
Train de
bits DTS
Sortie
DOLBY DIGITAL/PCM
←
←
←
Pas de
sortie
←
48-kHz, PCM
linéaire 16 bits
←
←
←
REMARQUES
• L’unité n’offre pas de fonction de décodage DTS.
• Lorsqu’on lit un disque DVD ou Audio CD avec le DTS,
utiliser un décodeur DTS pour obtenir des signaux
corrects des haut-parleurs. Ne jamais utiliser des prises
jacks de sortie analogiques, celles-ci produisent des
signaux non conformes qui risquent d’endommager les
haut-parleurs.
Lorsqu’on connecte les sorties analogiques et les sorties
numériques simultanément, veiller absolument à choisir
correctement la source de l’amplificateur, ou alors mettre
la commande de volume de l’amplificateur connecté aux
sorties analogiques au minimum.
MIX. DEMULTI.
En programmant
correctement MIX.
DÉMULTI. l’on obtient des
disques DVD enregistrés en
audio multi-canaux
Surround Dolby Digital un
mixage stéréophonique
optimal pour la chaîne audio.
• Lt/Rt (seulement disques Dolby Digital) :
Pour le monitoring des signaux de sortie audio 2canaux de l’unité via un Décodeur Dolby Pro Logic.
• Lo/Ro :
Pour le monitoring des signaux de sortie audio 2canaux de l’unité via un téléviseur ou un
amplificateur sans Décodeur Dolby Pro Logic
incorporé. Également pour enregistrer une sortie
audio DVD sur une cassette, un MD, etc.
REMARQUE
• La fonction MIX. DÉMULTI. demeure inopérante lorsque
la fonction 3D PHONIC est activée.
PREFERENCE2PREFERENCE1
SORTIE AUDIO NUM.
MIX.DEMULTI.
COMPRESSION
PROTECTION D'ECRAN
MODE COMPULINK AV
ATTENTE AUTOMATIQUE
CHOISIR TOUCHE
PCM SEUL
←
←
←
←
48-kHz, PCM
linéaire 16 bits
←
←
←
←
FLUX/PCM
Lt/Rt
ARRET
MODE1
DVD1
ARRET
COMPRESSION
Il est possible de
comprimer la gamme
dynamique du son si
nécessaire. Grâce à cette
fonction, l’on peut
entendre très facilement
un très beau son à volume
réduit.
• MARCHE
L’audio est lue avec la compression de la gamme
dynamique.
• ARRET
L’audio est lue telle qu’elle a été enregistrée.
REMARQUES
• La fonction de compression agit seulement si le disque
mis en lecture a été enregistré en DOLBY DIGITAL 1 Canal
ou 2 Canaux. Cette programmation est inopérante sur
les autres disques.
• La fonction de compression est inopérante lorsque la
fonction 3D PHONIC est activée.
PROTECTION D'ECRAN
Un écran moniteur de
téléviseur peut être grillé
si une image statique
demeure affichée trop
longtemps. Pour éviter cet
inconvénient, l’unité
déclenche
automatiquement la
fonction protectrice d’écran dès qu’une image statique,
telle qu’une visualisation d’écran, ou un menu, reste
affichée plus de 5 minutes.
• MODE 1
L’image est défilée.
• MODE 2
L’image n’est pas défilée.
• VARIATEUR
L’image s’assombrit.
• ARRET
La fonction protectrice d’écran est désactivée.
REMARQUES
• Lorsque le mode de protection d’écran est placé sur
VARIATEUR (Dimmer), l’écran d’affichage de la platine
avant s’assombrit également (FL Dimmer). Pour revenir
à la luminosité normale, il faut régler sur un autre mode.
• L’écran moniteur d’un projecteur ou d’un téléviseur de
projection se grille facilement si une image statique
demeure affichée trop longtemps. Veiller absolument à
ne pas laisser griller l’écran moniteur lorsque le mode
de protection d’écran a été ARRET.
• L’écran du téléviseur pourrait se brouiller lorsqu’on
programme le protecteur d’écran sur MODE 1. Il faut dans
ce cas choisir un autre mode.
English
Français
et réglages
Programmations
36
Page 84

Programmations et réglages
CENSURE PARENTALE
CODE PAYS
CA
ETABLIR NIVEAU
NIVEAU8
CODE
– – – –
SORTIE
CHOISIR TOUCHE ENTER
CENSURE PARENTALE
CODE PAYS
CA
ETABLIR NIVEAU
NIVEAU 8
CODE
– – – –
SORTIE
CHOISIR TOUCHE ENTER
MODE AV COMPULINK
En cas d’utilisation du
sytème AV Compulink,
cette rubrique doit être
réglée correctement.
Choisir entre les trois
options : “DVD1”, “DVD2”
et “DVD3” selon
l’équipement sur lequel
s’effectuera la connection.
Voir page 40.
PREFERENCE2PREFERENCE1
SORTIE AUDIO NUM.
MIX.DEMULTI.
MIX.DEMULTI.
PROTECTION D'ECRAN
MODE COMPULINK AV
ATTENTE AUTOMATIQUE
CHOISIR TOUCHE
FLUX/PCM
Lt/Rt
ARRET
MODE1
DVD1
ARRET
ATTENTE AUTOMATIQUE
Lorsque l’unité se trouve
en mode arrêt pour plus
de 30 ou de 60 minutes,
l’unité se met
automatiquement en
mode d’attente.
•60
Le temps est réglé sur
60 minutes.
•30
Le temps est réglé sur 30 minutes.
• ARRET
La fonction d’attente automatique est désactivée.
PREFERENCE2PREFERENCE1
SORTIE AUDIO NUM.
MIX.DEMULTI.
COMPRESSION
PROTECTION D'ECRAN
MODE COMPULINK AV
ATTENTE AUTOMATIQUE
CHOISIR TOUCHE
FLUX/PCM
Lt/Rt
ARRET
MODE1
DVD1
60
Lecture limitée pour les
Appuyer sur ENTER tout en maintenant la
1
touche SHIFT enfoncée.
La Censure Parentale apparaît en visualisation
d’écran sur l’écran du téléviseur.
Utiliser le CURSEUR 5/∞ pour amener la
2
sur le [Code Pays] ; choisir le code pays avec
le CURSEUR 2/3 et appuyer sur ENTER.
Il faudra choisir le
code pays dont les
normes ont été
utilisées pour évaluer
le vidéodisque DVD.
Voir “Annexe B :
Liste des Codes Pays
pour la censure
parentale.”
Utiliser le CURSEUR 5/∞ pour amener la
3
sur le [Etablir Niveau]; choisir ensuite le
niveau de censure parentale avec le
CURSEUR 2/3.
Si l’on a choisi “US”
à l’étape 2, le niveau
de censure parentale
change comme cidessous:
Code de pays
enfants
Cette fonction restreint la lecture des DVD qui
contiennent des scènes violentes (et autres) en fonction
du niveau imposé par l’utilisateur. En instaurant par
exemple strictement le niveau de censure parentale, les
passages violents sont remplacés par d’autres plus
anodins afin que les enfants ne soient pas exposés à
des séquences inconvenantes pour leur âge.
et réglages
Programmations
Programmation de la censure parentale
pour la première fois [CENSURE
PARENTALE]
1
OPEN/
CLOSE
TITLE
THEATER
POSITION
3D PHONIC SUBTITLE
CANCEL RESUME ZOOM DIGEST
1234
5678
9100+10
TV/VIDEO
SHIFT
RM-SV511U REMOTE CONTROL
RETURN
STOP PAUSE
PLAY
ENTER
TV POWER
POWER
ON SCREEN
STROBE ANGLE
++
TV ch TV VOL.
––
DVD
MENU
5
1, 2, 3,
4, 5
NONE (No restriction)
G
PG
NC-17
RPG13
Niveau choisi
Si l’on a choisi un code pays autre que “US”, le
niveau de censure parentale change entre Niveau
1 et Niveau 8.
Recommandations
“G” (pour US) ou “Niveau 1” (pour les autres pays) est le
niveau le plus faible.
Les disques frappés d’un niveau de censure supérieur au
niveau choisi par l’utilisateur font l’objet d’une lecture
restreinte.
Appuyer sur ENTER.
4
Saisir son code à quatre chiffres à l’aide du
5
pavé des touches numériques (0 à 9) et
appuyer sur ENTER.
CENSURE PARENTALE
CODE PAYS
ETABLIR NIVEAU
CODE
NOUV. CODE? • • • SAISIR TOUCHE 0~9
CA
NIVEAU 8
– – – –
SORTIE
7 Lorsqu’un disque DVD est arrêté ou qu’aucun disque
ne se trouve chargé.
37
Le niveau de censure parentale et le code sont
désormais programmés.
Page 85

Programmations et réglages
CENSURE PARENTALE
CHANGT. NIVEAU
TEMPORAIRE
CE DISQUE NE PEUT ETRE LU MAINTENANT!
CODE
OUI
NON
– – – –
CODE? • • • SAISIR TOUCHE 0~9
Pour modifier les réglages [CENSURE
PARENTALE]
OPEN/
CLOSE
TITLE
THEATER
POSITION
3D PHONIC SUBTITLE
CANCEL RESUME ZOOM DIGEST
1234
5678
9100+10
TV/VIDEO
SHIFT
1
RM-SV511U REMOTE CONTROL
7 Lorsqu’un disque DVD est arrêté ou qu’aucun disque
ne se trouve chargé.
Appuyer sur la touche ENTER tout en
1
maintenant enfoncée la touche SHIFT.
La visualisation
d’écran de la
Censure Parentale
apparaît sur l’écran
du téléviseur.
RETURN
STOP PAUSE
PLAY
ENTER
DVD
TV POWER
POWER
MENU
ON SCREEN
STROBE ANGLE
++
TV ch TV VOL.
––
CENSURE PARENTALE
CODE PAYS
ETABLIR NIVEAU
CODE
CODE COURANT? • • • SAISIR TOUCHE 0~9
1, 2, 3,
4, 5
2, 5
CA
NEVEAU 8
– – – –
SORTIE
Pour lever temporairement la [CENSURE
PARENTALE]
OPEN/
CLOSE
TITLE
THEATER
POSITION
3D PHONIC SUBTITLE
CANCEL RESUME ZOOM DIGEST
1234
5678
9100+10
TV/VIDEO
SHIFT
RM-SV511U REMOTE CONTROL
Lorsqu’on programme une censure parentale stricte, il
est possible que certains disques ne se mettent pas en
lecture du tout. Si l’on charge un tel disque pour le
mettre en lecture, la visualisation d’écran de censure
parentale apparaît sur l’écran du téléviseur et l’unité
demandera à l’utilisateur s’il désire que la censure
parentale soit provisoirement levée ou non.
RETURN
STOP PAUSE
PLAY
ENTER
TV POWER
ON SCREEN
STROBE ANGLE
++
TV ch TV VOL.
––
POWER
DVD
MENU
1
2
English
Français
Saisir son code à quatre chiffres à l’aide du
2
pavé des touches numériques (0 à 9) et
appuyer sur ENTER.
Si l’on a saisi le mauvais code, “ERRONÉ!
NOUVEL ESSAI......” apparaît sur l’écran du
téléviseur, interdisant de passer à l’étape suivante.
Utiliser le CURSEUR 5/∞ pour amener la
3
sur [ETABLIR NIVEAU], et utiliser ensuite le
CURSEUR 2/3 pour sélectionner le niveau
de censure parentale.
CENSURE PARENTALE
CODE PAYS
ETABLIR NIVEAU
CODE
CHOISIR TOUCHE ENTER
Appuyer sur ENTER.
4
Saisir son code à quatre chiffres à l’aide du
5
CA
NIVEAU 8
– – – –
SORTIE
Niveau choisi
pavé des touches numériques (0 à 9) et
appuyer sur ENTER.
7 La nouvelle programmation est maintenant opérante.
REMARQUES
• Si l’on saisit un code faux plus de trois fois, dans l’étape
2 ci-dessus, la se déplace automatiquement sur
[SORTIE] et le CURSEUR 5/∞ demeurent inopérant.
• Si l’on a oublié son code à l’étape 2
Saisir “8888”.
Utiliser le CURSEUR 5/∞ pour amener la
1
sur [TEMPORAIRE] ; puis, toujours avec le
CURSEUR 2/3 sélectionner [OUI] ou [NON]
; et enfin, appuyer sur ENTER.
Si l’on choisit [OUI],
la
se déplace
vers la palge CODE.
Si l’on a choisi
[NON] appuyer sur
OPEN/CLOSE
(ouvrir/fermer) pour
décharger le disque.
Saisir son code à quatre chiffres à l’aide du
2
pavé des touches numériques (0 à 9).
Si l’on a saisi le mauvais code, <ERRONÉ!
NOUVEL ESSAI...> apparaît sur l’écran du
téléviseur, interdisant de passer à l’étape suivante.
La Censure parentale est levée, l’unité commence
la lecture.
REMARQUE
• Si l’on saisit un code faux plus de trois fois, dans l’étape
2 ci-dessus, la se déplace sur [NON]
automatiquement et le CURSEUR 5/∞demeure
inopérant.
et réglages
Programmations
38
Page 86

Informations complémentaires
Informations complémentaires
Soins à apporter dans la manipulation et l’entretien des disques
Comment se traitent les disques
Ne jamais poser les doigts sur la surface du disque (la face brillante aux reflets métalliques, ou encore, la face sans
étiquette) lorsqu’on le manipule.
Les disques sont en plastique, ils se griffent donc facilement. Lorsqu’un disque est devenu sale, poussiéreux, griffé ou
déformé, les images et les sons ne peuvent plus être lus correctement. De tels disques pourraient même créer des
dysfonctions de lecteur.
Et même le côté de l’étiquette
Ne pas détériorer le côté portant l’étiquette, coller du papier dessus, par exemple, ou utiliser un agent adhésif
quelconque sur sa surface.
Rangement
Toujours veiller à ce que les disques demeurent sagement rangés dans leur pochette. Empiler les disques les uns sur
les autres sans leur pochette protectrice, les déformerait. Ne pas laisser les disques exposés directement à la lumière
du jour, ni dans un endroit humide ou trop chaud. Et éviter surtout de les abandonner dans la voiture l’été!
Entretien des disques
Dès que l’on relève des empreintes de doigt ou autres taches sur le disque, essuyer au chiffon doux et sec, en
rayonnant du centre à la périphérie.
Si la saleté demeure rétive à ce traitement, essuyer cette fois au chiffon doux humidifié à l’eau. Ne jamais utiliser de
produits de nettoyage pour disques, pétrole, alcool ou tout agent antistatique.
Attention :
Il peut arriver qu’en lecture le son, ou l’image, devienne brouillé. Ceci est parfois dû␣ au disque lui-même. (Il pourrait
ne pas être au niveau des normes industrielles exigées).
Informations
Ces symptômes proviennent des disques, et non d’un mauvais fonctionnement du lecteur.
complémentaires
39
Page 87

Informations complémentaires
Système de tél´écommande AV COMPU LINK
Lorsqu’on fait l’achat séparément d’un téléviseur, magnétoscope à cassettes, lecteur DVD, récepteur, ou tout autre
composant et qu’on les interconnecte, il faut commander à chacun de ces éléments individuellement. C’est ici
qu’intervient le système de télécommande AV COMPULINK de JVC qui répond à la demande générale d’avoir un
système constitué d’éléments individuels mais présentant cependant la commodité de manipulation d’une seule unité
solidaire.
Connexions et montage
Connecter les unes aux autres les bornes AV COMPULINK de chaque composant à l’aide du cordon AV COMPULINK.
Vers AV COMPULINK (II/EX)
TV
Lecteur DVD
English
Français
• Si l’on connecte un lecteur DVD à un téléviseur via AV COMPULINK, régler l’AV COMPULINK du lecteur DVD,
comme suit:
• Lorsqu’on connecte à la borne d’entrée VIDEO 1 du téléviseur: DVD2
• Lorsqu’on connecte à la borne d’entrée VIDEO 2 du téléviseur: DVD3
Vers AV COMPU LINK (II ou EX)
Vers AV COMPU LINK
TV
Lecteur DVD VCR (Magnétoscope à cassettes)
• Si l’on connecte un lecteur DVD à un téléviseur et un VCR via AV COMPULINK, régler le Code de Télécommande du
VCR et l’AV COMPULINK du lecteur DVD, comme suit:
• Lorsqu’on connecte à la borne d’entrée VIDEO 1 du téléviseur:
RÈglage de l’AV COMPULINK du lecteur DVD: DVD2
Code de Télécommande du VCR : B.
• Lorsqu’on connecte à la borne d’entrée VIDEO 2 du téléviseur:
Réglage de l’AV COMPULINK du lecteur DVD: DVD3
Code de Télécommande du VCR: A
Informations
complémentaires
TV
Récepteur Lecteur DVD
• Si l’on connecte un lecteur DVD à un téléviseur et un récepteur via AV COMPULINK, régler l’AV COMPULINK du
lecteur DVD sur DVD1.
• Le réglage AV COMPULINK du lecteur DVD est exploité dans l’affichage “PREFERENCE”. Voir page (37)
pour l’exploitation.
• Pour ce qui regarde la connectique entre le téléviseur et le Récepteur, se reporter aux Instructions pour le
Récepteur.
40
Page 88

Informations complémentaires
Remarques à propos des connexions
• Si l’on connecte un lecteur DVD à un récepteur via AV COMPULINK, dans une chaóne comprenant un décodeur Dolby Digital,
certaines fonctions pourraient ne plus être automatiques.
• La borne AV COMPULINK sur certains téléviseurs porte l’indication “II”. Ne pas connecter la borne marquée “II” avec la borne
AV COMPULINK sur le récepteur. Si l’on établit cette connexion, la chaóne ne fonctionnera pas correctement.
• Connecter les prises jacks AUDIO OUT du lecteur DVD aux jacks d’entrée audio d’un récepteur portant l’indication “DVD”,
faute de quoi, la chaóne ne fonctionnera pas correctement.
• Les manuels d’instructions des téléviseurs ou des magnétoscopes à cassettes (VCR) ne comportent aucune explication sur la
connectique avec un lecteur DVD. Toutefois, un téléviseur ou un VCR doté des bornes AV COMPULINK portant l’indication “II”
ou “EX” pourra toujours être connecté à un lecteur DVD.
Exploitation
L’on peut ainsi profiter d’images et/ou de sons simplement en amenant en mode lecture un composant source (qui lit
les images et/ou les sons, tels le lecteur DVD ou le magnétoscope à cassette (VCR). Il n’est pas nécessaire pour cela
d’agir sur le téléviseur, ni sur le récepteur, ce qui implique qu’on n’aura même pas à agir sur la commutation de
l’alimentation.
Mettre sous tension l’interrupteur principal du téléviseur.
1
Charger un disque dans l’élément source.
2
Appuyer sur la touche 3 de l’élément source.
3
Les actions suivantes deviennent automatisées:
• Mise sous tension du téléviseur.
• Fixation de la source du téléviseur sur l’entrée externe VIDEO 1 ou VIDEO 2.
• Mise sous tension du récepteur.
• Fixation de la source du récepteur sur le composant s’est mis en lecture.
Informations
complémentaires
41
Page 89

Informations complémentaires
Dépannage
Il arrive souvent, après examen, que ce qui était apparu comme une panne n’est finalement pas bien grave...pour peu
qu’on ait pris la peine de consulter la liste des symptômes ci-dessous.
English
Français
Symptôme
Le courant n’arrive pas.
Le module de télécommande
est inopérant.
Aucune image n’apparaît sur le
moniteur.
L’image est bruyante.
L’audio n’est pas reproduite.
Cause probable
La fiche d’alimentation n’est pas
insérée à fond.
Trop éloigné du lecteur.
L’extrémité du module de
télécommande n’est pas pointée dans
la bonne direction.
Les piles sont usées.
La polarité des piles n’est pas
respectée.
La connexion du câble vidéo est mal
faite.
Le choix de l’entrée TV est mauvais.
Le disque n’est pas jouable.
L’unité est directement connectée à un
magnétoscope (VCR) et la fonction de
protection contre la copie est activée.
La connexion est mauvaise.
Le choix de l’entré de l’amplificateur
est mauvaise.
Remède
Insérer bien à fond.
Se rapprocher du lecteur.
Pointer la fenêtre émettrice d’infrarouges
vers le télécapteur situé sur la platine avant
du lecteur.
Remplacer les vieilles piles par des nouvelles.
Retirer les piles et les disposer correctement
en respectant la polarité.
Connecter le câble correctement.
Opérer le bon choix.
Utiliser un disque jouable (voir page 11).
Connecter l’unité en sorte que le signal
d’image s’achemine directement sur le
téléviseur.
Vérifier toutes les connexions.
Choisir correctement.
Aucune audio n’est reproduite
lorsqu’on met en lecture un
DVD enregistré en audio PCM
linéaire, 96kHz.
Son déformé, présence de
bruits parasites.
L’image est brouillée.
L’image ne cadre pas avec
l’écran du téléviseur.
Exploitation impossible,
commandes demeurent
inopérantes.
Le signal audio provient de DIGITAL
OUT de l’unité.
Disque sale.
Le mode de protection d’écran est en
MODE 1, et la fonction de protection
d’écran est activée.
TYPE MONITEUR est mal réglé.
Le téléviseur est mal réglé.
Mauvais fonctionnement de microordinateur dû à la foudre ou à des
phénomènes d’électricité statique.
Une saute brusque de température ou
un regain d’humidité peuvent
provoquer de la condensation.
Utiliser AUDIO OUT lorsqu’on met ce disque
en lecture.
Essuyer la surface du disque.
Amener le mode de protection d’écran sur
l’autre mode.
Sélectionner le type de moniteur
correctement. (voir page 53.)
Régler correctement le téléviseur.
Couper le courant, débrancher la prise
d’alimentation et la rebrancher ensuite.
Couper le courant de l’unité, et le remettre
quelques heures plus tard.
Informations
complémentaires
42
Page 90

Informations complémentaires
Fiche technique
Généralités
Disques lisibles : VIDÉO DVD, CD Audio, CD Vidéo
Format vidéo : NTSC
Divers
Alimentation : AC 120 V , 60 Hz
Consommation : 23 W (sous tension), 2 W (en mode veille)
Poids : 4,3 kg (9,5 livres)
Dimensions (W x H x D) : 435 x 112 x 338 mm
17-3/16 x 4-7/16 x 13-5/16 pouces
Sortie vidéo
COMPONENT (éléments) (prise jack miniature) :
Sortie Y : 1,0 Vp-p (75 ohms)
Sortie PB/PR : 0,7 Vp-p (75 ohms)
VIDEO OUT (prise jack miniature) : 1,0 Vp-p (75 ohms)
S-VIDEO OUT (prise jack S) : Sortie Y : 1,0 Vp-p (75 ohms)
Sortie C : 286 mVp-p (75 ohms)
Résolution horizontale : 500 lignes
Rapport signal/bruit : 65 dB
Sortie audio
ANALOG OUT (prise jack miniature) :2,0 Vrms (10 k ohms)
DIGITAL OUT (optique) : -21 à -15 dBm (crête)
Caractéristiques audio
Réponse en fréquence : CD (cadence d’échantillonnage 44,1 kHzl) : 2 Hz à 20 kHz
DVD (cadence d’échantillonnage 48 kHz) : 2 Hz à 22 kHz
DVD (cadence d’échantillonnage 96 kHz) : 2 Hz à 44 kHz
Gamme dynamique : 16 bit : plus de 100 dB
20 bit : plus de 108 dB
24 bit : plus de 108 dB
Pleurage et scintillement : non mesurables (mois de ± 0,002%)
Distorsion harmonique totale : moins de 0,002%
* Spécifications et présentation sont susceptibles de recevoir des modifications sans nul préavis.
Informations
complémentaires
43
Page 91

Appendix A: Table of languages and their abbreviations
Annexe A: Tableau des langues de travail et de leurs sigles
When you select the subtitle language or sound, the languages shown below are displayed as abbreviations. To
select the desired language, select the abbreviation corresponding the language you want to.
Lorsqu'on choisit la langue des sous-titre ou la langue parlée, les langues figurant au tableau ci-dessous apparaissent
sous forme de sigle. Pour sélectionner la langue souhaitée, sélectionner le signe (abréviation) correspondant à la
langue que l'on désire entendre.
AA Afar
AB Abkhazian
AF Afrikaans
AM Ameharic
AR Arabic
AS Assamese
AY Aymara
AZ Azerbaijani
BA Bashkir
BE Byelorussian
BG Bulgarian
BH Bihari
BI Bislama
BN Bengali, Bangla
BO Tibetan
BR Breton
CA Catalan
CO Corsican
CS Czech
CY Welsh
DA Danish
DZ Bhutani
EL Greek
EO Esperanto
ET Estonian
EU Basque
FA Persian
FI Finnish
FJ Fiji
FO Faroese
FY Frisian
GA Irish
GD Scots Gaelic
GL Galician
GN Guarani
GU Gujarati
HA Hausa
HI Hindi
HR Croatian
HU Hungarian
HY Armenian
IA Interlingua
IE Interlingue
IK Inupiak
IN Indonesian
IS Icelandic
IW Hebrew
JI Yiddish
JW Javanese
KA Georgian
KK Kazakh
KL Greenlandic
KM Cambodian
KN Kannada
KO Korean (KOR)
KS Kashmiri
KU Kurdish
KY Kirghiz
LA Latin
LN Lingala
LO Laothian
LT Lithuanian
LV Latvian, Lettish
MG Malagasy
MI Maori
MK Macedonian
ML Malayalam
MN Mongolian
MO Moldavian
MR Marathi
MS Malay (MAY)
MT Maltese
MY Burmese
NA Nauru
NE Nepali
NL Dutch
NO Norwegian
OC Occitan
OM (Afan) Oromo
OR Oriya
PA Panjabi
PL Polish
PS Pashto, Pushto
PT Portuguese
QU Quechua
RM Rhaeto-Romance
RN Kirundi
RO Rumanian
RU Russian
RW Kinyarwanda
SA Sanskrit
SD Sindhi
SG Sangho
SH Serbo-Croatian
SI Singhalese
SK Slovak
SL Slovenian
SM Samoan
SN Shona
SO Somali
SQ Albanian
SR Serbian
SS Siswati
ST Sesotho
SU Sundanese
SV Swedish
SW Swahili
TA Tamil
TE Telugu
TG Tajik
TH Thai
TI Tigrinya
TK Turkmen
TL Tagalog
TN Setswana
TO Tonga
TR Turkish
TS Tsonga
TT Tatar
TW Twi
UK Ukrainian
UR Urdu
UZ Uzbek
VI Vietnamese
VO Volapuk
WO Wolof
XH Xhosa
YO Yoruba
ZU Zulu
Page 92

Appendix B: Country code list for parental lock
Annexe B: Liste des Codes Pays pour la Censure Parentale
This list is used for the parental Lock operation. For details, see page 37.
Cette liste est utilisée pour l'exploitation de la Censure Parentale (ou Restriction Parentale). Voir le détail Page 37.
AD Andorra
AE United Arab Emirates
AF Afghanistan
AG Antigua and Barbuda
AI Anguilla
AL Albania
AM Armenia
AN Netherlands Antilles
AO Angola
AQ Antarctica
AR Argentina
AS American Samoa
AT Austria
AU Australia
AW Aruba
AZ Azerbaijan
BA Bosnia and Herzegovina
BB Barbados
BD Bangladesh
BE Belgium
BF Burkina Faso
BG Bulgaria
BH Bahrain
BI Burundi
BJ Benin
BM Bermuda
BN Brunei Darussalam
BO Bolivia
BR Brazil
BS Bahamas
BT Bhutan
BV Bouvet Island
BW Botswana
BY Belarus
BZ Belize
CA Canada
CC Cocos (Keeling) Islands
CF Central African Republic
CG Congo
CH Switzerland
CI Côte d’Ivoire
CK Cook Islands
CL Chile
CM Cameroon
CN China
CO Colombia
CR Costa Rica
CU Cuba
CV Cape Verde
CX Christmas Island
CY Cyprus
CZ Czech Republic
DE Germany
DJ Djibouti
DK Denmark
DM Dominica
DO Dominican Republic
DZ Algeria
EC Ecuador
EE Estonia
EG Egypt
EH Western Sahara
ER Eritrea
ES Spain
ET Ethiopia
FI Finland
FJ Fiji
FK Falkland Islands
(Malvinas)
FM Micronesia
(Federated States of)
FO Faroe Islands
FR France
FX France, Metropolitan
GA Gabon
GB United Kingdom
GD Grenada
GE Georgia
GF French Guiana
GH Ghana
GI Gibraltar
GL Greenland
GM Gambia
GN Guinea
GP Guadeloupe
GQ Equatorial Guinea
GR Greece
GS South Georgia and the
South Sandwich Islands
GT Guatemala
GU Guam
GW Guinea-Bissau
GY Guyana
HK Hong Kong
HM Heard Island and
McDonald Islands
HN Honduras
HR Croatia
HT Haiti
HU Hungary
ID Indonesia
IE Ireland
IL Israel
IN India
IO British Indian Ocean
Territory
IQ Iraq
IR Iran (Islamic Republic of)
IS Iceland
IT Italy
JM Jamaica
JO Jordan
JP Japan
KE Kenya
KG Kyrgyzstan
KH Cambodia
KI Kiribati
KM Comoros
KN Saint Kitts and Nevis
KP Korea, Democratic
People’s Republic of
KR Korea, Republic of
KW Kuwait
KY Cayman Islands
KZ Kazakhstan
LA Lao People’s Democratic
Republic
LB Lebanon
LC Saint Lucia
Page 93

LI Liechtenstein
LK Sri Lanka
LR Liberia
LS Lesotho
LT Lithuania
LU Luxembourg
LV Latvia
LY Libyan Arab Jamahiriya
MA Morocco
MC Monaco
MD Moldova, Republic of
MG Madagascar
MH Marshall Islands
ML Mali
MM Myanmar
MN Mongolia
MO Macau
MP Northern Mariana
Islands
MQ Martinique
MR Mauritania
MS Montserrat
MT Malta
MU Mauritius
MV Maldives
MW Malawi
MX Mexico
MY Malaysia
MZ Mozambique
NA Namibia
NC New Caledonia
NE Niger
NF Norfolk Island
NG Nigeria
NI Nicaragua
NL Netherlands
NO Norway
NP Nepal
NR Nauru
NU Niue
NZ New Zealand
OM Oman
PA Panama
PE Peru
PF French Polynesia
PG Papua New Guinea
PH Philippines
PK Pakistan
PL Poland
PM Saint Pierre and
Miquelon
PN Pitcairn
PR Puerto Rico
PT Portugal
PW Palau
PY Paraguay
QA Qatar
RE Réunion
RO Romania
RU Russian Federation
RW Rwanda
SA Saudi Arabia
SB Solomon Islands
SC Seychelles
SD Sudan
SE Sweden
SG Singapore
SH Saint Helena
SI Slovenia
SJ Svalbard and Jan Mayen
SK Slovakia
SL Sierra Leone
SM San Marino
SN Senegal
SO Somalia
SR Suriname
ST Sao Tome and Principe
SV El Salvador
SY Syrian Arab Republic
SZ Swaziland
TC Turks and Caicos Islands
TD Chad
TF French Southern
Territories
TG Togo
TH Thailand
TJ Tajikistan
TK Tokelau
TM Turkmenistan
TN Tunisia
TO Tonga
TP East Timor
TR Turkey
TT Trinidad and Tobago
TV Tuvalu
TW Taiwan, Province of
China
TZ Tanzania, United
Republic of
UA Ukraine
UG Uganda
UM United States Minor
Outlying Islands
US United States
UY Uruguay
UZ Uzbekistan
VA Vatican City State
(Holy See)
VC Saint Vincent and the
Grenadines
VE Venezuela
VG Virgin Islands (British)
VI Virgin Islands (U.S.)
VN Vietnam
VU Vanuatu
WF Wallis and Futuna
Islands
WS Samoa
YE Yemen
YT Mayotte
YU Yugoslavia
ZA South Africa
ZM Zambia
ZR Zaire
ZW Zimbabwe
Page 94

VICTOR COMPANY OF JAPAN, LIMITED
Printed in Japan
JVC
0699TTMUBNTOKEN. FR.
 Loading...