

Page 1
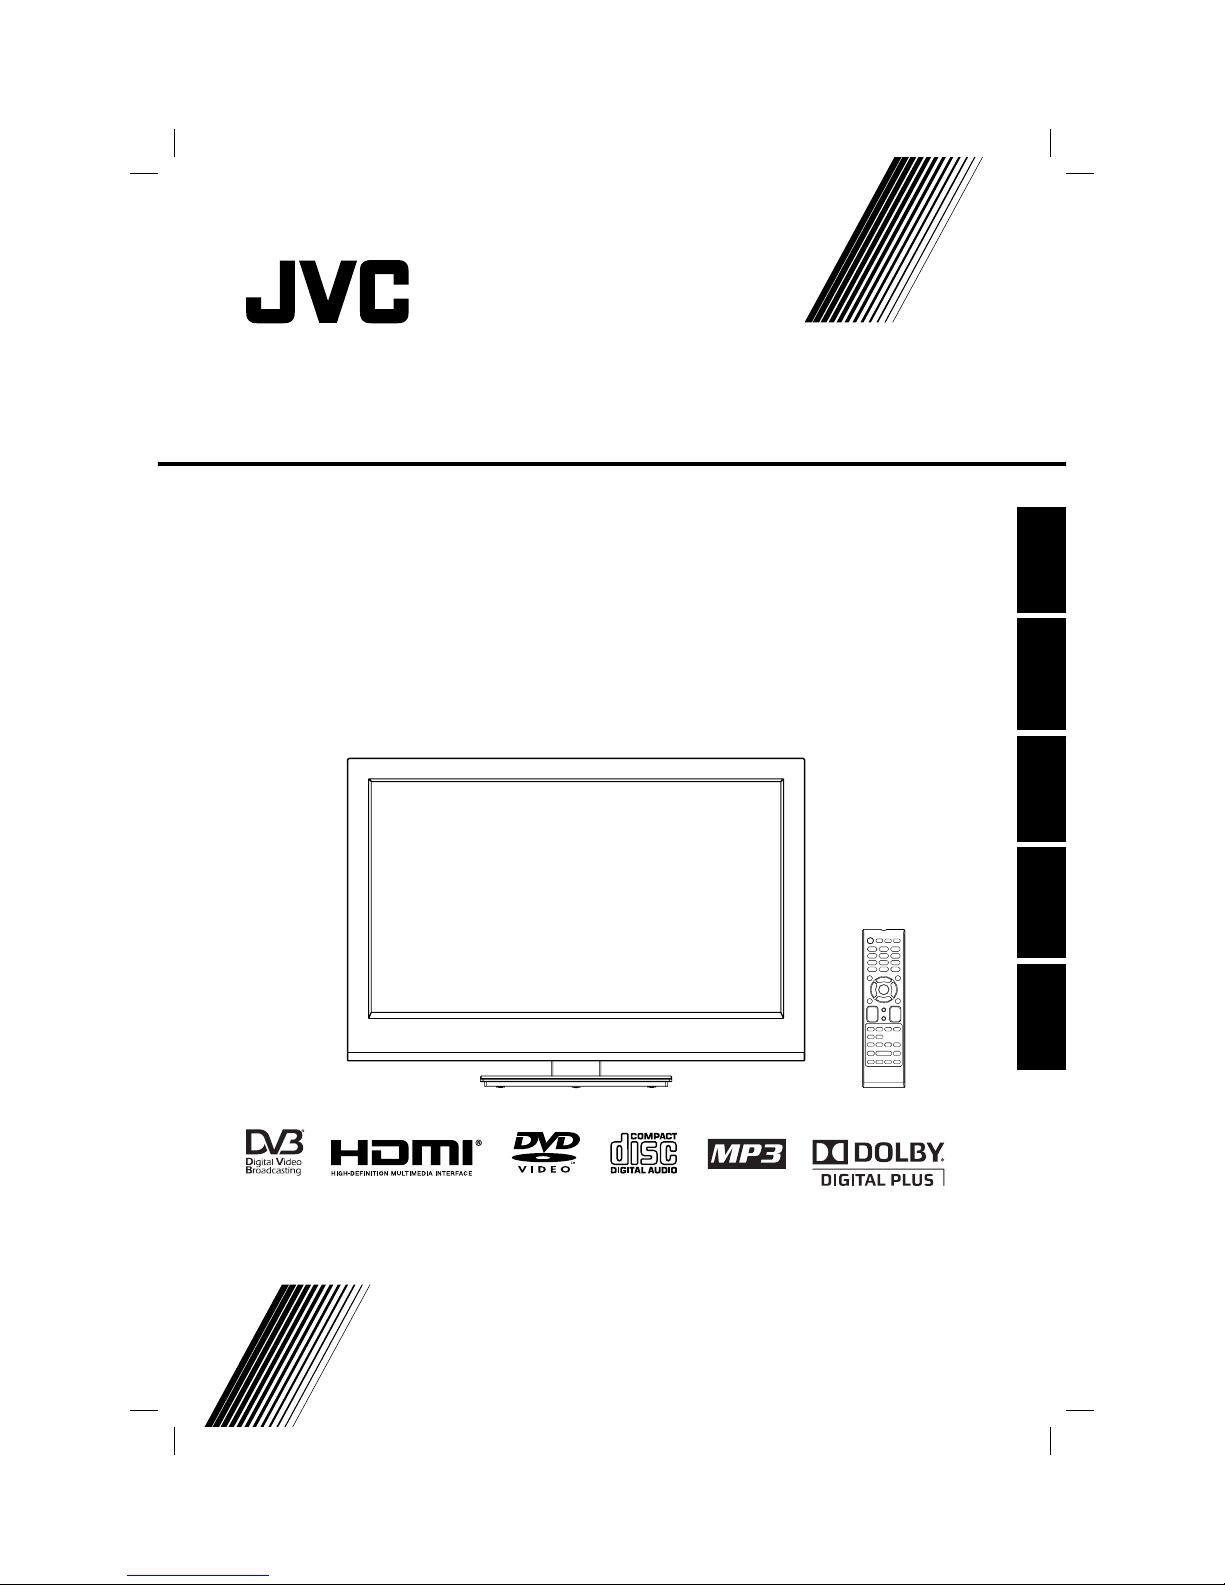
LT-22HD32U
LED TV/DVD Combo
Operating Instructions
Manual de instrucciones
Manuale di istruzioni per l’uso
Mode d’emploi
Gebruiksaanwijzing
ESPAÑOL ENGLISHFRANÇAIS ITALIANO
NEDERLANDS
57W0151A.indb 157W0151A.indb 1 9/15/11 4:42:36 PM9/15/11 4:42:36 PM
Page 2
2
Important Warning
CAUTION:
A UNIT IS A CLASS 1 LASER PRODUCT. HOWEVER THIS UNIT USES A VISIBLE LASER BEAM
WHICH COULD CAUSE HAZARDOUS RADIATION EXPOSURE IF DIRECTED. BE SURE TO OPERATE THE PLAYER CORRECTLY AS INSTRUCTED.
THE FOLLOWING CAUTION LABEL IS LOCATED ON THE REAR PANEL OF THE UNIT.
WHEN THIS UNIT IS PLUGGED INTO THE WALL OUTLET, DO NOT PLACE YOUR EYES CLOSE TO
THE OPENINGS TO LOOK INTO THE INSIDE OF THIS UNIT.
USE OF CONTROLS OR ADJUSTMENTS OR PERFORMANCE OF PROCEDURES OTHER THAN
THOSE SPECIFIED HEREIN MAY RESULT IN HAZARDOUS RADIATION EXPOSURE.
DO NOT OPEN COVERS AND DO NOT REPAIR YOURSELF. REFER SERVICING TO QUALIFIED
PERSONNEL.
WARNING:
TO REDUCE THE RISK OF FIRE OR ELECTRIC SHOCK, DO NOT EXPOSE THIS EQUIPMENT TO
RAIN OR MOISTURE.
TO REDUCE THE RISK OF FIRE OR ELECTRIC SHOCK, AND ANNOYING INTERFERENCE, USE
THE RECOMMENDED ACCESSORIES ONLY.
Precautions
Battery notice (valid in EU only)
Look after our environment - contact your local authorities for advice on how to safely dispose of exhausted
batteries. The crossed out wheelie bin symbol indicates that used batteries should not be disposed of with your
normal household waste! A separate collection system for used batteries is in place to allow the correct treatment
and recycling in accordance with current legislation. Please contact your local authority for details on collection
and recycling schemes in your area.
DVB-C notice
The DVB-C reception possibly requires an additional contract with your cable supplier. A Smartcard
for the receipt of encrypted programmes comes with the contract. Programmes that do not come with the contract
will remain encrypted and not be viewed.
You receive DVB-C programmes with a CA module (CAM) of your cable network operator. You insert the CAM
into the CI-Slot (refer to page 10) of this TV set. You insert the Smartcard into the CAM.
You can possibly receive a few unencrypted DVB-C programmes at your home location even without
an additional contract and without a CAM. However, these programmes frequently reveal a poorer
image quality than the DVB-C-HD programmes that are subject to a charge. The image quality that is frequently
poor is a feature of the respective programmes.
Information for the DVB-T function
Any function relative to the digital television (with the DVB logo) is available only within the country or area
where such signals are transmitted. Verify with the salesman if it is possible to receive a DVB-T signal in the
zone where you live.
Remove the CAM for DVB-T reception, if it has been inserted.
A DVB-T antenna must be connected for DVB-T reception.
Even if the television conforms to the DVB-T specifications, the compatibility to future digital DVB-T
transmissions is not guaranteed.
Some digital television functions may not be available in some countries.
The DVB-T system present in this device is FTA (Free to air).
•
•
•
•
•
•
•
•
•
CLASS 1
LASER PRODUCT
Dear Customer, [European Union]
This apparatus is in conformance with the valid European directives and standards regarding
electromagnetic compatibility and electrical safety.
European representative of JVC KENWOOD Corporation is:
JVC Technical Services Europe GmbH Postfach 10 05 04
61145 Friedberg
Germany
57W0151A.indb 257W0151A.indb 2 9/15/11 4:42:42 PM9/15/11 4:42:42 PM
Page 3

3
Features
Precautions ........................................................... 2
Features ................................................................ 3
Contents ............................................................... 3
Important safety information.................................. 4
Location of controls ............................................... 7
Remote Control ..................................................... 8
Antenna connection ............................................ 10
Auto setup........................................................... 11
Selecting the input source ................................... 11
On-screen Language Selection .......................... 12
Changing the order of stored channels ............... 12
Station search ..................................................... 12
Update Scan ....................................................... 12
Manual Station search ........................................ 13
Basic Operation .................................................. 13
Teletext ............................................................... 14
Stereo reception in analogue cable TV
channel mode ..................................................... 14
Remarks on DVB-T system ................................. 15
Password Setup (Parental lock) .......................... 16
EPG (Electronic Program Guide) ........................ 16
Picture size and resolution .................................. 17
Picture format...................................................... 18
Other convenience functions .............................. 19
Media Operation ................................................. 22
Media Browser .................................................... 22
Playback files ...................................................... 23
Playable File Types ............................................. 24
Disc..................................................................... 25
Playing a disc ...................................................... 27
Zooming (DVD) ................................................... 28
Locating desired scene (DVD/Audio CD) ............ 28
Changing Soundtrack Language (DVD) .............. 28
Subtitles (DVD) ................................................... 28
Changing angles (DVD) ...................................... 29
Title selection (DVD) ........................................... 29
DVD menu (DVD) ................................................ 29
Disc status .......................................................... 29
Using HOME MENU ........................................... 29
Play mode ........................................................... 30
Audio Settings menu ........................................... 31
Video Adjust menu .............................................. 31
Customizing The Function Settings ..................... 31
Parental Control .................................................. 33
Language Code List ............................................ 34
Country/Area code list ........................................ 34
PC connection .................................................... 35
Connecting an HDMI or a DVI device to
the HDMI input .................................................... 35
Connection to other equipment ........................... 35
Troubleshooting table .......................................... 37
License information ............................................. 38
Specifications ..................................................... 39
TV
16:9 LCD screen
LED-Backlight-Technology
On-Screen Language Display in 18
languages
DVB-C-HDTV-Tuner
D V B -T-Tuner
Cable-analogue-Tuner
Electronic Progr. Guide (EPG) for DVB
•
•
•
•
•
•
•
USB-Media player for JPEG and WMA
CI-Slot for CA- module
Auto Power Off after 4 hours with no
operation
DVD Player
Digital output for Dolby Digital and DTS
Playback of DVD, MP3/WMA/JPEG and
Audio-CD
•
•
•
•
•
Contents
Information for Users on Disposal of Old
Equipment and Batteries
[European Union]
These symbols indicate that the electrical and
electronic equipment and the battery with this
symbol should not
be disposed of as
general household
waste at its end-of-life.
Instead, the products
should be handed
over to the applicable
collection points
for the recycling
of electrical and
electronic equipment
as well as batteries
for proper treatment,
recovery and recycling in accordance with your
national legislation and the Directive 2002/96/EC
and 2006/66/EC.
By disposing of these products correctly, you
will help to conserve natural resources and will
help to prevent potential negative effects on the
environment and human health which could
otherwise be caused by inappropriate waste
handling of these products.
For more information about collection points and
recycling of these products, please contact your
local municipal office, your household waste
disposal service or the shop where you purchased
the product.
Penalties may be applicable for incorrect disposal of
this waste, in accordance with national legislation.
[Business users]
If you wish to dispose of this product, please
confirm attached “KESA ELECTRICALS SAFETY
INSTRUCTIONS” to obtain information about the
take-back of the product.
[Other countries outside the European Union]
These symbols are only valid in the European
Union.
If you wish to dispose of these items, please do so
in accordance with applicable national legislation or
other rules in your country for the treatment of old
electrical and electronic equipment and batteries.
Products
Battery
Notice :
The sign Pb below the symbol
for batteries indicates that this
battery contains lead.
ENGLISH
57W0151A.indb 357W0151A.indb 3 9/15/11 4:42:43 PM9/15/11 4:42:43 PM
Page 4

4
Important safety information
This unit has been produced according to all current safety regulations. The following safety tips should safeguard
users against careless use and the dangers connected with such use.
Although this appliance has been carefully manufactured and rigorously checked prior to leaving the factory, as
with all electrical appliances it is possible for problems to develop. If you notice smoke, an excessive build-up
of heat or any other unexpected phenomena, you should disconnect the plug from the mains power socket
immediately.
Ensure that the unit is sufficiently ventilated! Never place next to or underneath curtains!
This set should be only be connected to an AC 220~240V / 50Hz mains power supply - do not attempt to
connect it to any other type of supply.
The socket-outlet must be installed near the equipment and easily accessible.
Any repairs must be carried out by qualified service personnel only.
Do not open this unit. A non-expert attempting to repair the unit could be dangerous and potentially cause a fire
hazard.
Keep away from rodents. Rodents (and also cockatiels) enjoy biting into electric flexes.
The animal can cause a short cut (fire hazard!) and receive a fatal electric shock.
Always hold plug when pulling out plug from power mains supply system. Do not pull on flex. The flex can
become overloaded and cause a short cut.
Never wet clean. Only use a damp cloth, the same as when cleaning furniture.
Do not submerge in or under water!
Set up unit so that no one is able to trip over the flex.
This unit is recommended to be installed on shock-free benches in order to avoid any danger from falling.
Take note that toddlers can pull the unit down from the table or cupboard by means of its flex. Children can hurt
themselves when doing this.
Do not use the unit near heat sources. The casing and flex could be damaged by the impact of heat.
Watch out for kiddies copying what adults do! Do not stick any objects through the vents!
The vents must remain open! No newspapers or covers should be put on the unit!
The remote control is not a toy! Toddlers could swallow the batteries. If a battery has been swallowed, please
seek out a doctor immediately.
The screen is made of glass and can break if damage is done to it. Be careful when collecting sharp-edged
glass splitters.
You could be hurt or the unit could be damaged.
If the unit is mounted on the wall, contact the shop where you purchased the unit for advice, and leave the
installation work to experts. Incomplete installation work can cause you injuries.
Taking fall-prevention measures
- If these measures are not taken, the unit can fall and you could be injured.
- Contact the shop where you purchased the unit to obtain full details of the measures.
When a TV stand is used,
- Ensure the unit is fully on the stand and placed in the centre.
- Do not leave the stand doors open.
- You could be hurt as a result of the unit falling or breaking, or your fingers being caught or jammed. Take extra
precautions if you have children.
Avoid placing the unit on any surfaces that may be subject to vibrations or shocks.
To protect the unit during a thunder storm unplug the AC power cord and disconnect the antenna. Caution: Do
not touch the antenna connector.
When you leave your home for a long period of time, unplug the AC power cord for safety reasons.
The unit becomes warm when in operation. Do not place any covers or blankets on the unit in order to prevent
overheating. The ventilation holes are not to be blocked. Do not set up near radiators. Do not place in direct
sunshine. When placing on a shelf leave 10 cm free space around the whole unit. Make some space around TV
(Correct shelf assembly).
The apparatus shall not be exposed to dripping or splashing and that no objects filled with liquids, such as
vases, shall be placed on the apparatus.
Liquids spilled into the unit can cause serious damage. Switch the set OFF and disconnect the mains power
supply, then consult a qualified service person before attempting to use the unit again.
Please pay attention to the following instructions in order to avoid receiving a life-threatening electric
shock:
Protect against moisture. Never use in the bath or sauna.
Never use near a bath, shower or swimming pool.
Never use the unit if it has got wet. This can also mean condensation moisture, which occurs in the winter when
the cold unit is brought into a heated flat. Wait before operating the unit especially after it has been transported
in the winter, until the cold unit has adjusted to the room temperature.
Do not place any heavy objects on the flex. Electrical isolation could be damaged.
Never wrap insulating tape around damaged flexes or on damaged plugs. These should be repaired or replaced
by qualified service personnel.
Never use this unit if the cabinet is defective. Do not make provisional repairs if the cabinet is damaged - this
should be replaced by a new cabinet if necessary.
Unplug the unit from the mains power supply prior to the cleaning of the unit.
•
•
•
•
•
•
•
•
•
•
•
•
•
•
•
•
•
•
•
•
•
•
•
•
•
•
•
•
•
•
•
•
•
•
•
57W0151A.indb 457W0151A.indb 4 9/15/11 4:42:44 PM9/15/11 4:42:44 PM
Page 5
5
Important safety information
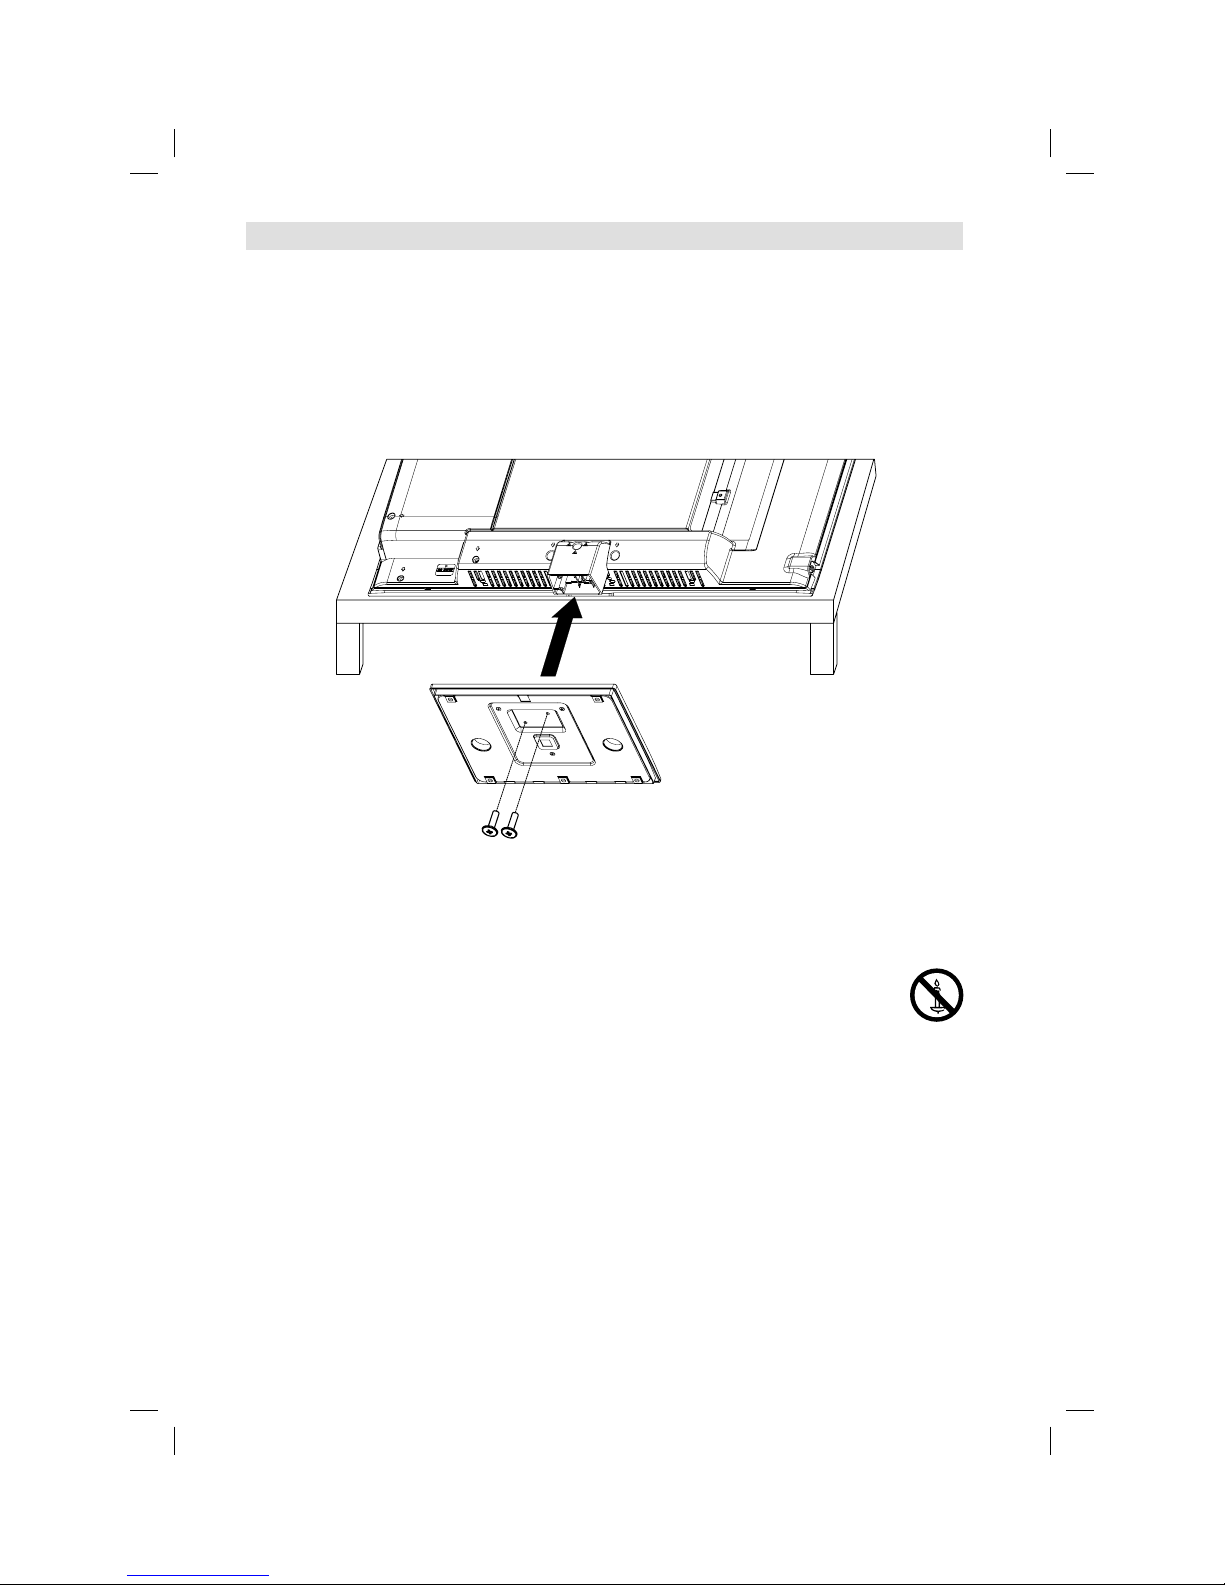
How to attach the stand
NOTE:
• Unplug the AC cord from the AC INPUT terminal.
• Before performing work spread cushioning over the base area to lay the TV on.
• Do not support the TV by the screen as sharp objects and too much pressure may cause damage.
• Be sure to follow the instructions. Incorrect installation of the stand may result in the TV falling over.
1) Place the TV on its front onto a table.
2) Align the stand’s base-plate (supplied) as seen here.
It will fit in only one direction. Make sure the locating pegs project through the locating holes.
3) Carefully hold the base plate in position and secure it with screws (included).
Dismantling the base
For wall mounting, the base plate must be dismantled. To do this, remove screws (M, see page 10) from the
back. Take off the base plate entirely. Fit a VESA 100mm wall mounting kit.
WARNING
To prevent fire, never place any type of candle or open
flame on the top or near the TV set.
Headphone Warning
Loud music can damage your hearing irreversibly, therefore do not set the volume to a high level when
listening through headphones, particularly for extended listening periods.
Moving the unit or carrying by hand
When the unit is moved a long way, unplug the power cord and disconnect the antenna, connecting cables and any fall-prevention apparatus.
• Moving without doing so could result in damage to the power cord, a fire, electric shocks or injuries
from dropping the unit.
Ensure that unpacking and transfer of the unit is carried out by two or more people and that
the unit stays upright when doing this.
When the TV stand has casters, remove caster cups from the stand and push it while supporting the unit.
• Ensure that you support the unit when the stand is pushed, as this can cause the unit to fall and you
could be injured.
• The appliance could leave indentations in wooden tables with extremely soft wooden surfaces due to
its heavy weight.
• Furniture polish could corrode and dissolve rubber feet. Black imprints could be visible on the table.
You should therefore only use TV benches, which have been constructed for this specific purpose.
NOTE:
To detach the base plate, perform these steps in reverse order.•
57W0151A.indb 557W0151A.indb 5 9/15/11 4:42:44 PM9/15/11 4:42:44 PM
Page 6

6
Secure the casters when the unit is installed on a TV stand with casters.
• The stand can move and you could be hurt if the casters are not secured.
Remove casters when the stand is placed on a soft surface such as a mat and carpet.
The distance between eyes and the screen should be about 3 ~ 4 times as long as height of the
screen.
• Viewing from too close a distance can cause strain for your eyes.
When installing the Monitor on a table, be careful not to place the edge of its stand.
• This may cause the Monitor to fall, causing serious injury to a child or adult, and serious damage to
the Monitor.
Possible Adverse Effects on LCD Screen: If a fixed (non-moving) pattern remains on the LCD screen for
long periods of time, the image can become permanently engrained in the LCD TV panel and cause subtle
but permanent ghost images. This type of damage is NOT COVERED BY YOUR WARRANTY. Never leave
your TV on for long periods of time while it is displaying the following formats or images:
• Fixed Images, such as stock tickers, video game patterns, TV station logos, and websites.
• Special Formats that do not use the entire screen. For example, viewing letterbox style (16:9) media on
a normal (4:3) display (Black bars at top and bottom of screen); or viewing normal style (4:3) media on
a widescreen (16:9) display (Black bars on left and right sides of screen).
Attention!
Cleaning instructions for your LCD TV.
Safety note:
Before you start to clean, switch the set’s power off completely and disconnect the plug from the mains
power supply.
Be careful not to scratch the plastic coated front panel - it is highly vulnerable to accidental scratching (e.g.
by fingernails or other sharp items). (While cleaning, do not wear jewelry) that could cause surface scratching (such as rings, wrist-watch, etc.). Use a lint-free cloth and pure water to clean with, but make sure the
cloth is thoroughly wrung out so that it is just damp and not soaking wet - also make sure that the cloth is free
from any dirt that could cause scratching to the surface.
Wipe the set clean using minimal pressure.
Do not use standard window cleaning fluid. Its alcohol / ammonia will dissolve the front window’s coating.
Never use solvent or thinner. Never use special cleaners which are designed for cleaning PC Monitors or
CRT TVs. Finally carefully rub dry with a clean dry lint-free cloth.
Do not use paper towels or tissues to clean the set - paper can disintegrate when wet or may leave a trail of
dust behind. Some paper can also be abrasive and scratch your screen.
Saving electricity
The high energy consumption during operation is reached only with maximal brightness of the display light.
Maximal brightness is only necessary in a daylight environment in order to get a luminous and full of contrast
picture. With less light in the environment, e.g. in the evening, the picture already can be too bright and might
dazzle. The brightness of the display light can be reduced to the desired value in the menu Backlight (see p.
19). If the Backlight is set to a smaller value you can save up to 30 % of energy.
Note:
Maximal contrast values are reached only with a maximal setting (100) of Backlight.
The biggest energy saving effect is reached with minimal setting of Backlight.
•
•
Important safety information
Equipment connected to the protective earthing of the building installation through the mains connection
or through other equipment with a connection to protective earthing – and to a cable distribution system
using coaxial cable, may in some circumstances create a fire hazard. Connection to a cable distribution system has therefore to be provided through a device providing electrical isolation below a certain
frequency range.
Utstyr som er koplet til beskyttelsesjord via nettplugg og/eller via annet jordtilkoplet utstyr – og er tilkoplet
et kabel-TV nett, kan forårsake brannfare.
For å unngå dette skal det ved tilkopling av utstyret til kabel-TV nettet installeres en galvanisk isolator mellom utstyret og kabel-TV nettet.
Utrustning som är kopplad till skyddsjord via jordat vägguttag och/eller via annan utrustning och samtidigt
är kopplad till kabel-TV nät kan i vissa fall medföra risk för brand.
För att undvika detta skall vid anslutning av utrustningen till kabel-TV nät galvanisk isolator finnas mellan
utrustningen och kabel-TV nätet.
57W0151A.indb 657W0151A.indb 6 9/15/11 4:42:45 PM9/15/11 4:42:45 PM
Page 7
7
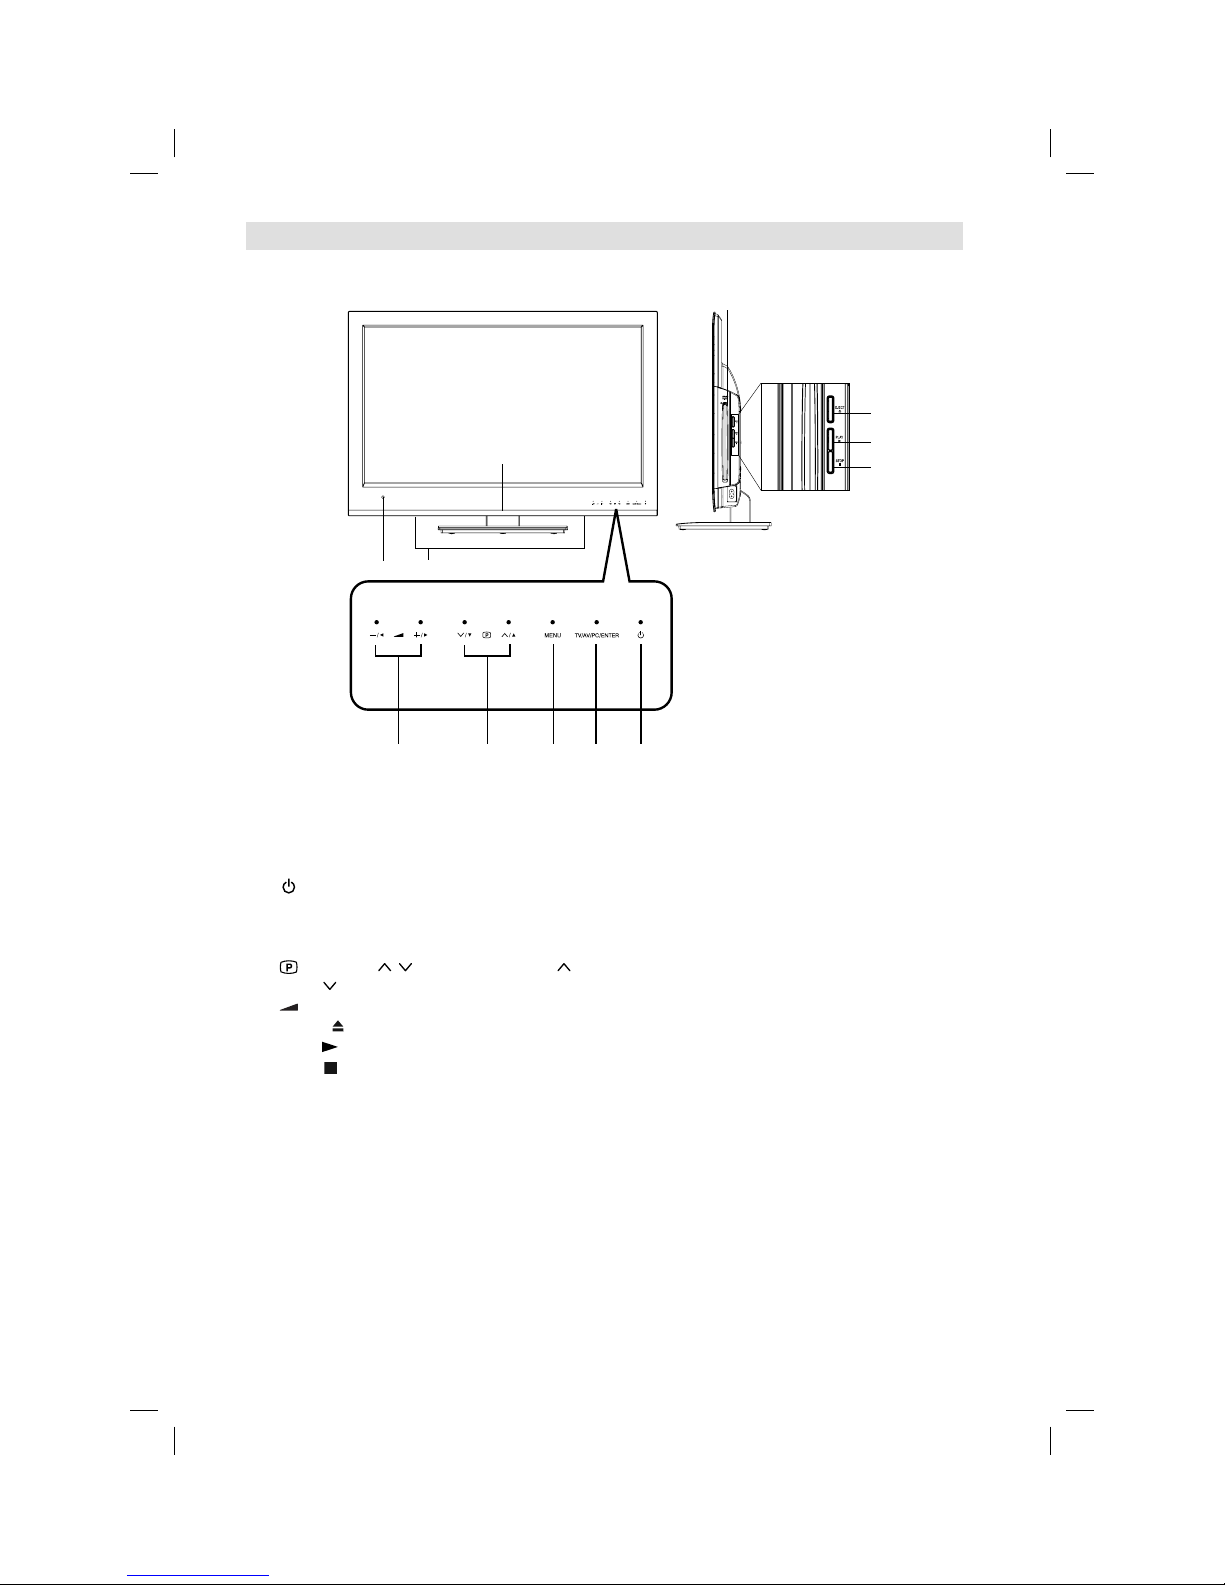
Location of controls
Description of Indicators and Controls
1. Remote sensor
2. Power indicator: The power indicator lights up red in standby mode, and blue in power - ON mode.
3. Loudspeakers
4.
(Power)-button: Preparation: Connect power-cable to AC220~240V/50Hz.
Press power-button to enter standby mode or turn on the power.
5. TV/AV/PC/ENTER button: Select input mode. In Menu : Using as ENTER button.
6. MENU button: To display the menu screen.
7.
(Channel) / /▲/▼ buttons: Press to change to a higher numbered channel set into memory.
Press
to change to a lower numbered channel set into memory. In Menu: Setting.
8.
(Volume) +/–/◀/▶ buttons / In Menu: Setting.
9.
EJECT
button: Eject a disc.
10. PLAY
button: Playback of a disc.
11.
STOP
button: Stop of a disc.
For complete disconnection from the network, remove the supplied power cable from the socket.
5
3
6
78
1
4
2
9
10
11
DVD-Player
57W0151A.indb 757W0151A.indb 7 9/15/11 4:42:46 PM9/15/11 4:42:46 PM
Page 8
8
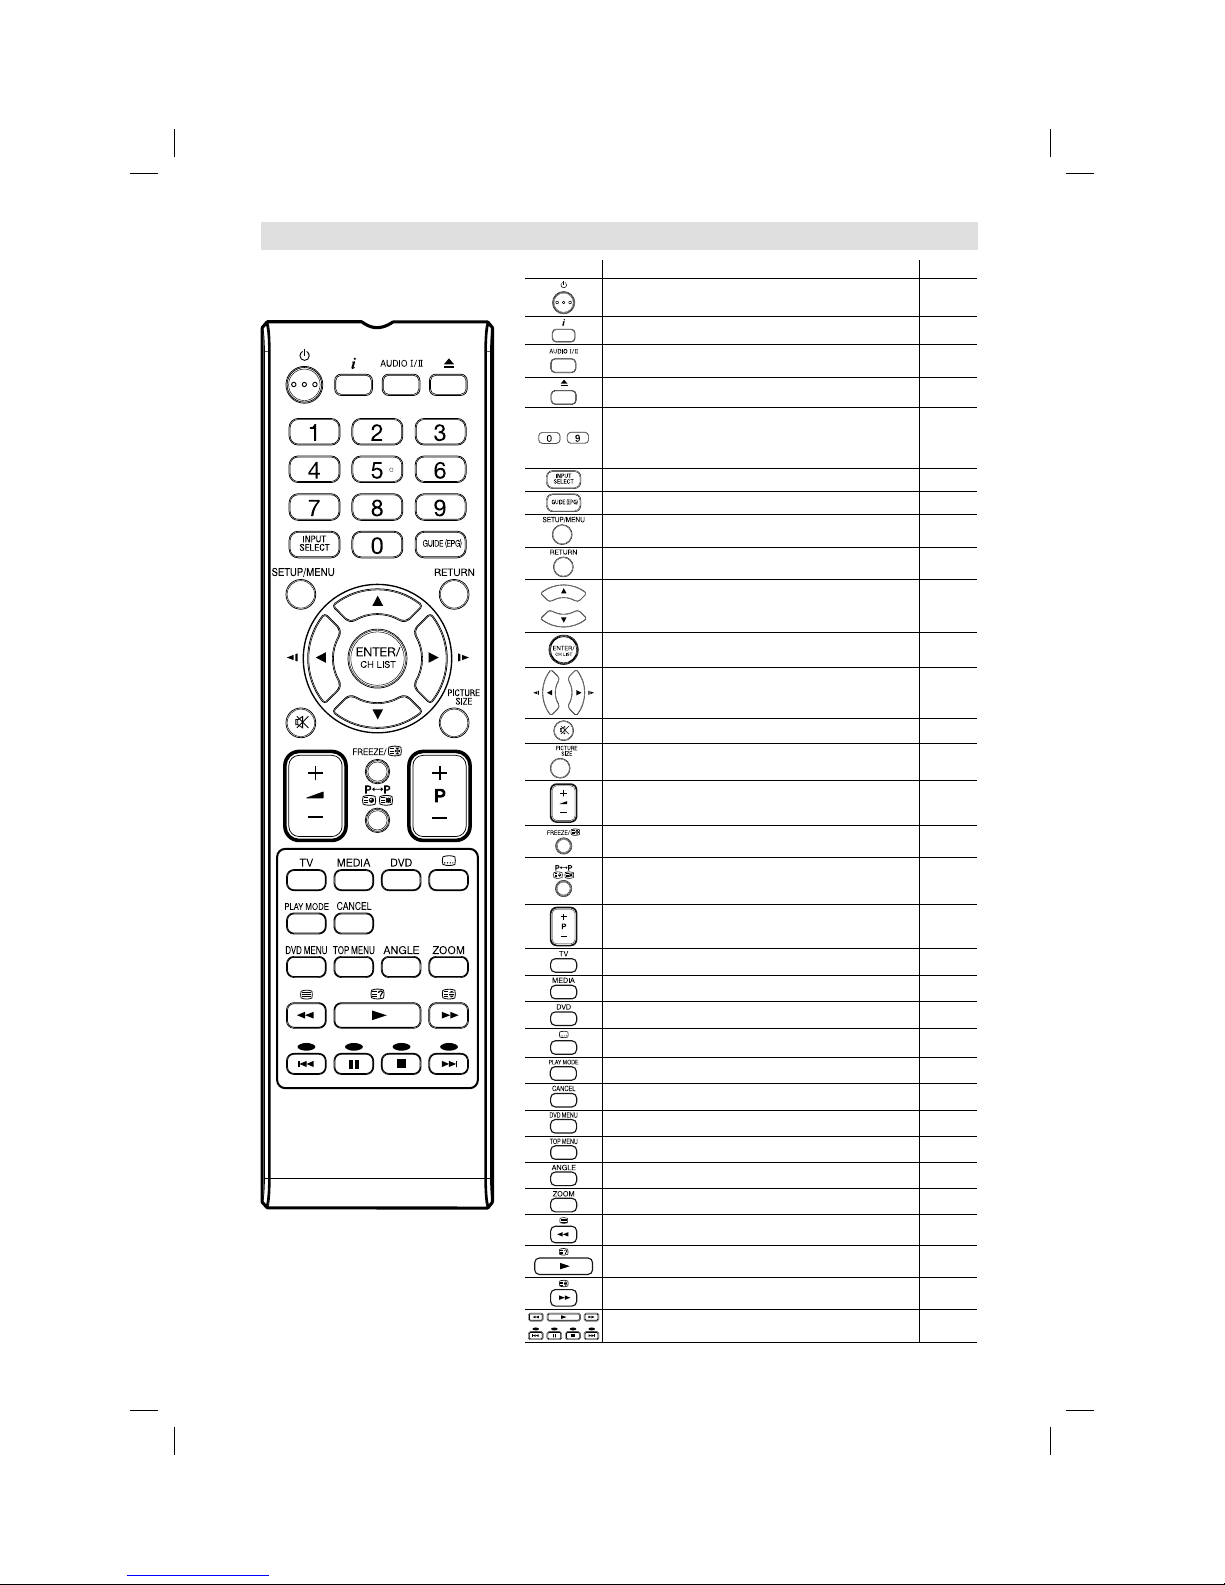
Remote Control
Function
Page
Enter standby mode or turn on the power
11
Display program position number
13, 29
Select between the available broadcast audio
Change sound track language of DVD
14
28
Eject a disc
27
~
Select channel
Select Teletext page
Enter password
Select title/chapter/track
13
14
16, 33
28, 29
Select an input source
11
Display the EPG (Electronic Progr. Guide)
16
Activate the menu
Call HOME MENU
11
29
In menu, return 1 step / exit menu
29
Cursor buttons
Memorize
CH LIST
13
Cursor buttons
Reverse/Forward slow motion
28
Turn the sound on/off
14
Select picture format
18
Volume
14
Still picture
Hold the text page
14
14
Switches between the present channel and the last
selected channel
Sub page selection
14
14
Change the TV channel or Teletext page up or down
13, 14
Select to operate TV
To enter Media Browser
22
Select to operate DVD
27
Display the subtitle 13, 28
Call Play Mode screen
30
Cancel the Program Step
Select menu of a DVD disc
29
Select title of a DVD disc
29
Change playback angle of a DVD disc
29
Zoom (for DVD/JPEG playback)
28
Teletext ON / TV+Text / OFF
14
Reveal quiz page answers
14
Teletext enlargement
14
Control buttons for USB/DVD - playback
Fastext/TOPtext buttons
23, 27
14
57W0151A.indb 857W0151A.indb 8 9/15/11 4:42:48 PM9/15/11 4:42:48 PM
Page 9
9
Remote Control
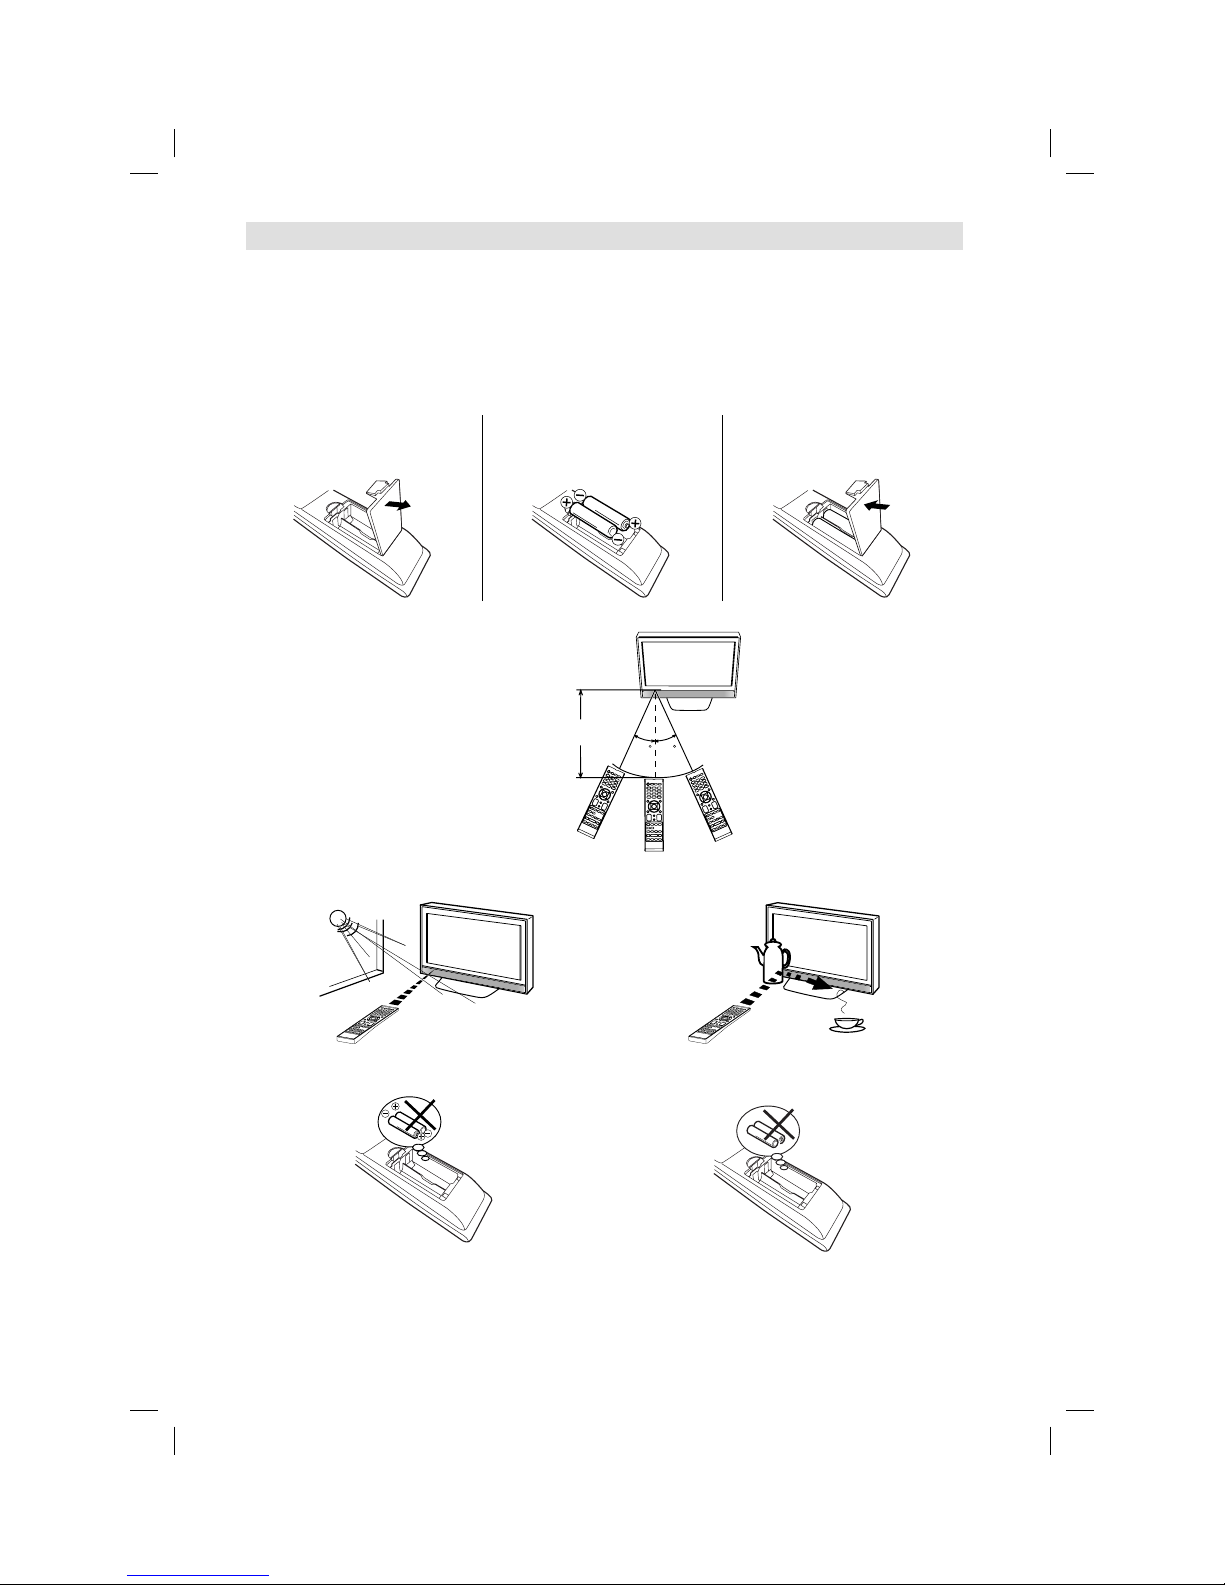
Install the batteries
Use batteries type UM3 (AA-Size).
Do not use old or weak batteries. The remote control may not work properly with a weak voltage from such
batteries. Replace exhausted batteries with new ones. Never try to recharge normal batteries - this could
cause an explosion.
Note:
Exhausted batteries can leak corrosive electrolyte, which may cause damage to the remote
control - therefore remove exhausted batteries immediately.
Batteries should not be exposed to excessive heat such as sunshine, fire or the like.
1
Open the battery
compartment.
2
Install the batteries as shown
below, ensuring the correct
polarity.
3
Close the battery
compartment.
•
•
The remote control handset will not work properly in the following cases:
a) If bright sunlight directly beams onto the unit front. b) If an obstacle is placed between the unit and the
handset.
Z
Z
Z
Z
Z
Z
c) If the batteries have not been installed according
to their polarities.
d) If the batteries are weak.
Distance of Remote Control Operation
Point the remote control
directly at the remote sensor.
Transmitter window
Maximum distance approx. 5m
Remote sensor
30 30
57W0151A.indb 957W0151A.indb 9 9/15/11 4:42:52 PM9/15/11 4:42:52 PM
Page 10

10
100 mm
M4 x 10
100 mm
(L)
(M)
(K)
(H)
(I)
(J)
(A)
(B)
(C)
(D)
(E)
(F)
(G)
(N)
Antenna connection
Note: Before you connect other appliances:
To avoid potentially damaging your set, make sure all items are switched off and disconnected from the
mains power when you make the connections.
Arrange the desired connection.
When you have finished making the connections, reconnect the mains power to the unit and switch it
back on.
Connect your antenna as shown below (A). Connections to other equipment is explained further on
P.35~36. If you have problems with reception, consult a specialist of antenna.
•
•
•
(A)
Antenna: Connect an antenna.
The built-in tuner receives all analogue cable programmes and DVB-T/-C channels.
(B) DIGITAL AUDIO COAXIAL output: digital audio output
(C) AV/COMPONENT input: Input for analogue AV-Signal/Component-Signal. See P.35, 36
Note: AV-AUDIO input is sharing with COMPONENT AUDIO input.
(D) USB input: See P.22-24.
(E) Scart socket: For the connection of scart cable. See P.36.
(F) C.I. slot: for CA- module (CAM) (if PayTV-provider supports this).
Note: To prevent malfunctions and damages, be sure to turn off the TV before inserting or removing
the CAM card.
(G) HEADPHONE jack: Plug headphones with a mini plug (3.5 mm) into this jack.
(H) PC-INPUT (PC): See P.35.
(I) PC/DVI AUDIO input: See P.35.
(J) HDMI/DVI input: See P.35.
(K) Power supply: Connect the supplied power cable to an AC 220-240V/50Hz mains power supply only
- do not attempt to connect it to any other type of supply. Never try to repair a damaged AC power cord
with isolation-tape - this should be repaired by a specialist or replaced. Do not let your pet loose near
the cable. Animals biting into the cable could receive a fatal electric shock, and could cause a hazard
to others.
(L) Bracket holes: Fix a wall mounting bracket (not supplied) here.
(M) To hang the television on a wall, remove these screws and then remove the stand.
Before performing work spread cushioning over an area to lay the TV on.
(N) Service connector cover: Please do not open this cover. There is a socket only for service purpose inside.
Back Side
57W0151A.indb 1057W0151A.indb 10 9/15/11 4:42:55 PM9/15/11 4:42:55 PM
Page 11

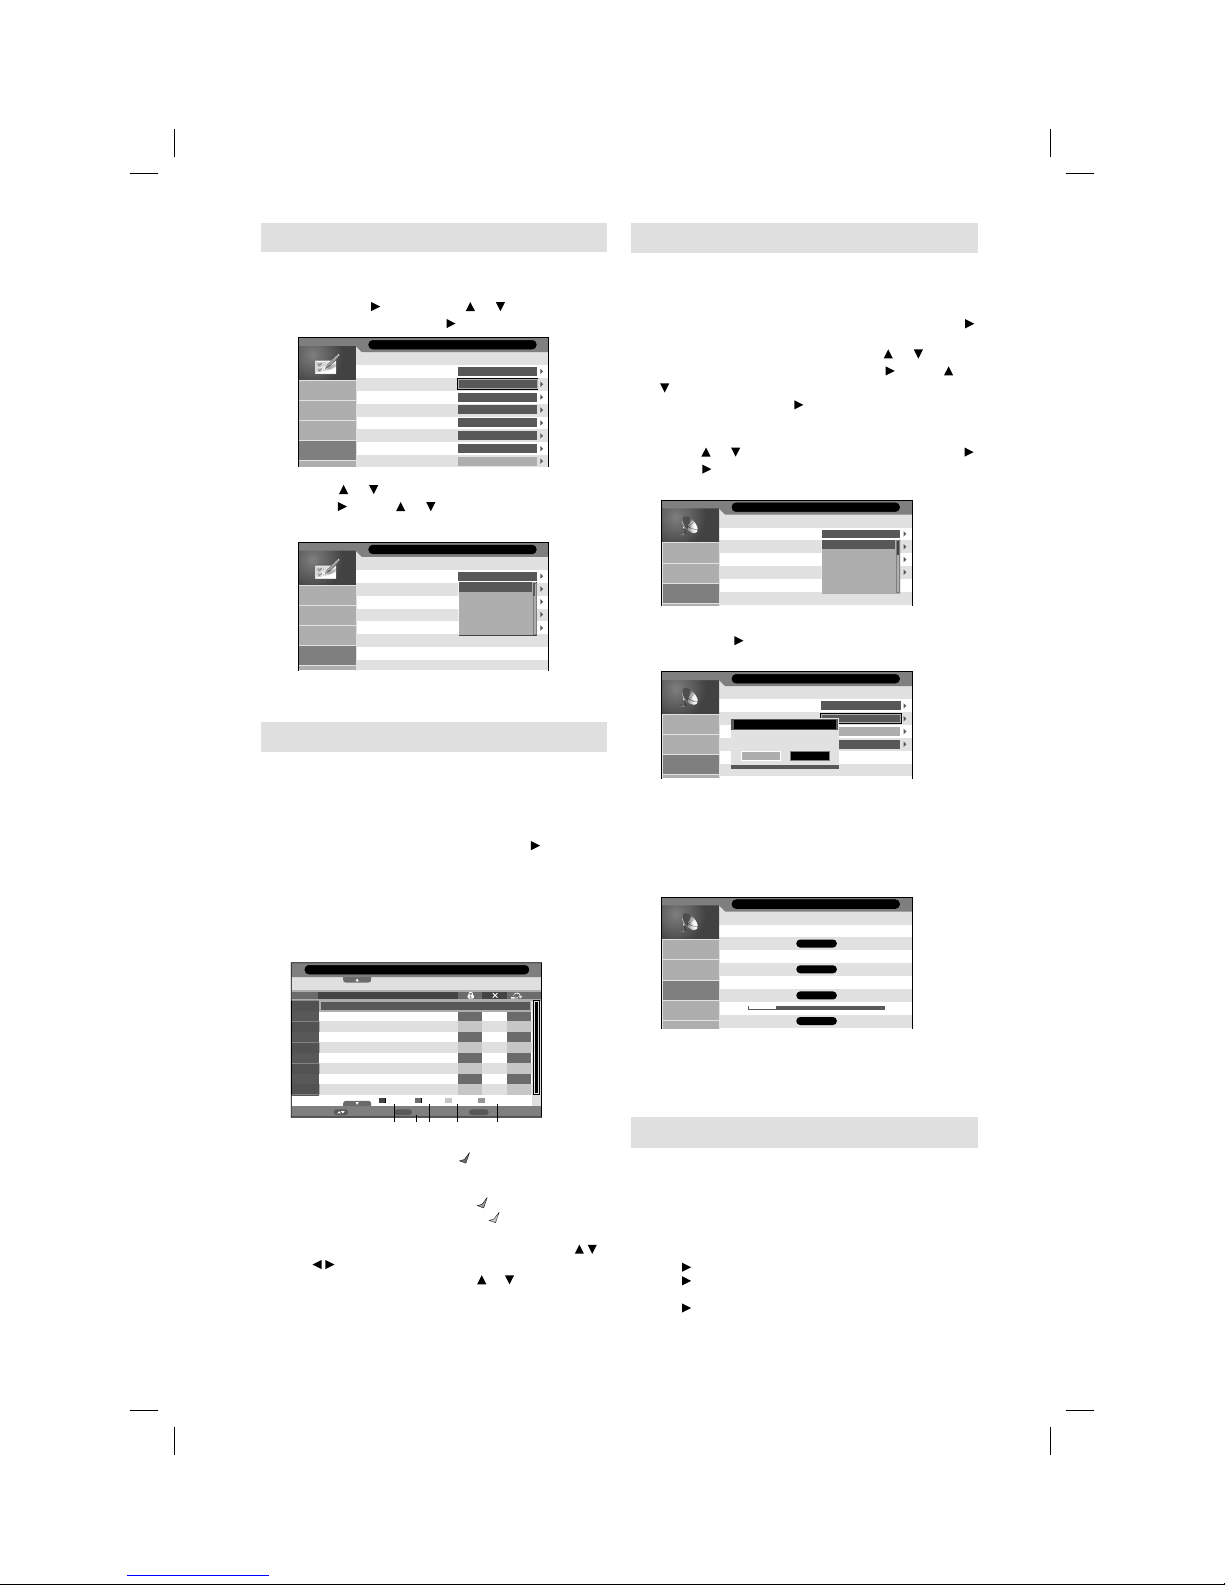
11
Auto setup
The built-in tuner receives DVB-C, DVB-T and Cableanalogue. At the first time you operate after the
purchase, “Auto Installation” menu will appear.
Preparation:
Turn on TV-unit (see P.7) and connect antenna.
1
Auto Installation menu will appear.
Press
or to select desired language.
Then press ENTER
.
Auto Installation
- Setup 1 -
Language : German
English
French
Italian
Polish
2
Press or to select your country.
Then press ENTER
.
Auto Installation
- Setup 2 -
Country :
UK
France
Italy
Polan d
Spain
3
Press or to select Home.
Then press ENTER
.
Auto Installation
- Setup 3 -
TV Location :
Please select where the TV
will be placed. The picture
will be optimized for that
location.
Home
Store
4
If you cancel Auto Power Off (see page 20),
press
or to select Off. Then press ENTER.
Auto Installation
- Setup 4 -
Auto Power Off :
Your TV has been set to
power off after 4 hours of
continuous viewing. If you
want to change this setting,
please choose Off. This
setting can also be changed
in the MENU.
Off
1 Hour
2 Hours
4 Hours
5
Press or to select Antenna or Cable, then
press ENTER.
Auto Installation
- Setup 5 -
TV Connection :
Please select the method of
TV Connection.
Antenna
Cable
6
TV will search for Digital TV-channels at first.
Connect your DVB-T antenna (or DVB-C
antenna if you selected “Cable” at step 5) now.
Continue with ENTER to start auto tuning.
The tuning’s progress will be displayed in
percent for confirmation.
Auto Installation
- Setup 6 -
Start Auto Tune (Digital)
Note:
Please be patient - the Auto Tuning process
can take several minutes to complete.
•
7
When the tuning for Digital TV-channels is
completed, you will be asked if you want to proceed
to autotuning for Analogue TV-channels. If you wish to
start autotune Analogue TV-channels, connect your
Analogue cable-TV antenna and press ENTER.
Note:
If you do not wish to carry out the autotuning for
Analogue TV-channels, press MENU to exit the
menu.
•
Auto Installation
- Setup 7 -
Start Auto Tune (Analogue)
8
When the display reads 100%, normal TV-screen will
appear.
Note:
To cancel the auto tuning, press RETURN during the
process.
THE AUTOMATIC TUNING PROCESS WILL
ONLY START BY ITSELF THE FIRST TIME YOU
SWITCH THE SET ON. HOWEVER YOU CAN
RESTART THIS PROCESS VIA THE MENU
SYSTEM (see page 12).
If you could not set up a correct pair of language and
country in this auto setup process, you will be able to
make your preferred language selection as illustrated in
page 12 (On-screen Language Selection).
Selecting the input source
Press INPUT SELECT to view a signal from
another device connected to your TV, such as a
VCR or DVD player. You can select each input
source depending on which input jacks you used to
connect your devices.
To select the video input source, press INPUT
SELECT or
/ , then press ENTER.
Note:
Playback either source of DVB-T- or DVB-C-TV, and
DVB-T-Radio or DVBC-Radio depends on the selection
in step 2 of “Station search” on page 12.
•
•
•
57W0151A.indb 1157W0151A.indb 11 9/15/11 4:42:58 PM9/15/11 4:42:58 PM
Page 12
12
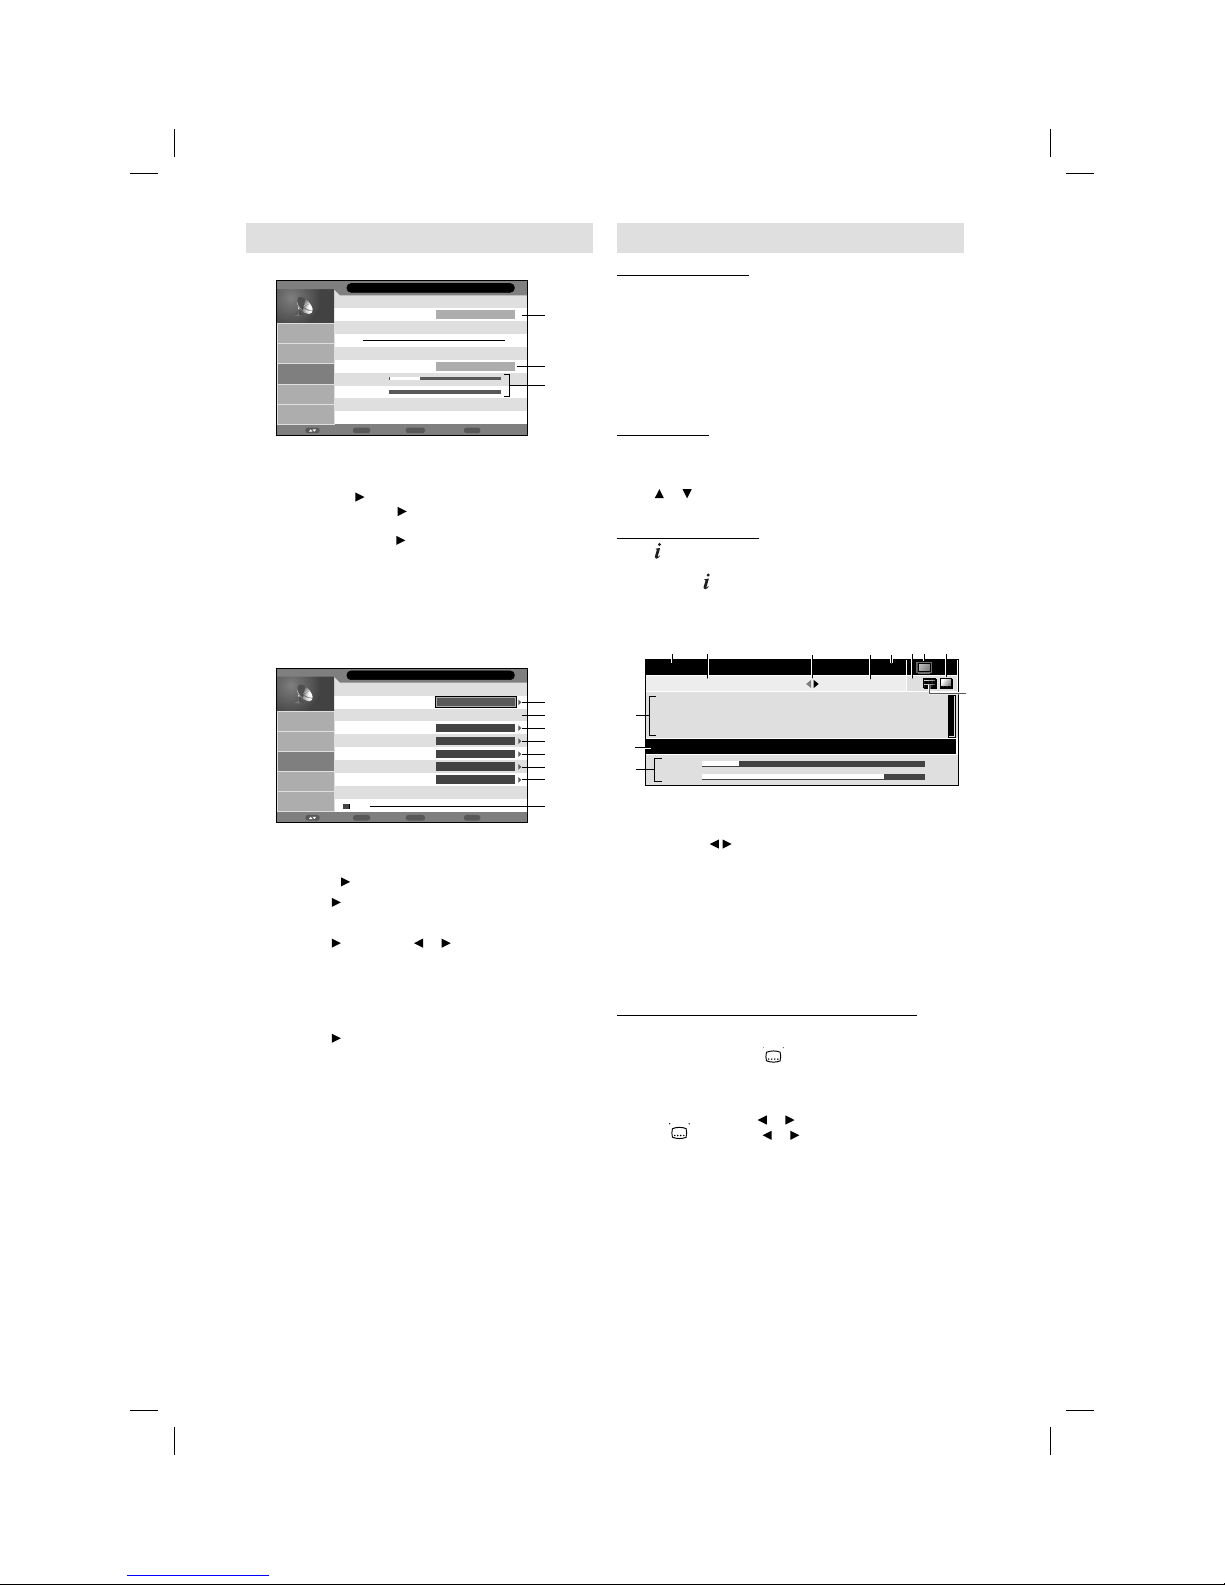
On-screen Language Selection
1
Select Feature (unless you have already
selected when the set was first switched on)
then press
. Then press or to select
Language, then press .
Child Lock
Language
Clock
Sleep Timer
Auto Power Off
Power On LED
Hearing Impaired
CI Info
Off
Off
On
Off
Picture
Sound
Channel
Feature
ENTER
ENTER
ENTER
ENTER
Feature
2
Press or to select OSD Language, then
press . Press or to select the desired
language.
OSD Language
Preferred Subtitle
Preferred Audio
Digital Teletext Language
Analogue Teletext Lang.
Picture
Sound
Channel
Feature
English
English
French
Italian
Polish
Spanish
Feature - Language
3
Press MENU to exit the menu.
Changing the order of stored channels
The Automatic station presetting stores the
stations in a specific order. However, this order
can be changed if you wish.
1
Press MENU. Select Channel Management
option in Channel menu, then press .
2
Press ▲/▼ to select the channel that you want
to change, then select desired option from
the below of the TV-screen. Then press the
appropriate coloured button on the remote
control.
Return
Return
Enter
RenameMove
Lock
No. Program Name
Del Skip Swap
ANTENA 3
ANTENA.NEOX
ANTENA.NOVA
Telehit
FRATV1
MNO
PQR
STU
VWXYZ
0001
0002
0003
0004
0005
0006
0007
0008
0009
Channel - Channel Manager
1 Lock (red button): Red mark will appear.
(Lock is available only when Child Lock is On. See
page16.)
2 Del (green button): Green mark will appear.
3 Skip (yellow button): Yellow mark will appear.
4 Rename (ENTER button): You can change the
name of a channel on the cursor screen with /
//, ENTER and Red/Green/Yellow buttons.
5 Swap (blue button): Press or to select the
position that you want to swap the channel with,
then press ENTER.
Station search
Warning! All previously saved channels are
deleted in Step 5. A new channel search then
starts automatically.
1
Press MENU. Select Channel menu, then press .
2
For Digital channel search, press or to
select TV Connection, then press . Press or
to select Antenna (for DVB-T) or Cable (for
DVB-C), then press .
You can select this option in DTV input mode only.
•
3
Press or to select Auto Search, then press .
Press and then press ▲ or ▼ to select the
desired country, then press ENTER.
Country
All
Digital
Analogue
Picture
Sound
Channel
UK
UK
France
Italy
Poland
Spain
Channel - Auto Search
4
Press ▲ or ▼ to select the searching mode,
then press . The confirmation screen will be
displayed.
Country
All
Digital
Analog
Picture
Sound
Channel
UK
Message
Are you sure?
OK Cancel
ENTER
ENTER
ENTER
Channel - Auto Search
All: Search for the both of Digital, Analogue
and Radio channel.
Digital: Search for Digital and Radio channel.
Analogue:
Search for Analogue channel only.
5
Select OK and press ENTER to start Auto
Search.
Picture
Sound
Channel
Feature
Analogue channels found:
0
Digital channels found:
1
Radio channels found:
0
14%
Channel Tuning
Note:
Press RETURN if you return to step 3.•
6
When the display reads 100%, press MENU to
exit the menu.
Update Scan
If you wish to search and store only new channel,
perform the Update Search. The current channel
store is remained and only new channel will be
stored to channel store.
Preparation:
Select DTV in INPUT SELECT. Press MENU.
Select TV Connection option in Channel menu, then
press . Press ▲ or ▼ to select Antenna or Cable, then
press .
Select Update Search option in Channel menu, then
press .
Perform the same steps as 4 - 6.
•
•
57W0151A.indb 1257W0151A.indb 12 9/15/11 4:43:01 PM9/15/11 4:43:01 PM
Page 13
13
Basic Operation
Channel selection
With the numbered buttons.
Example:
No. 2: Press 2.
No. 29: Press 2 and within 2 seconds, press 9.
No. 929: Press 9, 2, 9 same as above.
Press P + or – to change up or down a channel. This
takes approx. 2 seconds. If the auto search only stored 5
stations, only these 5 will appear. Skipped channels will
not appear (see P.12).
Channel List
The channel List shows a list for each receivable
programmes for TV/DTV and Radio.
Press CH LIST to display the Channel List.
Press or to select the desired channel.
Press CH LIST to display the selected channel.
Information display
Press . The program information will appear for approx. 4
seconds.
If you press twice, more information and signal
strength and quality will appear. (DVB-T)
The following figure is an example of DVB-channel
reception.
0672 PQR
672_PQR_SMPTE Color Bar_0101_0000_0001
Frequency : 842000 kHz Bit Rate : 5196000 bps Stereo
13:00
13:00-13:01 I/II
Strength :
Quality :
24%
79%
672_PQR_SMPTE Color
Bar_0101_0000_0001_Audio3_ABCDEFGHIJKLMNOPQRSTUVWXYZabcdefg
hijklmnopqrstuvwxyz
1 Channel Name
2 Program Title
3 Next program detail and current program detail
alternate by / buttons
4 Program Duration
5 Current time
6 There are two or more audio languages. (see below)
7 Radio icon will appear in case of Radio channel.
8 There is one or more subtitle languages. (see below)
9 DVB Teletext available
0 Signal strength and quality
! Frequency and Bit Rate of channel
@ Program Detail
Audio/Subtitle language for DVB-channel
If the current watching DVB-channel has more than one
audio language or subtitle language, you can change
them with AUDIO I/II or .
Press AUDIO I/II. Audio language menu will appear.
Then press ▲ or ▼ to select the Audio language.
You can also select the audio format (Stereo, Left or
Right) by pressing of
or .
Press
, then press or to select DTV Subtitle.
Then press ▲ or ▼ to select the Subtitle language. Then
press ENTER.
Note:
Some DVB-broadcasts may not provide subtitle
language service.
To cancel the Audio/Subtitle language menu, press
RETURN.
•
•
•
•
•
•
•
•
•
Manual Station search
Digital Manual Search
Return
Return
Enter
Enter
Menu
ExitMove
Frequency(kHz)
Picture
Sound
Channel
Feature
Setup
474000
Start
Channel - Digital Manual Search
Strength
Quality
Preparation:
Select DTV in INPUT SELECT. Press MENU.
Select TV Connection option in Channel menu,
then press
. Press ▲ or ▼ to select Antenna or
Cable, then press .
Select Digital Manual Search option in Channel
menu, then press .
•
•
1 Frequency of Digital channel to be searched.
2 Select Start, then press ENTER to start searching.
3 You can verify the signal strength and quality of
the selected service here. If necessary, adjust
the direction of the DVB-T antenna to obtain the
maximum signal strength.
Analogue Manual Search
Return
Return
Enter
Enter
Menu
ExitMove
Current Channel
Search
Fine Tune
AFC
Colour system
Sound System
Picture
Sound
Channel
Feature
Setup
001
217.25 MHz
On
Auto
BG
Save
ENTER
ENTER
Channel - Analogue Manual Search
Preparation:
Select TV in INPUT SELECT. Press MENU. Select
Analogue Manual Search option in Channel menu,
then press .
1 Press , then press ▲ or ▼ to select the current
channel, then press ENTER.
2 Frequency of current selected Analogue channel.
3 Press
, then press or to perform intermittent
search from current selected Analogue channel’s
frequency position.
4 Already correctly and optimally installed. Do not
change anything here. Any changes can cause
picture or sound disruption. The video can also be
affected.
5 Press , then press ▲ or ▼ to select AFC On or
Off, then press ENTER.
6 Colour system has already been preset to Auto.
Do not change anything here. Any changes can
cause picture or sound disruption.
7 The correct sound system is already installed. Any
changes can cause sound disruption.
8 Finally, press red button to save the searched
channel.
57W0151A.indb 1357W0151A.indb 13 9/15/11 4:43:06 PM9/15/11 4:43:06 PM
Page 14

14
Select Page
Press P + or – until the page you desire appears. Or
... enter the requested page number by using the 10
Number Buttons.
And if you mistype something, just enter the complete
3-digit wrong page number then enter the desired number
again. Or ... press one of the coloured teletext buttons so
that a page from Fastext/TOPtext is shown.
Hold Pages
Some pages are divided up into subpages by the channel.
Subpages are automatically shown in turn, as they are
transmitted. In order to hold the page, press . Press
again in order to display the next subpage.
Directly Select Subpages
You can directly select the subpages if required. You may use
one of two operations.
1.
Press in order to select subpage 2. 0 0 0 0
is
shown. Enter 0 0 0 2. It can take a minute before
subpage 0002 appears.Press
again in
order to switch off the subpage feature.
Or:
2. Wait a few seconds, and the right now available
subpages will be shown in the bottom line. Select
your page with or .
Enlargement
In order to enlarge the display, press .
Either the upper or lower half of the screen is enlarged.
Each time you press you switch between the display of
the upper or lower half of the screen or the full picture.
Answering Quiz Questions
Some pages contain quiz questions with concealed
answers.
Press in order to show the answers.
Stereo reception in analogue cable
TV channel mode
You can see the each signal type of STEREO,
Nicam Mono, and DUAL I/II, etc. on the TV-screen
when you press
.
When 2-channel sound reception is available,
you can select your preferred audio with the
AUDIO I/II.
Each time you press AUDIO I/II, the sound channel
will switch to the alternative channel available.
Note:
In case of bad reception, the stereo sound also can be
disturbed.
The broadcast sound type may not be saved if Power
off.
•
•
QuickView
button allows you to go back to the last selected
TV channel.
This feature is not available in external input mode and
also it can not step over the ATV-input mode and DTVinput mode.
MUTING
Press . The sound will be cut off.
The muting can be released by pressing again or
+ or –.
Still picture
Press FREEZE to make a still picture. To cancel the still
picture, press FREEZE again.
Note:
During still picture mode, PICTURE SIZE feature is
not available. (If you press PICTURE SIZE, still picture
mode will be canceled.)
If you performed the still picture function in DTV-input
mode, this function works with also the external output
signal from SCART socket.
Note:
During TV or external input mode (except PC input
mode), if there is no signal reception, the TV will change
to standby after approx. 15 minutes (in PC input mode:
2 minutes).
Some functions are activated and de-activated with
the same button. Others require RETURN button for
de-activating.
Teletext
Teletext is sent page by page. This unit is able to
automatically store up to 800 pages, but they can
only be accessed once they have been stored. This
can take a few moments.
The Teletext language menu allows the installation of
the teletext language.
The languages displayed are only those supported
by the channel.
Fastext/TOPtext
The Fastext/TOPtext is teletext with a special directory.
On the lower part of the screen there are four different
coloured fields (red, green, yellow and blue). These fields
lead directly to the pages shown within. The coloured
buttons on the remote control correspond to the coloured
fields. Press the appropriate coloured button in order to
activate the desired colour field.
Switch on / off Teletext
Teletext is not transmitted by all channels.
Select a channel that shows teletext.
Press
. You will now see a teletext page.
(If “100” is shown without any text information, it may mean
that the channel you have selected does not support
teletext.)
Press again. The TV-screen will be split into two and
both Teletext information and actual broadcast will be
displayed at the same time.
Press again in order to switch off teletext.
Press again in order to switch on teletext again. The
last page which was stored is now shown.
Note:
You cannot select any other channels as long as teletext
is switched on. Switch teletext off when you want to
switch over to another channel.
•
•
•
•
•
•
57W0151A.indb 1457W0151A.indb 14 9/15/11 4:43:09 PM9/15/11 4:43:09 PM
Page 15

15
Remarks on DVB-T system
DVB-T is at present still being developed. You can get information regarding the current stage of development
from your specialist retailer.
As a digital service DVB-T basically works differently to previous analogue TV reception.
Reception Possibilities:
In contrast to cable TV, DVB-T is received via room or roof antennas. A room antenna is sufficient for reception
within the reception area of a DVB-T transmitter. A roof antenna may perhaps be necessary for reception in a
fringe area. Existing roof antennas may have to be turned in a different direction.
Contact your specialist retailer to find out about the location of the reception areas or fringe areas. You cannot
get DVB-T reception outside the fringe area. Ask a certified antenna specialist for advice on interference with
reception. The tuner of this appliance cannot provide active room antennas with operating voltage. Active room
antennas have to be equipped with a separate power supply.
Reception Quality:
DVB-T reception principally either works really well or not at all. There is not a smooth transition with a constant
reduction in reception quality. Digital interference occurs at maximum reception range:
the image freezes, the picture becomes blocky, the sound breaks up or reception cuts out altogether at times. If
you notice interference with DVB-T reception then this is usually not due to a fault on the TV appliance. Please
contact an antenna specialist if you have interference with reception. Inspection of the quality of DVB-T reception
is not included in the free warranty to be provided by the manufacturer of the TV appliance.
Image and Sound Quality:
An individual transmitter transmits up to 4 TV channels on one transmission frequency. This is possible through
compression in accordance with the MPEG standard, which is similar to digital data storage on a DVD. The
data rate of DVB-T is just a lot lower; at present the max. video bit rate is approx. 4Mbps and the max. audio bit
rate is at 256kbps. Visible interference (e.g. blocky picture) can result at extremely low data rates despite there
being excellent reception quality within vicinity of the transmitter. Blocky pictures are no fault of the receiver.
They are the result of the low data rate transmitted. The digital DVB-T sound can be transmitted to the digital
amplifier via the digital output of your TV set.
Image Format
Images are transmitted in 4:3 format, 4:3 letterbox format (with black bars above and below the picture) and
anamorphic 16:9 format (without black bars). The max. transmitted resolution at present is 704x576.
Child Lock
Like DVDs, DVB-T offers can also provide age-restricted access. At the moment, no channels are equipped
with this restriction. This appliance does, however, already offer the feature of setting up password protected
age restrictions, which only work when the respective programmes are broadcast.
DVB-T Update
The DVB-T norm earmarks the transfer of firmware updates. The transfer of firmware updates is called Over
Air Download or OAD for short.
If this product happens to require a firmware update in future, this update could be received via DVB-T. If the
available software for updating is detected, the confirmation message whether start the software to download
is displayed. The rest please proceed to download-operation according to the directions of a TV screen.
EPG (Electronic Program Guide)
EPG is part of the DVB-signal with 8-days-schedule. This TV can receive and display the EPG-information
included into DVB. This TV’s EPG-Decoder will not work with Satellite-TV.
57W0151A.indb 1557W0151A.indb 15 9/15/11 4:43:10 PM9/15/11 4:43:10 PM
Page 16

16
Password Setup (Parental lock)
Parental lock is a function of the channel
provider. If it is not supported by the channel,
parental lock is without function. Currently there
are no channels supporting parental lock.
1
Press MENU. Select Child Lock option in
Feature menu, then press
.
2
‘Password’ will appear. Press ‘0 0 0 0’ using
the Number buttons (0-9). (This is the default
password.)
3
Select the desired option, then press .
Child Lock: To activate the Lock feature in
Channel Management, select On with /
, then
press ENTER.
Parental Lock: Press
or to select desired
parental rating, then press ENTER.
Change Pin Code:
Old Password
Enter the current password with Number
buttons.
New Password
Enter your chosen new password (please
call Service, if you have forgotten the new
number).
Confirm New Password
After you have entered the new password,
you need to enter the same password again
for confirmation.
•
•
•
4
Press RETURN several times to return to the
normal screen.
While toggling between channels, if a service which
has a parental rating (higher than your setting)
and you have set the Child Lock to On is selected,
the channel will be locked. The password entering
screen will appear. Then enter the password to view
that channel.
EPG (Electronic Program Guide)
The Guide menu shows the available
programme listings for the next 8 days only,
including today.
1
Press GUIDE (EPG) to display the Guide
menu.
Return
Return
i
InfoMove
31/12/2011 13:02:28
0672 PQR
31/12/2011 13:02 - 31/12/2011 01:02 672_PQR_SMPTE Color Bar_0101_0002
672_PQR_SMPTE Color
Bar_0101_0002_0003_Audio3_ABCDEFGHIJKLMNOPQRSTUVWXYZabcdefghijklmnopqrst
MNO
PQR
STU
TCM
VWXYZ
FRATV1
Daily Prev Day Next Day
Sun 31/12 Sun Mon Tue Wed Thu Fri Sat Sun
13:02-13:03
13:03-13:04
13:04-13:05
13:05-14:10
14:10-15:00
15:00-16:45
16:45-17:00
672_PQR_SMPTE Color Bar_0101_0002_...
672_PQR_SMPTE Color Bar_0101_0002_...
672_PQR_SMPTE Color Bar_0101_0002_...
672_PQR_SMPTE Color Bar_0101_0002_...
672_PQR_SMPTE Color Bar_0101_0002_...
672_PQR_SMPTE Color Bar_0101_0002_...
672_PQR_SMPTE Color Bar_0101_0002_...
EPG Weekly Mode
1 Service list :
Lists all the services that are currently available.
As you scroll through the service list by
pressing or
, the Event list will be refreshed
accordingly.
2 Events list :
List the events in a grid of rows.
Press to enter the Events list. You can press
or to navigate through the rest of the events.
You can easily move to the Previous day or
Next day in the Events List by pressing Yellow
or Blue button (the date of the programme
information you are currently viewing is shown
in the top left hand corner).
Note:
You can change to Daily mode by pressing of Red.•
2
From within the Events list, you can open
the Event detail for the currently highlighted
programme by pressing
.
The Event detail shows the extended event
description of an event.
To return to the Events list, press
.
To clear the menu screen, press MENU or
RETURN.
57W0151A.indb 1657W0151A.indb 16 9/15/11 4:43:11 PM9/15/11 4:43:11 PM
Page 17
17
Resolution and picture quality
Broadcast wide screen films in different resolutions. The following table shows the resolution options for
wide screen film broadcast media.
Broadcast media
Resolution of the wide
screen signal
Analogue
cable TV
Digital
cable TV
DVB-T Satellite
(DVB-S)
DVD HDTV
Satellite
(DVB-S2)
Blu-rayDisc
432i x 768 (Letterbox) Yes Yes Yes Yes Yes Yes No
576i x 768 (anamorphic) No Yes Yes Yes Yes Yes No
720 x 1280 (HD) No Yes No No No Yes Yes
1080i x 1920 (HD) No Yes No No No Yes Yes
1080p x 1920 (HD) No No No No No No Yes
Picture quality and black bars
Wide screen films come in different formats. The format is the relationship
between the width and height of the picture. For example, with a 16:9 film
the width to height ratio is 16:9 or 1.78:1. Only 16:9 films can fill a HDready screen without black bars. Therefore, black bars are always visible
when a format other than 16:9 is received. E.g. 4:3, A 4:3 displays vertical
black bars to the right and left.
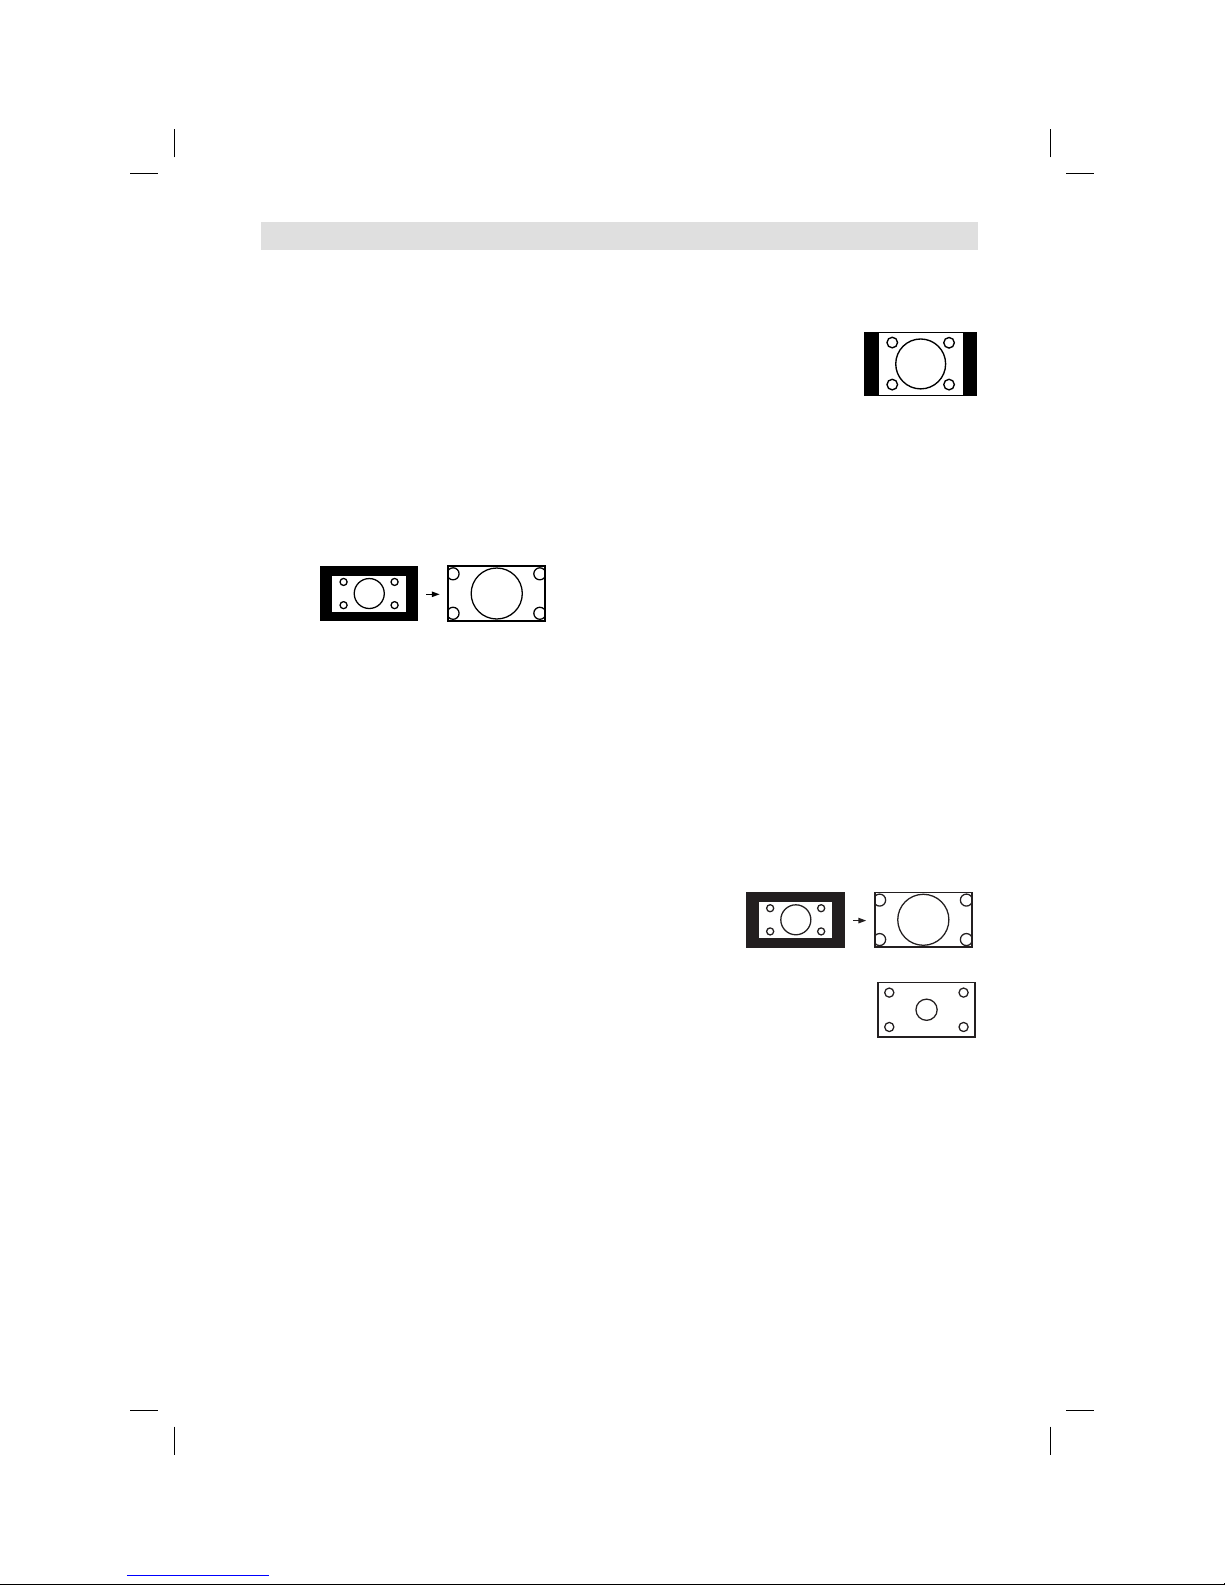
If a 4:3 picture is increased to 16:9 format then it either appears distorted
(see illustration) or some parts of the picture are cropped off at the top and
the bottom. This is completely normal and is not a fault in the wide screen
TV.
Super Cinemascope films are wider than 16:9 films. They are in the format
2.4:1 or 22:9, for example. This is clearly wider than16:9. Therefore, Super
Cinemascope films display black bars at the top and bottom on any HDTV
set.
Picture format and resolution
There is no connection between the picture format and the resolution received. For example, the Super
Cinemascope format can be received in all resolutions, even in the HD resolution1080ix1920. For HDTV
reception too an HDTV set may display black bars at the top and bottom.
4:3 picture 1:1 on
16:9 screen
4:3 picture zoomed on
16:9 screen
Picture size and resolution
Best picture quality is achieved when the input signal has a resolution of 1920 x 1080i. If a signal with a lower
resolution is input (e.g. analogue cable TV), there is a visibly poorer picture quality.
This is understandable as, if the same picture quality were available at a lower resolution, the broadcasting
companies would not need to take the trouble to send the signal at the higher resolution.
Why are there different resolutions?
Analogue cable TV uses a standardised TV signal. Each analogue 4:3- tube TV, however old it is, can process
this signal. That is the advantage of standardisation. The disadvantage is that the resolution has not changed
since the end of the Second World War. The resolution has been max. 576 x 768 for over 60 years.
For comparision: today’s TVs feature a FullHD-resolution of 1080 x 1920.
The analog cable-network offers the 16:9-format at a low resolution of only 432 x 768. This input covers only 16%
of a FullHD-screen’s area. 84% of the screen would stay black, if the TV would not make up the rest by some
special mathematics. 84% of what you see had been made up artificially by magnifying the tiny input-signal to
full-screen-size. That’s the reason for the analog cable-network’s low picture-quality seen on every FullHD-TV.
57W0151A.indb 1757W0151A.indb 17 9/15/11 4:43:12 PM9/15/11 4:43:12 PM
Page 18
18
Picture Size
The required picture format can be set by pressing
the PICTURE SIZE button. Press PICTURE SIZE
until the required format is displayed.
You move through the following formats when you
press the button: Auto, 4:3, 16:9, 14:9, Cinema,
Real (HDMI/DTV/PC mode only).
Auto
The picture is automatically only then shown in
a format-filling display when a WSS-TV signal is
received.
Note:
Auto is not available in Component mode.
Example:
If the analogue tuner receives a letterbox image with WSS
signal then the resulting image looks like this:
illustration 1:
Letterbox image is increased
WSS:
Public broadcasters include 16:9 identification,
the WSS signal (WideScreenSignalling), during
transmission in order to ensure automatic
conversion to 16:9.
Some private broadcasters do not transmit a WSS
signal. Automatic does not recognise anything
without WSS signal and does not automatically alter
the picture size. Use the PICTURE SIZE button to
set the required picture size for private channels.
•
Other formats
Press PICTURE SIZE until the desired size is
reached.
4:3
The picture is displayed in 4:3
format with black bars to the
right and left.
16:9
The width of the picture will be zoomed evenly.
16:9 is particularly suitable for DVD players, DVB-T,
DVB-C and satellite receivers, which can transmit
and show 16:9 feature films without black bars. In
the set-up menu of the set, adjust it to show that a
16:9 TV set is connected.
14:9
The picture is increased somewhat but not up to the
full screen width. Black bars remain on the right and
left and also at the top and bottom.
Cinema
Use Cinema to increase a small 4:3 letterbox signal.
How do you recognise whether the broadcasting
station / the set operating is using a 4:3 letterbox
signal that is too low? Press the PICTURE SIZE
button on the remote control until the 4:3 format
appears. If the picture is surrounded by a black
border as in the illustration, this is a 4:3 letterbox
signal. Limited by the broadcasting station / the
set operating, this signal is much too low for a
16:9 HD screen. Cinema increases this picture
that is too small as far as possible. Natural visible
poor focus emerges, rather as if a postcard were
being increased to poster size. This unfocused
appearance is conditioned by input signals that are
too low and is in no way a production fault in this TV
set.
4:3 Letterbox picture increased to Cinema format.
Real (HDMI/DTV/PC mode only)
All images are displayed on the
TV screen of 16:9 ratio without
overscanning.
Note:
In PC mode, the picture size feature is available only for
16:9-, 4:3- or Real-format.
External receivers can automatically adjust the picture
size via a SCART cable. Please read the instructions for
the external receiver.
If you select Real, the image might become a horizontal
expansion according to the signal format.
In this case, select an appropriate aspect with
PICTURE SIZE.
•
•
•
Picture format
57W0151A.indb 1857W0151A.indb 18 9/15/11 4:43:12 PM9/15/11 4:43:12 PM
Page 19
19
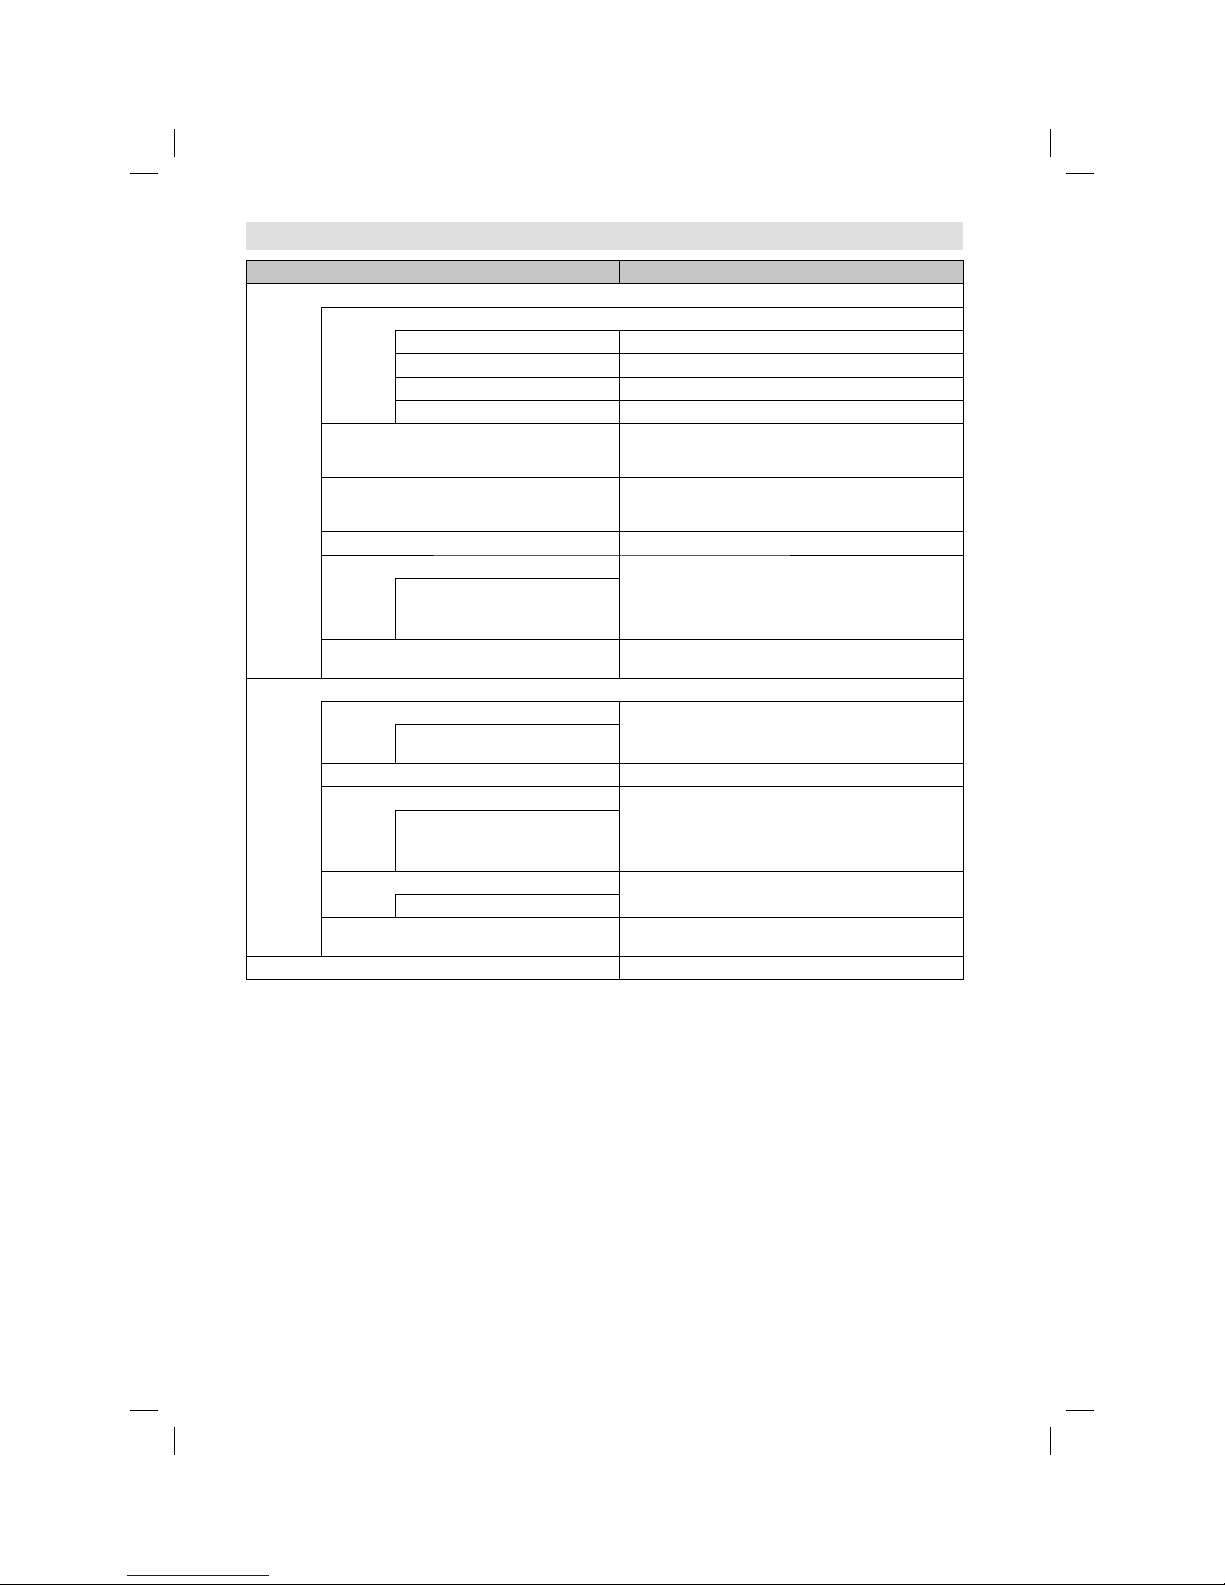
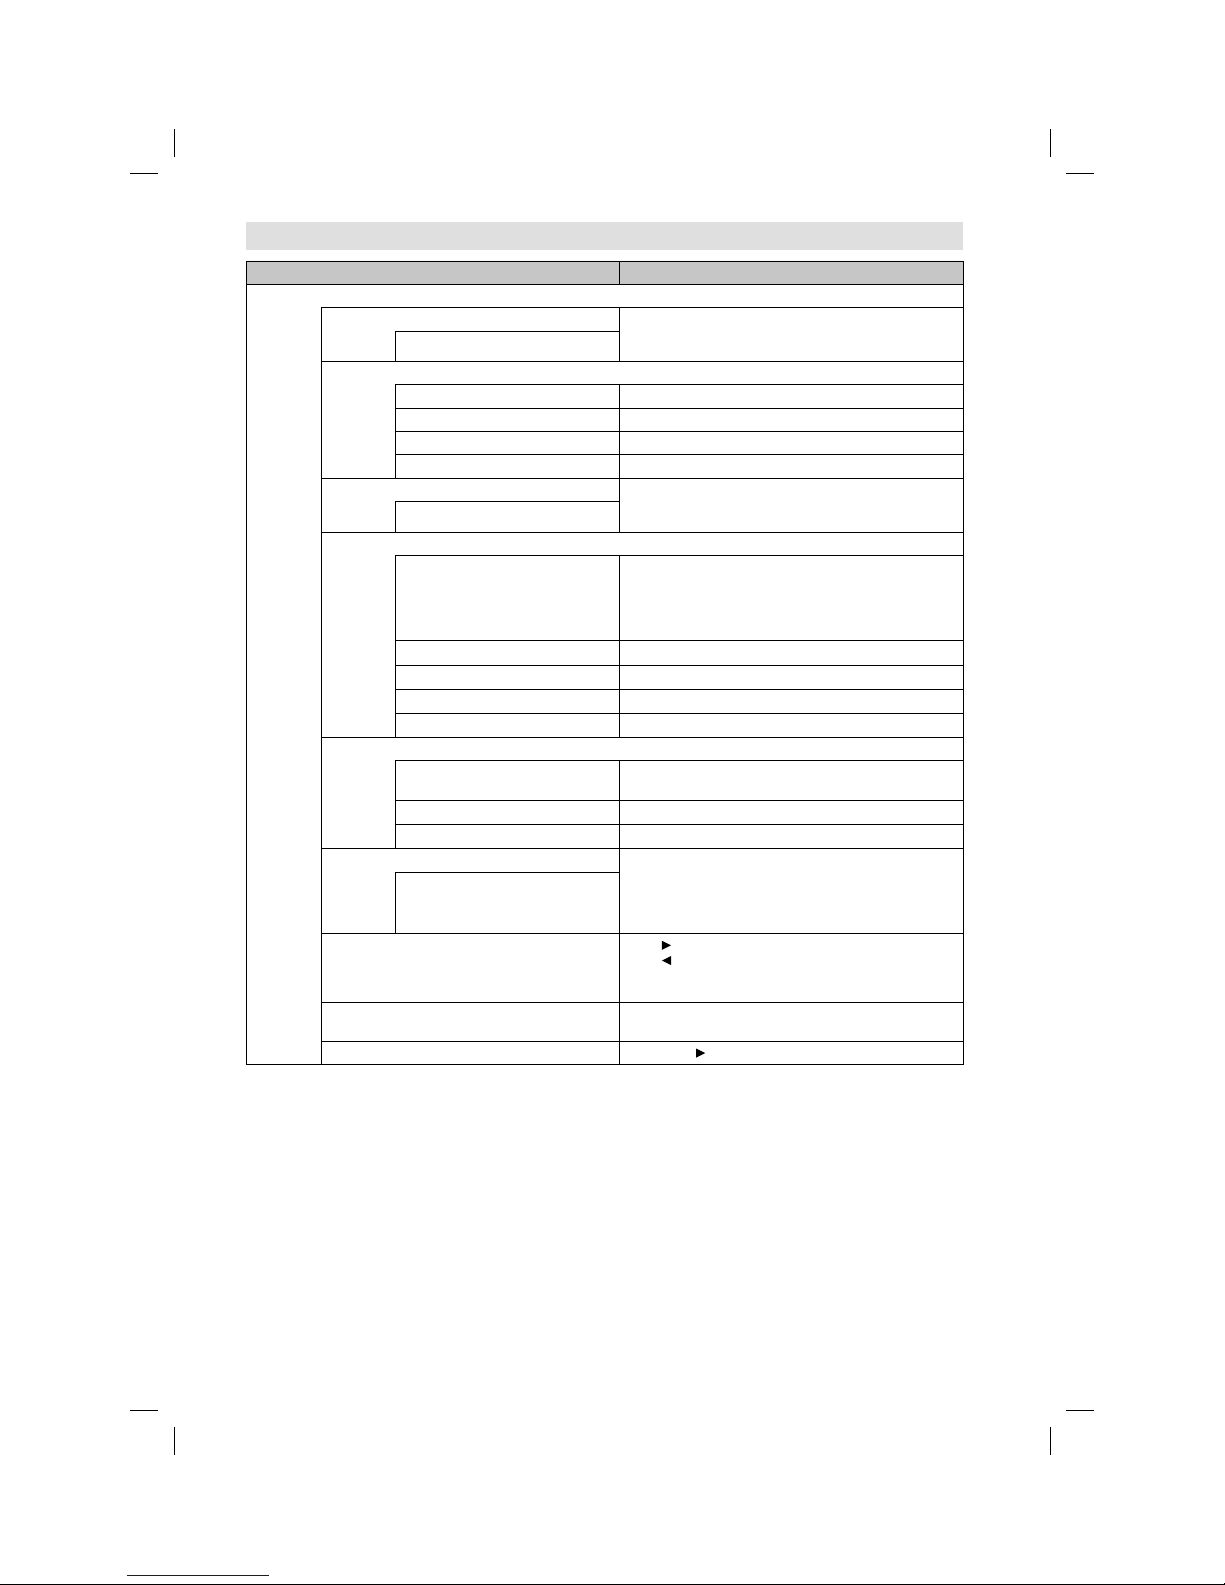
Other convenience functions
Selected Items Setup hint
Picture
Picture Mode
Standard Standard picture quality (factory-set)
Vivid Enhanced picture contrast and sharpness (factory-set)
Soft Intended for bad-quality signals (factory-set)
User Your personal preferences
Brightness / Contrast / Sharpness / Colour / Tint
(available only when you selected “User” at
Picture Mode)
You can adjust the picture to your preference.
Tint is available in NTSC-signal mode or Component/
HDMI-signal with 60Hz.
•
Backlight
(available only when you selected “User” at
Picture Mode)
You can use the Backlight feature to adjust the screen
brightness for improved picture clarity.
Colour Temperature Neutral (Standard) / Reddish (Warm) / Bluish (Cool)
Noise Reduction Sometimes it is not possible to input a high-quality HD
signal. The actual signal input is too small and noisy,
e.g. a video film in letterbox format, or a noisy analogue
cable TV signal. This feature can slightly reduce
interferences caused by the faulty input signal.
Off / Low / Middle / High
Reset Select “Reset” to reset Picture options to the factory
preset values.
Sound
Sound Mode You can change the sound mode setting. If you select
“User”, you can change the setting of Bass and Treble
and TV memorizes your setting.
Standard / Movie / Music / Speech
/ User
Bass / Treble / Balance You can adjust the sound quality to your preference.
Surround The Surround feature processes the audio signal to
expand the listening field wider and deeper to create a
‘pseudo surround-sound’ from the TV’s speakers.
The feature works with stereo signals from TV broadcast
or AV input.
On / Off
Stable Sound This will automatically adjust volume so each channel
and input has the same average volume level.
On / Off
Reset Select “Reset” to reset Sound Mode, Bass, Treble and
Balance to the factory preset values.
Channel See page 12-13.
57W0151A.indb 1957W0151A.indb 19 9/15/11 4:43:13 PM9/15/11 4:43:13 PM
Page 20
20
Other convenience functions
Selected Items Setup hint
Feature
Child Lock See page 16.
Language
OSD Language See page 12.
Preferred Subtitle Select preferred subtitle language, if the current
watching DVB channel has more than one subtitle
language.
If the preferred subtitle language set here is not
transmitted in the channel, the first displayed
subtitle language in Subtitle language menu (P.13) is
automatically selected.
This option is not available for analogue channel.•
Preferred Audio Select preferred audio language, if the current watching
DVB channel has more than one audio language.
If the preferred audio language set here is not
transmitted in the channel, the first displayed
audio language in Audio language menu (P.13) is
automatically selected.
This option is not available for analogue channel.•
Digital Teletext Language If a DVB-channel name or information-display in the
Channel banner (page 13) or EPG has a data of each
language, the first preferred display language can be
set here.
Analogue Teletext Lang. See page 14.
Clock
Date The date/time is displayed that is recognized on this
unit.
You can not adjust the date/time manually.•
Time
Time Zone If the time displayed on the Channel Information differs
from the actual time, adjust the time offset until the
correct time zone is shown.
Normally, this would be done by selecting “Auto”.•
DST If DST is set to “On”, time is displayed one hour earlier.
This option is not available if you set Time Zone to
Auto.
•
On / Off
Sleep Timer Sleep timer switches the TV to standby after a defined
period of time.
To cancel the Sleep Timer, set to “Off”.
Off/15/30/45/60 Min
Auto Power Off When the Set and Remote button operation are not
operated with specified period by this setting(1/2/4
Hours), the power status is changed to stand by mode
automatically.
Off/1/2/4 Hour
Power On LED
To cancel the lighting of
power indicator (P.7 (2))
during operation, set to “Off”.
On / Off
Hearing Impaired The hearing impaired subtitle type is output
preferentially.
Even if you set this option to On, the subtitle of
Hearing Impaired is not displayed. Press
on the
remote control to display the subtitle.
•
On / Off
CI Info You can access the Common Interface module
information from this menu option.
This unit supports the C.I. card of “Top Up TV” and
“Boxer”.
•
57W0151A.indb 2057W0151A.indb 20 9/15/11 4:43:14 PM9/15/11 4:43:14 PM
Page 21
21
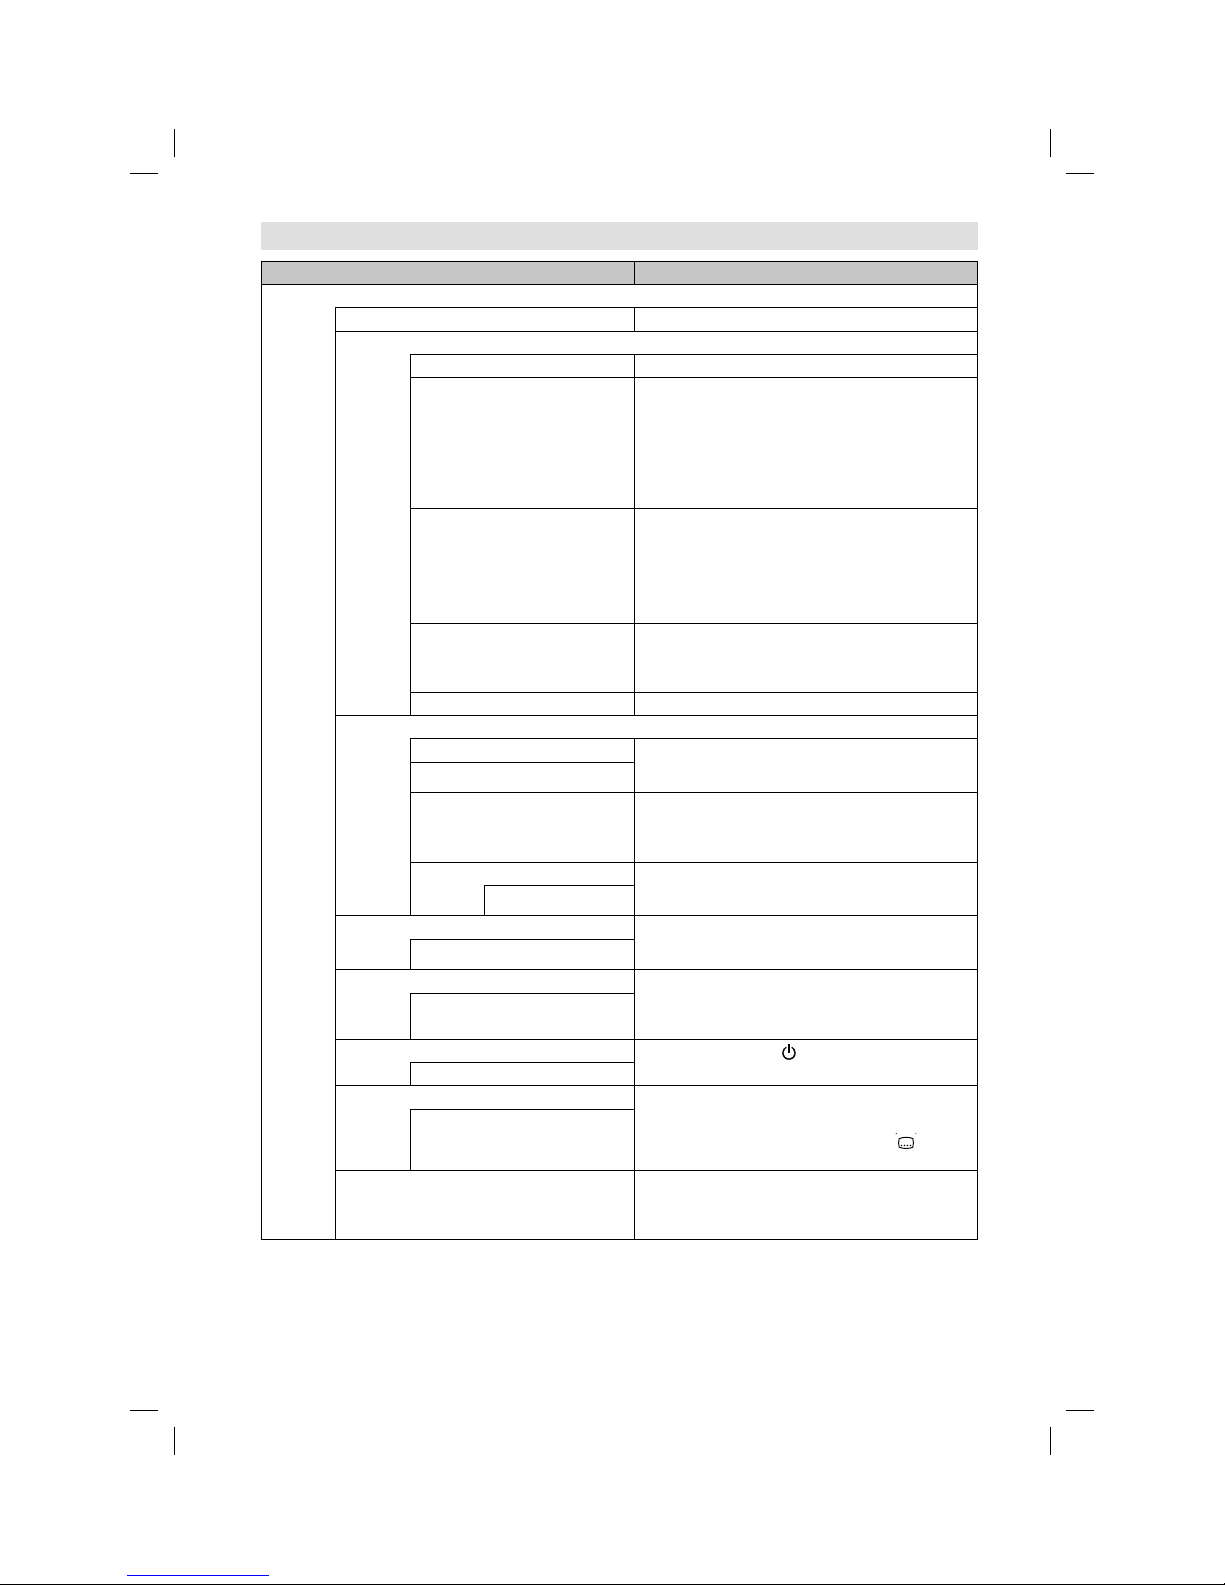
Other convenience functions
Selected Items Setup hint
Setup
OSD Timer The OSD is cleared automatically as per this setting.
But if you select “Never”, the OSD is not cleared
automatically .(Press RETURN to clear.)
5/10/15/20/25/30 Seconds/Never
SCART Input
Auto Factory setting, normally OK.
RGB when RGB is input.
CVBS when Composite is input.
S-Video When S-Video is input.
SCART Output This determines whether the SCART outputs the signal
from the internal tuner or whatever input is shown on the
screen.
TV / Monitor
PC Setup
Auto Adjust H Position, V Position, Phase and Clock are adjusted
automatically as per the input PC video signal.
When PC-input mode was selected and a PCsignal was input, Auto Adjust will be performed
automatically.
•
H Position To adjust the horizontal placing of the image.
V Position To adjust the vertical placing of the image.
Phase Eliminates the horizontal (PHASE) interfering lines.
Clock Eliminates the vertical (CLOCK) interfering lines.
HDMI Mode
Auto Auto (factory setting), can remain in this mode. Change
not necessary.
PC PC (for PC), if desired.
Video Video (for Video), if desired.
Blue Screen You can set the TV to automatically change to a blue
screen and mute the sound if the signal is weak or
absent.
This option is not available for DTV, PC and Radio
mode.
•
On / Off
Reset TV Setting Press
to enter the Reset TV Setting screen.
Press to select “OK”, then press ENTER. Reset the TV
function will now begin, and this unit will automatically
turn off.
Software Upgrade This option is not available because of service purpose
only.
Version If you press , the μ-com’s software version is displayed.
57W0151A.indb 2157W0151A.indb 21 9/15/11 4:43:14 PM9/15/11 4:43:14 PM
Page 22

22
Media Operation
You can enjoy viewing pictures and playing music
from your USB-Stick.
1
Connect the USB-Stick into the Media Input
terminal.
2
Press MEDIA. Media Browser will appear.
Warning:
Do not disconnect a USB-Stick while it is
being accessed. Doing so can damage the
USB-Stick or the files stored on the USBStick. You can safely connect or disconnect
the USB storage device when the TV is not in
MEDIA mode.
Back up all the data in the USB-Stick in case
if data was lost due to unexpected accident.
We do not assume any liability for the losses
by misuse or malfunction.
Do not use USB extension cable.
•
•
•
Note:
Not all USB storage devices are compatible
with this TV.
The character that exceeds the display area
is not displayed.
The displaying of images that fill the screen
cannot be guaranteed. Black margins can remain
around the images displayed.
•
•
•
Media Browser
Photo
/udska1/pic
Pic1.JPG
Pic2.JPG
Enter
Enter
Move
Page + -
P +-
Back
001/002
843KB
4256X2848
2011/1/11
Thumbnails
Note:
The content will change in accordance with each media
setting screen.
You can use various playback operation with
appropriate guide button in Operation guide panel.
•
Media Selection
File Path
Thumbnail window
Current File/Total Files
File information
- File size
- Resolution
- Time stamp
- WMA tag
Operation Guide Panel
File/Folder List
57W0151A.indb 2257W0151A.indb 22 9/15/11 4:43:15 PM9/15/11 4:43:15 PM
Page 23

23
Playback files
1
Press ◀/▶ to select (Music) or (Photo)
at
Media Selection and press ▼.
2
Select folder or file with ▲ or ▼, and then start
the playback with ENTER.
Press RETURN to return to Media Selection.•
You can playback the files with the following remote
control buttons.
Button Action
▲/▼/ /
Press to lotate the picture.
ENTER
Press to start the playback
Press to show / hide the picture information
window.
▶
(PLAY)
Press to start the playback or slideshow.
▌▌
Press to pause the playback.
Press to stop the playback.
During the playback, press to select the next
file.
During the playback, press to select the
previous file.
During the music playback, press to search
forward.
During the music playback, press to search
backward.
PLAY
MODE
During the music playback, press to select
repeat or random mode.
YELLOW
In Media Browser, press to display JPEG files
in thumbnail view.
Note:
For large image sizes, the display time will be longer
than the slideshow interval set.
During the playback of a music file, you can not adjust
the volume with VOL +/- on the set.
•
•
57W0151A.indb 2357W0151A.indb 23 9/15/11 4:43:15 PM9/15/11 4:43:15 PM
Page 24

24
Playable File Types
Photo
Type Extension Name Compression Spec / Limitation
JPEG .jpg
.jpeg
Baseline
Progressive
Non-support JPEG 2000 compression
Color type : YCbCr (Non-support CMYK)
Support JPEG/JFIF and JPEG/Exif file format
Picture size limitation:
Baseline: Number of horizontal pixels: up to 165370
Progressive: Number of horizontal pixels: up to 61648
No limitation on vertical pixels.•
Audio
Format Extension Name Audio Codec Sampling Rate (kHz) Bitrate (kbps)
WMA .wma
WMA 7 / 8 / 9
STD
8, 11.025, 16, 22.05, 32,
44.1, 48
8 to 768
File System
Standard Media Type
Maximum
Storage Size
File Number File Size
FAT32 USB Mass
Storage
* HDD (Not
Supported)
2TB Not limited
within
maximum
storage size
range.
Maximum 4GB
NTFS Maximum 2T - OVER HEAD(INCLUDE
NTFS META DATA and RESERVE
REGION)
57W0151A.indb 2457W0151A.indb 24 9/15/11 4:43:17 PM9/15/11 4:43:17 PM
Page 25

25
DVD discs must be Region 2 or Region ALL type to play on this unit.
The loaded Disc (DVD and Audio-CD) will be recognized automatically.
The suitable disc formats are: DVD-ROM, DVD-Video, DVD-R/-RW/-R DL,
Audio CD, Fujicolor CD, KODAK Picture CD, CD-R/CD-RW, CD-ROM.
Some CD-R/RW discs may be incompatible.
This unit cannot play an 8cm disc. It cannot also be
played even using a disc adapter.
Please do not insert any disc of an irregular shape into
the unit, as it may interfere with the function of the unit.
You may not be able to remove it.
If you tilt or move the unit while DVD or CD discs are
placed inside, your discs may be damaged.
Please do not use after market accessories, such as
a ring protector, as this may cause trouble with the
operation of the unit.
Use only UDF (Universal Disc Format) discs for
recording.
When you play a movie that has been edited with
a DVD recorder (partially deleted, etc), it may be
paused for a moment where edited.
When you play a movie that has been edited with a
DVD recorder or such, it may not be played exactly
as you edited it.
Do not play DVD-Audio, CD-G, Photo CD, Video CD and SVCD to prevent accidental erasure of prerecorded
material.
Title
When two or more movies are recorded on a disc, the
disc is divided into two or more sections. Each section is
called a “TITLE”.
Chapter
The titles can be subdivided into many sections.
Each section is called a “CHAPTER”.
Track
An Audio CD can contain several items.
These are assigned to tracks.
Removing Disc from Case
Be sure to hold the edge of disc. Do not touch the
surface of the disc.
Pick up the disc gently from the case.
Do not scratch the disc.
Do not get dirt on the surface of the disc.
Do not stick a label or adhesive tape on the disc.
Do not drop or bend the disc.
Storing Disc
Store the disc in the case to avoid risk of scratches, dirt or damage.
Do not leave disc exposed to direct sunlight or in hot or humid places.
Cleaning Disc
Wipe the disc with a clean, dry cloth from center to edge.
Do not wipe in circular direction.
Do not use liquid or aerosol cleaners.
•
•
•
•
•
•
•
•
•
•
•
•
•
•
•
CHAPTER 1
TITLE1 TITLE2
DVD DISC
CHAPTER 2 CHAPTER 2 CHAPTER 3CHAPTER 1
TRACK 1 TRACK 2 TRACK 3 TRACK 4 TRACK 5
Audio-CD
Disc
Example:
2
Disc type and logo mark content
DVD Video
Audio
+
Video
(moving
pictures)
CD-DA
Audio
The following discs are also available.
DVD-ROM, DVD-R/-RW/-R DL discs of DVD
video format and MP3/WMA/JPEG.
CD-ROM, CD-R/CD-RW discs of MP3/WMA/JPEG.
•
•
57W0151A.indb 2557W0151A.indb 25 9/15/11 4:43:17 PM9/15/11 4:43:17 PM
Page 26

26
Disc
PC-created disc compatibility
You may not be able to play discs recorded
using a personal computer or recorder for disc
compatibilities, scratches or marks on the disc,
dirty lenses of the unit or condensation and so on.
Discs recorded using a personal computer may
not be playable in this unit due to the setting of
the application software used to create the disc.
In these particular instances, check with the
software publisher for more detailed information.
•
•
Playable files
ISO 9660 Level 1 or 2 compliant.
Romeo and Joliet file systems are both
compatible with this player.
DRM (Digital Rights Management) protected files
will not play in this player.
For detailed information, please see the
instruction manuals or help files that came with
your PC and/or software.
File structure (may differ): Up to 299 folders on a
disc; up to 648 files within each folder
Folder and file names can be displayed as long
as they are typed in alphabets and numbers. If
folder and file names are other than alphabets
and numbers, they may be replaced and
displayed as “_”. Garbled characters may also be
displayed in this case.
•
•
•
•
Playing image files
JPEG files recorded in DVD-R/-RW/-R DL and CDR/-RW can be played.
JPEG file compatibility
Image files should be saved in JPEG format.
Files recorded in Fuji Colour CD, Kodak Picture
CD or CD-R/-RW can be played.
Compatible formats: Baseline JPEG and EXIF
2.2* still image files up to a resolution of 3072 x
2048.
*File format used by digital still cameras.
Files with extensions .jpg or .JPG can be played.
Progressive JPEG formatted files do not work.
It may take some more time to start to play larger
files than usual.
JPEG files with different aspect ratio may be
displayed with black bands (either vertical or
horizontal).
•
•
•
•
•
•
•
Playing Audio files
WMA and MP3 files recoded in DVD-R/-RW/-R DL,
CD-R/-RW can be played.
Windows Media Audio (WMA) compatibility
WMA is an acronym for Windows Media Audio
and refers to an audio compression technology
developed by Microsoft Corporation.
You can encode your files by using Windows
Media Player Ver.7, 7.1, Windows Media Player
for Windows XP or Windows Media Player 9
Series.
When encoding your files, use only applications
approved by Microsoft Corporation. If you use
non-approved application, it may not work
properly.
This unit is compatible with audio files recorded
with the following sampling frequency: 32 kHz,
44.1 kHz and 48 kHz.
It is not compatible with loss-less encoding.
Files with extensions .wma or .WMA can be
played.
•
•
•
•
•
•
Playing MP3 (MPEG-1 Audio Layer-3) files
This unit is compatible with audio files recorded
with the following sampling frequency: 32 kHz,
44.1 kHz and 48 kHz.
Files with extensions .mp3 or .MP3 can be
played.
For the best quality of sound, 128 kbps or higher
bit rate is recommended.
•
•
•
Copy Control CD (CCCD)
This product is designed to conform to CD-DA
(Compact Disc Digital Audio). Any other discs than
CD-DA are not guaranteed with their operation and
performance in this product.
57W0151A.indb 2657W0151A.indb 26 9/15/11 4:43:18 PM9/15/11 4:43:18 PM
Page 27

27
To pause playback (still mode)
Press
during playback.
To resume normal playback, press PLAY (
).
The sound is muted during still mode.•
To stop playback
Press .
To remove the disc
Press
.
Remove the disc after the disc comes out.
Using inferior discs may result that you cannot
remove the disc. In this case, press PLAY (
) to
play the disc and then press EJECT
.
•
Note:
If a non-compatible disc is loaded, “Can’t play disc”
or “Incompatible disc region number Can’t play disc”
will appear on the TV screen according to the type of
loaded disc. In this case, check your disc again (see
page 25).
Some discs may take a minute or so to start playback.
When you set a single-faced disc label backwards (i.e.
the wrong way), “Loading” will appear on the display for
a few minutes and then “Can’t play disc” will continue to
be displayed.
Some playback operations of DVDs may be
intentionally fixed by software producers. Since this unit
plays DVDs according to the disc contents the software
producers designed, some playback features may not
be available. Also refer to the instructions supplied with
the DVDs.
Do not move the unit during playback. Doing so may
damage the disc.
In many instances, a menu screen will appear after
playback of a movie is completed. Prolonged display
of an on-screen menu may damage your television
set, permanently etching that image onto its screen. To
avoid this, be sure to press Power ( ) on your remote
control once the movie is completed.
There may be a slight delay between the button is
pressed and the function activates.
•
•
•
•
•
•
•
Playing in fast reverse or fast forward
directions (DVD/Audio CD)
Press
or during playback.
: Fast reverse playback
: Fast forward playback
Each time you press
or , the playback
speed changes.
To resume normal playback
Press PLAY (
).
Note:
The unit mutes sound during reverse and forward scan
of DVD discs.
The playback speed may differ depending on the disc.
•
•
Playing frame by frame (DVD)
Press
during playback.
Each time you press
or , the picture
advances one frame.
To resume normal playback
Press PLAY (
).
Note:
The sound is muted during frame by frame playback.•
Playing a disc
This section shows you the basics on how to
play a disc.
Basic playback (DVD/Audio CD)
Preparation
Make sure that the
(Power) on the unit is
pressed (ON).
1
Press DVD on the remote control to select the
DVD mode.
2
Place the disc
in the disc slot
with the label
side facing
forward. (If
the disc has a
label.)
Do not place a disc which is unplayable in
this unit.
•
3
On the TV-screen, “ ” changes to “Loading”
and then playback commences.
A menu screen will appear on the TV screen
if the disc has a menu feature.
Press /
// to select title, then press
ENTER.
Title is selected and play commences.
•
•
4
Press to end playback.
The unit can record where you stop a video,
but it depends on a disc you are using.
Press PLAY (
) to resume a playback point.
The unit can store a memory of stopped point
of last five discs that you have played. When
one of these discs is next loaded, you can
resume playback from where you stopped
playing last time.
If you press again (“Resume off” appears
on the screen.), the unit will clear the memory
of its stopped point.
It is only DVD videos that a stopped point can
be stored in the unit with.
You cannot save a stopped point for some
discs.
If a number of discs played and stored in
the unit exceeds five, a new memory will
overwrite the old stored memory.
•
•
•
•
To start playback in the stop mode
Press PLAY (
).
Note:
If the unit does not operate property:
Static electricity, etc., may affect the player’s
operation.
Disconnect the AC power cord once, then
connect it again.
If a disc is inserted during some modes other than
DVD mode, it may switch to DVD mode and then
playback may be begun automatically.
•
•
57W0151A.indb 2757W0151A.indb 27 9/15/11 4:43:19 PM9/15/11 4:43:19 PM
Page 28

28
Playing in slow-motion (DVD)
Press
or during playback.
Each time you press
or , the slow-motion
speed changes.
To resume normal playback
Press PLAY (
).
Note:
The sound is muted during slow-motion playback.•
Locating a chapter or track (DVD/Audio CD)
Press
or repeatedly to display the chapter or
track number you want.
Press
to playback starts from the selected
chapter or track.
Press
to locate succeeding chapters or tracks.
Playback starts from the beginning of the current
chapter or track.
Note:
A prohibition message “Depending on the
disc, this operation may be prohibited” or “This
operation can’t be performed” may appear at the
screen. This message means either the feature
you tried is not available on the disc, or the unit
cannot access the feature at this time. This does
not indicate a problem with the unit.
•
Zooming (DVD)
This unit will allow you to zoom in on the frame
image. You can then make selections by switching
the position of the frame.
1
Press ZOOM during playback.
The centre part of the image will be zoomed in.
Each press of ZOOM will change the ZOOM x2
and x4.
2
Press / / / to view a different part of the
frame.
You may move the frame from the centre
position
to UP, DOWN, LEFT or RIGHT direction.
3
In the zoom mode, press ZOOM repeatedly to
return to a 1:1 view.
Note:
You can select the Pause or Slow in the zoom
mode.
Some discs may not respond to zoom feature.
•
•
Locating desired scene (DVD/Audio
CD)
Use the title, chapter or track recorded on the disc
to locate the desired point to playback.
To check the title and chapter/track, press
.
1
Press Number buttons (0–9) to input the
number during playback or stop mode.
If you input a wrong number, press CANCEL.
Refer to the package supplied with the disc
to check the numbers.
•
•
2
Press ENTER. Playback starts.
When you change the title, playback starts
from Chapter 1 of the selected title.
Some discs may not work in the above
operation.
•
•
Changing Soundtrack Language
(DVD)
You can select the language when you play a
multilingual disc.
1
Press AUDIO I/II
during playback.
The current soundtrack
language will appear.
Current/Total
Audio 1/2 English Dolby Digital 2/0CH
2
Press AUDIO I/II
repeatedly until the
desired language is
selected.
Current/Total
Audio 2/2 French Dolby Digital 2/0CH
The on screen display will disappear after a
few seconds.
•
Subtitles (DVD)
When playing back a disc recorded with subtitles,
you can select the subtitle language or turn the
subtitle off.
1
Press repeatedly
during playback until
the desired language is
selected.
Current/Total
Subtitle 1/2 English
2
To turn off the subtitle,
press
until “Off”
appears.
Subtitle Off
The on screen display will disappear after a
few seconds.
•
Note:
If the desired language is not heard after pressing the
button several times, the language is not recorded on
the disc.
The selected soundtrack language is cancelled when
you eject the disc. The initial default language or
available language will be heard if the disc is played
back again.It does not go back to the initial default
language if the unit has a resuming memory.
When you want to play DTS audio, connect this unit to
a DTS-compatible amplifer or decoder using a digital
audio cable.
Depending on the DVD, you may not be able to change
subtitles, or to turn subtitles on or off.
While playing a DVD, the subtitle may change when you
loaded or eject the disc.
In some cases, a selected subtitle language may not be
changed immediately.
•
•
•
•
•
•
57W0151A.indb 2857W0151A.indb 28 9/15/11 4:43:20 PM9/15/11 4:43:20 PM
Page 29

29
Changing angles (DVD)
When playing back a disc recorded with multi-angle
facility, you can change the angle that you are
viewing the scene from.
1
Press ANGLE during
playback.
The current angle will
appear.
Current/Total
Angle 1/2
2
Press ANGLE repeatedly until the desired
angle is selected.
Note:
Depending on the DVD, you may not be able
to change the angles even if multi-angles are
recorded on the DVD.
•
Title selection (DVD)
Two or more titles are recorded on some discs.
If the title menu is recorded on the disc, you can
select the desired title.
1
Press TOP MENU during playback.
Title menu appears on the screen.
2
Press /// to select the desired title.
3
Press ENTER.
The playback of the selected title will start.
Note:
Some DVDs allow you to select the disc contents
using the menu.
When you playback these DVDs, you can select
the subtitle language and soundtrack language,
etc. using the menu.
•
•
DVD menu (DVD)
Two or more titles are recorded on some discs.
If the title menu is recorded on the disc, you can
select the desired title.
1
Press DVD MENU during playback.
The DVD menu appears on the screen.
Press DVD MENU again to resume playback
at the scene when you pressed DVD MENU.
•
2
Press / / / to select the desired item.
3
Press ENTER.
The menu continues to another screen. Repeat
steps 2 and 3 to set the item completely.
Note:
Depending on the DVD, you may not be able to
resume playback from the scene point when you
press DVD MENU.
•
Disc status
With press of , the status of the disc will appear
on the screen. To cancel the display, press
repeatedly.
Display messages may change at every time when you
press for some discs or files.
•
Using HOME MENU
Playing a disc
1
Press SETUP during stop mode.
HOME MENU will appear.
2
Press //
/ to select “Disc
Navigator”, then
press ENTER.
Audio Settings Video Adjust
Disc Navigator
Play Mode
Initial Settings
HOME MENU
DVD
3
Press / to
select desired
option, then press
ENTER.
Disc Navigator
Title
Chapter
Some discs may not work Disc Navigator.
Depending on a disc, you can select Title,
Chapter, or both.
•
•
4
Press / / / or Number Buttons (0-9) to
select Title or Chapter then press ENTER.
Press
or to move previous/next page.
Press RETURN to go to previous step.
•
•
Playing a file
1
Press SETUP during stop mode.
HOME MENU will appear.
2
Press /// to select “Disc Navigator”, then
press ENTER.
3
Press / to
select folder, then
press ENTER.
Folder1
Folder2
Folder3
Folder4
00:00/ 00:00 0kbps
4
Press / to select file, then press ENTER.
If you select JPEG file, unit shows the
pictures one after another automatically.
Press RETURN to return to previous step
screen.
Press SETUP to exit the menu.
Note:
When music files and JPEG files are
recorded in one disc, you can play
simultaneously. Please select the music file
then select the JPEG file.
•
•
•
•
57W0151A.indb 2957W0151A.indb 29 9/15/11 4:43:22 PM9/15/11 4:43:22 PM
Page 30

30
Play mode
A-B repeat playback
A-B repeat playback allows you to repeat selection
between two selected points.
1
Press PLAY
MODE during
playback.
Play Mode screen
will appear.
A(Start Point)
B(End Point)
Off
A-B Repeat
Repeat
Random
Program
Search Mode
Play Mode
2
Press / to select “A-B Repeat”, then press
or ENTER.
3
Press / to select “A(Start Point)”, then press
ENTER. The start point is selected.
4
Press / to select “B(End Point)”, then press
ENTER.
The end point is selected. Playback starts
at the point that you selected. Playback
stops at the end point and returns to Point A
automatically, then starts again.
To resume normal playback
Select “Off” in step 3.
Note:
Some discs may not work Play mode function.
A-B Repeat playback does not work with MP3/
WMA CD.
•
•
Repeat playback
1
Press PLAY MODE during playback.
Play Mode screen will appear.
2
Press / to select “Repeat”, then press or
ENTER.
3
Press / to select desired repeat option, then
press ENTER.
The unit automatically starts repeat playback
after finishing the current title or chapter.
To resume normal playback
Select “Repeat Off” in step 3.
Note:
Some discs may not work with the repeat operation.
Random playback
1
Press PLAY MODE during playback.
Play Mode screen will appear.
2
Press / to select “Random”, then press or
ENTER.
3
Press / to select desired random playback
option, then press ENTER.
The unit automatically starts random playback.
To resume normal playback
Select “Random Off” in step 3.
Note:
During Random playback, it may repeat the same
title, chapter or track.
In stop mode, you can also enter Play Mode
screen by selecting “Play Mode” in HOME MENU.
•
•
Program playback
1
Press PLAY MODE during playback.
Play Mode screen will appear.
2
Press / to select “Program”, then press or
ENTER.
3
Press / to
select “Create/
Edit”, then press
ENTER. “Create/
Edit” display
differs, depending
on discs or files.
Program Step
01. 01
02.
03.
04.
05.
06.
07.
08.
Title 1-38
Title 01
Title 02
Title 03
Title 04
Title 05
Title 06
Title 07
Title 08
Chapter 1-004
Chapter 001
Chapter 002
Chapter 003
Chapter 004
Program Current Title:02 Chapter:001
4
Press / / / to select Title, Chapter, Track or
File, then press ENTER.
When you add a program, find where you
want to add it (Program Step) and select
Title, Chapter or Track then press ENTER. (It
will be added to the bottom if File is added.)
To go to previous step, press RETURN.
To delete a program, select Program Step
that you want to delete and press CANCEL.
•
•
•
5
Press PLAY ( ).
To play existing programmed contents, select
“Playback Start” from Play Mode screen and
press ENTER.
To delete all programmed contents, select
“Program Delete” in Play Mode screen and
press ENTER.
Note:
You can repeat the programmed contents.
Select “Program Repeat” from “Repeat” in the
Play Mode screen during Program playback.
In stop mode, you can also enter Play Mode
screen by selecting “Play Mode” in HOME
MENU.
•
•
•
•
Locating desired scene
1
Press PLAY MODE during playback.
Play Mode screen will appear.
2
Press / to select “Search Mode”, then press
or ENTER
.
3
Press / to select desired search mode
option, then press or ENTER.
Search Mode options differs, depending on
discs or files.
•
4
Input Title,
Chapter, Track or
Folder number
or time by using
Number buttons
(0-9) and press
ENTER.
0 0 1
Title Search
Chapter Search
Time Search
Input Chapter
A-B Repeat
Repeat
Random
Program
Search Mode
Play Mode
For instance, if you want to enter 1hr 4min
(64:00), input 6, 4, 0, 0.
•
Note:
You can locate desired scene in Menu screen for
some DVD video.
In stop mode, you can also enter Play Mode
screen by selecting “Play Mode” in HOME MENU.
•
•
57W0151A.indb 3057W0151A.indb 30 9/15/11 4:43:24 PM9/15/11 4:43:24 PM
Page 31

31
Audio Settings menu
The Audio Settings menu offers features for
adjusting the way discs sound.
1
Press SETUP during stop mode.
HOME MENU will appear.
2
Press / / /
to select “Audio
Settings”, then
press ENTER.
Audio Settings Video Adjust
Disc Navigator
Play Mode
Initial Settings
HOME MENU
DVD
3
Press / /
/ to setting the
option, then press
ENTER.
Audio Settings
Equalizer
Audio DRC
Dialog
Off
Rock
Pop
Live
Dance
Techno
Classic
Soft
4
Press SETUP to save the setting.
Equalizer
Select the most suitable setting to match a
category of music that you are listening to.
Audio DRC
Loud sound level goes down and quiet sound
level goes up while playing. This is useful, for
instance, when you watch a film in the late
night.
It only works with Dolby Digital Sound.
The effect depends on your AV amplifier and
speakers volume. Adjust the sound as you
wish and find the most effective setting.
Dialog
Adjust setting when you cannot hear dialogs
very well.
Note
It may not be very effective for some discs or
files.
•
•
•
•
Video Adjust menu
From the Video Adjust menu you can adjust various
settings that affect how the picture is presented.
1
Press SETUP during stop mode.
HOME MENU will appear.
2
Press ///
to select “Video
Adjust”, then
press ENTER.
Audio Settings Video Adjust
Disc Navigator
Play Mode
Initial Settings
HOME MENU
DVD
3
Press / /
/ to setting the
option, then press
ENTER.
Sharpness
Brightness
Contrast
Gamma
Hue
Chroma Level
Fine
Standard
Soft
Video Adjust
4
Press SETUP to save the setting.
Sharpness
Adjust sharpness of images.
Brightness
Adjust brightness of images.
Contrast
Adjust a ratio of brightness between the brightest
part and the darkest part.
Gamma
Emphasize dark part of images.
Hue
Adjust a balance between green and red.
Chroma Level
Adjust color density. It is effective with animation or
something with high color density.
Note
It may not be very effective for some discs or files.•
Customizing The Function Settings
You can change the default settings to
customize performance to your preference.
Setting procedure
1
Press SETUP in stop mode.
HOME MENU will appear.
2
Press ///
to select “Initial
Settings”, then
press ENTER.
Audio Settings Video Adjust
Disc Navigator
Play Mode
Initial Settings
HOME MENU
DVD
3
Press / / / to select the desired option, then
press ENTER.
4
Change the selection using / / / or ENTER,
by referring to the corresponding page 32.
Repeat steps 3 and 4 to change other option.•
5
To clear HOME MENU screen, press SETUP.
57W0151A.indb 3157W0151A.indb 31 9/15/11 4:43:25 PM9/15/11 4:43:25 PM
Page 32

32
Setting Option Setup hint
Digital Audio Out settings
Digital Out On Digital audio is output when playing a disc.
Off Digital audio is not output when playing a disc.
Dolby Digital Out Dolby Digital Dolby Digital encoded digital audio is output when playing a Dolby
Digital DVD disc.
Dolby Digital > PCM Dolby Digital audio is converted to PCM audio before being output.
DTS Out DTS DTS encoded digital audio is output when playing a DTS disc. (Noise
will be output if your amplifier/receiver is not compatible with DTS
audio.)
Off DTS encoded digital audio is not output when playing a DTS disc.
96kHz PCM Out 96kHz > 48kHz 96 kHz digital audio is converted to 48 kHz for digital output.
96kHz 96 kHz digital audio is output as is at 96 kHz.
MPEG Out MPEG MPEG encoded digital audio is output as is.
MPEG > PCM
MPEG encoded digital audio is converted to PCM audio for digital output.
Video Output settings
TV Screen 4:3 (Letter Box)
Set Picture Size to Natural. Widescreen movies are shown with black
bars top and bottom.
4:3 (Pan & Scan)
Set Picture Size to Natural. Widescreen movies are shown with the sides
cropped so that the image fills the screen.
16:9 (Wide) Set if you have a widescreen TV.
NTSC Out NTSC Display the picture of NTSC discs as NTSC-TV system.
NTSC > PAL Display the picture of NTSC discs converting to PAL-TV system.
Language settings
Audio Language English If there is an English soundtrack on the disc then it will be played.
Languages as
displayed
If there is the language selected on the disc, then it will be played.
Other Language Select to choose a language other than the ones displayed. (see
Language Code List on page 34)
Subtitle Language English
If there is an English subtitle on the disc, then it will be displayed.
Languages as
displayed
If there is the subtitle language selected on the disc, then it will be
displayed.
Other Language Select to choose a language other than the ones displayed. (see
Language Code List on page 34)
DVD Menu Lang. w/Subtitle Lang. DVD disc menus will be displayed in the same language as your
selected subtitle language, if possible.
Languages as
displayed
DVD disc menus will be displayed in the selected language, if possible.
Other Language Select to choose a language other than the ones displayed. (see
Language Code List on page 34)
Subtitle Display On Subtitles are displayed according to your selected subtitle language
(see above).
Off Subtitles are always off by default when you play a DVD disc (note that
some discs override this setting).
Display settings
OSD Language On-screen displays are shown in the language selected.
Angle Indicator On
A camera icon is displayed on-screen during multi-angle scenes on a DVD disc.
Off No multi-angle indication is shown.
Options settings
Parental Lock See page 33.
Customizing The Function Settings
57W0151A.indb 3257W0151A.indb 32 9/15/11 4:43:28 PM9/15/11 4:43:28 PM
Page 33

33
Parental Control
Some discs are specified as not suitable for
children. Such discs can be limited not to playback
with the unit.
How to into the Parental menu
1
Press SETUP in stop mode.
HOME MENU will appear.
2
Press / / /
to select “Initial
Settings”, then
press ENTER.
Audio Settings Video Adjust
Disc Navigator
Play Mode
Initial Settings
HOME MENU
DVD
3
Press / to select “Options”, then press .
Then press
to enter the Parental Lock menu.
Set Password
1
Press or to select “Password”, then press
ENTER.
Parental LockDigital Audio Out
Video Output
Language
Display
Options
Initial Settings
Password
Level Change
Country Code
2
Press Number buttons (0–9) to input the
password, then press ENTER.
Digital Audio Out
Video Output
Language
Display
Options
Initial Settings
Parental Lock: Register Code Number
Change Password
1
Press or to
select “Password
Change”, then
press ENTER.
Parental LockDigital Audio Out
Video Output
Language
Display
Options
Initial Settings
Password Change
Level Change
Country Code
2
Press Number
buttons (0–9) to
input the current
password, then
press ENTER.
Digital Audio Out
Video Output
Language
Display
Options
Initial Settings
Parental Lock: Password Change
Password
New Password
3
Press Number
buttons (0–9)
to input the
new password.
Press ENTER.
Now your new
password has
been set. Be sure
to remember this
number!
Parental Lock: Password Change
Password
New Password
Digital Audio Out
Video Output
Language
Display
Options
Initial Settings
Level Change
1
Press or to
select “Level
Change”, then
press ENTER.
Parental LockDigital Audio Out
Video Output
Language
Display
Options
Initial Settings
Password Change
Level Change
Country Code
2
Press Number
buttons (0–9) to
input the current
password, then
press ENTER.
Digital Audio Out
Video Output
Language
Display
Options
12345678Off
Initial Settings
Parental Lock: Level Change
Password
3
Press or to
select from the
level 1 to level
8. The limitation
will be more
severe as the
level number is
lower. Then press
ENTER.
Digital Audio Out
Video Output
Language
Display
Options
1234 678Off
Initial Settings
Parental Lock: Level Change
Password
5
Level 1: DVD software for adults cannot be
played back.
Level 8: Virtually all DVD software can be
played back.
Level Off: The parental control setting does
not function.
Country Code
1
Press or to
select “Country
Code”, then press
ENTER.
Parental LockDigital Audio Out
Video Output
Language
Display
Options
Initial Settings
Password Change
Level Change
Country Code
2
Press Number
buttons (0–9) to
input the current
password, then
press ENTER.
Digital Audio Out
Video Output
Language
Display
Options
Initial Settings
Parental Lock: Change Country Code
Password
Country Code List Code
US
2
1 1 9
3
Press or to
select the input
mode from
“Country Code
List” or “Code”.
Digital Audio Out
Video Output
Language
Display
Options
Initial Settings
Parental Lock: Change Country Code
Password
Country Code List Code
US
2
1 1 9
When you selected “Country Code List”:
Press or to select Country Code, then
press ENTER.
When you selected “Code”: Press then
use the Number buttons (0-9) to enter the
4-digit Country Code. Press ENTER. (see
Country/Area Code List on page 34)
•
•
Note:
Depending on the discs, the unit cannot limit
playback.
Some discs may not be encoded with
specific rating level information though its
disc jacket says “adult.” For those discs, the
age restriction will not work.
If you input a wrong number, press , then
input correct number.
•
•
•
57W0151A.indb 3357W0151A.indb 33 9/15/11 4:43:29 PM9/15/11 4:43:29 PM
Page 34

34
Language Code List
Language (Language code letter), Language code
Japanese (ja), 1001
English (en), 0514
French (fr), 0618
German (de), 0405
Italian (it), 0920
Spanish (es), 0519
Chinese (zh), 2608
Dutch (nl), 1412
Portuguese (pt), 1620
Swedish (sv), 1922
Russian (ru), 1821
Korean (ko), 1115
Greek (el), 0512
Afar (aa), 0101
Abkhazian (ab), 0102
Afrikaans (af), 0106
Amharic (am), 0113
Arabic (ar), 0118
Assamese (as), 0119
Aymara (ay), 0125
Azerbaijani (az), 0126
Bashkir (ba), 0201
Byelorussian (be), 0205
Bulgarian (bg), 0207
Bihari (bh), 0208
Bislama (bi), 0209
Bengali (bn), 0214
Tibetan (bo), 0215
Breton (br), 0218
Catalan (ca), 0301
Corsican (co), 0315
Czech (cs), 0319
Welsh (cy), 0325
Danish (da), 0401
Bhutani (dz), 0426
Esperanto (eo), 0515
Estonian (et), 0520
Basque (eu), 0521
Persian (fa), 0601
Finnish (fi), 0609
Fiji (fj), 0610
Faroese (fo), 0615
Frisian (fy), 0625
Irish (ga), 0701
Scots-Gaelic (gd), 0704
Galician (gl), 0712
Guarani (gn), 0714
Gujarati (gu), 0721
Hausa (ha), 0801
Hindi (hi), 0809
Croatian (hr), 0818
Hungarian (hu), 0821
Armenian (hy), 0825
Interlingua (ia), 0901
Interlingue (ie), 0905
Inupiak (ik), 0911
Indonesian (in), 0914
Icelandic (is), 0919
Hebrew (iw), 0923
Yiddish (ji), 1009
Javanese (jw), 1023
Georgian (ka), 1101
Kazakh (kk), 1111
Greenlandic (kl), 1112
Cambodian (km), 1113
Kannada (kn), 1114
Kashmiri (ks), 1119
Kurdish (ku), 1121
Kirghiz (ky), 1125
Latin (la), 1201
Lingala (ln), 1214
Laothian (lo), 1215
Lithuanian (lt), 1220
Latvian (lv), 1222
Malagasy (mg), 1307
Maori (mi), 1309
Macedonian (mk), 1311
Malayalam (ml), 1312
Mongolian (mn), 1314
Moldavian (mo), 1315
Marathi (mr), 1318
Malay (ms), 1319
Maltese (mt), 1320
Burmese (my), 1325
Nauru (na), 1401
Nepali (ne), 1405
Norwegian (no), 1415
Occitan (oc), 1503
Oromo (om), 1513
Oriya (or), 1518
Panjabi (pa), 1601
Polish (pl), 1612
Pashto, Pushto (ps),
1619
Quechua (qu), 1721
Rhaeto-Romance (rm),
1813
Kirundi (rn), 1814
Romanian (ro), 1815
Kinyarwanda (rw), 1823
Sanskrit (sa), 1901
Sindhi (sd), 1904
Sangho (sg), 1907
Serbo-Croatian (sh),
1908
Sinhalese (si), 1909
Slovak (sk), 1911
Slovenian (sl), 1912
Samoan (sm), 1913
Shona (sn), 1914
Somali (so), 1915
Albanian (sq), 1917
Serbian (sr), 1918
Siswati (ss), 1919
Sesotho (st), 1920
Sundanese (su), 1921
Swahili (sw), 1923
Tamil (ta), 2001
Telugu (te), 2005
Tajik (tg), 2007
Thai (th), 2008
Tigrinya (ti), 2009
Turkmen (tk), 2011
Tagalog (tl), 2012
Setswana (tn), 2014
Tonga (to), 2015
Turkish (tr), 2018
Tsonga (ts), 2019
Tatar (tt), 2020
Twi (tw), 2023
Ukrainian (uk), 2111
Urdu (ur), 2118
Uzbek (uz), 2126
Vietnamese (vi), 2209
Volapük (vo), 2215
Wolof (wo), 2315
Xhosa (xh), 2408
Yoruba (yo), 2515
Zulu (zu), 2621
Country/Area Code List
Country/Area, Country/Area code, Country/Area code letter
Argentina, 0118, ar
Australia, 0121, au
Austria, 0120, at
Belgium, 0205, be
Brazil, 0218, br
Canada, 0301, ca
Chile, 0312, cl
China, 0314, cn
Denmark, 0411, dk
Finland, 0609, fi
France, 0618, fr
Germany, 0405, de
Hong Kong, 0811, hk
India, 0914, in
Indonesia, 0904, id
Italy, 0920, it
Japan, 1016, jp
Republic of Korea,
1118, kr
Malaysia, 1325, my
Mexico, 1324, mx
Netherlands, 1412, nl
New Zealand, 1426, nz
Norway, 1415, no
Pakistan, 1611, pk
Philippines, 1608, ph
Portugal, 1620, pt
Russian Federation, 1821, ru
Singapore, 1907, sg
Spain, 0519, es
Sweden, 1905, se
Switzerland, 0308, ch
Taiwan, 2023, tw
Thailand, 2008, th
United Kingdom,
0702, gb
USA, 2119, us
57W0151A.indb 3457W0151A.indb 34 9/15/11 4:43:32 PM9/15/11 4:43:32 PM
Page 35

35
PC connection
Follow these steps: On your PC monitor choose a resolution of 1920 × 1080 at 60Hz and save this
configuration. Shut down your PC and connect the shut off LCD TV.
Use a screensaver to avoid burning-in of static picture content.
Use a PC-VGA cable (not supplied) to connect the LCD-Monitor
to your PC. Make the connections carefully so as not to break or
bend the contacts inside the plug.
Select PC input
Switch on the LCD-TV.
Select the PC input mode (see page 11).
Supported PC resolutions
resolution fps (Hz)
640x480 60
800x600 60
1024x768 60
1280x720 60
1280x768 60
1360x768 60
1280x1024 60
1440x900 60
1920x1080 60
VGA Cable (not supplied)
Audio cable (not supplied)
TV (Rear view)
to PC/DVI AUDIO input
PC
The HDMI input receives digital audio and uncompressed video from a HDMI equipped device or
uncompressed digital video from a DVI equipped device.
When you connect to a DVI device with a HDMI-to-DVI adapter cable, it only transfers the video signal, so it
is necessary to use separate analogue leads to transfer the audio signals.
Select the HDMI input mode (see P.11).
Connecting an HDMI or a DVI device to the HDMI input
Note:
Please notice the operating manual for the HDMI device to be set up.•
Note:
If no signal or a signal with a non-supported resolution is connected,
No Signal is displayed
As this LCD-TV is not a PC monitor correct display cannot be
guaranteed for every PC / graphics card.
•
•
Attention: Preparation:
• Disconnect all equipment from the AC-supply, to prevent any possible damage.
• Make the necessary connections.
• Make sure all connections are safe & secure before reconnecting your equipment the AC-supply.
Note:
Select an appropriate external input mode. (See page 11).•
Connection to other equipment
1. Connecting a Video camera or Games console to AV
(AV cable, not supplied)
AV output
Video camera
(example)
TV (Side view)
or
DVI device
HDMI device
To DVI output
Audio cable (not supplied)
HDMI - to - DVI adapter cable
(HDMI type A connector)
(not supplied)
HDMI cable (type A connector)
(not supplied)
To HDMI output
To PC/DVI AUDIO input
TV (Rear view)
57W0151A.indb 3557W0151A.indb 35 9/15/11 4:43:33 PM9/15/11 4:43:33 PM
Page 36

36
Connection to other equipment
VCR
TV
(All illustrated SCART cables and
antenna cables are not supplied)
TV
Satellite antenna
Satellite
receiver
Video recorder
2. Connecting to other equipment
Please connect your satellite-receiver or DVD player via SCART. Make sure your SCART cable’s crosssection is at least 1 cm or more. SCART cables with less thickness may cause visible noise.
Please make the following settings inside your receiver’s / DVD-player’s setup-menu:
Video signal: RGB
TV-Format: 16:9
If you miss to make these settings properly, picture quality will be inferior and parts of the picture
might be missing. This is not a fault of this TV-set.
In case you need help to make this adjustment with your satellite-receiver / DVD-player, please consult
the related instructions or contact the supplier or maker of those apparatus for support.
Please use the satellite’s remote-control handset to select Teletext or desired TV-station. Generally it is
not possible to store satellite TV-stations into a standard TV.
If the TV does not automatically switch to SCART, please select INPUT SCART manually, as seen on page 11.
Y
Pb
Pr
4. Connecting to a DVD player or other AV device with Component Video outputs
If your DVD player (or other device) has Component Video output jacks, use a suitable set of leads (RCA/
Phono) to connect these to the Component Video inputs on this TV as shown - it can greatly enhance
the picture quality and performance. Please remember that you will also need to connect separate leads
(RCA/Phono) for the audio signals.
Component output
Audio output
Video cable (not supplied)
To COMPONENT IN
TV (Side view)
Note:
The Component Video input of this unit are for use with equipment which outputs interlaced signals (PAL: 576i/1080i or
NTSC: 480i/1080i) and progressive signals (PAL: 576p/720p or NTSC: 480p/720p).
•
DVD player
Audio cable (not supplied)
3. Connection of a digital amplifier or digital A/V receivers
(with DTS or Dolby Digital Decoder)
DTS and Dolby Digital are two different systems. DTS-DVDs cannot be played with a Dolby Digital
receiver. Please use in this case a decoder that matches your DVDs.
TV (Side view)
Audio digital cable
(not supplied)
A/V receiver with Dolby
Digital decoder
After connecting a Dolby Digital
decoder please select in the DVD
menu the Dolby Digital sound track
option.
When a DTS sound track is played
the integrated loudspeakers are mute.
The DTS sound can only be played
digitally using the digital outlet. For
hearing a DTS decoder is necessary.
Digital audio output is active
only when receiving DVB-T, not
when receiving analog cable TV
broadcasting.
•
•
•
57W0151A.indb 3657W0151A.indb 36 9/15/11 4:43:34 PM9/15/11 4:43:34 PM
Page 37

37
Troubleshooting table
Please check the following list before requesting service.
Symptom Possible solution Page
TV
No picture, no sound Switch on the set.
Check that the mains power outlet is properly connected.
Select appropriate input mode.
Unplug unit for 1 minute, then plug it back in.
7
11
No reception Have you tuned in the TV stations?
Press 1 on the remote control.
Connect the antenna.
Make sure the set is ON and not in Standby mode
10
11
The TV switches off with
missing antenna input
signal
This is normal.
15 minutes after the antenna signal has disappeared, the set
will change to standby mode. 14
The Channel option cannot
be selected.
The unit is set to AV mode. Press 1 on the remote control. 12
Wrong Colours Colour and Brightness errors can occur when the viewing
angle/ambient air temperature (see technical specifications)
are exceeded.
While viewing a DVB
(digital) channel, there is
sound but no picture.
Some channel offers audio content only. It is normal.
Blocky image or image
stops intermittently.
Check all antenna connections.
Move the antenna away from areas of possible interference.
Try using an antenna booster.
10
Some digital channels
cannot be viewed.
Contact the service provider to subscribe.
No colour or picture black. SCART input set to Auto. 21
A cracking sound is
sometimes heard from the
unit.
If there is nothing wrong with the picture or sound, this is the
sound of the cabinet undergoing very slight contractions in
response to changes in the room temperature.
There are no adverse effects on the performance or other
aspects.
DVD
The playback picture has
occasional distortion.
The disc is dirty. Eject the disc and clean it.
Some times a small amount of picture distortion may appear.
This is not a malfunction.
25
The unit does not start
playback.
No disc is inserted. Insert a disc.
An unplayable disc is inserted. Insert a playable disc (Check
the disc type and colour system).
Place the disc in the disc slot with the label side facing
forward.
The disc is dirty. Clean the disc.
Cancel the parental lock function or change the parental lock
level.
27
25
27
25
33
The LCD panel is a very high technology product, giving you fine picture details. Occasionally, a few nonactive pixels
may appear on the screen as a fixed point of blue, green or red. Please note that this does not affect the performance
of your product.
•
57W0151A.indb 3757W0151A.indb 37 9/15/11 4:43:35 PM9/15/11 4:43:35 PM
Page 38

38
* This item incorporates copy protection technology that is protected by U.S. patents and other
intellectual property rights of Rovi Corporation. Reverse engineering and disassembly are prohibited.
* Manufactured under license from Dolby Laboratories. Dolby and the double-D symbol are trademarks
of Dolby Laboratories.
*
is a trademark of DVD Format/Logo Licensing Corporation.
* This product is protected by certain intellectual property rights of Microsoft. Use or distribution of such
technology outside of this product is prohibited without a license from Microsoft.
* DVB and the DVB logos are trademarks of the DVB Project.
* THIS PRODUCT IS LICENSED UNDER THE AVC PATENT PORTFOLIO LICENSE FOR THE
PERSONAL USE OF A CONSUMER OR OTHER USES IN WHICH IT DOES NOT RECEIVE
REMUNERATION TO (i) ENCODE VIDEO IN COMPLIANCE WITH THE AVC STANDARD (“AVC
VIDEO”) AND/OR (ii) DECODE AVC VIDEO THAT WAS ENCODED BY A CONSUMER ENGAGED
IN A PERSONAL ACTIVITY AND/OR WAS OBTAINED FROM A VIDEO PROVIDER LICENSED TO
PROVIDE AVC VIDEO. NO LICENSE IS GRANTED OR SHALL BE IMPLIED FOR ANY OTHER USE.
ADDITIONAL INFORMATION MAY BE OBTAINED FROM MPEG LA, L.L.C. SEE HTTP://WWW.
MPEGLA.COM
* HDMI, the HDMI Logo, and High-Definition Multimedia Interface are trademarks or registered trade-
marks of HDMI Licensing LLC in the United States and other countries.
License information
Information on software license
The following open source software component is included in this product:
* Posix Compatibility Layer
Portions of this software is
CYGPKG_POSIX Copyright © 1990, 1999 The Regents of the University of California.
All rights reserved.
* MIPS HAL
Portions of this software is
CYGPKG_HAL_MIPS Copyright © 1992 The Regents of the University of California.
All rights reserved.
* Standard C Library
Portions of this software are
CYGPKG_LIBC_STDIO Copyright © 1990 The Regents of the University of California.
CYGPKG_LIBC_STDLIB Copyright © 1990, 1992, 1993 The Regents of the University of California.
CYGPKG_LIBC_STRING Copyright © 1988 Regents of the University of California.
CYGPKG_LIBC_TIME Copyright © 1999 Kungliga Tekniska Hogskolan (Royal Institute of
Technology, Stockholm, Sweden).
All rights reserved.
57W0151A.indb 3857W0151A.indb 38 9/15/11 4:43:35 PM9/15/11 4:43:35 PM
Page 39

39
Specifications
TV
System: Analogue: PAL (B/G, D/K, I), SECAM (B/G, D/K), SECAM (L/L’)
Digital: DVB-T, DVB-T HD (H.264), DVB-C, DVB-C HD (H.264)
Video Colour System: PAL/SECAM/NTSC 3.58/NTSC 4.43/PAL 60
Preset channels: Digital 1200 Service, Analog 100 Carrier
Frequency Range: Analogue: 45.75~858MHz
Digital: E2~E69
LCD: TFT low-glass Active Matrix Colour LCD
HDMI input: HDMI compliant (type A connector), HDCP compliant
Suggested scan rates: 50Hz: 576i/576p/720p/1080i/1080p
60Hz: 480i/480p/720p/1080i/1080p
24Hz: 1080p
HDMI Audio: 2-channel PCM, 32/44.1/48 kHz sampling frequency
16/20/24 bits per sample
Audio Output Power: 2.0W (MAX) x 2
DVD
Signal system: NTSC, PAL (Region 2)
Applicable disc: DVD (12cm), CD (12cm)
Output: Audio : (RCA) –12.0 dBm, 1 k Ω
Digital Audio : 0.5Vp-p/75 Ω
Pickup: CD : Wavelength: 775 - 815 nm
Maximum output power: 0.5 mW
DVD : Wavelength: 650 - 666 nm
Maximum output power: 2.0 mW
GENERAL
Power Source: AC 220-240V, 50Hz
Energy efficiency class: B
Visible screen size
(diagonal):
55 cm/22 inch
Power Consumption
(Rating):
39 W
Power Consumption in
on mode:
29 W
Energy consumption per
year
*1
:
42 kWh
Power Consumption in
standby mode:
0.49W
Screen resolution: 1.920 point (horizontal) x 1.080 line (vertical)
Weight: 3.9 kg
Dimensions: 54(W)x39(H)x17(D)cm
Surrounding temperature:
Operating Humidity:
Operation: 5°C ~ 40°C/Storage: –20°C ~ 60°C
Less than 80%RH
ACCESSORIES
2 batteries (AA/R6/UM-3)/Remote control unit/AC cord/Base plate/2 screws for stand
*1
Energy consumption per year, based on the power consumption of the television operating 4 hours per
day for 365 days. The actual energy consumption will depend on how the television is used.
Weight and Dimensions are approximate. Because we continuously strive to improve our products we may
change specifications and designs without prior notice.
57W0151A.indb 3957W0151A.indb 39 9/15/11 4:43:36 PM9/15/11 4:43:36 PM
Page 40

JVC has assigned the service and in warranty responsibility to Kesa Electricals plc.
FOR CUSTOMER SERVICE, ADDITIONAL SET-UP AND OPERATING ASSISTANCE, OR TO ORDER
ACCESSORIES PLEASE CALL:
Country Sales
Company
Tel URL Main Service Contact
UK COMET 0844 8009595
http://www.comet.co.uk
France DARTY 0978970970 http://www.darty.com/ Spain EMH - http://www.emh.es/ pedidosweb@emh.es
Belgium NVB 02/334.00.00 http://www.vanden-
borre.be/
Netherlands BCC 0900-0555 http://www.bcc.nl/ http://www.bcc.nl/info/
contact
Italy DARTY IT 800928884 http://www.darty.it/ scrivici@darty.it
Czech DATART 810 328 278 http://www.datart.cz/ infolinka@datart.cz
WHEN CALLING CUSTOMER SERVICE - PLEASE HAVE YOUR MODEL NUMBER READY
57W0151A.indb 4057W0151A.indb 40 9/15/11 4:43:36 PM9/15/11 4:43:36 PM
Page 41

2
Précautions
ATTENTION :
CET APPAREIL EST UN PRODUIT LASER DE CLASSE 1. CET APPAREIL UTILISE UN FAISCEAU LASER
VISIBLE PRÉSENTANT UN RISQUE D’EXPOSITION À DES RADIATIONS. VEILLEZ À OPÉRER LE LECTEUR CORRECTEMENT ET CONFORMÉMENT AUX INSTRUCTIONS.
L’ÉTIQUETTE D’AVERTISSEMENT SUIVANTE EST SITUÉE SUR LE PANNEAU ARRIÈRE DE L’APPAREIL.
UNE FOIS CET APPAREIL BRANCHÉ À LA PRISE MURALE, NE REGARDEZ PAS DIRECTEMENT
L’INTÉRIEUR DE L’APPAREIL VIA LES OUVERTURES.
L’UTILISATION DE COMMANDES OU RÉGLAGES OU PERFORMANCES DE PROCÉDURES AUTRES QUE
CELLES INDIQUÉES ICI PEUVENT ENTRAÎNER UNE EXPOSITION DANGEREUSE À DES RADIATIONS.
N’OUVREZ PAS LES COUVERCLES ET NE RÉPAREZ PAS VOUS-MÊME L’APPAREIL. CONFIEZ TOUTE
RÉPARATION À UN TECHNICIEN QUALIFIÉ.
AVERTISSEMENT :
AFIN DE RÉDUIRE LE RISQUE D’INCENDIE OU D’ÉLECTROCUTION, N’EXPOSEZ PAS CET APPAREIL À
LA PLUIE OU À L’HUMIDITÉ.
AFIN DE RÉDUIRE LE RISQUE D’INCENDIE OU D’ÉLECTROCUTION, ET LES INTERFÉRENCES
GÊNANTES, UTILISEZ UNIQUEMENT LES ACCESSOIRES RECOMMANDÉS.
CLASS 1
LASER PRODUCT
A pleine puissance, l’écoute prolongée du baladeur peut endommager l’oreille de l’utilisateur
AVERTISSEMENT: pour protéger votre ouïe il est important que n’importe quel casque ou écouteurs utilisés
en conjonction avec ce produit soient conformes à la norme française, Arrêté du 8 novembre 2005 portant
application de l’article L. 5232-1 Ceci garantit que le niveau sonore ne dépasse pas 100 dB SPL.
L’ écoute prolongée à volume élevé pendant plus de cinq heures par semaine peut endommager votre
audition.
Remarque : Antenne DVB-C
La reception du signal de l’antenne DVB-C nécessite éventuellement la signature d’un contrat supplémentaire avec votre fournisseur de câble. Une carte mémoire pour la réception des programmes cryptés vient avec le
contrat. Les programmes qui ne figurent pas sur le contrat resteront cryptés jusqu’à nouvel ordre.
Vous recevez les programmes DVB-C à l’aide du module CA (CAM) fourni par votre fournisseur de câble. Insérez tout
simplement le CAM dans la fente prevue à cet effet dans le CI de (confère page 10) votre appareil. Insérez ensuite la
carte mémoire dans le CAM.
Vous pouvez éventuellement recevoir quelques programmes DVB-C décryptés sur votre téléviseur sans abonnement
supplémentaire et sans CAM. Toutefois, ces programmes se révèlent souvent être de moins bonne qualité que les
programmes DVB-C-HD payants. La mauvaise qualité de l’image en est une illustration parfaite.
Informations relatives à la fonction DVB-T
Toutes les fonctions relatives à la télévision numérique (accompagnées du logo DVB) sont uniquement disponibles
dans le pays ou la région dans lesquels ces signaux sont émis. Demandez au revendeur si la réception d’un signal
DVB-T est possible dans votre région de résidence.
Retirez le CAM pour la réception DVB-T, au cas où il aurait été inséré.
Le raccordement d’une antenne DVB-T est obligatoire pour la réception DVB-T.
Même si le téléviseur est conforme aux spécifications DVB-T, la compatibilité des futures transmissions DVB-T
numériques n’est pas garantie.
Certains téléviseurs numériques ne fonctionnent pas dans certains pays.
Le système DVB-T installé dans cet appareil est de type FTA (Free to Air, diffusion gratuite sur les ondes sources)
•
•
•
•
•
•
•
•
•
Cher client, [Union européenne]
Cet appareil électrique est conforme aux directives et normes européennes en vigueur concernant la compatibilité électromagnétique et la sécurité électrique.
Le représentant européen de JVC KENWOOD Corporation est :
JVC Technical Services Europe GmbH Postfach 10 05 04
61145 Friedberg
Allemagne
Avertissement important
57W0151A.indb 257W0151A.indb 2 9/15/11 4:43:36 PM9/15/11 4:43:36 PM
Page 42

3
Caractéristiques
TV
Écran à cristaux liquides 16:9
Technologie de rétroéclairage LED
Affichage à l’écran (OSD) en 18 langues
DVB-C-HDTV-Tuner
D V B -T-Tuner
Câble analogique Tuner
Affichage du GEP (Guide électronique des
programmes) pour DVB
•
•
•
•
•
•
•
Table des matières
Précautions ................................................................ 2
Caractéristiques ......................................................... 3
Table des matières ..................................................... 3
Précautions et installation .......................................... 4
Commandes et touches ............................................. 7
Commande à distance ............................................... 8
Raccordement antenne ...........................................10
Configuration automatique ....................................... 11
Sélection de la source d’entrée ................................ 11
Sélection de la langue à l’écran ...............................12
Modifier l’ordre des chaînes enregistrées ................ 12
Recherche de stations ............................................. 12
Mise à jour balay. .....................................................12
Recherche de stations manuelle .............................. 13
Fonctions de base ...................................................13
Télétexte .................................................................. 14
Réception stéréo en mode de chaînes
TV câble analogiques ..............................................14
Remarques sur le système DVB-T ...........................15
Configuration de mot de passe
(Contrôle parental) ................................................... 16
EPG (Guide électronique des programmes) ............ 16
Taille d’image et résolution ....................................... 17
Format d’image ........................................................ 18
Autres fonctions personnelles .................................. 19
Prise en charge des périphériques ..........................22
Explorateur multimédia ............................................ 22
Lecture des images (diaporama) .............................23
Types de fichiers jouables ........................................ 24
Disque .....................................................................25
Lecture d’un disque .................................................27
Zoom (DVD) ............................................................. 28
Repérage de la scène désirée
(DVD/Audio CD) ......................................................28
Sélection d’une autre langue pendant la
lecture (DVD) ........................................................... 28
Sous-titres (DVD) ..................................................... 28
Modifications des angles (DVD) ...............................29
Sélection du titre (DVD) ...........................................29
Menu DVD (DVD) ..................................................... 29
Affichage d’état du disque ....................................... 29
Utilisation de HOME MENU ..................................... 29
Mode de lecture .......................................................30
Menu Réglages audio .............................................. 31
Menu Ajustment vidéo .............................................31
Personnalisation du réglage des fonctions ...............31
Verrou Parents .........................................................33
Tableau des langues ................................................ 34
Liste des codes de pays/régions .............................. 34
Mode PC .................................................................. 35
Raccorder un périphérique HDMI ou DVI par
l’entrée HDMI ........................................................... 35
Connexion a un autree equipement ......................... 35
Guide de dépannage ...............................................37
Informations sur la licence .......................................38
Specifications .......................................................... 39
Garantie : Avertissement Général ............................40
Lecteur multimédia USB pour JPEG et WMA
Emplacement CI pour module CA
S’éteint automatiquement au bout de 4
heures sans fonctionnement.
Lecteur DVD
Sortie numérique pour Dolby Digital et DTS
Lecture de DVD, MP3/WMA/JPEG et CD
audio
•
•
•
•
•
Informations relatives à l’élimination des
appareils et des piles usagés, à l’intention des
utilisateurs
[Union européenne]
Si ces symboles
figurent sur un
appareil électrique/
électronique ou une
pile, cela signifie qu’ils
ne doivent pas être
jetés comme déchets
ménagers à la fin de
leur cycle de vie.
Ces produits devraient
être amenés aux
centres de précollecte
appropriés pour le
recyclage des appareils électriques/électroniques
et des piles pour traitement, récupération et
recyclage, conformément à la législation nationale
et la Directive 2002/96/EC et 2006/66/EC.
En traitant ces produits d’une manière correcte,
vous contribuez à la conservation des ressources
naturelles et à la prévention d’effets négatifs
éventuels sur l’environnement et la santé humaine,
pouvant être causés par une manipulation
inappropriée des déchets de ces produits.
Pour plus d’informations sur les centres de
précollecte et de recyclage de ces produits,
contactez votre service municipal local, le service
d’évacuation des ordures ménagères ou le magasin
dans lequel vous les avez achetés.
Des amendes peuvent être infligées en cas
d’élimination incorrecte de ces produits,
conformément à la législation nationale.
[Utilisateurs professionnels]
Si vous voulez jeter ce produit, veuillez vous
réferer aux “KESA ELECTRICALS SAFETY
INSTRUCTIONS”, afin d’obtenir des informations
sur son recyclage.
[Pays ne faisant pas partie de l’Union
européenne]
Ces symboles ne sont reconnus que dans l’Union
européenne.
Si vous voulez jeter ces produits, veuillez respecter
la législation nationale ou les autres règles en
vigueur dans votre pays pour le traitement des
appareils électriques/électroniques et des piles usagés
.
Notification:
La marque Pb en dessous du
symbole des piles indique que
cette pile contient du plomb.
Produits
Pile
FRANÇAIS
57W0151A.indb 357W0151A.indb 3 9/15/11 4:43:37 PM9/15/11 4:43:37 PM
Page 43

4
Tout appareil électrique, même fabriqué avec le plus grand soin, peut avoir un défaut. Si vous constatez que
de la fumée s’échappe de l’appareil ou que celui-ci dégage une chaleur anormalement élevée, débranchez-le
immédiatement.
Assurez-vous que l’appareil est suffisamment ventilé ! Ne l’installez pas sous des rideaux ou à proximité !
Branchez le câble souple exclusivement sur AC 220~240 V / 50 Hz.
La prise secteur doit être installée à proximité de l’équipement et facilement accessible.
Toute réparation doit être effectuée par un spécialiste.
N’ouvrez pas l’appareil et ne tentez pas de le réparer sous peine de provoquer un incendie.
Conservez-le à l’abri des rongeurs. Les rongeurs (ainsi que les calopsittes élégantes) ont pour habitude de
mordre les câbles électriques, ce qui peut produire un court-circuit (risque d’incendie) et un choc électrique
fatal.
Lorsque vous débranchez l’appareil de l’alimentation secteur, veillez à bien tenir la prise. Ne tirez pas sur le
câble. Cela peut entraîner sa surcharge et causer un court-circuit.
Ne nettoyez pas l’appareil à l’eau. Utilisez uniquement un chiffon humide, le même que vous utilisez pour
nettoyer vos meubles.
Ne plongez pas l’appareil dans l’eau !
Installez l’appareil de manière à ce qu’il soit impossible de trébucher sur le câble.
Il est recommandé d’installer l’appareil sur des bancs de travail à l’abri des chocs pour éviter tout risque de
chute.
Tenez compte du fait que les jeunes enfants peuvent faire tomber l’appareil de la table ou de l’étagère en tirant
sur son câble et peuvent être blessés.
N’utilisez pas l’appareil à proximité d’une source de chaleur. La gaine et le câble pourraient être endommagés
en raison de la chaleur.
Les enfants aiment imiter les adultes ! Veillez à ne pas insérer d’objets dans les ouvertures d’aération !
Les ouvertures d’aération ne doivent pas être obstruées ! Ne posez pas de journaux ou de housses sur
l’appareil !
La télécommande n’est pas un jouet ! Les jeunes enfants risquent d’avaler les piles. Si cela devait se produire,
rendez-vous immédiatement chez un médecin.
L’écran étant en verre, il peut se briser en cas de choc. Si vous avez cassé un objet en verre, faites attention
lorsque vous ramassez les morceaux.
N’utilisez sous aucun prétexte l’appareil dans un véhicule en mouvement ! Il pourrait tomber lors de son
transport, entraînant blessures ou dommages matériels.
Précautions contre la chute de l’appareil
- Si ces mesures ne sont pas respectées, l’unité peut tomber et entraîner des blessures.
- Contactez le magasin où vous avez acheté l’unité pour de plus amples renseignements sur ces mesures.
En cas d’utilisation d’un socle TV,
- Assurez-vous que l’unité est bien posée au centre du socle.
- Ne laissez pas les portes du socle ouvertes.
- Si l’unité tombe ou se casse, vous pouvez vous blesser ou vos doigts peuvent se retrouver coincés.
Prenez des mesures supplémentaires si vous avez des enfants.
Évitez de placer l’appareil sur une surface exposée à des vibrations ou à des chocs.
En cas d’orage, débranchez l’écran de la prise du secteur et de l’antenne.
En cas d’absence prolongée, éteindre le téléviseur et le débrancher de la prise secteur.
L’appareil chauffe en cours d’utilisation. Ne jamais le couvrir avec un linge, du papier ou autre, afin d’éviter
toute surchauffe. Veillez à ce qu’il y ait toujours une ventilation d’air suffisante. Ne placez pas l’appareil près
d’une source de chaleur, ni à la lumière directe du soleil. Laisser au moins 10 cm d’espace autour de l’appareil.
LAISSER ASSEZ D’ESPACE AUTOUR DU TV !
L’appareil ne doit pas être exposé à un écoulement ou un éclaboussement d’eau et aucun récipient contenant
de l’eau, comme les vases, ne doit être placé sur l’appareil. L’écoulement de liquides dans l’unité peut entraîner
de sérieux dommages. Eteignez l’alimentation principale de l’unité et contactez un agent de service qualifié
avant d’utiliser l’unité à nouveau.
Afin d’éviter tout choc électrique constituant un danger de mort, veuillez lire attentivement les
instructions suivantes :
N’exposez pas l’appareil à l’humidité. Ne l’utilisez pas dans votre bain ou dans un sauna.
N’utilisez pas l’appareil à proximité d’une baignoire, d’une douche ou d’une piscine.
N’utilisez sous aucun prétexte l’appareil s’il a été mouillé. Ceci concerne également la condensation, qui se
produit lorsqu’un appareil froid est introduit dans une pièce chauffée (en hiver par exemple). Attendez que
l’appareil soit à température ambiante avant de l’utiliser, particulièrement en hiver.
Ne placez pas d’objets lourds sur le câble sous peine d’abîmer l’isolation électrique.
Ne placez pas de ruban isolant autour d’un câble abîmé ou d’une prise endommagée. Ce type de réparation
doit être effectué par un spécialiste.
N’utilisez pas l’appareil si son coffret est endommagé et ne tentez pas de réparer ce dernier. Le coffret doit être
remplacé.
Débranchez l’appareil du secteur avant de le nettoyer.
•
•
•
•
•
•
•
•
•
•
•
•
•
•
•
•
•
•
•
•
•
•
•
•
•
•
•
•
•
•
•
•
•
Précautions et installation
Lisez attentivement le mode d’emploi avant d’allumer votre appareil. Cet appareil a été fabriqué conformément à
l’ensemble des réglementations de sécurité en vigueur. Les recommandations de sécurité suivantes permettent
aux utilisateurs d’éviter toute mauvaise utilisation de l’appareil et tout risque correspondant.
57W0151A.indb 457W0151A.indb 4 9/15/11 4:43:38 PM9/15/11 4:43:38 PM
Page 44

5
Précautions et installation
Comment fixer le socle
REMARQUE:
• Débranchez le cordon d’alimentation de la prise AC INPUT.
• Avant d’exécuter l’intervention, disposez un amortissement matelassé sur lequel déposer la télévision.
• Ne pas toucher ni appuyer sur l’écran de la télévision, le verre risque de se briser sous la pression.
•
Assurez-vous de suivre les instructions. Une installation incorrecte du socle pourra faire tomber la télévision.
1) Posez le téléviseur, face vers le bas, sur une table.
2) Alignez la plaque inférieure du socle (fournie) comme illustré.
Elle s’adaptera dans un seul sens. Assurez-vous que les chevilles d’emplacement sont projetées sur les
orifices d’emplacement.
3) Tenez soigneusement la plaque de base dans sa position et fixez-la à l’aide de vis (fournies).
Démontage du socle
Le socle doit être démonté pour accrocher l’appareil au mur. Pour ce faire, ôtez les vis (M, voir page 10) à
l’arrière. Démontez complètement le socle. Placez un kit de montage au mur VESA de 100mm.
AVERTISSEMENT : Pour prévenir tout risque d’incendie ne
jamais placer une bougie ou tout autre flamme au dessus ou
dans l’environnement proche du téléviseur.
En cas de déplacement ou de déménagement de l’appareil :
Toujours débrancher l’appareil de la prise du secteur et de l’antenne pour éviter
d’endommager les câbles ou les fiches, et pour éviter tout risque d’électrocution.
• Tout déplacement de l’appareil sans observer ces consignes peut endommager le câble d’ alimentation,
entraîner un incendie, des chocs électriques ou des blessures dues à la chute de l’unité.
Veillez à soulever téléviseur à deux en le tenant bien droit comme décrit ci-dessous.
Lorsque le moniteur se trouve sur un socle, retirez-le du meuble avec son socle.
• Maintenez bien le moniteur en le soulevant de son meuble, déplacez-le à deux pour éviter toute
chute.
• Ne posez pas cet appareil sur une table en bois. Il est très lourd et risque de laisser des marques sur
les bois tendres.
• Le vernis du meuble risqué d’entraîner la corrosion et la dissolution des pieds en caoutchouc, en laissant
des marques noires sur la table. Utilisez un socle TV, qui est spécialement conçu à cette fin.
Remarque:
Pour retirer le socle, procédez dans l’ordre inverse.•
57W0151A.indb 557W0151A.indb 5 9/15/11 4:43:39 PM9/15/11 4:43:39 PM
Page 45

6
Précautions et installation
Veillez à ce que le socle soit fixé fermement lorsque le TV est sur un meuble.
• Le socle est amovible et il peut provoquer des blessures si les roulettes ne sont pas fixées. Retirez les
roulettes lorsque le TV est placé sur une surface douce comme un tapis.
La distance entre vous et l’écran doit être de 3 ~ 4 fois la dimension de la diagonale de l’écran.
• Si vous ne respectez pas cette distance, vous risquez d’avoir mal aux yeux.
Lors de l’installation du moniteur sur une table, veillez à ne pas le placer trop près du bord ou des coins.
• Cela pour éviter toute chute qui endommagerait sérieusement le Moniteur.
REMANENCE/BRULURES à l’écran ACL:
Ne figez pas d’images sur l’écran du moniteur ACL trop longtemps car cela peut entraîner une rémanence
à l’écran, également appelée « brûlure d’écran ». Pour éviter la rémanence, réduisez le niveau du contraste
ou de luminosité de l’écran lorsque vous affichez une image figée.
!! LA GARANTIE NE COUVRE PAS LES DOMMAGES CAUSES PAR LA REMANENCE !!
• IMAGES FIXES : Image de jeu vidéo, de PC, logo d’émetteur TV etc...
• Les formats spéciaux qui ne couvre pas l’entièreté de l’écran. Par exemple, les formats (16:9) sur un
écran normal (4:3) (lignes noir en haut et en bas de l’écran); ou les formats d’image (4:3) sur un écran
large (16:9) display (lignes noir à gauche et à droite de l’écran).
Attention !
Instructions de nettoyage de votre l’écran ACL.
Mesure de sécurité :
Avant de commencer à nettoyer, éteignez l’appareil et débranchez les fiches de courant.
Soyez attentif de ne pas gratter la poussière de la face avant en plastic.
Ne grattez pas avec des outils ou vos ongles.
Lors du nettoyage, ne portez pas de bijoux (bagues, montre-bracelet, etc)
Utilisez un chiffon humide mais bien essoré, habituellement un chiffon micro-fibre sans peluche, rincé dans
de l’eau pure.
Essuyez avec des petites pressions.
Ne pas utilisez des nettoyants standards pour vitres : leur teneur en alcool / amoniaque dissoudrait la pellicule de protection de la face avant.
N’utilisez jamais de solvant ou dissolvant. N’utilisez jamais de nettoyants spéciaux utilisés pour les moniteurs PC ou tv CRT.
Finalement, frottez doucement avec un chiffon sec en micro-fibre.
N’utilisez pas de mouchoirs en papier car le papier se désagrège lorsqu’il est mouillé. Certains papiers
peuvent griffer votre écran. Certains papiers peuvent laisser des traînées de poussière.
Economie d’énergie
L’appareil présente une consommation élevée uniquement lorsque l’écran est utilisé avec une luminosité
maximale. Cette dernière est uniquement nécessaire lorsque le téléviseur est utilisé de jour afin d’obtenir
une image lumineuse et contrastée. Lorsque l’environnement est moins lumineux (par ex : le soir), l’image
est parfois trop vive et peut éblouir. Vous pouvez alors réduire la luminosité de l’écran via le menu
Rétroéclairage (voir p. 19). En ajustant la valeur de Rétroéclairage, vous pouvez économiser jusqu’à 30 %
d’énergie.
Remarque:
Pour obtenir un contraste maximal, Rétroéclairage doit être réglé sur sa valeur la plus haute (100).
Pour une économie d’énergie optimale, Background doit être réglé sur sa valeur la plus basse.
ATTENTION en cas d’utilisation ABUSIVE d’un casque...
L’utilisation abusive (volume trop élevé, durée trop longue...) peut endommager l’ouïe.
Remarques concernant les piles nécessaires à l’utilisation de la télécommande (valable dans l’UE
uniquement)
N’abandonnez pas les piles déchargées dans la nature. Déposez-les dans des conteneurs prévus à cet
effet. Le symbole représentant une poubelle barrée signifie que les piles usagées ne doivent pas être mises
au rebut en même temps que vos déchets ménagers classiques. Un système de collecte distinct a été
mis en place pour les piles usagées. Il permet de traiter et de recycler ces dernières dans le respect de la
législation en vigueur. Veuillez contacter votre collectivité locale pour obtenir des informations sur les plans
de collecte et de recyclage mis en place dans votre zone d’habitation.
•
•
57W0151A.indb 657W0151A.indb 6 9/15/11 4:43:40 PM9/15/11 4:43:40 PM
Page 46

7
Commandes et touches
Description des commandes et des touches
1. Capteur télécommande.
2. Voyant
(Marche/Veille): Le témoin lumineux s’allume en rouge en mode d’attente, et en bleu
lorsque l’appareil est allumé.
3. Haut-parleurs
4. Touche
(MARCHE/ARRÊT) : Préparations : Raccordez le câble d’alimentation à une prise
AC220~240 V / 50 Hz.
Appuyez la touche POWER pour passer en mode veille ou pour mettre l’appareil sous-tension.
5. TV/AV/PC/ENTER-touche: Pour choisir la source d’entrée. Dan le menu: s’utilise comme la touche
ENTER.
6. MENU-touche: Pour afficher l’écran du menu.
7.
(Canal) / /▲/▼ -touches: Presser pour passer au canal suivant. Presser la touche pour
retourner au canal précédent. Dans le Menu : touches de navigation/d’installation.
8.
(Volume) +/–/◀/▶ touches: Pour régler le volume / dans le Menu : touches de navigation.
9.
EJECT
-touche: Éjecter un disque.
10. PLAY
-touche: Lecture d’un disque.
11.
STOP
-touche: Arrêt d’un disque.
Pour une déconnexion complète du réseau, retirez le câble d’alimentation de la prise.
5
3
6
78
1
4
2
9
10
11
DVD-Player
57W0151A.indb 757W0151A.indb 7 9/15/11 4:43:41 PM9/15/11 4:43:41 PM
Page 47

8
Commande à distance
Fonction Page
Activer le mode stand-by ou arrêter le téléviseur 11
Affiche le les informations 13, 29
Sélection du mode son
Modifier la langue de la piste sonore du DVD
14
28
Éjecter un disque 27
~
Sélection chaîne
Sélection page Vidéo
Entrer un mot de passe 0 0 0 0
Sélection Titre/Chapitre/Titre
13
14
16, 33
28, 29
Selection de l’entrée externe 11
Affichage du GEP (Guide électronique des
programmes)
16
Activer le menu
Activer le HOME MENU
11
29
Etape précédente du menu / jusqu’à la sortie du
menu
29
Boutons curseurs
Pour Mémoriser
Liste De Chaînes 13
Boutons curseurs
Ralenti arrière / avant 28
Arrêt temporaire du son 14
Pour format image 18
Volume 14
Arrêt sur image
Maintient une page texte
14
14
Switch entre le canal en cours et le dernier canal
choisi
Sélection d’une page télétexte secondaire
14
14
Sélection canal /page télétexte suivante page par
page
13, 14
Sélectionner pour opérer TV
Pour entrer dans l’explorateur de médias 22
Sélectionner pour opérer DVD 27
Affi cher les sous-titres 13, 28
Activer le Play Mode 30
Annuler l’étape de programmation
Sélectionner le menu d’un disque DVD 29
Sélectionner le titre d’un disque DVD 29
Modifier l’angle de lecture d’un disque DVD 29
Zoom (pour la lecture DVD/JPEG) 28
Videotext ON/ TV+Text/ OFF 14
Répondre Quiz 14
Agrandissement page Videotext 14
Touches de commande pour périphériques USB/
DVD - Lecture
Fastext/TOPtext boutons
23, 27
14
57W0151A.indb 857W0151A.indb 8 9/15/11 4:43:43 PM9/15/11 4:43:43 PM
Page 48

9
Mise en place des piles
Utiliser des micro-batteries type UM-3 (format AA).
N’utilisez pas de piles faibles ou usagées. Avec une tension faible, la télécommande marcherait mal.
Remplacez les piles usagées par des neuves. Ne rechargez jamais les piles standard – ceci pourrait
provoquer une explosion.
Remarque:
Les piles usagées peuvent contenir de l’ électrolyte corrosif, qui risque d’endommager la télécommandeaussi, retirez toute pile usagée au plus vite.
N’exposez jamais les piles à une forte chaleur (éclairage solaire direct, feu ou autre).
1
Faire glisser le couvercle
dans le sens de la flèche et
l’enlever.
2
Introduire les 2 piles en
respectant la polarité.
3
Replacer le couvercle.
•
•
La télécommande ne fonctionnera pas correctement dans les cas suivants:
a) Si le capteur de télécommande est exposé au
soleil ou à toute autre lumière trop intense.
b) S’il y a un obstacle entre le téléviseur et le boîtier
de télécommande.
Z
Z
Z
Z
Z
Z
c) Si les piles sont mal placées (respecter les
polarités).
d) Si les piles sont usées.
Utilisation efficace de la télécommande
Diriger la télécommande
directement vers l’écran.
Fenêtre de transmission
Environ 5m
Capteur télécommande
Commande à distance
30 30
57W0151A.indb 957W0151A.indb 9 9/15/11 4:43:47 PM9/15/11 4:43:47 PM
Page 49

10
100 mm
M4 x 10
100 mm
Raccordement antenne
Attention : avant de faire le raccordement :
Pour éviter de causer des dommages à votre écran, arrêter le téléviseur par la touche (MARCHE/
ARRÊT) de l’appareil et retirer le cordon secteur de la prise de courant.
Effectuer les raccordements nécessaires.
Lorsque les raccordements sont faits correctement, branchez l’écran sur le secteur (AC 220~240V) et
allumez-le.
Raccordez l’antenne comme décrit ci-dessous ou à une antenne extérieure (A). Le raccordement à d’autres
équipements est expliqué plus loin aux pages 35~36.
•
•
•
(A) Antenne: Connectez une antenne.
Le récepteur intégrée capte toutes les chaînes analogiques par câble et les chaînes DVB-T/-C.
(B) Sortie DIGITAL AUDIO COAXIAL : sortie audio numérique.
(C) Entrée AV/COMPONENT : Entrée pour signal AV-analogue/Composante-signal. Voir page 35, 36.
Remarque: L'entrée AV-AUDIO est partagée avec l'entrée COMPONENT AUDIO.
(D) Entrée USB: Voir page 22~24.
(E) Entrée Scart : À raccorder avec un câbles SCART. Voir page 36.
(F) Fente C.I. :
Pour CA- module (CAM) (Si le fournisseur des services TV payants prend en charge ceci).
Remarque: Pour éviter tout dysfonctionnement ou dommage, assurez-vous d’éteindre la TV avant d’insérer
ou de retirer la carte de la CAM.
(G) Prise HEADPHONE (Casque) : Pour casque muni d’une « mini plug » (3,5 mm).
(H) Entrée PC-INPUT (PC) : Voir page 35.
(I) Entrée PC/DVI AUDIO : Voir page 35.
(J)
Entrée HDMI/DVI: Voir page 35.
(K)
Alimentation: Branchez le câble d'alimentation fourni à une prise AC 220-240V/50Hz uniquement
- N'essayez jamais de le brancher à n'importe quel autre type de prise. N'essayez jamais de réparer un
câble d'alimentation AC endommagé avec un ruban isolant - Ceci doit être réparé par un spécialiste ou
remplacé. Ne laissez pas votre animal de compagnie se promener près des câbles. Si un animal mord
dans un câble, il pourrait recevoir un choc électrique fatal, choc qui pourrait constituer par la suite un
danger pour les autres.
(L)
Trous du support: Fixez un support mural (non fourni) ici.
(M)
Pour accrocher le téléviseur sur le mur, retirez ces vis puis retirez le support.
Avant de commencer le travail, remplissez d'abord un tissu de rembourrage à l'endroit ou vous avez
retiré le support.
(N)
Cache du connecteur: N’ouvrez pas ce cache. Il contient une prise uniquement destinée en cas de panne.
Arriére
(L)
(M)
(K)
(H)
(I)
(J)
(A)
(B)
(C)
(D)
(E)
(F)
(G)
(N)
57W0151A.indb 1057W0151A.indb 10 9/15/11 4:43:49 PM9/15/11 4:43:49 PM
Page 50

11
Configuration automatique
Le tuner interne reçoit le signal DVB-C, DVB-T et celui du
câble analogique. Au premier démarrage, le message “Auto
Installation” apparaîtra.
Préparation:
Allumez le téléviseur (Voir page 7) et connectez
l’antenne.
1
Le menu Auto Installation s’affichera.
Presser sur
ou pour choisir la langue désirée.
Puis presser
ENTER
.
Auto Installation
- Inst. 1 -
Langue : Allenand
Anglais
Français
Italien
Polonais
2
Presser ou pour sélectionner votre pays.
Puis presser ENTER.
Auto Installation
Pays : France
Italie
Pologne
Espagne
Belgique
- Inst. 2 -
3
Presser ou pour choisir Domicile.
Puis presser ENTER.
Auto Installation
Emplacement TV : Domicile
Magasin
Veuillez l'endroit où le
téléviseur sera placé.
L'image sera optimisée pour
cet endroit.
- Inst. 3 -
4
Si vous arrêtez Extinction auto (voir page 20),
appuyez sur
ou pour sélectionner Off.
Puis presser ENTER.
Auto Installation
Extinction auto : Off
1 heure
2 heures
4 heures
Le téléviseur est programmé
pour s'éteindre après 4 h
de visionnement continu.
Sélectionnez Off ou utilisez
le MENU pour changer ce
réglage.
- Inst. 4 -
5
Presser ou pour choiser Antenne ou Câble,
puis presser ENTER.
Auto Installation
TV Connection :
Please select the method of
TV Connection.
Antenne
Câble
- Inst. 5 -
6
Le TV commence par rechercher les chaînes
TV numériques.
Connectez maintenant votre antenne DVBT (ou votre antenne DVB-C si vous avez
sélectionné “Câble” à l’étape 5).
Appuyez sur ENTER pour démarrer la
recherche automatique.
La progression de la recherche s’affiche en
pourcentage à des fins de confirmation.
Auto Installation
Lancer le réglage Auto (numérique)
- Inst. 6 -
Remarque:
Il faut être patient – le processus de recherche
automatique peut prendre quelques minutes.
•
7
Une fois la recherche des chaînes TV numériques
terminées, vous serez invité à passer à la recherche
automatique des chaînes TV numériques. Si vous
souhaitez démarrer la recherche automatique des
chaînes TV analogiques, connectez votre antenne
TV et appuyez sur ENTER.
Remarque:
si vous ne souhaitez pas procéder à la recherche
automatique des chaînes TV analogiques,
appuyez sur MENU.
•
Auto Installation
Lancer réglage auto (analogique)
- Inst. 7 -
8
Quand 100 % s’affiche, l’écran télé normal
apparaît.
Remarque:
Pour annuler la Mémorisation automatique, appuyez sur
RETURN pendant le processus.
LE PROCESSUS DE RECHERCHE
AUTOMATIQUE NE DÉMARRERA
AUTOMATIQUEMENT QU’AU PREMIER
DÉMARRAGE DE L’APPAREIL. CEPENDANT,
VOUS POUVEZ REDÉMARRER CE PROCESSUS
VIA LE SYSTÈME DE MENU (voir page 12 ).
Si vous n’avez pas réussi à paramétrer la paire
langue-pays adaptée au cours de ce processus de
configuration automatique, vous pourrez sélectionner
la langue de votre choix comme cela est illustré à la
page 12 (Sélection de la langue à l’écran).
Sélection de la source d’entrée
Presser INPUT SELECT pour afficher le signal
d’un autre appareil raccordé à votre TV, tel qu’un
magnétoscope ou un lecteur DVD. Vous pouvez
choisir chaque source selon les prises d’entrées
utilisées pour raccorder vos appareils.
Pour sélectionner la source d'entrée vidéo, appuyez
sur INPUT SELECT ou sur /, puis appuyez sur
ENTER.
Remarque:
La reproduction de la source DVB-T- ou DVB-C-TV, et
DVB-T-Radio ou DVBC-Radio dépend de la sélection de
l’étape 2 de « Recherche de stations », page 12.
•
•
•
57W0151A.indb 1157W0151A.indb 11 9/15/11 4:43:52 PM9/15/11 4:43:52 PM
Page 51

12
Sélection de la langue à l’écran
1
Sélectionnez Caractéristique (sauf si vous l’avez
déjà sélectionné au premier démarrage du
moniteur).
Puis presser . Puis presser ou pour choisir
Langue, puis presser .
Verrou du système
Langue
Horloge
Minut. Extinc.
Extinction auto
DEL Marche
Malentendant
Info CI
Image
Son
Canaux
Caractéristique
ENTER
ENTER
ENTER
Off
Off
On
Off
ENTER
Caractéristique
2
Presser ou pour choisir Langue OSD, puis
presser . Presser ou pour choisir la langue
désirée.
Langue OSD
Sous-titre préféré
Audio préféré
Langue télétexte numériq.
Langue télétexte analogue
Image
Son
Canaux
Caractéristique
Français
Anglais
Français
Italien
Polonais
Espagnol
Caractéristique - Langue
3
Presser MENU pour revenir en écran neutre.
Modifier l’ordre des chaînes enregistrées
Vous pouvez changer l’ordre des chaînes mises
en mémoire par la fonctionautomatique de
mémorisation.
1
Appuyez sur MENU. Sélectionnez Gestion des
chaînes sous le menu Canaux, puis appuyez
sur .
2
Appuyez sur ▲/▼ pour sélectionner la chaîne
que vous souhaitez modifier, puis choisissez
l’option Depuis l’écran TV. Appuyez ensuite
sur la touche de couleur correspondant de la
télécommande.
Return
Retour
Enter
RenommerDépl.
Verr.
n° Nom du programme
Suppr. Sauter Echang.
ANTENA 3
ANTENA.NEOX
ANTENA.NOVA
Telehit
FRATV1
MNO
PQR
STU
VWXYZ
0001
0002
0003
0004
0005
0006
0007
0008
0009
Canaux - Gestion des chaînes
1 Verr. (touche rouge): Une marque rouge
s’affiche. (Verr. N’est disponible que lorsque
Verrou du système est en Marche. Voir page16.)
2 Suppr. (touche verte): Une marque verte
s’affiche.
3 Sauter (touche jaune): Une marque jaune
s’affiche.
4 Renommer (Touche ENTER): vous pouvez
changer le nom d’une station avec le curseur à
l’écran / / / , ENTER et touche Rouge/Verte/
Jaune.
5 Echang. (touche Bleue): Appuyez sur ou
cette touche pour choisir la position de la chaîne,
puis presser ENTER.
Recherche de stations
Attention ! Toutes les chaînes enregistrées
précédemment sont supprimées à l’étape 5. Une
nouvelle recherche de chaînes démarre alors
automatiquement.
1
Appuyez sur MENU. Sélectionnez l’option
Canaux, puis appuyez sur .
2
Pour recherche les chaînes numeriq., presser
ou pour choisir TV Connection, puis presser .
Presser ou pour choisir Antenne (pour DVB-T)
ou Câble (pour DVB-C)
, puis presser .
Vous pouvez sélectionner cette option dans le
mode d’entrée DTV uniquement.
•
3
Presser ou pour choisir Recherche auto, puis
presser .
Appuyez sur , puis sur ▲ ou ▼ pour sélectionner
pays désiré, puis appuyez sur ENTER.
Pays
Tou s
Numériq.
Analog.
Image
Son
Canaux
France
Royaume Uni
France
Italie
Pologne
Espagne
Canaux - Recherche auto
4
Appuyez sur ▲ ou ▼ pour sélectionner un mode,
de recherche, puis appuyez sur . Un écran de
confirmation s’affiche alors.
Pays
Tou t
Numériq.
Analog.
Image
Son
Canaux
France
ENTER
ENTER
ENTER
Message
Êtes-vous certain?
OK Annuler
Canaux - Recherche auto
To u s: Recherche à la fois les chaînes
Numériq., analogiques et radios.
Numériq.:
Recherche les chaînes Numériq. et
radios.
Analog.: Recherche uniquement les chaînes
Analog.
5
Sélectionnez OK et appuyez sur ENTER pour
lancer la recherche automatique.
Image
Son
Canaux
Caractéristique
Inst.
Chaîne analogique trouvée:
0
Chaînes numériques:
0
Chaîne Radio trouvée:
0
14%
Réglage de chaîne
Remarque:
Appuyez sur RETURN pour revenir à l’étape 3.•
6
Lorsque l’affichage est à 100%, appuyez sur
MENU pour quitter le menu.
Mise à jour balay.
Si vous souhaitez rechercher et mémoriser uniquement
les nouvelles chaînes, réalisez le Update Search. La
mémorisation de chaînes actuelle est conservée et
seules les nouvelles chaînes seront mémorisées.
Préparation:
Sélectionnez DTV sous INPUT SELECT.
Appuyez sur MENU.
Sélectionnez l’option TV Connection dans le menu des
Canaux, puis appuyez sur . Appuyez sur ▲ ou ▼ pour
sélectionner Antenne ou le Câble, puis appuyez sur .
Sélectionnez l’option Update Search dans le menu des
Canaux, puis appuyez sur .
Exécutez les mêmes étapes que pour les points 4 - 6.
•
•
57W0151A.indb 1257W0151A.indb 12 9/15/11 4:43:54 PM9/15/11 4:43:54 PM
Page 52

13
Recherche de stations manuelle
Recherche manuelle de stations
ReturnEnter Menu
Fréquence(kHz)
Image
Son
Canaux
Caractéristique
Inst.
474000
RetourSaisir SortieDépl.
Canaux - Rech. Manuelle Numérique
Début
Force
Qualité
Préparation:
Sélectionnez DTV dans INPUT SELECT. Appuyez
sur MENU.
Sélectionnez l’option TV Connection dans le menu
des Canaux, puis appuyez sur
. Appuyez sur ▲
ou ▼ pour sélectionner Antenne ou Câble, puis
appuyez sur .
Sélectionnez l’option Rech. Manuelle Numérique
dans le menu des Canaux, puis appuyez sur .
•
•
1 Fréquence de la chaîne numérique à chercher.
2 Sélectionnez Début, puis appuyez sur ENTER
pour lancer la recherche.
3
Vous pouvez vérifier ici la force et la puissance du
signal du service sélectionné. Si nécessaire, ajustez
la direction de l’antenne DVB-T pour obtenir un signal
optimal.
Recherche manuelle analogique
Return
Retour
Enter
Saisir
Menu
SortieDépl.
Chaîne courante
Rechercher
Rég. fin
AFC
Système couleur
Système Son
Image
Son
Canaux
Caractéristique
Inst.
001
217.25 MHz
ENTER
ENTER
On
Auto
BG
Enregistrer
Canaux - Rech. Manuelle Analogique
Préparation:
Sélectionnez TV sous INPUT SELECT. Appuyez
sur MENU. Sélectionnez Rech. Manuelle
Analogique
sous le menu Canaux, puis appuyez sur .
1 Appuyez sur , puis sur ▲ ou ▼ pour sélectionner
une chaîne à rechercher, puis appuyez sur
ENTER.
2 Fréquence de la chaîne analogique à chercher.
3 Sélectionnez Démarrer , puis appuyez sur ou
sur Pour rechercher des stations à partir de la
fréquence actuelle.
4
Déjà installé correctement et de manière optimale.
Ne modifiez rien ici. Toute modification peut causer
des perturbations au niveau du son ou de l’image. La
vidéo peut aussi être affectée.
5 Appuyez sur , puis sur ▲ ou sur ▼ pour
sélectionner AFC On ou Off, puis appuyez sur
ENTER.
6
Le système couleur est déjà préréglé sur Auto. Ne
modifiez rien ici. Toute modification peut causer des
perturbations au niveau du son ou de l’image.
7
Le système de son correct est déjà installé. Toute
modification peut causer des perturbations au niveau
du son.
8 Enfin, appuyez sur rouge pour sauvegarder la
recherche.
Fonctions de base
Choix du programme
Avec les 10 touches numériques.
Exemple:
No. 2: Presser 2.
No. 29: Presser 2 et endéans les 2 secondes, presser 9.
No. 929 : Appuyez sur 9, 2, 9 comme ci-dessus.
Avec P + ou –, passer à la chaîne précédente ou
suivante : il faut compter +/– 2 secondes. Si la
recherche automatique n’a mémorisé que 5 chaînes ;
seules ces 5 chaînes pourront être choisies (voir P.12).
Liste des chaînes
La Liste des chaînes affiche une liste de l’ensemble
des programmes disponibles. Appuyer sur CH LIST
pour afficher la Liste des chaînes. Appuyer sur ou
pour sélectionner la chaîne de votre choix. Appuyer
sur CH LIST pour afficher la chaîne sélectionnée.
Afficher les informations
Appuyez sur
. Les informations sur le programme
s’affichent pendant environ 4 secondes.
Si vous appuyez deux fois sur , vous aurez plus
d’information à propos de La force et la qualité du
signal. (DVB-T)
La figure suivante montre un exemple de réception
d’une chaîne DVB.
•
•
•
•
0672 PQR
672_PQR_SMPTE Color
Fréquence : 842000 kHz Bit Rate : 519600 bps Stereo
13:00
13:00-13:01 I/II
Force :
Qualité :
24%
79%
672_PQR_SMPTE Color
Bar_0101_0000_0001_Audio3_ABCDEFGHIJKLMNOPQRSTU
VWXYZabcdefghijklmnopqrstuvwxyz
1 Nom de la chaîne
2 Titre du programme
3 Détails du programme suivant et précédents avec les
touches /
4 Durée du programme
5 Heure actuelle
6 Une ou deux langue audio. (ci-dessous)
7 L’icône radio ou la station radio s’affichent.
8 Une ou deux langue de sous-titrage. (ci-dessous)
9 Télétexte DVB disponible
0 Force et qualité du signal
! Fréquence ou Station et Bit Rate de canal.
@ Détails sur le programme
Langue audio/Sous-titre pour station DVB
Si vous regardez une chaîne DVB associée à plus dune
langue audio ou de sous-titrage, vous pouvez les modifier
Avec la touche AUDIO I/II ou
.
Appuyez sur AUDIO I/II. Le menu de langues audio
s’affiche. Appuyez ensuite sur ▲ ou ▼ pour sélectionner
la langue audio.
Vous pouvez aussi sélectionner le format audio (Stéréo,
Gauche ou Droite) en appuyant sur
ou .
Appuyez sur
, puis appuyez sur ou pour
sélectionner les DTV Subtitle. Appuyez ensuite sur
▲ ou ▼ pour sélectionner la langue de sous-titrage, puis
appuyez sur ENTER.
Remarque:
Certaines diffusions DVB peuvent ne pas proposer de
sous-titrages.
Npour annuler une langue audio/un sous-titre, appuyez
sur RETURN.
•
•
•
•
•
57W0151A.indb 1357W0151A.indb 13 9/15/11 4:43:58 PM9/15/11 4:43:58 PM
Page 53

14
QuickView
vous permet de retourner rapidement au
programme regardé précédemment.
Cette fonction n’est pas disponible en mode externe et
Ne peut pas êre utilisée lorsque les modes ATV et DTV
sont activés.
MUTE
Avec . couper le son temporairement.
Pour annuler la coupure de son, presser
ou + ou –.
Arrêt sur image
Presser FREEZE pour geler l’image. Pour repartir
appuyer une nouvelle fois sur FREEZE.
Remarque:
Pendant le mode d’image fixe, la fonction PICTURE
SIZE n’est pas disponible. (Si vous appuyez sur
PICTURE SIZE, le mode d’image sera annulé.)
Si vous avez choisi la fonction image dans le mode
DTV-input, cette fonction fonctionne également avec le
signal externe de sortie de la prise SCART.
Remarque:
Si le TV ne reçoit aucun signal (ex. pas de connexion
antenne) il se mettra automatiquement en standby
après +/– 15 minutes. (En la modo PC: 2 minutos)
Certaines fonctions sont activées et désactivées
avec la même touche. D’autres nécessitent la touche
RETURN pour être désactivées.
Télétexte
Le télétexte est diffusé page par page. L’appareil
est capable de sauvegarder automatiquement
800 pages. La sauvegarde se termine après
mémorisation de toutes les pages qui sont
uniquement accessibles après la finalisation de la
sauvegarde. Cela peut prendre un certain temps.
Le menu TELETEXT permet l’installation des
langues télétexte.
Les langues affichées sont celles prises en
charge par la chaîne. En Allemagne il s’agit
habituellement de l’ALLEMAND.
Fastext/TOPtext
Le Fastext/TOPtext est un vidéotexte avec un
INDEX spécial.
En bas de l’écran, vous avez le choix entre 4
fenêtres de couleur (rouge, vert, jaune et bleu). Ces
fenêtres vous permettent d’accéder directement
aux pages regroupées par couleur. Presser sur la
touche de couleur qui correspond à la couleur de la
fenêtre choisie pour activer celle-ci.
Télétexte activé/Désactivé
Le Télétexte n’est pas proposé par toutes les chaînes.
Rechercher la chaîne désirée avec option télétexte.
Appuyez sur
. Une page télétexte s’affiche. La
chaîne choisie ne propose pas le télétexte si la page
100 est affichée. Appuyez sur
à nouveau. L’écran
du téléviseur sera divisé en deux et les informations
du télétexte et du programme en cours s’afficheront
simultanément.
Sur
à nouveau pour désactiver le Télétexte
Sur
à nouveau pour activer le Télétexte. La dernière
page sauvegardée est affichée.
Attention:
Aussi longtemps que la fonction Télétexte est
activée, vous ne pouvez changer de chaîne.
Sortez de la fonction Télétexte pour changer de
programme.
•
•
•
•
•
•
Choisir une page
Avec P + ou – pour obtenir la page désirée.
Ou utiliser les 10 touches numériques pour
introduire le numéro de la page souhaitée.
Lorsqu’un numéro de page a été introduit par erreur,
il suffit de réintroduire le bon numéro de page à l’aide
des touches numériques ou appuyez sur une touche
de couleur pour atteindre la page Fastext/TOPtext qui
correspond à la rubrique choisie.
Bloquer les pages
Certaines pages sont divisées en plusieurs pages
(sub-pages).
Ces sous-pages apparaissent à l’écran une par une.
Pour consulter et garder à l’écran une page appuyez
. et à nouveau pour faire apparaître les sous-
pages suivantes.
Sélection directe des sous-pages
Peut se faire directement avec les touches
numériques. Vous pouvez utiliser une ou deux
opérations.
1. Avec
passer à la 2ème page. 0 0 0 0
s’affichent. Introduire 0 0 0 2. cette opération peut
prendre 1 minute avant que la sous-page 0002
s’affiche à l’écran. Réappuyez sur
pour faire
disparaître la page de l’écran.
Ou:
2. Patientez quelques secondss, les options
s’affichent à l’écran. Suivez les consignes et passez
de page en page grâce aux touches ◀ ou ▶.
Agrandissement
Pour agrandir la page appuyez sur
.
La moitié supérieure ou inférieure de la page sera
agrandie.
Appuyez sur
pour passer d’une moitié de page
agrandie à l’autre ou à la page dans son format
original.
Réponse aux solutions d’un jeu/Quiz.
Pour dévoiler les solutions d’un jeu ou d’un quiz,
appuyez sur la touche
pour obtenir les solutions.
Réception stéréo en mode de
chaînes TV câble analogiques
Vous pouve zvoir le signal de recherche des mode
STEREO, Nicam Mono, et DUAL I/II, etc sur l’écran,
si vous appuyez sur
.
En cas de réception sur 2 canaux, vous pouvez
choisir le canal avec
AUDIO I/II.
A chaque pression sur
AUDIO I/II, les deux canaux
sont proposés alternativement.
Remarque:
En cas de mauvaise réception, le son stereo peut être
détérioré.
Le type sonore de la diffusion peut ne pas être
sauvegardé si le téléviseur est mis hors tension.
•
•
57W0151A.indb 1457W0151A.indb 14 9/15/11 4:44:00 PM9/15/11 4:44:00 PM
Page 54

15
Remarques sur le système DVB-T
Le système DVB-T est toujours en cours de développement. Vous pouvez obtenir des informations sur les
dernières avancées technologiques auprès de votre revendeur spécialisé.
Le système DVB-T étant un service numérique, son fonctionnement est différent de celui des chaînes TV
analogiques antérieures.
Possibilités de réception :
Contrairement à la TV par câble, la réception DVB-T est assurée par le biais d’antennes intérieures ou sur le toit.
Les antennes intérieures sont suffisantes pour assurer la réception dans les zones couvertes par un émetteur
DVB-T. L’installation d’une antenne sur le toit peut s’avérer nécessaire dans les zones limites de réception. Si
vous avez déjà une antenne en place, vous devrez peut-être l’orienter différemment.
Contactez votre revendeur spécialisé pour plus d’informations sur les zones de réception ou les zones limites
de diffusion. La réception DVB-T est impossible au-delà des zones limites de diffusion. Demandez conseil à un
revendeur spécialisé en cas d’interférences au niveau de la réception. La puissance du tuner de cet appareil
n’est pas suffisante pour assurer la tension de fonctionnement d’une antenne intérieure active. Les antennes
intérieures actives doivent être équipées d’une alimentation séparée.
Qualité de la réception :
Soit la réception DVB-T est parfaite, soit elle est inexistante. Elle n’est associée à aucun phénomène de
transition en douceur donnant lieu à une réduction constante de la qualité de la réception. Les interférences
numériques apparaissent dans la plage de réception maximale :
l’image se fige, elle devient saccadée, le son se coupe ou la réception cesse complètement. Si vous remarquez
des interférences au niveau de la réception DVB-T, il ne s’agit généralement pas d’un dysfonctionnement du
téléviseur. Veuillez contacter un revendeur spécialisé. Le contrôle de la qualité de la réception DVB-T n’est
pas inclus dans la garantie assurée par le fabricant du téléviseur.
Qualité de l’image et du son :
Un émetteur individuel transmet jusqu’à 4 chaînes TV sur une fréquence de transmission. Cette capacité
est possible grâce à la compression MPEG, similaire au stockage numérique de données sur un DVD. Par
contre, le taux de transfert des données du système DVB-T est fortement inférieur. A l’heure actuelle, le taux
de transfert des données vidéo est d’environ 4 Mbps et le taux de transfert audio max. est 256 kbps. Les
interférences visibles (par exemple, image saccadée) peuvent entraîner des taux de transfert extrêmement
bas, même si la qualité de la réception est excellente grâce à la proximité de l’émetteur. Les images saccadées
n’indiquent pas un dysfonctionnement du récepteur. Elles sont dues au faible débit de transfert des données.
Le son numérique DVB-T peut être transmis à l’amplificateur numérique par le biais de la sortie numérique
de votre téléviseur.
Format de l’image
Les images sont transmises au format 4:3, au format 4:3ème (avec des barres noires au-dessus et en dessous
de l’image) et au format 16/9ème anamorphique (sans barres noires). Actuellement, la résolution maximale
transmise est 704x576.
Verrou parental
Tout comme le système DVD, la norme DVB-T permet également de restreindre l’accès en fonction de l’âge.
Actuellement, aucune chaîne n’est équipée de cette fonction. Néanmoins, cet appareil permet déjà d’activer
un mot de passe permettant de restreindre l’accès à certaines chaînes.
Mise à jour DVB-T
La norme DVB-T est appliquée au transfert des mises à jour des micro-programmes. Le transfert des mise à
jour du microprogramme est appelé Over Air Download ou OAD (Technologie de Téléchargement par Réseau
sans Fil). S'il arrive qu'à l'avenir ce produit exige une mise à jour du micrologiciel, cette mise à jour peut être
reçue via le DVB-T. Si le logiciel de mise à jour disponible est détecté, le message de confirmation indiquant
s'il faut télécharger le logiciel ou non s'affichera. Puis, veuillez procéder au téléchargement en suivant les
instructions apparaissant à l'écran.
EPG (Guide électronique des programmes)
Le signal EPG est intégré au signal DVB dans le cadre d’une programmation à 8 jours. Ce TV est équipé pour
recevoir les informations EPG incluses dans le signal DVB. Le décodeur EPG de ce téléviseur ne fonctionne
pas avec la télévision par satellite.
57W0151A.indb 1557W0151A.indb 15 9/15/11 4:44:01 PM9/15/11 4:44:01 PM
Page 55

16
Configuration de mot de passe
(Contrôle parental)
Le contrôle parental est une fonction du
fournisseur de la chaîne. S’il n’est pas pris en
charge par la chaîne, le contrôle parental n’est
pas disponible. Il n’y a actuellement aucune
chaîne prenant en charge le contrôle parental.
1
Appuyez sur MENU. Sélectionner
Caractéristique/Verrou du système puis
appuyez sur
.
2
Mot de passe’ s’affiche. Appuyez sur ‘0 0 0 0’
à l’aide des Touches numérotées (ceci est le
mot de passe par défaut).
3
Sélectionnez l’option désirée, puis appuyez sur .
Verrou du système : Pour activer la fonction
Verr. sous Gestion des chaînes, sélectionnez
On avec
/ , puis appuyez sur ENTER.
Verr. parental : Appuyez sur ou pour
sélectionner le contrôle parental désirée, puis
appuyez sur ENTER.
Changer le code Pin :
Ancien Mot de passe
Entrez l’ancien mot de passe au moyen du
clavier numérique.
Nouveau mot de passe
Entrez un nouveau mot de passe (veuillez
appeler le Service si vous avez oublié le
nouveau mot de passer).
Confirmez le nouv. mot de passe
Confirmez le nouveau mot de passe en le
retapant une deuxième fois.
•
•
•
4
Appuyez plusieurs fois sur RETURN pour
revenir à l’écran normal.
En naviguant entre les chaînes, Si le contrôle
parental a été activé vous devez ôter le verrouillage
On sur la chaîne, la chaîne est verrouillée. L’écran
de paramétrage du mot de passe s’affiche. Cela
signifie que vous pouvez enregistrer un mot de
passe pour cette chaîne.
EPG (Guide électronique des
programmes)
Le menu Guide affiche l’ensemble des
programmes disponibles pour les 8 jours
à venir uniquement, y compris le jour
d’aujourd’hui.
1
Appuyez sur GUIDE (EPG) pour afficher le
menu Guide.
Return
Retour
i
DétailDépl.
31/12/2011 13:02:28
0672 PQR
31/12/2011 13:02 - 31/12/2011 01:02 672_PQR_SMPTE Color Bar_0101_0...
672_PQR_SMPTE Color
Bar_0101_0002_0003_Audio3_ABCDEFGHIJKLMNOPQRSTUVWXYZabcdefghijklmnopqrst
MNO
PQR
STU
TCM
VWXYZ
FRATV1
Journalier Jour précédent Jour suivant
Dim 31/12 Dim Lun Mar Mer Jeu Ven Sam Dim
13:02-13:03
13:03-13:04
13:04-13:05
13:05-14:10
14:10-15:00
15:00-16:45
16:45-17:00
672_PQR_SMPTE Color Bar_0101_0002_0...
672_PQR_SMPTE Color Bar_0101_0003_0...
672_PQR_SMPTE Color Bar_0101_0004_0...
672_PQR_SMPTE Color Bar_0101_0005_0...
672_PQR_SMPTE Color Bar_0101_1010_0...
672_PQR_SMPTE Color Bar_0101_0200_0...
672_PQR_SMPTE Color Bar_0101_0345_0...
Mode EPG hebdomadaire
1 Liste des services :
Répertorie tous les services actuellement
disponibles.
En naviguant dans la liste de services à l’aide
des touches
ou , la Liste des événements
sera actualisée en conséquence.
2 Liste des événements :
Répertorie les événements dans une
grille. Appuyez sur
pour saisir la liste des
évènements. Vous pouvez appuyer sur
ou
pour naviguer dans le reste des événements.
Vous pouvez vous passer facilement au Jour
précédent ou au Jour suivant dans la Liste
des événements en appuyant sur la touche
Jaune ou Bleu (la date des informations sur
le programme que vous visionnez s’affiche en
bas à gauche).
Remarque:
Vous pouvez passer en mode Hebdomadaire en
appuyant sur Rouge.
•
2
À partir de la liste des évènements, il est
possible d’ouvrir le détail de l’évènement pour
le programme actuellement mis en surbrillance
en appuyant sur la touche
.
Le détail de l’évènement affiche la description
détaillée d’un évènement.
Pour revenir à la liste des évènements,
appuyez sur la touche
.
Pour quitter l’écran de menu, appuyez sur
MENU ou RETURN.
57W0151A.indb 1657W0151A.indb 16 9/15/11 4:44:01 PM9/15/11 4:44:01 PM
Page 56

17
Taille d’image et résolution
Résolution et qualité d’image
Visualisez des films grand écran selon différentes résolutions. Le tableau suivant indique les options de
résolution pour les médias de diffusion de films grand écran.
Média de diffusion
Résolution du signal
grand écran
Télévision
analogique
par câble
Télévision
numérique
par câble
DVB-T Satellite
(DVB-S)
DVD Satellite
HDTV
(DVB-S2)
Disque
Blu-ray
432i x 768 (Letterbox) Oui Oui Oui Oui Oui Oui Non
576i x 768 (anamorphosée)
Non Oui Oui Oui Oui Oui Non
720 x 1280 (HD) Non Oui Non Non Non Oui Oui
1080i x 1920 (HD) Non Oui Non Non Non Oui Oui
1080p x 1920 (HD) Non Non Non Non Non Non Oui
Qualité d’image et bandes noires
Les films grand écran présentent différents rapports de format.
Le rapport de format est la relation entre la largeur et la hauteur de l’image. Par
exemple, avec un film 16:9, le rapport largeur/hauteur est 16:9 ou 1.78:1. Seuls
les films 16:9 peuvent remplir un écran compatible HD sans bandes noires. Par
conséquent, les bandes noires sont toujours visibles lorsqu’un format autre que le
format 16:9 est reçu.
Ex. : 4:3, un rapport de format 4:3 affiche des bandes verticales noires
à droite et à gauche.
Si une image 4:3 passe au format 16:9, elle apparaît déformée (voir l’illustration),
ou certaines parties sont rognées en haut et en bas de l’image. Ceci est tout à fait
normal et ne constitue pas un défaut du téléviseur grand écran.
Les films Super Cinemascope sont plus larges que les films 16:9.
Ils sont au format 2.4:1 ou 22:9, par exemple. Ceci est clairement plus large que le
16:9. Par conséquent, les films Super Cinemascope affichent des bandes noires
en haut et en bas des téléviseurs compatibles HD.
Format d’image et résolution
Il n’y a pas lien entre le format d’une image et la résolution reçue. Par exemple,
le format Super Cinemascope peut être reçu dans toutes les résolutions, même
en résolution HD de 1080ix1920. Pour la réception HDTV aussi, un téléviseur
compatible HD peut afficher des bandes noires en haut et en bas de l’écran.
Image 4:3 1:1 sur
écran 16:9
Image 4:3 zoomée sur
écran 16:9
Vous obtiendrez une meilleure qualité d’image si le signal d’entrée a une résolution de 1920 x 1080i. En cas
d’utilisation d’un signal avec une résolution inférieure (par ex : TV par câble analogique), la qualité de l’image est
visiblement inférieure.
En effet, si les résolutions inférieures offraient la même qualité d’image, les chaînes de télévision ne prendraient
pas la peine d’envoyer le signal à une résolution plus élevée.
Pourquoi existe-t-il différentes résolutions ?
Câble TV analogique utilisant un signal TV. Chaque néon analogique est un néon TV 4:3, qui émet un signal.
C’est l’avantage de la standardisation, le désavantage étant que la résolution est restée la même depuis le
Deuxième Guerre Mondiale. La résolution est au maximum de 576 x 768 depuis 60 ans.
Pour la comparaison: les postes de télévision actuels sont dotés d’une résolution FullHD de 1080 x 1920.
La câble réseau analogique –est au format 16:9ème et à faible résolution (seulement 432 x 768). Cette entrée
ne couvre que 16% de la surface d’un écran FullHD. 84% de l’écran reste noire si l’écran TV n’est pas mise
en veille après un certain temps. 84% de ce que vous voyez est composé de pixels de très petite taille. C’est
pourquoi le câble-réseau analogique donne une image de qualité sur n’importe quel écran FullHD-TV.
57W0151A.indb 1757W0151A.indb 17 9/15/11 4:44:02 PM9/15/11 4:44:02 PM
Page 57

18
Format de l’image
Appuyez sur le bouton PICTURE SIZE pour
paramétrer le format d’image correct. Appuyez sur
PICTURE SIZE jusqu’à ce que le format choisi
s’affiche.
Chaque pression sur le bouton permet de faire
défiler les formats dans l’ordre suivant : Auto,
4:3, 16:9, 14:9, Cinéma, Réelle (HDMI/DTV/PC
seulement).
Auto
L’image s’affiche automatiquement sur la totalité de
l’écran en cas de réception d’un signal WSS-TV.
Remarque:
Le Mode Auto n’est pas disponible en mode Composant.
Exemple :
Si le tuner analogique reçoit une image au format
letterbox avec un signal WSS, alors l’image apparaît
comme dans l’illustration ci-dessous :
WSS:
Les radiodiffuseurs publics intègrent une
identification 16:9, le signal WSS (Wide Screen
Signalling) au cours de la transmission afin
d’assurer la conversion automatique au format 16:9.
La plupart des radiodiffuseurs privés ne
transmettent pas de signal WSS. Leurs films 16:9
sont toujours diffusés au format letterbox. Le mode
automatique n’assure aucune reconnaissance
en l’absence de signal WSS et ne modifie pas
automatiquement la taille de l’image. Utilisez
le bouton PICTURE SIZE pour régler le format
d’image adapté aux chaînes privées.
•
illustration 1 :
L’image letterbox est agrandie.
Format d’image
Autres formats
Appuyez sur PICTURE SIZE jusqu’à ce que le
format désiré apparaisse.
4:3
L’image est affichée
au format 4:3 avec des
bandes noires à gauche et
à droite.
16:9
La largeur de l’image sera zoomée de manière
uniforme.
16:9 convient particulièrement pour les lecteurs
DVD, les récepteurs DVB-T, DVB-C et satellite, qui
peuvent transmettre et afficher des films 16:9 sans
bandes noires. Dans le menu de configuration du
téléviseur, réglez cette option pour indiquer qu’un
téléviseur 16:9 est raccordé.
14:9
L’image est quelque peu agrandie, mais pas jusqu’à
la largeur du plein écran. Des bandes noires
demeurent à droite et à gauche, et également en
haut et en bas.
Cinéma
Utilisez Cinéma pour augmenter un petit signal 4:3
Letterbox. Comment savoir si la station émettrice/
le téléviseur utilise un signal 4:3 Letterbox trop
faible ? Appuyez sur la touche PICTURE SIZE
de la télécommande jusqu’à ce que le format 4:3
apparaisse. Si l’image est entourée d’une bordure
noire comme sur l’illustration, il s’agit d’un signal
4:3 Letterbox. Étant limité par la station émettrice/le
téléviseur, ce signal est trop faible pour un écran
compatible
HD
16:9. Cinéma agrandit cette image
trop petite autant que possible. Il en résulte une
mauvaise mise au point visible, comme si une carte
postale était agrandie en poster. Cette apparence
floue est due aux signaux d’entrée trop faibles et ne
constitue aucunement un défaut de fabrication du
téléviseur.
Image 4:3 Letterbox agrandie au format Cinéma
Réelle (HDMI/DTV/PC
seulement)
Toutes les images sont affichées
à l’écran TV au format 16:9 sans
overscan.
Remarque :
En mode PC, la taille de l’image n’est disponible qu’au
format 16:9 ou 4:3.
Des récepteurs externes peuvent régler
automatiquement la taille d’image par un câble PERITEL.
Veuillez lire les instructions du récepteur externe.
Si vous sélectionnez Réelle, l’ image eut s’étendre
à l’horizontale pour le signalformat. Dans ce cas,
sélectionnez un format avec l’option PICTURE SIZE.
•
•
•
57W0151A.indb 1857W0151A.indb 18 9/15/11 4:44:03 PM9/15/11 4:44:03 PM
Page 58

19
Autres fonctions personnelles
Rubriques sélectionnées
Conseil de réglage
Image
Mode Image
Standard Qualité d’image standard (réglage d’usine)
Éclatant Contrastes et luminosité (réglage d’usine)
Doux Pour signaux de mauvaise qualité (réglage d’usine)
Utilisateur Vos préférences personnelles
Luminosité / Contraste / Netteté / Couleur /
Teinte (disponible uniquement lorsque vous
sélectionnez “Utilisateur” en mode Image)
Vous pouvez ajuster la qualité du image selon vos
préférences.
Teinte disponible en mode signal NTSC.
•
Rétroéclairage (disponible uniquement lorsque
vous sélectionnez “Utilisateur” en mode Image)
Vous pouvez utiliser la fonctionnalité d’éclairage de fond
pour régler la netteté de l’écran pour une clarté d’image
accrue.
Température Couleur Neutre (Standard) / Rouge (Chaud) / Bleu (Froid).
Réduction du bruit Quelquefois, il est impossible de capter un signal HD de
qualité. Il peut être trop faible ou brouillé (par exemple
: film vidéo au format 16/9ème, ou signal TV du câble
analogique brouillé).
Cette fonctionnalité peut légèrement réduire les
interférences dues au signal.
Off / Basse / Médium / Haute
Mise A Zéro Sélectionnez “Mise A Zéro” pour la remise à zéro de la
Image-options rétablir les réglages d’usine.
Son
Mode audio
Vous pouvez modifier le paramétrage du son. Si vous
sélectionnez “Utilisateur”, vous pouvez modifier les Graves
et les Aigus, qui restent enregistrés par la télévision.
Standard / Film / Musique / Paroles /
Utilisateur
Graves / Aigus / Balance Vous pouvez ajuster la qualité du son selon vos pré-
férences.
Surround La fonction surround ajoute amplitude et profondeur au
son émis par les HP pour une exceptionnelle qualité
d’écoute. Il nécessite un signal stéréo (par entrée vidéo
ou programme TV stéréo).
La fonction est opérante avec les signaux stéréo des
émissions télévisées ou de l’entrée AV.
On / Off
Son Stable Ceci ajustera automatiquement le volume de sorte que
chaque canal et chaque entrée aient le même niveau
sonore moyen.
On / Off
Mise A Zéro Sélectionnez “Mise A Zéro” pour la remise à zéro de la
Son-options rétablir les réglages d’usine.
Canaux Consulter la page 12-13.
57W0151A.indb 1957W0151A.indb 19 9/15/11 4:44:04 PM9/15/11 4:44:04 PM
Page 59

20
Autres fonctions personnelles
Rubriques sélectionnées Conseil de réglage
Caractéristique
Verrou du système Consulter la page 16.
Langue
Langue OSD Consulter la page 12.
Sous-titre préféré Sélectionnez la langue des sous-titres préférée, si la
chaîne DVB que vous regardez actuellement offre plus
d’une langue de sous-titres.
Si la Sous-titre préféré réglée ici n’est pas transmise
par la chaîne, la langue de sous-titres affichée en
premier dans les Subtitle language menu (P.13) est
automatiquement sélectionnée.
Cette option n’est pas disponible pour la chaîne
analogue.
•
Audio préféré Sélectionnez la langue audio préférée, si la chaîne DVB
que vous regardez actuellement offre plus d’une langue
audio.
Si la Audio préféré réglée ici n’est pas transmise par
la chaîne, la langue audio affichée en premier dans
les Audio language menu (P.13) est automatiquement
sélectionnée.
Cette option n’est pas disponible pour la chaîne
analogue.
•
Langue télétexte numériq. Vous pouvez régler ici la langue préférée Videotext,
utilisée au cas où la chaîne DVB actuellement visualisée
offre plus d’une langue Videotext. Si la chaîne n’offre
pas la langue Videotext réglée dans la langue de
télétexte numérique, la langue Videotext est affichée
avec la première langue de réception.
Langue télétexte analogue Consulter la page 14.
Horloge
Date La Date/Heure affichée est reconnue par cette unité.
Vous ne pouvez pas régler l’heure/ma date
manuellement.
•
Heure
Fuseau horaire Si l’heure affichée sur les informations de la chaîne
diffère de l’heure actuelle, réglez le décalage jusqu’à ce
que Fuseau horaire correcte s’affiche.
En principe, ceci est effectué en sélectionnant « Auto ».
•
DST If DST est configuré sur “On”, l’heure s’affiche avec une
heure d’avance.
Cette option n’est pas disponible si vous réglez
Fuseau horaire sur Auto.
•
On / Off
Minut. Extinc. La mise en veille bascule automatiquement la TV en
veille apres une periode de temps definie.
Pour annuler Minut. Extinc., réglez à « Off ».
Off/15/30/45/60 Min
Extinction auto Lorsque les opérations de réglage et de télécommande
ne sont pas effectuées dans la période spécifiée par ce
réglage (1/2/4 heures), le statut d’alimentation passe en
mode de veille automatiquement.
Off/1/2/4 heures
DEL Marche
Pour annuler
de l’indicateur (P.7 (2)) pendant le
fonctionnement, réglez sur “Off”.
On / Off
Malentendant Le type de sous-titres pour malentendants est émis par
défaut.
Even if you set this option to On, the subtitle of
Hearing Impaired is not displayed. Press
on the
remote control to display the subtitle.
•
On / Off
Info CI
Vous pouvez accéder aux informations du module
Interface commune à partir de l’option de ce menu.
Cette unité supporte les cartes C.I. “Top Up TV” et
“Boxer”.
•
TR
57W0151A.indb 2057W0151A.indb 20 9/15/11 4:44:04 PM9/15/11 4:44:04 PM
Page 60

21
Autres fonctions personnelles
Rubriques sélectionnées Conseil de réglage
Inst.
Heure OSD L’ OSD est supprimé lorsque vous modifiez ce
paramètre. Mais si vous sélectionne “Jamais”, l’OSD
n’est pas supprimé automatiquement. (Appuyez sur
RETURN pour supprimer.)
5/10/15/20/25/30 Sec/Jamais
Entrée Péritel
Auto Configuration d’usine, normalement OK
RVB Pour une entrée RVB.
CVBS Pour une entrée Composite.
S-Video Pour une entrée S-Video.
Sortie Péritel Ceci détermine si SCART émet le signal du tuner
interne ou d’une entrée indiquée à l’écran.
TV / Moniteur
Config. PC
Réglage Automatique
Position H, Position V, Phase et Horloge sont ajustés
automatiquement selon le signal vidéo PC reçu.
Lorsque le mode d’entrée PC est sélectionné et
qu’un signal PC est reçu, Réglage Automatique est
automatiquement exécuté.
•
Position H Pour ajuster le placement horizontal de l’image.
Position V Pour ajuster le placement vertical de l’image.
Phase Élimine les lignes d’interférence horizontale (Phase).
Horloge Élimine les lignes d’interférence verticale (Horloge).
Mode HDMI
Auto Auto (configuration d’usine), peut rester dans ce mode.
Aucune modification nécessaire.
PC PC (pour PC), si souhaité.
Vidéo Vidéo (pour Vidéo), si souhaité.
Blue Screen Lorsque le signal est très faible ou inexistant, un écran
bleu remplace automatiquement l’image brouillée.
This option is not available for DTV, PC and Radio
mode.
•
On / Off
M. À Z. Rég. TV Presser pour entrer dans te menu M. À Z. Rég. TV
Presser pour sélectionner “OK”, puis presser
ENTER.
La mise à zéro de la télévision est établie et l’appareil
s’éteindra automatiquement.
Mise à niveau du logiciel Cette option n’est pas disponible et n’est donnée qu’à
tiotre informatif.
Version Si vous appuyez sur , la photo du logiciel μ s’affiche.
TR
57W0151A.indb 2157W0151A.indb 21 9/15/11 4:44:05 PM9/15/11 4:44:05 PM
Page 61

22
Prise en charge des périphériques
Vous pouvez en profiter pour parcourir vos photos,
jouer à la musique depuis votre clé USB.
1
Connectez votre clé USB au port d'entrée de
médias.
2
Appuyez sur MEDIA. Explorateur multimédia
sàffiche
Attention!
Ne déconnectez pas le clé USB lorsqu'il
est en cours d'utilisation. Ceci risquerait
d'endommager l'appareil ou les fichiers
stockés dans le périphérique. Vous pouvez
en toute sécurité connecter ou déconnecter
le clé USB lorsque le téléviseur n'est pas en
mode MEDIA.
Sauvegardez toutes les données dans le clé
USB au cas où elles viendraient à se perdre
par accident. Nous ne sommes en aucun
cas responsables de toute perte de données
découlant d'une mauvaise utilisation ou d'un
dysfonctionnement.
N’utilisez pas le cable d’extension USB.
•
•
•
Remarque:
Certains périphériques de stockage USB ne
sont pas compatibles avec ce téléviseur.
Le caractère qui dépasse la zone d'affichage
ne s'affiche pas.
Rien ne garantit que les images qui apparaîtront
s’afficheront en grand format. Les marges noires
peuvent rester autour des images affichées.
•
•
•
Explorateur multimédia
Photo
/udska1/pic
Pic1.JPG
Pic2.JPG
RetourSaisir
Enter
Dépl.
Page + -
P +-
001/002
843KB
4256X2848
2011/1/11
Vignettes
Remarque:
Le contenu sera modifié selon chaque écran des
paramètres des médias.
Vous pouvez utiliser les nombreuses fonctions de
lecture proposées par le bouton guide approprié du
paneau Guide d'utilisation.
•
Sélection
multimédia
Chemin d’accès
du fichier
Fenêtre d'aperçu
Fichier actuel/Nombre total de fichiers
Informations sur les fichiers
- Taille du fichier
- Résolution
- Horodatage
- WMA tag
Panneau du guide d’utilisation
Liste des Fichiers/
Dossiers
57W0151A.indb 2257W0151A.indb 22 9/15/11 4:44:05 PM9/15/11 4:44:05 PM
Page 62

23
Lecture des images (diaporama)
1
Appuyez sur ◀/▶ pour sélectionner une
(Musique) ou (Photo) dans la sélection
multimédia, puis confirmez avec la touche
▼
.
2
Sélectionnez le dossier ou le fichier à l’aide
de ▲ ou ▼, puis commencez la lecture en
appuyant sur ENTER.
Appuyez sur RETURN pour revenir à la
selection multimédia.
•
Pour lire les fichiers images, utilisez les touches de
commande à distance suivantes.
Touche Action
▲/▼/ /
Appuyez pour tourner l’image.
ENTER
Appuyez pour lecture l’image
Appuyez pour montrer / occulter la fenêtre d’
information sur l’image.
▶
(PLAY)
Pour lancer la lecture ou diapositive.
▌▌
Pour suspendre la lecture.
Pour arrêter la lecture.
Pendant la lecture, appuyez sur pour passer
à fichier suivante.
Pendant la lecture, appuyez sur pour revenir
à fichier précédente.
Pendant la lecture de la musique d’un fichier
musical, appuyez pour rechercher vers
l’avant.
Pendant la lecture de la musique d’un fichier
musical, appuyez pour rechercher vers
l’arrière.
PLAY
MODE
Pendant la lecture de la musique, appuyez
pour sélectionner le mode répétition ou
aléatoire.
Jaune
Dans le Menu Multimédia, appuyez sur cette
touche pour afficher les fichiers JPEG en
petites icônes.
Remarque:
Le temps d’affichage des larges images est plus long
que prévu pendant la diapositive.
Pendant la lecture d’un fichier musical, vous ne pouvez
pas régler le volume avec la touche VOL +/- sur
l’appareil.
•
•
57W0151A.indb 2357W0151A.indb 23 9/15/11 4:44:05 PM9/15/11 4:44:05 PM
Page 63

24
Types de fichiers jouables
Photo
Type Extension Name Compression Spec / Limitation
JPEG .jpg
.jpeg
Baseline
Progressive
Non-support JPEG 2000 compression
Color type : YCbCr (Non-support CMYK)
Support JPEG/JFIF and JPEG/Exif file format
Picture size limitation:
Baseline: Number of horizontal pixels: up to 165370
Progressive: Number of horizontal pixels: up to 61648
No limitation on vertical pixels.•
Audio
Format Extension Name Audio Codec Sampling Rate (kHz) Bitrate (kbps)
WMA .wma
WMA 7 / 8 / 9
STD
8, 11.025, 16, 22.05, 32,
44.1, 48
8 to 768
File System
Standard Media Type
Maximum
Storage Size
File Number File Size
FAT32 USB Mass
Storage
* HDD (Not
Supported)
2TB Not limited
within
maximum
storage size
range.
Maximum 4GB
NTFS Maximum 2T - OVER HEAD(INCLUDE
NTFS META DATA and RESERVE
REGION)
57W0151A.indb 2457W0151A.indb 24 9/15/11 4:44:07 PM9/15/11 4:44:07 PM
Page 64

25
Disque
Les disques DVD doivent être de type Région 2 ou Région ALL pour être lus sur
cet appareil.
Le disque inséré (DVD et CD audio) sera automatiquement reconnu.
Les formats de disque suivants peuvent être lus : DVD-ROM, DVD-Vidéo, DVDR/-RW/-R DL, CD audio, Fujicolor CD, KODAK Picture CD, CD-R/CD-RW, CD-ROM.
Certains disques CD-R/RW peuvent ne pas être compatibles.
Cette unité ne peut pas reproduire un disque de 8cm. Il
est également impossible de le reproduire.
N’insérez pas un disque de forme irrégulière
dans l’appareil sous peine de provoquer un
dysfonctionnement.
Vous risqueriez de ne pas pouvoir le retirer.
Si vous inclinez ou déplacez l’appareil alors que
des DVD ou des CD sont chargés à l’intérieur, ces
derniers risquent d’être endommagés.
N’utilisez pas d’accessoires d’occasion, comme un
protecteur d’anneau, sous peine de provoquer un
dysfonctionnement de l’appareil.
Utilisez uniquement des disques UDF (Universal
Disc Format) pour l’enregistrement.
La lecture des films édités à l’aide d’un enregistreur
de DVD (partiellement supprimé etc.) peut être
momentanément interrompue à l’endroit de l’édition.
La lecture des films édités à l’aide d’un enregistreur
de DVD ou d’un appareil similaire risque ne de pas
correspondre exactement avec les modifications
apportées.
Ne lisez pas de DVD-Audio, CD-G, CD-Photo, Vidéo CD et SVCD afin d’éviter l’effacement accidentel d’un
contenu préenregistré.
TITRE
Lorsque plus de deux films sont enregistrés sur un disque, le
disque est divisé en plusieurs sections. Chaque section est
appelée un “ TITRE ”.
CHAPITRE
Les titres peuvent être sous-divisés en plusieurs sections.
Chaque section est appelée un “ CHAPITRE ”.
PLAGE
Un CD audio peut contenir plusieurs éléments.
Ceux-ci sont assignés à des pistes.
Retrait du disque de son boîtier
Tenez toujours le disque par le bord. Ne touchez pas la
surface du disque.
Sortez avec précaution le disque de son boîtier.
N’éraflez pas le disque.
Ne salissez pas la surface du disque.
Ne collez pas d’étiquette ou de ruban adhésif sur le disque.
Ne laissez pas tomber ni ne pliez le disque.
Rangement du disque
Rangez le disque dans son boîtier pour éviter le risque d’égratignure, de
salissure ou de dégât.
Ne laissez pas le disque en plein soleil ou dans un endroit chaud ou humide.
Nettoyage du disque
Essuyez le disque avec un chiffon propre et sec du centre vers le bord.
N’essuyez pas en un mouvement circulaire.
N’utilisez pas de nettoyants liquides ou en aérosol.
•
•
•
•
•
•
•
•
•
•
•
•
•
•
•
CHAPITRE 1
TITRE 1 TITRE 2
DISQUE DVD
CHAPITRE 2 CHAPITRE 2 CHAPITRE 3CHAPITRE 1
PLAGE 1 PLAGE 2 PLAGE 3 PLAGE 4 PLAGE 5
CD Audio
Exemple:
2
Type de disque et logo Contenu
DVD vidéo
Audio
et vidéo (films)
CD-DA
Audio
Les disques suivants sont également disponibles.
DVD-ROM, DVD-R/-RW/-R DL au format DVD
vidéo et MP3/WMA/JPEG.
CD-ROM, CD-R/RW
contenant des fichiers
MP3/WMA/JPEG.
•
•
57W0151A.indb 2557W0151A.indb 25 9/15/11 4:44:07 PM9/15/11 4:44:07 PM
Page 65

26
Disque
Compatibilité avec les disques créés sur PC
La lecture de disques enregistrés à l’aide d’un
PC ou d’un enregistreur compatible peut s’avérer
impossible en cas d’éraflures ou de marques sur
le disque, si la lentille est sale ou en présence de
condensation.
Il peut être impossible de lire des disques gravés
sur un ordinateur personnel en raison des
réglages employés par le logiciel de gravure.
Dans ce cas, consultez l’éditeur du logiciel pour
obtenir des informations complémentaires.
•
•
Fichiers lus
Conforme à la norme ISO 9660 Niveau 1 ou 2.
Les systèmes de fichiers Roméo et Joliet sont
tous les deux compatibles avec ce lecteur.
Les fichiers audio protégés DRM (Digital Rights
Management) ne seront pas lus par cet appareil.
Pour de plus amples informations, veuillez vous
reporter au manuel d’instruction ou aux fichiers
d’aide de l’ordinateur et/ou du logiciel.
Structure du fichier (peut différer) : jusqu’à 299
dossiers sur un disque, combinaison maximale
de 648 dans chaque dossier
Les noms de dossiers et de fichiers peuvent
s’afficher s’ils sont formés de caractères
alphabétiques et numériques. Si les noms de
fichiers et de dossiers comportent des caractères
autres qu’alphabétiques et numériques, ils seront
tronqués et remplacés par des noms du type
“_”. Les caractères peuvent aussi parfois être
tronqués.
•
•
•
•
Lectures de fichiers images
Cet appareil lit les fichiers JPEG enregistrés sur
DVD-R/-RW/-R DL et CD-R/-RW.
Compatibilité avec les fichiers JPEG
Les fichiers d’images doivent être enregistrés au
format JPEG.
Cet appareil lit les fichiers enregistrés sur CD Fuji
Colour, CD Kodak Picture et CD-R/-RW.
Formats compatibles : fichiers d’images fixes
JPEG de base et EXIF 2.2* dont la définition ne
dépasse pas 3072 x 2048.
* Format de fichier utilisé par les appareils photo
numériques.
La lecture des fichiers portant les extensions .jpg
ou .JPG est possible.
La lecture des fichiers formatés en JPEG
progressif est impossible.
La lecture des fichiers anormalement volumineux
nécessite davantage de temps.
Les fichiers JPEG dont le rapport hauteur/largeur
est différent s’affichent parfois avec des bandes
noires (soit verticales soit horizontales).
•
•
•
•
•
•
•
Lectures de fichiers audio
Cet appareil lit les fichiers WMA et MP3 enregistrés
sur DVD-R/-RW/-R DL et CD-R/-RW.
Comptabilité Windows Media Audio (WMA)
WMA est l’abréviation de Windows Media Audio,
une technique de compression sonore mise au
point par Microsoft Corporation.
Vous pouvez coder vos fichiers à l’aide de
Windows Media Player version 7, 7.1, de
Windows Media Player pour Windows XP ou de
Windows Media Player 9.
Pour coder vos fichiers, utilisez uniquement
des applications approuvées par Microsoft
Corporation. Les fichiers codés à l’aide d’une
application non approuvée risquent de ne pas
fonctionner correctement.
Cet appareil est compatible avec les fichiers
audio enregistrés avec les fréquences
d’échantillonnage suivantes : 32 kHz, 44,1 kHz et
48 kHz.
Il n’est pas compatible avec le codage sans perte.
La lecture des fichiers portant les extensions
.wma ou .WMA est possible.
•
•
•
•
•
•
Lecture de fichiers MP3 (MPEG-1 Audio Layer-3)
Cet appareil est compatible avec les fichiers
audio enregistrés avec les fréquences
d’échantillonnage suivantes : 32 kHz, 44,1 kHz et
48 kHz.
La lecture des fichiers portant les extensions
.mp3 ou .MP3 est possible.
Pour une qualité sonore optimale, il est
recommandé d’utiliser un débit au moins égal à
128 kbps.
•
•
•
CCCD (Copy Control CD)
Cet appareil a été conçu conformément à la
norme CD-DA (Compact Disc Digital Audio). Le
fonctionnement et les performances des disques
autres que CD-DA ne sont pas garantis avec ce
produit.
57W0151A.indb 2657W0151A.indb 26 9/15/11 4:44:08 PM9/15/11 4:44:08 PM
Page 66

27
Lecture d’un disque
Ce chapitre explique les démarches de base
pour la lecture d’un disque.
Lecture de base (DVD/Audio CD)
Préparatifs
Assurez-vous que l’interrupteur
(Power) de
l’appareil est enfoncé (ON).
1
Appyyez sur DVD pour sélectionner le mode
DVD.
2
Insérez le disque
dans la fente pour
disque avec le côté
face imprimée tourné
vers l’avant. (Si le
disque comporte une
étiquette.)
N’insérez pas un disque impossible à lire
dans cet appareil.
•
3
Sur l’écran TV, “Chargemt” s’affiche à la place
“ ” et la lecture commence.
Un écran de menu peut síafficher sur líécran
TV, si le disque a une fonction de menu.
Appuyez sur / / / pour sélectionner le
titre, puis sur ENTER.
Le titre est sélectionné, et la lecture
síamorce.
•
•
4
Appuyez sur pour finir la lecture.
L’appareil peut enregistrer le point d’arrêt de
lecture des vidéos, mais uniquement pour
certains disques.
Appuyez sur PLAY (
) pour reprendre la
lecture à partir du point d’arrêt.
L’appareil peut enregistrer le point d’arrêt des
cinq derniers disques lus. Lors du chargement
de l’un de ces disques, vous pouvez
reprendre la lecture à partir de l’endroit où
vous l’avez arrêtée la fois précédente.
Si vous réappuyez sur ou déchargez le
disque (“Reprise Sans” s’affiche à l’écran),
l’appareil efface le point final.
Seules les vidéos sur DVD comportant un
point d’arrêt peuvent être enregistrées avec
cet appareil.
L’enregistrement d’un point d’arrêt est
impossible sur certains disques.
Si plus de cinq disques sont lus et
enregistrés dans l’appareil, la mémoire sera
automatiquement réinitialisée.
•
•
•
•
Pour lancer la lecture en mode arrêt
Appuyez sur PLAY (
).
Remarque:
En cas de troubles de fonctionnement:
Líélectricité statique, etc., peuvent nuire à la bonne
marche du lecteur.Débranchez le cordon díalimentation
c.a. une fois, puis rebranchez-le.
Si un disque est inséré alors que l’appareil est dans un
autre mode que DVD, il peut passer au mode DVD et la
lecture commencera automatiquement.
•
•
Pour interrompre la lecture (lecture fixe)
Appuyez sur
pendant la lecture.
Pour reprendre la lecture normale, appuyez sur
PLAY (
).
Le son est inaudible pendant l’arrêt sur image.•
Pour arrêter la lecture
Appuyez sur .
Pour retirer le disque
Appuyez sur
.
Retirez le disque une fois celui-ci éjecté.
L’utilisation de disques de moindre qualité peut
empêcher l’éjection du disque. Dans ce cas,
appuyez sur PLAY (
) pour lire le disque puis
appuyez sur EJECT
.
Remarque:
Si un disque non compatible est chargé, “Lecture du
disque impossible”, “Code régional de disque incompatible
Lecture impossible” s’affichera sur l’écran TV selon le type
de disque chargé. Dans ce cas, revérifiez votre disque
(voir page 25).
Certains disques ont besoin d’environ une minute avant
que la lecture démarre.
Lorsque vous insérez un disque simple face étiqueté à
l’envers (dans le mauvais sens), “ Chargemt ” apparaîtra
sur l’écran pendant quelques instants, puis “ Lecture du
disque impossible ” restera affiché.
Certaines opérations de lecture DVD peuvent être fixées
délibérément par les réalisateurs de logiciels. Comme
cet appareil lit les DVD en fonction du contenu du disque
conçu par les réalisateurs de logiciels, certaines fonctions
de lecture risquent de ne pas exister. Consultez également
les instructions fournies avec les DVD.
Ne déplacez pas l’appareil pendant la lecture d’un disque
car il pourrait en être endommagé.
Dans bien des cas, un écran de menu apparaît quand
la reproduction d’un film est terminée. Ou un affichage
prolongé d’un tel menu sur écran risque d’endommager
votre téléviseur en incrustant de façon permanente cette
image sur l’écran. Pour éviter ceci, prenez soin d’appuyer
sur Power ( ) de votre télécommande une fois que le
film est terminé.
Un léger retard peut se manifester après que vous ayez
appuyé sur le bouton pour activer la fonction.
•
•
•
•
•
•
•
•
Lecture rapide vers l’arrière et vers l’avant
(DVD/Audio CD)
Appuyez sur
ou pendant la lecture.
: Lecture rapide en marche arrière
: Lecture rapide en marche avant
A chaque poussée sur la touche
ou , la
vitesse de lecture change.
Pour repasser à la lecture normale
Appuyez sur PLAY (
).
Remarque:
L’appareil assourdira les sons et omettra les sous-titres
pendant l’exploration en marche avant et arrière des
disques vidéo DVD.
La vitesse de lecture peut être différente selon les
disques.
•
•
Lecture image par image (DVD)
Appuyez sur
pendant la lecture.
A chaque poussée sur la touche
ou ,
l’image avance d’un cadre.
Pour repasser à la lecture normale
Appuyez sur PLAY (
).
Remarque:
Le son est inaudible pendant la lecture image par
image.
•
Lecture au ralenti (DVD)
Appuyez sur
ou pendant la lecture.
A chaque poussée sur la touche, la vitesse du
ralenti change.
57W0151A.indb 2757W0151A.indb 27 9/15/11 4:44:08 PM9/15/11 4:44:08 PM
Page 67

28
Pour repasser à la lecture normale
Appuyez sur PLAY (
).
Remarque:
Le son est inaudible pendant la lecture au ralenti.•
Localisation d’un chapitre ou d’une piste (DVD/
Audio CD)
Appuyez de façon répétée sur
ou de
manière à afficher le numéro du chapitre ou de la
piste souhaité.
Appuyez sur
pour lancer la lecture à partir du
chapitre ou de la piste sélectionné.
Appuyez sur
pour localiser les chapitres ou
pistes suivants.
La lecture commence au début du chapitre ou de la
piste en cours.
Remarque:
Il se peut que “Suivant les disques, cette opération
peut être interdite” ou “Cette opération ne peut être
exécutée” d’interdiction apparaisse dans le coin
supérieur droite de l’écran. Ce message signifie soit
que la fonction que vous voulez utiliser n’est pas
disponible sur le disque, soit que l’appareil ne peut pas
accéder à cette fonction à ce moment-là. Il ne s’agit pas
d’un défaut de cet appareil.
•
Zoom (DVD)
Cet appareil vous permet de faire un zoom avant sur
l’image. Ensuite, vous pouvez effectuer les sélections en
changeant la position de l’image.
1
Appuyez sur ZOOM pendant la lecture.
Vous ferez un zoom avant sur la partie centrale
de l’image.
À chaque fois que vous appuyez sur ZOOM,
vous modifierez le ZOOM x2 et x4.
2
Appuyez sur / / / pour voir une partie
différente de l’image. Il vous est possible de
déplacer l’image depuis sa position centrale
vers le HAUT, vers le BAS, vers la GAUCHE ou
vers la DROITE.
3
Dans le mode zoom, appuyez sur ZOOM à
plusieurs reprises pour retourner à une vue 1:1.
Remarque:
Vous pouvez sélectionner Pause ou Ralenti dans le
mode zoom.
Certains disques ne répondent pas á la fonction zoom.
•
•
Repérage de la scène désirée
(DVD/Audio CD)
Utiliser le titre, le chapitre et l’heure enregistrés sur
le disque DVD pour repérer la position de relecture
requise. Pour vérifier le titre, le chapitre/piste et la
durée, appuyez sur
.
1
Appuyez sur touches numériques (0–9) pour
changer le numéro pendant la lecture ou mode
d’arrêt.
Si vous entrez un numéro incorrect, appuyez sur
CANCEL.
Se reporter à l’emballage fourni avec le disque
pour vérifier les numéros.
•
•
2
Appuyez sur ENTER. La lecture commence.
Lorsque vous changez le titre, la relecture
commence à partir du chapitre 1 du titre
sélectionné.
Il se peut que l’opération ci-dessus ne soit pas
possible pour certains disques.
•
•
Sélection d’une autre langue pendant
la lecture (DVD)
Vous pouvez sélectionnez la langue quand vous
passez un disque multilingue.
1
Appuyez sur AUDIO I/II
pendant la lecture.
La langue actuelle de la
bande son s’affiche.
En Cours/Total
Audio 1/2 anglais Dolby Digital 2/0CH
2
Appuyez sur AUDIO I/II
à plusieurs reprises
jusqu’à ce que la
langue voulue soit
sélectionnée.
Audio 2/2 français Dolby Digital 2/0CH
En Cours/Total
L’affichage à l’écran disparaît après quelques
secondes.
•
Sous-titres (DVD)
Vous pouvez sélectionner la langue quand vous repassez
un disque enregistré avec des sous-titres multilingues.
1
Appuyez sur à
plusieurs reprises
pendant la lecture
jusqu’à l’affichage de la
langue voulue.
Sous-titre 1/2 anglais
En Cours/Total
2
Appuyez sur
pendant la lecture
jusqu’à l’affichage de
“Sans”.
Sous-titre Sans
L’affichage à l’écran disparaît après quelques
secondes.
•
Remarque:
Si vous n’entendez pas la langue désirée après avoir
appuyé sur la commande plusieurs fois, la langue de
votre choix n’est pas enregistrée sur le disque.
La langue de la piste sonore sélectionnée est
annulée lorsque vous éjectez le disque.
Vous entendrez la langue initiale par défaut ou
la langue disponible si vous repassez le disque.
La langue par défaut initiale n’est pas restaurée
si l’appareil enregistre en mémoire l’endroit où le
disque a été arrêté.
Pour la lecture du format audio DTS, connectez
cet appareil à un amplificateur ou un décodeur
compatible DTS à l’aide d’un câble audio numérique.
Selon le DVD, il peut s’avérer impossible d’activer
les sous-titres même s’ils sont enregistrés.
Lors de la lecture d’un DVD, les sous-titres peuvent
changer lorsque vous insérez ou éjectez le disque.
Dans certains cas, la langue de sous-titrage ne
passe pas immédiatement à la langue sélectionnée.
•
•
•
•
•
•
57W0151A.indb 2857W0151A.indb 28 9/15/11 4:44:10 PM9/15/11 4:44:10 PM
Page 68

29
Modifications des angles (DVD)
Quand vous passez un disque enregistré avec une
fonction multi-angles, vous pouvez modifier l’angle
de vue de la scène.
1
Appuyez sur ANGLE
pendant la lecture.
L’angle actuel s’affiche.
En Cours/Total
Angle 1/2
2
Appuyez sur ANGLE à plusieurs reprises
jusqu’à ce que l’angle voulu soit sélectionné.
Remarque:
Selon le DVD, il peut s’avérer impossible de
modifier les angles même si des angles multiples
sont enregistrés sur le DVD.
•
Sélection du titre (DVD)
Au moins deux autres titres sont enregistrés sur
certains disques. Si le menu titre est enregistré sur
le disque, vous pouvez sélectionner le titre voulu.
1
Appuyez sur TOP MENU pendant la lecture.
Le menu Titre s’affiche à l’écran.
2
Appuyez sur / / / pour sélectionner le titre
voulu.
3
Appuyez sur ENTER.
La lecture du titre sélectionné commence.
Remarque:
Selon le DVD, il peut s’avérer impossible de
sélectionner le titre.
Selon le DVD, un “menu titre” peut simplement
s’appeler un “menu” ou “titre” dans les instructions
fournies avec le disque.
•
•
Menu DVD (DVD)
Certains DVD vous permettent de sélectionner le
contenu du disque à l’aide du menu.
Quand vous passez ces DVD, vous pouvez
sélectionner la langue de sous-titrage et la langue
de la bande sonore, etc. à l’aide du MENU.
1
Appuyez sur DVD MENU pendant la lecture.
Le menu DVD s’affiche à l’écran.
Réappuyez sur DVD MENU pour reprendre
la lecture à la scène qui passait quand vous
avez appuyé sur DVD MENU.
•
2
Appuyez sur / / / pour sélectionner
l’élément voulu.
3
Appuyez sur ENTER.
Le menu passe à un autre écran.
Répétez les étapes 2 et 3 pour définir l’élément
complètement.
Remarque:
En fonction du DVD, il est possible que vous ne
puissiez pas reprendre la lecture à partir de la
scène pendant laquelle vous avez appuyé sur DVD
MENU.
•
Affichage d’état du disque
À chaque fois que vous appuyez sur , l’affichage
d’état du disque apparaît à l’écran. Pour faire
disparaître l’affichage à l’écran, appuyez sur à
plusieurs reprises.
Les messages affichés peuvent être modifiés chaque fois
que vous sélectionnez un disque ou un fichier différent.
•
Utilisation de HOME MENU
Lecture d’un disque
1
Appuyez sur SETUP en mode Arrêt.
HOME MENU apparaît.
2
Appuyez sur
/// pour
sélectionner
“Navigateur
disque”,puis
appuyez sur
ENTER.
Réglages audio Ajustement vidéo
Navigateur disque
Mode de lecture
Réglages initiaux
HOME MENU
DVD
3
Appuyez sur /
pour sélectionner
l’option
souhaitée, puis
appuyez sur
ENTER.
Navigateur disque
Titre
Chapitre
La fonction Navigateur disque ne fonctionne sur
certains disques.
Les différents disques permettent la sélection des
titres et/ou des chapitres.
•
•
4
Appuyez sur / / / ou sur les touches
numérotées (0-9) pour sélectionner le titre ou
le chapitre puis appuyez sur ENTER.
Appuyez sur ou pour passer à la page
précédente/suivante.
Appuyez sur RETURN pour revenir à l’étape
précédente.
•
•
Lecture d’un fichier
1
Appuyez sur SETUP en mode Arrêt.
HOME MENU apparaît.
2
Appuyez sur / / / pour sélectionner
“Navigateur disque”, puis appuyez sur ENTER.
3
Appuyez sur /
pour sélectionner
le dossier, puis
appuyez sur
ENTER.
Folder1
Folder2
Folder3
Folder4
00:00/ 00:00 0kbps
4
Appuyez sur / pour sélectionner le fichier, puis
appuyez sur ENTER.
Si vous sélectionnez le fichier JPEG, l’appareil
affiche automatiquement les images les unes
après les autres.
Appuyez sur RETURN pour revenir à l’étape
précédente.
Presser SETUP pour revenir en écran neutre.
Remarque:
si un disque comporte à la fois des fichiers audio
et des fichiers JPEG, ceux-ci peuvent être lus
simultanément. Veuillez sélectionner le fichier
audio lors de la sélection du fichier JPEG.
•
•
•
•
57W0151A.indb 2957W0151A.indb 29 9/15/11 4:44:11 PM9/15/11 4:44:11 PM
Page 69

30
Mode de lecture
Lecture à répétition A-B
La lecture à répétition A-B permet de répéter une
plage sélectionnée entre deux points.
1
Appuyez sur PLAY
MODE pendant la
lecture.
L’écran Mode de
lecture apparaît.
Point de début
Point de fin
Sans
Répétition A-B
Répétit
Hasard
Programme
mode recherche
Mode de lecture
2
Appuyez sur / pour sélectionner “Répétition
A-B”, puis appuyez sur ou ENTER.
3
Appuyez sur / pour sélectionner “Point de
début”, puis appuyez sur ENTER. Le point de
démarrage est sélectionné.
4
Appuyez sur / pour sélectionner “Point de
fin”, puis appuyez sur ENTER.
Le point d’arrêt est sélectionné. La lecture
commence au point que vous avez sélectionné.
La lecture s’arrête au point fi nal, retourne au
Point A.
Pour reprendre la lecture normale
Sélectionnez “Sans” à l’étape 3.
Remarque:
La fonction Mode de lecture ne fonctionne sur
certains disques.
La lecture à répétition A-B ne fonctionne pas sur
les CD MP3/WMA.
•
•
Lecture répétée
1
Appuyez sur PLAY MODE pendant la lecture.
L’écran Mode de lecture apparaît.
2
Appuyez sur / pour sélectionner “Répétit”,
puis appuyez sur
ou ENTER.
3
Appuyez sur / pour sélectionner l’option de
répétition souhaitée, puis appuyez sur ENTER.
L’appareil commence automatiquement à
répéter la lecture après avoir fi ni de lire le titre
ou le chapitre en cours.
Pour reprendre la lecture normale
Sélectionnez “Répétition désact” à l’étape 3.
Remarque:
Certains disques ne fonctionnent pas avec la
répétition.
Lecture aléatoire
1
Appuyez sur PLAY MODE pendant la lecture.
L’écran Mode de lecture apparaît.
2
Appuyez sur / pour sélectionner “Hasard”,
puis appuyez sur
ou ENTER.
3
Appuyez sur / pour sélectionner l’option de
lecture aléatoire souhaitée, puis appuyez sur
ENTER.
L’appareil démarre automatiquement la lecture
aléatoire.
Pour reprendre la lecture normale
Sélectionnez “Désact aléatoire” à l’étape 3.
Remarque:
Pendant la lecture aléatoire, il arrive qu’un titre,
un chapitre ou une piste soit répété.
En mode Arrêt, vous pouvez également accéder
à l’écran Mode de lecture en sélectionnant “Mode
de lecture” dans HOME MENU.
•
•
Lecture d’un programme
1
Appuyez sur PLAY MODE pendant la lecture.
L’écran Mode de lecture apparaît.
2
Appuyez sur / pour sélectionner
“Programme”, puis appuyez sur ou ENTER.
3
Appuyez sur /
pour sélectionner
“Créer/modif. prog.”,
puis appuyez sur
ENTER. L’affichage
“Créer/modif. prog.”
est différent d’un
disque/fichier à
l’autre.
Etape program.
01. 01
02.
03.
04.
05.
06.
07.
08.
Titre 1-38
Titre 01
Titre 02
Titre 03
Titre 04
Titre 05
Titre 06
Titre 07
Titre 08
Chapitre
1-004
Chapitre
001
Chapitre
002
Chapitre
003
Chapitre
004
Programme
En cours
Titre
:02 Chapitre:001
4
Appuyez sur / / / pour sélectionner le titre,
le chapitre, la piste ou le fichier, puis appuyez
sur ENTER.
Lors de l’ajout d’un programme, commencez par
rechercher l’endroit où vous souhaitez l’ajouter (Etape
program.), sélectionnez le titre, le chapitre ou la piste
puis appuyez sur ENTER. (si le fichier est ajouté, il
apparaîtra en bas de la liste).
Appuyez sur RETURN pour revenir à l’étape précédente.
Pour effacer un programme, sélectionnez l’étape du
programme à supprimer et appuyez sur CANCEL.
•
•
•
5
Appuyez sur PLAY ( ).
Pour lire un contenu programmé existant,
sélectionnez “Démar. lect. prog.” dans l’écran du
programme et appuyez sur ENTER.
Pour supprimer tout le contenu programmé,
sélectionnez “Effacer prog.” dans l’écran du
programme et appuyez sur ENTER.
Remarque:
Le contenu programmé peut être répété.
Sélectionnez “Répétition program” dans “Répétit”
sur l’écran Mode de lecture pendant la lecture du
programme.
En mode Arrêt, vous pouvez également accéder à
l’écran Mode de lecture en sélectionnant “Mode de
lecture” dans HOME MENU.
•
•
•
•
Mode recherche
1
Appuyez sur PLAY MODE pendant la lecture.
L’écran Mode de lecture apparaît.
2
Appuyez sur / pour sélectionner “mode
recherche”, puis appuyez sur ou ENTER.
3
Appuyez sur / pour sélectionner l’option du
mode de recherche souhaitée, puis appuyez sur
ou ENTER.
Les options du mode de recherche sont
différentes d’un disque ou d’un fichier à l’autre.
•
4
Entrez le numéro
du titre, du
chapitre, de la piste
ou du dossier à
l’aide des touches
numérotées (0-9),
puis appuyez sur
ENTER.
0 0 1
Recherche Titre
Recherche Chap.
Rech. temporelle
numéro de chapitre
Répétition A-B
Répétit
Hasard
Programme
mode recherche
Mode de lecture
Par exemple, pour entrer 1h 4 min (64:00), tapez
6, 4, 0, 0.
•
Remarque:
sur certains DVD vidéo, vous pouvez localiser la
scène souhaitée dans l’écran Menu.
En mode Arrêt, vous pouvez également accéder à
l’écran Mode de lecture en sélectionnant “Mode de
lecture” dans HOME MENU.
•
•
57W0151A.indb 3057W0151A.indb 30 9/15/11 4:44:13 PM9/15/11 4:44:13 PM
Page 70

31
Menu Réglages audio
Le menu Réglages audio propose différents outils
de réglage des sons provenant des disques.
1
Appuyez sur SETUP dans le mode d’arrêt.
HOME MENU apparaît.
2
Appuyez sur
/ / / pour
sélectionner
“Réglages audio”,
puis appuyez sur
ENTER.
Réglages audio Ajustement vidéo
Navigateur disque
Mode de lecture
Réglages initiaux
HOME MENU
DVD
3
Appuyez sur
//
/ pour
paramétrer
l’option, puis
appuyez sur
ENTER.
Réglages audio
Egaliseur
DRC Audio
Dialogue
Sans
Rock
Pop
Live
Dance
Techno
Classique
Douce
4
Appuyez sur SETUP pour enregistrer le
paramètre.
Egaliseur
Sélectionnez le paramètre le plus adapté à la
catégorie de musique écoutée.
DRC Audio
Pendant la lecture, les sons les plus forts
sont atténués et les sons les plus bas sont
amplifiés. Cette fonction est particulièrement
utile pour le visionnage d’un film pendant la
nuit.
Elle fonctionne uniquement avec le son
numérique Dolby.
L’effet dépend de votre amplificateur AV
et du volume des haut-parleurs. Réglez le
son selon vous préférences pour trouver le
réglage le plus efficace.
Dialogue
Ajustez ce paramètre lorsque vous n’entendez
pas correctement les dialogues.
Remarque
Cette fonction n’est pas disponible sur
certains disques ou fichiers.
•
•
•
•
Menu Ajustment vidéo
À partir de la page Ajustment vidéo, vous avez
la possibilité d’effectuer divers réglages qui
exercent une action sur la manière dont l’image est
représentée.
1
Appuyez sur SETUP dans le mode d’arrêt.
HOME MENU apparaît.
2
Appuyez sur
/ / / pour
sélectionner
“Ajustement
vidéo”, puis
appuyez sur
ENTER.
Réglages audio Ajustement vidéo
Navigateur disque
Mode de lecture
Réglages initiaux
HOME MENU
DVD
3
Appuyez sur
/// pour
paramétrer l’option,
puis appuyez sur
ENTER.
Netteté
Luminosité
Contraste
Gamma
Tei nt e
Niveau Couleur
Fine
Standard
Douce
Ajustement vidéo
4
Appuyez sur SETUP pour enregistrer le
paramètre.
Netteté
Ajustez la netteté des images.
Luminosité
Ajustez la luminosité des images.
Contraste
Ajustez le rapport de contraste entre les parties les
plus lumineuses et les parties les plus sombres.
Gamma
Renforce les zones sombres des images.
Teinte
Ajustez l’équilibre entre le vert et le rouge.
Niveau Couleur
Ajustez la densité de couleurs. Cette fonction est
efficace pour les animations ou les images dont la
densité de couleur est très élevée.
Remarque
Cette fonction n’est pas disponible sur certains
disques ou fichiers.
•
Personnalisation du réglage des
fonctions
Vous pouvez modifier les réglages par défaut
pour personnaliser votre lecteur à votre guise.
Procédure de réglage
1
Appuyez sur SETUP dans le mode d’arrêt.
HOME MENU apparaît.
2
Appuyez sur
/// pour
sélectionner
“Réglages
initiaux”, puis
appuyez sur
ENTER.
Réglages audio Ajustement vidéo
Navigateur disque
Mode de lecture
Réglages initiaux
HOME MENU
DVD
3
Appuyez sur / / / pour sélectionner la
section désirée puis appuyez sur ENTER.
4
Modifiez la sélection à l’aide de
///
ou ENTER
en consultant les page 32
correspondantes.
Répétez les étapes 3 et 4 pour modifier les
autres réglages.
•
5
Pour quitter l’écran HOME MENU, appuyez sur
SETUP.
57W0151A.indb 3157W0151A.indb 31 9/15/11 4:44:15 PM9/15/11 4:44:15 PM
Page 71

32
Réglage Option Conseil de réglage
Sortie audio num. settings
Sortie Numérique Avec Le signal audio numérique est rendu par les sorties numériques.
Sans Le signal audio numérique ne est rendu par les sorties numériques.
Flux Dolby Digital Dolby Digital Le signal audio numérique codé Dolby Digital est émis à la lecture
d’un DVD Dolby Digital.
Dolby Digital > PCM Le signal audio Dolby Digital est converti en signal audio PCM avant
d’être appliqué en sortie.
Flux DTS DTS Le signal audio numérique codé DTS est fourni à la lecture d’un
disque DTS. (Du bruit est émis si l’amplificateur ou le récepteur n’est
pas compatible avec le signal audio DTS.)
Sans Pas de signal audio numérique.
Flux PCM 96 kHz 96kHz > 48kHz Le son numérique 96 kHz est converti en son 48 kHz pour la sortie
numérique.
96kHz Le son numérique 96 kHz est émis tel quel à 96 kHz.
Flux MPEG MPEG Le signal audio numérique MPEG est disponible tel quel en sortie.
MPEG > PCM
Le signal audio numérique codé MPEG est converti en signal audio PCM
avant d’être émis en sortie numérique.
Sortie vidéo settings
Téléviseur 4/3 (Letter Box) Définir le format de l’image au Cinéma. Les films pour écran large sont
présentés avec des bandes noires en haut et en bas de l’écran.
4/3 (Pan&Scan) Définir le format de l’image au Cinéma. Les films pour écran large
sont présentés avec les côtés tronqués de sorte que les images
remplissent tout l’écran.
16/9 (Wide) À régler si vous possédez un téléviseur à écran large.
Flux NTSC NTSC Les disques NTSC doivent être lus sur le système NTSC-TV.
NTSC > PAL Les disques NTSC doivent être convertis en système PAL-TV.
Langue settings
L. Dialogues anglais Si le disque comporte une piste sonore en anglais c’est cette piste qui
est lue.
Lingue come indicato Si le disque comporte une piste sonore dans la langue choisie, c’est
cette piste qui est lue.
Autre langue À choisir pour sélectionner une langue autre que celles affichées
(Voir “Tableau des langues” à la page 34.)
L. Sous-titres anglais
Si le disque comporte des sous-titres en anglais ce sont ces sous-titres qui
sont affichés.
Lingue come indicato Si le disque comporte des sous-titres dans la langue choisie, ce sont
ces sous-titres qui sont affichés.
Autre langue À choisir pour sélectionner une langue autre que celles affichées
(Voir “Tableau des langues” à la page 34.)
Langue menu DVD Avec L. Sous-titres Dans la mesure du possible, les menus des DVD seront affichés dans
la même langue que la langue choisie pour les sous-titres.
Lingue come indicato
Dans la mesure du possible, les menus des DVD seront affichés dans
la langue choisie.
Autre langue À choisir pour sélectionner une langue autre que celles affichées
(Voir “Tableau des langues” à la page 34.)
Aff. Sous-titres Avec Les sous-titres sont affichés dans la langue que vous avez
sélectionnée (reportez-vous ci-dessus).
Sans Par défaut, les sous-titres ne sont jamais affichés pendant la lecture
d’un DVD (sachez que certains DVD passent outre ce réglage).
Affichage settings
L. Aff. Écran Les informations sont affichées sur l’écran dans la langue choisie.
Indicateur angle Avec
Une icône représentant une caméra est affichée sur l’écran lorsque la scène
gravée sur le DVD a été filmée sous plusieurs angles.
Sans Le fait que la scène puisse avoir été filmée sous plusieurs angles n’est
pas signalé.
Options settings
Verrou Parents Consulte la page 33.
Personnalisation du réglage des fonctions
57W0151A.indb 3257W0151A.indb 32 9/15/11 4:44:17 PM9/15/11 4:44:17 PM
Page 72

33
Verrou Parents
Certains disques ne conviennent pas aux enfants.
Ces disques peuvent être limités pour ne pas
fonctionner avec l’appareil.
Accès au menu Verrou parental
1
Appuyez sur SETUP dans le mode d’arrêt.
HOME MENU apparaît.
2
Appuyez sur
/ / / pour
sélectionner
“Réglages
initiaux”, puis
appuyez sur
ENTER.
Réglages audio Ajustement vidéo
Navigateur disque
Mode de lecture
Réglages initiaux
HOME MENU
DVD
3
Appuyez sur / pour sélectionner Options,
puis appuyez sur
.
Appuyez ensuite sur
pour accéder au menu
Verrou Parents.
Régler le mot de passe
1
Appuyez sur
ou
pour sélectionner “Mot de
passe”, puis appuyez sur ENTER.
Verrou Parents
Sortie audio num.
Sortie vidéo
Langue
Affichage
Options
Réglages initiaux
Mot de passe
Changement Niveau
Code du pays
2
Appuyez sur les touches numériques (0-9)
pour entrer le mot de passe actuel, puis
appuyez sur ENTER.
Verrou Parents: Enregistrement n⁰ codeSortie audio num.
Sortie vidéo
Langue
Affichage
Options
Réglages initiaux
Modification du mot de passe
1
Appuyez sur
ou
pour
sélectionner “Chg
Mot de Passe”,
puis appuyez sur
ENTER.
Verrou Parents
Sortie audio num.
Sortie vidéo
Langue
Affichage
Options
Réglages initiaux
Chg Mot de Passe
Changement Niveau
Code du pays
2
Appuyez sur
les touches
numériques
(0-9) pour entrer
le mot de passe
actuel, puis
appuyez sur
ENTER.
Verrou Parents: Chg Mot de Passe
Mot de passe
Nouveau mot passe
Sortie audio num.
Sortie vidéo
Langue
Affichage
Options
Réglages initiaux
3
Appuyez sur
les touches
numériques
(0-9) pour entrer
nouveau mot de
passe. Appuyez
sur ENTER.
Maintenant votre
nouveau mot
de passe a été
placé. Il ne faut
pas oublier ce
numéro !
Verrou Parents: Chg Mot de Passe
Mot de passe
Nouveau mot passe
Sortie audio num.
Sortie vidéo
Langue
Affichage
Options
Réglages initiaux
Modification du niveau
1
Appuyez sur
ou pour
sélectionner
“Changement
Niveau”, puis
appuyez sur
ENTER.
Verrou Parents
Sortie audio num.
Sortie vidéo
Langue
Affichage
Options
Réglages initiaux
Chg Mot de Passe
Changement Niveau
Code du pays
2
Appuyez sur
les touches
numérotées
(0-9) pour entrer
le mot de passe
puis appuyez sur
ENTER.
1 2 3 4 5 6 7 8 Sans
Verrou Parents: Changement Niveau
Mot de passe
Sortie audio num.
Sortie vidéo
Langue
Affichage
Options
Réglages initiaux
3
Appuyez sur
ou pour
sélectionnez
du niveau 1 au
niveau 8. Les
restrictions sont
plus sévères
quand le numéro
de niveau est
faible. Appuyez
ensuite sur
ENTER.
1 2 3 4 6 7 8 Sans5
Verrou Parents: Changement Niveau
Mot de passe
Sortie audio num.
Sortie vidéo
Langue
Affichage
Options
Réglages initiaux
Niveau 1: Impossible de passer les logiciels
DVD destinés aux adultes.
Niveau 8: Pratiquement tous les logiciels DVD
peuvent être lus.
Niveau Sans: Le réglage de contrôle parental ne
fonctionne pas.
Code du pays
1
Appuyez sur
ou pour
sélectionner
“Code du pays”,
puis appuyez sur
ENTER.
Verrou Parents
Sortie audio num.
Sortie vidéo
Langue
Affichage
Options
Réglages initiaux
Chg Mot de Passe
Changement Niveau
Code du pays
2
Appuyez sur
les touches
numérotées
(0-9) pour entrer
le mot de passe
puis appuyez sur
ENTER.
Verrou Parents: Changer code pays
Mot de passe
Liste codes pays Code
US
2
1 1 9
Sortie audio num.
Sortie vidéo
Langue
Affichage
Options
Réglages initiaux
3
Appuyez sur
ou pour
sélectionner le
mode d’entrée
dans “Liste codes
pays” ou “Code”.
Code
US
2
1 1 9
Verrou Parents: Changer code pays
Mot de passe
Liste codes pays
Sortie audio num.
Sortie vidéo
Langue
Affichage
Options
Réglages initiaux
Lors de la sélection de “Liste codes pays” :
Appuyez sur ou pour sélectionner le code du
pays, puis appuyez sur ENTER.
Lors de la sélection de “Code” : Appuyez sur
puis utilisez les touches numérotées (0-9) pour
spécifier le code du pays à 4 chiffres. Appuyez sur
ENTER (voir la Liste des codes de pays/régions à
la page 34).
•
•
Remarque:
Selon les disques, l’appareil ne peut pas limiter la
lecture.
Il est possible que certains disques ne soient
pas codés avec les informations du niveau de
classification spécifiques bien que la pochette de
disque porte la mention “adulte”. Pour ces disques,
les restrictions d’âge ne fonctionnent pas.
Si vous entrez un numéro incorrect, appuyez sur ,
puis entrer nombre correct.
•
•
•
57W0151A.indb 3357W0151A.indb 33 9/15/11 4:44:18 PM9/15/11 4:44:18 PM
Page 73

34
Tableau des langues
Langue (lettres du code de la langue), code de langue
Japanese (ja), 1001
English (en), 0514
French (fr), 0618
German (de), 0405
Italian (it), 0920
Spanish (es), 0519
Chinese (zh), 2608
Dutch (nl), 1412
Portuguese (pt), 1620
Swedish (sv), 1922
Russian (ru), 1821
Korean (ko), 1115
Greek (el), 0512
Afar (aa), 0101
Abkhazian (ab), 0102
Afrikaans (af), 0106
Amharic (am), 0113
Arabic (ar), 0118
Assamese (as), 0119
Aymara (ay), 0125
Azerbaijani (az), 0126
Bashkir (ba), 0201
Byelorussian (be), 0205
Bulgarian (bg), 0207
Bihari (bh), 0208
Bislama (bi), 0209
Bengali (bn), 0214
Tibetan (bo), 0215
Breton (br), 0218
Catalan (ca), 0301
Corsican (co), 0315
Czech (cs), 0319
Welsh (cy), 0325
Danish (da), 0401
Bhutani (dz), 0426
Esperanto (eo), 0515
Estonian (et), 0520
Basque (eu), 0521
Persian (fa), 0601
Finnish (fi), 0609
Fiji (fj), 0610
Faroese (fo), 0615
Frisian (fy), 0625
Irish (ga), 0701
Scots-Gaelic (gd), 0704
Galician (gl), 0712
Guarani (gn), 0714
Gujarati (gu), 0721
Hausa (ha), 0801
Hindi (hi), 0809
Croatian (hr), 0818
Hungarian (hu), 0821
Armenian (hy), 0825
Interlingua (ia), 0901
Interlingue (ie), 0905
Inupiak (ik), 0911
Indonesian (in), 0914
Icelandic (is), 0919
Hebrew (iw), 0923
Yiddish (ji), 1009
Javanese (jw), 1023
Georgian (ka), 1101
Kazakh (kk), 1111
Greenlandic (kl), 1112
Cambodian (km), 1113
Kannada (kn), 1114
Kashmiri (ks), 1119
Kurdish (ku), 1121
Kirghiz (ky), 1125
Latin (la), 1201
Lingala (ln), 1214
Laothian (lo), 1215
Lithuanian (lt), 1220
Latvian (lv), 1222
Malagasy (mg), 1307
Maori (mi), 1309
Macedonian (mk), 1311
Malayalam (ml), 1312
Mongolian (mn), 1314
Moldavian (mo), 1315
Marathi (mr), 1318
Malay (ms), 1319
Maltese (mt), 1320
Burmese (my), 1325
Nauru (na), 1401
Nepali (ne), 1405
Norwegian (no), 1415
Occitan (oc), 1503
Oromo (om), 1513
Oriya (or), 1518
Panjabi (pa), 1601
Polish (pl), 1612
Pashto, Pushto (ps),
1619
Quechua (qu), 1721
Rhaeto-Romance (rm),
1813
Kirundi (rn), 1814
Romanian (ro), 1815
Kinyarwanda (rw), 1823
Sanskrit (sa), 1901
Sindhi (sd), 1904
Sangho (sg), 1907
Serbo-Croatian (sh),
1908
Sinhalese (si), 1909
Slovak (sk), 1911
Slovenian (sl), 1912
Samoan (sm), 1913
Shona (sn), 1914
Somali (so), 1915
Albanian (sq), 1917
Serbian (sr), 1918
Siswati (ss), 1919
Sesotho (st), 1920
Sundanese (su), 1921
Swahili (sw), 1923
Tamil (ta), 2001
Telugu (te), 2005
Tajik (tg), 2007
Thai (th), 2008
Tigrinya (ti), 2009
Turkmen (tk), 2011
Tagalog (tl), 2012
Setswana (tn), 2014
Tonga (to), 2015
Turkish (tr), 2018
Tsonga (ts), 2019
Tatar (tt), 2020
Twi (tw), 2023
Ukrainian (uk), 2111
Urdu (ur), 2118
Uzbek (uz), 2126
Vietnamese (vi), 2209
Volapük (vo), 2215
Wolof (wo), 2315
Xhosa (xh), 2408
Yoruba (yo), 2515
Zulu (zu), 2621
Liste des codes de pays/régions
Pays/région, code du pays/de la région, lettres du code du pays/de la région
Argentina, 0118, ar
Australia, 0121, au
Austria, 0120, at
Belgium, 0205, be
Brazil, 0218, br
Canada, 0301, ca
Chile, 0312, cl
China, 0314, cn
Denmark, 0411, dk
Finland, 0609, fi
France, 0618, fr
Germany, 0405, de
Hong Kong, 0811, hk
India, 0914, in
Indonesia, 0904, id
Italy, 0920, it
Japan, 1016, jp
Republic of Korea,
1118, kr
Malaysia, 1325, my
Mexico, 1324, mx
Netherlands, 1412, nl
New Zealand, 1426, nz
Norway, 1415, no
Pakistan, 1611, pk
Philippines, 1608, ph
Portugal, 1620, pt
Russian Federation, 1821, ru
Singapore, 1907, sg
Spain, 0519, es
Sweden, 1905, se
Switzerland, 0308, ch
Taiwan, 2023, tw
Thailand, 2008, th
United Kingdom,
0702, gb
USA, 2119, us
57W0151A.indb 3457W0151A.indb 34 9/15/11 4:44:23 PM9/15/11 4:44:23 PM
Page 74

35
Mode PC
Suivez la procédure ci-dessous : Sur le moniteur de votre PC, sélectionnez une résolution de
1920 × 1080
à 60 Hz
et enregistrez cette configuration. Éteignez votre PC et branchez le TV LCD éteint.
Utilisez un économiseur d’écran pour éviter que les images statiques n’endommagent l’écran.
Sélectionner la source PC (input)
Rallumez le téléviseur ACL.
Sélectionnez le mode d’entrée du PC
(voir page 11).
Résolutions PC prises en charge
fréquence d’image (Hz)
640x480 60
800x600 60
1024x768 60
1280x720 60
1280x768 60
1360x768 60
1280x1024
60
1440x900
60
1920x1080
60
Utiliser un câble PC-VGA (non fourni) pour raccorder l’écran
à votre PC. Faites ce raccordement avec précaution afin de
n’endommager aucun élément du câble.
Câble VGA (non fourni)
Câble audio (non fourni)
PC
TV (Arrière)
Vers PC/
DVI AUDIO
Remarque:
Si aucun signal n’est connecté, ou que le signal propose une
résolution non prise en charge, Pas de signal s’affiche.
Ce TV à cristaux liquides n’étant pas un moniteur de PC, il est
impossible de garantir un affichage correct avec toutes les cartes
PC/graphiques.
•
•
L’entrée HDMI reçoit le signal audio digital et le signal vidéo non compressé, d’un second appareil HDMI,
ou le signal video non compressé depuis un système DVI.
Lorsque un ensemble DVI est connecté avec un câble connecteur HDMI/DVI, il ne sort que le signal vidéo :
pour le transfert du signal audio un câble audio analogique est impératif.
Sélectionnez le mode d’entrée HDMI (voir page 11).
Raccorder un périphérique HDMI ou DVI par l’entrée HDMI
Remarque:
Suivez le mode d’emploi accompagnant l’appareil HDMI que vous essayez de brancher sur ce téléviseur.•
Attention : Préparation :
• Débrancher tous les appareils de l’alimentation de courant afin d’éviter de les endommager.
• Faire les connexions appropriées.
• Vérifier que les connexions sont sûres et fiables avant de rebrancher vos appareils à l’alimentation de courant.
Remarque:
Sélectionnez un mode d’entrée externe adéquat. (Voir page 11)•
Connexion a un autree equipement
1. Raccordement d’un camcorder ou d’un Videoplayer
(câble AV non fourni)
Sortie AV
Caméra vidéo
(exemple)
TV (Côté)
TV (Arrière)
ou
Appareil DVI
Appareil HDMI
Câble audio (non fourni)
Câble HDMI
(connecteur type A)
(non fourni)
Vers sortie HDMI
Câble connecteur HDMI/DVI
(Connecteur HDMI type A)
(non fourni)
Vers PC/DVI AUDIO
Vers sortie DVI
57W0151A.indb 3557W0151A.indb 35 9/15/11 4:44:23 PM9/15/11 4:44:23 PM
Page 75

36
Y
Pb
Pr
Connexion a un autree equipement
VCR
TV
TV
2. Connexion à d’autres appareils
Connecter le récepteur satellite ou le lecteur DVD par le SCART. S’assurer que la section efficace du SCART
est d’au moins 1 cm ou plus. Des câbles SCART moins épais peuvent causer des bruits visibles.
Veuillez effectuer les réglages suivants dans le menu de configuration de votre récepteur ou de votre lecteur
DVD.
Signal vidéo : RGB
Format télévision : 16:9
Si les réglages ne sont pas bien faits, la qualité de l’image sera médiocre et certaines parties de l’image
pourraient manquer. Ceci n’est pas un défaut du téléviseur.
Si vous avez besoin d’aide pour effectuer ce réglage sur le récepteur satellite ou le lecteur DVD, veuillez
consulter les directives pertinentes ou communiquer avec le fournisseur ou le fabricant de ces appareils pour
obtenir de l’assistance.
Veuillez utiliser la télécommande du satellite pour sélectionner Teletext ou le poste de télévision souhaité.
Généralement, il n’est pas possible de mémoriser les stations satellites sur une télévision normale.
Si la télévision ne commute pas automatiquement à SCART, veuillez sélectionner manuellement INPUT
SCART, comme illustré à la page 11.
Remarque:
L’entrée composante vidéo de cet appareil est destinée à l’utilisation d’appareils émettant des signaux entrelacés
(PAL : 576i/1080i ou NTSC : 480i/1080i) et progressifs (PAL : 576p/720p ou NTSC : 480p/720p).
•
4. Raccorder un lecteur DVD avec composante vidéo
Si votre lecteur DVD est équipé de sorties composante vidéo, raccordez votre téléviseur à un lecteur DVD à l’aide
d’un câble composante vidéo. La qualité de l’image sera nettement améliorée.
TV (Côté)
Lecteur de DVD
Câble audio (non fourni)
Vers sortie AUDIO
Vers ENTRÉE
COMPOSANTE
Vers sortie
COMPOSANTE
Câble vidéo (non fourni)
TV (Côté)
(Câble numérique
coaxial, non fourni)
Ampli-tuner A/V avec
décodeur Dolby Digital
3. Raccordement d’un amplificateur numérique ou d’amplis-tuners A/V numériques (avec
décodeur DTS ou Dolby Digital)
DTS et Dolby Digital sont deux systèmes différents. Les DVD DTS ne peuvent pas être lus avec un ampli-
tuner Dolby Digital. Dans ce cas utilisez un décodeur correspondant à vos DVD.
Après avoir raccordé un décodeur
Dolby Digital, sélectionnez
l’option de piste sonore Dolby
Digital dans le menu DVD.
Lorsqu’une piste sonore DTS est
lue, le son des enceintes intégrées
est coupé. Le son DTS ne peut
être lu que numériquement à
l’aide d’une sortie numérique. Un
décodeur DTS est nécessaire pour
écouter le son.
La sortie audio numérique est
active uniquement lorsque vous
recevez une émission DVB-T,
pas lorsque vous recevez une
émission TV câblé analogique.
•
•
•
57W0151A.indb 3657W0151A.indb 36 9/15/11 4:44:24 PM9/15/11 4:44:24 PM
Page 76

37
Guide de dépannage
Avant de contacter le personnel qualifié du service d’assistance :
Symptôme Solution possible Page
TV
Aucune image, aucun son. Vérifier que le TV est allumé.
Vérifier l’alimentation secteur :AC 220~240V
Sélectionner le mode d’entrée approprié.
Débranchez l’appareil pendant 1 minute, puis rebranchez-le.
7
11
Pas de réception. Avez-vous synchronisé les chaînes de TV ?
Presser 1 sur la télécommande.
Vérifier le raccordement à l’antenne.
Vérifier que le TV est sur ON et pas en mode Veille.
10
11
Le TV s’éteint sans signal C’est normal.
15 minutes après l’absence de signal antenne, l’écran s’éteint
automatiquement. 14
Canaux menu ne peut être
sélecte.
Le TV est réglé sur le mode AV. Presser 1 sur la télécommande pour
contrôle.
12
Mauvaise Image. Les couleurs et la luminosité peuvent être mal perçues selon l’angle
de vision ou un problème de température. trop basse ou trop élevée.
En visionnant une chaîne DVB
(numérique), il y a le son mais
pas d’image.
Certaines chaînes proposent du contenu audio uniquement. Ceci
est normal.
L’image se fige ou s’arrête par
intermittence.
Vérifiez tous les branchements d’antenne.
Déplacez l’antenne à l’écart des zones d’interférences.
Essayez un amplificateur d’antenne.
10
Certaines chaînes numériques
ne peuvent pas s’afficher.
Contactez le fournisseur de service pour vous abonner.
Pas de couleur ou écran noir. Entrée Péritel réglée sur Auto.
20
Vous pourrez parfois entendre
un petit bruit provenant de
l’unité.
S’il n’y a rien d’anormal avec l’image ou le son, vous entendrez
de légères contractions du boîtier à cause du changement de
température de la pièce.
Aucune répercussion sur la performance ou d’autres aspects.
DVD
L’image lue est quelquefois
déformée.
Le disque est sale. Éjectez-le et nettoyez-le.
De temps en temps, il se peut qu’une image soit légèrement
déformée. Il ne s’agit pas d’un dysfonctionnement.
25
L’appareil ne lance pas la
lecture.
Aucun disque n’est inséré. Insérez un disque.
Un disque illisible est inséré. Insérez un disque lisible (vérifiez le
type de disque et le système couleur).
Insérez le disque dans la fente pour disque avec le côté face
imprimée tourné vers l’avant.
Le disque est sale. Nettoyez le disque.
Annulez la fonction de contrôle parental ou modifiez le niveau de
blocage parental.
27
25
27
25
33
Le panneau LCD est un produit issu d’une technologie de pointe qui permet d’obtenir des images très nettes. Il arrive
parfois que l’écran présente certains pixels non actifs sous la forme d’un point fixe bleu, vert ou rouge. Veuillez noter que
ceci n’affecte en rien les performances de votre produit.
•
57W0151A.indb 3757W0151A.indb 37 9/15/11 4:44:25 PM9/15/11 4:44:25 PM
Page 77

38
* Ce produit intègre une technologie de protection contre les copies protégée par la loi américaine et
celle d’autres pays sur la propriété intellectuelle de Rovi Corporation. Toute opération d’ingénierie
inverse et de démontage est interdite.
* Fabriqué sous licence de Dolby Laboratories. Le terme Dolby et le sigle double D sont des marques
commerciales de Dolby Laboratories.
*
est une marque de commerce de DVD Format/Logo Licensing Corporation.
* Ce produit est protégé par certains droits de propriété intellectuelle de Microsoft. L’utilisation ou la
distribution d’une telle technologie en dehors de ce produit est interdite sans une licence de Microsoft.
* DVB et les logos DVB sont des marques déposées de DVB Project.
* CE PRODUIT EST CONFORME A LA NORME AVC CONCERNANT L’UTILISATION PERSONNELLE
D’UN CLIENT NE RECEVANT AUCUNE COMPENSATION FINANCIERE DE LA PAR DE POUR CE (i)
ZSUPPORT VIDEO EN CONFORMITE AVEC LA NORME (“AVC VIDEO”) ET/OU AVEC LE SUPPORT
DECODE (ii) CODE AU PREALABLE DANS LE CADRE D’UNE ACTIVITE PERSONNELLE ET NON-
COMMERCIALE ET/OU OBTENU AUPRES D’UN FOURNISSEUR VIDEO AGREE CAPABLE DE
DELIVRER DES VIDEOS AVC. AUCUNE LICENCE N’EST OCTORYEE ET AUCUNE LICENCE N’EST
OBLIGATOIRE POUR UNE QUELCONQUE UTILISATION. PLUS D’INFORMATIONS DISPONIBLES
AUPRES DE MPEG LA, L.L.C. SEE HTTP://WWW.MPEGLA.COM
* HDMI, le Logo HDMI, et High-Definition Multimedia Interface sont des marques commerciales ou
déposées de HDMI Licensing LLC aux Etats Unis et autres pays.
Informations sur la licence
Information on software license
The following open source software component is included in this product:
* Posix Compatibility Layer
Portions of this software is
CYGPKG_POSIX Copyright © 1990, 1999 The Regents of the University of California.
All rights reserved.
* MIPS HAL
Portions of this software is
CYGPKG_HAL_MIPS Copyright © 1992 The Regents of the University of California.
All rights reserved.
* Standard C Library
Portions of this software are
CYGPKG_LIBC_STDIO Copyright © 1990 The Regents of the University of California.
CYGPKG_LIBC_STDLIB Copyright © 1990, 1992, 1993 The Regents of the University of California.
CYGPKG_LIBC_STRING Copyright © 1988 Regents of the University of California.
CYGPKG_LIBC_TIME Copyright © 1999 Kungliga Tekniska Hogskolan (Royal Institute of
Technology, Stockholm, Sweden).
All rights reserved.
57W0151A.indb 3857W0151A.indb 38 9/15/11 4:44:25 PM9/15/11 4:44:25 PM
Page 78

39
Specifications
TV
Système: Analogique: PAL (B/G, D/K, I), SECAM (B/G, D/K), SECAM (L/L’)
Numérique: DVB-T, DVB-T HD (H.264), DVB-C, DVB-C HD (H.264)
Système de couleur vidéo:
PAL/SECAM/NTSC 3.58/NTSC 4.43/PAL 60
Chaînes préenregistrées: Numérique 1200 Service, Carrière analogique 100
Bande de réception: Analogique: 45.75~858MHz
Numérique: E2~E69
ACL: LCD couleur à matrice active TFT
Entrée HDMI: HDMI compatible (connecteur de type A), HDCP compatible
Taux de balayage proposé: 50Hz: 576i/576p/720p/1080i/1080p
60Hz: 480i/480p/720p/1080i/1080p
24Hz: 1080p
Audio HDMI:
2 canaux PCM, Fréquence d’échantillonnage 32/44,1/48
kHz
16/20/24 bits par échantillon
Puissance de sortie: environ 2,0W (MAX) x 2
DVD
Système de signal: PAL et NTSC (Région 2)
Disque compatibles: DVD (12cm), CD (12cm)
Sortie: Audio: (RCA) –12 dBm, 1 KΩ
Digital Audio: 0,5Vp-p/75 Ω
Micro: CD: longueur d’onde: 775 - 815 nm
Sortie maximum: 0,5 mW
DVD: longueur d’ondes: 650 - 666 nm
Sortie maximum: 2,0 mW
DONNÉES GÉNÉRALES
Alimentation: AC 220-240V, 50Hz
Classe d’efficacité énergétique:
B
Taille de l’écran visible (diagonale):
55 cm/22 pouces
Consommation d’énergie
(Classement):
39 W
Consommation d’énergie en mode On:
29 W
Consommation énergétique par an*1:
42 kWh
Consommation énergétique
en mode veille:
0,49W
Résolution de l’écran: 1.920 point (horizontal) x 1.080 ligne (vertical)
Poids
: environ 3,9 kg
Dimensions: 57(W) x 39(H) x 17(D) cm
Température ambiante: Opérationnel: 5 °C ~ 40°C/Stockage: –20°C ~ 60°C
Humidité tolérée: Moins de 80%RH
ACCESSOIRES
2 piles (AA/R6/UM-3)/Télécommande/Cordon alimentation/Socle/2 vis pour le Socle
*1
Consommation d’énergie par an, en se reposant sur la consommation énergétique d’une télévision allumée 4
heures par jour pendant 365 jours. L’actuelle consommation énergétique dépendra de l’utilisation de la télévision.
Le poids et les dimensions sont approximatives. Parce que nous essayons toujours d’améliorer nos
produits, nous pouvons changer les spécifications et le design sans avertissement préalable.
57W0151A.indb 3957W0151A.indb 39 9/15/11 4:44:26 PM9/15/11 4:44:26 PM
Page 79

JVC a délégué le service d’assistance et de garantie au groupe Kesa Electricals plc.
POUR TOUTE DEMANDE D’ASSISTANCE, AIDE AU REGLAGE, COMMANDE DE PIECES ET
AIDE DE TOUTE SORTE, APPELEZ:
Pays Entreprise Tel Adresse Internet Contact
UK COMET 0844 8009595 http://www.comet.co.uk France DARTY 0978970970 http://www.darty.com/ Spain EMH - http://www.emh.es/ pedidosweb@emh.es
Belgium NVB 02/334.00.00 http://www.vanden-
borre.be/
Netherlands BCC 0900-0555 http://www.bcc.nl/ http://www.bcc.nl/info/
contact
Italy DARTY IT 800928884 http://www.darty.it/ scrivici@darty.it
Czech DATART 810 328 278 http://www.datart.cz/ infolinka@datart.cz
MUNISSEZ-VOUS DE LA REFERENCE DEVOTRE MODELE AVANT TOUT APPEL
57W0151A.indb 4057W0151A.indb 40 9/15/11 4:44:26 PM9/15/11 4:44:26 PM
 Loading...