

Page 1
TQBX0224 [J]
ENGLISH
Before Installing
The monitor stand cannot be installed in all models of motor
vehicles. Be sure to confirm first with the sales outlet that it can be
installed in your vehicle.
After setting up the monitor stand, be aware that it is necessary to
make a hole at an installation position inside the car and stabilize
the monitor stand with a screw to prevent it from falling over.
Be sure that customers are always given this installation manual.
WARNING!
• DO NOT INSTALL THE MONITOR IN A LOCATION WHICH
OBSTRUCTS DRIVING, VISIBILITY OR WHICH IS PROHIBITED
BY APPLICABLE LAWS AND REGULATIONS.
If the monitor is installed in a location which obstructs
forward visibility or operation of the air bag or other safety
equipment or which interferes with operation of the vehicle,
it may cause an accident.
• NEVER USE BOLTS OR NUTS FROM THE VEHICLE'S
SAFETY DEVICES FOR INSTALLATION.
If bolts or nuts from the steering wheel, brakes or other safety
devices are used for installation of the monitor, it may cause
an accident.
• ATTACH THE WIRES CORRECTLY.
If the wiring is not correctly performed, it may cause a fire
or an accident. In particular, be sure to run and secure the
lead wire so that it does not get tangled with a screw or the
moving portion of a seat rail.
• USE WITH DC12V NEGATIVE GROUND VEHICLES.
This monitor system is only for use in a DC12V negative
ground vehicle.
It cannot be used in large trucks or diesel vehicles which
are DC24V vehicles.
If it is used in the wrong type of vehicle, it may cause a fire
or accident.
Caution!
• Use the specified fuse.
Be sure to always use the specified fuse.
If a fuse other than the specified fuse is used, it may cause a fire
or an accident.
• Do not damage the cord by pinching or pulling it.
Do not pull or damage the cord. If the cord is not treated properly,
it will short out or be severed and may cause a fire or accident.
ESPAÑOL FRANÇAIS
KV -M65
Installation/Connection Manual
Manual de instalación/conexión
Manuel d’installation/raccordement
JVC
Printed in JAPAN
0498MNMUBNMTS
EN, SP , FR
Socket wrench One set
Un juego de llaves de vaso
Clé à douille, un jeu de douilles
Cutting pliers, nippers
Alicates de corte, alicates de
punta
Coupe-fils, pince
Screwdrivers
Destornilladores
T ournevis
Cutter
Cortador
Cutter
Rubber tape
Cinta de goma
Ruban caoutchouc
Vinyl tape
Cinta de vinilo
Ruban vinyle
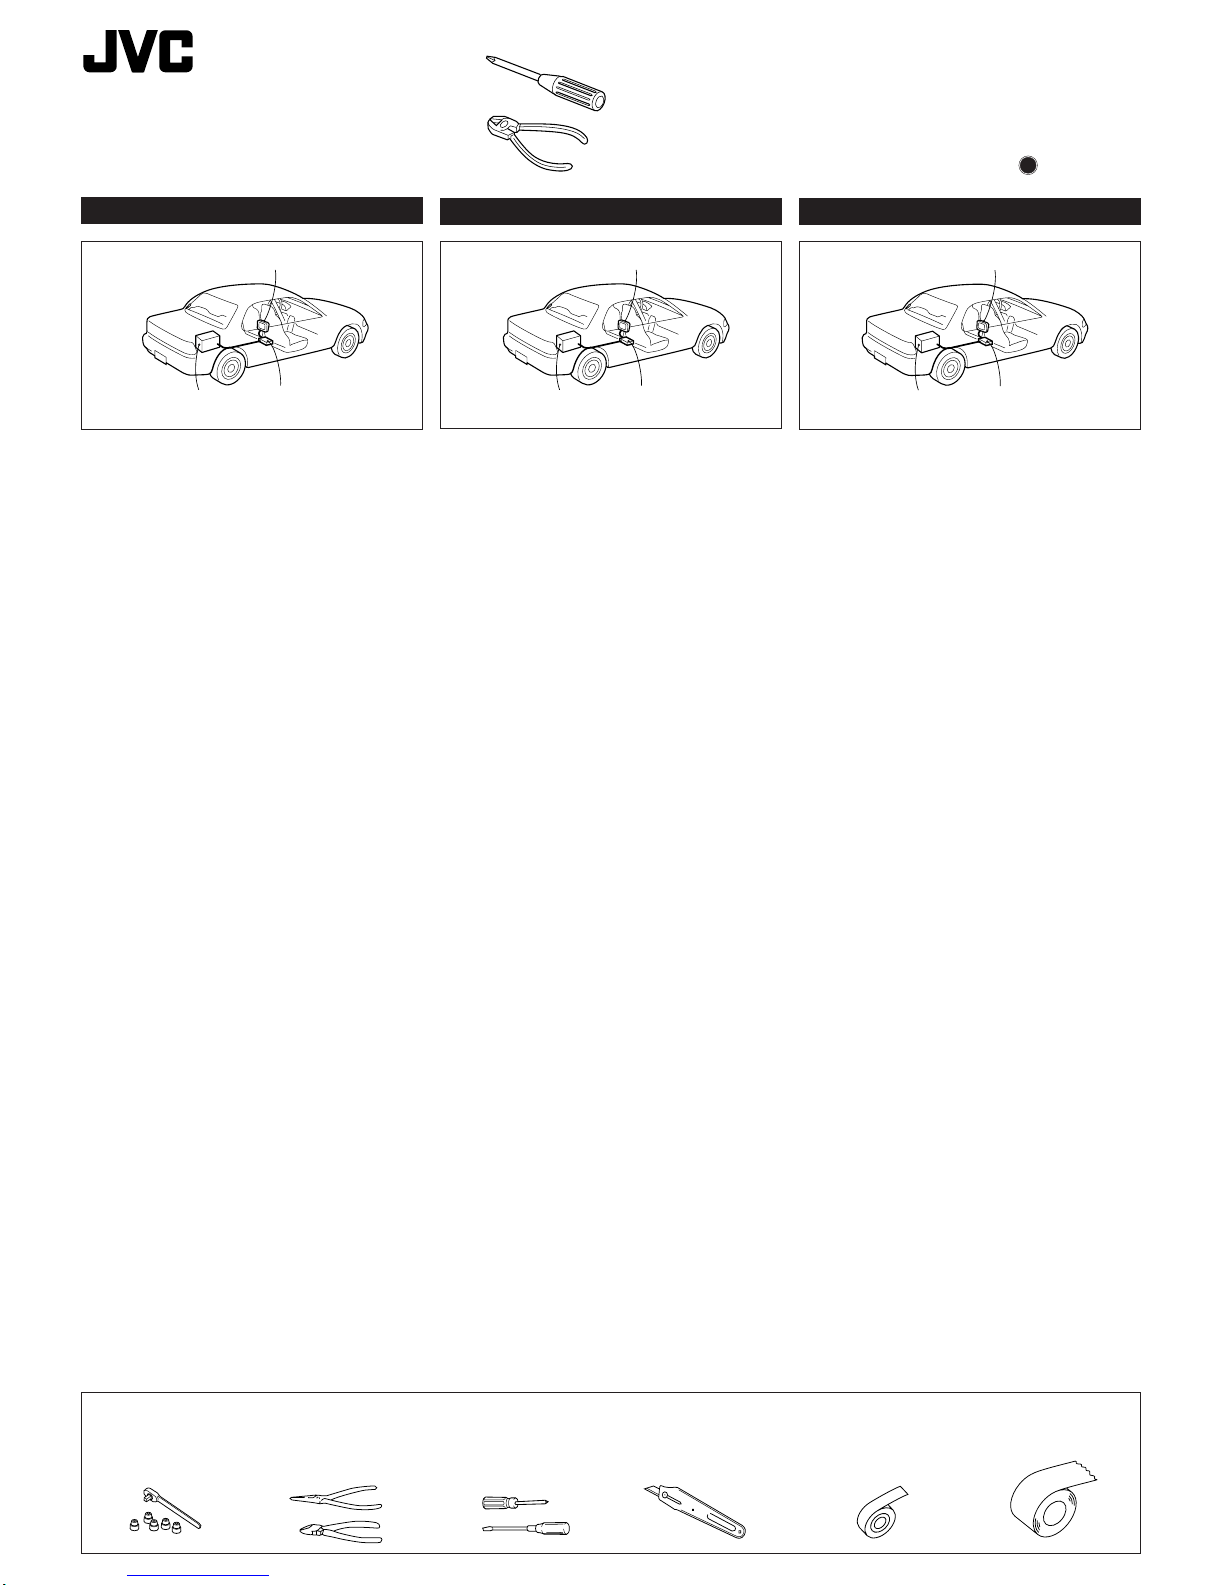
Tools for installation / Herramientas para la instalación / Outils d’installation
Display unit
Video machine
Controller unit
(under the passenger's seat)
Antes de instalar
El soporte del monitor no puede instalarse en todos los modelos
de vehículo motorizado. Confirme primero con su concesionario
de ventas si puede instalar el soporte en su vehículo.
Después de preparar el soporte del monitor, tenga en cuenta
que necesitará hacer un agujero en una posición de instalación
en el interior del automóvil y estabilizar el soporte del monitor
con un tornillo para evitar que se caiga. Asegúrese de dar a los
clientes este manual de instalación.
ADVERTENCIAS
• NO INSTALE EL MONITOR EN UN LUGAR QUE IMPIDA EL
MANEJO O LA VISIBILIDAD, NI DONDE LOS PROHIBAN LAS
LEYES Y REGLAMENTOS APLICABLES.
Si el sintonizador de TV se instala en un lugar que obstruye la
visibilidad hacia adelante o la operación de una bolsa de aire u
otro equipo de seguridad, o que interfiere con la operación del
vehículo, cerca de la palanca de cambios o pedal del freno por
ejemplo, podrá causarse un accidente.
• NUNCA UTILICE PERNOS O TUERCAS DE LOS
DISPOSITIVOS DE SEGURIDAD DEL VEHÍCULO PARA
HACER LA INSTALACIÓN.
Si los pernos o tuercas del volante, frenos u otros dispositivos
de seguridad se utilizan para instalar el monitor podrá causarse
un accidente.
• REALICE EL CABLEADO CORRECTAMENTE.
Si no se hace bien el cableado puede producirse un incendio o
un accidente. En particular, asegúrese de instalar el cable
conductor para que éste no quede enredado en un tornillo ni en
la parte móvil del raíl del asiento.
• UTILICE EL SINTONIZADOR DE TV EN VEHÍCULOS CON
PUESTA A TIERRA NEGATIVA.
Este sintonizador de TV ha sido diseñado para ser utilizado
solamente en vehículos de 12 V CC con puesta a tierra negativa.
No puede utilizarse en camiones grandes ni vehículos diesel de
24 V CC. Si se utiliza en el tipo equivocado de vehículo se puede
causar un incendio o accidente.
Precauciones
• Utilice el fusible especificado
Asegúrese de utilizar siempre el fusible especificado.
Si se utiliza un fusible que no sea el especificado podr
producirse un incendio o un accidente.
• No estropee el cable pellizcándolo o tirando de él.
No tire del cable ni lo estropee. Si no se trata bien el cable, éste
cortocircuitara o se rompera y podra producirse un incendio
o accidente.
Máquina de vídeo
Unidad controladora
(debajo del asiento del pasajero)
Unidad de visualización
(vendida por separado)
Avant d'installer.
La support du moniteur ne peut pas être installée sur tous les
modèles de véhicules. S'assurer tout d'abord, par consultation
avec le revendeur, si celui-ci peut être installé sur votre véhicule.
Après avoir monté le support de moniteur, il est nécessaire de
percer un trou sur une position d'implantation à l'intérieur du
véhicule et de stabiliser la support de moniteur à l'aide d'une vis
pour l'empêcher de tomber.
Faire en sorte que les clients se voient toujours remettre un
exemplaire de ce manuel d'installation.
MISES EN GARDE!
• N'INSTALLEZ PAS LE MONITEUR DANS UN ENDROIT QUI
GÊNE LA CONDUITE, LA VISIBILITÉ OU QUI EST INTERDIT
PAR LE CODE DE LA ROUTE ET LES RÈGLEMENTS.
Si le tuner de télévision était installé à un emplacement
gênant la visibilité avant, ou le déploiement du sac à air, et
autres dispositifs de sécurité, ou à un emplacement gênant
pour la conduite du véhicule, comme près du levier des
vitesses ou de la pédale du frein, cela risquerait de provoquer
des accidents.
• NE JAMAIS UTILISER POUR L'INSTALLA TION DES BOULONS
OU DES ÉCROUS PROVENANT DES DISPOSITIFS DE
SÉCURITÉ DU VÉHICULE.
Si l'on utilisait pour l'utilisation du moniteur des boulons et
des écrous cannibalisés du volant, des freins ou autres
dispositifs de sécurités, cela risquerait de provoquer des
accidents.
• ATTACHER LES CORDONS CORRECTEMENT.
Si le câblage n'est pas exécuté correctement, cela risque
de provoquer un incendie ou autre accident. Veiller, en
particulier, à tirer et attacher les fils en sorte qu'ils me
s'accrochent pas à une vis ou ne se coincent dans les parties
mobiles des rails des sièges.
• USAGE SUR LES VÉHICULES DE 12V CC AVEC NÉGATIF À
LA MASSE.
Ce système de tuner de télévision ne peut être utilisé que
sur les véhicules de 12V CC avec négatif à la masse.
Il ne peut pas être utilisé sur les gros camions ou les
véhicules diesel de 24V CC.
S'il était utilisé sur un type de véhicule inadéquat cela
risquerait de provoquer un incendie ou autres accidents.
PRÉCAUTIONS!
• Utiliser les fusibles spécifiés.
Veiller à ne jamais utiliser que les fusibles spécifiés.
Si l'on utilisait des fusibles autres que les fusibles spécifiés, cela
risquerait de provoquer un incendie ou autres accidents.
• Ne pas endommager les fils et cordons en les pinçant ou en
les tirant.
Ne pas tirer ni endommager le cordon. Si l'on maltraite un cordon,
il court-circuitera, se sectionnera, et cela risquerait de provoquer
un incendie ou autres accidents.
Unité de commande
(sous le siège du passager)
Appareil vidéo
Unité d'affichage
Page 2
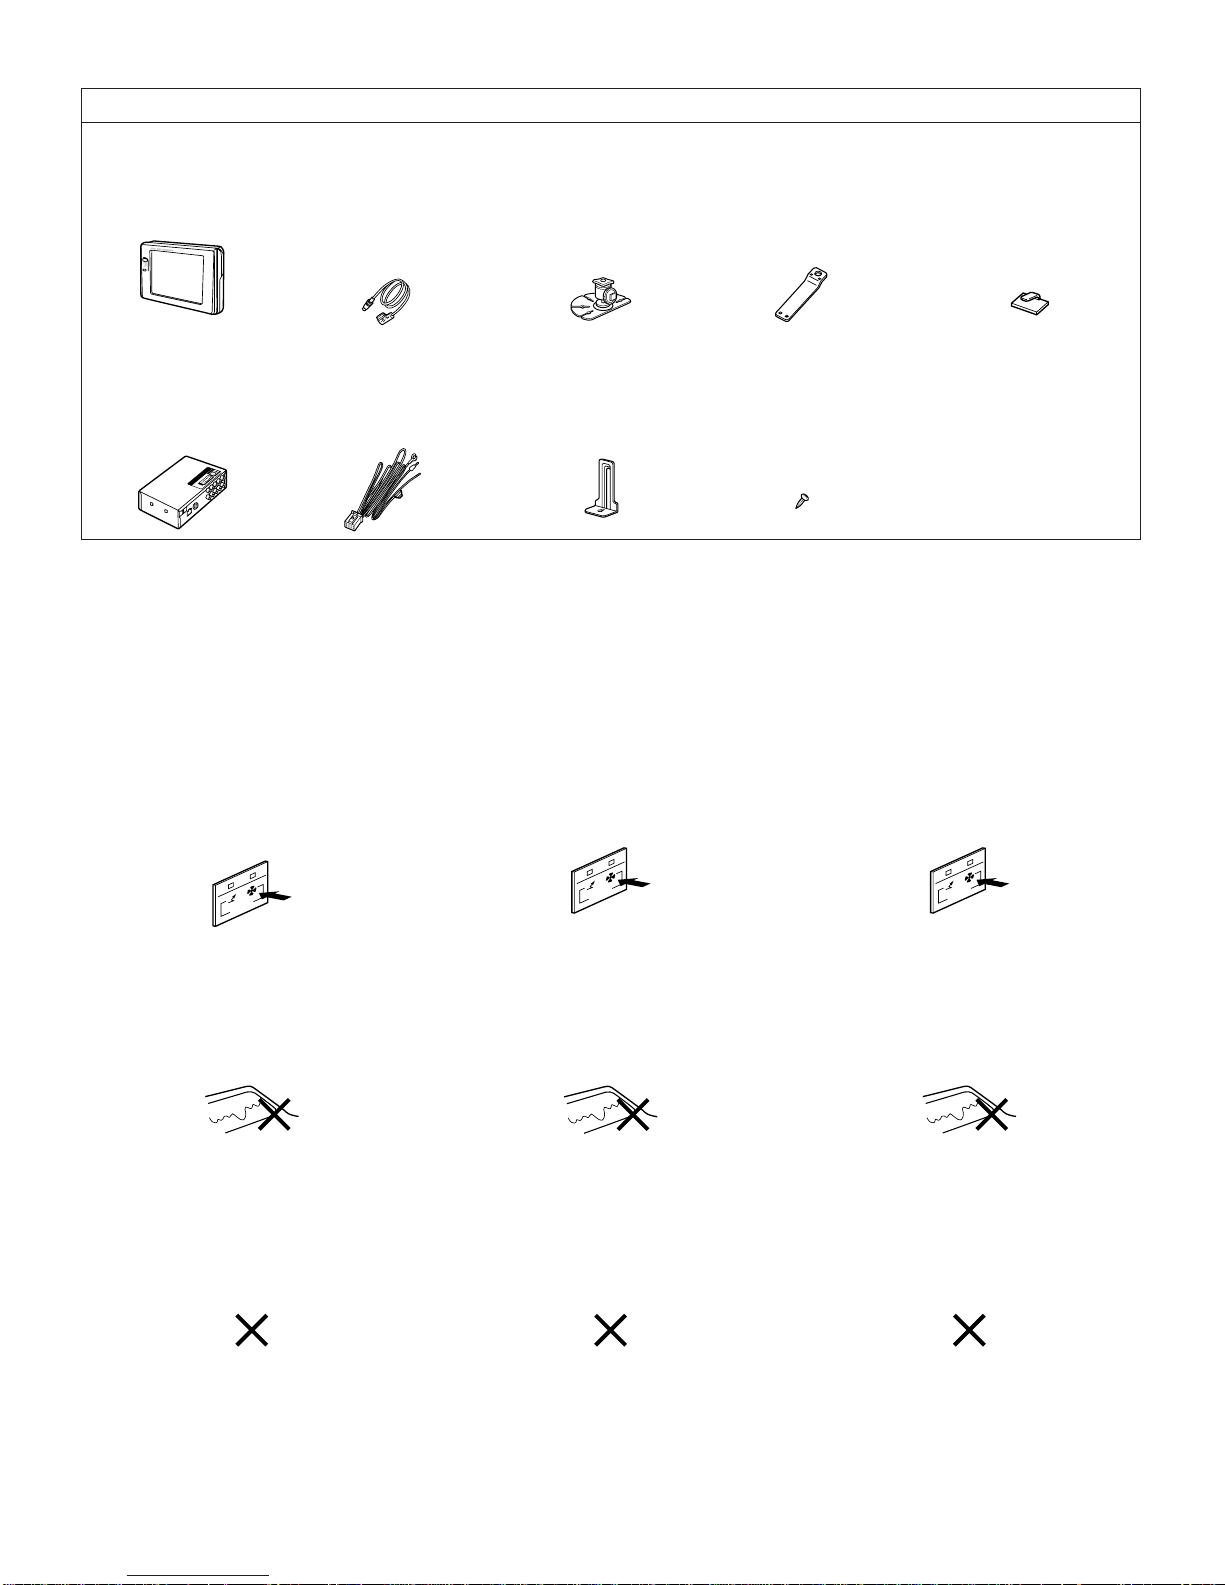
List of component parts (please confirm that you have all parts before starting the installation)
Lista de piezas componentes (Antes de iniciar la instalación confirme que no le falte ninguna pieza.)
Liste des pièces détachées (vérifier que rien ne manque, avant de passer à l'installation).
Monitor stand/Soporte del monitor/Unité d'affichage
Display unit (one)
Unidad de visualización (una)
Unité d'affichage (une)
JVC
Metal fitting body (one)
Cuerpo metálico (uno)
Applique de métal (une)
Fall stopper (one)
Soporte para impedir caídas (uno)
Pare-chute (un)
Clampers (three)
Abrazaderas (tres)
Colliers (trois)
Controller unit (one)
Unidad controladora (una)
Unité de commande (une)
U
N
IT
Power cord (one)
(with crimp connector)
Cable de alimentación (uno)
(Con conector de apriete)
Cordon d'alimentation (un)
(avec connexion sertie)
Monitor stand fastening screws
(
ø
4x12mm) (seven)
Tornillos de apriete del soporte del
monitor (ø4x12 mm) (siete)
Vis de fixation du support de
moniteur (ø4x12mm) (sept)
Height adjuster fitting (one)
Accesorio regulador de altura (uno)
Ferrure de réglage de hauteur (une)
Cable for connecting the display unit
and controller unit (one)
(Length: 2.5m/8.3ft)
Cable para conectar la unidad de
visualización y la unidad controladora
(uno)(Longitud: 2.5 m/8.3ft)
Cordon pour connecter l'unité
d'affichage et l'unité de commande
(un) (Longueur : 2.5m/8.3ft)
After attaching the stand
For the next 24 hours, do not pull at the stand or attach the display
unit (since this will weaken the adhesive strength and could cause
the stand to come off).
For the following 24 hours
When there is lots of moisture (during rainy season or other
similar conditions)
Use a dryer or other device to dry the attachment location before
attaching the stand (if the surface is not dry enough, the adhesive
strength will weaken and the display unit could come off while
driving).
Before installin
When the temperature is low (20 degrees C (68 degrees F) or
lower)
Turn on the car heater and warm up the car before attaching the
stand (warming up the car improves the adhesive strength).
AUTO
Removing the monitor stand
• Remove the screws and slowly detach the monitor stand starting
from the corners of the attachment surface.
(When the temperature is low, turn on the car heater or use a
dryer to warm up the attachment surface.)
• When adhesive tape remains on the attachment surface, use
your finger or other instrument to remove the remaining tape.
Installing the display unit
Después de colocar el soporte
Durante 24 horas después de colocar el soporte, no tire de él ni
coloque la unidad de visualización (porque esto puede debilitar
la fuerza adhesiva y podría ser la causa de que cayera el soporte).
Durante 24 horas
Antes de instalar
Cuando la temperatura est baja (20°C o menos)
Encienda la calefacción del automóvil y caliéntelo antes de colocar
el soporte (al calentarse el automóvil mejora la fuerza de
adhesión).
AUTO
Extracción del soporte del monitor
• Quite los tornillos y separe lentamente el soporte del monitor
empezando desde las esquinas de la superficie de colocación.
(Cuando la temperatura esté baja, encienda la calefacción del
automóvil o utilice un secador para calentar la superficie de
colocación.)
• Cuando quede cinta adhesiva en la superficie de colocación,
quítela con los dedos u otro instrumento.
Instalación de la unidad de visualización
Après avoir fixé le support.
Durant les 24 heures suivant, ne pas tenter de tirer sur le support
ni d'y fixer l'unité d'affichage, ce qui risque d'affaiblir la force
d'adhésion et entraîner la chute du support.
Laisser reposer pendant 24 heures.
En cas de forte humidité (durant la saison des pluies ou autres
conditions atmosphériques similaires).
Utiliser un séchoir, ou tout autre appareil adéquat, pour sécher
l'emplacement de la fixation avant d'attacher le support. (Si la
surface n'est pas assez sèche, la force d'adhérence faiblira et l'unité
pourra se détacher en conduisant).
Avant d'installer.
Au cas où la température est basse (20°C ou moins).
Mettre le chauffage et chauffer l'habitacle avant d'attacher le
support (le réchauffement améliore les qualités d'adhérence).
AUTO
Dépose du support du moniteur.
• Déposer les vis et détacher doucement le support du moniteur
en commençant par les coins de la surface de fixation.
(Lorsque la température est basse, mettre le chauffage de la
voiture ou chauffer la surface de fixation à l'aide d'un séchoir).
Installation de l'unité d'affichage.
Cuando haya mucha humedad (durante la estación de lluvias
u otra condición similar)
Utilice un secador u otro aparato para secar el lugar de colocación
antes de colocar el soporte (si la superficie no está bien seca, la
fuerza adhesiva se reducirá y la unidad de visualización podrá
desprenderse durante la conducción).
Liquid crystal color monitor/Monitor en color de cristal líquido/
Moniteur en couleur à cristaux liquides.
Page 3

Installing Instalación Installation.
Important
Since there may be legal regulations defining the permissible
installation locations for the display unit which differ by country
or by state, be sure to install the display unit in a location complying
with any such laws.
Importante
Como puede haber reglamentos legales, diferentes según el país
o estado, que indiquen las ubicaciones de instalación permitidas
para la unidad de visualización, asegúrese de instalar la unidad
de visualización en un lugar que cumpla con tales reglamentos.
Important.
Dès lors que diffèrent suivant les pays les règlements régissant
les emplacements autorisés pour l'installation des unités
d'affichage, se renseigner afin d'installer l'unité d'affichage sur un
emplacement autorisé par lesdites lois et règlements.
Assemble the monitor stand and the height adjuster fitting. Ensamble el soporte del monitor y el accesorio regulador
de altura.
Assembler le support de moniteur et la ferrure de réglage
de hauteur.
Loosen Aflojar
Desserrer
Ferrure de réglage de hauteur
Accesorio regulador de alturaHeight adjuster fitting
Stand fastening screws
Tornillos de apriete del soporte
Vis de fixation du support
Tighten Apretar
Serrer
Tighten Apretar
Serrer
Loosen Aflojar
Monitor fastening screw Tornillo de apriete del monitor
Vis de fixation du moniteur
Monitor stand Soporte del monitor
Support de moniteur
Stand fastening screws Tornillos de apriete del soporte
Vis de fixation du support
Provisionally attach the display unit to the height adjuster
fitting and decide the installation location. (At this point, still
do not remove the cover paper from the double-sided tape.)
Coloque provisionalmente la unidad de visualización en el
accesorio regulador de altura y decida el lugar de instalación.
(De momento, no quite aún el papel que cubre la cinta con
adhesivo en ambos lados.)
Monter provisoirement l'unité d'affichage sur sa ferrure de
réglage de hauteur et choisir son lieu d'implantation.
(À ce stade, il ne faudra pas encore retirer le papier protecteur
du ruban adhésif à double face).
Important
Bend the attachment surface to match the
shape of the attachment location.
Caution
Select a location where the monitor can be
easily seen but does not obstruct forward
visibility, and where it will not interfere with
opened air bags in vehicles equipped with
an air bag system.
Importante
Doble la superficie de colocación para que
se adapte a la forma del lugar de colocación.
Precaución
Seleccione un lugar donde el monitor
pueda verse fácilmente pero no obstruya
la visibilidad hacia adelante, y donde no
interfiera con la salida de las bolsas de
aire en vehículos equipados con un
sistema de bolsas de aire.
Important :
Recourber la surface de fixation pour lui faire
épouser la courbure du point d'implantation.
Mise en garde :
Choisir un emplacement d'où le moniteur
peut se regarder confortab-lement, mais
sans gêner toutefois la visibilité avant, et
où il ne gênera pas le déploiement éventuel
des sacs à air au cas où le véhicule est
équipé de sacs à air.
Remove the display unit from the height adjuster fitting. Peel
off the cover paper from the monitor stand and attach the
stand to the attachment location.
After attaching, secure with the fastening screws included.
(Be sure to adequately clean any dirt on the attachment location and
dry the surface before attaching. After attaching, push strongly onto the
spot to ensure that the stand is securely attached.
Quite la unidad de visualización del accesorio regulador de
altura. Quite el papel que cubre el soporte del monitor y
coloque el soporte en el lugar de colocación. Después de
colocarlo, asegúrelo con los tornillos de apriete suministrados.
(Asegúrese de limpiar adecuadamente la suciedad que pueda haber
en el lugar de colocación y seque la superficie antes de hacer la
colocación. Después de terminar la colocación, empuje con fuerza el
soporte para asegurarse de que esté firmemente instalado.
Retirer l'unité d'affichage de sa ferrure de réglage de hauteur.
Peler la protection de papier du support de moniteur et
attacher le support sur son emplacement. Après quoi, fixer
en place avec les vis de fixation comprises dans la fourniture.
(Veiller à nettoyer convenablement au préalable l'emplacement de
fixation de toute saleté et à bien sécher sa surface. Après avoir fixé en
place, exercer une forte poussée pour s'assurer que le support est
solidement en place).
Secure with the fastening screws
(in 5 spots)
Peel off the cover paper from the back side Pele el papel que cubre el lado trasero
Peler la protection de papier au dos.
After waiting 24 hours, place the display unit on the height
adjuster fitting.
Después de esperar 24 horas, ponga la unidad de
visualización en el accesorio regulador de altura.
Après avoir laissé reposer pendant 24 heures, placer l'unité
d'affichage sur sa ferrure de réglage de hauteur.
Using the Fall Stopper Utilización del retendor para evitar caídas Utilisation du Pare-chute
Desserrer
Fixer en place à l'aide des vis de fixation
(en 5 endroits).
Asegure con los tornillos de apriete
(en 5 puntos)
Assemble the monitor stand and the height adjuster fitting.
Remove the screws from the back side of the monitor stand,
attach the fall stopper to the back side of the monitor stand,
and then secure with the screws.
Decide the location of the monitor stand installation, and
bend the fall stopper as necessary.
After peeling off the cover paper from the monitor stand
back side and from the fall stopper, attach the fall stopper
and the monitor stand to the installation location, and then
secure the monitor stand with the fastening screws included.
After waiting 24 hours, place the display unit on the
height adjuster fitting.
Monte el soporte del monitor y el accesorio regulador de
altura.
Quite los tornillos de lado trasero del soporte del monitor,
cologue el retenedor en el lado trasero del soporte del
monitor y luego asegúrelo con los tornillos.
Decida el lugar de instalación del soporte del monitor y doble
el retenedor lo necesario.
Después de pelar el papel de cobertura del lado trasero del
soporte del monitor y del retenedor, cologue el retenedor y
el soporte del monitor en la posición de instalación, y luego
asegure el soporte del monitor con los tornillos de apriete
incluidos.
Después de esperar 24 horas, ponga la pantalla en el
accesorio regulador de altura.
Assembler le support de moniteur et la ferrure de réglage
de hauteur.
Déposer les vis de la face arrière du support de moniteur,
accrocher le pare-chute à l'arrière du support de moniteur,
et fixer en place à l'aide des vis.
Déterminer l'emplacement pour l'installation du support de
moniteur, et plier le pare-chute si nécessaire.
Après avoir enlevé le papier de protection du dos du support
de moniteur et du pare-chute, attacher le pare-chute et le
support de moniteur sur l'emplacement d'installation ; fixer
le support de moniteur à l'aide des vis de fixations
comprises dans la fourniture.
Après avoir laissé reposé pendant 24 heures, placer l'unité
d'affichage sur la ferrure de réglage de hauteur.
Loosen
Tighten
Apretar
Aflojar
Serrer
Desserrer
Bend
Peel off the cover paper
Plier
Enlever le papier de couverture
Doble
Pele el papel de coberture
Fasten with screws
Apriete con tornillos
Fixer avec des vis
Fall stopper
Soporte para impedir caídas
Para-chute
Page 4

POWER
DISPLAY UNIT
VIDEO
VIDEO
VIDEO
L-AUDIO-R
L-AUDIO-R L-AUDIO-R
AV
OUTPUT
AV INPUT 1
AV INPUT 2
VIDEO L - AUDIO - R VIDEO
AV
OUTPUT
VIDEO
AV INPUT 2
DISPLAY UNIT
AV INPUT 1
L - AUDIO - R L - AUDIO - R
POWER
Connecting the power source
Notes:
• This monitor system is designed only for use in a DC12V motor vehicle.
• Be sure to fully plug in the connector.
• Install the cord to avoid high-temperature spots and secure with clampers and
tape.
• Be sure to not install the controller unit in the following type of location.
A location which is exposed to water , a location which is stepped on or a location
which is exposed to hot air such as near a heater duct.
• When game devices are connected, the image may be unstable.
• When removing the DIN plug, be sure to press the clip.
Connecting the parking brake connection wire / Conexión del cable de conexión del freno de estacionamiento / Raccordement du câble de connexion du frein de stationnement.
A crimp connector is attached to the end of the parking brake connection
wire.
En el extremo del cable de conexión del freno de estacionamiento se ha
colocado un conector de apriete.
Une connexion sertie est fixée à l'extrémité du cordon de connexion du
frein de stationnement.
Vehicle chassis / Chasis del vehículo /
Châssis du véhicule
How to connect the crimp connector / Cómo conectar el conector de apriete / Raccordement de la connexion sertie.
Cable for connecting the display unit and controller unit (Length:
2.5m/8.3ft)
Install this cable as far as possible away from the antenna cable.
Use the cable included with the KV-M65 color monitor system
package.
Cable para conectar la unidad de visualización y la unidad
controladora
(Longitud: 2,5 m/8.3ft)
Instale este cable lo más lejos posible del cable de la antena.
Utilice el cable incluido con el sistema de monitor en color KVM65.
Cordon pour connecter l'unité d'affichage et l'unité de
commande.
(Longueur : 2,5m/8.3ft)
Installer ce cordon aussi loin que possible du cordon d'antenne.
Utiliser le cordon inclus dans les accessoires fournis avec le
système de moniteur couleur KV-M65.
The crimp connector is connected to the power source side
wire of the parking brake lever.
El conector de apriete está conectado al cable del lado de
alimentación de la palanca del freno de estacionamiento.
La connexion sertie est connectée au cordon côté source
d'alimentation du levier du frein de stationnemement.
When installing the monitor in a location which can be seen by the driver.
Cuando se instale el monitor en lugar que pueda ser visto por el conductor.
Lorsqu'on installe le moniteur à un emplacement où il peut être vu du conducteur.
Conexión de la fuente de alimentación
Notas:
• Este sistema de monitor ha sido diseñado para funcionar solamente en vehículos
motorizados de 12 V CC.
• Asegúrese de enchufar a fondo el conector.
• Instale el cable evitando los puntos de alta temperatura y asegúrelo con
abrazaderas y cinta.
• Asegúrese de no instalar la unidad controladora en los lugares siguientes:
Un lugar expuesto al agua, un lugar inclinado o un lugar que esté expuesto al
aire caliente como, por ejemplo, el conducto de salida de una calefacción.
• Cuando se conecten dispositivos de juego, la imagen podrá ser inestable.
• Asegúrese de presionar la presilla cuando desconecte la clavija DIN.
Connexion de la source d'alimentation.
Remarques:
• Ce système de moniteur est conçu pour fonctionner sur les véhicules de 12V
CC.
• Veiller à enfoncer le connecteur à refus.
• Installer le cordon en sorte d'éviter les points de fortes températures, et fixer en
place à l'aide de colliers et de ruban.
• Éviter absolument d'installer le tuner aux emplacements suivants :
Là où il serait exposé à l'eau, où il risque d'être piétiné, où il est exposé aux
souffles d'air chaud de la soufflerie du chauffage.
• Au cas où l'on connecte à des jeux vidéo, l'image peut être instable.
• Ne jamais oublier de presser sur le clip pour retirer la fiche DIN.
KV-M65 display unit
Unidad de visualización KV-M65
Unité d'affichage KV-M65
Accessory
Crimp connector
Conector de apriete
Accessoire,
Connexion sertie
Parking brake lever
/Palanca del freno
de estacionamiento
/Levier du frein de
stationnement
Battery / Batería /
Batterie
Side brake
Freno de mano
Frein de stationnement
Foot brake
Freno de pie
Frein à pied
When installing the monitor in a location which cannot be seen by the driver
Cuando instale el monitor en una posición que no pueda ver el conductor
Lorsqu'on installe le moniteur à un emplacement où il ne peut pas être vu du
conducteur.
Plug the connectors in the same color sockets.
Enchufe los conectores en los zócalos del mismo color.
Enficher les connecteurs dans les douilles de même couleur
AV cord (Sold separately)
Cable de AV vendido por separado
Cordon AV vendu séparément
Plug the connectors in the same color sockets.
Enchufe los conectores en los zócalos del mismo color.
Enficher les connecteurs dans les douilles de même couleur.
2nd television connected to the AV output terminal
Segundo televisor conectado al terminal de salida de AV
Deuxième télévision connectée à une borne de sortie AV
Controller unit
Unidad controladora
Unité de commande
AV cord (Sold separately)
Cable de AV vendido por separado
Cordon AV vendu séparément
AV cord (Sold separately)
Cable de AV vendido por separado
Cordon AV vendu séparément
Plug the connectors in the same color sockets.
Enchufe los conectores en los zócalos del
mismo color.
Enficher les connecteurs dans les douilles de
même couleur.
Video camera or car-installed video machine
Videocámara o máquina de vídeo instalada en un automóvil
Camera vidéo ou appareil vidéo mobile
How to connect with a mobile video machine or video camera
Cómo conectar a una máquina de vídeo móvil o a una videocámara
Raccordement sur un appareil vidéo mobile ou une camera vidéo
Display unit
(Be sure to install the display unit at least 1m (3.3ft) away from the controller unit.)
Unidad de visualización
(Asegúrese de instalar la unidad de visualización a 1m (3.3ft) como mínimo del sintonizador.)
Unité d'affichage.
(veiller à installer l'unité d'affichage à 1m (3.3ft) au moins de l'unité de commande)
If interference occurs in AM radio reception, connect this screw to the vehicle chassis metal.
Si se producen interferencias en la recepción de AM, conecte este tornillo al metal del chasis
del vehículo.
S'il se produit des interférences dans la réception radio AM, connecter cette vis à une pièce
métallique du châssis du véhicule.
Controller Unit / Unidad controladora / Unité de commande
(Not used at present.)
(No se utiliza actualmente)
(non utilisé à présent)
Power cord
Use the cord included with the KV-M65 color monitor system package.
Cable de alimentación
Utilice el cable de alimentación suministrado con la unidad de visualización KV-M65.
Cordon d'alimentation
Utiliser le cordon fourni avec les accessoires du système de moniteur couleur du KV-M65.
(blue) / (azul) /
(bleu)
(gray) / (gris) /
(gris)
Do not use any fuse other than a 3A fuse.
No utilice ningún fusible que no sea de 3A.
Ne pas utiliser d'autre fusible qu'un 3A
(red) / (rojo) /
(rouge)
Fuse (3A) / Fusible (3A) /
Fusible (3A)
Remote output wire
12V output when ON. When connected to a JVC car receiver with a remote input wire,
sound output automatically switches over to the monitor when the monitor is turned ON.
Cable de salida remota
Salida de 12 V en ON. Cuando se conecte a un receptor de automóvil JVC con cable
de entrada remota, la salida de sonido cambiará automáticamente al monitor cuando
se encienda el monitor.
Cordon de sortie à distance.
Quand sortie 12V ON. Lorsqu'il est connecté à un récepteur autoradio JVC à l'aide d'un
cordon d'entrée à distance, la sortie son commute automatiquement sur le moniteur
lorsque ce dernier est sous tension.
Parking brake connection wire (see below)
Cable de conexión a freno de estacionamiento (consulte abajo)
Cordon de connexion sur le frein de stationnement (voir ci-dessous)
Accessory power source (ACC power source) input wire (DC12V)
Connect to spots where the power source is cut when the engine key is removed.
Do not connect to spots which have a constant power source.
Lay the wire so that it does not get tangled up with screws or the moving parts of a seat
rail.
Cable de entrada de alimentación de accesorios (alimentación de ACC) (12 V CC)
Conéctelo en lugares donde se corte la alimentación cuando se retire la llave del motor.
No lo conecte en lugares que tengan una alimentación constante.
Ponga el cable de forma que no se enrede con tornillos ni con las partes móviles del
raíl del asiento.
Cordon d'entrée (12V CC) d'une source d'alimentation accessoire (source d'alimentation
ACC)
Connecter aux points privés de source d'alimentation lorsque la clé de contact est retirée.
Ne pas connecter aux points de source d'alimentation constante.
Faire courir le cordon là où il ne risque pas de s'accrocher aux vis ou de se coincer dans
les parties mobiles du rail du siège.
Ground wire
Connect to the vehicle chassis metal
Cable de tierra
Conéctelo al metal del chasis del vehículo.
Fil à la masse.
Connecter à une partie métallique du châssis du véhicule.
(black) / (negro) /
(noir)
Video camera or car-installed video machine
Videocámara o máquina de vídeo instalada en un automóvil
Camera vidéo ou appareil vidéo mobile
Comes up to this point
Viene hasta este punto
Arrive jusqu'en ce point
Parking brake connection wire (gray)
Cable de conexión del freno de estacionamiento (gris)
Cordon de connexion du frein de stationnement (gris)
Power source side
Parking brake lever wire
Lado de alimentación
Cable de la palanca del freno de estacionamiento
Côté source d'alimentation.
Cordon du levier du frein de stationnemement.
Parking brake connection wire (gray)
When the parking brake lever is pulled, the Unit is grounded by the chassis.
When the parking brake lever is returned to its original position, it connects to a wire with 12V applied.
Cable de conexión del freno de estacionamiento (gris)
Cuando la palanca del freno de estacionamiento esté aplicada, ésta será conectada a tierra mediante el chasis.
Cuando la palanca del freno de estacionamiento se ponga en su posición original, ésta será conectada a un cable con 12 V aplicados.
Cordon de connexion du frein de stationnement (gris).
Lorsque le frein de stationnement est serré, il est à la masse par le châssis.
Lorsque le frein de stationnement revient à sa position originale, il est connecté avec un fil de 12V appliqués.
From the controller unit
Desde el sintonizador
En provenance de l'unité de tuner.
Parking brake connection wire (gray)
Cable de conexión del freno de estacionamiento (gris)
Cordon de connexion au frein de stationnement
Connect to the vehicle chassis metal together with the
ground wire.
Conecte al metal del chasis del vehículo junto con el
cable de tierra.
Connecter à une pièce métallique du châssis du
véhicule en même temps que le fil à la masse.
From the controller unit
Desde la unidad controladora
En provenance de l'unité de commande
The parking brake lever position varies depending on the vehicle model.
The diagram below show typical examples.
La posiciÛn de la palanca del freno de estacionamiento cambia seg˙n el modelo del vehÌculo.
El diagrama de abajo muestra ejemplos tÌpicos.
La position du levier du frein de stationnement varie selon les modèles de véhicules.
Le schéma ci-dessous est un exemple typique.
Vehicle chassis / Chasis del vehículo / Châssis du véhicule
Brake light / Luz de freno / Témoin de frein
 Loading...