

Page 1
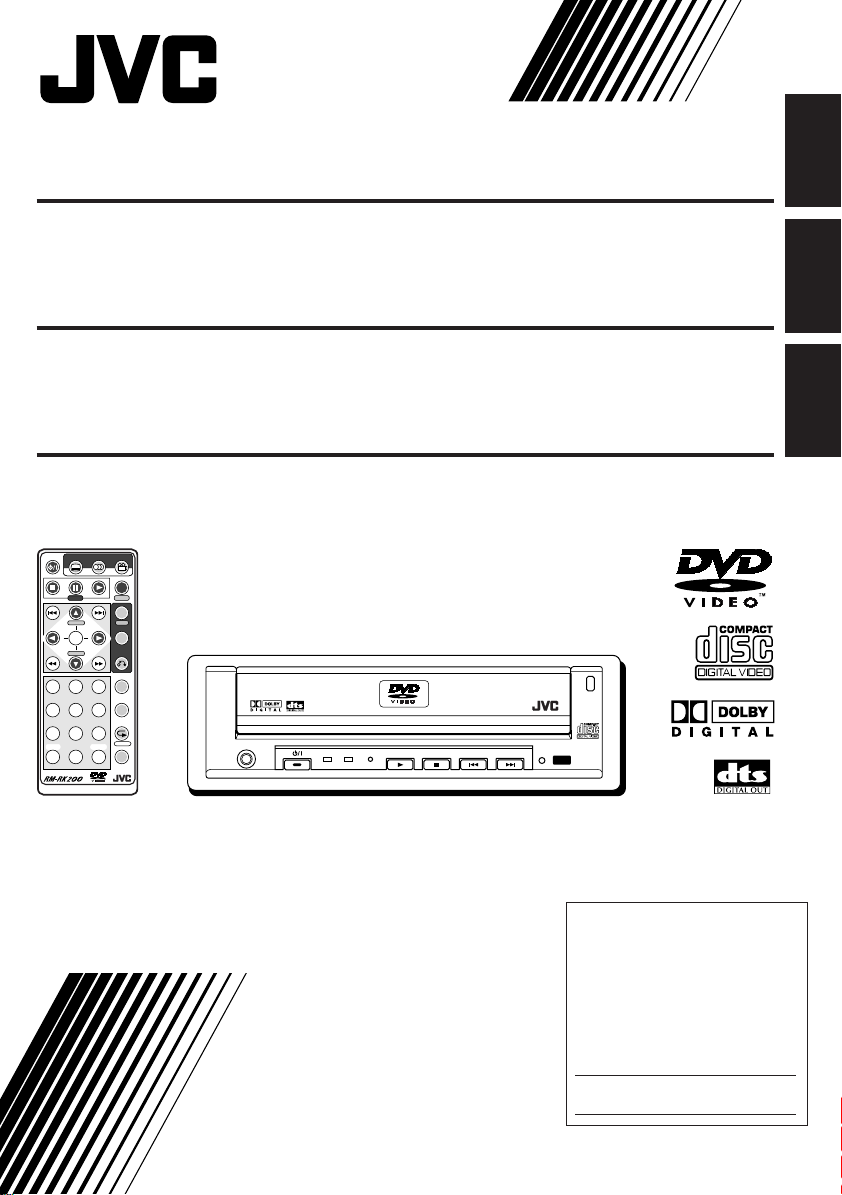
DVD/CD PLAYER KV-DV7
ENGLISH
REPRODUCTOR DVD/CD KV-DV7
LECTEUR DVD/CD KV-DV7
POWER
SUBTITLE AUDIO ANGLE
DISPLAY
D
STEP
TIME
MENU
H/P VOL SETUP
TITLE
ENTER
H/P VOL
RETURN
123
456
789
SHIFT
S0C
For installation and connections, refer to the separate manual.
Para la instalación y las conexiones, refiérase al manual separado.
Pour l’installation et les raccordements, se référer au manuel séparé.
SLOW
KV-DV7
ZOOM
REPEAT
A-B RPT
CLEAR
M
SEARCH MODE
PHONES
DVD / VIDEO CD / CD
DVD VCD/CD
DVD / CD PLAYER
OPEN
ESPAÑOL
FRANÇAIS
INSTRUCTIONS
MANUAL DE INSTRUCCIONES
MANUEL D’INSTRUCTIONS
For customer Use:
Enter below the Model No. and
Serial No. which are located on
the top or bottom of the cabinet.
Retain this information for future
reference.
Model No.
Serial No.
LVT0590-001A
[J]
Page 2
INFORMATION (For U.S.A.)
This equipment has been tested and found to comply with the limits for a Class B digital device,
pursuant to Part 15 of the FCC Rules. These limits are designed to provide reasonable protection
against harmful interference in a residential installation. This equipment generates, uses, and can
ENGLISH
radiate radio frequency energy and, if not installed and used in accordance with the instructions,
may cause harmful interference to radio communications. However, there is no guarantee that
interference will not occur in a particular installation. If this equipment does cause harmful
interference to radio or television reception, which can be determined by turning the equipment off
and on, the user is encouraged to try to correct the interference by one or more of the following
measures:
– Reorient or relocate the receiving antenna.
– Increase the separation between the equipment and receiver.
– Connect the equipment into an outlet on a circuit different from that to which the receiver is
connected.
– Consult the dealer or an experienced radio/TV technician for help.
IMPORTANT FOR LASER PRODUCTS
Precautions:
1.CLASS 1 LASER PRODUCT
2.DANGER: Invisible laser radiation when open
and interlock failed or defeated. Avoid direct
exposure to beam.
3.CAUTION: Do not open the top cover. There
are no user-serviceable parts inside. Leave all
servicing to qualified service personnel.
4.CAUTION: This DVD/CD player uses invisible
laser radiation, however, is equipped with safety
switches to prevent radiation emission when
unloading discs. It is dangerous to defeat the
safety switches.
5.CAUTION: Use of controls, adjustments or
performance of procedures other than those
specified herein may result in hazardous
radiation exposure.
WARNINGS
• DO NOT install any unit in locations where;
– it may obstruct the steering wheel and
gearshift lever operations, as this ma y result
in a traffic accident.
– it may obstruct the operation of safety
devices such as air bags, as this may result
in a fatal accident.
– it may obstruct visibility.
• DO NOT operate any unit while manipulating
the steering wheel, as this may result in a
traffic accident.
• The driver must not watch the monitor while
driving.
If the driver watches the monitor while driving,
it may lead to carelessness and cause an
accident.
• DO NOT use the headphones while driving. It
is dangerous to shut off the outside sounds
CAUTION: DO NOT insert a disc while the
disc loading lamp is flashing or is not lit.
(See page 6.)
while driving.
• If you need to operate the unit while driving,
be sure to look ahead carefully or you may be
involved in a traffic accident.
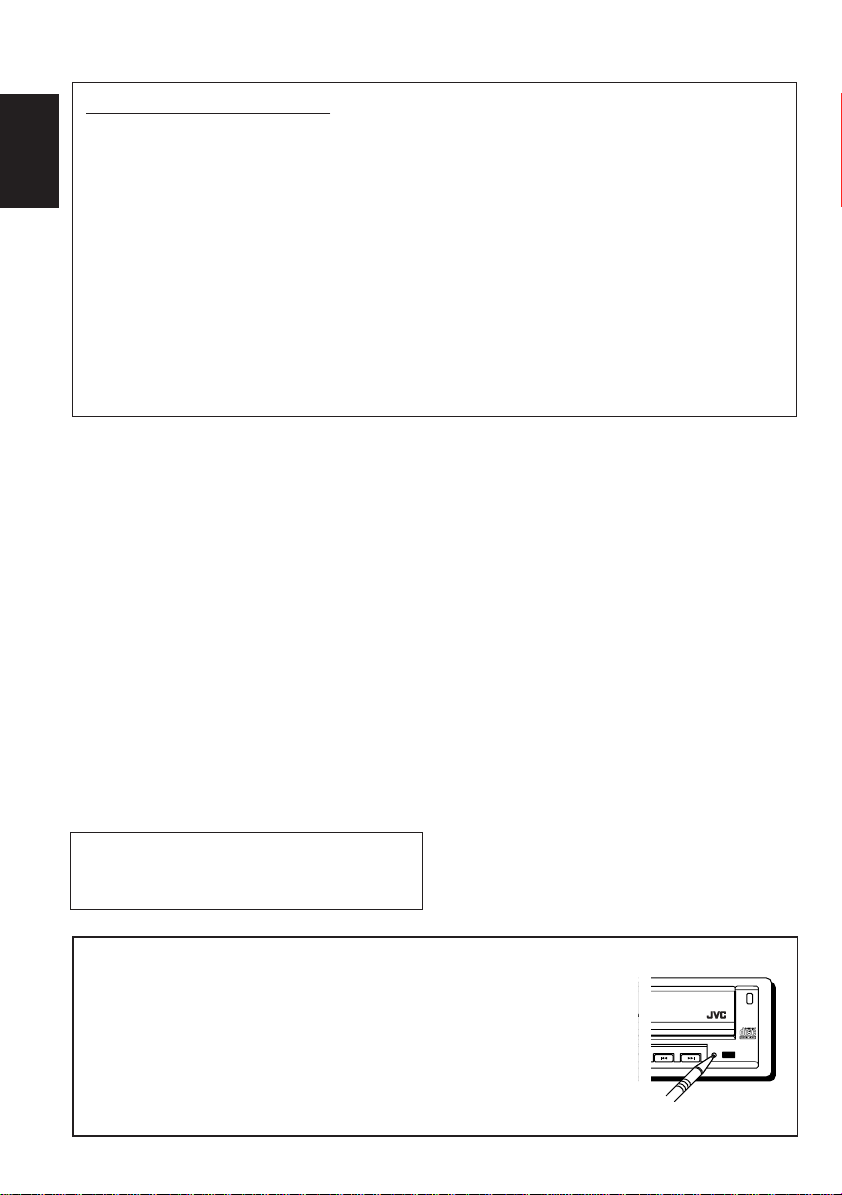
How to reset your unit
Press the reset button on the front panel using a ball-point pen or a similar
tool. This will reset the built-in microcomputer.
NOTE:
If you reset the unit during play, the playback mode selections (e.g. repeat play mode
setting), you have selected for the current disc will be reset to the initial settings.
• During DVD playback, the disc menu selection will be also reset to the initial disc
settings.
2
V-DV7
DVD / CD PLAYER
OPEN
Page 3

Thank you for purchasing a JVC product. Please read all instructions carefully before operation,
to ensure your complete understanding and to obtain the best possible performance from the unit.
CONTENTS
How to reset your unit............................... 2
INTRODUCTION ........................... 4
PREPARATION ............................. 5
Installing the battery ................................. 5
BASIC PLAYBACK ......................... 6
Starting playback ..................................... 6
• Listening with headphones .................. 7
Showing the on-screen bar....................... 8
• Checking the playing time.................... 9
DVD PLAYBACK ........................... 10
Selecting subtitles.................................... 10
Selecting audio languages ....................... 11
Selecting multi-angle views ...................... 11
MENU-DRIVEN PLAYBACK............... 12
Menu operations ...................................... 12
• While playing a DVD ............................ 12
• While playing a VCD ............................ 13
SEARCH FUNCTIONS ..................... 14
Searching for a particular point ................ 14
• Forward Search .................................. 14
• Reverse Search .................................. 14
Locating a particular point directly............ 15
REPEAT PLAYBACK ....................... 16
Playing repeatedly ................................... 16
• Repeat Play ........................................ 16
• A-B Repeat ......................................... 17
SPECIAL EFFECTS PLAYBACK........... 18
• Slow-Motion Playback.......................... 18
• Frame-by-frame Playback.................... 18
• Zoom................................................... 19
DVD SETUP MENU ........................ 20
Setting initial audio language ................... 20
Setting initial subtitle language................. 21
Setting initial disc menu language............ 22
Setting digital audio output ....................... 22
Setting compression ................................. 23
Setting audio output during
Low Speed Search................................. 24
Setting monitor type................................. 25
Setting closed caption .............................. 26
Changing the color of the on-screen bar .. 26
Setting zoom preference .......................... 27
MAINTENANCE ............................ 29
Handling discs ......................................... 29
LANGUAGE CODES ....................... 30
GLOSSARY ................................. 31
LOCATION OF THE BUTTONS............ 32
• Remote controller ................................ 32
• Control panel ...................................... 33
TROUBLESHOOTING...................... 34
SPECIFICATIONS .......................... 35
ENGLISH
CAUTION on Volume Setting
Discs produce very little noise compared with other sources. If the volume level is adjusted for the tuner, for
example, the speakers may be damaged by the sudden increase in the output level. Therefore, lower the volume
before playing a disc and adjust it as required during playback.
BEFORE USE
* For safety....
• Do not raise the volume level too much, as this
will block outside sounds, making driving
dangerous.
* Temperature inside the car....
If you have parked the car for a long time in hot
or cold weather, wait until the temperature in the
car becomes normal before operating the unit.
• Stop the car before performing any complicated
operations.
3
Page 4
INTRODUCTION
About this manual
This manual mainly explains operations using the buttons on the remote control. You can also use the
buttons on the control panel for the same operations if they have the similar or same marks.
ENGLISH
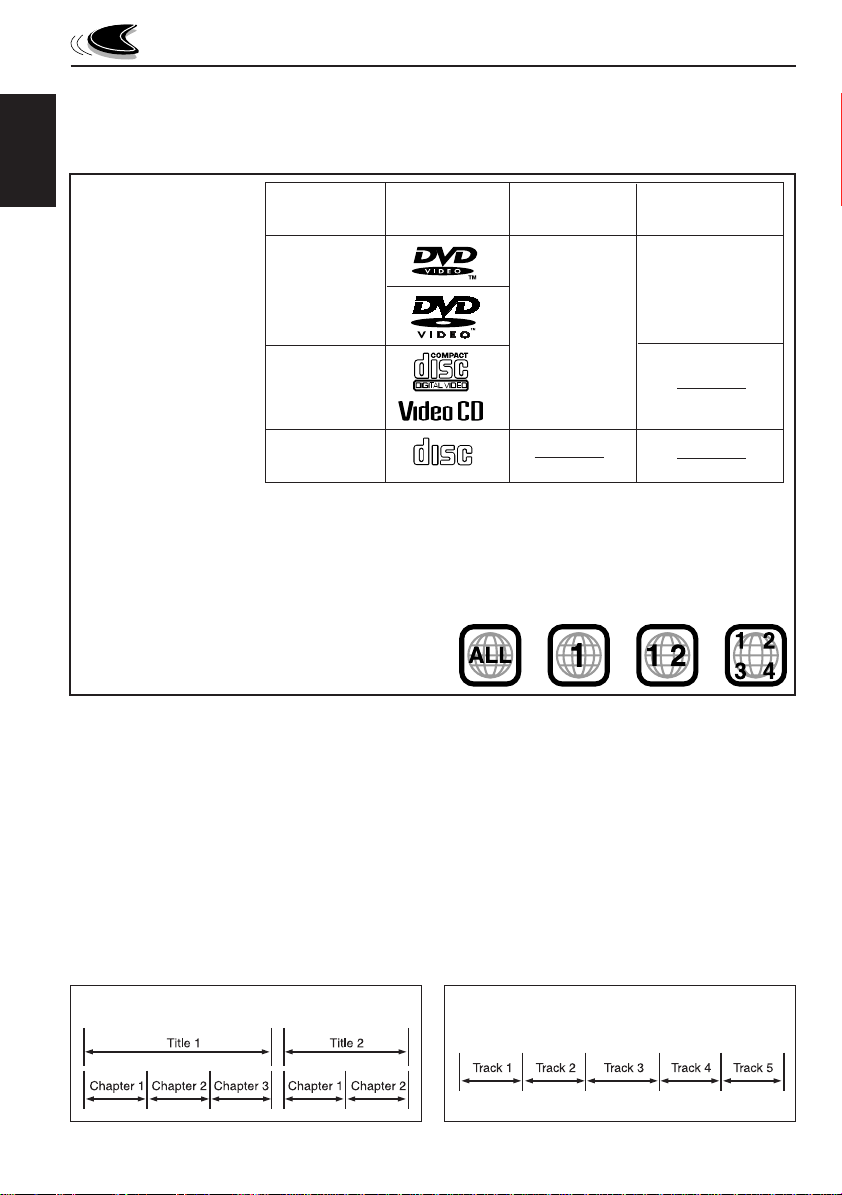
Discs you can play:
Disc Mark Video Region Code
Type (Logo) Format Number*
D VD Video
1
ALL
NTSC
Video CD
Audio CD
• On some discs, their actual operations may be different from what is explained in this manual.
• The following discs cannot be played back;
– DVD-A udio, DVD-ROM, DVD-RAM, DVD-R, DVD-RW, CD-ROM, CD-R, CD-RW, CD-I
(CD-I Ready), Photo CD, etc.
Playing back these discs will generate noise and damage the speakers.
* Note on Region Code
DVD players and DVD Video discs have their own Region
Code numbers. This unit only can play back DVD discs
whose Region Code numbers include “1.”
COMPACT
DIGITAL AUDIO
Examples:
Disc structure – DVD, Video CD (VCD) and Audio CD (CD)
A DVD disc consists of Titles, and each title may be divided into some Chapters. (See Example 1.)
For example, if a DVD disc contains some movies, each movie may have its own title number, and it
may be further divided into some chapters.
On the other hand, a VCD or CD consists of Tracks. (See Example 2.)
In general, each song has its own track number. (On some discs, each track may also be divided by
Indexes.)
When playing back a VCD with Playback Control (PBC) function, you can select what to view using the
menu shown on the monitor. (While operating a Video CD using the menu, some of the functions such
as Repeat and Track Search may not work.)
Example 1: DVD disc
4
Example 2 : Video CD/Audio CD
Page 5
1)
2)
PREPARATION
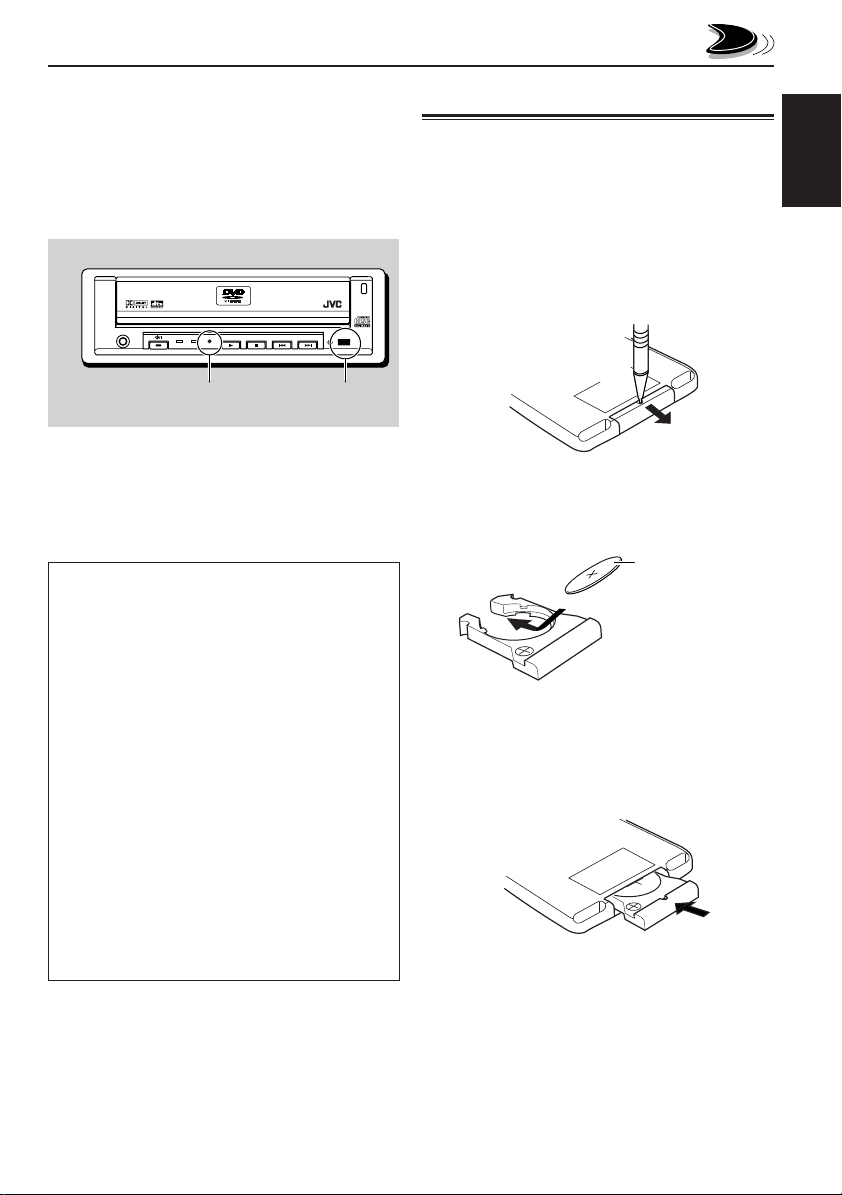
Before using the remote controller:
• Aim the remote controller directly at the remote
sensor on the main unit. Make sure there is no
obstacle in between.
• The remote signal reception lamp flashes when
the unit receives a remote control signal from the
remote controller.
OPEN
PHONES
Remote signal
reception lamp
DVD / VIDEO CD / CD
DVD VCD/CD
KV-DV7
DVD / CD PLAYER
Remote sensor
• Do not expose the remote sensor to strong light
(direct sunlight or artificial lighting).
WARNING:
• Store the batteries in a place which children
cannot reach.
If a child accidentally swallows the batteries,
immediately consult a doctor.
• Do not recharge, short, disassemble or heat the
batteries or dispose of in a fire.
Doing any of these things may cause the
batteries to give off heat, crack or start a fire.
• Do not leave the batteries with other metallic
materials.
Doing this may cause the batteries to give off
heat, crack or start a fire.
• When throwing away or saving batteries, wrap in
tape and insulate; otherwise, it may cause the
batteries to give off heat, crack or start a fire.
• Do not poke the batteries with tweezers or
similar tools.
Doing this may cause the batteries to give off
heat, crack or start a fire.
Installing the battery
When the controllable range or effectiveness of the
remote controller decreases, replace the battery.
ENGLISH
1. Remove the battery holder.
1) Push out the batter y holder in the direction
indicated by the arrow using a ball-point pen
or a similar tool.
2) Remove the battery holder.
(back side)
2. Place the battery.
Slide the battery into the holder with the + side
facing upwards so that the battery is fixed in the
holder.
Lithium coin battery
(product number:
CR2025)
3. Return the battery holder.
Insert again the battery holder pushing it until
you hear a clicking sound.
(back side)
5
Page 6
BASIC PLAYBACK
The following marks used in this manual indicate
the discs to be used.
ENGLISH
Video CD Audio CDDVD Video
POWER
POWER
H/P VOL 5
H/P VOL
SHIFT (S)
7
∞
SUBTITLE AUDIO ANGLE
STEP
H/P VOL SETUP
ENTER
H/P VOL
123
456
789
SHIFT
CLEAR
S0C
DISPLAY
D
TIME
MENU
TITLE
RETURN
SLOW
ZOOM
REPEAT
A-B RPT
M
SEARCH MODE
8
STEP
3
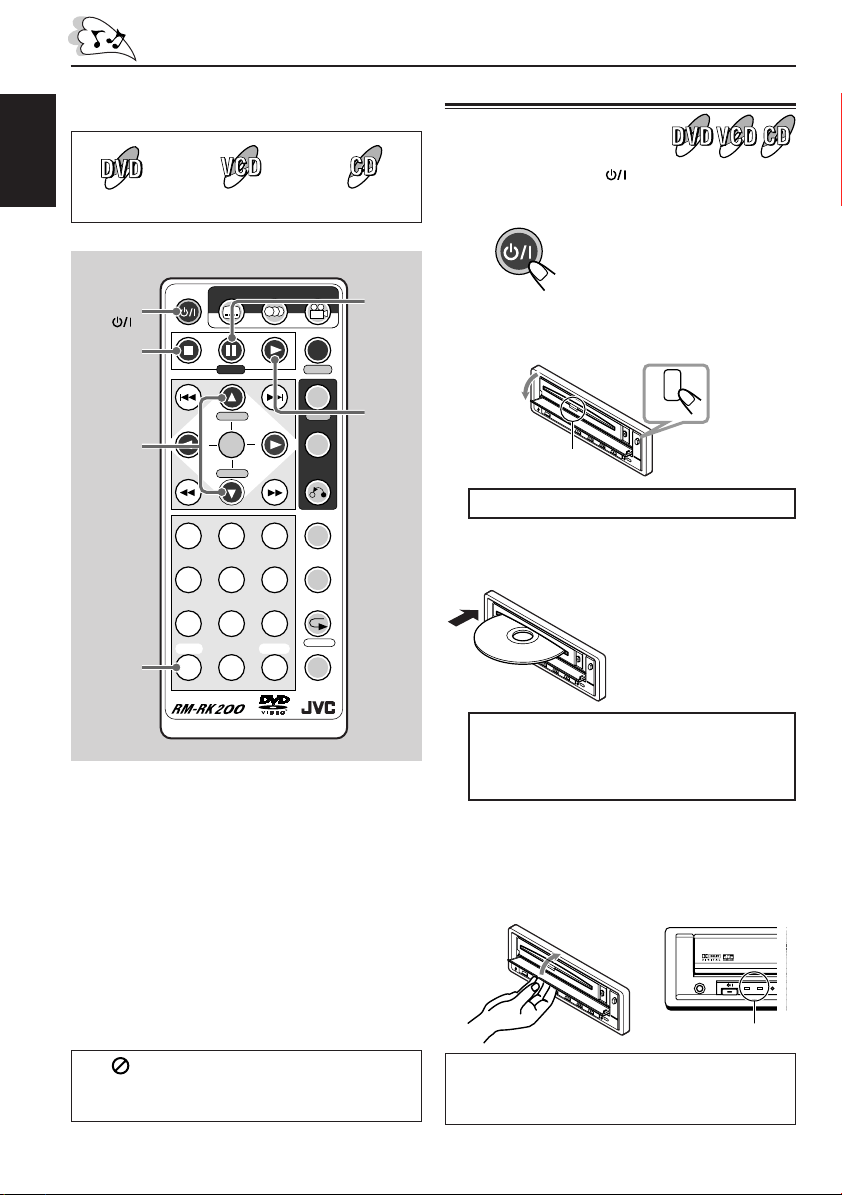
Starting playback
1
Press POWER to turn on the
power.
POWER
2
Press OPEN on the unit.
The loading slot cover opens.
Disc loading lamp
DO NOT force the cover open by hand.
3
Insert a disc into the loading slot.
The lamps on the buttons on
the unit light up.
OPEN
The unit draws in the disc
automatically.
• When the power is off, you
cannot insert a disc.
Before performing any operations, make sure
the following....
• Check the connection with the TV and with the
car receiver.
• Turn on the TV and the receiver.
• Select this unit (auxiliary or external input) as
the playback source on the receiver.
• Select the correct input where this unit is
connected.
• For DVD playback, you can change the
Setup Menu setting to your preference. (See
pages 20 – 28.)
If “ ”appears on the screen when
pressing a button, the disc cannot accept an
operation you have tried to do.
6
DO NOT insert a disc while the disc loading
lamp is flashing* or is not lit**.
* Flashing: while loading or ejecting a disc
**Not lit: when a disc has been loaded.
4
Close the slot cover by hand.
The disc type is automatically detected and
the detected disc lamp (DVD, VCD/CD)
lights up, and playback starts automatically.
• It takes a while to detect the disc type.
PHONES
Disc lamps
If a menu appears while playing a DVD or VCD
with PBC function, see “MENU-DRIVEN
PLAYBACK” on page 12.
DVD / VIDEO CD / CD
DVD VCD/CD
Page 7
To stop playback temporarily
Press 8 (STEP). A still picture appears while
playing a DVD or VCD.
• You can advance the still picture frame by
frame by pressing the button repeatedly. (See
page 18.)
To resume playback, press 3.
To stop playback
Press 7.
If you are playing back a DVD or
VCD, this unit can memorize the
end point (“7” appears for a while
on the screen), and when you start
playback again, playback begins from where it
has been stopped. (Resume play)
To eject a disc
1 Press OPEN on the unit to open the slot cover.
2
Press 0 on the unit (inside the slot cover).
The disc automatically comes out of the
loading slot.
To locate a particular chapter or track
You can move to another chapter or track while
playing a disc.
• Press ¢ to go ahead to the beginning of the
next track.
Each time you press the button consecutively,
the beginning of the next tracks is located and
played back.
• Press 4 to go back to the beginning of the
current track.
Each time you press the button consecutively,
the beginning of the previous tracks is located
and played back.
Listening with headphones
1 Connect the headphones to the PHONES jack
on the unit.
2 While holding SHIFT (S), then press
H/P VOL 5 or H/P V OL ∞ to adjust the
headphones volume.
DO NOT use the headphones while driving. It
is dangerous to shut off the outside sounds
while driving.
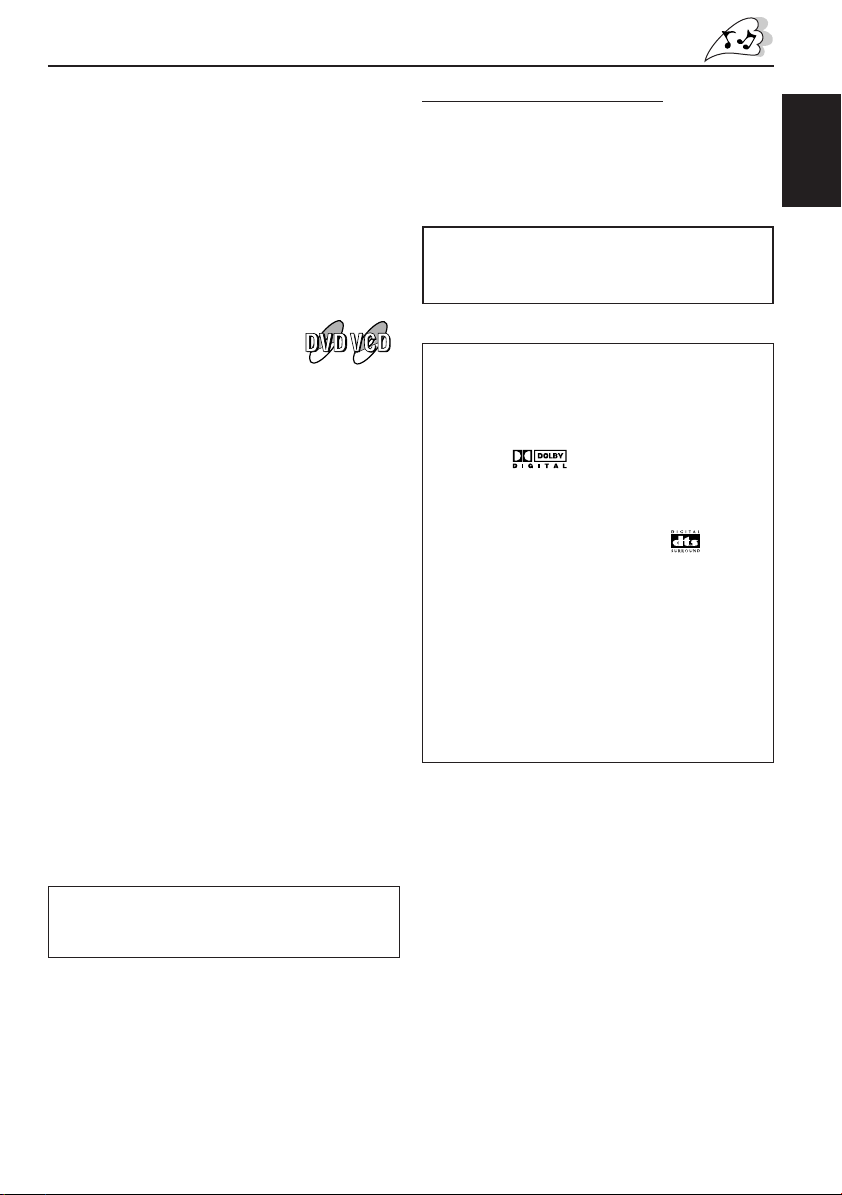
About sounds reproduced through the rear
terminals
• Through AUDIO (L/R):
Analog stereo signals are output.
When playing a source encoded with Dolby
Digital* ( ) , multichannel signals are
mixed to the left and right front channel
signals, then output.
–You cannot reproduce the sound encoded
with DTS Digital Surround** ( ).
• Through DIGITAL OUT:
Digital signals (Linear PCM, Dolby Digital,
DTS Digital Surround) are output through this
terminal. (For more details, see page 35.)
To reproduce the multichannel sounds such
as Dolby Digital and DTS Digital Surround,
connect an amplifier or a decoder compatible
with these multichannel sources to this
terminal, and set “DIGITAL OUT” correctly.
(See page 22.)
ENGLISH
If you press and hold the button, you can fastforward (by holding ¢) or fast-reverse the play
(by holding 4).
* Manufactured under license from Dolby
Laboratories. “Dolby” and the double-D symbol
are trademarks of Dolby Laboratories.
Confidential unpublished works. © 1992–1997
Dolby Laboratories. All rights reserved.
** Manufactured under license from Digital Theater
Systems, Inc. US Pat. No. 5,451,942, 5,956,674,
5,974,380, 5,978,762 and other world-wide patents
issued and pending. “DTS” is a registered
trademark of Digital Theater Systems, Inc.
Copyright 1996, 2000 Digital Theater Systems, Inc.
All Rights Reserved.
7
Page 8
ENGLISH
SHIFT (S)
POWER
SUBTITLE AUDIO ANGLE
STEP
H/P VOL SETUP
ENTER
H/P VOL
123
456
789
SHIFT
CLEAR
S0C
DISPLAY
D
TIME
MENU
TITLE
RETURN
SLOW
ZOOM
REPEAT
A-B RPT
M
SEARCH MODE
DISPLAY (D)
TIME
When a VCD or CD is loaded:
PBC
1/3
00:00:01
OFF
*
On-screen bar goes off.
* This appears only while a VCD is loaded.
About the indications on the on-screen bar
Indications shown on the on-screen bar vary
depending on the disc type and the signals
recorded on the loaded disc.
When a DVD is loaded
1/3
1
OFF/0
6 7 8 9
1/25
00:00:01
1/1
2 3 4 5
ENG 1/1 OFF
Digital
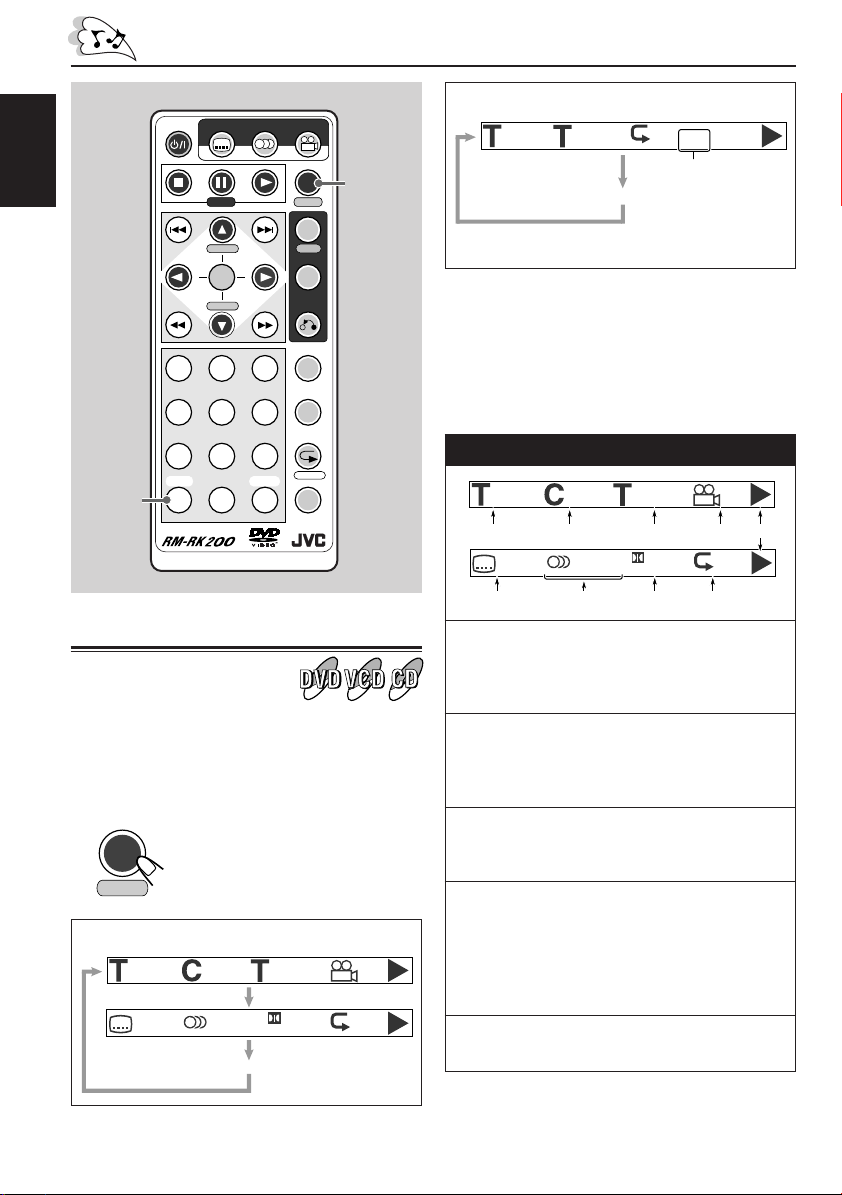
Showing the on-screen bar
You can show the following information on the
screen while a disc is loaded.
To show the disc information, press DISPLAY
(D)/TIME.
DISPLAY
D
TIME
When a DVD is loaded:
8
Each time you press the button,
the following on-screen bar
appears in sequence.
1/3
OFF/0
1/25
00:00:01
ENG 1/1 OFF
Digital
On-screen bar goes off.
1/1
1 :Current title and the total number of the
titles on the disc.
(Ex.: 1st title is playing out of 3 titles
recorded.)
2 :Current chapter and the total number of
the chapters recorded on the disc.
(Ex.: 1st chapter is playing out of 25
chapters recorded.)
3 :Playing time or the remaining time.
(Ex.: Playing time of the title. See page 9
for more details.)
4 :Indicates whether the disc contains multi-
angle views.
(Ex.: When only main angle-view is
recorded on the disc without any multiangle views. See page 11 for more
details.)
5 :Current operation mode.
(Ex.: This appears while playing a disc.)
Page 9
6 :Indicates whether the disc contains
subtitles.
(Ex.: When no subtitle is recorded on the
disc. See page 10 for more details.)
7 :Current selected audio language and the
total number of the audio languages
recorded on the disc.
(Ex.: “ENGLISH” is selected as the only
recorded audio language on the disc. See
page 11 for more details.)
8 :Sound mode — Linear PCM (stereo),
Dolby Digital, and DTS Digital Surround.
(Ex.: When the disc is encoded with Dolby
Digital.)
9 :Repeat play mode.
(Ex.: When Repeat play mode is set to
“OFF.” See page 16 for more details.)
Checking the playing time
You can also show the elapsed playing time or
the remaining time.
To show the on-screen bar and to change the
playing time information, press DISPLAY (D)/
TIME while holding SHIFT (S).
SHIFT
S
Each time you press the button, the playing time
information changes on the on-screen bar.
and
When a DVD is loaded
00:00:01
DISPLAY
D
TIME
-01:54:01
ENGLISH
When a VCD or CD is loaded
PBC
1/3
1 2345
1 :Current track and the total number of the
tracks on the disc.
(Ex.: 1st track is playing out of 3 tracks
recorded.)
2 :Playing time or the remaining time.
(Ex.: Playing time of the track. See the
right column for more details.)
3 :Repeat play mode.
(Ex.: When Repeat play mode is set to
“OFF.” See pages 16 and 17 for more
details.)
4 :Appears only while loading a VCD.
Indicates whether the VCD is recorded
with the PBC function ( ) or without
( ).
(Ex.: When PBC function is recorded.)
5 :Current operation mode.
(Ex.: This appears while playing a disc.)
00:00:01
* This appears only while a VCD is loaded.
OFF
*
-00:34:09
Elapsed playing time of the current title \
Remaining time of the current title \
Elapsed playing time of the current chapter \
Remaining time of the current chapter \
(Back to the beginning)
00:00:05
When a VCD or CD is loaded
00:00:01
-00:43:09
Elapsed playing time of the current track \
Remaining time of the current track \
Elapsed playing time of the current disc \
Remaining time of the current disc \
(Back to the beginning)
To erase the on-screen bar, press DISPLAY
(D)/TIME twice while playing a DVD, or once
while playing a VCD or CD.
• It is not required to hold down SHIFT (S) to
erase the on-screen bar.
-00:04:41
00:00:05
9
Page 10
ENGLISH
3
SUBTITLE
DVD PLAYBACK
POWER
SUBTITLE AUDIO ANGLE
STEP
H/P VOL SETUP
ENTER
H/P VOL
DISPLAY
TIME
MENU
TITLE
RETURN
ANGLE
D
AUDIO
Some DVDs contain several audio languages,
subtitles, and multi-angle views.
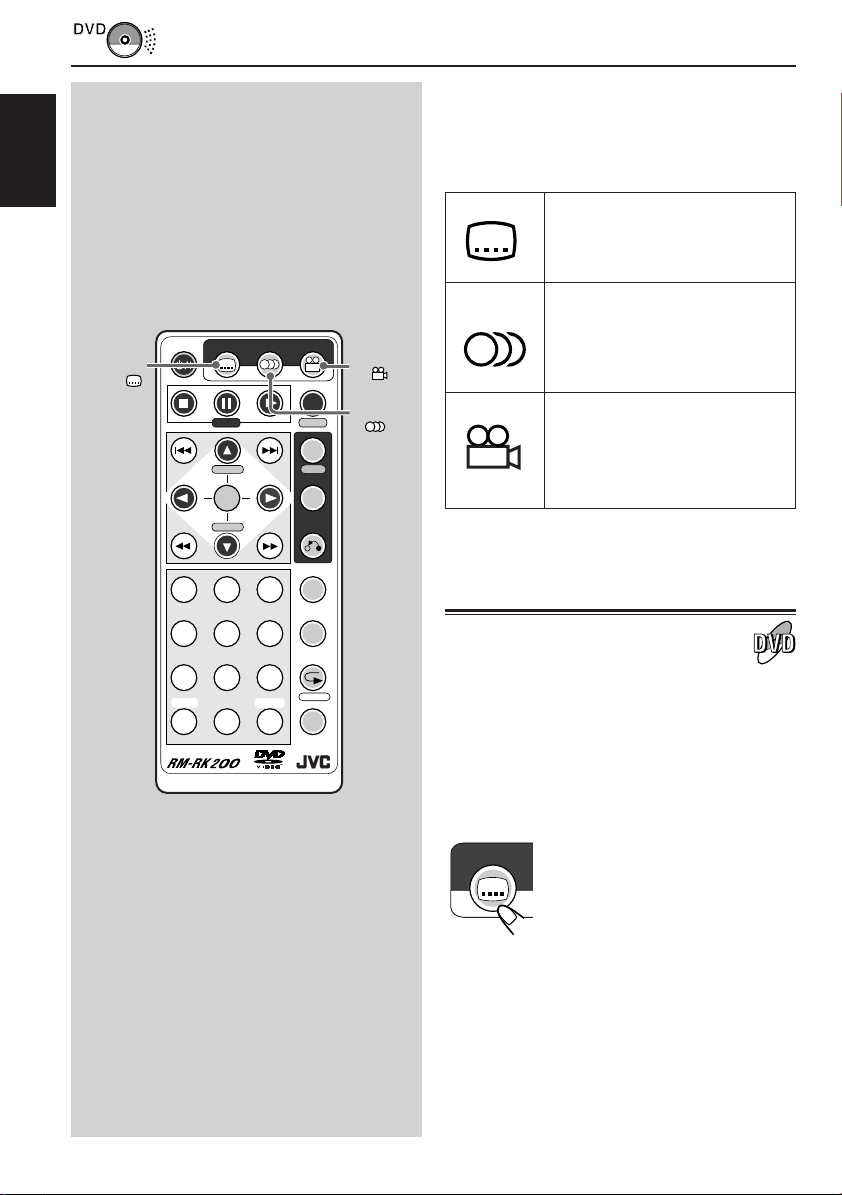
When you find the following marks on the DVD or
its package, you can select these elements
recorded on the DVD.
Subtitles are recorded on the
disc. The number inside the
mark indicates the total number
of the recorded subtitles.
Several audio languages are
recorded on the disc. The
3
number inside the mark
indicates the total number of
the recorded audio languages.
Multi-angle views are recorded
on the disc. The number inside
3
the mark indicates the total
number of the recorded multiangle views.
CLEAR
SLOW
ZOOM
REPEAT
A-B RPT
M
SEARCH MODE
Selecting subtitles
While playing a disc containing subtitles in
different languages, you can select the subtitle to
be displayed on the screen.
• You can set your favorite subtitle language as
123
456
789
SHIFT
S0C
the initial language shown on the screen. (See
page 21.)
Select a desired subtitle language.
SUBTITLE
The on-screen menu bar appears
on the screen. Each time you
press the button, the subtitle
language changes.
10
Page 11
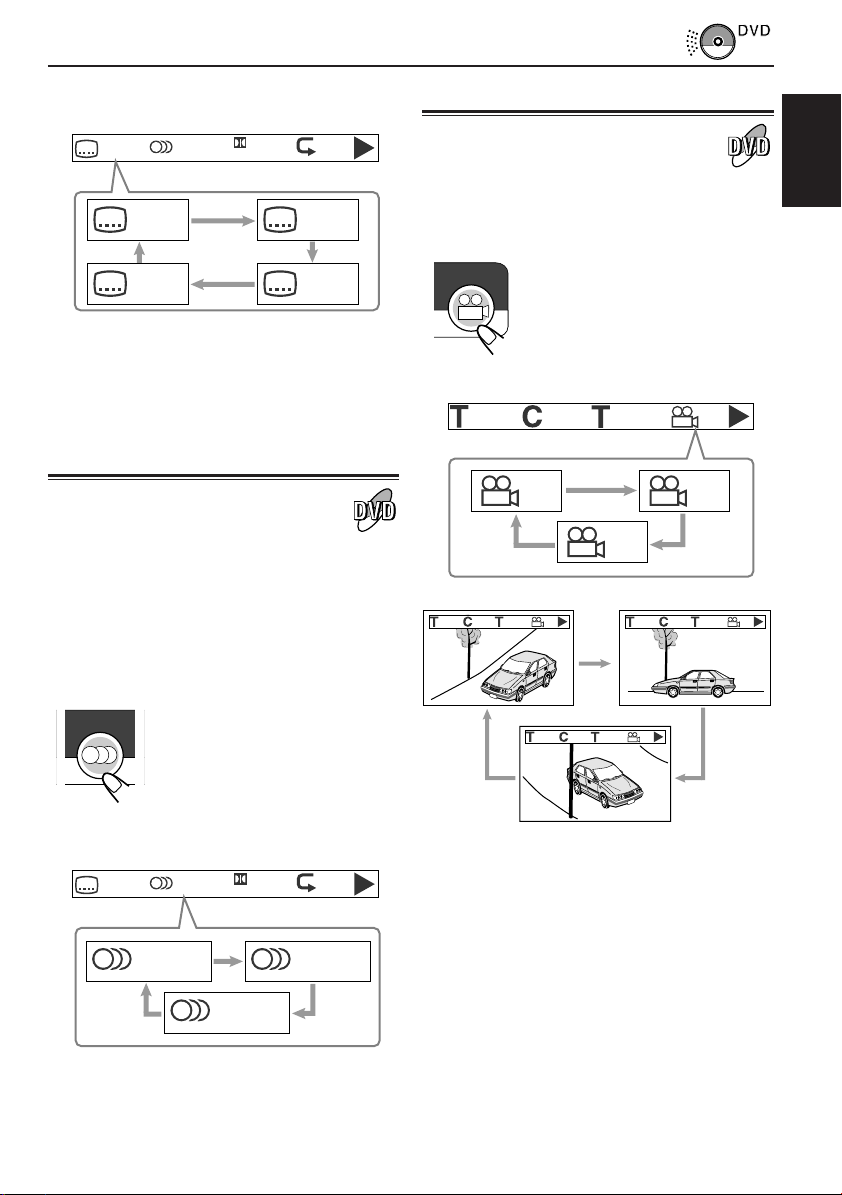
Ex.: When the disc has 3 selections —
English, French, Spanish and no subtitle (OFF)
OFF/3
ENG 1/3 OFF
Digital
OFF/3 ENG/3
SPA/3 FRE/3
Selecting multi-angle views
While playing a disc containing multi-angle views,
you can view the same scene at different angles.
Select a desired view angle.
ANGLE
The on-screen menu bar appears
on the screen. Each time you
press the button, the view angle
changes.
ENGLISH
To erase the on-screen bar, press DISPLAY
(D)/TIME.
Selecting audio languages
While playing a disc containing audio languages
(sound tracks), you can select the language
(sound) to listen to.
• You can set your favorite audio language as the
initial audio language shown on the screen.
(See page 20.)
Select a desired audio language (sound).
AUDIO
The on-screen menu bar appears
on the screen. Each time you
press the button, the audio
language changes.
Ex.: When the disc has 3 selections —
English, French, and Spanish
OFF/3
ENG 1/3 OFF
Digital
Ex.: When the disc has 3 multi-angle views
1/3
3/25
00:00:01
1/3
1/3 2/3
3/3
3/25
1/3
00:00:01
1/3
3/25
1/3
00:00:01
To erase the on-screen bar, press DISPLAY
(D)/TIME twice.
3/25
1/3
00:00:01
3/3
2/3
ENG 1/3 FRE 2/3
SPA 3/3
To erase the on-screen bar, press DISPLAY
(D)/TIME.
11
Page 12

MENU-DRIVEN PLAYBACK
Menu operations
ENGLISH
Cursors
5∞ 3 2
(
ENTER
Numbers
POWER
)
123
456
789
SHIFT
S0C
SUBTITLE AUDIO ANGLE
DISPLAY
STEP
CLEAR
MENU
TITLE
RETURN
SLOW
ZOOM
REPEAT
A-B RPT
SEARCH MODE
H/P VOL SETUP
ENTER
H/P VOL
Menu-driven playback is possible while playing
back a DVD with menu-driven features or a VCD
with the PBC function.
While playing a DVD:
DVD discs generally have their own menus or title
lists. A Menu usually contains various information
about the disc and playback selections. On the
other hand, a title list usually contains titles of
movies and songs recorded.
1
3
D
TIME
MENU
SETUP
TITLE
CLEAR
M
(C)
Press MENU/SETUP or TITLE.
A menu or title list will appear on the screen.
MENU
SETUP
2
Select a desired item on the menu or
TITLE
or
on the title list, using Cursor buttons
(5/∞/3/2) and ENTER.
The unit starts playback of the selected item.
H/P VOL
ENTER
H/P VOL
12
• On some discs, you can also select items
by pressing the Number buttons
corresponding to the item numbers listed.
To erase the menu or title list
Press RETURN until it goes off from the
screen.
• If “ ”appears on the screen when
pressing MENU in step 1, the disc does not
have a menu.
• If “ ”appears on the screen when
pressing TITLE in step 1, the disc does not
have a title list.
Page 13

While playing a VCD:
The Playback Control function (PBC) allows you
to operate the VCD using menus.
When you start playback, a menu will
automatically appear on the screen.
• A menu may be a list of items, divided screens,
or some moving pictures. (See “PBC operation
concept” to the right.)
Select a desired item on the menu.
• When a list of items is displayed on the screen,
press the Number buttons to select an item.
• When “3” or “SELECT” is displayed on the
screen, press 3 (or ENTER if pressing 3 does
not work) to start playback.
How to select items using the Number
buttons
• To select number 5, press 5, then ENTER.
• To select number 10, press 1, 0, then
ENTER.
• To select number 23, press 2, 3, then
ENTER.
123
456
ENTER
789
PBC operation concept
ENGLISH
0
• To cancel a mis-entry, press CLEAR (C).
Each time you press the button, the last
entry will be erased.
To return to the previous menu
Press RETURN .
To cancel the PBC playback
You can cancel the menu-driven operations (PBC
function):
1 Press 7 to stop playback.
2
Press the Number buttons to select a track,
then press ENTER.
Normal playback starts from the selected
track.
• You can also turn on and off the PBC
playback by pressing MENU/SETUP
repeatedly.
13
Page 14

ENGLISH
ENTER
1 ¡
Numbers
SHIFT (S)
SEARCH FUNCTIONS
Searching for a particular point
You can search for a particular portion while
playing a disc — Forward/Reverse Search.
Forward Search
To fast-forward the chapter or track, press ¡
while playing a disc.
POWER
SUBTITLE AUDIO ANGLE
DISPLAY
CLEAR
D
TIME
MENU
TITLE
RETURN
SLOW
ZOOM
REPEAT
A-B RPT
M
SEARCH MODE
SEARCH
MODE
(M)
CLEAR
(C)
Reverse Search
To reverse the chapter or track, press 1 while
playing a disc.
STEP
H/P VOL SETUP
ENTER
H/P VOL
123
456
789
SHIFT
S0C
Each time you press the button,
the search speed changes
as follows:
(Low Speed Search)
(High Speed Search)
(Normal Play)
When playing a DVD or VCD
•
No sound comes out during High Speed Search.
•
When Low Speed Search sound setting is “ON,”
sounds come out during Low Speed Search. (See
page 24.)
Each time you press the button,
the search speed changes
as follows:
14
(Low Speed
Reverse Search)
(High Speed
Reverse Search)
(Normal Play)
When playing a DVD or VCD
No sound comes out during Reverse Search.
Page 15

Locating a particular point directly
You can use the following Search Modes to
locate a particular portion directly while playing a
disc.
• For DVD: Title Search, Chapter Search, and
Time Search
• For VCD and CD: Track Search and Time
Search
2
Press the Number buttons then
ENTER to select a desired title,
chapter, track or playing time.
The unit starts playback of the selected item.
123
456
789
0
ENGLISH
ENTER
1
Press SEARCH MODE (M) to select
Search Mode.
The on-screen bar appears on the screen.
M
SEARCH MODE
When a DVD is playing:
--/3
Title
Search
When a VCD or CD is playing:
--/25
Track
Search
* Time Search can be performed only within the
current title (for DVD) and the current track (for
VCD and CD).
--/25
Chapter
Search
Canceled
Canceled
--:--:--
Time
Search*
--:--:--
Time
Search*
How to input the title, chapter, and track
number
Press the Number buttons corresponding to
the number, then press ENTER to start its
playback.
• To select number 5, press 5, then ENTER.
• To select number 10, press 1, 0, then
ENTER.
• To select number 23, press 2, 3, then
ENTER.
How to input the playing time
Press the Number buttons to input the
playing time, then press ENTER to start
playback at the selected elapsed playing
time.
• To input time “00:45:23,” press 4, 5, 2, 3,
then ENTER.
• To input time “01:23:45,” press 1, 2, 3, 4, 5,
then ENTER.
• To cancel a mis-entry, press CLEAR (C).
Each time you press the button, the last
entry will be erased.
To erase the on-screen bar, press DISPLAY
(D)/TIME.
When Search Mode is canceled
You can use the number buttons to directly select
the title number (for DVD) and track number (for
VCD and CD).
15
Page 16

REPEAT PLAYBACK
Playing Repeatedly
ENGLISH
SHIFT (S)
POWER
SUBTITLE AUDIO ANGLE
STEP
H/P VOL SETUP
ENTER
H/P VOL
123
456
789
SHIFT
CLEAR
S0C
DISPLAY
D
TIME
MENU
TITLE
RETURN
SLOW
ZOOM
REPEAT
A-B RPT
M
SEARCH MODE
REPEAT
A-B RPT
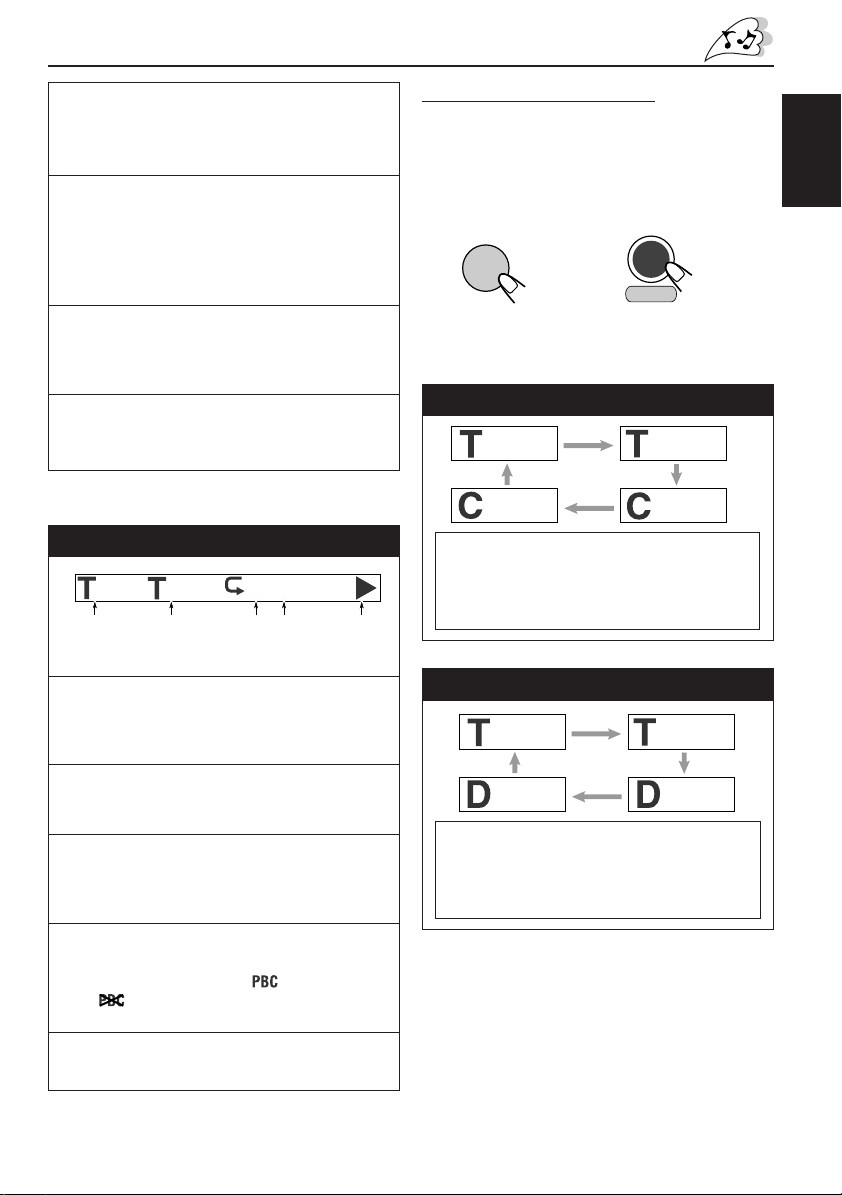
Repeat Play
You can repeat a chapter, track, or disc.
To repeat playback, press REPEAT ( )/A-B
RPT while playing or pausing.
REPEAT
A-B RPT
When a DVD is playing:
Chapter repeat
• Chapter repeat: Current chapter will be
• Title repeat: Current title will be repeated.
• Repeat OFF: Repeat play is canceled.
* On some DVDs, repeat play may be canceled by the
disc itself.
When a VCD is playing:
Track repeat
The on-screen bar appears.
Each time you press the button,
the repeat mode indication on the
on-screen bar changes as
follows:
Title repeat
C T
OFF
Repeat OFF
repeated.
Disc repeat
16
T D
OFF
Repeat OFF
• Track repeat: Current track will be
repeated.
• Disc repeat: All the tracks in the disc will
be repeated.
• Repeat OFF: Repeat play is canceled.
* While playing back a VCD using the PBC function,
Repeat play cannot be used.
Page 17

When a CD is playing*:
SHIFT
S
Disc repeat
Track repeat
TD
• Disc repeat: All the tracks in the disc will
be repeated.
• Track repeat: Current track will be
repeated.
* When you start playing back a CD, Disc repeat is
always activated first.
To erase the on-screen bar, press DISPLAY
(D)/TIME.
2
While holding SHIFT (S), press
REPEAT (
)/A-B RPT again to
select the end point.
REPEAT
and
A-B RPT
The repeat mode indication changes as
follows, and A-B Repeat begins.
The unit automatically locates point A and
starts repeated playback of the portion
between points A and B.
AB
ENGLISH
A-B Repeat
While playing, you can also select a portion you
want to repeat.
• When playing a DVD, A-B Repeat is not
performed between different chapters or
different titles.
1
While holding SHIFT (S), press
REPEAT (
start point.
SHIFT
S
The on-screen bar appears, and the repeat
mode indication changes as follows:
)/A-B RPT to select the
REPEAT
and
A-B RPT
A-
Ex.: When viewing a picture
A-
AB
To cancel A-B Repeat, press REPEAT ( )/A-B
RPT once while holding SHIFT (S).
To erase the on-screen bar, press DISPLAY
(D)/TIME.
If “ ”appears on the screen when
pressing REPEAT ( )/A-B RPT in step 1,
A-B Repeat cannot be used on the selected
portion.
• On some DVDs, A-B Repeat may not be
used even within the same chapter. This is
due to their disc structures, and not a
malfunction of the unit.
17
Page 18

ENGLISH
SPECIAL EFFECTS PLAYBACK
Slow-Motion Playback
You can enjoy slow-motion playback while playing
a DVD or VCD.
To start Slow-motion Playback, press SLOW
while playing a DVD or VCD.
SLOW
Each time you press the button,
the slow motion speed changes
as follows:
8
STEP
Cursors
(5∞ 3 2)
POWER
SUBTITLE AUDIO ANGLE
STEP
H/P VOL SETUP
ENTER
H/P VOL
123
456
789
SHIFT
CLEAR
S0C
DISPLAY
D
TIME
MENU
TITLE
RETURN
SLOW
ZOOM
REPEAT
A-B RPT
M
SEARCH MODE
SLOW
ZOOM
1
/
2
1
/
4
1
/
8
1
/
16
(Normal play)
To resume normal play
Press SLOW repeatedly until normal play
resumes.
Frame-by-frame Playback
You can advance the picture frame by frame.
1
Press 8 STEP once during play.
A still picture appears on the
screen.
STEP
2
Press 8 STEP repeatedly to advance
the picture frame by frame.
Each time you press the button,
the picture advances frame by
STEP
frame.
18
To resume normal play
Press 3.
Page 19

Zoom
You can zoom up a particular portion of the
picture while playing a DVD and VCD.
• You can select the start point of zoom and
adjust how precisely the zoomed-up portion is
moved. (See page 27.)
1
Press ZOOM to zoom in to the
picture.
Each time you press the button,
ZOOM
2x Zoom
the picture is enlarged as follows:
2x Zoom 4x Zoom
Canceled
2
2
Move the enlarged portion on the
screen, using Cursor buttons (5/∞/
3/2).
2
To cancel Zoom, press ZOOM repeatedly until
normal size screen appears.
ENGLISH
4
4x Zoom
Ex.: When 2x Zoom is selected
When playing a VCD
You can only select 2x Zoom.
2
19
Page 20

DVD
LANGUAGES
AUDIO: AUDIO: ENGLISHENGLISH
SUBTITLE: SUBTITLE: ENGLISHENGLISH
DISC MENU: DISC MENU: ENGLISHENGLISH
RETURN SELECT OK
ENTER
AUDIO
ENGLISHENGLISH HUNGARIANHUNGARIAN
JAPANESEJAPANESE ITALIANITALIAN
GERMANGERMAN YIDDISHYIDDISH
SPANISHSPANISH PORTUGUESEPORTUGUESE
FRENCHFRENCH RUSSIANRUSSIAN
HINDIHINDI CHINESECHINESE
ORIGINALORIGINAL OTHERS 0OTHERS 0
RETURN SELECT OK
ENTER
ENGLISH
Cursors
(
5∞
Numbers
SHIFT (S)
DVD SETUP MENU
POWER
SUBTITLE AUDIO ANGLE
DISPLAY
CLEAR
D
TIME
MENU
TITLE
RETURN
SLOW
ZOOM
REPEAT
A-B RPT
M
SEARCH MODE
)
123
456
789
SHIFT
S0C
STEP
H/P VOL SETUP
ENTER
H/P VOL
MENU
SETUP
ENTER
CLEAR
(C)
You can store the initial selection for subtitle
languages, audio languages (sound), and other
settings using the Setup Menu.
• DVD Setup menu can only be displayed while a
disc is not playing.
Setting initial audio language
You can select the initial language for audio
sound.
However, in the following cases, the original
language will be selected as the initial language
regardless of your setting.
– If the language you have selected is not
recorded on the disc.
– If the disc is programed to be played back in
the original language.
To go back to the previous screen during the
procedure, press RETURN .
1
While holding SHIFT (S), press
MENU/SETUP.
Setup Menu appears on the screen.
(“LANGUAGES” must be selected –
highlighted.)
SHIFT
and
S
2
Press ENTER.
MENU
SETUP
Language menu appears. (“AUDIO” must be
selected – highlighted.)
SETUP MENU
LANGUAGES
AUDIO
DISPLAY
RETURN SELECT OK
ENTER
20
ENTER
3
Press ENTER again.
Audio Language selecting screen appears.
ENTER
Page 21

4
LANGUAGES
AUDIO: AUDIO: ENGLISHENGLISH
SUBTITLE: SUBTITLE: ENGLISHENGLISH
DISC MENU: DISC MENU: ENGLISHENGLISH
RETURN SELECT OK
ENTER
SUBTITLE
ENGLISHENGLISH HUNGARIANHUNGARIAN
JAPANESEJAPANESE ITALIANITALIAN
GERMANGERMAN YIDDISHYIDDISH
SPANISHSPANISH PORTUGUESEPORTUGUESE
FRENCHFRENCH RUSSIANRUSSIAN
HINDIHINDI CHINESECHINESE
AUTOAUTO OTHERS 0OTHERS 0
RETURN SELECT OK
ENTER
Press Cursor ∞ (or 5) to select a
desired language, then press
ENTER.
• To use the original
H/P VOL
H/P VOL
ENTER
If a language you want is not listed on
the screen, follow the procedure below;
1 Press 5 or ∞ to select “OTHERS.”
2
Press ENTER.
3
Press the Number buttons to enter the
language code number you want.
• See “LANGUAGE CODES” on page
30.
Ex.: To select Finnish as the initial
language, press 7, 0, 7, 3, then
ENTER.
• To cancel a mis-entry, press CLEAR (C).
Each time you press the button, the last
entry will be erased.
language on the disc,
select “ORIGINAL.”
1
While holding SHIFT (S), press
MENU/SETUP.
Setup Menu appears on the screen.
(“LANGUAGES” must be selected –
highlighted.)
SHIFT
S
2
Press ENTER.
and
MENU
SETUP
SETUP MENU
LANGUAGES
AUDIO
DISPLAY
RETURN SELECT OK
Language menu appears.
ENTER
3
Press Cursor ∞ (or 5) to select
“SUBTITLE,” then press ENTER.
Subtitle Language selecting screen appears.
DVD
ENGLISH
ENTER
To erase the Setup Menu screen, press MENU/
SETUP while holding SHIFT (S).
Setting initial subtitle language
You can select the initial language for subtitles.
However, in the following cases, the original
language will be selected as the initial language
regardless of your setting.
– If the language you have selected is not
recorded on the disc.
– If the disc is programed to be played back in
the original language.
To go back to the previous screen during the
procedure, press RETURN .
H/P VOL
H/P VOL
4
Press Cursor ∞ (or 5) to select a
ENTER
desired language, then press
ENTER.
H/P VOL
H/P VOL
If a language you want is not listed on
the screen, see the left column.
To erase the Setup Menu screen, press MENU/
SETUP while holding SHIFT (S).
• To use the same
ENTER
language as the initial
audio language, select
“AUTO.”
21
Page 22

DVD
AUDIO
DIGITAL OUT:DIGITAL OUT: STREAMSTREAM
COMPRESSION: STANDARDCOMPRESSION: STANDARD
AUDIO DURING :AUDIO DURING : ONON
¡
RETURN SELECT OK
ENTER
Setting initial disc menu language
You can select the initial language for the disc
ENGLISH
menu.
However, in the following cases, the disc menu
will be displayed in the original language on the
disc regardless of your setting.
– If the language you have selected is not
recorded on the disc.
– If the disc is programed to be played back in
the original language.
To go back to the previous screen during the
procedure, press RETURN .
1
While holding SHIFT (S), press
MENU/SETUP.
Setup Menu appears on the screen.
(“LANGUAGES” must be selected –
highlighted.)
SHIFT
and
S
2
Press ENTER.
MENU
SETUP
Language menu appears.
ENTER
3
Press Cursor ∞ (or 5) to select
“DISC MENU,” then press ENTER.
Disc Menu Language selecting screen
appears.
H/P VOL
H/P VOL
ENTER
SETUP MENU
LANGUAGES
AUDIO
DISPLAY
RETURN SELECT OK
LANGUAGES
AUDIO: AUDIO: ENGLISHENGLISH
SUBTITLE: SUBTITLE: ENGLISHENGLISH
DISC MENU: DISC MENU: ENGLISHENGLISH
RETURN SELECT OK
DISC MENU
ENGLISH HUNGARIAN
JAPANESE ITALIAN
GERMAN YIDDISH
SPANISH PORTUGUESE
FRENCH RUSSIAN
HINDI CHINESE
RETURN SELECT OK
OTHERS 0
4
Press Cursor ∞ (or 5) to select a
desired language, then press
ENTER.
H/P VOL
H/P VOL
If a language you want is not listed on
the screen, see page 21.
To erase the Setup Menu screen, press MENU/
SETUP while holding SHIFT (S).
ENTER
Setting digital audio output
When connecting an amplifier or a decoder to the
DIGITAL OUT terminal, set it as recommended –
STREAM, LPCM, or OFF (see step 3).
To go back to the previous screen during the
procedure, press RETURN .
ENTER
1
While holding SHIFT (S), press
MENU/SETUP.
Setup Menu appears on the screen.
ENTER
ENTER
SHIFT
and
S
2
Press Cursor ∞ (or 5) to select
MENU
SETUP
“AUDIO,” then press ENTER.
Audio menu appears. (“DIGITAL OUT” must
be selected – highlighted.)
H/P VOL
H/P VOL
ENTER
LANGUAGES
AUDIO
DISPLAY
RETURN SELECT OK
SETUP MENU
ENTER
22
Page 23

DVD
AUDIO
DIGITAL OUT:DIGITAL OUT: STREAMSTREAM
COMPRESSION: STANDARDCOMPRESSION: STANDARD
AUDIO DURING :AUDIO DURING : ONON
¡
RETURN SELECT OK
ENTER
3
Press ENTER.
Digital Out selecting screen appears.
DIGITAL OUT
ENTER
4
Press Cursor ∞ (or 5) to select an
STREAMSTREAM
LPCMLPCM
OFFOFF
RETURN SELECT OK
ENTER
appropriate output, then press
ENTER.
H/P VOL
H/P VOL
• STREAM: Select this when connecting an
• LPCM: Select this when connecting an
• OFF: Select this when you use the
For more detailed information about the output
signals, see page 35.
To erase the Setup Menu screen, press MENU/
SETUP while holding SHIFT (S).
ENTER
amplifier or a decoder
compatible with Dolby Digital
and with DTS Digital Surround.
amplifier or a decoder
incompatible with Dolby Digital.
AUDIO L/R (analog) jacks on
the rear.
Only with this setting, you
can enjoy original highquality sound of disc whose
sampling frequency is 96 kHz
through the AUDIO L/R jacks.
(No signal will be output from
the DIGITAL OUT terminal.)
Setting compression
You can compress the dynamic range (difference
between the maximum and minimum sound
levels) while playing a source encoded with Dolby
Digital. This is useful when listening at a low
volume level.
To go back to the previous screen during the
procedure, press RETURN .
1
While holding SHIFT (S), press
MENU/SETUP.
Setup Menu appears on the screen.
SHIFT
and
S
2
Press Cursor ∞ (or 5) to select
MENU
SETUP
“AUDIO,” then press ENTER.
Audio menu appears.
H/P VOL
H/P VOL
3
Press Cursor ∞ (or 5) to select
ENTER
“COMPRESSION,” then press
ENTER.
Compression Rate selecting screen
appears.
H/P VOL
H/P VOL
ENTER
SETUP MENU
LANGUAGES
AUDIO
DISPLAY
FULLFULL
STNDARDSTNDARD
NIGHTNIGHT
ENTER
ENTER
RETURN SELECT OK
COMPRESSION
RETURN SELECT OK
ENGLISH
TO BE CONTINUED
23
Page 24

DVD
AUDIO
DIGITAL OUT:DIGITAL OUT: STREAMSTREAM
COMPRESSION: STANDARDCOMPRESSION: STANDARD
AUDIO DURING :AUDIO DURING : ONON
¡
RETURN SELECT OK
ENTER
4
Press Cursor ∞ (or 5) to select a
desired setting, then press ENTER.
ENGLISH
H/P VOL
H/P VOL
ENTER
2
Press Cursor ∞ (or 5) to select
“AUDIO,” then press ENTER.
Audio menu appears.
H/P VOL
H/P VOL
ENTER
• FULL: Select this not to apply
compression (full dynamic range
as recorded on the original disc).
• STANDARD: Select this to reduce the
dynamic range a little.
• NIGHT: Select this to apply compression
fully (useful at a low volume).
To erase the Setup Menu screen, press MENU/
SETUP while holding SHIFT (S).
Setting audio output during Low Speed Search
You can turn on or off the sound during Low
Speed Search on a DVD and VCD.
• Regardless of this setting, sound always comes
out during Low Speed Search on a CD.
To go back to the previous screen during the
procedure, press RETURN .
1
While holding SHIFT (S), press
MENU/SETUP.
Setup Menu appears on the screen.
SHIFT
S
and
MENU
SETUP
SETUP MENU
LANGUAGES
AUDIO
DISPLAY
RETURN SELECT OK
ENTER
3
Press Cursor ∞ (or 5) to select
“AUDIO DURING ¡,” then press
ENTER.
Sound on/off selecting screen appears.
ONON
OFFOFF
¡
ENTER
AUDIO DURING
H/P VOL
H/P VOL
4
Press Cursor ∞ (or 5) to select a
ENTER
RETURN SELECT OK
desired setting, then press ENTER.
H/P VOL
H/P VOL
• ON: Sounds come out during Low
• OFF: No sounds come out during Low
* Some sounds will be skipped during Low
Speed Search.
To erase the Setup Menu screen, press MENU/
SETUP while holding SHIFT (S).
ENTER
Speed Search*.
Speed Search.
24
Page 25

DVD
Setting monitor type
Set the monitor type when you watch a wide
screen picture.
• This setting takes effect only when playing back
a DVD recorded with 16:9 wide screen video
signal.
To go back to the previous screen during the
procedure, press RETURN .
1
While holding SHIFT (S), press
MENU/SETUP.
Setup Menu appears on the screen.
SHIFT
and
S
2
Press Cursor ∞ (or 5) to select
MENU
SETUP
“DISPLAY,” then press ENTER.
Display menu appears. (“MONITOR TYPE”
must be selected – highlighted.)
H/P VOL
H/P VOL
3
Press ENTER.
ENTER
Monitor type selecting screen appears.
ENTER
4
Press Cursor ∞ (or 5) to select a
desired setting, then press ENTER.
SETUP MENU
LANGUAGES
AUDIO
DISPLAY
RETURN SELECT OK
DISPLAY
MONITOR TYPE: 4:3 LB
CLOSE CAPTION: OFF
COLOR SCHEME: YELLOW
ZOOM SETUP
RETURN SELECT OK
MONITOR TYPE
4 : 3 LETTERBOX
4 : 3 PAN-SCAN
16 : 9 WIDE
RETURN SELECT OK
ENTER
ENTER
ENTER
• 4:3 LETTERBOX: Select this when
viewing on TV whose aspect ratio is 4:3.
While viewing a wide screen picture, the
black bars appear on the top and the
bottom of the screen.
ENGLISH
• 4:3 PAN-SCAN: Select this when viewing
on TV whose aspect ratio is 4:3. While
viewing a wide screen picture, the black
bars do not appear, however, the left and
right edge sides of the pictures will not be
shown on the screen.
• 16:9 WIDE: Select this when viewing on TV
whose aspect ratio is 16:9.
• Even if “4:3 PAN-SCAN” is selected, the
screen size may become “4:3 LETTERBOX”
while playing some DVDs. This depends on
how the DVD is programed and recorded.
• If a disc (or some portions of the disc) is
recorded with the video signals of 4:3
aspect ratio, this setting does not take
effect. The pictures are displayed with full
4:3 aspect ratio or with 4:3 Letter box.
H/P VOL
H/P VOL
ENTER
To erase the Setup Menu screen, press MENU/
SETUP while holding SHIFT (S).
25
Page 26

DVD
DISPLAY
MONITOR TYPE: 4:3 LB
CLOSE CAPTION: OFF
COLOR SCHEME: YELLOW
ZOOM SETUP
RETURN SELECT OK
ENTER
SHIFT
S
Setting closed caption
Some discs have closed captions.
You can set whether you will display the close
captions or not.
ENGLISH
• To show the closed captions on the TV, you
have to use a TV with a built-in closedcaption decoder, or to connect a closedcaption decoder in between this unit and a
TV.
To go back to the previous screen during the
procedure, press RETURN .
1
While holding SHIFT (S), press
MENU/SETUP.
Setup Menu appears on the screen.
SHIFT
and
S
2
Press Cursor ∞ (or 5) to select
MENU
SETUP
“DISPLAY,” then press ENTER.
Display menu appears.
H/P VOL
H/P VOL
3
Press Cursor ∞ (or 5) to select
ENTER
“CLOSE CAPTION,” then press
ENTER.
Closed-caption on/off selecting screen
appears.
SETUP MENU
LANGUAGES
AUDIO
DISPLAY
RETURN SELECT OK
DISPLAY
MONITOR TYPE: 4:3 LB
CLOSE CAPTION: OFF
COLOR SCHEME: YELLOW
ZOOM SETUP
RETURN SELECT OK
CLOSE CAPTION
4
Press Cursor ∞ (or 5) to select a
desired setting, then press ENTER.
H/P VOL
H/P VOL
• ON: Select this to display the close
• OFF: Select this not to display the close
To erase the Setup Menu screen, press MENU/
SETUP while holding SHIFT (S).
ENTER
captions when you start playback.
captions when you start playback.
Changing the color of the on-screen bar
You can change the color of the on-screen bar
displayed on the top of the screen, by selecting
the color – yellow, green, blue, or red.
ENTER
To go back to the previous screen during the
procedure, press RETURN .
1
While holding SHIFT (S), press
MENU/SETUP.
Setup Menu appears on the screen.
ENTER
and
MENU
SETUP
2
Press Cursor ∞ (or 5) to select
“DISPLAY,” then press ENTER.
Display menu appears.
LANGUAGES
AUDIO
DISPLAY
RETURN SELECT OK
SETUP MENU
ENTER
H/P VOL
H/P VOL
26
ENTER
OFFOFF
ONON
RETURN SELECT OK
ENTER
H/P VOL
H/P VOL
ENTER
Page 27

DISPLAY
MONITOR TYPE: 4:3 LB
CLOSE CAPTION: OFF
COLOR SCHEME: YELLOW
ZOOM SETUP
RETURN SELECT OK
ENTER
3
Press Cursor ∞ (or 5) to select
“COLOR SCHEME,” then press
ENTER.
H/P VOL
H/P VOL
ENTER
COLOR SCHEME
YELLOW
GREEN
BLUE
RED
DVD
Setting zoom preference
You can change the zoom setting to your
preference – where to start the zoom and how to
move the zoomed-up portion.
To go back to the previous screen during the
procedure, press RETURN .
ENGLISH
RETURN SELECT OK
4
Press Cursor ∞ (or 5) to select a
ENTER
desired color, then press ENTER.
H/P VOL
H/P VOL
To erase the Setup Menu screen, press MENU/
SETUP while holding SHIFT (S).
ENTER
1
While holding SHIFT (S), press
MENU/SETUP.
Setup Menu appears on the screen.
SHIFT
and
S
2
Press Cursor ∞ (or 5) to select
MENU
SETUP
SETUP MENU
LANGUAGES
AUDIO
DISPLAY
RETURN SELECT OK
“DISPLAY,” then press ENTER.
Display menu appears.
H/P VOL
H/P VOL
3
Press Cursor ∞ (or 5) to select
ENTER
“ZOOM SETUP,” then press ENTER.
Zoom Setup screen appears. (“START
POINT” must be selected – highlighted.)
ZOOM SETUP
H/P VOL
H/P VOL
ENTER
START POINT: CENTER
PAN SCALE: NORMAL
ENTER
RETURN SELECT OK
ENTER
TO BE CONTINUED
27
Page 28

DVD
4
Press ENTER again.
Start Point selecting screen appears.
ENGLISH
MENU
SETUP
RETURN SELECT OK
5
Press Cursor ∞ (or 5) to select a
desired setting, then press ENTER.
You can select the start point of zoom.
H/P VOL
H/P VOL
• UPPER LEFT: When you press ZOOM,
• CENTER: When you press ZOOM, the
• LAST POINT: When you press ZOOM, the
ENTER
the upper left portion of the picture is
zoomed up first.
center portion of the picture is
zoomed up first.
last zoomed-up portion of the picture
is zoomed up.
ZOOM START POINT
UPPER LEFT
CENTER
LAST POINT
7
Press Cursor ∞ (or 5) to select a
desired setting, then press ENTER.
You can select the movement amount
(speed) of the zoomed-up portion.
H/P VOL
ENTER
H/P VOL
• NORMAL:Select this to move at normal
• ROUGH: Select this to move faster to
• FINE: Select this to move slower to
To erase the Setup Menu screen, press MENU/
SETUP while holding SHIFT (S).
ENTER
speed to another portion of the
picture.
another portion of the picture.
(Rough movement)
another portion of the picture.
(Fine movement)
28
6
Press Cursor ∞ (or 5) to select “PAN
SCALE,” then press ENTER.
Pan Scale selecting screen appears.
ZOOM PAN SCALE
H/P VOL
H/P VOL
ENTER
NORMAL
ROUGH
FINE
RETURN SELECT OK
ENTER
Page 29

MAINTENANCE
Handling discs
How to handle discs
When removing a disc from its case, press down
the center holder of the case and lift the disc out,
holding it by the edges.
• Always hold the disc by the edges. Do not
touch its recording surface.
When storing a disc into
its case, gently insert the
disc around the center
holder (with the printed
surface facing up).
• Make sure to store
discs into the cases after use.
To keep discs clean
A dirty disc may not play
correctly. If a disc does
become dirty, wipe it with a
soft cloth in a straight line
from center to edge.
To play new discs
New discs may have some
rough spots around the
inner and outer edges. If
such a disc is used, this
unit may reject the disc.
To remove these rough
spots, rub the edges with
a pencil or ball-point pen, etc.
Center holder
Moisture condensation
Moisture may condense on the lens inside the
unit in the following cases:
• After starting the heater in the car.
• If it becomes very humid inside the car.
Should this occur, the unit may malfunction. In
this case, eject the disc and leave the unit turned
on for a few hours until the moisture evaporates.
CAUTIONS:
• Do not insert 8 cm discs (single discs) into the
loading slot. (Such discs cannot be ejected.)
• Do not insert any disc of unusual shape — like a
heart or flower; otherwise, it will cause a
malfunction.
• Do not expose discs to direct sunlight or any
heat source or place them in a place subject to
high temperature and humidity. Do not leave
them in a car.
• Do not use any solvent (for example,
conventional record cleaner, spray, thinner,
benzine, etc.) to clean discs.
ENGLISH
About mistracking:
Mistracking may result from driving on extremely
rough roads. This does not damage the unit and the
disc, but will be annoying.
We recommend that you stop disc play while
driving on such rough roads.
29
Page 30

LANGUAGE CODES
6565 Afar
6566 Abkhazian
6570 Afrikaans
6577 Amharic
6582 Arabic
ENGLISH
6583 Assamese
6589 Aymara
6590 Azerbaijani
6665 Bashkir
6669 Byelorussian
6671 Bulgarian
6672 Bihari
6673 Bislama
6678 Bengali; Bangla
6679 Tibetan
6682 Breton
6765 Catalan
6779 Corsican
6783 Czech
6789 Welsh
6865 Danish
6869 German
6890 Bhutani
6976 Greek
6978 English
6979 Esperanto
6983 Spanish
6984 Estonian
6985 Basque
7065 Persian
7073 Finnish
7074 Fiji
7079 Faeroese
7082 French
7089 Frisian
7165 Irish
7168 Scots Gaelic
7176 Galician
7178 Guarani
7185 Gujarati
7265 Hausa
7273 Hindi
7282 Croatian
7285 Hungarian
7289 Armenian
7365 Interlingua
7375 Knupiak
7378 Indonesian
7383 Icelandic
7384 Italian
7385 Inuktitut (Eskimo)
7387 Hebrew
7465 Japanese
7473 Yiddish
7487 Javanese
7565 Georgian
7575 Kazakh
7576 Greaenlandic
7577 Cambodian
7578 Kannada
7579 Korean
7583 Kashmiri
7585 Kurdish
7589 Kirghiz
7665 Latin
7678 Lingala
7679 Laothian
7684 Lithuainnian
7686 Latvian, Lettish
7771 Malagasy
7773 Maori
7775 Macedonian
7776 Malayalam
7778 Mongolian
7779 Moldavian
7782 Marathi
7783 Malay
7784 Maltese
7789 Burmese
7865 Nauru
7869 Nepali
7876 Dutch
7879 Norwegian
7967 Occitan
7977 Afan Oromo
7982 Oriya
8065 Punjabi
8076 Polish
8083 Pashto, Pushto
8084 Portuguese
8185 Ouechua
8277 Rhaeto-Romance
8278 Kirundi
8279 Romanian
8285 Russian
8287 Kinya, Rwanda
8365 Sanskrit
8368 Sindhi
8371 Sangro
8372 Serbo-Croatian
8373 Singhalese
8375 Slovak
8376 Slovenian
8377 Samoan
8378 Shona
8379 Somali
8381 Albanian
8382 Serbian
8383 Siswati
8384 Sesotho
8385 Sundanese
8386 Swedish
8387 Swahili
8465 Tamil
8469 Telugu
8471 Tajik
8472 Thai
8473 Tigrinya
8475 Turkmen
8476 Tagalog
8478 Setswana
8479 Tonga
8482 Turkish
8483 Tsonga
8484 Tatar
8487 Twi
8571 Uigur
8575 Ukrainian
8582 Urdu
8590 Uzbek
8673 Vietnamese
8679 Volapuk
8779 Wolof
8872 Xhosa
8979 Yoruba
9065 Zhuang
9072 Chinese
9085 Zulu
30
Page 31

GLOSSARY
4:3 Letterbox Screen
This is one method for displaying a wide screen
picture on a conventional sized (4:3) TV. While
viewing a wide screen picture, the black bars
appear on the top and the bottom of the screen.
4:3 Pan-Scan Screen
This is one method for displaying a wide screen
picture on a conventional sized (4:3) TV. While
viewing a wide screen picture, the left and right
edges of the pictures will not be shown on the
screen.
Dolby Digital
This is a digital audio compression technology
that was developed by Dolby Laboratories. Dolby
Digital encoding method (so-called discrete 5.1
channel digital audio format) records and
compresses the left front channel, right front
channel, center channel, left rear channel, right
rear channel, and LFE channel (total 6 channels,
but LFE channel is counted as 0.1 channel,
therefore called 5.1 channels) signals digitally.
Each channel is completely independent from
other channel signals to avoid interference,
therefore, you can obtain much better sound
quality with stereo and surround effects.
To reproduce these original surround signals, you
need to connect an amplifier or a decoder
compatible with Dolby Digital.
DTS Digital Surround
Another discrete 5.1 channel digital audio format,
available on CD, LD, and DVD software,
developed by Digital Theater Systems, Inc.
Compared to Dolby Digital, audio compression
rate is relatively low. This fact allows DTS Digital
Surround format to add breadth and depth to the
reproduced sounds. As a result, DTS Digital
Surround features natural, solid and clear sound.
To reproduce these surround signals, you need to
connect an amplifier or a decoder compatible
with DTS Digital Surround.
Linear PCM
This is a digital recording format that is used for
audio CDs.
Playback Control (VCD)
When a VCD has the PBC (Playback Control)
function, you can enjoy menu-driven operations
and high-resolution still pictures.
Sampling Frequency, Quantization Bits
When analog signals are converted into digital
signals, they are divided into many points and
digitized. This dividing method is called
“sampling.” The sampling frequency indicates
how many points one second is divided into – for
example, for CD sound, one second is divided
into 44100 points since its sampling frequency is
44.1 kHz. On the other hand, the number of
quantization bits indicates the volume size used
to memorize each divided point.
The larger this number is, the clearer the sound
can be reproduced.
Titles and Chapters (DVD)
A DVD is divided into several titles (large
divisions), and each title is divided into chapters
(smaller divisions).
These divisions are assigned their particular
numbers, so that they are easily accessed.
ENGLISH
Tracks (VCD, CD)
VCDs and CDs are divided into tracks. Each
track has its own number so that it is easily
accessed.
31
Page 32
LOCATION OF THE BUTTONS
Remote controller
ENGLISH
1
2
3
4
5
6
7
POWER
SUBTITLE AUDIO ANGLE
STEP
H/P VOL SETUP
ENTER
H/P VOL
123
456
789
SHIFT
CLEAR
S0C
DISPLAY
D
TIME
MENU
TITLE
RETURN
SLOW
ZOOM
REPEAT
A-B RPT
M
SEARCH MODE
8
9
p
q
w
e
r
t
y
u
i
o
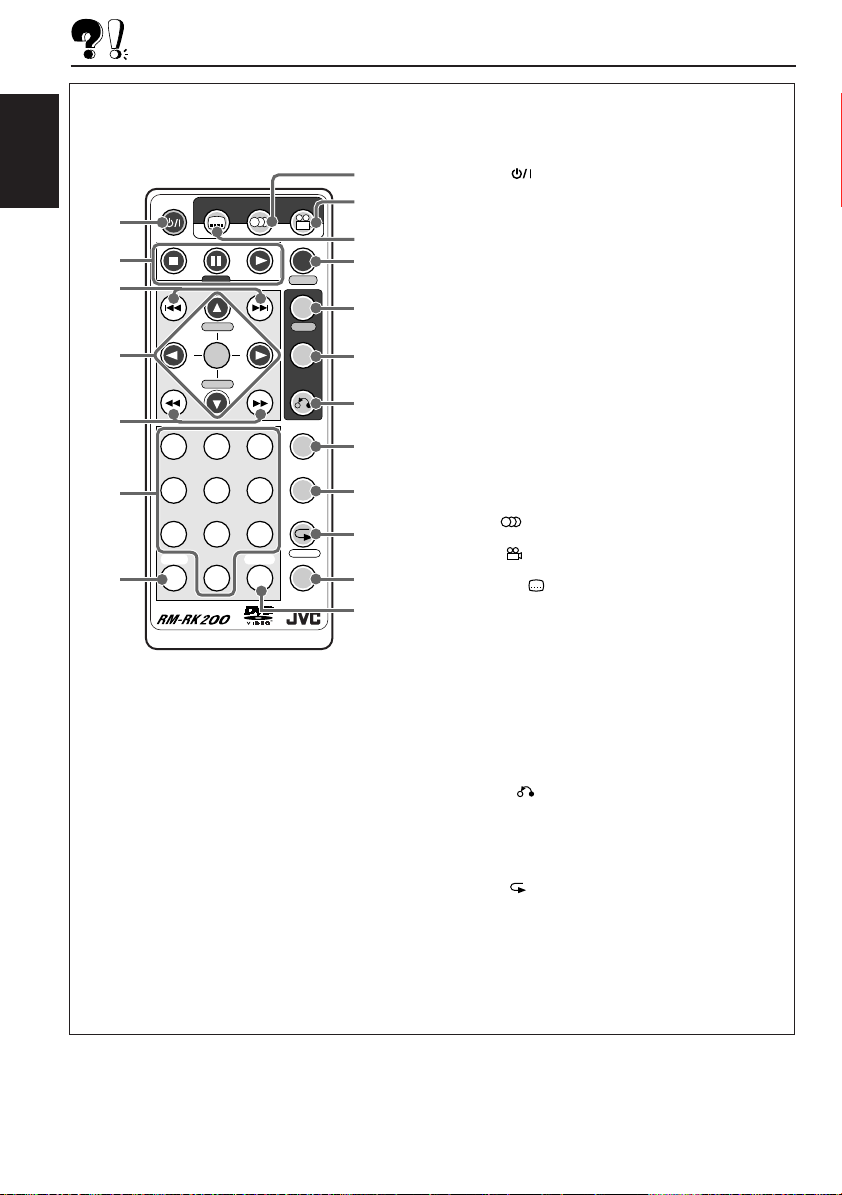
1 POWER (standby/on) button
2 Disc operation buttons
7 (stop), 8 (pause) STEP, 3 (play)
3 4 / ¢ (reverse search/forward search)
buttons
4 Menu operation buttons
5 / ∞ / 2 / 3 (cursors), ENTER
• 5 / ∞ also function as H/P V OL
(headphones volume) buttons while
pressed with SHIFT (S) button.
5 1 / ¡ (reverse/fast forward) buttons
6 Number buttons
7 SHIFT (S) button
8 AUDIO button
9 ANGLE button
p SUBTITLE button
q DISPLAY (D)/TIME button
• Also functions as TIME button while
pressed with SHIFT (S) button.
w MENU/SETUP button
• Also functions as SETUP button while
pressed with SHIFT (S) button.
e TITLE button
r RETURN button
t SLOW button
y ZOOM button
u REPEAT /A-B RPT button
• Also functions as A-B RPT button while
pressed with SHIFT (S) button.
i SEARCH MODE (M) button
o CLEAR (C) button
32
Page 33

Control panel
123 45
ENGLISH
OPEN
PHONES
6
DVD VCD/CD
789pqwert
1 Slot cover
2 Disc loading lamp
This lamp goes off when the disc type is
detected.
3 Loading slot
4 0 (eject) button
5 OPEN button
6 PHONES jack
7 (standby/on) button and lamp
The lamp always lights up when the
ignition key is on.
8 Disc lamps (DVD, VCD/CD)
These lamps indicate the type of the disc
loaded.
9 Remote signal reception lamp
This lamp flashes when receiving the
remote control signals.
p 3 (play) button and lamp
The lamp lights up when the power is on.
q 7 (stop) button and lamp
The lamp lights up when the power is on.
w 4 (reverse search) button and lamp
The lamp lights up when the power is on.
e ¢ (forward search) button and lamp
The lamp lights up when the power is on.
r Reset button
t Remote sensor
33
Page 34

TROUBLESHOOTING
What appears to be trouble is not always serious. Check the following points before calling a service
center.
Symptoms
• Playback cannot start after
ENGLISH
inserting a disc.
• Sound and picture are
sometimes interrupted or
distorted.
• Sound cannot be heard from
the speakers.
• No picture appears on the
screen.
• The left and right edges of the
picture are missing on the
screen.
• No subtitle appears on the
display though you have
selected the initial subtitle
language.
• Audio language is different
from the one you have
selected as the initial audio
language.
• Disc can be neither played
back nor ejected.
• This unit does not work at all.
Causes
The disc is inserted upside
down.
You are driving on rough roads.
The disc is scratched.
Connections are incorrect.
The volume is turned to the
minimum level.
Connections are incorrect.
You are playing a disc with DTS
Digital Surround.
The video cord is not connected
correctly.
An incorrect input has been
selected on the TV or monitor.
“4:3 PAN-SCAN (PS)” is
selected when viewing on a
conventional TV (aspect ratio
4:3).
The built-in microcomputer may
function incorrectly due to noise,
etc.
The built-in microcomputer may
function incorrectly due to noise,
etc.
Remedies
Insert the disc correctly.
Stop playing a disc while driving
on rough roads.
Change the disc.
Check the cords and
connections.
Adjust it to the optimum level.
Check the cords and
connections.
This unit cannot output DTS
sound without connecting a
decoder compatible with DTS
Digital Surround.
Connect the video cord
correctly.
Select a correct input on the TV
or monitor.
Select “4:3 LETTERBOX (LB).”
(See page 25.)
Some DVDs are programed to
always display no subtitle
initially. If this happens, press
SUBTITLE after starting
play.
Some DVDs are programed to
always use the original
language initially.
If this happens, press AUDIO
after starting play.
Turn off the power, then turn it
again.
Press the reset button to reset
the unit. (See page 2.)
34
Page 35

SPECIFICATIONS
AUDIO SECTION
Frequency Response:
DVD, fs=48 kHz: 16 Hz to 22 000 Hz
DVD, fs=96 kHz: 16 Hz to 44 000 Hz
VCD, CD: 16 Hz to 20 000 Hz
Dynamic Range: 93 dB
Signal-to-Noise Ratio: 95 dB
Pickup wave length: 650 nm
Wow and Flutter: Less than measurable
limit
Audio output level:
Analog (AUDIO L/R): 1.5 Vrms
Digital (DIGITAL OUT):
Signal wave length: 660 nm
Output level: –21 dBm to –15 dBm
VIDEO SECTION
Color system: NTSC
Video output (composite):1 Vp-p/75 Ω
GENERAL
Power Requirement:
Operating Voltage: DC 14.4 V
(11 V to 16 V allowance)
Grounding System: Negative ground
Allowable Operating Temperature:
0°C to +40°C
(32°F to 104°F)
Dimensions (W x H x D):
Unit Size:
178 mm x 50.5 mm x 167 mm
(7-1/16" x 2" x 6-5/8")
Installation Size:
182 mm x 52 mm x 150 mm
(7-3/16" x 2-1/16" x 5-15/16")
Panel Size: 188 mm x 58 mm x 13.4 mm
(7-7/16" x 2-5/16" x 9/16")
Mass: 1.4 kg (3.1 lbs) (excluding accessories)
Design and specifications subject to change without
notice.
If a kit is necessary for your car, consult a
telephone directory for the nearest car audio
speciality shop.
ENGLISH
Output signals through the DIGITAL OUT terminal
They differ depending on the “DIGITAL OUT” setting on the Setup Menu.
DIGITAL OUT
Playback Disc
DVD 48 kHz, Linear PCM
96 kHz, Linear PCM
with Dolby Digital
with DTS Digital Surround
Video CD, Audio CD
Auido CD with DTS
STREAM
48 kHz, Linear PCM
48 kHz, Linear PCM
Dolby Digital bitstream
DTS bitstream
44.1 kHz, 16 bit Linear PCM
DTS bitstream
Output Signals
48 kHz, Linear PCM
48 kHz, Linear PCM
Down mix (2 channels)
None
44.1 kHz, 16 bit Linear PCM
DTS bitstream
LPCM OFF
None
None
None
None
None
None
35
Page 36

http://www.jvcmobile.c
Visit us on-line for
Technical Support & Customer Satisfaction Survey .
US RESIDENTS ONLY
om
Having TROUBLE with operation?
Please reset your unit
Refer to page of How to Reset
Still having trouble??
USA ONLY
Call 1-800-252-5722
http://www.jvcservice.com
We can help y ou!
EN, SP, FR
VICTOR COMPANY OF JAPAN, LIMITED
Printed in Japan
JVC
0201MNMMDWOZK
 Loading...