

Page 1

ENGLISH
DIGITAL MEDIA CAMERA
Advanced Operation Manual
LYT1366-001A
This manual includes the advanced operations of the camera.
To read the contents, use the table of the contents on the left, or click the major titles below.
ADVANCED RECORDING
ADVANCED PLAYBACK
MANAGING FILES
PLAY LIST
PRINTING
MENU SETTINGS
© 2004 Victor Company of Japan, Limited
0904HOH-AL
Page 2

Zoom
MODE: /
Use the zoom function for close-up or wide-angle shooting. You can zoom in up to 10x by
using the optical zoom.
To zoom in
Slide the zoom lever towards [T] (telephoto).
To zoom out
Slide the zoom lever towards [W] (wide-angle).
The further you slide the zoom lever, the quicker the zoom action becomes.
● Zoom magnification over 10x is done through digital image processing, and is
therefore called digital zoom. Digital zooming is possible up to 200x. Set [ZOOM] to
[40X] or [200X].
NOTES:
● Focusing may become unstable during zooming. In this case, set the zoom before
recording and lock the focus by using the manual focus, then zoom in or out during
recording.
● During digital zoom, the quality of image may suffer.
● Macro shooting is possible as close as approx. 5 cm (2") to the subject when the
zoom lever is set all the way to [W].
● When you zoom into a subject close to the lens, the camera may automatically zoom
out depending on the distance to the subject. In this case, set [TELE MACRO] to [ON].
© 2004 Victor Company of Japan, Limited
Page 3
Flash
MODE:
You can use the flash for still image recording. The flash mode can be changed as required.
Set the power switch to .
Press MODE to select .
Press ( ). The menu appears.
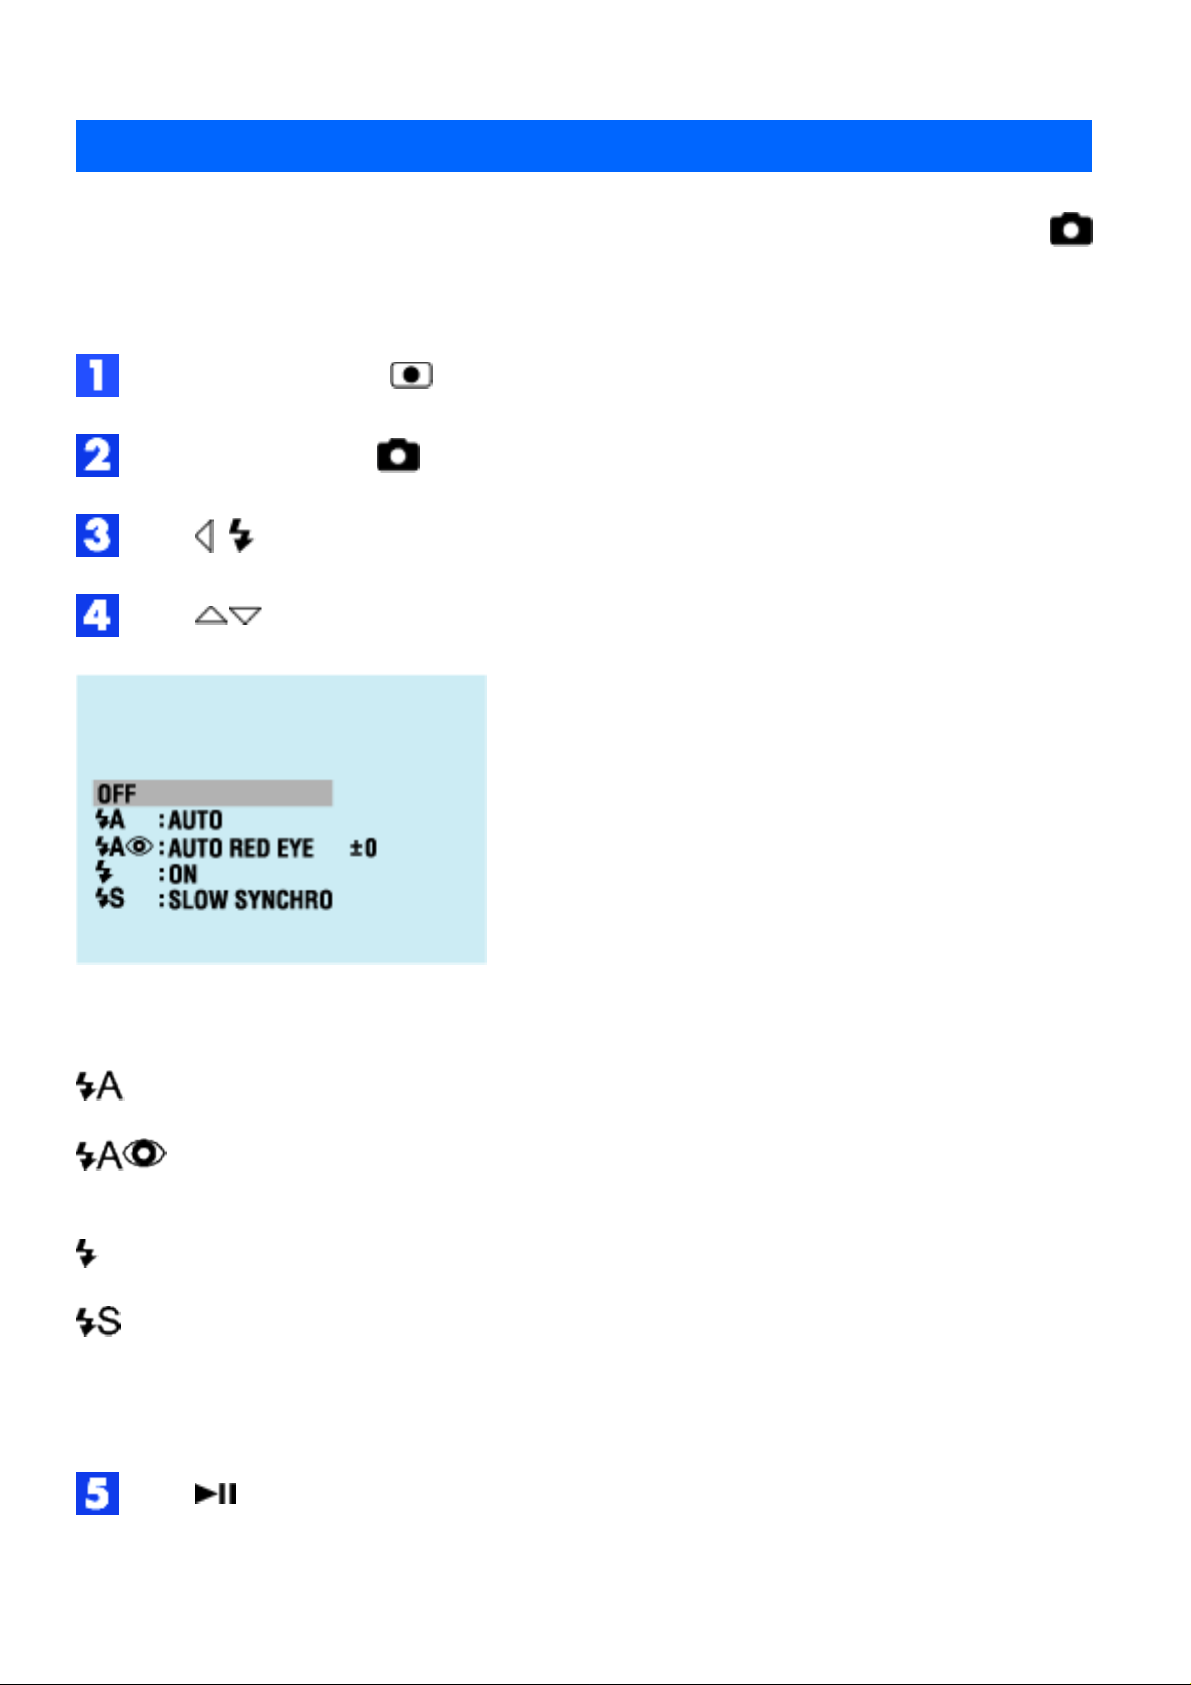
Press to select the desired flash mode.
[OFF]: The flash does not fire.
AUTO: The flash fires automatically when the surroundings are dark.
AUTO RED-EYE: The flash fires automatically but reduces the red-eye
phenomenon of the subject's eyes.
ON: The flash fires regardless of the shooting condition.
SLOW SYNCHRO: The flash fires regardless of the shooting condition. The shutter
speed becomes slower in this mode, so the background can be also brightened.
[ ] = Factory preset
Press . The selected mode indicator appears.
To adjust the flash brightness
Page 4

Press after selecting a flash mode in step 4, then select the desired setting by pressing
.
● The adjustment range is -3 to +3.
NOTES:
● The flash does not fire during continuous shooting.
● If the flash is not bright enough, set [GAIN] to [160].
© 2004 Victor Company of Japan, Limited
Page 5
Manual Settings in MSET Menu
MODE: /
You can use manual recording functions easily by selecting items in the MSET menus.
How To Select a Menu Item
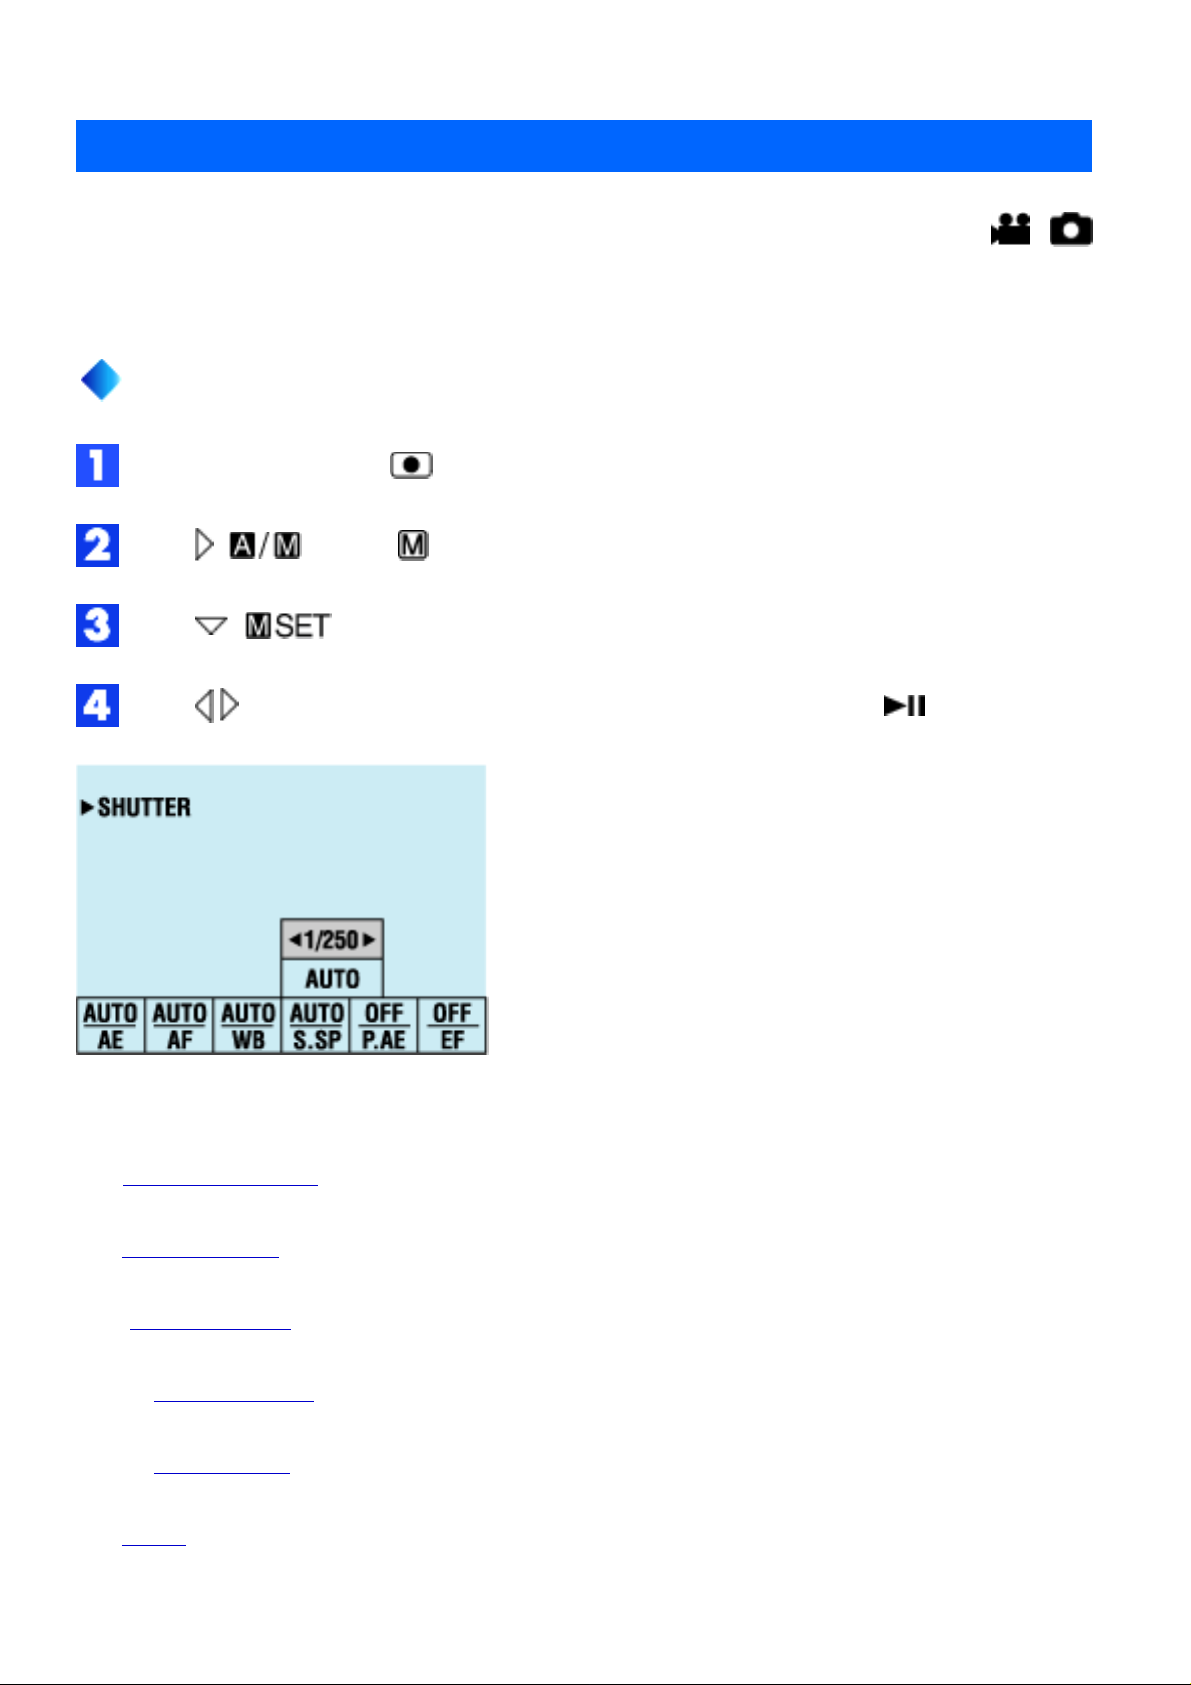
Set the power switch to .
Press ( ) so that is displayed.
Press ( ). The menu appears.
Press to select a desired item from the MSET menu, then press .
There are 6 items in the MSET menu.
AE: Manual Exposure
AF: Manual Focus
WB: White Balance
S. SP: Shutter Speed
P. AE: Program AE
EF: Effect
Page 6

Press (or ) to select a setting, then press .
Press ( ). The menu disappears.
NOTES:
● While recording is in progress, [S. SP], [P. AE] and [EF] cannot be set even if
( ) is pressed.
● It is not possible to set [P. AE] and [S. SP] simultaneously.
© 2004 Victor Company of Japan, Limited
Page 7
Manual Exposure
MODE: /
Manual exposure is recommended in the following situations:
● When shooting using reverse lighting or when the background is too bright.
● When shooting on a reflective natural background such as at the beach or when
skiing.
● When the background is overly dark or the subject is bright.
Select [AE] in the MSET menu. (How To Select a Menu Item)
If [AUTO] is selected, press . (video mode only)
To brighten the image, press . To darken the image, press .
Adjustment range
For video recording: -6 to +6 or AUTO (automatic exposure)
For still image recording: -2.0 to +2.0 (EV)
Press . The setting is completed.
Press ( ) to close the MSET menu.
To lock the exposure
After step 5, press and hold for over 2 seconds. The indicator appears.
NOTES:
● You cannot use the manual exposure at the same time when [P. AE] is set to
[SPOTLIGHT] or [SNOW], or with backlight compensation.
● If the adjustment does not cause any visible change in brightness, set [GAIN UP] to
[ON].
Page 8

© 2004 Victor Company of Japan, Limited
Page 9
Manual Focus
MODE: /
The camera's Full Range AF system offers continuous focusing ability from close-up to
infinity. However, the correct focus may not be obtained depending on the shooting
condition. In this case, use the manual focus mode.
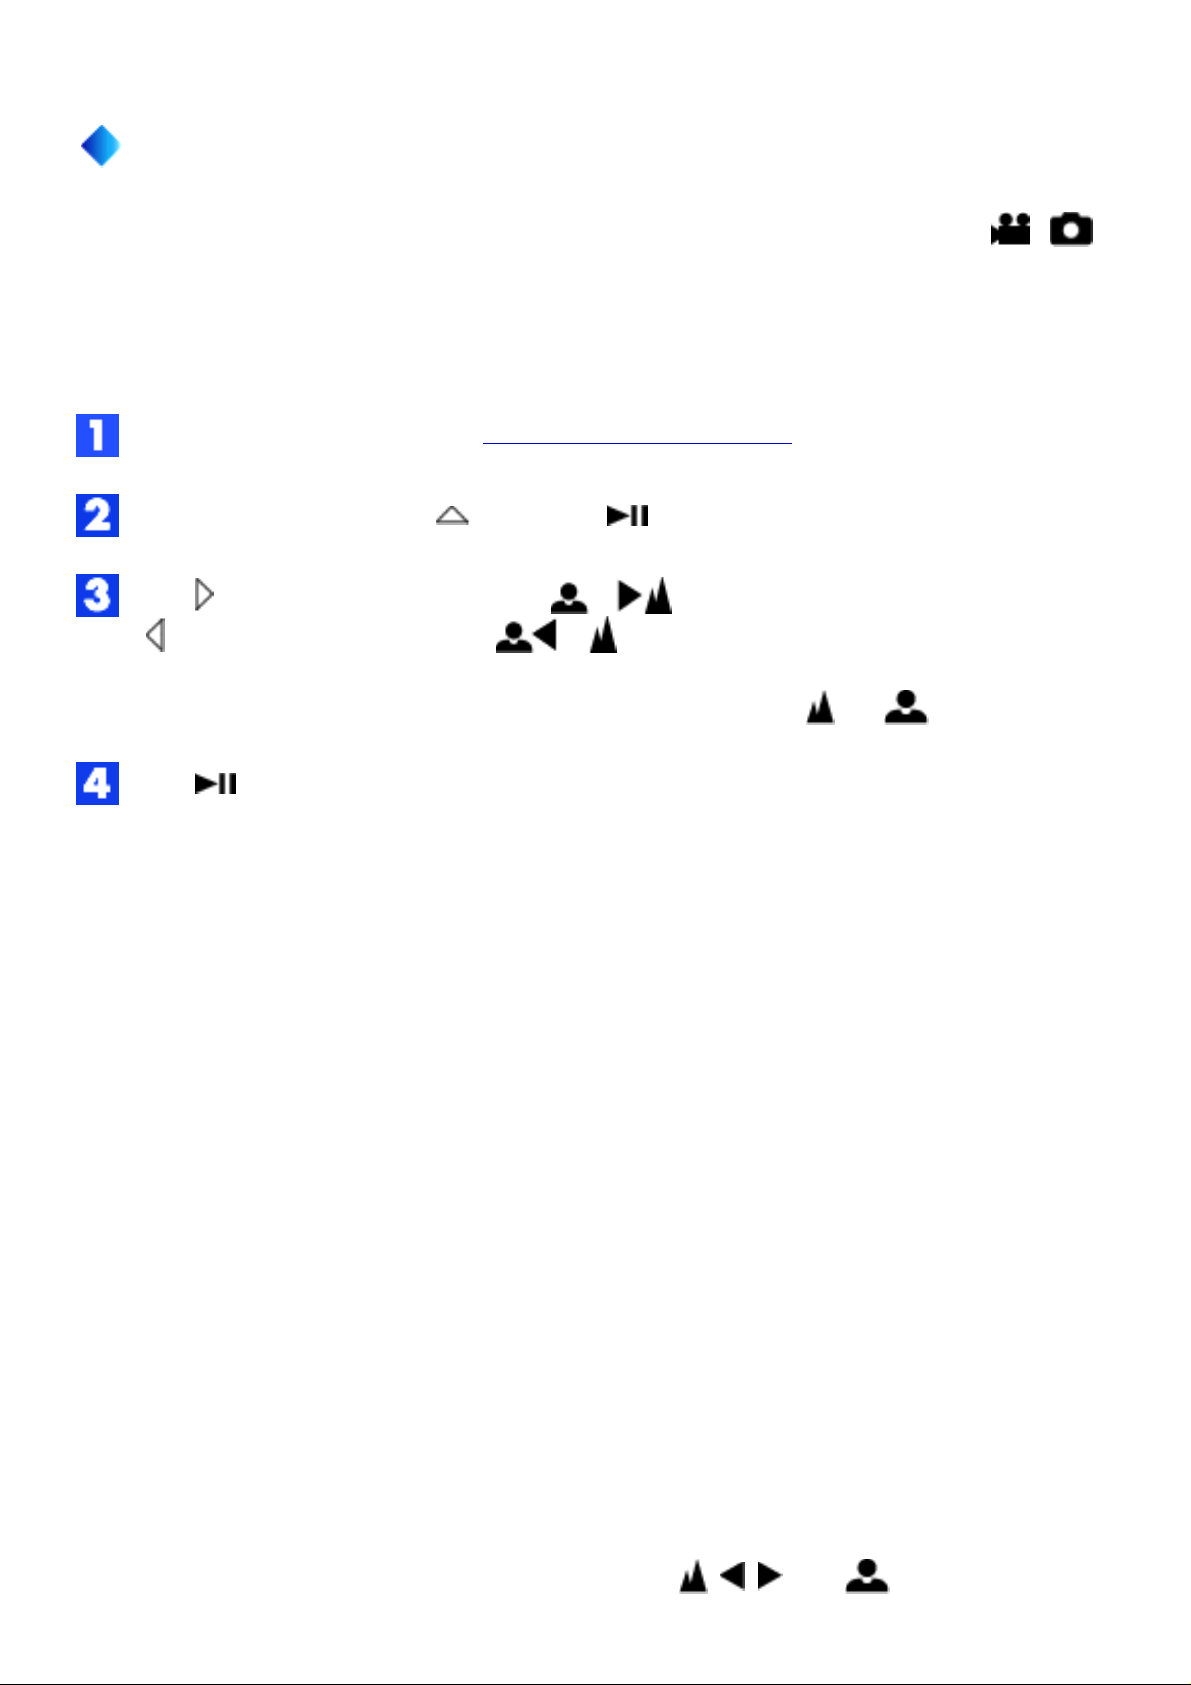
Select [AF] in the MSET menu. (How To Select a Menu Item)
If [AUTO] is selected, press , then press .
Press to focus on a further subject. ( )
Press to focus on a closer subject. ( )
● When the focus level cannot be adjusted any further or closer, [ ] or [ ] will blink.
Press . The setting is completed.
To return to automatic focus
Select [AUTO] in step 2.
Manual focus is recommended in situations listed below;
● When two subjects overlap in the same scene.
● When illumination is low.*
● When the subject has no contrast (difference in brightness and darkness), such as a
flat, one-color wall, or a clear, blue sky.*
● When a dark object is barely visible in the display.*
● When the scene contains minute patterns or identical patterns that are regularly
repeated.
● When the scene is affected by sunbeams or light reflecting off the surface of a body
of water.
● When shooting a scene with a high-contrast background.
* The following low-contrast warnings appear blinking: , , , and .
Page 10

© 2004 Victor Company of Japan, Limited
Page 11
White Balance
MODE: /
The white balance is usually adjusted automatically for correctness of the color
reproduction under various lighting. However, you can also select the following modes
according to the shooting situations.
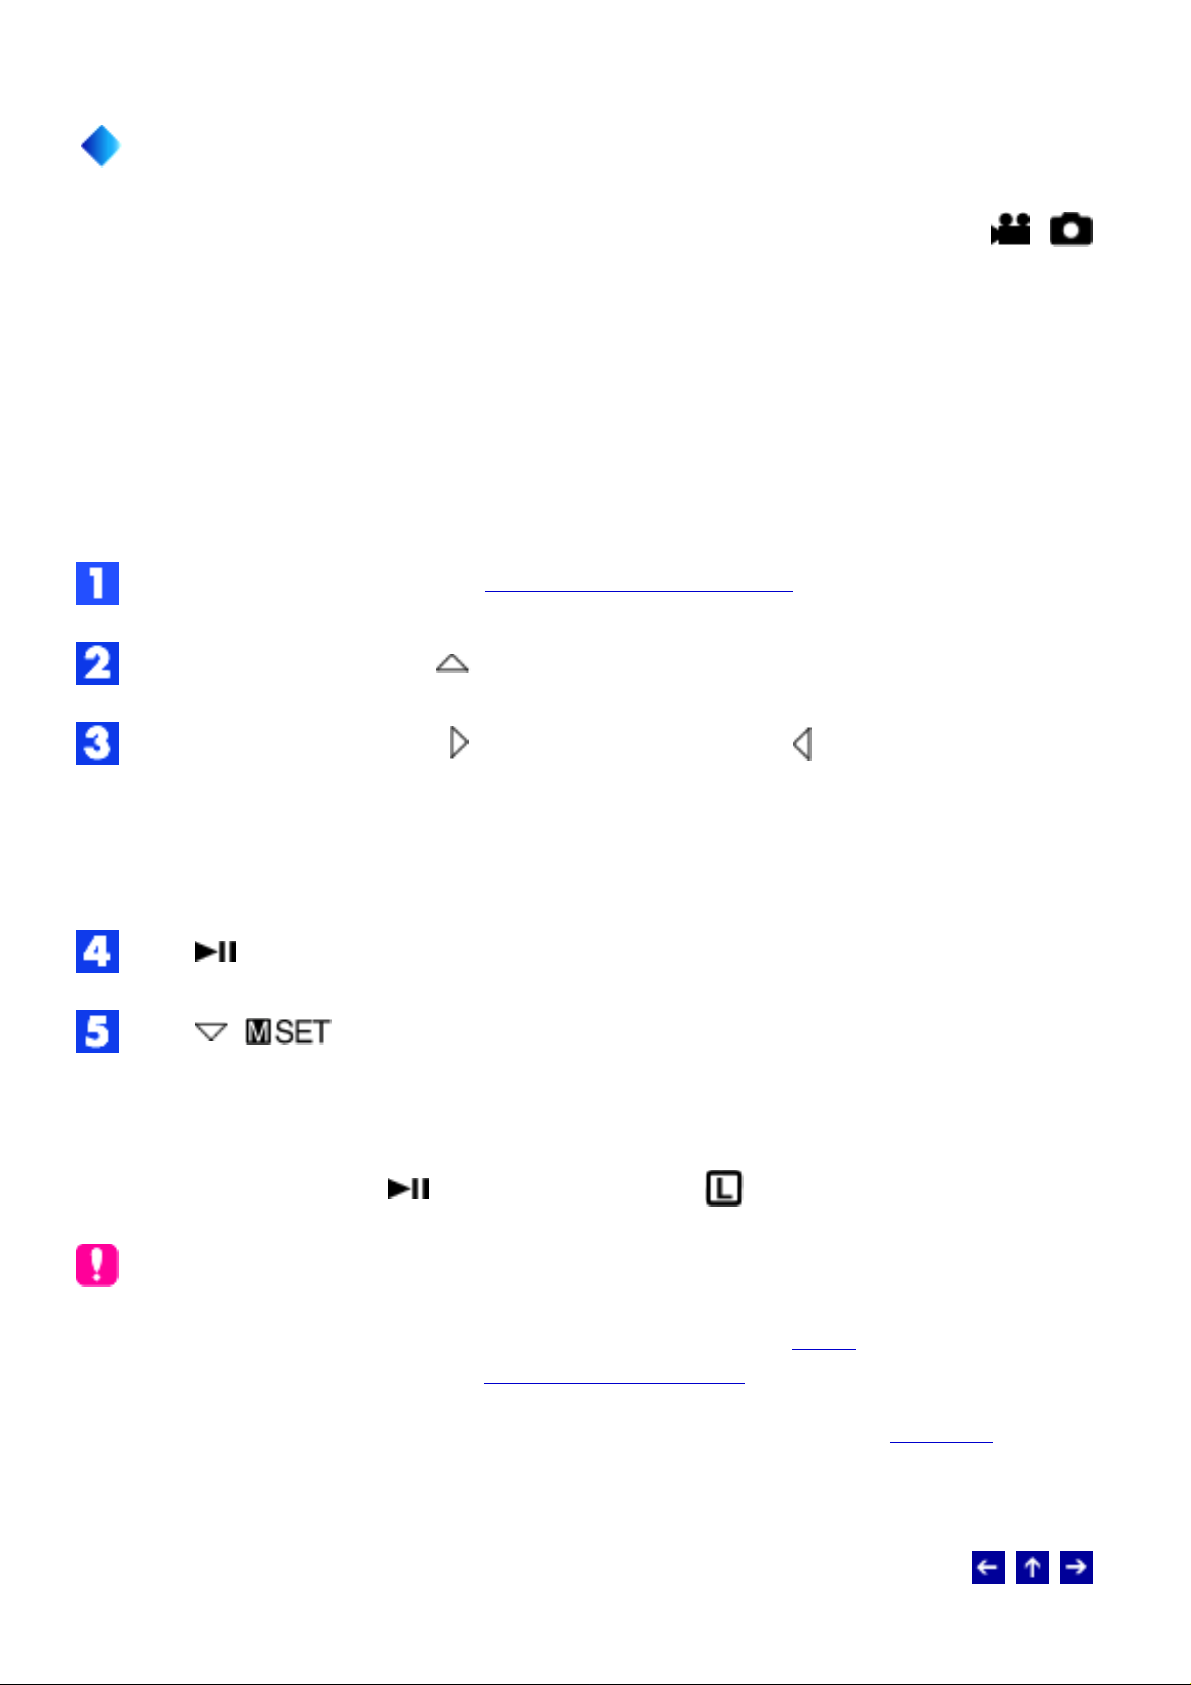
Select [WB] in the MSET menu. (How To Select a Menu Item)
Press to select the desired mode.
MWB: For adjusting the white balance manually depending on the light source.
(Manual White Balance Adjustment)
FINE: When shooting outdoors on a sunny day.
CLOUD: When shooting outdoors on a cloudy day.
HALOGEN: When a video light or similar type of lighting is used.
Press . The setting is completed.
Press ( ) to close the MSET menu.
To return to automatic white balance
Select [AUTO] in step 2.
Manual White Balance Adjustment
Select [MWB] in WB menu.
Hold a sheet of plain white paper in front of the subject. Adjust zoom or position
yourself so that the white paper fills the screen.
Press and hold until begins blinking then stops blinking.
Page 12

NOTES:
● In step 2, it may be difficult to focus on the white paper. In such a case, adjust with
manual focusing.
● A subject can be shot under various types of lighting conditions indoors (natural,
fluorescent, candlelight, etc.). Because the color temperature is different depending
on the light source, the subject tint will differ depending on the white balance settings.
Use this function for a more natural result.
● Once you adjust white balance manually, the setting is retained even if the power is
turned off or the battery is removed.
© 2004 Victor Company of Japan, Limited
Page 13
Shutter Speed
You can adjust the shutter speed manually.
Select [S. SP] in the MSET menu. (How To Select a Menu Item)
Press to select the desired mode.
The shutter speed can be selected from 1/2 to 1/4000 second.
1/2
1/4
1/8
1/15
1/30
Slow shutter speed can blur the subject to give the impression
of flowing motion.
MODE: /
1/60 (NTSC)
1/50 (PAL)
1/100 (NTSC)
1/120 (PAL)
1/250
1/500
1/1000*
1/2000*
1/4000*
* Not available for still image recording. If the flash is used, 1/500 is also not available.
Press . The setting is completed.
The shutter speed is fixed at 1/60 (or 1/50) second. Black bands
that usually appear when shooting a TV screen become
narrower.
The shutter speed is fixed at 1/100 (or 1/120) second. The
flickering that occurs when shooting under a fluorescent light or
mercury-vapor lamp is reduced.
Fast shutter speed allows fast-moving subject to be captured
one frame at a time vividly. Use these settings when an
automatic adjustment does not work well by SPORTS mode in
Program AE.
Press ( ) to close the MSET menu.
To return to automatic shutter speed
Select [AUTO] in step 2.
Page 14

© 2004 Victor Company of Japan, Limited
Page 15
Program AE
MODE: /
You can use program AE settings for specific shooting situations.
Select [P. AE] in the MSET menu. (How To Select a Menu Item)
Press to select the desired mode.
SPORTS: Fast shutter speed allows fast-moving subject to be captured one frame at a
time vividly. The shutter speed is set at 1/250 to 1/4000 second automatically.
SNOW: Compensates for subjects that may appear too dark when shooting in
extremely bright surroundings such as in the snow.
SPOTLIGHT: Compensates for subjects that may appear too bright when shooting
under extremely strong direct lighting such as spot lights.
TWILIGHT: Makes evening scenes look more natural.
Press . The setting is completed.
Press ( ) to close the MSET menu.
To turn off the program AE function
Select [OFF] in step 2.
© 2004 Victor Company of Japan, Limited
Page 16
Effect
MODE: /
You can add special effects to your recording images.
Select [EF] in the MSET menu. (How To Select a Menu Item)
Press to select the desired mode.
SEPIA: The image has a brownish tint like old photos.
MONOTONE: The image becomes black and white like old movies.
CLASSIC FILM*: The image has an old movie atmosphere by the effect of skipping
frames.
STROBE*: The image looks like a series of consecutive snapshots.
* Not available for still image recording.
Press . The setting is completed.
Press ( ) to close the MSET menu.
To turn off the effect
Select [OFF] in step 2.
© 2004 Victor Company of Japan, Limited
Page 17
Backlight Compensation
MODE: /
Backlight Compensation brightens the subject quickly. With simple operation, dark portions
of the subject are brightened by increasing the exposure.
Set the power switch to .
Press ( ) so that is displayed.
Press ( ) so that the indicator appears.
To cancel backlight compensation
Press ( ) twice so that the indicator disappears.
© 2004 Victor Company of Japan, Limited
Page 18
Spot Exposure Control
MODE: /
Selection of a spot metering area enables more precise exposure compensation. You can
select one of the three metering areas.
Set the power switch to .
Press ( ) so that is displayed.
Press ( ) twice so that the indicator appears.
● The spot metering area frame appears at the center.
Press to select the desired spot metering area frame.
Press . The setting is completed.
To lock the exposure
After step 4, press and hold for over 2 seconds. The indicator appears.
To cancel spot exposure control
Press ( ) once so that the indicator disappears.
NOTES:
● Spot exposure control may not be possible when some other functions are activated.
● Depending on the shooting location and condition, optimum result may not be
attained.
© 2004 Victor Company of Japan, Limited
Page 19
Index Display
MODE: / /
You can view multiple files stored in a recording medium at a time. This browsing capability
makes it easy to locate a particular file you want.
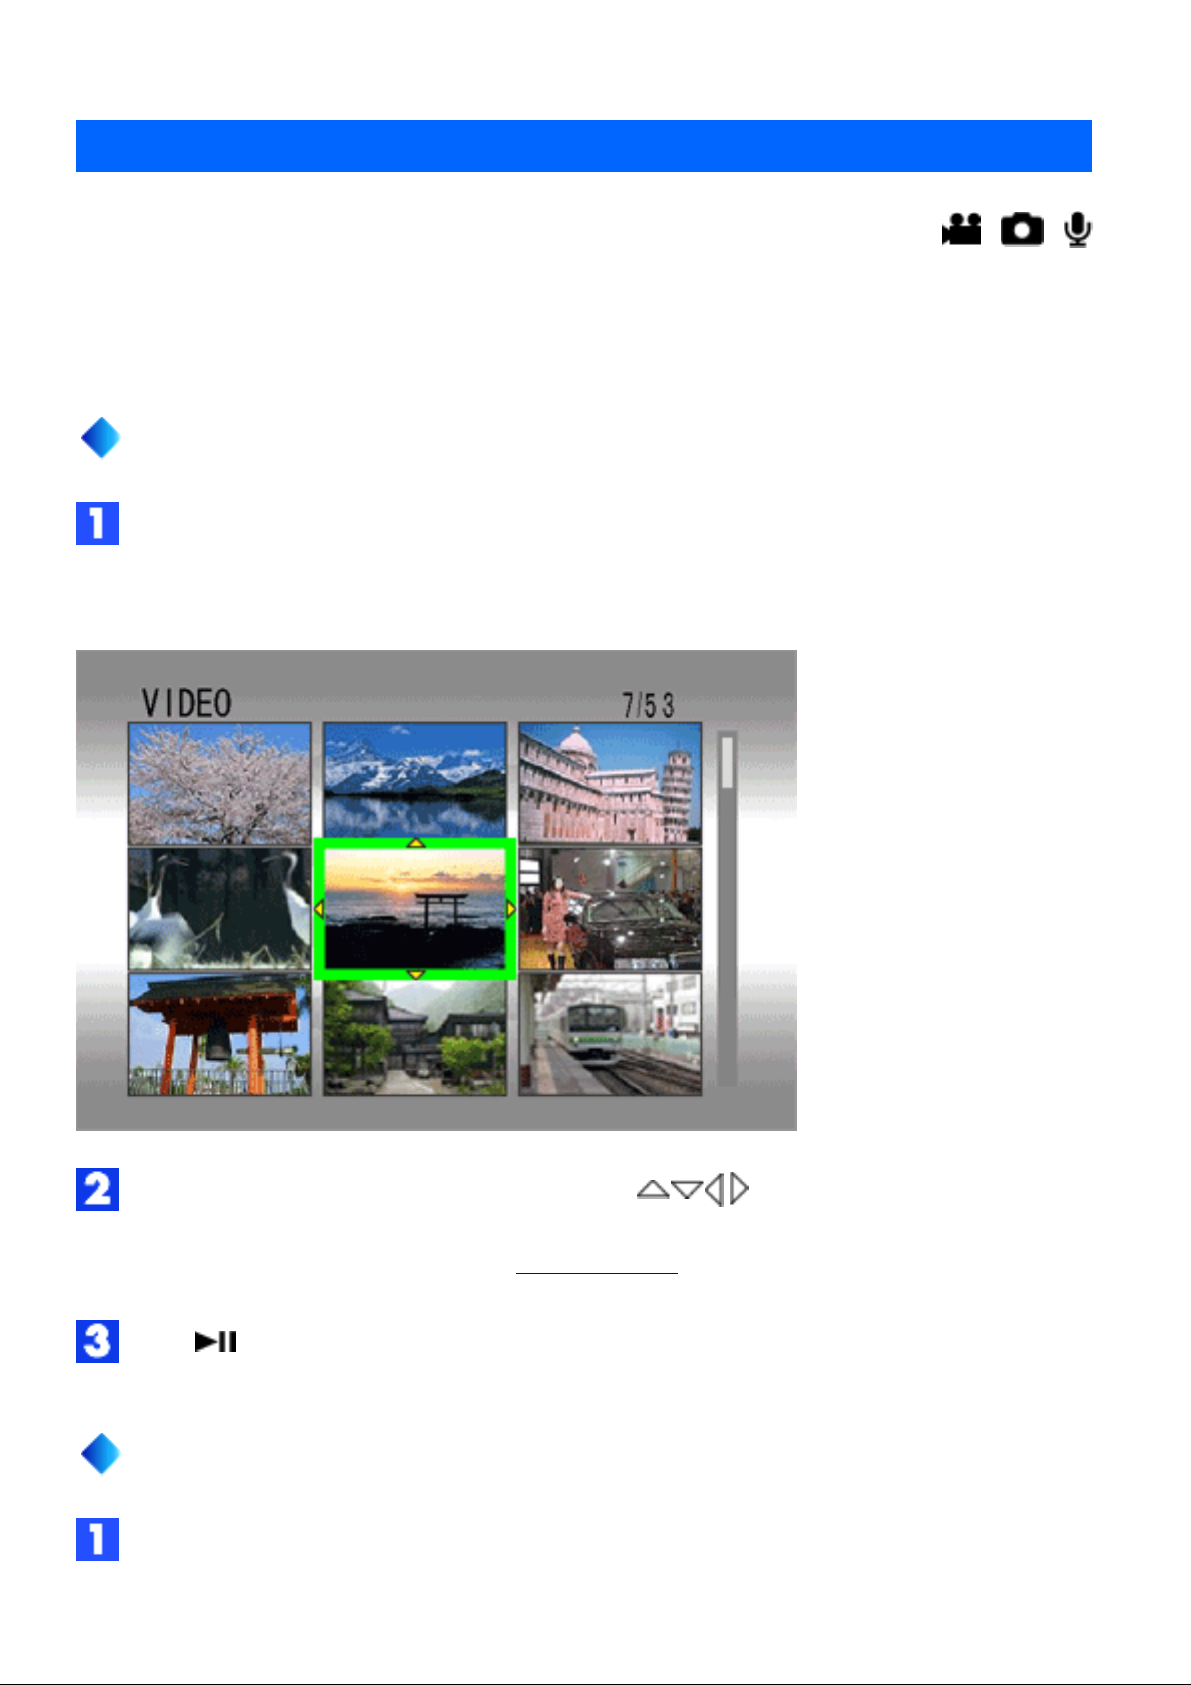
Index Display of Video Files
Slide the zoom lever to [W] while playback is paused.
● The display switches to the index screen.
Move the frame to the desired file by pressing .
● Pressing INFO displays the selected file information.
Press to start playback.
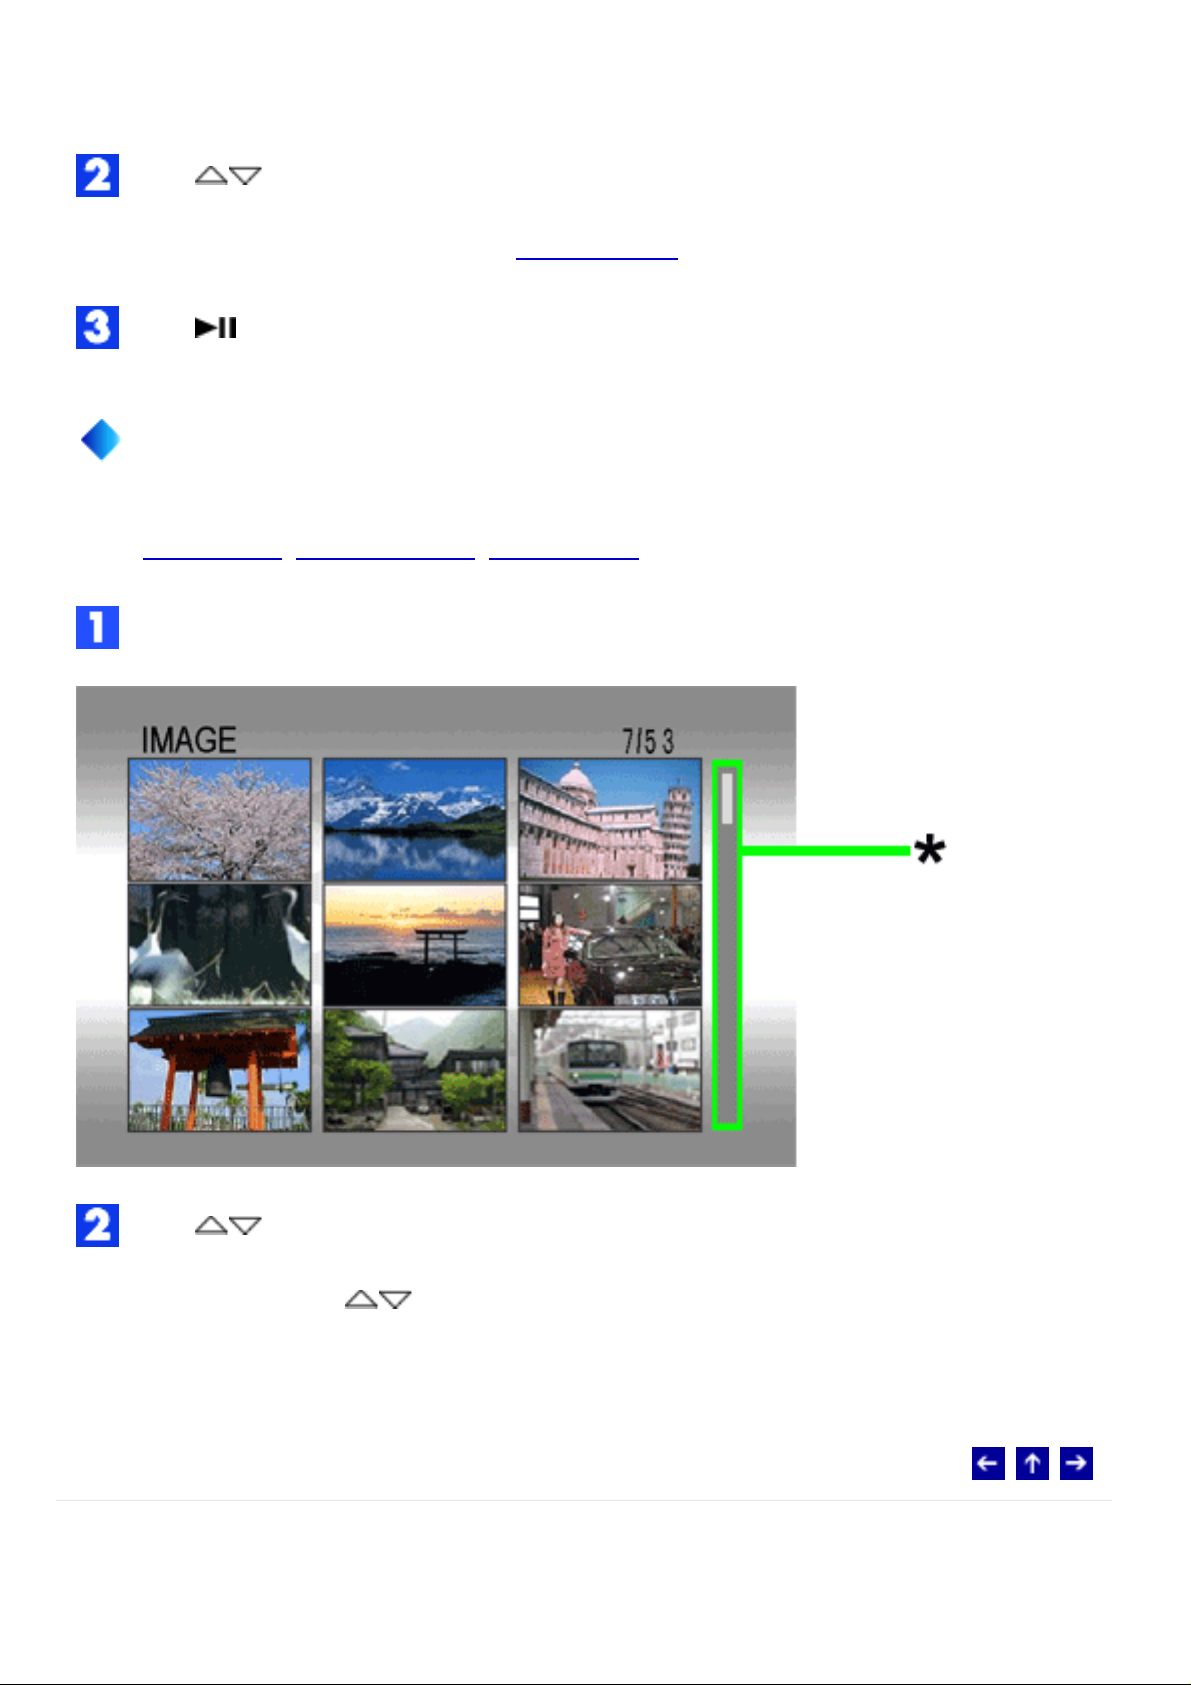
Index Display of Still Image Files
Slide the zoom lever to [W] when a recorded image is displayed.
● The display switches to the index screen.
Page 20
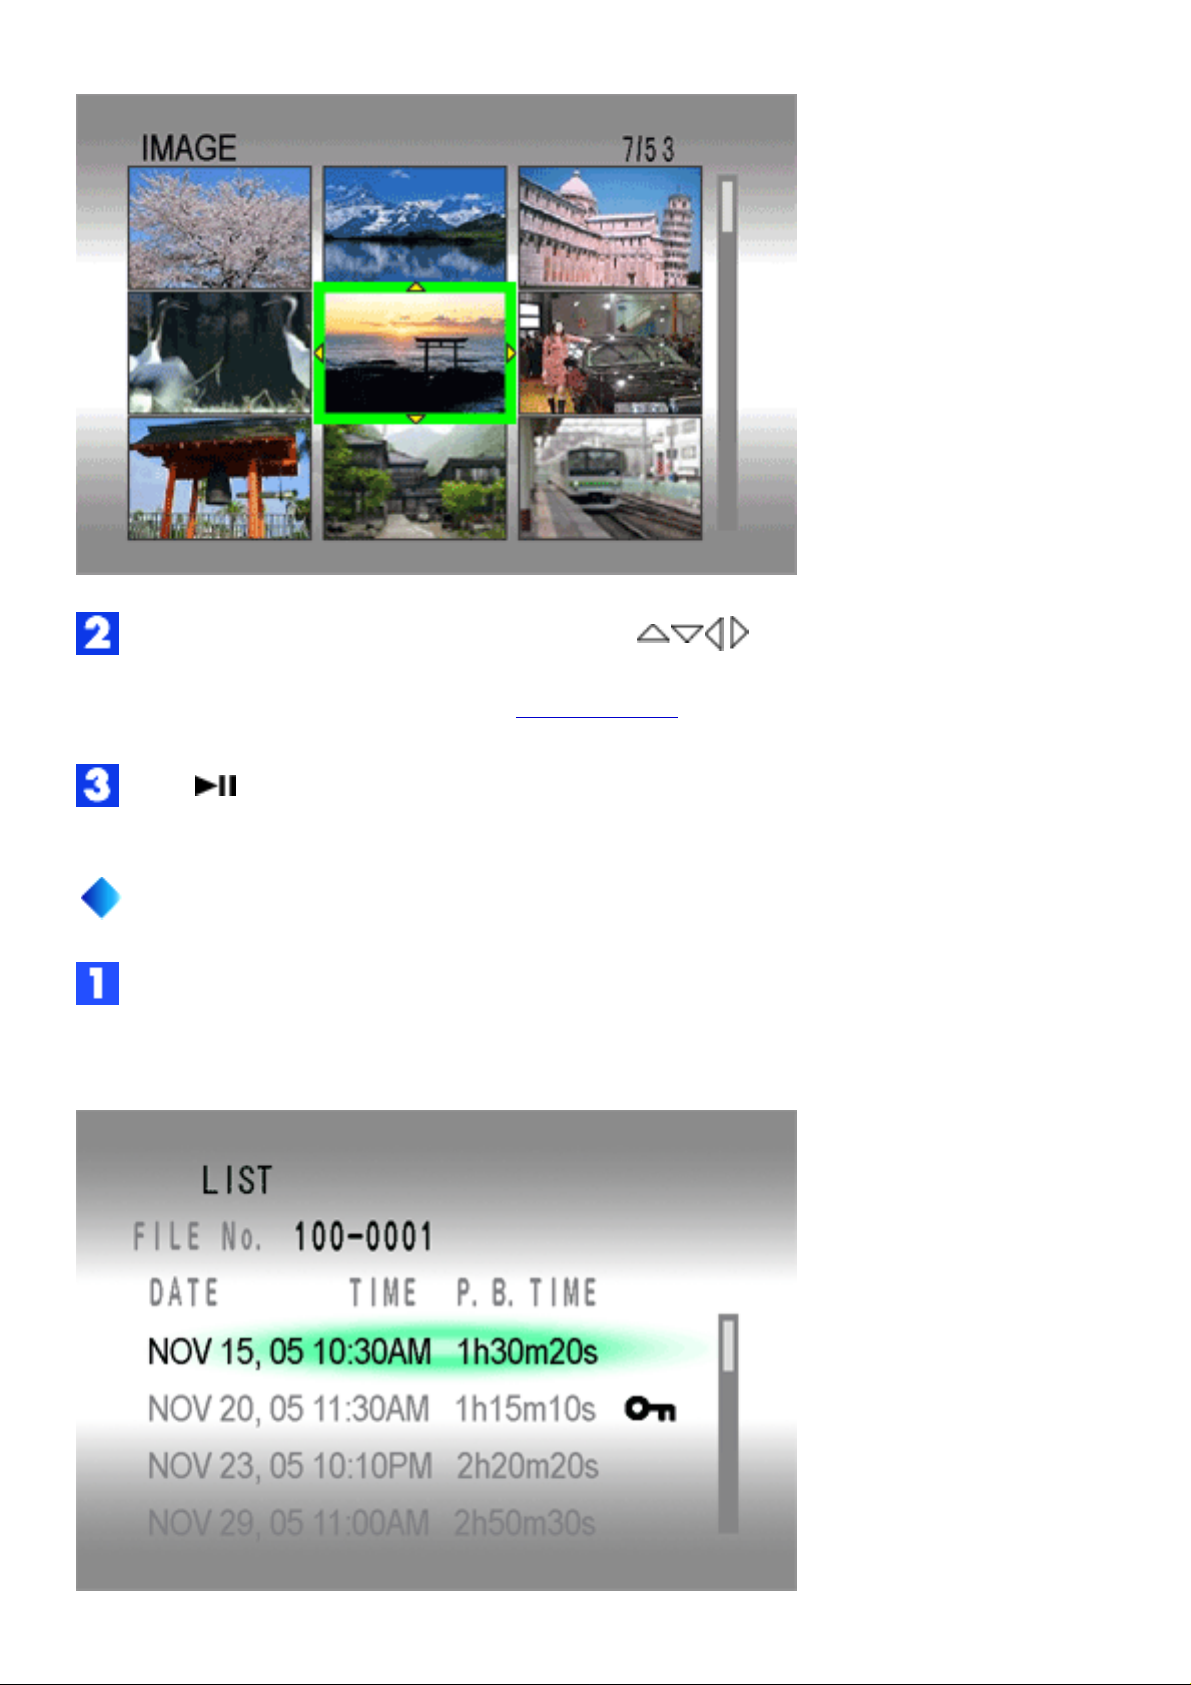
Move the frame to the desired file by pressing .
● Pressing INFO displays the selected file information.
Press . The selected file is displayed.
Playback List of Voice Files
Slide the zoom lever to [W] while playback is paused.
● The display switches to the playback list.
Page 21
(The display format of date and time differs depending on the country where this product is
sold.)
Press to select the desired file.
● Pressing INFO displays the selected file information.
Press to start playback.
How to Use the Scroll Bar
You can use the vertical scroll bar to find the desired files quickly. The scroll bar is useful
when deleting files, creating play list, setting DPOF, etc.
Slide the zoom lever towards [W] to select the scroll bar* in the index display.
Press to display the next or previous page.
● If you press and hold , the high speed search starts.
● If you find the desired file, slide the zoom lever towards [T], then select the file.
© 2004 Victor Company of Japan, Limited
Page 22

Various Playback Features
Still playback (Pause)
MODE:
Press
● To resume normal playback, press again.
during normal playback.
Search playback
During normal playback, press
● Each press of the button increases the search speed for each direction. (-60x to +60x)
● To resume normal playback, press .
( ) for forward search, or ( ) for reverse search.
Locating the start point of the file or skip the file
Press
( ) to locate the start point of the next file. Pressing ( ) repeatedly skips
files in forward direction.
Press ( ) to locate the start point of the current file. Pressing ( ) repeatedly
skips files in reverse direction.
● If ( ) or ( ) is pressed during normal playback or search, playback
resumes after locating the start point of a file.
Frame-by-frame playback
While playback is paused, press
● Each press of button advances or reverses the still picture frame by frame.
● To resume normal playback, press .
( ) or ( ).
Slow motion playback
While playback is paused, press
● To stop slow motion playback, press .
( ) or ( ) for over 2 seconds.
Page 23

© 2004 Victor Company of Japan, Limited
Page 24
Playback Zoom
MODE:
You can magnify the playback image up to 5x.
During playback, at the point you want to zoom in, press to pause playback.
Slide the zoom lever towards [T] to zoom in.
● The full view of the image is displayed in the small screen on the lower right side. The
* mark indicates the center point of the magnified area.
Press to move to the magnified area you want to view.
To zoom out, slide the zoom lever towards [W].
● When the zoom is set all the way to [W] (wide-angle) side, sliding the zoom lever to
[W] switches the display to the index screen.
© 2004 Victor Company of Japan, Limited
Page 25

Wipe or Fader Effect
You can view videos with various effects of scene transition.
Set the power switch to .
Press MODE to select .
Press MENU. The menu appears.
Press to select [ WIPE/FADER], then press .
Press to select a desired effect.
MODE:
FADER-WHITE: Fade in or out with a white screen.
FADER-BLACK: Fade in or out with a black screen.
FADER-B.W: Fade in to a color screen from a black and white screen, or fade out from
color to black and white.
WIPE-CORNER: Wipe in on a black screen from the upper right to the lower left
corner, or wipe out from lower left to upper right, leaving a black screen.
WIPE-WINDOW:The scene starts in the center of a black screen and wipes in toward
the corners, or comes in from the corners, gradually wiping out to the center.
WIPE-SLIDE: Wipe in from right to left, or wipe out from left to right.
WIPE-DOOR: Wipe in as the two halves of a black screen open to the left and right,
revealing the scene, or wipe out and the black screen reappears from left and right to cover
the scene.
WIPE-SCROLL: The scene wipes in from the bottom to the top of a black screen, or
wipes out from top to bottom, leaving a black screen.
WIPE-SHUTTER: Wipe in from the center of a black screen toward the top and
bottom, or wipe out from the top and bottom toward the center leaving a black screen.
Page 26

Press . The setting is completed.
Press MENU to close the menu.
● The selected wipe or fader effect works when playback starts and ends.
To turn off the effect
Select [OFF] in step 5.
© 2004 Victor Company of Japan, Limited
Page 27

Playback Effect
You can view videos with special image effects.
Set the power switch to .
Press MODE to select .
Press MENU. The menu appears.
Press to select [ EFFECT], then press .
Press to select a desired effect.
MODE:
SEPIA: The image has a brownish tint like old photos.
MONOTONE: The image becomes black and white like old movies.
CLASSIC FILM: The image has an old movie atmosphere by the effect of skipping
frames.
STROBE: The image looks like a series of consecutive snapshots.
Press . The setting is completed.
Press MENU to close the menu.
To turn off the effect
Select [OFF] in step 5.
© 2004 Victor Company of Japan, Limited
Page 28

Playback Zoom
MODE:
You can magnify the playback image up to 5x.
Display the playback screen of a still image.
● If the index screen is displayed, slide the zoom lever to [T].
Slide the zoom lever towards [T] to zoom in.
● The full view of the image is displayed in the small screen on the lower right side. The
* mark indicates the center point of the magnified area.
Press to move to the magnified area you want to view.
To zoom out, slide the zoom lever towards [W].
● When the zoom is set all the way to [W] (wide-angle) side, sliding the zoom lever to
[W] switches the display to the index screen.
© 2004 Victor Company of Japan, Limited
Page 29

Image Rotation
You can rotate a still image clockwise or counterclockwise.
Display the playback screen of a still image.
● If the index screen is displayed, slide the zoom lever to [T].
Press to rotate 90° clockwise.
● Each time you press , the image rotates clockwise (90°→180°→270°→0°).
Press to rotate 90° counterclockwise.
MODE:
● Each time you press , the image rotates counterclockwise (270°→180°→90°→0°).
© 2004 Victor Company of Japan, Limited
Page 30

Playback Effect
You can view still images with special image effects.
Set the power switch to .
Press MODE to select .
Press MENU. The menu appears.
Press to select [ EFFECT], then press .
Press to select a desired effect.
MODE:
SEPIA: The image has a brownish tint like old photos.
MONOTONE: The image becomes black and white like old photos.
Press . The setting is completed.
Press MENU to close the menu.
To turn off the effect
Select [OFF] in step 5.
© 2004 Victor Company of Japan, Limited
Page 31

Voice Playback Functions
Changing playback speed
MODE:
You can adjust the playback speed by setting [
[SLOWPLAY].
Search playback
During normal playback, press ( ) for forward search, or ( ) for reverse search. To
resume normal playback, press .
Locating the start point of the file or skip the file
Press
files in forward direction.
Press ( ) to locate the start point of the current file. Pressing ( ) repeatedly
skips files in reverse direction.
( ) to locate the start point of the next file. Pressing ( ) repeatedly skips
PLAYBACK SPEED] to [FASTPLAY] or
● If ( ) or ( ) is pressed during normal playback or search, playback
resumes after locating the start point of a file.
© 2004 Victor Company of Japan, Limited
Page 32

Viewing File Information
MODE: / /
You can view the file information in playback mode.
Information on video files
Press INFO while video playback is paused. File information appears.
FILE: File name
FOLDER: Folder name
DATE/TIME: Date and time of the recording
PB TIME: Playback time (length of the file)
QUALITY: Image quality
PROTECT:
● If you press INFO in the index screen, selected file information is displayed.
To turn off the file information display, press INFO again.
Information on still image files
Press INFO while a still image is displayed. File information appears.
FILE: File name
FOLDER: Folder name
File protection status
DATE/TIME: Date and time of the recording
SIZE: Image size
QUALITY: Image quality
PROTECT:
File protection status
Page 33

● If you press INFO in the index screen, selected file information is displayed.
To turn off the file information display, press INFO again.
Information on voice files
Press INFO while voice playback is paused. File information appears.
FILE: File name
FOLDER: Folder name
DATE/TIME: Date and time of the recording
PB TIME: Playback time (length of the file)
QUALITY: Sound quality
PROTECT:
● If you press INFO in the playback list, selected file information is displayed.
File protection status
To turn off the file information display, press INFO again.
© 2004 Victor Company of Japan, Limited
Page 34

Protecting Files
You can protect files from the accidental erasure.
Set the power switch to .
Select the file type (video, still image or voice) by pressing MODE.
Press MENU. The menu appears.
Press to select [ PROTECT], then press .
MODE: / /
To protect the currently displayed file
Press to select [ CURRENT], then press .
Press to select [EXECUTE], then press .
● You can select the previous or next file with .
● To release protection, select the protected file, then perform step 5 and 6.
To protect by selecting multiple files
Press to select [ FILE SELECT], then press .
● The index screen appears.
Press to select the file you want to protect, then press .
● The mark appears on the file.
● To protect other files, repeat step 6.
● The scroll bar can also be used with the zoom lever and .
Press MENU.
Page 35

Press to select [QUIT], then press .
● The selected files are protected.
● To release protection, select the protected file in step 6.
To protect all files
Press to select [ PROTECT ALL], then press .
Press to select [EXECUTE], then press .
● All files are protected.
To release protection of all files
Select [ CANCEL ALL], then press .
Press to select [EXECUTE], then press .
CAUTION:
● Do not remove the recording medium or perform any other operation (such as turning
off the power) during protection. Also, be sure to use the provided AC adapter, as the
recording medium may be corrupted if the battery becomes exhausted during
protection. If the recording medium becomes corrupted, format it.
© 2004 Victor Company of Japan, Limited
Page 36

Deleting Files
You can delete unnecessary files.
Deleting by the button
Set the power switch to .
Select the file type (video, still image or voice) by pressing MODE.
Display the desired file by pressing , then press .
● You can also select the file in the index display.
MODE: / /
Press to select [EXECUTE], then press .
NOTE:
● If you press during recording mode, the file recorded most recently will be deleted.
However, if the recording mode (video, still image or voice) is switched or the power
is turned off and on again after recording, you cannot delete the file.
Deleting on the menu screen
Set the power switch to .
Select the file type (video, still image or voice) by pressing MODE.
Press MENU. The menu appears.
Press to select [ DELETE], then press .
To delete the currently displayed file
Page 37

Press to select [ CURRENT], then press .
Press to select [EXECUTE], then press .
● You can select the previous or next file with .
To delete by selecting multiple files
Press to select [ FILE SELECT], then press .
● The index screen appears.
Press to select the file you want to delete, then press .
● The scroll bar can also be used with the zoom lever and .
● To delete other files, repeat step 6.
Press MENU.
Press to select [EXECUTE AND QUIT], then press .
● The selected files are deleted.
To delete all files
Press to select [ DELETE ALL], then press .
Press to select [EXECUTE], then press .
● To cancel deletion, select [CANCEL], then press .
NOTES:
● Protected files cannot be deleted. To delete them, release protection first.
● Once files are deleted, they cannot be restored. Check files before deleting.
CAUTION:
● Do not remove the recording medium or perform any other operation (such as turning
Page 38

off the power) during deletion. Also, be sure to use the provided AC adapter, as the
recording medium may be corrupted if the battery becomes exhausted during
deletion. If the recording medium becomes corrupted, format it.
© 2004 Victor Company of Japan, Limited
Page 39

Formatting a Recording Medium
MODE: / /
You can format (initialize) a recording medium in the CF or SD slot. Before using a
recording medium that you have purchased, format the medium first. Be aware that all files
and data including protected files will be erased.
Set the power switch to or .
Press MENU. The menu appears.
Press to select [ MEMORY CARD SETTING], then press .
Press to select [ FORMAT], then press .
Press to select [CF SLOT] or [SD SLOT], then press .
CF SLOT : CF card
SD SLOT: SD card
Press to select [EXECUTE], then press .
● To cancel the formatting, select [CANCEL], then press .
CAUTION:
● Do not remove the recording medium or perform any other operation (such as turning
off the power) during format. Also, be sure to use the provided AC adapter, as the
recording medium may be corrupted if the battery becomes exhausted during format.
If the recording medium becomes corrupted, format it again.
NOTE:
● Do not format the recording medium on the PC. Make sure to format the recording
medium on the camera.
Page 40

© 2004 Victor Company of Japan, Limited
Page 41

Cleaning Up a Recording Medium
MODE: / /
Writing speed of recording media tends to become slow after long period of repeated use.
To regain the speed, execute cleanup periodically.
NOTE:
Make sure to use the provided AC adapter for the power supply when cleaning up a
recording medium.
Set the power switch to or .
● If the AC adapter is not connected to the camera, a warning message appears. In this
case, connect the AC adapter.
Press MENU. The menu appears.
Press to select [ MEMORY CARD SETTING], then press .
Press to select [ CLEAN UP], then press .
Press to select [CF SLOT] or [SD SLOT], then press .
CF SLOT : CF card
SD SLOT: SD card
Press to select [EXECUTE], then press .
● To cancel clean up, select [CANCEL], then press .
When clean up is finished, [CLEANING UP COMPLETED] appears. Press to
complete the operation.
● It may take for a while until cleanup is completed.
CAUTION:
Do not remove the recording medium or perform any other operation (such as turning off
the power) during cleanup.
Page 42

© 2004 Victor Company of Japan, Limited
Page 43

Copying/Moving Still Image Files
MODE:
You can copy or move still image files between recording media in CF and SD slots using
the on-screen display.
Before proceeding to following steps,
● Make sure that recording media are inserted in both CF and SD slots.
● Make sure that enough free space is left in the copy/move destination medium.
Set the power switch to or .
Press MENU. The menu appears.
Press to select [ MEMORY CARD SETTING], then press .
Press to select [ COPY/MOVE], then press .
Press to select [COPY] or [MOVE], then press .
COPY: Files are copied to the destination medium while leaving original files in the source
medium.
MOVE: Files are moved to the destination medium while deleting original files (except readonly files) in the source medium.
Press to select the direction of copy/move, then press . (SD CF or CF SD)
To copy or move by selecting files
Press to select [FILE], then press .
● The index display appears.
Press to select a desired file, then press .
● The check mark ( ) appears on the selected file.
Page 44

● To select other files, repeat this step.
● The scroll bar can also be used with the zoom lever and .
Press MENU to return to the previous screen.
Press to select [EXECUTE], then press .
File transfer starts.
● To stop the file transfer, press , then select [EXECUTE] and press .
When [COPYING COMPLETED] appears, press to finish the operation.
To copy or move all still image files in the recording medium
Press to select [ALL].
Press to select [EXECUTE], then press .
● If you want to cancel, select [CANCEL], then press .
File transfer starts.
● To stop the file transfer, press , then select [EXECUTE] and press .
When [COPYING COMPLETED] appears, press to finish the operation.
© 2004 Victor Company of Japan, Limited
Page 45

Resetting the File Number
MODE: / /
By resetting the file number (name), a new folder will be made. The new files you are going
to make will be stored in the new folder. It is convenient to separate the new files from
previously recorded files.
Set the power switch to or .
Press MENU. The menu appears.
Press to select [ MEMORY CARD SETTING], then press .
Press to select [ NO. RESET], then press .
Press to select the file type (video, still image or voice), then press .
Press to select [EXECUTE], then press .
Press .
● The new folder (such as [101JVCSO]) will be made and the file number will start
again from the new number (such as "PIC_0001.JPG").
© 2004 Victor Company of Japan, Limited
Page 46

Play List Functions
MODE:
What is "Play List"?
You can create a play list by collecting previously recorded video files. (Creating Play List)
By playing back the play list, you can view your original video clips. (Playing Back Play List)
Created play lists can be modified or deleted. (Modifying Play Lists)
Dubbing to an external device using a play list is possible. (Dubbing Using Play List)
© 2004 Victor Company of Japan, Limited
Page 47

Creating Play List
You can create a play list by collecting previously recorded video files.
Set the power switch to .
Press MODE to select .
Press MENU. The menu appears.
Press to select [ PLAY LIST], then press .
Press to select [ EDIT], then press .
MODE:
Press to select [NEW LIST], then press .
Page 48

(The display format of date and time differs depending on the country where this product is
sold.)
Press to scroll upward or downward the thumbnail images of recorded files, and
select a file to be added to a play list.
● The scroll bar can also be used with the zoom lever and .
Press . The frame for selecting an inserting point appears.
Press to scroll upward or downward the thumbnail of images in a play list, and
select a position where you want to insert the selected file.
● The scroll bar can also be used with the zoom lever and .
Page 49

Press . The selected file is added to a play list.
● To add other files, repeat steps 7 to 10.
Press MENU. The confirmation screen appears.
Press to select [SAVE AND QUIT], then press .
● To return to the edit screen, select [CANCEL].
● If you do not want to save the play list, select [DELETE AND QUIT].
To check the play list by playing back the video
You can check the play list before saving it.
After step 10, select a thumbnail image of the play list with .
Press to select a scene you want to check.
Press . The playback of the play list starts from the selected scene.
● The playback stops at the end of the play list automatically.
To check only the scene transition
After step 10, select a scene transition with .
● If a scene is selected, press once more to select the scene transition bar.
Press to select a scene transition you want to check.
Press to start playback of the selected scene transition.
To delete the added file from the play list
After step 10, select a thumbnail image of the play list with .
Press to select the file you want to delete, then press .
Page 50

© 2004 Victor Company of Japan, Limited
Page 51

Playing Back Play List
MODE:
By playing back the play list, you can view your original video clips.
Set the power switch to .
Press MODE repeatedly to select .
Press MENU. The menu appears.
Press to select [ PLAY LIST], then press .
Press to select [ PLAY LIST CONTENTS], and press . The table of play
lists appears.
Press to select a list you want to play back.
(The display format of date and time differs depending on the country where this product is
sold.)
● The scroll bar can also be used with the zoom lever and .
Press to start playback.
Page 52

● During playback of play list, "P" mark appears on the top left corner of the screen.
● If you slide the zoom lever towards [W] while playback is paused, the index screen for
play list appears. You can see the contents of the play list and select the desired
scene. To return to playback screen, slide the zoom lever to [T].
● You can use various playback functions during playback.
To stop playback, press .
● To return to the normal playback mode, select [ALL SCENES] in step 6.
© 2004 Victor Company of Japan, Limited
Page 53

Add/Delete Files in Play List
You can edit existing play lists by adding or deleting files.
Set the power switch to .
Press MODE to select .
Press MENU. The menu appears.
Press to select [ PLAY LIST], then press .
Press to select [ EDIT], then press .
MODE:
Press to select the play list you want to edit, then press .
● To add or delete files, follow the steps 7 to 12 in Creating Play List.
© 2004 Victor Company of Japan, Limited
Page 54

Changing Play List Name
MODE:
The default name of play list is its creation date and time. You can change the name on the
keyboard screen as you like.
Set the power switch to .
Press MODE to select .
Press MENU. The menu appears.
Press to select [ PLAY LIST], then press .
Press to select [ RENAME], then press . The table of play lists appears.
Press to select a play list whose name you want to change.
● The scroll bar can also be used with the zoom lever and .
● The thumbnail appears on the upper right side.
Press . The keyboard screen appears.
Press to select the desired letter, then press .
● Repeat this process to complete the name.
● You can change the character types (capital letters, small letters or marks) by
selecting [A/a/@].
● To correct a letter, select [ ] or [ ] and press to move the cursor to the letter,
then select [CLEAR] and press .
Press to select [ ], then press .
● To cancel the setting, select [CANCEL], and press .
Page 55

© 2004 Victor Company of Japan, Limited
Page 56

Deleting Play List
MODE:
You can delete unnecessary play lists.
Set the power switch to .
Press MODE to select .
Press MENU. The menu appears.
Press to select [ PLAY LIST], then press .
Press to select [ DELETE], then press . The table of play lists appears.
Press to select a play list you want to delete.
● The thumbnail appears on the upper right side.
● To delete all play lists at once, select [DELETE ALL].
Press .
Press to select [EXECUTE], and press . The selected play list is deleted.
● To cancel the setting, select [CANCEL], and press .
● Original files are not deleted even if you delete the play list.
© 2004 Victor Company of Japan, Limited
Page 57

Dubbing Using Play List
MODE:
Dubbing to an external device using a play list is possible.
Connect the camera and your VCR with the S-Video/Audio/Video cable. For details,
refer to "Connecting to a TV or VCR" in the instruction manual (printed edition).
Set the VCR to the recording standby mode.
Set the power switch to .
Press MODE to select .
Press MENU. The menu appears.
Press to select [ PLAY LIST], then press .
Press to select [ PLAY LIST CONTENTS], and press . The table of play
lists appears.
Press to select a list you want to dub.
● The scroll bar can also be used with the zoom lever and .
Press . Screen for dubbing appears.
Press to select [START PLAYBACK], then press . Playback on the camera
starts.
● The black screen is displayed for 5 seconds.
● To cancel the setting, press to select [CANCEL], and press .
While the black screen is displayed for 5 seconds, start recording on the VCR. (Refer
to your VCR’s instruction manual.)
To stop dubbing, stop recording on the VCR while the black screen is displayed for 5
seconds. Then stop playback on the camera.
Page 58

© 2004 Victor Company of Japan, Limited
Page 59

DPOF Print Setting
MODE:
This camera is compatible with DPOF (Digital Print Order Format). You can set which
images to be printed and the number of prints with this camera. This feature is useful to
print with a DPOF-compatible printer or bring a recording medium to photo lab for print.
To print by selecting a still image
Set the power switch to .
Press MODE to select .
Press MENU. The menu appears.
Press to select [ DPOF], then press . The DPOF menu screen appears.
Press to select [ SELECT IMAGES], then press .
Press to select the desired file, then press .
Page 60

● The scroll bar can also be used with the zoom lever and .
● If you slide the zoom lever towards [T], the preview screen of the still image is
displayed.
Press to select the number of prints (max. 15 prints), then press .
● To set print information for other images, repeat steps 6 and 7.
Press MENU to finish the setting.
● To cancel the selection, select the same image in step 6.
To print all still images (One print for each)
Display the DPOF menu screen. (To print by selecting a still image)
Press to select [ ALL 1], then press .
Press to select [EXECUTE], then press .
Press to finish the setting.
To confirm the DPOF setting
Display the DPOF menu screen. (To print by selecting a still image)
Press to select [ CHECK SETTINGS], then press .
Page 61

If necessary, change the number of prints for the desired file by following the steps 6 to
7 in To print by selecting a still image.
● You can also cancel the DPOF setting for the desired file by pressing .
Press MENU to return to the previous menu.
To reset the DPOF setting
Display the DPOF menu screen. (To print by selecting a still image)
Press to select [ RESET], then press .
Press to select [EXECUTE], then press .
Press to close the menu.
© 2004 Victor Company of Japan, Limited
Page 62

Direct Printing with a PictBridge Printer
MODE:
If your printer is compatible with PictBridge, still images can be printed easily by connecting
the camera with USB cable directly to the printer. DPOF setting can also be used.
To print by selecting a still image
Set the power switch to .
Press MODE to select .
Press MENU. The menu appears.
Press to select [ DIRECT PRINT], then press . A message [PLEASE
CONNECT PRINTER] appears.
Connect the camera to the printer with USB cable.
● After a while, the print menu appears.
Press to select [SELECTED PRINT], then press .
Press to select the desired file, then press .
Press to set the number of prints.
Page 63

● The number of prints can be set from 1 to 99.
Press to select [DATE], then press to select [ON] or [OFF].
● Select [ON] to print the date and [OFF] to not to print.
Press to select [PRINT], then press . The image is printed.
To cancel print setting
Press
to select [CANCEL], then press .
To stop printing after printing starts
Press . The confirmation screen appears.
Press to select [EXECUTE], then press .
To print using the DPOF setting
If the printer is compatible with DPOF, you can use the
Set the power switch to .
Press MODE to select .
DPOF setting.
Press MENU. The menu appears.
Page 64

Press to select [ DIRECT PRINT], then press . A message [PLEASE
CONNECT PRINTER] appears.
Connect the camera to the printer with USB cable.
● After a while, the print menu appears.
Press to select [DPOF PRINT], then press .
Press to select [PRINT], then press . The images are printed.
● To confirm the DPOF setting, press to select [CHECK SETTINGS], then press
. After that, press MENU to return to the previous menu.
© 2004 Victor Company of Japan, Limited
Page 65

Changing The Menu Settings
MODE: / /
You can change the menu settings to customize your camera. Access the desired menu
screen by following the steps below, then change the various settings.
Select the operation mode by setting the power switch to (recording) or
(playback).
Press MODE to select (video), (still image) or (voice).
Press MENU. The menu screen appears.
Press to select the desired menu item.
Press . The sub menu appears.
● When selecting the menu which has one more sub menu, repeat step 4 and 5.
Press to select the desired setting.
Press . Selection is complete.
● To return to the normal screen, press MENU.
Following menus are available:
Menu Power switch Mode lamp
Common Menus for All Modes
/ / /
Video Recording Menus
Video Playback Menus
Still Image Recording Menus
Still Image Playback Menus
Voice Recording Menus
Voice Playback Menus
Page 66

To display the operation guide
Press INFO when the menu screen is displayed.
● To remove the operation guide, press INFO again.
© 2004 Victor Company of Japan, Limited
Page 67

Common Menus for All Modes
[ ]=Factory-preset
BASIC SETTING
PRESET
EXECUTE: Resets all settings to the factory-preset.
[CANCEL]: Returns to menu screen without executing reset.
DEMO MODE
MODE: / /
OFF: Disables the function.
[ON]: Activates demonstration mode and shows various features on the display.
Demonstration starts in the following cases:
● When the menu screen is closed after [DEMO MODE] is set to [ON].
● With [DEMO MODE] set to [ON], if there is no operation for about 3 minutes after the
power switch is set to .
● Performing any operation during the demonstration stops the demonstration
temporarily. If no operation is performed for more than 3 minutes after that, the
demonstration will resume.
NOTES:
● If a recording medium is in the camera, the demonstration cannot be turned on.
● [DEMO MODE] remains [ON] even if the camera power is turned off.
OPERATION SOUND
OFF: Turns off operation sound.
BEEP: The beep sounds when the power is turned on or off, and at the beginning and end
of recording.
Page 68

[MELODY]: Instead of a beep, a melody sounds when any operation is performed.
MEMORY CARD SETTING
VIDEO MODE
[CF SLOT]: The CF card is selected as a recording medium.
SD SLOT: The SD card is selected as a recording medium.
IMAGE MODE
CF SLOT: The CF card is selected as a recording medium.
[SD SLOT]: The SD card is selected as a recording medium.
VOICE MODE
CF SLOT: The CF card is selected as a recording medium.
[SD SLOT]: The SD card is selected as a recording medium.
FORMAT
[CF SLOT] / SD SLOT
After formatting, all files and data including protected files will be erased. (
Recording Medium)
Formatting a
CLEAN UP
[CF SLOT] / SD SLOT
Writing speed of recording media tends to become slow after long period of repeated use.
To regain the speed, execute cleanup periodically. (
COPY/MOVE
Cleaning Up a Recording Medium)
Page 69

You can copy or move files between recording media in CF and SD slots. (Copying/Moving
Sill Image Files)
NO. RESET
VIDEO / IMAGE / VOICE
By resetting the file number, a new folder will be made. The new files you are going to
make will be stored in the new folder. (
Resetting the File Number)
DISPLAY
BRIGHT
When this item is selected, the brightness control indicator appears. Adjust the brightness
of the display using
DATE/TIME
OFF: The date/time does not appear.
[AUTO]: Displays the date/time for approx. 5 seconds when the power switch is set from
OFF to
ON: The date/time is always displayed.
SCENE COUNTER
[OFF]: Disables the function.
.
, then press .
ON: Displays the counter during video mode.
CLOCK ADJUST
Allows you to set the date/time. For actual operations and details, refer to "Date/Time
Settings" in the instruction manual (printed edition).
Page 70

© 2004 Victor Company of Japan, Limited
Page 71

Video Recording Menus
Power switch:
Mode lamp:
[ ] = Factory-preset
QUALITY
Select the desired picture quality.
Mode (In order of the quality) Size (pixels) Bit rate
[
ULTRA FINE]
FINE
NORMAL
ECONOMY
WIDE MODE
OFF]: Disables the function.
[
D.WIDE: The zoom range is extended beyond the maximum optical zoom wide angle
range. This mode’s wide angle setting is equivalent to using a 0.8X wide conversion lens.
Zooming is possible from 0.8X to 10X. This mode is suitable for shooting in a small room.
720 x 480 (NTSC)
720 x 576 (PAL)
720 x 480 (NTSC)
720 x 576 (PAL)
720 x 480 (NTSC)
720 x 576 (PAL)
352 x 240 (NTSC)
352 x 288 (PAL)
8.5 Mbps
5.5 Mbps
4.2 Mbps
1.5 Mbps
WIND CUT
OFF]: Disables the function.
[
ON: Helps cut down on noise created by wind.
GAIN UP
OFF: The image in the dark will be recorded with no picture brightness adjustment.
Page 72

[ ON]: The image in the dark will be brightened. But the overall appearance may
become grainy.
DIS
OFF: Disables the function.
[
ON]: Compensates for unstable images caused by camera-shake, particularly at high
magnification.
NOTES:
● Accurate stabilization may not be possible if hand shake is excessive, or depending
on the shooting condition. In this case, the
● Switch off this mode when recording with the camera on the tripod.
indicator blinks or goes out.
CAMERA SETTING
ZOOM
10X: Only optical zoom is available up to 10X.
[40X]: Digital zoom is available up to 40X.
200X: Digital zoom is available up to 200X.
● Zooming is possible to a maximum of 10X during still image recording.
TELE MACRO
OFF]: Disables the function.
[
ON: You can shoot a subject as large as possible at a distance of approx. 60 cm (2 ft).
© 2004 Victor Company of Japan, Limited
Page 73

Video Playback Menus
Power switch:
Mode lamp:
[ ] = Factory-preset
PLAY LIST
PLAY LIST CONTENTS / EDIT / RENAME / DELETE
For details, refer to Play List Functions.
WIPE/FADER
You can view videos with various effects of scene transition. (
[
OFF]: Disables the function.
FADER-WHITE: Fade in or out with a white screen.
FADER-BLACK: Fade in or out with a black screen.
FADER-B.W: Fade in to a color screen from a black and white screen, or fade out from
color to black and white.
WIPE-CORNER: Wipe in on a black screen from the upper right to the lower left
corner, or wipe out from lower left to upper right, leaving a black screen.
WIPE-WINDOW: The scene starts in the center of a black screen and wipes in toward
the corners, or comes in from the corners, gradually wiping out to the center.
Wipe or Fader Effect)
WIPE-SLIDE: Wipe in from right to left, or wipe out from left to right.
WIPE-DOOR: Wipe in as the two halves of a black screen open to the left and right,
revealing the scene, or wipe out and the black screen reappears from left and right to cover
the scene.
WIPE-SCROLL: The scene wipes in from the bottom to the top of a black screen, or
wipes out from top to bottom, leaving a black screen.
Page 74
WIPE-SHUTTER: Wipe in from the center of a black screen toward the top and
bottom, or wipe out from the top and bottom toward the center leaving a black screen.
EFFECT
You can view videos with special image effects.
[
OFF]: Disables the function.
SEPIA: The image has a brownish tint like old photos.
MONOTONE: The image becomes black and white like old movies.
CLASSIC FILM: The image has an old movie atmosphere by the effect of skipping
frames.
STROBE: The image looks like a series of consecutive snapshots.
PROTECT
CURRENT] / FILE SELECT / PROTECT ALL / CANCEL ALL
[
You can protect files from accidental erasure. (Protecting Files)
DELETE
CURRENT] / FILE SELECT / DELETE ALL
[
You can delete unnecessary files. (Deleting Files)
© 2004 Victor Company of Japan, Limited
Page 75

Still Image Recording Menus
Power switch:
Mode lamp:
[ ] = Factory-preset
QUALITY
FINE] / STANDARD
[
Select the desired image quality. ( : fine, : standard)
IMAGE SIZE
[
Select the desired image size.
[
By setting the self-timer, a still image is recorded 2 or 10 seconds after pressing recording
start/stop button.
[
1600 x 1200] / 1280 x 960 / 1024 x 768 / 640 x 480
SELF-TIMER
OFF] / 2SEC / 10SEC
CONTINUOUS SHOOTING
OFF]: Disables the function.
ON: Keeping the recording start/stop button pressed provides an effect similar to serial
photography. (Interval between still images: approx. 0.3 seconds)
GAIN
80] / 160
[
Select the ISO sensitivity to the desired setting.
Page 76

CAMERA SETTING
TELE MACRO
OFF]: Disables the function.
[
ON: You can shoot a subject as large as possible at a distance of approx. 60 cm (2 ft).
© 2004 Victor Company of Japan, Limited
Page 77

Still Image Playback Menus
Power switch:
Mode lamp:
[ ] = Factory-preset
DPOF
For details, refer to
DIRECT PRINT
For details, refer to
EFFECT
You can view still images with special image effects.
[
OFF]: Disables the function.
SEPIA: The image has a brownish tint like old photos.
MONOTONE: The image becomes black and white like old photos.
DPOF Print Setting.
Direct Printing with a PictBridge Printer.
PROTECT
CURRENT] / FILE SELECT / PROTECT ALL / CANCEL ALL
[
You can protect files from accidental erasure. (Protecting Files)
DELETE
CURRENT] / FILE SELECT / DELETE ALL
[
You can delete unnecessary files. (Deleting Files)
Page 78

© 2004 Victor Company of Japan, Limited
Page 79

Voice Recording Menus
Power switch:
Mode lamp:
[ ] = Factory-preset
QUALITY
Select the desired sound quality.
Mode (In order of the quality) Recording mode Bit rate
[
FINE] 48 KHz
STANDARD 16 KHz 512 Kbps
ECONOMY 8 KHz 256 Kbps
RECORDING LEVEL
HIGH] / MIDDLE / LOW
[
Select the desired voice recording level. ( : high, : middle, : low)
WIND CUT
OFF]: Disables the function.
[
1.5 Mbps (1,536
Kbps)
ON: Helps cut down on noise created by wind.
© 2004 Victor Company of Japan, Limited
Page 80

Voice Playback Menus
Power switch:
Mode lamp:
[ ] = Factory-preset
PLAYBACK SPEED
NORMAL]: Normal speed
[
FASTPLAY: Playback speed is 20% faster than normal speed.
SLOWPLAY: Playback speed is 20% slower than normal speed.
Select the desired voice playback speed.
PROTECT
CURRENT] / FILE SELECT / PROTECT ALL / CANCEL ALL
[
You can protect files from accidental erasure. (Protecting Files)
DELETE
CURRENT] / FILE SELECT / DELETE ALL
[
You can delete unnecessary files. (Deleting Files)
© 2004 Victor Company of Japan, Limited
 Loading...