

Page 1
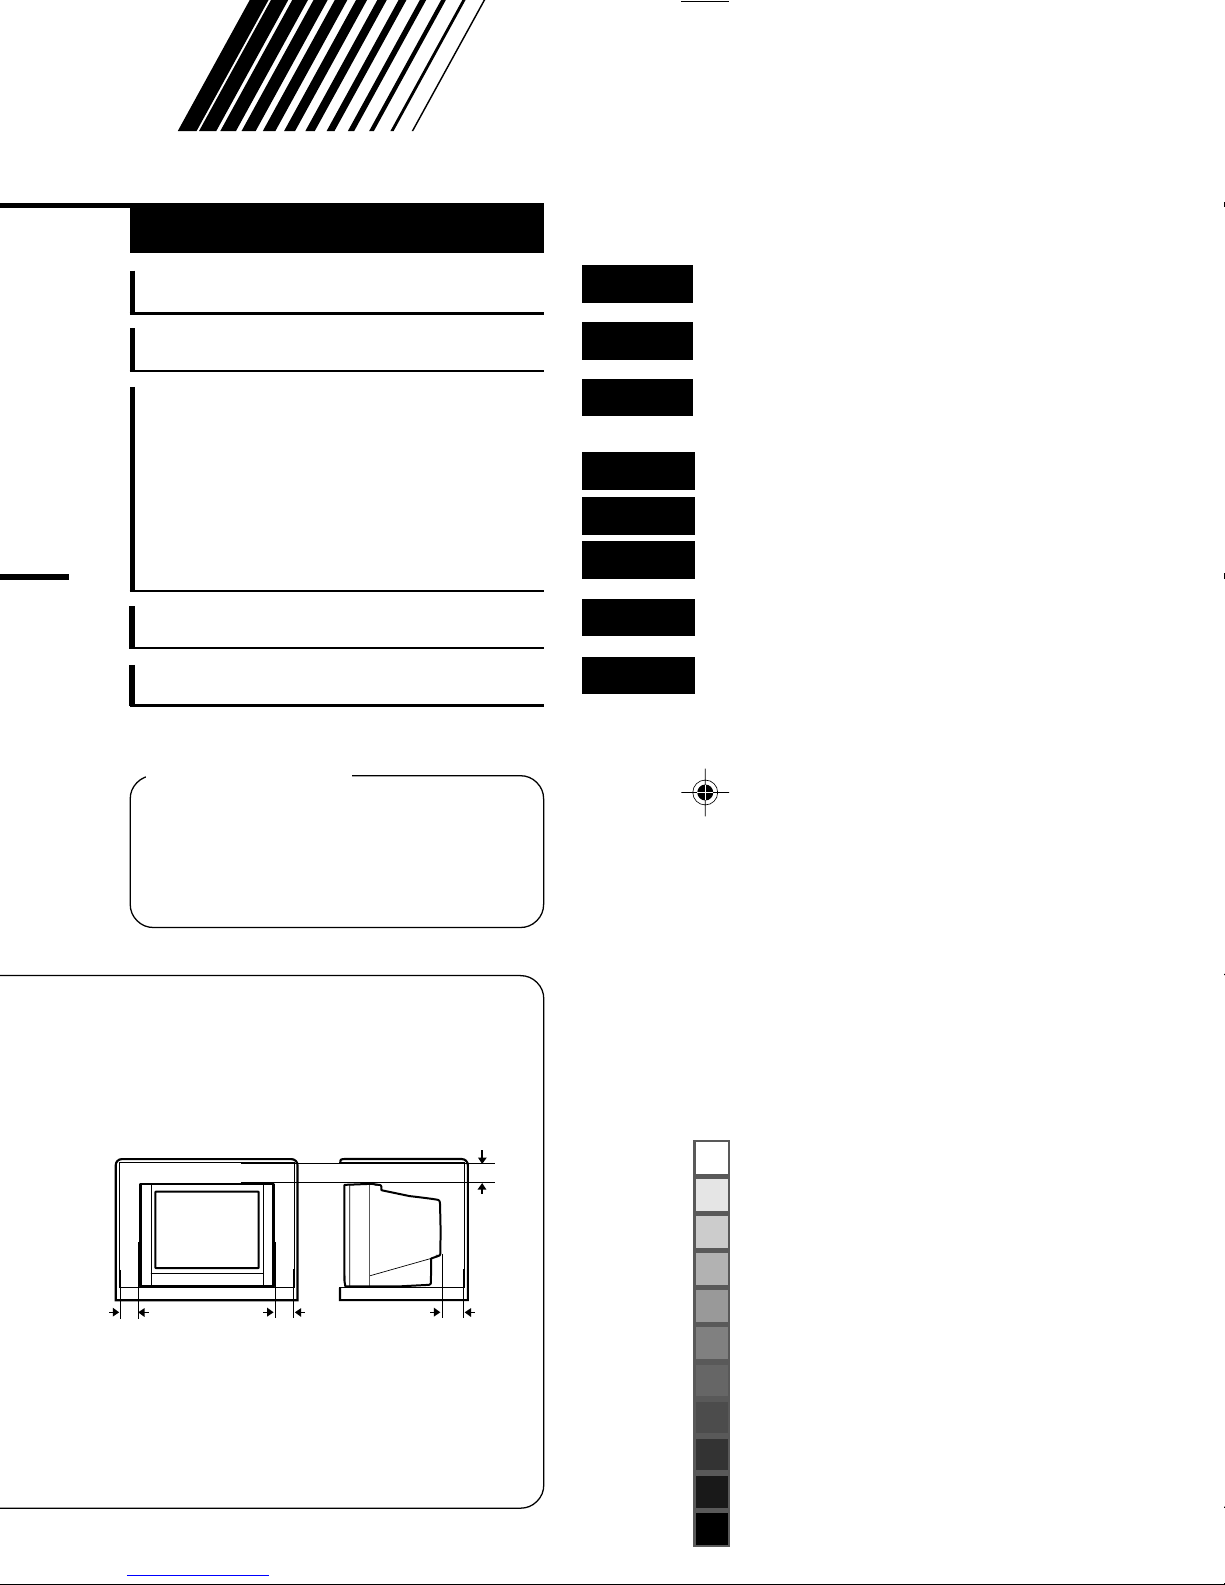
15 cm
10 cm 15 cm
10 cm
Locations ................................
2
Preparation .............................
3
Basic operation ......................
9
Remote control buttons
and functions........................
10
Using the TV’s menus ..........
13
Using the button on the TV ...
16
Troubleshooting ...................
18
Specifications .......................
19
Contents
WARNING:
TO PREVENT FIRE OR SHOCK
HAZARD, DO NOT EXPOSE THIS
APPLIANCE TO RAIN OR
MOISTURE.
Page 2

Locations
POWER
123
456
789
RETURN+
0
-/--
PICTURE
MODE
SYSTEM
COLOUR
TV/VIDEO
CHANNEL
SCAN
OFF
TIMER
DISPLAY
MENU
VOLUME
MUTING
SOUND
5
6
!
@
9
3
2
8
4
7
#
~
-
0
=
CHANNEL
REMOTE CONTROL UNIT
RM-C360GY
RM-C364GY RM-C360GY
1
ECO
2
3
4
5
6
7
8
SENSOR
SYSTEM
COLOUR
TV/VIDEO
OFF
TIMER
CHANNEL
SCAN
DISPLAY
SOUND
123
456
789
RETURN
+
POWER
PICTURE
MODE
0
MUTING
0
-
=
-/--
~
!
MENU
CHANNEL
VOLUME
9
REMOTE CONTROL UNIT
RM-C364GY
1 ECO SENSOR button p.11
2 SOUND SYSTEM button p.10
3 COLOUR SYSTEM button p.10
4 TV/VIDEO button p.9
5 OFF TIMER button p.11
@
#
0 POWER button p.5,9
- PICTURE MODE button p.10
= Number buttons p.9
~ -/-- button p.9
! MUTING button p.11
6 CHANNEL SCAN button p.12
7 RETURN + button p.12
8 DISPLAY button p.11
9 CHANNEL –/+ buttons p.9
2
@ MENU buttons
• MENU
• MENU –/+ buttons
buttons
/
# VOLUME –/+ buttons p.9
Page 3
Preparation
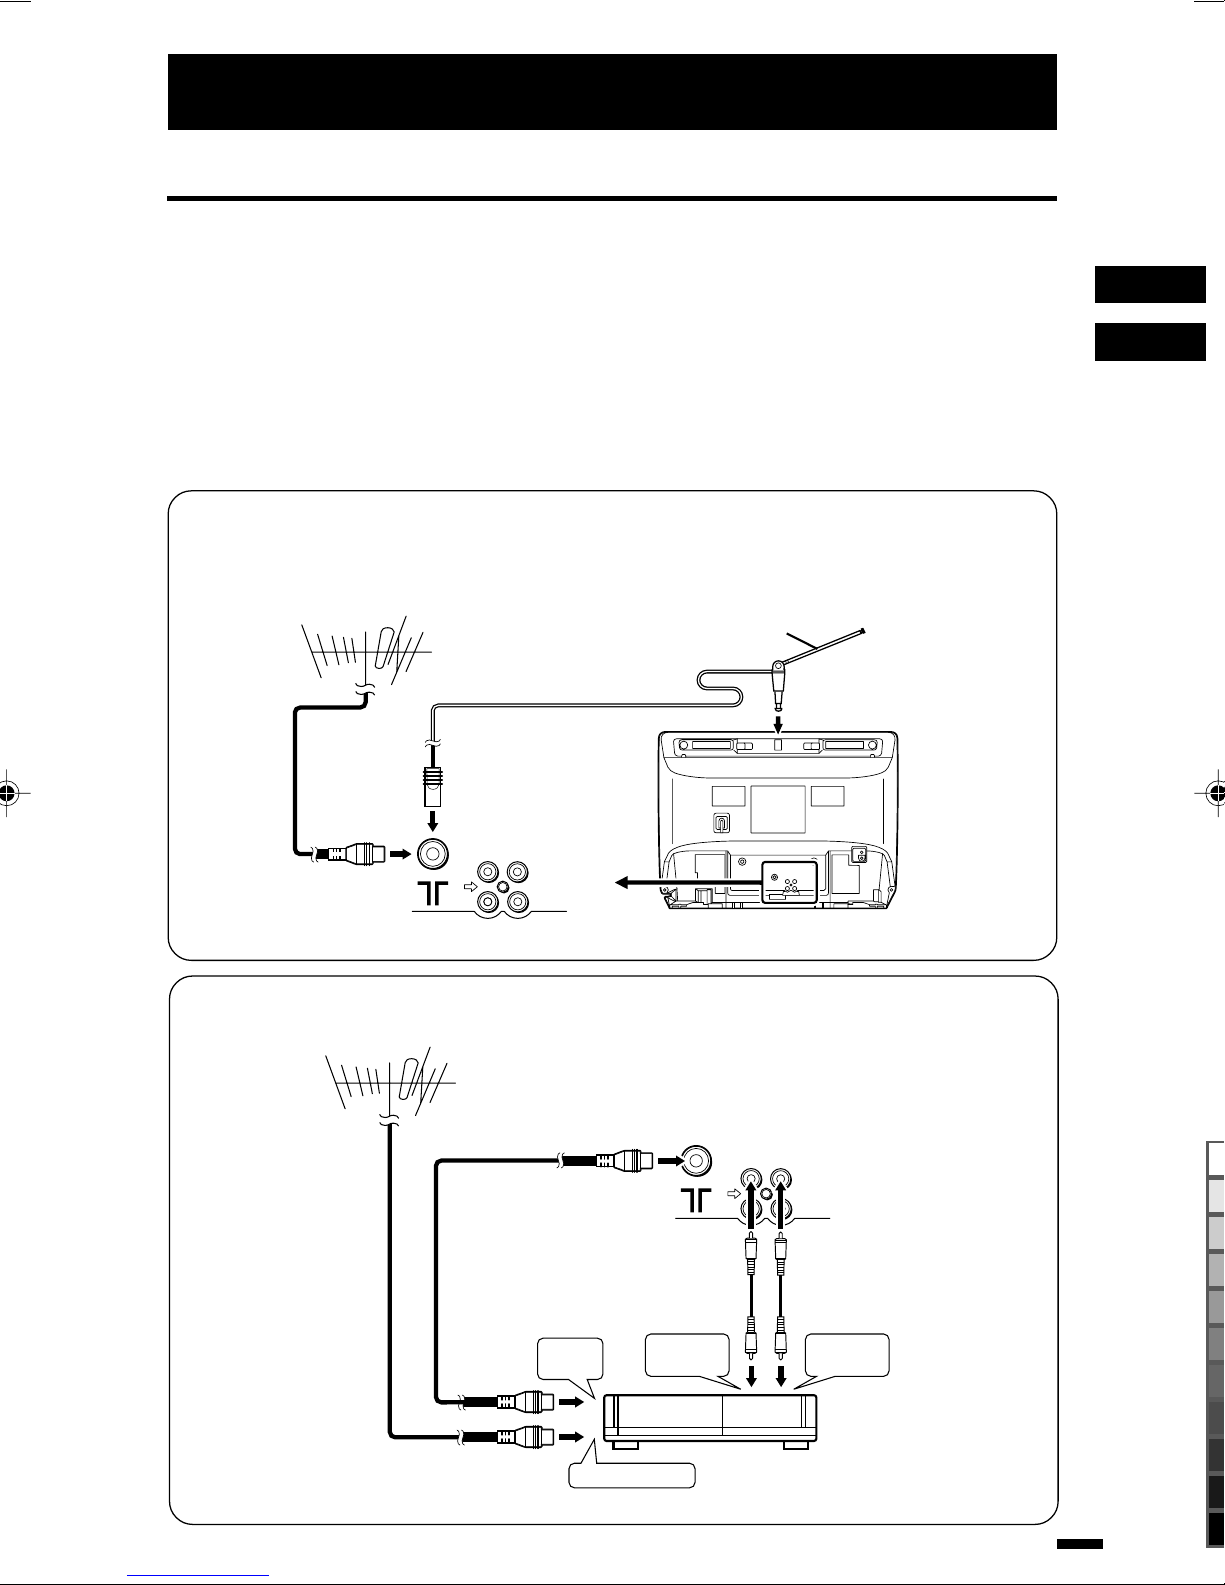
1. Connecting the aerial and external devices
Notes: .........................................................................................................................
• For further details, refer to the manuals provided with the devices you are connecting.
• Connecting cables are not supplied.
• The front and rear AUDIO/VIDEO input jacks are directly connected so that input to either
jack is output through both. You cannot provide input to both the front and rear jacks at the
same time. Disconnect one input, or use one of the jacks as an output jack only (for
monitoring or recording).
• The rod aerial is supplied with the AV-14A10 and AV-14F10.
....................................................................................................................................
■ Connecting the aerial and VCR
Connecting the aerial
To install rod aerial:
Install into the top-rear aerial holder. Once installed, it cannot be removed.
VHF/UHF outdoor aerial
Indoor aerial
Rod aerial
VIDEO
AUDIO
IN
OUT
Connecting the aerial and VCR
VHF/UHF outdoor aerial
To RF
output
2
To video
output
VIDEO
• Illustration of AV-14F10.
AUDIO
IN
OUT
3
To audio
output
1
To aerial input
VCR
• Illustration of AV-14F10.
3
Page 4

Preparation
■ Connecting other external devices
VIDEO
AUDIO
• Illustration of AV-21D10.
IN
OUT
To audio
output
VCR (for playing)
VCR (for recording)
To audio
input
To video
output
To video
output
To video
input
Camcorder
Headphones
Note: ..................................................................................................................
• Use the headphones with a stereo mini jack (3.5 mm in diameter). When you connect
the headphones, the TV speakers go off.
...........................................................................................................................
4
VIDEO AUDIO
IN
To audio
output
MENU
or
TV game
• Illustration of AV-21D10.
Page 5

Preparation
2. Connecting the power cord
Insert the Power plug into an AC outlet.
3. Inserting batteries into the remote control
Correctly insert two batteries, observing the and polarities and inserting the
end first.
CAUTION: ...........................................
• Follow the cautions printed on the
batteries.
............................................................
Notes: .................................................
• Use AA/R6/UM-3 dry cell batteries.
• If the remote control does not work
properly, fit new batteries.
The supplied batteries are for testing, not
regular use.
............................................................
4. Turning your TV on
1.
Press the Main power button on the TV to turn the TV’s main power
on.
The POWER lamp or POWER/ON TIMER lamp lights.
If image does not appear:
Your TV is in the standby mode. Press the POWER button on the remote control
to turn your TV on.
• You can also turn on your TV by pressing the CHANNEL –/+ button on your TV.
To turn your TV off:
Press the POWER button on the remote control. Your TV enters the standby
mode.
To turn the TV’s main power off:
Press the Main power button on the TV.
5
Page 6
Preparation
MENU 3
AUTO CH PRESET
MANUAL CH PRESET
LANGUAGE ENGLISH
SELECT BY EXIT BY
OPERATE BY -+
DISPLAY
5. Selecting the on-screen language
You can select the language for the on-screen display.
1.
Press MENU
then select
2.
Press MENU –/+ to select language.
LANGUAGE
to display the
/
.
MENU 3
The on-screen displays indications are in the selected
menu,
MENU 3
AUTO CH PRESET
MANUAL CH PRESET
LANGUAGE ENGLISH
SELECT BY EXIT BY
OPERATE BY -+
DISPLAY
language.
6. Presetting TV stations
To view a TV programme, you must first preset TV channels to channels on the TV.
This TV has 100 channels (channel 1 to 99 and channel AV).
■ Auto Channel Preset
You can automatically preset all TV channels that can be received by your TV to
channels.
• The Auto Channel Preset function does not preset a TV channel to the AV channel
(channel number 0).
• If the TV cannot preset the TV channel you want to view, preset it manually. For details see
“Manual Channel Preset” on page 7.
1.
Press MENU
then select
2.
Press MENU –/+ to start the Auto Channel
/
AUTO CH PRESET
Preset function.
ON SEARCH
When you have finished presetting all TV channels that can be received on your
TV, the display will go out and the Auto Channel Preset function will end.
• To stop the Auto Channel Preset, press the MENU –/+ button.
6
to display the
MENU 3
.
is displayed on the screen.
menu,
Page 7

Preparation
MANUAL
FINE
SKIP NO
SOUND SYSTEM B/G
EXIT
SELECT BY PR 1 VL
PROGRAM BY -+ EXIT BY
SEARCH BY VOL-+
DISPLAY
Channel
No.
■ Manual Channel Preset
You can manually preset the desired TV channels to the desired channels.
1.
Press MENU
then select
2.
Press MENU –/+.
The sub-menu is displayed.
• The channel No. is displayed as a PR No.
3.
Press MENU –/+ to select the channel
MANUAL CH PRESET
number.
4.
Press VOLUME –/+ to start searching for
the TV channel.
or is displayed on the screen.
to display the
/
MENU 3
.
menu,
MENU 3
AUTO CH PRESET
MANUAL CH PRESET
LANGUAGE ENGLISH
SELECT BY EXIT BY
OPERATE BY -+
DISPLAY
When a TV channel is received, the
or display goes out, and the TV
station is preset to the currently selected channel No.
• If the TV channel you want to preset is not displayed, repeat step 4 until the TV finds the
TV channel you want to preset.
• To stop the Manual Channel Preset function, press any button other than the VOLUME
–/+ button.
If the picture is not clear:
Use the Fine function to fine-tune the TV station.
1. Press MENU
2. Hold VOLUME –/+ down to fine-tune the TV station
so that the best image is displayed on screen.
or indicates that the TV station is being
fine-tuned.
5.
Press MENU
6.
Press VOLUME –/+ to select the appropriate
sound system.
• For the sound systems in each country or region, refer to the
table “Broadcasting systems” on page 19.
to select
/
to select
/
FINE
.
SOUND SYSTEM
MANUAL
FINE
SKIP NO
SOUND SYSTEM B/G
EXIT
SELECT BY PR 3 VL
PROGRAM BY -+ EXIT BY
FINE BY VOL-+
.
MANUAL
FINE
SKIP NO
SOUND SYSTEM B/G
EXIT
SELECT BY PR 3 VL
PROGRAM BY -+ EXIT BY
CHANGE BY VOL-+
DISPLAY
DISPLAY
7.
Press MENU
8.
Repeat steps 3 to 7 if you want to preset another TV station to a
channel.
9.
Press DISPLAY to turn the display off.
/
to select
MANUAL
.
7
Page 8

Preparation
MANUAL
FINE
SKIP NO
SOUND SYSTEM B/G
EXIT
SELECT BY PR 1 VL
PROGRAM BY -+ EXIT BY
YES/NO BY VOL-+
DISPLAY
Channel
No.
■ Skip
You can set undesired channels to be skipped.
Channels set to be skipped cannot be selected by the CHANNEL –/+ buttons nor
the CHANNEL SCAN button.
• Channels to which a station has not been preset are automatically set to be skipped.
1.
Press MENU
PRESET
2.
Press MENU –/+.
The sub-menu is displayed.
3.
Press MENU
• The channel No. is displayed as a PR No.
.
to select
/
to select
/
MANUAL CH
SKIP
.
MENU 3
AUTO CH PRESET
MANUAL CH PRESET
LANGUAGE ENGLISH
SELECT BY EXIT BY
OPERATE BY -+
MANUAL
FINE
SKIP NO
SOUND SYSTEM B/G
EXIT
SELECT BY PR 1 VL
PROGRAM BY -+ EXIT BY
SEARCH BY VOL-+
DISPLAY
DISPLAY
4.
Press MENU –/+ to select the channel
you want to skip.
5.
Press VOLUME –/+ to select
YES
.
The channel you selected is set to be skipped.
To cancel the Skip:
select NO.
6.
Repeat steps 4 and 5 if you want to set another channel to skip.
7.
Press DISPLAY to turn the display off.
MANUAL
FINE
SKIP YES
SOUND SYSTEM B/G
EXIT
SELECT BY PR 5 VL
PROGRAM BY -+ EXIT BY
YES/NO BY VOL-+
DISPLAY
8
Page 9

Basic operation
ECO
SENSOR
SYSTEM
COLOUR
TV/VIDEO
SOUND
POWER
PICTURE
MODE
123
2.
Select a channel.
■ Press the CHANNEL –/+
button.
• Up/down selection cannot be selected
for channels to which the Skip has
been set to
YES
. (See page 8.)
456
OFF
TIMER
CHANNEL
SCAN
DISPLAY
CHANNEL
1.
Press the POWER button to
789
RETURN+
MENU
REMOTE CONTROL UNIT
RM-C364GY
0
MUTING
VOLUME
-/--
turn your TV on.
• If your TV does not turn on, press the
Main power button on the TV then
press the POWER button again.
• You can also turn on your TV by
pressing any of the following buttons;
– the CHANNEL –/+ button
– the Number buttons
– the TV/VIDEO button
■ Press the Number buttons
to enter the channel
number.
• If you want to enter a two-digit
number, press the -/-- button to select
the two digit mode “--”, then enter the
channel number.
If the colour is abnormal:
Repeatedly press the COLOUR
SYSTEM button to select the
appropriate colour system. For
details, see “Colour System” on
page 10.
3.
Press VOLUME –/+ to adjust
the sound.
If the sound is abnormal:
Repeatedly press the SOUND
SYSTEM button to select the
appropriate sound system. For
details, see “Sound System” on
page 10.
4.
To turn your TV off, press
POWER.
• We recommend that you press the
Main power button on the TV to turn
the main power off if you do not plan
to use your TV for a long time or if you
wish to save energy.
Viewing Images from an
External Device:
Press the TV/VIDEO button to
select the VIDEO mode.
• You can also use the Input function to
select the VIDEO mode. For details,
refer to page 13.
9
Page 10

Remote control buttons and functions
Colour System
If the colour is abnormal, select the
appropriate colour system. Each press
of the COLOUR SYSTEM button
changes the colour system as follows.
In TV mode (channel 1 to 99 and
AV):
AUTO PAL
In VIDEO mode:
AUTO PAL
NTSC4.43
AUTO:
Automatic colour system selection.
• For the colour systems in each country or
region, see the table “Broadcasting
Systems” on page 19.
• If the colour is abnormal even though you
selected
colour system manually.
AUTO
, change the appropriate
SECAM
SECAM
NTSC3.58
Sound System
If the sound is abnormal, select the
appropriate sound system. Each press
of the SOUND SYSTEM button
changes the sound system as follows.
B/G I D/K
• For the sound systems in each country or
region, see the table “Broadcasting
Systems” on page 19.
• You cannot select any sound system
when in VIDEO mode.
Picture Mode
You can select one of three picture
adjustment modes.
Repeatedly press the PICTURE
MODE button to select the desired
mode.
BRIGHT:
Heightens contrast and sharpness.
STANDARD:
Standardizes picture adjustments.
SOFT:
Softens contrast and sharpness.
• Pressing the PICTURE MODE button
returns all the picture settings in the
MENU 4
menu to their default settings.
10
Page 11

Remote control buttons and functions
Display
You can continuously display the
current channel number or VIDEO
mode on the screen.
Press the DISPLAY button.
To turn the display off, press the
DISPLAY button again.
• When selecting a channel or VIDEO mode
with no input signal, indication of selected
channel or VIDEO mode becomes fixed
on the screen.
Off Timer
You can set this TV to turn off
automatically within a specified period
of time.
Repeatedly press the OFF TIMER
button to select the period of time.
• You can set the period of time a maximum
of 120 minutes in 10 minute increments.
• 1 minute before the Off Timer turns off the
TV,
GOOD NIGHT!
displays.
Eco Sensor
<AV-14A10 does not have this
function.>
You can adjust this TV so that the
screen automatically adjusts to the
optimum contrast according to the
brightness of your room. This function
reduces eye strain and the power
consumption of this TV.
Repeatedly press the ECO SENSOR
button to select the desired mode.
DIGITAL ECO SENSOR
DISPLAY:
The Eco Sensor function will work.
In this mode, the clover mark indicating
the brightness of your room is displayed for several seconds each time
the brightness changes. The number of
clover marks displayed on screen
increases as your room becomes
darker.
To display the remaining time:
Press the OFF TIMER button once.
To cancel the Off Timer:
Press the OFF TIMER button to return
the period of time to 0.
• The Off Timer will not turn off the TV’s
main power.
DIGITAL ECO SENSOR:
The Eco Sensor function will work.
However, in this mode, the clover mark
will not be displayed even if the
brightness of your room changes.
DIGITAL ECO SENSOR OFF:
The Eco Sensor function will not work.
Muting
You can turn the volume off instantly.
This is convenient when answering the
phone or when you have visitors.
Press the MUTING button.
To return the sound, press the
MUTING button again.
11
Page 12

Remote control buttons and functions
Channel Scan
You can search for the channel you
want to view while scanning all of the
channels that can be viewed on this
TV.
1.
Press CHANNEL SCAN.
Channels will be scanned in
channel No. order.
2.
When the channel that you
want to view appears, press
CHANNEL SCAN again
before scanning for the next
channel begins.
• Channel Scan selection cannot be
selected for channels to which the
Skip has been set to
8.)
YES
. (See page
Return +
You can set a channel you frequently
view to the Return Channel and you
can view that channel at any time with
one-touch.
To set the channel to the Return
Channel:
1. Select the channel you want to
set to the Return Channel.
2. Press RETURN + and hold until
the message
PROGRAMMED!
• When you turn off the TV, the Return
Channel setting is cancelled.
To view the Return Channel:
Press the RETURN + button.
• You can view two channels (current
channel and Return Channel) alternately
by pressing this button.
RETURN PLUS
appears.
To cancel the Return Channel
setting:
Press the RETURN + button and hold
until the message
CANCELLED!
RETURN PLUS
appears.
If no channel is set to the Return
Channel:
You can view the channel selected
right before the current channel by
pressing this button.
12
Page 13

Using the TV’s menus
On Timer
Your TV will automatically turn on and
tune into the channel you set after the
period of time you set.
1.
Press MENU
the
MENU 1
select
MENU 1
INPUT TV
ON TIMER
PR 1 0:00
VNR OFF
PROGRAM BY -+
SELECT BY EXIT BY
OPERATE BY VOL-+
2.
Press MENU –/+ to select a
ON TIMER
menu, then
DISPLAY
channel you want to view
when the TV turns on.
3.
Press VOLUME –/+ to select
the period of time after which
you want to turn on the TV.
The On Timer function starts.
• Each time you press the button, the
period of time changes in 15 minute
intervals (up to 12 hours).
to display
/
.
Channel
No.
When the time set for the On
Timer function is reached:
The TV automatically turns on and the
channel set for the On Timer function
is displayed.
• For safety reasons the TV will
automatically turn off if no operations are
made within approximately two hours after
the TV is turned on with the On Timer
function.
• The Off Timer function and Auto Shutoff
function have priority over the On Timer
function.
Input
You can view images from VCRs or
other devices connected to your TV.
1.
Press MENU
the
MENU 1
select
MENU 1
INPUT TV
ON TIMER
PR 1 0:00
VNR OFF
SELECT BY EXIT BY
OPERATE BY -+
INPUT
menu, then
.
DISPLAY
to display
/
To cancel the On Timer function,
press the VOLUME –/+ button to
set the period of time to
4.
Press DISPLAY to turn the
0:00
display off.
• If you turn off the TV’s main power by
pressing the Main power button, the
On Timer function is canceled.
• If you do not turn off the TV after
starting the On Timer function, the
channel will automatically switch to
the channel set for the On Timer
function.
2.
Press MENU –/+ to select the
.
VIDEO mode.
TV mode changes to VIDEO mode.
13
Page 14

Using the TV’s menus
VNR (Video Noise Reduction)
You can reduce the picture noise.
1.
Press MENU
the
MENU 1
select
MENU 1
INPUT TV
ON TIMER
PR 1 0:00
VNR OFF
SELECT BY EXIT BY
OPERATE BY -+
2.
Press MENU –/+ to select
VNR
menu, then
.
To cancel the VNR function, select
OFF
.
3.
Press DISPLAY to turn the
display off.
/
DISPLAY
to display
ON
2.
Press MENU –/+ to select
ON
.
To cancel the Child Lock function,
OFF
select
3.
Press DISPLAY to turn the
.
display off.
• The Child Lock function is canceled
when you turn the TV’s main power
off.
Auto Shutoff
You can set your TV to turn off if no
signals are received for about 15
.
minutes or longer after the end of a
broadcast.
1.
Press MENU
the
MENU 2
select
AUTO SHUTOFF
menu, then
to display
/
.
Child Lock
You can disable the front control
buttons of the TV.
ON
When this function is set to
can be operated using only the remote
control.
Use this function to prevent children
from operating the TV at their own
discretion (without parental consent).
1.
Press MENU
the
MENU 2
select
MENU 2
AUTO SHUTOFF OFF
CHILD LOCK OFF
BLUE BACK ON
SELECT BY EXIT BY
OPERATE BY -+
CHILD LOCK
menu, then
/
DISPLAY
to display
, the TV
.
MENU 2
AUTO SHUTOFF OFF
CHILD LOCK OFF
BLUE BACK ON
SELECT BY EXIT BY
OPERATE BY -+
2.
Press MENU –/+ to select
DISPLAY
To cancel the Auto Shutoff function,
select
3.
Press DISPLAY to turn the
OFF
.
display off.
• The Auto Shutoff function does not
turn off the TV’s main power.
• The Auto Shutoff function will not work
for a VIDEO mode.
ON
.
14
Page 15

Using the TV’s menus
Blue Back
You can mute the sound and change
the picture into a blue screen while no
signals are received by the TV, or
when the signals are unstable.
1.
Press MENU
the
MENU 2
select
MENU 2
AUTO SHUTOFF OFF
CHILD LOCK OFF
BLUE BACK OFF
SELECT BY EXIT BY
OPERATE BY -+
2.
Press MENU –/+ to select
BLUE BACK
menu, then
DISPLAY
To cancel the Blue Back function,
select
• To view a broadcast even when the
• Even when the Blue Back function is
3.
Press DISPLAY to turn the
OFF
.
reception signal is poor, set the Blue
Back function to
set to
OFF
, the sound may not be
audible.
display off.
to display
/
OFF
.
.
ON
Picture Adjustment
You can adjust the picture as you like.
1.
Press MENU
to display the
MENU 4
TINT
COLOUR
BRIGHT
CONT.
SHARP
SELECT BY EXIT BY
OPERATE BY -+
2.
Press MENU
DISPLAY
item and press MENU –/+ to
adjust it.
.
3.
– Item +
Reddish TINT Greenish
Lighter
Darker BRIGHT Brighter
Lower CONT. Higher
Softer SHARP Sharper
•
TINT
(tint) is displayed only when
viewing images from NTSC3.58 or
NTSC4.43 colour systems.
COLOUR
Press DISPLAY to turn the
display off.
repeatedly
/
MENU 4
to select an
/
.
Deeper
15
Page 16

Using the button on the TV
<AV-21D10>
ON
POWER
MENU
CHANNEL
VOLUME
EXIT
TIMER
1
2
3
<AV-21A10>
MENU
1
CHANNEL
2
VOLUME
EXIT
3
<AV-14F10/AV-20N10/AV-21F10>
MENU
1
CHANNEL
2
VOLUME
EXIT
3
47
5
POWERON TIMER
5
4
7
POWERON TIMER
45 7
<AV-14A10>
MENU
1 MENU buttons
• MENU button
• MENU –/+ buttons
2 CHANNEL –/+ buttons
3 VOLUME –/+ buttons
4 ON TIMER lamp
The light is switched on while
On Timer function is operating.
16
CHANNEL VOLUME
–+++
––
EXIT
POWER/
ON TIMER
63721
5 POWER lamp
When the Main power is on,
the light is red.
6 POWER/ON TIMER lamp
When the Main power is on,
the light is green.
When On Timer function is on,
it is red.
7 Main power button
Page 17

Using the button on the TV
Basic operation
• Check to make sure the Child Lock
function is set to
Lock function is set to ON, the TV cannot
be operated using the front control
buttons. For details, see “Child Lock” on
page 14.
1.
Press CHANNEL –/+ to turn
the TV on from standby
mode.
2.
Press CHANNEL –/+ to select
a channel.
3.
Press VOLUME –/+ to adjust
the volume.
4.
To turn your TV off, press the
Main power button to turn off
the TV's main power.
OFF
. When the Child
Operating menus
You can operate functions in menus
using the front control buttons on the
TV.
1.
Press MENU to display a
menu.
2.
Press MENU repeatedly to
display the menu you want to
use.
3.
Press MENU to select the
desired function or item.
4.
Press MENU –/+ or VOLUME
–/+ to carry out the desired
operation.
• For details, see the description for
each function.
5.
Press VOLUME –/+ to turn the
menu display off.
To turn the sub-menu display
off:
1. Press MENU to select
MANUAL
FINE
SKIP NO
SOUND SYSTEM B/G
EXIT
SELECT BY PR 1 VL
PROGRAM BY -+ EXIT BY
EXIT BY VOL-+
2. Press VOLUME –/+ to turn the
display off.
DISPLAY
EXIT
.
17
Page 18

Troubleshooting
Important: Review all the instructions in this manual.
Problem Check/Action
Cannot turn TV on Press the Main power button (see p.5).
Insert the power plug in an AC outlet.
No picture nor sound Press the TV/VIDEO button to select the correct mode (see p.9).
Check the aerial connections.
Remote control inoperable Replace the batteries (see p.5).
Insert the batteries correctly.
Buttons on front of TV do Is the Child Lock function ON ? (see p.14).
not work
The TV turns on suddenly The TV will automatically turn on when the On Timer is
operated (see p.13).
The TV turns off suddenly The TV will automatically turn off in the following cases.
• When the Off Timer or Auto Shutoff is operated (see p.11
and p.14).
• When no operations are made within approximately two hours
after the TV was turned on with the On Timer (see p.13).
Abnormal sound Select the appropriate sound system (see p.10).
Abnormal colour Adjust the colour and brightness (see p.15).
Select the appropriate colour system (see p.10).
Set the Picture mode to
Lines or streaks in picture
(interference)
Spotted picture (crosstalk) Move the aerial away from the source of interference.
Double picture (ghost) Reposition the aerial.
Snowy picture Check the aerial connection and aim it correctly.
(image noise) Replace or repair the aerial.
The TV channel changes The channel will automatically be changed when the On Timer
suddenly operates (see p.13).
The screen turns blue Is the Blue Back set to ON ? (see p.15).
Move the components apart until the interference disappears.
Reposition the aerial.
Replace the aerial cable with a coaxial cable, which is less
prone to interference.
Replace with an aerial with good directionality.
STANDARD
(see p.10).
The following are normal occurrences and are not the result of TV
malfunctions:
• When a still bright image (of a white dress, for example) appears on the screen, the image
may be coloured. This problem occurs in all CRTs, and when the bright image disappears,
the colouration also disappears.
• This TV is equipped with a microcomputer that may operate abnormally due to interference
from external devices. If this happens, press the Main power button to turn the main power
off and disconnect the power plug from the AC outlet. Then, reconnect the power plug to the
AC outlet and press the Main power button again.
18
Page 19

Specifications
TV RF systems B, G, I, D, K, K1
Colour systems PAL, SECAM, NTSC3.58/4.43MHz (in VIDEO mode only)
Channel and frequencies VHF low channel (VL) = 46.25 to 168.25 MHz
VHF high channel (VH) = 175.25 to 463.25 MHz
UHF channel (U) = 471.25 to 863.25 MHz
■ Receives cable channels in mid band (X to Z, S1 to S10),
super band (S11 to S20) and hyper band (S21 to S41) .
External input / output VIDEO input (RCA)
AUDIO input (RCA)
VIDEO output (RCA)
AUDIO output (RCA)
Headphone jack: mini jack (dia. 3.5 mm)
Design and specifications subject to change without notice.
Broadcasting Systems
Area
Asia,
Middle
East
Europe
Oceania
Africa
Country or Region
Bahrain, Kuwait, Oman, Qatar,
United Arab Emirates, Yemen, etc.
Indonesia, Malaysia, Singapore,
Thailand, India, etc.
China, Vietnam, etc.
Hong Kong, etc.
Islamic Republic of Iran, Lebanon,
Saudi Arabia, etc.
Russia, etc.
Czech Republic, Poland, etc.
Germany, Holland, Belgium, etc.
UK, etc.
Australia, New Zealand, etc.
Republic of South Africa, etc.
Nigeria, etc.
Egypt, Morocco, etc.
Colour
PA L
PA L
PA L
SECAM
SECAM
PA L
PA L
PA L
PA L
PA L
PA L
SECAM
System
Sound
B/G
D/K
I
B/G
D/K
D/K
B/G
I
B/G
I
B/G
B/G
19
Page 20

 Loading...