

Justin JM-LED Bright Strike 4 User Manual
AH006E
Please read carefully before use
User manual
JM-LED Bright Strike 4
Unpacking: Thank you for purchasing the AH006E. Every AH006E has been tested and
shipped in perfect operating condition. Carefully check the shipping carton for damage
that may have occurred during shipping. If the carton appears to be damaged, carefully
inspect your fixture for any damage and be sure all equipment necessary to operate the
unit has arrived intact. In the event damage has been found or parts are missing, please
contact our toll free customer support number for further instructions. Please do not
return this unit to your dealer without contacting customer support first.
Introduction: The AH006E has five DMX mode, The fixture can operate in three different
operating modes; DMX contorl, sound-active, or in a Master/Slave configuration. For best
results use fog or special effects smoke to enhance the beams projections.
Warning! To prevent or reduce the risk of electrical shock or fire, do not expose this unit
to rain or moisture.
Warning! This may cause severe eye damage. Avoid looking directly into the light source
at all times!
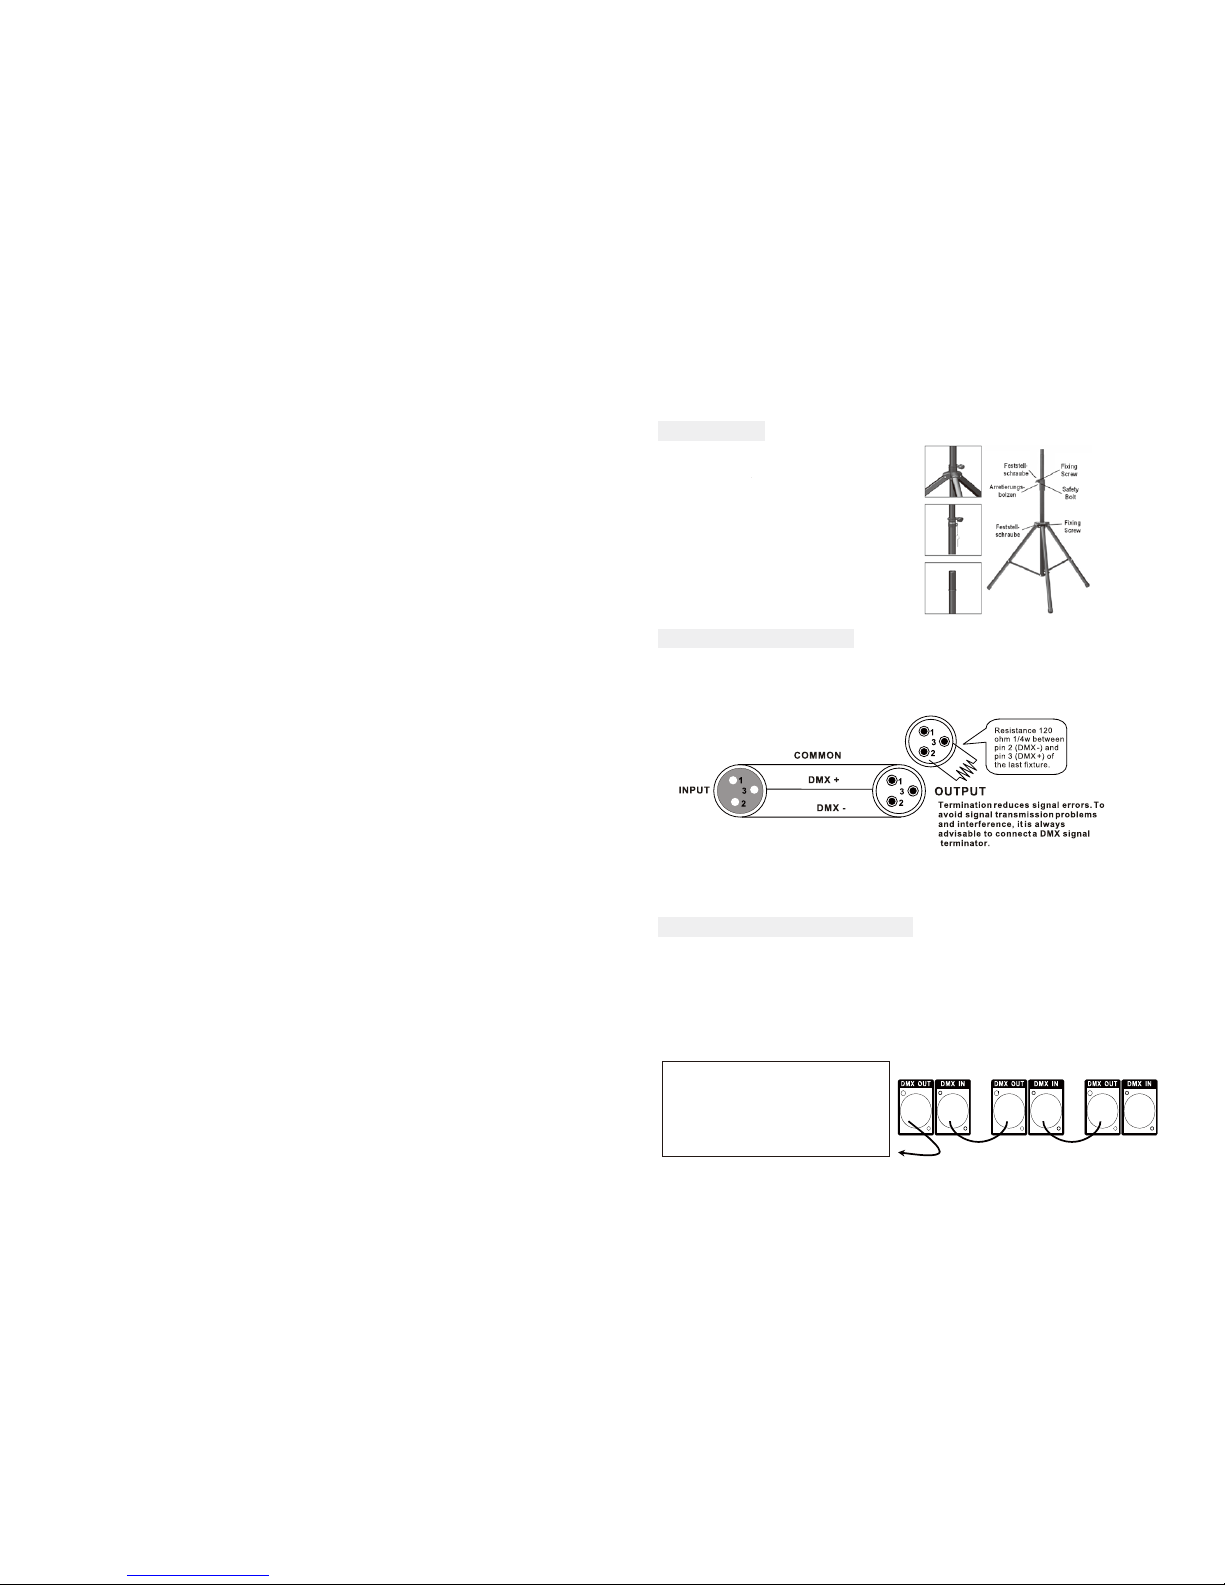
Place the AH006A stand on solid flat
ground. Set the AH006A with 35mm
flange on top of stand . Adjust the stand
height and tighten all fixing screws .
Additionally fix screws with safety bolts.
Move LED PARs in direction you need
and fix them with screws. Before you
switch on power please crosscheck that all
connections have been made properly.
1 6
Installation
CABLE CONNECTORS
Master/Slave Fixture Linking
Cabling must havea male XLR connector on one end and a female XLR connector on
the other end.
caution:Do not allow contact between the common and the fixture’s chassis ground. Grounding the
common can cause a ground loop, and your fixture may perform erratically. Test cables with an ohm
meter to verify correct polarity and to make sure the pins are not grounded or shorted to the shield or
each other.
DMX connector configuration
Often, the setup for Master Slave and Standalone
operation requires that the first fixture in the chain be
initialized for this purpose via either settings in the
control or DIP-switches. Secondarily. the fixtures that
follow may also require a slave setting. Please consult
the “Operating instructions” section in this manual for
complete instructions for this type of setup and
configuration
1. Connect the (male) 3 pin connector side of the DMX cable to the output (female) 3
pin connector of the first fixture.
2. Connect the end of the cable coming from the first fixture which will have a (female)
3 pin connector to the input connector of the next fixture consisting of a (male) 3 pin
connector. Then,proceed to connect from the output as stated above to the input of the
following fixture and soon.
Slave Slave Master
BS-4. BS-4
BS-4
BS-4
BS-4
 Loading...