

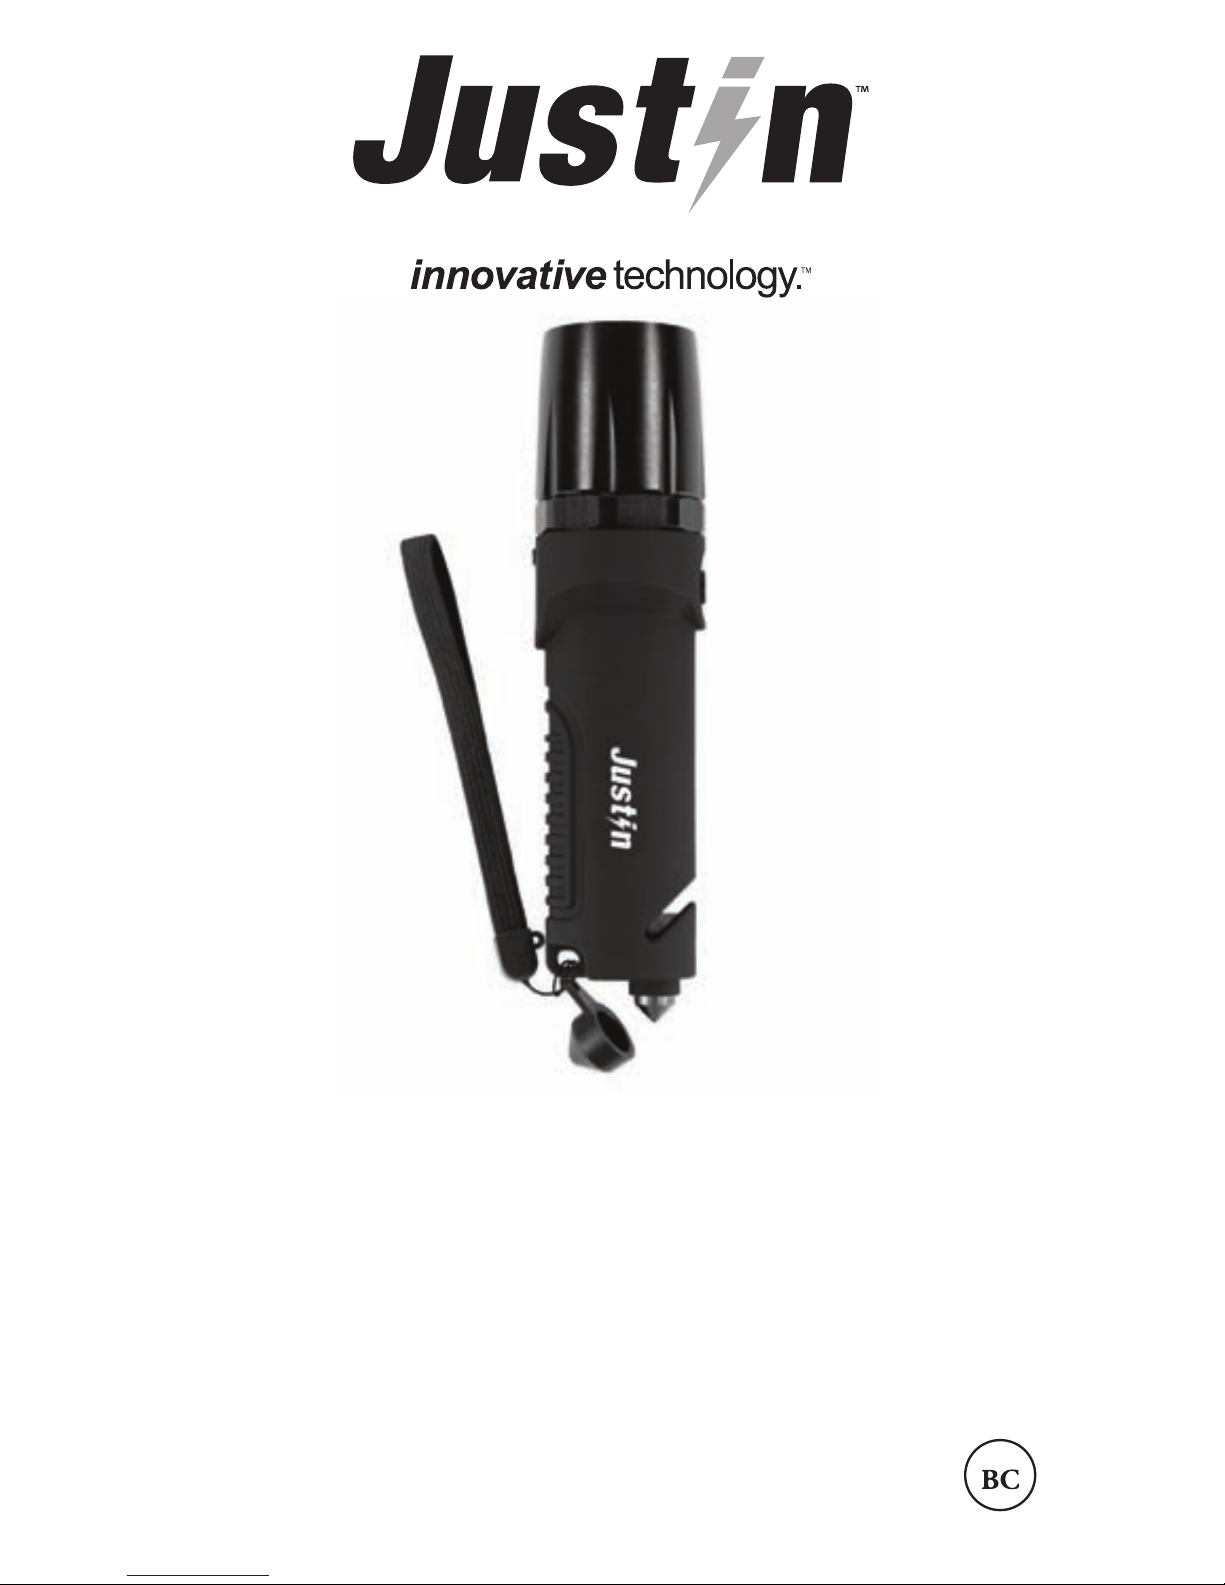
Justin JF-500-5200 User Manual
BEFORE INSTALLING AND USING THE PRODUCT,
PLEASE READ THE INSTRUCTIONS THOROUGHLY,
AND RETAIN THEM FOR FUTURE REFERENCE.
Included: (1x) Flashlight Power Bank, (1x) USB Charging
Cable and (1x) Nylon Lanyard
To ensure safe operation, check your device’s
compatibility with Flashlight specifications prior to use.
5,200mAh Water-Resistant
LED Flashlight
with Smartphone Charger
Model:
JF-500-5200
USER MANUAL
by
BEFORE INSTALLING AND USING THE PRODUCT,
PLEASE READ THE INSTRUCTIONS THOROUGHLY,
AND RETAIN THEM FOR FUTURE REFERENCE.
PRODUCT OVERVIEW
Included: (1x) Flashlight Power Bank, (1x) USB Charging
Cable and (1x) Nylon Lanyard
SPECIFICATIONS
To ensure safe operation, check your device’s
compatibility with Flashlight specifications prior to use.
Before first use, it is recommended to charge the
Flashlight via the Micro USB Input Port with the supplied
Micro USB Cable. The Flashlight will take approximately
6.5 hours to charge from 0-100%.
1
. Charging the Flashlight:
Plug the supplied Micro USB Cable into the Flashlight’s
Micro USB Input Port. Next, insert the USB end of the
charging cable into a computer or AC power source
with a USB Output Port of 5V. While charging, the 3 Blue
LED Indicator Lights will FLASH to show the power level.
When the Flashlight is fully charged, all 3 LEDs will
stop flashing and stay lit. See “Checking Power Levels”.
1 2
Capacity: 5,200mAh (19.24Wh)
Input: 5VDC / 900mA
Output: 5VDC / 1.0A (max)
Weight: 263g / .58lbs
Temperature: 0ºC – 45ºC
32ºF – 113ºF
Battery Cell: Lithium-Ion
Charging Time: 6.5 Hours
Cycle Life: ≥300 times
Dimensions: 2 x 8.11in
50.95 x 206mm
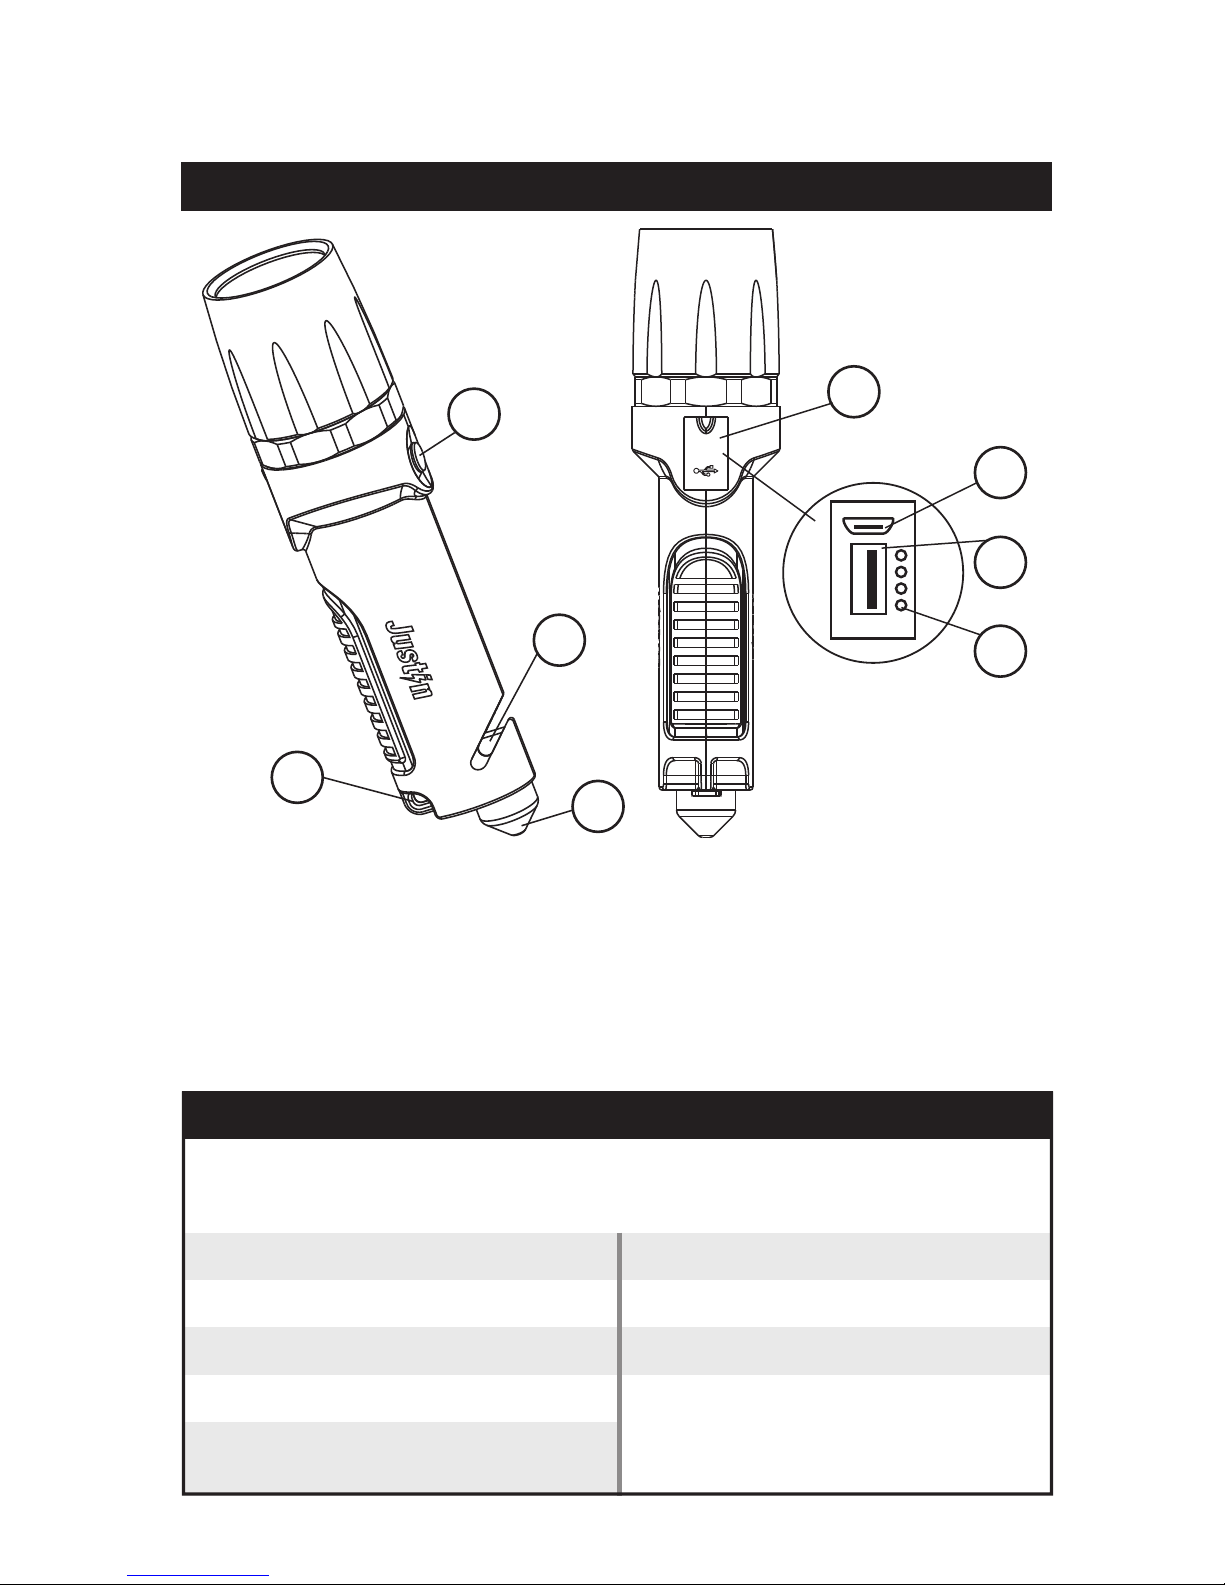
1. Power Button
2. Seatbelt Cutter
3. Lanyard Loop
4.
Glass Breaker with Protective Cap
5. Dust Cover
6. Input
7. Output
8. LED Indicators
5
1
4
3
2
6
7
8
INPUT
OUTPUT
USE
Before first use, it is recommended to charge the
Flashlight via the Micro USB Input Port with the supplied
Micro USB Cable. The Flashlight will take approximately
6.5 hours to charge from 0-100%.
1
. Charging the Flashlight:
Plug the supplied Micro USB Cable into the Flashlight’s
Micro USB Input Port. Next, insert the USB end of the
charging cable into a computer or AC power source
with a USB Output Port of 5V. While charging, the 3 Blue
LED Indicator Lights will FLASH to show the power level.
When the Flashlight is fully charged, all 3 LEDs will
stop flashing and stay lit. See “Checking Power Levels”.
2. Charging Your Smartphone, Etc:
Using your device’s supplied charging cable (Apple
Lightning
™
cable, Micro USB cable, etc.), plug your
smartphone, tablet or other USB powered device into
the USB Output Port of the Flashlight. Press and Hold
the Power Button on the Flashlight for Two Seconds
to begin charging your device. The Green LED will
turn on and remain on to indicate your device is
charging. Charging will continue until your device is fully
charged or the Flashlight’s internal battery has drained.
Important: Please check voltage compatibility with your device prior to use.
3. Using the Flashlight:
Disconnect all cables and devices from the Flashlight
before use. The LED Torch is operated by pressing the
Power Button. The Flashlight operates in four light
modes: Normal, Extra Bright, Flashing, SOS & OFF.
Push the Power Button to cycle through each light
mode. To stop charging or turn OFF the Flashlight at
any time, push and hold the Power Button for Two
seconds.
Please Note: The Green LED will remain lit briefly.
LED FLASHLIGHT / BATTERY LIFE
4. In Case of Emergency:
Seatbelt Cutter:
strap inside blade chamber. Then hold the flashlight
firmly, pull blade quickly across strap to cut completely.
Important: Intended only to cut seat belt webbing if a seatbelt does
not unlatch during a vehicular accident.
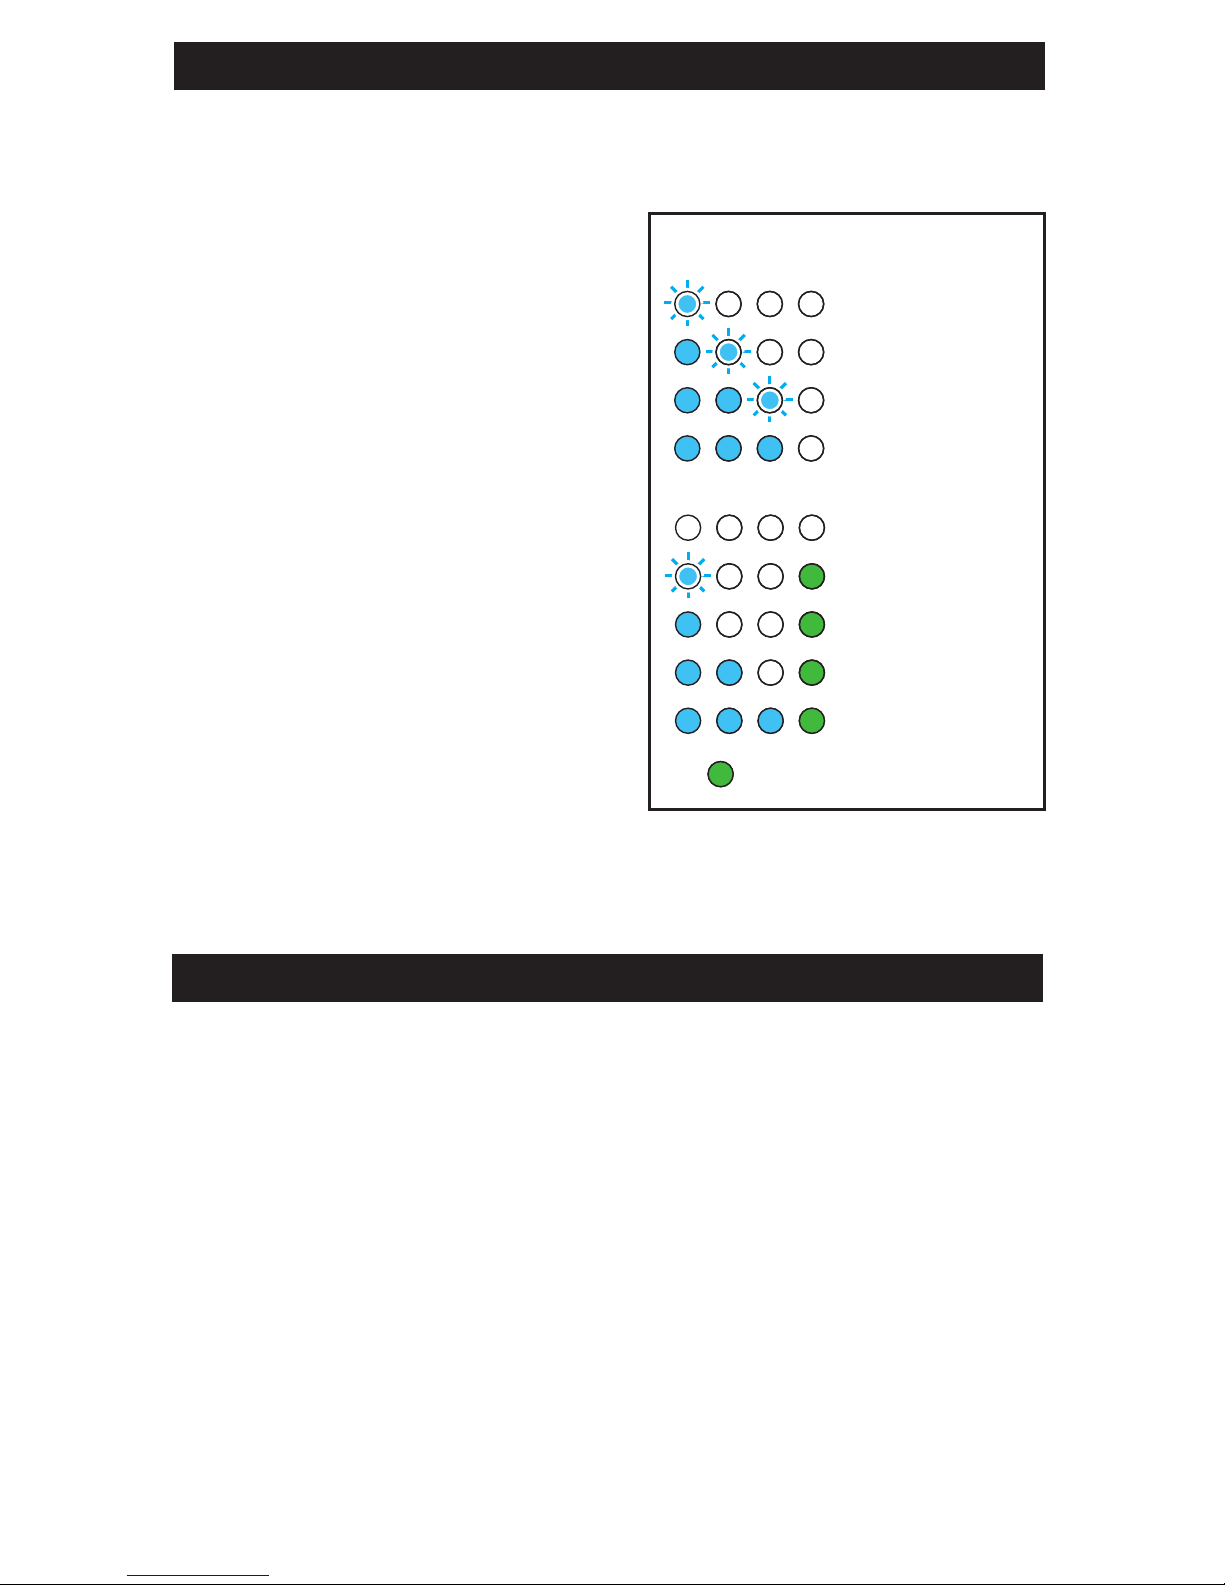
To show the battery status, press the Power Button and
the LED Indicator Lights will indicate the Flashlight’s
power level according to the
diagram.
When charging the Flashlight,
the LED Indicators will FLASH
according to the current
power level (i.e., at 50%
charged, one LED will be lit
and the second will be
flashing). Once the Flashlight
is fully charged, the LEDs will
STOP FLASHING.
To view the power level of the
Flashlight while an external
device is connected, press
the Power Button. The LEDs will light up for about
2 seconds while charging your device.
31 - 70% Charged
1 - 30% Charged
100% Charged
71 - 99% Charged
LED Power Levels When
Charging the Flashlight:
1 - 5% Charge
Completely Drained
36 - 70% Charge
71 - 100% Charge
6 - 35% Charge
LED Power Levels:
GREEN LED is ON when
Charging External Devices
CHECKING POWER LEVELS
 Loading...