

Justin JB-580-10400 User Manual
BEFORE INSTALLING AND USING THE PRODUCT,
PLEASE READ THE INSTRUCTIONS THOROUGHLY,
AND RETAIN THEM FOR FUTURE REFERENCE.
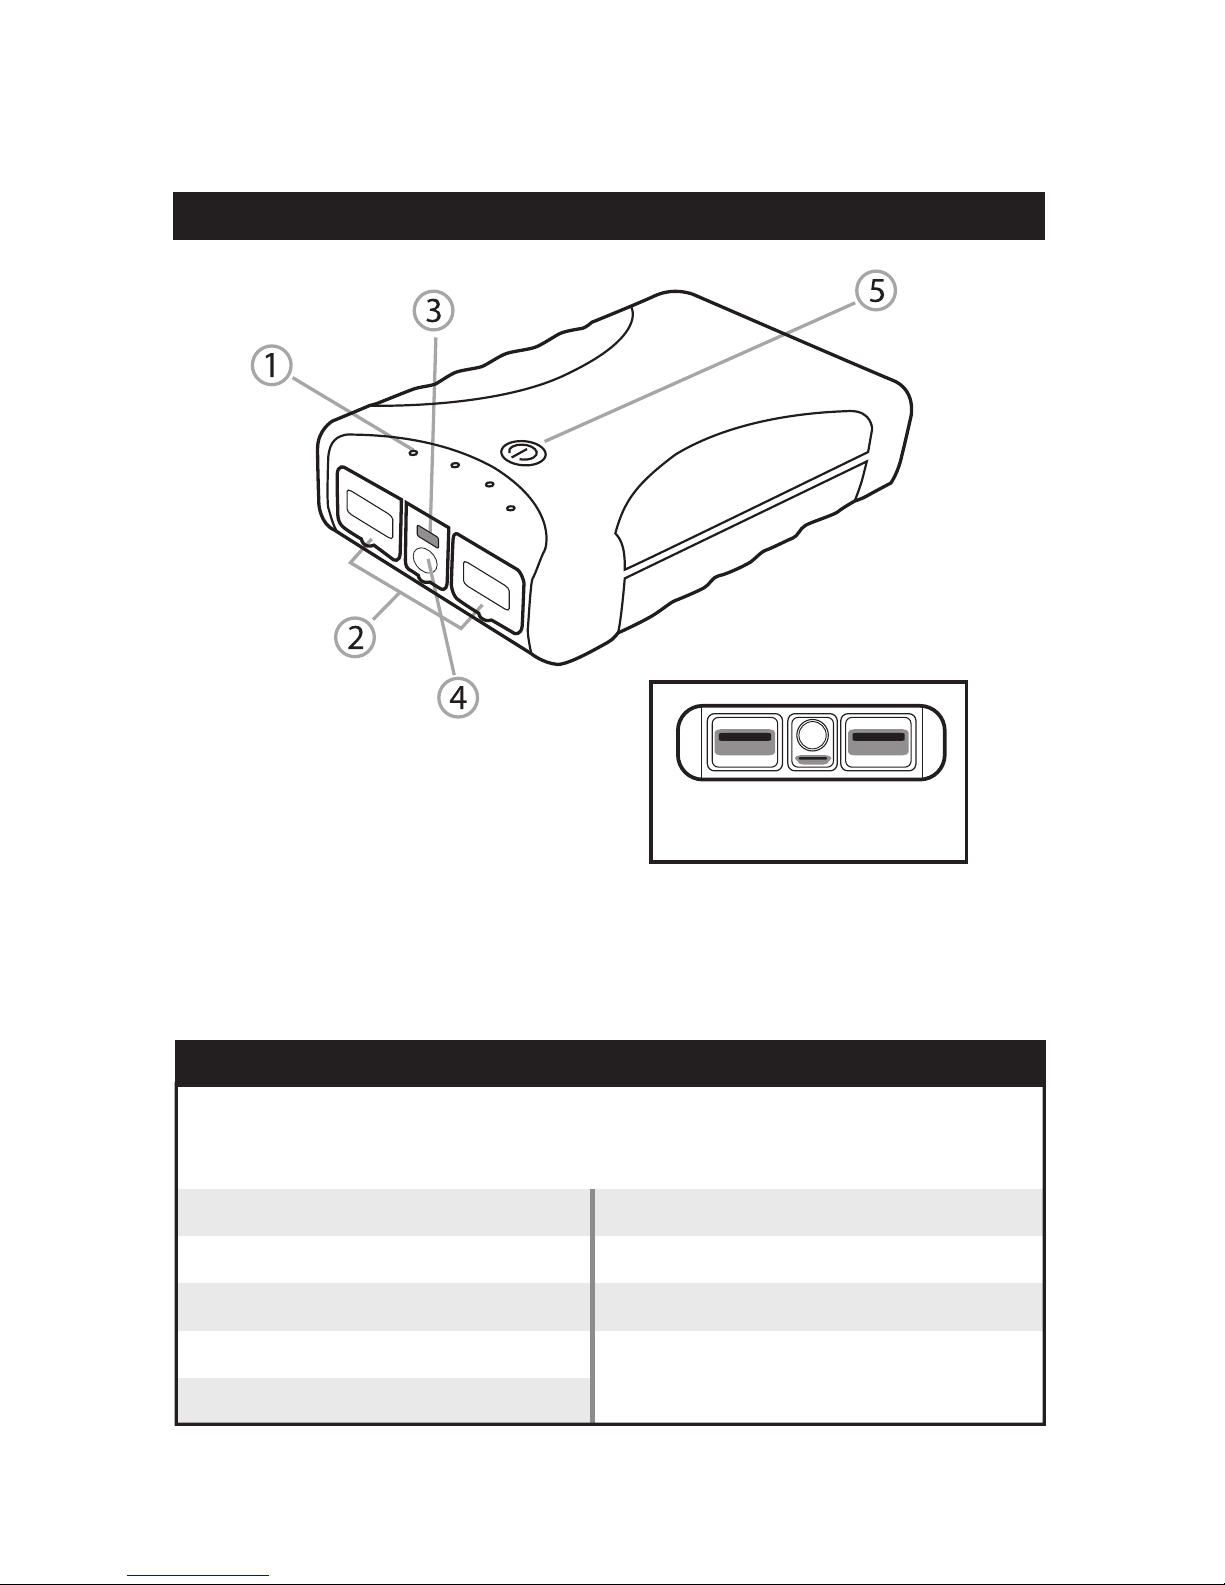
PRODUCT OVERVIEW
1. LED Indicator Lights
2. USB Output Ports
3. LED Flashlight
4. Micro USB Input Port
5. Power Button
Included: (1x) Power Bank and Charging Cable (1x)
To ensure safe operation, check your device’s
compatibility with Power Bank specifications prior to use
10,400mAh Weatherproof
Power Bank
Model:
JB-580-10400
USER MANUAL
by
BEFORE INSTALLING AND USING THE PRODUCT,
PLEASE READ THE INSTRUCTIONS THOROUGHLY,
AND RETAIN THEM FOR FUTURE REFERENCE.
PRODUCT OVERVIEW
1. LED Indicator Lights
2. USB Output Ports
3. LED Flashlight
4. Micro USB Input Port
5. Power Button
Included: (1x) Power Bank and Charging Cable (1x)
SPECIFICATIONS
To ensure safe operation, check your device’s
compatibility with Power Bank specifications prior to use
CHECKING POWER LEVELS
Before first use, it is recommended to charge the Power
Bank via the supplied USB Charging Cable. The Power
Bank will take approximately 14 hours to charge 0-100%.
1. Charging the Power Bank:
Plug the supplied Micro USB Charging Cable into the
Power Bank’s Micro USB input. Next, insert the USB
end of the charging cable into a computer or AC
power source with a USB Output Port of 5V. While
charging, the 4 blue LED Indicator Lights will FLASH
to show the power level. When the Power Bank is fully
charged, all 4 LEDs will stop flashing and stay lit.
See “Checking Power Levels”.
1 2
Capacity: 3.6V / 10,400mAh
Input: 5VDC / 1.5A (max)
Output 1: 5VDC / 2.1A (max)
Output 2: 5VDC / 1.0A (max)
Weight: 285g / 0.63lbs
Battery Cell: Lithium-Ion
Charging Time: 14 Hours
Cycle Life: ≥300 times
Dimensions: .94 x 2.99 x 4.8in
24 x 76 x 123mm
OUT 1
2.1A
OUT 2
1A
OUT 1
IN
OUT 2
CHECKING POWER LEVELS
USE
Before first use, it is recommended to charge the Power
Bank via the supplied USB Charging Cable. The Power
Bank will take approximately 14 hours to charge 0-100%.
1. Charging the Power Bank:
Plug the supplied Micro USB Charging Cable into the
Power Bank’s Micro USB input. Next, insert the USB
end of the charging cable into a computer or AC
power source with a USB Output Port of 5V. While
charging, the 4 blue LED Indicator Lights will FLASH
to show the power level. When the Power Bank is fully
charged, all 4 LEDs will stop flashing and stay lit.
See “Checking Power Levels”.
2. Charging Your Smartphone, Etc:
Using your device’s supplied charging cable (Apple
Lightning™ cable, Micro USB cable, etc.), plug your
smartphone, tablet or other USB powered device into
one of the USB Output Ports of the Power Bank.
Press the Power Button on the Power Bank to begin
charging your device (LEDs will stay lit for approx. 10
seconds). Charging will continue until your device is
fully charged or the Power Bank has drained. To
manually stop charging, simply disconnect your device.
Please Note: If you have a high powered device such
as a tablet, it is recommended to use the 2.1A Output
Port for an optimal charging experience.
3. Using the Flashlight
Press & hold the power button for 3 seconds. Press
& hold an additional 3 seconds to turn flashlight off.
•
The Power Bank comes pre-packaged with a partial
charge, NOT a full charge. We recommend fully charging
your Power Bank before first use for best performance.
• The Power Bank’s LED Indicator represents the
estimated power levels. Actual charge may vary.
• If your device (smartphone, tablet, etc.) is not charging,
this may be a sign that the battery level of the Power
Bank is very low and you need to recharge it.
• Your Power Bank includes a special Micro USB to USB
cable. Some devices, namely BlackBerry
REQUIRE this cable for charging. If you do not use this
cable, your device might not charge.
•
In some instances, some older Samsung
you to turn OFF the tablet prior to charging with the
Power Bank.
• It is normal for the Power Bank to become slightly
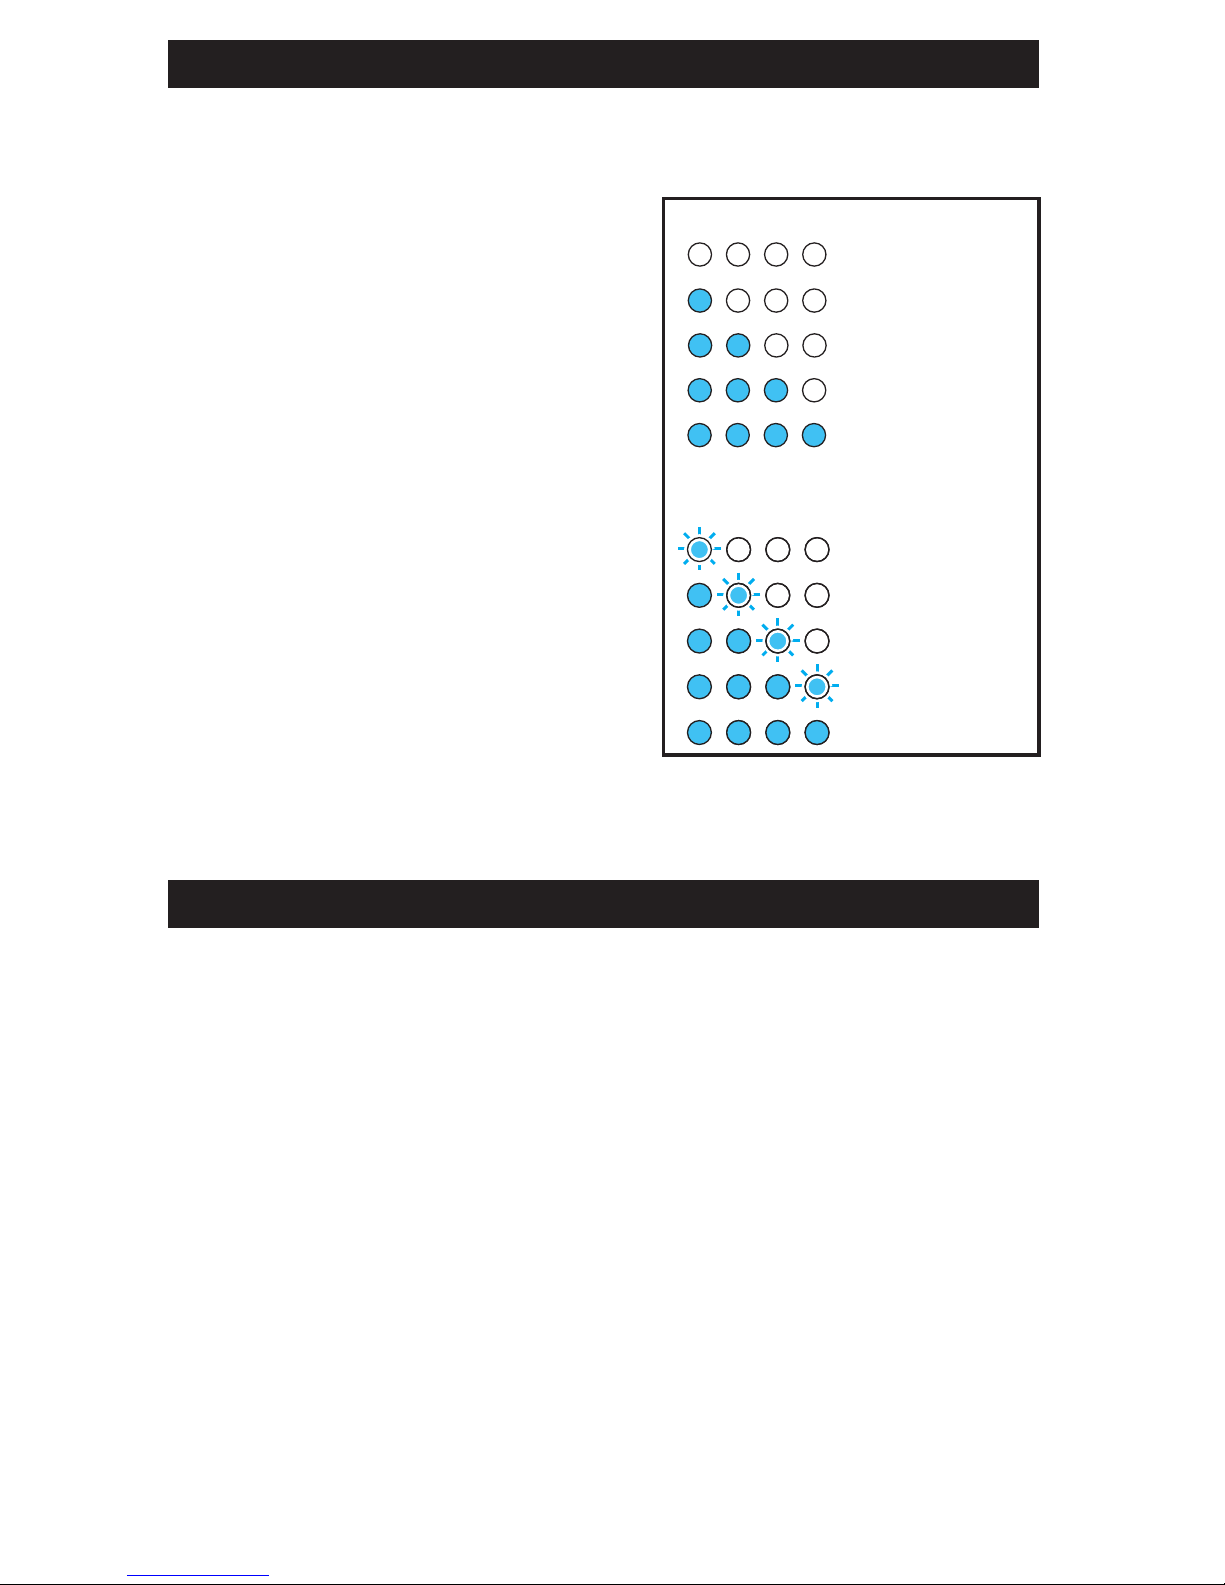
To show the battery status, press the Power Button. The
LED Indicator Lights will indicate the Power Bank’s power
level according to the diagram.
When charging the Power
Bank, the LED Indicators will
FLASH according to the
current power level (i.e., at
40% charged, one LED will be
lit and the second will be
flashing). Once the Power
Bank is fully charged, the
LEDs will STOP FLASHING.
To view the power level of the
Power Bank while an external
device is connected, press the
Power Button. The LEDs will light up for approximately
10 seconds, then turn OFF.
1 - 25% Charge
Completely Drained
51 - 75% Charge
76 - 100% Charge
26 - 50% Charge
26 - 50% Charged
1 - 25% Charged
76 - 99% Charged
100% Charged
51 - 75% Charged
LED Power Levels:
LED Power Levels When
Charging the Power Bank:
 Loading...