

Page 1

Copyright ⓒ 2019. Lab-T, Inc.
User Manual
Page 2
JUNSUNG TECH Co., Ltd.
Page 3
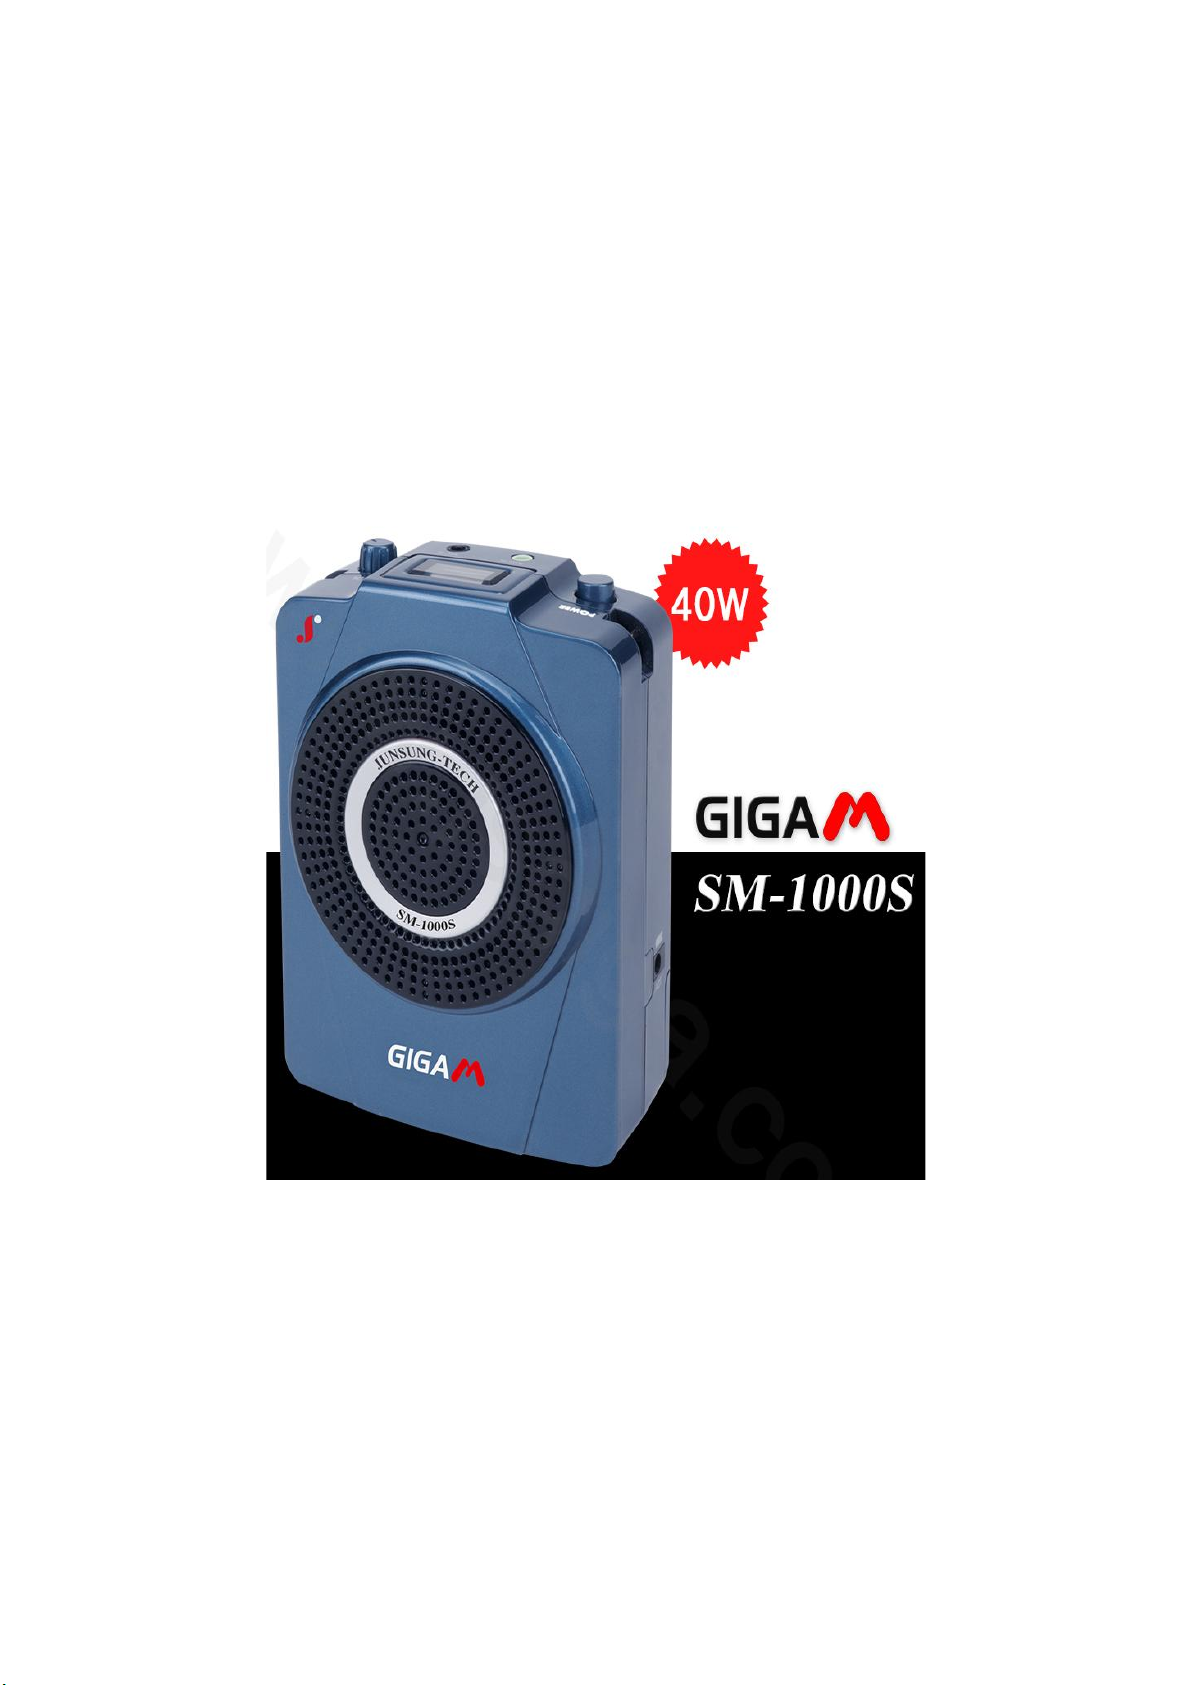
Features
SM 1000S is a 2.4GHz portable digital wireless amplifier.
It has a high output of 30W and weight only 300g because it is an ultra-
light and micro-mini product. With the 2.4GHz FHSS technology, the
product will not be affected by noise and frequency interference.
The portable microphone amplifier has the highest output of 30W among
the product of same capacity. Due to the line out function, it can be used
as a receiver by being connected to existing microphone amplifiers.
The charging microphone and a wire microphone and other external
devices can be used at the same time.
It is possible to use various external devices, such as a wireless microphone,
a MP3 device or a smartphone, at the same time.
The main body can be used as a wireless receiver for a large amplifier.
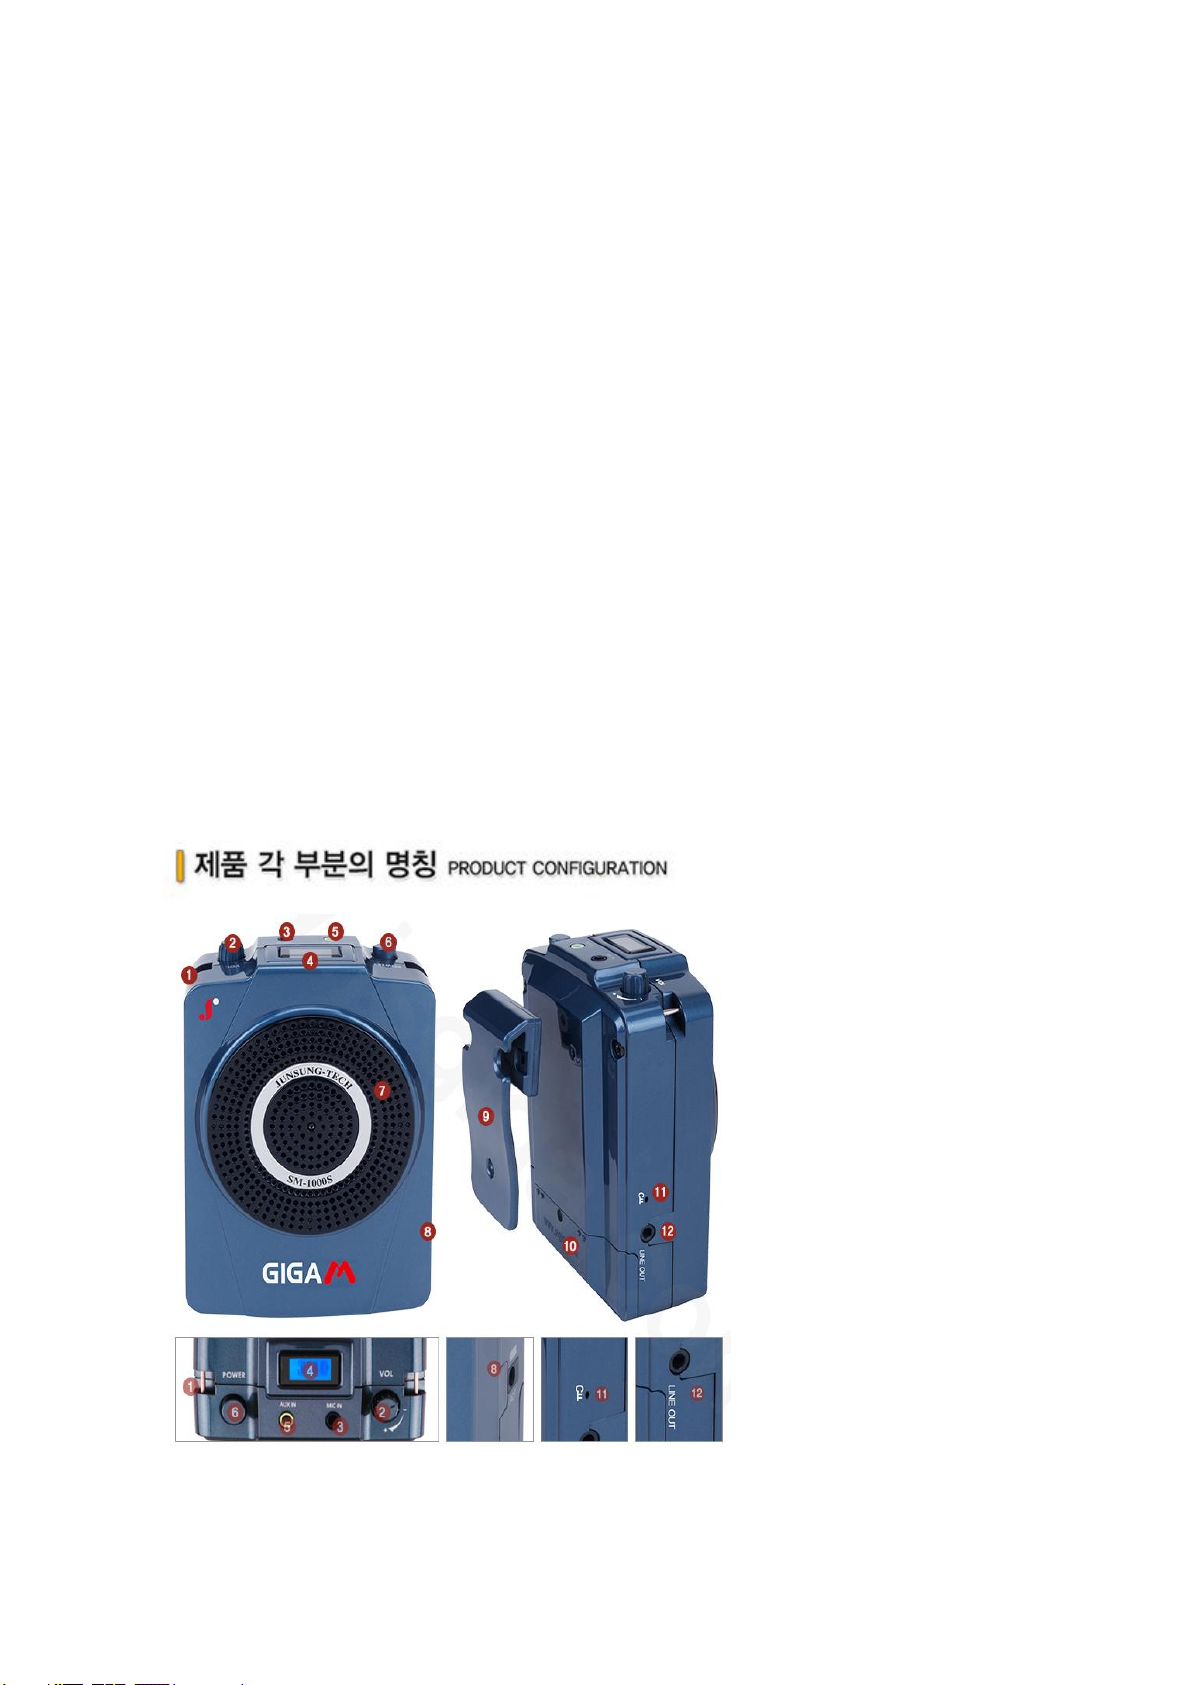
① Shoulder strap hook
② Volume
③ MIC input terminal
④ Indicator (Battery Level)
⑤ AUX terminal
⑥ Power switch
⑦ Speaker Grill
⑧ Charging input
⑨ Belt clip
⑩ Battery cover
⑪ Registration switch
⑫ Line out terminal
Page 4

ITEM SPECIFICATION
Max. Output 40W Min. (4ohm speak load)
Distortion 5% Max.
SPL 95dB/W ±2dB
Hum & Noise 50dB Min.
AF Response ±2dB (at 260Hz~15KHz)
Power Source Li-polymer 3.7V x 2
Size 89 x 115 x 43mm (W/H/D)
Weight 300g
1. Power On/Off
① Press and hold the main power switch to turn on the power.
② When the power is turned on, the remaining battery level indicator lights
up on the top LCD display.
③ When connected to a wireless microphone, the wireless connection icon
appears on the LCD display.
④ To turn off the power Press and hold the power switch to turn off the
power.
Page 5

2. Connecting Wireless Microphone
① urn on the main unit and the wireless microphone.
② When the wireless microphone is connected to the main unit, the LED on
the microphone side lights green and the main unit displays the wireless
connection icon on the LCD window.
3. Battery Level Indicator and Charging
Battery remaining status If the LCD remains one space, charge the battery.
During charging, the remaining battery level indicator on the LCD screen of
the main unit is repeatedly turned on and off sequentially from 0 to 4, and it
is fixed to be turned on when fully charged.Charging time varies depending
on battery level, but it takes up to 3 ~ 4 hours.
Charging complete state
Page 6

4. Battery Change
The main unit has a built-in rechargeable Li-polymer battery.
The built-in battery is removable so you can easily replace it if you have run
out of battery life.
5. Efficient Wireless Microphone
Turn on the power (A) of the main unit and raise the main volume (B) just
before the + mark.
The volume control uses the ▲▼buttons to adjust the volume, and the
volume level is 4 levels.
The adjusted sound state remains the same even when the power is turned
off and on. Press the ▲button 4 times to set the maximum volume (4 levels).
Pressing the ▼button once in step 4 is the standard volume (step 3).
Page 7

6. Registration Method
If wireless connection is not qualitativelyWhen you use a new wireless
microphone, you can easily re-register and use it.
A. Insert the clip into the registration switch hole at the bottom left of the
main body and hold down the power switch of the main body while
pressing it.
B. The wireless connection icon blinks on the main body LCD window.
C. While holding down the CH button on the wireless microphone, turn on
the power switch.
D. The red LED of the wireless microphone turns on and the red LED blinks
when registration is completed.
E. At this time, when you press CH button of wireless microphone, LED turns
green and becomes usable.
6. Line Out function
You can record the contents of your lectures on smart phones, notebooks,
and other external devices.
Page 8

This equipment complies with FCC radiation exposure limits set forth for an
uncontrolled environment.
 Loading...