

Page 1
FOR JUNO T37D / T37D-9-16 T-BAR ATTACHMENT CLIP: DROPTILE CEILING
FOR JUNO T37F / T37F-9-16 T-BAR ATTACHMENT CLIP: INVERTED TEE CEILING
INSTALLATION INSTRUCTIONS
To attach Trac use 2 for 4´ trac and 3 for 8´ or 12´ trac.
FEATURES:
T37D / T37D-9-16 / T37F / T37F-9-16
• Trac sections can be mounted at any angle with
respect to the T-Bars; i.e., directly under trac, at
right angle to trac or other angle. This is possible
because the clamp attaches to the trac wireway
instead of through the hole in the trac section.
• The T37D / T37D-9-16 / T37F / T37F-9-16 rotates
360˚ for precise positioning and alignment.
• One-piece “turn and lock” system. Mounts with
ease to T-Bar and trac. No tools required. No
loose parts.
INSTALLATION INSTRUCTIONS:
T37D / T37D-9-16 / T37F / T37F-9-16
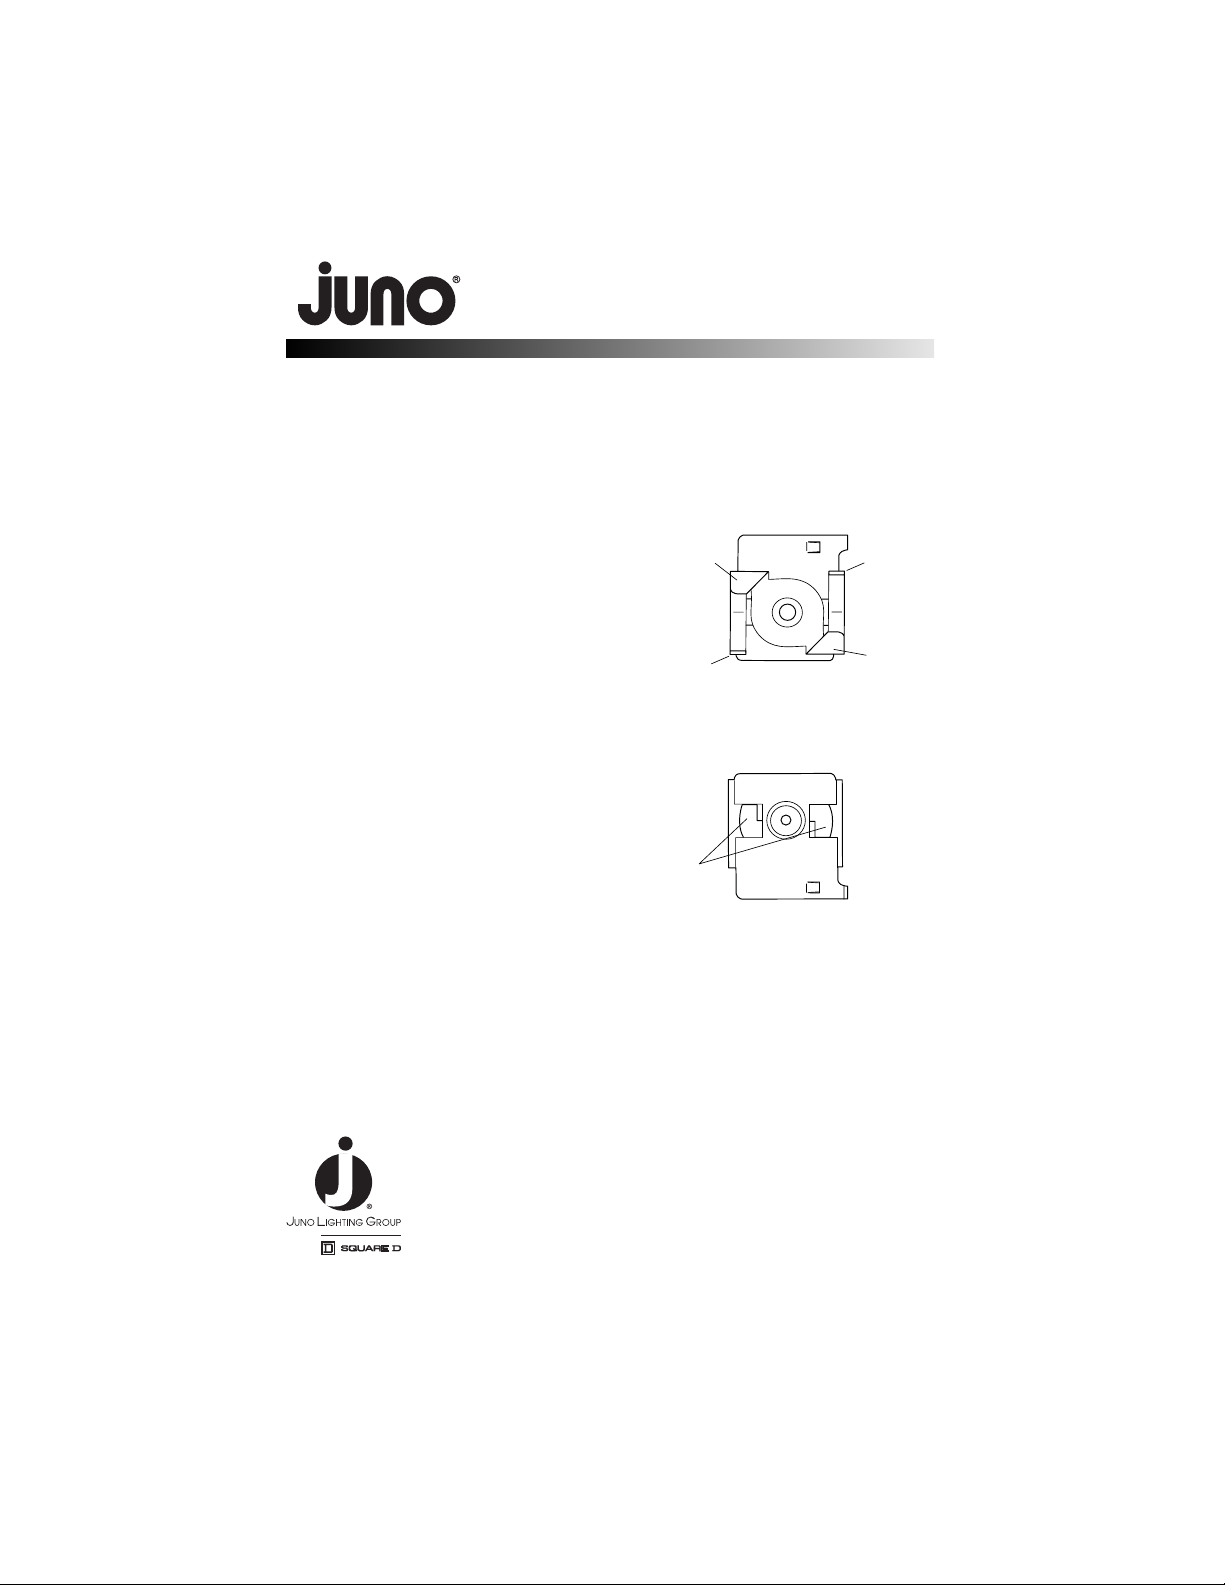
Step 1 Attach T37D / T37D-9-16 / T37F /
T37F-9-16 to T-Bar by gripping bottom
of T-Bar with 1 Large Clamping Finger,
push and rotate clip so remaining 3
Fingers lock into T-Bar.
Step 2 Align the trac section against the T37D /
T37D-9-16 / T37F / T37F-9-16 so that the
2 Retaining Shear Forms fit into the trac
wireway. Rotate clip so that the Shear
Forms lock under the trac extrusion legs.
© 2008 Juno Printed in USA Rev 5/08 P760 pg 1 of 1
1300 S. Wolf Rd • Des Plaines, IL 60018
Visit us at www.junolightinggroup.com
T37D / T37D-9-16 / T37F / T37F-9-16: T-Bar Side
Large
Clamping
Finger
Support
Finger
T37D / T37D-9-16 / T37F / T37F-9-16: Trac Side
Retaining
Shear
Forms
Support
Finger
Large
Clamping
Finger
Page 2

T37D
T37D-9-16
T37F
T37F-9-16
T37D
T37D-9-16
T37F
T37F-9-16
 Loading...