

Page 1
1300 South Wolf Road • Des Plaines, IL 60018 • Phone 800-323-5068 • www.junolightinggroup.com
© 2010 Juno Lighting LLC Rev 11/10 P1583 pg 1 of 1
INSTALLATION INSTRUCTIONS
JUNO PENDANT STEM KITS
T90 – T-BAR PENDANT
STEM KIT
T91 – RIGID CEILING
PENDANT STEM KIT
TRAC-MASTER®TRAC
TRAC-LITES™ TRAC
T93 – WIREWAY COVER
FOR ELECTRIFIED TRAC
Figure 2
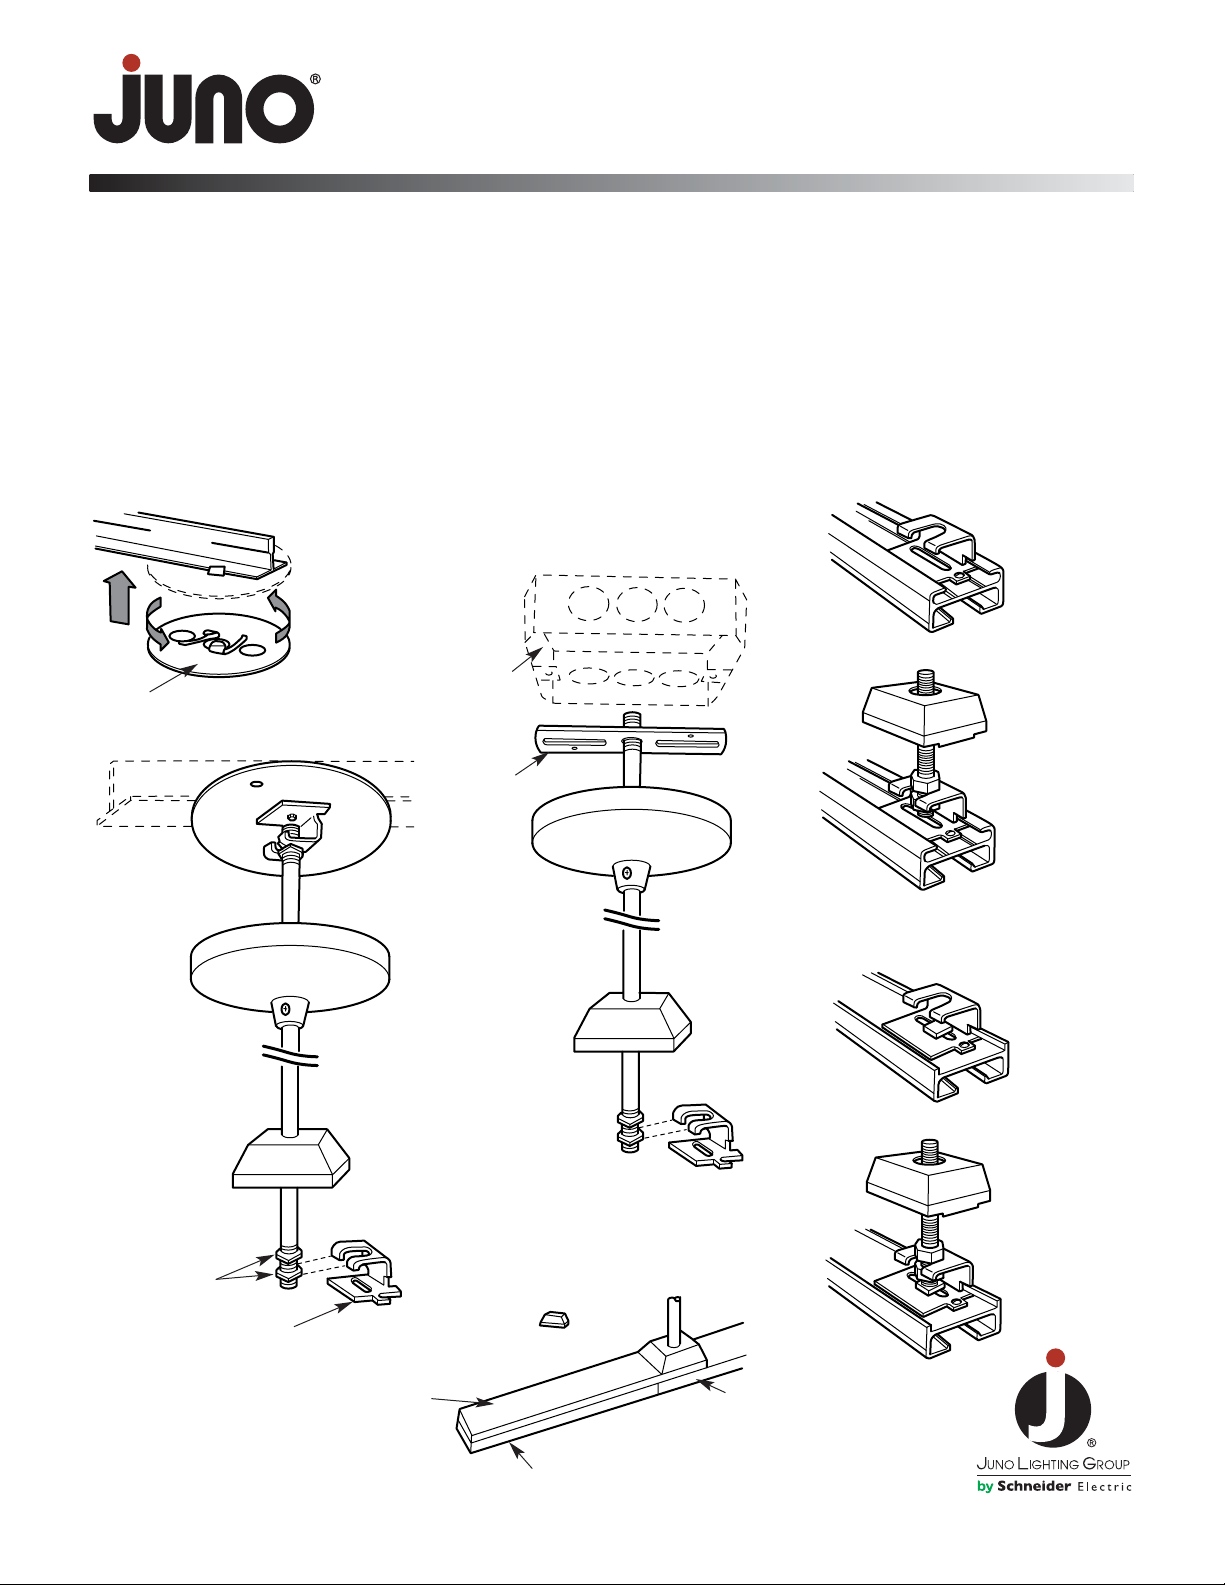
Step 1. Assemble pendant kits per Figures 1 & 2.
Step 2. Assemble bracket to Trac per Figure 3.
Step 3. Hang Trac onto stem by slipping the bracket over the nut on the end of the stem. Tighten the nuts to secure Trac (Figure 4).
Step 4. On Trac-Master
®
Trac, tighten the locking screw to stop pendant from sliding on Trac.
Step 5. Use two kits for 2', 4' and 6' trac sections, three kits for 8' trac section and four kits for 12' trac sections.
Position the “Plate
Assembly” on the
T-Bar and rotate
clockwise to
secure “fingers”
onto the bar.
Assemble parts as shown
in diagram and hook onto
“Plate Assembly”
Figure 2
Assemble parts as
shown in diagram and
attach to “Mounting
Strap” in Junction Box
Figure 3
Slide the bracket down
the wireway channel to
position desired and lock
in place
Figure 4
To hang Trac, slip
bracket over the nut on
bottom of stem
Figure 3
Use square headed bolt
and acorn nut to attach
bracket to Trac utilizing
existing holes or those
drilled by installer
Figure 4
To hang Trac, slip
bracket over the nut on
bottom of stem
Figure 1
Attach “Mounting Strap” to Junction Box
When electrifying the Trac,
replace the small, square
bracket cover with
the T93 Wireway Cover to
conceal the wires.
Note: The Wireway Cover can be used
with either Trac-Master
®
(Single Circuit)
or Trac-Lites™ Trac sections.
Plate Assembly
Lock Nuts
Bracket
Connector
Trac
Wireway
Cover
Mounting
Strap
Junction
Box
Figure 1
 Loading...