

Page 1

owner’s manual
i Juniper Aspect Owner’s Manual
Page 2

© Copyright October 2012, Juniper Systems, Inc. All rights
reserved. Information is subject to change without notice.
Juniper Systems and Archer Field PC are registered
trademarks of Juniper Systems, Inc. in the United States.
Juniper Aspect Field Mapping Solutions and Mesa
Rugged Notepad are recognized trademarks of Juniper
Systems, Inc.
ActiveSync, Windows Mobile Device Center, Windows
Vista, and the Windows logo are trademarks or registered
trademarks of Microsoft Corporation in the United States
and other countries.
Rain Bird is a registered trademark of Rain Bird
Corporation.
The word HUNTER is a registered trademark owned by
Hunter Industries, Inc.
Adobe Acrobat is a trademark of Adobe Systems
Incorporated.
ArcGIS and ArcToolbox are trademarks of Esri.
AutoCAD is a trademark of Autodesk in the United States.
Contains Autodesk® RealDWG by Autodesk, Inc. All rights
reserved. Copyright © 1998-2009 Autodesk, Inc. All Rights
reserved.
P/N 2310 8.01
tel: 435.753.1881
1132 W. 1700 N. Logan, UT 84321
web: www.junipersys.com
l
Page 3
Table of Contents
1 Introduction to Juniper Aspect Field Mapping
Solutions 1
2 Overview of Project Planning and
Implementation 5
Planning Projects 7
Setting up Projects 8
Collecting Data on the Mobile Computer 8
Managing Data and Creating Maps and
Reports 9
Maintenance and Inspections 10
3 Software Installation, Desktop and Mobile
Ve rs io ns 11
Installing the Desktop Software 12
Installing the Mobile Software 15
Software Updates 23
Upgrading Software Editions 24
4 Introduction to Juniper Aspect Desktop
Software 25
Home Screen Functions 26
5 Creating a New Project on the Desktop
Computer 31
Creating a New Project 33
Setting up a Map 34
Contents iii
Page 4

6 Object Database Management 39
Manage Object Catalogs 41
Manage Object Catalogs Screen 43
Object Type 45
Objects 49
Importing, Exporting CSV Object Catalogs 52
Synchronizing Object Data With a Mobile
Computer 57
7 Collecting Data on a Mobile Computer 59
Preparing to Collect Data 60
Entering Information and Making Selections 61
Juniper Aspect Mobile 63
Mapping Objects Using GPS 70
Mapping Objects Without GPS 86
Editing Objects 90
Navigating to an Object 97
Synchronizing Data with Desktop Computer 97
Sample Maps 98
8 Map Functions on a Desktop Computer 99
Viewing and Editing Project Maps 100
9 Generating Reports 113
Sample Reports 116
A Troubleshooting 123
GPS Tips 124
Editing Tips on the Desktop Computer 125
Maintenance Tips for the Mobile Computer 126
Suspend, Reset, or Turn Off Mobile Computer 126
Index 128
iv Contents
Page 5

Chapter 1
Field Mapping Solutions
Introduction to
Juniper Aspect
1 Juniper Aspect Owner’s Manual
Page 6

2 Juniper Aspect Owner’s Manual
Page 7

Juniper Aspect Field Mapping Solutions
Juniper Aspect™ provides mobile mapping and reporting
solutions for eld professionals. Use Juniper Aspect to:
Create accurate as-built maps of object locations
including irrigation systems, trees and vegetation,
utility meters, street and trafc signs, water coverage,
repair locations, and more
Overlay maps on aerial photographs
Navigate to previously mapped objects
Take geotagged photographs
Create custom eld asset documentation that includes
maps, photos, object and parts lists, and notes for your
company or client
Juniper Aspect System Components
Juniper Aspect includes the following software and
hardware components:
Juniper Aspect Software, Desktop License: Runs
on a desktop or laptop computer and is used for
setting up and managing projects before and after
data is collected in the eld on one or more mobile
computers.
Juniper Aspect Software, Mobile License: Runs on the
mobile computer(s) and is used to collect project data
such as mapping the location of objects using GPS or
manual l y.
Mobile Computers: Juniper Aspect mobile software,
runs on mobile computers from Juniper Systems,
including the Mesa Rugged Notepad™ Geo model,
and the Archer Field PC®.
Ch 1 Introduction to Juniper Aspect 3
Page 8

What You Receive
Juniper Aspect consists of a CD-ROM inserted into a CD
sleeve. The desktop and mobile versions of the software
as well as the owner’s manual are located on the CDROM. Serial numbers are included for each license you
purchased. These numbers are used to download and
register your software.
The initial license fee includes software support, system
enhancements, system updates and access to basemap
imagery for one year from the date of activation. If
you have a professional license, you are automatically
notied when it is time to renew your product registration
(standard licenses are not renewable). Read the product
registration information for details.
Professional and Standard Licenses
There is a professional version and standard version of
Juniper Aspect. The professional edition provides the
following additional features:
Access to Bing Maps (imagery, streetmap, and hybrid)
CAD import
Multiple databases
Export to File Geodatabase, Shapele, and KML
CSV data export
Photo images associated with objects
Access to online imagery through Wi-Fi or cell modem
(mobile computer)
Annual renewal option
Review Juniper Aspect features on our website: www.
junipersys.com/Aspect.
To upgrade your software to a professional license,
contact our sales department. Contact options are
shown on our website: www.junipersys.com/Contact Us.
4 Juniper Aspect Owner’s Manual
Page 9

Chapter 2
Overview of Project Planning
and Implementation
5 Juniper Aspect Owner’s Manual
Page 10

Mapping Projects
Juniper Aspect gives you the power to accurately create
and maintain detailed maps and reports of objects
and system layouts. This information can be given to
customers or government agencies, and archived for
future audits, updates and maintenance.
Terminology
In this manual, the following terms are used:
Project: An entire system or a portion of a system to
map and report on.
As-Built: A system consisting of an existing layout or a
layout that has been planned out and is in the process
of being implemented.
Project Manager: the person doing the project
planning and creating the nal maps and reports.
Mobile Worker: the person in the eld collecting map
data and other desired information.
Mobile Computer: Mesa Rugged Notepad or Archer
Field PC.
Generate Report: Final maps and object information.
Workow for Juniper Aspect Field Mapping Solutions
A typical project follows the workow outlined in this
chapter, although you will see that Juniper Aspect is
exible and some steps can occur on either the desktop
computer or mobile computer. Each project is unique. A
typical workow:
1. Planning projects
2. Setting up new projects or editing existing projects
3. Collecting data on the mobile computer
4. Synchronizing data between the desktop and mobile
computers
5. Managing collected data and creating reports
6. Future maintenance and inspection using reports
6 Juniper Aspect Owner’s Manual
Page 11

Planning Projects
Ideally some planning will occur before the Juniper
Aspect software is used. You may need to load the
software or read this manual in order to take a look at the
features provided before proceeding. Some decisions
don’t need to be made up-front, but it will help if you are
aware of them.
As you are planning a project, keep the following items in
mind:
1. Location of project: basic knowledge of where the
project is located is needed so it can be located on
the basemap.
2. Basemap: Is a good basemap (aerial imagery) of
the project location available from the software?
If not, you can import a CAD drawing that is
georeferenced, create a boundary map on a mobile
computer using GPS and walking the area you are
mapping, or work without a background.
3. Object catalog: What object catalog do you want
to use? You can use the object catalog provided
with the software, load a predened CSV (commaseparated values) le with the object information you
want to use, or create one from scratch. You will also
select symbology to represent objects.
4. Assigning tasks: Depending on the size of your
company and the scope of individual projects, you
might have one person take care of planning, data
collection in the eld, data management, and report
generation. Or, you might have one person doing the
project management on the desktop computer while
one or more other people collect data in the eld.
Multiple mobile workers can collect data on the
same project at the same time. They could have
different tasks to perform for a single irrigation system
layout. For example, they could each have different
geographical areas or different object types to
Ch 2 Overview of Planning and Implementation 7
Page 12

map. When the data from each mobile computer is
uploaded to the desktop computer, it is combined
and synchronized under a single project name.
5. Synchronizing data: You need to determine how often
you want data synchronized between the mobile
computer(s) and the desktop computer. This could
be several times a day or less often depending on the
scope of the project.
Setting up Projects
Projects are typically set up by the project manager on
the desktop computer and loaded onto one or more
mobile computers.
1. Set up communication between the desktop
computer and mobile computer.
2. Load the Juniper Aspect software onto the desktop
computer.
3. Select which object database you want to use, edit if
nece s sa ry.
4. Open up a new project.
5. Find the location of the current project on the map.
Add object information if desired.
6. Load the mobile software, object database, and
basemap onto a mobile computer.
7. Train the mobile worker(s) on how the software works,
how you want them to collect data for the project,
when you want them to synchronize data, etc.
Collecting Data on the Mobile Computer
Information is collected in the eld by the mobile
worker(s) and loaded onto the desktop computer.
1. If applicable, get basic training on the project from
the project manager.
8 Juniper Aspect Owner’s Manual
Page 13

2. Map the location of objects and coverage areas
based on the training given to you by the project
manager.
3. Edit map data in the eld if appropriate.
4. Add new objects or projects on the y if appropriate.
5. Make notes as requested.
6. Once map data is collected and the dened time to
synchronize it with the desktop computer has come,
give the mobile computer(s) to the project manager.
The project might be set up so you synchronize data
yourself.
7. Depending on the workow plan, the data collection
process could be repeated for the project you are
working on or a new project.
Managing Data and Creating Maps and Reports
Collected data can be edited on the desktop computer
by the project manager after it is uploaded or on the
y by the mobile worker on the mobile computer. The
process will be similar to the following:
1. Edit maps for nal presentation. The system allows
you to manipulate the data in each layer, including:
changing objects, changing labels and label colors,
correcting errors, moving lines, moving points, and
adjusting polygons.
2. Create an inventory list of system components to
accompany maps that are created in the editing
function. These reports include all objects shown on
that particular map.
3. Provide the client or agency with electronic and
hard copies of the entire system, including maps,
component lists and photographs if they exist.
4. Store digital project les for future updating and
planning.
Ch 2 Overview of Planning and Implementation 9
Page 14

Maintenance and Inspections
Project data can be used for maintenance and service
on existing projects. In addition, the data can be used
to aid in project inspections and audits. Users can be
directed to the exact locations of various components
using the navigation feature.
1. Retrieve digital project les for existing projects.
2. Load the project data from the desktop computer to
a mobile computer.
3. Mobile workers use the mobile computer to locate
components of the project requiring repair, perform
system audits, and to facilitate system inspections.
Using the navigation feature they can be directed
to the exact locations of various components.
When components are replaced or repaired, the
information can be documented.
4. Upload the new eld data taken on the mobile
computer(s) to the desktop computer, process the
data and update the project le.
5. Produce and distribute necessary updated maps and
reports to the client or agency.
6. Store updated project les and historical object data
to efciently aid in and document eld service and
repair.
Details on how to perform these functions can be found
in this owner’s manual.
10 Juniper Aspect Owner’s Manual
Page 15

Chapter 3
Software Installation, Desktop
and Mobile Versions
11 Juniper Aspect Owner’s Manual
Page 16

Software Installation, Desktop and Mobile
Versions
The Juniper Aspect CD-ROM includes the desktop and
mobile versions of the software as well as the owner’s
manual.
The desktop software is installed on your desktop PC
rst. The mobile version is downloaded onto your mobile
computer(s) from the desktop software.
Installing the Desktop Software
Your desktop PC must be running Microsoft® Windows®
X P, M i c r o s o f t® Windows® Vista, or Microsoft® Windows® 7.
Follow these steps to install the desktop version of the
software on your desktop PC:
1. You need an active internet connection on your
desktop PC to facilitate software registration.
2. Synchronization software must be installed on your
desktop PC so it can communicate with the mobile
computer. It is free from Microsoft® on their website at:
www.microsoft.com. Locate the Microsoft® Download
Center. In the search window, type in the name of
the software you need for your computer as dened
below:
a. Microsoft® ActiveSync
is running Windows® XP
b. Windows® Mobile Device Center if your desktop
computer is running Windows Vista® or
Windows® 7
Once you nd the correct software, download and
install it onto your desktop PC.
Note: The names, website locations and features of
Microsoft’s software can change over time. These
instructions might vary somewhat from what you see.
You do not need to do anything else with the
synchronization software until you download Juniper
Aspect to the mobile computer.
®
if your desktop computer
12 Juniper Aspect Owner’s Manual
Page 17

3. Insert the Juniper Aspect CD into your computer CD
drive.
4. When the main screen appears, select Juniper
Aspect Installation.
5. The software setup wizard starts. Select Next.
6. Screens come up asking you to review and approve
the license agreement, select a folder to install the
software into, and to conrm installation. Select or
enter the appropriate information for each screen
and select Next.
7. An installation screen is shown with an installation
progress bar. When installation is complete, select
Close (you have the option to run the software upon
closing with a check box.)
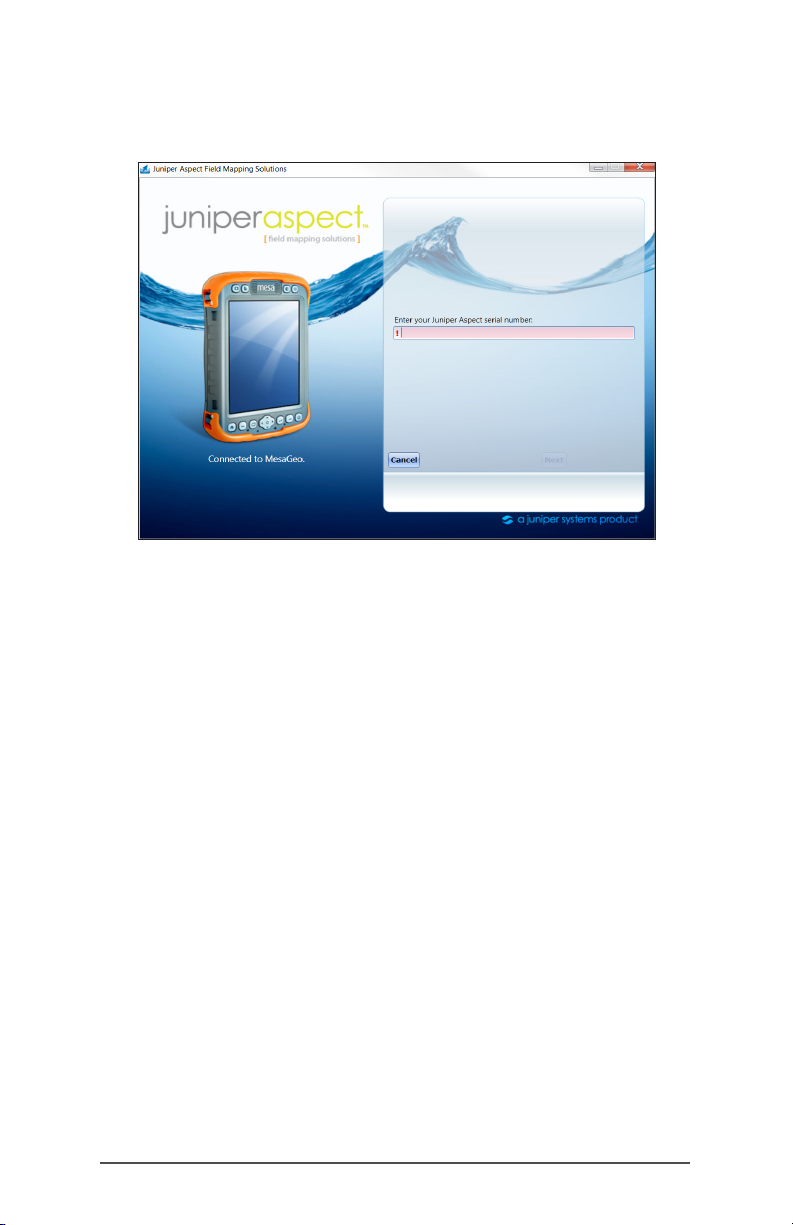
8. The rst time you run the software, you are asked to
enter the serial number. The number for the desktop
PC software is located on the CD sleeve.
Ch 3 Software Installation 13
Page 18

Enter the number and select OK.
9. The Juniper Aspect Activation screen is shown. Fill out
the registration information. Select Activate.
10. Once you have successfully registered the software,
a registration email is sent to the email address you
provided. Registration information is shown along with
the software expiration date which is automatically
set for one year from the registration date.
Note: If choose not to register the software or the
registration fails (if you aren’t connected to the
internet, for example), Juniper Aspect shuts down and
is not usable until it is registered.
11. When the software is successfully installed, a shortcut
14 Juniper Aspect Owner’s Manual
Page 19
is automatically placed on your desktop.
12. When you open the software, the following screen is
shown on your desktop computer:
Installing the Mobile Software
The mobile version of Juniper Aspect is downloaded from
the desktop version of the software to a Mesa Rugged
Notepad or Archer Field PC.
Note: The professional edition allows you to install the
software on multiple mobile computers.
You need the following items:
Mesa Rugged Notepad running OS version 1.1.5 or
greater or Archer Field PC running OS version 3.0.6 or
greater (OS upgrades are available on our website)
Internet connection on the desktop computer to
facilitate registration
USB communication cable that came with your mobile
computer
AC wall power charger that came with your mobile
computer
Note: An Archer or Mesa dock accessory can be used for
Ch 3 Software Installation 15
Page 20

communication and charging purposes. Refer to manual
for the dock or the mobile computer for details. Manuals
are available on our website at www.junipersys.com/
Juniper-Systems/support/Documentation.
Establishing Communication Between a Desktop
Computer and a Mobile Computer
Before you can download the mobile version of Juniper
Aspect to a mobile computer, you need to establish
communication between the desktop computer and the
mobile computer.
1. Plug the AC wall power charger into a wall socket.
Plug the other end into the DC power jack on the
mobile computer (or dock).
2. Plug the USB cable Client end (mini B) into the mobile
computer (or dock). Plug the USB cable Host end (full
size A) into your desktop computer.
3. The synchronization software you downloaded
while installing the desktop software automatically
opens. A setup wizard asks you if you want to set up
a partnership. This happens each time you establish
communication between a desktop and mobile
computer. You can congure a partnership between
the desktop PC and a mobile computer by following
the instructions on the screen, however a partnership
is not required to run Juniper Aspect. For ActiveSync,
select Next to set up a partnership or Cancel. For
Windows Mobile Device Center, select Set up Your
Device or Connect Without Setting up Your Device.
Note: The names and features of Microsoft’s software
can change over time. These instructions might vary
somewhat from what you see.
For more information on setting up communication, refer
to the Owner’s Manual for your mobile computer.
16 Juniper Aspect Owner’s Manual
Page 21
Installing Software on the Mobile Computer
Once the desktop computer and the mobile computer
are communicating with each other, follow these steps to
install the mobile version of the software:
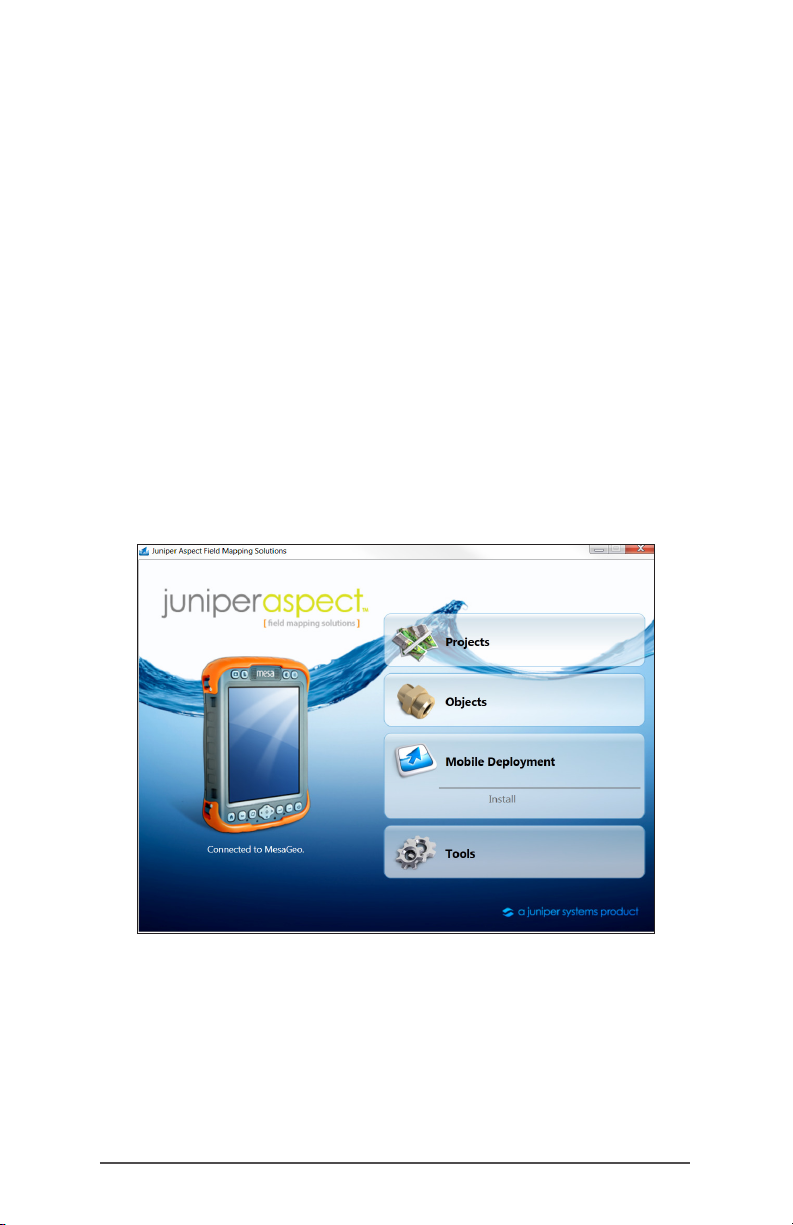
1. Open the Juniper Aspect home screen on the
desktop computer. When the desktop computer and
mobile computer are communicating with each
other, the computer graphic on the left side of the
screen is shown in color with the caption “Connected
to (your mobile computer’s name).” If they are not
communicating, the graphic is gray and the caption
says “No Device Connected.” If this happens,
review the previous steps under “Establishing
Communication.”
2. Hover the mouse arrow over the Mobile Deployment
function and click Install.
Ch 3 Software Installation 17
Page 22
3. The following screen is shown. To proceed with the
software installation on the mobile computer click on
the install button .
4. A screen asks you to review and approve the license
agreement. Select Accept, then Next.
5. You are automatically connected to our website,
www.junipersys.com. You are asked for the license
serial number for the mobile version of the software.
This number is located on a printed card included
with the software. (You will receive a card for each
mobile license purchased. Each license can only be
18 Juniper Aspect Owner’s Manual
Page 23
installed on one mobile computer). Enter this number.
Select OK. It is automatically veried.
6. The Juniper Aspect Activation screen is shown.
The registration information you entered when
you installed the desktop version of the software
(name, company, address, email address, etc.) is
automatically lled in. Select Activate.
7. Once you have successfully registered the software,
an email is sent to the email address you provided.
Your registration information is shown along with
the software expiration date which is automatically
set for one year from the registration date (for the
professional version).
Note: If choose not to register the software or the
registration fails (if you aren’t connected to the
internet, for example), Juniper Aspect shuts down and
is not usable until it is registered. If the serial number
has been used previously, you are given a warning.
You will have a unique serial number for each license.
Ch 3 Software Installation 19
Page 24
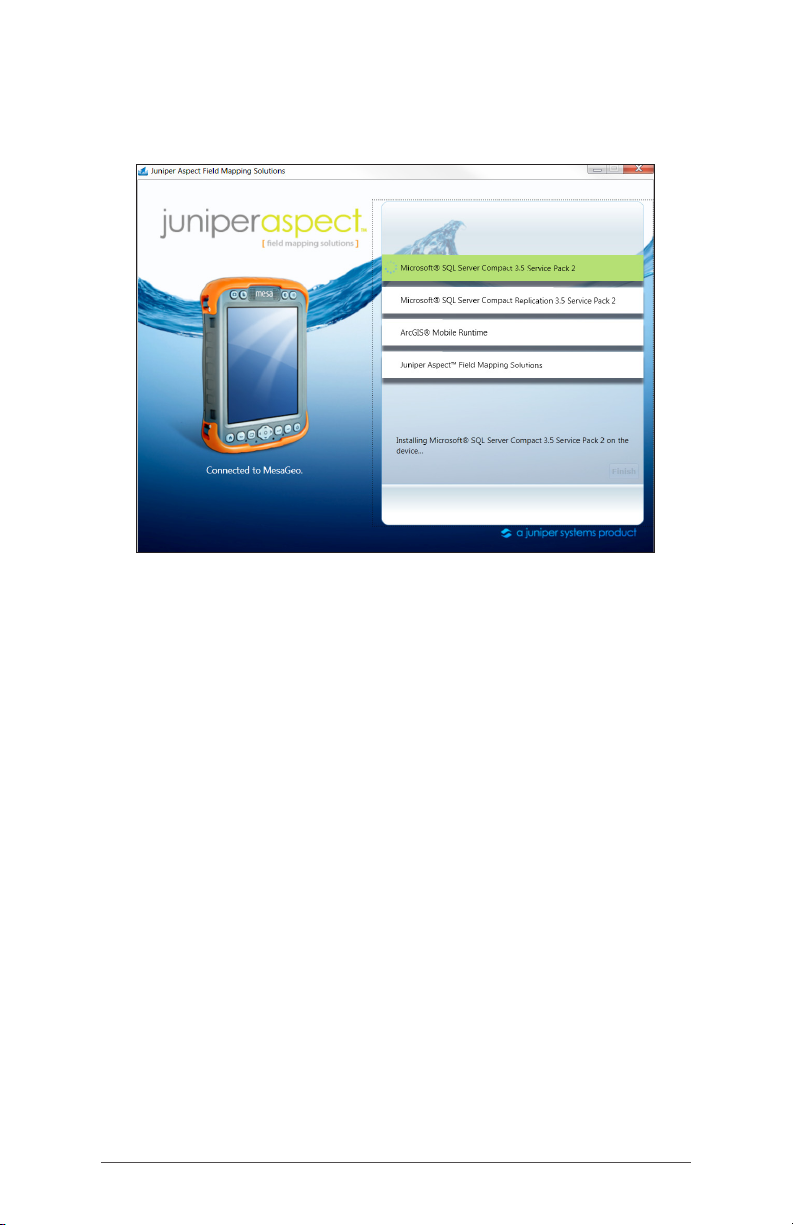
8. As the Juniper Aspect software components are
installed, the following screen is shown:
Do not disconnect the mobile computer from the
desktop computer while the installation is going on.
When the software is initially installing, it can take up
to ten minutes.
9. When the software is successfully installed, a shortcut
is automatically placed on your mobile computer.
20 Juniper Aspect Owner’s Manual
Page 25

10. When Juniper Aspect software installation is complete
on the mobile computer, click Finish. The following
screen is shown on the desktop computer:
Select the menu button in the lower right-hand
corner to return to the home screen.
Ch 3 Software Installation 21
Page 26
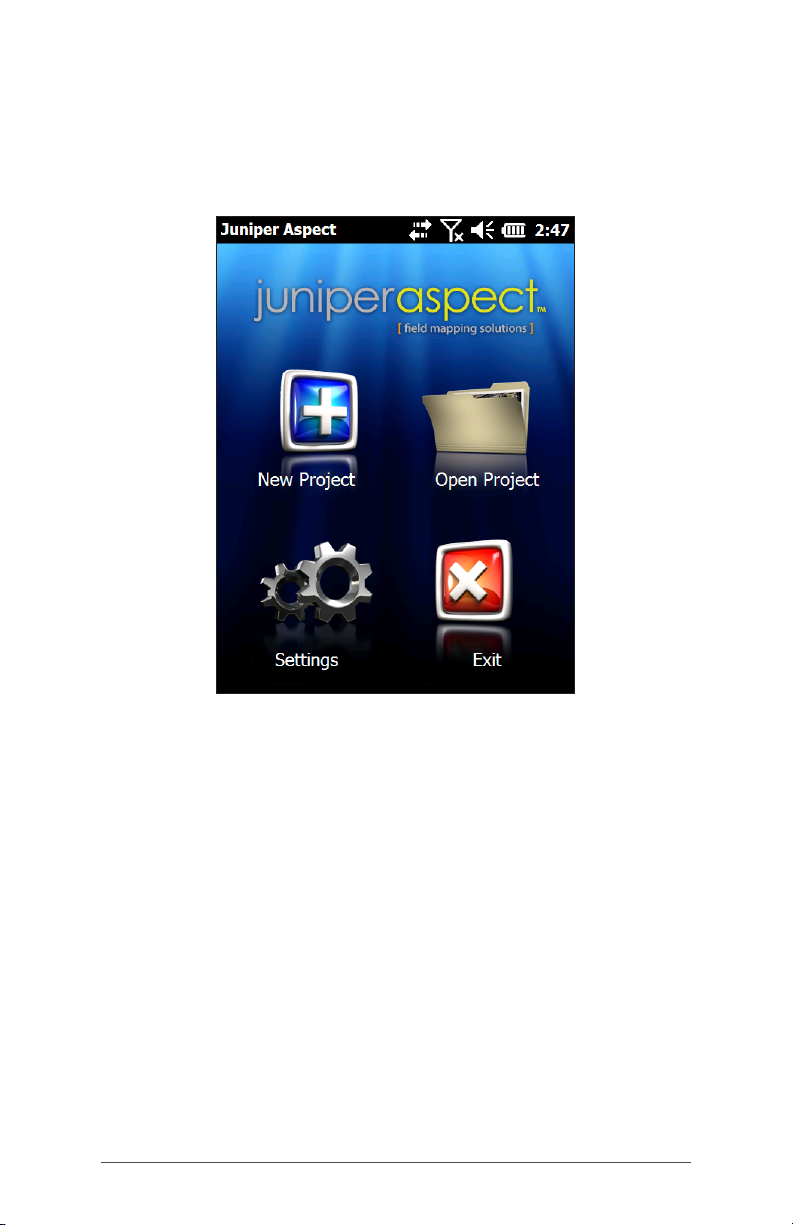
Mobile Computer Home Screen
Once you have successfully installed the mobile
software, a screen similar to the following is shown when
you open the program on your mobile computer:
The functions of the mobile software are described later in
this manual.
22 Juniper Aspect Owner’s Manual
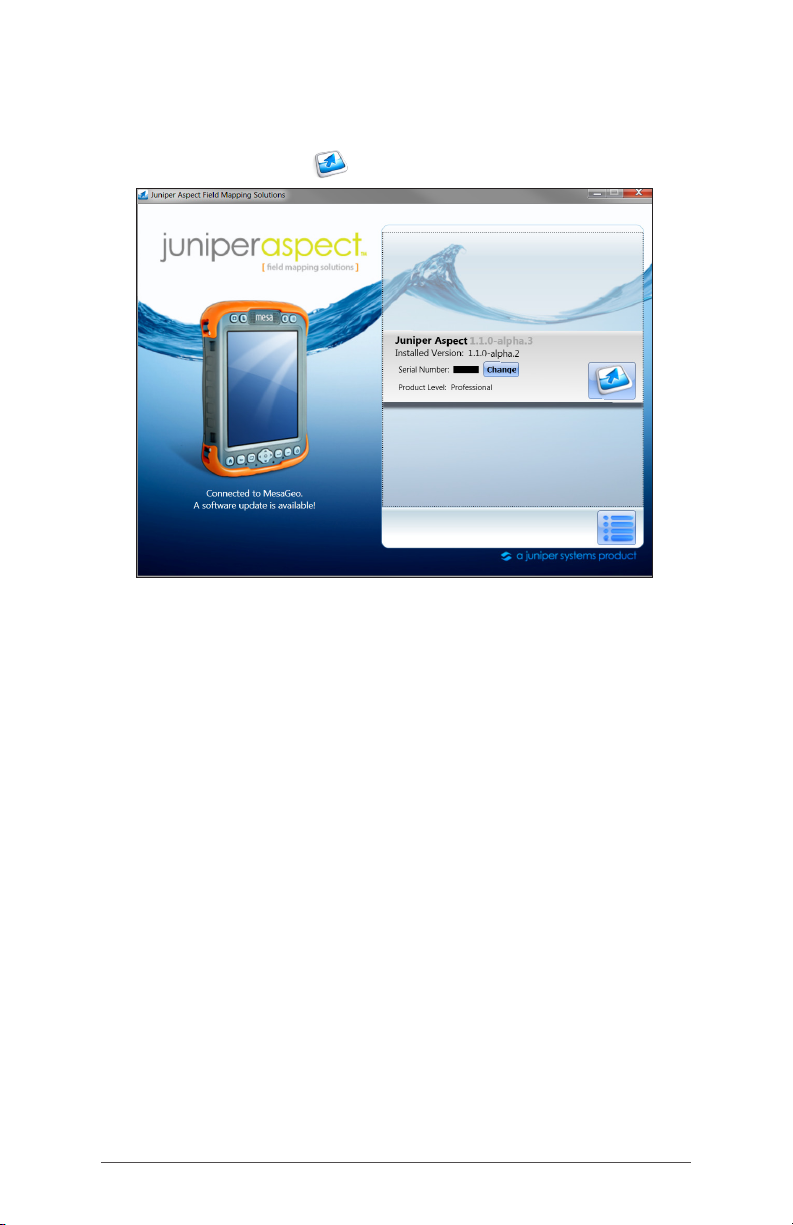
Page 27
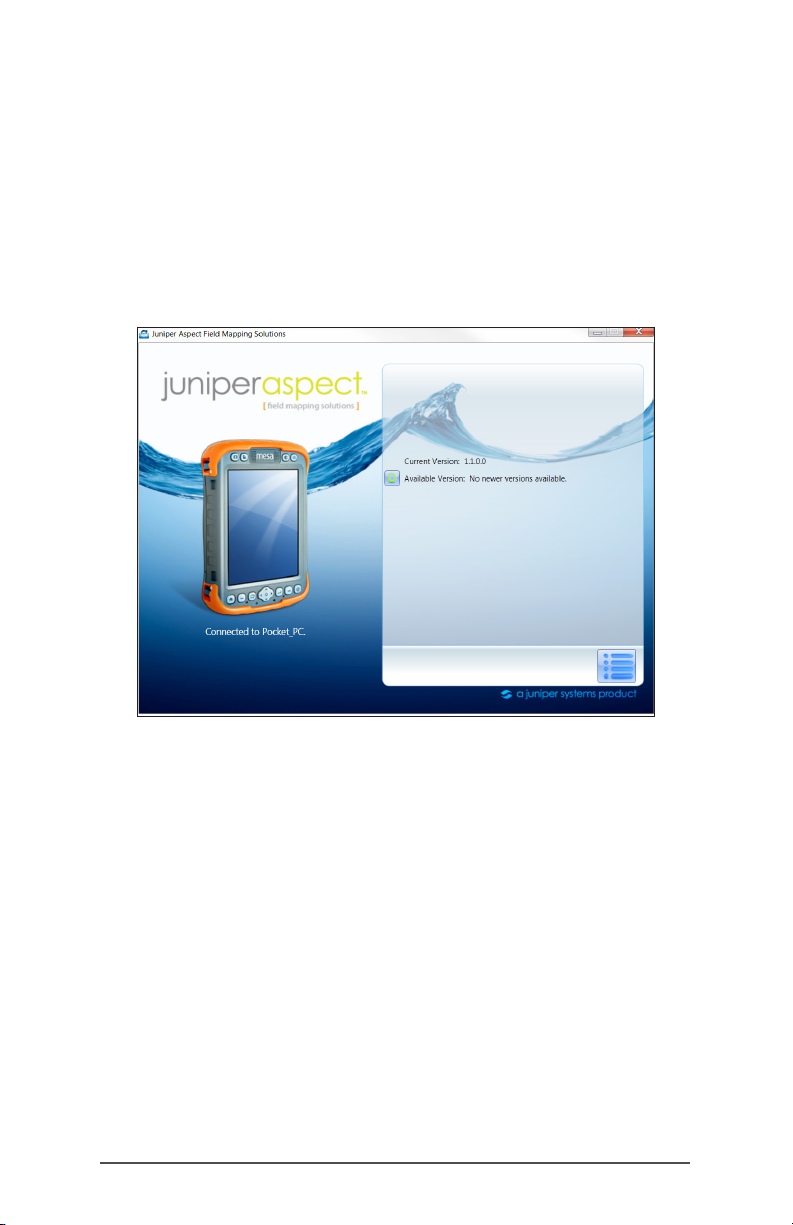
Software Updates
In the Tools menu is an option called Check for updates.
When you select it, the software automatically goes to
our website to see if a software update is available. If an
update is available, it is listed on the screen as shown
below. If you want to install the update, select Download
Update, then Install Update. We recommend that you
check for updates periodically.
Ch 3 Software Installation 23
Page 28

Upgrading Software Editions
If you have the standard edition of Juniper Aspect
software on your desktop computer and mobile
computer(s), you can upgrade to the professional
edition which has additional features. Contact our sales
department to purchase the upgrade. Contact options
are listed on our website at junipersys.com/Contact Us.
Desktop Software Upgrade
When you purchase an upgrade, you are given a new
serial number. Select Tools on the Juniper Aspect main
menu and then choose About. Select the Change button
to the right of the serial number and enter the new serial
number. Additional features are automatically activated.
Mobile Computer Upgrade
You are given new serial numbers for each mobile
computer that is upgraded. Connect the mobile
computer(s) to the desktop computer (see Installing
Software on the Mobile Computer earlier in this chapter
for details), select Mobile Deployment from the home
screen, then Install. Select the Change button to the right
of the serial number and enter the new serial number.
Additional features are automatically activated.
24 Juniper Aspect Owner’s Manual
Page 29

Chapter 4
Introduction to Juniper Aspect
Desktop Software
25 Juniper Aspect Owner’s Manual
Page 30
Introduction to Juniper Aspect Desktop Software
The desktop version of Juniper Aspect software is used
for setting up projects for mapping, managing the object
database, loading software to the mobile computer(s),
synchronizing data between the desktop computer
and mobile computer(s), checking for software and
documentation updates, and creating maps and reports
with the collected data.
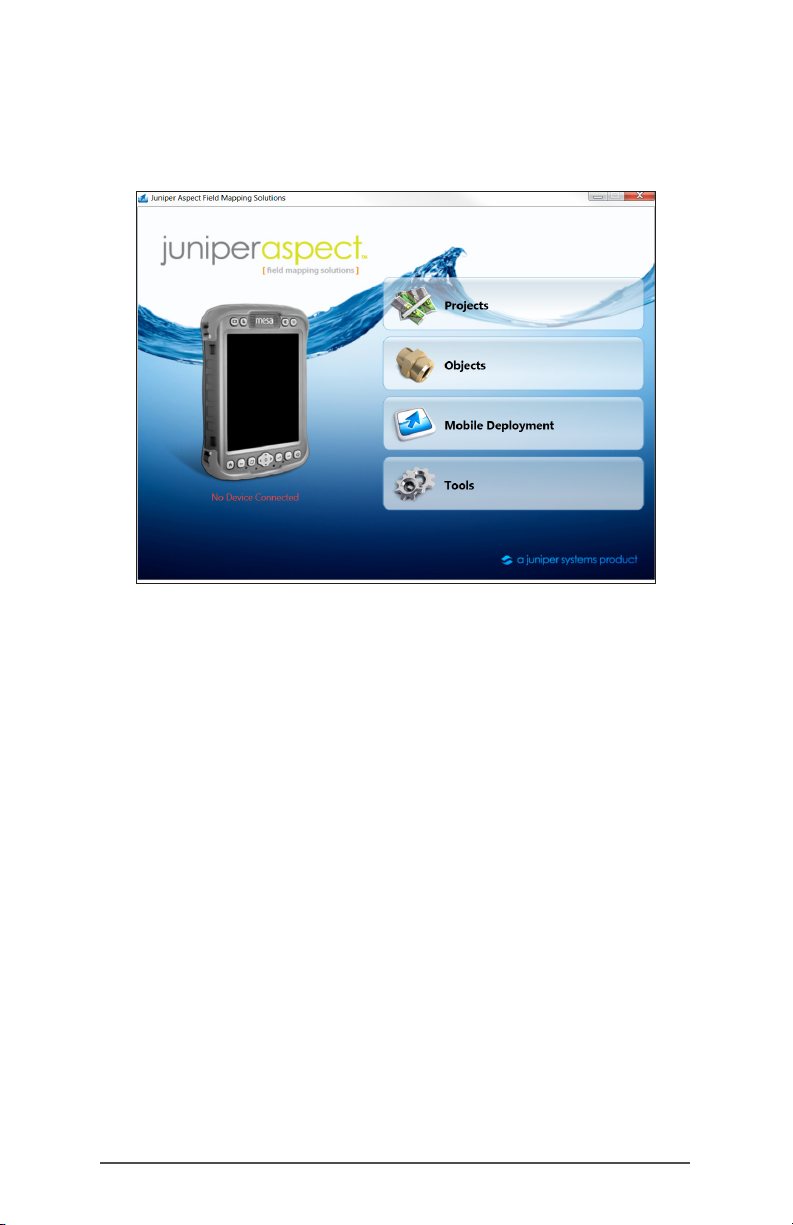
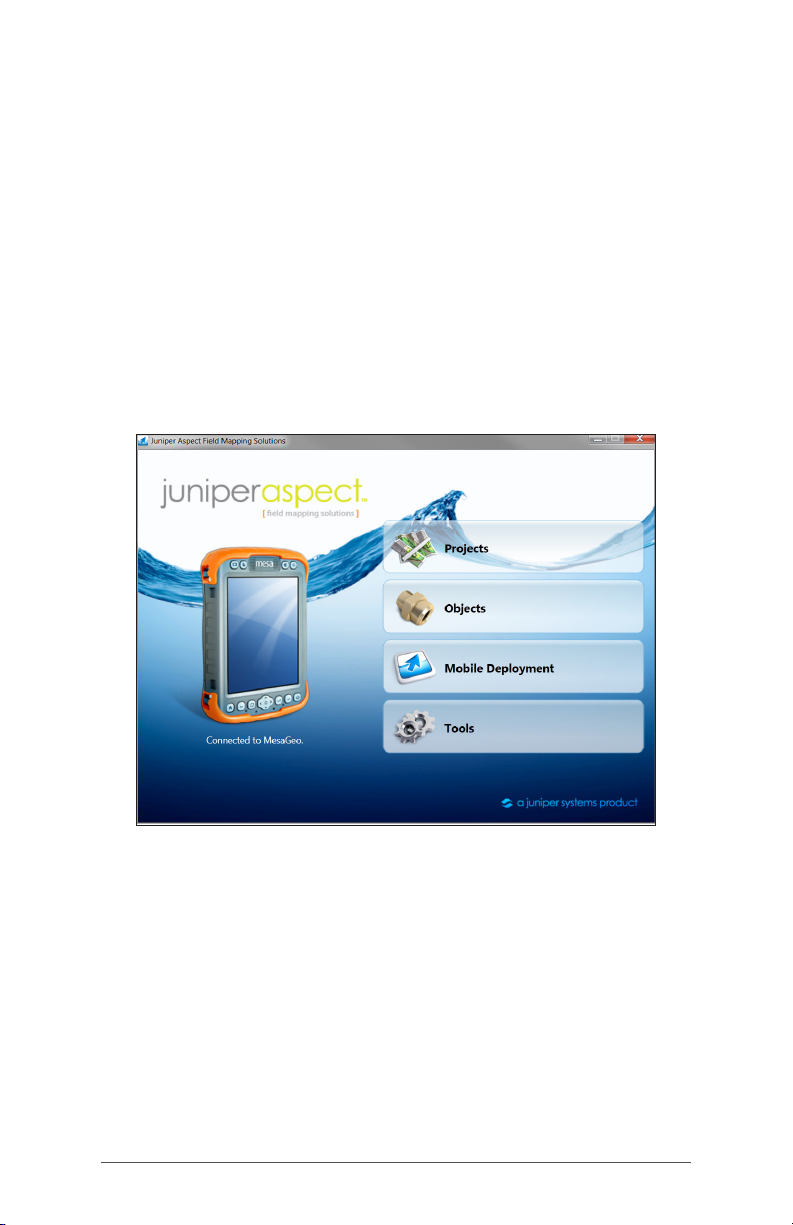
Home Screen Functions
When you open the program on the desktop, the
following home screen is shown:
.
When the desktop computer and mobile computer are
communicating with each other, the mobile computer
graphic on the left side of the screen is shown with
orange bumpers with the caption “Connected to (your
device name).” If they are not communicating, the
graphic is gray and the caption says “No Device
Co nne cted.”
Four main functions are accessed from this screen:
Projects, Objects, Mobile Deployment, and Tools.
26 Juniper Aspect Owner’s Manual
Page 31

Projects
The Projects function is used to set up and manage
projects, synchronize data between the desktop
computer and the mobile computer(s), and create nal
maps and reports. When you select Manage Projects,
you can create new mapping projects or view and edit
existing projects. If a mobile computer is connected to
the desktop computer, projects from both computers are
shown. Symbols inform you if an update is available for
either the mobile computer or desktop computer. Below
is an example project list:
Select the Open Project symbol for a new project to
show a basemap on the map screen. Once map data is
collected and downloaded onto the desktop computer,
you can return to the map screen to edit the map as
needed and select Generate Report to create nal maps
and reports.
See Chapter 5, Creating a New Project on the Desktop
Computer.
Ch 4 Introduction to Aspect Desktop Software 27
Page 32

Objects
The Objects function is used to manage object
catalogs. Select Objects then Manage Object Catalogs
and a list of object catalogs is shown. A Default Object
Catalog for irrigation mapping is provided with Juniper
Aspect. Other catalogs can be loaded.
Select the open object catalog symbol to open the
Manage Objects window. You can create object types,
symbology, and attributes. An example is shown below:
28 Juniper Aspect Owner’s Manual
Page 33

Mobile Deployment
The Mobile Deployment function is used to install
the Juniper Aspect software onto a mobile computer.
Set up communication between the desktop computer
and mobile computer and select Install. Follow the
instructions on the screen to install the software.
During the process you will see a screen similar to the
following:
See Chapter 3, Software Installation.
Ch 4 Introduction to Aspect Desktop Software 29
Page 34

Tools
There are four categories under the Tools function:
Check for Updates, Preferences, About, and Help.
Check for Updates: searches our website for new
software updates.
Preferences: select whether or not you would like units
of measurement to be feet or meters.
About: Information about Juniper Aspect software is
shown including which version number is installed,
product edition (professional or standard), the serial
number, and contact information. The screen will look
something like the following:
Help: Shows the Juniper Aspect Owner’s Manual in a
PDF. (A PDF viewer, such as Adobe Acrobat Reader,
must be installed on your computer.)
30 Juniper Aspect Owner’s Manual
Page 35

Chapter 5
Creating a New Project on
the Desktop Computer
31 Juniper Aspect Owner’s Manual
Page 36

Creating a New Project on the Desktop Computer
The Projects function is used for setting up mapping
projects, editing map data as needed, and creating
maps and reports.
This chapter discusses mapping project creation on
the desktop computer. Mapping projects can also be
created on the mobile computer.
There are several informative and action symbols to be
aware of when creating and managing projects. Refer to
the following chart,
Desktop computer and mobile computer
have the same updated project le
Desktop and/or mobile computer need
updates from each other
Project error
Project is currently synchronizing between
desktop and mobile computer
Delete project (large projects can take 2-3
minutes to delete)
Project properties, view or edit
Refresh synchronization status
Synchronize basemap from the desktop
computer to the mobile computer (only
active if computers are connected)
Synchronize the project (only active if
computers are connected)
Open project and reports (for basemap
creation and editing, map and report
creation)
Repair corrupted le (appears when the
project has an error or is corrupted)
32 Juniper Aspect Owner’s Manual
Page 37

Create new project
Main menu (goes to the desktop home page)
Save
Close or cancel
Creating a New Project
Select Projects from the desktop home screen,
Manage Projects, then the symbol. The following
project properties screen is shown:
Fill it out with the requested information for the project.
Press the disk symbol when you are nished. Press the
close symbol to cancel.
Ch 5 Creating a New Project on the Desktop Computer 33
Page 38

The new project is shown in a list similar to the following:
Setting up a Map
To set up a map for a new project, click on the Open
Project symbol . When the new project opens, the
World Imagery basemap is displayed showing the entire
Earth.
To nd the project location, you can use the address
search function or load existing location data.
34 Juniper Aspect Owner’s Manual
Page 39

Address Search Function
To search for the area of your project extent, type in the
address of the area into the “Address Search” bar on
the left hand side of the map. As you type, information
below the text box provides suggestions to help you nd
the address. Once the address has been typed in, click
on one of the search results in the list below the text box
to zoom to that area. The map will zoom in to the area of
interest and the search box will hide itself.
You can choose which basemap you want shown in
the background by clicking on the “Basemap Layers”
drop down list and selecting your basemap. You have
access to basemaps from ArcGIS Online (including World
Imagery, World Streetmap, and World Topography).
Users with the professional license of Juniper Aspect
can use Bing Imagery in addition to the ArcGIS Online
imagery (including Bing Road, Bing Aerial, and Bing
Hybrid).
To search for an address again, click on the tab on the
left hand side of the screen. This brings the “Address
Search” box out again.
Zooming and Panning to Fine Tune Your Search
After you click on a search result in the box, the map
zooms in to that area, You can zoom in and out on
the map by using a scroll wheel on a mouse (scrolling
up zooms in on the location of the mouse cursor while
scrolling down zooms out), using the plus (+) key to zoom
in and the minus key (-) to zoom out, or by selecting the
zoom in and out buttons in the upper left corner of the
map window. You can also draw a box around the area
of interest using your cursor to zoom in on it.
Ch 5 Creating a New Project on the Desktop Computer 35
Page 40

As the map zooms in, the detail becomes greater and
more features are revealed.
Always wait for the basemap and/or streetmap to
completely draw before performing any mapping.
When you pan or the map zooms in or out, a progress
bar appears at the bottom of the screen and grows. The
map is completely drawn when the progress bar at the
bottom hits 100% and then hides again.
Note: Be aware that map data for specic locations
is not always available, might not be available at the
highest resolution, and can be outdated. Professional
license users can switch between basemaps to get
better imagery.
Navigating to a Location by Loading Existing CAD Data
Another way to get to a desired location is by loading
existing data. If you have the professional edition of
Juniper Aspect, you can load CAD data that has been
georeferenced correctly onto the project map.
CAD data has to be created from ArcGIS or referenced
properly in AutoCAD® using the ArcGIS for AutoCAD®
extension. In ArcGIS, if you have GIS les that you want
to use and they are properly adjusted spatially, go into
ArcToolbox and export the GIS les into CAD (any version
36 Juniper Aspect Owner’s Manual
Page 41

of the dwg le extension will work). In AutoCAD®, load
the ArcGIS for AutoCAD® extension and load a reference
basemap. Move the drawing to the proper area
geographically and then give the drawing a projection
and coordinate system.
Click on the From File button to load in the CAD layers.
Once the CAD le loads, click on the Project Extent
button to zoom to the extent of the CAD le.
Adding Features to the Basemap
On the desktop computer you can choose to put in
some known features on the map (like sprinkler heads,
valves, etc) by starting an editing session and adding
objects. These can be added to places that are clearly
seen on the basemap imagery or to places on a properly
referenced CAD le. Details about the Map window
functions are in Chapter 8, Map Functions.
Typically objects are added to a basemap on the mobile
computer while a project is being mapped in the eld.
Downloading the Basemap to a Mobile Computer
Once you get to the desired location, dene the extent
you want for use on the mobile computer(s). When the
area of interest has been chosen, you need to zoom in to
a map extent of 3,000 feet to be able to download the
basemap.
Once you are at this extent or closer, the Download
Basemap button becomes active. Select this button
to download the basemap imagery from the desktop
computer to the mobile computer(s). (See Chapter
Ch 5 Creating a New Project on the Desktop Computer 37
Page 42

3, Software Installation, for details on establishing
communication between a desktop computer and a
mobile computer.) The current basemap that is in view
is downloaded. (Basemaps can be cached on the
desktop computer with the professional edition of Juniper
Aspect.)
Map Window Functions
You will return to the project map window when you
upload map data from a mobile computer, you want
to review or edit the map, or you are ready to create
reports.
38 Juniper Aspect Owner’s Manual
Page 43

Chapter 6
Object Database
Management
39 Juniper Aspect Owner’s Manual
Page 44

Object Database Management
The Objects function is used to manage the object
database which is made up of one or more object
catalogs. You can manage object catalogs by creating
object types, symbology, and attributes from the
Manage Objects screen. The standard license provides a
Default Object Catalog and the ability to add one more
catalogs. The professional license allows you to have
unlimited catalogs
A Default Object Catalog is for irrigation applications.
It consists of over 1,900 commonly used irrigation parts
(objects) from manufacturers such as Hunter™, Rain Bird®,
Irritrol, Toro, Watts, Wilkins and Charlotte. The attributes
for each object include Object Type, Geometry,
Manufacturer, Object Number, Object Description,
Schedule Description, etc. Other catalogs can be loaded
from the Manage Object Catalogs screen.
40 Juniper Aspect Owner’s Manual
Page 45

Manage Object Catalogs
When you select Objects then Manage Object
Catalogs, a list of object catalogs is shown. You are
given the status of the catalogs and have the option
of deleting a catalog, viewing catalog properties,
synchronizing a catalog between a desktop PC and
mobile computer, and opening an object catalog for
editing. A sample object catalog list is shown below:
Ch 6 Object Database Management 41
Page 46

There are several informative and action symbols to be
aware of when are managing object catalogs. Refer to
the chart below:
Desktop computer and mobile computer
have the same updated object catalog
Desktop and/or mobile computer need
updates from each other
Object catalog error
Object catalog is currently synchronizing
between desktop and mobile computer
Delete object catalog
Show object catalog properties
Refresh the object catalog synchronization
status
Synchronize the object catalog (only active
if desktop and mobile computers are
connected)
Open the object catalog for editing
Repair corrupted le (appears when the
project has an error or is corrupted)
Create new object catalog
Main menu (goes to the desktop software
home page)
Save
Close or cancel
42 Juniper Aspect Owner’s Manual
Page 47

Manage Object Catalogs Screen
The Manage Object Catalog home screen tab is
accessed from the Manage Object Catalogs screen.
Select Objects , nd the object catalog you want
to use, then click the open object catalog symbol
to open the Manage Object Catalog screen. A screen
similar to the following appears:
You can upload your own objects database from an
existing CSV le (more details are given later in this
chapter), create an object database by manually keying
it in, and manipulate the database you are using by
creating object types, symbology, and attributes.
Object management functions are shown across the top
Ch 6 Object Database Management 43
Page 48

of the screen. See the chart that follows for descriptions
of these functions.
Object, New: add a new object to the
selected object type. Select an object type
from the database rst by dropping down the
Object Types list. The new object will be auto
selected in the grid view and object view
screens.
Object, Delete: delete the currently selected
object from the object list. Select an object
to delete and click on the delete button. (The
object that is selected to be deleted is shown
in the object view in the bottom right box.)
Object Type, New: add a new object type to
the existing database. A dialog box comes
up called “Add New Object Type.” Fill in the
name, geometry type, and catalog attributes.
Object Type, Delete: deletes an object type
and all associated objects. Warning: there is
no undo option when you delete an object
type.
Import, From File: Import an existing object
database from a CSV le.
Export, To File: Exports the selected database
to a CSV le.
There are two sections to the Manage Object Catalog
screen: Object Type and Objects.
44 Juniper Aspect Owner’s Manual
Page 49

Object Type
Select an object type from the Object Type pull down list.
The following functions can be selected:
The area above the list of functions changes depending
on which function is selected. In the above example,
Symbology is selected (box is orange instead of blue).
Symbology
Choose how an object type is symbolized. Options: Icon,
Simple, and Custom.
Icon Object Type Symbol
Select a predened Icon from the drop down list to
represent an object type. You can also select the symbol
size. Here are sample settings for backow devices:
Ch 6 Object Database Management 45
Page 50

Simple Object Type Symbol
For the Simple symbol type, simply choose a color from
the drop down list to represent an object type. You can
also choose to use a square or circle for symbology as
well as change the border width of the symbol.
Custom Object Type Symbol
For the Custom symbol type, choose your own icon for
that particular object type. Click the Select button to
browse to the icon (le type must be png, jpg, gif, or
bmp). Images used for the custom symbology can be
any size but when they are brought into Juniper Aspect,
they are resized to 48x48 pixels.
Object Browser Attributes
The object browser attributes section lists the three
attributes that will show up on the mobile computer.
Select the three you want to appear on the smaller
mobile computer screen.
46 Juniper Aspect Owner’s Manual
Page 51

Catalog Attributes
In Catalog Attributes, add or delete attributes for each
object type.
To add a new attribute, type in the box that says “Type
a new name…” and click on the plus (+) sign next to it or
press Enter.
Note: if the (+) sign is not clicked or you don’t press Enter,
the attribute won’t be added. To delete an existing
attribute, click on the minus sign (-) next to the attribute
to be deleted. You receive a warning before an attribute
is deleted.
Ch 6 Object Database Management 47
Page 52

In-Field Attributes
Click on the button that says In-Field Attributes.
User Entered Attributes
To add an in-eld attribute type in the name of the
attribute and choose the data type from the drop down
list. Possible types are:
Text: for any string of characters
Number: for integers
Decimal: for oating point numbers
Date
When you have typed a name and selected a data
type, click the plus (+) sign.
You can populate the eld of the attribute while
mapping in the eld. Example: for sprinkler heads, an In-
Field Attribute could be “Condition.” You can manually
type in the current condition of each sprinkler head. Or
for an object type like water meters, an In-Field Attribute
could be “Size.” You can manually put in the pipe size for
the meter (as a number).
48 Juniper Aspect Owner’s Manual
Page 53

Selectable Attributes
The Selectable Attributes option provides a drop down
list of selectable attributes you dene. Traditionally you
create an in-eld attribute and then in the eld you type
in the value for the attribute. For example, if the attribute
is Age you could type in Old. Now, with Selectable
Attributes, you can pre-dene values for the in-eld
attribute of Age using Old and New. These attributes
show up in the drop-down box.
Objects
Objects Grid
The Objects grid appears in the upper right section of the
Manage Object Catalog screen. When an Object Type
is selected, the grid is automatically populated with the
objects of that Object Type. Here is an example:
The headers in the grid are dynamically movable. Click
on one of the headers and drag it to the left or right to
rearrange the order of the headers. When the up and
down arrows appear, release the dragged header for
placement.
Ch 6 Object Database Management 49
Page 54

The header can be hidden by moving it off of the header
list. A red circle with white appears. Release the dragged
object and the column will be hidden.
To sort the objects list by header, drag the header into
the light blue box above the headers. White up and
down arrows appear. Release the dragged header.
After the header is released, you can chose to sort
headers ascending or descending by clicking on the
header again. Each record can be expanded by
clicking on it to show the details of that record.
If a header is hidden and you want it back, drop down
the object type list, switch to a different object, and then
go back to the desired object.
50 Juniper Aspect Owner’s Manual
Page 55

Object Attributes
Editing object attributes is done in the Object Attributes
section located on the bottom right of the Objects
window. Here is a sample list of attributes for a backow
device:
Object attributes are used as follows:
1. When you select an object from the Objects grid
table above, the object is displayed in the Object
Attributes section and you can edit the existing
attributes.
2. When a new object is created in Object Types, it
automatically appears in the Object Attributes
section so you can ll in the elds with information
about the object.
Note: Everything you type in Object Attributes is
automatically saved. There is no save button.
Ch 6 Object Database Management 51
Page 56

Importing and Exporting CSV Object Catalogs
You can import an object catalog into Juniper Aspect
using CSV les. The CSV import method allows you to
dene object types, symbology and other attributes.
You might nd it easier to manage object catalogs by
exporting them and editing the CSV les, then importing
them back into Juniper Aspect.
Juniper Aspect uses a two le system for exibility
in editing both object types and individual objects
separately. An “Object Types.csv” le contains
information specic to an Object Type (i.e. Colors, Icons,
Object Browser Attributes etc.). The object type le
maintains the symbology data dened for an object
type even when importing into a new catalog or when
importing data into another copy of Juniper Aspect on
a different computer. Additionally, you create a second
CSV le containing object data for individual objects
in the catalog. The CSV le will have a lename that
matches the name of the catalog being exported.
Note: The single le method found in previous versions
of Juniper Aspect is still supported, but we recommend
you familiarize yourself with the two le system for easier
maintainability and expanded functionality.
Exporting and Viewing An Example CSV File
One way to easily see an example of how the CSV le
should look is to export the Default Object Catalog to
a CSV le. Select Objects from the Juniper Aspect
home screen then Manage Object Catalogs and a list
of object catalogs is shown. Select the Default Objects
Catalog. The Manage Object Catalogs screen is shown.
Select the To Fi le button located near the top of the
screen on the left-hand side in the Import/Export section
of the Manage Object Catalog screen. Browse to the
location you want to export the CSV data to. Click the
Export button to begin the export of the Default Objects
Catalog. Windows Explorer automatically opens to the
directory you selected. Open the newly created folder
52 Juniper Aspect Owner’s Manual
Page 57

(which should be named Default Objects Catalog for this
example). View the two exported CSV les:
Default Objects Catalog.csv contains the individual
objects contained in the catalog.
Object Types.csv contains data specic to the object
types contained in the catalog.
Note: If you plan on importing this data back into Juniper
Aspect it works best if you do not rename the “Object
Types.csv” le. Otherwise, you have to specify the object
types le manually as the importer will not be able to
automatically detect which CSV le contains Object
Type data and which contains Object data.
You can now see what the Default Object Catalog CSV
le looks like and use it as an example as you create your
own.
CSV File Formatting Requirements
A CSV le must be formatted properly before it can be
imported.
An acceptable Object Types.csv le requires the
following format
1. A header row (the rst row in the CSV le) containing
the following
a. Column 1 must be “Object Type”
b. Column 2 must be “Geometry”
c. Additionally 1 or more of the following columns (in
any order)
i. “BorderColor”, “BorderThickness”,
“Custom Imag e”, “F ill”, “ IconI nd ex ”,
“SimpleSymbolType”, “SimpleSymbolSize”,
“Transparency”, “BrowserCategory1”,
“BrowserCategory2”, “BrowserCategory3”
ii. A custom in-eld attribute name.
Dening In-Field Attributes: To import an ineld
attribute using a CSV le use the following
Ch 6 Object Database Management 53
Page 58

indicator “F:” (it must be a capital F) in the
header row followed by the attribute name. ie.
“F:Date mapped”. The row then must specify
the ineld attribute type in the corresponding
cell (below the “F:” header). Valid in-eld
attribute types include “Text”, “Decimal”,
“Number”, or “Date” or you can leave the cell
blank if you do not want that object type to
have that in-eld attribute.
iii. A selectable in-eld attribute name.
Dening Selectable In-eld Attributes: To
import a selectable in-eld attribute using a
CSV le use the following indicator “S:” (it must
be a capital S) in the header row followed
by the attribute name. ie “S:Is Broken?”. The
row then must specify the list of selectable
attribute values in the cell that corresponds
to the “S:” column header. This list must be
separated by comma, ie “Yes,No”.
2. Each row following the header row must dene
the values for the attributes specied in the
corresponding header. If you don’t want to dene
an attribute for a particular object type leave the
column blank for that row.
Acceptable values for the various object type
attributes:
a. “BorderColor” – A hex value representing a color
for the border (for polygon object types).
b. “BorderThickness” – An integer value representing
the thickness of the border (for polygon and line
object types).
c. “CustomImage” – The lename for a le
containing a custom image for the object type
(acceptable le types include .png, .bmp, .jpg)
d. “Fill” – A hex value representing the color used for
a simple symbol
e. “IconIndex” – A number representing an icon
54 Juniper Aspect Owner’s Manual
Page 59

f. “SimpleSymbolType” – acceptable values include
“Icon”, “Simple” and “Custom”
g. “SimpleSymbolSize” – acceptable values include
“Size10X10”, “Size16X16”, “Size24X24”, “Size48X48”
h. “Transparency” – acceptable values are numbers
(integers) 1-10 0
i. “BrowserCategory1” – A name representing the
rst category to be used when viewing objects
in the object browser
j. “BrowserCategory2” – A name representing the
second category to be used when viewing
objects in the object browser
k. “BrowserCategory3” – A name representing the
third category to be used when viewing objects in
the object browser
An acceptable object le requires the following format
(in addition to standard CSV formatting rules):
1. A header row (the rst row in the CSV le) containing
the following:
a. Column 1 must be “Object Type”.
b. Column 2 must be “Geometry”.
c. Column 3 - many are used to indicate object
attribute names.
2. Each row following the header row requires the
following:
a. Column 1 must be an object type name
(whatever you like).
b. Column 2 must be a valid geometry. Valid
geometries include “point”, “polygon”, “line”.
c. The number of columns in any given row must
match the number of columns in the header row.
Note; If you don’t want an object (row) to have a
particular attribute leave that column blank.
Ch 6 Object Database Management 55
Page 60

Importing CSV Data Into an Object Catalog
You can import data into a catalog (in this example,
the Default Objects Catalog) from CSV les from the
Import Object Catalog screen. To open this screen click
the From File button at the top of the Manage Object
Catalog screen. Browse to the folder containing the CSV
les to import. The folder should contain at most two CSV
les and may also contain custom icon les that you want
to include to dene custom symbology for a particular
part type.
If the folder contains more than two CSV les or does not
contain an Object Types.csv le you have to manually
specify these les in the More Options section of the
import screen. You can additionally dene Import
Options such as appending the imported data to the
existing catalog or replacing the existing catalog with
the imported data. You can also have the importer
check for duplicate objects as they are imported into the
catalog. Note that when Check for duplicates is checked
it does not check existing data for duplicates, but only
56 Juniper Aspect Owner’s Manual
Page 61

checks to see if the objects being imported already exist
in the catalog.
Synchronizing Object Data With a Mobile Computer
Once you are done making changes to an object
database, close the Manage Object Catalog window.
Synchronize your changes with the database on the
mobile computer(s).
Establish communication between the desktop and
mobile computer. Select the object catalog you want
to synchronize from the list of catalogs on the desktop
computer. Select the Refresh symbol for the catalog
to refresh the synchronization (this updates the time
stamp). Select the Sync symbol to synchronize
the changes with the mobile computer. Repeat this
process to load additional catalogs or if multiple mobile
computers are being used.
Note: Changes made after objects have been mapped
do not get pushed down to existing objects. The changes
only occur on objects that are mapped after the
database has been synchronized.
Ch 6 Object Database Management 57
Page 62

58 Juniper Aspect Owner’s Manual
Page 63

Chapter 7
Collecting Data on a
Mobile Computer
59 Juniper Aspect Owner’s Manual
Page 64

Collecting Data on a Mobile Computer
Mapping data is collected in the eld by a mobile worker
on a Mesa Rugged Notepad™ or an Archer Field PC®
running Juniper Aspect mobile software.
Preparing to Collect Data
Before you go into the eld to collect data, complete the
following tasks:
1. Place a screen protector on the mobile computer,
charge the battery pack(s), and review the owner’s
manual for the mobile computer so you have a
basic understanding of how it works. (Manuals are
available on our website at www.junipersys.com/
Juniper-Systems/support/Documentation.)
2. Make sure the information you need from the
desktop computer has been loaded onto the mobile
computer, including:
a. Juniper Aspect mobile software. The mobile
software is downloaded from the desktop version
of the software (see Chapter 3).
b. Projects set up on the desktop computer.
c. Object catalogs to be used with the project. All
object catalogs are downloaded, created and
edited only on the desktop computer, including
the Default Objects Catalog.
d. Updates made on the desktop computer to
existing projects or objects since your mobile
computer was last synchronized with the desktop
computer.
3. Set up the GPS receiver in the software.
Note: The GPS receiver used with Juniper Aspect must
be congured correctly. See the Appendix for details.
4. Understand what data you are going to be collecting
and how the software works on the mobile computer.
5. Know when you should synchronize collected data
with the desktop computer.
60 Juniper Aspect Owner’s Manual
Page 65

Entering Information and Making Selections
To enter information and navigate around the software
and handheld, tap options on the touchscreen and soft
keys to select them, use the on-screen keyboard to type
information, and press keypad buttons. A sample Mesa
keyboard follows:
Note: To toggle between the numbers and letters on the
keyboard, tap on the “123” button.
Soft Keys
The bar at the bottom of each screen has soft keys that
vary depending on which handheld you are using and
which screen you are on. On the Mesa, this is called the
tile bar.
Soft keys include:
Start: Takes you to the Windows Start menu.
Close and Back: Close the current screen and take you
to the previous screen.
Ch 7 Collecting Data on a Mobile Computer 61
Page 66

Cancel: Closes the current screen and takes you back
to the previous task.
Save: Saves new settings and project information and
returns you to the previous screen.
Keyboard: Brings up an on-screen (SIP) keyboard.
Menu: Options include Cancel which closes the
current screen and takes you back to the previous task,
Enable or Disable GPS, and open the Field Guide.
Field Guide: Depending on the page you are on, this
function could be available as a soft key or available
from the Menu button.
Create: Create a new project.
Project Screen
The features of a project screen are shown in the
following example:
Recent Objects Used,
Select Catalogs and
Objects
62 Juniper Aspect Owner’s Manual
Project
Mapping Tools
Tile Bar (Soft Keys)
Page 67

Juniper Aspect Mobile
Start the Juniper Aspect mobile application on your
mobile computer. For the Mesa, select Start > Juniper
Aspect. For the Archer, select Start > Programs > Juniper
Aspect. A splash screen is shown for a moment while the
program loads, then the Juniper Aspect home screen
appears:
Four main functions are accessed from this screen:
New Project: Create a new mapping project.
Open Project: Open existing mapping projects.
Settings: Set up the GPS and Geometry Collection.
The About option provides information such as the
software serial number.
Exit: Close the software and return to the home screen.
Note: In this manual, screen shots are shown on a Mesa
Rugged Notepad in the portrait screen orientation.
Juniper Aspect does not run in a landscape orientation.
Ch 7 Collecting Data on a Mobile Computer 63
Page 68

New Project
Select the New Project symbol on the home screen. The
New Project Details screen is shown. Enter the requested
information as shown in the example below:
Select the Create soft key. The new project mapping
screen is opened. Mapping is described in this chapter.
64 Juniper Aspect Owner’s Manual
Page 69

Open Project
Select the Open Project symbol on the home screen
to view a list of existing projects. A Projects screen is
displayed. Tap on the project you want to open:
An example of an irrigation project is shown below. You
can review or continue working on the project.
Ch 7 Collecting Data on a Mobile Computer 65
Page 70

Settings
GPS
Select the Settings function on the Juniper Aspect home
screen to congure the GPS. From the Settings screen,
select GPS. The following screen is shown:
Tap the current setting to see a list of settings to select
from. Tap the down arrow ▼ to select a setting.
Port Name: The port name for your GPS receiver can
vary based on the model of mobile computer, the
GPS receiver and how the GPS receiver and mobile
computer have been congured.
Baud Rate: The baud rate is normally set in your
receiver. Typical setting:
Port Name Baud Rate
Mesa, integrated GPS COM2 38,400
Tap Save when are done. The Settings screen is shown.
66 Juniper Aspect Owner’s Manual
Page 71

Geometry Collection
From the Settings screen select Geometry Collection. The
following screen with default settings is shown:
Tap the current setting to see a list of settings to select
from. Tap the down arrow ▼ to manually enter a setting.
See the following example for Max PDOP:
Ch 7 Collecting Data on a Mobile Computer 67
Page 72

Collection Mode: Select from Manual, Time, and
Distance.
Max PDOP: PDOP stands for Positional Dilution Of
Precision. It indicates the quality of the GPS position
solution. Low PDOP values are best, and generally a
PDOP of 6 or less will provide adequate accuracy. This
setting tells the software to discard GPS data when the
PDOP is higher than this threshold to help insure the
accuracy of the points that are mapped. Although
setting Max PDOP to a lower value may improve the
accuracy of the points that you map, it may increase
the time that it takes to map the point.
Number of Points to Average: Points to average is the
number of GPS data points that you want to average
when mapping a point. Depending on the GPS that
you are using, you may be able to achieve reasonable
accuracy by only averaging a few points (less than 10).
Some GPS receivers may work better when averaging
more points. The more points you choose to average,
the longer it will take to map an object. Typically, each
point takes one second, so 10 points would take 10
seconds to nish (this is dependent on good PDOP,
etc).
Measure Unit: Select the type of units you prefer for
distance.
Exit
Select Exit to close Juniper Aspect mobile and return to
the home screen.
68 Juniper Aspect Owner’s Manual
Page 73

Object Catalogs
Each Juniper Aspect mobile license includes a Custom
Objects Catalog and Default Objects Catalog (for
irrigation objects). One or more additional catalogs can
be downloaded from the desktop software (depending
on which Juniper Aspect software license you have).
From the project screen select Objects. The Object
Catalog Selection screen is shown. The available
object catalogs are shown as illustrated in the following
example:
Custom Objects Catalog
A Custom Objects Catalog provides a way to create
new objects and new object types in the eld so that
items that do not exist in another object catalog can be
mapped.
Select the Custom Objects Catalog then the New
Object button at the top of the screen. Dene a new
object by selecting an object type, or you can create
a new object type by selecting the + button. Enter the
appropriate information to dene the new object or new
object type.
Ch 7 Collecting Data on a Mobile Computer 69
Page 74

Note: A Custom Objects Catalog exists only on mobile
computers. Custom objects are not synchronized to the
desktop or to other mobile computers. They are unique
to each mobile computer. The objects show up in reports
generated on the desktop, but must be manually added
to an object catalog on the desktop computer if desired.
Mapping Objects Using GPS
Objects are typically mapped using GPS, although they
can be added manually (instructions on how to do this
are given later in this manual).
Mapping Tools
Mapping tools are in a bar above the tile bar. The
following tools are available:
Select: objects are selected to edit, delete, or
navigate to.
Pan: click and drag the map to view the
desired area.
Zoom In: using a stylus or nger draw a box
around the area of interest to zoom to it.
Zoom Out: using a stylus or nger draw a box
in which the current screen will t. A large box
will zoom out a small amount, and a small box
will zoom out a long way.
Zoom to Project Extent: Click to zoom to the
combined extent of all the project layers.
Layers: toggle the layers you want to show on
and off.
Delete
Object
Pause
and
Resume
70 Juniper Aspect Owner’s Manual
A mapped object can be deleted by
selecting the object and choosing the Delete
option from the context menu that appears.
While mapping a line or polygon, tap on
Stop to pause mapping. To resume, tap on
Capture to continue the mapping of the line
or polygon.
Page 75

At the top of the map screen on the left, you might see
up to three symbols like the following:
Recent objects used, can use as shortcuts
(symbols for up to the last three are shown).
Mapping a Project
Open the new or existing project you want to map.
Select Menu, then Enable GPS.
You can see the status of the GPS based on the icon
that is shown in the center of the mapping area of the
screen. A green circle indicates that the GPS receiver is
working and that Juniper Aspect is receiving data from
the GPS receiver. A red circle with a “!” symbol indicates
that Juniper Aspect has attempted to activate the GPS
receiver and that you are either in a location where the
GPS cannot acquire a position x or that the program is
not receiving data from the GPS.
Once the GPS is working and you have a position x,
select an object to map. Follow these steps.
1. Tap the Objects button near the top of the screen on
the right to open the Object Catalog Selection.
Ch 7 Collecting Data on a Mobile Computer 71
Page 76

2. Select the Object Catalog you want to use. The
Default Objects Catalog is shown for this example.
3. The Object Types screen is shown. Select the object
type you want to view.
4. The Remaining Categories screen is shown. To see all
the objects of that type, select Show Matching Parts
at the bottom of the list. An Objects screen is shown.
72 Juniper Aspect Owner’s Manual
Page 77

You can select an object to map from this screen. Or,
you can further lter the objects by a category such
as Manufacturer. Select the desired category.
Manufacturer is shown for this example.
5. Depending on the category you select, you will see
additional screens with options to select from. Keep
Ch 7 Collecting Data on a Mobile Computer 73
Page 78

making selections until you get to an Object screen.
Select the object that you want to map.
To map an object that is not in a catalog, go to the
Object Catalog Selection screen and select Custom
Objects Catalog. The Objects Types screen is shown.
Select N ew. Fill out the New Object screen shown
below using the keyboard and select Add.
74 Juniper Aspect Owner’s Manual
Page 79

6. Now that you have selected a part to map, the
main project screen with a display of the mapping
area is shown. Tap anywhere in the mapping area to
map the object.
Note: Up to three of the last used parts are shown in
the upper left-hand corner of the screen. You can
select these icons for quick access to an object.
7. You are prompted for the Object Label. The Object
Label is a name or identier that you want to use to
identify this specic object, similar to an inventory
Ch 7 Collecting Data on a Mobile Computer 75
Page 80

number or serial number. Enter the desired label for
this object.
8. Select the Map It option to start mapping the object.
A progress bar indicates when the program has
captured enough information from the GPS to map
the object.
76 Juniper Aspect Owner’s Manual
Page 81

9. If you are mapping an object like a pipe or wire,
you need to map two or more points to show where
the pipe runs. Additional points for an object are
mapped by selecting the capture button at the
bottom of the screen. Each time you tap the capture
button it will map another point, and you will see a
progress bar while information is acquired from the
GPS receiver.
10. When you have captured enough points to map the
object, select Finish. You are returned to the Object
Details screen.
Ch 7 Collecting Data on a Mobile Computer 77
Page 82

11. To record additional notes, select the Attributes from
the list.
12. Enter notes in the Comments eld if desired, then
select Save to return to the Object Details screen.
78 Juniper Aspect Owner’s Manual
Page 83

13. Up to 5 images of an object can be taken if you are
using a Mesa Geo with a camera. Tap the Capture
Image option on the Object Details screen.
Note: The Mesa camera resolution is set to 640 x 480.
Higher resolutions are not supported and may cause
unexpected problems.
The camera turns on and the Pictures and Videos
application opens. Select the Menu soft key for a pulldown list of options. (See the Mesa Owner’s Manual for
more details regarding the camera.)
Ch 7 Collecting Data on a Mobile Computer 79
Page 84

Once you have the camera options set up, take a
picture by pressing the camera button .
Pictures can be geotagged, showing the date, time,
latitude, and longitude either embedded or embossed
into the le. (See the Mesa Owner’s Manual for more
details on the camera.)
80 Juniper Aspect Owner’s Manual
Page 85

When you are done, tap OK to return to the Object
Details screen.
Images can be added or deleted by selecting the
Manage Images option on the Object Details screen.
To add another image, select the Menu soft key and
choose the Capture Image option. Repeat the steps
outlined earlier in this step.
Ch 7 Collecting Data on a Mobile Computer 81
Page 86

Tap OK to return to the Manage Images screen.
To delete images, select the checkbox next to each
image to be deleted. Select the Menu soft key and
choose Delete Selected.
14. To map the coverage area for an object like an
irrigation valve, select Capture Coverage, then start
walking.
82 Juniper Aspect Owner’s Manual
Page 87

Always walk/map a polygon in a clockwise or
counter-clockwise fashion. Avoid walking in a zigzag
line or crossing over the desired area.
If the polygon you create does not look right, you can
edit it later.
15. When you have mapped the coverage area, select
Finish to return to the Object Details screen.
Ch 7 Collecting Data on a Mobile Computer 83
Page 88

16. Select the Save button at the bottom of the Object
Details screen to map the object.
84 Juniper Aspect Owner’s Manual
Page 89

Object Labels
If your map screen starts to get crowded, you can turn
object labels off from the Layers function to simplify it.
The following screenshots show examples of labels being
turned on, then off.
Map with Labels On
Map Labels Off
Ch 7 Collecting Data on a Mobile Computer 85
Page 90

Mapping Objects Without GPS
It is possible to add objects to the map by manually
selecting the location on the screen.
1. From the Objects Browser select an object to map.
2. Tap on the map when you see the prompt “Tap
anywhere on the map to add.”
86 Juniper Aspect Owner’s Manual
Page 91

3. Enter an Object Label.
4. Select Map It.
5. Select Stop to stop the GPS point capture process.
Ch 7 Collecting Data on a Mobile Computer 87
Page 92

6. Choose Menu, then Add Point.
7. Tap the location on the map where you want to add
the object. A marker appears on the map to indicate
the location that you selected.
8. Choose Finish. (Objects can be edited without GPS.
See “Moving an Object Without GPS.”)
88 Juniper Aspect Owner’s Manual
Page 93

9. If needed, add or change any information on the
Object Details page.
10. Choose Save. The map you created is shown.
Ch 7 Collecting Irrigation Data on a Mobile Computer 89
Page 94

Editing Objects
Information associated with a mapped object can be
changed as follows:
1. Use the Select tool to select the object to be edited.
2. Choose Edit from the context menu that appears.
90 Juniper Aspect Owner’s Manual
Page 95

3. The following Object Details screen is shown:
You can edit or add the following object details:
• Object Label: edit text.
• Edit Geometry: move objects on the map, with or
without GPS (described later in this chapter).
• Attributes: change any of the editable attribute
data.
• Capture Image (Mesa only): add a picture or
replace the existing picture for an object.
• Capture Coverage: capture or edit valve object
coverage, with or without GPS (described later in
this chapter).
4. Choose Save when you are done editing the object.
Ch 7 Collecting Data on a Mobile Computer 91
Page 96

Moving Objects
Objects can be moved with or without GPS.
Moving Objects Without GPS
1. Use the Select tool to select the object to be edited,
then Edit from the menu.
2. The Object Details screen is shown. Choose Edit
Geometry. The Map It screen is shown.
3. Select Menu, then Move Point.
92 Juniper Aspect Owner’s Manual
Page 97

4. A circle tool appears in the center of the screen. Tap
on the object that you are editing to select it with the
Move tool.
5. Tap the new location where you want to place the
object.
Ch 7 Collecting Data on a Mobile Computer 93
Page 98

Note: The icon that shows the original location of the
object remains visible at the old location until the
object edit is complete.
A red box appears underneath the Move tool in the
new location. Because the Move tool covers the red
box when it is placed at the new location, you may
have to tap somewhere else on the map to verify that
the red box is at the location that you selected.
6. If you need to move the object again, use the Move
tool to select the red box and place it again by using
the same method.
6. Select Finish, then Save.
Moving an Object Using GPS
1. Use the Select tool to select the object to be edited,
then Edit from the menu.
2. The Object Details screen is shown. Choose Edit
Geometry. The Map It screen is shown.
3. Select Capture Coverage to collect coordinates from
the GPS.
94 Juniper Aspect Owner’s Manual
Page 99

Note: The icon that shows the original location of the
object remains visible at the old location until the
object edit is complete.
4. Select Finish, then Save.
Editing a Coverage Area
Coverage areas can be edited with or without GPS.
Editing a Coverage Area without GPS
1. Use the Select tool to select the object to be edited,
then Edit from the menu.
2. The Object Details screen is shown. Choose Edit
Coverage. The Map It screen is shown.
3. Choose Menu and then select the action you want to
per form:
Add Point – Use this option to add new points to the
coverage polygon. When you’ve selected this option
tap the locations for each of the new points.
Move Point – Use this option to move a point that is
part of the coverage polygon. When you’ve selected
this option, tap on one of the vertices of the polygon
to select that point, and then tap the new location to
move it.
Ch 7 Collecting Data on a Mobile Computer 95
Page 100

Insert Point – Use this option to add a new vertex to a
line segment of the coverage polygon. Tap the line to
select it, and then tap the location where you would
like to place the new vertex.
Delete Point – Use this option to delete a vertex in the
polygon. When you’ve selected this option, tap on
one of the vertices of the polygon to remove it.
Add Area – Use this option to start another coverage
area associated with the same object in a different
location. For example, this could be used to map a
coverage area that consisted of multiple islands in a
parking lot. After you’ve selected this option, choose
Menu, then Add Point to start placing points for the
additional coverage area.
4. Select Finish, then Save.
Editing a Coverage Area using GPS
1. Select an object to edit to get to the Object Details
Screen.
2. Choose Edit Coverage. The Map It screen is shown.
3. If needed, adjust the Geometry collection settings
(manual, time, distance).
96 Juniper Aspect Owner’s Manual
 Loading...