

Page 1
Quick Start Guide
Welcome to Spike.
This Quick Start Guide will guide you through the steps to
set up your Spike and begin using it.
1
2
3
4
Spike QSG v1.8
Mounting Your Spike
Installing the Spike App
Starting Up
Measuring With Your Spike
Page 2
Before We Begin...
Packaged and Distributed by:
Health Pak Ltd
Auckland, NZ
Supported Devices
Spike currently supports the following:
Apple iOS iOS 7.1 or later
Google Android v4.4 or later
• Must support Bluetooth Smart (v.4 – low energy)
• For detailed device support, visit:
www.ikegps.com/support
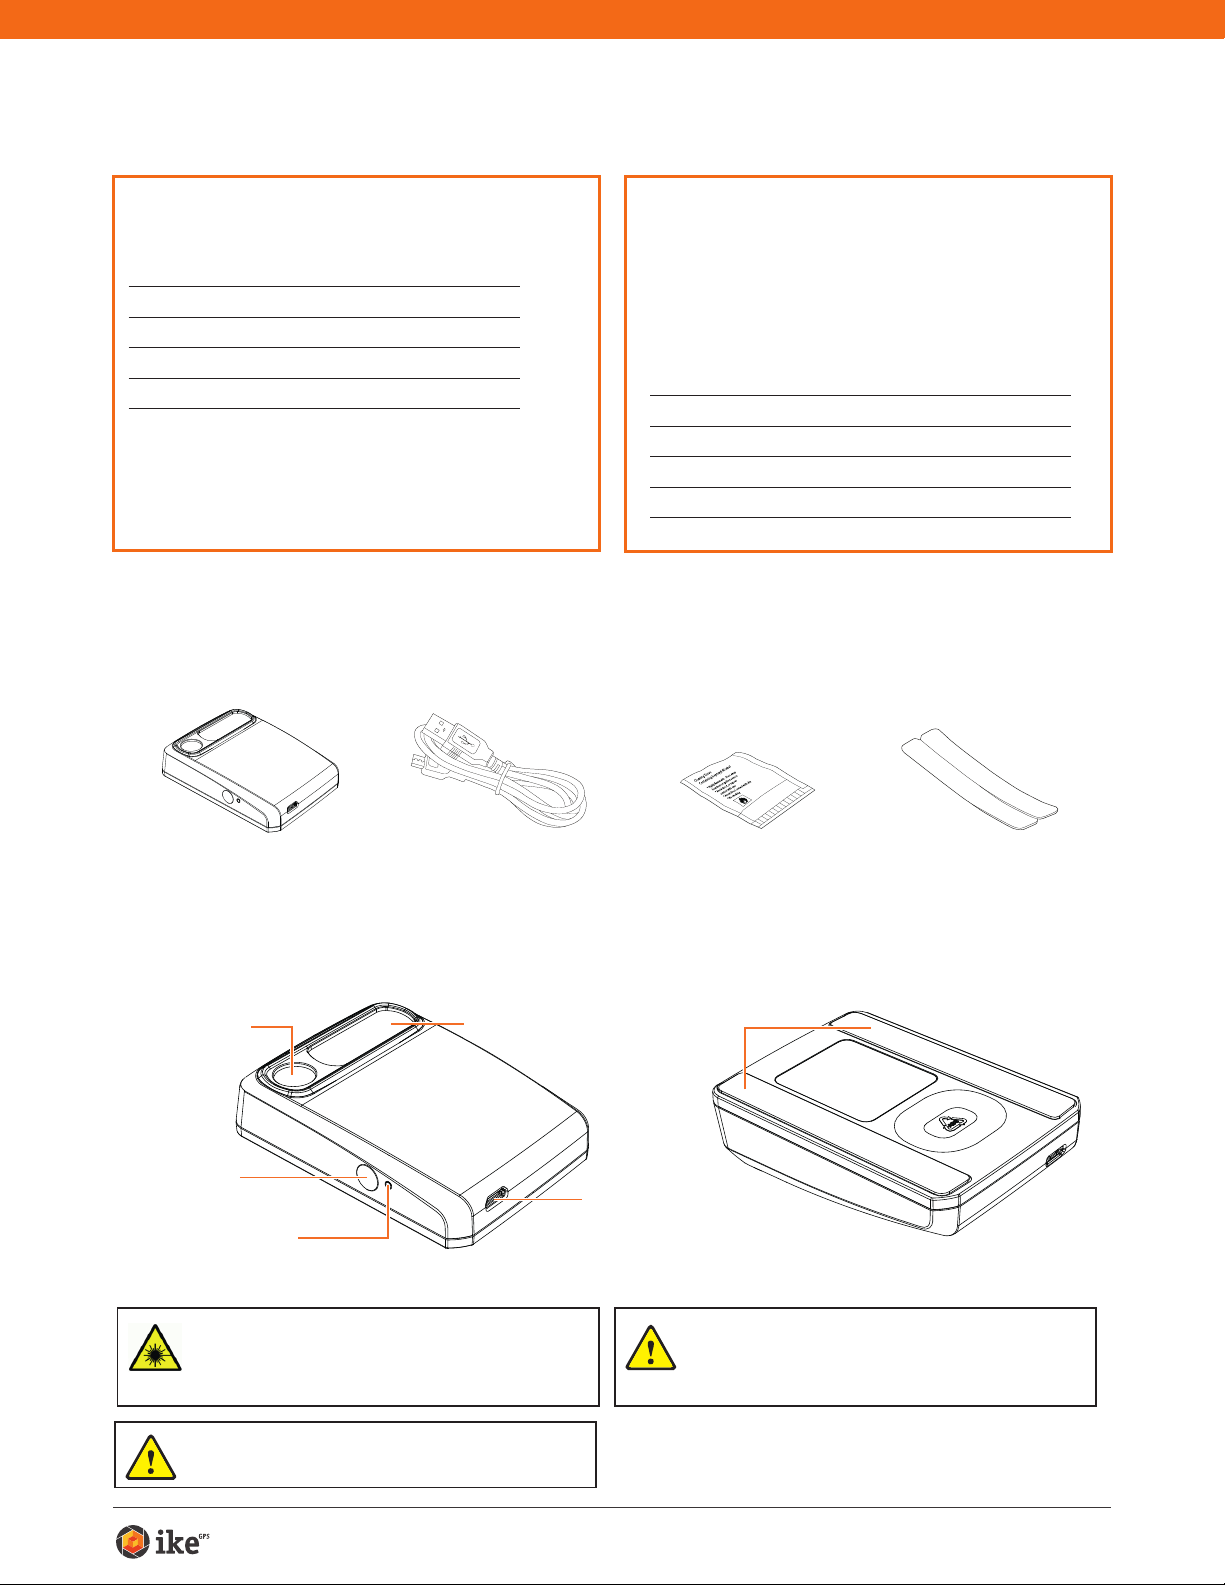
What’s in the Box
Spike Functionality
The Spike app contains core measurement
functionality. As the Spike app quickly evolves,
each Spike app update will introduce additional
features and capabilities.
Spike contains the following functionality:
Range 6-to-650ft (2-to-200m)
Accuracy ±2% photo measure accuracy
Output PDF, Spike File (XML), KMZ
Share Email
Spike Unit Extra double sided
Laser Transmit
Lens
Power Button
LED Indicator
WARNING This device contains an eye safe class 1 laser product.
Invisible laser radiation is emitted from (and received into) the front
apertures. Avoid staring into the laser beam. This product complies
with IEC60825-1 Ed 2.0 and 21CFR1040.10 except for deviations
pursuant to Laser Notice No.50, dated July 26 2001.
CAUTION Use of controls or adjustments, or performance of
procedures other than those specied herein may result in
hazardous radiation exposure.
USB Cable for
charging
Receive Lens
Micro USB
Charging Port
Cleaning Tissue to
clean the mounting
surface (contains
Isopropyl alcohol)
Adhesive Strips
WARNING This equipment complies with FCC radiation exposure
limits set forth for an uncontrolled environment. In order to avoid the
possibility of exceeding the FCC radio frequency exposure limits,
human proximity to the antenna shall not be less than 20cm during
normal operation.
adhesive tape for
mounting to another
Smartphone case
Spike Quick Start Guide 2
Page 3
1
case
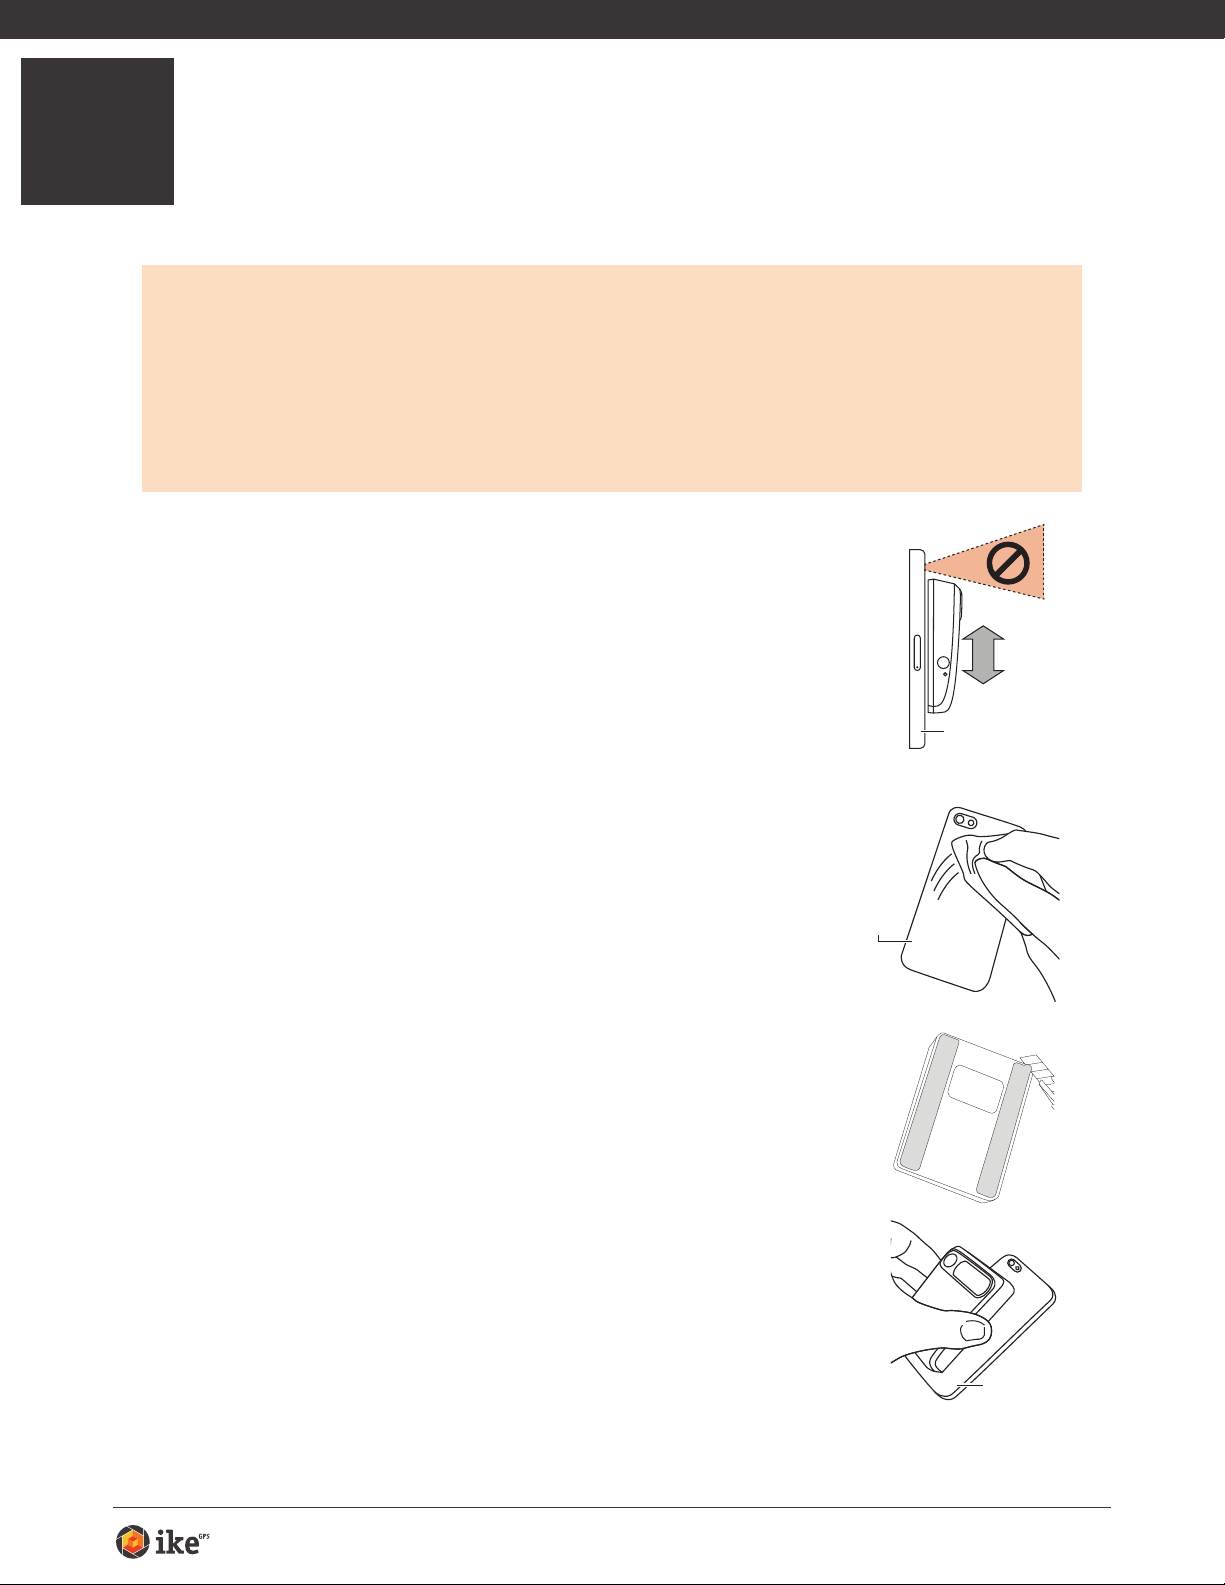
Mounting Your Spike
IMPORTANT TO NOTE...
Mount your Spike to your Smartphone case. You may wish to use two cases -
•
one with Spike attached to it and the other for general day-to-day use.
We recommend attaching your Spike to a hard case with a at back. It will not
•
attach securely to a soft or curved back design.
Optimal surfaces to attach Spike to are metal and hard plastic surfaces.
•
1 Find the best location for your Spike on the
back of your Smartphone case.
• Ensure that Spike does not obstruct the view from
your camera or ash.
• Centrally place Spike on the back of your Smartphone
case.
• To verify, start your Smartphone’s camera app and hold your
Spike against the back to validate the correct placement.
Smartphone case
2 Use the Cleaning Tissue provided to thoroughly
clean the area on the back of your Smartphone
case where Spike will be attached.
Important: Do not use the Cleaning Tissue to clean
lenses as it may cause damage.
3 On the back of your Spike, peel off the protective
backing to expose the adhesive tape.
• Use a sharp knife to lift the edge of the backing strip.
• The adhesive tape adheres best at room temperature.
4 Make sure the cleaned area on your Smartphone
case is completely dry, then position Spike onto
your Smartphone case, and press down rmly for
approximately 60 seconds.
• Allow approximately 1 hour for useable bond strength.
• Ultimate bond strength is dependent upon the amount
of adhesive-to-surface contact developed. Be sure to
press rmly to develop this bond strength.
Smartphone
case
Smartphone
Spike Quick Start Guide 3
Page 4
2
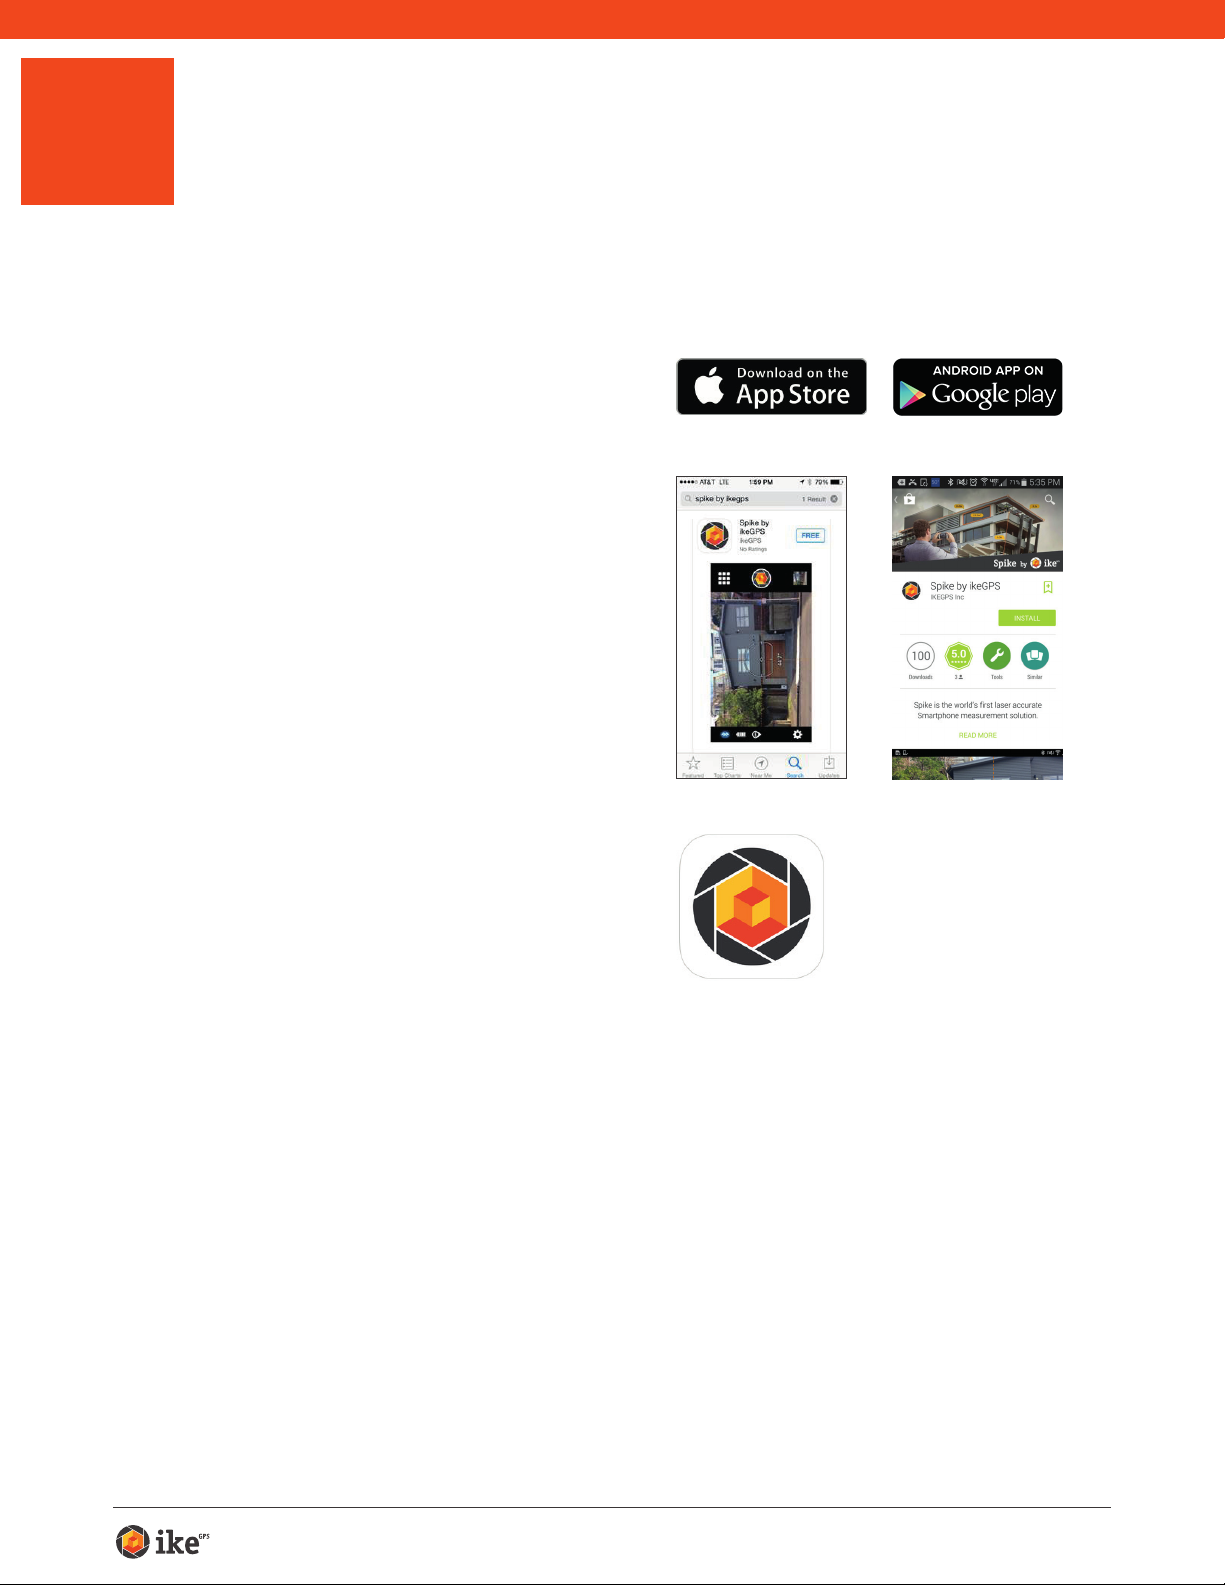
Installing the Spike App
The Spike app is available for download from the App Store or Google Play.
1 On your Smartphone, launch the
App Store or Google Play.
2 Within the search box, search for
ikeGPS.
3 Follow the instructions to
download and install the app on
your Smartphone.
4 Once installed, the Spike app icon
will appear on your Smartphone’s
screen.
You can launch the Spike app and test
it out in Demo mode. Note however
that without the Spike unit, you cannot
generate accurate measurements.
Spike Quick Start Guide 4
Page 5
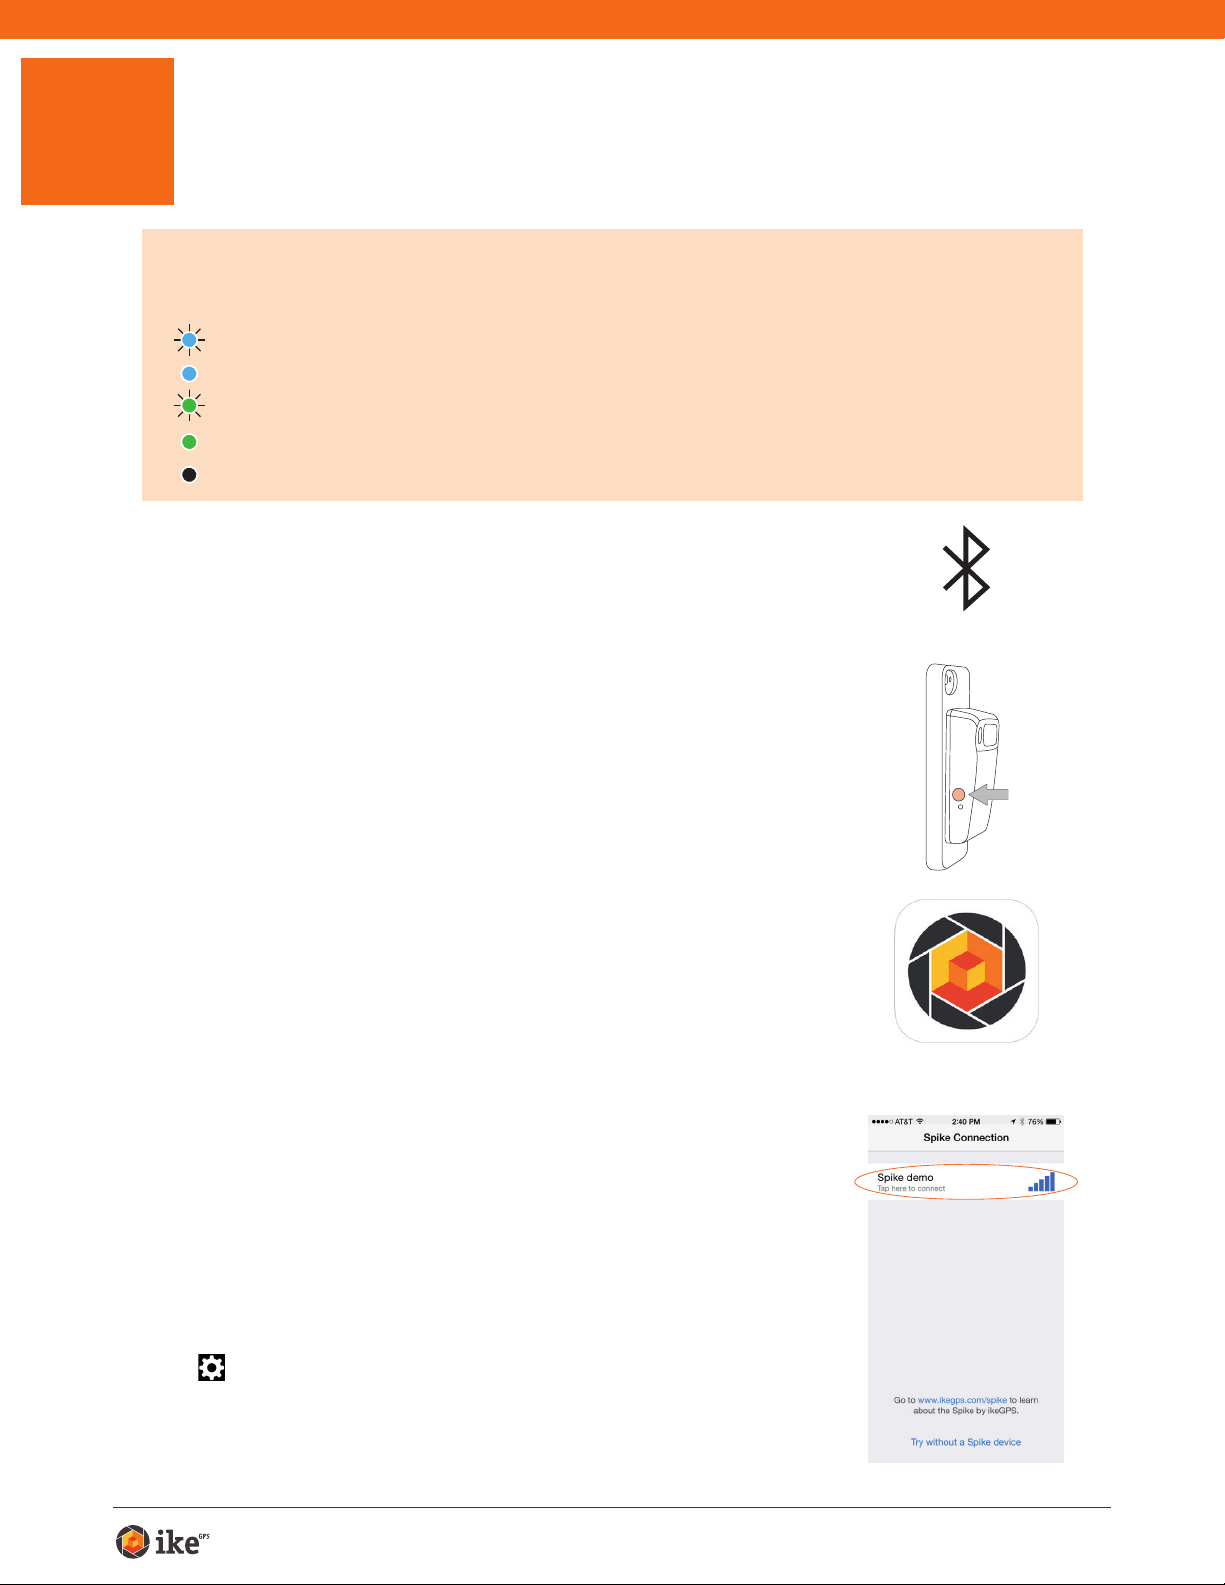
3
Off: Power off
Starting Up
IMPORTANT TO NOTE...
The LED indicator shows the status of your Spike:
Blue flashing: Spike discoverable over Bluetooth
Blue on: Spike connected to Smartphone
Green flashing: Spike charging
Green on: Spike fully charged
1 Turn on Bluetooth on your Smartphone.
2 On your Spike, press the Power button.
• The LED indicator ashes blue indicating that the
Spike is discoverable over Bluetooth.
• If the LED indicator remains off, Spike may need
charging.
3 On your Smartphone, tap on the Spike app to
launch it.
The app will display “Searching for Spike Devices” and
then displays the Spike unit name available for pairing.
If no unit name appears, ensure that the Spike unit’s
LED indicator is ashing blue (see Step 2).
4 When your Spike unit name appears, tap on
it to pair it with your Smartphone (no need to
wait for the spinning circle to stop).
This step is necessary the rst time you use Spike. For
subsequent uses, your Spike will automatically be paired
with your Smartphone.
TIP: After connecting your Spike, go into the Spike app settings
, and select your preferred units of measurements: feet or
meters.
Spike Quick Start Guide 5
Page 6

Aligning the Spike Laser
➋
Done
X: 5
6'9"
Y: 0
➌➌
➊
Before using your Spike, you need to ensure that the laser is aligned with
the camera on your Smartphone.
1 In the Spike app, tap on
, then tap Align Laser.
2 Rest your Smartphone on top of a at, hard
surface, such as a table top. Then hold your
Smartphone vertically and aim it towards two
objects that are at different distances, for
example the edge of a door. Ensure that the
closest object has a vertical edge.
• The distance between the two objects should be
at least 15 feet (5 meters).
• You can use the vertical edge of an open door
and the wall of the room behind it.
3 Slowly move your Smartphone sideways ➊
and check that the distance measurement ➋
changes when the crosshair in the center of
the screen moves on and off the vertical edge.
4 If the measurement changes at the point where
the crosshair moves on and off the vertical
edge, your laser is correctly aligned. If this
does not happen at the correct point, tap on
the left and right blue arrows ➌ to adjust to the
correct point.
EDGE OF DOOR
Settings Laser Calibration
9'1"
X: 0 Y: -15
5 Turn your Smartphone horizontally
and aiming at the same two objects,
repeat steps 3 and 4 to align the
laser horizontally.
EDGE OF DOOR
-15
Y:
9'1"
Settings Laser Calibration
X:
0
Spike Quick Start Guide 6
Page 7

Calibrating Your Compass
Calibrating your compass is only required if you intend to capture the
location of your target (latitude, longitude, altitude), and export KMZ les.
You need to ensure that your Smartphone or Tablet’s compass is calibrated
so your target’s location can be accurately captured.
1 In the Spike app, tap on
, then tap Calibrate Compass.
2 Follow the calibration steps as they appear on your screen. You
will be prompted to rotate your Smartphone or Tablet as indicated.
Make sure to face north, that your movements are smooth and
steady, and that each separate rotation is approximately 10
seconds.
We recommend calibrating your compass before capturing target location(s) in a
new area.
Charging Your Spike
Your Spike has an internal battery that requires charging. After setting up your Spike,
we recommend charging your Spike for approximately 3 hours.
1 Connect the USB cable provided to the micro USB charging port on the bottom
of your Spike.
2 Connect the other end of the USB cable to any device that can charge USB
devices (e.g. computer, wall charger, etc). The LED indicator will ash while
charging.
3 The LED indicator will turn green when Spike is fully charged. Disconnect the
USB cable and store in a safe place.
Turning Your Spike Off
Your Spike will automatically turn off after 1 minute of inactivity. Alternatively, you can
turn it off manually by holding down the Power button for 5 seconds until the blue
LED indicator turns off.
Spike Quick Start Guide 7
Page 8

4
Measuring With Your Spike
To measure accurately with your Spike, you need to ensure that:
1) Your target is a at surface and is all on the same plane.
2) Your target is or has a rectangular shape on it (to align the object).
3) Your laser (cross-hair on the screen) is pointed at your target. The cross-
hair should be on a solid surface and not a window.
4) You are perpendicular
to the target. Photo
measurements taken
from the optimal position
typically see an accuracy
of ± 2%. Please reference
the following target
distance and positioning
guide when taking a Spike
photo.
You cannot measure an object or objects that are on different planes.
Below are some examples.
The side of the
house and the roof
are on different
planes, so
measurements will
be incorrect.
The side of the
house is all
on the same
plane, so
measurements will
be correct.
The side of the
house is on
different planes,
so measurements
will be incorrect.
The side of the
house that is all
on one plane is
being measured,
so measurements
will be correct.
Spike Quick Start Guide 8
Page 9

Taking a Photo of the Object to Measure
To measure an object, you need to take a photo of it rst. Be sure to aim the
laser (crosshair on the screen) directly at the object you wish to measure.
1 On your Smartphone, ensure
that the Spike app is open and
connected to your Spike.
Refer to Section 2 “Starting Up” for
details.
2 Point your Smartphone at the
object you wish to measure,
ensuring that the crosshair is on
the target.
• The whole object must be on the
same surface or plane as explained
above.
• Ensure the crosshair is on a solid
surface and not on a window or hole.
• Use the zoom slider so you can better
view the crosshair location on your
target, or when you are positioned at
a distance from your target
3 Tap on the screen to take a
picture.
4 Tap on the small preview image
to display the photo you have just
taken.
Spike Quick Start Guide 9
Page 10

Aligning to the Object
Before you can measure an object, you need to set the surface’s
perspective by outlining a large rectangle on it. This identies the angle
from which your photo was taken. Your target must be or must contain a
rectangular shape so that the object can be aligned.
1 In the Edit screen,
will be
selected by default.
A rectangular shape will appear over
your target.
2 Drag the green circles of the
rectangular shape to align them
to the extreme corners of the
rectangle on your object.
• Here you are simply aligning to the
surface or plane of your object.
You are not measuring your object
precisely unless your object’s shape
ts within the rectangular shape. If it
does t in the rectangular shape,
then the measurements shown will
be those of your object.
• Use the zoom window to help you
align the green circles precisely to
the corners of your object.
• You may also use your ngers to
Pinch & Zoom on the photo to better
view the object. To enter Pinch
& Zoom mode, the
unselected.
should be
Spike Quick Start Guide 10
Page 11

Measuring the Area of the Object
Once you have aligned your app to the object, you can measure the area of
your object.
1 In the Edit screen, tap
.
2 Drag the outline of the rectangular
shape to align precisely to the
shape of your object.
• Use the zoom window to help you
align the green circles precisely to the
corners of your object.
• You can add more anchor points
(green circles) by selecting
then tapping anywhere on the line of
the shape. Drag the new anchor point
to create your polygon.
• The measurements of your object will
display on the screen.
• You may also use your ngers to
Pinch & Zoom on the photo to better
view the object. To enter Pinch
& Zoom mode, the
unselected.
should be
and
Spike Quick Start Guide 11
Page 12

Cutting Out a Section of Your Object
You can cut out a section of your object that you do not want included in
the total measurement of the object area. For example, you may want to
measure the surface area of a wall without including the area of windows or
doors.
1 In the Edit screen, tap
A rectangular shape appears.
.
2 Drag the green circles of the
rectangular shape to align them to
the section of the object you want
to cut out.
• Use the zoom window to help you
align the green circles precisely to the
corners of the cutout object.
• You can add more anchor points
(green circles) by tapping lightly
anywhere on the line of the shape.
• The screen will display the new area
measurement excluding the cutout
section.
• To add another cutout, tap
select it. To transition into Pinch &
Zoom mode, tap
to unselect it.
to
Spike Quick Start Guide 12
Page 13

Measuring a Length
1 In the Edit screen, tap . Then
tap the screen, and drag to create
a line.
2 Drag the end of the line to the
edge of the object you want to
measure. Then drag the other end
of the line to the other edge of the
object.
• Use the zoom window to help you
align the line precisely to the edges of
your object.
• The length of your object will display
on the screen.
• Draw connecting lines by dragging the
orange circles.
• To add another line, tap
it. To transition into Pinch & Zoom
mode, tap
to unselect it.
to select
Spike Quick Start Guide 13
Page 14

Saving Your Measurements
1 In the Edit screen, tap Save.
Gallery Options
You can view a gallery of the photos you have taken with the Spike app and
perform various functions on the photos.
1 In the Preview screen, tap
A gallery of your photos appears.
.
2 Tap on the photo you want to view
or edit.
• To add or modify measurements on
the photo, tap Edit and follow the
instructions in Section 3 “Measuring
with Your Spike”.
• To delete the photo, tap
• To email your photo with
measurements, tap Share.
• To view orientation and location
details of the photo, tap Details.
.
For technical assistance...
Please visit our Frequently Asked Questions or contact our support team at Spike
Support.
Copyright © 2014 ike
GPS
Spike Quick Start Guide 14
Page 15

Compliance
Federal Communication Commission Interference Statement
This device complies with Part 15 of the FCC Rules. Operation is subject to the following two conditions:
(1) This device may not cause harmful interference, and (2) this device must accept any interference
received, including interference that may cause undesired operation.
This equipment has been tested and found to comply with the limits for a Class B digital device,
pursuant to Part 15 of the FCC Rules. These limits are designed to provide reasonable protection
against harmful interference in a residential installation. This equipment generates, uses and can
radiate radio frequency energy and, if not installed and used in accordance with the instructions, may
cause harmful interference to radio communications. However, there is no guarantee that interference
will not occur in a particular installation. If this equipment does cause harmful interference to radio
or television reception, which can be determined by turning the equipment off and on, the user is
encouraged to try to correct the interference by one of the following measures:
• Reorient or relocate the receiving antenna.
• Increase the separation between the equipment and receiver.
• Connect the equipment into an outlet on a circuit different from that to which the receiver is connected.
• Consult the dealer or an experienced radio/TV technician for help.
FCC Caution: Any changes or modications not expressly approved by the party responsible for
compliance could void the user’s authority to operate this equipment.
This transmitter must not be co-located or operating in conjunction with any other antenna or transmitter.
Radiation Exposure Statement:
This equipment complies with FCC radiation exposure limits set forth for an uncontrolled environment.
This equipment should be installed and operated with minimum distance 20cm between the radiator
& your body.
Note: The country code selection is for non-US model only and is not available to all US model. Per
FCC regulation, all WiFi product marketed in US must xed to US operation channels only.
ikeGPS Contact Information
350 Interlocken Blvd, Suite 250
Broomeld, CO 80021, USA
ofce: +1 303 222 3218
Model: Spike
Part No.: 940-02000
42 Adelaide Rd
42 Adelaide Rd
Wellington, NZ
Wellington, NZ
www.ikegps.com
www.ikegps.com
5VDC 350mA
Complies with 21 CFR
1040.10 and 1040.11 except
for deviations pursuant to
Laser Notice No. 50,
dated June 24, 2007
Contains FCC ID: QOQBLE112
Contains IC: 5123A-BGTBLE112
By ensuring this product is disposed of correctly, you will help prevent
potential negative consequences for the environment and human health,
which could otherwise be caused by inappropriate waste handling of
this product. The recycling of materials will help to conserve natural
resources. For more detail on how to recycle your Spike please visit
Disposal of Old Electrical & Electronic Equipment
(Applicable in the European Union)
This symbol on the product or on its packaging indicates that
this product shall not be treated as household waste.
Instead it shall be returned, at no cost to you, to ikeGPS.
www.ikegps.com/support and submit a request for collection. ikeGPS
MADE IN NEW ZEALAND
will coordinate the collection of the unit from you with our logistics service
provider at no additional cost to you.
Spike Quick Start Guide 15
Page 16

Industry Canada Statement:
This device complies with RSS-210 of the Industry Canada Rules. Operation is subject to the following
two conditions: (1) This device may not cause harmful interference, and (2) this device must accept any
interference received, including interference that may cause undesired operation.
Ce dispositif est conforme à la norme CNR-210 d’Industrie Canada applicable aux appareils radio
exempts de licence. Son fonctionnement est sujet aux deux conditions suivantes: (1) le dispositif ne
doit pas produire de brouillage préjudiciable, et (2) ce dispositif doit accepter tout brouillage reçu, y
compris un brouillage susceptible de provoquer un fonctionnement indésirable.
Radiation Exposure Statement:
This equipment complies with IC radiation exposure limits set forth for an uncontrolled environment.
This equipment should be installed and operated with minimum distance 20cm between the radiator
& your body.
Déclaration d’exposition aux radiations:
Cet équipement est conforme aux limites d’exposition aux rayonnements IC établies pour un
environnement non contrôlé. Cet équipement doit être installé et utilisé avec un minimum de 20 cm de
distance entre la source de rayonnement et votre corps.
ikeGPS Contact Information
350 Interlocken Blvd, Suite 250
Broomeld, CO 80021, USA
ofce: +1 303 222 3218
Europe - EU Declaration of Conformity
This device complies with the essential requirements and other relevant provisions
of the R&TIE Directive 1999/5/EC. The following test methods have been applied
in order to prove presumption of conformity with the essential requirements of the
R&TIE Directive 1999/5/EC:
• EN 60950-1/A12: 2011
• EN 300 328 V1.8.1: 2012
Electromagnetic compatibility and Radio spectrum Matters (ERM); Wideband Transmission systems;
Data transmission equipment operating in the 2,4 GHz ISM band and using spread spectrum
modulation techniques; Harmonized EN covering essential requirements under article 3.2 of the
R&TIE Directive
• EN 301 489-1 V1.9.2: 2011
Electromagnetic compatibility and Radio Spectrum Matters (ERM); ElectroMagnetic Compatibility
(EMC) standard for radio equipment and services; Part 1: Common technical requirements
• EN 301 489-17 V2.2.1: 2012
Electromagnetic compatibility and Radio spectrum Matters (ERM); ElectroMagnetic Compatibility
(EMC) standard for rad io equipment and services; Part 17: Specic conditions for 2,4 GHz wideband
transmission systems and 5 GHz high performance RLAN equipment
• EN 62479:2010
Assessment of the complia nce of low power electronic and electrical equipment with the basic
restrictions related to human exposure to electromagnetic elds (10 MHz to 300 GHz)
For additional compliance information, please visit www.ikegps.com/support.
Spike Quick Start Guide 16
 Loading...