

Page 1
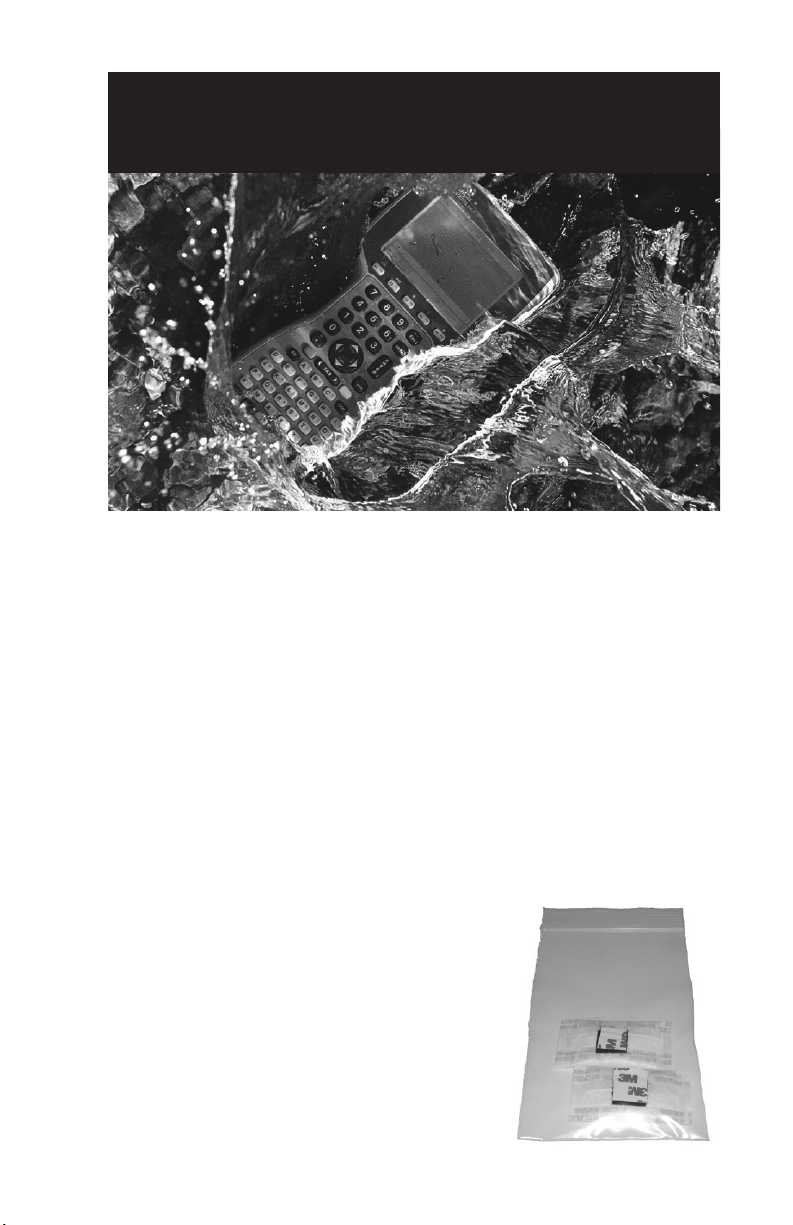
Desiccant Pack
Installation Instructions
Why Install a Desiccant Pack into the Allegro?
The Allegro is waterproof when the baery and PC card doors are
properly closed. However, the unit is built with a micro-pore lter
in the wall of the Allegro, which allows for a balance of atmospheric
pressure between the inside and outside of the case. This can allow
the passage of atmospheric gases, comprised mostly of nitrogen and
oxygen as well as the minor elements such as carbon dioxide and
water vapor.
In higher humidity environments, water vapor may collect inside
the case to a level sucient to cause condensation inside the case
when the Allegro is subjected to colder conditions. This condition
appears as fog inside of the touchscreen covering the display. Placing
a desiccant pack in the Allegro case can reduce the possibility of
condensation on the inside of the touchscreen.
Included Items
When you order a desiccant pack, you
receive two desiccant packs in a small, airtight, resealable plastic bag. Each desiccant
pack is shipped with two small pieces of
Velcro. The rst piece is aached to the
desiccant pack, and the other is aached to
the rst piece of Velcro.
Page 2
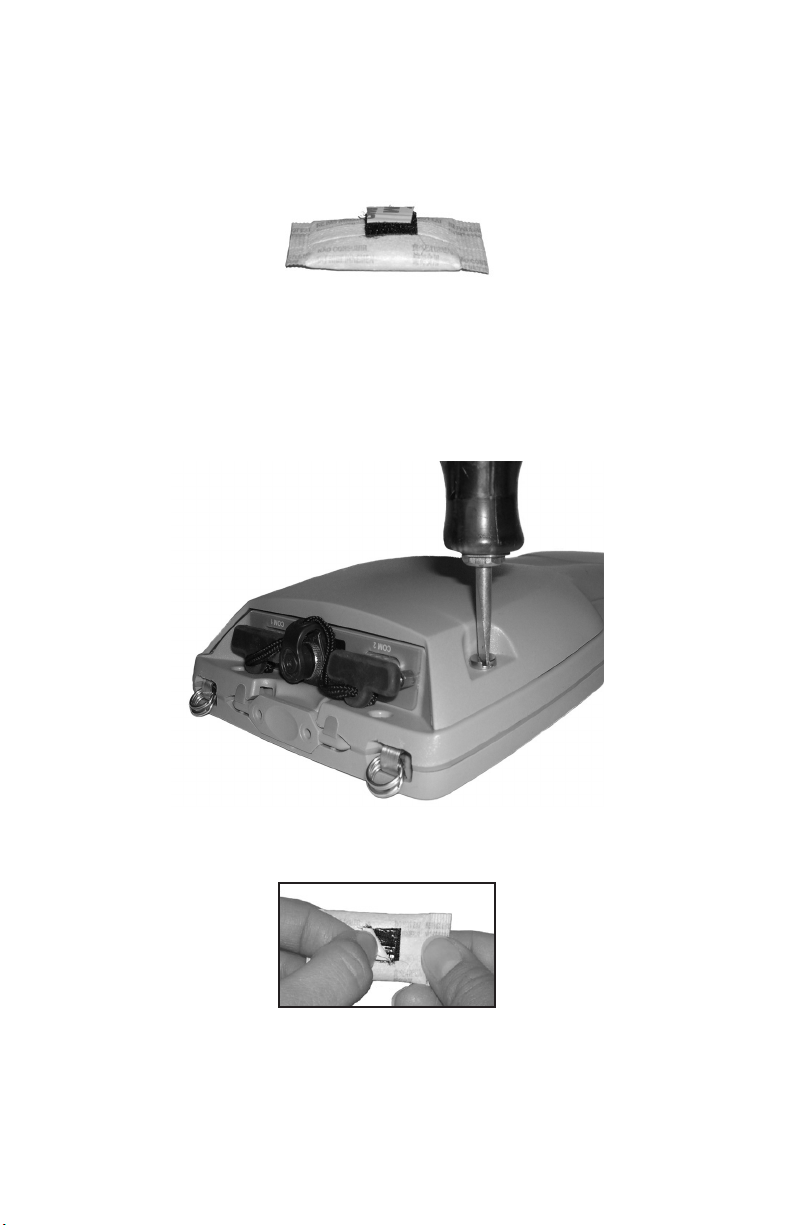
Items Needed
• Desiccant pack with two pieces of Velcro aached (included)
• Small athead screwdriver
Velcro with adhesive to attach to Allegro
Velcro attached to desiccant pack
Installation Instructions
To install a desiccant pack in the Allegro, complete the following steps:
1. Using a small athead screwdriver (or coin), turn the screws on the
PC Card door ¼ turn to the le to unlock the latches.
2. Remove the adhesive backing from the piece of Velcro aached to
the Velcro that is aached to the desiccant pack.
3. Aach the desiccant pack with the aached Velcro pieces so it is
about ¼ inch below the upper gasket rim and centered between the
PC card door holder tabs. Make sure the lower edge of the desiccant
pack sits directly above the PC Card holder tabs.
Make sure the transparent window is facing out so the color indicator is
visible.
Page 3

Upper Gasket Seal Rim
PC Card Holder Tabs
Note: If a piece of Velcro is already aached to the inside of the Allegro’s PC
card door, remove the piece on the new pack that has the removable adhesive
cover and throw it away. Aach the desiccant pack to the piece of Velcro that is
already aached to your Allegro.
4. Close the door slowly while inspecting the newly installed desiccant
pack. Make sure the edges of the packet are far enough away from
the gasket so that it is not pinched by the PC Card door when it is
closed.
Caution: If the edge of the packet is pinched between the gasket and seal rim,
the door may not fully seal, thus compromising the waterproof integrity of the
Allegro.
5. Using a small athead screwdriver (or coin), turn the screws a ¼
turn to the right to lock the latches on the PC Card door.
6. Replace the desiccant pack periodically as needed.
Indicating Silica Gel
We use an indicating silica gel that has been washed with a
concentration of cobalt chloride (a heavy metal salt). The cobalt
chloride is a deep blue color when it is dry and turns from blue to
purple to pink as it becomes saturated with moisture. Typically, the
color changes as the desiccant goes past 8% moisture levels (by weight)
and indicates it is time to replace the desiccant.
Page 4

If the indicator is pink, heat the bag according to the following
instructions:
Dry the bag in a cool, convection, circulating, forced air oven set at
245 degrees F. Be sure the bag has sucient airow around it.
Warning: Do not exceed 245 degrees. Failure to do so could melt the
desiccant.
Leave the bag in the oven for 24 hours. Once done, seal the bag in the
included air-tight bag or a small air-tight glass jar for cooling.
For detailed instructions, please see the white paper Mil-Spec
Desiccant Regeneration on our website.
If the color changes from pink back to blue, it is reusable. If the color
does not change, contact Juniper Systems for more information.
Color indicator
Storage
You must store the unused desiccant packs in the sealable plastic
bag in which the packs were shipped until you are ready to use
them. Storing the desiccant packs in containers that are not air tight
shortens the useful life of the desiccant pack.
Ordering Information
Replacement packs of two desiccant packs (part number 20391) can
be purchased from Juniper Systems, Inc. at js@junipersys.com or by
calling (435) 753-1881.
a Campbell Scientic Company
1132 West 1700 North
Logan, UT 84341, USA
Tel +1 435.753.1881
Fax +1 435.753.1896
Email js@junipersys.com
Web www.junipersys.com
Mobile Field Computers and Mobile GIS/GPS
HarvestMaster™ Brand Data Collection Tools for Agriculture
Part # 20393-02
Released May 2011
Page 5

MIL-SPEC DESICCANT REGENERATION
Regeneration of Tyvek desiccant bags or brown paper bags can be accomplished
by the following method:
•
Arrange the bags on a wire tray in a single layer to allow for adequate
airflow around the bags during the drying process. The oven’s inside
temperature should be room or ambient (77o F – 85o F.) A CONVECTION,
CIRCULATING, FORCED AIR TYPE OVEN IS RECOMMENDED FOR THIS
REGENERATION PROCESS. SEAL FAILURES MAY OCCUR IF ANY OTHER
TYPE OF HEATING UNIT OR APPLICANCE IS USED.
•
When placed in a forced air, circulating air, or convection oven, allow a
minimum of 1.5 to 2.0 inches of air space between the top of the bags and
the next metal tray above the bags. If placed in a radiating exposed infrared
element type oven, shield the bags from direct exposure to the heating
element, giving the closes bags a minimum of 16 inches clearance from the
heat shield. Excessive surface film temperature due to infrared radiation
will cause the Tyvek material to melt and/or the seals to fail.
•
Seal failure may also occur if the temperature is allowed to increase
rapidly. This is due to the fact that the water vapor is not given sufficient
time to diffuse through the Tyvek material, thus creating internal pressure
within the bag, resulting in a seal rupture. Temperature should not increase
faster than 0.25o to 0.50o F per minute.
•
Set the temperature of the oven to 245o F, and allow the bags of desiccant
to reach equilibrium temperature. WARNING: Tyvek has a melt temperature
of 250o F – 260o F. (NON MIL-D-3464E, activation or reactivation of both
silica gel and Bentonite clay can be achieved at temperatures of 220o F).
•
Desiccant bags should be allowed to remain in the oven at the assigned
temperature for up to 24 hours. At the end of the time period, the bags
should be immediately removed and placed in a desiccator jar or dry (0%
relative humidity) airtight container for cooling. (LPTG01 foil ziplock bags
are ideal) If this procedure is not followed precisely, any water vapor driven
off during reactivation may be re-absorbed during cooling and/or handling.
•
After the bags of desiccant have been allowed to cool in an airtight
desiccator, they may be removed and placed in either an appropriate type
polyliner tightly sealed to prevent moisture absorption, or a container that
prevents moisture from coming into contact with the regenerated
desiccant.
 Loading...