


Juniper SECURITY THREAT RESPONSE MANAGER 2008.2 R2 - LOG MANAGEMENT ADMINISTRATION GUIDE REV 1 Administration Manual

Security Threat Response Manager
STRM Log Management Administration
Guide
Release 2008.2 R2
Juniper Networks, Inc.
1194 North Mathilda Avenue
Sunnyvale, CA 94089
USA
408-745-2000
www.juniper.net
Part Number: 530-027298-01, Revision 1

Copyright Notice
Copyright © 2008 Juniper Networks, Inc. All rights reserved. Juniper Networks and the Juniper Networks logo are registered trademarks of Juniper
Networks Inc. in the United States and other countries. All other trademarks, service marks, registered trademarks, or registered service marks in this
document are the property of Juniper Networks or their respective owners. All specifications are subject to change without notice. Juniper Networks
assumes no responsibility for any inaccuracies in this document or for any obligation to update information in this document. Juniper Networks reserves
the right to change, modify, transfer, or otherwise revise this publication without notice.
FCC Statement
The following information is for FCC compliance of Class A devices: This equipment has been tested and found to comply with the limits for a Class A
digital device, pursuant to part 15 of the FCC rules. These limits are designed to provide reasonable protection against harmful interference when the
equipment is operated in a commercial environment. The equipment generates, uses, and can radiate radio-frequency energy and, if not installed and
used in accordance with the instruction manual, may cause harmful interference to radio communications. Operation of this equipment in a residential
area is likely to cause harmful interference, in which case users will be required to correct the interference at their own expense. The following
information is for FCC compliance of Class B devices: The equipment described in this manual generates and may radiate radio-frequency energy. If it
is not installed in accordance with NetScreen’s installation instructions, it may cause interference with radio and television reception. This equipment has
been tested and found to comply with the limits for a Class B digital device in accordance with the specifications in part 15 of the FCC rules. These
specifications are designed to provide reasonable protection against such interference in a residential installation. However, there is no guarantee that
interference will not occur in a particular installation. If this equipment does cause harmful interference to radio or television reception, which can be
determined by turning the equipment off and on, the user is encouraged to try to correct the interference by one or more of the following measures:
Reorient or relocate the receiving antenna. Increase the separation between the equipment and receiver. Consult the dealer or an experienced radio/TV
technician for help. Connect the equipment to an outlet on a circuit different from that to which the receiver is connected.
Caution: Changes or modifications to this product could void the user's warranty and authority to operate this device.
Disclaimer
THE SOFTWARE LICENSE AND LIMITED WARRANTY FOR THE ACCOMPANYING PRODUCT ARE SET FORTH IN THE INFORMATION PACKET
THAT SHIPPED WITH THE PRODUCT AND ARE INCORPORATED HEREIN BY THIS REFERENCE. IF YOU ARE UNABLE TO LOCATE THE
SOFTWARE LICENSE OR LIMITED WARRANTY, CONTACT YOUR JUNIPER NETWORKS REPRESENTATIVE FOR A COPY.
STRM Log Management Administration Guide
Release 2008.2 R2
Copyright © 2008, Juniper Networks, Inc.
All rights reserved. Printed in USA.
Revision History
September 2008—Revision 1
The information in this document is current as of the date listed in the revision history.
2

CONTENTS
ABOUT THIS GUIDE
Audience 1
Conventions 1
Technical Documentation 1
Contacting Customer Support 2
1 OVERVIEW
About the Interface 3
Accessing the Administration Console 4
Using the Interface 4
Deploying Changes 5
Viewing STRM Log Management Audit Logs 5
Logged Actions 6
Viewing the Log File 7
2 MANAGING USERS
Managing Roles 9
Creating a Role 9
Editing a Role 11
Managing User Accounts 12
Creating a User Account 12
Editing a User Account 13
Disabling a User Account 14
Authenticating Users 15
3 SETTING UP STRM LOG MANAGEMENT
Managing Your License Keys 19
Updating your License Key 20
Exporting Your License Key Information 21
Creating Your Network Hierarchy 22
Considerations 22
Defining Your Network Hierarchy 23
Scheduling Automatic Updates 26
Configuring System Settings 27
Configuring System Notifications 31
Configuring the Console Settings 33

Starting and Stopping STRM Log Management 35
Accessing the Embedded SNMP Agent 35
Configuring Access Settings 36
Configuring Firewall Access 36
Updating Your Host Set-up 38
Configuring Interface Roles 39
Changing Passwords 40
Updating System Time 40
4 MANAGING BACKUP AND RECOVERY
Managing Backup Archives 45
Viewing Back Up Archives 45
Importing an Archive 46
Deleting a Backup Archive 47
Backing Up Your Information 48
Scheduling Your Backup 48
Initiating a Backup 49
Restoring Your Configuration Information 50
5 USING THE DEPLOYMENT EDITOR
About the Deployment Editor 54
Accessing the Deployment Editor 55
Using the Editor 55
Creating Your Deployment 57
Before you Begin 57
Editing Deployment Editor Preferences 58
Building Your Event View 58
Adding Components 59
Connecting Components 60
Forwarding Normalized Events 61
Renaming Components 63
Managing Your System View 63
Setting Up Managed Hosts 64
Using NAT with STRM Log Management 68
Configuring a Managed Host 72
Assigning a Component to a Host 72
Configuring Host Context 73
Configuring STRM Log Management Components 76
Configuring an Event Collector 76
Configuring an Event Processor 77
6 FORWARDING SYSLOG DATA
Adding a Syslog Destination 79
Editing a Syslog Destination 80
Delete a Syslog Destination 81

A Q1 LABS MIB
INDEX

ABOUT THIS GUIDE
The STRM Log Management Administration Guide provides you with information
for managing STRM Log Management functionality requiring administrative
access.
Audience This guide is intended for the system administrator responsible for setting up
STRM Log Management in your network. This guide assumes that you have
STRM Log Management administrative access and a knowledge of your corporate
network and networking technologies.
Conventions Table 1 lists conventions that are used throughout this guide.
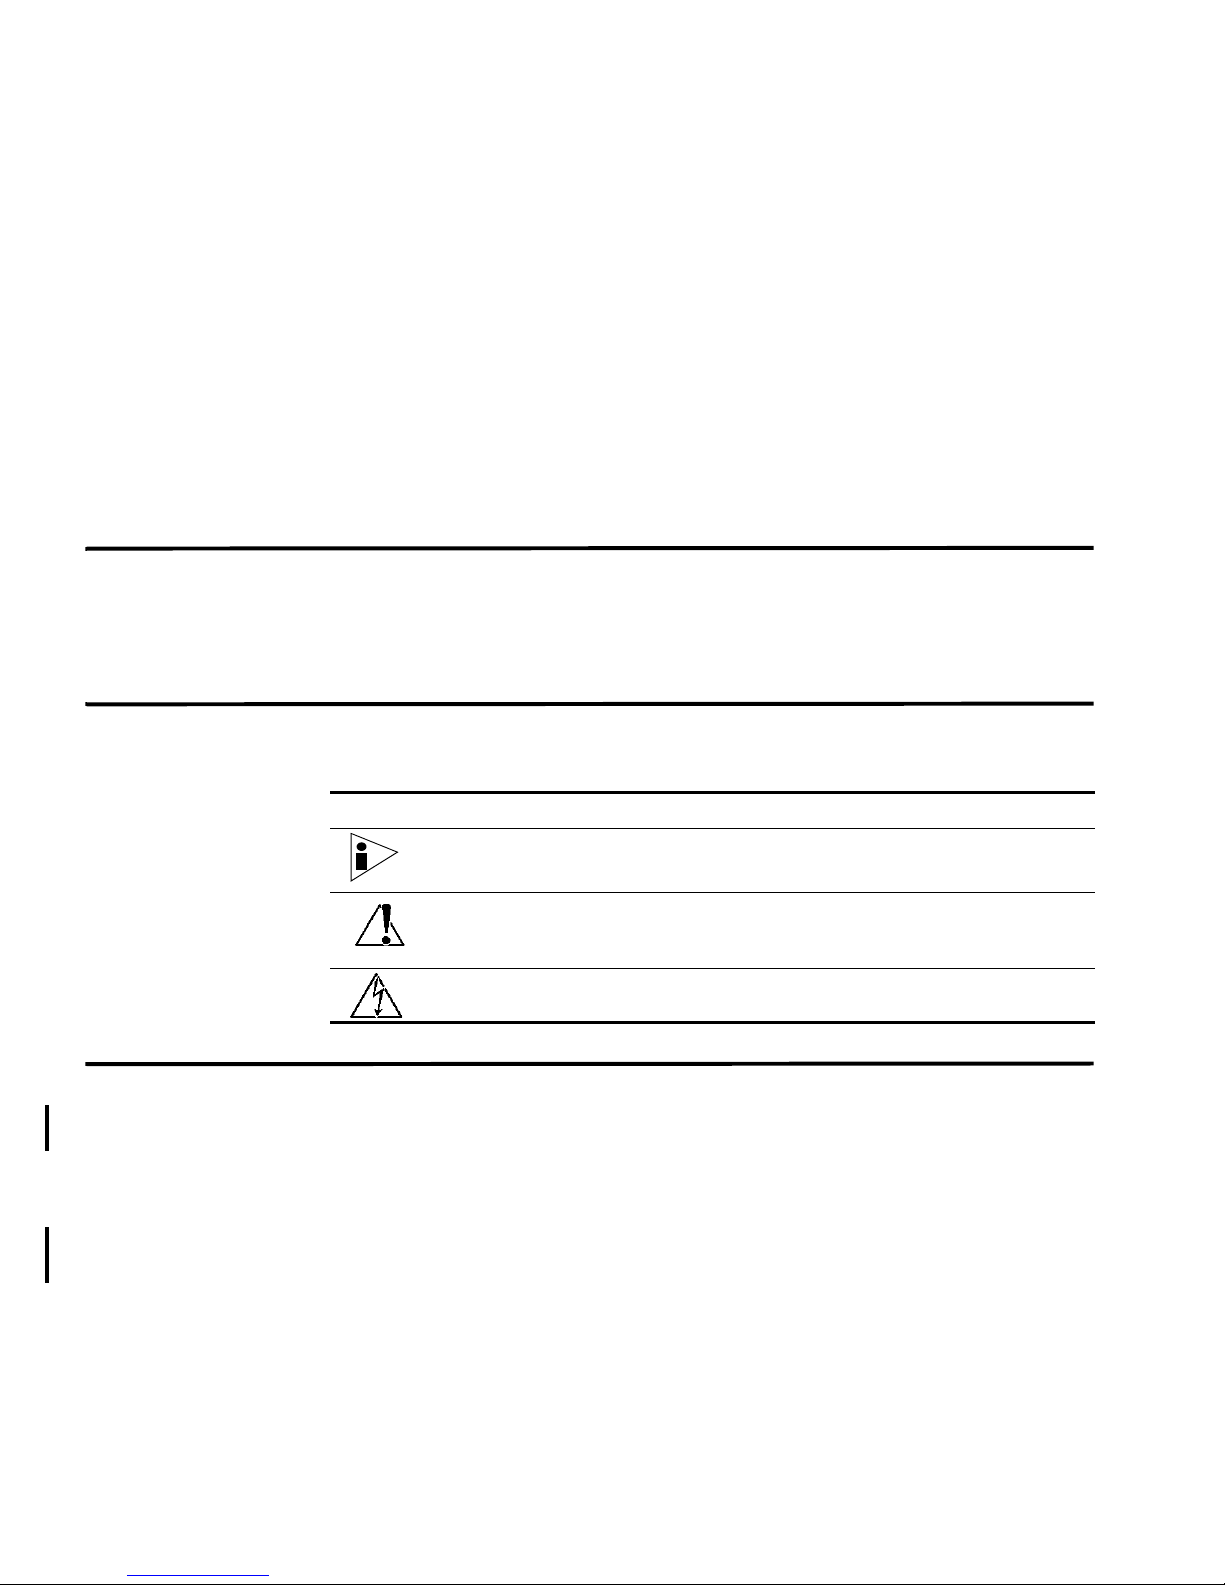
Table 1 Icons
Icon Type Description
Information note Information that describes important features or
instructions.
Technical
Documentation
Caution Information that alerts you to potential loss of
data or potential damage to an application,
system, device, or network.
Warning Information that alerts you to potential personal
injury.
You can access technical documentation, technical notes, and release notes
directly from the Juniper Networks support web site at https://juniper.net/support.
Once you access the Juniper Networks support web site, locate the product and
software release for which you require documentation.
Your comments are important to us. Please send your e-mail comments about this
guide or any of the Juniper Networks documentation to:
documentation@juniper.net.
Include the following information with your comments:
• Document title
STRM Log Management Administration Guide

2 ABOUT THIS GUIDE
• Page number
Contacting
Customer Support
To help you resolve any issues that you may encounter when installing or
maintaining STRM Log Management, you can contact Customer Support as
follows:
• Log a support request 24/7: https://juniper.net/support/
For access to the Juniper Networks support web site, please contact Customer
Support.
• Access Juniper Networks support and Self-Service support using e-mail:
support@juniper.net
• Telephone assistance: 1-800-638-8296.
STRM Log Management Administration Guide

OVERVIEW
1
This chapter provides an overview of the STRM Log Management Administration
Console and STRM Log Management administrative functionality including:
• About the Interface
• Accessing the Administration Console
• Using the Interface
• Deploying Changes
• Viewing STRM Log Management Audit Logs
About the Interface You must have administrative privileges to access the Administration Console. The
STRM Log Management Administration Console provides access to following
administrative functionality:
• Manage users. See Chapter 2 Managing Users.
• Manage STRM Log Management. See Chapter 3 Setting Up STRM Log
Management.
• Backup and recover your data. See Chapter 4 Managing Backup and
Recovery.
• Manage your deployment views. See Chapter 5 Using the Deployment Editor.
• Configure syslog forwarding. See Chapter 6 Forwarding Syslog Data.
All configuration updates using the Administration Console are saved to a staging
area. Once all changes are complete, you can deploy the configuration changes or
all configuration settings to the remainder of your deployment.
QSTRM Log Management Administration Guide
4 OVERVIEW
Accessing the
Administration
Console
You can access the STRM Log Management Administration Console through the
main STRM Log Management interface. Also, you can create a shortcut on your
desktop that allows you to access the Administration Console directly.
To access the Administration Console, click Config in the main STRM Log
Management interface. The Administration Console appears.
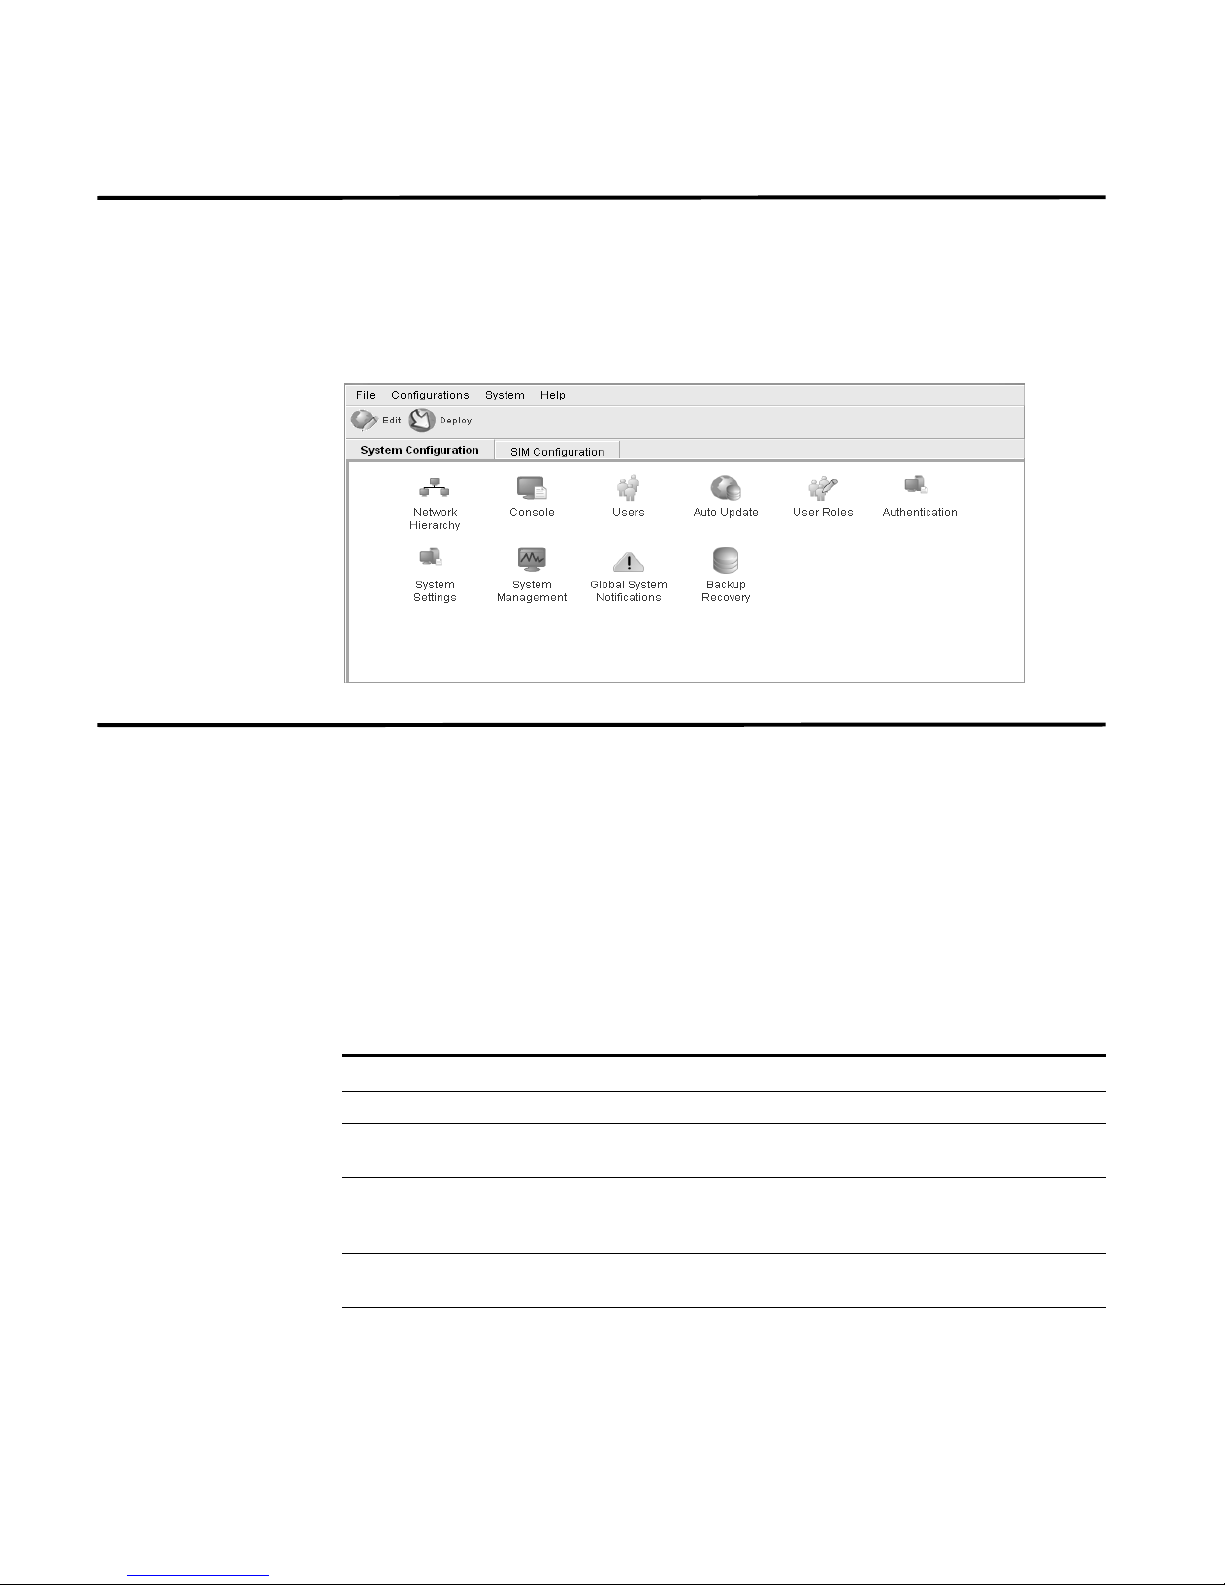
Using the Interface The Administration Console provides several tab and menu options that allow you
to configure STRM Log Management including:
• System Configuration - Provides access to administrative functionality, such
as, user management, automatic updates, license key, network hierarchy,
system settings, system thresholds, backup and recovery and Console
configuration.
• SIM Configuration - Provides access to sensor device management and
syslog forwarding.
The Administration Console also includes several menu options including:
Table 1-1 Administrative Console Menu Options
Menu Option Sub-Menu Description
File Close Closes the Administration Console.
Configurations Deployment Editor Opens the deployment editor
interface.
Deploy configuration
changes
Deploy All Deploys all configuration settings to
System STRM Start Starts the STRM Log Management
Deploys any configuration changes
from the current session to your
deployment.
your deployment.
application.
QSTRM Log Management Administration Guide
Deploying Changes 5
Table 1- 1 Administrative Console Menu Options (continued)
Menu Option Sub-Menu Description
STRM Stop Stops the STRM Log Management
application.
STRM Restart Restarts the STRM Log Management
application.
Help Help and Support Opens user documentation.
About STRM Displays version information.
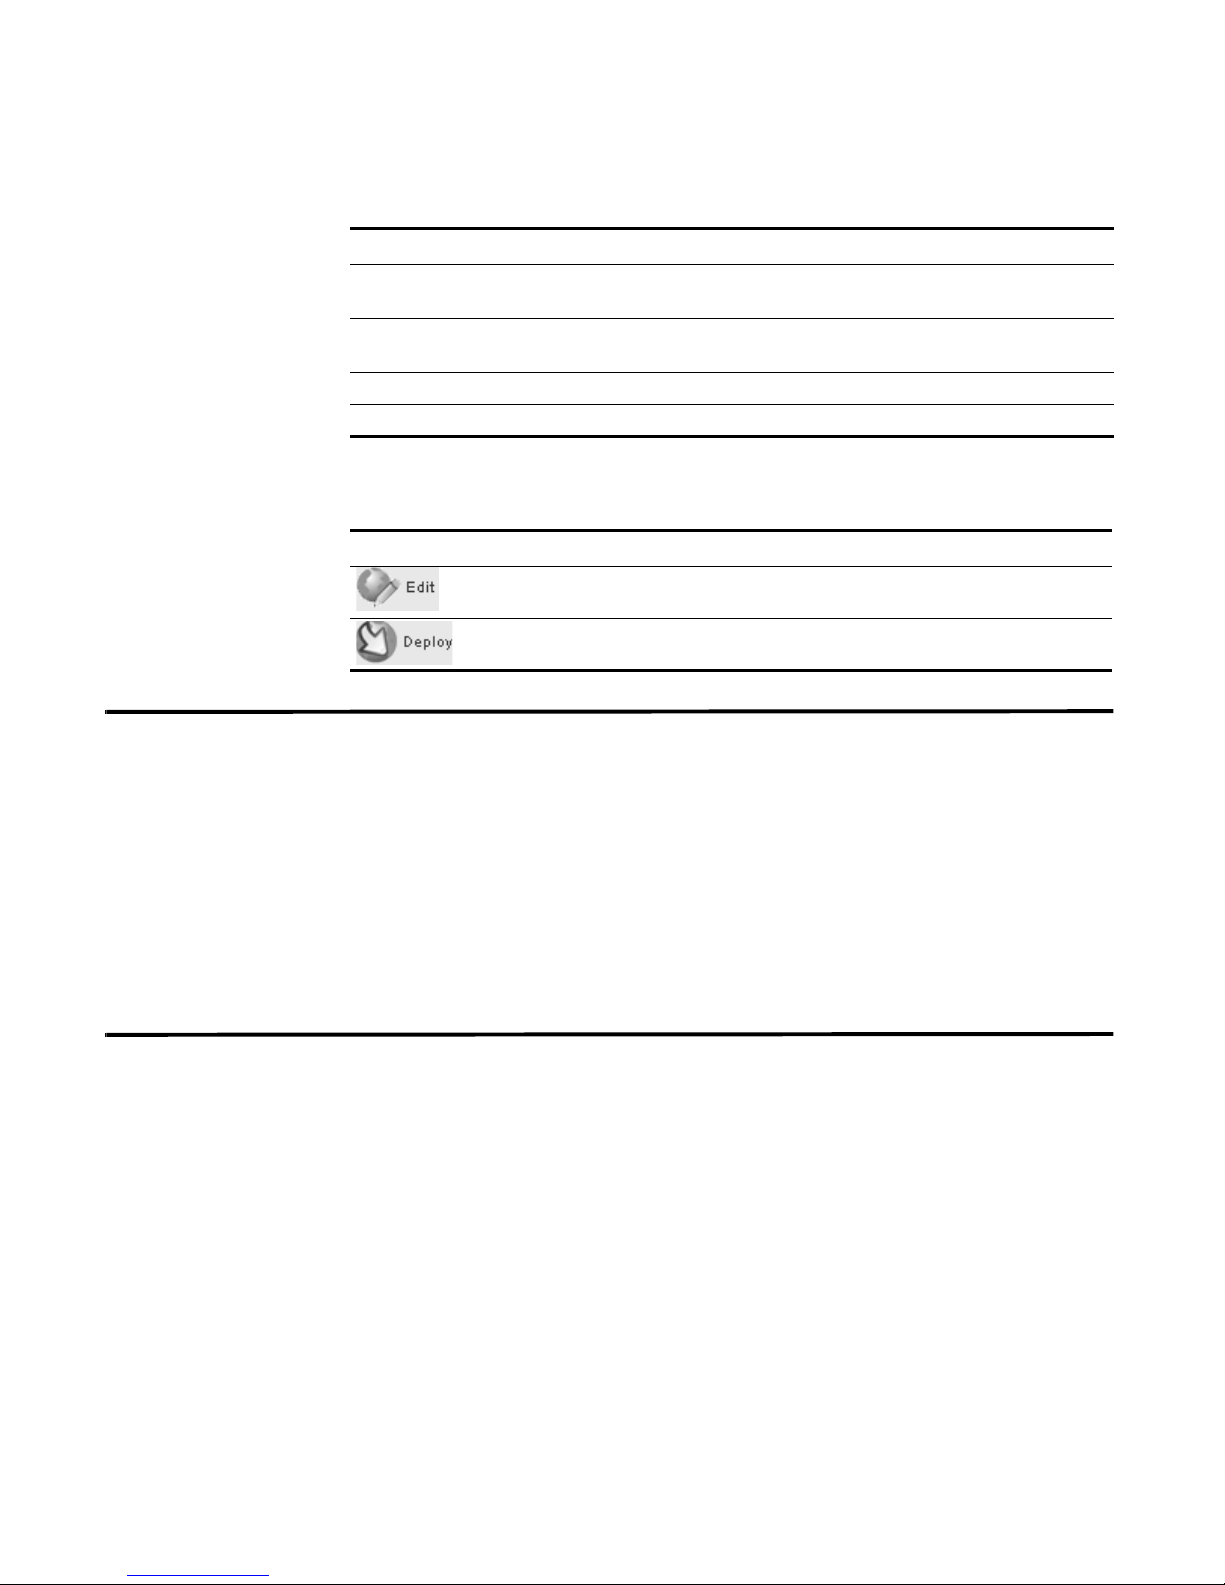
The Administration Console provides several toolbar options including:
Table 1- 2 Administration Console Toolbar Options
Icon Description
Opens the deployment editor interface.
Deploys all changes made through the Administration Console.
Deploying Changes Once you update your configuration settings using the Administration Console,
you must save those changes to the staging area. You must either manually
deploy all changes using the Deploy menu option or, upon exit, a window appears
prompting you to deploy changes before you exit. All deployed changes are then
enforced throughout your deployment.
Using the Administration Console menu, you can deploy changes as follows:
• Deploy All - Deploys all configuration settings to your deployment.
• Deploy configuration changes - Deploys any configuration changes from the
current session to your deployment.
Viewing STRM Log
Management Audit
Logs
Changes made by STRM Log Management users are recorded in the audit logs.
You can view the audit logs to monitor changes to STRM Log Management and
the users performing those changes.
All audit logs are stored in plain text and are archived and compressed once the
audit log file reaches a size of 200 MB. The current log file is named
audit.log.
Once the file reaches a size of 200 MB, the file is compressed and renamed as
follows:
audit.1.gz, audit.2.gz, etc with the file number incrementing each
time a log file is archived. STRM Log Management stores up to 50 archived log
files.
This section provides information on using the audit logs including:
• Logged Actions
• Viewing the Log File
QSTRM Log Management Administration Guide

6 OVERVIEW
Logged Actions STRM Log Management logs the following categories of actions in the audit log
file:
Table 1-3 Logged Actions
Category Action
User Authentication Log in to STRM Log Management
User Authentication Log out of STRM Log Management
Administrator Authentication Log in to the STRM Log Management
Administration Console
Administrator Authentication Log out of the STRM Log Management
Administration Console
Root Login Log in to STRM Log Management, as root
Log out of STRM Log Management, as root
User Accounts Adding an account
Editing an account
Deleting an account
User Roles Adding a role
Editing a role
Deleting a role
Sensor Devices Adding a sensor device
Editing a sensor device
Deleting a sensor device
Adding a sensor device group
Editing a sensor device group
Deleting a sensor device group
Protocol Configuration Adding a protocol configuration
Deleting a protocol configuration
Editing a protocol configuration
Syslog Forwarding Adding a syslog forwarding
Deleting a syslog forwarding
Editing a syslog forwarding
Reports Adding a template
Deleting a template
Editing a template
Executing a template
Deleting a report
Groups Adding a group
Deleting a group
Editing a group
QSTRM Log Management Administration Guide

Viewing STRM Log Management Audit Logs 7
Table 1- 3 Logged Actions
Category Action
Sensor Device Extension Adding an sensor device extension
Editing the sensor device extension
Deleting a sensor device extension
Uploading a sensor device extension
Uploading a sensor device extension
successfully
Downloading a sensor device extension
Reporting a sensor device extension
Modifying a sensor devices association to a
device or device type.
Backup and Recovery Editing the configuration
Initiating the backup
Completing the backup
Failing the backup
Deleting the backup
Synchronizing the backup
Cancelling the backup
Initiating the restore
Uploading a backup
Uploading an invalid backup
Deleting the backup
License Adding a license key.
Editing a license key.
Viewing the Log File To view the audit logs:
Step 1 Log in to STRM Log Management as root.
Step 2 Go to the following directory:
/var/log/audit
Step 3 Open the desired audit log file.
Each entry in the log file displays using the following format:
Note: The maximum size of any audit message (not including date, time, and host
name) is 1024 characters.
<date_time> <host name> <user>@<IP address> (thread ID)
[<category>] [<sub-category>] [<action>] <payload>
Where:
QSTRM Log Management Administration Guide

8 OVERVIEW
<date_time> is the date and time of the activity in the format: Month Date
HH:MM:SS.
<host name> is the host name of the Console where this activity was logged.
<user> is the name of the user that performed the action.
<IP address> is the IP address of the user that performed the action.
(thread ID) is the identifier of the Java thread that logged this activity.
<category> is the high-level category of this activity.
<sub-category> is the low-level category of this activity.
<action> is the activity that occurred.
<payload> is the complete record that has changed, if any. This may include a
user record or an event rule.
For example:
Nov 6 12:22:31 localhost.localdomain admin@10.100.100.15
(Session) [Authentication] [User] [Login]
Nov 6 12:22:31 localhost.localdomain jsam@10.100.100.15 (0)
[Configuration] [User Account] [Account Modified]
username=james, password=/oJDuXP7YXUYQ, networks=ALL,
email=sam@q1labs.com, userrole=Admin
Nov 13 10:14:44 localhost.localdomain admin@10.100.45.61 (0)
[Configuration] [FlowSource] [FlowSourceModified] Flowsource(
name="tim", enabled="true", deployed="false",
asymmetrical="false", targetQflow=DeployedComponent(id=3),
flowsourceType=FlowsourceType(id=6),
flowsourceConfig=FlowsourceConfig(id=1))
QSTRM Log Management Administration Guide

2
MANAGING USERS
This chapter provides information on managing STRM Log Management users
including:
• Managing Roles
• Managing User Accounts
• Authenticating Users
You can add or remove user accounts for all users that you wish to access STRM
Log Management. Each user is associated with a role, which determines the
privileges the user has to functionality and information within STRM Log
Management. You can also restrict or allow access to areas of the network. By
default, the STRM Log Management Administrative (admin) user has unrestricted
access to all components of your deployment. You can create multiple admin
accounts for your STRM Log Management system.
Managing Roles You must create a role before you can create user accounts. By default, STRM
Log Management provides a default administrative role, which provides access to
all areas of STRM Log Management. A user that has been assigned administrative
privileges (including the default administrative role) cannot edit their own account.
Another administrative user must make any desired changes. Using the
Administration Console, you can:
• Create a role. See Creating a Role.
• Edit a role. See Editing a Role
Creating a Role To create a role:
Step 1 In the Administration Console, click the System Configuration tab.
The System Configuration panel appears.
Step 2 Click the User Roles icon.
The Manage User Roles window appears.
Step 3 Click Create Role.
STRM Log Management Administration Guide
10 MANAGING USERS
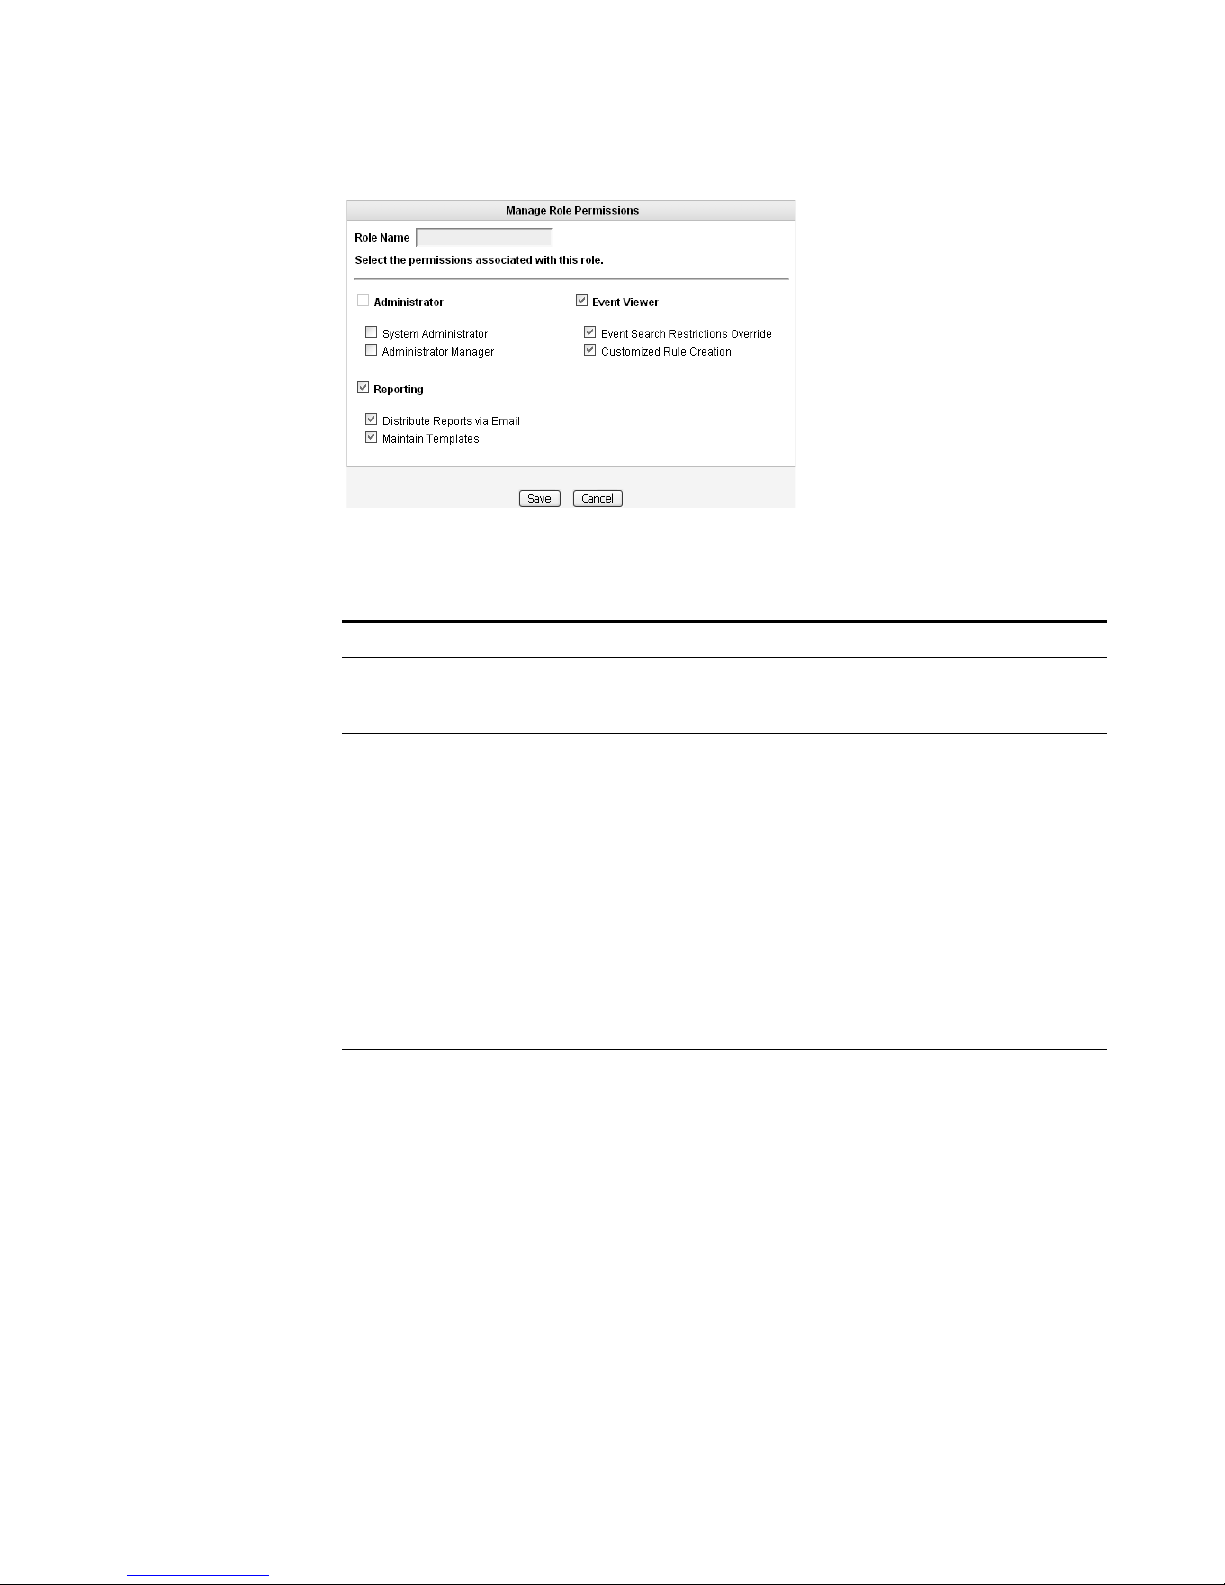
Step 4 Enter values for the parameters. You must select at least one permission to
proceed.
Table 2-1 Create Roles Parameters
Parameter Description
Role Name Specify the name of the role. The name can be up to 15
characters in length and must only contain integers and
letters.
Administrator Select the check box if you wish to grant this user
administrative access to the STRM Log Management
interface. Within the administrator role, you can grant
additional access to the following:
• System Administrator - Select this check box if you wish
to allow users access to all areas of STRM Log
Management. Also users with this access are not able to
edit other administrator accounts.
• Administrator Manager - Select this check box if you
wish to allow users the ability to create and edit other
administrative user accounts. If you select this check box,
the System Administrator check box is automatically
selected.
Event Viewer Select the check box if you wish this user to have access to
the Event Viewer. Within the Event Viewer, you can also
grant users additional access to the following:
• Event Search Restrictions Override - Select the check
box if you wish to allow users the ability to override event
search restrictions.
• Customized Rule Creation functionality - Select the
check box if you wish to allow users to create rules using
the Event Viewer.
For more information on the Event Viewer, see the STRM
Log Management Users Guide.
STRM Log Management Administration Guide

Managing Roles 11
Table 2- 1 Create Roles Parameters (continued)
Parameter Description
Reporting Select the check box if you wish to grant this user access to
Reporting functionality. Within the Reporting functionality,
you can grant users additional access to the following:
• Distribute Reports via Email - Select the check box if
you wish to allow users to distribute reports through
e-mail.
• Maintain Templates - Select the check box if you wish to
allow users to maintain reporting templates.
For more information, see the STRM Log Management
Users Guide.
Step 5
Step 6 Click Return.
Step 7 Close the Manage Roles window.
Click Save.
The STRM Log Management Administration Console appears.
Step 8 From the menu, select Configurations > Deploy configuration changes.
Editing a Role To e di t a r o l e :
Step 1 In the Administration Console, click the System Configuration tab.
The System Configuration panel appears.
Step 2 Click the User Roles icon.
The Manage Role window appears.
Step 3 For the role you wish to edit, click the edit icon.
The Permissions for Role window appears.
Step 4 Update the permissions (see Ta bl e 2 -1 ), as necessary.
Step 5 Click Return.
Step 6 Click Save.
Step 7 Close the Manage User Roles window.
The STRM Log Management Administration Console appears.
Step 8 From the menu, select Configurations > Deploy configuration changes.
STRM Log Management Administration Guide
12 MANAGING USERS
Managing User
Accounts
Creating a User
Account
You can create a STRM Log Management user account, which allows a user
access to selected network components using the STRM Log Management
interface. You can also create multiple accounts for your system that include
administrative privileges. Only the main administrative account can create
accounts that have administrative privileges.
You can create and edit user accounts to access STRM Log Management
including:
• Creating a User Account
• Editing a User Account
• Disabling a User Account
To create an account for a STRM Log Management user:
Step 1 In the Administration Console, click the System Configuration tab.
The System Configuration panel appears.
Step 2 Click the Users icon.
The Manage Users window appears.
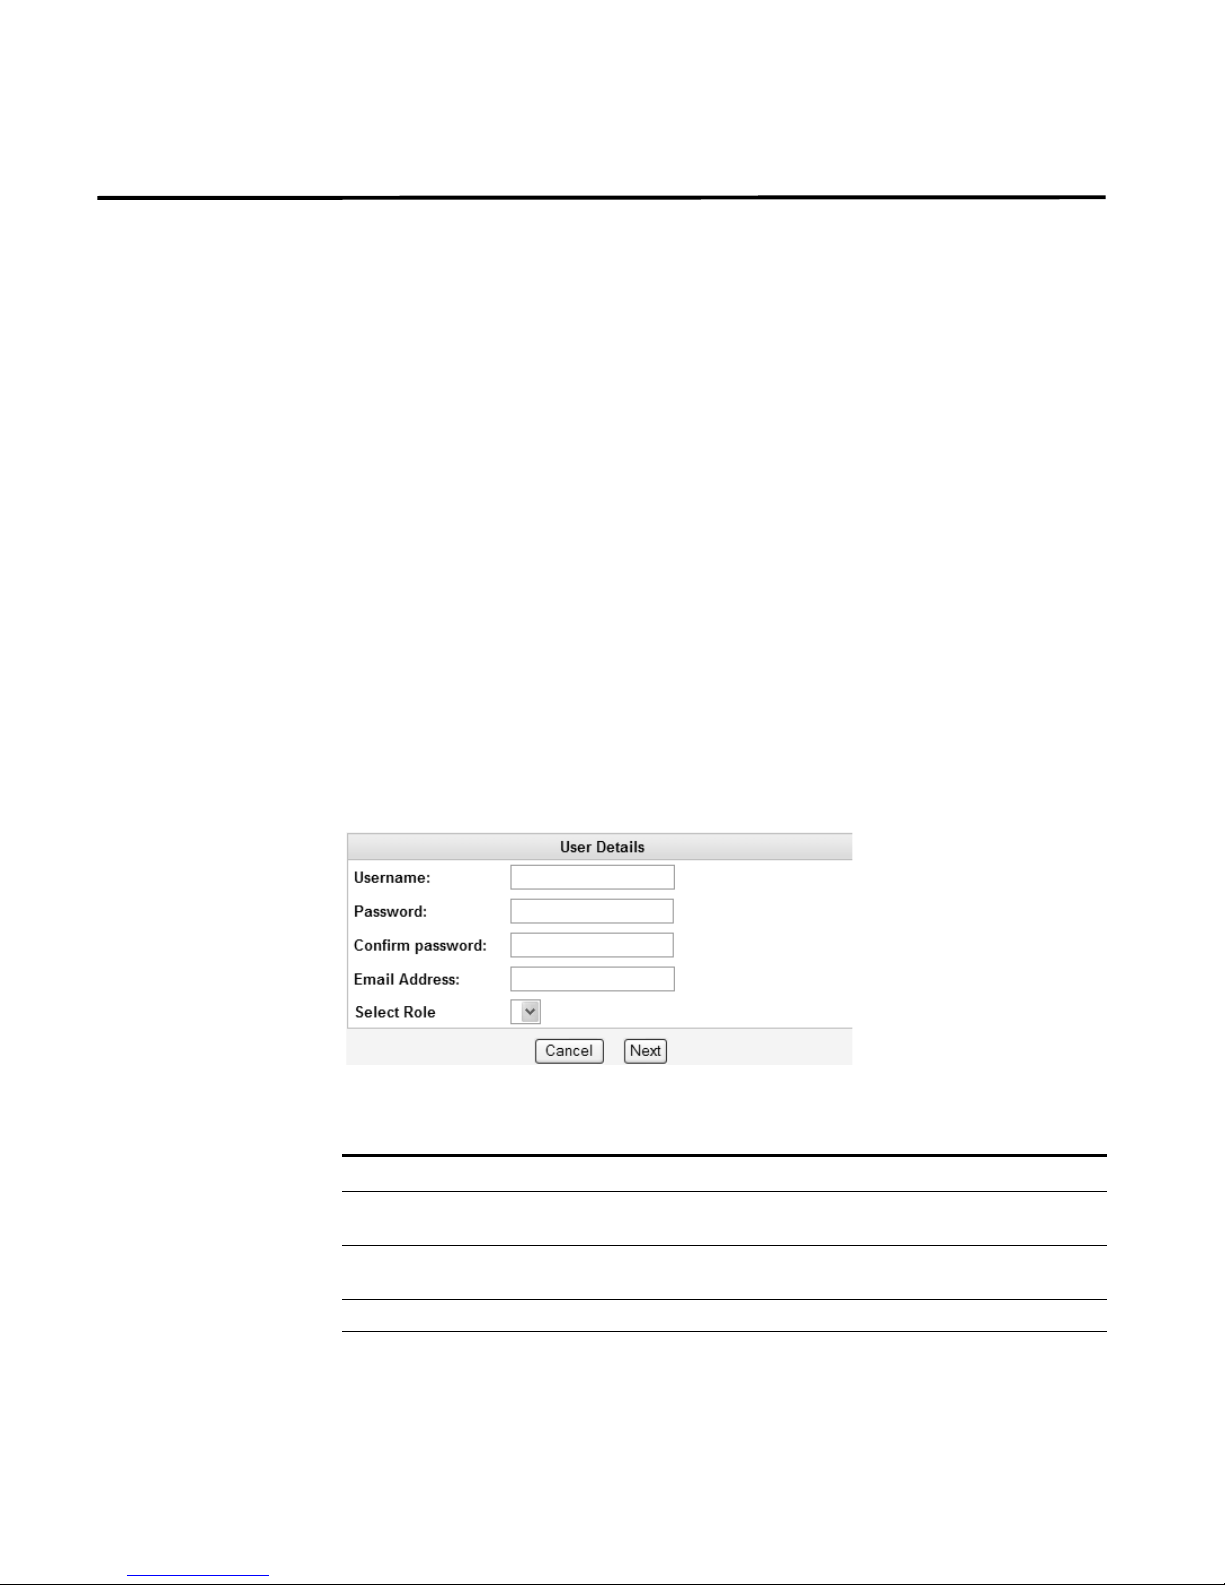
Step 3 In the Manage Users area, click Add.
The User Details window appears.
Step 4 Enter values for the following parameters:
Table 2-2 User Details Parameters
Parameter Description
Username Specify a username for the new user. The username must not
Password Specify a password for the user to gain access. The password
Confirm Password Re-enter the password for confirmation.
Email Address Specify the user’s e-mail address.
include spaces or special characters.
must be at least 5 characters in length.
STRM Log Management Administration Guide
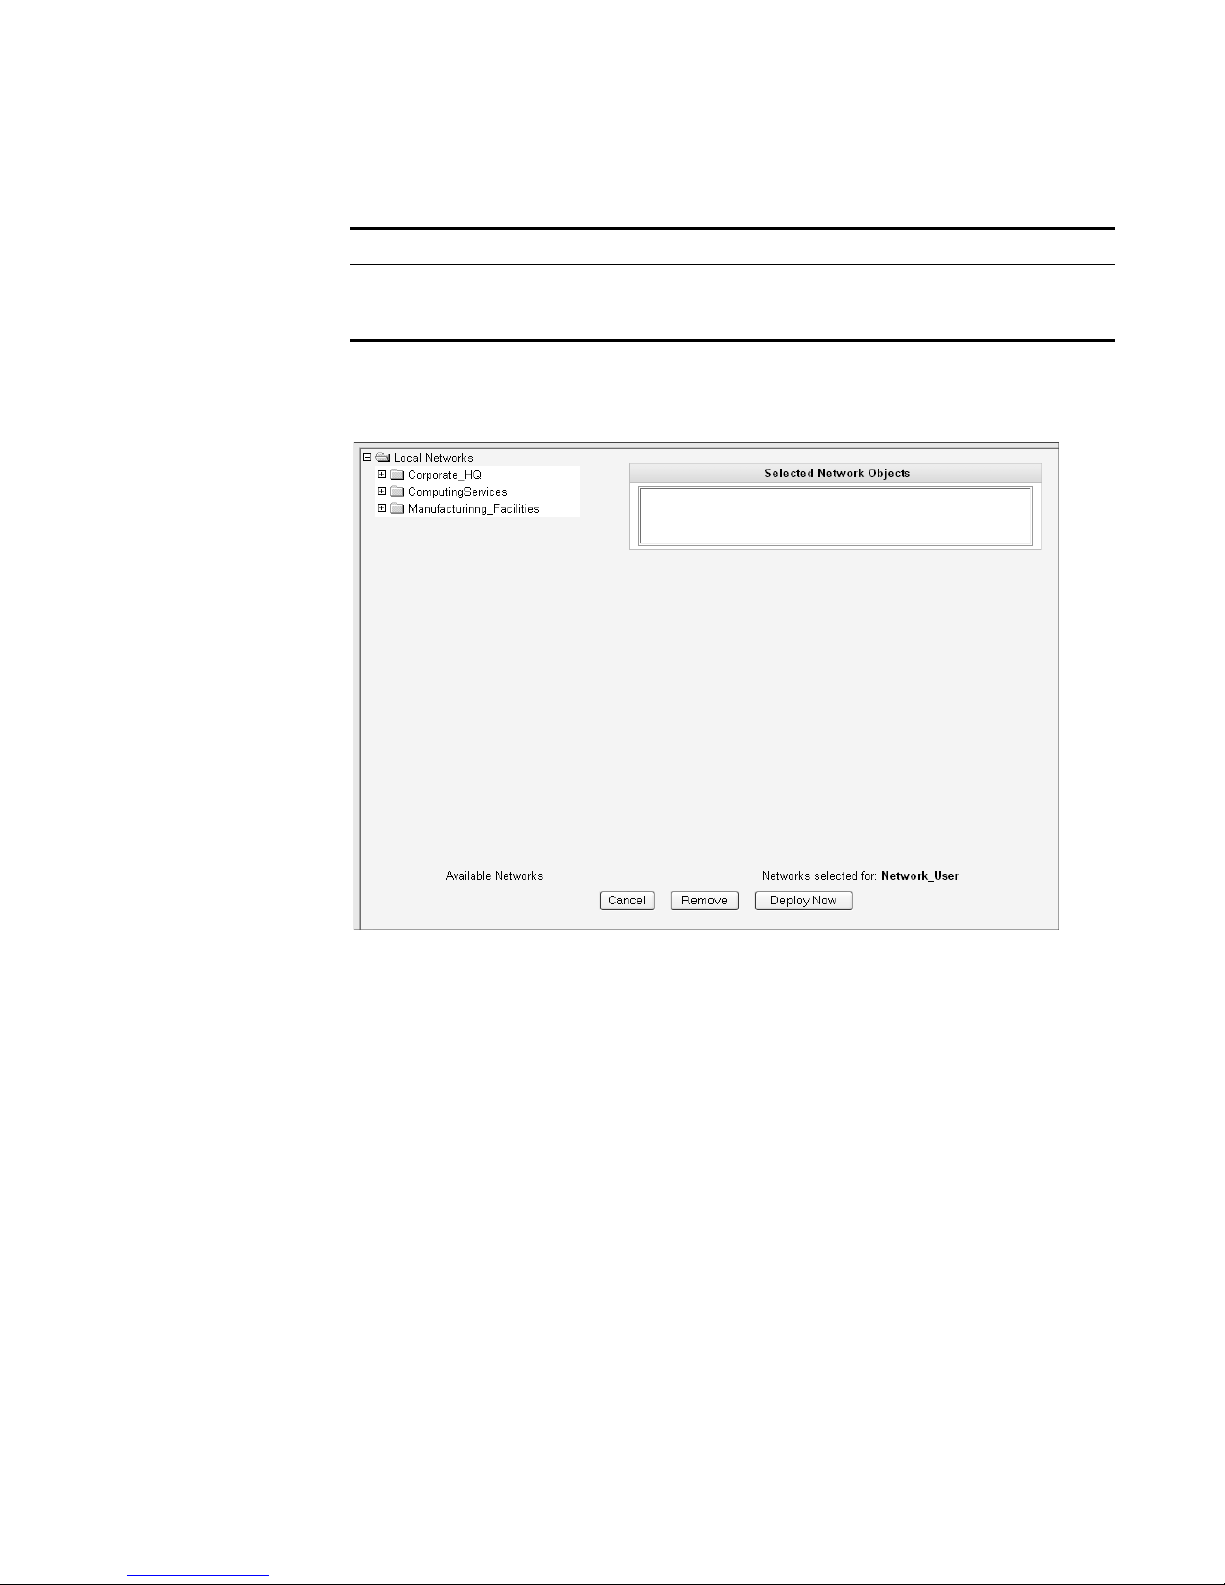
Table 2- 2 User Details Parameters (continued)
Parameter Description
Role Using the drop-down list box, select the role you wish this user to
Step 5 Click Next.
The Selected Network Objects window appears.
Managing User Accounts 13
assume. For information on roles, see
select Admin, this process is complete.
Managing Roles. If you
Step 6 From the menu tree, select the network objects you wish this user to be able to
Step 7 Choose one of the following options:
Step 8 Close the Manage Users window.
Editing a User
Account
Step 1 In the Administration Console, click the System Configuration tab.
Step 2 Click the Users icon.
monitor.
The selected network objects appear in the Selected Network Object panel.
a Click Deploy Now to deploy new user information immediately.
b Click Cancel to cancel all updates and return to the Manage Users window.
The STRM Log Management Administration Console appears.
To edit a user account:
The System Configuration panel appears.
STRM Log Management Administration Guide

14 MANAGING USERS
Step 3 In the Manage Users area, click the user account you wish to edit.
Step 4 Update values (see Table 2-2), as necessary.
Step 5 Click Next.
Step 6 From the menu tree, select the network objects you wish this user to access.
Step 7 For all network objects you wish to remove access, select the object from the
Step 8 Choose one of the following options:
Step 9 Close the Manage Users window.
The Manage Users window appears.
The User Details window appears.
If you are editing a non-administrative user account, the Selected Network Objects
window appears. If you are editing an administrative user account, go to Step 9.
The selected network objects appear in the Selected Network Object panel.
Selected Network Objects panel and click Remove.
a Click Deploy Now to deploy new user information immediately.
b Click Cancel to return to cancel all updates and return to the Manage Users
window.
Disabling a User
Account
Step 1 In the Administration Console, click the System Configuration tab.
Step 2 Click the Users icon.
Step 3 In the Manage Users area, click the user account you wish to disable.
Step 4 In the Role drop-down list box, select Disabled.
Step 5 Click Next.
Step 6 Close the Manage Users window.
The STRM Log Management Administration Console appears.
To disable a user account:
The System Configuration panel appears.
The Manage Users window appears.
The User Details window appears.
The STRM Log Management Administration Console appears. This user no longer
has access to the STRM Log Management interface. If this user attempts to log in
to STRM Log Management, the following message appears: This account has
been disabled.
STRM Log Management Administration Guide

Authenticating Users 15
Authenticating
Users
You can configure authentication to validate STRM Log Management users and
passwords. STRM Log Management supports the following user authentication
types:
• System Authentication - Users are authenticated locally by STRM Log
Management. This is the default authentication type.
• RADIUS Authentication - Users are authenticated by a Remote Authentication
Dial-in User Service (RADIUS) server. When a user attempts to login, STRM
Log Management encrypts the password only, and forwards the username and
password to the RADIUS server for authentication.
• TACACS Authentication - Users are authenticated by a Terminal Access
Controller Access Control System (TACACS) server. When a user attempts to
login, STRM Log Management encrypts the username and password, and
forwards this information to the TACACS server for authentication.
• LDAP/ Active Directory - Users are authenticated by a Lightweight Directory
access Protocol) server using Kerberos.
If you wish to configure RADIUS, TACACS, or LDAP/Active Directory as the
authentication type, you must :
• Configure the authentication server before you configure authentication in
STRM Log Management.
• Make sure the server has the appropriate user accounts and privilege levels to
communicate with STRM Log Management. See your server documentation for
more information.
• Make sure the time of the authentication server is synchronized with the time of
the STRM Log Management server. For more information on setting STRM Log
Management time, see Chapter 3 Setting Up STRM Log Management.
Once authentication is configured and a user enters an invalid username and
password combination, a message appears indicating the login was invalid. if the
user attempts to access the system multiple times using invalid information, the
user must wait the configured amount of time before attempting to access the
system again. For more information on configuring system settings for
authentication, see Chapter 3 Setting Up STRM Log Management - Configuring
the Console Settings. An administrative user can always access STRM Log
Management through a third party authentication module or by using the local
STRM Log Management Admin password
To configure authentication:
Step 1 In the Administration Console, click the System Configuration tab.
The System Configuration panel appears.
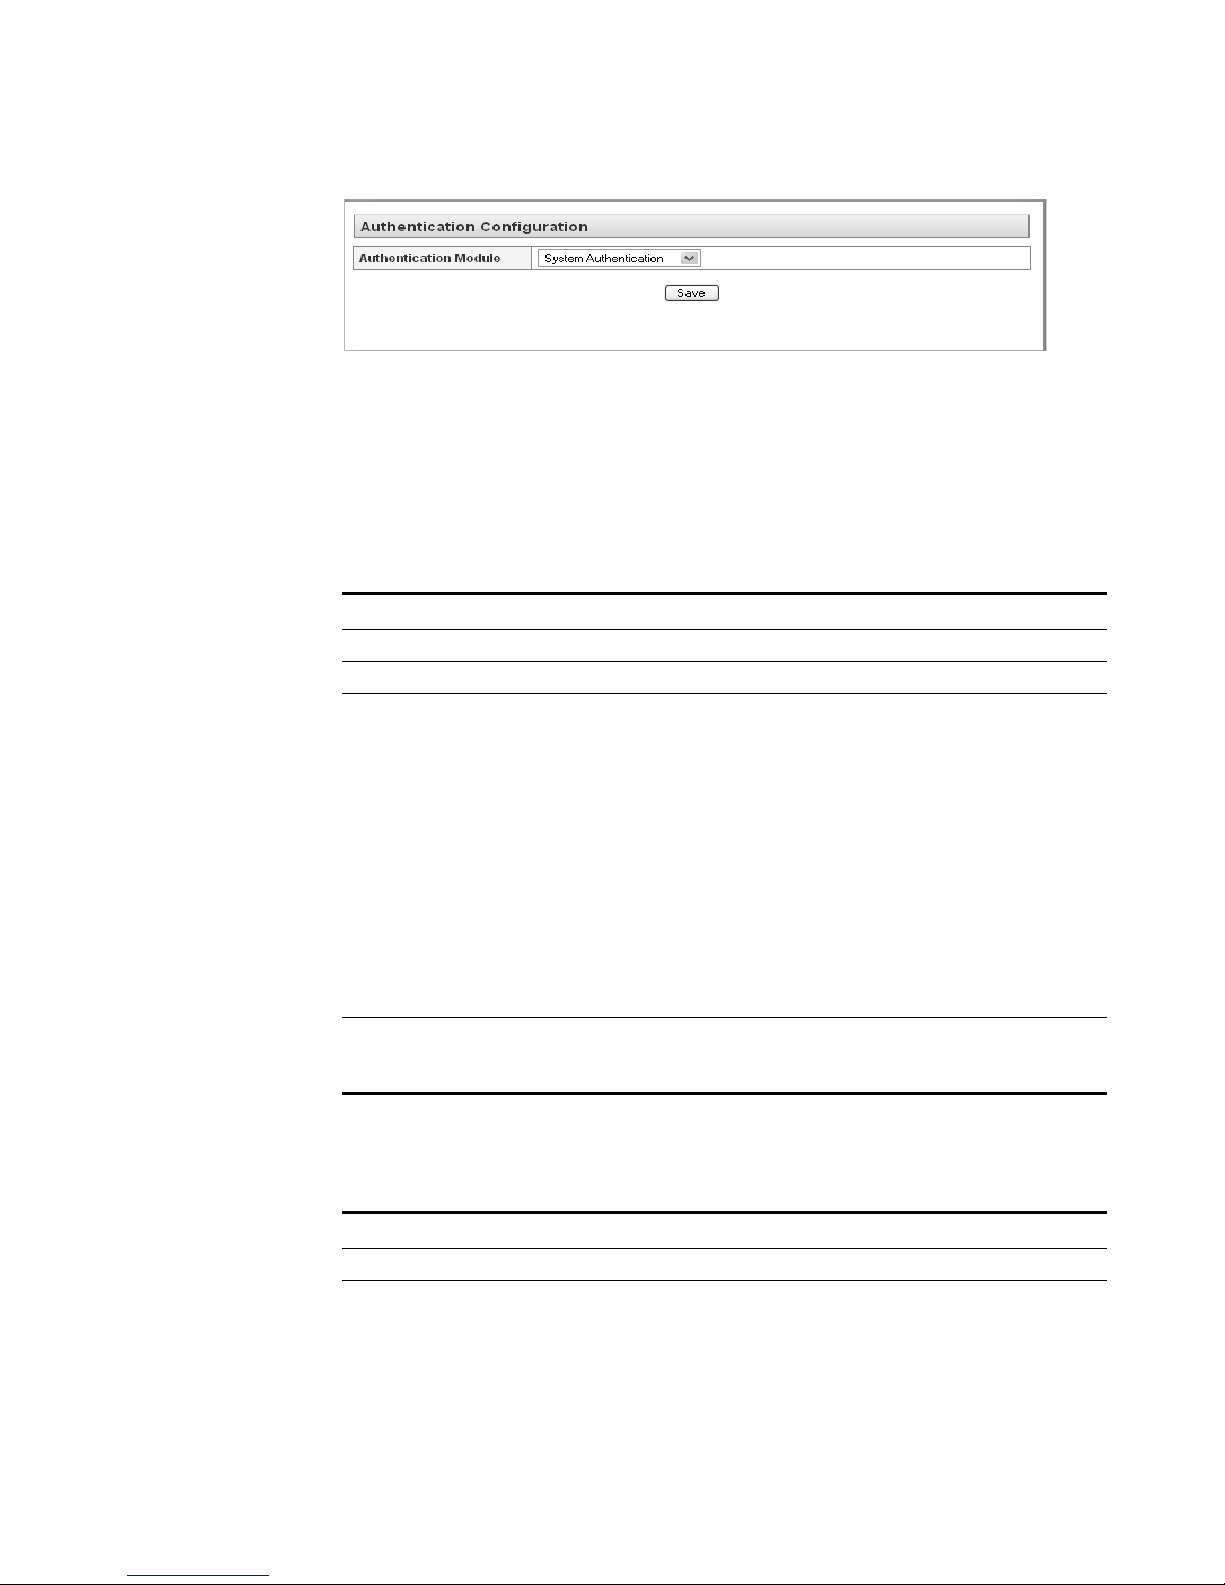
Step 2 Click the Authentication icon.
The Authentication window appears.
STRM Log Management Administration Guide
16 MANAGING USERS
Step 3 From the Authentication Module drop-down list box, select the authentication type
Step 4 Configure the selected authentication type:
you wish to configure.
a If you selected System Authentication, go to Step 5
b If you selected RADIUS Authentication, enter values for the following
parameters:
Table 2-3 RADIUS Parameters
Parameter Description
RADIUS Server Specify the hostname or IP address of the RADIUS server.
RADIUS Port Specify the port of the RADIUS server.
Authentication
Type
Specify the type of authentication you wish to perform. The
options are:
• CHAP (Challenge Handshake Authentication Protocol) -
Establishes a Point-to-Point Protocol (PPP) connection
between the user and the server.
• MSCHAP (Microsoft Challenge Handshake Authentication
Protocol) - Authenticates remote Windows workstations.
• ARAP (Apple Remote Access Protocol) - Establishes
authentication for AppleTalk network traffic.
• ASCII
• PAP (Password Authentication Protocol) - Sends clear text
between the user and the server.
Shared Secret Specify the shared secret that STRM Log Management uses to
encrypt RADIUS passwords for transmission to the RADIUS
server.
c If you selected TACACS Authentication, enter values for the following
parameters:
Table 2-4 TACACS Parameters
Parameter Description
TACACS Server Specify the hostname or IP address of the TACACS server.
TACACS Port Specify the port of the TACACS server.
STRM Log Management Administration Guide

Authenticating Users 17
Table 2- 4 TACACS Parameters (continued)
Parameter Description
Authentication
Type
Specify the type of authentication you wish to perform. The
options are:
• PAP (Password Authentication Protocol) - Sends clear text
between the user and the server.
• CHAP (Challenge Handshake Authentication Protocol) -
Establishes a PPP connection between the user and the
server.
• MSCHAP (Microsoft Challenge Handshake Authentication
Protocol) - Authenticates remote Windows workstations.
• MSCHAP2 - (Microsoft Challenge Handshake Authentication
Protocol version 2)- Authenticates remote Windows
workstations using mutual authentication.
• EAPMD5 (Extensible Authentication Protocol using MD5
Protocol) - Uses MD5 to establish a PPP connection.
Shared Secret Specify the shared secret that STRM Log Management uses to
encrypt TACACS passwords for transmission to the TACACS
server.
If you selected LDAP/ Active Directory, enter values for the following
d
parameters:
Table 2- 5 LDAP/ Active Directory Parameters
Parameter Description
Server URL Specify the URL used to connect to the LDAP server. For
LDAP Context Specify the LDAP context you wish to use, for example,
LDAP Domain Specify the domain you wish to use, for example q1labs.inc
Step 5 Click Save.
example, ldap://<host>:<port>
DC=Q1LABS,DC=INC.
STRM Log Management Administration Guide


3
SETTING UP STRM LOG
M
ANAGEMENT
This chapter provides information on setting up STRM Log Management including:
• Managing Your License Keys
• Creating Your Network Hierarchy
• Scheduling Automatic Updates
• Configuring System Settings
• Configuring System Notifications
• Configuring the Console Settings
• Starting and Stopping STRM Log Management
• Accessing the Embedded SNMP Agent
• Configuring Access Settings
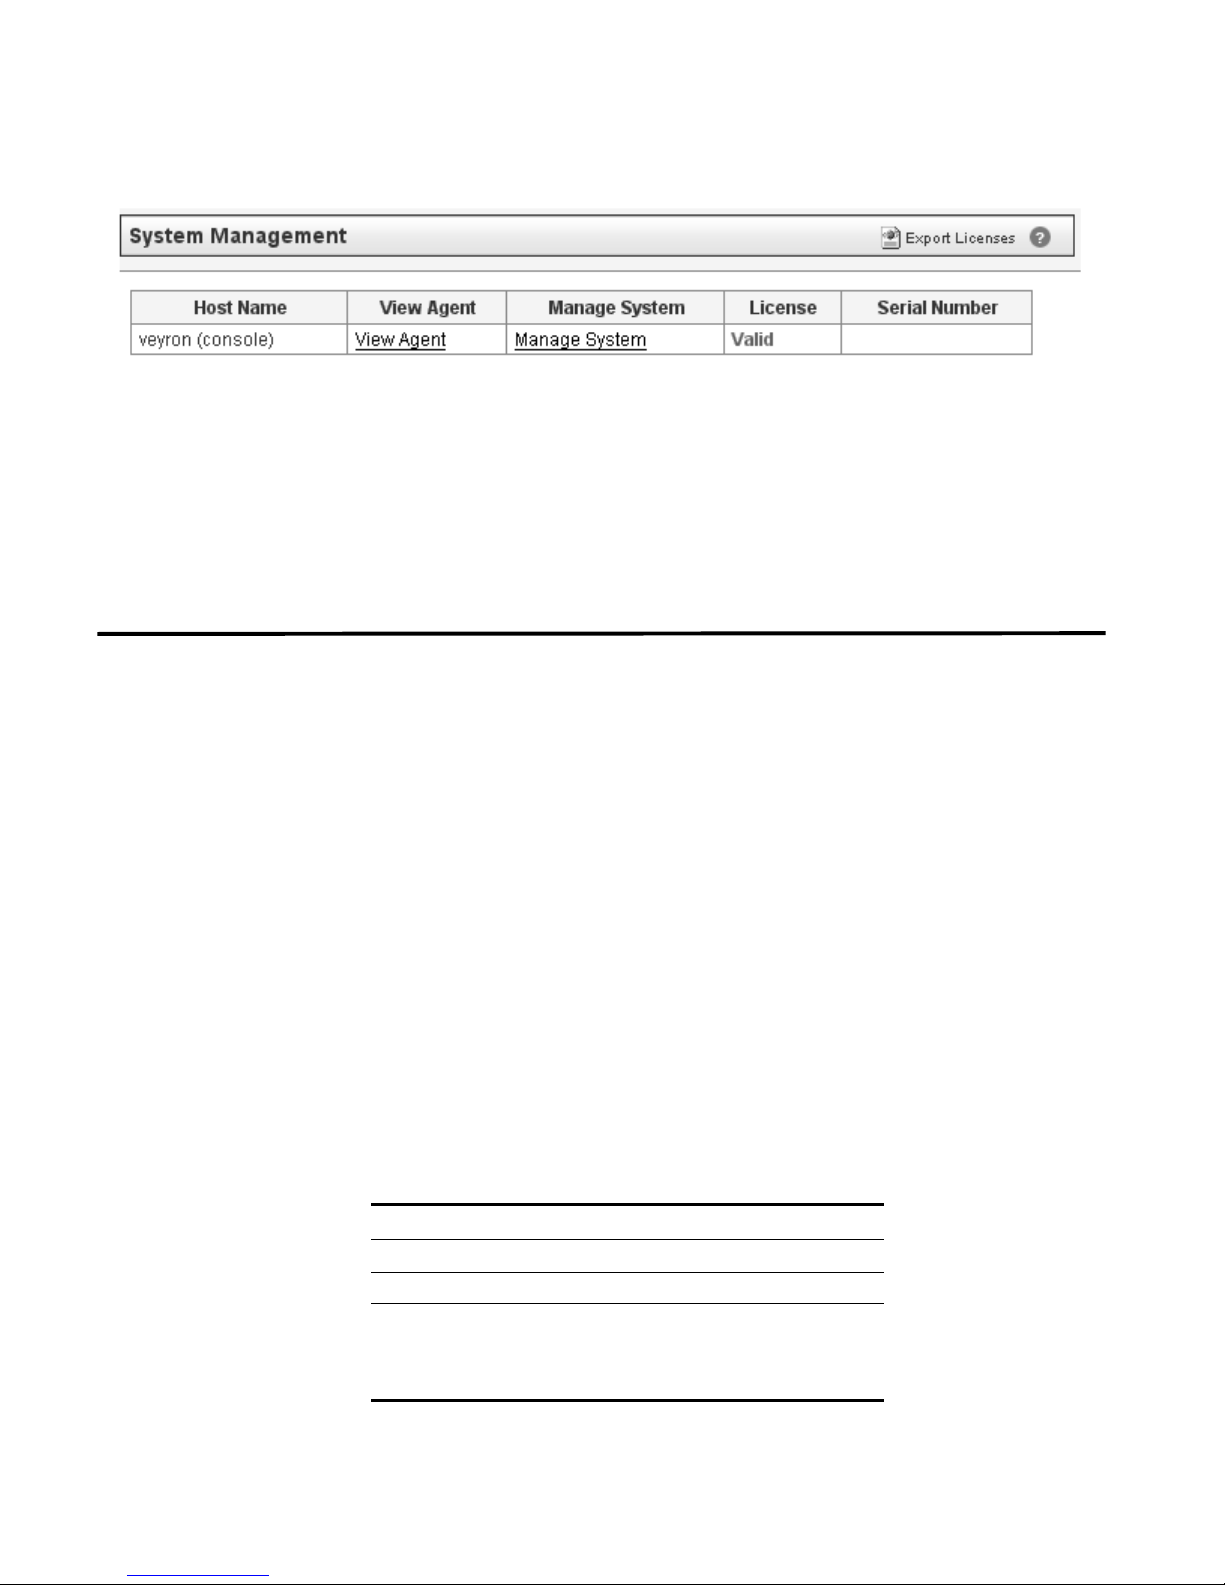
Managing Your
License Keys
For your STRM Log Management Console, a default license key provides you
access to the interface for 5 weeks. You must manage your license key using the
System Management window in the Administration Console. This interface
provides the status of the license key for each system (host) in your deployment
including:
• Valid - The license key is valid.
• Expired - The license key has expired. To update your license key, see
Updating your License Key.
• Override Console License - This host is using the Console license key. You
can use the Console key or apply a license key for this system. If you wish to
use the Console license for any system in your deployment, click Default
License in the Manage License window. The license for that system will default
to the Console license key.
This section provides information on managing your license keys including:
• Updating your License Key
• Exporting Your License Key Information
STRM Log Management Administration Guide

20 SETTING UP STRM LOG MANAGEMENT
Updating your
License Key
Step 1 In the Administration Console, click the System Configuration tab.
Step 2 Click the System Management icon.
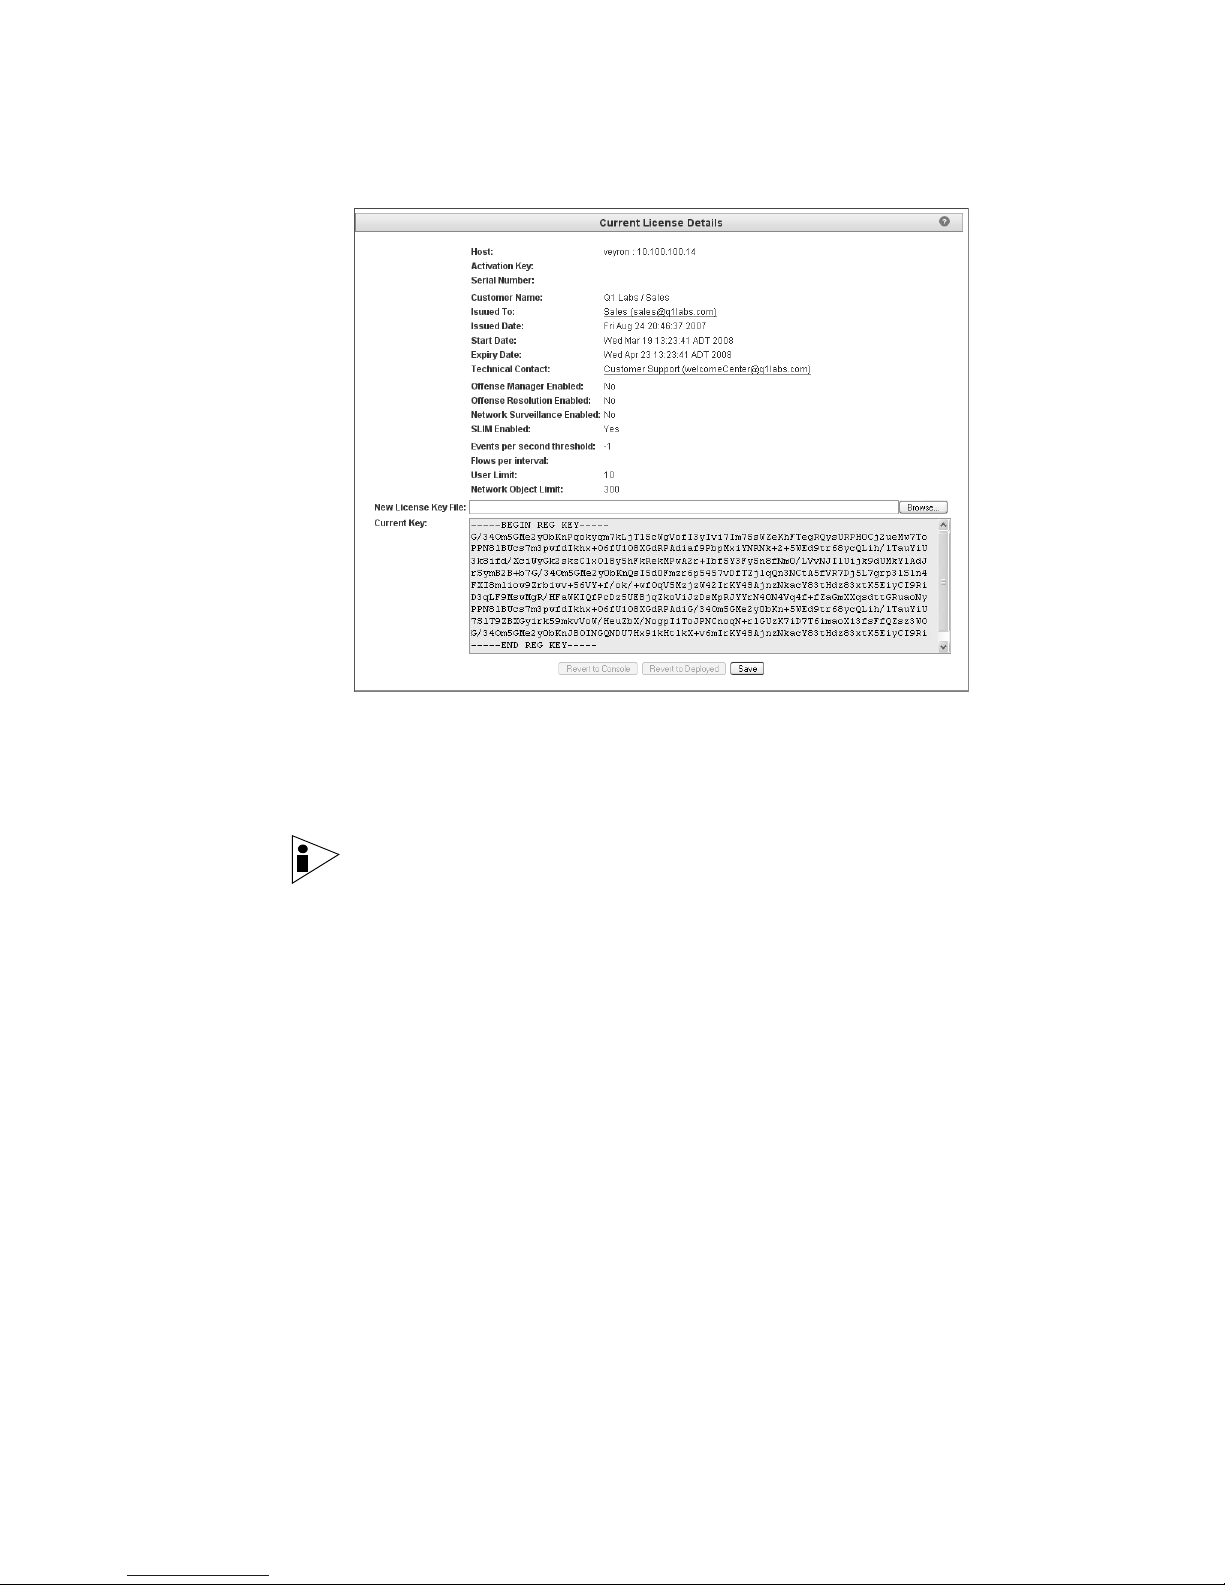
Step 3 For the host that on which you wish to update the license key, click the value that
For your STRM Log Management Console, a default license key provides you
access to the interface for 5 weeks. Choose one of the following options for
assistance with your license key:
• For a new or updated license key, please contact your local sales
representative.
• For all other technical issues, please contact Juniper Customer Support.
If you log in to STRM Log Management and your Console license key has expired,
you are automatically directed to the System Management window. You must
update the license key before you can continue. However, if one of your
non-Console systems includes an expired license key, a message appears when
you log in indicating a system requires a new license key. You must navigate to the
System Management window to update that license key.
To update your license key:
The System Configuration panel appears.
The System Management window appears providing a list of all hosts in your
deployment.
appears in the License column.
Note: If you update the license key for your Console, all systems in your
deployment default to the Console license key at that time.
The Current License Details window appears.
Step 4 Click Browse beside the New License Key File and locate the license key.
STRM Log Management Administration Guide
Managing Your License Keys 21
Step 5 Once you locate and select the license key, click Open.
Step 6 Click Save.
Step 7 Close the license key window.
Step 8 From the menu, select Configurations > Deploy All.
Exporting Your
License Key
Information
Step 1 In the Administration Console, click the System Configuration tab.
Step 2 Click the System Management icon.
The Current License Details window appears.
A message appears indicating the license key was successfully updated.
Note: If you wish to revert back to the previous license key, click Revert to
Deployed. If you revert to the license key used by the STRM Log Management
Console system, click Revert to Console.
The Administration Console appears.
The license key information is updated in your deployment.
To export your license key information for all systems in your deployment:
The System Configuration panel appears.
The System Management window appears providing a list of all hosts in your
deployment.
STRM Log Management Administration Guide
22 SETTING UP STRM LOG MANAGEMENT
Step 3 Click Export Licenses.
The export window appears.
Step 4 Select one of the following options:
• Open - Opens the license key data in an Excel spreadsheet.
• Save - Allows you to save the file to your desktop.
Step 5 Click OK.
Creating Your
Network Hierarchy
Considerations Consider the following when defining your network hierarchy:
STRM Log Management uses the network hierarchy to understand your network
traffic and provide you with the ability to view network activity for your entire
deployment.
When you develop your network hierarchy, you should consider the most effective
method for viewing network activity. Note that the network you configure in STRM
Log Management does not have to resemble the physical deployment of your
network. STRM Log Management supports any network hierarchy that can be
defined by a range of IP addresses. You can create your network based on many
different variables, including geographical or business units.
• Group together systems and user groups that have similar behavior. This
provides you with a clear view of your network.
• Do not group together servers that have unique behavior with other servers on
your network. For example, placing a unique server alone provides the server
greater visibility in STRM Log Management allowing you to enact specific
policies.
• Combine multiple Classless Inter-Domain Routings (CIDRs) or subnets into a
single network/group to conserve disk space. For example:
Group Description IP Address
1 Marketing 10.10.5.0/24
2 Sales 10.10.8.0/21
3 Database Cluster 10.10.1.3/32
10.10.1.4/32
10.10.1.5/32
STRM Log Management Administration Guide